The most important improvement in photographic
processes that has been introduced since Maynard first
made collodion, and Archer discovered its adaptability
to the production of photographic negatives, is the
gelatine bromide dry plate.
Wet plate photography had reached its utmost point
of adaptability to the demands of the times.
A few men of marked ability, and the skill of long
study and practice, had reached the point of highest
excellence in working with collodion, and the great
multitude were pressing on toward that designated
height to which it was given to but few to attain.
It had been demonstrated that wonderfully beautiful
effects could be produced by the collodion process,
but that there was a limit beyond which progress
could not be made. The great range of subjects in
still and animate life requiring very rapid exposures,
were practically out of the power of collodion, to compass
satisfactory results. At this time, when there
seemed to be a very constant and increasingly urgent
demand for more rapid acting lenses and for "lightning
processes," there appeared the wonderful argentic
bromide Gelatine Emulsion, which, in four short years,
has superseded the collodion process almost, if not
altogether, and besides (notwithstanding the opposition
of the elite of the profession, whom for a time it
leveled with the rest of the workers, but who were
quick to see and acknowledge the extraordinary
merits of the new candidate) it has caused such a
quickening of the pulses of the business, and such an
increase in its range and adaptability as never before
was known, and which, in the year or two past, has
caused such an activity in invention and in other ways,
as to make that period of time so remarkable for the
many new things that have been brought out, and the
many new processes that have been adopted, as to
render a detailed account of such for the profession,
and also for the amateur, most desirable.
It is with such a view that this book is offered to the
photographic public, and that numerous and still increasing
army of amateurs, who have taken up photography
as an amusement, to while away a leisure hour.
For to these latter a few hours' study of a good hand-book
is about all that is necessary to enable them to expose
and develop a dry plate, a little practice only being
requisite to the successful performance of the same.
There may be many, however, who, having made a
promising commencement, would like to proceed
farther and acquire a knowledge of former photographic
processes, as well as those which succeed the making
of the negative, such as printing, toning, fixing, etc.,
and in fact, learn how to make a finished photograph.
To such, particularly, and to all photographers, this
book is offered, in full confidence that it will be a useful
companion in the studio and in the field.
To accomplish this end we will take the reader as
an apprentice, and commencing at the beginning, instruct
him in that knowledge he would have to acquire
were he an actual apprentice in a photographic studio,
working the wet collodion process, after which an
equally full course of instruction will follow for the
dry plate and other new processes, both for negative
making and for printing.
In the following pages, also, will be found many
useful formulæ that have been carefully culled from a
mass of published contributions, from many of the
leading spirits in photography, most of which have
been verified practically by the author, and others
bear on their faces so plainly the impression of their
practicability as to need no assurance that they are
reliable.
In getting up this work I have availed myself of information
from any and all sources at my command,
giving credit where possible, and endeavoring to make
everything clearly understandable, and neglecting no
details necessary to the successful working of every
formula, even by the youngest learner.
Mr. Hardwick, than whom there can be no more
faithful or competent guide, says that much care
should be taken in the selection of glass to be used in
the production of photographic negatives.
Window glass is always unsuitable, because of its inferior
quality, having scratches upon its surface and air
bubbles in its substance, each of which causes irregularities,
as well in the negatives as in the subsequent
printing; also the squares are seldom flat so that they
do not lie true in the holder, and hence a part of the
image may be out of focus; and also they are extremely
liable to be broken by compression in the printing
frames.
Formerly many photographers used a thin plate glass
of very fine quality, but of late years the great demand
for glass suitable for such purposes has made it possible
for the manufacturers to prepare a cheaper quality,
well adapted to the uses of photography.
Before proceeding to wash the glass, each square
should have its edges roughened, by means of a file or
a coarse stone, or the edges of two pieces of glass may
be abraded against each other in such a manner as to
remove the sharpness, which is so liable to injure the
fingers in the various manipulations.
In the process of cleaning the glass it is not sufficient
to wash it with water. Other means are necessary to
remove grease, rust and dirt, which would not yield to
the influence of water alone, and for this purpose a solution
of caustic potash is most generally used.
The glass is immersed in the potash solution, each
piece separately, and when the dish is full, it should be
left not longer than is necessary for the potash to have
its proper action, for when left for a considerable time
the solution of potash (if strong) will attack the surface
of the glass, to its injury.
When a suitable time has elapsed (which in the case
of new glass should not be more than one day or
night, and in the case of old negatives not longer than
to cause the film to slip off), the glass should be removed
and washed with water, after which it should be
immersed in the same manner, in a solution composed
of four parts of water to one of commercial
nitric or sulphuric acid, or the two mixed, as may be
the most convenient.
This latter solution removes rust or other metallic
blemishes, that have not been affected by the potash,
and also effectively neutralizes all traces of the potash
that have remained on the surfaces of the glass.
The glass may be permitted to remain in the acid
an indefinite time, as it can have no injurious effect on
it, as might the potash, and when required for use, it
should be carefully washed and immediately albumenized
and set up in racks to dry.
While the glass is still wet from the washing, after
being taken from the acid, it should be coated with a
preparation of albumen, prepared as follows:
To the albumen or white of a fresh egg, add
eight ounces of water; put it in a bowl and thoroughly
beat it with an egg beater, or in any manner that may
be convenient, until the fibre or structure is completely
destroyed, when it should be filtered through loose cotton,
and after the addition of a few drops of strong
ammonia, it is ready for use.
Many prefer to beat up the albumen before adding
the water, in which case it should be beaten into a stiff
froth, when the proper amount of water is added, and
after the froth has subsided the whole is filtered and
the ammonia put in last.
The albumen being prepared and the glass ready,
a square is taken in the left hand, and clean water
flowed over it, until no particle of dust can be seen adhering
to either surface, when a small portion of the
albumen is flowed on it, and after covering every part of
the surface the excess is allowed to drain off the right
hand lower corner, after which, if running water is at
hand, the back of the same portion of the plate should
be passed under the faucet, and the water will carry off
any excess of albumen which might return or crawl, as
it is termed, up the back of the plate from the point
where it is drained.
The greatest care should be taken to avoid dust settling
on the plate during the coating and afterwards
while drying, and after the glass has been coated, if it
is found that any dust adheres to the albumenized surface,
it should be again washed and recoated.
It is important that the back of the glass should be
kept free from the albumen, so that when the plate is
afterward collodionized and immersed in the silver
solution, there should be no albumen uncovered to
contaminate the bath, and as most of the glass used
has some slight inequalities of surface, the albumen
should always be flowed on the concave side, for two
reasons:
The first is, that when sensitized and placed in the
holder, the pressure, being against the convex side, may
have a tendency to counteract the curve and make
the plate flatter and more perfectly adjusted to the focus.
The other reason is that the pressure of the printing
frame has a less tendency to break the glass when
against the concave side.
The amount of glass required having been albumenized
and set up in racks, it should be carefully covered
with paper to exclude dust, and it should be set away
to dry, after which it should be placed in its proper
receptacle in the dark room, ready for use.
The reasons for albumenizing the glass are important.
Before this process was adopted, all glass used for
photographic purposes, after being subjected to the
action of potash or acid, or both, had to be finely
polished with rottenstone or some other polishing substance,
to render its surface sufficiently free from all
traces of acid, organic matter, rust, etc., which would
injuriously affect the collodion or the deposit of silver
iodide derived from the bath.
This polishing was very laborious, and in consequence
it was often very imperfectly done, causing
much loss of time and material; also the glass thus
prepared did not offer to the collodion a surface to
which it could adhere with much tenacity, and in consequence
it would frequently slip from it in the subsequent
manipulations.
The first reason for Albumenizing then, is to cover
the surface with a substance chemically pure, and
when dry of a crystaline nature and impervious to, or
at least not soluble in the silver solution, thus saving
the labor of polishing.
Another reason is that the albumen offers a surface
to which the collodion will adhere with extreme
tenacity, thus saving and preventing the film from
slipping.
"The discovery that explosive cotton was soluble in
ether, was made by Mr. Maynard, who gave it the
name of Collodion, and later, in 1848, published in
the American Journal of Medical Science the formula
for its preparation."
"This ethereal solution, having a certain proportion
of alkaline iodides, and iodides of silver added thereto,
constituted the collodion first employed by Mr. Archer,"
who thus shares with Mr. Maynard, and with a Mr.
Legray (who first published an account of its use as a
photographic agent) the honor of having given to the
world the collodion process in photography.
The progress that has been made since Mr. Archer's
time in perfecting the adaptability of collodion to
photographic uses could not be better illustrated
than by comparing the formulæ for collodion first
published with those in use at this time.
The practice of photography in the present day by
the collodion process is divided into two branches, the
positive and the negative.
In the first the object is to obtain in the camera a
direct image, which is to be viewed by reflected light,
and as it is desired that the pictures so produced
should possess pure blacks and whites, certain modifications
of the collodion, silver solution and developer
are resorted to, which cause these preparations to differ
somewhat from those prepared for the production of
superior negatives, consequently the formulæ given
hereafter will be designated as positive or negative.
These modifications, however, are not of such a
character as to render either of the solutions prepared
for one process totally unfit to be used for the other,
for in fact, many photographers at this day use the same
collodion bath and developer for making both positives
and negatives.
In the first place, we will take up for consideration
the positive process.
The first positives on glass were called ambrotypes,
and were the successors to the daguerreotype, which
they superseded and displaced by the superior facility
of their production.
For the same reason the ambrotype was succeeded
by the ferrotype, which was a positive collodion picture,
made on a thin iron plate with a black japanned
surface.
The ferrotype or tintype is now about the only product
of the positive collodion process of considerable
importance, and is the only one that will receive consideration
in these pages.
Ferrotype plates are sold by all dealers in photographic
materials; they are mostly manufactured by
two large concerns in Worcester, Mass.
As has before been stated, to produce the finest results
in positive photography requires certain modifications of
the collodion bath and developer, which, while not unfitting
them altogether for negative work, yet would
render them quite unsuitable for high class work.
The formula for positive collodion here given has
many merits, and among those is a certain quality of
film, which might be termed opacity, but not in the
strict sense of the word; it is that quality in the film
which enables it to cover up any small scratch or
water mark on the surface of the plate that would infallibly
spoil the picture, if almost any other collodion
were used.
This quality, with great clearness or transparency in
the shadows, and a beautiful gradation of light and
shade, make it unique as a positive collodion.
There may seem to be a contradiction between the
terms opacity and great transparency of shadows,
which may need further explanation. As the shadows of
a positive collodion picture are produced by the black
surface of the plate showing through the collodion, any
defect on that portion of the surface would be expected
to show very plainly, and it does so with the
use of the ordinary collodions sold by the dealers, but
not so with the collodion under consideration, which
may be because it is less permeable by the silver solution,
and that consequently the deposit of iodide of
silver lies more on the surface and less within the texture
of the film, and is thus kept from contact with organic
matter or other defects on the surface of the
plate; in some such manner only, can I account for a
very valuable quality that has saved thousands of
plates, that would under other usage have been thrown
away.
This formula has never before been published, and
must be prepared as directed.
Alcohol and ether equal parts; gun cotton sufficient
to make a moderately thick film, say 5 or 6
grains to the oz.; put the cotton in the ether first;
when it is well saturated, pour in the alcohol. To
which add:
| Iodide of Ammonium | 4 grains to oz. |
| Iodide of Cadmium | 2 |
| Bromide of Cadmium | 1 |
| Bromide of Copper | 1 |
The latter ingredient can only be had in aqueous
solution, I believe, and requires close calculation to
get at the right quantity.
This formula gives 8 grains of salts to the ounce of
collodion, and would require a silver solution of 50
grains to the fluid ounce to balance properly.
The silver solution may be prepared as per directions
on page 29, under the heading—The Negative Bath.
The ferro-plate is held between the thumb and first
two fingers of the left hand. The collodion bottle is
held in the right hand, and the collodion is poured on
the right upper end of the plate, flowed to the left upper
corner, by deflecting the plate in that direction, and
then down the left side toward the hand, and the excess
run back into the bottle from the right lower corner,
when it has all run off, the plate should be gradually
brought to a perpendicular position and rocked
from right to left, that is, perpendicular to the end,
then to the side, until the film has set or become
fixed, which may be ascertained by touching the film
at the lower corner of the plate, when, if it breaks and
does not run farther, it has set and should, without
delay, be immersed in the silver solution, where it
should remain until it has become fully sensitized,
which will be in from 2 to 5 minutes.
The plate should be lowered into the bath by one
continuous motion; any stoppage will cause a line and
spoil the plate.
The plate is sensitized when on removing it from
the bath it presents a smooth, yellowish surface; if it
shows lines as of water running off a greasy surface, it
is not coated; return it to the bath.
The plate having become sufficiently coated is taken
from the bath, well drained, and placed in the holder
or shield, and a piece of glass of the same size put
behind it, which is to receive the pressure of the spring
on the door of the holder, and force the plate into its
proper position evenly, so that all parts will be in
focus.
The holder containing the plate is then taken to the
studio, or light room, where the subject, we will say,
has already been posed; the camera set and focused,
the exposure is then made, after which it is returned
to the dark room for development.
In the preparation of a developing solution for
plate pictures, we must consider that we desire to produce
a picture, which, to be admired, must have
pure whites, clear shadows, be full of detail and have
an easy gradation of light and shade.
That you may succeed in this object, use the following
formula, and persist until you have learned its every
modification:
| Water |
64 ounces f. |
| Protosulphate of iron |
4 |
| Acetic acid |
4 |
| Alcoholic solution of tannin, 10 grains to the ounce |
4 |
The four ounces of iron should be dissolved in the
sixty-four ounces (fluid) of water, and the acetic acid
and tannic alcohol added.
In using this solution, develop your plate over a
large filter, which will receive all your surplus developing
solution, and conduct it into a bottle for use again;
drain the plate into this filter before washing, wash carefully
and then place it into the fixing solution—the developing
solution which has filtered through into the bottle
is afterwards used in the proportion of one-half of old
to one-half of the new or fresh solution. This greatly
improves the high lights of the picture, and by using
more or less of the old solution, effects can be produced
that are impossible by any other means.
Great care should be taken to cause the developing
solution to flow evenly and with one sweep, as it were,
over the whole surface, so that the action may be as
near as possible equal on all parts of the surface.
In a very few seconds after the action of the developer
has commenced the picture will show up. The
plate meanwhile should be kept in motion and the
solution caused to flow from side to side and from one
end to the other, in order that the development may
progress evenly and with the same speed on all parts.
The picture will gradually grow and brighten, until
all the detail that might be expected is seen in the
shadows; then pour off the remaining solution into
the filter and proceed to wash the plate until all traces
of greasiness disappear; when the plate is sufficiently
washed and is ready to be fixed or cleared. Another
developing solution is prepared as follows:
Make a 64-ounce saturated solution of protosulphate
of iron, into which drop tannin solution
enough to cause a precipitate, which remains undissolved
after shaking, then add drop by drop pure nitric
acid, until the precipitate is taken up and the solution
becomes clear. To one ounce of this add water, until
it tests 18 to 20 grains to the ounce by the hydrometer,
then add one ounce acetic acid, which perfects
the formula and constitutes the developer.
The solvent most generally used for fixing or clearing
positives is cyanide of potassium.
By the term "fixing" is meant the dissolving from
the collodion film all the iodide of silver not acted on
by the developer; the remaining portion of the silver is
in a metallic state and constitutes the image; the
cyanide very readily dissolves the iodide, but acts very
slowly on the metallic silver.
This fixing solution should be contained in a glass
upright dish, enclosed in a wood case, with a tight or
close-fitting cover, this in order that as little exposure
to the air as possible may be had, as the fumes
arising from the evaporation of the solution are
injurious.
Two ounces of cyanide to 64 ounces of water will
make a suitable fixing solution for plate pictures; if,
however, its action is thought to be too slow, add more.
The plate picture having now been developed and
fixed, it only remains that it should be dried, varnished,
cut into shape, placed in the proper envelopes and it
is ready for delivery.
Those desiring more extended instructions in the
making of plate pictures are referred to the work on
that subject, entitled, "The Ferrotype and How to
Make it," published by E. & H. T. Anthony & Co.,
of New York.
The Phenix Plate Co., the largest manufacturers
of ferrotype plates in this country, and whose name
is familiar with every ferrotypist, as well as most
photographers, have lately placed on the market ferrotype
plates, with surfaces coated or sensitized with
gelatine emulsion, which they, offer as a substitute for
the ordinary collodion positive or tintype.
The plates are cut to sizes and packed in much the
same manner as the Stanley or any other dry plates
are, and being extremely sensitive to light, they must
be handled with the same care.
The manufacturers claim, that "the 'Argentic Dry
Plate' will be found far superior to any other form of
positive plate, giving as it does the maximum of
beautiful effects with a minimum of labor, producing
a rich and brilliant picture with a rapidity and cleanliness
never before attained, doing away as they do
with the use of the silver bath and all its concomitant
evils, pinholes, stains, fog, etc., not forgetting the
vast saving in time and temper. The argentic plate
is always ready-at-hand, and the working of it is
simplicity itself. Their permanency and reliability is
beyond question. These plates are extremely rapid.
An exposure of from 1 to 3 seconds will suffice with
a good light, 2 minutes to develop, 3 to fix, wash, dry
and varnish, and the operation is complete, ready
within ten minutes for delivery. For out-door views
these plates work well with a drop shutter exposure,
and the results, both for portrait and view work, are
remarkable for fullness of detail, and great delicacy and
softness of tone."
While these plates may be developed by the common
ammonia pyro developer, the manufacturers
claim, that "much finer effects may be produced by
using the Phenix Stock Solution," that accompanies
the plates, put up in 12 oz. bottles. By its use,
greater rapidity of development, purer white, extreme
brilliancy and finer detail can be obtained, the result
being far superior to that produced by any other
developer.
The following formula can be relied on to give
excellent results, and by simply modifying the proportions,
to "suit circumstances," will answer every
purpose. As these plates are very rapid, six times more
rapid than wet plates, guard well against white light.
Formula for development:
NO. 1.
| Pyrogallic Acid |
1 oz. |
| Water |
12 oz. |
| Citric Acid |
20 grs. |
p23
NO. 2.
| Phenix Stock Solution. |
| Keep the Stock Solution securely corked. |
NO. 3.
| Bromide Potass. | 1 oz. |
| Water | 12 oz. |
| Water | 4 oz. |
| No. 1 | 4 drams. |
| No. 2 | 4 drams. |
If the plate be over exposed, add a few drops of
No. 3. Should the plate, however, be under exposed,
add one dram more of No. 2. When the plate is
placed in the developer, the image will begin to
appear in from 5 to 10 seconds. Continue the development
until the details are all out. But be careful
not to over-develop, and thereby obscure the shadows.
Wash thoroughly after development, and fix in the
following solution:
| Cyanide of Potass. | 120 grains. |
| Water | 10 oz. |
"Let the plate remain in the fixing basin until every
trace of Bromide of silver disappears. Wash well after
fixing, and dry with a gentle heat or flow the plate
with alcohol for a few seconds. Set it aside, and it
will dry in a few minutes without the aid of heat.
For varnishing any good negative or positive varnish
will answer. Apply a little heat to prevent chilling."
Directions accompany each box.
We now take up that more important branch of the
collodion process, vis., that for negatives.
The formulæ and instructions already given for
positives might enable one to make a negative, but
the negatives so made would bear even a remoter
relation to one made by the formula about to be given
than would a positive made according to these formulæ
bear to a good one made by the appropriate means.
Important modifications are necessary to reach the
highest excellence in either process.
To produce a good negative a collodion is necessary,
the film of which is more permeable than that for positives,
so that a heavier deposit of iodide of silver may
be carried in the film, to the end that in the development
a denser deposit of metallic silver may be secured
on all parts of the image, but especially on the high
lights, which should be sufficiently dense to prevent the
transmission of light almost altogether, or at least to
exclude the light sufficiently to allow the shadows and
intermediate shades to print to the proper depth, while
the high lights of the face and such parts of the clothing
as are white shall be only slightly discolored.
There are very many formulæ for such collodions,
some of which have proved to be eminently satisfactory,
and among the best are classed the following:
Ether and alcohol, equal parts. Climax cotton
(Anthony's), 3 grains to the oz. Negative cotton
(Anthony's), 1 grain to oz. Place the cotton in the ether
first, then add the alcohol and sensitize with
| Iodide of Ammonium | 3 grains to ounce |
| Iodide of Lithium | 1 |
| Bromide of Cadmium | 2 |
Collodion prepared after this formula gives very
pleasing results and is rather more rapid than the
average.
In many cases it is well to have two samples of collodion
differing in formulæ, mixing them in varying proportions,
according to the effect desired.
A good formula for mixing with the above is as follows.
It can be used separately if desired, but is not
primarily intended to be used alone:
Plain collodion, prepared as in the preceding formula,
but with a different cotton, Anthony's snowy
Cotton, for instance, to each ounce of the plain collodion
add:
| Iodide of
Potassium | 2½ grains |
| Bromide of Cadmium | 2 |
| Iodide of Cadmium | 2½ |
The iodide of potassium is insoluble in absolute
alcohol and ether, therefore it must be first dissolved in
the smallest quantity of water possible and then added
to the collodion. A portion will even then most probably
be precipitated; if it is not, it would be an indication
that the alcohol or ether used were either one or
both of a higher specific gravity than they should be.
It is more important that the ether should be pure
than the alcohol, as the former is often contaminated
or adulterated with water as well as with alcohol, and
sometimes contains impurities of an acid nature.
Ether, for photographic purposes, should not have a
higher specific gravity than 720, and the alcohol should
never be used for collodion when below 95 per cent.,
as the presence of water in the collodion makes the
film weak and glutinous.
Most formulæ for collodion prescribe alcohol and
ether in equal parts, but these may be varied with advantage
during the hot season; for instance, the alcohol
may be used in somewhat larger proportion, as the tendency
to evaporation is much more with a high temperature,
and alcohol evaporates less rapidly than ether.
Consequently the flowing quality of the collodion and
the evenness of the film would be promoted by a not too
rapid congelation or setting of the film. And again,
during the cold season, the ether may be used in larger
proportion, to promote a more rapid evaporation and
setting of the film. By a moderately close observation
of the action of collodion under varying temperatures,
the operator might soon learn how to modify his formulæ
to suit all conditions of heat and cold.
It should be mentioned that it would not be correct
to vary the proportions of ether and alcohol very greatly,
as an over proportion of alcohol would render the collodion
weak and glutinous, and, being very soluble in
water, would the sooner injure the silver solution. On
the other hand too great a proportion of ether would
make the collodion less sensitive.
| Alcohol and ether, equal parts. |
| Anthony's Negative Cotton | 3 grains to ounce |
| Anthony's Climax Cotton | 1 |
Put the cotton into the ether and let it become saturated,
then add the alcohol. Excite with
| Iodide of Ammonium | 3½ grains to ounce |
| Iodide of Cadmium | 2 |
| Bromide Cadmium | 2½ |
Collodion sometimes, from long keeping, loses sensitiveness
and becomes of a deep red color. When such
is the case, it should be set aside and fresh samples prepared,
which would be improved in working quality by
the addition of small quantities of the old, and thus old
stock may be used up without deterioration in the
work.
Negative collodion should not be so heavy bodied
or thick as that for positives; neither should it be so
highly excited. Good positive collodion should have as
many as 8 grains of the iodides and bromides to the
ounce, requiring a silver solution not lower than 50
grains strong and going somewhat higher in cold
weather.
The standard silver solution for negatives is 45 grains
of silver nitrate to the ounce of water and the collodion
from 5½ to 6½ grains to the ounce, with a tendency
to less in cold weather.
Collodion for negatives should be permitted to ripen
a day or two before using, unless it is brought to that
state by mixing with old.
| Iodide Ammonium | 192 grains |
| Bromide Cadmium | 128 |
| Bromide Potassium | 96 |
| Ether and Alcohol | 32 oz. each |
| Cotton | 320 grains |
The preceding formulæ are for portrait work in
studio. For other work, such as outdoor views,
landscape or architectural, or for copying engravings,
etc., certain modifications of the collodion, to produce
greater intensity or more contrast, are desirable.
Collodion suitable for such purposes can always
be purchased from the photo stock dealer, in quantities
desired, and for that reason it is not best for the
amateur nor the professional photographer either, to
prepare small samples for special purposes. If it
should, however, be found at any time necessary
to prepare such a collodion, the second formula of
Negative Collodion A will be found suitable for views
of buildings, copies of engravings and such like work.
It was at first thought to be unnecessary to give a formula
for the preparation of pyroxiline or gun cotton,
as no individual not in the business can possibly produce
an article that can be in any way compared to that
made by manufacturers of skill and experience.
For the benefit of any one wishing to experiment,
this formula is given:
| Sulphuric Acid | 6 oz. |
| Nitric Acid | 4 |
| Water | 2 |
Mix and the temperature will rise to 170° F.
Inmerse dry cotton wool (best long fibre), be sure
wool is dry, draw it in long flakes and pull it under
acids with a stout glass rod; do not crowd in too much,
take care that each tuft is well wetted with the
acids before putting in a fresh tuft. Carefully cover
the vessel and put it where any slight fumes may
escape; leave it for at least 12 hours—20 hours will
not spoil it. When ready, lift cotton out and plunge it
into a large quantity of water, quickly separating the
tufts with glass rods, wash in changes of water, until
no acid is left, then wring the cotton in a coarse towel
until dry as possible and pull it all apart and place in
the air to dry.
| Alcohol | 5 oz. |
| Ether | 10 |
| Cotton | 100 grains |
TO IODIZE:
| Alcohol | 5 oz. |
| Iodide Ammonium | 60 grs. |
| Iodide Cadmium | 30 |
| Bromide Cadmium | 20 |
Dissolve the iodides in the 5 oz. alcohol or in the
whole 10 oz., if desired, then put in the 100 grains
cotton, shake well, then add the 10 oz. ether and shake
till the cotton is all dissolved; it will be ready for use
in a few hours, and will improve with age.
The silver solution for a negative bath is prepared
in substantially the same manner as for a positive.
Two thirds of the amount of silver nitrate intended
to be used, should be dissolved in the quantity of
water required to make the bath, and a grain or two
of iodide of potassium added and placed in the sunlight
until the solution has changed color, become
turbid, and again clear and colorless. This change is
caused by a minute portion of the silver combining
with the organic matter and with other impurities in
the water, if there are any; a molecular change then takes
places, oxygen is evolved and the infinitesimal portion
of silver changes to a metallic state and sinks to the
bottom, carrying with it the impurities, which induced
the chemical action or change.
The solution may now be filtered, the remaining
portion of the silver nitrate added, and with a few drops
of pure nitric acid, the solution will be ready for use.
But if on trial it is ascertained that it will not give
satisfactory results, it will be found that it has not
been sufficiently excited, or an acid reaction has not
been induced.
If the first supposition is true, more iodide of potassium
must be used, as a silver solution must receive
as much or nearly as much of the iodide as it will hold
in solution, before it will work harmoniously with the
collodion; the grain or two put in the solution with
the first portion of nitrate of silver have not been
sufficient.
A very little more may be added, which will combine
with the silver, forming a white curdy precipitate, which,
on shaking the bottle, will in a short time redissolve. If
any remains, it should be filtered out, as no more can
be held in solution.
An other plan is rather more convenient, but requires
more time. It is to coat with collodion as large
a plate as the bath will receive; immerse it in the
bath, leaving it there some hours, usually all night.
After trying one of these remedies, if the bath refuses
still to yield good results, more nitric acid should
be added, until the solution will turn blue litmus
paper slowly red.
I have never known a silver bath to fail to come to
terms under this treatment.
The silver solution, when in constant use, rapidly
deteriorates, and unless there is a very large quantity,
it will soon become unfit for use, and however much or
little there may be, it is only a question of time as to
when it will cease to act satisfactorily.
This result is caused partly by the gradual contamination
of the solution by the alcohol and ether washed
from the collodionized plates that have been sensitized
in it. When the bath is seriously affected in this
manner, it is indicated by the difficulty experienced
in getting the developer to flow evenly over the plate,
and also by the strong alcoholic odor of the silver solution.
The necessity for a change of the bath may be delayed
for a time by the addition of alcohol to the developer,
which causes it to flow more evenly.
Another source of evil to the bath is the continual
absorption from the surfaces of the plates immersed of
minute portions of the salts with which the collodion
is excited. After the silver solution has taken up all
it can dissolve or assimilate, the surplus is held in
suspension and is called free iodide, which deposits
itself on the surfaces of the plates, and when in quantity
causes the plate when taken from the bath to appear
as if fine sand had been sprinkled over it. These
small crystals prevent the action of the light on the
parts they cover, and when the plate has been developed
and fixed, every crystal has produced a small
transparent spot or pinhole, as it is termed, and many
a lovely negative has been ruined by pinholes.
This trouble may be cured by increasing the quantity
of the solution and adding more silver nitrate,
which, if in sufficient quantity, will dissolve the free
iodide. But if it may not be convenient to do this
and no other solution is ready for use, then, after immersing
your plate, tip the bath dish back so that the
face of the plate may be inclined downwards, when the
crystals will be deposited on the back of the plate and
do no harm.
The silver bath is also contaminated with organic
matter, taken up from the edges and backs of the
many plates used, of which some portion of the albumen
is likely to be exposed to the action of the solution,
and also from dust, etc., falling into the bath
dish, which will be taken up and held in solution by
the acid in the bath, but when the acid can hold no
more in solution, its presence will be indicated by a
greyish white vail forming on the surface of the plate
when developed; this is called fog, and may only partially
obscure the image, or it may completely veil it.
The fogging of the plates in this manner may be
prevented for a time by adding more nitric acid to the
bath, which will dissolve the organic matter and prevent
its deposition on the plate.
When the silver bath has, from long or much use,
become seriously affected by any of these evils, it
should be set aside and a fresh bath put in use, until
an opportunity offers to thoroughly cleanse and
renew the old solution, which can be done by one
series of manipulations, as thus:
Into a large bottle, which will hold the solution to
be treated, and somewhat more, put from a pint to a
quart of water, according to the quantity of the solution;
into this bottle containing the pint of water, pour
in a small stream the whole of the old solution, when
it will be found to have turned to a milky whiteness
or opalescence, which is the iodide of silver set free by
reducing the strength of the solution; this must be
filtered out, and the solution neutralized with bi-carbonate
of soda, which should be put in, in small
quantities until a deposit of carbonate of silver begins
to be formed; then place the solution in an evaporating
dish, and subject to heat until the bulk is reduced
about one-half; test it with litmus paper, and if acid,
give it more bi-carbonate of soda; add water and silver
nitrate to bring to the required bulk and strength, set
in the sunlight for a time or until required for use,
then filter, and it will be found to be as good as new,
but it may require a few drops of nitric acid.
Pure water may be always had ready for use, by
keeping a large bottle full of the common water
standing out-door in the sunlight, adding a grain of
silver from time to time as the bottle is emptied and
replenished.
The new "agate iron ware" pots are the best for use
as evaporating dishes. They will not break or crack,
and they are not nearly so expensive as porcelain dishes.
There are a thousand and one formulæ for developing
solutions for the wet plate, but they are all composed
of protosulphate of iron or a compound thereof,
acetic acid, and water, with the addition of some organic
substance, such as sugar, rock candy, glycerine, etc. etc.
The development of a negative is nothing more than
the deposition of metallic silver in a state of fine sub-division
upon a base of the same metal, which is the
image latent in the collodion film after exposure in the
camera. And it is supposed that the finer the deposit
secured in the development the better will be the chemical
effect and printing quality of the resulting negative.
Therefore, the use of organic bodies in the developer is
supposed to effect or induce a finer deposit. The
careful observer, however, will soon discover that the
success of the development depends more on the time
of exposure, the temperature of the developing solution
and the condition of the bath, than upon any adventitious
aids, such as rock candy, etc.
A developing solution, composed alone of an aqueous
solution of protosulphate of iron and acetic acid, can
be made to produce the finest effects possible to the
process.
Half fill with protosulphate of iron a wide mouth
64 oz. bottle, fill up full with water, set aside to dissolve,
shaking the bottle once in awhile, so that the water
may become saturated. Put a small glass funnel on
a stand, so that you can place under it a 16 oz. bottle;
fill the 16 oz. bottle with water and enough of the
strong iron solution to make a twenty grain to the
ounce solution, add one ounce of acetic acid, pour all
into the filter and place the bottle beneath the funnel
to receive it. This filtered solution is the developer
for negatives.
Some experience is necessary to enable one to develope
a negative properly and secure the best results.
Holding the plate in the left hand, take the developer
bottle in the right, hold it over the plate near the
left hand, let the first finger of the right hand rest
against the edge of the plate, tilt the bottle so that the
developer will run on the plate; at the same time move
the right hand toward the other end of the plate rather
quickly, letting the developer run in a steady, but not
copious stream; deflect the plate with the left hand at
the same time, so that the solution will flow from you
in such a manner that the whole surface of the plate
may be covered with the liquid at nearly the same time
as possible. Now set down the bottle and keep the
plate in motion, so as to cause the solution to have an
equal action on every part of the surface. Very soon the
image will appear and brighten, until every part of the
detail comes out, and when it begins to look as if
fading away or becoming less distinct the development
is finished.
This can be ascertained with more certainty at this
time by holding the plate so as to be able to look
through it toward the light, so as to examine its density,
remembering that the high lights should be quite dense
and the medium shadows be full of detail. One
very soon learns to know the proper density.
The plate should be now very thoroughly washed, to
free the surface from the iron before fixing.
Great care should be taken in this manipulation to
cover the plate quickly with the solution, holding it all
on the plate. As the development is made by the precipitation
of the free silver on the surface of the film
upon the latent image, none of the free silver should be
washed from the plate by a flood of developing solution
carrying it off the surface.
Hyposulphite of soda is generally considered to be
the most suitable fixing agent for negatives, although
some prefer cyanide of potassium.
The hyposulphite, however, is the safest, both for
the plate and for the operator. One pound of hyposulphite
of soda to a gallon of water will make a solution
of a suitable strength to clear a negative as rapidly
as is necessary, and it should be contained in a flat
dish. When from much use the fixing solution becomes
muddy, it should be thrown into a suitable
receptacle for liquid wastes, as it is rich in silver.
Leave the negative in the fixing solution until all the
iodide of silver is dissolved from the film, and no trace
of the yellowish deposit can be seen by transmitted
light.
When the negative is thoroughly cleared, if it is
found that it lacks density or, in other words, is not
intense enough, wash it very carefully to free it from
every trace of the soda solution, and then proceed to
strengthen it in the following manner:
Keep near at hand in a 64 oz. bottle this solution:
| Protosulphate of iron | 2 oz. |
| Citric acid | 1 |
| Water | 64 |
and in a small bottle a ten-grain-to-the-ounce solution
of silver nitrate.
When a negative is to be strengthened, from the
large bottle take enough of the solution to cover the
surface; to this add a half dram of the silver and flow it
over the negative.
A change of color will at once take place in the
film, which will become darker as the silver deposit
becomes heavier; if one application is not enough to
secure the required density, wash the plate and proceed
again, as before.
Negatives may be strengthened before fixing, if it is
found necessary, by flowing the surface with the weak
silver solution and afterwards using the ordinary developer.
When one has become accustomed to the work, and
can tell that the negative is not dense enough before
fixing, it is the best plan to re-develop before fixing.
The mercurial intensifying solution for dry plates is
very nice for wet plates.
Having described the positive and negative collodion
process, there remains to give an account of the latest
and greatest achievement in photographic progress.
The history of dry plate photography comes within
the last ten or fifteen years, and being so recent and so
fully written up in current photographic literature,
space in this work will not be taken for a full account
of the rise and progress abroad and at home of this
wonderful improvement in photography, but instead
will be given some formulæ for the preparation of
Gelatino Argentic Emulsion, and the most approved
methods of working it.
The shortening of the time of exposure for sittings
in the studio from one-tenth to one-twentieth of the
time required for the old wet plate process, at its best,
has rendered the dry plate such a power in the hands
of the photographer as to have caused it to be almost
universally adopted in the studios of this country, and
has practically displaced the wet process in the field
and for all out-door photography.
Since the introduction of the new process into the
United States, the preparation of rapid dry plates has
been and remains now in the hands of certain prominent
firms, who, from the skill they have acquired and
the advantages they derive from all the machinery and
conveniences that large capital enables them to procure,
are enabled to supply fully the demand with a
much better article than could be had were each consumer
to manufacture for himself. In fact, if the
photographer were compelled to manufacture his own
dry plates there would be a very different condition of
affairs at the present time.
Gelatine is a substance so susceptible to change from
the action of our climate, with its varying temperature,
that of a large number who have attempted to make
dry plates for the trade, many have completely failed,
some of them after a partial success; and others after
spending thousands of dollars never could make two
batches of emulsion alike; and then again the keen
competition of the successful concerns has reduced the
profits to not more than fair returns to a precarious
business.
There are many, no doubt, who would be glad to
experiment in this field, especially among amateurs,
and it is for the benefit of such that certain hints and
formulæ are given in this connection to enable them
to make, if successful, their own plates.
The formulæ herewith given are selected from a
large number published in the German, English and
American journals, and while good dry plates may be
made by either of them, yet it is doubtful if the highest
success would repay the outlay.
A careful study of the published formulæ and the
current literature on the subject of Gelatino-Bromide
Emulsion will disclose the general principles on which
they are based.
A certain amount of bromide of ammonium or
potassium (preferably ammonium, on account of its
greater uniformity and purity) and nitrate of silver are
dissolved separately, and mixed together in a thin solution
of gelatine, at a moderately warm temperature.
Great sensitiveness is obtained by a long exposure to
the same warm temperature, or by the addition of a
small amount of ammonia, and raising the heat to the
boiling-point for from a half to a full hour; when it is
cooled more gelatine is added and the whole allowed to
congeal or set, when it is reduced to shreds, and washed
in cold water to remove the excess of the preponderate
salt.
The sensitiveness of the emulsion is said to depend
upon the fineness of sub-division of the grain of the
bromide of silver in the presence of the gelatine.
This extreme fineness is secured by long emulsification,
or by the use of ammonia and a boiling heat.
The strength and tenacity of the emulsion depend
on the quality of the gelatine, and its freedom from
deterioration during the process of emulsification and
the subsequent washing. A soft gelatine is suitable
for the process of emulsification; afterwards a hard
quality is used to give body and resistance.
The presence of free bromide or of free nitrate of
silver in the finished emulsion would be fatal to its
usefulness; therefore, as both of those salts are easily
soluble in water, they must be got rid of by washing;
consequently, before washing, the mass of jelly should
be induced by the use of a refrigerator to set firm and
hard, so that it may be broken up into shreds for
washing, and the smaller the shreds the less washing
they will require.
Of the following formulæ the first two are copied
from English photographic year books, and are believed
to be reliable; the others are by Dr. Eder, the
greatest German authority on gelatine emulsion, and
they are comparatively simple.
PAGET PRIZE.
NO. 1.
| Hydrochloric acid | 1 drachm |
| Distilled water | 12½ oz. |
NO. 2.
| Distilled water | 3 oz. |
| Bromide Ammonium | 210 grains |
| Gelatine | 50 |
Twenty minims of No. 1 solution are introduced
into the whole of No. 2, and the Gelatine is left to
swell.
In another glass vessel 330 grains of nitrate of silver
are dissolved in 3 ounces of distilled water; a small
quantity, about two fluid drachms, of the latter is poured
into a test tube and diluted with an equal bulk of distilled
water.
The solution of the bromo-gelatine is then rendered
complete by immersing the bottle in hot water, and
the dilute silver nitrate is added all at once.
The bottle is then shaken and the remainder of the
strong silver solution added in quantities of half an
ounce at a time, shaking the bottle as before after
each addition.
The emulsion is then boiled for fifty-five (55) minutes,
and when cooled down to 90 degrees F., one
ounce of gelatine, which has been previously swelled
and dissolved in water so as to measure four ounces, is
added and put away in a cold place to set.
When set, squeeze through coarse canvas into cold
water one half gallon and ¼ lb. salt; let it remain for
five minutes, then wash thoroughly.
The addition of two ounces of alcohol and enough
water to make up to twenty ounces completes the
process.
In the preparation of this or any gelatine emulsion
the work may be carried on in daylight as far as the
mixing of the bromide and silver, which must be done
in a dark room by the aid of a lamp or gas light
shaded by orange or ruby glass. Sufficient of this
non-actinic light may be admitted to enable the work
of washing the emulsion, and afterwards the coating of
the plates, to be carried on with ease and comfort, as
the emulsion when wet is only half as sensitive as when
dry.
JARMAN.
| Picked white Gum Arabic |
75 grains |
| Bromide Ammonium |
200 |
| Gelatine |
150 |
| Water |
10 oz. |
| |
| Nitrate of silver |
300 grains |
| Water |
7½ oz. |
Dissolve in two jars in a vessel of water heated to
140 degrees F., stir each solution well with a separate
rod or strip of glass, and when equally heated to 140
degrees the silver may be poured in a gentle stream
into the gelatine gum solution by the aid of a safe
light.
When all has been mixed and thoroughly stirred,
cover the top of the dish and allow the temperature to
be at 140 degrees for eight hours, occasionally stirring
the emulsion during that time, which should be done
in the dark.
At the end of that time there should be weighed
out, of Nelson's soft gelatine 250 grains, and of French
hard gelatine 150 grains.
This 400 grains of gelatine must now be added to
the emulsion, and occasionally stirred until all of it is
thoroughly dissolved and incorporated with the emulsion,
which will take about a quarter of an hour; it is
then poured out in a clean 12×10 deep porcelain dish to
set, and should be allowed to set for forty-eight hours,
when it may be wrung through a piece of coarse canvas
and allowed to fall into a solution of
| Common salt |
½ lb. |
| Water |
1 gallon |
Let it remain in this for five minutes, then strain
through a horse hair sieve and wash it well for an hour
and a half. Allow the shreddy emulsion to drain well
in the sieve for about a quarter of an hour; at the end
of that time place it in a clean stone-ware jar to melt,
with the addition of four drachms of saturated solution
of nitrate of potash upon melting, which may be done
by setting the jar into a dish of water at a temperature
of about 120 degrees F.
It will be found on measurement to be nearly 25
ounces of emulsion; as soon as it is ready for filtering
four ounces of methylated spirit may be mixed with it,
to which have been added four drachms of an alcoholic
solution of tannic acid, made by mixing ten grains of
tannic acid with one ounce of alcohol; this is to prevent
frilling.
The rapidity of the plates will be about eight times
that of a wet collodion plate, which for all ordinary
purposes will be as rapid as could be desired.
Dr. Eder, the distinguished German scientist (who
is a great authority on gelatine emulsions, and has
published a book on this subject), gives the two
following formulæ:
EDER.
| Bromide potassium |
4 |
grams, equal to |
61 grains. |
| Gelatine |
7½ to 8 |
grams, equal to |
115 grains. |
| Water |
50 |
c. c., equal to |
1 ounce. |
| Nitrate of silver |
5 |
grams, equal to |
77 grains. |
| Water |
50 |
c. c., equal to |
1 ounce. |
Dissolve the silver in water and precipitate it with
ammonia. Continue the addition a few drops at a
time, until the brown oxide of silver re-dissolves and
the liquid looks as bright as pure water; the strength
of the ammonia is immaterial.
The nitrate of silver may be warmed to 93 degrees F.,
and poured into the bromized gelatine a little at a
time, continually stirring with a glass rod. Rinse the
silver bottle with 10 c. c. about 1½ drachms of water
and add it to the emulsion, place the bottle containing
the emulsion in a basin or saucepan of water heated
to 90 degrees F., leave it therein from 15 to 30 minutes
without further heat; after 30 minutes the emulsion
is ready to be congealed previous to washing.
This emulsion never fogs, but it is imperative that
in no part of the progress the temperature should exceed
100 degrees F., and it is a safe rule not to go
beyond 90 degrees F. It is recommended to use
French gelatine.
EDER.
| Bromide of potassium |
61 grains. |
| Gelatine |
115 |
| Water |
1 oz. (plus) |
The bromide of potassium must be pure and not
alkaline, ditto the gelatine.
The bromized gelatine must be melted at 140 to
160 degrees, and then add 77 grains of silver nitrate
in one ounce (plus) of water. The silver may be
warmed to the same temperature as the gelatine, but
this is immaterial. Rinse the silver bottle with three
drachms of water and add it to the emulsion. The
bottle with the emulsion is now put in a saucepan
partly filled with hot water, covered to exclude all
light, and the water in the saucepan set boiling, which
should be continued for 25 to 30 minutes, then both
water and emulsion cooled down to 90 degrees F.,
then add 340 minims of ammonia, stirring it thoroughly
through the emulsion, which should be left for from
30 to 40 minutes at a heat of 90 degrees F., then it is
ready to set and wash.
Dr. Eder says this last is quicker and better for portraits.
Any form of room that has running water in it, if
there is a window, the better, unless the work is done
at night. If in the daytime, shade the window with
heavy red orange paper; if gas is used, shade the flame
with a ruby globe or chimney, and cut a piece of tin
to fit in the pipe below the burner to cut off rays
of light falling through bottom opening of globe or
chimney.
If there is no gas purchase a dry plate lantern.
Emulsion in the jelly and when wet on the plates
is only half as sensitive as when dry, so that it is not
necessary to distress one's self working in the dark.
When the silver and bromide are brought together
and mixed, it should be done in this dark room. The
solutions are poured into a glazed earthenware bottle,
which can be tightly corked. When it is required
that the emulsion should be heated, put the bottle into
a tin pail, fill the pail with hot water and put on the
cover and heat in any convenient manner; when it is
necessary to examine the emulsion, remove the pail
and contents to the dark room.
A thermometer for testing heat in liquids should be
used to regulate the temperature.
A deep porcelain tray is the best dish for holding the
emulsion, while it sets previous to washing. To prevent
the emulsion from adhering to the tray it may be
waxed carefully, but leave no surplus; when the emulsion
has set as firmly as it will, it may be cut up into
very small squares for washing, but probably the best
way is to squeeze it through the meshes of very coarse
canvas, such as ladies use for embroidering on with
wool. The shreds may be permitted to fall into a fine
horsehair sieve placed in a pan of very cold water and
allowed to soak for a time, when the sieve may be
raised, and the water will in a short time drain away
from the shreds. This may be repeated until the
water, when tested with silver solution, gives no precipitate
of bromide.
After the emulsion is washed it must be melted and
filtered before it can be used to coat plates. These
manipulations must be performed in the dark room.
For melting the emulsion use a small oil stove placed
in a tin box, the open side placed to the wall; set the
dish containing the emulsion on the tin box over the
heat; or, a more perfect arrangement is to take a tin or
sheet iron bake-pan, make a hole through the bottom
near one end, and into the hole fix and solder a tin
funnel, into which you can put a glass funnel that will
hold a pint or more; set this pan on the tin box containing
the oil or gas stove, the end of the pan containing
the funnel projecting over the tin box towards
you; fill the pan with hot water, which the heat of the
stove beneath will keep hot; into it set the dish containing
the emulsion to be heated or melted; when
that has taken place pour into the funnel to filter,
through loose absorbent cotton or a thin piece of
chamois skin or flannel, as you prefer; the funnel will
be kept warm by the hot water in the pan surrounding
it.
Filter into a pitcher with a lip suitable for pouring
from, or a small earthenware teapot would be better.
You would be using the emulsion from the bottom,
and thus avoid air bubbles; when all is filtered set the
pitcher or pot into the hot water to keep of an even
temperature.
Soak the glass in strong lye or potash for a time,
then wash carefully and put into acid, then wash
again and albumenize with the white of one egg to
six ounces of water without ammonia. The plates
should be slightly warm when being coated.
Hold the plate in the left hand, as you would for
coating with collodion, flow with emulsion as you
would with collodion, letting the surplus flow off the
right hand lower corner, but do not let more than the
gross surplus run off; retain enough to make a rather
thick film; now move the plate so as to facilitate an
even distribution of the film, then set the plate on the
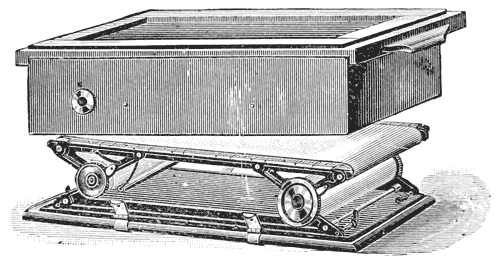
leveled cooling table.
This table should be a large slab of marble or slate
with a perfectly plain and level surface; before using
it should be cooled by placing ice or a refrigerating
solution on it. The coated plates are laid on this
level table, where the cold soon chills the emulsion,
causing it to set, when they may be set up in racks
and placed in the drying room or box, where in the
course of a few hours, if the conditions are favorable,
they will dry and are then ready for use.
The drying room, or box, as the case may be, must
be kept cool, and if any current of air is induced it
should be cool and constant, so that the drying may
proceed with perfect regularity until the process is
complete. Should the drying by any means be checked
a line will be formed on the plate, showing where
the drying stopped for the time.
Plates may be dried by a current of warm air, but
they are much more likely to frill during development;
and a very little heat will melt the coating.
If the plates are dried by an induced current of air,
the process may be hastened by placing dishes, filled
with chloride of calcium, in the air passage to the
drying box or room. The chloride will absorb all the
moisture from the air passing over it, and the dry air
will take up the moisture from the plates.
When the chloride of calcium becomes too damp
for further use, place the dishes containing it in an
oven and drive off the moisture by heat, when the dry
calcium may be again used. By employing such
means the plates may be dried in a few hours.
After the plates have become dry, they should be
packed in good light-tight boxes and kept in a dry
room until wanted for use.
Dry plates, ranging in rapidity from one-tenth to
one-twentieth the time necessary for a wet collodion
plate, are now commonly used in the studios of this
country. Of course, plates of such extreme sensitiveness
require great care in handling, and absolute freedom
from any umpremeditated exposure to white light
is necessary to their successful use.
It is therefore necessary that the dark room should
be remodelled to suit the requirements necessary to the
successful handling of such extremely rapid plates,
and in this connection it is proposed to describe the
necessary changes and alterations.
Any ordinary dark room may with little expense be
fitted for dry plate work. First see that every chink
or crevice which might admit white light is stopped or
filled up, then fit the door or doors so that they will
shut tight and remain closed.
For convenience of access to the room while work is
proceeding, and for greater safety, it is well to erect a
small porch or ante-room at each door, the entrance
to which should be at right angles with the dark room
door. The door to this porch and the dark room
door should be fitted with springs to keep them closed.
With this arrangement one can have access to the dark
room at any time by closing one door before opening
the other.
If the dark room is lighted by a window, it should
be glazed with dark red orange glass, and if the exposure
is toward the sun, it should be shaded with a
green or ruby colored shade on a spring roller. If
the sun never shines in the window, the shade is not
necessary.
If the room is lighted by artificial light, the best
way is to cut an opening in the wall or partition at the
most convenient place, make a frame to fit or cover
this opening, that will raise or slide, glaze it with red
orange glass. On a shelf outside the opening place
your gas-burner or lamp, with a large reflector behind,
so as to reflect all the light through the glass into the
room. If gas is used on the outside an argand burner
will be the best, with a common white glass chimney
for ordinary work, but for the most sensitive plates a
light green or thin ruby chimney will be absolutely safe.
If a kerosene lamp is used, the common white chimney
with full flame will be safe; and being outside, the
room will not be heated by its flame, nor rendered
offensive by its smoke and odor.
In front of the window or of the artificial light,
erect a shelf or place a small table with a level top,
which will support the developing dishes and bottles of
developing solution, and on which the work of development
may be carried on.
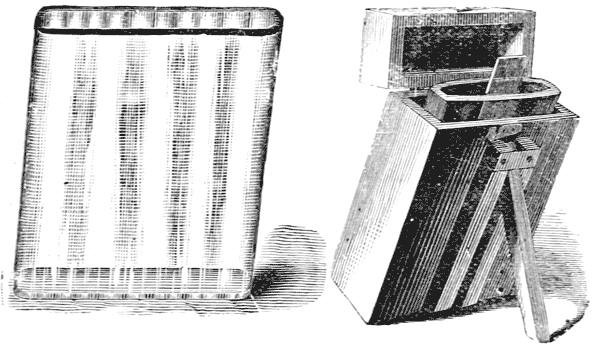
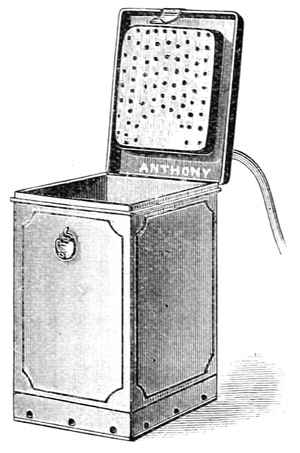
WASHING BOX.
If the room is so situated that neither window nor
gas may be used in the manner suggested, then procure
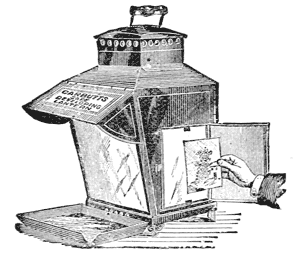
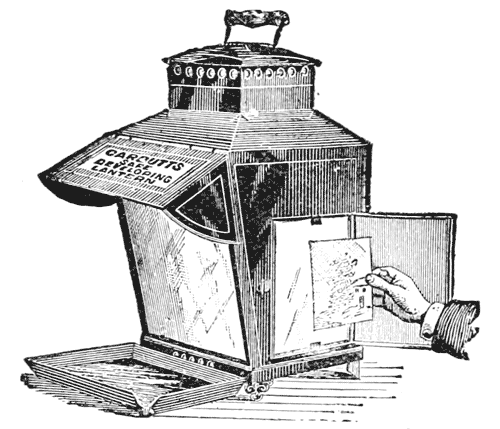
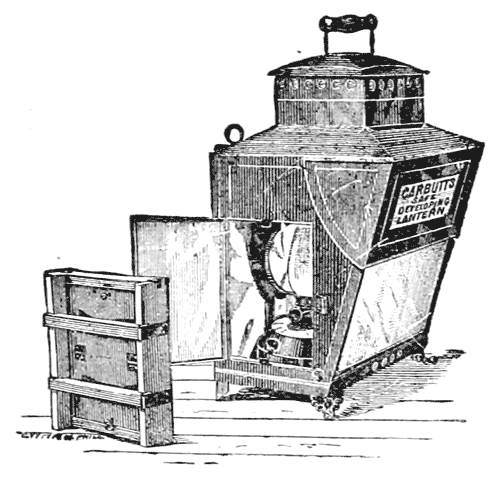
Carbutt's Developing Lantern, which is a most
convenient lantern, not only for developing, but for
other purposes. See figure.
The dark room should be supplied with running
water, and the more generous the supply, the better, as
a dry plate requires much washing, and a large stream
will do the work much quicker than a small one.
In many instances,
however, where running
water may not be had,
the washing box may be
used with advantage. If
running water is used, be
careful not to use too
much pressure; by attaching
a rubber hose to
the faucet and passing it
over a nail or hook
above, the pressure may
be reduced so that a full
but gentle stream falls
upon the plate.
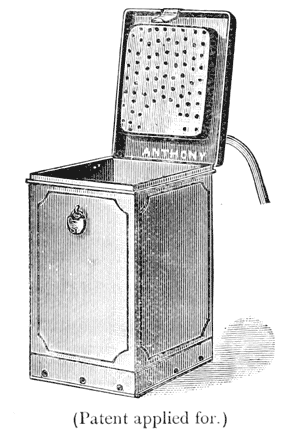
Safe closets should be
provided to contain all
sizes of plates; or the new
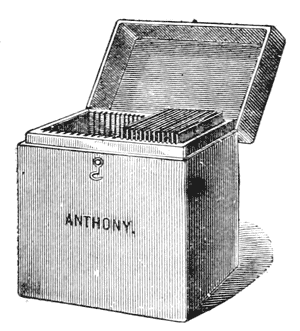
made by Anthony & Co., may be used instead, both for
unexposed and for exposed plates awaiting development.
NEGATIVE BOXES
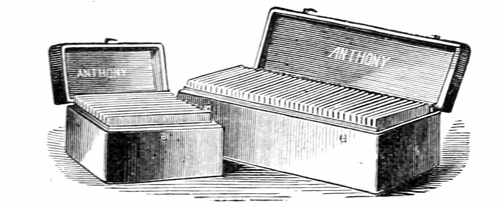
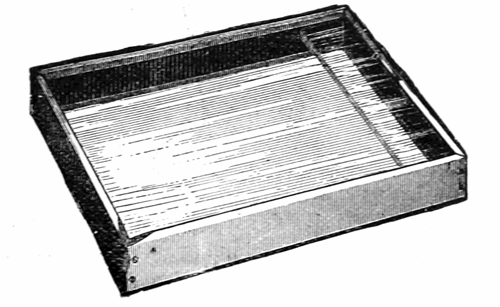
The dark room should be supplied with the necessary
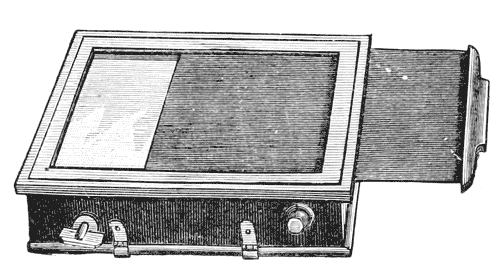
apparatus, such as developing trays, which are of
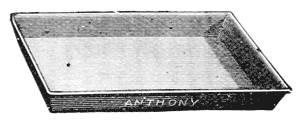
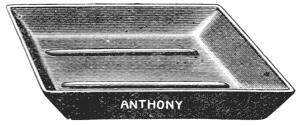
japanned tin, of glass or india rubber; see cuts,
JAPANNED IRON DEVELOPING TRAY,
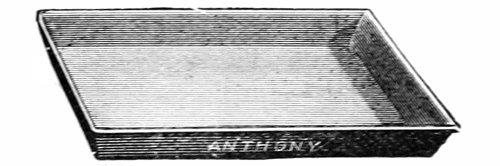
ANTHONY'S GLASS TRAYS,

or the patented article, the
GLASS BOTTOM DRY PLATE DEVELOPING TRAYS.
p52
and also the dishes to contain the fixing solutions,
which may be trays or upright, like silver-bath dishes.
THE COMMON SENSE TRAY
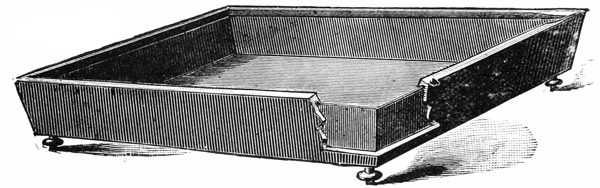
is a capital dish to contain the hypo and clearing
solutions and is not expensive, and can be had of all
sizes. All these dishes should be kept scrupulously
clean when not in use.
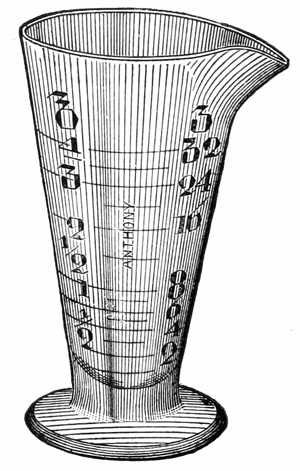
There should be Graduates of the 16 oz. and the
8 oz. sizes, and also a minim glass measuring up to
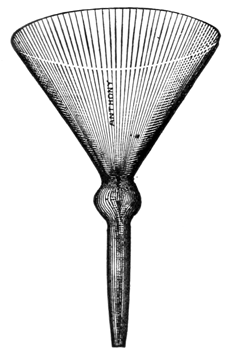
one fluid ounce, also one or more of Anthony's Combined
Funnel and Filter, for filtering the various solutions.
ANTHONY'S COMBINED FUNNEL AND FILTER.
There should be glass-stoppered bottles for containing
the developing solutions, especially the pyro; also
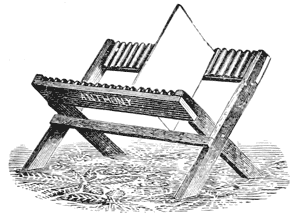
racks to hold the
plates while drying;
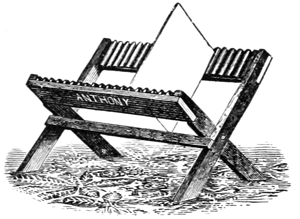 FOLDING NEGATIVE RACK.
one finely adjusted
scale with
apothecary weights
weighing to a ¼ lb.;
one camel's hair-brush,
3 inches
wide, for dusting
the plates before
putting them in the holders for exposure, and also for
removing
sediment
from the
surface of the
film after fixing
and washing.
FOLDING NEGATIVE RACK.
one finely adjusted
scale with
apothecary weights
weighing to a ¼ lb.;
one camel's hair-brush,
3 inches
wide, for dusting
the plates before
putting them in the holders for exposure, and also for
removing
sediment
from the
surface of the
film after fixing
and washing.
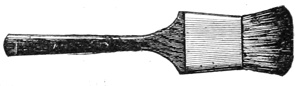
CAMEL'S HAIR DUSTERS.
Thus fitted and furnished, the dark room is ready
and well adapted for the most difficult dry plate work,
and we will now proceed to the consideration of the
Every manufacturer of dry plates encloses in each
box of plates packed for the market a formula for the
development of the same.
The various manufacturers of dry plates, whose names
will be found in the advertising pages in this book,
each have a formula which in some respects differs
from all the others, and it is but fair to the maker of
the plate, that his formula should be used, unless the
operator is of much experience and understands the
requirements of each particular kind of plate.
Therefore, while formulæ are given in this connection,
although they are known to be of the best, yet in
the hands of inexperience they may result to no better
advantage than the formula appropriate to the plate
used; consequently, we do not urge their use above
any other, but rather that to which the operator is
most accustomed.
The alkaline pyro developer is now in general use
among professional photographers in this country, and
there remains no doubt that it is the best developing
agent for dry plates that has yet been brought into use.
This developer is composed of pyrogallic acid and
an alkali, either ammonia, sal soda, or carbonate of
potash, which, in solution and of proper strength, forms
the medium through which the pyro is applied.
To these is added bromide of potassium or ammonium,
which is the restrainer, and occupies about the
same position or performs the same function as acetic
acid in the wet plate developer, and besides being a
restrainer it greatly aids in securing intensity and printing
quality; and when plates are overtimed in exposure
its prompt use may result in securing a good negative.
Some plates require double the quantity of pyro that
others do to produce the same quality of negative.
After ascertaining the normal amount of pyro necessary
to develop plates of a certain make, if it is
desired to increase intensity add more pyro, if your
plate is developing too intense or hard add more of the
alkali.
No. 1.
| Carbonate of Soda (Sal) |
1 lb. |
| Carbonate of Potash |
1 lb. |
| Yellow Prussiate of Potash |
1 oz. |
| Bromide of Ammonium |
1 oz. |
| Water |
64 oz. |
No. 2.
| Pyrogallic Acid |
1 oz. |
| Saturated Solution Sulphite Soda |
15 oz. |
Keep No. 2 in glass-stoppered bottle.
To develop one 8×10 plate, take of
| No. 1 |
1 dr. |
| No. 2 |
½ dr. |
| Water |
6 oz. |
Put the exposed plate into the developing tray and
pour the solution upon it, making sure that all parts
of the plate are covered, and no air bubbles fixed to the
surface; keep the dish in motion and in a short time
the image will begin to appear; if properly timed the
high lights will show up promptly, and in due time all
parts will appear, and when detail is seen in the
shadows take the plate from the dish and examine it
by transmitted light. Note the gradations of light and
shade; if they appear properly balanced, the plate has
been properly timed in exposure. Return the plate to the
dish and let the development proceed until the image
sinks well into the film and you see nothing very
clearly as it lies but the blacks.
Time is necessary in this process to secure enough
intensity, and this stage is the most difficult in the
process, there being no means by which to judge with
any degree of certainty the density of the image before
you. It is better then to proceed too far than not far
enough, as a slow printing negative is far better than
one that is too thin and weak.[1]
When the image has sunk pretty well into the film
examine it again by looking through it, and note well
its appearance, so that if it is about right when fixed
you may remember how it appeared if you wish to increase
or diminish the intensity of your next plate.
If the plate has been overtimed it will show up
quickly, almost at once; when such is the case quickly
pour off the developer and flow the plate with water,
washing it well, then prepare more developer with
nearly double the amount of pyro and a few drops of a
strong solution of bromide of ammonium, which add
to the 6 oz. of water and pour on the plate; then take
half the usual quantity of the No. 1 solution in a
graduate and pour it, a few drops at a time, into the
developing tray, watching the action closely and keeping
the solution in motion.
The negative at this time probably shows all the detail
of the subject, but without any gradation of intensity.
If the changes just described have been made
promptly you will soon observe that the high lights
will begin to gain in strength. Keep up the action by
adding more of the alkali, drop by drop, until you can
proceed no farther.
The chances are that you will secure a printable
negative, but not a very good one; and if it is a portrait
the best thing to do is to throw it away and make
a new one.
The plate should now be very carefully washed previous
to fixing.
Should the film show signs of loosening from the
edges of the glass and swell so as to form folds or frills,
take it from the water and immerse it in a solution of
alum, which will harden the film and stop the frilling.
Then wash the film again and put it in the
| Hyposulphite of Soda |
1 lb. |
| Alum |
¼ lb. |
| Water |
1 gal. |
When the soda and alum are dissolved let it stand
until all sediment settles to the bottom, then pour off
the clear solution and use it to fix until from much
use it becomes black and turbid, then make up and
use a fresh solution.
The plate should be left in the fixing solution for
fully five minutes after it appears thoroughly cleared,
then take it out and wash until all traces of hypo are
removed.
If the plate has not previously been in the alum
solution it may now be put in the
| Alum |
½ lb. |
| Citric Acid |
2 oz. |
| Water |
½ gal. |
Keep this solution in a flat dish, and after the plate
has been washed from the hypo put it in this solution
for two or three minutes; if there are any remaining
traces of hypo in the film it will be decomposed, the
film will be hardened and freed from color; when this
is accomplished wash again and set the plate up to dry.
While the alkaline pyro developer is the best and
gives the finest printing quality to negatives, there are
many who prefer (for other reasons) the
No. 1.
| Neutral oxalate of potash |
1 lb. |
| Water |
5 pints. |
Acidify with oxalic acid and filter.
No. 2.
| Protosulphate of iron |
1 lb. |
| Water |
2 quarts. |
Filter and add 60 drops sulphuric acid.
No. 3.
| Bromide of Ammonium |
1 oz. |
| Water |
10 oz. |
The developer is prepared by mixing together in a
graduate the quantity necessary to cover the plate in
the following proportions:
| Oxalate solution |
3 parts. |
| Iron solution |
1 part. |
| Bromide solution |
1⁄8 part. |
For instance, it will take about 8 ounces to cover
an 8x10 plate in a flat dish; to make this quantity take
of the
| Oxalate |
6 oz. |
| Iron |
2 oz. |
| Bromide |
2 drs. |
Always pour the iron into the oxalate solution, then
add the bromide, and having placed the exposed plate
in the dish pour the developer upon it, covering the
surface of the plate as quickly as possible and removing
any air bells that may stick to the surface.
Keep the solution in motion on the surface of the
plate and in a short time the image will begin to appear,
the high lights first, then the intermediate
shades, last of all detail will be seen in the shadows.
Now pour the developer off, take the plate out of the
tray and look at the back of it. If the subject or
image can be distinctly seen it may be considered
finished and only needs to be washed and fixed.
If the plate has been over-exposed, which will be indicated
by the image appearing quickly, wash off the
developer with water, add more bromide to the solution
and immerse the plate again.
If, on the contrary, the plate has not had enough
time, it will be indicated by developing very slowly
and with a very thin and weak image; when such is
the case add more of the iron solution, however, not
more than to make the proportion of the iron nearly
one-fourth of the whole solution. More than this proportion
will cause a yellow precipitate, which will settle
on the surface of the film and destroy it. If by this
course you succeed in securing sufficient detail in the
shadows, the negative may afterwards be strengthened.
It is as well, however, when a plate is found to be
undertimed (and it is possible to make another from
the same subject) to throw it away; it will scarcely repay
further attention.
It will be seen that a considerable margin in time of
exposure can be allowed and provided for. Yet none
the less it is of the utmost importance to learn to give
the correct and proper exposure to secure the finest
results.
This, it is true, is not always possible, and as an under-exposed
plate is lost, any error in exposure would
better be in too much rather than in too little time.
It is said by some that by the use of citrate of soda
almost any degree of over-exposure may be remedied,
but there remains the fact that for a restraining agent
to be of any value its application to a negative in development
must be almost instantaneous upon the
earliest discovery of the over-exposure.
When a large number of plates have been exposed
and the first developed indicates that all have been
overtimed, then a 50 per cent. solution of citrate of
soda, used with judgment, might result in saving the
lot.
When over-timing makes itself visible unexpectedly
and it is feared that the development will have proceeded
too far before the retarder can act, a good plan
is to take the plate out of the dish and flow over it a
solution of citric acid, containing a little chrome alum,
which will immediately stop the action of the developer
and give time to make other arrangements.
No. 1.
| Pyrogallic acid |
1 oz. |
| Alcohol |
4 oz. |
No. 2.
| Water |
60 oz. |
| Bromide of ammonium |
60 grs. |
| Strong liquor ammonia |
2 drs. |
To use, take of
| No. 1 or pyro solution |
1 dr. |
| No. 2 or ammonia solution |
10 oz. |
This will be enough to develop three or four 8×10
plates, if they are properly timed.
The above is one of the best forms of ammonia pyro
developer; it gives negatives of very fine quality.
Many dry plates, on development with ammonia and
pyro, show a green fog by reflected light, and a pink or
red fog by transmitted light; this fog does not materially
injure the printing quality of the plate, but
spoils its appearance to the eye, and for that reason
many establishments have given up the use of ammonia
and in its place use soda or potash.
From the difficulty of judging when the development
has reached the right point, in consequence of
the opacity of the gelatine film, many negatives are
finished before they have acquired sufficient density in
development. As a result of this, much attention has
been given to the discovery and preparation of redeveloping
or intensifying solutions, many formulæ
for which have been published; among the best are the
following:
| Bichloride of Mercury |
120 grains. |
| Dissolved in hot water |
16 oz. |
Add to this a strong solution of Iodide of Potassium
drop by drop, until the red precipitate begins to redissolve,
then add a few grains of hyposulphite of
Soda, or enough to clear the liquid.
When required for use pour part of this solution
into a tray of a suitable size for the plate, add an equal
amount of water, then immerse the plate and keep the
solution in motion. You will immediately notice a
change in the color of the film; take the plate out, and
if it has gained enough strength, wash it and set it up
to dry; if not, give it more.
It is proper to state that this process is more effective
if the plate has been dried after development.
When the plate has been thoroughly fixed and fully
washed, it will intensify by this method, without change
of color by transmitted light, and it will have secured
a lovely printing quality rarely seen even in the most
perfect negatives.
This solution may be used until it is exhausted.
| Water |
10 oz. |
| Sulphate of Copper |
100 grains. |
| Bromide of Potassium |
100 |
When dissolved, this solution is ready for application
and can be used repeatedly.
The negative, after fixing and washing, is immersed
in the solution until it turns white.
Now remove it and wash slightly, then immerse it
in old ferrous oxalate developer and allow it to remain
until it becomes black entirely through the film. This
method gives fine results and good printing color.
Form the habit of noticing carefully the intensity of
the illumination of the subject on the ground glass of
the camera, so as to judge correctly the time of exposure,
as much of the successful working of dry plates
depends on the exposure; for although slightly under-exposed
or much over-exposed plates may by suitable
modification of the developer be saved and print good
pictures, yet they will lack the glow and balance that
are characteristic of the most perfect work.
Use a flat camel's-hair brush to remove any dust from
the plate, before putting it in the shield for exposure.
Always keep your developing solution in motion on
the plate.
Fix your negative very thoroughly; leave it in the
hypo 5 or 6 minutes longer than it is apparently
necessary.
Never use hypo after it becomes discolored or turbid
and deposits a sediment.
Develop longer than you think necessary; a slow
printing negative is preferable to a weak one.
Keep your dark room and its contents very clean and
free from dust, and well ventilated.
No photographic establishment in these days is considered
to be well equipped that does not employ a
skillful retoucher and provide all the apparatus and
conveniences for the proper performance of this very
important branch of the art.
It is within the memory of many photographers
when this work of retouching was done on the positive,
and some establishments were compelled to employ a
large force of skilled hands to work up and finish the
crude productions of the camera and the printing
frame.
After the introduction of the carte de visite portrait,
and later the Imperial card, and the consequent reduction
in price, the expense of this work became such
a burthen to photographers that they were compelled
to perfect their mechanical operations to the utmost
extent, and by every means to endeavor to avoid it.
It occurred then to some one of the retouching
artists to do this work upon the negative once for all,
and from this beginning the art of retouching the negative
has reached its present high position.
Retouching, like stippling or hatching in miniature,
is a work of art, skill in which is gained only by assiduous
practice controlled by good taste, and it is the
special work of the artist and not of the photographer.
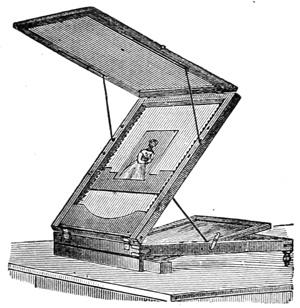
Fig. 1.
While then it is not considered wise for the photographer
to be his own retoucher any more than it is
for every man to be his own lawyer or doctor, yet
every photographer should know enough about the art
and practice of retouching to appreciate good work
and to detect the bad. And for that reason he should
make a study of it both from the artistic and the
mechanical points of view.
By such a course of study he will learn to produce
that quality of negative that will require the least
amount of improvement at the hands of the retoucher.
The work of retouching requires certain appliances
to facilitate it, and its own special room or atelier. A
small well-ventilated room having a window with a
northern exposure is the best adapted for this work.
This room should be supplied with the necessary conveniences,
such
as the retouching
stand or
frame, which in
its earlier form
is as represented
in Fig 1,
but which, after
a time, became
much improved
upon; one form
of improvement
is shown
in Fig. 2, but
neither of these
forms became universally used, as many artists
fashioned their stands or frames to suit their individual
taste or the requirements of their room or light. The
march of improvement, however, is never delayed by
such a condition of affairs, and was not in this case.
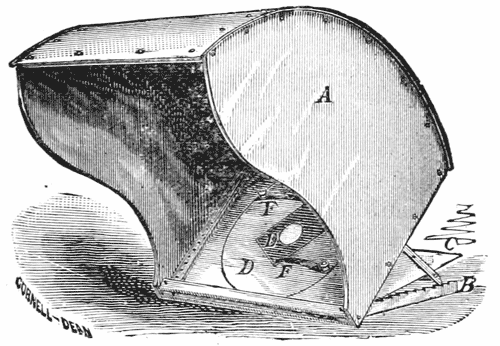
Fig. 2.
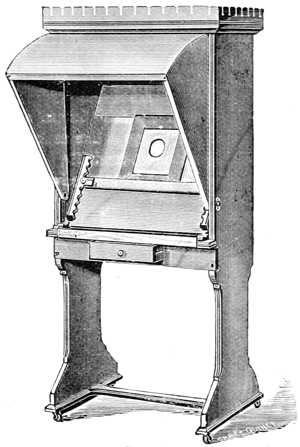
Fig. 3.
It became necessary on the part of those interested
in the manufacture of such apparatus to produce something
that should meet all requirements, and this has
indeed been
accomplished
by the
production of
the desk represented
in
Fig 3, which
is called the
Novel Retouching
Desk and is
suitable for
any size of
negative under
25×30; it
has a false top
which can be
pulled down
to darken the
space in front
of the ground
glass cut out.
The bed on which the negative is laid can be set at
any inclination to suit the convenience of the artist.
By means of the slide-rest the negative may be
moved up or down to any desired position.
It is handsomely made in hard wood, and would be
quite an ornament to any retoucher's room.
Next in importance would be a varnishing table, a
small table or bench supplied with a gas or oil stove.
See Figs. 4 and 5.
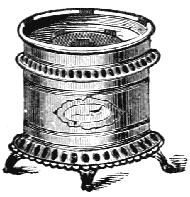
Fig. 4. Common Gas Stove.
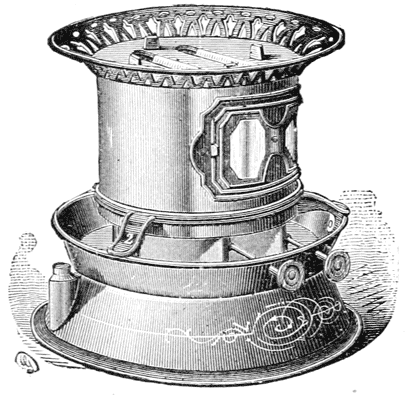
Fig. 5. Oil Stove.
Also Anthony's retouching varnish and varnish pot.
See Fig 6, page 68.
A tin pot as shown in cut, with a filter and funnel
in top; rubber stopper in spout.
The retoucher's room should also be supplied with
- Faber's Siberian leads, full set,
- Eagle lead pencils,
- Metallic leads,
- Camel's hair pencil brushes,
- Camel's hair blender,
- Guenther Wagner's retouch colors,
- India ink,
- Water colors, blue, white and red,
- A coarse sharpening stone,
- Fine emery paper.
p68
The principal work of retouching, the stippling of the
face, neck and shoulders when bare, and the hands, is
done with Graphite or metallic leads, and directly upon
the varnished or film surface.
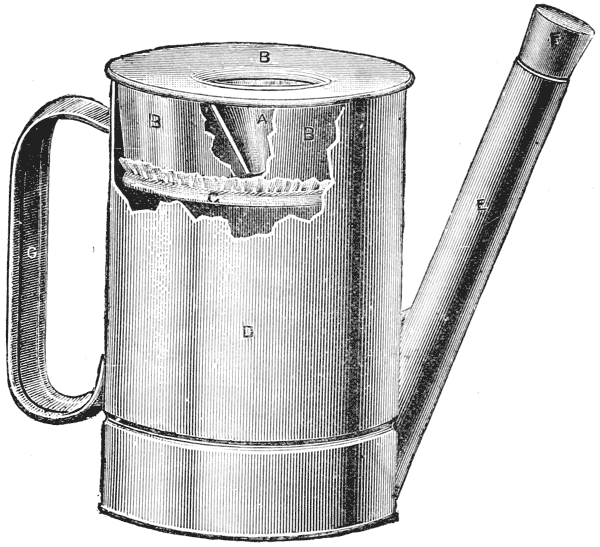
Fig. 6. Peerless Varnish
Pot and Filterer.
The gelatine emulsion film is strong enough to take
the pencil without varnish, and many prefer to retouch
and even to print them before varnishing; but it is
pretty generally conceded that gelatine negatives will
receive the pencil better when varnished.
Before varnishing a gelatine plate, heat it as much
as it will bear, so as to drive off all moisture from the
film, then let it cool to the proper temperature before
applying the varnish.
If the varnish used is too smooth or hard to take
the pencil, a better tooth may be given it by the application
delicately, to the parts to be retouched only, of
a solution of rosin in turpentine, which should be
allowed to stand and dry an hour or so before the retouching
is done.
The work of retouching is very trying to the eyes;
great pains should therefore be taken to ascertain the
most favorable conditions of light and distance under
which to work.
A negative should be kept at one angle and stationary
while being retouched.
There should be as little lead used on a negative as
is consistent with good work; make every touch tell to
some purpose.
Note carefully the way the subject is lighted, and let
the effect of the stippling be in that direction; you will
thus be less likely to change the character or likeness
of the face.
The lights and shadows should be caused to blend
imperceptibly; this will give a harmonious effect.
Let the grain or stipple be seen in all parts suitable
in fineness to the size of the head.
The refinements of negative retouching cannot be
taught in books, although much has been written concerning
the same.
Try to light your subject and develop your negative
so as to get the utmost roundness or relief; then
be careful not to destroy this modeling, but improve
it by retouching, only doing so much work as to give
a soft, clean-looking complexion.
Patient perseverance, close observation and trying
again, will bring a certain degree of success, and while
only the few can become first-class retouchers all may
learn to improve their work by this great help to photography.
It was long ago said that silver printing was doomed,
that in a few more years it would be among the things
that were.
Other processes have been introduced, have had
their little day and have passed off, some of them of
much merit, and, it was supposed, possessed of
every element of permanency, but they were found
wanting in some very important respect, and so not
being able to hold their ground they passed into the
limbo of neglected things.
Silver printing, however, still maintains the field
against all comers, and does so by its intrinsic merits
alone. No other process has equalled it in ease of
production and in beauty of finish, and it is doubtful
if any process has results of greater permanence, taking
the best products of the process as samples.
The one defect of the process is the possibility of its
products fading, but we must not judge of a process by
its poorest examples, but rather by its best; if such
should be the decision, there are at this day thousands
of silver prints that are co-existent with the process
and remain as perfect as it is possible for anything on
paper to be after such a lapse of time.
A process that is so simple and easy that it can be
acquired in a few hours, is predestined to careless working,
slovenly manipulation, and to endless scamping at
the hands of careless workers. What wonder then if
prints fade which were only half made.
Suffice it that the process, intelligently and conscientiously
worked, would never suffer from such an
imputation.
All professional photographers practice the silver
printing process with more or less of success, as they
bestow care and intelligence in the working and are
zealous for the reputation of their work.
The proper handling of a negative by the printer requires
as much study and skill on his part as does the
posing and lighting of the subject in the studio; and
the printing room should be as replete with every convenience
for forwarding and improving the operations
therein conducted, as any other department of the
establishment.
This room is generally situated at the top of the
house, and wherever situated, should be so arranged
that the east, south and west sides may be opened to
the sun, that his direct rays may be utilized from the
earliest to the latest working hours. Part of the room
should be partitioned off in such a manner, and illuminated
in such a moderate degree, that the sensitized
paper may not suffer from excess of light while the
frames are being filled and the changes made.
The printing room outfit consists of the various sizes
of printing frames, cardboard, tissue paper and cotton-wool
for vignetting, and knives, long-blade scissors,
and glass forms for cutting the paper to various sizes,
light tight drawers to hold the prepared paper, shelves,
and racks for the negatives.
- Mucilage or paste and brushes.
- Flat brushes for removing dust from negatives.
- India ink and Opaque, with pencil brushes and lead
pencils for spotting negatives.
The silvering room may be also used for other
manipulations in the process, such as fuming the paper
and washing the prints, and should be furnished with
all the conveniences for such work, which consist of
- Nitrate of Silver.
- Albumenized and plain paper.
- A flat dish to hold the silver solution, of the size of
the largest paper to be floated.
- A fuming box.
- A bottle of concentrated Ammonia.
- A gas or oil stove for drying the paper.
- A dozen or more of Lockwood's patent photo clips.
Bi-Carbonate of Soda.
- An Argento meter.
- A 16 oz. Graduate.
- A clock.
- One agate evaporating dish, and 2 or 3 wide-mouth
glass bottles, that will hold the full quantity of silver
solution in use.
A plain silver solution, of a strength of 30 grains of
nitrate of silver to the ounce of water in hot weather, increasing
to 60 grains in the coldest, with enough bi-carbonate
of soda added from time to time to keep a
small sediment of carbonate of silver in the bottom of
the bottle or dish, is all that can be desired as a silvering
solution for albumen paper. It only needs to be
kept up to the proper strength by the addition of silver
nitrate and water, when required; and when it shows
signs of discoloration a little more soda and an hour's
sunlight will keep it in good order the year round.
Albumen paper is sensitized by being floated for a
time on the surface of this silver solution, albumen
side down. For this purpose it is necessary that the
solution should be held in a flat dish, like a tray, with
sides from 1½ to 2 inches high, and of a size suitable
to the size of the sheet of paper to be floated; if a full
sheet, then the dish should be 19×24, and may be of
porcelain, agate ware, hard rubber, or any other kind
that will resist the corrosive action of the silver solution.
Pour the silver solution into the dish; there should
be enough to give a depth of at least half an inch. If
there is any scum or dust on the surface after the air
bubbles have subsided, take a long strip of tissue
paper and draw the edge over the surface of the solution,
which will remove the scum or any floating dust
or air bells that may remain.
Place your paper on a bench or table, albumen up,
and with a large tuft of cotton rub the surface, using a
light friction over the whole; then turn the sheet of
paper over and take between the thumb and first
finger of each hand opposite corners diagonally across
the paper, holding the corners up and near together;
let the sag of the paper sink one end first, until it
touches the solution, which can be plainly seen; then
let the hands fall until the other end has reached the
surface of the silver; then lower the corners gradually,
until the paper lies flat on the solution, care being
taken that none of the silver solution runs over the
edge of the paper to the back.
The corners of the paper may now be gently raised
to see if any air bubbles have attached themselves to the
surface of the paper; if so, remove them and let the
paper fall again to the solution. It will now be seen
that the edges of the sides of the paper will begin to
curl back, as if repelled from the solution. This may
be permitted to a certain extent, but not so far as that
the wet surface shall curl over against the back of the
sheet. After a short time this action ceases and the
rolled edges unroll and fall again upon the solution,
which, when they have reached and lie flat, may be
taken as an indication that the paper is sufficiently
silvered, when it should be removed. With a small
pointed stick raise the left corner farthest from you
from the solution, take it between the thumb and first
finger of the left hand and raise it very slowly, until
the right hand far corner is off the solution. Take
that corner between the right hand thumb and finger
and continue to raise the paper, still very slowly, until
it is clear of the solution; then hang it up to dry in a
moderately dark place, or better still, place it face down,
on a sheet of clean blotting paper, put another sheet
over it and on that the next sheet that is silvered, and
so on alternate sheets, until you have floated as many
sheets as may be needed.
When this is done turn the papers over, bringing
the sheet first silvered to the top, which on removing
the blotting paper will be found surface dry at least, and
may now be completely dried by artificial heat, or by
hanging it up two sheets together, back to back, on lines
with spring clips, until they dry spontaneously, when
they are ready to be fumed.
The fuming box is usually a light-tight box with
two compartments; the upper part has a door and
should be sufficiently large to hold the amount of paper
necessary for a full day's work, without crowding the
sheets together or preventing a free circulation of the
fumes between their surfaces.
The paper is taken from the lines, each two sheets
back to back, the corners fastened with clips and set
up on end in this compartment or hung on lines, as
the case may be. When all the paper is in, shut and
fasten the door and into the bottom compartment
(which is usually a shallow drawer, and separated from
the upper only by a lattice work of wood) place a
saucer containing an ounce or two of strong liquor of
ammonia, push the drawer in, thus closing the compartment,
and leave for fifteen or twenty minutes, or
until you are ready to use the paper.
When you remove the paper from the fuming box
do not expose it to strong light until you have it in the
printing frames, nor after that, until you have toned
and fixed it. Take the spent ammonia from the box
and pour it into a bottle; it is useful for other purposes.
Many printers cut the paper to size before printing,
others simply tear each sheet into halves, quarters,
eighths or twelfths, and print them thus, trimming them
afterwards, some before toning, others after they are
finished and before wetting them for mounting. The
most economical method is to trim before printing;
all the trimmings should be carefully saved for the
silver they contain.
A toning solution is composed of chloride of gold
in water with enough carbonate of soda to make it
slightly alkaline, and a pinch of common salt. The
action of toning is merely the deposition upon the
metallic silver in the print of a certain minute
quantity of metallic gold from the solution, which
deposit causes the change of color that may be seen
while the toning is taking place.
The normal toning solution is varied endlessly by
the addition of acetates, chlorides and nitrates of various
metals and salts and of borax and chalk and such, the
object being to produce unusual tones, such as sepia,
blue, blue-grey, brown and black, but the richest and
most agreeable tones may be produced as well by the
simplest means.
Into this put half as many grains of pure chloride of
gold as you have sheets of paper to tone; after adding the
gold make the solution alkaline by adding enough of a
strong solution of a carbonate or bicarbonate of soda to
turn red litmus paper just blue; then add a pinch of salt,
and the toning solution is ready for use. When half your
prints are toned, or the toning proceeds too slowly, add
more gold, allowing not over 1 grain of gold for each
sheet of paper. When all the prints are toned, put the
toning solution into a bottle to keep for the next
time, when it will probably work better than at first;
use it until it becomes badly discolored, then put it
into a large bottle to save the waste gold.
The toning must be done in a flat dish that is as
large as the largest print that requires to be toned.
Your toning solution being ready, the prints are
now to be prepared for toning by being deprived of all
excess of silver and free chloride not acted on by the
light; in order to do this, put them one by one in a
large dish full of water, in this dish keep them in
motion for some little time, then prepare another dish
containing the same amount of water slightly acidified
with acetic acid, and remove the prints into this one by
one as before, keeping them in motion; they will at
once commence to turn red, and when they are so
they may be taken out, the waters of these two washings
must be saved for the silver contained therein.
The prints require two more waters after the acid,
when they are ready for toning.
Immerse half a dozen or more of the prints, one at
a time, in the toning solution and watch the change
of color.
They may at first become a little redder from the
action of the salt in the solution, but they will soon
change to a brown and then to a bluish or grey brown.
And when the faces have become as clear and white as
to suit as finished pictures, remove them to fresh water
and proceed with another batch until all are done.
Hyposulphite of soda, about 1 lb. to a gallon of
water, constitutes the fixing solution; its function is to
dissolve all the chloride of silver that may remain in
the prints after their previous washing and toning.
The prints should be immersed one at a time, and
kept in motion so that the solution may have an equal
action. When there are a large number of prints the
dish containing the fixing solution should be correspondingly
large, so that the prints may not be massed
together but kept separate and free for the more perfect
action of the fixing solution; they should be kept
in motion until the fixing is completed, which will be
in about 15 or 20 minutes. Some printers ascertain
that the action is complete by holding the print up and
examining it by transmitted light; if it looks mottled
and uneven it is not fixed, but if you can see the fibre
of the paper and all is clear, then remove the prints
from the hypo into a dish containing brine or common
salt and water, one by one as before, and keep them in
motion in this brine until all are well saturated with it;
then let fresh water run into the dish, which will
gradually change the brine to clear water.
The prints are put into the brine, and this gradually
changed to clear water to prevent blisters or a
separation of the albumen from the paper in the form
of blisters. The water may be allowed to run into the
dish, the prints being kept in motion, and in the
course of an hour they will be sufficiently washed;
they may then be taken out and placed between the
sheets of blotting paper to remain until next morning,
when they can be overlooked, the blemished prints
thrown out, and the perfect may be mounted.
The fixing solution should not be used a second
time, but should be thrown into a large barrel with
the washings, that at some future time the silver may
be recovered; when the barrel becomes full, a small
amount of saturated solution of protosulphite of iron
may be thrown in, the water stirred well, and when the
sediment has settled to the bottom the clear liquid
may be drawn off and the barrel is ready to receive the
next washings of hypo.
The selected prints are again placed in water and
permitted to remain until they become saturated; in
the meantime some starch paste should be prepared.
The prints are then removed from the water and placed
on a sheet of glass, face down; when all are thus
placed, squeeze out all the water and they are ready to
mount. Now with a wide bristle brush spread the
paste evenly on the back of the print, carefully removing
any lumps or dust or fibre of any kind, then insert
under the edge of the print the point of a knife-blade,
raise it until you can take it in the fingers, then place
it pasted side down on the face of your mount, adjust
it evenly and lay it on the table; now cover it with a
piece of clean white paper, and with the palm of the
hand rub it down until all parts are in contact and all
air is expelled from between the print and mount. As
the prints are mounted they should be placed in rows
on clean white or blotting paper, one layer over the
other; on the top place a clean sheet of paper and over
that a board of the proper size with a weight on it to
press the mounted picture flat; in the course of an hour
they will be dry enough to spot.
With a fine pencil brush and Indian ink, go over
the prints and carefully touch up all the white spots
and other blemishes that may be found on the surface,
so that they harmonize in color with the surrounding
parts. When this is done the pictures may be lubricated
for burnishing.
Make a pad of Canton flannel, get a piece of white
castile soap, rub the pad on the soap until it is well
covered, then with this soaped pad rub the surface of
each print separately, carefully covering every part of
the surface; keep the pad well soaped by rubbing it on
the soap after every 2 or 3 prints. While this is being
done the burnisher may be heated; when the tool is
hot enough to hiss when touched by a wet finger, proceed
to burnish. Do not use much pressure; too great
pressure will degrade the whites of the picture.
When they are all burnished go over them again
with a moderately soft lead pencil, touching up and
blending any streaks or spots that may be found; if any
streaks or dirty lines are discovered in the direction of
the draw of the burnisher, they may be removed by
light friction with a piece of Canton flannel moistened
with alcohol. This completes the photograph.
Mr. Ernest Lacan, a prominent artist of Paris,
France, about ten years ago, wrote for the Philadelphia
Photographer an account of some of the prominent
studios of that great city, from which I take a description
of the studio and establishment of the celebrated
Reutlinger.
This establishment comprises the fifth and sixth
stories of a fine house on the Boulevard Montmartre.
A handsome and wide stairway leads to the studio.
The first thing that strikes you on entering the ante-chamber,
which is transformed into an office, is the
lowness of the ceiling and the want of light. On the
right is a room, larger and better lighted, for the sale of
choice specimens of his work. On the left are the
exhibition and waiting rooms, which are of medium
size and whose principal ornaments are the framed
pictures, which cover the walls. A small door leads
to the skylight, of which the diagram at the head of
this article is a correct view as taken from a photograph.
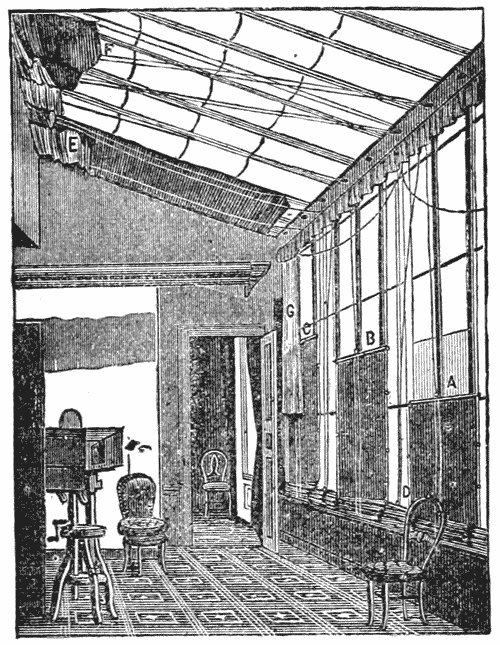
THE
PHOTOGRAPHIC STUDIO.
The view is taken from the door at which you
enter. This gallery is formed of two mansards, which
have been united by removing the partition; is 39 feet
long by 13 in breadth; its height to the top of the upper
sash is about 16 feet; the light comes from the north.
It is by means of an ingenious combination of white
and blue shades, that the artist succeeds in obtaining
the charming effects so much admired in his productions.
At the end of the gallery is a small room for
ladies. The door which is seen on the left leads to
the laboratory, which is divided into three small apartments.
The first is used for cleaning plates, the
second for their preparation, and the third for developing
negatives.
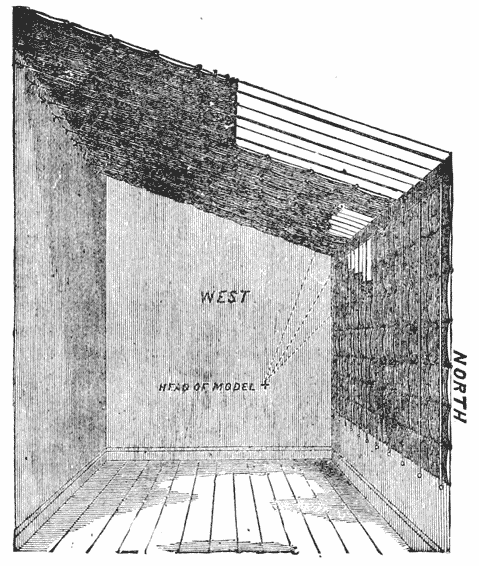
This is a diagram of the studio of the famous
Loescher & Petsch, of Berlin, who became so well
known, some years ago, through the style of picture
called "Berlin Heads," which were among the first
samples of fine photographs from retouched negatives
brought to this country, and which certainly created
a sensation.
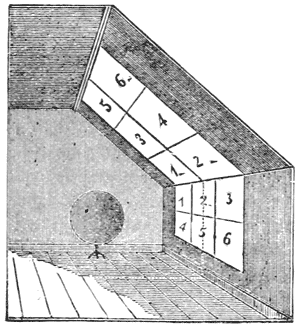
FIG. 1.
The shades are arranged so as to show how some of
the most charming effects of illumination are produced.
The room is filled with diffused light, with a ray of
direct light falling so as to produce a clear high light
on the prominences of the head of the sitter.
The next diagram
is one of
the Biglow studios.
Mr. Biglow
is the author of a
book on lighting
and posing,
which had a large
sale, and is a valuable
book for positionists.
These three
views represent
forms of skylight
and side-light
with north exposure, by which all the finest effects
possible are obtained, but other forms of exposure are
capable of being utilized with fine success.
The studio of Sarony, of New York, is lighted with
a top light similar to the top light of the Biglow studio,
and without any side light at all.
A prominent artist of Brooklyn produces very fine
work under an east light, or rather a light a little south
of east, which to the ordinary photographer would be
considered a very difficult light to work. Good effects
can be produced, however, under any form of light by
the use of shades, screens and reflectors, so that no photographer
need regret a favorable location, because unable
to have a northern exposure for his light.
The studio should be furnished with every requisite
for the production of the finest work, such as
- Lenses and Camera boxes,
- Camera stands,
- Pneumatic shutters for the lenses,
- Scenic grounds; interior and exterior accessories,
such as balustrades, rocks, grass-mats, flowers, tables,
chairs, draperies, rugs, etc.; head-rests, screens, reflectors,
and all such articles as can be advantageously
introduced in a picture to improve and embellish.
All these things are of importance, but should be
used with taste and judgment. The photograph should
never be a picture of a piece of furniture, with a figure
thrown in, but rather the accessories should be used
only to improve the figure and make it more prominent
by increasing the perspective, when possible or allowable.
A solar beam of light is a bundle of rays; a ray
being the smallest portion of light which can emanate
from a luminous body.
Each of these rays possesses distinctive characters,
both as regards their chemical functions and colors.
Sir Isaac Newton proved that the white light emitted
by the sun is not so simple as it appears, but is composed
of vivid colors, as shown by his beautiful experiment,
the Analysis of Light, which is exemplified by
the use of a glass prism. (See fig. 1.)
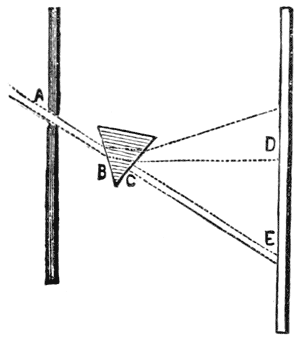
FIG. 1.
The ray of light A, E, being
admitted into a darkened
room through a hole A, in
the shutter, would fall upon
the wall at E. As soon as
the prism, B, C, is placed in
the path of the sunbeam so
as to allow it to fall on one
of its angles B, the ray will
be refracted, or bent out of
its course so as to pass
through the prism (as in the
line D) and not in the same line, A, E, that it would
have done had the prism not been interposed.
Another effect also takes place; the ray of white
light is decomposed into its component colors, and if
you stand at a short distance from the prism, you will
see that these colors are spread out in a triangular
form, the base of which is on the wall and the apex at
the angle C of the prism. Remove the prism and it
is seen that the splendid display of colors upon the
wall has disappeared, and a round spot of white light,
E, is seen below the place occupied by the spectrum.
The colored image on the wall is called the prismatic
or solar spectrum, which, according to Sir Isaac Newton,
is composed of seven different colors. The color at
the lowest portion of the image is red and the one at
the other end is violet, the intermediate parts being
occupied by five other colors, and the whole arranged
according to the table below, the proportion of each
color having been measured by Fraunhofer with the
greatest care, with the results placed opposite to each,
corresponding with the 360 degrees of a circle, the red
ray being the least and the violet the most refracted of
this chromatic image.
TOP
| Violet |
109 |
| Indigo |
47 |
| Blue |
48 |
| Green |
46 |
| Yellow |
27 |
| Orange |
27 |
| Red |
56 |
|
360 |
The sunbeam, the ray of white light, contains
powers within it of which the earlier philosophers
had but a faint idea, besides its accompanying heat.
There is a principle associated intimately with it,
which has the power of decomposing and of determining
the decomposition of chemical compounds.
This principle is "Actinism" and is as perfectly distinct
in the nature of its properties from light, as light
is from the principle of heat, with which it is also
closely connected.
Actinism may then be considered as the fundamental
principle, on which photography is based, and its
power is exerted in forming the image on the sensitized
plate in the Camera, as well as subsequently in forming
or causing the impression on the sensitized paper
exposed to the light beneath the negative.
In this connection we have only to consider the
application of this Actinism through the medium of a
combination of lenses to form an image on a sensitized
plate in the Camera.
It has been shown that when light passes through
a prism of glass its colors are separated; this separation
is caused by the unequal refrangibility of the different
colored rays, the violet being the most and the red the
least refrangible of the seven rays.
A ray of light passing through a vacuum progresses in
a perfectly straight line, but all matter, however attenuated
it may be, has the property of refracting or
bending the ray of light.
The refractive power of some substances is immense,
while that of others is very trifling. The mode of the
refraction depends on the comparative density or
rarity of the respective media. If the medium which
the rays enter be denser, they move through it in a
direction nearer to the perpendicular drawn to its
surface; on the contrary, when light passes out of a
denser into a rarer medium, it moves in a direction
farther from the perpendicular. This refraction is
greater or less, that is the rays are more or less bent
or turned from their straight course, as the second
medium through which they pass is more or less dense
than the first.
We next study the utilization of this power of refraction
in the manufacture of lenses to overcome the
unequal refrangibility of the colored rays of light.
A lens for use in photography is made of glass as
pure and as colorless as can be procured, and is ground
into such a form as to collect or disperse the rays of
light which pass through it. Lenses are of different
shapes, and thence receive different names.
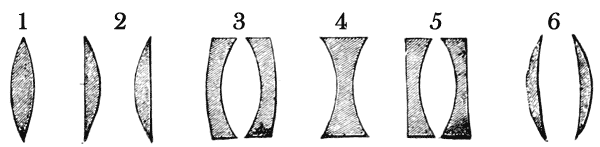
FIG. 2 E.
1. Double convex. 2. Plano-convex.
3. Concavo-convex.
4. Double concave. 5. Plano-concave. 6. Meniscus.
The figures 1 to 6 represent sections of the variously
shaped lenses which are combined for use in photography.
The design in forming lenses is to procure a medium
through which the rays of light from any object may
pass and converge to a corresponding point beyond; the
manner in which the rays proceed through the lens,
and then centre in a focal point, will depend on the
form of the lens, its capacity for refraction and the distance
of the object.
The double convex lens may be viewed as a portion
cut out of the side of a sphere. Here, as in all cases of
convexity, the focus of the parallel rays passing through
the lens is at the centre of the sphere. (See fig. 3.)
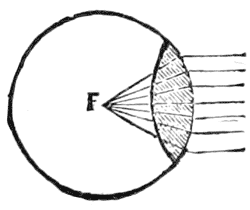
FIG. 3.
A plano-convex has only half of the
refractive power of the double convex;
the parallel rays, falling on the convex
side of the lens, would converge at the
distance of the whole diameter of the
sphere. Thus the focal point at
which the rays of light converge is always regulated by
the degree of curvature of the lens. Thus the double
convex lens has the greatest power of converging the
rays of light; the plano-convex has only half the power
of the former. Both these lenses have also the power
of magnifying the image of an object seen through
them in the same proportion.
The double concave and the
plano-concave have the power
of dispersing the rays of light
and of diminishing the image of
an object seen through them in
the same proportion.
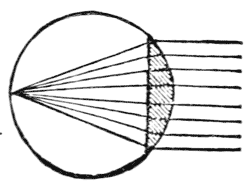
FIG. 4.
The meniscus lens has but a
very slightly dispersive power, and the concavo-convex
merely separates the parallel rays to the thickness of
the lens and sends them on parallel as they entered.
All these lenses, having something of the prism in
their shape, have the power to a greater or lesser extent
of decomposing the light that passes through
them. This is called chromatic aberration, because
the colored rays do not all converge to the same focus;
thus the image seen through them is surrounded by a
fringe or border of color.
Single lenses lack the power of producing a straight
image of a straight object; the image will have the
curve of the lens through which the light passes to
form it; a double convex lens will give a greater curve
than a plano-convex. This is called spherical aberration.
The main object to be considered in the manufacture
of a lens for photographic purposes is to produce one
with the least spherical and chromatic aberration.
Spherical aberration is overcome to a great extent by
the use (in connection with the double convex) of a
meniscus lens.
Chromatic aberration is overcome by the use of two
glasses of unequal density in forming one lens; thus
the front lens of the portrait combination is composed
of a double convex of crown glass and plano-concave
or meniscus of flint glass, which two glasses are
sealed together with Canada balsam.
The forms of lenses which are corrected for chromatic
and spherical aberration will be seen in Fig. 5.
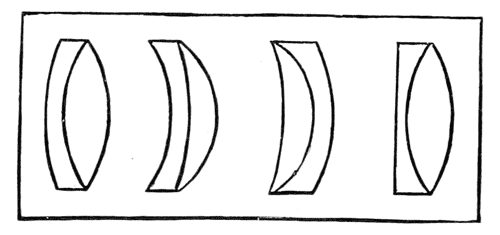
FIG. 5.
These lenses are termed achromatic, and, although
each is formed of two kinds of glass, they are sealed
together so as to be practically one lens.
Every manufacturer of portrait or view lenses, uses
the six forms shown in the diagram (Fig. 2), in some
manner peculiar to himself, but of the six, four will
be found in every combination in general use, varied
in radii, construction and dimension, according to the
use for which they are intended.
Formerly the photographer's choice of lenses was
restricted to two combinations, the double combination
for portraits and the single for views. There have of
late years been invented a great variety of lenses,
among which and in the order of invention, probably
are Petzval's Orthoscopic, Harrison's Globe, Ross's
Doublet, Darlot's Wide Angle and Rectilinear Hemispherical,
Steinheil's Aplanatic, Voightlander's Euryscope,
and greatest of all, Dallmeyer's Patent Portrait,
Wide Angle and Rapid Rectilinear Lenses.
The combinations of lenses are three, the single,
double and triple; the latter is now no longer in use,
or if so, its use is greatly restricted. The single combinations
have greater focal length than the double,
and consequently at the same diameters larger pictures
are obtainable, and they are principally used for landscape
or view work.
The double combinations, so called from having a
second pair of lenses behind the first, which have the
effect of shortening the focus about one-half, whereby
the action of the light is accelerated, and both the
spherical and chromatic aberrations more perfectly
corrected, which result in an image more delicate in
definition and more rotund in form, thus peculiarly
qualifying them as portrait lenses.
In the selection of lenses for studio or view work,
the intending purchaser, if desirous and pecuniarily
able to avail himself of the best, will naturally inquire
what make of lenses is the most widely known and
used, and it will not take much time to procure a satisfactory
answer to the question.
It has been conceded now for some years, both in
Europe and in America, that the lenses manufactured
by J. H. Dallmeyer, of London, England, are superior
to all others, not only for their fitness for the work for
which they are specially constructed, but for their
adaptability to work beyond anything claimed for them
by the maker, and also for a certain undefinable and
æsthetic quality inherent in the negative made by these
lenses.
The fact that there is not in the wide world a photographic
establishment of any note that does not possess
one or more of these lenses is strong evidence of their
superiority. In the quality of the glass used, in the
perfection of finish and adjustment, in softness, crispness
and depth, in rapidity, illumination and every
quality that recommends a lens, the Dallmeyer lenses
are unrivalled.
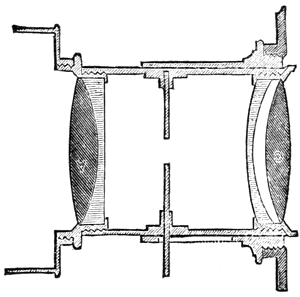
FIG. 6.
The portrait combination now in general use, was
first constructed from calculations made by Professor
Petzval, of Vienna. Its optical components are, a
front crown lens
of unequal convex
curves to which
is cemented a
double flint lens of
unequal concave
curves. The back
combination is a
crown lens of unequal
convex
curves and a concavo-convex
flint
lens at a little space
from it. (See Fig. 6.)
For more than a quarter of a century this form of
lens had been used without material change in
its construction, until Mr. Thos. Ross, by a modification
of the curves, succeeded in flattening the field
and increased its rapidity by shortening the focus, but
left it with the peculiar shallowness of focal depth,
especially in the larger sizes, which has been the torment
of photographers to this time.
Mr. Dallmeyer was the first to improve upon the
original portrait combination, and in his new Patent
Portrait Lens he has most ingeniously obtained a
diffusion of focus at the will of the operator. By a
quarter or half turn of the cell of the back combination
the focus is diffused, giving an agreeable softness in
place of the shallow plane of excessive and wiry definition
so familiar to the photographer.
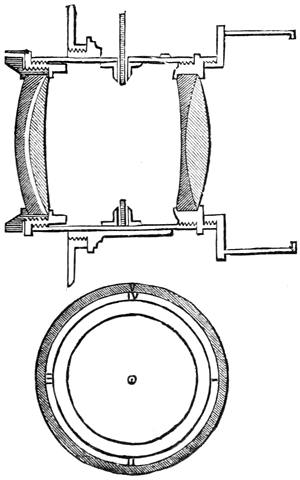
Fig. 7.
The diagram, Fig. 7, shows a section of Mr. Dallmeyer's
New Portrait Lens. There are two actinic combinations,
of which the
front resembles the
Petzval lens; the
back combination
differs as regards
the ratio of radii
of the lenses used,
the crown being a
deep meniscus and
the flint a deep
concavo-convex,
with their adjacent
surfaces dissimilar;
their positions also
are reversed, the
concavo-convex of
flint occupies the
external position,
instead of as in the
Petzval, and this
lens being
mounted in a cell capable of being unscrewed supplies
the means of regulating the spherical aberration of the
system at will. The lower portion of the diagram
exhibits a plan of the mount of the back flint glass
lens; this cell admits of being unscrewed, one or
more parts of revolutions of the screw indicated by an
index and divisions; with this back lens screwed home
this combination has all the good qualities of the old
form of portrait lens, but with a flatter field and wider
illumination.
There are three distinct classes of portrait lenses.
The first are lenses of large diameter and aperture
compared with their short focal length. In this class
the greatest rapidity is obtained at the sacrifice of
flatness of field. Of this class are the B and C lenses
of Dallmeyer.
The second class are lenses of equal diameter and
aperture with those just described; but with about
double their focal length, and therefore less rapid,
but with more field and wider illumination; of this class
are the A series.
In the third class are long focus lenses, which,
at three inches diameter have fifteen inches focal
length; with the result of a larger
and flatter field; they are, however,
necessarily slow, but well
calculated for out-door views,
groups and copying. Of this
class are the D series, which,
since the introduction of the
rapid dry plate, have become
available for ordinary portrait
work in the studio.
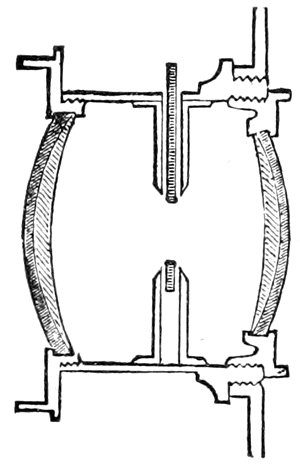
Fig. 8.
Fig. 8 represents the Dallmeyer
Wide Angle Rectilinear Lens. It
consists of two cemented combinations,
each composed of a deep meniscus crown and
a deep concavo-convex flint glass lens; between the
two, dividing the space in the proportion of their respective
diameters, is placed a revolving diaphragm,
the largest aperture of which is f15;
the position of the
stop being nearer the back combination avoids the
central spot or flare.
This lens embraces an angle of 90 to 100 degrees;
it is quite free from distortion,
and particularly adaptable for
taking views in confined situations,
such as interiors, views in
narrow streets, &c. Being a
double combination its work is
more finished and round than
that by the single lens.
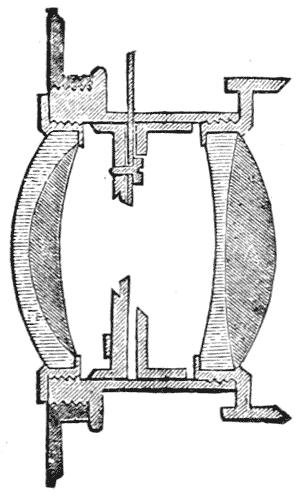
Fig. 9.
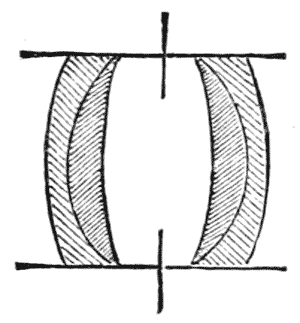
Fig. 10.
Probably the two greatest
rivals to the Dallmeyer Wide
Angle Lens are the Actinic
Doublet of Ross (Fig. 9), and
the Steinheil Aplanatic (Fig. 10).
The Ross Doublet consists of a
crossed crown lens, cemented to its correcting flint
lens, which is a crossed concave, the whole forming a
deep meniscus the focus of which
is equal to the back combination
or about double that of the equivalent
focus of the complete instrument,
the posterior meniscus
combination consists of a meniscus
crown lens cemented to a concavo-convex flint lens.
The two combinations are mounted rigidly with a rotating disk of
diaphragms or stops placed midway between the
lenses.
The Steinheil consists of a front and back corrected
combination of precisely the same shape, mounted
rigidly and having a rotating disk of apertures placed
midway between the lenses.
These are three distinct types of view lenses of wide
angle, and a comparison of the diagrams will show the
wide difference in the construction of the two latter
from the Dallmeyer; and while they stand unrivaled for
the perfection and beauty of their work, which is about
equal, the Dallmeyer obtains a great advantage over
the others in the thinness of its lenses, which enables
it to work with greater rapidity, and indeed it has been
used with great success with the drop-shutter for
photographing moving objects and other similar out-door
work.
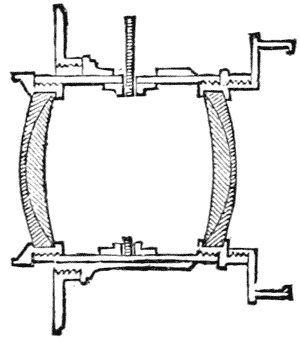
FIG. 11.
While the possession of a wide angle lens is indispensable
in the varied selection of out-door subjects,
yet for many purposes it has been found they are unsuitable;
and to meet this want Mr. Dallmeyer has
constructed a modification of the wide angle, which he
calls Rapid rectilinear. Its construction is shown in
Fig. 11. The lenses of the
front and back combination
have the same general form as
those of the wide angle, but
they are of smaller diameter,
being constructed for angles of
60 to 70 degrees only. It is
four times as rapid, and is in
fact an aplanatic and symmetrical
lens, and may be regarded
as the most perfect lens extant. As it admits of the use
of a larger aperture it is well adapted for interiors,
where there is space for its use, and for almost every
purpose of out-door photography, requiring short exposure
and no greater angle.
The use of this lens has been greatly extended since
the introduction of the rapid dry plate, which admits
of its employment as a portrait lens in the studio, and
in fact it has become a very popular instrument for
portrait work, especially for the larger and life sizes,
so that there is a strong probability that before many
years the Rapid rectilinear and the D series of lenses
of Dallmeyer will be the most useful and the most
profitable lenses for portrait work in the studio that
have ever been constructed, unless the near future
shall give us something not now thought possible in
optics.
Dallmeyer lenses are sold only by E. & H. T. Anthony
& Co., who are the agents in this country, and as these
lenses are quite expensive, and are indeed beyond the
means of many, the Messrs. Anthony keep other and
cheaper lenses, which are good of their kind, both for
portrait and for out-door work, among which are the
E A lenses for portraits, and the Platyscope and other
lenses for views, etc.
To those desiring advice on the choice of a lens,
this much may be said. If it is intended to procure
a Dallmeyer, it is only necessary to know the limit in
size of the work to be done. If in portraiture, you
select a lens that will cover the size of plate you intend
to use. If in landscape, or architectural work, or copying,
consult the catalogue and order the lens that
meets the requirements of the case. There is said to
be no difference in these lenses; that is, all lenses of
the same series and size are exactly alike, the glass is of
the same density, ground to the same curve, and
polished to the same degree of fineness, so that each
one is as good and no better than any of the others of
the same kind and size. It is the same with the view
lenses; one may order with confidence, and not be
disappointed by receiving an inferior lens, while expecting
the best in the world.
It is not so, however, with any other make of lenses;
at least I have never heard such a claim made on the
part of any other maker, hence for the selection of a
lens by any other maker, some thought and experiment
are justifiable and even necessary. Under such
circumstances, the following method of testing a lens
will be found useful.
When of several lenses of the same size it is desired
to select the best, attach one to a camera box and
focus it on some long object placed parallel with the
axis of the lens; adjust the focus so that the part of the
object nearest the lens shall be in focus, but near that
point where it would begin to lose sharp definition.
Mark the position of the carriage on the rail, then turn
the focus forward so that the same point will be as near
the other extremity of sharp definition, then mark the
position of the carriage on the rail and note the distance
between the two marks, which will indicate the
depth of sharp focus. Now stretch a line across the
room and focus the instrument on the centre of
the line, and note to what distance on each side
of the centre sharp definition extends; this will indicate
the flatness of the field. Try all the lenses in the
same manner, and secure the one that has the greatest
depth of focus and the greatest extent of sharp definition
on the horizontal line.
Expensive lenses should be treated with much carefulness.
They should be kept free from dust and
dampness, and should never be cleaned or rubbed
with cloth or the handkerchief; nothing but fine chamois
should be used to clean a lens, the fine polish of
which (one important factor in its usefulness and value)
is so easily injured by abrading its surface with anything
of a fibrous or gritty nature.
The lens should always be covered when the day's
work is done and while the studio is being cleaned
up, to exclude dust, etc., from the glasses.
Examine the lens every morning to see if the glasses
are at all dimmed by damp or dust, and if so, use the
chamois. You must not expect good work from
lenses whose surfaces are in any way dimmed.
Study your lens with care, and learn all its good and
weak points, and so enable yourself to take every advantage
of instrument, light and pose in making a
sitting.
The camera box and lens in the hands of the competent
photographer are what the brush and colors may
be in the hands of the portrait painter. They are the
means whereby he produces his portrait and stamps his
individuality upon his work. Therefore, when we look
back and consider the rude implements the pioneers in
our art had to work with, we are often surprised that
the work they produced was so really respectable in
point of finish and excellence as it was.
Starting from a cigar box and a burning glass, not
50 years ago, the progress made, as represented by
the instruments in use at this day, would seem to be
fully equal to the advance from Fox Talbot's paper
negative to that made on the Gelatine Dry plate.
As late as 25 years ago the box in general use consisted
of two sections of square wooden tube, one
sliding inside the other, in telescopic style; to the front
of the smaller section was attached the lens, and the
focusing glass fitted into a groove in the rear of the
larger section. The lens afforded the means of adjusting
the focus in its rack and pinion movement, and
the ground glass had to be removed from its groove
before the plate holder could be put in place.
This rude apparatus was considered in its time to be
a very ingenious construction, but if the shades of
Morse and Draper could contemplate the objects of art
that have supplanted the rude constructions they were
so familiar with and knew so well how to use, they
might well wish themselves back among the living for
the pleasure of working with one of the latest camera
boxes.
The cameras of the present time seem constructed
to meet every requirement of the most exacting intelligence.
They are light, yet firm and durable, they
are rigid as wood and metal can make them, and yet
they are fitted to focus sharply all positions of the
human form. They are complicated, yet extraordinarily
convenient, and they are made in forms and sizes
adapted to every possible use or demand.
There are four principal varieties of camera boxes in
general use, viz:
The camera for positives, which includes the multiplier.
The camera for negatives, wet or dry, for portraiture.
The camera for copying, and the camera for
viewing and out-door work; descriptive accounts of the
several varieties will be given under their appropriate
heads.
These boxes are usually made for use with four or
more lenses in a block, by which at one exposure as
many pictures are made as there are lenses.
The size represented by Figs. 1 and 2 is usually employed
for work in tents or portable houses, on fairgrounds
and places of resort at the seaside and elsewhere
during the summer season.
Fig. 1 shows the front, with the method of attaching
the four lenses, which are of the ¼ size, and they make
four pictures on a 5×7 plate.
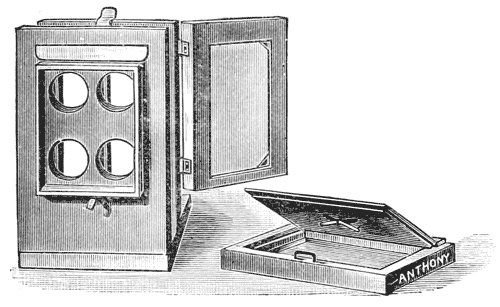
FIG. 1. CLIMAX.
Fig. 2 shows the back of the same box with the
ground glass reversed, and the plateholder partly
pushed into position; there are shown also the openings
through which the various sizes of pictures are made.
This box can also be used with one lens for making
two cartes de visite or one cabinet on the 5×7 plate.
The same style may be had with the ground glass
hinged to the box.
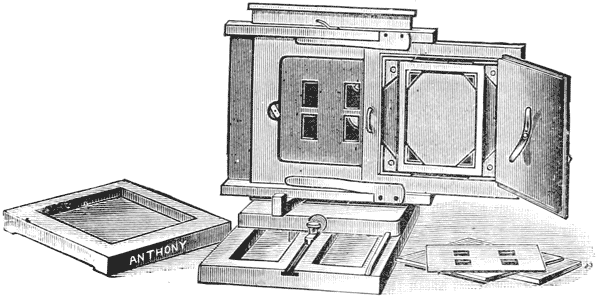
FIG. 2. CLIMAX.
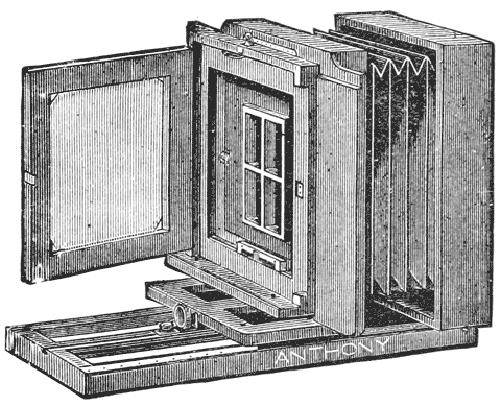
FIG. 3.
This same style of box is made also of larger sizes,
to be used with one or more lenses, of which Fig. 3
represents the size for 8×10, by which with one lens
can be made 4 cartes de visite or 2 cabinets on 8×10
or 7×10 plates, and with 4 lenses 8 cartes de visite on
the same size plate, or with 9 lenses 18 large gems are
made by two exposures.
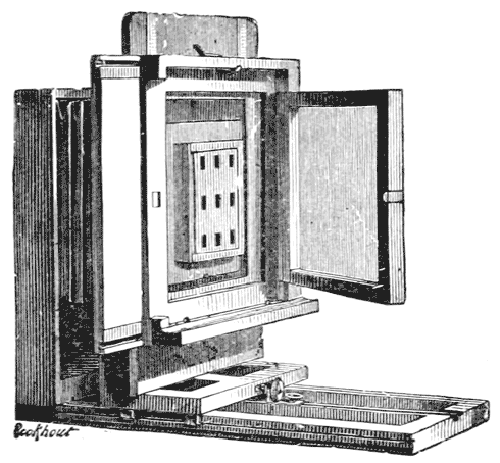
FIG. 4. N CAMERA, REAR VIEW.
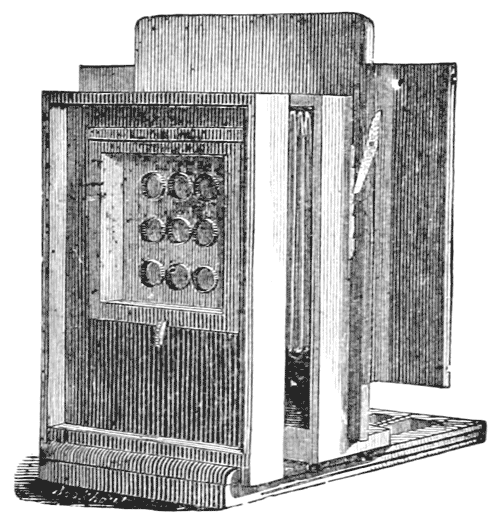
FIG. 5.
For gallery work, however, the Figs. 4 and 5 represent
the most useful form of multiplying camera, as
by their aid everything that would be called for in a
ferrotype gallery can be made.
With one lens can be made on 8×10 plate: 2 cabinets,
2 cartes de visite or 1 large picture. With 4 lenses
can be made on 8×10 plate by 2 exposures: 8 cartes
de visite, and on 5×7 plates by one exposure, 4 cartes
de visite.
With 9 1⁄9
lenses on 7×10 plate can be made
with two exposures: 18 gems; with 4 exposures, 36
gems; and with 8 exposures, 72 gems; on 5×7 plate
with 1 exposure, 9; 2 exposures, 18; and with 4 exposures,
36 gems.
The carriage and plate holder of these boxes move
vertically and horizontally, thus giving the operator
the power of making a great variety of sizes and of
using any size of plate from ¼ upwards to 8×10.
On the ¼ plate can be made with one exposure, 4 1⁄9 gems; 8 of the next smaller size by 2 exposures; and
16 of the smallest size, by 4 exposures, thus bringing
into use only 4 of the 9 lenses; the second size is
made by placing the lenses horizontally, also the openings
in the back of the box, the plate also is laid on its
side in the holder.
These boxes are finished in a variety of styles, plain
or ornamental, and are fitted with holders for negatives
as well as the usual rabbeted holders for ferrotypes,
and by their use all the work of a small establishment
might very easily be done, as all the sizes of ferrotypes
are made from 16 gems on ¼ plate to 72 of the same
size on 7×10 plate, and by one lens everything, positive
or negative, from ¼ to 8×10 size, are made without
difficulty.
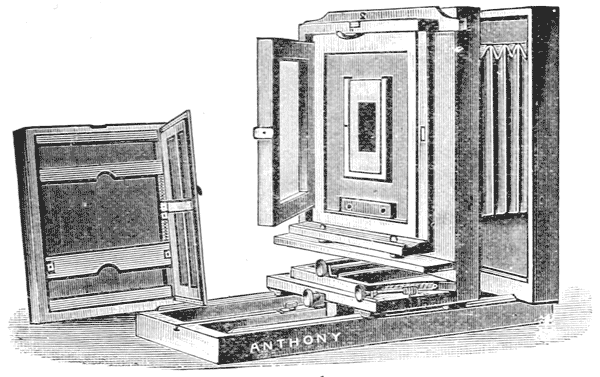
FIG. 6.
For the gallery making no pictures larger than 8×10,
the above, figure 6, represents the camera box that is
the best fitted in every respect. It is light, compact
and durable, and it is most accurately adjusted for
cartes de visite, cabinets, 4×4 or 8×10 pictures in every
style, full length, half lengths or heads. It has the
double swing back, with the tangent movement, and
is fitted with the Benster holder, which is represented
in the cut.
This style can be had in every variety of finish, from
the plain to the most ornamented, in mahogany or
ebonized wood, with brass fittings or nickel or silver-plated,
as may be most desired.
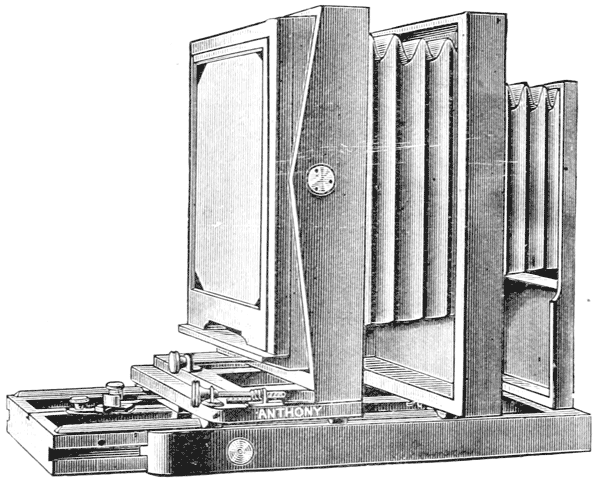
FIG. 7.
For galleries where larger work is called for, figure
7 represents a box that is made in all the sizes from
11×14 to 25×30, and it is fitted with an attachment
(see Fig. 8 for 8×10 to ¼ plate), thus enabling the
photographer with one box to fill every order for pictures,
from a card to a life-size portrait.
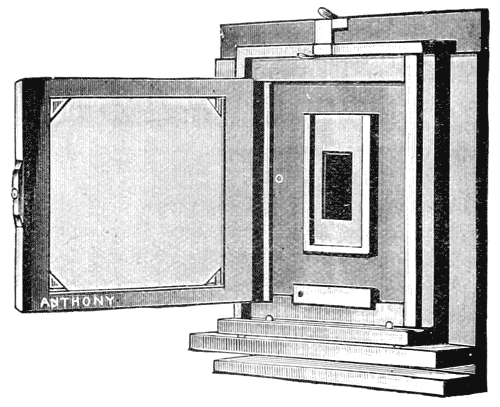
FIG. 8.
This box is fitted with the double swing back, tangent
movement, the telescope bed, which renders it
very compact, and with the Benster holders.
CLIMAX ROYAL CAMERA.
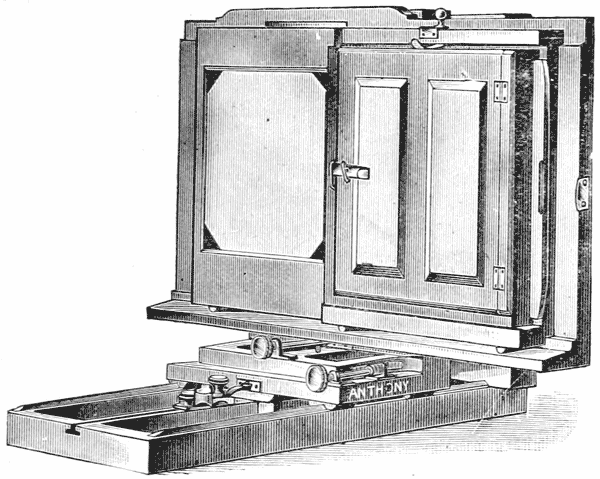
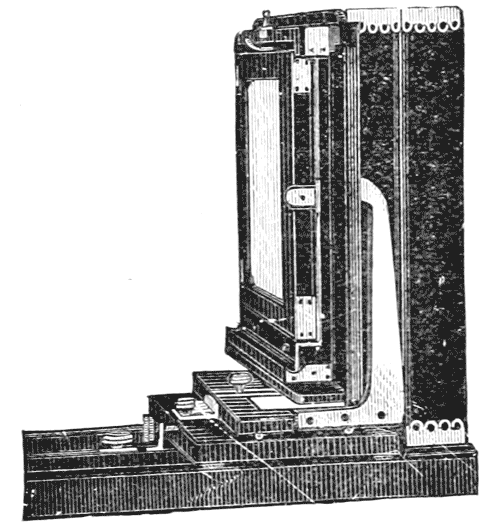
FIG. 10.
p108
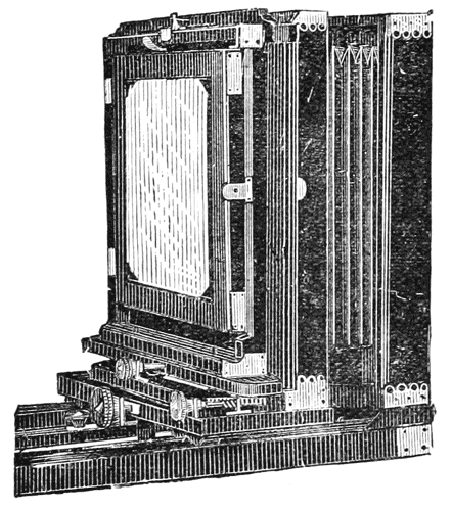
THE M SUCCESS WITH TANGENT MOVEMENT.
FIG. 11.
Figs. 10 and 11 represent varieties of cameras of a
highly ornamental kind. They are made of hard
wood, ebonized, and with nickel-plated fittings. Fig.
10 has the Wright's patent metallic swing, Fig. 11, the
tangent movement.
The "Benster" Plate-holder (see page 109) is
intended to, and will undoubtedly, supersede the
Bonanza holder for wet plate work, as it is a more
perfect silver saver than the Bonanza, while its
easy adjustability to every size of plate places it
away ahead of anything known or in use heretofore.
The operator who has ever used this holder will never
consent to go back to any of the old styles while he
can procure the Benster. The plate rests on pure
silver wire, and there is a trough with large bottle
beneath, into which all the silver waste readily finds its
way. As the trough is raised, the upper ledge descends,
so that the centre of the plate is at all times in
the centre of the holder, no matter what size is used.
This obviates the use of inside kits, and adapts itself
at once to any size of plate, from the largest the holder
will admit to one not under three inches square.
This is unquestionably the best gallery plate-holder
made. By a recent improvement, the horizontal bars
may be instantly fastened for plates of any size, and
there is also an attachment for the vertical adjustment.
For dry plate studio work it is the holder par excellence.
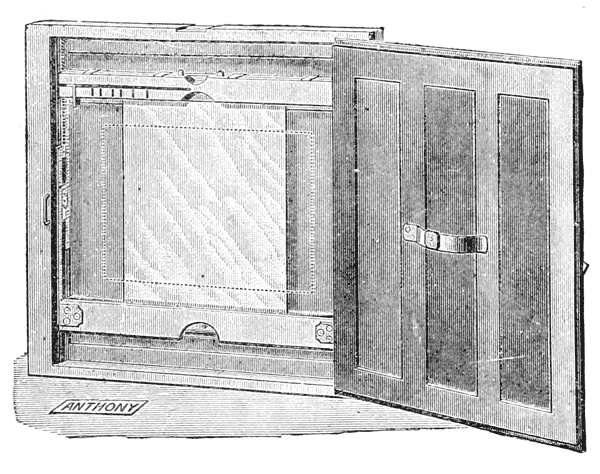
FIG. 12.
p110
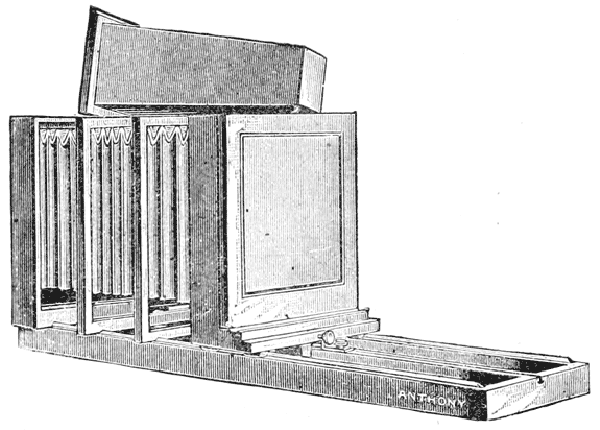
FIG. 13.
Copying constitutes a large portion of the business
of every gallery, and a camera for that purpose is almost
indispensable, as the portrait camera is entirely unfitted
for a major portion of the copying work that comes.
The copying camera requires no swing back, but
does require great length of bellows and bed, which has
often to be supplemented by the cone when a very
small picture is to be enlarged to a great size.
A special form of copying camera is adapted to enlarging
and reducing negatives, and for making transparencies.
This form, Fig. 14, can be so arranged as
to render it possible to remove the lens from the position
as seen in Fig. 14 to the front, so that the two
forms, Figs. 13 and 14, might be combined in one for
copying and making transparencies.
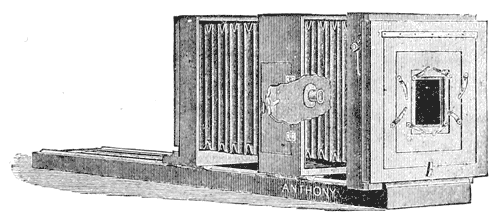
FIG. 14.
The Success Camera, for viewing, Figs. 15 and 16,
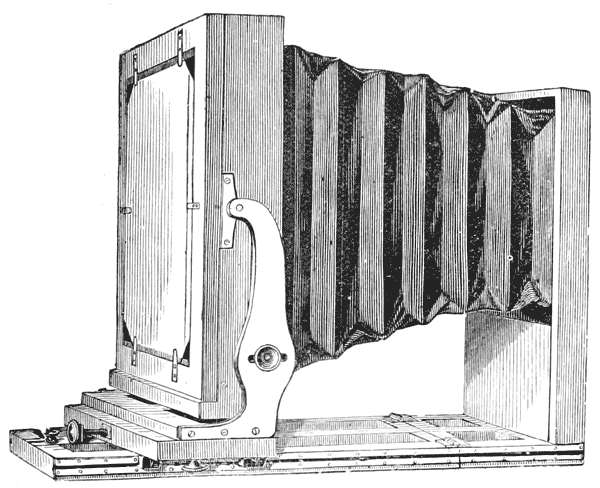
FIG. 15.
p112
is an instrument calculated in every way to meet the
requirements of professional out-door work. It is made
in a form to secure the utmost rigidity and strength
with the least weight. The bellows is conical, the bed
is folding, the double swing back is convenient and
easy of adjustment. In front,
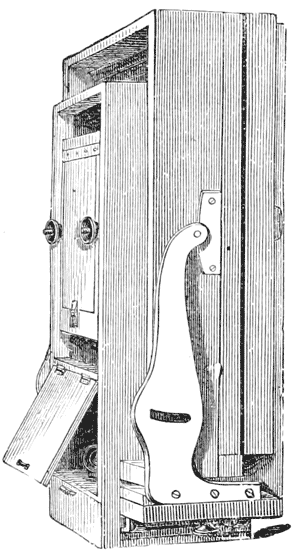 FIG. 16.
below the lens, is a small
recess, or closet, in which
extra tubes, flanges, screws,
screwdriver, etc., may be
safely carried; when folded,
its bulk is small and occupies
but little space. From
the front to the outside surface
of the bed, as folded, is
only six inches, and the
weight for 11×14 box, with
ground glass and plate-holder,
is only twenty-two
pounds. By referring to the
cut, 16, the compactness of
this camera may be realized.
FIG. 16.
below the lens, is a small
recess, or closet, in which
extra tubes, flanges, screws,
screwdriver, etc., may be
safely carried; when folded,
its bulk is small and occupies
but little space. From
the front to the outside surface
of the bed, as folded, is
only six inches, and the
weight for 11×14 box, with
ground glass and plate-holder,
is only twenty-two
pounds. By referring to the
cut, 16, the compactness of
this camera may be realized.
From the mode of construction
the bed is rendered peculiarly rigid, and in
their attachment and arrangement the brass guides are
protected from injury. In case that, through accident,
any part should get broken, it can readily be replaced
without returning the camera.
The Novel View Camera is the latest response to
the demand for something that shall be very light
and very convenient. Its construction is the result
of a series of experiments entered into with a
view to obtaining an instrument in the make up
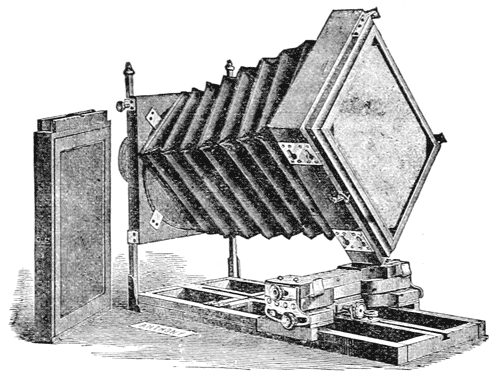
FIG. 17.
REPRESENTING THE CAMERA
WHILE BEING REVERSED.
of which there shall be no unnecessary weight, and
combining easy adjustment with great rigidity. It being
absolutely necessary that a view camera shall permit
the use of the plate both horizontally and vertically,
all the older forms of view cameras were built square,
to permit the shifting of the plate, thus adding very
much to the weight of the instrument. In this instrument,
however, all that is possible has been done to
reduce the bulk and weight; in doing so several new
improvements have been adopted. The box itself is
very little larger in outside measurement than the
largest plate it will take, and the double holder is so
perfect as to be very little if any heavier than the glass
plates it is intended to contain. The greatest improvement
is the revolving bellows, the front end of which is
fastened in the light frame-work in such a way that
when the back is detached from the bed the whole bellows
revolves, instead of requiring to be unbuttoned,
as heretofore, making a great saving in time. The back
is held to the bed by metal plates having slotted holes,
which permit the passage of round screw-heads, which
slide over the slots and thus hold very firmly. The
back may be detached and changed from a vertical position
to a horizontal in so short a space of time as two
seconds, by the watch.
These boxes are made with a double swing, the
combination of the two swings making it possible to
avoid all distortion of lines.
These cameras are made in all sizes from 4×5 to 18×22,
and they are decidedly the camera of the period.
The 3 suitable sizes are fitted with partitions, and extra
fronts for stereoscopic work.
The novel dry plate holders for these cameras are
stripped of every unnecessary bulk and weight; each
will contain two plates, except the sizes above 8×10,
which are fitted with a patent shield, each one of which
has two slides working in the end and in the side of
the shield, therefore the slide can be withdrawn from
the side of the shield, no matter in what position the
camera is placed. These shields are single for one
dry plate only. All the sizes of Novel Cameras above
8×10 are made with the ground glass of the same focus
as for wet plate holders; if desired wet plate holders can
be furnished to order.
A new idea has been perfected and carried out in
connection with the Novel Camera, making it a combination
View and Portrait Camera with the above
name. See Cuts 18 and 19. A portrait attachment has
been constructed to fit the back of the larger sizes of
the Novel Camera, which can be attached or detached
in a few seconds, thus rendering it unnecessary that
there should be two large and expensive cameras in one
gallery. This is an exceedingly valuable improvement
for the larger sizes in more than one particular. The
18×22 size, with ground glass and two plate holders,
weighs only 50 lbs.; the measurement of this size outside
is 11×22×30¼ inches only.
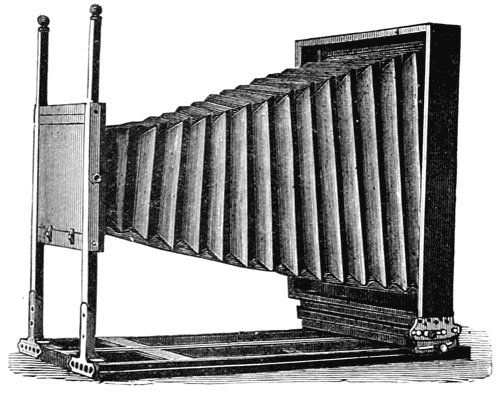
Fig. 18.
KLAUBER CAMERA, VIEW PART ONLY.
p116
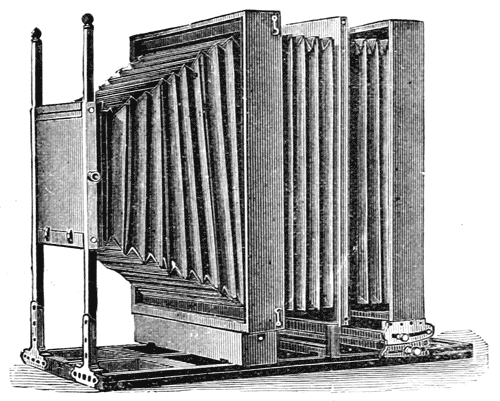
Fig. 19.
Thus it will be seen that every variety of work in the
gallery may be done with two or at the most three
Cameras.
The Climax Imperial Cameras for work up to 8×10;
a Klauber Camera for portrait and view work from 8×10
to any size desired, together with a Copying Camera,
would make a superb outfit for any gallery.
A stand or support for the camera box and lens, by
means of which the box and lens can be raised or
lowered or moved about the room with facility.
The stand best suited for the purpose is one that is
strong, and heavy enough to be very rigid and firm,
but not so heavy as to be cumbersome and difficult to
move. For raising and lowering the camera, which
in some cases is quite heavy, there are several appliances,
such as levers, screws, weights, &c., &c., and
the different styles of camera stands may be designated
by the name of the mechanical power which is applied
for that purpose, viz:
Lever Stands, Screw Stands, Balance Stands.
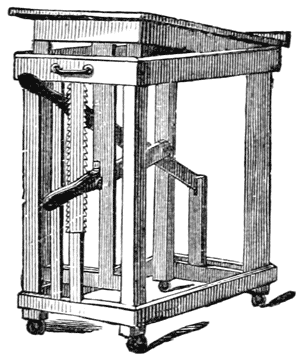
Fig. 20.
The Lever Stand, Fig. 20, is one of the oldest forms
of camera stand, and is still
used in many establishments.
The method of raising the top
may be seen in the cut. There
are two levers, one for each
end, by means of which
the camera may be inclined
upwards or downwards. The
levers are held in place by
means of springs which press
a beveled edge steel plate—attached
to the levers near
the handles—against a serrated plate of steel, attached
vertically between the handles. (See cut.)
This style of camera stand is more used for
very large and heavy cameras than for the smaller
kind. They are very firm and rigid, and exceedingly
durable, being made of hard wood, well seasoned,
and they are consequently not at all liable to get out
of order; in fact, a well made stand would last a life-time,
if one cared to have a camera stand last so long.
The next style in order is the
which is a very popular stand, and its most popular
form is that called the Knickerbocker Stand, which
is made in 4 or more sizes and has 2 styles of
tops; the top seen in Fig. 21 has the name of
the inventor of the stand and is called the Stoddard
Top; the other, No. 22, is the Acme Top. This
form of stand is better adapted for light camera boxes,
and is therefore preferred in small establishments and
tintype galleries to the other styles, which take up more
room and are not so portable.
THE KNICKERBOCKER STAND.
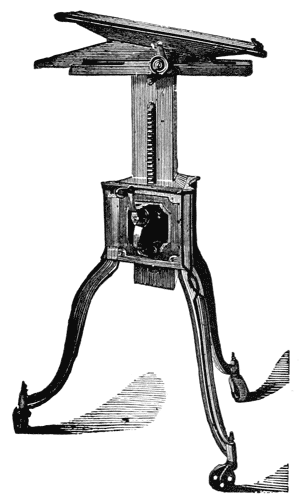
FIG. 21.
p119
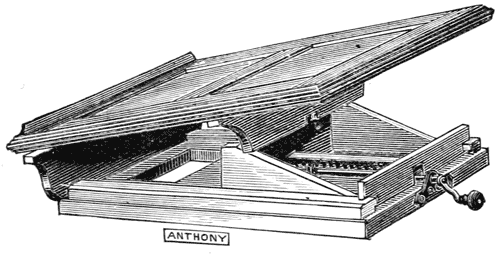
FIG. 22. THE ACME TOP.
This style comprises a greater variety of forms than
all the others combined, it requiring the least exertion
to move the box up or down. The weight of the
camera box when placed on the stand top is counterbalanced
by weights which rest upon a shelf attached
to cords, which pass over pulleys and downwards, to
be fastened to uprights which support the top; when
properly balanced it requires only a touch of the hand
to raise the box or to lower it.
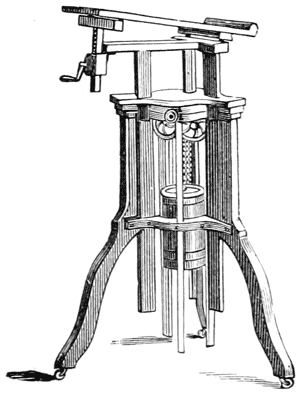
FIG. 23.
The most popular form
of this stand is the
Bowdish. See cut 23.
The description will be
rendered quite intelligible
by observing the weights
which are in the centre,
between the three legs,
and the cords which
pass over the pulleys to
the three supports of the
top. From the peculiar
construction of this stand
it has the most simple
means of adjustment; it is raised or lowered by
touch, and a binding screw serves to keep it immovably
in position.
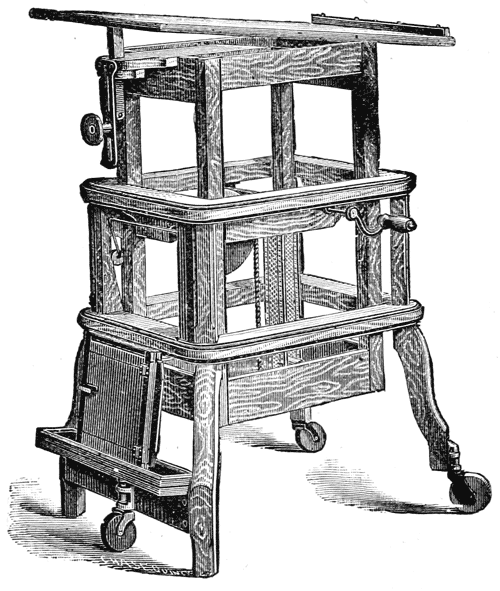
Another form of this stand is the Automatic, Fig. 24,
which is a later form than the Bowdish, and has several
improvements not yet applied to the latter. It is
entirely new in shape and principle; it is very light and
simple. The various changes are made quicker and
easier than with any other stand. A coil spring bears
most of the weight in raising and lowering, and self-acting
stops hold the centre frame and bind it firmly
at any height desired by the operator, no set-screw being
required to make it rigid. It has also a new and superior
device for tilting the top. Another form of this,
very popular stand is the Gem City Stand, see Fig. 25,
which in some respects is even better than the Automatic;
beside the weight balancing the camera box it
has a crank in common with the Automatic for raising
and lowering. It also has a very convenient arrangement
for copying, which is an extension which moves
under the top of the stand and holds an upright support
for the picture to be copied; this is a very convenient
arrangement for galleries where there is not
enough copying done to require a special copying
box.
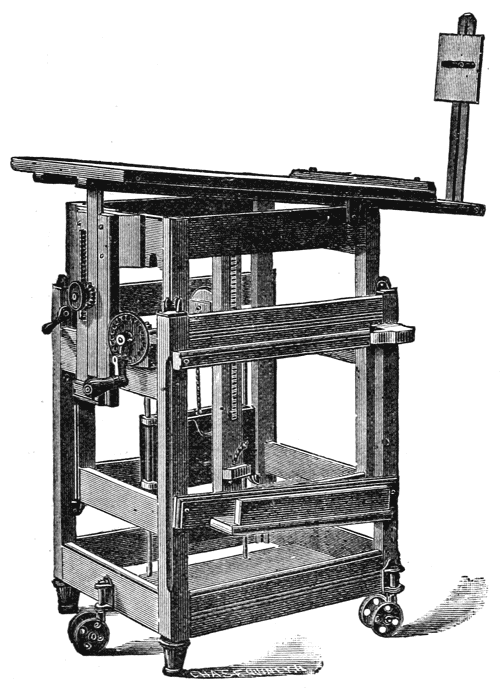
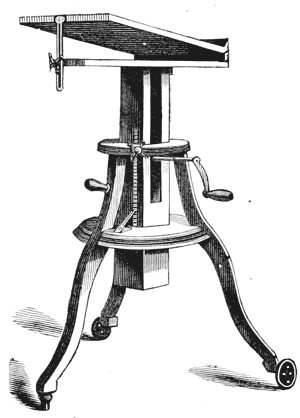
There is another form of stand in use, in which the
balancing
weight is replaced
by a
crank and pulley;
of this kind
is the Handy
Camera Stand.
Of this style
there is another
form that
has advantages
of its own,
which would
seem to render
it peculiarly a
useful and
appropriate
stand for light
boxes; it is
the Magic Camera Stand.
All these various styles
of stands are made in sizes
to suit cameras from 8×10 to
25×30.
Fig. 28 represents a style
of stand which does not
classify, but which is a useful
stand in a portable gallery
or tent.
This device for making exposures in the photographic
studio has proved to be so useful and popular
as to have secured almost general recognition and
adoption among the photographers of America.
The possibility of making exposures in the studio,
unknown to the subject, placed a very decided advantage
in the hands of the operator, who, standing at any
point, could watch the expression of the subject and
seize the right moment to secure the impression desired;
so that the pneumatic shutter seemed to be the
proper complement to the lightning dry plate.
There is a great variety of these shutters exhibited
and for sale, and the number continually increases.
The earliest example of this style of shutter that we
know of is the Cadett, an English invention, which, in
its introduction into this country, served as a stimulus
to the inventive genius of Americans, and, as a consequence,
we have the great variety that now may be selected
from. An effort was made to apply electricity
to use in working a shutter, but it did not succeed,
and so the rubber tube and bulb became the accepted
means for applying the force necessary to open and
shut the slides or doors constituting the shutter.
An attempt has been made to apply a time regulator
to the pneumatic exposer that shall keep the lens
uncovered for a period of time at the will of the operator,
which shall be regulated by an index pointing at
a figure representing a definite period of time. By
turning the index to any figure, from 1 to 20 or more,
representing seconds, the shutter is held open for that
time, and then closes automatically. This shutter is
opened, in the first instance, by pressure upon a bulb,
in the same manner as any of the pneumatic devices.
We may enumerate, among the various shutters,
those giving the most satisfaction in use,
It has often been remarked by eminent photographers
that the arrangement is a most useful one
which enables persons to be photographed without
being aware of it. The efforts in this direction necessitated
the operator being close to the camera; here
we have an instrument which permits him to be at
any part of the studio he pleases.
Many have experienced the difficulty of taking children's
portraits with the proper amount of profile;
with the above device all difficulty vanishes—the
operator may be by the side of the child and attract
its attention to any direction, and he has the means of
exposing and capping the lens with far greater rapidity
than with the usual method.
Directions.—After the day's work is done the rubber
tubing should be taken off the instrument; this will
prevent a partial vacuum in the bellows and tube, which
would otherwise ultimately occur. These instruments
are now constructed for application either inside or
outside the camera. Its use is very simple—squeeze
the ball end of the tube and the shutter opens.
This instrument no sooner made its appearance
than Yankee ingenuity set to work to improve on it,
or at least to produce something similar that might not
infringe on the patent.
The first effort was to bring electricity into use to
move a shutter inside the camera box, and a very good
device was perfected and sold to numbers who were
convinced of the usefulness of the idea, but were unwilling
to pay the price demanded for the English instrument.
This electrical apparatus, however, soon
played out, and few operators had the time or knowledge
necessary to keep the battery in order; and in many
instances after the sittings had been made it was found,
on attempting to develop the plate, that no exposure
had taken place, hence these electrical shutters were
soon relegated to the limbo of played-out photographic
apparatus, of which every gallery of any standing has
one.
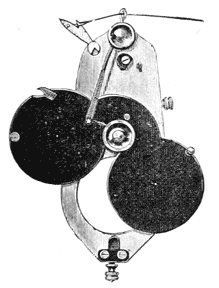
THE "ECLIPSE" INSTANTANEOUS SHUTTER.
For simplicity of construction and operation, for reliability
and good results obtained with it, the "Eclipse"
Shutter has gained an enviable reputation. It is safe
to say that no shutter is better or more favorably
known.
The "Eclipse" is made wholly of metal, and is
finely finished. It attaches over hood of lens by a
velvet-lined collar, and has a clamp to securely hold
it in place. It is made in five standard sizes, collars
for hoods of lenses being attached to a shutter of the
most suitable size.
When the shutter is in a locked position ready for
an exposure, the right-hand leaf of fly covers the aperture
of lens. When released, the fly revolves, uncovering
the aperture, which is again covered by the left-hand
leaf.
When the shutter is in the position shown in cut,
less illumination is given to the foreground; but by
adjusting the shutter in different positions any part of
the view may be favored.
The hair trigger release may be operated either by
hand, by a cord, or by a pneumatic device. The
pneumatic apparatus costs $1.00 extra.
The speed of the shutter is perfectly controlled by
moving the spring on back of shutter from notch to
notch on the curved arm.
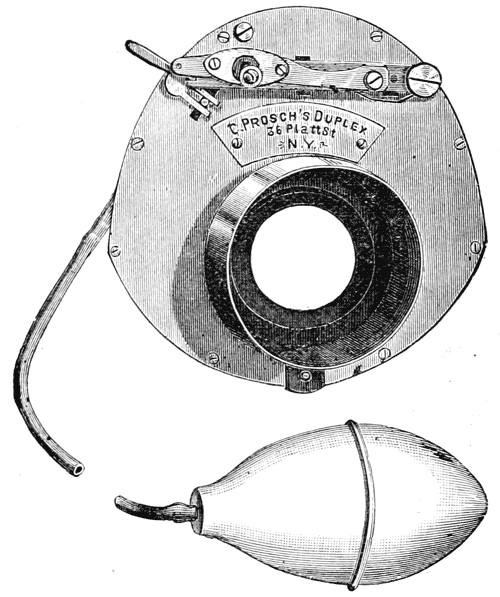
FOR TIMED OR INSTANTANEOUS WORK. PERFECT
IN BOTH.
With this shutter, the latest production of the inventor
of the very popular "Eclipse" shutter, exposures
can be made of any desired duration. It is equal
to any requirement for the most rapid work, and as a
time shutter, exposures can be made as quick as two
pulsations can be given to air bulb (about one-tenth
of a second) or of minutes' duration.
"Duplex" Shutters work perfectly, with even the
very largest lenses, up to their full capacity; and several
lenses can be used with the same shutter. The
shutter gives a full opening; but yet, by the peculiar
opening in the exposure slides, any part of the picture
can be favored with more or less illumination by
turning the shutter, sometimes even inverting it.
The illustration gives a front view of the shutter,
one-half size of No. 2, which is suitable for an 8×10
lens, or even larger, as it has an opening at the diaphragm
of 11⁄8
inches.
Inclosed in metal casing are two pivoted slides,
which move, in unison, in opposite directions, and
make the exposure in one continuous movement
without the slightest jar, even when worked at its
greatest rapidity. The motive spring is on the back of
the shutter, and is of coiled wire; a perfectly reliable
spring. Its tension is regulated by moving it along a
series of notches. The exposure slides are moved by
a stud on the lever shown on front, which passes
through the shutter and a slot in each slide, and engages
with the spring on the back. On the end of the
lever are two notches hidden by the secondary lever.
When the lever is fully depressed, the release catches
in the upper notch and locks the slides closed. A
slight pressure on the air bulb or a trip to the projecting
end of the release, frees the slides, and they make
an instantaneous movement or exposure. If the secondary
lever has been brought into play, by a turn or
two of a milled-head nut, the release will catch in the
second or lower notch and hold the slides at a full
opening, in which position they remain until a second
pressure is given to the bulb, or the release is tripped
by hand.
The shutters are made in standard sizes, having narrow
threaded collars on each side, to which can be
adapted tubes to receive lenses, which are to be transferred
from regular lens tubes. Any intelligent instrument
maker or machinist can adapt such tubes to
lenses; the original tube is not used.
It might have been thought that the rapid dry plate, by
shortening the time of exposure so much, would have
done away with the necessity for using head-rests; and
many old photographers whose backs have often ached
from handling the "Wilson," the "Spencer" and
other enormously heavy head-rests, thanked their stars
that a time of relief seemed to be at hand. But not
so. The head-rest is just as necessary as ever, and the
heavy ones are as advantageous now as before. The
most important use of the head-rest is to keep the head
in the position required. That the head should be
immovable is necessary during the time of exposure.
Many people are quite able to keep still enough for
photographic purposes without a rest for the head, but
very few are able to keep the head in the position desired
by the operator without some assistance; hence the
necessity for the use of the head-rest for even the
shortest exposure. One benefit, however, has been derived
from the advent of short exposures; there seems
no necessity for the use of the extremely heavy varieties.
The lighter rests would seem to be capable of
fulfilling all the requirements of a head-rest.
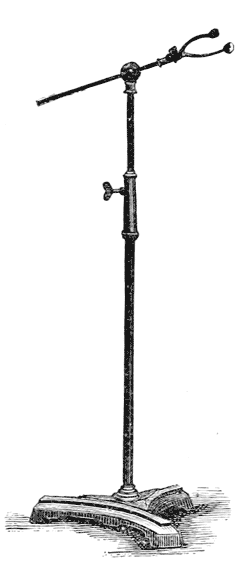
CENTENNIAL HEAD-REST.
The Success head-rest is one variety of the lighter
kinds, of which another is the Centennial. These are
very useful in the studio, more particularly in posing a
group, when it is necessary to have a head-rest for each
one of the party; they are also sufficiently rigid for single
sitters. They are in all sizes, short for children and
long for adults, and if any part should be broken or get
out of order duplicates can be had at trifling expense.
The Rigid head-rest is of a heavier kind, and is a
favorite with many who prefer a medium weight. It
sets firmly on its base and can be quickly and easily
adjusted to either sitting or standing figures.
The Spencer head-rests are examples of the heavier
kind; they are very firm and rigid, and heavy enough to
suit the most exacting gymnast or athlete. There are
many other varieties of the light, medium and heavy
kinds, but the cuts show the best of the various
weights, and a selection can be made from these without
fear or hesitation.
A gallery should have half a dozen head-rests at
least, and while the majority should be of the lighter,
there should be a sample of the medium and heavier,
kinds, so that no important aid to good work should be
lacking.
Much attention has been bestowed upon the posing
chair since 1865, when Sarony introduced into the
country the posing apparatus which first brought his
name permanently before the American photographers
and the public.
The Sarony posing chair, table, rest, etc., has, however,
passed, and remains among the things that were,
and many other styles of chair since have had their
brief day and are gone.
p134
Among those that still remain in use this continues
to be popular, and indeed it is a very useful and elegant
article of furniture for the studio; and from the
ease with which it can be converted from a high back
chair for standing figures, to a posing chair for sitters,
it will probably continue to be, as it always has been,
the most useful accessory in the photographic studio.
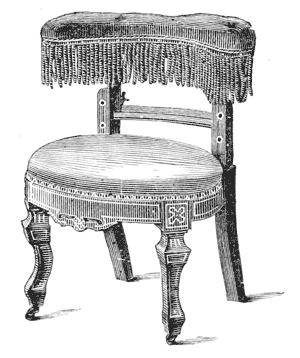
THE BOWDISH CHAIR WITH REVOLVING CIRCULAR ARM.
These chairs are so pre-eminently superior in all desirable
qualities that it is only necessary that their perfection
of manufacture and ingenious plan of construction
be seen to be commended by every one. Made
of solid walnut, secured by means of a patented iron
frame, they unite unusual strength with graceful outline
and richness of effect. The quality of materials
used, also, has always been of the best; and the constant
aim is to make them excel in each and every
particular. They have no uncertain joints, no clumsy
and unsightly proportions, no "fixings" to become
detached or render the chair useless when broken.
They are better adapted to the varied requirements of
a modern photographic gallery—better suited to the
prevailing styles of portraiture, and more in consonance
with modern studio accessories.
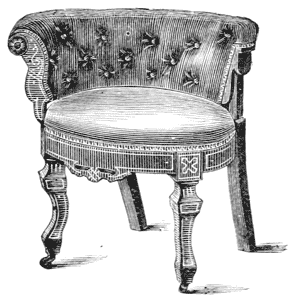
THE BOWDISH CHAIR WITH SOFA ATTACHMENT.
In short, the Bowdish chair combines the advantages
and uses of all the various chairs in market,
comprising—
- First.—A chair with high back, with or without
arms.
- Second.—A chair with a revolving circular arm. This
is an advantage over the ordinary chair with circular
arm, which has only the vertical movement.
- Third.—A lounge attachment, which is invaluable
for infants and children.
p136
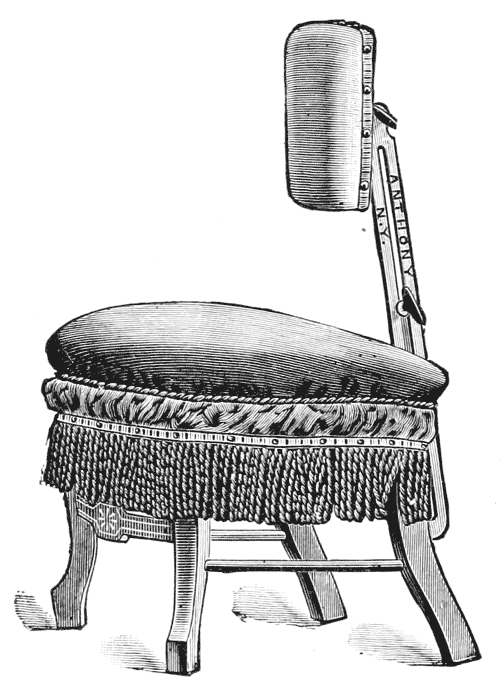
THE NEW PATENT NOVEL CHAIR.
For sitting positions, vignettes, etc., the Novel chair
is the best out for low bust and vignette pictures. The
back is peculiarly well adapted; it gives support without
the back becoming conspicuous in the picture. This
chair is a valuable piece of furniture for any gallery,
and many prefer it to the old-established favorite Anthony'
Position Chair, which has been for many years
the useful chair of the studio.
ANTHONY'S POSITION CHAIR.
ANTHONY'S SLIDING-BACK POSITION CHAIR
ANTHONY'S SLIDING-BACK POSITION CHAIR
has been found to be just the thing for many positions,
such as half lengths, full lengths and even sittings, and
also for babies, as the back and arms are movable.
For some years past the little folks, babies and infants, have
become a large part of the most profitable clientage of the photo
studio, and much attention has been bestowed on the furniture and
accessories suitable for them and their pictures. Among such, the
QUEEN ANNE CHILD'S LOUNGE is a novelty itself, indispensable to
any photographic studio; the opening between seat and back is an
advantage for posing children. (Also made with hole in centre of
the high back.)
QUEEN ANNE CHILD'S LOUNGE
These two forms of lounge are very useful and popular,
having been adopted in many studios doing a large
business with the little folks.
An extra cushion is now made for the Child's
chair. This, placed in a semicircle under the knees,
ensures the favorite pose of babyhood.
Two forms of chairs for babies are very popular
with the average photographer, being neat in design
and finely finished, greatly adding to the effect of a
good photograph of a pretty baby.
THE BABY CHAIR.
The Baby Holder is not a chair, but a holder, and
can be placed in any chair or on a table, It can be
adjusted to any angle, to hold the baby securely in
position.
These baby lounges and chairs should be raised on
a platform, when in use. The platform should be
from 6 to 12 inches high and on large, easy casters, so
that it can be easily moved about the room. Such a
platform is a great convenience for all sitters, the subject
can so readily be moved without being put to the
inconvenience of rising from the seat. With these
chairs certain little cushions for the back and seat are
very useful, and are supplied when required.
p140