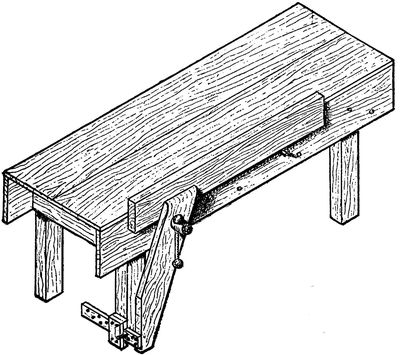
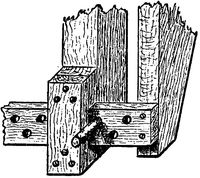
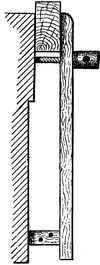
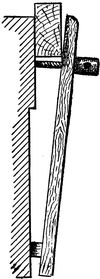
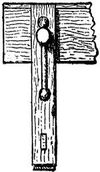
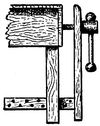
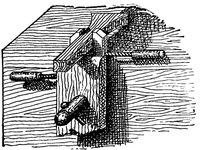
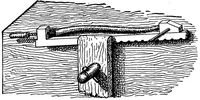
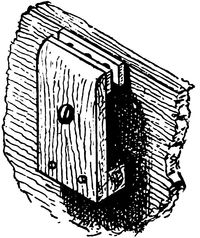
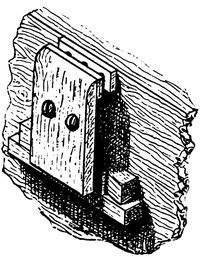
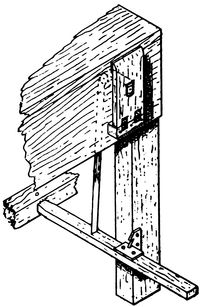
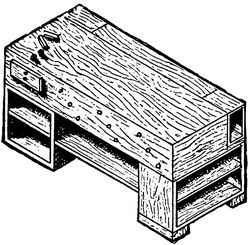
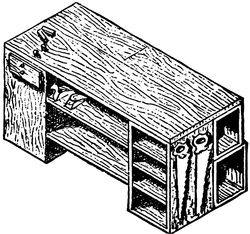
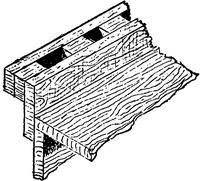
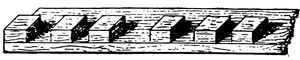
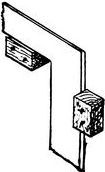
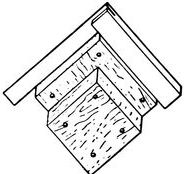
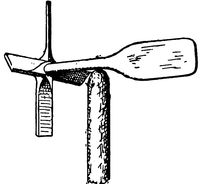
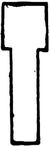
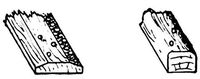
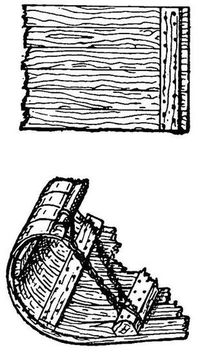
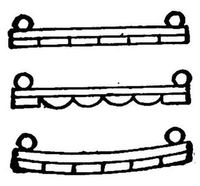
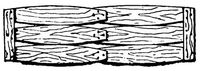
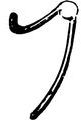
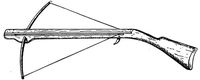
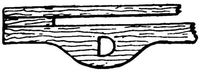
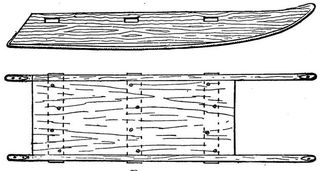
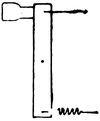
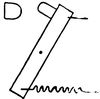
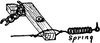
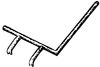
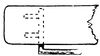
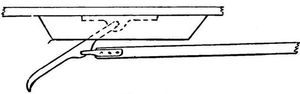
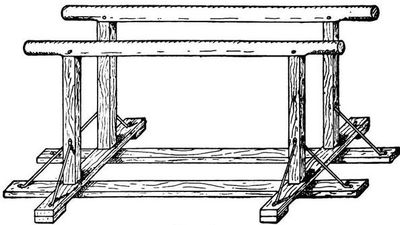
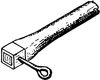
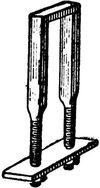
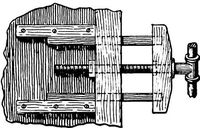
Anvil.—An anvil is often useful and is sometimes combined
with a vise. It should have a flat steel surface and also a tapering,
rounded (conical) point. An old flat-iron does quite well.
Auger-Bit.—See Bits.
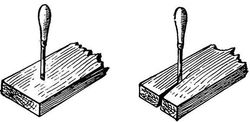
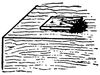
Fig. 464.
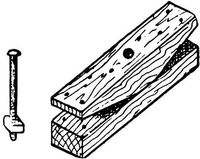
Awl.—The Brad-awl is the simplest boring tool you will use.
Unlike gimlets and bits, it does not take out any wood, but merely
presses it aside out of the way, which is good for nail and screw
holes, because the elasticity of the woody fibres tends to make
them spring back and close around the nail or screw, thus helping
to keep it in place. The awl should always be a trifle smaller
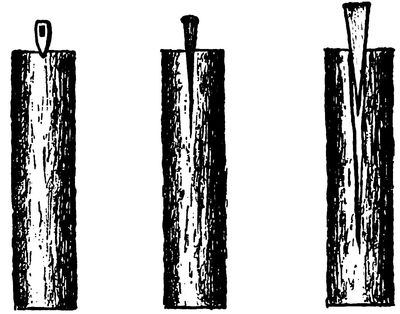
than the nail. Bore with
the cutting edge across
the grain of the wood, on
the same principle as in
driving nails (Fig. 464),
lest the wedge shape of
the tool cause the wood to
split (see Nailing).
Press the awl straight
down in this position until the point is well into the wood, when
you can twist it a little, at the same time pushing it further into
the wood. There is always risk of splitting thin wood near an
edge, unless you use great care. The brad-awl can be sharpened
easily. See Sharpening and also Boring.
Do not buy combination awls with "tool-chest handles," filled
with an assortment of awls and little chisels, gouges, screw-drivers,
saws, etc. Such affairs are sometimes useful, but the loose tools
are apt to become lost or broken, and the money can be used to
better advantage in other ways.
It is well to have a variety of sizes of awls, fitted into hardwood
handles. An awl handle into which awls of various sizes
can be fitted, somewhat as a brace holds bits, answers very well,
if you have to carry your tools from place to place, but for shop-work
it is more convenient to have each awl in a separate handle.
The Marking-awl or Scratch-awl is simply an awl with a round,
sharp point used for marking in carpentry, but for very close
work a knife or chisel is better. See Marking.
Axe.—This is such a common tool that it needs no description,
and is, moreover, seldom required for amateur work.
Back-Saw.—See Saw.
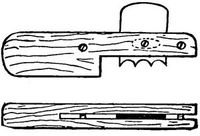
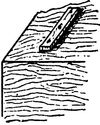
Fig. 465.
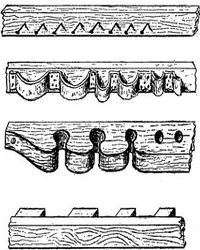
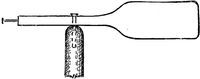
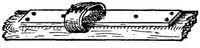
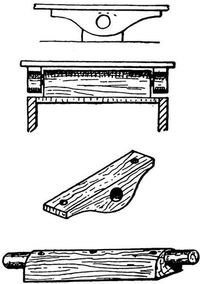
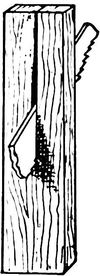
Beading.—A tool for scraping beading, reeds, and the like,
can be made by filing the reverse of the shape required on the
edge of a piece of saw-blade steel, taken from a broken saw or
scraper, and inserting this blade in a kerf sawed in the end of a
piece of wood (Fig. 465). To change the position of the blade,
one or both of the screws can be loosened and then tightened
after the blade has been adjusted. This tool is pushed forward
with both hands, much like a scraper, the shoulder of the block
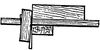
bearing against the edge of the board as in using the gauge (Fig.
466). Tools for this purpose can be bought.

Fig. 466.
It usually produces the best effect not to carry this beading to
the extreme ends of an edge, but to stop a short distance from
the ends and with a chisel cut the beads to a square and abrupt
end (Fig. 305). See Plane.
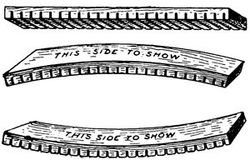
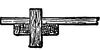
Fig. 467.
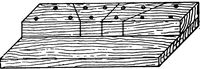
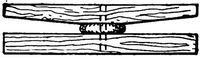
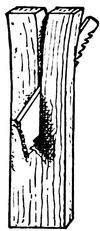
Bending Wood.—To bend a piece (without steaming or boiling)
which is to be fastened so that but one side will show, make
a series of saw-cuts of equal
depth (Fig. 467) across the
piece, and partly through it,
on the back side (the side
which will not show), first
running a gauge line along the edge (see Gauge), that the cuts
may be of equal depth. This will practically, so far as bending
is concerned, make the piece thinner, and it can readily be
bent and fastened in position. The nearer together and the
deeper the cuts are the more the piece can be bent—that is, up
to the breaking-point. Hot water can be used on the face side.
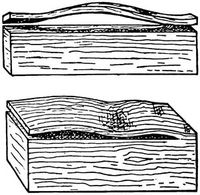
Such curves can sometimes be strengthened by driving wedges,
with glue, into the saw-kerfs after the piece is bent to the desired
curve (Fig. 468).
Fig. 468.
To make a small piece of wood pliable, so that it will bend to
any reasonable extent (which, however, depends much upon the
kind of wood), soak it for some time in boiling water, when
it can usually be bent into the desired shape. It must be securely
held in position until the moisture has entirely left it, or it will
spring back to (or towards) its original shape. This drying will
take from several hours to several days, according to the size of
the piece and the condition of the atmosphere. There is almost
always a tendency to spring back a little towards the original
shape, so it is well to bend a piece a little more than you wish it
to remain, except where it is to be fastened so that it cannot
spring back.
Wood which naturally bends easily (particularly thin pieces)
can often be made pliable enough by simply soaking in cold
water, but hot water is usually more effective. Anything which
you cannot manage with the hot water you can take to a mill or
a ship-yard and have steamed in a regular steam-chest, which is
really nothing, in principle, but a big wooden or iron box, with a
steam-pipe running into it, in which the pieces are kept until
the steam has made them pliable. Wood is now bent for many
purposes by "end pressure," but this is impracticable for the
amateur.
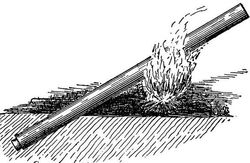
Fig. 469.
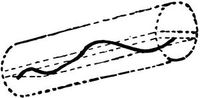
To bend the ends of pieces like skis, hockies, etc., a big kettle
or common wash-boiler
full of boiling water
can be used. An apparatus
for long sticks,
as ribs for a canoe, can
be made with a piece
of iron pipe of suitable
size. Plug one end
tightly and stick it
firmly in the ground,
so that the pipe is fixed
in a slanting direction.
Put water in the pipe, build a fire underneath, put the sticks in
the pipe, stuff a rag loosely in the upper end and the apparatus
will be in working order (Fig. 469).
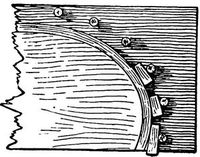
Fig. 470.
You must often have some sort of form or mould for bending
the piece and for holding it while drying. For some kinds of
bending, where there is no occasion to be accurate, you can often
bend a piece around some corner or common object, as a barrel,
log, etc., and tie it in place until dry, or fasten it with cleats, but
for nice work you should make a form or mould. If you wish to
bend ribs, for instance, which should be accurate in shape, you
can cut a piece of board or plank to fit the concave side of the
desired curve. Fasten this piece upon any flat surface, as an old
plank, and bore holes for wooden
pins around the curve at such a distance
from the pattern piece or mould that the piece to be bent
can be firmly wedged against it, as shown in Fig. 470; or
you can attach blocks instead of pins—any arrangement by which
the bent piece can be wedged in place. A strap of hoop iron or
other metal or even a thin piece of wood can be placed outside
of the stick to be bent, to prevent the wood splitting or splintering
on the outside, as it is liable to do if bent much, unless of
good quality and straight grain, but there is no need of doing this
in many cases.
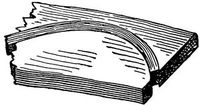
Fig. 471.
Another way is to have the mould or form in two parts, as the
two parts of a board or plank through which the curve has been
sawed (Fig. 471). The piece to be bent is put between the two
forms, which are then pressed together by clamps, wedges, or a
lever. This is a good way for short pieces which cannot
easily be bent, or which do not readily cling to the required
curve.
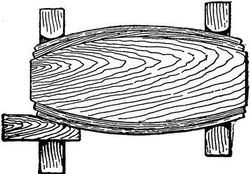
Fig. 472.
Another form of bending-mould is shown (an inverted view) in
Fig. 472. In this case the pieces to be bent are held in place by
easily made clamps.
A simple way to make a form for
bending strips is to cut the curve out
of a piece of plank, or boards nailed
together (Fig. 473). The end of the
strip is then caught against the cleat
and the piece bent around the curve.
If it tends to spring off the curve, you must contrive some way
to clamp, wedge, or even tie it in place. As a piece must be left
on the form until dry and set, if you have a number to bend, it
may be better to make a form wide enough to bend them all at
once. Take any boards, or build a curved addition on the end
of a box, and contrive a wider form
on the same principle (Fig. 474).
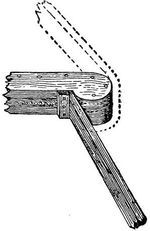
Fig. 473.
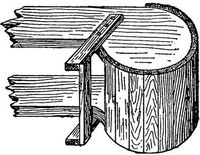
Fig. 474.
For ribs, and the like, the stock
should be got out so that the annual
layers will be at right angles to the
direction of the nails with which
the pieces are to be fastened, or
parallel with the curved sides of the
pieces.
Bevel.—This is similar to the square, but with a movable
blade which can be set at any angle. When permanently fixed
at an angle of 45°, it is called a mitre-square. The bevel is
useful, not merely to mark any desired angle, but to repeat some
angle already formed, to which you apply it, moving the blade
until it fits the angle, when the tool can be applied to another
piece and the angle repeated.
The directions
about holding the
head of the square
close to the edge apply
also to the use of the
bevel (see Square).
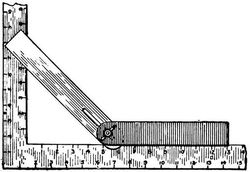
Fig. 475.
To obtain an angle
of 45° with the bevel,
place it against the inside
edge of the large
steel square (Fig. 475),
setting the blade at such an angle that it will intercept equal
distances on both arms of the square.
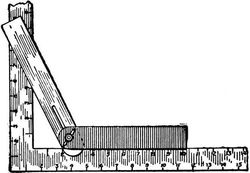
Fig. 476.
On this same principle, for other angles, observe the figures
intercepted by the blade, as shown in Fig. 476. Note that for
this angle the figures are 2 and 4, and you can get the angle again
at any time by setting
the bevel at those
figures. You can also
set the bevel by laying
off the required angle
with compasses on a
straight-edged board,
to which the bevel can
be applied. The
angle should be so laid
out on the board that
it will not be necessary
to try to set the point of the compasses exactly at the edge,
which is of course impossible. See Bevelling.
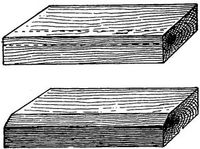
Fig. 477.
Bevelling.—To bevel the edge of a piece with the chisel,
draw-knife, spoke-shave, plane, or even knife, first mark parallel
lines to work to with a pencil-gauge (see Gauge) rather than a
spur-gauge, so as not to leave a scratch to disfigure the work after
the bevel or chamfer is cut (Figs. 477 and 485). Then pare the
edge down gradually to these lines, or prepare the way by first
scoring the wood with cuts (Fig. 615), being sure to trim off in
the direction of the grain; but in bevelling both end and side,
as in Fig. 478, first cut the end, because of possible chipping at
the corner, and in cutting the end you can work from each corner
towards the centre. In paring a bevel across the grain, push the
chisel as shown in Fig. 479, as it is the easiest and cleanest way
to cut, and prevents splintering.
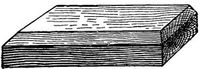
Fig. 478.
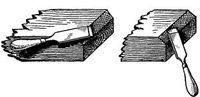
RIGHT.WRONG.
Fig. 479.
A simple bevel (Figs. 477 and 478) is usually best made with
the plane, whenever there is room to use it. Plane bevels in end
wood from both edges and you can often slant the plane to good
advantage like the chisel in Fig. 479. See also Chamfering.
Bit-Brace or Bit-Stock.—This tool requires no description.
The ratchet brace is useful for boring in awkward places where it
is difficult to use a common bit-stock. There is also a contrivance
for extending the bit-brace to bore in places which cannot
be reached by the common brace alone, but this you will
seldom require. An angular bit-stock, with a "universal angle"
adjustment, is useful. By this the bit can be pointed in different
directions, while the bit-stock is turned continuously in the ordinary
way, thus enabling a hole to be conveniently bored in an
out-of-the-way corner. See Boring.
Bits.—The auger-bit (the sizes of which are arranged by sixteenths
of an inch) so commonly used with the bit-brace, consists,
at the cutting end, of a spur, two scoring-nibs,
and two cutting-lips. You will see from Fig. 480 that
the spur a, acting like a gimlet point or a screw (which
it is), starts the bit by drawing it into the wood so that
the scoring-nibs b make a circular cut around the circumference.
As this cut deepens, the cutting-lips
c slice away the wood to be removed
in the form of shavings, which are brought
to the surface as the boring proceeds.
This bit can be sharpened with a file, the
scoring-nibs being sharpened from the inside,
lest they be made to score a circle too small
for the rest of the bit, while the cutting-lips
are filed from the under side.
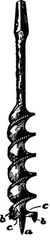
Fig. 480.
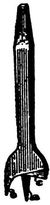
Fig. 481.
The centre-bit is a useful tool, particularly
for very thin stock. The spear-like point a
(Fig. 481), acting as a centre, the point b
cuts a deep ring, and the edge c, which is bent so as to form a flat
chisel, scoops out the pieces of wood, and so a round and smooth
hole is made. This bit does not cut very well with the grain.
It can be sharpened with a small oil-stone. It is well to bore a
trial hole with this bit in a piece of waste wood when exactness
is required, because the spur is not exactly in the centre, so
that the hole cut is a trifle wider than the diameter of the bit.
The expansion-bit has an adjustable contrivance that enables it to
bore holes of various sizes, but such tools are hardly necessary for
beginners, though very convenient and often used by carpenters.
The gimlet-bit is a common form, but is easily dulled and bent
and is likely to split delicate work. The quill-bit is excellent,
except for end grain. Shell-bit, gouge-bit, pod-bit, spoon-bit,
duck's-bill-bit, etc., are names applied to simple tools good for
boring small holes. They are easily sharpened with a stone,
work quickly and leave a smooth hole, but do not cut so well in
end grain. They are not as much in use as formerly, the twist-drill
taking their place for many purposes.
Reamers, or tapering bits (half-round, square, octagonal, conical),
are useful to enlarge holes and occasionally to make them
conical. Reamers for metal are also useful.
For other forms of boring implements, see Awls and Twist-drill.
See also Boring and Countersink.
Block-Plane.—See Plane.
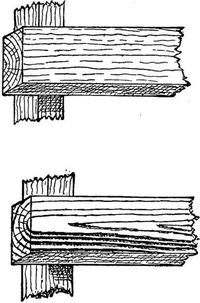
Fig. 482.
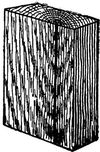
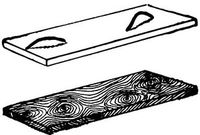
Boards or Planks, Laying Exposed.—In laying boards or
planks to be exposed to the weather,
place them (unless they are from the
middle of the tree) so as to have the
outer side exposed—that is, the side
farthest from the heart should be put
outside or uppermost. If put the
other way the action of the atmosphere,
water, etc., will tend to separate
and loosen the layers and fibres
(Fig. 482).
Boring.—In boring with the bit-brace,
after the bit has gone a short
distance into the wood, stop and,
keeping the brace in position, test
carefully from in front and from one
side to see whether the bit is at right angles to the surface. Repeat
this test and alter the position of the brace as many times
as may be necessary until you are sure that the bit is going through
at the right angle. A common way to do this is to stand squarely
in front of the work and judge by the eye whether the bit is at right
angles with the work, and then to stand at either side at right
angles to the first position and judge of the angle again. The
direction of the bit can be tested more accurately by applying the
square. Few people can bore accurately without some such
test.
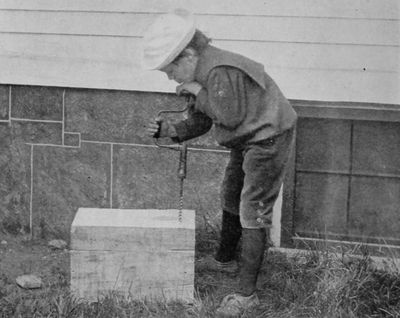
Fig. 483.
Some workmen rest the chin on the left hand on top of the
handle of the brace, to steady it (Fig. 483), and to increase the
pressure, and sometimes the shoulder is applied.
To remove a bit from the wood, give the brace a turn or two
backward, which will loosen the spur, and then either pull the bit
straight out, if it can be done easily without turning the brace,
or, as you pull it out, keep turning the brace as if boring, thus
bringing out the chips, which, if you remove the bit by turning
the brace backward, will be left in the hole.
In boring through a board or timber, watch to see when the
spur of the bit begins to come through on the other side; when it
does, turn the piece over and bore in from that side, or clamp
a piece of waste wood on the other side and bore right through
into it. Either way will prevent splintering or a ragged or
"burred" edge, where the bit leaves the wood.
In boring a hole of any depth with the grain, i.e., in the end
of a piece of wood, withdraw the bit, after it has entered the
wood a short distance, to clear the chips from the hole, reinsert,
bore, and withdraw again, and continue in this way until you
reach the required depth. This will save injuring the bit, and
will make the boring easier.
In boring with small bits, particularly when there is danger of
splitting, as with the gimlet-bit, draw out the bit and chips once
in a while.
When the position of a hole must be exact on both sides of the
wood it is well to mark the position accurately on each side and
bore from each side until the holes meet.
Frequently holes must not be bored through a piece, but must
stop at a certain depth. Suppose you have to make a dozen holes
2" deep. Take a wooden tube if you
have one, or bore a hole through a
block of wood of such length that
when pressed against the jaws of the
brace two inches of the end of the
bit will project beyond the tube or
block (Fig. 484). Then bore until
the end of the tube touches the surface
of the wood, when the hole will,
of course, be 2" deep. Metal attachments
can be bought for this purpose. See Awl, Bits, Twist-drill.
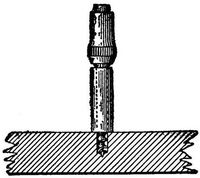
Fig. 484.
To cut a hole larger than any bit you have, bore a series of
smaller holes just within the circumference of the desired circle,
and trim to the line with the gouge or finish with keyhole or
compass-saw.
Bow-Saw.—See Saw.
Brad-awl.—See Awl.
Bruises, To Take Out.—Small bruises in wood can be
taken out by wetting the place with warm water, or even with
cold water, and rubbing down the grain with sandpaper if necessary.
If that is not sufficient, a hot iron, as a flat-iron, held near
the bruise, the latter being covered with wet blotting paper or
several thicknesses of brown paper, will often remove a quite large
dent. The operation can be repeated until it has no further effect.
Brushes.—It is well to have a brush of some sort for cleaning
off work, the bench, etc. A sash brush is good.
For most of your painting, shell acing, etc., you will usually
get along better with small flat brushes than with large round
ones, except for very coarse work. Those with flattened handles
are convenient. From one to two inches in diameter will
usually be large enough, unless for such work as painting the
outside of a house, when something larger will save time. For
painting small or narrow surfaces, the brushes used for "drawing"
sashes are good, and for drawing lines "pencil" brushes
will be required. A good brush for glue can be made by soaking
one end of a piece of rattan in hot water and then pounding
the softened part, when the fibres will separate, making a stiff
brush.
Bull-Nosed Plane—See Plane.
Calipers.—Calipers, which are "inside" or "outside," according
to whether they are to find the diameter of a hole or the
outside diameter of an object, are very important in some work,
as turning, but, though very useful at times, are not nearly as
important for the work of the beginner as compasses.
Carving-Chisel.—See Carving Tools.
Carving Tools.—A few carving tools are often very useful
for general wood-work. It is convenient to have these carving
tools fitted in handles of a different pattern from your other tools.
An octagonal shape is good. A carving-chisel is very useful
in working on odd-shaped pieces, because the cutting edge is
bevelled on both sides. A carver's skew chisel will be, perhaps,
more generally useful for your work than one ground squarely
across. A parting-tool, sometimes called a "V tool," is occasionally
convenient, though hardly a necessity for most plain work.
A small veining-tool (like a very small gouge) is often useful.
Centre-Bit.—See Bits.
Chalk-Line.—See Marking.
Chamfering.—A chamfer is the surface formed by cutting
away the angle made by two faces of a piece of wood.
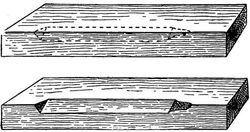
Fig. 485.
In cutting the ends of a stop-chamfer (Fig. 485), take care not
to cut quite down to the line at first, as you will be very apt to
cut a little too deep and leave a tool mark which cannot be
removed. In the case of long stop-chamfers, use the plane
whenever you can, so
far as it can be used
without hitting the
wood at the ends. The
draw-knife can often
be used to remove the
wood, being followed
by the plane. The
plane can be used
slantingly, so as to cut
nearer the ends, and a bull-nosed plane will cut nearer still, but
the extreme ends will have to be trimmed to shape with the chisel
or other tool. See also Bevelling and Paring.
Chisel.—The firmer-chisel is meant for light hand-work, for
paring off wood and trimming to shape, and can be used for light
mortising, though the mortise-chisel is intended for that purpose.
It is often an advantage to have the long edges of such a chisel
bevelled on the same side as the cutting basil, as it can be used
more conveniently in some places. Taking off the corner of the
basil when grinding, often answers the purpose.
The framing-chisel is stouter than the firmer, has a stronger
handle to stand heavy blows
of the mallet, and is meant,
as the name indicates, for
framing, mortising, and other
heavy work.[41] See Mortising.
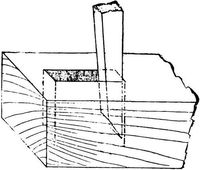
Fig. 486.

Fig. 487.
The straight-bent chisel is
shaped as shown in Fig. 487,
and is very useful for cleaning
out corners, grooves, and other places where the common firmer-chisel
cannot be used to advantage.
A skew-chisel is simply ground slanting, instead of squarely
across, and is useful for corners and odd work. See Carving
Tools.
There are other forms, seldom needed by the amateur, as the
corner-chisel, which is used for cutting or paring angles and
corners.
Those chisels and gouges which have the handles fitted into
sockets at the upper end of the iron, instead of the iron being
stuck into the handle, and with ferrules at the upper end where
they are struck by the mallet are, of course, the strongest for
heavy work, although the lighter handles are just as good for
light work.
Do not let your left hand get in front of the edge of the chisel
while working, for the tool may slip and give you a bad cut, and
in most cases the left hand should be kept on the lower part of
the chisel to help control it, which is not easily done with one
hand. In some cases, as in paring the edge of a piece directly
downward towards the bench, it may be proper to hold the work
with the left hand and use the chisel with the right; but as a
rule, particularly for beginners, first see that the work is securely
fastened or held from slipping by vise, clamp, or other expedient,
and then keep the left hand on the chisel, which will steady and
guide the tool, and, incidentally, prevent the hand from being
cut. See Paring and Sharpening.
Circular-plane.—See Plane.
Clamps.—Long clamps (cabinet-clamps), shown in the accompanying
illustrations, are extremely useful in making glued
joints and in various clamping operations. Many, of different
lengths, are to be found in wood-working shops. Although much
work can be accomplished without them, if you can afford a pair
or more of medium
length, or longer, they
will be very useful.
Wooden clamps will
answer every purpose,
although steel ones are
better, but more expensive.
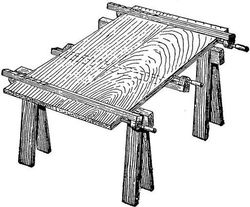
Fig. 488.
To clamp two or
more flat pieces together,
as in making a
"glue-joint," or in
clamping framework,
as a door or picture-frame,
lay the work across the horses, which should be so placed
that their tops will be as nearly level, or in the same plane, as
possible, and apply the clamps as shown in Fig. 488, always
putting pieces of waste wood between the edges of the work and
the clamps. Place the clamps so that either the flat side of the bar
or the corner, as shown, will lie against the surface of the work,
thus keeping it from bending towards the bar when the screw is
tightened. The number of clamps to be used must depend on
the size of the work, but there is not usually much danger of an
amateur's work being clamped too securely.[42]
If you have to glue a flexible strip, put a stiff piece outside between
it and the clamp to distribute the pressure.
You will often find by sighting across the surface of the work
as you tighten the clamps, particularly in the case of door-frames,
picture-frames, and the like, that the surface is winding. When
this happens, move one or more corners of the work up or down,
as the case may be, in the clamps, and thus take out the winding.
A little experimenting will show how to do this. In the case of
framed work, such as doors or picture-frames, test the angles with
the square as soon as the joints are brought to a bearing. If the
angles are not right, as will often be the case, move one end of
either one or both of the clamps to the right or left, as the case
may be, and you can easily change the angle until the square
shows it to be right, when the screws can be tightened and the
joints should close accurately. In clamping nearly all kinds of
"case" work, such as bookcases, cabinets, boxes, and the like,
these directions about moving the clamps until the angles are
correct and the work free from winding are applicable.
In such cases as that shown in Fig. 488, waste no time in trying
to get the surfaces exactly flush with each other at the joint before
partially tightening the clamps, lest the glue become set. Any
slight alteration can best then be made by tapping with the hammer
near the joint, whenever either piece needs to be raised or
lowered, putting a block under the hammer if the dent will not
be removed by planing (see Gluing). The clamps can then be
screwed tighter.
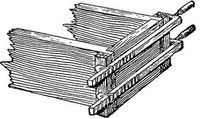
Fig. 489.
In such cases as gluing the joints of a box, put stout blocks or
cleats over the joints before tightening the clamps (Fig. 489), to
distribute the pressure. This applies to all cases of clamping
where the pieces to be glued are not heavy enough to resist the
change of shape from the pressure of the clamps, and pieces of
waste wood are almost always required in any case to prevent
bruising of the work.
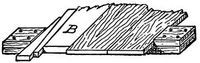
Fig. 490.
You can contrive home-made clamps out of any strong pieces
of wood of suitable length, by nailing or screwing a block at each
end (Fig. 490), when the work can be tightly wedged to a close
bearing by driving home the double wedge shown, using, if
necessary, one or more blocks, B, when you use the clamp for
smaller work than that for which it was made. By keeping such
clamps for future use, you will soon have enough to answer very
well until you can afford to buy the regular cabinet-clamps.
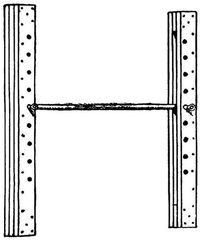
On the same principle, a simple clamp, derived from the Orient,
can be made by boring a series of holes in two stout strips—just
as the holes are bored in the sides of a ladder, but nearer together.
The work to be glued is laid on one of these strips in the
same way as shown in Fig. 490. The other strip is then placed
directly above and stout pins put through corresponding holes
outside of the work, which can then be wedged against the pins
in the way just shown.
Another way, which can be applied to many cases, is to put a
stout cord, doubled, around the work, and inserting a stick between
the two parts of the string, turn it
around until, the doubled cord thus becoming
shortened, the
parts of the work are
drawn together. This can
only be done where there
is room to swing the stick
around, as, for example,
to tighten the rounds of a
chair by drawing the legs
together (Fig. 491).
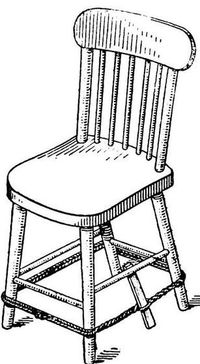
Fig. 491.
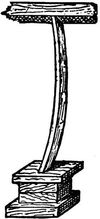
Fig. 492.
You can often apply pressure,
when no more convenient
means are at hand,
by making use of the elasticity
of a board or pole. Suppose, for example, you need to
press two blocks tightly together, as shown in Fig. 492. Place
them on the bench or floor and spring in a board or pole between
the top of the upper block and a beam of the floor above, as
shown. Of course this board must be a little longer than merely
to reach between the two points, as it must be sprung into place
bent, when in the effort to straighten itself out again it will cause
pressure on the blocks. Pieces should be placed outside the
blocks when scarring of the surface is to be avoided. The pressure
can be applied in any direction, always supposing that you
have something firm to press against.
Pressure can often be obtained by a lever, and many applications
of the wedge will suggest themselves in your work. Even
if you have a shopful of clamps and hand-screws and vises, these
applications of the simple mechanical powers often come into
play (see Fig. 390). See also page 71.
Adjustable wood-carver's clamps can be bought for holding
pieces in position on the bench, and are useful, but by no means
necessary, as common clamps, or various devices, can be used.
The small iron clamps which can be used in place of hand-screws
are very useful.
For other suggestions about clamping, see Hand-screws.
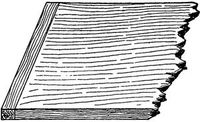
Fig. 493.

Fig. 494.
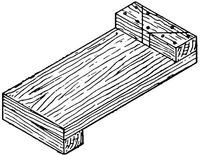
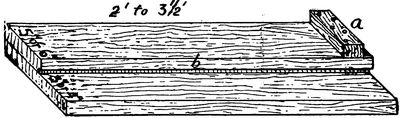
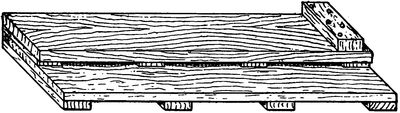
Cleating.—A simple way to join two or more pieces of board
or plank to make a wider piece is
to cleat them. If short, they can
be cleated across the ends. This
can also be done to keep a single
board from warping (Fig. 493).
Such a cleat should not be glued
unless the width is very slight, on
account of the expansion and contraction
across the board being so
much greater than that lengthways
of the cleat (see pages 50-53).
Screws (which are best), nails, or
dowels should be used, as they will
give some play to the pieces. A
groove can also be made in the cleat, into which a tongue on the
end of the board is fitted. Grooves can be cut in both cleat and
board and a tongue or spline inserted (Fig. 494). These are
operations best done by machinery. This end-cleating does
very well on small work and where the tendency to warp is not
too great. For heavier work, as doors, cleats on the side are
better, but they are sometimes in the way, and not always desirable
on the ground of looks. This is a strong way. Side cleats
should be fastened with screws (see Screws) or clinched nails (see
Nailing), but not with glue, for the same reason as in the case of
end cleats. If the cleat is wide enough, do not put the screws in
a straight line, but "alternate" them (Fig. 368). See Jointing
and Doors and Panels.
Clinching-Nails.—See Nailing.
Compasses.—Wing compasses, or those with arc and set-screw,
are easy to adjust accurately and will not slip, but, whatever
kind you get, be sure that the points stay where you put
them and do not spring away or wobble around.
The chief uses of this tool are to strike circles, to lay off angles
and arcs, to take off measurements from a rule or some object,
to lay off measurements, and to "scribe" in places where a gauge
can not be used (see Scribing). In using compasses, particularly
those which are not set by a screw, hold them and swing them
around by the top at the hinged joint, rather than grasp them
near the points, which may cause them to move or slip.
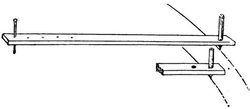
Fig. 495.
Circles or circular arcs can be struck roughly, as you doubtless
know, with a string
and a nail at the centre,
the string being loose
around the nail. This
method is not very accurate,
for obvious
reasons, and is only suitable
for rough work. A
more accurate way is to drive two nails through a strip of wood at a
distance apart just equal to the radius of the required circle, one
nail being driven into the wood to act as the centre, the other
doing the marking (Fig. 495). Instead of the marking nail a
hole can be bored for a pencil. You can use a stick of this sort
repeatedly by changing the position of the centre nail, or of the
marking point. The same can be done with a brad or stout pin
and a pencil, using stiff paper, card-board, or zinc instead of a
stick. By such expedients you can do a great deal of work without
buying compasses.
Compass-Saw.—See Saw.
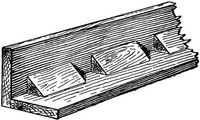
Fig. 496.
Corner-Blocks.—These are merely small pieces of pine, or
other wood which holds glue well, with two adjacent surfaces at
right angles. Hot glue is applied
to them and they are rubbed into
interior angles of cabinet-work, to
strengthen and stiffen the work
(Fig. 496), and are very useful for
this purpose. They are got out in
short pieces, lengthways of the
grain, and can be freely used in
places where they will not show, as
inside of the base-board in Fig. 304. The shape can be varied
according to the conditions of the joint. Apply hot glue plentifully,
place the block where it is to go, and rub it back and forth
several times, when it can be left for the glue to dry.
Corner-Chisel.—See Chisel.

Fig. 497.
Countersink.—This tool, to be used with the bit-brace, for
enlarging the outer part of a hole, thus forming
a cavity or depression for receiving the head of a
screw (Fig. 497), is quite important, as being
much more convenient than to use gouge, chisel,
or knife for the purpose. See page 205.
The rose form of countersink is common and good. The Clark
double-cut countersink (for wood only) cuts smoothly and is
easily sharpened. A countersink for metal is useful.
Cracks, To Stop.—See Holes, To Stop.
Cross-Cut Saw.—See Saw.
Cutting-Pliers.—A pair of these will often be useful in connection
with wood-working operations.
Dents, To Take Out.—See Bruises.
Dividers.—See Compasses.
Doors and Panels.—It is important to have some understanding
of the theory of framing panels, doors, and the like.
The simplest form of door is, of course, a piece of board. This
will do for some cases, but it is liable to warp or wind,—if a
large door, sometimes to such a degree as to be useless. It is
also, if large, liable to swell or shrink so as to be either too loose
or too tight, and to break. Cleating can be resorted to (see
Cleating), but will not prevent the swelling and shrinking, nor is
a cleated door especially ornamental. Besides, there are limits
to the width of ordinary boards. Several boards can, however,
be joined, edge to edge, and cleated on one side, in which way a
large door can be made (Fig. 405), and, if the boards are not
fitted too closely together, there may be no trouble caused by the
swelling and shrinking. Another way to make a very strong door
is to make it of two thicknesses, or layers, one running up and
down and the other crossways, or diagonally, the two thicknesses
being firmly nailed or screwed together.
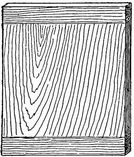
Fig. 498.
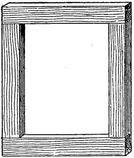
Fig. 499.
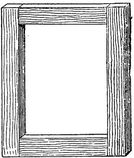
Fig. 500.
All such arrangements are, however, suited for the rougher
class of work. When we come to nicer work we must have something
more scientific, that will swell and shrink as little as possible
and that will look better. So, instead of using a broad flat surface
with the boards all running one way, we try to overcome the faults
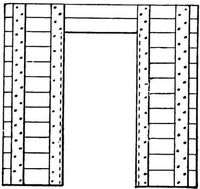
of the flat door by framing the pieces together. Suppose, for a
theoretical case, that you make a door like Fig. 498. It will not
warp or curl because of the cleats at the top and bottom, but it
will swell and shrink in width because there is such a wide surface
of board to be affected by the atmosphere, etc., and it may
become winding. To lessen these objections the middle part of
the board can be removed—all but a strip at each edge (Fig.
499). It will not now swell and shrink much in width because
most of the board has been removed. This frame will hold its
shape quite well, but it is only a frame, not a door. How can
you fill up this open frame to make a door, so as to avoid the
trouble about warping, winding, swelling, and shrinking? First,
however, as this frame is considerably taller than it is wide, you
will readily see that it will be a better arrangement to make it as
shown in Fig. 500, with the cross-pieces between the uprights,
according to the usual custom in such cases. Suppose, now, that
you fill up the open space with a thin board, fastened on one side
(Fig. 501), instead of the thick wood which occupied the space
at first. The thin board will tend to warp and twist, but, being
thin, it will not exert force enough to change the shape of the
thick frame. That will prevent the warping and winding from
doing much harm. If the screw-holes in this thin piece are
reasonably loose, they will allow play enough for the board to
expand and contract without putting any strain on the frame.
This arrangement does not, however, look very nice on the side
to which the board is screwed, though it can be used in some
situations. Suppose, finally, that you cut a groove around the
inside edge of the frame of the door (Fig. 502) into which this
thin board can be fitted loosely, making the groove deep enough
to give the board room to shrink and swell in width without dropping
out or pushing against the frame. You now have a complete
door (Fig. 503), and the warping, winding, swelling, and
shrinking will do as little harm as possible. That is all there is
to the theory of framing doors, panels, and the like.
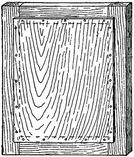
Fig. 501.
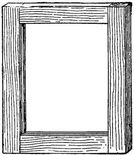
Fig. 502.
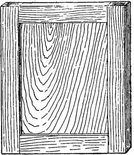
Fig. 503.
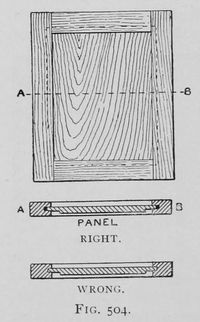
Fig. 504.
The panel should fit closely into the groove, but at the same
time be loose enough to slide in and out
as it expands and contracts, and should
not be wide enough to reach to the bottom
of the grooves, but room be left for
all possible change in width, as shown
in Fig. 504, which shows sections on the
line AB. All this is important and has
many applications to other things than
doors. It is not very uncommon for
amateurs, ignorant of these simple principles,
to make a door-frame properly,
but in fitting the panel to make it the
full width of the space from the bottom
of one groove to the bottom of the opposite,
and also to make it such a snug
fit in the groove as to be stuck tight, all
with the idea of making such a good fit as to prevent any of the
gaping cracks so often seen, but really taking the very course to
ruin the work. So important is it that the panel should have
play, that it is quite common in nice work to rub wax or tallow
around the edge of the panel, lest some of the glue from the
joints of the frame should cause it to stick when the frame is
glued up. If the panel is badly fitted or stuck, it may buckle
or split, or the frame be split or forced apart at the joints.
There are many more elaborate ways of arranging the details
of door-framing and panelling (too numerous to be described
here, as they will not often be required by the beginner); but if
you understand the general principles upon which this simple
door is put together, you will understand the principles upon
which all panelling is based; and, though you may never do
much of it, it is quite important to have a clear understanding
of the theory, which is really quite simple—for it has many
applications which may save you much trouble, labour, and
expense.
The best way to fasten the frame of a door together is by mortise
and tenon (see Mortising). This method is almost invariably
adopted for house doors. Dowelling is often used for smaller
doors, but is inferior to the mortise and tenon.
A common way nowadays to make light doors, and such as are
not to be subjected to much strain, is to run the grooves in the
stiles through to the ends and cut tongues or short tenons on the
ends of the rails to fit these grooves, as shown in Figs. 508 and
509. The whole door, panel and all, can thus be quickly got out
and fitted accurately with a circular saw at any wood-working mill,
without any hand-work being required, except the smoothing of
the pieces and the putting together. In this way you can have
a door made for a small sum, smoothing and putting it together
yourself. Such a door is not fitted, however, to stand great
strain. A house door made in that way would last but a short
time. Any heavy door, or one to have much strain, or liable to
be slammed, should be framed with mortise and tenon. You
can have grooving for a door-frame done at the mill very cheaply
and do the mortising yourself, or you can have the mortising done
by machine at slight expense. Sometimes the grooving and mortising
are combined,—an excellent way (Fig. 592).
In using any of these methods mark distinctly one side of each
piece for the "face" and lay out all the work from that side
only. If the job is to be taken to a mill, see that the work is all
gauged from the face side.
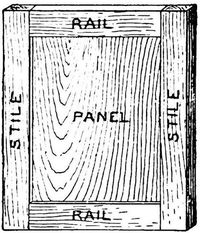
Fig. 505.
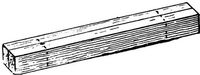
Fig. 506.
In laying out such work never cut off
the stiles (Fig. 505) to length at first.
Leave them too long (Fig. 507). The projecting
ends will be useful when you knock
the frame apart for gluing, after first putting
it together to see if everything fits.
Besides, the
extra length
makes the
ends stronger
for the mortising
and less likely to split out. The rails in door-framing and
panelling are usually wider than the stiles.
In laying out a door or panelled frame, place the stiles together,
with the inside edges uppermost, and square lines across the
edges to mark the positions for the rails (Fig. 506). Carry these
lines across the faces of the stiles, and mark
the rails and stiles with some symbols to indicate
the way they are to be fitted together
(Fig. 507).
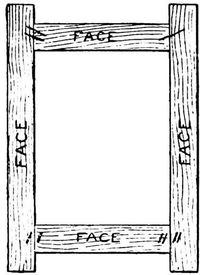
Fig. 507.
The whole should be put together once
to see that everything is right before beginning
to glue. Before putting together
permanently, the panel and the inside edges
of the frame (the edges which come next
the panel) must first be planed and
smoothed, as this cannot well be done afterwards.
Then fit the panel in the grooves of the rails (Fig. 508), glue
the tenons of one end of the rails and the grooves or mortises of
the corresponding stile (see Gluing), taking care not to put any
glue where it may cause the panel to stick, and fit these parts
into place (Fig. 509). Drive the rails home.
Then glue and fit the other side of the frame
in the same way (Fig. 510)—all being done as
quickly as possible.
Finally
clamp the frame
securely (see
Clamps). The
tongued and
grooved joint
represented in
the accompanying illustrations is not as good as a mortise and
tenon, as already stated, but is shown as a simple way for making
a light door. Leave the work to dry, and when dry remove the
clamps. Saw off the ends of the stiles, and dress off the surface
of the frame with the plane (see Plane), after which you can
smooth with scraper (see Scraper) and sandpaper (see Sandpaper),
and the door or panel will be done. When there is objection
to the end of a tenon showing on the outside edge of the
stile, and a blind mortise is not desired
(see Mortising), the end of the
tenon can be cut a little short and
the mortise-hole on the
edge plugged with a piece
of wood, with the grain
running the same way as
that of the stile. Fit the
piece with a very trifling
bevel on the edges, glue, drive tightly into place, and when dry
smooth off (Fig. 511).
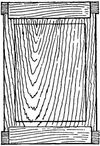
Fig. 508.
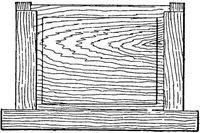
Fig. 509.
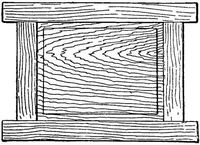
Fig. 510.

Fig. 511.
It is hardly worth while to work out the grooving or grooved
and tongued joints by hand in these days when it can be so
cheaply done by machinery. If obliged to do it by hand, you
should have the proper plane for the purpose, as it will be very
difficult and slow work otherwise.
A panel is sometimes made flush with either side of the frame,
by having a deep rabbet on that side, as in the case of a desk lid,
for instance, but this is a form which can well be avoided by the
beginner.
Dovetailing.—This is an operation requiring considerable
skill to do well and, with the exception of an occasional single
dovetail, is not frequently required in the work of the beginner.
It is, however, a valuable, workmanlike accomplishment and a
thoroughly scientific method, of which the amateur should have
some understanding, even if he should never use it.
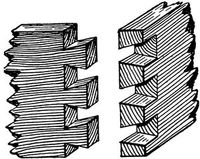
Fig. 512.
The common form, such as is used in joining the sides of a box
(Fig. 512), can be done as follows: Mark the lines ab (Fig. 513)
completely around each piece, at a distance from the end equal to
the thickness of the stock. Lay off the lines cd on the end of the
piece A. Lay off the oblique lines ec on both sides of the piece.
With the back-saw cut by these oblique lines (ec) to the lines ab.
Fasten the piece in the vise, end upward, for the sawing. With
the chisel, cut out the parts to be removed (marked m), as in cutting
a mortise (see Mortising), undercutting very slightly at the
end (Fig. 302). When this cutting has been cleanly done, lay
the piece A on the end of the piece B in the way it is finally to
go, so that the pins just cut will rest exactly in position across
the end of the piece B. Mark around the pins, forming the
oblique lines fg, from the ends of
which square the lines gh on both
sides of the piece. Remove the
wood as before, taking care not to
cut on the wrong sides of the lines
which mark the pins, or the dovetailing
may come together too loosely.
When exactly fitted, apply glue, fit
together, and when dry smooth off
with plane, scraper, and sandpaper,
as may be required.
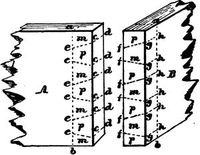
Fig. 513.
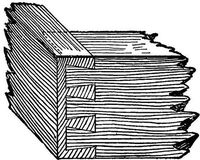
Fig. 514.
Lap or drawer dovetailing (Fig. 514) is similar to the preceding
form, but the ends of the pins or dovetails on the piece forming
the side of the drawer are shortened, and the recesses in the
front piece which are to receive them are not cut through. First
the side piece A (Fig. 515) is marked and cut on the principle
just shown, the pins
being shorter; then
the piece B is marked
and cut to fit.
Practised workmen
in dovetailing usually
(unless symmetry of
the pins is required)
determine the bevels
for the pins of the first
piece by eye, but the
beginner would best
not attempt to lay off angles or saw by eye.
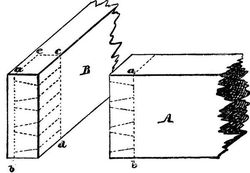
Fig. 515.
Mitre dovetailing (blind or secret dovetailing) is used in cases
where it is desired to conceal the dovetails, the result looking like
an ordinary mitred joint, but this is difficult work for the beginner.
Dovetail Saw.—See Saw (Back-Saw).
Dowelling.—Dowels are merely round sticks of different
diameters and usually of hard wood. They can be bought ready
made and can be used instead of nails or screws, or instead of
mortising, dovetailing, etc. They can be used simply as pins or
in many cases can be split and wedged, though the holes must be
tapered with a gouge if wedges of much
thickness are to be used (Fig. 516).
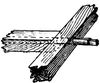
Fig. 516.
A common use of dowels is to fasten the
frames of tables, chairs, bedsteads, and various
domestic articles.
The use of dowels for such purposes is not
to be recommended, however, although very
common in cheap work and in much work
which is not cheap in price. The mortise and tenon is
usually much to be preferred. Dowelling, to be really good, has
to be skilfully done, while it is a very common way to stick the
work together in any manner that will look right on the outside.
A dowelled joint is not, as a rule, as scientific a form of construction
as a well-planned mortise and tenon,—a statement
which you can easily prove for yourself by comparing some
article of your grandmother's or great-grandmother's time, and
which is still strong, with some modern dowelled chair, which is
in so many cases all to pieces and thrown on the woodpile after
a short term of service. The gaping joints and dropping apart
of modern dowelled work can be seen on every hand. There
are some cases, however, where the use of dowels is scientific
and just what is required. For example, split dowels, wedged
dovetail fashion like wedged tenons, are often very useful (see
Mortising).
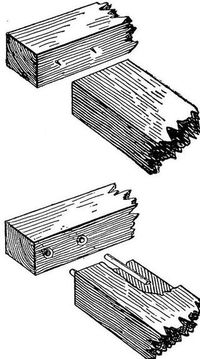
Fig. 517.
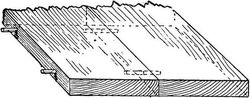
Fig. 518.
To find the centres for boring, so that the holes bored in the
two pieces shall be in line, you can cut off the heads of some
small wire brads so that they will be pointed at both ends. Stick
the brads into one piece where the centres of the holes should
be. Then press this piece against the other in the position it is
to take when the work is done and the brads will of course prick
holes in the second piece exactly corresponding to those in the
first piece (Fig. 517). Instead of brads,
small shot can be used in a similar manner.
It is well to take a round-pointed
awl, or some such tool, and carefully
prick a small hole with it at each of the
points marked. This is to start the
spur of the bit exactly at the point, as
the spur sometimes has a way of working
off to one side, so that the hole may
not be in exactly the right place. The
hardest part, however, is to bore the
holes exactly at right angles to the surface,
as a slight deviation in either or
both may make a bad angle where the
two holes meet. You can sometimes
lay the pieces flat on the bench and arrange
boards or blocks so as to guide the
bit straight. The dowels must be thoroughly dry. It is better
to have them a trifle too large, rather than too small, for you can
easily trim them down to a snug fit. Scratch them lengthways
with the toothed-plane, or with the edge of a file. Countersink
a little hollow around
the opening of each
hole (see Countersink),
to catch the surplus
glue which would
otherwise form a rim
around the dowel
(Fig. 517). Before
gluing you should fit the work together once, as it is very awkward
to make changes after the gluing is begun. When the parts fit accurately,
take the joint apart for gluing. Brush a little glue around
the inside of one of the holes, dip one end of a dowel in the glue
and drive into place. Wipe off the superfluous glue and repeat
the process with each of the dowels in that half of the joint.
Leave this to dry a day, or more if you can. Then clean any
hardened glue from the dowels and glue them, as before, into
the other piece, this time putting glue on the flat surfaces which
are to come together. The whole should be firmly clamped and
left to dry (see Gluing and Clamps). Dowels are sometimes used
in joining the edges of pieces, as in Fig. 518, and in many other
joints too numerous to be specified (see Joints and Jointing).
Dowelling looks very easy, but it is usually hard for the beginner
to bore the holes straight and to make the pieces fit
accurately.
Dowel-Plate.—A steel plate with various holes of such sizes
that pins made by driving blocks of wood through them will
drive snugly into the holes made by the corresponding bits. This
is useful in fitting dowels.
Drawers.—The making of well-fitting and smoothly running
drawers is an operation requiring much skill—more skill than
can be expected of the beginner, or, in fact, than is attained by
the average workman. The beginner should, however, have some
understanding of the work, even if he does not attain a high degree
of skill in its execution.
Bear in mind that it is much easier to make a drawer which is
narrow and long (from front to back) run smoothly than one
which is wide across the front, but shallow from front to back.
The more accurately the case which holds the drawers is made,
the easier it is to make smoothly running drawers. In good work
having more than one drawer, a horizontal frame is fitted beneath
each drawer for it to run on. These frames, as well as the whole
case, should be free from winding, and it is also important that
the stock for the drawers should be true. The front and sides
of a drawer should be got out to fit very snugly in their places.
The piece for the back is narrower than the front piece, to allow
for the bottom (Fig. 521), and is often cut off at the top also.
The front, sides, and back can be put together with any suitable
form of joint. Dovetailing is by far the best way, but it is difficult
for the beginner
(see Dovetailing). The
joints shown in Fig. 519
can very well be used for
ordinary work. These
can be quickly made by
machinery (see
Joints). See also Gluing
and Clamps.
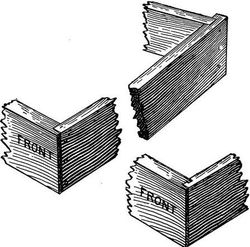
Fig. 519.
A groove for the
bottom must be cut on
the inside of the front
and of the sides (Fig.
520). The insides of
the pieces must be
smoothed before putting
the drawer together. When these parts are fitted, slip the bottom
(previously fitted)
into place. It should be got
out with the grain running
across the drawer, or parallel
with the front (Fig. 521),
and should be glued at the
front edge only, the rest being
free to swell and shrink,
which saves the drawer from
injury.
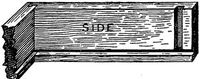
Fig. 520.
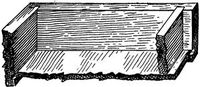
Fig. 521.
Be sure that the drawer is
rectangular (putting in the
bottom will assist in this) and
free from winding. When put together and dry, carefully
smooth the front and the sides. A little trimming with the
plane may be required to make the drawer run freely, but care
should be taken not to plane away too much. A drawer which
is a trifle larger at the back than at the front will run better than
if larger in front, as it will be less likely to bind or catch. Small
slides, between which the drawer runs, are fastened at each side
outside the drawer, at the bottom, and must be adjusted carefully.
Thin blocks or "stops" can be fastened on the cross-frame so
that the inside of the drawer front will strike against them when
the drawer has been pushed in as far as it should go, or the
drawer can be stopped at the back.
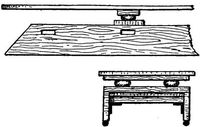
A simple way to attach a drawer under a shelf, bench, or table
is shown in Fig. 143. The contrivance shown in Figs. 141 and
142 can sometimes be used in place of small drawers.
Bayberry tallow is excellent to rub on the sides of drawers.
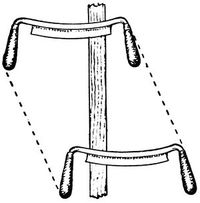
Fig. 522.
Draw-Knife or Draw-Shave.—The draw-knife or draw-shave
is very useful for slicing off large pieces and for trimming
wood into odd shapes. It can be obtained with folding handles,
adjustable at different angles, for use in places which can not be
reached by the blade of the old-fashioned draw-knife; but the
latter is good enough for all ordinary purposes. Choose a
medium-sized or large one. It is in principle simply a knife or
very wide and short-bladed chisel with a handle at each end, and
can be used with the flat side or the bevel against the wood as
the character of the work may require. Having but a short
bearing surface to guide its course, it is very prone to follow the
grain and cut deeper than you wish, so you must take special
pains to cut with the grain, stopping and cutting the other way,
whenever necessary. Attachments can be bought for guiding
the draw-knife in chamfering and such cases.
The draw-knife can often be best used with an oblique stroke—either
drawing it sideways across the work at the same time that
you pull it towards you (Fig. 522), or holding it obliquely across
the work and pulling it straight towards you (Fig. 523).
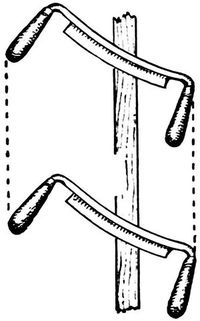
Fig. 523.
It is one of the most dangerous tools if carelessly left lying
around, and should be kept hung up out of reach of all small
children. See Paring, Bevelling, and Chamfering.
Draw-Shave.—See Draw-knife.
Drill.—Drills for metal only are often useful to the wood-worker,
but the one most important for the amateur is the twist-drill.
See Twist-drill.
Drill-Stock.—There are various patterns of drill-stocks, some
of them automatic, for holding drills of different sizes for small
holes. Hand drills with revolving handle, like an egg-beater,
can be used for small drills. See Bit-brace.
Duck's-bill-Bit.—See Bits.
Expansion-Bit.—See Bits.
File.—The file is a piece of hard steel with rows of ridges or
teeth cut obliquely on the surface. When cut in one direction
only it is called single-cut, but when there are two oblique rows
of teeth crossing each other it is called double-cut. These ridges
incline towards the end or point of the tool, so that the file, like
the saw, plane, and scraper, cuts when pushed forward. Files
for wood have wider teeth than those for metal, so do not use a
wood file on metal or a metal file for wood. The slab-sided
shape (Fig. 524) is perhaps the most useful, if you can have but
one file. A round "rat-tailed" file is also useful, and various
other shapes if you can have a variety. For metal, the triangular,
flat, the half-round, shown in Fig. 525, and the rat-tail are
best. Files are very important for smoothing or rounding edges
and curving surfaces.
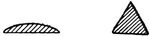
Fig. 524.

Fig. 525.
Before beginning to file, be sure that the wood is firmly secured
so that it will not slip and so that you can use the file with both
hands. Hold the tool with the right hand, thumb uppermost,
and steady the end with the left hand, thumb uppermost (Fig.
526), or with the fingers or palm.
To file squarely across, push
the tool steadily and evenly
straight forward, without rocking
up and down, and pressing only
on the forward stroke.
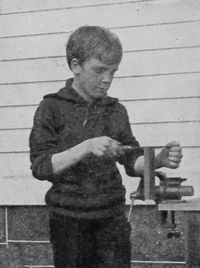
Fig. 526.
In filing rounded surfaces, a
rocking motion is often helpful
and the way and direction in
which to file in such cases must depend
upon the shape of the work
and the grain of the wood, as you
will quickly learn. See Rounding-sticks.
Press lightly the first time you
use a new file, until the fine edges
of the teeth have been worn a
little, as a violent filing on the first strokes may damage the cutting
edges of the teeth.
When a file becomes clogged with wood-dust or other substances,
soak it in hot water a little while and then brush with a
stiff brush. A file-card is useful. A piece of dog-fish skin, if
you can obtain it, cuts somewhat like a file or coarse sandpaper,
and is useful for curved surfaces where you wish to use the tools
after smoothing.
Filing.—See File.
Filing (of Saws).—See Sharpening.
Finishing.—To acquire a high degree of proficiency in finishing
indoor wood-work requires long training and practice, but the
simpler processes can be undertaken to good advantage by the
beginner.
There are a number of ways from which to choose. Simply
rubbing thoroughly with linseed oil gives a good, soft, permanent
finish, which some prefer to anything else, but you should be sure
that all superfluous oil is rubbed off. Do not hang a recently
oiled book-shelf or cabinet against the wall-paper of the room, for
fear of defacing it. An oil finish, unless rubbed a good deal, has
the disadvantage of getting soiled and collecting dust and dirt,
but it is easily sandpapered and renewed and is certainly in better
taste than a coarse, shiny, cheap varnish.
An old-fashioned way is simply to apply a mixture of turpentine
and beeswax, rubbing it as long as your strength and patience
will allow. Melt some beeswax in a can or saucepan and, when
melted and taken from the stove, pour in enough turpentine to
make it the consistency of paste. Then apply with a brush or
cloth and rub in and clean off the excess with a stiff brush or
cloth, scrubbing the work as you would a stove. This makes a
beautiful finish, soft and lustrous. It shows spots, however, and,
though it is so easily applied, it requires continual renewing and
rubbing to be kept in good condition.
To make a hard and durable coating on the surface of the
wood some kind of varnish is required. There is nothing better
than shellac for the purpose of the amateur. It is not very hard
to use, and there is certainly nothing which gives a finish of nicer
quality. The surface dries quickly and the coat hardens more
rapidly than most kinds of varnish. For some cases, as a boat,
it is well to shellac first and finish with good varnish.[43] Shellac is
cut (dissolved) in alcohol, and can be bought prepared, but it
is better to cut it yourself, to diminish the chance of adulteration
with cheaper substances. Orange shellac will do for most of your
work. Into an open-mouthed bottle put some of the shellac
(which comes in flakes and looks somewhat like glue) and pour
over it enough grain alcohol (95 per cent. grade) to somewhat
more than cover the shellac. Cork the bottle and leave in a
warm place until the shellac is cut. Shaking will hasten the
process. Wood alcohol can be used and is cheaper, but work
done with it is not so good. It is a deadly poison taken internally
and on account of the fumes it is best not to use it for a
long time in a close room. If the tawny tint of the orange
shellac is objectionable, white (bleached) shellac can be used,
but this it is well to buy already prepared. It is a little harder
to use than the coloured kind.
Use a flat bristle-brush and not a soft camel's-hair brush, unless
for the last coat. One from one inch to two inches wide will be
probably suitable for most of your work. For large surfaces,
however, a larger brush is better. After using, always clean the
brush thoroughly with alcohol.
Always shellac in a warm, dry place, free from dust—never
where it is cold and damp; but on the other hand do not leave
the work close to a hot stove or it may blister.
The shellac should be quite thin. It should flow very freely
from the brush. Of the two extremes, it is better to have it too
thin rather than too thick. Three or four thin coats give a much
better result than two coats of thick, gummy shellac. Never try
to thin it with anything but alcohol. Keep the bottle corked to
prevent evaporation of the alcohol and to keep out the dust.
Before beginning to shellac, see that the work is free from
dust. Pour a small quantity of the shellac into a small dish of
glass or earthenware, not of tin. Before applying to the wood,
wipe the surplus shellac from the brush on the edge of the dish,
so that it will not drip, and then lay on the coat as evenly and
smoothly as possible, working from the top or from one end or
side, and with the grain, so far as possible.[44] Do not apply the
brush at first exactly at the edge of the surface, lest the shellac
collect too thickly at the edge, but apply the brush first a little
way on the surface and then work from the edge. Work quickly
and lightly. Begin and end the strokes of the brush gradually—lighten
them at the end—so as to avoid a "lap" when the
strokes begin again. Do not work over the coat after it has begun
to set or try to patch up spots. Simply lay it on as well as
you can and let it go at that. If it is not right you will know
how to do better next time.
Give each coat plenty of time to harden before applying
another—twenty-four hours is none too long. Do not put on five
or six coats in a day as is sometimes done. The outer coat
hinders the drying of the shellac underneath, by keeping the air
from it,—just as with paints,—and the way to do durable work
is not to put on a fresh coat until the previous one is thoroughly
dry and hard. Shellac dries very quickly so that you can touch
it, but does not get really hard throughout for some time, so do
not be in haste to put on a second coat.[45]
If there are holes, cracks, or defects of any kind to be filled
up, this is the time to do it—after the first coat is hard. One
way to do this is to hold a hot iron close to a piece of shellac
directly over the hole, which will be filled with the melted shellac.
The surplus can be carefully pared off after it is hard. Another
way is to use wax coloured to match the wood. The wax can
easily be coloured by melting and adding a small quantity of
whatever dry colour—burnt umber, for instance—may be required.
Do not use putty in such cases.
When the first coat is hard, skim over the surface with very
fine sandpaper (00), to remove any roughnesses, and apply the
second coat. This is sometimes sufficient. If not, sandpaper
and shellac again, and a fourth time if necessary. When you
have a sufficient "body" of shellac on the wood, you can much
improve the quality of the surface by rubbing it down with powdered
pumice-stone and oil, which will remove the "shiny" effect
and leave a softer and finer surface. To do this, take a bit of
felt or haircloth, and wet it with thin oil (kerosene will do, or
petroleum, or linseed oil thinned with turpentine or benzine, but
the latter is dangerous to have around), take up a little of the
pumice, and carefully and evenly rub over the surface, with the
grain, renewing the oil and pumice as may be needed, or they
can be sprinkled on the work. But be careful to rub evenly and
not too long on any one spot, for it will be hard to repair the
damage if you should rub through to the wood. Wipe the whole
off thoroughly with soft cloth. This process will be sufficient for
most amateur work. For some work simply rubbing down with
the finest sandpaper wet with oil is enough. In using sandpaper
for rubbing down nice work, split it—that is, remove the outer
layer of paper, which will leave the sanded layer thin and pliable
and less likely to scratch or rub through the finish. A handful
of tightly squeezed curled hair can be used.
If varnish is to be used over the shellac as in case of a boat,
simply sandpaper the shellac and do not rub with pumice and oil.
With fine-grained wood, such as cherry, the process given
above is all that will be required, but with coarse, open-grained
wood, like oak, a good many coats will be needed to fill the pores
and give a smooth surface. Therefore a "filler" is often used
to fill the pores of the grain. This is cheap and can be bought
in the form of paste (either light or dark), which you can apply
according to the directions on the can. Rub it into the wood
thoroughly, let it stand until it begins to set, or stiffen, then rub it
off with a bit of burlap or any coarse material, across the grain (lest
you wipe it out of the pores). After it has become hard enough,
sandpaper, and clean off any that may remain on the surface.
Then shellac as described. The filler can have the shade of the
wood, or sometimes, as in oak, the figure of the grain can be
brought out finely by using a filler somewhat darker than the hue
of the wood. Be sure to clean off the filler thoroughly, using a
tool to clean out the angles and corners, or the finished surface
will have a cloudy or muddy appearance.
The general directions given for shell acing apply also to the
use of varnish, but varnishing is in some respects harder for the
amateur to do well. Consult the dealer about the kind of varnish
and the brush best suited to the particular piece of work you have
in hand. The final coat of varnish can be rubbed down with
pumice or tripoli and water. Rotten-stone used with oil (petroleum
is good) is excellent for giving a soft polish.
French polishing is often attempted by the amateur, but it
should be learned by taking a lesson from a practical polisher,
and not from a book. The general idea of the process is as
follows: A wad or pad of wool is made and on this is poured
thin shellac, adding whatever alcohol may be necessary. This
wet pad is then covered with a piece of clean linen, a drop of oil
put on the outside to prevent the shellac from sticking, and the
pad is then quickly passed over the surface with a circular motion,
or with longer strokes in the form of the figure 8, or in some
cases simply back and forth. After doing this for a while a very
thin coat will have been deposited. This is allowed to dry for a
short time, when the process is repeated, again and again, until a
sufficient body of the polished finish has been formed. The details
of the process vary with different finishers. It is quite easy
to polish a small flat surface or such an object as the arm of a
chair, but it is much harder for an amateur to successfully polish
a large flat surface, like a table-top, except after much practice.
A first coating of shellac applied with the brush and skimmed
over with sandpaper will save labour in the polishing process.
Before refinishing old work it should, if the surface is in bad
condition, be scraped down to the wood, using the scraper and
finishing with sandpaper. A chisel (used like the scraper) is
sometimes convenient to remove a thick body of old varnish. If
the surface does not need scraping, it should be cleaned, either
by washing with soapsuds or it can be scrubbed clean with the
finest sandpaper, split, using oil or water as the case may be, but
seeing that the work is wiped off perfectly dry before applying a
new coat. Pumice can be used, as already described, and a stiff
brush, like a nail-or tooth-brush, is excellent for cleaning out
corners and carved work.
For simply brightening and cleaning furniture, a mixture of
equal parts of linseed oil and turpentine with a minute quantity
of japan is excellent. It should be well rubbed and carefully
cleaned off. This will make scratches and bruises less conspicuous,
and will make the article look fresher for a time, but
it is only a cleaner and not a substitute for refinishing.
Firmer-Chisel.—See Chisel.
Fore-Plane.—See Plane.
Framing-Chisel.—See Chisel.
Gauge.—There are many kinds of gauges in the market, but
they all depend on the same principle, having a block, head,
stock, or fence, to slide along against the edge of the wood, and
a bar, beam, or stem, which slides through the block, can be set
to project from it at any required distance, and which has near
its end a spur or marking point (Fig. 533). The stem has the
divisions of a rule marked upon it, so that the spur can be readily
set at the required distance. In some gauges the spur or marking
point is sharpened to an edge parallel with the head, rather
than to a point, as it is more certain to make a clear, sharp line,
and is best when slightly convex on the side toward the head
(Fig. 527). This gives the spur a tendency to run the line away
from and not toward the edge where the
head is, thus helping to keep the head
close up to the edge. Sometimes a round
point is used, and occasionally a knife
point or blade for cutting thin stock into
strips; and sometimes a wheel with sharpened
edge. A form of gauge adapted for
gauging from curved as well as straight edges is also made. Do
not trust the accuracy of the scale marked on a common gauge,
for if the spur is at all out of place, as is sometimes the case,
you cannot rely upon the scale. Test by measuring from the
head to the spur with the rule.
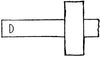
Fig. 527.
The mortise-gauge has two spurs, one of which is movable and
can be set at any required distance from the other, so that two
lines can be marked at once, as for a mortise. This is a time-saving
tool, and very convenient, but not a necessity for amateur work.
There are gauges with long beams or stems and with long
heads for gauging across wide spaces, but when you need anything
of the sort you can easily make it and use with it either
pencil, awl, or knife, as may best suit the case in hand.
If you wish to draw a line two inches from the edge of a board,
for example, you can mark off two or more points at the required
distance and with a rule and pencil draw the line through these
points. If you were to make the points so near together as to
touch, you would have the line without needing the ruler. This
is what the gauge does. It makes a continuous measurement and
a continuous mark, which is of course the line required.
The only gauge you need for rough work is a rule (or even a
stick) and a pencil. To draw a line, for example, two inches
from the edge of a board, take the rule in one hand, and lay the
end flat on the surface of the board so that it laps over two inches
from the edge (Fig. 528). Place the forefinger underneath,
against the edge, so that the end of the rule will remain two
inches from the edge, and simply slide rule and finger along the
edge, holding a pencil at the end of the rule with the other hand
to make the mark. The
finger must be kept evenly
pressed against the edge.
This is only suited for
rough work, or for getting
out stock approximately
to shape, and of course
cannot be depended upon
for accurate measurement.
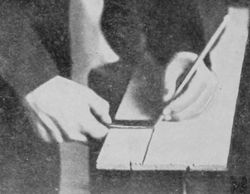
Fig. 528.
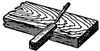
Fig. 529.
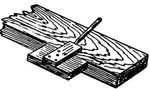
Fig. 530.
Something more accurate,
with which you cannot
get splinters in your
finger, can easily be
made, when needed, in this way. To run a line two inches from
an edge, for example, and parallel to it, simply take any short
stick and cut a piece out of it at one end so that the distance from
the shoulder to the end will be just two inches,
as shown in Fig. 529. Apply this to the edge
of the piece and slide it along on the same
principle as the rule and finger, being careful
to keep the shoulder pressed up to the
edge and the pencil or knife held firmly
against the end. Instead of cutting out a
piece you can nail one piece on another
(Fig. 530). The latter is better for straight
work because the head or fence is longer
and so can be more securely pressed against
the edge. An objection to this gauge is the need of making a
new one for every measurement, but where there is occasion to
keep repeating a measurement it is particularly convenient and
quickly made.
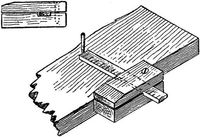
Fig. 531.
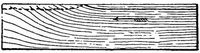
Fig. 532.
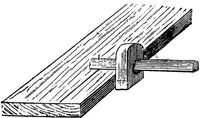
Fig. 533.
For another home-made gauge (Fig. 531) cut a recess in one
side of a block just wide enough to hold the rule and just deep
enough so that the flat side
of the rule will project a
trifle above the surface of
the block. On this side of
the block fasten a small strip,
with a screw, so that when the two pieces are seized in the hand
the rule will be held fast at the point to which it is adjusted.
This is more accurate than to use the hand alone. You can
readily contrive such arrangements, which will be quite accurate
if carefully used, but it is not worth while to spend much time
over such makeshifts (except in case of necessity), for a fairly
good gauge can be bought for a small sum.
The gauge is usually an awkward tool for the beginner to use.
He finds it hard to keep the stock firmly against the edge while
sliding it along, and lets the
spur dig or plough deeply
into the wood—the spur
tends to follow the grain of
the wood and when the grain
runs toward the edge the result
is often as shown in Fig.
532, the stock being pushed
from the edge. The stock is
then pushed back and the wobbly process continued. To avoid
these errors, the gauge, held well in front of you in one hand,
should be tipped or inclined from you so that the spur will be
drawn along the surface (Fig. 533) and will make but a slight
scratch. Then, keeping the stock or head firmly pressed against
the edge, push the gauge steadily from you, watching carefully
to see (1st) that the spur does not begin to dig into the wood instead
of lightly scratching it, and (2d) that the head does not
slip away from the edge. This will prevent the point catching
or jumping and will insure a good mark, which can easily be
deepened by going over the line a second time if necessary.
It is easier to mark a line when the spur is near the head of the
gauge than when it is run out to some distance. The guiding
power of the fence or head is greater over a point near to it than
over a point at a distance, from which you can readily see that,
conversely, the longer the head or fence, the easier the gauging
becomes—that is, for straight lines, which is much the most common
use of the gauge. In gauging from a curved edge, a long
fence, unless curved, would be impracticable.
Where it will injure the work to have the gauge marks show
(as when the work is to be finished with shellac or varnish), be
careful not to carry them farther than necessary, as very slight
scratches show plainly after finishing. Otherwise, in cases where
the marks will not show or do no harm, as in rough framing, it
is as well to run them past the required points, as it is quicker
to do so and the juncture of lines which cross is more distinct.
Gauge from the same side of the wood in laying out mortises
or any lines intended to be in the middle of a piece of wood, or at
a fixed distance from one edge, else if the edges are not exactly
parallel (as is often the case) the markings will differ. See also
Scribing.
Gimlet.—The gimlet is useful, cheap, and good for boring
where the hole does not come near the edge, but near the edge
or in thin wood great care must be taken to prevent splitting. If
necessary to use it in such a case, keep turning it backwards for
every turn ahead and do not try to force it through the wood.
It is better, however, to use some other tool if you can (see Bits
and Twist-drill), for the tapering form of the gimlet gives it a
wedge-like, prying action upon the woody fibres.
Gimlet-Bit.—See Bits.
Glazing.—An old chisel can be used to clean off old putty
before setting glass. On new work, see that the rabbet or
shoulder where the putty is to go is primed with lead paint before
putting on the putty (see Painting). You can buy glazier's
points, to hold the glass in position under the putty, for a trifle,
or very small brads can be used. No special directions are
necessary for using the putty.
To set common glass in furniture, as in bookcase doors, it is
better to fasten it in place with small strips, not pressed too tightly
against it. Strips of plain moulding are good. To set plate glass
in furniture, the same means can be used for small pieces, but
large plates, as for a mirror, should be held in place by little strips
of soft pine, one or two inches long, bevelled on one side. The
other side being glued, these strips can be lightly pressed into
the crack around the glass. These short pieces, glued to the
frame on one side and with the bevelled side wedging the glass
into place, hold the latter securely, but, owing to the softness of
the wood, not too rigidly.
Glue.—See Gluing.
Gluing.—Glue is made from refuse animal matter, and also
from parts of fishes, the latter being known as fish glue. It
comes in sheets or cakes or flakes, to be dissolved and used hot,
or already prepared in liquid form.
The majority of practical mechanics prefer the former (i.e.,
"hot" glue) for nice work, although the use of liquid glue has
increased much of late years. Hot glue is probably preferable
if all the conditions are just as they should be, but if not so,
liquid or "cold" glue may be better.
Buy the best grade. It is the cheapest for good work, and you
will not use enough to make the price much of an obstacle. The
only sure test by which to buy glue is to get a little and see how
it holds. A good way to prove the quality of your glue is to soak
it over night, or as long as may be necessary, in whatever quantity
of water you think it will absorb. The more it will swell without
dissolving, the better the quality. Poor glue will dissolve.
You cannot positively tell good glue by the colour, for there
are many kinds (and for more than one purpose) and many
makers, but whatever the colour, the glue should be clear looking
and not cloudy or muddy. Do not use glue that has a mouldy
or otherwise disagreeable or offensive smell or a bad taste.
To prepare hot glue, break the glue into small pieces, and soak
it in all the cold water it will absorb for perhaps twelve hours,
when it will have become swollen and softened and will look and
feel somewhat like jelly. Then put it in the inner glue-pot (see
Glue-pot) and cause the water in the outer vessel to boil for several
hours. It is quicker to dissolve the glue at once without soaking,
but the result does not seem to be quite as good as by the
former method. The glue to be right for use must be thin
enough to drip from the brush in a thread or stream, without
collecting in drops like water, and you can tell something about
its being in condition to use by testing it between your fingers.
Do not weaken its strength, however, by diluting with more water
than is necessary.
It is important to keep the glue and the glue-pot clean, and if
the odour from your glue becomes offensive at any time clean
out the glue-pot and make fresh.
Glue loses strength by repeated meltings, so do not dissolve too
much at a time, and after heating it over two or three times throw
away any that is left in the glue-pot, cleaning the latter thoroughly.
On work which you are very particular about mix fresh
glue each time.[46]
You can make a good glue-brush of a stick of rattan. Soften
the end in hot water and pound it with the hammer until the
fibres separate. For corners, cracks, holes, and the like use
sticks, which you can whittle to any required shape.
Although apparently too simple an operation to need much
explanation, and often ignored in books on wood-work, as if anyone
could of course glue two pieces together, the operation, to be
really successful, calls for more knowledge of the principles involved
than beginners or amateurs usually possess. Do not daub
a thick layer of lukewarm glue on the pieces, and then slap them
together as you would make a sandwich, after the usual domestic
fashion. Done in this way the pieces often stick for a while,
but there is nothing certain about it.
We have seen that wood is full of little holes (pores, as they
are commonly called), or spaces between the fibres (see Fig. 6).
The glue becomes worked into these little pores and that is what
gives it such a firm hold on the wood, somewhat as plastering is
forced (purposely) into the cracks between the laths.
So you must have the glue thin, that it may fill these little
cavities and get a "grip" on the wood; you must have it hot,
that it may the more easily penetrate these open spaces before it
becomes chilled; you must have the wood warm, that the glue
may not be chilled and begin to set before it has a chance to
penetrate the interstices of the wood; and you must press the
pieces together so hard as to expel the body of glue from between
them, forcing it into the pores and squeezing outside what will
not go in, to be wiped or scraped off afterward. For what you
want is not to have the two pieces held together by a layer of
glue between them, lightly sticking to each surface and separating
the two in proportion to the thickness of the layer; but to
have the two surfaces as close together as possible, held so by the
tenacity of the glue reaching from the cavities of one surface to
those of the other. The closer the surfaces are forced together
the better, as the glue will be less exposed to the atmosphere.
You will see from all this that gluing should be done in a
warm room of an even temperature.
While with hot glue it will not do to change the relative positions
of the pieces after putting together, you can have considerable
time to get them in position if the liquid or cold glue is
used. Where several places in the same piece of work have to
be glued together at the same time, it is frequently very hard to
get around with the hot glue before that first applied has begun
to set, unless you have help. In such cases, cold glue is a great
convenience. If your shop is not warm or if you cannot have
your glue hot, you had better use the liquid glue. It takes much
longer to set than the other. In cold weather it should be
slightly warmed. It can be thinned with vinegar or acetic acid,
or what you wish to use at once may be thinned with water. Do
not pour water into the can of glue, as it will not keep so well.
You will also readily see that it is much easier to make good
glued joints in soft wood than in hard, for the former is more
readily squeezed to a fit by the clamping, while with the latter it
is quite essential that the pieces should fit with extreme accuracy
before clamping (see note under Clamps).
Before beginning to glue have everything laid out, fit the pieces
together, clamp them up just as if you had put on the glue, and
see that everything comes together right—i.e., rehearse the
gluing process before using the glue itself. This is a very important
point, particularly when there are several pieces to be
glued, for you will have no time to waste after you have begun
to use the glue.
Do not spread the glue on too thick. Take the dirt off both
pieces, then, while putting the glue on one, have the other warming
slightly at the fire. The moment the glue on the brush leaves
the glue-pot it begins to cool. If it fairly begins to set before
you get the two pieces together, your joint will not be good.
You will have to take it apart, scrape off all the old glue, and begin
over again. So you will see there is no time to be lost when
once you begin and it will be too late then to correct any mistakes
in the fitting of the wood-work. Good workmen always put the
work together and take it apart again before gluing.
Do not wipe off the glue which squeezes out from a glued joint
(unless for some special reason) nor wash it off with water. Let
it harden, and clean it off after the joint has set. It helps protect
the joint.
Do not be in haste to unclamp your work. When to release it
depends on the kind of wood, the kind of work, and the circumstances
under which the gluing is done, and no exact time can
be set. If for some temporary and unimportant purpose and in
soft pine, for instance, you can unclamp in a few hours or even
less, but for important work, which is to hold permanently,
twelve hours is scarcely time enough even for soft wood and hot
glue, and twenty-four hours is none too long, for though the glue
dries quickly to the touch, it takes considerable time to get thoroughly
hard. It is safer to allow more time for hard wood.
The thickness of the stock makes a difference also. Large junks
and blocks and boards glued flatways require more time than ¼"
stock, thin strips, or little splinters. You can tell something by
the condition of the glue that is squeezed from the joint. Liquid
glue sets much more slowly, and twenty-four hours is soon enough
to release the work under average conditions. The warmth and
dryness of the air make a good deal of difference. Under unfavourable
conditions more than forty-eight hours may be required.
If for any reason you cannot clamp a joint, after applying the
glue rub one piece back and forth upon the other a few times.
Rub wax, soap, or tallow on any part which must not be stuck
by surplus glue which may exude from a joint, as in the case of
a panel which may become stuck by the glue used in fastening
the frame (see Doors and Panels).
To glue two pieces where the surface is to be planed or trimmed
at the joint, do not glue them together after they are planed or
trimmed, but glue them first, and plane or trim them afterwards,
taking care to have the grain of the pieces run in the same
direction (see Jointing).
To glue pieces end to end, or as in a mitre,—that is, "end
wood,"—first size with thin glue to stop the pores, else the glue
will be quickly soaked up. Then, after allowing this coat to
stand, glue in the ordinary way. But glued joints in end wood
are seldom good and are to be avoided.
A great deal of glued work comes apart, and a great many mistakes
in putting work together are caused by not understanding,
or not bearing in mind, the way wood expands and contracts and
warps and winds from heat and cold, dryness and moisture.
This is an important matter if you wish to do good gluing. Do
not think that all that is necessary is to have your wood dry and
that then you can glue the pieces together in any relative positions.
Veneers or thin pieces are sometimes successfully glued with the
grain of the pieces running at right angles, as seen in chair seats,
but as a rule avoid gluing wide pieces together with the grain
running at right angles. See Laying out the Work, in Chapter
IV.; also Jointing.
Glue-Pot.—This can be bought of copper, iron, or tin. A
medium-sized one is more useful than a very small one. Have
a cover to keep out dust and loose particles.
If obliged to make shift without a proper glue-pot, always use
two dishes like a regular glue-pot, with water in the outer one, on
the principle of the double boiler used for cooking, else the glue
will be sure to burn and be spoiled. Two cans, such as are used
for tomatoes or other vegetables, can be used on a pinch, one
being larger than the other and fastened in place with wire or in
some way to keep the smaller can from moving around too much;
but a regular glue-pot is much better. See Gluing.
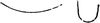
Fig. 534.
Gouge.—This tool is similar to the chisel, except for the
curvature across the blade. The common gouge has the bevel
on the convex or outer side and is known as an "outside"
gouge. This is the more useful for ordinary work. The "inside"
gouge has the bevel on the inner or concave side.
Although very useful for many purposes, it is less important for
general work and is harder to sharpen.
Gouges are of various degrees of curvature,
Fig. 534 showing a "flat" and a "quick"
curve. Those of moderate depth and curvature
will be more useful for your work than very deep or very
flat ones.
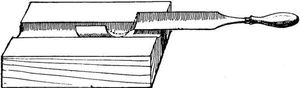
Fig. 535.
In using the common or "outside" gouge, light, short strokes
should usually be made, for only the bevel of the tool bears on
the wood, which makes this gouge quite hard to control.
You can often apply the principle of the sliding or sideways
cut in using the gouge, as with the chisel, to good advantage.
You can roll the gouge around
with your hand from side to side
so as to make it cut slantingly.
This is particularly useful to give
a clean cut when gouging across
the grain (Fig. 535). In some
cases, in working out a moulding,
for instance, you can hold the
tool at an angle with the work and
get a better result than to push it straight forward lengthways
(Fig. 536).
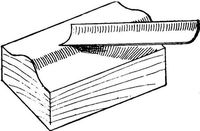
Fig. 536.
Be careful not to scoop out little hollows below the required
depth of the cut, and keep the direction of the grain in mind the
same as with the chisel. The little inequalities left by the gouge
can be reduced easily by the file, curved scraper, or glass and
sandpaper. See Sharpening.
Gouge-Bit.—See Bits.
Grindstone.—When you get to the point of having a grindstone,
get one which is somewhat soft and fine, for if too coarse
it will produce a rougher edge than is desirable for your tools.
Do not allow your grindstone to become softened in spots by
being left partially immersed in a trough of water, as it will wear
away irregularly. With the best of care a stone will, however,
become untrue after continued use, not merely in its circular
outline, but the face will become hollowed and uneven. It must
then be trued, either by some one of the contrivances now made
for the purpose, or by simply turning the stone into the correct
shape by holding the end of a piece of soft iron, as a piece of
pipe, against the surface, without water, moving the iron as occasion
requires, until the stone becomes true.
Grooving.—Grooves of different dimensions are often required
for various purposes in wood-working. By far the best way, as a
practical matter, is to take the work to a mill and have the grooving
done by machine, which is not expensive. It can be done
by hand with the planes devised for the purpose (as the plough),
but though these are valuable tools, they are largely superseded,
or becoming so, by machine-work, and it is usually fully as well
for the amateur to take such work to the mill as to buy the tools.
In some cases the sides of the groove can be sawed by the hand-saws
and the material removed by the chisel, but this is not easy
if the groove is long. Pieces are sometimes clamped beside the
line to guide the saw and sometimes even attached to the saw
itself, or to a piece of saw-blade. The lines for the groove can
be scored with the knife or chisel and the wood between removed
by the chisel, much as in cutting a mortise.
In nice work, as fitting a shelf in a bookcase, it makes a better
joint not to fit the entire end of the shelf into a groove, but to cut
a tongue or wide tenon on the end of the shelf, with a shoulder at
each side and the front edge, to fit into a corresponding groove,
as shown in Fig. 284.
Half-Round File.—See File.
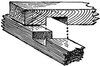
Fig. 537.
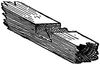
Fig. 538.
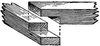
Fig. 539.
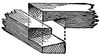
Fig. 540.
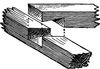
Fig. 541.
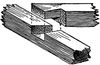
Fig. 542.
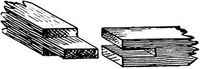
Fig. 543.
Halving.—This joint shown in Fig. 537 is a common, simple,
and good way of joining two sticks when they cross at right angles
or obliquely. Place the sticks in position and mark the width of
each upon the surface of the other, using a knife or chisel for
scribing. With small sticks the wood can be removed with the
knife, first cutting a notch at each side and then paring off the
wood between (Fig. 538). With large pieces the lines should be
marked by the square, the depth (one-half the thickness of either
piece) by the gauge. The lines at the outside of the space can
then be sawed down to the gauge line, taking care to keep just on
the inside edge of the line. The wood between can be pared
out with the chisel down to the gauge lines. When the halving
is at the ends of the pieces or at the end of one piece (Fig. 539),
the process is the same, except that the wood can be entirely removed
by the saw. Other forms involving bevelling and dovetailing
are shown in Figs. 540, 541, and 542. This principle of
the lap joint is often carried a little further and we have the open
mortise and tenon (Fig. 543), which can successfully be applied
to a mitred joint and can also be dovetailed, and boxes are now
made by machine with the corners entirely made up of a continuous
series of these joints (Fig. 544). See Joints.
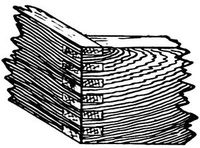
Fig. 544.
Hammer.—The hammer is made in many forms, but the
common kind used by carpenters will usually answer your purpose,
and is too familiar to require description. For general use
select one of medium size and weight. Remember that the face
of the hammer-head, although harder than the nails it is meant
to drive, is not intended to pound every piece of hardened steel
you may run across, nor to break up boulders when you are after
minerals. For the use of the hammer see Nailing.
Hand-Screws.—Hand-screws are of great use in clamping
work that has been glued and for holding pieces in any required
position. Wooden hand-screws are probably the most generally
useful, but a couple (or more) of the simple iron clamps will be
of great service at times, as they can be used more advantageously
than the wooden ones in some kinds of work. Get medium-sized
hand-screws rather than small ones if you can, as they will be
generally more serviceable.
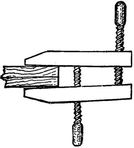
Fig. 545.
Fig. 546.
Fig. 547.
To open or close a hand-screw, hold it at arm's-length in front
of you with a handle in each hand, and with a twirling motion revolve
it toward or from you, as may be required, to increase or
decrease the opening between the jaws. The screws should be
greased or rubbed over with black-lead, soap, or bayberry tallow.
To hold two pieces together with uniform pressure is of course
necessary for gluing and various other operations, but a little
practice will show you how to adjust the hand-screws so that the
jaws will bear on the wood evenly. The main point to remember
is to keep the jaws parallel. The final tightening is given entirely
by the outer screw, so, in adjusting the screws, leave the jaws
open a little at the tip as in Fig. 545, that when the final pressure
is put upon the outer screw the jaws will bear on the wood with
an even pressure (Fig. 546). If the jaws were adjusted to bear
evenly before tightening the outer screw,
the final result would be as shown in Fig.
547.
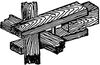
Fig. 548.
In clamping together finished work or
pieces which could be injured by the pressure,
always put pieces of waste wood between
the work and the hand-screws. In
case of delicate work, like carving or mouldings, a piece of soft
pine placed between the surface and the hand-screws or clamps
will enable considerable pressure to be applied without injury to
the work.
A simple home-made clamp, suitable for such work as temporarily
holding in place parts of the frame of a boat, for instance,
is shown in Fig. 548. See Clamps and also Figs. 66 and 647.
Hatchet.—The hatchet is too familiar to need description.
A common, medium-sized hatchet, that can easily be swung with
one hand, is all that the beginner will ordinarily require, although
there is quite a variety of hatchets and axes for various purposes.
The main thing in the use of the hatchet, besides keeping your
fingers out of the way, is to look sharply after the direction of the
grain of the wood, as it is not easy to stop a blow in the wrong
place, for the hatchet is not so easily controlled as some other
tools. Experience is the best teacher in the use of a hatchet.
For removing superfluous wood with the hatchet, see Paring.
Hinges.—There are many varieties of hinges for various purposes.
The common kind, like that shown in Fig. 135, had best,
for neatness' sake, on moderately heavy work, be narrower than
the thickness of the stock, so as not to extend across the edge.
The hinge should be sunk in the wood of one or both of the
parts to be hinged—in the case of many boxes, for instance, one
half of the hinge when shut is usually sunk in each part, but in
some kinds of work the whole thickness may be sunk in one part.
The hinge can be held in position on the edge (in the case of
the box) so that the centre of the pin on which it turns is in line
with the back of the box, or sometimes a little outside. Marks
can be made with the knife or chisel at the ends of the hinge, and
the recess in which it is to fit marked with the square and gauge.
This wood should be removed with the chisel, first making cross
cuts to break up the grain, as in Fig. 614. Fit the other hinge
or hinges in the same way. Next lay the lid exactly in position
on top of the hinges and mark by them and cut the recesses in
the top in the same way. Hold the hinges in place with two or
three screws each and see whether the cover opens and shuts as
it should. Make any needed alterations, and finally screw the
hinges firmly in place. Another way is to place the lid exactly in
position (shut) and mark directly from the hinges, on both box
and cover at the same time, the points from which to lay out the
recesses. It will be well to look at a properly fitted hinge for a
similar purpose before beginning your work, since one rule cannot
be laid down for all cases.
For strap-hinges, T-hinges, and the like, see page 247.
Holes and Cracks, To Fill.—The simplest way to stop
holes, cracks, checks, and the like, in painted work, is with putty,
always applying it after the first coat of paint and never before
(see Painting), but this method should not be used for other than
painted work, and the nicer the work, the less desirable the use
of putty becomes.
For nice work, as furniture, which has not been finished, small
holes or cracks are often stopped by putting a daub of hot glue
on the smooth end of a piece of wood of the same kind as the
article, and with a sharp chisel, held nearly at right angles with
the surface, scraping off fine wood-dust, which, mixing with the
glue, forms a paste with which the crack can be more than filled.
When hard, the surplus can be pared and
scraped off.
Plaster of Paris (calcined plaster), mixed
with very thin hot glue, is excellent for stopping
cracks and holes of considerable size. It can
be mixed with water only, but this is not as good.
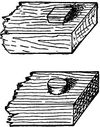
Fig. 549.
Fitting in a plug of wood is a good way when
the hole is of such shape that you can do so,
making the grain of the plug run the same way
as that of the piece to be plugged. Taper the
plug slightly, so that when driven in it will fit tightly and not be
flush with the surface, but project above it (Fig. 549). Dip in hot
glue, and drive well in. When dry smooth off. If the hole is
irregular, trim to some shape to which you can fit a plug. In
nice work take pains to have the plug a good match for the rest
of the wood.
Slight cracks at the end of a piece can often be plugged and
at the same time secured against further splitting by sawing
directly down the crack, so as to remove it and substitute a
straight saw-kerf. In this kerf a slip of wood can be fitted and
glued.
Wax, and also melted shellac, can be used to stop holes and
cracks in finished work. For this, see under Finishing.
Jack-Plane.—See Plane.
Jointer.—See Plane.
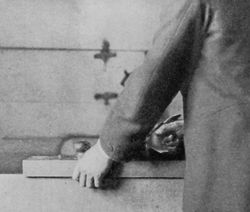
Fig. 550.
Jointing.—This term is applied to the act of straightening
and making true the edges of two boards or planks which are to
be joined to make a
tight joint, with glue or
otherwise. It is, also,
popularly applied to
straightening the edge
of one piece only, as
to "joint" the edge
of a board. This you
will often have to do,
and for jointing two
edges which are to be
glued particular care
will be required. Assuming
that the edges
have been got out
nearly straight, the
only plane you will require is the fore-plane,—or better, the
jointer, or even the "long" jointer if the piece is long and
you are fortunate enough to have these tools,—and it should be
set fine, although if the edge is very crooked and you have to
work off much superfluous stock, the iron can be set to make a
coarse shaving at first.
In shooting or jointing edges it is customary to hold the finger
under the sole of the plane as a guide (Fig. 550). This helps in
regard to the common fault of tipping the plane sideways so as
to plane off more on one side than on the other (Fig. 551). This
trouble may be aggravated by a wrong position of
the left hand on the fore part of the plane in case
you use a wooden plane (see Fig. 624 for correct
position). Keep testing across the edge with the
square (Fig. 640). The shooting-board can be
used to advantage for short pieces (see Shooting-board),
and attachable guides can also be obtained.
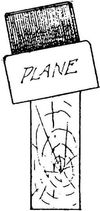
Fig. 551.
The jointing should be done with long, deliberate,
steady strokes. Any hasty, hit-or-miss
slashing away with the plane will be sure to result
in a bad joint, and you can easily get the edge into such shape
by three or four careless strokes that it will take you a good while
to get it straight. Try also to avoid planing the edge rounding,
from end to end (see Plane, Figs. 635-637). Sight along the
edge. Also test with straight-edge, looking toward the light. If
any shines through, the edge is not yet accurate and the process
must be resumed.
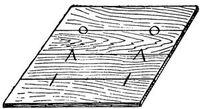
Fig. 552.
If you are jointing two edges, as for a "glue-joint," first examine
the pieces to see which edges will best go together, according
to the purpose for which they are intended. Look at
the end grain so as to arrange it in different ways if you are
building up a piece of selected parts (Fig. 559). If merely
joining two or more boards to make a wider one, notice the way
the grain runs lengthways, and the way it crops up to the surface,
for you will have, for everything but the roughest work, to plane
the surface over after the joint is glued, and if the grain runs in
two or three different ways it will be harder to make the surface
smooth. There are cases, however, in handsomely figured
wood, as quartered oak or mahogany, where you will arrange
the grain in the way that will look the best, but in such cases you
expect to go through extra labour for the sake of having the
article as handsome as possible. With soft, straight-grained
white pine or whitewood, these matters are of less importance.
When you have the pieces laid together in the best way, mark on
the surface right across the joints (Fig. 552) so that you will
know how to put the pieces together, for you will forget how they
were arranged after you have moved them around a few times.
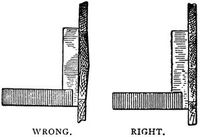
Fig. 553.
Joint each edge separately. For nice work it is well to joint
the edges of the successive pieces alternately from opposite sides,—that
is, if in planing the edge of the first piece the marked (or
face) side of the board is towards you, plane the edge of the next
piece with the face side of the board against the bench, or away
from you. This helps to counteract the result of any tendency
to tip the plane to one side or any inaccuracy in setting the
plane-iron. See Shooting-board.
Then, putting one piece in the vice with the jointed edge upwards,
lay the other edge upon it in the proper position and see
if the two edges touch throughout. If not, one or both must be
planed with thin, careful strokes until they do fit, for the joint
will not be good unless the edges coincide. Remember, however,
that it takes more than merely touching to make a good
joint. The surfaces of the boards must be in line (in the same
plane). Of course this really depends upon the edges being
square. Test by holding a straight-edge, the square, the edge
of the plane, or anything straight, against the surface of the
boards (Fig. 553).[47]
Do not be misled by the directions you may see in "amateur"
books and magazine articles which tell you, for cases like this,—when
you wish to glue up the lid of a desk, for instance,—to plane
and sandpaper your boards carefully on the sides and then fit the
edges together, after which you "have only to glue the edges and
the job is done." That is not the right way to make a glued
joint, as you will find out for yourself after you have planed a
few dozen boards the second time. The skilled workman seldom
attempts to do this except in repairing or some case where the
surface of the pieces must be preserved. The practical work-man's
way (which is the way for you), is to glue first and plane
afterwards. The best way, practically, is to glue up the rough
boards before they have been planed at all, and then have the
whole planed down as one piece by machine to the required
thickness. Of course you should get the surfaces as nearly in line
as you can, to avoid needless planing afterwards, but give your
special attention to making the joint hold (see note under
Clamps).
Sometimes the edges of boards to be glued are purposely
planed, hollowing lengthways, so that the two pieces touch at the
ends, but do not quite come together in the middle, the idea
being that a clamp at the middle will force the joint together for
its whole length and will give a stronger result than to attempt to
make both edges exactly straight. If there is to be any open
place in the joint before gluing, it is better to have it at the
middle than at the ends, but there is a difference of opinion as
to whether there is any advantage in springing boards to fit in
this way.
Before gluing hardwood edges, it is well to tooth them over
with the toothed-plane, if you have one. (See Plane.)
See Plane, Gluing, Joints, Cleating, Dowelling, etc.
Joints and Splices.—There are many kinds of splices and
joints used in the different branches of
wood-work, a few of which are here given.
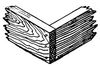
Fig. 554.
The common square butt-joint (Fig.
554) is the simplest way to join two pieces
at right angles, as in making a box or
frame, and is used for all common work.
Glue is of but little use with this joint.
Rely wholly on nails or screws.
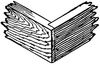
Fig. 555.
To make a better joint, cut a rabbet at
the end of one piece and you have a joint
(Fig. 555) which shows less end wood, and
can be helped a good deal by gluing, on
account of the shoulder.
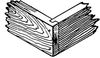
Fig. 556.
Another way is shown in Fig. 556.
Some strength and stiffness is gained by
the tongue and groove, but a groove near
the end introduces an element of weakness.
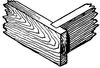
Fig. 557.
A much stronger way and a tighter joint
(Fig. 557) is often used for cisterns, water-tanks,
and horse troughs, but the projecting
ends are objectionable for most
purposes. See Halving, Mitring, Dovetailing,
and also Box-making, page 219.
In nailing any such joints as those just
shown, remember to always bore holes for the nails wherever
there is danger of splitting. See Awl, Bits, Boring, Nailing.
There are many ways, besides those just mentioned, for joining
sticks and timbers at right angles, which is something you
will often have to do, whether for a kite or some small framework
or for the timbers of a building.
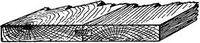
Fig. 558.
To join two or more boards or planks to make a wider surface,
several methods can be used. Cleating, though strong and suitable
for all such work as drawing-boards, rough doors, and the
like, is often undesirable, both on account of the looks and because
the cleats may be in the way (see Cleating). The simplest
way, without cleats, is to glue the jointed edges (see Jointing
and Gluing). Dowels can be used with this joint (see Dowelling),
or grooves can be cut and a strip or spline or tongue inserted
(Fig. 558). This last way can be done at the mill quicker
and better than by hand. The edges can also be halved, or a
rabbet cut in each edge from opposite sides. The boards
can also be "matched" (see page 46), in which case it is not
usual to glue them. All of these joints can best be made by
machine.

Fig. 559.
To avoid the warping and change of shape to which wide pieces
are subject, particularly when they are not middle boards (see
Chapter III), they are often built up of selected narrower pieces
(Fig. 559). This is done for many things,—the frames of machines,
the tops of sewing-tables, drawing-boards, chopping-blocks,
etc. Masts, bows, fishing-rods, and the like are sometimes
built up of selected pieces, the idea being that a better result can
be obtained by combining selected smaller pieces, that flaws and
defects (which are apt to occur in larger pieces) can be avoided,
and that sometimes the grain can be arranged to better advantage.
This is doubtless true, but there is always the objection
that glued joints may give way. If you can get a piece which
is practically perfect, it is probably in most cases better than a
glued-up combination, for it is not easy to improve on Nature
when you can get her best specimens; but unless you can get
first-class stock of the dimensions required, it is better to "build
up" with smaller pieces of selected stock.
Where the ends of two pieces come together and you wish to
make a close joint, you will, of course, saw the pieces off as
squarely as possible, using the square or perhaps the mitre-box.
If you mark and saw them with exactness, and if everything
about their arrangement is straight and square and true, the ends
will come together exactly and make a close joint, but as a practical
matter this frequently will not happen, however careful you
may be. For nice work, the workmanlike way in such cases is
to plane or pare the ends until they fit, but for rougher work the
expedient of sawing the ends to fit can be resorted to. To do
this, put the ends together as they are to go (Fig. 560), keep
them from moving, and saw straight down through the joint. As
the saw will leave a kerf of uniform thickness, the pieces can
now be pushed together and the ends will fit, unless the joint
was very much open, in which case you have only to saw again,
and if necessary repeat the operation until the ends fit. This is
a very useful expedient in case of need, but should not be relied
on as a regular way to make joints, lest it engender a careless
and inaccurate method of work. This applies also to joints
which meet at any angle.
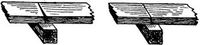
Fig. 560.
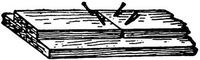
Fig. 561.
In some cases, where only one side of each piece shows, as in
laying floor-boards, it is usual to undercut the ends slightly—that
is, to make the joint a little open at the bottom, which gives a
tight and neat joint on the side which shows (Fig. 561, which is
exaggerated).
Another way to make an end joint is by bevelled scarfing or
splaying (Fig. 562). You will see the ends of the clapboards on
old houses joined in this way, and it doubtless makes a better
joint in many cases than the common square or butt-joint, but
it is more work. Strips of moulding are often cut in this way.
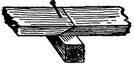
Fig. 562.
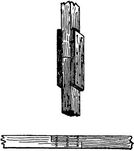
Fig. 563.
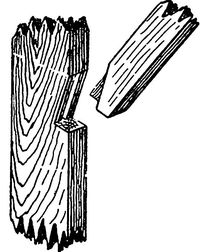
Fig. 564.
There are many ways of splicing two or more pieces so as to
get greater length, many of them, such as are used in bridge-building
and roof-framing, being quite complicated. You will
rarely, however, in such work as you will do at first, have occasion
to do more than nail strips (fish-plates) on the sides of the
pieces or make a halved splice or scarfed joint (Fig. 563). The
latter is often made longer than that shown and fastened in
various ways. A joint for a brace is shown in Fig. 564.
See Cleats, Doors, Dovetailing, Dowelling, Gluing, Halving,
Mitring, Mortising, Nailing, etc.
Keyhole Saw.—See Saw.
Knife.—An excellent knife for shop work is a sloyd knife. A
good shoe-knife will do very well. This is better for shop work
than a jack-knife. It will not close on your fingers for one thing.
For general purposes, however, a pocket-knife is the best thing,
as you cannot carry a sloyd knife around with you. In buying
it get a good plain knife with not more than two or three blades
and of the best steel you can afford. Do not waste money in
trying to get your whole kit of tools into the compass of one jack-knife
handle. In selecting a knife, open the blades and sight
along the back to see that each blade is accurately in line with
the handle, as they are sometimes fastened at a slight angle,
which weakens the knife.
An immense variety of work can be done with a common
pocket- or jack-knife, which is the best emergency tool for either
the beginner or the skilled workman. One great thing about
whittling is that you cannot rely on squares, rules, or compasses
to get your work right, but must be independent, think quickly,
look sharply, and rely on your own faculties. A knife is so easy
to sharpen that there is not much excuse for using a dull one.
See Sharpening.
In cutting, always keep your left hand behind the blade, and
as a general rule cut from you, for the tool may slip and cut you
instead of the wood. There are cases where you have to cut towards
you, but there is never any need of getting your left hand
in front of the cutting-edge.
Level.—A spirit-level is important for some work, but not
often necessary for the beginner, as a substitute can easily be
made. A horizontal or level line being at right angles with a
vertical line, a home-made level can be made by using the principle
of the plumb-line, as shown on page 96. When the plumb-line
hangs freely on the line ab, which is at right angles to cd,
the latter line (cd) must of course be level. The frame should be
several feet long for levelling large work, as it can be adjusted
more accurately than if small.
Linseed Oil.—See Finishing and Painting.
Locks.—Use locks of good quality or none at all. Never put
very cheap locks on good work. There are many varieties of
locks, some to be screwed on the outside of the wood, others to
be sunk in recesses cut in the side of the wood, others still to
be let into mortises—chest-locks, door-locks, cupboard-locks,
drawer-locks, etc.
To fit a chest- or box-lock (not a mortise-lock), place the lock
in the right position, mark around the part required to be sunk
in the wood, which can be cut away with gouge and chisel, the
keyhole having been bored quite through the wood and trimmed
to a neat outline which will conform to the shape of the key.
When the lock has been screwed in its recess, put the "hasp,"
or part which is to be on the lid, into its place in the lock, just
where it will be when the chest is locked. Then close the lid,
and by slightly pressing you can make a mark on it to show
where to put the hasp. Sometimes you can mark the place
with a pencil, or by putting transfer-paper between the hasp and
the wood, or by rubbing blackened grease on the plate of the
hasp. The plate of the hasp should be sunk in the lid to be
flush with the surface, and may then be screwed on, bearing in
mind the thickness of the lid when selecting the screws. A
mortise-lock is fitted in a similar way, but let into a mortise (see
Mortising).
To fit a common drawer-lock, determine the place for the
keyhole and place the lock in position on the inside as before.
With a pencil mark the outline of the box-part of the lock,
which bears against the wood. Cut away the wood within this
line, making a recess slightly deeper than the thickness of
the box-part of the lock. The hole must be bored for the key,
as before. Put the lock into place and mark the outline of the
outer plate, not merely on the inside of the drawer front but also
on the top edge. Cut away the wood with the chisel to let the
plate sink flush with the wood. When the keyhole is shaped, try
the lock and if it works, screw it on. Close the drawer and turn the
key hard to raise the bolts (the tops of which have been previously
rubbed with blackened grease, such as can be scraped
from an oil-stone, or using transfer paper), which, pressing
against the wood, will mark the places for the mortises into
which they are to slide. Cut these mortises and the drawer can
be locked.
The variety of locks and their arrangement in regard to fitting
is so great that it will be best for you to examine a well-fitted
lock for the same purpose that the lock you have to fit is intended,
for one rule cannot be given for all cases.
Mallet.—The mallet, which is merely a hammer with a wooden
head, is made in various forms and sizes, from the big beetle of
the wood-chopper to the ladies' carving mallet. It is used to
strike the wooden tool-handles.
For heavy work a mallet with the handle put through the head
from the outside, like the handle of a pickaxe, is good because
the head cannot come off. A rounded head with the handle on
the end (like a potato-masher) saves having to notice how you
hold it, as it is equally effective in any position. A mallet of
this type can be turned all in one piece. Hickory or lignum-vitæ
or any dense, hard wood is good for a mallet.
You do not gain force by using the mallet instead of the hammer,
but the softer and more yielding blow of the mallet saves
the tool-handle.
Marking.—For all rough work the ordinary carpenter's pencil,
sharpened flatways, like a screw-driver, is the most convenient
and durable instrument. For nicer work, where you need more
accurate lines, the common round pencil (medium hard or rather
soft) is all you need, but for
nice, close work (such as marking
accurate joints), a knife,
the corner of a chisel, a marking-awl,
or a scriber of some sort
is necessary. There is no need
to buy any tool for this,
although they are to be had—nothing
is better than a common
pocket-knife or a chisel.
Keep your pencils sharp by
rubbing them on a piece of
fine sandpaper, or an old file.
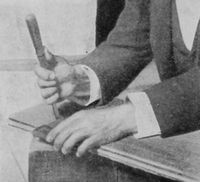
Fig. 565.
In scribing with the chisel, the edge is drawn along with one
corner slightly raised and the flat side next the straight-edge,
holding the tool either like a pencil or for deeper scoring as in
Fig. 565.
In all marking and scribing, whether with pencil, awl, knife,
chisel, or other tool, be sure that the marking edge is kept close
up to the rule, straight-edge, or square, as it will often tend to
follow the grain of the wood and run off the line, and will sometimes
force the straight-edge or square out of position if the latter
is not held firmly.
Do not try to stop lines which meet at a given point, but let
them cross one another when they will not show in the finished
work, as it is quicker to do so and the crossing of two lines
marks a point more accurately than a dot. For work to be
finished, however, scoring the surface with lines should be
avoided wherever they will show, as they will become conspicuous
after the work is finished.

THIN RULE—FINE WORK.
Fig. 566.
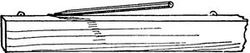
THICK RULE—ROUGH WORK.
Fig. 567.
In marking lines with a straight-edge or ruler you must be careful
that it does not slip. If it is long you can put weights on it.
To mark a line accurately through given points, the ruler should
not quite touch the points, but be pushed almost up to them and
equally distant from each (Fig. 566). This will give you a clear
view of both points so that
you can be sure that the
pencil or whatever you
mark with will go as nearly
as possible through the
centre of each. Bearing
the pencil against the edge
of the ruler, you can slant
it a trifle till the pencil-point
will just coincide with
the given point on the wood, and, keeping the same inclination,
move the pencil along the ruler, and it should also go through the
second given point. This applies to a regular ruler with a comparatively
thin edge, and to fine work only. In marking by a
thick edge, or where extreme nicety is not required, you will of
course put the straight-edge right up to the points and run the
pencil-point along in the angle (Fig. 567).
Besides marking lines, the straight-edge (in some form), is used
to determine whether a surface is true. See Straight-edge.
For rough, off-hand marking, particularly on undressed stock,
chalk is often best. Sticks, shaped like school-crayons, of
graphite or some black composition, are good for rough marking.
The chalk-line is used for distances too great to be covered
conveniently by a straight-edge and in places where the latter
could not so well be used. The chalk-line is a chalked cord
drawn taut between the two points to be connected. It is better
to use a small cord than a large one, and blue chalk is often preferred
to white. Fasten one end of the cord with a loop around
an awl or nail at one end of the desired line, and from this point
chalk the cord, holding it between the thumb and the chalk so
that the cord will bear on the flat side of the chalk in such a way
as to wear it away evenly without cutting it in two. Then
draw the chalked cord tight to the other end of the desired line
and, holding the end down with one hand, lift the cord from as
near the middle as practicable with the thumb and forefinger of
the other hand and let it snap back on to the surface. The cord
should be raised squarely from the work and not pulled slantingly
to one side or the line will not be straight.
Marking-Awl.—See Awl.
Marking-Gauge.—See Gauge.
Matching-Plane.—See Plane.
Measurements and Measuring.—For various suggestions,
see Rule, and also pages 47, 48, 50, 167 (footnote), 244, and 261.
Mirror-Plates.—A good way to fasten such articles as mirrors,
cabinets, etc., to the wall is by mirror-plates, which you can
buy or make yourself of brass. These should be sunk in the
wood so as to be flush with the back side of the shelves. After
being fitted, they should be taken off during the process of finishing
the work.
Mitre.—See Mitring.
Mitre-Board.—See Mitring and also page 92.
Mitre-Box.—If you can afford it, an iron mitre-box which
will cut at various angles will be very useful. You can make one
yourself of wood. You can get a carpenter to make you one for
a small sum, but the iron ones are better. See page 90.
Mitre Shooting-Board.—See page 94.
Mitring.—A common joint is the mitre (Fig. 568). Its only
advantage is that it shows nothing but a line at the angle and the
"end wood" is entirely concealed. It is a weak joint at best,
even when made by a skilled workman, and is particularly hard
for an amateur to make well. The slightest variation in one of
the corners of a frame or box throws the whole structure out of
shape and in attempting to correct the error the other joints are
apt to be opened, and if the whole is finally got together in a
fashion it is often after bother enough to have accomplished
much good work in some other way.
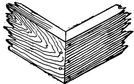
Fig. 568.
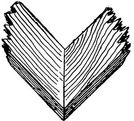
Fig. 569.
Fig. 570.
The mitre is particularly unscientific for wide pieces used flatways
(Fig. 569), as the inevitable expansion and contraction of
the pieces is very apt to cause an open joint. If the wood is not
quite dry, so that it shrinks, the joint may open permanently toward
the inside corner, for when the wood shrinks in width the
pieces will become narrower and so separate at the joint, leaving
a crack, tapering from the inner to the outer corner. Even if the
wood is thoroughly seasoned it will expand and contract more
or less. When it expands, the joint will tend to open at the
outer corner (Fig. 570). When it contracts it will tend to
open, as just shown (Fig. 571), at the inner corner.
Fig. 571.
Fig. 572.
Fig. 573.
Of course there are some cases, as in making a picture frame
of prepared "mouldings," when mitring is the only way in which
the frame can be put together, and there are some other cases in
which it is the most proper and suitable joint, but as a general
rule, for amateur work, particularly in framing where strength
is a consideration, avoid the mitre. Other and better forms for
anything like a box are shown in Figs. 554, 555, 556, 557.
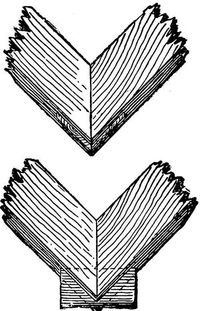
Fig. 574.
The mitre is sometimes strengthened for box work and the like
by fitting a spline or tongue with the grain running across and
not lengthways of the joint (Fig. 572.) This, properly glued
under pressure, makes a good joint and one much superior to the
plain mitre. But, though easy to do with machinery, it is a slow
and careful job to make such a joint by hand, and if a case arises
where you wish it done you had best take the work to a factory,
where a circular saw is all that is needed.
The principle of halving shown in Figs. 539 and 543, can also
be applied to a mitred joint.
Saw-kerfs are often made (Figs. 573 and 574) into which small
strips are tightly fitted and glued. This is a good way and easily
done, once having got the mitre properly put together. A combination
of the mitre with the joint shown in Fig. 555 is shown
in Fig. 575. See also Dovetailing and Joints.
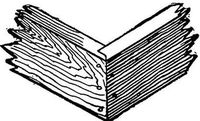
Fig. 575.
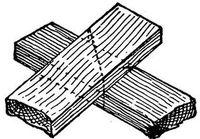
Fig. 576.
To lay off a mitre, or the lines by which to cut the intersection
of any two pieces at any angle, a simple way is that shown in Fig.
576. The pieces are laid one above the other at the desired
angle. Then the points of intersection are marked on each edge.
Lines connecting these points will give the desired angles for
sawing. The square can be used to help in determining the
points accurately and to project them to the upper side of the
top piece.
Mortise and Tenon.—See Mortising.
Mortise-Chisel.—See Chisel.
Mortise-Gauge.—See Gauge.
Mortising (Mortise and Tenon).—If you can get out two
pieces and fit them together accurately with a mortise-and-tenon
joint, and do the work well, you will be competent to handle a
great many of the difficulties of ordinary wood-work.
You will often have occasion to use this joint. The mortise is
the hole in one of the two pieces to be joined. The tenon is the
pin or projection in the other piece, shaped to fit the mortise.
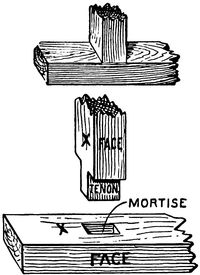
Fig. 577.
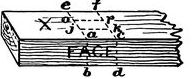
Fig. 578.
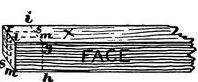
Fig. 579.
To lay out a mortise and tenon (Fig. 577), select and mark the
working faces for each piece. First take the piece in which the
mortise is to be cut (Fig. 578). Square two lines, ab and cd,
across the face and the same distance apart as the width of the
piece on which the tenon is to be cut. Carry these lines across
the side X (ae and cf) and also across the side opposite to X
(that is, the side where the tenon will come through).
Next take the tenon-piece (Fig. 579) and measure from the
end a distance a little greater than the width of the face of the
mortise-piece, and at this point square a line, gh, across the face
of the tenon-piece. Continue this line, gi, around the piece, with
the square.
Now take the gauge and, setting it at the distance from the
face settled upon for the mortise, scribe the line jk on the
side X and also on the side opposite X. Also from the face of
the tenon-piece, without changing the gauge, mark the line lm on
the side X, on the opposite side, and on the end. Set the gauge
to measure from the face to the other side of the mortise,—that
is, add the width of the mortise to the figure at which the gauge
was set,—and scribe another set of lines, op and rs, in the same
manner as before, remembering to gauge all the time from the
same face.
In the coarser kinds of work, where marks on the surface do
no harm, the gauge marks can be run across the other lines, as
being easier and more distinct, but in fine work, especially that
which is to be finished, care should be taken not to make scratches
that will be seen when the work is finished. The parts to be cut
away are indicated by cross marks (Fig. 580) and it will be seen
at once that the tenon and mortise are laid out correctly.
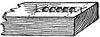
Fig. 580.
To cut, take first the mortise-piece and fasten it securely by
vise or clamp in a convenient position.
The simplest way to remove the wood is to
bore a series of holes with a bit of a diameter
as nearly the width of the mortise as
you have (Fig. 580), but a trifle smaller.
This removes a large part of the wood with but slight danger of
splitting. The rest can easily be trimmed away to the lines with
the chisel, taking care not to jam the chisel down lengthways of
the mortise when the latter is blocked with chips or firm wood,
or the wood may split off at the side of the mortise.
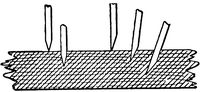
Fig. 581.
To cut out the wood with the chisel only (or to trim the ends
of the mortise after using the bit), bear in mind the way the chisel
acts when you drive it into the wood. If both sides of the
chisel were bevelled (as is the case with carving chisels), it
would tend to go straight down into the wood, and if held vertically
would make a vertical cut (Fig. 581), but the chisels you
use for mortising are flat on one side and bevelled on the other.
Being one-sided in this way, the edge of the tool is forced by
the inclined bevel to slide off, so to speak, more or less, in the
direction of the side which is flat. You can prove this easily
by holding a chisel across the grain of a board and driving it
in. If you hold the tool lightly, you will see that as you drive
it in it will incline to cut under, always on the side which is
flat (Fig. 581).
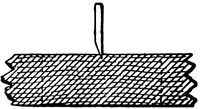
Fig. 582.
This shows how to go to work to cut a mortise so as to keep
the sides square and true. If you put the chisel at the end, flat
side outward, the cut will tend to run under and make the hole
too large below the surface. If you turn the tool the other way,
it tends to slip in towards the middle of the mortise. So, to cut
out the wood, take a chisel just a trifle less in width than the
mortise, and, beginning near the middle of the mortise, hold the
chisel as in Fig. 582 and make successive cuts, working toward
the end, first in one direction and then in the other, giving the
chisel handle a slight pull toward the centre of the mortise each
time you move it, to loosen the chips (Fig. 583). You can thus
work safely toward the ends, which will be left slanting (Fig. 584).
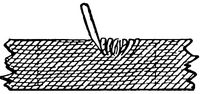
Fig. 583.
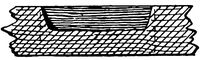
Fig. 584.
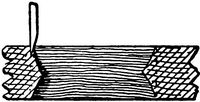
Fig. 585.
After cutting about half through the piece in this way, turn it
over and repeat the process from the other side, the result being
a hole like that shown in Fig. 585. Now turn the chisel around
with the flat side toward either end of the hole, and you can pare
down the ends to the line without danger of undercutting (Fig.
585).
Care must be taken not to jam the chisel down lengthways of
the grain until the hole is practically cleared of wood, or the side
of the mortise may be split off. Use the chisel lengthways of
the grain only at the end of the process, to pare the sides of the
mortise evenly, with light strokes, down to the line.
In all the use of the chisel, take pains to hold it vertically as
regards the sides of the mortise—that is, do not tip it over sideways,
or the mortise will be slanting or too wide at the bottom.
The common firmer-or paring-chisel can be used for all light
mortising, but for heavy work the regular mortising-chisel should
be used (see Chisel).
To cut the tenon, simply saw carefully on the line gh and its
opposite (Fig. 579) and then on the lines lm and rs. Be careful
not to cut beyond the line, so as to make the tenon too small. It
is easy to trim it a little with the chisel if it is too large. Cut a
little bevel around the end of the tenon, so that it will drive
through smoothly without catching and tearing the sides or ends
of the mortise. When it goes through properly and the tenon
and shoulder fit snugly, the projecting end of the tenon can be
sawed off after the whole job is done.
The tenon should be just large enough to drive through with
a slight pressure and fit snugly without any wobbling around. It
should not be so tight as to require much force to drive it home,
or there will be danger of splitting out the sides of the mortise.
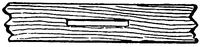
Fig. 586.
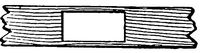
Fig. 587.
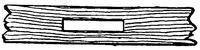
Fig. 588.
There is no absolute rule as to how wide to make the mortise
and tenon in proportion to the width of the pieces. It depends
on the kind of work, the kinds of wood, the kind of strain to be
put on the joint, and various circumstances too complex to be
gone into here. If the tenon is very thin it will be weaker than
the sides of the mortise (Fig. 586). If very thick, the sides of
the mortise will be too thin and will be weaker than the tenon
(Fig. 587). One third of the width is as thin as a tenon is often
made. It will then sometimes be weaker than the sides of the
mortise, as you can see from Fig. 588. But it all depends on
what the joint is for. If it is to stand violent wrenching, the
tenon in this case might break before the mortise-cheeks, and
had best be made a little thicker, with the sides of the mortise a
little thinner; but, on the other hand, if the joint is merely to
hold the tenon-piece in position, as in case of a
post resting on a sill, one third is plenty wide
enough for the tenon, as it will be best not to
weaken the sill by cutting any larger mortise
than is necessary. Sometimes the tenon-piece
is simply let in to the other piece for its full
width. This is called housing (Fig. 589). Two
thirds of the width of the piece is thicker than you will be likely
to have occasion to make a tenon, as this leaves the cheeks
of the mortise very thin. It is wholly a matter of judgment (between,
say, one third and two thirds of the width), according to
the conditions of each job.
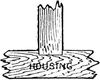
Fig. 589.
Fig. 590.
The length to which a mortise can safely be cut is also a matter
of judgment according to circumstances. If the tenon is thin,
the mortise can be longer than if the tenon is thick, as the cheeks
will be thicker and stronger, but, as a rule, avoid trying to make
very long mortises, unless the tenon is
very thin and the wood very strong, as
there will not be strength enough left in
the cheeks of the mortise (Fig. 590).
Six times as long as it is wide is about as
long as it is well to make a mortise
under ordinary circumstances, though,
as just said, it all depends on the conditions
of the particular piece of work.
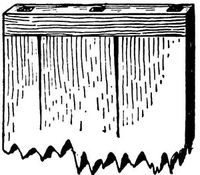
Fig. 591.
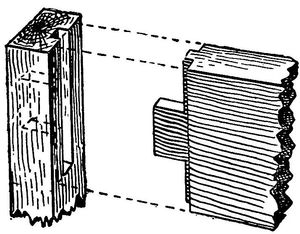
Fig. 592.
When a wide piece is to be mortised
into another piece, two or more tenons
are sometimes cut, thus avoiding too
long a mortise, but this will not do for very wide pieces, unless
some of the tenons are fitted loosely, for the expansion and
contraction of the wide piece may cause it to buckle or split if
all the mortises fit snugly (Fig. 591).
In such cases as a door-frame or when the end of a board is
to be fitted into the side of a post, a tongue and groove is often
used in addition to the tenon, and this (known as "relishing")
is a good way to do (Fig. 592).
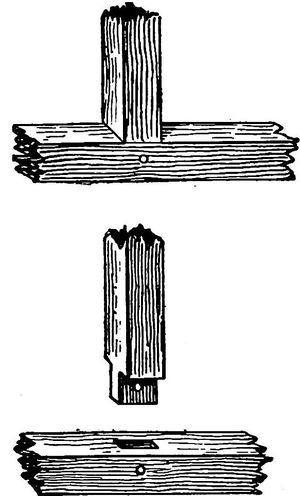
Fig. 593.
The mortise and tenon given above is a very simple form.
Sometimes the tenon is short and does not go through (Fig.
593). This is a common form, and is used a great deal in the
best work. It is sometimes called blind mortising, the tenon
being known as a "stub" tenon.
Mortise and tenon joints are sometimes merely fitted together,
but can also be glued (see Gluing), pinned, wedged, or dovetailed
and fastened with a key.
To pin a mortise and tenon, simply mark a point with square
and gauge upon each side of the piece containing the mortise
(Fig. 593), fit the tenon in place, and bore in from each side (or
in rough work bore right through from one side until the spur
appears on the opposite surface) (see Boring). Then drive through
a snugly fitting pin and trim off the projecting ends. The pin
should be slightly pointed before driving, on the same principle
that the end of the tenon is bevelled. It is not necessary to
round the pin. An eight-sided one is just as good.
Do not use too large pins. In ship-building, bridge-building,
and old-fashioned house-framing pins and treenails from 1"
to 1¾" or more in diameter, are used. Dowels of various sizes
will usually answer for such framing as you may have to do
(though a rift-pin is stronger). For such work as pinning a joint
in a chair, you will not need anything larger than a ¼" hardwood
pin.
You must use judgment as to how near the edge to place the
pin. If you put it too far from the edge, its hold on the tenon
will be weak and the end of the tenon may break out (shear).
If you put it too near the edge, the sides of the mortise may tear
or split out.
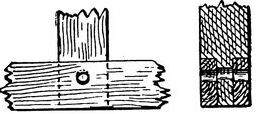
Fig. 594.
Sometimes, particularly in timber work, to insure a snug fit at
the joint, "draw-boring" is resorted to (Fig. 594). The hole for
the pin is not bored through the tenon as just shown, but is bored
a trifle nearer the shoulder of the tenon than the other holes
(in the mortise-piece). The result is that when the pin is driven
through it draws the tenon-piece down to a snug fit at the
shoulder. But this has to be done with judgment. If the hole
in the tenon is too much out of line, driving the pin through tends
to split (strictly speaking to shear) the end of the tenon, and too
much strain is put on the pin.
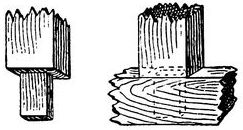
Fig. 595.
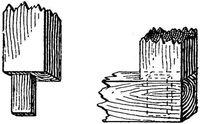
Fig. 596.
In the mortising just shown, there are only two shoulders where
the tenon begins—that is, the tenon is made by only four cuts.
This is good for all common or rough work. In nice work a
shoulder is also cut at each edge of the tenon (Fig. 595). This
makes a neater-looking joint, as these shoulders cover the ends
of the mortise completely. When the joint comes at the end of
the mortise-piece, the tenon can extend to the edge on the outside
and the mortise be cut clear out to
the end, forming an open mortise-and-tenon
joint (Fig. 543), or a wide
shoulder can be left on the outside of
the tenon—the tenon itself being made
narrower (Fig. 596). This course is
adopted in doors and frames of various
kinds (see Fig. 334).
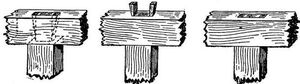
Fig. 597.
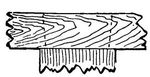
Fig. 598.
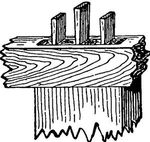
Fig. 599.
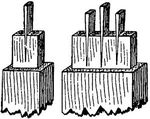
Fig. 600.
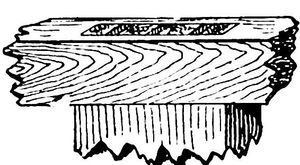
Fig. 601.
A good way to fasten tenons is to wedge them. This can be
done whether the tenon goes through the mortise-piece or only
part way, as in a blind joint. The wedges can be driven between
the tenon and the ends of the mortise (Fig. 597), or, as is often
better, driven into cuts made in the tenon itself, thus spreading
the tenon toward the end, dovetail fashion, making it extremely
difficult, or impossible, to pull it out of the mortise. Before wedging,
the mortise should be cut under or enlarged toward the side
on which the tenon comes through (Fig. 598). The wedges can
then be dipped in glue and driven as in Fig. 599. To spread the
tenons themselves, one or two or even three saw-cuts should be
made in the tenon, lengthways and farther than the wedges will
extend (Fig. 600). The tenon and mortise having been properly
glued, the tenon is fitted in place, and the wedges, previously prepared
of some strong wood and tapering quite gradually, are
dipped in the glue and driven down into the saw-cuts, thus
spreading the end of the tenon into a dovetail until it fills the
mortise (Fig. 601). It is often best to drive the outer wedges
nearer the edge of the tenon than is shown in Fig. 600, lest the
tenon-piece be split.
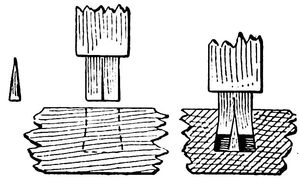
Fig. 602.
The process is much the same when the tenon does not go through
the mortise-piece (Fig. 602). The mortise is undercut as before,
and saw-cuts are made in the end of the tenon. The wedges are
carefully planned and cut so that, when the tenon is finally in
place, they will be of the right size to spread it so as to fit the
mortise. The wedges must not be too long, so as to interfere
with the tenon being driven home or to break off. When you
are sure the whole will go into place and fit snugly, glue everything,
start the wedges in the cracks, and drive the tenon quickly
to place. This will of course drive in the wedges, which will
spread the tenon at the end and fix it firmly. In fact, if well
done, you cannot get it out again.
There are other forms of mortise and tenon, but they will be
seldom required by the amateur. See Joints.
Nailing.—To drive nails, hold the hammer near the end of
the handle. Do not, as is often done by boys and amateurs,
grasp it close to the head. The nearer the end of the handle
you take hold, the harder blow you can strike, just as the longer
the handle, the harder the blow. Use light strokes—mere taps—in
starting the nail. After you are sure it is going straight you
can then use more force to drive it home. Do not try to sink
the nail-head quite flush with the wood. Leave that for the
nail-set. You may think that any slight depression you may
make if the hammer strikes the wood will be too slight to be seen,
but that is not so, as the slightest dent or depression will probably
show in finished work.
The head of the hammer should be swung back and forth
through an arc of a circle of which the wrist is the centre. Do
this carefully and steadily and you will send the nail in quicker
and straighter than when you flourish the hammer wildly around
in the air and bring it down with a ferocious bang somewhere in
the vicinity of the nail, as boys of all ages have been known to
do.
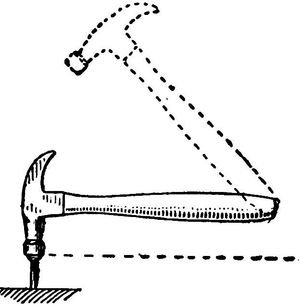
Fig. 603.
Now, remembering that the hammer-head will (and should)
swing around in an arc of which your wrist is the centre, you
must see that your wrist is in such a position that the hammer-head
can strike the nail squarely—that is, the hammer-handle,
when the head rests squarely on the nail-head, must be in a line
parallel with the flat surface of the top of the nail (Fig. 603). If
the wrist is much above or below this line, the nail will be struck
slantingly, and either be driven crooked or bent (Fig. 604).
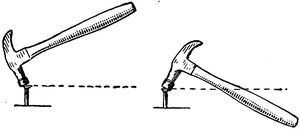
Fig. 604.
First place the hammer in the correct driving position, and
then swing it back and forth as nearly in the same curve as
you can. Practise this motion a little on a soft piece of board
to see how squarely you can dent the board and how nearly you
can hit the same dent with successive strokes.
Frequently a nail does not drive straight, but becomes bent and
goes in the wrong direction. If you withdraw it do not, as a rule,
try to drive another in the same hole, but start it in another place.
Sometimes a nail will be bent because the face of the hammer-head
has glue or grease on it. In such a case rub it on a piece
of fine sandpaper or in the ashes or the ground.
Holes should always be bored when there is any chance of
splitting, or when slender nails are driven into hard wood (lest
they bend), but remember that the hole, particularly in the inner
piece, should not be quite as large as the nail. With nails having
large heads it does not matter
in hard wood if the holes in
the outer piece are about as large
as the nails, provided the latter
drive tightly into the inner piece.
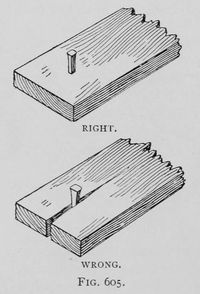
Fig. 605.
The hole made by a brad-awl is
better, when it does not split the
wood, than one made by a bit or
drill, because it does not remove
the wood but merely presses it
aside, so that when the nail is
driven the fibres tend to spring
back to their original position and
close in around the nail, helping
to hold it in place.
In driving the old-fashioned
nails, which have two sides parallel,
while the other two incline toward the point or taper,
they should be used on the same principle on which you use the
brad-awl. If placed the other way, the wedge shape of the nail
will tend to separate the fibres and split the wood (Fig. 605).
With nails having two sides smooth and two rough, as you pick
them up you can tell by the fingers which way to hold them,
the rough sides going across the grain and the smooth sides with it.
Nails will drive into hard wood easier if you touch the points
to grease, tallow, lard, or soap.
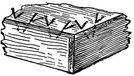
Fig. 606.
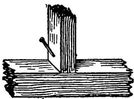
Fig. 607.
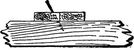
Fig. 608.
"Toe" Nailing.—If you wish nails to hold as much as possible,
toe them—that is, slant them (Fig. 606). You can see
at a glance that the board will be held much tighter than if the
nails were driven straight up and down. Of course you cannot
always drive nails this way, and there are many cases in which
you would gain nothing, but it takes only a moment longer to
toe nails, and it is often very useful where you wish to be sure
that the work will hold together. There are many cases where
you cannot nail any other way, as when you fasten a stud to the
top of a sill (Fig. 607), and you can see at once that it is advantageous.
Of course this is not a good method for work which
you may wish to take apart again.
Slanting the nails helps to draw one piece tightly up to another,
as is often desirable for a tight box or a floor (Fig. 608). You
can increase this effect, after you have driven the nail part way
in, by drawing the hammer towards you as you strike, or in the
direction towards which the nail points, thus bending the upper
part of it toward the other piece, which tends to make a tight
joint.
Clinching Nails.—The way to clinch nails is simply to drive them
through against a heavy hammer, or any solid metal object, held on
the other side. As the point comes through it is gradually turned
over or hooked around into the wood and when the head is driven
home the point will be firmly embedded in the wood. Another
way is to simply strike the projecting ends with light, slanting
blows. This will gradually bend or curl the point over to one
side, and as it bends over you can pound more directly downward
until the hooked end of the nail is buried in the wood. Clinching
is very useful for many purposes, as in nailing cleats on a
shed door. It is usually best to bend the nails over in the direction
of the grain, rather than across it.
Whether to clinch or toe the nails must depend on the work.
Clinching is better for anything that is to be slammed or subjected
to violent treatment, while in many cases toeing is better,
and frequently you cannot reach the points of the nails to clinch
them.
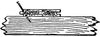
Fig. 609.
Blind nailing is resorted to in order to have a clear, smooth
surface, as in floors laid with matched-boards. Each board is
nailed just above the tongue, with the nails slanting through the
solid part of the board (Fig. 609). This holds the board down
and tends to force it closer to the adjoining board. The grooved
edge of the next board entirely
conceals the nailing
and leaves an unbroken
surface.
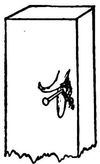
Fig. 610.
Another form of concealed
nailing, known as "sliver"
nailing, is sometimes
practised in inside work
(sometimes in putting up "inside finish"). A little shaving is
raised with the gouge (an inside gouge is best) or a narrow chisel,
where the nail is to go, and curled away sufficiently to drive and
set the nail (Fig. 610). Hot glue is then dabbed into the groove,
the shaving (which is only raised at one end and not detached
from the wood) is pressed back into place, and the spot rubbed
with sandpaper drawn around a flat block until the shaving is
firmly glued where it belongs. This takes but a moment or two,
and when the work is finally smoothed and finished the place cannot
be detected, if the operation has been properly done. This
is convenient to know in case you have to drive a nail where
there is objection to its being seen.
See Withdrawing Nails.
Nails.—There are many kinds of nails, many more than is
worth while to specify here, as you will probably use those of
wire for most of your work. When another kind would be
preferable (as is the case for some purposes) it will be specified.
The nails in common use before the introduction of those of wire
were known as "cut," being stamped from a sheet of metal, and
"wrought," the latter kind being much older and originally forged
by hand into shape, one by one (hence the name), but now commonly
made by machine. The expressions three-penny, eight-penny,
ten-penny, etc., indicate the length, and come from an
old custom of so designating the lengths, but you need only to
call for them by the length, as 2 inch or 2¾ inch, in order to get
what you want, and you can easily select whatever degree of
stoutness you need. Copper or galvanised nails and tacks will
be needed for your boat-building, copper being preferable, particularly
for salt water.
Fig. 611.
Nail-Set, or Punch.—The nail-set, for sinking nail-heads
below the surface, is quite important, and it is well to have a
large one and a fine one. The end of the set or punch must not
be allowed to become rounding or it will be all the time slipping
off the nail-head and punching holes in the surrounding wood.
A slight conical depression in the end of the set is good. Do
not use a file for a nail-set, for the end is too hard and will dent
the face of the hammer-head.
When setting nails, hold the nail-set firmly against the little
finger, placing the latter on the wood close to the head of the
nail, as shown in Fig. 611. This will keep the set from slipping
off the nail-head and damaging the work.
Nippers.—A pair of these will often be of use in wood-working
operations.
Odd-Jobs.—A very simple combined tool known as "Odd-jobs"
can be used as a marking-gauge, mortise-gauge, scratch-awl,
try-square, T-square, depth-gauge, mitre-square, spirit-level
and plumb, inside-square, and beam-compass. It is well suited
to much amateur work, and is cheap.
Oil.—Sperm oil is good to use with your oil-stones. Kerosene
is good. Lard oil can be used. All thick and gummy oils
should be avoided. Never use linseed oil or any similar vegetable
oil, as it is not a good lubricator, and gums the stone. Glycerine
thinned with turpentine or alcohol is sometimes used, and even
turpentine alone. For oil for finishing and painting, see Finishing
and Painting.
Oil-stone.—It is very essential to have a good oil-stone. They
can be found of many degrees of fineness. Those of very fine and
hard grain, which give a keen edge but cut very slowly, will not
be found so well adapted to your use as those of moderate coarseness
and softness, which cut faster. The stone known as Red
Washita is good to use for wood-working tools, as it cuts rapidly.
It should be free from hard spots. The Arkansas stone produces
a very fine edge, but is of so fine texture that it is not so
well adapted for your tools as a coarser stone, unless you happen
to find a quick-cutting one. The Turkey stone will produce a
keen edge, but is not so good for your use.
Some stones (and excellent ones) cut best with water. When
first trying a new stone use water, and if the surface does not
become at all glazed or polished it will not be necessary for you
to use oil.
The stone should always be kept covered when not in use, to
protect it from the dust and dirt. Set it in a block with a cover
or make a box for it. Always wipe it clean after using, to remove
the paste of ground stone, steel, and oil left on the surface.
When an oil-stone becomes unevenly worn, it can be trued by
rubbing it around on a sheet of sandpaper fastened on a flat surface,
like the side of a board. Water can be used in this
operation.
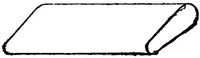
Fig. 612.
In addition to the ordinary flat oil-stone, slips of stone of various
shapes are useful, a common and useful
form being that shown in Fig. 612, wedge-shaped
on one edge and convex on the
other. If you have V-tools, carving
gouges, or other tools sharpened on the inside, you must have
slips of stone of various shapes with which to sharpen them.
See Oil and Sharpening.
Painting.—You can paint your work very satisfactorily—perhaps
not quite as well or quickly as a skilled painter by trade,
but well enough for all practical purposes if you observe carefully
a few simple principles. If you disregard them and think, like
many amateurs, that anyone can paint right off the first time
without any knowledge or thought, your painting will be botch-work.
Keep your work well painted. It is cheaper in the end to
paint frequently and keep the work protected from the decay and
damage due to exposure—not to speak of the better appearance.
Do not use cheap paint, unless, of course, for some cheap or
temporary purpose, and it is most important that the first or
"priming" coat should be of good quality. If you are obliged
to use inferior paint at all, use the best for the first coat and the
poorer quality outside rather than the reverse, but it is economy
of money and time to use good paint throughout.
Prepared liquid paints are the simplest, handiest, and cleanest
for amateur work, and (if you do not try to economise on the
quality) the best for you to use for many purposes, but for outside
work (work exposed to the weather) you can probably do no
better than to use the best quality of white lead and oil,[48] coloured
if desired, which costs less, is more durable, and which you can
easily mix yourself, or buy already mixed of a painter. If you
need but a little, you can get a pot of paint with suitable brush at
a paint shop, returning what you do not use and paying by weight.
But if you have much painting to do, it is better and cheaper to
have your own brushes and paint. The prepared paints of any
colour you can also buy in the form of paste, to be thinned when
used, which is usually cheaper than the prepared paint in liquid
form.
The white lead you can buy by the pound, ground and already
thinned with oil, or, what is perhaps more reliable, ground in the
form of paste ready to be thinned with oil or, if for inside work,
with turpentine. White lead, which is also the basis or an ingredient
of the prepared paints, is a poisonous and unhealthful
substance. There is, however, but slight danger (practically
none) from such painting as you will do. But it is well to wear
old clothes when you paint, and carefully wash the hands and
face as soon as the work is done, and in case of continued indoor
painting to see that the room is well ventilated. The mere odour
from a can of paint is enough to make some people feel ill, as
you may know, while it can be used for a long time by others
apparently without harm.
In regard to coloured paints, the simplest way is to buy your
colours ready mixed in oil, to be thinned for use, or in liquid form
of any desired colour, prepared to use upon opening the can.
You can, however, colour or tint your paint yourself with various
dry colours, which you can buy in the form of powder at the paint
shops for a few cents. It takes but very little of most colours.
Do not stir these dry colours directly into your paint, but first
mix them with oil or turpentine.
It requires considerable knowledge of colours and their combinations
to know how to mix different colours or shades to produce
some particular shade, or to match some tint, but when the
exact shade makes no difference you will have no great difficulty
in producing the colour you wish. Test the shade of your paint
on a piece of wood. The way it looks in the paint-pot is often
very deceptive. In making a shade darker, especially when
tinting white paint, be careful to add but a very little of the darker
pigment at first and be sure that it is thoroughly mixed, or you
will be likely to find after you have begun to paint that you have
a much darker shade than you intended. It is surprising how
small a quantity is sometimes needed to tint a whole canful of
white paint—the merest dab of chrome yellow will tint a quart of
white paint to a good cream shade. Remember that it is much
easier to add a little more colour if the result is not dark enough
than to lighten the shade if too dark.
Linseed oil (either raw or boiled) is required with which to
mix the lead and thin it to the proper consistency. Raw oil is
best for outside work that is exposed to the weather, as it is more
penetrating and more adhesive, although slower in drying than
boiled oil. Boiled oil does very well for inside work where it is
not exposed to the weather. There is some difference of opinion,
however, in regard to the use of the two kinds.
Turpentine is also used for thinning paint. It makes the paint
flow easily and is freely used for that reason, but it probably detracts
from the durability of all paint if used lavishly and should
never be used for outside work. It is commonly used for inside
work and causes the paint to work more freely and smoothly
from the brush and to dry more quickly. It gives the paint that
dull, soft, or "dead" appearance often desired in inside work,
instead of the shiny surface which is produced when mixed with
linseed oil alone.
It is usual to add to the paint something else, known as a
"dryer," to cause it to dry more quickly. Japan is one of the
best of these preparations, but be careful to use very little of any
form of dryer, as it is undoubtedly injurious to the durability of
the paint and liable to cause cracking and checking. Avoid all
kinds of "chain-lightning" dryers. Do not add a dryer to the
colour until just before you use the paint and only to the amount
you are to use at one time.
Another ingredient, which is not injurious to use, is zinc, but
zinc paints are considered inferior. Red lead is commonly used
to paint iron and is considered very durable for that purpose.
Black japan varnish is often used. Iron must always be dry and
it will be better to have it warm also.
Be sure that your work is thoroughly dry before beginning to
paint, else the wood will be liable to decay, or the paint to peel,
or both. Do not paint wood before it is thoroughly seasoned.
Look the work over carefully and see that it is ready in all respects,
before applying the paint. See that the surface is free
from dust.
Look over the work for any knots or streaks of resinous or
pitchy matter and wash them with a coat or two of shellac, to
"kill" the turpentine and prevent its oozing through and spoiling
the paint.
Try to mix enough, and only enough, paint for the coat you
are about to put on, but do not mix a great quantity in advance
with the idea of keeping it on hand.
The first coat should be thin rather than thick—with plenty of
oil to saturate the wood. The oil will be quickly drawn into the
wood, and you can readily see that the first coat should be thin
to properly soak into the surface. If thick, the paint will not be
sufficiently absorbed, but the oil will soak in quickly, leaving too
much residue of the pigment on the outside. Work this first
coat well into the wood. Take up but little paint, and draw the
brush carefully over the edge of the pail,[49] or over a wire stretched
across the top, to remove any superfluity of paint, and begin the
painting at the highest part of the work, or the part farthest from
you, to prevent spattering or dripping paint over the freshly
covered surface. Begin, also, at one end or side of the surface,
working toward the other end or side, drawing the brush back
and forth both ways to distribute the paint as evenly and smoothly
as possible, and try not to leave any part of a surface untouched
until another time, or it will be likely to show a "lap" where
you end and begin—that is, if you cannot cover the work entirely
at one time, leave off where there is some natural line or
break in the work. Finish the side or the end and do not leave
off right in the middle of a flat surface. This does not matter
quite so much in the priming, but will show plainly in the later coats.
After this coat has had time to dry thoroughly, carefully putty
the holes and cracks. Remember never to use the putty until
after at least one coat of paint has been applied and dried. The
reason for this is that the fresh wood will quickly absorb the oil
from the putty, leaving it dry and crumbly, while if a coat of
paint has been put on first and dried, the wood will be already
charged, so to speak; the pores will be more or less choked up
and the bulk of the oil will remain in the putty.
Paint with the grain of the wood, or the long way of the work,
using a large brush for large surfaces and finishing all corners,
mouldings, and edges with a small brush. In doors or panel-work
first paint the panels, then the rails, then the styles (see
Fig. 505). You will thus follow the construction of the work
and the grain of the wood, and where you daub the paint beyond
the part you are painting (as you will have to do), the daub will
be wiped out neatly when you paint the next part.
Paint joints in outside work, tenons and mortises, shoulders,
etc., before putting together, with good white lead. It is not
always customary to paint the hidden parts of joints before putting
together, particularly in cheap work, but it is well to do so
in all work which you wish to have endure, in all framework exposed
to water and the weather, and in boat-building. Exposed
work quickly decays at the joints and seams because the water
and dampness collect in such places and do not run off or evaporate
as readily as from a smooth surface, so the more you can
protect these hidden parts with paint, the better, and the labour
is but slight.
When you have paint left in the paint-pot which you wish to
keep for use another time, pour just enough raw linseed oil over
the top to cover it completely. This thin layer of oil will exclude
the air and keep the paint from hardening. When you wish to
use it again, pour off the oil or stir it into the paint, according to
whether the latter requires more oil or not. When you get
through painting, if you are going to do more in a short time, it
will do to leave the brush in the paint, but do not leave it standing
or resting on the bottom of the can, as that tends to bend the
ends of the bristles and get the brush out of shape. Rig a wire
hook on the handle and hang the brush so that the bristles will
be covered by the paint, but without touching the bottom. If
you are not going to use the brush again for some time, it should
be cleaned and put away. Turpentine is often used, but kerosene
answers every purpose. Be careful to wash out all the
paint, however, as a very little left between the bristles will
stick them together so as sometimes to ruin the brush. Another
way to keep brushes which are in use is to hang them from the
handles in a can partially filled with oil, the whole being kept
covered. Water can be used instead of oil. Arrange it so that
the hairs will be just covered.
The first coat especially should be given plenty of time to dry,
for it is the foundation and basis of the whole operation and the
firmness and durability of the painting depends much upon it.
Each succeeding coat should have plenty of time to dry before
applying another, bearing in mind that applying a second coat,
before the first is fully hard, excludes the air from the under
layer of paint and causes it to dry much more slowly than if left
exposed as it should be. In such cases, the outside surface may
often seem to be dry and hard while the paint underneath remains
comparatively soft. When the first layer finally does dry,
the tendency is to crack the surface of the outside, which has
dried first. You can find an extreme illustration of this point in
some old paint and varnish shop where some convenient place
on the wall has been taken against which to slap and work
brushes. You can find daubs of old paint and varnish, sometimes
an inch thick, made up in this way of hundreds of layers
slapped on before the previous ones were dry, the inside remaining
soft in some cases after twenty years.
Paint dries, as a rule, more quickly in a warm temperature than
where it is cold, and more quickly where it is dry than where it
is damp. So, if you are obliged to paint where it is cold or damp,
you will be justified in using more dryer than where it is warm
and dry.
Sandpaper nice inside work after the first coat and between
each two successive coats. Pumice can be used for old inside
work to be repainted. Steel wool can also be used.
Keep a rag with you, when painting, to wipe off the spattering
which you will be sure to make. It is not easy to get daubs of
paint off after they are hard.
Turpentine will take the paint from your hands, but common
kerosene will clean them satisfactorily when the paint is fresh,
and is probably better for the hands.
Panels.—See Doors and Panels.
Panel-Saw.—See Saw.
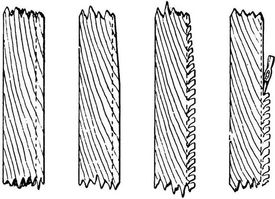
Fig. 613.
Paring.—In paring or trimming a piece of wood to a line, if
there is much surplus wood to be removed, you can sometimes
chop pretty boldly with the hatchet until you get near the line,
provided you watch the direction of the grain carefully to see
that the split cannot run up to the line; sometimes you can chop
safely in one direction but not in the opposite (Fig. 613), but
as a rule keep well away from the line for the first cut. Even
wood that appears to be
quite straight-grained will
often split differently
from the way you expect.

Fig. 614.
To trim a piece of
wood, like the edge of a
board, down to a line,
with a hatchet, for instance,
you can first score
the piece with a series of
short cuts, stopping short
of the line, to break up
the grain of the wood, and then trim these loosened chips off
down to the line with the plane, chisel, draw-knife, or whatever
tool may be suitable. The main point is to cut in such a direction
that the grain will not cause the cuts to extend farther than
the line or to run into the main piece of wood (Fig. 614). The
same principle can be applied often in trimming and removing
superfluous wood with a chisel, a draw-knife, or a knife. The
cuts can often be made with the saw to better advantage (Fig.
614). It takes a little more time to make these cross-cuts with
hatchet, knife, chisel, or saw than to whack away furiously lengthways,
as if you were chopping kindling, but after you have spoiled
a few pieces by splitting beyond the line you will conclude that
the former is the more workmanlike and reliable way.
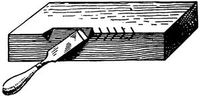
Fig. 615.
This same principle is applicable to making chamfers or bevels
with a chisel or knife (Fig. 615). You will find frequent occasion
to apply this principle of breaking the grain into small pieces before
making the final cuts in many kinds of work. It is in constant
use in "roughing out" carving.
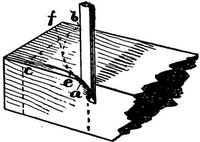
Fig. 616.
To trim to a curve as shown in Fig. 616, begin at the edge just
outside of the end of the curve and
work with the grain from a to b. It
is often a help in such cases to first remove
part of the wood with the saw,
as on the lines bc and then ef. Finally
trim the curve smoothly close to
the line. Frequently this can be done
to better advantage with the work
held in the vise instead of lying horizontally on the bench.
Paring off superfluous wood down to a given line or trimming
off an irregular edge with the chisel is very easily done provided
the grain of the wood is straight, or runs in the same direction,
even if slanting, as in Fig. 617, because you can then cut with
the grain. It is often better, however, to cut across the grain, or
diagonally, with the chisel, as the wood is less likely to be split
by the tool.
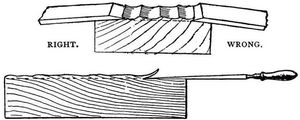
Fig. 617.
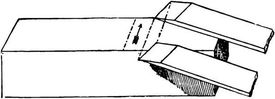
Fig. 619.
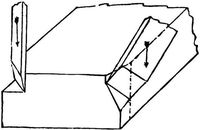
Fig. 620.
When the grain runs in several directions, and keeps cropping
up to the surface and dipping down again as shown in Fig. 701,
it becomes more difficult to pare the surface smoothly with the
chisel. In such a case remember the sliding or drawing stroke
and traverse the surface with a diagonal crossways motion
(Fig. 619) that will trim off the fibres with a slanting stroke without
causing them to be torn up. Slant the cut so that if the
wood should tend to split, it will be in the direction of the part
cut away and not towards the piece to be kept—i.e., so that the
chips will split and not the body of the wood. Reverse the chisel
and cut in the opposite
direction when a
change in the direction
of the grain requires
it. Some
pieces are, however,
so extremely irregular
that you cannot do
this, but must slice away the best
that you can and leave the rest to
other tools. In cutting off a
corner or rounding or bevelling
an edge you can use the slanting
cut (Fig. 620).
In using the chisel for paring,
let the left hand, which is nearer
the cutting-edge than the right, act as a brake or countercheck
or drag to check the progress of the tool. It is largely by the
varying balance of these two forces—the pushing forward of the
tool with the right hand and the checking and controlling with
the left—that correct and effective control of the tool is gained.
The left hand should in many cases rest upon or grasp the wood
as well as the blade. See Chisel.
Paring-Chisel.—See Chisel.
Parting-Tool.—See Carving Tools.
Pencil.—See Marking.
Pincers.—There are various kinds of pincers, pliers, and
nippers. A pair of common pliers and also cutting nippers will
be very useful.
Plane.—A plane is in principle (roughly speaking), as you
will readily see, nothing but a chisel stuck through a block of
wood or iron. Small or narrow surfaces may be smoothed to a
certain degree by the chisel, the knife, or even the hatchet, but
for large surfaces something is needed which can be more exactly
controlled than the knife, ax, or chisel, held in the hands. So,
to hold the chisel firmly in one position and to apply force to it
more advantageously, it is firmly fixed in a block of convenient
size and shape and becomes a plane.
A very short block will prevent the chisel cutting deeper at one
point than another, but the tool will follow the irregularities of
the surface and, though it may make the surface smooth, it will
not make it level, or flat; so the block is made longer, that it
may not go down into all the little hollows, but plane off only the
higher parts.
The two essential parts of a plane are the iron and the stock.
The bottom surface of the stock
is called the sole or face (ab in Fig.
621), the wedge-shaped hole where
the iron goes is called the throat
(c), and the slot at the bottom
through which the edge of the
iron projects is called the mouth (d).
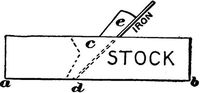
Fig. 621.
Bear in mind that the shape of the cut made by the plane will
be a reversed copy of the shape of the cutting-edge. If the edge
is rounding, the cut will be hollowing. If the edge is hollowing,
the cut will be rounding. If the edge is straight, the cut will be
straight. If the edge is nicked, ridges will be left on the wood.
If buying new, you will do best, as a rule, to get iron planes,
though very good ones can be had with wooden stocks, but with
the convenient appliances of the iron planes. Some workmen
still prefer the old wooden planes, but it is better to buy iron
ones.

Fig. 622.
The jack-plane is used for coarse work and to rough off the
surface with large shavings, ready for the other planes. Fourteen
or fifteen
inches is a good
length. The edge
of the iron is not
ground squarely
across, like the
chisel, but is
rounded slightly so
as to cut deeper in the middle (Fig. 622). Heavy shavings
can be cut and the rough outside of a piece of wood taken off
quicker and easier than with a more squarely ground iron, but
it does not leave the surface smooth, as the strokes of the jack-plane
form a series of hollows and ridges (Fig. 623, exaggerated).
After taking off the rough surface with the iron projecting considerably,
you can of course set the iron finer, and by going over
the work several times you can take off the worst of the ridges,
but without a great deal of labour you can never get a really
smooth surface with a plane that cuts hollows. A common use of
the jack-plane is for "traversing," or planing across the grain,
which is often the quickest and easiest way to reduce a surface to
the desired shape, and for cleaning off where pieces have been
glued together. If you should use a jack-plane to do the work
of a fore-plane, have it ground more squarely across like the fore-plane.
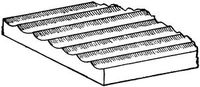
Fig. 623.
If you use an old-fashioned wooden plane, take the handle in
your right hand, laying your left over the top and side, just a
little in front of the iron, with the thumb towards you and the
fingers on the farther side, as shown in Fig. 624. This position
allows you to bear weight on the fore part of the plane when
necessary and to control the tool to the best advantage. This
applies to the old-fashioned wooden planes. If your plane is
iron, there is a handle or knob for the left hand which you simply
grasp in a natural way.
Push the jack-plane forward steadily an arm's-length. Then
stop and start afresh for another arm's-length stroke. When
drawing the plane back tip it on the farther edge. The cap or
break-iron can be set quite far back from the edge for rough
work, about one eighth inch, but much nearer for finer work.
Fig. 624.
In these days when almost everything is planed by machinery
with greater or less smoothness, you will probably not have much
use for a jack-plane unless you find you have a good deal of
rough planing to do yourself.

Fig. 625.
The fore-plane or trying-plane is longer and larger than the
jack-plane. Eighteen to twenty-two inches is a good
length. It is used to straighten and level the surface
after the worst roughness has been taken off. The
surface having been roughed off by the jack-plane,
the fore-plane is not required to take off such heavy
shavings and the iron is therefore ground squarely
across like a chisel, but very slightly rounded at the
corners (Fig. 625). It is held in the same way as the jack-plane,
but the stroke should be long and steady, for the fore-plane, which
is long, will straighten the surface, and smooth it also. The iron
can project more for soft and loose-grained woods than for hard,
and the cap or break-iron should be nearer the edge for hard
woods.
The jointer (22" to 30" in length) or long jointer (from 24"
to 30"), is still longer than the fore-plane and correspondingly
more accurate for making a surface level and true, or for shooting
the edges of boards. Twenty-four inches is a good length.
It is very useful for making joints to be glued, and is used in
the same way as the fore-plane, the stroke being continued
steadily the whole length of the piece if possible.
The smoothing-plane is used, as its name indicates, for the final
smoothing of the surface, so far as it can be done with a plane.
It is from five to ten inches long.
It is an invaluable plane to the amateur, and the beginner can
get along very well for a great deal of work with no other, for
stock can be bought ready planed and can easily be trued and
jointed, when necessary, at any wood-working mill or shop at
slight expense.
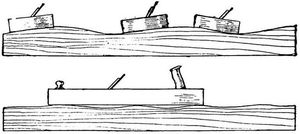
Fig. 626.
A plane with a short stock, as the smoothing-plane, will make
your work smooth, but it is hard to make it straight and level or
true with such a tool, because, being short, it will follow the
larger irregularities of the surface and will only plane off the
smaller inequalities. It will go up and down over the hills and
valleys of the wood, so to speak, while a longer plane cannot do
this, but will cut off the tops of the hills until the surface is made
level, as shown in Fig. 626. The smoothing-plane is therefore
merely to smooth the surface after it has been straightened by a
longer plane, or in cases where smoothness only is essential and
it is not required that the surface should be true. Small pieces
can, of course, be straightened and trued by the smoothing-plane
alone.
A wooden smoothing-plane can be held as shown in Fig. 627.
An iron plane can be used by laying the hand naturally over the
knob for the purpose.
Fig. 627.
The block-plane is small and is meant chiefly for planing across
the ends of pieces (for planing "end-grain"), but it is also frequently
useful in other directions. The iron is usually set at a
more acute angle with the face of the stock than in the other
planes and with the bevel upwards, and the width of the mouth
is often adjustable, which is a convenience. A block-plane is
made which can, by means of a detachable side, be used as a
rabbet-plane. The block-plane makes a quite good substitute
for a smoothing-plane for amateur work and is a very useful little
tool.
The toothed-plane is about the size of the smoothing-plane,
but the iron is corrugated or scored with grooves lengthwise,
so that one side of the cutting-edge of the iron, instead of being
smooth, is notched into little teeth somewhat like a fine saw
or the edge of a file, and the iron is inserted in the body of the
plane almost vertically. This plane makes scratches all along its
course instead of taking off shavings. It is used in veneering
and in gluing other surfaces. It can frequently be used to good
advantage to break up the grain where two edges or surfaces are
to be glued together, so that the glue may hold the two rough
surfaces together more strongly, upon somewhat the same principle
that the plastering on a lathed wall holds its place tightly
through the hold it gets on the cracks between the laths, intentionally
left for the purpose. The toothed-plane is used for this
purpose in veneering. The idea upon which this tool is based
originated with the Orientals, who have for ages scratched or
toothed the joints of their wood-work.
It can also be used to subdue a refractory piece of crooked grain
which you wish to get smooth, but which may crop to the surface
in such a way that you cannot plane it without chipping the
grain. By scratching the surface thoroughly in all directions
with the toothed-plane set very fine, the obstinate fibres can be
broken so that the surface can be smoothed with the scraper, not
using the smoothing-plane. As a matter of fact, however, if you
cannot smooth a piece of wood, the trouble is usually with the
edge of the plane-iron or its adjustment, or with your manner of
planing, for a very keen edge is supposed to be able to cut the
most obstinate grain, unless, of course, the wood is extraordinarily
hard.
The bull-nosed-plane has the iron close to the fore end of the
stock, to work into corners and awkward places which cannot be
reached by the smoothing-or block-planes. The iron is reversed.
A very small plane (perhaps four inches long) of this kind is
useful.
The circular-plane is used for planing curved surfaces, the sole
being now made of a thin, flexible metal plate and adjustable so
that either concave or convex surfaces can be smoothed. It is
very useful at times, but is not essential for an amateur.
The rabbet-plane, which is used to cut rabbets, as the name indicates,
is a useful tool, but in most cases you can dispense with
it by having rabbets cut at a mill.
A router, for cleaning out and smoothing the bottoms of grooves
and depressions, is very useful at times.
There is a variety of other planes for special purposes, as the
plough, matching-planes, hollow and round planes, beading-planes,
etc., as well as various combination and "universal" planes.
Many of these are excellent, but, as a rule, are not important for
the amateur in these days, as the work they do can be so easily
and cheaply done at a mill. You will seldom feel the need of buying
any of them, unless you live where you cannot reach a factory.
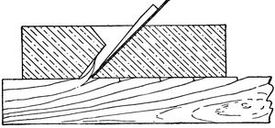
Fig. 628.
You will find it important to bear in mind the purpose of the
cap or dull iron screwed upon one side of the cutting-iron, in
what are called "double-ironed" planes. A plane with a single
iron, like a chisel, will cut satisfactorily and easily for straight-grained,
soft wood, and for hard wood when planing with the
grain, but many pieces of stock are difficult to plane, because the
grain does not run in the same way, but turns and twists, cropping
up to the surface and dipping down again in all sorts of
curious and perplexing ways. In planing them the wood is
likely to be continually chipping or tearing and breaking off
below the surface, instead of planing smoothly like a piece of
straight-grained pine, leaving dents and rough hollows over the
surface. The natural tendency of the plane-iron is to split the
wood in front of the iron in such cases (Fig. 628). To remedy
this the plane has a double iron. An iron or cap with a dull
edge is screwed on to the face of the cutting-iron (Fig. 629)
so as to help bend and break off the shavings before the split
gets fairly started (Fig. 630),
when the iron can cut it smoothly
off. The thickness of the shavings
is greatly exaggerated in the
cuts for the sake of illustration.
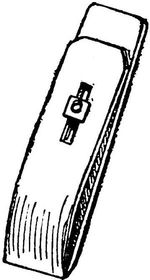
Fig. 629.
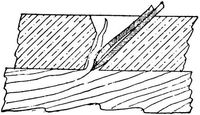
Fig. 630.
The cutting edge is said to have
"lead" in proportion to the distance
it is in advance of the cap-iron.
The cap can be set some little distance from the edge for
the jack-plane, as far as an eighth of an inch, but with the fore-plane
and smoothing-plane it must be set quite close to the edge,
the distance varying according to the character of the wood. The
more crooked or cross-grained the wood, the nearer the dull iron
is brought down towards the edge of the sharp one. The nearer
the edge, the smoother the result, but the harder to work the plane.
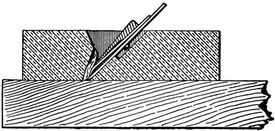
Fig. 631.
Something more than the break-iron is required, however, to
insure breaking the shavings. There must be an angle, against
which they can be broken, close in front of the cutting edge and
above the shaving. This angle is the forward edge of the mouth
or slot in the sole
through which the
iron projects (Fig.
631). Thus the
width of the
mouth makes a
difference in the
smoothness of the
surface, for a
narrow mouth is
necessary to ensure the shaving being readily broken by the cap.
With a wide mouth, the shaving will not be broken by the cap in
time, because there is no corner against which to break it.
With straight-grained wood this does not make so much difference,
but with crooked and broken grain narrowness of mouth is
quite essential to a smooth surface, provided that the opening is
wide enough to allow the shaving to pass through freely. Rough
and knotty wood requires the mouth very narrow and the iron
set very fine (i.e., projecting but very little from the sole) and
the cap quite near the edge.
The modern iron planes have simple appliances for setting or
adjusting the projection of the iron from the sole and thus regulating
the thickness of the shaving. If, however, you are obliged
to use the old-fashioned wooden planes, you raise the iron
in the same way that you loosen it for removal, by lightly
tapping on the top of the fore end of the stock, keeping hold of
the plane with the left hand so as to prevent the iron falling
through if loosened too much. When the iron is raised enough,
fix it in place by tapping on top of the "chip" (Fig. 621, e) or
wedge which holds it in place. To lower the cutting edge, loosen
as before and, checking the edge with the finger, let it project the
required distance, which you can tell about by looking along the
sole (Fig. 632), and fix in place by tapping the "chip" as before.
This is the process used in removing the iron for sharpening and
replacing it, the chip being removed as well as the iron. Any
carpenter will show you the operation. Always hold the plane in
the left hand in all these adjusting operations. Do not strike or
tap any part of it while it rests on the bench or on anything solid.
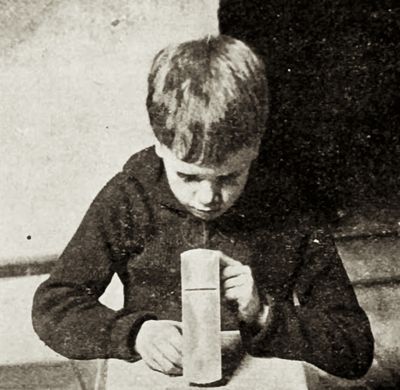
Fig. 632.
To smooth a rough piece of wood, use first the jack-plane, to
remove the rough surface and superfluous wood, and then the
fore-plane, to straighten and smooth the surface. If there is no
need to have the surface true, but only smooth, you can omit
using the fore-plane and follow the jack-plane at once by the
smoothing-plane. With ordinary machine-planed stock you do
not usually need the jack-plane, though it is sometimes useful in
reducing a piece of wood to a given shape.
Before beginning to plane, see that all dirt or grit which might
dull the tool is brushed from the surface.
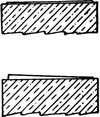
Fig. 633.
Turn the plane over and sight along the sole (Fig. 632), not
merely to see that the iron projects to the required degree, but
also to see that it projects equally, lest one side or corner of the
iron should cut more
deeply than the other,
and thus make a groove
or scratch on the wood
(Fig. 633). The latest
iron planes have appliances
to adjust any inequality
of this sort,
but if your plane is not
so arranged a little tapping
on one side of the
upper end of the iron
will correct the
trouble. Try the plane
on a waste piece before
beginning on nice
work.
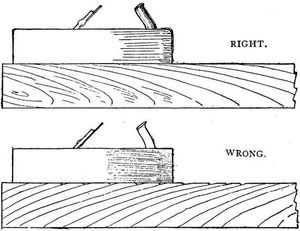
Fig. 634.
Plane with the grain, as a rule, and the fibres will be cut off
cleanly where they crop up to the surface and your work will be
left smooth. If you plane against the grain, some of the fibres
will tend to splinter or chip off just below the surface before they
are cut off (Fig. 634).
Stand behind the work with the plane before you. Plane
with the arms (and from the shoulder), not with
the whole body. Try to shove the plane straight
ahead, also to plane as equally and evenly as possible
over the surface; for while it is comparatively
easy to get a surface smooth it is quite another
thing to keep it true or to make it true if warped
or winding.
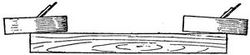
Fig. 635.

Fig. 636.
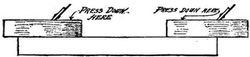
Fig. 637.
The natural tendency, and a common fault, is to begin and
end the stroke as shown in Fig. 635. Rolling the body back and
forth, instead of pushing steadily with the arms from the shoulder,
aggravates this trouble. The result of this way (which is unconscious
at first) is that the surface after planing is apt to be as
shown in Fig.
636. To prevent
this, press down
with the left hand
on the forward
part of the plane
during the first
part of the
stroke, and with
the right hand
on the rear part
of the plane during
the last part
of the stroke (Fig. 637).
In planing wood which is dirty or rough, it is best to lift the
plane from the work when drawing it back for a fresh stroke, or
to draw it back so that only the point touches the board, or to
draw it back on edge,
but in planing small
surfaces of clean
wood it is not usually
worth while to take
this precaution.
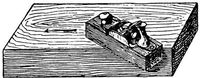
Fig. 638.
In planing pieces
with crooked grain,
turn the piece when
practicable, so as to
plane as much of it
with the grain as you
can. But many pieces are so crooked in grain that you cannot
do this. So at times it is well to turn your plane sideways to get
a slicing cut and cross the grain at an angle (Fig. 638); but as a
rule the plane should be pushed straight forward.
A few drops of oil rubbed over the face of the plane will make
it run more smoothly, particularly
on hard wood.
Fig. 639.
Test the accuracy of your
planing of broad surfaces
with a straight-edge, the
blade of a square, or the
edge of the plane itself (if
straight). By applying such a straight-edge across the surface
or lengthways or diagonally you can tell whether your work is
straight and true (Fig. 639). Also "sight" with your eye. If
the surface is large or long, winding-sticks can be used (see
Winding-sticks). In planing edges test lengthways with the eye
and straight-edge of some sort, and crossways by applying the
try-square (Fig. 640). (See Jointing.)

Fig. 640.
Fig. 641.
It is, of course, harder to plane a broad surface, as the side of
a board, than a narrow one, as the edge. When planing a flat
surface, as a board, be careful not to plane off more at the edges
than elsewhere (Fig. 641), as you will be quite likely to do if
you allow the plane to tip sideways over the edge instead of
keeping the sole parallel with the flat surface.
When planing across end-grain with the block-plane or smoothing-plane,
either secure a waste piece of wood at the side where
the planing ends, to prevent the edge chipping off, as shown in
Fig. 642, or plane from both edges toward the middle (Fig. 643).
Fig. 642.
Fig. 643.
The use of the straight-edge will give the necessary clue to the
process of making warped surfaces true. (See Truing Surfaces.)
Whenever you make nice articles from wood planed by an
ordinary cylinder planer, the wood will seem quite smooth just
as it is, but do not neglect to smooth it carefully so as to take
out all the "planer-marks" or those little corrugations across
the grain left by the machine will often show clear across the
room as soon as the work is finished. See
pages 44, 45, and 46, and also Sharpening.
Planing.—See Plane, Jointing, Truing
Surfaces.
Plank, Laying.—See Boards, Laying.
Plough.—See Plane.
Plumb.—You can make a plumb-line by merely hanging any
weight at the end of a cord, when the cord will of course be
vertical as soon as it stops swinging (Fig. 644). For convenience
in using hang the cord on a board as shown in Fig. 130. When
the cord hangs exactly on the line or at the apex of the notch the
edge of the board will be vertical.
A long board will give a more accurate test than a short one in
most cases, just as a long
plane will make a straighter
edge than a short plane, for
the long board will bridge
over the irregularities of
the surface to be plumbed.
For example, to take an exaggerated
case, the post
plumbed as at a (Fig. 645)
is vertical, taken as a
whole; while the same post
plumbed as at b leans
over, because the short
board happens to be placed where the surface of the post is not
straight.
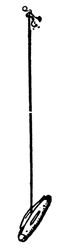
Fig. 644.
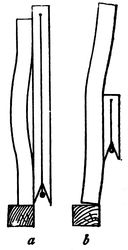
Fig. 645.
Fig. 646.
When the plumb-line is used to determine a point exactly over
or under another point, as in surveying, the bob is shaped with a
point like a top (Fig. 646). For making the plumb, see page 96.
(See also Level.)
Pod-Bit.—See Bits.
Punch (for Nails).—See Nail-set.
Putty.—Common putty is (or should be) a mixture of linseed
oil and whiting of about the consistency of dough. A mixture of
white lead worked in with the whiting is, however, superior for
some purposes, and is better when but one coat of paint is to
be put on after the puttying. To colour putty, stir the colouring
matter in a little oil and then work and knead it into the putty
until the whole is coloured. Keep putty under water. Do not
leave it wrapped in the paper in which you may take it from the
painter's, for the oil will be absorbed by the paper and the putty
will quickly become dry and hard. Use a square-bladed putty-knife
for flat surfaces, and do not use your fingers. See also
Holes, To Stop.
Putty-Knife.—An old case-knife can be used (better if reshaped
squarely across or to an obtuse angle), or, in fact, any
knife, but a regular putty-knife is best.
Quill-Bit.—See Bits.
Rabbet.—A rabbet is a recess or rectangular groove cut
lengthways in the edge of a piece of board, plank, or other
timber (Fig. 284). It is usually better for the amateur to get
such work done at a mill, when practicable, rather than to do it
by hand. The rabbet-plane is, however, a very useful tool to
have. In some cases, as at the end of a piece, the saw can be
used, the lines for the rabbet having been carefully marked with
a knife or chisel. The chisel can also be used to make a rabbet,
much as in cutting a mortise, taking pains when driving the chisel
down next the line not to cut under or jam the wood beyond the
line. In the final trimming to the line, the chisel should be held
with the flat side toward the line. In removing the wood with
the chisel, it is often best to pare across the grain rather than
with it (see Paring).
A strip of wood can be clamped across the piece exactly on the
line as a guide for the saw and the sawing be done with the heel
or rear corner of the saw, keeping the latter close up to the gauge
stick, and pieces are sometimes even clamped to the saw itself to
guide it, but such arrangements, though useful expedients under
some circumstances, are hardly the most workmanlike methods.
Rabbet-Plane.—See Plane.
Rasp.—The rasp—only used for wood—is a sort of coarse file,
but instead of ridge-like teeth it is studded with projecting points,
which tear off the wood more quickly, but also more roughly,
than the file. It is extremely useful to remove surplus wood and
to get curved objects roughly into shape. One good-sized half-round
(or "slab-sided") rasp will be a great help. See File.
Rasping.—See Filing.
Reamers.—See Bits.
Repairing Furniture.—To repair thoroughly—to make
things as strong as when new and to leave no sign of the mending—often
requires more skill and ingenuity and more general
knowledge of wood-working than to make new articles. Skill in
repairing comes not merely from general knowledge of wood-working,
but from experience and ingenuity in applying your
knowledge to new problems. You will rarely have two jobs of
repairing just alike, even if of the same kind, and the variety is
almost endless. It is, therefore, impossible to give rules to cover
all the different cases. In fact, to attempt to give complete
directions for repairing would be to describe the majority of operations
used in wood-working, and the reader is referred to other
parts of the book for whatever information it may contain. Suggestions
on one or two points may, however, be of use.
Suppose the arm of a chair comes off, after having been stuck
on with glue perhaps a dozen times. How is it usually mended
each time it comes off? The family glue-pot, containing the
dregs of all the glue used since it was bought, is put on the stove,
a little water poured in, and as soon as the glue gets warmed into
a thick paste a lot of it is daubed on to the joints, on top of the
thick coating they already have, and the arm pushed as nearly
into place as it will go. It is then usually left for a few hours
and sometimes even tied on with a string while the glue dries.
Of course it sticks for a while and then the usual result follows.
Now how should you go to work to do this properly? First
clean off all the old glue. This is important. You want to put
the fresh glue on the wood, not on top of the old glue; but do
not scrape away the wood in getting off the glue so that the parts
will no longer fit. Next, see whether the pieces will fit together
as they should. If they will, then contrive some way to clamp
them in place while the glue is drying. Sometimes hand-screws
will do this, sometimes clamps, sometimes a rope twisted, and
often it will take all your ingenuity to contrive any arrangement,
but clamped they must be if you wish to be sure of a good job.
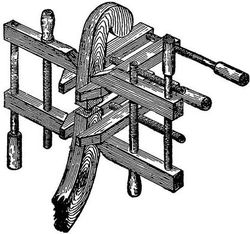
Fig. 647.
The pieces often make an angle with one another, or are
curved, so that the
clamps or hand-screws
will not hold, but slip as
fast as you tighten them.
In such a case the
method shown in Fig.
647 can often be used.
Screw a hand-screw firmly
on each side of the joint,
rubbing chalk on the
insides of the jaws to
help prevent slipping,
and putting on the hand-screws
so that the jaws
will be parallel. Then,
by using two other hand-screws, those first put on can be drawn
towards one another and the joint firmly closed. Then proceed to
glue the parts as with new work. For the way to do this see Gluing.
In patching old work with new wood, pains should be taken to
have the wood match as well as possible, and, as a rule, pare or
trim the new pieces after they are glued in place rather than before.
Staining to match the older parts is often required (see
Staining). See also Holes, To Stop.
The repaired joint may never be quite as strong as a new one,
therefore it is well to reinforce it with a block glued and screwed
on the under or inner side, in cases where this can be done without
injuring the appearance, as inside of the frame under a chair,
sofa, or table.
It is not uncommon, particularly in work which has come apart
several times, for the tenons to be too small. If you can glue on
thin pieces to make the tenon larger, trimming them afterwards
to fit, it will be the best way; but if the conditions do not admit
of this, a little muslin, laid in glue, can sometimes be wrapped
around the tenon as the latter is fitted to place. The same can
sometimes be done with round pins or dowels. The expedient of
splitting and wedging tenons and dowels can often be applied in
repairing (see Mortising and Dowels).
Sometimes you may find it necessary to use screws in places
where the heads will show. In such cases first make, when possible,
a neat round or square hole with bit or chisel of sufficient
diameter to admit the head of the screw and deep enough to allow
a shallow plug to be inserted after the screw has been set (see
Holes, To Stop). The hardest part in finished work is to make
the patch match the rest of the work.
See also Gluing, Clamps, and whatever other operations may be
required.
Ripping-Saw.—See Saw.
Rivets.—In heading rivets hold another hammer or piece of
metal, or have someone else do so, against the head of the rivet
while upsetting the other end.
Rounding Sticks.—It is often required to round sticks for
poles, masts, spars, arrows, and a great many other purposes.
First plane the piece until it is as nearly square, in section, as
you can make it. Then use the form shown on page 95,
which will hold the squared stick firmly while you plane off the
corners, making it eight-sided. Be careful not to plane the corners
off too much, for the eight sides of the stick should be as
nearly alike as possible. Next, if the stick is large enough, plane
off each of the eight corners so that it will be sixteen-sided.
This is about as far as you can go in this way, unless the stick is
very large. Set the plane quite fine for taking off these corners
or you may plane off too much before you know it. The rest of
the rounding you must do with light, fine strokes, testing by eye
and by passing your hand over the work (for you can judge a
great deal by the sense of touch). The rasp and file can often
be used to good advantage. The spoke-shave is good for the final
smoothing, followed by the scraper or glass (both of which can
be curved) and sandpaper. The latter can be used crosswise as
well as lengthwise. Cut it in strips and pull it back and forth
around the stick, much as bootblacks put
the final polish on shoes with a strip of
cloth (Fig. 648).
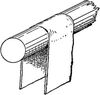
Fig. 648.
To hold large sticks for this final shaping
and smoothing you can put them in
the vise, but if there are several, and
large, it is better to contrive some way to
hold them after the fashion of the centres
of a lathe. For one centre, drive a nail
or screw through a block or stick of wood
and screw the block in the vise (Fig. 649). Make the other
centre in the same way and fasten it at such a distance from the
first centre that the stick will just fit in between the two. Just
how to fasten this second centre will depend on the length of the
stick to be rounded and the arrangements of your shop, but you
can easily contrive some way to hold it. The stick held between
these centres will be clear of everything and can be turned
around without trouble. The middle can be supported, if
necessary, by a piece of board or a strip lightly nailed to the
bench-top.
Masts and spars should be "natural sticks," if possible, and
the final shaping and smoothing will be all they will require, for
which some such apparatus as that just described will save time
and trouble.
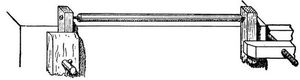
Fig. 649.
To round small sticks, as spars for model boats, arrows, etc.,
the same process should be followed so far as the small size of the
sticks will allow, as you can of course shave more accurately with
the plane, on account of the long guiding sole, for the same degree
of effort, than with any "free-hand" tool like the knife. But
when the stick is quite small it is hard to hold it firmly, and it is
also too much covered by the plane. In such cases turn Japanese.
Fasten the plane bottom-up in the vise (or even hold it in your
lap if you have no vise) and pull the stick along the sole of the
plane instead of pushing the plane over the stick. But look out
for your fingers when you do this, for a plane-iron in this position
has a great appetite for finger-tips.
In filing a short, round stick, one end can often be rested on the
bench and the stick turned around towards you as you file.
A good way to finish the shaping of such small sticks is to hold
your knife with the edge downward close against the side of your
leg just above the knee. Then pull the stick up steadily between
your leg and the knife. The leg acts as a sort of gauge to steady
both the stick and the knife and with care you can cut a very
even shaving in this way.
One very important thing to bear in mind in all these rounding
operations is that you will rarely find wood with absolutely straight
grain, except in "rift" stock or natural sticks (and in these there
are often seemingly unaccountable twists and crooked streaks);
so you need to keep constant watch of the direction of the grain,
for even a slight turn of the stick will often bring the grain wrong
with relation to your tool, and one false cut running in too deep,
or even across the stick, will spoil the work.
Router.—See Plane.
Rule.—A rule with which to lay out your work and measure
your stock is one of the first tools of which you can make use. A
two-foot rule, folding once, is the most convenient for shop-work,
but the more common kind, folding to six inches in length, is more
convenient to carry around away from the shop. One brass-bound
(with brass edges) is more durable, but hardly as convenient
to use as the common cheap kind, which will answer every
purpose until it breaks.
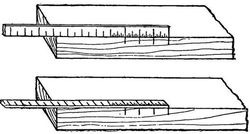
Fig. 650.
To mark distances with the rule for accurate work, lay the rule
on edge so that the divisions
marked on it will
touch the wood and not be
an eighth of an inch above
it, as they are when the
rule lies flat (Fig. 650).
You can thus mark the
points more accurately.
Sandpaper.—The fineness of sandpaper is indicated by numbers—00
(the finest), 0, ½, 1, 1½, 2, 2½ and 3 (the coarsest). You
will use the fine and medium numbers more than the very coarse
ones, and will seldom require coarser than 1½. Test sandpaper,
when buying, by rubbing the sand a little with your hand to see
if it is securely stuck on, and tear the paper a little to see if it is
strong.
Never use sandpaper until all the cutting with the tools is done.
Sandpaper with the grain, except for work which is to be painted.
The proper use of sandpaper, as a rule, for such work as you
will do, is merely to give a little extra smoothness, to take out
little scratches, to round edges, and the like, but not to cut away
the wood and scrub it into the shape you wish. To use it much,
except to skim over your work, is apt to get you into a slovenly
style of working, and the result will lack the sharp accuracy of
good work. Do not rely on the sandpaper to remove the defects
in your work. Do the work right and you will need but little
sandpaper, except in a few operations which will be specified
when there is occasion.
Fig. 651.
For flat surfaces it is well to fold the sandpaper over a flat
block of cork or wood (Fig. 651), the edges
of which have been slightly rounded. If
the surface is curved, the block should be
curved correspondingly. A piece of thick
rubber or leather which can be bent to fit
the surface is excellent. Care should be
taken not to round the corners and edges of the work when sandpapering.
In sandpapering any very delicate piece of work, when the edge
might get rounded or the surface scratched by the stiffness of
even the finest sandpaper, as in rubbing down finished work, split
the paper, which you can easily do by removing the outer layer
of paper from the back, when the remaining part to which the
sand adheres will be much softer and more flexible.
Saw.—Saws are used for cutting across the grain and with the
grain and there are various kinds for special purposes.
The cross-cutting saw is used, as the name indicates, for cutting
across the grain of wood and for ordinary work. The blade is
usually thicker at the teeth than at the back, to stiffen it and to
enable it to pass through the wood more freely. From 18" to 24"
is a good length for a cross-cutting saw (or more commonly called
panel-saw) for your work, with about eight to ten teeth to the
inch.
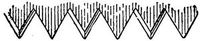
Fig. 652.
Examine the teeth (Fig. 652) and you will see that they are
pointed and sharp, somewhat like the point of your knife, and that
they cut across the fibres much the same as your knife does when
you hold it upright and draw it across a board.
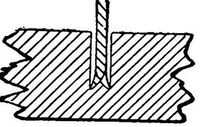
Fig. 653.
You will notice, also, that the teeth are alternately bent outwards,—one
tooth being bent out to one side, the next to the
other side,—this spreading of the teeth (which is called the
"set") making the saw wider at the points of the teeth than elsewhere.
You will also notice that the sharp cutting edge of each
tooth is on the outside. This set, and the way the teeth are
sharpened, makes the cut wider than the thickness of the blade,
thus giving the saw "clearance" and enabling it to slip back and
forth easily and without "binding" (Fig. 653). As a practical
matter of fact, however, it is nothing uncommon for a saw to bind
in the cut, either from not sawing straight or from the wood closing
on the saw (see Fig. 695). The teeth not only cut or break
off the fibres in parallel lines at the points of the teeth, but also
tear off and remove the bits of wood (i.e., the sawdust) between
these parallel cuts.
The degree to which the teeth are set and the number of teeth
to the inch depend upon the use to which the saw is to be put
and the kind of wood to be used. Of course the finer the teeth
the smoother the cut. Cross-cut saws are usually sharpened
differently for soft and for hard wood, but little set being required
for the latter, while the former needs a wider set to give the blade
clearance, because the fibres of the looser-textured soft wood are
bent aside by the tearing action of the saw teeth and are not so
cleanly cut off as in the hard wood.
We have examined the teeth of the cross-cut saw and have seen
that they cut across the grain of the wood very much as the point
and edge of a knife, and that the fibres, being cut or broken or torn
off in fine pieces, are removed from the kerf by the teeth. Now to
saw in the direction of the grain, instead of across it, we use a saw
based on a different principle. As we used little knives to cut
across the grain, so we use little chisels to cut with the grain.
Look at the teeth of the ripping-saw and you will see that they
are little chisels sharp only at the end (Fig. 654), though not as
acute as chisels for obvious reasons. These sharp ends, which
are square (Fig. 655, showing set) or may be oblique, cut or tear
off the fibres, and the front edges of the teeth push the pieces out
of the cut. The teeth of the cross-cut saw are filed so that the
front cutting-edge is drawn across the wood in the most effective
way, much as you would draw the knife-point across, while the
teeth of the ripping-saw are pointed forward at a more acute
angle so that the cutting-edge is pushed through the wood, somewhat
as you push a chisel.
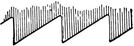
Fig. 654.
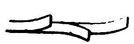
Fig. 655.
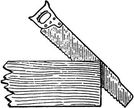
Fig. 656.
The ripping-saw cuts only on the down stroke. It is not suitable
for use directly across the grain, as it tears the fibres when
pushed across them much more than the cross-cut saw. The
ripping-saw usually has larger teeth than the cross-cut saw. From
5½ to 8 points to the inch will do for your work. The ripping-saw
usually cuts best when held slanting rather than at right
angles with the board (Fig. 656), as you can easily understand
when you think how a chisel works best in paring at the end of
a board.
If the cut closes up after the saw so as to "bind" it, drive a
wedge (or even a screw-driver or chisel) into the crack so as to
open it enough for the saw to work freely. Binding of the saw
from this cause is very common in making long cuts. When you
come to a hard knot in splitting you can sometimes gain by taking
the cross-cut saw to cut through it.
You will probably get most of your splitting done at a mill and
will not have to depend on hand ripping-saws so much as your
grandfathers did.
The back-saw should have, for your use, from 10 to 16 teeth to
the inch and be perhaps 12 inches long. The blade is very thin
to insure a finer and more accurate cut than can be made with
the common saw, and therefore requires care in using. It has a
back (whence the name) made of a thin piece of brass or iron
put on so as to give the blade the necessary firmness.
This is an exceedingly useful tool, with which and a common
panel saw you can do a great deal of work without any other.
The back-saw must be used with care, for the blade is so thin
that a little wrenching will spring it out of shape in spite of the
strengthening back.
In the compass-saw the blade is very narrow, being about one
inch at the broadest part and diminishing gradually to about a
quarter of an inch at the other end. It is about fifteen inches
long and is employed in cutting curved forms. As the blade is
narrow and tapers towards the back and the teeth have a wide
set it will cut a small circle. Notice that the teeth of the compass-saw
are a sort of a compromise between those of the ripping
and cross-cut saws, which enables them to cut freely either way of
the grain, as is of course necessary in sawing curves.
The turning- or bow-saw is much better for any work with which
the bow will not interfere, and is a very useful tool at times. Get
one with handles which turn so that the blade can be turned to
saw at an angle with the frame. You will need a few extra blades
of different widths. The main thing to be borne in mind is to
make the cut square with the surface. It is easier to follow the
line than to secure a cut at right angles to the surface.
The keyhole-saw, which is even smaller than the compass-saw,
is used for cutting quicker curves, as for a keyhole. It has a
handle like that of a chisel, with a slot cut through from end to
end. There is a screw on one side, so that the blade may be
fixed at any length, according to the size of the hole to be cut.
A good kind, which can be used for both compass-and keyhole-saws,
has a handle into which various blades can be fitted.
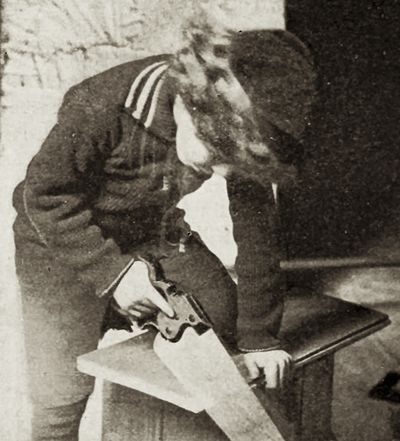
Fig. 657.
Compass-and keyhole-saws are difficult for beginners to use
without bending, twisting, or breaking their thin and narrow
blades. Most of your curved sawing can be done better with a
turning-saw or at a mill by a band- or jig-saw. If done at the
mill, have a piece of waste wood put on the under side to prevent
the burr, or ragged edge, left by the sawing.
A common way to test saws, when buying, is to take the handle
in one hand and bend the point of the saw around in a curve
sideways and then let the blade spring back, which it should do
without being permanently bent or sprung.
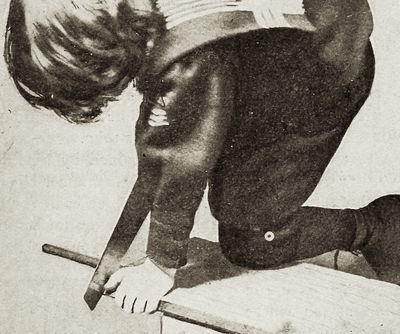
Fig. 658.
Do not saw from one side of the line. Have your eyes above
the line so that you can look on both sides of the saw (Fig. 657).
This will help you to keep the saw-blade at right angles with the
surface of the wood.
Hold the saw firmly with the forefinger pressed against the side
of the handle to help guide and steady it (Fig. 657).
Having placed the saw just at the outside edge of the line and
on the farther side of the piece, seize the wood with the left hand
and hold the thumb against the blade (above the teeth) to help
start the cut in the right place (Fig. 658). Aside from the danger
of the saw jumping and damaging the wood unless guided by
the thumb, it is liable to cut your left hand.
You can make a little notch with the knife or chisel on the
outside of the line, to help start the saw, in the case of nice work,
if you wish. Cut straight in just on the line and then make a
sloping cut to meet this from outside
the line (Fig. 659). First draw the
saw gently backwards, guiding it by
the thumb, with as little pressure on the
wood as possible until you see that the
cut is started right, then push it gently
forward, and after a few easy strokes in
this way to get the cut started right, keep on with long, steady
strokes, but not long enough so that the end of the saw enters the
kerf, lest it catch and the saw buckle. The saw should cut most
on the downward motion, not on the up stroke.
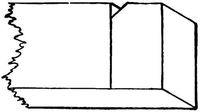
Fig. 659.
With a sharp saw, there is nothing gained by bearing down
heavily on the teeth, which may spring the saw and make crooked
work. Rather let the saw run of itself with an easy, light stroke,
guiding it carefully, and not letting it press on the wood on the
up stroke. The more hastily and furiously you saw the poorer
the result will probably be.
When you begin to run
off the line, as you will be
pretty sure to do, twist the
saw a little with the wrist
as you go on, which will
bring it back to the line,
because of the kerf being
wider than the thickness of
the saw-blade.
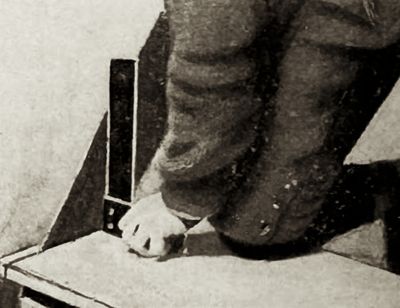
Fig. 660.
Beginners are apt to
bend the saw over to one
side. You can tell whether
it is cutting at right angles with the face of the board by testing
with the try-square as shown in Fig. 660. Such a test as this is,
however, too inconvenient for ordinary practical work and you
should learn as quickly as you can to hold the saw-blade correctly.
At the end of the cut, as at the beginning, saw gently with
quick, light strokes, and hold the piece which is being cut off
with the left hand, lest it break off and splinter one of the two pieces.
If the saw "binds" or does not work easily, you can for your
rougher work put a little tallow, butter, lard, or lubricating oil on
the blade, but beware of doing this for your nice work, or it will
deface it when done. If the binding is caused by the springing
together of the wood (Fig. 695) the crack should be wedged open.
Do not get into the habit of sawing a little way outside of the
line and then trimming off the superfluous wood with your knife
or a chisel. That is not a good way to learn to saw by a line.
Try your best to make the cut where it should be (even if you do
make mistakes for a good while) and thus get into the habit of
doing it right without having to rely on any other tool than the saw.
Many pieces of wood can better be screwed in the vise for sawing
instead of being laid on the horses, and this position is often
preferable. In this case you grasp the wood with the left hand
and use the saw as already described. (See Sharpening).
Saw-Filing.—See Sharpening.
Sawing.—See Saw.
Saw-Set.—Various contrivances can be bought for setting
saw teeth. When you get to the point of needing one you can
easily find a variety from which to select.
Scraper.—The scraper is made of saw-blade steel (frequently
from an old saw) and may be of any shape or size to suit the work
required of it. A common form for scraping flat surfaces is rectangular
like a postal-card, and a good size is from 2" × 4" to 3" × 5".
A piece of glass makes a good scraper for almost every purpose
except where a flat, true surface is required. It is good to smooth
the handle of a paddle, for instance, but not good for scraping the
top of a nice table. For many rounded surfaces glass is fully as
good as a steel scraper, but for general use the latter is much
better. The following directions may be of use when you wish
to break glass to use for a scraper: "Take the back of a knife,
or the smooth, straight edge of any piece of iron fixed with tolerable
firmness for a moment, then, taking the piece of glass in both
hands, rest its edge midway between them on the edge of the iron;
let the upper edge of the glass lean from you, and push it gently
along the iron, so as slightly to indent the edge of the glass; then,
reversing its position so as to make it lean towards you, draw it
smartly along the iron, and you will find it separated by a clean
fracture directly across, forming a line more or less curved, and
leaving one edge of the glass much sharper than the other. By
a little practice, and by pressing a little more with one hand than
the other, almost any curvature that the work to be done may require
may be achieved" (Lord and Baines, Shifts and Expedients
of Camp Life).
The edge of the scraper is turned over so as to form a sort of
hooked edge or angle (Fig. 661), which when pushed over the
surface scrapes off
thin shavings. To
smooth a flat surface
the scraper can be
held with both hands,
between the fingers and thumb
(Fig. 662), and pushed along
in the direction towards which
it is inclined. Sometimes one
end of the scraper is held between
the thumb and fingers of
the left hand and the palm of
the right hand applied below to
push the tool along. As a rule
scrape with the grain, and it is often advantageous to hold the
scraper obliquely to the grain when pushing it forward. In case
of some crooked and twisted grain you will find it best to scrape
in any and in all directions.
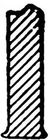
Fig. 661.
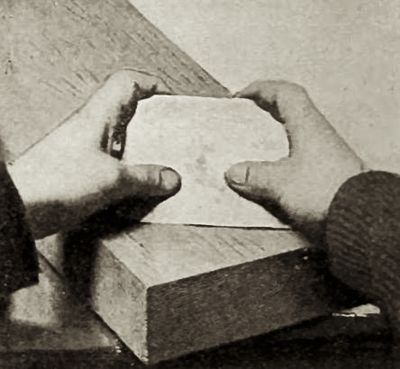
Fig. 662.
You can make scrapers yourself by filing and grinding pieces
of old saw-blades. It is very convenient to have a number of
them with edges of various degrees of curvature (both convex
and concave), but these you can make as you need them. A
scraper is sometimes set in a stock and guided by handles like
those of a spoke-shave, and sometimes set in a stock like a plane
and used in the same manner. A scraper of the latter sort is
often useful to assist in keeping the surface true when scraping,
as its flat sole prevents its following all the undulations of the
surface as readily as the hand-scraper, with which one is apt to
make depressions by scraping too much in some particular spot.
But so far as smoothing the surface goes there is nothing better
than the common hand-scraper or so easily taken care of. For
sharpening the scraper, see Sharpening.
In many large places you can get your wood for nice work
scraped to a satin-like finish by a machine made for the purpose,
but this is hardly worth while for ordinary work. You can also
have it smoothed very nicely by sandpapering machines, but this
is not advisable if there is to be any cutting of the wood afterwards,
as the grit left in the pores of the wood will quickly take
the keen edge from your tools.
The best test for smoothness alone is to run the fingers over
the surface with a light touch. Great acuteness of touch can be
acquired in this way. Any experienced wood-worker can at once
detect inequalities with his fingers that he could not possibly see.
Irregularities in curves can be detected in the same way.
Bead cutters or scrapers and reed scrapers and fluters can be
bought of various patterns. You will hardly need to buy anything
of the sort for some time, as you can make one when required.
See Beading.
Scratch-Awl.—See Awl.
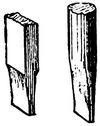
Fig. 663.
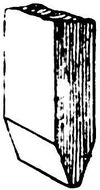
Fig. 664.
Screw-Driver.—The screw-driver is too familiar to need description,
but in buying one see that the end is shaped like either
of those shown in Fig. 663 and not as shown in Fig. 664. Cheap
screw-drivers are often made in the latter way. If ground with
a short bevel (Fig. 664) it will bear only on the top of the slot
in the screw and will be all the time slipping out, on the principle
of the inclined plane, while if the sides
are parallel or concaved slightly the end
will remain at the bottom of the nick of
the screw. This is also a help in extracting
screws, as it saves the need of pressing
against the screw so hard to keep the
screw-driver from slipping out of the slot.
It is well to have screw-drivers of different
sizes, as it is difficult and often impossible to use a screw-driver
with an edge much too large or too small.
Remember that a long screw-driver is always preferable to a
short one, except where lack of space makes a short one necessary.
The reason for this is in the fact that in using the screw-driver
you do not, as a practical matter, keep it exactly in the line
of the screw, but keep wobbling it round more or less, which
gives a leverage in the form of a crank-like action as you turn the
handle. The longer the screw-driver the larger the circle or
wobbling curve you describe with your hand and the greater the
leverage (Fig. 665).
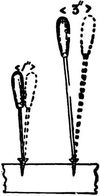
Fig. 665.
A screw-driver to be turned by the bit-brace is
very useful for driving screws rapidly and with
force, on account of the greater leverage gained by
using the brace instead of the common handle.
This is particularly useful where they need to be
driven in very hard or when tight screws have to
be loosened. It also saves much time when many
screws are to be used. It is not advisable to buy
automatic screw-drivers. They work satisfactorily
for light work, but are not suitable for such
wrenching and straining as your screw-drivers are
liable to be subjected to. You want screw-drivers to which you
can apply all your strength. See Screws.
Screws.—There are many kinds of screws. You will use the
common wood-screws for most of your work. These are either
flat-headed or round-headed, and of steel (either bright or blue or
bronzed or nickled) or of brass. When others are required they
will be mentioned. It is doubtful economy to buy second-hand
or waste screws, but a pound or two of "mixed" screws, which
you can get at any hardware store, will be very useful when you
want some odd screw for some special purpose. Many of the
screws in the "mixed" lots, which are sold very cheap, are defective,
but you can often find among them just the peculiar screw
you need, and so save time and money.
Nails are often used where it would be better to use screws,
which will, as a rule, hold the pieces more securely. When work
becomes loose, screws can be tightened, while nails usually have
to be redriven.
To make a screw drive easily, rub the point on a piece of common
soap. Oil is objectionable for nice work on account of the
spot made by it. If screws are to be used in places where they
may rust, it is a good plan to warm them slightly and then dip
them in melted tallow or lard. They can also be inserted and
removed more easily for this treatment. Try to keep the screw-driver
from slipping from the slot of the screw (see Screw-driver).

Fig. 666.
In boring holes for screws, considerable discretion must be
used. The hole in the outer piece (the one nearer the head of
the screw) should be large enough to allow the screw to slip
through freely—that is, you should not screw it into both
pieces, but only the inner one, the screw acting somewhat in the
nature of a clamp to bind the outer piece to the
inner by pinching it tight between the screw-head
and the inner piece (Fig. 666). How much of a
hole to bore in the piece into which the point of
the screw enters depends on circumstances. The stouter the screw
the less hole required. The softer and larger the piece and the
farther from the edge the less hole required. If the piece is
small or liable to split, the hole must be carefully made—the more
carefully in proportion to the slenderness of the screw, as a slim
screw is liable to twist off in hard wood unless a sufficient hole is
provided. Brass screws are very apt to do this, and much care
must be used, particularly with slender ones in hard wood. If
the hole is a bit too large, they will not hold. If a trifle too
small, they will twist off, which is very annoying, especially in
such cases as hinge-screws, for instance, where the place for the
screws cannot well be changed. The hole should be somewhat
smaller than the diameter of the screw. In good-sized pieces of
soft wood there is frequently no need of any hole.
In rough work, especially in soft wood, the screws may be
pounded part way with the hammer, driving them home with the
screw-driver. Some theoretical workman will be quite sure to
tell you never to do such a thing as that, so be sure to understand
what is meant. Theoretically there may be some loss of holding
power by that process, but practically the screws will hold just as
well for the cases in which you are advised to do that way.
Judgment must be used about all such things and theories are
only of value when used by the light of common-sense. For example,
if you are screwing the top on a mahogany table or framing
a nice boat never think of using a hammer to start your screws,
but if you are putting cleats on an old shed door or screwing up
a packing-case do not spend an hour and a lot of strength driving
screws all the way with a screw-driver when you can do the work
in half an hour by driving the screws three quarters of the way in
with the hammer. Good practical workmen are just as certain
to use the hammer in such cases as they are careful not to use it for
nice work or where the full holding power of the screw is needed.
Flat-headed screws almost always should be countersunk (see
Countersink), for neatness if for no other reason, and in hard
wood you should cut the depression for the head of the screw
with the regular countersink made for the purpose. This should
be done for nice work in soft wood where a good surface is required,
but for common work in soft wood there is no need, as a
rule, for the head of the screw will sink itself easily until flush
with the surface.
If a screw hole requires to be moved a little, but not far enough
so that a new hole can be bored without the bit slipping into the
old hole, plug the old hole with a wooden pin dipped in glue,
and when dry bore the new hole where required.
See Screw-driver.
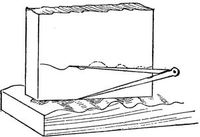
Fig. 667.
Scribing.—Compasses are often used for scribing a line
parallel to another line or surface, whether regular or irregular,
in places where the gauge cannot be used. Suppose, for instance,
you wish to cut the edge of a board to fit the undulating surface
shown in Fig. 667. Run the compasses along with one point on
the surface and the other making a mark on the board, and the
line on the board will be parallel with the surface.
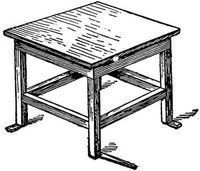
Fig. 668.
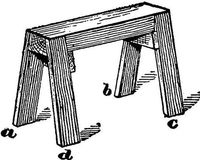
Fig. 669.
Another example is that of making a table, bench, chair, horse,
or any four-legged object stand evenly. If it stands on three legs,
which is a common fault and likely to
occur in your first attempts, do not hastily
saw one leg shorter by guess, and, making
it too short, saw another and so on
until it stands firmly, when the top will
probably be all out of level. If there is
any true surface on which you can stand
the article (right side up), you can level
the top by wedging under the legs until the corners of the top are
equally distant from the surface on which the object stands.
Then setting the compasses at a distance equal to that at which
the end of the shortest leg is raised (Fig. 668), scribe around the
other legs, which can then be cut off.[50]
See also Winding-Sticks and Marking.
Setting Saws.—See Sharpening.
Sharpening.—Before attempting to sharpen your tools yourself
it would be well to read the advice given on page 22 under
Care of Tools.
The general process of sharpening edged tools is first to grind
them to as keen an edge as possible on the grindstone, or the
emery-wheel, then to smooth down the coarse edge left by the
grindstone by rubbing on a fine stone with oil or water, and
finally stropping on leather. The grindstone must be kept wet
while grinding or the heat caused by the friction of the tool on
the dry stone will ruin the temper of the steel. Besides, the
water carries off the waste particles of stone and steel. Stand on
the side towards which the top of the stone turns. The tool can
be ground with the stone turning from you, and, in fact, this
usually seems the natural way to a novice, but it is usually more
difficult to grind uniformly in that way and too thin an edge (a
"wire-edge," ragged but not sharp) is apt to be produced, the
removal of which is difficult without further damaging the edge
and delaying the final sharpening.
To grind the point of a knife, it can be moved back and forth
lengthways with a curving motion, while resting flat on the
grindstone, and to grind the straight part of the blade, it can be
allowed to bear very slightly harder near the edge of the stone than
elsewhere, as it is passed back and forth.
To grind a chisel, grasp the handle with the right hand, hold
the blade in the left hand with the fingers uppermost and near
the cutting-edge. The arms and wrists should be kept as rigid
as possible, the former at the sides of the body, so that the tool
may be held firmly against the motion of the stone. Lay the
chisel with slight pressure quite flatly on the stone and then raise
the handle until the bevel touches the stone. As you grind keep
moving the tool slowly back and forth across the stone, which
helps keep the edge of the tool straight and prevents the stone
being worn away too much in one place. Use plenty of water.
The common way of holding the tool on the stone is the one
just described, but it can also be held at right angles to this position,
so that, in the case of a chisel, for instance, the grinding
action of the stone instead of being from the edge toward the
handle is from side to side of the blade. The tool is ground
quicker and easier by this means, and it is a good way to reduce
the edge to shape, finishing the grinding by the regular method.
You will see that the curvature of the stone will tend to give
the bevel a slight curve, in whatever position the tool is held,
which is advantageous in the common way of grinding. When
held so that the stone grinds from side to side of the blade the
tool must be continually turned a little in the hand so that each
part of the edge will bear in turn on the stone, as, the tool edge
being flat, and the surface of the stone rounding, the tool would
otherwise be ground hollowing. It is harder to hold the tool in
this way, however, without its slipping or making nicks or grooves
in the stone, and you had best learn to grind in the ordinary
manner.
Try to grind squarely across the chisel—that is, to have the
cutting-edge at right angles to the lengthways edge of the tool.
Apply the square at intervals to test the accuracy of the grinding.
The angle for grinding the bevel of such tools as the chisel is
about twenty-five degrees, but when used for very hard wood the
angle should be slightly greater, or the edge may be broken.
Do all the grinding on the bevel. Do not apply the flat side
of the tool to the grindstone. Any slight burr or turning over of
the edge on the flat side should be taken off by the oil-stone.
If the edge is badly nicked or broken, you can first straighten
or grind it down roughly on the side of the stone or by holding it
nearly at right angles to the stone—but with the latter turning
the other way—before grinding in the regular way.
To tell when the tool is ground sufficiently, hold the edge in
front of you toward the light. If the edge can be seen as a bright
shining line it is a sign that the tool is dull. It will not be sharp
until this bright line has been removed, and the edge has become
invisible, for a really keen edge cannot be seen by the naked eye.
Bear this in mind, as it is the final test and the simplest way to
tell when to stop grinding.
In grinding on a grindstone and in rubbing on an oil-stone, the
great difficulty is to keep the same angle between the tool and
the stone, as the natural tendency in moving the tool is to rock
it back and forth and thus alter the angle between the blade and
the stone. An arrangement can be bought which preserves the
desired angle without effort on the part of the grinder. A little
ingenuity will enable you to rig up a guide or gauge with a piece
of board which will enable you to replace the tool on the grindstone
at the same angle.
The plane-iron is sharpened in the same way as the chisel, only,
being wider than most of the chisels you are likely to use, it requires
more care to sharpen. The plane-irons can be ground to
a somewhat more acute angle than the chisels, although the jack-plane,
which is used for rough work, may require more strength
at the edge.
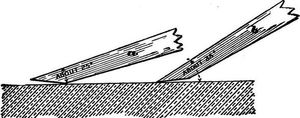
Fig. 670.
In rubbing the edge upon the oil-stone, do not attempt to smooth
down the whole bevel made by the grindstone, but first lay the
tool lightly on the stone as shown in Fig. 670a, then raise the
handle until the upper part of the bevel is very slightly raised,—barely
enough to clear the stone (Fig. 670b),—and then proceed
with the whetting, thus making a second or little bevel at
the edge (Fig. 671).
Fig. 671.
The tool must be moved back and forth very steadily or instead
of a second bevel the whole edge will be rounded (Fig. 672) and
will not have the requisite keenness. The angle of this second
bevel is usually about ten degrees greater than the long bevel, or
thirty-five degrees, although the angles of sharpening should be
varied slightly according to the hardness of the wood and the
kind of work to be done; but where you have only few tools and
must use them for all kinds of work you cannot always, as a
practical matter, pay much regard to such variations, as of course
you cannot keep regrinding your tools every time you begin on a
new piece of wood. Just how acute to make the edge you must
learn by experience, according to the conditions of your work.
An edge suitable for delicate work in white-pine would be immediately
ruined if used upon lignum-vitæ.
Fig. 672.
Any little wire edge which is produced on the flat side by the
process of rubbing on the oil-stone can be removed by drawing
the flat side of the iron over the stone once, but be sure that you
do not raise the handle at all, as the slightest bevel on the flat
side of the edge will spoil it. After the tool has been sharpened
a good many times on the oil-stone this smaller bevel (the oil-stone
bevel, so to speak) will become so wide that it is a waste of time
and strength to rub it down. The chisel must then be reground
and a new bevel made on the oil-stone.
It is a good plan to have a separate stone or "slip" for the outside
bevel of gouges, because it is so hard to avoid rubbing hollows
in the stone, which injures it for the other tools. Care
must be taken also with very narrow or pointed tools lest the
stone be grooved or nicked. Gouges can be rubbed at right
angles with the stone, rolling the tool with the left hand, or by
the use of a slip they can be rubbed as described below. For
rubbing gouges on the inside, i.e., on the concave surface,
rounded pieces of stone, called "slips," are used. These can
be bought of various sizes and shapes to fit the various curves.
Do not think, however, that you must try to find a slip that will
fit each gouge as exactly as if it had been shaped by the gouge
itself. The curve of the slip may be a little "quicker" or
sharper than that of the tool, but must not be flatter or of course
it cannot be made to bear on all parts of the curve.
In rubbing with the slip, hold the tool upright in the hand and
rub the slip up and down, moving the slip and not the tool. If
you rest the tool against the bench, it will steady it and also avoid
any probability of your finger slipping on to the edge. The more
common "outside" gouges are not rubbed on the inside, except
the merest touch of the slip to remove any wire edge or burr.
The draw-knife is also rubbed with a flat slip, in the same manner,
resting it on the bench.
In rubbing the knife on the oil-stone give it a circular motion
rather than simply back and forth, particularly for the point.
The straight part can be allowed to bear a little more heavily
near the edge of the stone as it is passed back and forth.
It is much the best way to sharpen tools frequently, as soon as
they begin to get dull, when they will require but little rubbing
on the stone, rather than to let them get into such condition that
it is a long and hard job to whet them; and of course the more
careful you are to keep them sharp, the better work you will do.
To test the sharpness of your tools, cut across the grain of a
piece of soft pine wood. If the cut is clean and smooth, the tools
are sharp, but if the cut is rough or the wood torn, further sharpening
is needed. The reason for using soft wood, which at first
thought might not seem to require as keen an edge as hard wood,
is because the fibrous structure of the soft wood, being more
yielding, offers less resistance to the tool and so is torn or crushed
apart except by a very keen edge, while the firmer structure of
the hard wood can be cut smoothly by a tool which would tear
the soft wood. The difference is somewhat like that between cutting
a fresh loaf of bread or cake and a stale one.
The edge left by the oil-stone can be improved by stropping on
a piece of leather on which a little paste of lard and emery or
some similar composition has been spread. This is better than
to strop knives and other tools on your boots. Any piece of
leather such as barbers use, or even a piece from an old boot,
will answer. For flat edges see that the strop rests on a flat surface,
so as not to tend to round the edge, as it may do if held
carelessly in the hand. See Oil-stone and Strop.
Saw Filing is particularly hard for boys and amateurs to do
satisfactorily and you are advised not to undertake it until you
have become quite familiar with the use of tools, for it does not
need to be done very often, costs but little, and there are very
few places where you cannot get it done.
It is not difficult to understand the theory of setting and filing
saw teeth, but to fix a saw in really good shape is hard for an
amateur,—and for that matter you will find but a small proportion
of good workmen who are experts in saw filing. Even in very
small villages there is almost always some mechanic who has
the knack of putting saws in order better than anyone else and
who therefore makes quite a business of such work and people
bring their saws to him from all the country round, even though
they may be able to fix them tolerably well themselves, so great
is the advantage in the quality of the work and the saving of time
in having a saw in perfect condition. You had best do the same,
and have your saws fixed whenever they get dull. The expense
is but slight, and there is nothing that will conduce more to good
work, and to your own success and satisfaction, than to have
your tools in first-rate working order.
When you get to the point of filing and setting your saws you are
advised to take a lesson from a good saw-filer. There are few persons
so situated that they cannot do this, or at least watch someone
go through the process, and thus learn much more readily
than by reading about the process in a book. In fact, it is one
of those things that it is so hard to learn from a book that merely
a few remarks on the subject are given here.
The saw is firmly fastened in a saw-clamp, expressly for the
purpose, so that it will not shake or rattle. The teeth are
"jointed," or reduced to the same level, by lightly passing the
flat side of a file over their points, lengthways of the saw. The
saw can also be jointed along the sides after filing, but this is
frequently omitted.
For a cross-cutting saw the file (a triangular saw-file) is held at
an angle with the blade depending upon the particular form of
tooth adopted, as you will see by examination. The handle being
grasped in the right hand, the point of the file should be held
between the thumb and forefinger of the left hand (Fig. 526).
The file must be pushed across with an even, straight stroke,
without any rocking or up and down motion, pressure being applied
only on the forward or pushing stroke, the tool being drawn
back very lightly or lifted entirely on the back stroke. The filing
is begun at one end of the saw, filing only the teeth which
bend away from you (i.e., every alternate tooth), carefully keeping
the file at the proper angle, pressing only on the tooth you
are filing, but keeping the tool lightly touching the adjacent tooth,
and making allowance for the fact that when you file the alternate
set the passing file will take off a little from the teeth first
filed. The saw is then turned around and the process repeated
with the other teeth. If you look lengthways along the edge of
a panel-saw that has been properly filed and set, an angular
trough or groove will be seen along the whole length, so that you
can slide a needle along in it from one end of the saw to the
other.
The ripping-saw is usually filed squarely across the saw (at
right-angles to the blade), as you will see at once on examination
of the teeth (Figs. 654 and 655), but sometimes at a more acute
angle.
The teeth are set by bending every other tooth outward, first
setting those on one side and then those on the other. You
should do this with some one of the various adjustable tooth-setting
contrivances sold for the purpose, as it requires a skilled
workman to set teeth in any other way, and any attempt on your
part to do so without some instrument adjusted to the purpose
will probably result in damaging the saw.
For soft and loose-fibred wood more set is needed than for hard
wood, because the fibres, which are quite cleanly cut or broken
in the hard wood, in the more yielding soft wood are bent aside
by the teeth to close in upon the blade with considerable binding
force; and less set is required by fine work than for coarse.
The angles and points of saw teeth can be more acute for soft
than for hard wood.
To sharpen the scraper you must have a sharpener or burnisher.
The edge of a chisel or any piece of very hard steel can be used
after a fashion, but it is better to have a regular tool for the purpose,
which can be made easily from an old three-cornered file,
such as is used for filing saws, by grinding off the teeth and
slightly rounding the angles on the grindstone until the whole
tool is smooth. Two opposite edges of the scraper are ground
or filed and the edge then turned over by the burnisher. Some
workmen grind the edges with an obtuse bevel and use only one
angle of each edge. Others grind the edges square and use both
angles of each edge. The bevel gives a slightly keener scraping
edge than to grind the steel square, but it requires more frequent
sharpening and the squared edge turned over on both sides is
likely to be more satisfactory.
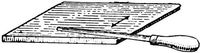
Fig. 673.
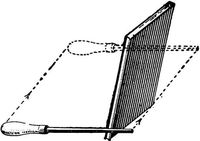
Fig. 674.
First grind or file the two opposite edges squarely across and
slightly round each corner to prevent scratching the wood. If
there is a burr at the edge it
can be removed by rubbing the
scraper lightly on the oil-stone,
but this is advisable only for
final scraping of very fine work.
Having thus got the edge at right angles and smooth, lay the
scraper flat on its side near the edge of the bench and rub the
burnisher back and forth a few times in the position shown in
Fig. 673, which is almost flat on the scraper. This rubbing
bends a little of the steel over the edge. Do this on each opposite
edge of the two sides, giving four edges thus curled over.
Next, holding the scraper as shown in Fig. 674, draw the burnisher
with a firm, even stroke, once or twice, lengthways of the
edge, as shown. The scraper can be laid flat on the bench, if
preferred, slightly projecting
over the edge. Notice that
the tool should be drawn with
a slightly end to end motion,
as shown, which helps turn the
edge. This turns a fine scraping
edge, which will take off
shavings. All four edges are
treated in the same way. After
one edge gets dull, use
another. When all four are
dull, resharpen with the burnisher as before, without grinding or
filing the edge. This can be done a few times, but soon the edges
will get worn off and rounded, and the scraper then needs refiling.
Shellac.—See Finishing.
Shell-Bit.—See Bits.
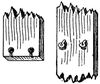
Fig. 675.
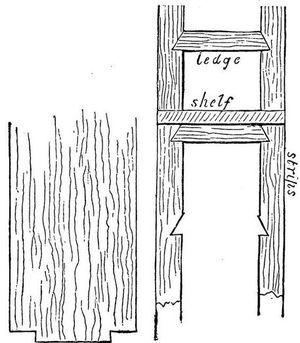
Fig. 676.
Shelves.—Examples of shelves fitted permanently into place
are given in Chapter X. (on Furniture). Removable shelves can
most easily be fitted to rest on cleats screwed to the sides of the
space, but this arrangement does not always look very well and
the position of the shelves cannot be changed so readily as by
using screw-eyes driven into the sides under the shelves (Fig.
675), recesses of
the right shape being
cut on the under
side of the
shelves so that the
screw-eyes will be
sunk and not be
conspicuous. The
position of the
shelves can quickly
be changed by
screwing the supports
higher or lower as may be required. Pins and other contrivances
to fit in a series of holes can be bought for this purpose.
A common way to adjust shelves is shown in Fig. 676. The
construction is obvious. The vertical strips can be laid on edge
side by side, clamped together, and the notches laid out and cut
as if there were but one piece. Where a circular saw is available
the notches are cut on the side of a narrow piece of board which
is then sawed into the desired strips or "ratchets."
Shooting-Board.—The shooting-board is very useful for
jointing edges, particularly for short, thin stock. The carpenter
or cabinet-maker will make you one for a moderate price, or you
can make one yourself as soon as you become a good enough
workman (see page 93).
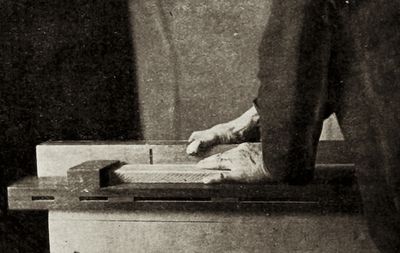
Fig. 677.
To use it, the board to be jointed is laid flat on the raised part
of the shooting-board, where it is firmly held with the left hand,
with the end of the board pressing against the stop of the shooting-board,
and the edge to be jointed lapping over the edge of the
raised part. The planing is done with the plane lying on its side
on the lower part of the shooting-board (Fig. 677). The cutting-edge
of the plane thus being at right angles with the surface of
the board, the edge will be planed squarely across. The shooting-board
should be fastened on the bench in some way, to prevent
it from slipping around.
Attachments to keep the sole of the plane at right angles to the
surface of the piece can be had at any hardware store, and serve
the same purpose as a shooting-board for thick stock, but not
equally well for thin pieces.
You can reverse the sides of two pieces to be jointed for
gluing, as described on page 406, giving a joint like that
shown in Fig. 678 (which is exaggerated). The iron of
the plane is sometimes purposely set to project unevenly
beyond the sole.

Fig. 678.
If you have many joints to make, you can have the
edges jointed at slight expense at any wood-working mill
on a planer made for the purpose. See Jointing.
Smoothing-Plane.—See Plane.
Smoothing Surfaces.—See Plane, Scraper, Sandpaper.
Splices.—See Joints and Splices.
Spline.—A flexible strip, used as a ruler, for drawing curves.
See Marking.
Splitting-Saw.—See Saw.
Splitting Wood.—We have seen how a log in drying cracks
along the radial lines (page 31), thus showing the natural lines
of cleavage or separation in the direction of the medullary rays,
that is, radiating from the centre. From this we see that the
wood will, of course, split most easily and smoothly on the radial
lines. Like all wood-choppers you can often make practical
use of this fact in splitting wood with a knife or chisel, or in
splitting fuel with an axe. The next easiest way to split wood
is as nearly as may be on the line of the annual rings, or tangential
to the line of the medullary rays, in the same direction
as when the layers separate in forming "cup shakes" (see Appendix).
This way is sometimes easier than to rive a stout log
through the centre.
Spokeshave.—The spoke-shave is very useful for smoothing
small curved and irregular surfaces. Metal spoke-shaves of various
patterns can be bought with various adjustments for different
curves, etc. Also a "universal" spoke-shave can be had, with
movable handles and detachable bottoms which can be adapted
for curved or straight work, and a width gauge by means of which
it can be used for rabbeting.
The spoke-shave is a very useful tool and works upon the same
general principle as the plane, but lacking the long flat sole of
the plane is used only for irregular surfaces, which its short and
sometimes curved face enables it to smooth with great ease. It
also acts on the same principle as a draw-knife with the addition
of a guiding stock. It bears somewhat the same relation to the
draw-knife that the plane does to the chisel.
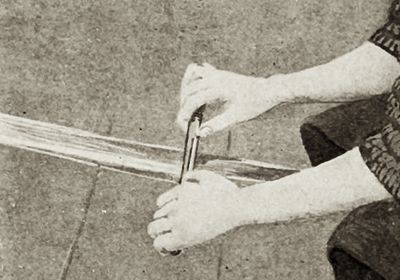
Fig. 679.
Grasp the tool firmly,
bearing downward
with both hands and
pressing forward with
the thumbs, pushing
the tool from you so
as to cut like a plane
(Fig. 679). Of course
it can also be drawn
towards you when the
circumstances of the
work render it advisable.
See Paring and
Sharpening.
Spoon-Bit.—See Bits.
Square.—This tool is one of the most useful in the list, for
the importance of having your work "square" can hardly be
over-estimated.
The try-square should have a metal strip on the inside edge of
the wooden arm, head, or beam, or the handle can be wholly
of metal. Get a medium-sized try-square (9- or 10-inch blade is
good) rather than a very small one, as it is much more useful;
and a graduated scale, like a rule, on the blade is sometimes
serviceable.
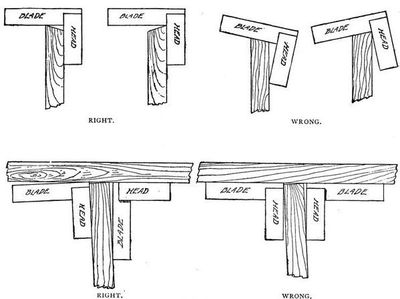
Fig. 680.
The primary use of this tool is to test or "try" the accuracy
of right-angled work—hence the name. The one special point
to bear in mind in using it for this purpose is to be sure that the
head or beam is pressed firmly against the edge or side to which
it is applied, determining the accuracy of the angle by the position
of the blade (Fig. 680).
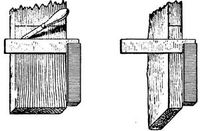
Fig. 681.
You will also use the try-square continually for marking straight
lines across boards or timbers at right angles to one side or one
edge (Fig. 681). In using it for this purpose be sure not merely
to press the head of the square firmly against the edge of the
board, but to keep it securely in the same position. When the
blade is placed correctly on the given point do the marking as by
any straight-edge. Another way is to place the point of the pencil
or knife directly on the given point and slide the square along
until it bears on the pencil or knife. Then, keeping the head of
the square firmly against the edge, the line can be drawn along the
blade.
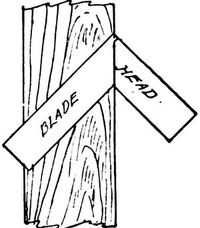
Fig. 682.
The try-square sometimes is made with the end of the head or
beam next the blade cut on a bevel. By placing this bevel
against the edge a try-square of this construction can also be
used as a mitre-square (Fig. 682).
If you buy a second-hand square, or if a square has been
wrenched, you can test its accuracy by marking a line with it
across a surface from a straight edge, then turning the square
over and repeating the operation; the two lines should coincide.
But the edge from which you rule must be perfectly straight, or
the test will be of no value. If, however, you buy new squares
made by the best makers they will be as accurate as any test you
can apply to them.
Beginners, particularly young beginners, are very apt to be so
engrossed in making the line along the blade that they forget to
keep the head in position, or let it slip, when the blade will of
course cease to be at right angles with the edge or side (Fig. 683).
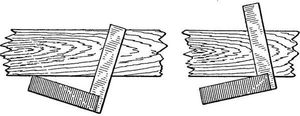
Fig. 683.
The framing-square, "steel-square," or large two-foot carpenter's
square, is a very useful and important tool; not merely
for framing and large, heavy work but also for small work, and it
is of great value in many mechanical operations. Even an iron
square is very useful, but a nickel-plated steel-square is the best,
as the figures are more distinct and it is less likely to rust. The
long arm makes a good straight-edge. See also page 181.
Staining.—When you stain wood, do it for the sake of the
colour, preserving the beauty of the grain, and not to try to
imitate a more expensive wood. It is better, as a rule, to use
good wood of a handsome colour and leave it as it is to mellow
with age than to stain or colour it, but there are times when you
will wish to stain wood.
The main point to bear in mind for successful staining is to
colour the wood itself, not to put on a superficial coat of coloured
varnish. For instance, the fumes of ammonia (or the liquid
itself) will give oak in a very short time the same dark colour
which the ammonia in the air will produce after years of exposure.
This is a natural process—merely anticipating the change
caused by time.
There are a number of ways of staining dependent upon such
chemical processes carried on in the wood itself. These ways
are the best, as you can readily see. Having got the right colour,
the wood can be oiled, shellacked, varnished, or waxed in the
usual way. By this method the natural grain of the wood is not
obscured. In fact, the figure of the grain is sometimes made
more conspicuous.
Another way is to wash the wood with some thin stain of the
desired colour, after which you can finish in the usual way.
This is a good method, for the wood itself is coloured to some
distance below the surface, and after it is finished it will take
considerable bruising to expose its original colour. This method
also sometimes enhances the beauty of the grain.
The poorest way to stain, but a very common one with amateurs
and in cheap work, is, instead of staining the wood itself, to cover
the surface with coloured varnish or shellac. This is often the
cheapest and quickest way of getting a desired colour, but it is
decidedly the poorest way. Of course, no coating of colour put
on outside can be as durable as colour imbedded in the substance
of the wood itself, and scarring or injury to the coating exposes
the original colour beneath. Besides this, the grain and character
of the wood are necessarily obscured by a coloured coating.
Wood finished in this way almost always has a cheap, artificial
look, and you can usually detect the fraud at a glance. There
are many cheap "varnish stains" or coloured varnishes, but you
will do well to avoid them, unless for the cheapest and poorest
work.
There are two things you will wish to do in staining. One is
simply to darken or enrich the natural colour of the wood, so as
to give it at once the rich, deep, mellow tone produced by age.
This is always the best way to do when it will give the colour you
want. But if you want to change the colour entirely—to make
pine wood red or green, or cherry black, you must use some
chemical process that will develop a new colour in the wood, or
must apply a regular stain.
Raw linseed oil alone, well rubbed in and allowed to stand before
applying shellac or varnish, will deepen and bring out the
natural colouring in time as well as anything else, but it takes a
good while. Repeated applications, each thoroughly rubbed in
and the excess rubbed off, and after standing some days or weeks,
given a light rubbing down with fine sandpaper, then another oiling,
and so on, will in time give a surface of beautiful colour, as
well as a soft and attractive lustre. But to carry out this process
may take months, so that you will not be very likely to practise
it; but you see the result sometimes on old wooden tool-handles
and plane-stocks which have been so treated. If you do not care
about deepening the colour greatly, one or two applications,
allowed to stand a week or two before finishing, will often be
sufficient and will make a great difference in the looks of your
work, and take off that raw, fresh look peculiar to recently cut
wood.
If your work is such that you can defer the shell acing for a
year or so, as in the case of some pretty piece of furniture to
remain in the house, there is no way you can develop the richness
of the wood better than to oil it and let it stand to mellow,
with occasional applications of oil and rubbing down. Then
finally rub down with fine sandpaper and shellac in the usual
way.
To hasten the process we must apply something stronger than
oil. If the work is of oak, shut it up in a box or tight closet,
with a dish of strong ammonia on the floor. Do not stay in the
box or closet yourself, as it is dangerous. A simpler way is to
wash the work with the ammonia, more than once if necessary.
Have the room well ventilated when you do this, and do not
inhale more of the fumes than necessary. Wetting the wood is
sometimes a disadvantage, however, in glued-up work, and it
"raises the grain," which must be rubbed down with fine sandpaper
before finishing.
To deepen the colour of mahogany or cherry, simply wash it
with lime-water (a simple solution of common lime in water) as
many times as may be necessary, which is cheap and effective.
After this process, thoroughly clean out all cracks and corners
before sandpapering, for particles of the lime which may be deposited
will spoil the appearance of the work when finished.
This process preserves the natural appearance of the wood. The
only drawback is the necessity of getting the work so wet. Some
days should be allowed for the water to evaporate before shellacking.
To get a darker shade, apply in the same way a solution of
bichromate of potash in water.
Whitewood takes stains finely—much better than pine. Oak
will stain almost any colour, but the individuality of the wood—the
character of its grain and structure—is so strongly marked
that it is poor taste to attempt to stain it to imitate other woods.
If you stain it, stain it just as you would paint it, simply for the
colour.
A good way for indoor work, such as a piece of furniture or
anything of the sort you may wish to colour, is to mix dry pigments
with japan and then thin the mixture with turpentine, or
turpentine alone can be used. After the work is coloured in this
way put on a couple of coats of varnish. For outside work you
can use oil. This is a cheap way and wears well. It applies
only to the cheaper woods which you do not care to leave of the
natural colour. For black inside work you can use ivory-black,
ground in japan and thinned with turpentine. Ivory-black or
bone-black are superior to lampblack, but the latter will do very
well for most purposes. Dragon's blood in alcohol is used to
give a colour similar to mahogany. Alkanet root in raw linseed
oil will give a warm and mellow hue to mahogany or cherry.
There is an almost endless number of recipes for staining, but
such others as you need you can learn from some finisher or
painter, for the limits of this book do not allow fuller treatment
of so extensive a subject.
Steel-Square.—See Square.
Steel-Wool.—Long, fine steel shavings done up in bundles
can be used instead of sandpaper for some purposes. There are
various degrees of fineness. This is good for cleaning off paint
and for smoothing curved surfaces, but should not be used until
all work with the edge-tools is done, because of the particles of
the metal. It can be used for "rubbing down" in finishing.
Straight-Bent Chisel.—See Chisel.
Straight-Edge.—There are no definite dimensions for a
straight-edge. Any piece of wood that is straight and convenient
to use can be so called; the size and the length depending on the
work for which it is to be used, from a common ruler to a long
board. The edge of a large carpenter's square is handy for short
work. Clear white pine or straight-grained mahogany is good
for straight-edges, but a straight-edge is not the easiest thing for
a beginner to make, and you will do well to find something
straight to use for a while until you acquire the skill to make
one—or get the carpenter to make you one, which he will do for
a very small sum or for nothing.
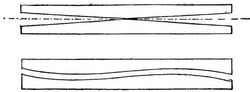
Fig. 684.
To test a straight-edge, mark a line by it, then turn the straight-edge
over and see if it still coincides with the line, or mark
another line and see if it coincides with the first one. Try your
straight-edges by this test once in a while, as they are liable to
become crooked. In
turning the edge over,
however, do not reverse
the ends, as in
case of an undulating
curvature the curves
may agree and give
you the impression that the edge is straight when it is not. In
the first case shown in Fig. 684 (exaggerated) this would not happen,
but in the second case (also exaggerated) it might. See
Marking.
Strop.—A piece of hard, smooth leather on which to strop
your tools you can easily procure. It can be fastened on a piece
of wood (see page 85). Spread on it a paste of sweet oil and
emery, lard oil and crocus powder, or some similar preparation.
A pine board on which "air-dust" has accumulated can even
be used. See remarks under Sharpening.
Tacks.—Tacks are sold as one-ounce, two-ounce, and so on
according to size.
Do not use tacks for fastening wood to wood, but only for
fastening leather or cloth or the like to wood. The pointed
wedge-shape of the tack tends to split thin wood, and is not at
all suitable to fasten two pieces of wood together, particularly in
thin wood or near the edge. Possibly you may have seen some
disastrous results from the attempt to tack pieces of wood
together.
Tape-Measure.—This article (preferably of steel) is often
useful, though not nearly as important for an amateur to buy as
many other things.
Tenon.—See Mortising.
Tenon-Saw.—See Saw (Back-Saw).
Tool-Racks.—See page 83.
Toothed-Plane.—See Plane.
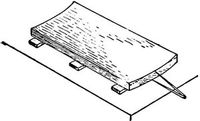
Fig. 685.
Truing Surfaces.—To true a curved or warped surface, as
of a board, lay it on the bench with the rounded side down and
wedge it firmly underneath to make it as nearly level as possible.
Then scribe a line with the compasses across each end of the
board at the height of the lowest point of the surface (Fig. 685).
Cut a depression or kind of rabbet at each end down to this line
(Fig. 686). Next, by the use of winding-sticks placed on each of
these rabbets you can easily see whether they are in line (see
Winding-sticks). Alter the rabbets if necessary to get them in
line. Draw lines on each edge connecting the bottoms of the
rabbets, and plane away the superfluous wood down to these lines.
When this is done the top of the board will be true or in the same
plane. Test it by placing the straight-edges in different positions
on the surface and sighting as before, correcting any errors. One
side of the board being made true in this way, the other can be
made parallel by gauging a line all around the edge, measuring
by the thinnest point of the board, and planing off the superfluous
wood in the same manner as the first side.
Fig. 686.
You can sometimes facilitate the process of planing off the
superfluous wood by making cuts with the saw and removing part
of it with the chisel, or by planing across the grain (the jack-plane
is good for this purpose), or paring across the grain with
the chisel, or any such method, always being careful not to cut
quite as deep as the intended surface, so that all the marks and
cuts can be removed by the final planing. See Plane, and also
page 179.
Try-Square.—See Square.
Turning-Saw.—See Saw.
Turpentine.—See Finishing and Painting.
Twist-Drill.—The twist-drill is much better than the gimlet-bit.
It makes a good hole, bores easily, is not easily dulled, can
be used upon metal, and one kind in common use can be easily
kept in order by simply sharpening the ends. There are various
patterns. A little care is necessary, however, particularly in
hard wood, as they are liable to be snapped by bending. See
Bits.
Varnish.—See Finishing.
Veining-Tool.—See Carving-Tools.
Vise.—See page 65. For vise for metal-work, see page 70.
Warping, To Remove.—Of course the simplest way to
straighten a warped board is to put a weight on it, but the difficulty
here is that it usually will stay straight only while the weight
is on it, unless you leave it longer than the patience of the average
amateur lasts. To do this (or to warp a straight board
either) with some chance of success, (1) heat one side, or (2) wet
one side, or (3) wet one side and heat the other, or (4) wet both
sides and expose one to the fire
(Fig. 687). But do not be too sure
that the result will be lasting. Sometimes
it will and sometimes not. Another
way is to thoroughly soak the
board, press it into shape between
clamps or under a weight, and leave
it until dry; a week or more is none
too long, and boiling water is better
than cold. Simply laying a board
down on a flat surface will often
cause it to warp, because the two
sides of the board will be unequally
exposed to the action of the atmosphere.
Planing off one side only, or planing one side more than
the other, often produces the same effect. See pages 50-53 and
Appendix.
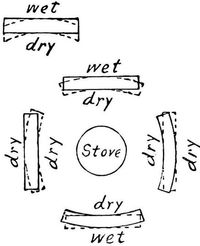
Fig. 687.
Wedges.—Wedges are in constant use for lifting or separating
heavy bodies, as doubtless you know, and the principle of the
wedge comes in in using the axe, hatchet, chisel, knife, and the
other edge-tools (see page 25). Besides this use of the wedge
you will often find it valuable to tighten or clamp objects of
various kinds, or to hold them firmly in place.
If you wish to split objects or tear them apart, use a single
wedge, for the increasing thickness of the wedge applied at one
point tears or splits the wood apart. But if you merely wish to
squeeze, or press, or hold firmly, or move, without damaging the
shape of the wood, use double wedges,—that is, two wedges having
the same inclination or taper and pointing opposite ways. You
will see that the sides of the double wedge (that is, the outsides
of the wedges) will be parallel no matter how hard you drive the
separate wedges, so that the pressure will be exerted without
injuring or jamming the surfaces against which the wedge bears
(see Fig. 333). Short, flaring wedges do the work more quickly,
but require harder blows to drive, and are more liable to slip.
Long, tapering wedges work more slowly, more easily, and are
not liable to slip. You will also use wedging to secure tenons
and dowels (see Mortising, etc.).
Whittling.—See Knife.
Winding-Sticks.—Two straight-edges, each of equal width
throughout, can be laid on edge, one across each end of the surface
to be tested. Stand back a little and look across the top
edge of one to the top edge of the other, and if these edges agree
you may know at once that there is no winding where you have
placed the straight-edges (Fig. 688). By putting them in different
positions you can finally determine whether the whole surface
is true or not.
Fig. 688.
Fig. 689.
It is more accurate to use winding-sticks considerably longer
than the width of the piece to be tested, as then any warping or
winding will be exaggerated and more easily seen (Fig. 689). If
the upper edges of the sticks are thin, or "feather-edged," it is
easier to tell exactly when they are in line, but this does not
ordinarily matter, except in work requiring extreme accuracy.
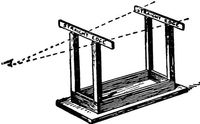
Fig. 690.
To find, for example, when the legs of a table, chair, or the
like are cut so that the article will stand evenly, turn it over with
the legs sticking up, put
straight-edges on the ends of
the legs, sight across these
(Fig. 690), and trim one or two
legs until the edges are in line.
See Scribing for other methods.
Warping or winding of short
pieces can be detected by simply
laying one straight-edge diagonally
from corner to corner (Fig. 691). This will show at
once which parts require to be planed to make the surface true.
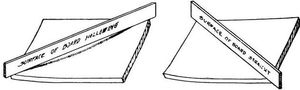
Fig. 691.
Withdrawing Nails.—When withdrawing nails place a block
under the hammer-head as shown (Fig. 692), using more blocks,
if necessary, as the nail is withdrawn.
To draw the nails from boxes, pry up a board, together with
the nails, a short distance—perhaps ¼"—and then with a sharp,
quick blow of the hammer pound the board back into place, not
striking the nails but the board between them. This will usually
leave the nail-heads projecting a little above the surface, so
that you can draw them as shown in Fig. 692, and thus save
splitting or defacing the boards and bending the nails, as usually
results from smashing or wrenching boxes apart. The quick
blow drives the board back before the motion has time to communicate
itself to the nails, on somewhat the same principle that
a bullet makes a round hole in a window pane without smashing
the glass.
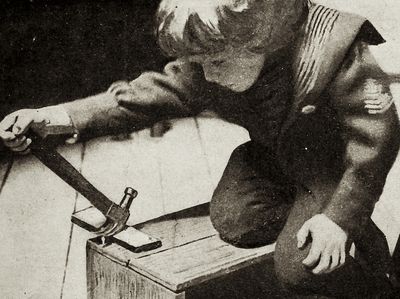
Fig. 692.
Wood-Filler.—See Finishing.
Wrench.—A strong wrench is often very serviceable in wood-working
operations.