The cutting of a line block needs patience and care and skill, but it is
not the most difficult part of print making, nor is it so hopeless an
enterprise as it seems at first to one who has not tried to use the
block-cutter's knife.
In Japan this work is a highly specialised craft, never undertaken by
the artist himself, but carried out by skilled craftsmen who only do
this part of the work of making colour prints. Even the clearing of the
spaces between the cut lines is done by assistant craftsmen or
craftswomen.
The exquisite perfection of the cutting of the lines in the finest of
the Japanese prints, as, for instance, the profile of a face in a
design by Outamaro, has required the special training and tradition of
generations of craftsmen.
The knife, however, is not a difficult weapon to an artist who has hands
and a trained sense of form. In carrying out his own work, moreover, he
may express a quality that is of greater value even than technical
perfection.
At present we have no craftsmen ready for this work—nor could our
designs be safely trusted to the interpretation of Japanese
block-cutters. Until we train craftsmen among ourselves we must
therefore continue to cut our own blocks.
A set of blocks consists of a key-block and several colour blocks. The
block that must be cut first is that which prints the line or "key" of
the design. By means of impressions from this key-block the various
other blocks for printing the coloured portions of the design are cut.
The key-block is the most important of the set of blocks and contains
the essential part of the design.
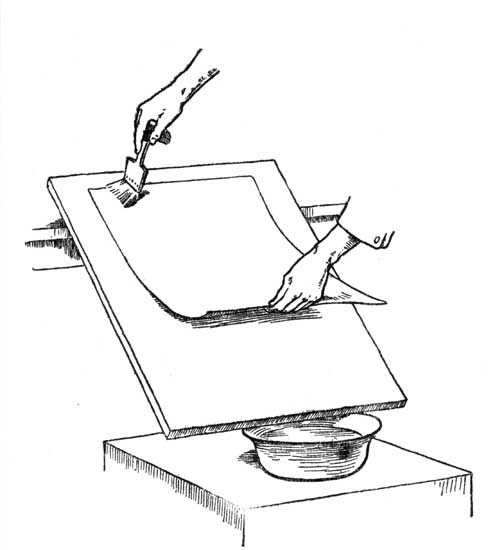
A drawing of that part of the design which is to be cut on the key-block
should first be made. This is done on the thinnest of Japanese tissue
paper in black indelible ink. The drawing is then pasted face downward
on the prepared first block with good starch paste. It is best to lay
the drawing flat on its back upon a pad of a few sheets of paper of
about the same size, and to rub the paste on the surface of the block,
not on the paper. The block is now laid down firmly with its pasted side
on the drawing, which at once adheres to the block. Next turn the block
over and lay a dry sheet of paper over the damp drawing so as to protect
it, and with the baren, or printing rubber, rub the drawing flat, and
well on to the block all over.
The drawing should then be allowed to dry thoroughly on the block.
With regard to the design of the key block, it is a common mistake to
treat this as a drawing only of outlines of the forms of the print. Much
modern so-called decorative printing has been weak in this respect. A
flat, characterless line, with no more expression than a bent gaspipe,
is often printed round the forms of a design, followed by printings of
flat colour, the whole resulting in a travesty of "flat" decorative
treatment.
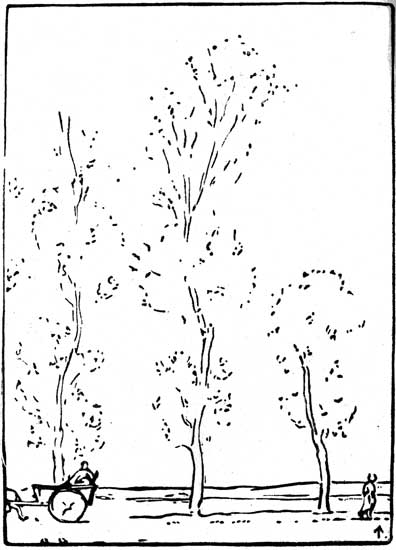
The key design should be a skeleton of all the forms of a print,
expressing much more than mere exterior boundaries. It may so suggest
form that although the colour be printed by a flat tint the result is
not flat. When one is unconscious of any flatness in the final effect,
though the result is obtained by flat printing, then the proper use of
flat treatment has been made. The affectation of flatness in inferior
colour printing and poster work is due to a misapprehension of the true
principle of flat treatment.
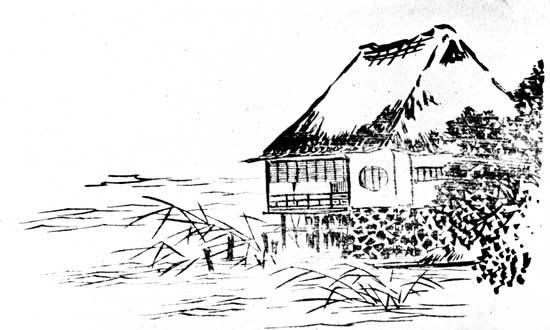
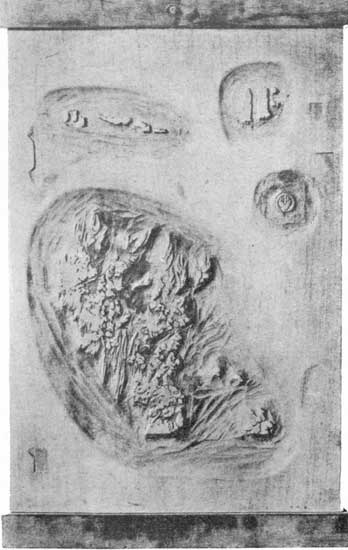
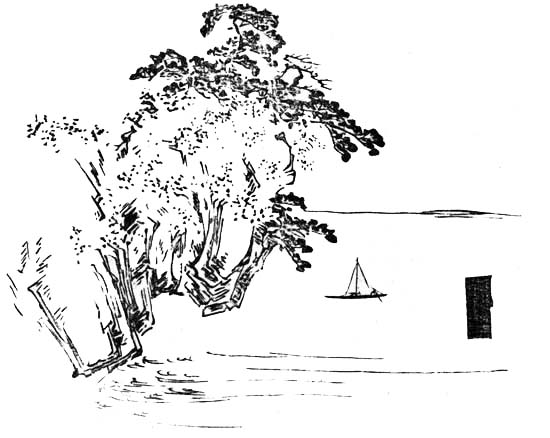
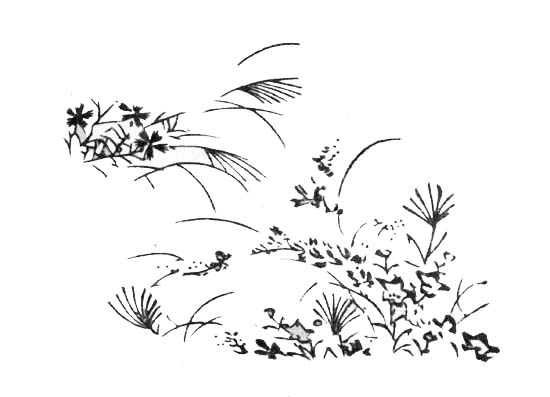
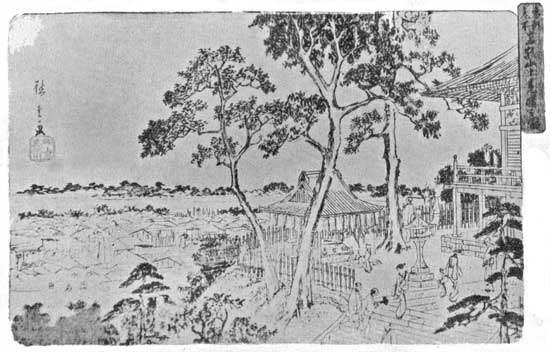
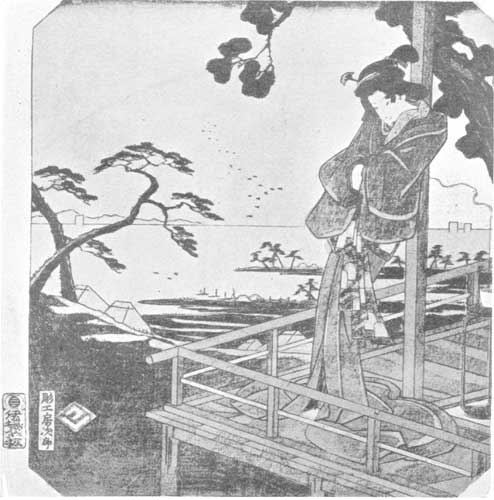
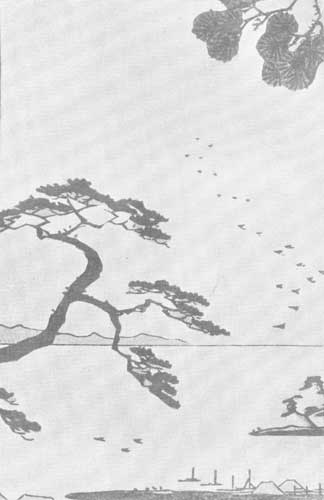
As an illustration of the great variety of form that may be expressed by
the key-block, a reproduction is given (page 33) of an impression from a
Japanese key-block. It will be seen that the lines and spots express
much more than boundaries of form. In the case of the lighter tree
foliage the boundaries are left to be determined entirely by the
subsequent colour blocks, and only the interior form or character of the
foliage is suggested. The quality or kind of line, too, varies with the
thing expressed, whether tree, rock, sea, or the little ship. The
design, too, is in itself beautiful and gives the essential form of the
entire print.
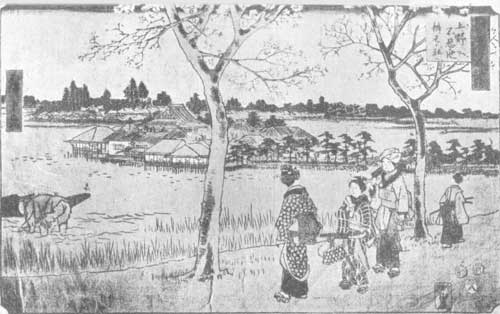
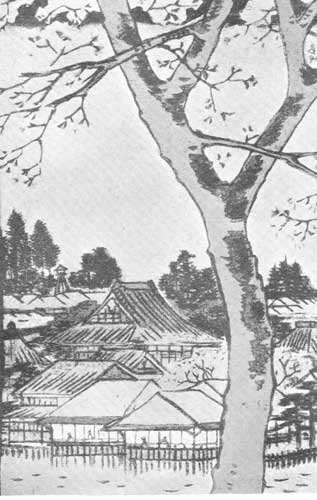
The study of the drawing of any of the key-blocks of the Japanese
masters will reveal their wonderful power and resource in the suggestion
of essential form by black lines, spots, and masses of one uniform tint
of black or grey. The development of this kind of expressive drawing is
most important to the designer of printed decoration, whether by wood
blocks, or lithography, or any other printing process.
Other good types of drawing for the purposes of key-blocks in wood are
given on Plate V facing page 26 and Plate XVI p. 110 in Appendix.
When the key-block with its design pasted upon it is thoroughly dry, a
little sweet oil should be rubbed with the finger at that part where the
cutting is to begin, so as to make the paper transparent and the black
line quite clear.
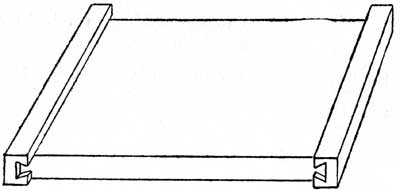
In order to keep the block from moving on the work-table, there should
be fixed one or two strips of wood screwed down, to act as stops in case
the block tends to slip, but the block should lie freely on the table,
so that it may be easily turned round during the cutting when necessary.
One should, however, learn to use the cutting knife in all directions,
and to move the block as little as possible.
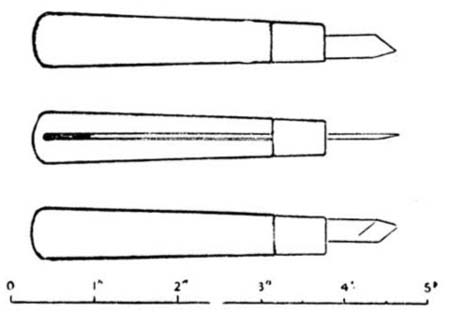
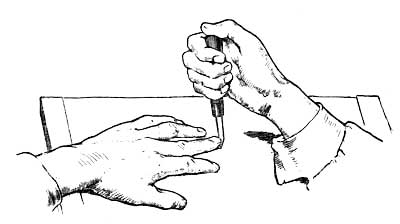
The knife is held and guided by the right hand, but is pushed along by
the middle finger of the left hand placed at the back of the blade,
close down near the point. The left hand should be generally flat on the
work-table, palm down, and the nail of the middle finger must be kept
short. This position is shown (fig. 7) on p. 30.
The flat side of the knife should always be against the line to be cut.
Sometimes it is convenient to drive the knife from right to left, but in
this case the pressure is given by the right hand, and the left middle
finger is used to check and steady the knife, the finger being pressed
against the knife just above the cutting edge.
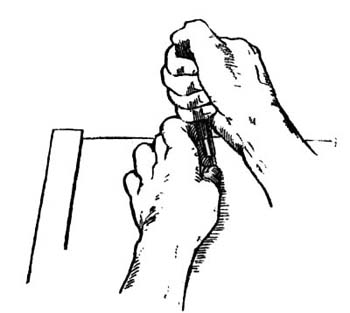
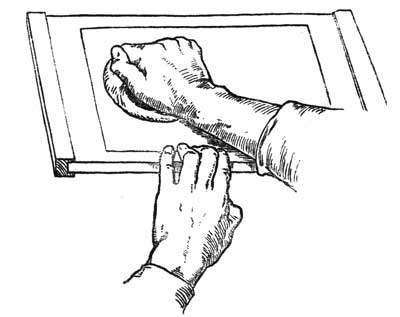
A good position for cutting a long straight line towards oneself on the
block is shown below (fig. 8). The left hand is on its side, and the
middle finger is hooked round and pulls the knife while the right hand
guides it.
In all cases the middle finger of the left hand pushes or steadies the
knife, or acts as a fulcrum.
A beginner with the knife usually applies too much pressure or is apt
to put the left finger at a point too high up on the blade, where it
loses its control. The finger should be as close down to the wood as
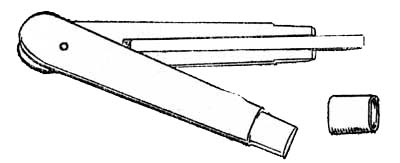
possible, where its control is most effective. A small piece of
india-rubber tubing round the knife blade helps to protect the finger.
With practice the knife soon becomes an easy and a very precise tool,
capable of great expressiveness in drawing. Bear in mind that both sides
of a line are drawn by the knife. The special power of developing the
expressive form of line on both sides is a resource tending to great
development of drawing in designs for wood-block prints. The line may be
of varying form, changing from silhouette to pure line as may best serve
to express the design. It should never be a mere diagram.
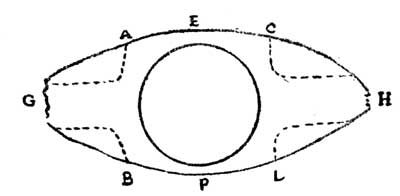
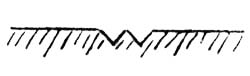 Fig. 9.—Knife cuts in section.
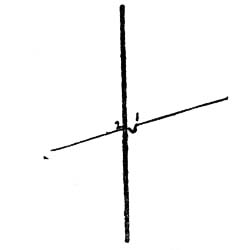 Fig. 10.—Diagram of knife cuts.
The actual cutting proceeds as follows: Starting at some point where the
surface of the key-block design has been oiled and made distinct, a
shallow cut is made along one side of any form in the design, with the
knife held slanting so that the cut slants away from the edge of the
form. A second outer parallel cut is then made with the knife held
slanting in the opposite direction from the first, so that the two cuts
together make a V-shaped trench all along the line of the form. The
little strip of wood cut out should detach itself as the second cut is
made, and should not need any picking out or further cutting if the
first two cuts are cleanly made. This shallow V-shaped trench is
continued all round the masses and along both sides of all the lines of
the design. No clearing of the intervening spaces should be attempted
until this is done. It will be seen at once that the V-shaped cuts give
great strength to the printing lines, so that a quite fine line between
two cuts may have a strong, broad base (fig. 9). The depth of the cut
would be slightly shallower than that shown in this diagram. In cutting
fine line work a cut is first made a little beyond the line, then the
cut is made on the line itself (fig. 10).
Where a very fine line is to be cut, especially if it is on a curve, the
outer cut of the V trench should be made first, and then that which
touches the line: there is thus less disturbance of the wood, and less
danger of injuring the edge of the line.
When the V cut has been made outside all the lines, one proceeds to
clear the intervening spaces between the lines of the design by taking
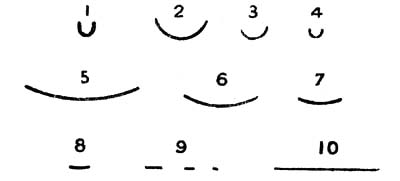
tool No. 1 (fig. 5). The large spaces should be cleared first. The
safest and quickest way is to make a small gouge cut with No. 1 round
all the large spaces close up to the first cut, then, with one of the
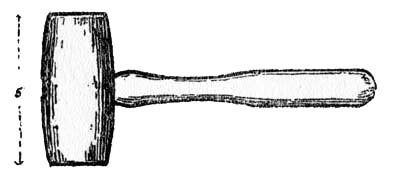
shallower chisels, Nos. 5, 6, or 7 (fig. 5), and the mallet, clear out
the wood between the gouge cuts.
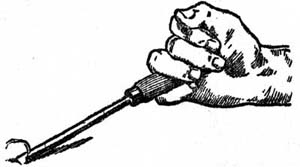
For all shallow cuts where the mallet is not needed, the Japanese hold
the chisels as shown in fig. 11. With practice this will be found a very
convenient and steady grip for the right hand. It has also the advantage
that the chisel can be held against the centre of the body and exactly
under one's eyes.
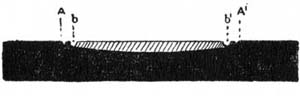
In the diagram (fig. 12), if the wood from A to A1 is to be cleared
away, gouge cuts are made at b and b1, then the space between b
and b1 may be quickly cleared without risk to the edge of the form at
A. When this rough work is done the little ridge between A and b may
be cleared with small round or flat tools, as is most convenient. But
this final clearing should not be done until all the large spaces are
roughed out.
The depth to which the spaces must be cleared will depend on their
width, as, in printing, the paper will sag more deeply in a wide space
than in a narrow one. In spaces of half an inch the depth of the first
V-cuts is sufficient, but the proportionate depth is about that of the
diagram above. The small spaces are cleared by means of small flat or
round chisels without the mallet or the preliminary gouge cut: this is
only needed where a large space has to be cleared.
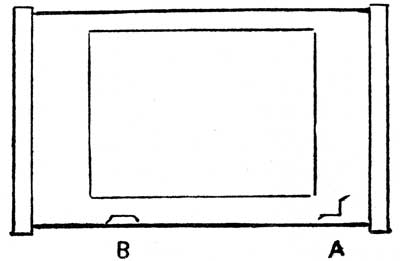
There remain now only the placing and cutting of the two register marks
or notches for controlling the position of the paper in printing.
These are placed relatively to the design as shown in fig. 13.
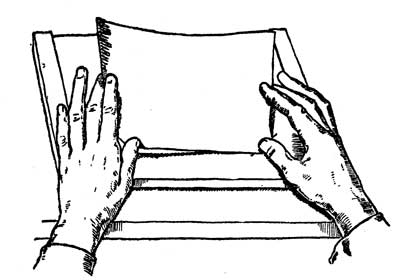
The corner of the print fits into the notch at A, and one edge of the
print lies against the straight notch at B.
The register marks may be even closer to the space covered by the
design, but must not actually touch it, as some margin of paper is
necessary in printing: they should also be cut always on the long side
of the printing block. It will be seen from the drawing on page 70 that
these register marks correspond to the position of the thumb of each
hand in laying the paper on the block for printing.
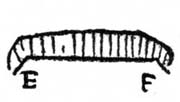 Fig. 14.
Register marks.
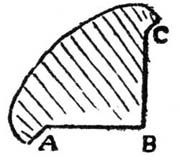 Fig. 14.
Register marks.
The corner mark, ABC, is made by cutting from A to B and B to C, with
the knife held perpendicularly, and its flat side against the line, then
the shaded portion is cut with a flat chisel, sloping from the surface
of the block at AC to a depth of about 1/16 inch along AB and BC. The
straight notch, EF, is similarly cut, first with a perpendicular knife
along EF, and then the shaded portion is chiselled sloping down to the
line EF.
In section the two register marks would be as above.
The register marks must be smoothly and evenly cut so that the paper, in
printing, may slide easily home to its exact place.
When the design of the key-block and the two register marks have been
cut and cleared, the trace of paper and paste on the uncut parts of the
wood should be carefully washed off with a piece of sponge and warm
water. The block is then finished and ready for use. The key-block,
however, is only one of the set of blocks required for a print in
colour, but the colour blocks are simpler and require, as a rule, far
less labour.
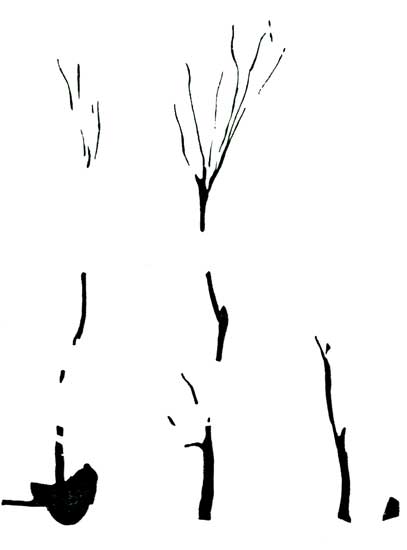
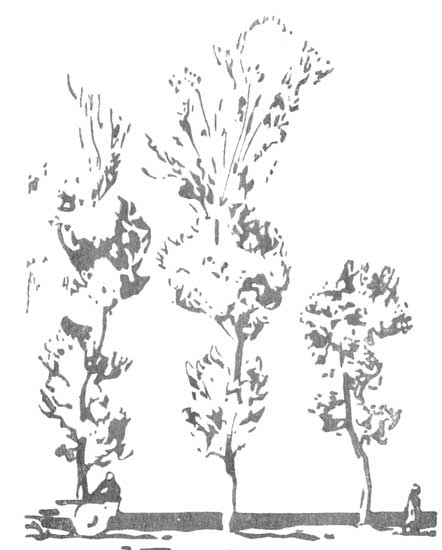
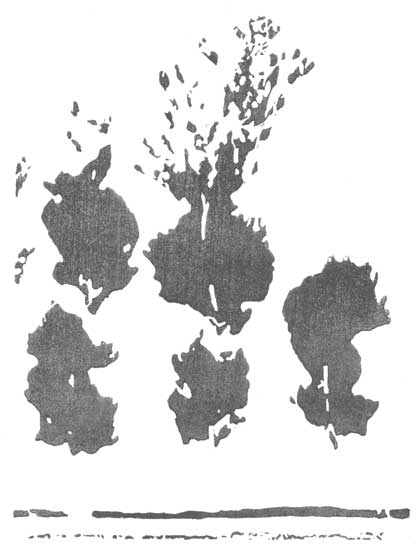
The colour blocks are planned and established by means of impressions
taken from the key-block. For this purpose the register marks are
inked[2] for printing as well as the design on the block, and the
impressions must include both. These impressions are taken on thin
Japanese paper, but not necessarily the thinnest tissue. If the thinnest
is used, it should be pasted at the corners to a sheet of stiffer paper
for convenience in handling.
It is then a fairly simple matter to take one of these key-block
impressions and to make a plan of the various colour-blocks that will be
required. These should obviously be as few as possible.
It is not necessary to provide an entire block for each patch of
colour, but only the extent of surface required for each coloured
portion of the print, as well as for its pair of register marks. Patches
of different colour that are not adjacent to one another on the design
of the print may be cut on the same block, provided they are not too
close for free colouring of the block in printing. Each block also may
be cut on both sides, so that there is considerable scope for economy in
the arranging and planning of the colour blocks.
When the arrangement of the plan of colour has been simplified as far as
possible, a new block is prepared as described above, and a sheet of
thin Japanese paper (unsized) is cut large enough to cover the print
design and its register marks. The clean surface of the new block is
covered thinly with starch paste well rubbed into the grain, and while
this is still wet an impression on the sheet of thin Japanese paper is
taken of the entire key-block, including its register marks in black,
and laid before it is dry face downward on the pasted surface of the
new block. This should be done as already described on page 25. It
should be rubbed flat with the printing pad and left to dry.
This operation requires careful handling, but it should be done easily
and methodically, without any hurry.
Each side of the set of colour planks should be treated in the same
way—a thin impression of the key-block and its register marks being
laid upon each. It is advisable to paste down a freshly taken
impression, each time, while the ink is still moist, for if these are
allowed to dry, the shrinking of the paper causes errors of register.
When these new blocks are dry, the patch of colour to be cut on each
surface should be clearly indicated by a thin wash of diluted ink or
colour, but not so as to hide the printed key line.
The blocks may then be cut. A V-shaped cut is made round each form, as
in the case of the key-block, and the clearing proceeds in the same way,
but it is only necessary to clear a space of about an inch round each
form: the rest of the wood should be left standing. A section of the
printing surface of a colour block would be as follows:
When the register marks corresponding to these colour forms have also
been cut, and the paper washed off the blocks, the clear spaces may be
used for pasting down new key impressions for the smaller colour patches
and their corresponding register marks. In this way one side of a colour
plank may contain several different colour forms and sets of register
marks. As a rule the different colour patches would be printed
separately, though in some cases two colours may be printed at one
impression if they are small and have the same register marks.
When the blocks have been cut and cleared it is advisable to smooth
with sand-paper the edge of the depression where it meets the uncut
surface of the wood, otherwise this edge, if at all sharp, will mark the
print.
For any particulars about which one may be in doubt, the sets of blocks
at South Kensington Museum or in the Print Room at the British Museum
are available for examination. In one of the sets at the British Museum
it is interesting to see the temporary corrections that have been made
in the register marks during printing by means of little wooden plugs
stuck into the register notches.
In nearly all cases the Japanese blocks were made of cherry wood, but
planks of box are said to have been occasionally used for very fine
work.
However exactly the register marks may be cut in a new set of blocks,
very puzzling errors occasionally arise while printing, especially if
the planks are of thin wood.
Some of the blocks are necessarily printed drier than others. For
instance, the key-block is printed with a very small amount of ink and
paste. Other blocks may be even drier, such as the blocks which print
small forms or details in a design. The blocks, however, which are used
for large masses of colour, or for gradated tones, are moistened over
the whole or a large part of the surface of the block, and if the wood
is thin, and not well mounted across the ends, the block soon expands
sufficiently to throw the register out. If the block is not mounted
across the ends there will also be a tendency to warp, and this will add
to the errors of register. But if the blocks are of fairly thick wood,
and well mounted, the register will remain very exact indeed.
Usually the key-block is printed first. If the subsequent blocks are not
in exact register the error is noticeable at once, and slight
adjustments may be made for its correction. But in cases where the
key-block is printed last (as sometimes is necessary) each colour block
must be tested before a batch of prints is passed over it. For this
purpose the first few prints of every batch should receive a faint
impression of the key-block, so that the register of the colour
impression may be verified before proceeding with the whole batch.
If these precautions are taken, and the entire set of blocks kept as
nearly as possible in the same conditions of dryness or moisture, all
difficulties of register in printing will be easily overcome.
When cutting a new set of blocks there is another possible source of
error which needs to be carefully guarded against. Most of the work in
designing a new print is necessarily spent in planning and cutting the
key-block, which may occupy a considerable time, especially if other
work has to be carried on as well. If new wood is used, or wood that has
not been seasoned long indoors, it will dry and contract considerably
across the grain before the work is finished. Then, if newer planks are
prepared and cut up for the colour blocks, and impressions from the
key-block are pasted down on them for cutting, it will be found that, as
the newer wood of the colour-blocks goes on drying, it will shrink out
of register, and the colour impressions will not fit the line perfectly.
It is easy to fall into this difficulty, but there is no danger of it if
the planks from which the key-block and the colour-blocks are cut are
all equally seasoned and are in the same condition.