In this book I am placing before you
the secrets of a trade I have followed for
fourteen years. I have made as high as
$170 a day. It is a poor Steeple-Jack who
cannot make at least $25 a day. If you
have the ability, the appearance, and can
approach a business man, you need not
worry about getting his work.
He is aware of the chances you are
taking. He has work that must be done,
and has an admiration for the man with
nerve enough to accomplish what he
would not undertake himself.
Steeple-Jacks are always in demand.
When I speak of Steeple-Jacks, I refer to
men who comprehend that a certain thing
up in the air needs attention, whether it
is the reaving of halyards on a flagpole,
the adjustment of a cross on a steeple, the
replacing of a guy wire on a stack, the
repairing of the hands of a clock on a
tower, or the mere painting of any of
these lofty objects which ordinary
workmen are not courageous enough to
attempt.
I know a great deal of this fascinating
game, but I do not want to convey to
you the thought that I know it ALL, for
that is not the truth. Bear in mind the
old adage: “We are never too old to
learn.”
I call this work a game, because it
appeals to me as a great game, although
it is difficult work. People will gather
in crowds on the street to watch a
Steeple-Jack at his perilous duty. I use
the word “perilous” because that is what
it would look like to the man on the sidewalk,
but to one in the air it is just a trick
to the trade, and he would not exchange
places with the man who is so eagerly
watching every move he makes for fear
that he may make a wrong move.
While he is thus busily engaged watching
you, the following questions run thru
his mind: “How in the world did he
ever get up there?” “How can he stay
up there so long?” His thoughts finally
run something like this: “My, but he
certainly is brave.”
From my experience with Steeple-Jacks
I am convinced that they never like
to be called “brave,” because stunts that
are pulled are all in the game, and it is no
more dangerous for a Steeple-Jack to
climb to the top of a flagpole or smokestack
than for the individual to ride in an
elevator, a motor car or train, for when
we consider the number of people who are
trusting to the safety of the above mentioned
conveyances, and the proportion of
accidents in comparison to the number
of Steeple-Jacks and the accidents in connection
with this trade, the Steeple-Jacks
are not at a disadvantage in respect to
casualties.
It is to the credit of the Steeple-Jack,
however, that he is less careless regarding
the dangers of his profession than the
thoughtless traveling public.
The Steeple-Jack considers it no more
irksome to go out on a job than the book-keeper
to go to his desk or a bank teller
to enter his cage. The only difference
between the Steeple-Jack and the book-keeper
or bank teller is in regard to
working hours. The Steeple-Jack’s hours
range from two to four a day, while those
of the tradesman are from six to ten
hours a day. The Steeple-Jack, whose
day comprises about four hours (often
less and seldom more) makes more money
in his day than the average man makes
in a week.
As before stated, I have had considerable
experience in the line about which
I write, and I therefore feel safe in saying
that no man is worthy of the title of
Steeple-Jack unless he can make at least
$20 a day in days when he chooses to
work less than the customary two to four
hours.
From my past experiences I have come
to the conclusion that “time is money,”
and therefore my advice to any man who
entertains the idea of going into the great
game of a Steeple-Jack is to always bear
that slogan in mind and never perform
for the audience which you will undoubtedly
have watching you from the street.
Remember it is your time that is being
taken up by the performance of whatever
daring stunts you may be able to “show
off,” and no matter how large an audience
you may have, there are no benefits derived
therefrom.
The work of a Steeple-Jack has a great
many assets besides that of being able to
earn a great amount of money. With the
exception of the money question, here are
two that will appeal to every man: First,
it is healthful work, because you are
always in the open air. Second, you have
no boss. You are your own boss and may
come and go when you please. However,
I would not advise any man who is following
this work to assume too great an
air of independence. We all concede that
it helps to be a little independent at times,
but always bear in mind that it is the
privilege of the “other fellow” to assume
an air of independence also, and, after all,
YOU are dependent upon his work. By
that I do not mean just one individual,
but I am taking your trade as a whole.
In business we must give and take. Remember
that.
The Steeple-Jack’s work is ordinarily
performed on smokestacks, flagpoles and
church spires. You will agree with me
that there are very few who follow this
line of work. Just to prove this to you,
allow me to ask you a question: “How
many Steeple-Jacks do you know?” Perhaps
the answer will be “One,” “Two,”
or “Three,” and, again, it may be “Not
any.” I have worked in this business in
every large city in the United States and
I can candidly say that I have had very
little competition and, in a great many
cities, not any.
Another important factor of this work
is always to endeavor to please the man
whose work you are doing and never to
do cheap or skimpy work, for I have been
convinced that cheap and skimpy workmanship
gains nothing for you. However,
on the other hand, if you put forth
your best and succeed in pleasing the man
who is to be considered, you can always
count on a renewed order the following
year. REMEMBER: Satisfy the other
fellow first and you cannot help but satisfy
yourself.
THE SMOKESTACK
To a Steeple-Jack any stack, regardless
of whether it is composed of brick,
steel or concrete, is a smokestack. Undoubtedly
you have heard these stacks
referred to as chimneys; nevertheless,
from now on we will call them smokestacks.
Steel smokestacks are supported by guy
wires. As a general rule two sets of guy
wires support a steel stack, but I have
often found a smokestack supported by
three sets of guy wires. These guy wires
consist of four wires to a set.
There is supposed to be a wire which
runs through a sheave from the top of the
stock to enable the stack man to rig up.
This wire is flexible and is called a gimblet
wire. Above all things, do not use
this gimblet wire for ascending purposes;
by that I mean in such a manner as to
cause the weight of your body to rest
upon this wire, as there is often great
danger in an act of this kind.
Read carefully the following few lines
and you will be convinced of the risk you
are taking by endeavoring to ascend on
the gimblet wire.
If the gimblet wire in question has been
in that position for a year, in all probability
it is rotten at the point where it
runs through the hook at the top of the
stack, and it would not take much weight
to loosen it. So bear in mind, no matter
how light or heavy in weight you may
be, do not climb up on the gimblet wire.
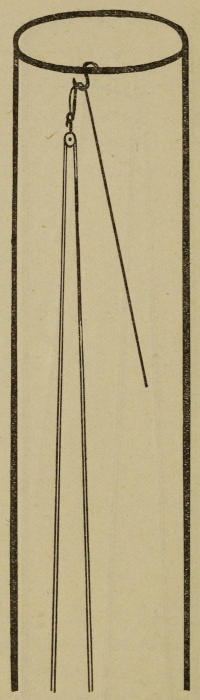
The following is a more simple and far
more safe way of getting to the top:
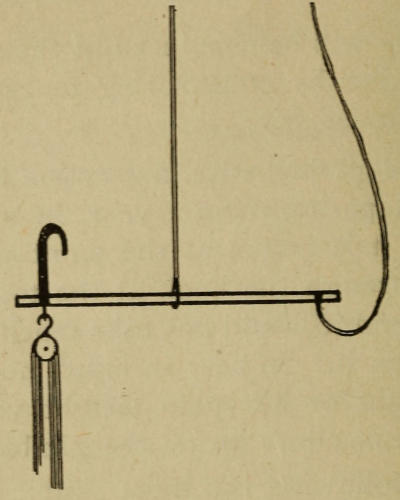
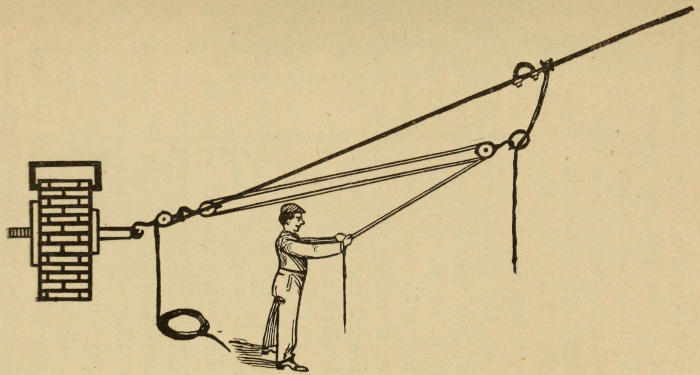
First of all, get a board from six to
nine feet in length and two to three inches
in depth. Take one end of the gimblet
wire and tie it to the end of your board,
and fasten the other end of the wire to
the board about three feet from the end.
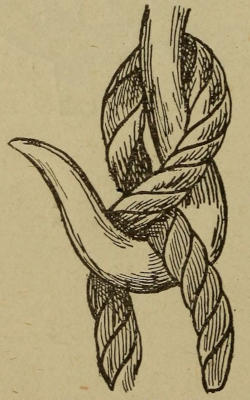
Take your stack hook—a hook of good
⅝-inch steel. This hook should be about
fourteen inches long, the hook being six
inches long; a five-inch opening with an
eye opening of about two inches, so that
you can hook your block and tackle to it.
Attach your stack hook to the board on
the side opposite to where your gimblet
wire is fastened. Be sure the hook is
turned towards the stack.
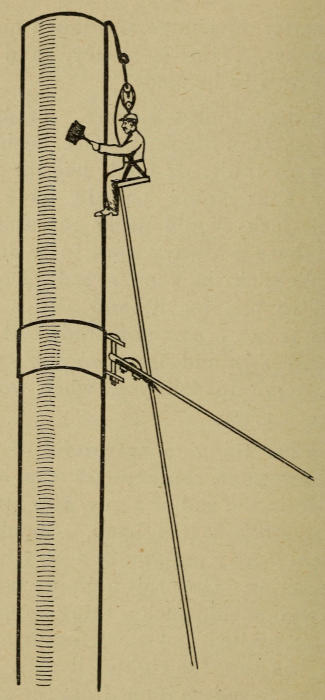
Ready to Pull the Rigging Up
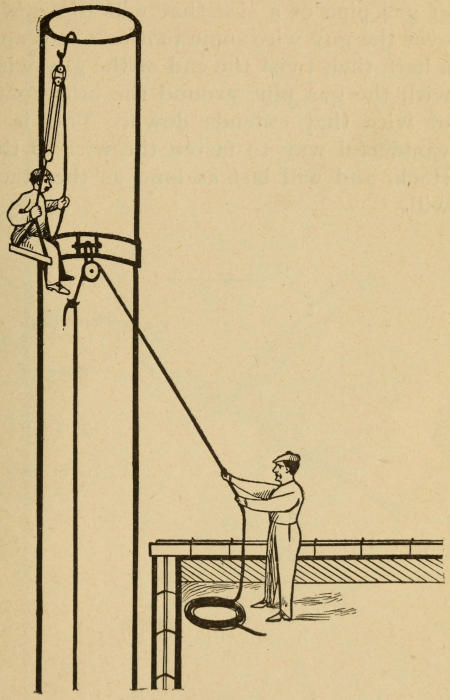
The Boatswain Chair
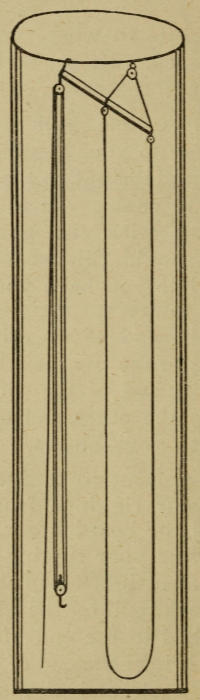
When this is done, pull on the wire;
that will draw up your riggings, reaving
your block and falls out to the size of the
stack, so as to enable you to keep them
from twisting with the gimblet wire.
Now, then, should this board be weak
and break while you have your riggings
near the top, to prevent them from falling
down and one end of the gimblet wire
from running to the top, tie a heavy piece
of cord to the end of the gimblet wire,
running it to the other end of the wire,
then fasten to your blocks.
This will prevent a hard day’s work
untangling your riggings from the guy
wires, should the board break.
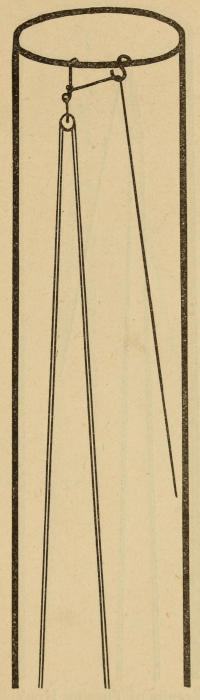
Tripping Riggings on Top of Stack
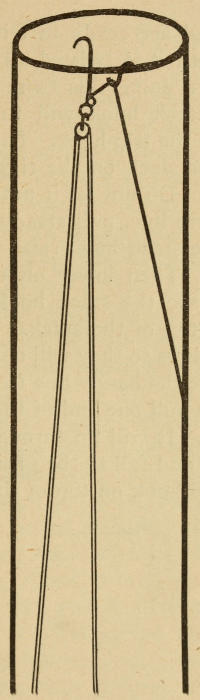
After drawing your rigging to the top,
the board drawn tight up to the block on
top of the stack, pull on the gimblet wire
that is attached to the end of the board.
This motion brings the end of your board
bearing the hook and rigging up. In
some cases, the stack being small in diameter
and the board being too long, the
hook will stick far out from the stack,
and with all hard efforts will not lodge it
over the top. When you have this proposition
to contend with, leave the stack
about three or four inches on the gimblet
wire that holds the board tight to the
block on the stack. In some cases you
have to drop the board as far as from
two to three feet below the block, in
order to get your hook in a position
where it will settle over the top of the
stack with the hooked part inside of the
stack.
This is very important. Be sure that
the hook is not only setting on top. This
can be determined by twisting all four
lines, making them one bundle; then by
giving the lines a few switchings back
and forth in all directions. When this is
done and you have fully convinced yourself
that the hook is properly over the top,
then your next move is to start for the
top.
If it is your first time in a boatswain
chair, I would suggest that you sound
yourself first as to dizziness. This can
very easily be done by the following
method:
Stand along the side of the stack,
throwing your head to one side and looking
up, allowing your eyes to follow the
stack and the clouds, shaking the head at
different times. This brings on dizziness.
Then stand erect, so as to clear your head.
After getting into the boatswain chair,
you place the fall line of your riggings—that
is, the line with which you draw
yourself up—between your legs. This
enables you and your helper to pull more
steadily together, and you get to the top
much quicker.
I have noticed that the majority of
stack men regard this as the most difficult
part of the job—drawing to the top.
Once up, the job is half done.
After you reach the top of the stack,
the first thing to be done is to cut away
the string that holds the stack hook to
the board. You then lower the board
to the ground. Still tied by the wire to
the board for further use in case you want
to trip off with it when the job is finished.
There is still an easier way, which I
will explain later. Now we will say the
work you are to do is paint. For your
information I will say that oil paint is
preferred by Steeple-Jacks for several reasons,
some of which are: It is easy to
apply in all kinds of weather; you are
bound to get plenty of it in the face, and
it is easier to wash off than tar. From
my personal experience I have found that
graphite and oil preserve a steel smokestack
better than any other. You will
come in contact with people who will differ
with you as to this point; however,
when you meet with a difficulty of this
nature, give the man what he asks for.
If he wants water, give him water; if he
desires to have tar, give it to him, but if
he wants something good, then suggest
an oil paint. Graphite and oil—the preservable.
A great number of men with whom you
deal will say: “I want tar on my stack.”
I have learned from my own personal
experience that the answer which will in
nine cases out of ten take with the man
with whom you are dealing is something
on this order: “If you want tar, all right,
but it will cost you more money.” He
will immediately confront you with a
question similar to this: “Why is that?”
Your reply should be: “If I put tar on
your smokestack and come back next year
for your work, you will refuse me, because
tar blisters in places and rust forms under
the blisters, which prevent the rust from
being seen, and in a few years there are
holes in the stack, whereas an oil paint
wears off, showing the rust spots.”
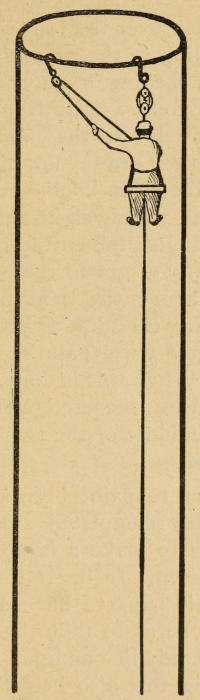
Changing Positions on Top of Stack
However, I am running away from my
story. We will go back to the top of the
stack. You look down, getting straight
above a guy wire, reach over as far as you
can and paint, leaving the space directly
in front clear; drop down about ten feet,
painting as you go; draw up to the top
again, switching the stack hook over and
directly above the next nearest guy wire.
In order to accomplish this, take an extra
hook similar to your stack hook and
about seven feet of ½-inch line. Place
the extra hook over the top; tie the other
end of the sling to the rope of your boatswain
chair, making it good and secure.
Then lower your weight from your rigging
until it rests on the extra hook and
sling. You then draw your regular stack
hook up to the extra hook. When this is
done you pull your weight again to your
riggings and push the extra hook around.
Do this until you get to the position you
want, just above the next nearest guy
wire, repeating the same as you did above
the other guy wire, painting about ten
feet down. When this is done, draw back
to the top, using the same method to get
over to the middle of the two spaces you
have painted.
Then start to paint between the two
spaces already completed. By so doing
you are able to make a larger sweep on
your way down. In order to make time
on a stack it pays to have a helper on
the ground, so as to take the end of the
fall line or handy line and pull you around
and by doing this also help to keep you
in to the stack, which enables one to work
to a better advantage and much quicker.
Remember, “Time is money,” and there
is lots of it to be made.
The opportunity is there. Tradesmen
of all walks of life say: “Gee, business is
dull in my trade. If I only had the opportunity
that some people have.” A
Steeple-Jack should never say that, because
there is always work to be done on
a smokestack the year ’round. Don’t be
afraid to ask for it, and also a price.
Yours is not a common trade. It takes
brains, brawn and nerve, so don’t permit
your nerve to fail you when you are
asking a price.
Another thing to be careful of is not
to allow your rope to get caught and
tangled in the end of a guy wire attached
to the stack at the band. Should this
happen, it may put you in a very hazardous
position. Give this a glance now and
then and, should such a thing happen, do
not get excited and start tugging. The
more you tug, the tighter it gets. Have
someone to switch it out from the ground.
It is possible to do this from the air.
Showing Falls Caught in Guy Wire
High wind is the Steeple-Jack’s greatest
enemy. It is only a fool who would
attempt to rig a smokestack when the
wind is blowing a gale; in fact, it is almost
impossible to work in a high wind. More
work can be accomplished in one-fifth of
the time on a calm day. “Time is
money,” but always take time when your
life is at stake. Always keep in mind the
motto: “Safety First.”
When tying up your riggings for the
night, and it might be calm at the close
of the day. Weather changes in a very
few minutes at times. To safeguard
against the rope from wearing against
the stack and guy wires, walk out about
fifteen feet from the stack, taking a piece
of extra sling. Tie the sling to some
object that is solid, throw two half-hitches
with your fall line around the riggings
just above the single block. When this
is done, pass the sling which you have
tied to some object through the hook of
the block, making it fastened to the block.
Then pull the slack out of your riggings
with the fall line, at the same time keeping
the two half-hitches just above the
block. Do not take up all the slack; leave
some play in your lines, using your own
judgment as to whether the lines will
come in contact with the guy wires. The
weather will shrink the line more or less.
TO RIG A STACK WITHOUT A GIMBLET WIRE
When this proposition confronts you
it may look to you like a job not worth
fooling with. It can be done and, on
some stacks, almost as quickly as with
a gimblet wire.
There are a number of ways to rig
without the aid of a gimblet, of which I
will show you two of the quickest and
most simple.
Look over your guy wires and pick out
the most solid of the lot running to the
top band. Make sure of its anchorage.
There are supposed to be two clips at
each end of a guy wire where it is connected
to the turn-buckle, and at the band
place the double block without the stack
hook on the guy wire.
Tie a long and heavy line to the block.
Take this line, passing it around all the
guy wires with the exception of the one
the block and falls are attached to. Then
reave out your line to what you would
figure the length of the stack to be.
You then take hold of the line that is
around the guys, pulling on it and at the
same time switching on your rigging.
Unless the guy wire is slanting at about
45 degrees down, your rigging will slide
up very easily.
With this system it is possible to get
your rigging to within a very few feet
of the top band, then tie off your tug line,
be sure to some object that is good and
solid. Remember your weight will be
on that, and also your life.
SAFETY FIRST always. You only
fall once. Use every safety device available.
Remember this book only tells you
how to rig, but it takes common sense
while following these methods, and that
is, take no chances where you think a
thing will hold. Be sure it holds.
The first thing to do when getting into
the boatswain chair is to see that your
lines are not twisted. Have your helper
walk out some fifteen or twenty feet from
the stack. Take the fall line with you
on your way up. The stack hook, extra
hook, sling string, small stick, hang line,
and you are ready.
Quite a load going up! After placing
the line between your legs and your
helper stands away out, this helps to avoid
the twisting of your line. While going
up remember this: A very steady pull,
the two pulling together. Long grabs
and jerks are liable to prove disastrous,
as it may cause the line to snap. Half-inch
line has tremendous straining power;
nevertheless, there are flaws in rope and
rope also rots.
My first experience on a stack I remember
I wanted to buy 1½-inch line. Now
wouldn’t I have had a wonderful time
trying to get that ton of rope to the top
of a smokestack! Since then I have used
¼-inch rope, but that is too small. At
any rate I had the correct idea of “Safety
First” at the beginning. However, ½-inch
is the proper size for a job not over
two hundred (200) feet high.
Now, when nearing the top guy wire,
have your helper slack up, allowing you
to continue the pull alone. When the two
blocks are together tie a safety line to the
wire. Tie the extra hook to the stick and
the end of the sling to your chair, then
in the hook, passing the hook over and
in the eye of the band. Pull the stick
away from the hook. You then tie the
stick to the block attached to the guy
wire. After this is done, lower yourself
until your weight rests on the line hooked
in at the band.
Make sure when lifting the riggings
away from the wire that they don’t fall,
leaving you up there in a great predicament.
If this should happen, you will
agree with me on that point.
Experience is a great teacher. I have
had this experience: On lifting the block
away from the wire, place it in the eye
of the band; also draw yourself up close
to the band. Untie the sling, tying it
closer to the hook, then draw up a long
pole—the size you figure you will need
to reach the top with. Tie the stack hook
to the pole; put the block and falls in the
hook; push it to the top.
Poling to the Top of a Smokestack
Now, not in all cases is this as easy to
do as to say. If the top is only fifteen or
twenty feet from the band, it can be done
without much effort, but should it be a
reach of thirty or thirty-five feet, I would
suggest the following method:
Tie a hook to the pole just so it will
stay on. A light hook is required for this.
Place your handy line through the eye of
the hook. Tie the handy line end down
about eight feet from the top of the pole,
then lash yourself to the band, pull yourself
up and stand in the chair, throwing
one leg over the guy wire. Make yourself
good and solid, spread your feet out in
the chair. Do not have them together.
This sometimes prevents the chair from
sliding to one side. Above all remember
never to let your riggings get away from
you. You are in a mighty tiresome position.
Always be sure to have a handy line
with you in making a reach of thirty or
thirty-five feet. Figure your pole, which
is only two by two or so, is easily broken
in a little wind. I have had poles break
eight or ten times before reaching the top
of a stack.
Now, in pushing the pole up with a
handy line, always wait until the wind
ceases for a second, then up with it. This
has to be done quickly. With the pole
leaning against the stack once over the
top, pull the pole away from the light
hook, lower the pole until the top end is
at the band. Tie on the hook and block,
then, with the handy line now over the
top, pull on it and at the same time push
on the pole with a steady push and pull.
The rest is very simple. After this is
accomplished, undo yourself from the
band, lowering yourself into the boatswain
chair. Hook up the riggings to
the chair, start for the top, cut away the
pole, lower it down and start your work.
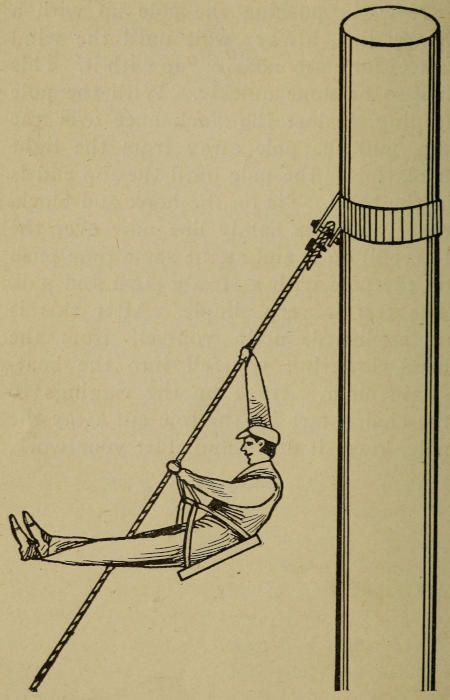
Climbing Guy Wire with Slings and Chair
HOW TO CHANGE THE RIGGINGS
When completing one side of a stack
and in order to get the tackle to another
position on the stack, twist the rope, making
it all in one; then leave a little slack
to make a snake whip movement towards
the top, and you will have the satisfaction
of seeing your rigging move around on
the top. If the wind is blowing hard, perhaps
you will have to do several of the
switching movements before getting the
hook to start to move. Then take the line
around the guy wire and you are ready
for the next set.
STEEL STACKS WITH BRICK LINING
You will encounter a little difficulty in
the shifting of your riggings from the
ground when you are working on steel
stacks with brick linings. In fact, you
will save time by not trying to shift from
the ground. If the brick extends all the
way to the top, you will have to have a
hook large enough to spread over the
steel and brick.
It is wise to go to the top, whether you
have to tow it over fresh paint or not. In
doing this you have your helper walk out
some fifteen or twenty feet. You then
place your legs around the fall line; after
this is done both you and your helper pull
together.
In this movement you are going up
backwards with your back towards the
stack, until about half way up; then turn
with your face towards the stack. Daub
the tips of your shoes with paint; this
helps to cover up the prints of your shoes
on the fresh paint. If you do not comply
with this rule, the print of your shoes on
the fresh paint will look from the ground
as if those spots had never been painted,
and would tend to leave a bad impression
as to your workmanship with the man for
whom you are doing this work. Neat and
impressive work draws more returns. On
reaching the top an equal size hook is
required, as aforesaid, with the sling,
afterward having your helper take the fall
line over the guy wires and you are ready
to do another set.
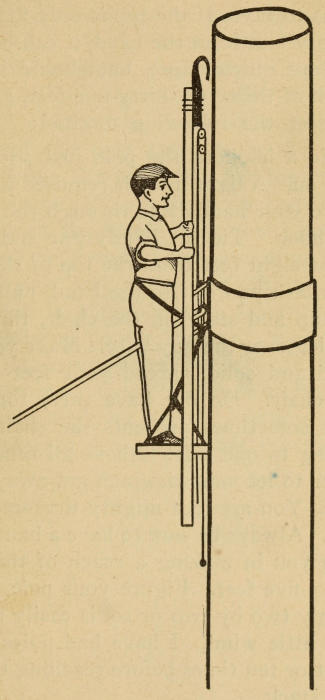
SMOKESTACKS WITH LADDERS
There is no use of going into detail
about rigging a stack that has a ladder
on it. This can be answered in a very few
words: Walk up the ladder and hook the
rigging over the top. But there is this
much about it—Watch your step! These
ladders after a few years become very
rusty and the bolts where connected from
the inside are sometimes eaten away by
the gas from the coal, and just a little
weight on them might cause the handles
to give way. So always remember to be
very careful when climbing a smokestack
that has a ladder connected to it.
STEEL STACKS DECAY AT BAND
You will notice that as a general rule
steel stacks commence to weaken at the
first half-dozen sections from the top
downward, or at the band. The rain
hitting the in- and outside from the top,
and lying around the band, is causing the
rust to form more quickly than on any
other part of the stack. This accounts
for the aforesaid parts weakening the
quickest.
It is always wise to sound a stack at
the top and band so as to determine
whether it will stand much tugging or
bouncing upon. If it looks weak and you
make up your mind that you will go
through with what you are doing, I would
suggest that you do all the pulling and
take just what tools you can possibly get
along with.
REGUYING
To reguy a smokestack it is necessary
to have these parts before the job is really
called complete: Turn-buckles for the
bottom ends of the guys and clips for both
ends. Although you can guy a smokestack
without these articles, it is best to
have them. Without the aid of the turn-buckle
to draw the slack out of the guy
wires, a device like this can be used:
Lash the guy wire with a sling, using two
half-hitches so as to grip the wire. Tie
a bow-line knot at the opposite end so as
to enable you to attach the block and
fall, placing the opposite block in the eye
of the guy wire anchor, then by pulling
on the fall line, this takes the slack from
the wire, even with the turn-buckles.
Sometime you will have to resort to this
method in order to take up the loose
slack.
Drawing Guy Wire Tight with Block and Falls
When guying a stack the first thing to
do is to place the spool that holds the
wire between two boxes of equal size.
Take your handy line and a small single
block when going up to attach the guys;
hook this single block to the eye of the
band at the position where you are to
work; have your helper tie the handy line
about three feet down from the end of
the guy wire, and then bend the wire
double. You then have your helper do
the pulling up of the guy wire. Should
you do the pulling while sitting in the
chair, you would soon notice the strain
from it in the stomach. As you have
nothing under the feet to press the strain
there, it really falls to the stomach to
receive all the hard work. Always leave
some slack to the guy wire.
A stack must vibrate to a certain extent,
therefore if the guy wires are drawn
as tight as they possibly can be, the
chances are the result would be a broken
wire or an anchor giving way.
Helper Pulling Guy Wire Up to Stack Band
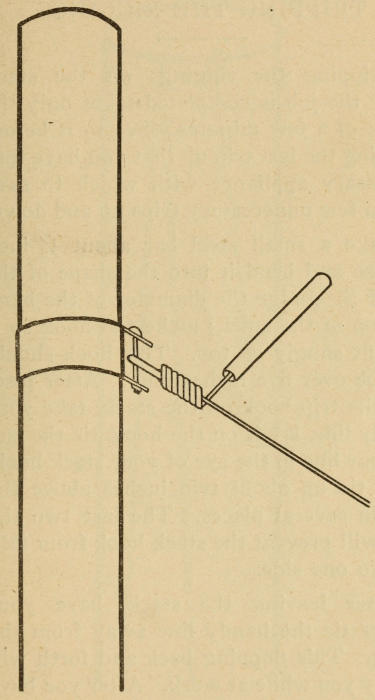
In using clips to fasten the wire at both
ends, they should be a size larger than
the guy wire, and when clips are not available,
allow about two feet over. After
passing guy wires through the eye of the
band or the eye of the anchor, take a piece
of gas pipe of a size that will slip down
over the guy wire some foot or a foot and
a half, then twist the end of the guy wire
with the gas pipe around the other part
of wire that extends down. This is a
wonderful way to fasten the wire to the
stack, and will last as long as the stack
will.
Turning Guy Wire with Steel Pipe
TRIPPING THE RIGGINGS
Tripping the riggings off the stack
after the job is completed takes only the
work of a few minutes. See to it before
making the last trip up that you have that
necessary appliance with which to save
you a few unnecessary trips up and down.
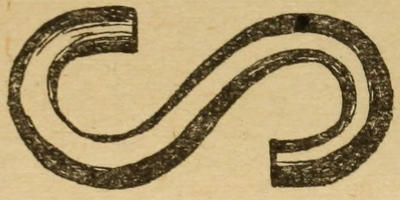
Take a small steel bar about ¼-inch
in size and bend it into the shape of the
letter S. Judge the diameter of the band
on top of the stack; make the hook so it
will fit snugly on top. This hook should
not be over five inches long. After placing
the trip hook on the stack, take your
handy line, lay it on the hook, tie the end
of your line in the eye of your stack hook,
then tie up about two inches above the
eye in several places. The last two tie-offs
will prevent the stack hook from falling
to one side.
Handy Line Attached from S Hook to Stack Hook
Results of Turning Hook in Wrong Direction
Hook Turned in Proper Direction for Tripping
After leaving the stack, have your
helper tie the handy line away from the
stack. This flopping back and forth will
annoy you while at work. After you have
finished and are ready to trip, twist the
rigging until it is twisted all the way to
the top. In doing this twist the rope so
that the stack hook will turn out and
away from the trip hook. This is important.
Leave slack on the riggings at the
same time. Do not let it untwist. Then
take the trip line, pull steady on it, until
you see the stack hook raise up and over
the stack. Then lower on the trip line
until you see the stack hook is off and
below the top of the stack. Then let go
of the riggings so they will untwist; lower
away; untie the handy line from the block
hook; then pull one end of the handy line
to the top. It will go through the small
S up there and fall to the ground, leaving
the small S hook on top of the stack.
SELF-SUPPORTERS
Steel smokestacks are generally supported
by guy wires, although there are
some steel stacks without guy wires,
which are called self-supporters.
Self-supporters taper at the base and
have an extra heavy foundation and a
ladder to enable you to climb to the top,
although in my travels I have come in
contact with one self-supporter that had
neither ladder nor gimblet wire. Fortunately
this self-supporter was very small
in diameter.
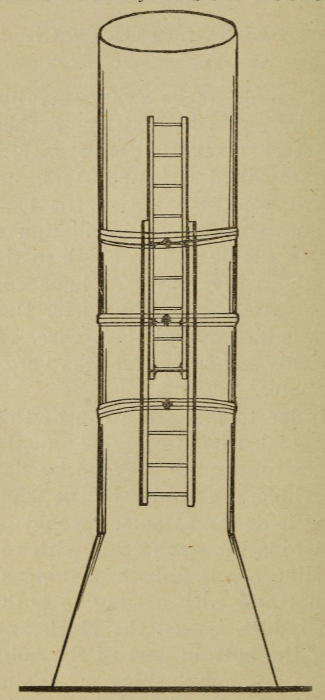
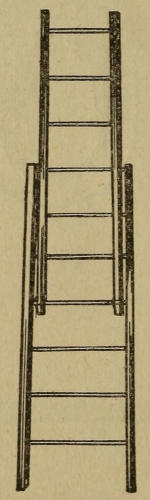
In order to make the top of this particular
stack I had to rely on an extension
ladder, working my way up by degrees;
first lashing the ladder to the stack, extending
it as far as safety would permit,
then lashing the stack again with an extra
large sling about ¾-inch, making a bow-line
knot and with a sling to both sides
of the ladder I used the block and fall,
pulling the bottom part of the ladder up
as far as possible, lashing off again, then
pushing the top part up.
Ladder Lashed to Self-Supporting Stack
After making the lower half of the
extension ladder solid at the top and bottom
so as not to permit it to sway to
either side, climb the top half of the ladder,
lashing the stack again, and repeat
as before. Guy wires have to be replaced
from time to time, as these wires rust and
fall down, leaving the stack to the mercy
of the winds, if not attended to before
they become so badly decayed.
As stated before, stacks that are supported
by guy wires have from one to
three sets, and generally four wires to a
set. A ½-inch galvanized wire is sufficient
for any stack, although some people
prefer a larger size wire for double
safety.
KNOTS
Knots are a very important factor in
the Steeple-Jack’s life. Only knots that
have been properly tested should be used.
Many a terrible disaster has been caused
by the use of a knot which was quickly
invented by a man and never tested.
Avoid such accidents by learning to tie
knots in the proper fashion.
Slip knots are bothersome as well as
dangerous to both the person working in
the air and the people walking underneath.
There are very few knots that are
useful to the Steeple-Jack, and it is well
for every man following this trade to
learn to make these few knots well and
thereby avoid delay when in need.
For instance, if you were on the top
of a stack and saw a part of your rigging
that did not look any too safe, or you
were near a band and saw your hook was
only sitting on top of the stack and not
inside, as it should be. A sling and the
knowledge of tying knots properly is
required. Practice until you are thoroughly
familiar with this important part
of your trade.
SQUARE KNOT
As I said before, slippery knots are
bothersome in many cases. When you
use the slip knot the only way to get
it out is to cut the line; then you are disfiguring
the line or shortening it.
The square knot and the bow-line knot
are the ones most commonly used.
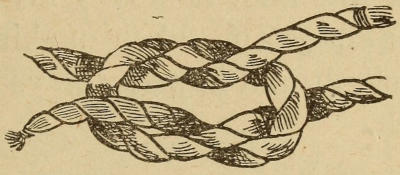
In tying a square knot take the ends of
the rope, passing the left end over and
under the right, and then take the right
end and pass it over and under the left.
In trying to make the square knot there
often forms what is known to line men
as “the granny,” which is useless for any
hazardous purpose. Follow the instructions
of right over and left over and you
can’t go wrong in making the best-liked
knot of all—the SQUARE KNOT.
In using the square knot while working
in the chair, make two half hitches in
each end of the line. This is used to insure
double safety.
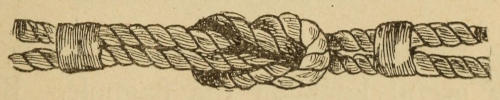
When using the square knot for the
purpose of adding more line to the riggings,
tie both ends of the lines (as illustrated
on page 61).
Square Knot
Granny Knot
Square Knot Sized at Both Ends
BOW-LINE
A more efficient knot than the bow-line
knot was never known. This knot is
used more than any five knots put together
in the Steeple Jack’s work.
The bow-line knot is mostly favored in
climbing a flagstaff, when making the
stirrup to climb, and in many ways for the
smokestack.
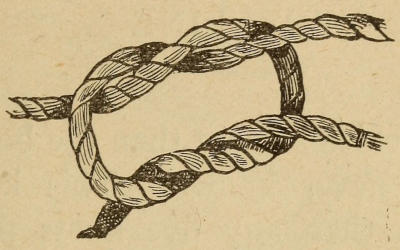
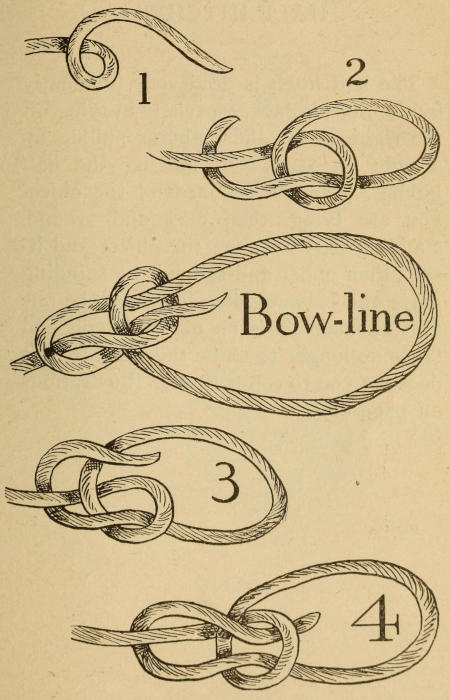
In making the bow-line knot follow the
illustrations according to numbers. In
No. 1 the rope is formed in a bight; pass
No. 1 through the bight under then over
and then under, as illustrated in No. 2;
then over and down through the bight as
illustrated in Nos. 3 and 4. Draw tight
as illustrated on page 63.
As I said before, the bow-line knot is a
very useful knot on the flagpole. By
placing the sling around the pole, passing
the end through the eye, then make your
bow-line knot, leaving the loop for the
size of your foot so as to slip your foot in.
How to Tie the Bow-line Knot
HALF HITCHES
The half hitch is used very frequently
by the Steeple Jack, especially in tying off
the riggings for the night or pulling up
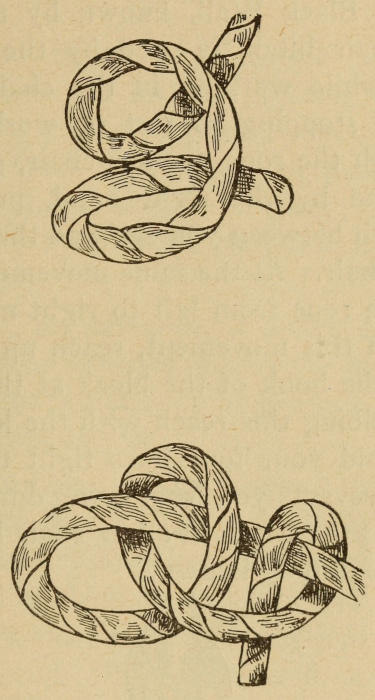
a pole or paint. In making the half
hitches, pass the end around the object
you are tying, then over and around,
standing part between the object and itself;
then under and around the standing
parts and between own loop and the one
first formed. It is no more difficult and
takes no longer to make this knot than it
does for you to count three. Illustrations
on page 65.
Half Hitch
THE BLACK WALL
The Black Wall, known by many as
the chair hitch, is used by the Steeple
Jack while working in the chair up or
down; stopping to rest or work, reach
through the rope of your chair, grab the
fall line by the right hand, pulling it
through between yourself and the rope of
your chair. At the same movement turning
the rope from left to right making a
loop in this movement, reach up and set
it on the hook of the block at the chair;
while doing this reach with the left hand
and hold your four lines tight together.
This prevents you from going down while
making the Black Wall or chair hitch, as
it is commonly known.
Black Wall Knot
TANKS, TOWERS AND STANDPIPES
Water tanks, water towers or water
standpipes are an easy matter to work
on as far as the rigging is concerned, but
not as much money is to be made as on
smokestacks, church steeples and flagpoles.
Nevertheless, they are worth soliciting.
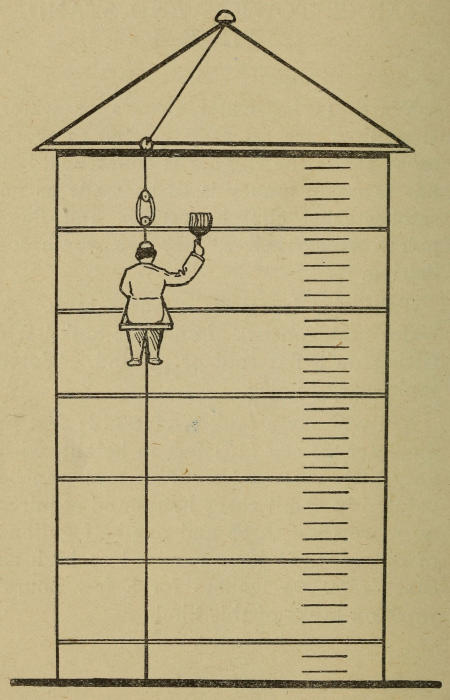
Take, for instance, a water tank. A
water tank consists of only the tank itself
sitting on a flat roof or ground. Water
tanks vary in size.
We will say a tank twelve (12) feet in
diameter, fifteen (15) feet in height, with
very little rust scales. This tank can be
painted in about three hours and requires
no more than three and one-half gallons
of oil paint. I have received as high as
Sixty ($60.00) Dollars for a few hours’
work on tanks of this kind.
Painting Water Tank
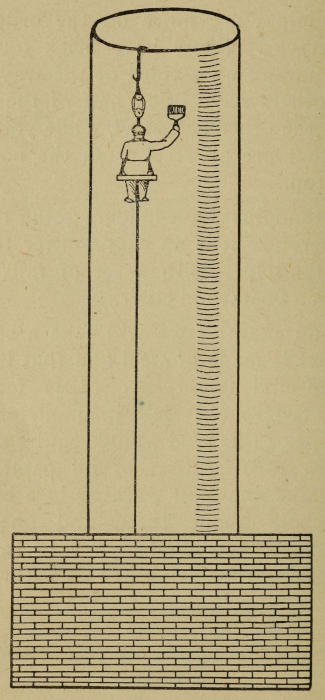
Standpipes are more on the order of
smokestacks. Some have brick foundations
running up a third of the way and
again others have brick half of the way
up and the other half steel, while you find
some that are all steel from the bottom
to the top.
All standpipes have ladders going to the
top, therefore it is an easy matter to rig
such standpipes with a set of falls and
work in a boatswain chair.
For an example we will take a standpipe
that is made of steel and that is one
hundred and twenty-five (125) feet in
height, twelve (12) feet in diameter. A
standpipe of this kind would require about
eighteen (18) gallons of oil paint. It
would take one man working in a boatswain
chair about three and one-half
(3½) days. It is always safe to ask
about $250.00 for a job of this nature.
Painting Standpipe
WATER TOWERS
A chair man considers a water tower
more difficult to work on than the two
mentioned previously.
The majority of water towers are supported
by four stiff legs. Some have
more and very few less. You will find
very few water towers that stand less
than one hundred and fifty (150) feet
high.
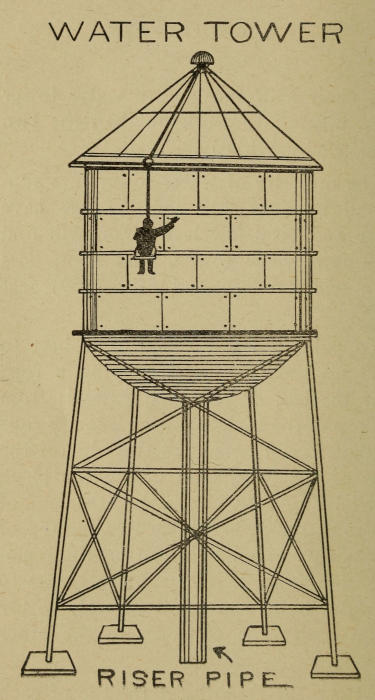
To paint a water tower it is best to
start on the tank proper, tying a rope
over the ball or pole that extends from
the top of the tank, allowing enough rope
so that it will extend to the edge of the
roof of the tank, then attach the block
and falls to same. Take the other end of
the rope, which is attached to the top of
the tank, running it down on the opposite
side from where you are going to
work, and there fasten it securely to the
beam under the platform to the other
side.
WATER TOWER
Attach the riggings at the top of each
stiff leg to the platform while working
down the leg supports.
It takes considerable time and plenty
of patience when working on a water
tower.
A water tower one hundred and fifty
(150) feet high with four stiff legs and
the tank proper about twelve (12) feet
in diameter by twenty (20) feet in height
will require in the neighborhood of twenty-five
(25) gallons of oil paint. It will
take one man approximately four days
and a half (4½). It should not be difficult
for you to secure about Three Hundred
and Fifty ($350.00) Dollars for a
job of this kind.
CHURCH SPIRES
A tapering construction and not a hard
job to rig after once tried. If you are
capable of rigging a church spire, then it
is an easy matter for you to rig a church
dome or any other structure of that
nature.
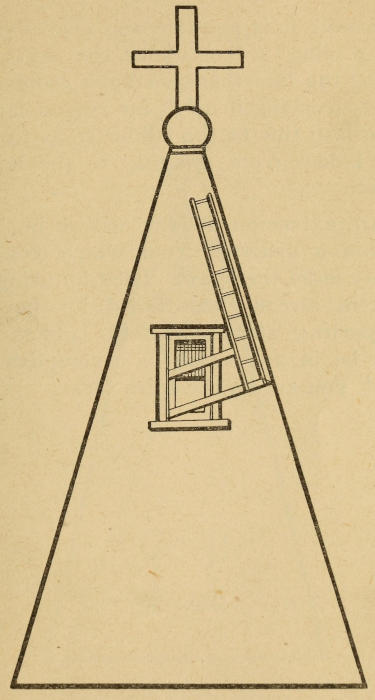
For the majority of church jobs an extension
ladder is the handiest article.
After drawing the extension ladder up to
what is known to the Jack as the pigeon
hole window in the church spire, build
your platform from the window with 3×4
lumber, extending it out some six feet;
lower a line down on both sides of the
window, having your helper tie the two
ends together around the lower section
of the spire. Then by drawing it to the
window you will have your first loop
around the steeple. Place the extension
ladder on the platform; nail two boards
to the inside of the window, then attach
other ends of boards to the ladder. Use
all the safety devices available when
going out on the ladder. Lash the ladder
wherever it is possible and also yourself
by placing a line under the arms and
tying the line that you have around the
spire, working it up as far as you can go,
then lash this to the ladder so as to keep
the ladder from swaying to the left or
right.
Showing Ladder Position from Pigeon-hole
on Spire
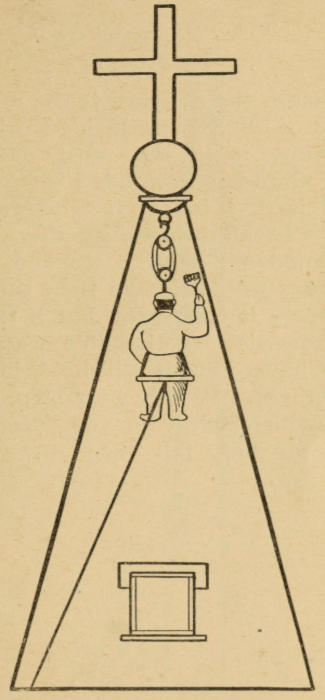
An extension ladder will bring you
within a distance from which you can
easily lasso the spire. Then by using the
system already mentioned in the self-supporting
stacks without ladders you
will be in a position to accomplish any
work you are on the spire for.
Showing Where Riggings Should
Be Lashed at Top of Spire
THE FLAGSTAFF
Although the flagstaff is the most simple
part of the Steeple Jack’s work, at the
same time it is the most dangerous.
Before climbing a wooden pole look all
around it first to see if any cracks are
visible. In all probability there are, as
most wooden poles are cracked. If the
crack runs up and down then the pole is
safe, unless it is dry rot, but if the crack
runs crosswise on the pole watch your
step. Chances are it will hold, but again
it might not. Watch your step, because
no one will watch it for you. Remember,
a man can only fall once.
THE STAFF
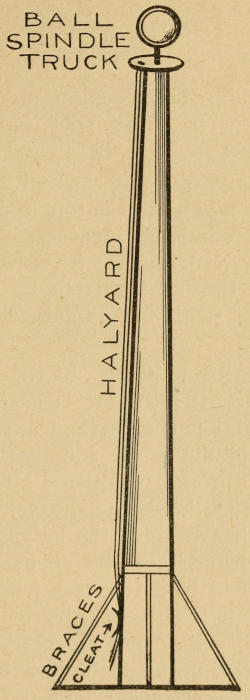
The flagpole is composed of the following
parts: The pole ball, spindle,
truck, sheave, cleat, brace and halyard.
The halyard is the rope with which the
flag is drawn up to the top, and it is never
used for climbing purposes. The art of
climbing a flagpole with ease and performing
that which is to be done upon
the pole will be explained in detail
later on.
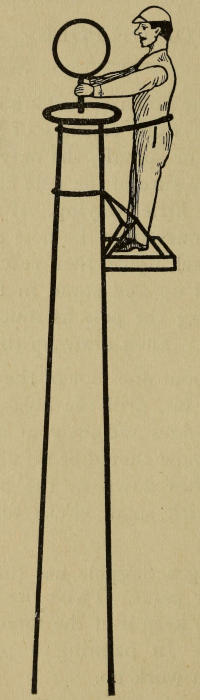
The ball on the top of the staff plays
no important part. It is used more for
ornamental purposes than anything else.
The spindle is the rod that runs from
the ball through the truck into the pole.
The truck holds the sheave.
The sheave holds the halyard.
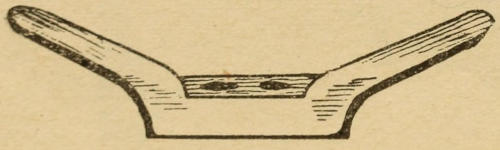
The cleat is for the purpose of tying
the halyard to a few feet from the base
of the pole. The majority of poles have
iron braces for support connected about
six (6) feet up from the base of the pole.
From experience I find the steel pole
the most dangerous. In my opinion it is
more dangerous than the wooden pole for
the reason that rust forms inside of the
steel pole and around the bands where it
is connected, and in the winter time it is
easily broken by the cold weather if any
weight is put on it, whereas the wooden
pole can be tested by sounding it as to its
condition.
If the wooden pole has the dead sound
it is in all probability dry rot, and with a
pole of this kind I would advise you to
be extremely careful. Never sway such
a pole any more than you absolutely must,
and take plenty of time in climbing it. A
pole in this condition gives no warning
before it breaks, but a pole with plenty
of sap gives a cracking sound before it
gives way, which gives the man working
on it a chance to slide to a more secure
position.
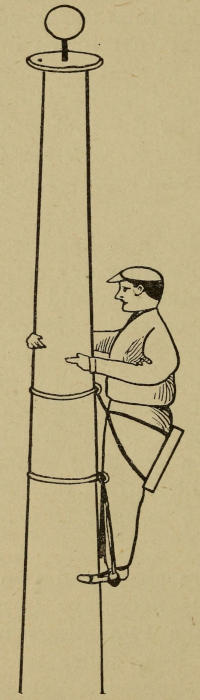
Climbing Flagstaff With Slings
A boatswain chair and two slings are
the only tools necessary to work on a
flagpole. Take two slings made of at
least ½-inch line, splice an eye in the
end of each sling—the eye being about
two inches in diameter; place the sling
around the pole, drawing the end opposite
from the eye through the eye; do likewise
with the other sling; tie the boatswain
chair to the top sling, allowing five inches
from the rope of the boatswain chair to
the eye of the sling; tie a loop in the end
of the lower sling—tying a bow-line knot.
This is called a stirrup. Leave the same
distance from eye to knot as from the
chair to the knot. Get into the boatswain
chair.
The first thing to do is to see that the
loop around the pole is as tight as it will
go. Then place your foot in the stirrup,
take hold of the pole to steady yourself,
raise up in the stirrup, and with the
right hand push the sling holding the
chair up, again making the sling tight to
the pole. Sit down in the chair, reach
down and pull the stirrup sling up until
you can get your foot in. Repeat these
movements and you will see how simple
it is to climb without exerting yourself.
At every movement going up and coming
down make sure that the sling that
holds the chair is secure and thereby prevent
it from slipping down. Should it
be loose and slip down and your foot in
the stirrup, the result would undoubtedly
be that you would be dangling in the air
head down. Avoid all of this by taking
every precaution.
TOP OF POLES
At any time you are working on a flagpole
and the work consists of replacing
a truck, ball or spindle, the only thing to
do is to make sure of the pole being solid
enough for a little swaying. If so, take a
sling, lash yourself to the pole under the
arms as a back brace, then reach up and
pull yourself up and stand in the chair.
Avoid shaking the pole as much as you
possibly can. Then draw up the saw.
Saw off about one foot of the top, take
a brace and bit, drill the holes, chip off
around the edges and set your new truck
on. The spindle should be set about from
8 to 10 inches down in the pole, then
wedge in with small sticks to make it
solid.
In painting a flagpole use the halyard
to hold your paint. Twist the rope several
times to keep it at the same distance
as yourself. In painting a pole work
down as you work up.
Working the Top of a Flagstaff
S Hook Used for Tripping Purpose
Swivel Snap
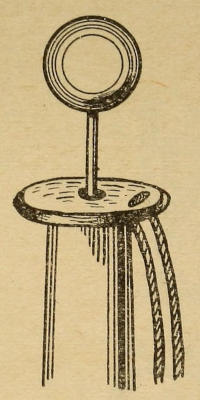
Cleat
Top of Flagstaff
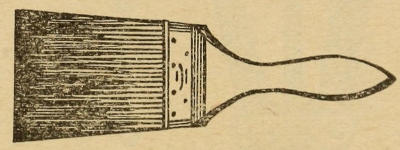
Five-inch Brush Is Mostly Used by Steeple-Jacks
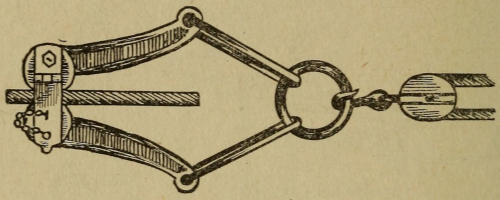
Come-along Used for Tightening Guy Wire
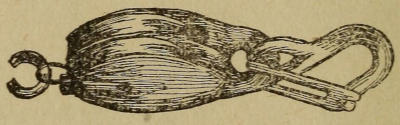
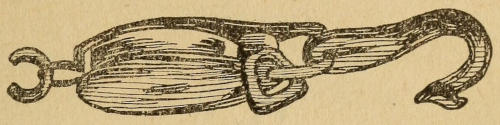
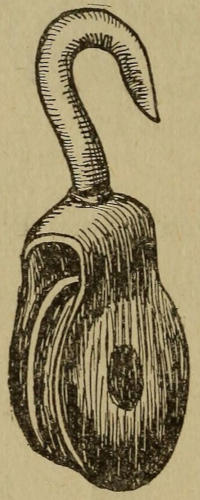
Double Steel Ball-bearing Block Is
Preferred by the Stack Man
Single Steel Block
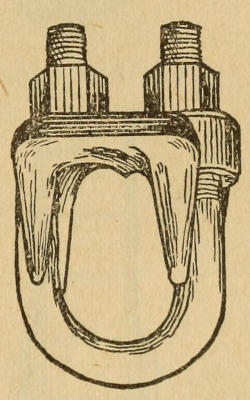
Clip
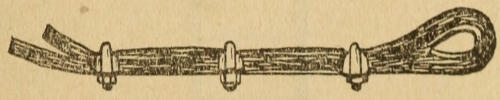
Guy Wire with Clips
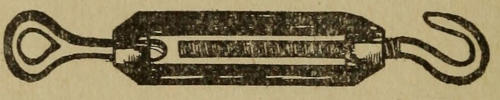
Turn-buckle
Gimblet Block
Extension Ladder
PRICES TO CHARGE FOR WORK
Prices vary in the different parts of the
country, so it is really difficult for me to
give you exact pointers on that, but we
will take for an example a smokestack
one hundred and fifty feet (150) feet high,
six (6) feet in diameter, in six sections of
the United States. These prices are figured
on the basis as follows (the firm or
individual for whom you are doing the
job is to furnish the paint under these
prices):
New York, N. Y.
$130.00
Chicago, Ill.
170.00
Denver, Colo.
170.00
San Antonio, Tex.
140.00
New Orleans, La.
135.00
San Francisco, Cal.
130.00
The following prices are used as to
flagstaffs sixty (60) feet high:
New York, N. Y.
$35.00
Chicago, Ill.
40.00
Denver, Colo.
40.00
San Antonio, Tex.
35.00
New Orleans, La.
35.00
San Francisco, Cal.
35.00
With reference to forty (40) foot staffs,
use the following schedule:
New York, N. Y.
$25.00
Chicago, Ill.
30.00
Denver, Colo.
30.00
San Antonio, Tex.
25.00
New Orleans, La.
25.00
San Francisco, Cal.
25.00
As above stated, these are not standard
prices, but it is safe for you to quote your
prices along these lines.