34.[6] Thorough training in the school of the trooper is the basis of
efficiency.
35. Short and frequent drills are preferable to long ones, which
exhaust the attention of both instructor and recruit.
36. As the instruction progresses, the recruits will be grouped
according to proficiency, in order that all may advance as rapidly as
their abilities permit. Those who lack aptitude and quickness will be
separated from the others and placed under experienced drillmasters.
37. The individual dismounted instruction of the recruit is habitually
given by experienced noncommissioned officers, especially selected for
that purpose. All such instruction is under the careful personal
supervision of a commissioned officer, and in the corresponding
mounted instruction it is desirable that the actual instructor be a
commissioned officer when this is practicable. All lieutenants will be
required to instruct recruits in person sufficiently to acquire skill
in such work.
When recruits, upon their arrival at a station, are assigned to their
respective troops for training, the captains prescribe and supervise
the instruction.
38. The instructor will always maintain a military bearing and by a
quiet, firm demeanor, set a proper example to his men. A calm and even
temper is indispensable. Unnecessarily loud commands and prolonged
explanations are to be avoided.
As the recruits become somewhat proficient in the school of the
trooper, the officer superintending the instruction may call upon them
in turn to drill the squad in his presence and to correct any errors
that may be observed. This will increase their interest,
hasten their instruction, and facilitate judgment upon their fitness
for the duties of noncommissioned officers.
39. A carefully thought out program of instruction, prepared in
advance and based upon the probable time and facilities for
instruction that the case in question may present, is essential to
economy of time and effort and to systematic, thorough instruction.
40. The preliminary individual instruction, dismounted and mounted,
should be carried on during different drill hours of the same days.
This preliminary phase should include, in addition to regular drill,
instruction in: The elements of discipline; the names of the various
parts of the arms and equipment; the proper care of arms, equipment,
and clothing; elementary instructions as to the names of those parts
of the horse that are frequently referred to at drill and stable duty;
grooming; a few simple rules regarding the care of the horse; personal
hygiene; and other related subjects.
41. As soon as the instruction shall have advanced so far as to
include the few necessary preliminary drills, collective instruction
in the school of the squad will be taken up. This instruction may,
like the individual instruction, properly be carried on during
different hours of the same drill days, in both mounted and dismounted
phases. The recruits meanwhile continue their progress in the
individual instruction.
42. The progress in mounted collective instruction must be carefully
regulated in accordance with the recruit's confidence and skill in the
management of his mount, and must progress no faster than the
recruit's horsemanship justifies; but this restriction need not affect
the dismounted collective instruction, and the latter may properly be
carried forward as rapidly as the state of the dismounted individual
instruction will permit. By the time the recruit's instruction in
equitation has progressed so as to prepare him for mounted drills at
the faster gaits, he should have learned the mechanism of all the
movements by executing them at a walk. His course of dismounted
training should meanwhile have included not only the close-order
movements of the squad but the mechanism of extended order, practice
in the use of the saber, a little preparatory range practice with the
rifle and pistol, and work in the nature of minor field
exercises involving dismounted fire action. He should, during the same
period, have learned the mechanism of passing from mounted action to
dismounted action and should have acquired familiarity with all
commands and signals used in the squad. The recruit will thus
ordinarily be ready to enter with reasonable efficiency upon certain
phases of the work in the platoon and troop before his individual
mounted instruction is completed.
43. There are two kinds of commands:
The preparatory command, such as forward, indicates the movement that
is to be executed.
The command of execution, such as MARCH, HALT, or ARMS, causes the
execution.
Preparatory commands are distinguished by boldface type, those of
execution by CAPITALS.
The preparatory command should be given at such an interval of time
before the command of execution as to admit of being properly
understood; the command of execution should be given at the instant
the movement is to commence.
The preparatory command is enunciated distinctly, with a rising
inflection at the end, and in such manner that the command of
execution may be more energetic.
On foot, the command of execution is firm in tone and brief.
In mounted movements the preparatory command is usually somewhat
prolonged to insure its being heard, and the command of execution is
always prolonged.
Commands will be given no louder than is necessary.
Laxness or indifference suggested in the manner of giving a command is
certain to result in corresponding carelessness of execution.
44. To revoke a preparatory command, or being at the halt, to begin
anew a movement improperly begun: AS YOU WERE. Any movement ceases and
the former position is resumed.
45. To stay the execution of a movement when marching, for the
correction of errors, the commands may be given: 1. In place, 2. HALT.
All halt and stand fast. If executed dismounted, the position of the
rifle is not changed. To resume the movement, the commands are: 1.
Resume; or, 1. Resume, trot; or, 1. Resume, gallop. 2. MARCH. The
movement is then completed as if it had not been interrupted.
46. Movements that may be executed toward either flank are
explained as toward but one flank, it being necessary to substitute
the word "left" for "right," and the reverse, to have the explanation
of the corresponding movement toward the other flank. The commands are
given for the execution of the movements toward either flank. The
substitute word of the command is placed within parentheses.
47. Any movement may be executed either from the halt or when marching
unless otherwise prescribed.
Any movement on foot not specially excepted may be executed in double
time.
If at a halt, or if marching in quick time, the command double time
precedes the command of execution.
48. As instructors, officers and noncommissioned officers go wherever
their presence is necessary.
49. Before beginning work, the instructor always assures himself that
those under his charge are neatly dressed and in proper uniform. At
mounted formations he will also require that horses be properly
groomed and that equipments be in good condition and adjusted as
prescribed.
50. The value of recruit drill as an exercise in teaching discipline
must be kept constantly in view by the instructor. No phase of the
instruction is of such great ultimate importance.
51. The object of this school is to develop the strength and agility
of the trooper, to give him a military bearing, to fix in him the
habit of sustained attention and instant obedience, to prepare him for
instruction in mounted combat with the saber and pistol, and to train
him in dismounted combat with the rifle.
In order to make rapid progress in those exercises which form the
basis of instruction of the trooper, it is necessary that the lessons
should, as far as practicable, be given individually.
52. Cautions to instructors.—The instructor explains briefly each
movement, first executing it himself if practicable. He requires the
recruits to take the proper positions unassisted and does not
touch them for the purpose of correcting them, except when they are
unable to correct themselves. He avoids keeping them too long at the
same movement, although each should be understood before passing to
another. He exacts by degrees the desired precision and uniformity.
Recruits should be allowed to stand at ease frequently. During these
pauses the instructor will not be idle, but opportunity will be taken
to talk to the men, to encourage them to ask questions, and so to
develop their confidence and common sense.
53. During the period devoted to preliminary instruction, without
arms, the recruit will be prepared for subsequent instruction with
arms by being taught the names of the principal parts of the different
weapons and the proper methods of cleaning, disassembling, assembling,
and operating the latter.
Physical Training.
54. The physical training of the soldier must receive due attention.
Its direct results are to increase the soldier's strength, agility,
and endurance, and it has indirect results of far-reaching value in
connection with discipline and morale. It should begin with his first
instruction as a recruit and be continued throughout his entire
enlistment. The methods prescribed in the authorized Manual of
Physical Training will be followed with a view to making the soldier's
development thorough and well balanced, and to prevent the instruction
from becoming unnecessarily tedious and monotonous.
55. In the earlier phases of the recruit instruction, and under
temporary conditions that do not favor the carrying out of a more
comprehensive scheme of training, special attention will be given to
the setting-up exercises. Running, jumping, and swimming are phases of
training of special importance to the soldier.
Individual Instruction Without Arms.
56. For this instruction a few recruits, usually not exceeding 3 or 4,
are placed (as a squad) in single rank, facing to the front.
57. To teach the recruits how to form in ranks the instructor
will first place them in single rank, arranged according to height,
the tallest man on the right, with intervals of about 4 inches between
men, and will explain that the object of these intervals is to give
freedom of movement in marching and in the use of the rifle in ranks.
He will then direct each man singly to place the palm of the left hand
on the hip, fingers pointing downward, and draw attention to the fact
that the indicated interval of about 4 inches may be verified by each
man so placing himself that his right arm, when hanging naturally at
his side, touches the elbow of the man on his right. When this is
understood, he will cause the recruits to fall out and successively to
place themselves as before, each man verifying his interval by causing
his right arm to touch the left elbow of the man on his right, the
latter's hand being on his hip, as already explained. He will then
explain that at the command FALL IN the men will, beginning with the
right trooper, successively and quickly take their places in rank,
each man placing the left hand at the hip as above and dropping his
hand to his side as soon as the man on his left has the proper
interval.
58. The recruits having had sufficient instruction to understand how
to form by command, the instructor commands: FALL IN.
The men assemble as prescribed in par. 57, each taking the position of
attention as described below.
As soon as the recruits have had sufficient preliminary instruction
they will habitually be formed as regularly prescribed for a squad.
POSITION OF THE TROOPER, OR ATTENTION (DISMOUNTED).
59. Heels on the same line and as near each other as the conformation
of the man permits.
Feet turned out equally and forming an angle of about 45°.
Knees straight without stiffness.
Hips level and drawn back slightly; body erect and resting equally on
hips; chest lifted and arched; shoulders square and falling equally.
Arms and hands hanging naturally, thumb along the seam of the
breeches.
Head erect and squarely to the front, chin drawn in so that the axis
of the head and neck is vertical; eyes to the front.
Weight of the body resting equally upon the heels and balls of the
feet.
THE RESTS.
60. Being at a halt, the commands are: FALL OUT; REST; AT EASE; and 1.
Parade, 2. REST.
At the command fall out, the men may leave the ranks, but are required
to remain in the immediate vicinity. They resume their former places,
at attention, at the command fall in.
At the command rest, each man keeps one foot in place, but is not
required to preserve silence or immobility.
At the command at ease, each man keeps one foot in place and is
required to preserve silence, but not immobility.
1. Parade, 2. REST. Carry the right foot 6 inches straight to the
rear, left knee slightly bent; clasp the hands, without constraint, in
front of the center of the body, fingers joined, left hand uppermost,
left thumb clasped by the thumb and forefinger of the right hand;
preserve silence and steadiness of position.
61. Being in march, at the command: 1. Route order, 2. MARCH; or 1. At
ease, 2. MARCH, the men keep their places in ranks, but are not
required to keep the step; at route order, they are not required to
preserve silence. If halted from route order, the men stand at rest;
if halted from at ease, they remain at ease.
Marching at route order or at ease, rifles are carried at will, the
muzzles elevated.
62. To resume the attention: 1. Squad, 2. ATTENTION.
If at a halt, the men take the position of the trooper, dismounted
(par. 59). If marching, the cadenced step in quick time is resumed,
and rifles, if carried, are brought to the right shoulder.
63. To dismiss the squad: DISMISSED.
EYES RIGHT OR LEFT.
64. 1. Eyes, 2. RIGHT, 3. FRONT.
At the command right, turn the head to the right oblique, eyes fixed
on the line of eyes of the man in, or supposed to be in, the same
rank. At the command front, turn the head and eyes to the front.
FACINGS.
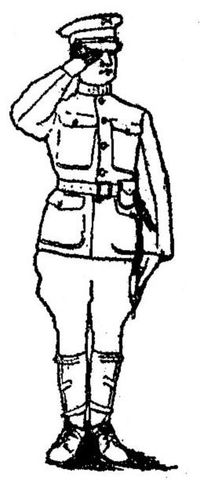
Fig. 1, par. 67.
65. To the flank: 1. Right, 2. FACE.
Raise slightly the left heel and right toe; face to the right, turning
on the right heel, assisted by a slight pressure on the ball of the
left foot; place the left foot by the side of the right. Left face is
executed on the left heel in the corresponding manner.
66. To the rear: 1. About, 2. FACE.
Carry the toe of the right foot about a half foot length to the rear
and slightly to the left of the left heel without changing the
position of the left foot; face to the rear, turning to the right on
the left heel and right toe; place the right heel by the side of the
left.
67. 1. Hand, 2. SALUTE.
Raise the right hand smartly till the tip of the forefinger touches
the lower part of the headdress above the right eye, thumb and fingers
extended and joined, palm to the left, forearm inclined at about 45°,
hand and wrist straight; at the same time look toward the person
saluted.
(TWO), Drop the arm smartly by the side. The salute for officers is
the same (Fig. 1).
STEPS AND MARCHES.
68. All steps and marchings executed from a halt, except right step,
begin with the left foot.
69. The length of the full step in quick time is 30 inches, measured
from heel to heel, and the cadence is at the rate of 120 steps per
minute.
The length of the full step in double time is 36 inches; the
cadence is at the rate of 180 steps per minute.
The instructor, when necessary, indicates the cadence of the step by
calling one, two, three, four, or left, right, the instant the left
and right foot, respectively, should be planted.
70. All steps and marchings and movements involving march are executed
in quick time unless the squad be marching in double time, or double
time be added to the command; in the latter case double time is added
to the preparatory command.
Example: 1. Forward, double time, 2. MARCH.
71. It should be explained to the recruits that in collective drills
and exercises one of the troopers, termed the guide, habitually has to
follow a leader or direct himself upon some designated objective, the
other troopers regulating their march so as, in line, to march abreast
of the guide, maintaining their approximate intervals. The necessity,
in this connection, for learning to march steadily in a given
direction without wavering from side to side should further be pointed
out. Each recruit should then be practiced individually in marching
upon a designated objective, selecting for that purpose two points of
direction on the straight line that passes through the trooper and the
objective and keeping constantly in the prolongation of that line.
When the objective is sufficiently distinct it should be taken as one
of the points of direction and another point in line with the trooper
and the objective, and either nearer or more distant than the latter
be selected as a second point to fix the direction of march.
QUICK TIME AND DOUBLE TIME.
72. Being at a halt, to march forward in quick time: 1. Forward, 2.
MARCH.
At the command forward, shift the weight of the body to the right leg,
left knee straight.
At the command march, move the left foot smartly straight forward 30
inches from the right, sole near the ground, and plant it without
shock; next, in like manner, advance the right foot and plant it as
above; continue the march. The arms swing naturally.
73. Being at a halt, or in march in quick time, to march
forward in double time: 1. Forward, double time, 2. MARCH.
If at a halt, at the first command shift the weight, of the body to
the right leg. At the command march, raise the forearms, fingers
closed, to a horizontal position along the waist line, take up an easy
run with the step and cadence of double time, allowing a natural
swinging motion to the arms.
If marching in quick time, at the command MARCH, given as either foot
strikes the ground, take one step in quick time and then step off in
double time.
74. To resume the quick time: 1. Quick time, 2. MARCH.
At the command march, given as either foot strikes the ground, advance
and plant the other foot in double time; resume the quick time,
dropping the hands by the sides.
TO MARK TIME.
75. Being in march: 1. Mark time, 2. MARCH.
At the command march, given as either foot strikes the ground, advance
and plant the other foot; bring up the foot in rear and continue the
cadence by alternately raising each foot about 2 inches and planting
it on line with the other.
Being at a halt, at the command march, raise and plant the feet as
described above.
THE HALF STEP.
76. 1. Half step, 2. MARCH.
Take steps of 15 inches in quick time, 18 inches in double time.
77. Forward, half step, halt, and mark time may be executed one from
the other in quick or double time.
To resume the full step from half step or mark time: 1. Forward, 2.
MARCH.
SIDE STEP.
78. Being at a halt or mark time: 1. Right (left) step, 2. MARCH.
Carry and plant the right foot 15 inches to the right; bring
the left foot beside it and continue the movement in the cadence of
quick time.
The side step is used for short distances only and is not executed in
double time.
If at order arms, the side step is executed at trail without other
command.
BACK STEP.
79. Being at a halt or mark time: 1. Backward, 2. MARCH.
Take steps of 15 inches straight to the rear.
The back step is used for short distances only and is not executed in
double time.
If at order arms, the back step is executed at trail without other
command.
TO HALT.
80. To stop the march in quick or double time: 1. Squad, 2. HALT.
At the command halt, given as either foot strikes the ground, plant
the other foot as in marching; raise and place the rear foot by the
side of the other. If in double time, drop the hands by the sides.
TO MARCH BY THE FLANK.
81. Being in march: 1. By the right (left) flank, 2. MARCH.
At the command march, given as the right foot strikes the ground,
advance and plant the left foot, then face to the right in marching,
and step off in the new direction with the right foot.
This movement is not executed by signal except in foragers.
TO MARCH TO THE REAR.
82. Being in march: 1. To the rear, 2. MARCH.
At the command march, given as the right foot strikes the ground,
advance and plant the left foot, turn to the right-about on the balls
of both feet, and immediately step off with the left foot.
If marching in double time, turn to the right-about, taking
four steps in place, keeping the cadence, and then step off with the
left foot.
This movement is not executed by signal except in foragers.
CHANGE STEP.
83. Being in march: 1. Change step, 2. MARCH.
At the command march, given as the right, foot, strikes the ground,
advance and plant the left foot, plant the toe of the right foot near
the heel of the left, and step off with the left foot.
The change on the right foot is similarly executed, the command MARCH
being given as the left foot strikes the ground.
TO COUNT FOURS.
84. Being in line, at the command, COUNT FOURS, all the troopers in
the rank except the right trooper execute eyes right and, beginning on
the right, count successively 1, 2, 3, 4. Each turns his head and eyes
to the front as he counts.
Fours may be counted at the halt or marching, mounted or dismounted,
in line or in column of twos or troopers. In counting fours in column
of twos or troopers the elements count off successively from front to
rear in the column and from right to left in each two. Eyes right is
not executed when counting fours from column of twos or troopers.
TO TAKE INTERVALS AND DISTANCES.
85. Being in line at a halt: 1. Take intervals, to the right (left),
2. MARCH, 3. Squad, 4. HALT.
At the command march, all face to the right and the leading trooper
steps off; the other men step off in succession, each following the
preceding trooper at four paces.
At the command halt, given when all have their intervals, all halt
and face to the front.
86. Being at intervals, to assemble the squad: 1. Assemble to
the right (left), 2. MARCH. The trooper on the right stands fast. The
other troopers face to the right, close by the shortest line and face
to the front.
87. Being in line at a halt and fours having been counted: 1. Take
distance, 2. MARCH, 3. Squad, 4. HALT.
At the command march, No. 1 moves straight to the front; Nos. 2, 3,
and 4 in the order named, move straight to the front, each stepping
off so as to follow the preceding man at 4 paces. The command halt is
given when all have their distances.
If there be more than one No. 1, all the Nos. 1 move forward together,
guiding on the right trooper. The same principle applies to the other
numbers.
88. The normal interval and distance of 4 paces indicated,
respectively, in pars. 34 and 36, may be increased or diminished by
adding to the corresponding preparatory command the indication of the
interval or distance desired; thus: 1. Take interval to the right at 1
pace, 2. MARCH, etc.; 1. Take distance, at 2 paces, 2. MARCH, etc.
89. Being at distances, to assemble the squad: 1. Assemble, 2. MARCH.
No. 1 of the front rank stands fast; the other numbers move forward to
their proper places in line.
MANUAL OF THE RIFLE.
90. When the recruit has made fair progress in the instruction without
arms, including that required by par. 53, he is taught the manual of
arms. Instruction without arms and that with arms alternate.
91. The following rules govern the carrying of the rifle:
First. The rifle is not carried with cartridges in either the chamber
or the magazine except when specifically ordered. When so loaded, or
supposed to be loaded, it is habitually carried locked; that is, with
the safety lock turned to the "safe." At all other times it is carried
unlocked, with the trigger pulled.
Second. Whenever troops are formed under arms, rifles are
immediately inspected at the commands: 1. Inspection, 2. ARMS; 3.
Order (right shoulder, port), 4. ARMS.
A. similar inspection is made immediately before dismissal.
If cartridges are found in the chamber or magazine they are removed
and placed in the belt.
Third. The cut-off is kept turned "off" except when cartridges are
actually used.
Fourth. Fall in is executed with the rifle at the order arms. Fall
out, rest, and at ease are executed as without arms. On resuming
attention the position of order arms is taken.
Fifth. If at the order, unless otherwise prescribed, the rifle is
brought to the right shoulder at the command march, the three motions
corresponding with the first three steps. Movements may be executed at
the trail by prefacing the preparatory command with the words at
trail, as, 1. At trail, forward, 2. MARCH; the trail is taken at the
command march.
When the facings, alignments, open and close ranks, taking interval,
and assemblings are executed from the order, raise the rifle to the
trail while in motion and resume the order on halting.
Sixth. The rifle is brought to the order on halting. The execution of
the order begins when the halt is completed.
Seventh. A disengaged hand in double time is held as when without
arms.
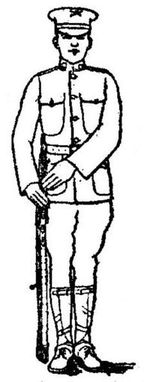
Fig. 2, par. 92.
92. The following rules govern the execution of the manual of arms:
First. In all positions of the left hand at the balance (center of
gravity) the thumb clasps the rifle; the sling is included in the
grasp of the hand. (Figs. 6, 12.)
Second. In all positions of the rifle "diagonally across the body" the
position of the rifle, left arm, and hand are the same as in port
arms. (Fig. 6.)
Third. In resuming the order from any position in the manual, the
motion next to the last concludes with the butt of the rifle about 3
inches from the ground, barrel to the rear, the left hand above and
near the right, steadying the rifle, fingers extended and
joined, forearm and wrist straight and inclining downward, all fingers
of the right hand grasping the rifle. To complete the order, lower the
rifle gently to the ground with the right hand, drop the left quickly
by the side, and take the position of order arms. (Fig. 2.)
Allowing the rifle to drop through the right hand to the ground, or
other similar abuse of the arm to produce effect in executing the
manual, is prohibited.
Fourth. The cadence of the motions is that of quick time; the recruits
are first required to give their whole attention to the details of the
motions, the cadence being gradually acquired as they become
accustomed to handling their rifles.
Fifth. The manual is taught at a halt and the movements are for the
purpose of instruction, divided into motions and executed in detail;
in this case the command of execution determines the prompt execution
of the first motion, and the commands, two, three, four, that of the
other motions.
To execute the movements in detail, the instructor first cautions: By
the numbers; all movement divided into motions are then executed as
above explained until he cautions: Without the numbers; or commands
movements other than those in the manual of arms.
Sixth. Whenever circumstances require, the regular positions of the
manual of arms and the firings may be ordered without regard to the
previous position of the rifle.
Under exceptional conditions of weather or fatigue the rifle may be
carried in any manner directed.
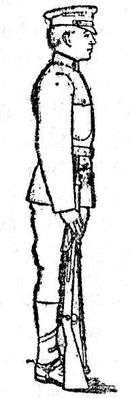
Fig. 3, par. 93.
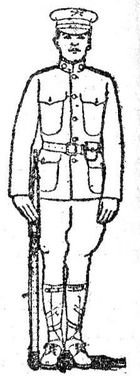
Fig. 4, par. 93.
93. Position of order arms, standing: The butt rests evenly on the
ground, barrel to the rear, toe of the butt on a line with toe of, and
touching, the right shoe, arms and hands hanging naturally, right hand
holding the rifle between the thumb and fingers.
94. Being at order arms: 1. Present, 2. ARMS.
With the right hand carry the rifle in front of the center of the
body, barrel to the rear and vertical, grasp it with the left hand at
the balance, forearm horizontal and resting against the body. (TWO)
Grasp the small of the stock with the right hand. (Fig. 5.)
95. Being at order arms: 1. Port, 2. ARMS.
With the right hand raise and throw the rifle diagonally across the
body, grasp it smartly with both hands; the right, palm down, at the
small of the stock; the left, palm up, at the balance; barrel up,
sloping to the left and crossing opposite the junction of the neck
with the left shoulder; right forearm horizontal; left forearm resting
against the body; the rifle in a vertical plane parallel to the front.
(Fig. 6.)
96. Being at present arms: 1. Port, 2. ARMS.
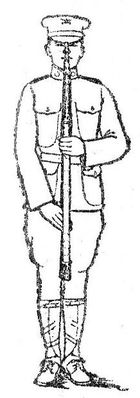
Fig. 5, par. 94.
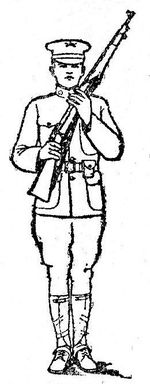
Fig. 6, par. 95.
Carry the rifle diagonally across the body and take the position of
port arms.
97. Being at port arms: 1. Present, 2. ARMS.
Carry the rifle to a vertical position in front of the center of the
body and take the position of present arms.
98. Being at present or port arms: 1. Order, 2. ARMS.
Let go with the right hand; lower and carry the rifle to the right
with the left hand; regrasp it with the right hand just above the
lower band; let go with the left hand, and take the next to the last
position in coming to the order. (TWO) Complete the order.
99. Being at order arms: 1. Right shoulder, 2. ARMS.
With the right hand raise and throw the rifle diagonally across the
body; carry the right hand quickly to the butt, embracing it, the heel
between the first two fingers. (TWO) Without changing the grasp of
the right hand, place the rifle on the right shoulder, barrel
up and inclined at an angle of about 45° from the horizontal, trigger
guard in the hollow of the shoulder, right elbow near the side, the
rifle in a vertical plane perpendicular to the front; carry the left
hand, thumb, and fingers extended and joined, to the small of the
stock, tip of the forefinger touching the cocking piece, wrist
straight and elbow down. (THREE) Drop the left hand by the side. (Fig.
7.)
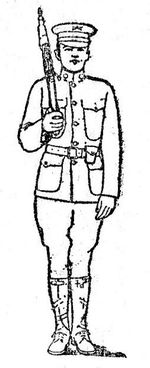
Fig. 7, par. 99.
100. Being at right shoulder arms: 1. Order, 2. ARMS.
Press the butt down quickly and throw the rifle diagonally across the
body, the right hand retaining the grasp of the butt. (TWO), (THREE)
Execute order arms as described from port arms.
101. Being at port arms: 1. Right shoulder, 2. ARMS.
Change the right hand to the butt. (TWO), (THREE) As in right shoulder
arms from order arms.
102. Being at right shoulder arms: 1. Port, 2. ARMS.
Press the butt down quickly and throw the rifle diagonally across the
body, the right hand retaining its grasp of the butt. (TWO) Change the
right hand to the small of the stock.
103. Being at right shoulder arms: 1. Present, 2. ARMS.
Execute port arms. (THREE) Execute present arms.
104. Being at present arms: 1. Right shoulder, 2. ARMS.
Execute port arms. (TWO), (THREE), (FOUR). Execute right shoulder arms
as from port arms.
105. Being at port arms: 1. Left shoulder, 2. ARMS.
Carry the rifle with the right hand and place it on the left shoulder,
barrel up, trigger guard in the hollow of the shoulder; at the same
time grasp the butt with the left hand, heel between first and second
fingers, thumb and fingers closed on the stock. (TWO) Drop the right
hand by the side.
Left shoulder arms may be ordered directly from the order, right
shoulder, or present, or the reverse. At the command Arms execute port
arms and continue in cadence to the position ordered.
106. Being at left shoulder arms: 1. Port, 2. ARMS.
Grasp the rifle with the right hand at the small of the stock. (TWO)
Carry the rifle to the right with the right hand, regrasp it with the
left and take the position of port arms.
107. Being at order arms: 1. Parade, 2. REST.
Carry the right foot 6 inches straight to the rear, left knee slightly
bent; carry the muzzle In front of the center of the body, barrel to
the left; grasp the rifle with the left hand just below the stacking
swivel and with the right hand below and against the left. (Fig. 8.)
Being at parade rest: 1. Squad, 2. ATTENTION.
Resume the order, the left hand quitting the rifle opposite the right
hip.
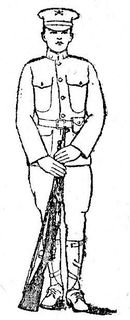
Fig. 8, par. 107.
108. Being at order arms. 1. Trail, 2. ARMS.
Raise the rifle, right arm slightly bent, and incline the muzzle
forward so that the barrel makes an angle of about 30° with the
vertical. (Fig. 9.)
When it can be done without danger or inconvenience to others, the
rifle may be grasped at the balance and muzzle lowered until the rifle
is horizontal; a similar position in the left hand may be used.
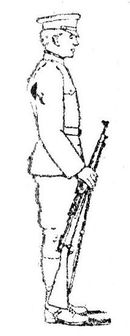
Fig. 9, par. 108.
109. Being at trail arms: 1. Order, 2. ARMS.
Lower the rifle with the right hand and resume the order.
RIFLE SALUTE.
110. Being at right shoulder arms: 1. Rifle, 2. SALUTE.
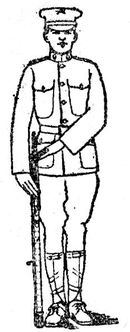
Fig. 11, par. 111.
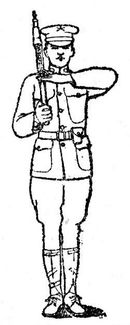
Fig. 10, par. 110.
Carry the left hand smartly to the small of the stock, forearm
horizontal, palm of the hand down, thumb and fingers
extended and joined, forefinger touching end of cocking piece; look
toward the person saluted. (TWO) Drop left hand by the side; turn head
and eyes to the front. (Fig. 10.)
With the rifle on the left shoulder, the salute is rendered in a
corresponding manner with the right hand.
111. Being at order or trail arms: 1. Rifle, 2. SALUTE.
Carry the left hand smartly to the right side, palm of the hand down,
thumb and fingers extended and joined, forefinger against the rifle
near the muzzle; look toward the person saluted. (TWO) Drop the left
hand by the side; turn the head and eyes to the front. (Fig. 11.)
THE INSPECTION.
112. Being at order arms: 1. Inspection, 2. ARMS.
At the second command, take the position of port arms. (TWO) Seize the
bolt handle with the thumb and forefinger of the right hand, turn the
handle up, draw the bolt back and glance at the chamber. Having found
the chamber empty, or having emptied it, raise the head and eyes to
the front. (Fig. 12.)
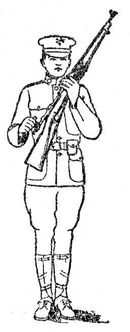
Fig. 12, par. 112.
113. Being at inspection arms: 1. Order (right shoulder, port), 2.
ARMS.
At the preparatory command, push the bolt forward, turn the handle
down, pull the trigger, and resume port arms. At the command arms
complete the movement ordered.
TO DISMISS.
114. Being at halt: 1. Inspection, 2. ARMS, 3. Port, 4. ARMS, 5.
DISMISSED.
TO STACK AND TAKE ARMS.
115. Three rifles only are used to make a stack; rifles not so used
are, in this connection, termed loose rifles.
Being in line at a halt: STACK ARMS.
At the command stack, No. 3 steps back and covers No. 2, No. 2 raises
his rifle with the right hand, grasps it with the left at the upper
band and rests the butt between his feet, barrel to the front, muzzle
inclined slightly to the front and opposite the center of the interval
on his right, the thumb and forefinger raising the stacking swivel;
No. 3 then passes his rifle, barrel to the rear, to No. 2, who grasps
it between the bands with his right hand and throws the butt about 2
feet in advance of that of his own rifle and opposite the right of the
interval, the right hand slipping to the upper band, the thumb and
forefinger raising the stacking swivel, which he engages with that of
his own rifle; No. 1 raises his rifle with the right hand, carries it
well forward, barrel to the front, the left hand guiding the stacking
swivel, engages the lower hook of the swivel of his own rifle with the
free hook of that of No. 3; he then turns the barrel outward into the
angle formed by the other two rifles and lowers the butt to the ground
to the right of and against the toe of his right shoe. No. 2 lays
loose rifles on the stack; No. 3 resumes his place in line. When each
man has finished handling rifles, he takes the position of attention.
The instructor may then rest or dismiss the squad, leaving the arms
stacked.
On re-forming, the men take their places in rear of the stacks.
116. Being in line, behind the stacks: TAKE ARMS.
No. 3 steps back and covers No. 2; No. 2 returns the loose rifles,
then grasps his own rifle with the left hand, the rifle of No. 3 with
his right hand, grasping both between the bands; No. 1 grasps his
rifle in the same way with the right hand. No. 1 disengages his rifle
by raising the butt from the ground and then turning the rifle to the
right, detaches it from the stack; No. 2 disengages and detaches his
rifle by turning it to the left, and then passes the rifle of No. 3 to
him; No. 3 resumes his place in line; all resume the order.
KNEELING AND LYING DOWN.
117. If standing: KNEEL.
Half face to the right; carry the right toe about 1 foot to the left
rear of the left heel; kneel on the right knee, sitting as nearly as
possible on the right heel; left forearm across left thigh; rifle
remains in position of order arms, right hand grasping it above the
lower band. This is the position of order arms, kneeling. (Fig. 13.)
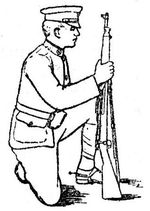
Fig. 13, par. 117.
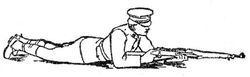
Fig. 14, par. 118.
118. If standing or kneeling: LIE DOWN.
Kneel, but with right knee against left heel; carry back the left foot
and lie flat on the belly, inclining body about 35° to the right;
rifle horizontal, barrel up, muzzle off the ground and pointed to the
front; elbows on the ground; left hand at the balance, right hand
grasping the small of the stock opposite the neck. This is the
position of order arms, lying down. (Fig. 14.)
119. If kneeling or lying down: RISE.
If kneeling, stand up, faced to the front, on the ground marked by the
left heel.
If lying down, raise the body on both knees; stand up, faced to the
front, on the ground marked by the knees.
120. If lying down: KNEEL.
Raise the body on both knees, take the position of kneel. When
deployed as skirmishers, a sitting position may be taken instead of
the position kneeling.
23. The commands for and the execution of the foot movements are the
same as already given for movements without the rifle.
24. The men having taken intervals or distances, the instructor
commands:
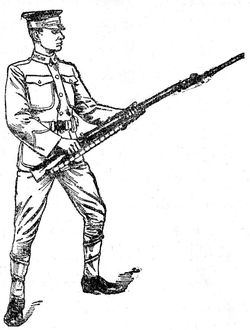
Fig. 15, par. 24.
1. Bayonet exercise, 2. GUARD.
At the second command take the position of guard (see par. 15); at the
game time throw the rifle smartly to the front, grasp the rifle with
the left hand just below the lower hand, fingers between the stock and
gun sling, barrel turned slightly to the left, the right hand grasping
the small of the stock about 6 inches in front of the right hip,
elbows free from the body, bayonet point at the height of the chin.
25. 1. Order, 2. ARMS.
Bring the right foot up to the left and the rifle to the position of
order arms, at the same time resuming the position of attention.
26. During the preliminary instruction, attacks and defenses will be
executed from guard until proficiency is attained, after which they
may be executed from any position in which the rifle is held.
ATTACKS.
27. 1. THRUST.
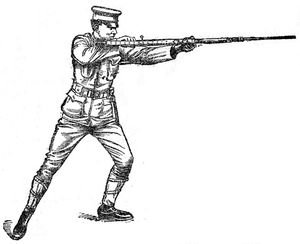
Fig. 16, par. 27.
Thrust the rifle quickly forward to the full length of the left arm,
turning the barrel to the left, and direct the point of the bayonet at
the point to be attacked, but covering the right forearm. At the same
time straighten the right leg vigorously and throw the weight of the
body forward and on the left leg, the ball of the right foot
always on the ground. Guard is resumed immediately without command.
The force of the thrust is delivered principally with the right arm,
the left being used to direct the bayonet. The points at which the
attack should be directed are, in order of their importance, stomach,
chest, head, neck, and limbs.
28. 1. LUNGE.
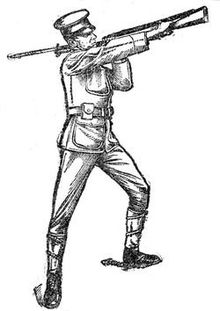
Fig. 17, par. 29.
Executed in the same manner as the thrust, except that the left foot
is carried forward about twice its length. The left heel must
always be in rear of the left knee. Guard is resumed immediately
without command. Guard may also be resumed by advancing the right foot
if for any reason it is desired to hold the ground gained in lunging.
In the latter case the preparatory command forward will be given. Each
method should be practiced.
29. 1. Butt, 2. STRIKE.
Straighten right arm and right leg vigorously and swing butt of rifle
against point of attack, pivoting the rifle in the left hand at about
the height of the left shoulder, allowing the bayonet to pass to the
rear on the left side of the head. Guard is resumed without command.
The points of attack in their order of importance are head, neck,
stomach, and crotch.
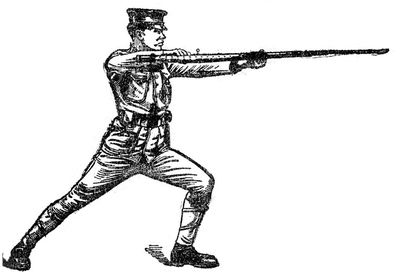
Fig. 18, par. 28.
30. 1. Cut, 2. DOWN.
Execute a quick downward stroke, edge of bayonet directed at point of
attack. Guard is resumed without command.
Par. 19.
Par. 20.
31. 1. Cut, 2. RIGHT (LEFT).
With a quick extension of the arms execute a cut to the right (left),
directing the edge toward the point attacked. Guard is resumed without
command.
The cuts are especially useful against the head, neck, and hands of an
enemy. In executing left cut it should be remembered that the false,
or back, edge is only 5.6 inches long. The cuts can be executed in
continuation of strokes, thrusts, lunges, and parries.
32. To direct an attack to the right, left, or rear the soldier will
change front as quickly as possible in the most convenient manner, for
example: 1. To the right rear, 2. Cut, 3. DOWN; 1. To the right, 2.
LUNGE; 1. To the left, 2. THRUST, etc.
Whenever possible the impetus gained by the turning movement of the
body should be thrown into the attack. In general this will be best
accomplished by turning on the ball of the right foot.
These movements constitute a change of front in which the
position of guard is resumed at the completion of the movement.
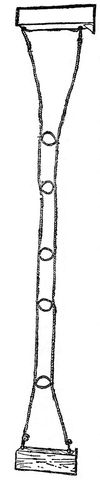
33. Good judgment of distance is essential. Accuracy in thrusting and
lunging is best attained by practicing these attacks against rings or
other convenient openings, about 3 inches in diameter, suitably
suspended at desired heights.
34. The thrust and lunges at rings should first be practiced by
endeavoring to hit the opening looked at. This should be followed by
directing the attack against one opening while looking at another.
35. The soldier should also experience the effect of actual resistance
offered to the bayonet and the butt of the rifle in attacks. This will
be taught by practicing attacks against a dummy.
36. Dummies should be constructed in such a manner as to permit the
execution of attacks without injury to the point or edge of the
bayonet or to the barrel or stock of the rifle. A suitable dummy can
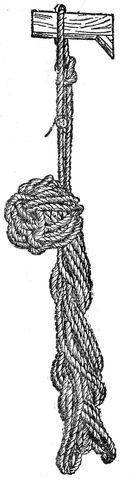
be made from pieces of rope about 5 feet in length plaited closely
together into a cable between 6 and 12 inches in diameter. Old rope is
preferable. Bags weighted and stuffed with hay, straw, shavings, etc.,
are also suitable.
DEFENSES.
37. In the preliminary drills in the defenses the position of guard is
resumed, by command, after each parry. When the men have become
proficient the instructor will cause them to resume the position of
guard instantly without command after the execution of each parry.
38. 1. Parry, 2. RIGHT.
Keeping the right hand in the guard position, move the rifle sharply
to the right with the left arm, so that the bayonet point is about 6
inches to the right.
39. 1. Parry, 2. LEFT.
Move the rifle sharply to the left front with both hands so as to
cover the point attacked.
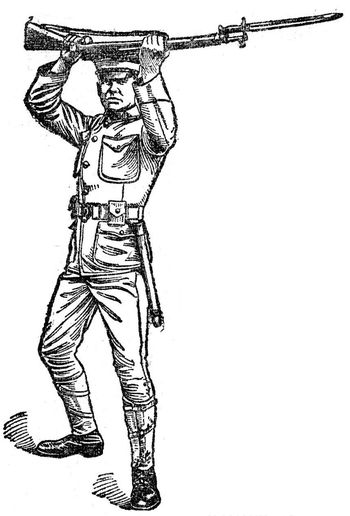
Fig. 21, par. 40.
40. 1. Parry, 2. HIGH.
Raise the rifle with both hands high enough to clear the line of
vision, barrel downward, point of the bayonet to the left front.
When necessary to raise the rifle well above the head, it may
be supported between the thumb and forefinger of the left hand. This
position will be necessary against attacks from higher elevations,
such as men mounted or on top of parapets.
41. 1. Low parry, 2. RIGHT (LEFT). Carry the point of the bayonet down
until it is at the height of the knee, moving the point of the bayonet
sufficiently to the right (left), to keep the opponent's attacks clear
of the point threatened.
These parries are rarely used, as an attack below the waist leaves the
head and body exposed.
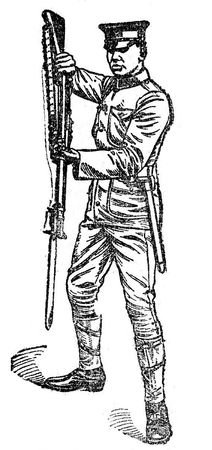
Fig. 22, par. 41.
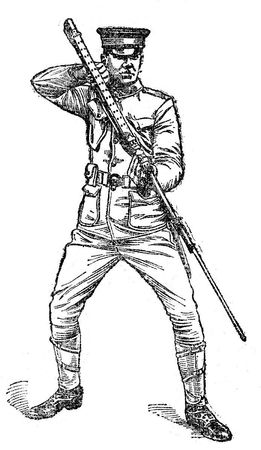
Fig. 23, par. 41.
42. Parries must not be too wide or sweeping, but sharp, short
motions, finished with a jerk or quick catch. The hands should, as far
as possible, be kept in the line of attack. Parries against butt
strike are made by quickly moving the guard so as to cover the point
attacked.
43. To provide against attack from the right, left, or rear the
soldier will change front as quickly as possible in the most
convenient manner; for example: 1. To the left rear, 2. Parry, 3.
HIGH; 1. To the right, 2. Parry, 3. RIGHT, etc.
These movements constitute a change of front in which the position of
guard is resumed at the completion of the movement.
In changing front for the purpose of attack or defense, if there is
danger of wounding a comrade, the rifle should first be brought to a
vertical position.
44. 1. Club rifle, 2. SWING.
Being at order arms, at the preparatory command quickly raise and turn
the rifle, regrasping it with both hands between the rear sight and
muzzle, barrel down, thumbs around the stock and toward the butt; at
the same time raise the rifle above the shoulder farthest from the
opponent, butt elevated and to the rear, elbows slightly bent and
knees straight. Each individual takes such position of the feet,
shoulders, and hands as best accords with his natural dexterity.
SWING. Tighten the grasp Of the hands and swing the rifle to
the front and downward, directing it at the head of the opponent, and
immediately return to the position of club rifle by completing the
swing of the rifle downward and to the rear. Repeat by the command,
SWING.
The rifle should be swung with sufficient force to break through any
guard or parry that may be interposed.
Being at club rifle, order arms is resumed by command.
The use of this attack against dummies or in fencing is
prohibited.
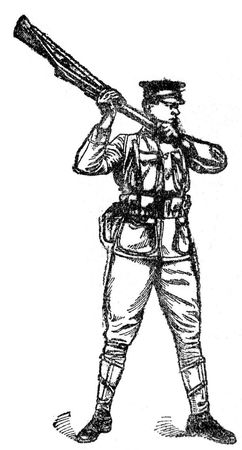
Fig. 24, par. 44.
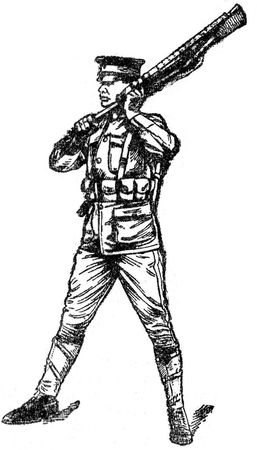
Fig. 25, par. 44.
45. The position of club rifle may be taken from any position of the
rifle prescribed in the Manual of Arms. It will not be taken in
personal combat unless the emergency is such as to preclude the use of
the bayonet.
46. The purpose of combined movements is to develop more vigorous
attacks and more effective defenses than are obtained, by the single
movements; to develop skill in passing from attack to defense and the
reverse. Every movement to the front should be accompanied by an
attack, which is increased in effectiveness by the forward movement of
the body. Every movement to the rear should ordinarily be accompanied
by a parry and should always be followed by an attack. Movements to
the right or left may be accompanied by attacks or defenses.
47. Not more than three movements will be used in any combination. The
instructor should first indicate the number of movements that are to
be combined as two movements or three movements. The execution is,
determined by one command of execution, and the position of guard is
taken upon the completion of the last movement only.
EXAMPLES.
- Front pass and LUNGE.
- Right step and THRUST.
- Left step and low parry RIGHT.
- Rear pass, parry left and LUNGE.
- Lunge and cut RIGHT.
- Parry right and parry HIGH.
- Butt strike and cut DOWN.
- Thrust and parry HIGH.
- Parry high and LUNGE.
- Advance, thrust and cut RIGHT.
- Right step, parry left and cut DOWN.
- To the left, butt strike and cut DOWN.
- To the right rear, cut down and butt STRIKE.
48. Attacks against dummies will be practiced. The approach
will be made against the dummies both in quick time and double time.
49. The principles of practical bayonet combat should be taught as far
as possible during the progress of instruction in bayonet exercises.
50. The soldier must be continually impressed with the extreme
importance of the offensive due to its moral effect. Should an attack
fail, it should be followed immediately by another attack before the
opponent has an opportunity to assume the offensive. Keep the opponent
on the defensive. If, due to circumstances, it is necessary to take
the defensive, constantly watch for an opportunity to assume the
offensive and take immediate advantage of it.
51. Observe the ground with a view to obtaining the best footing. Time
for this will generally be too limited to permit more than a single
hasty glance.
52. In personal combat watch the opponent's eyes if they can be
plainly seen, and do not fix the eyes on his weapon nor upon the point
of your attack. If his eyes can not be plainly seen, as in night
attacks, watch the movements of his weapon and of his body.
53. Keep the body well covered and deliver attacks vigorously. The
point of the bayonet should always be kept as nearly as possible in
the line of attack. The less the rifle is moved upward, downward, to
the right, or to the left, the better prepared the soldier is for
attack or defense.
54. Constantly watch for a chance to attack the opponent's left hand.
His position of guard will not differ materially from that described
in paragraph 24. If his bayonet is without a cutting edge, he will be
at a great disadvantage.
55. The butt is used for close and sudden attacks. It is particularly
useful in riot duty. From the position of port arms a sentry can
strike a severe blow with the butt of the rifle.
56. Against a man on foot, armed with a sword, be careful that the
muzzle of the rifle is not grasped. All the swordsman's
energies will be directed toward getting past the bayonet Attack him
with short, stabbing thrusts and keep him beyond striking distance of
his weapon.
57. The adversary may attempt a greater extension in the thrust and
lunge by quitting the grasp of his piece with the left hand and
advancing the right as far as possible. When this is done, a sharp
parry may cause him to lose control of his rifle, leaving him exposed
to a counter attack, which should follow promptly.
58. Against odds a small number of men can fight to best advantage by
grouping themselves so as to prevent their being attacked from behind.
59. In fighting a mounted man armed with a saber every effort must be
made to get on his near, or left, side, because here his reach is much
shorter and his parries much weaker. If not possible to disable such
an enemy, attack his horse and then renew the attack on the horseman.
60. In receiving night attacks the assailant's movements can be best
observed from the kneeling or prone position, as his approach
generally brings him against the sky line. When he arrives within
attacking distance rise quickly and lunge well forward at the middle
of his body.
61. Fencing exercises in two lines consist of combinations of thrusts,
parries, and foot movements executed at command or at will, the
opponent replying with suitable parries and returns.
62. The instructor will inspect the entire fencing equipment before
the exercise begins and assure himself that everything is in such
condition as will prevent accidents.
63. The men equip themselves and form in two lines at the order,
facing each other, with intervals of about 4 paces between files and a
distance of about 2 paces between lines. One line is designated as
number 1; the other, number 2. Also as attack and defense.
64. The opponents being at the order facing each other, the instructor
commands: SALUTE.
Each man, with eyes on his opponent, carries the left hand smartly to
the right side, palm of the hand down, thumb and fingers
extended and joined, forearm horizontal, forefinger touching the
bayonet. (Two.) Drop the arm smartly by the side.
This salute is the fencing salute.
All fencing exercises and all fencing at will between individuals will
begin and terminate with the formal courtesy of the fencing salute.
65. After the fencing salute has been rendered the instructor
commands: 1. Fencing exercise, 2. GUARD.
At the command guard each man comes to the position of guard,
heretofore defined, bayonets crossed, each man's bayonet bearing
lightly to the right against the corresponding portion of the
opponent's bayonet. This position is known as the engage or engage
right.
66. Being at the engage right: ENGAGE LEFT.
The attack drops the point of his bayonet quickly until clear of his
opponent's rifle and describes a semicircle with it upward and to the
right; bayonets are crossed similarly as in the engaged position, each
man's bayonet bearing lightly to the left against the corresponding
portion of the opponent's bayonet.
67. Being at engage left: ENGAGE RIGHT.
The attack quickly drops the point of his bayonet until clear of his
opponent's rifle and describes a semicircle with it upward and to the
left and engages.
68. Being engaged: ENGAGE LEFT AND RIGHT.
The attack engages left and then immediately engages right.
69. Being engaged left: ENGAGE RIGHT AND LEFT.
The attack engages right and then immediately engages left.
70. 1. Number one, ENGAGE RIGHT (LEFT); 2. Number two, COUNTER.
Number one executes the movement ordered, as above; number two quickly
drops the point of his bayonet and circles it upward to the original
position.
71. In all fencing while maintaining the pressure in the engage a
certain freedom of motion of the rifle is allowable, consisting of the
play, or up-and-down motion, of one bayonet against the other. This
is necessary to prevent the opponent from divining the
intended attack. It also prevents his using the point of contact as a
pivot for his assaults. In changing from one engage to the other the
movement is controlled by the left hand, the right remaining
stationary.
72. After some exercise in engage, engage left, and counter, exercises
will be given in the assaults.
ASSAULTS.
73. The part of the body to be attacked will be designated by name, as
head, neck, chest, stomach, legs. No attacks will be made below the
knees. The commands are given and the movements for each line are
first explained thoroughly by the instructor; the execution begins at
the command assault. Number one executes the attack, and number two
parries; conversely, at command, number two attacks and number one
parries.
74. For convenience in instruction assaults are divided into simple
attacks, counter attacks, attacks on the rifle, and feints.
SIMPLE ATTACKS.
75. Success in these attacks depends on quickness of movement. There
are three simple attacks—the straight, the disengagement, and the
counter disengagement. They are not preceded by a feint.
76. In the straight the bayonet is directed straight at an opening
from the engaged position. Contact with the opponent's rifle may or
may not be abandoned while making it. If the opening be high or low,
contact with the rifle will usually be abandoned on commencing the
attack. If the opening be near his guard, the light pressure used in
the engage may be continued in the attack.
Example: Being at the engage right, 1. Number one, at neck (head,
chest, right leg, etc.), thrust; 2. Number two, parry right; 3.
ASSAULT.
77. In the disengagement contact with the opponent's rifle is
abandoned and the point of the bayonet is circled under or over his
bayonet or rifle and directed into the opening attacked. This attack
is delivered by one continuous spiral movement of the bayonet
from the moment contact is abandoned.
Example: Being at the engage right, 1. Number one, at stomach (left
chest, left leg, etc.), thrust; 2. Number two, parry left (etc.); 3.
ASSAULT.
78. In the counter disengagement a swift attack is made into the
opening disclosed while the opponent is attempting to change the
engagement of his rifle. It is delivered by one continuous spiral
movement of the bayonet into the opening.
Example: Being at the engage right, 1. Number two, engage left; 2.
Number one, at chest, thrust; 3. Number two, parry left; 4. ASSAULT.
Number two initiates the movement, number one thrusts as soon as the
opening is made, and number two then attempts to parry.
79. A counter attack or return is one made instantly after or in
continuation of a parry. The parry should be as narrow as possible.
This makes it more difficult for the opponent to recover and counter
parry. The counter attack should also be made at or just before the
full extension of the opponent's attack, as when it is so made a
simple extension of the arms will generally be sufficient to reach the
opponent's body.
Example: Being at engage, 1. Number two, at chest, lunge; 2. Number
one, parry right, and at stomach (chest, head, etc.), thrust; 3.
ASSAULT.
ATTACKS ON THE RIFLE.
80. These movements are made for the purpose of forcing or disclosing
an opening into which an attack can be made. They are the press, the
beat, and the twist.
81. In the press the attack quickly presses against the opponent's
bayonet or rifle with his own and continues the pressure as the attack
is delivered.
Example: Being at the engage, 1. Number one, press, and at chest,
thrust; 2. Number two, parry right; 3. ASSAULT.
82. The attack by disengagement is particularly effective following
the press.
Example: Being at the engage, 1. Number one, press, and at stomach,
thrust; 2. Number two, low parry left; 3. ASSAULT.
83. The beat is an attack in which a sharp blow, is struck
against the opponent's rifle for the purpose of forcing him to expose
an opening into which an attack immediately follows. It is used when
there is but slight opposition or no contact of rifles.
Example: Being at the engage, 1. Number one, beat, and at stomach
(chest, etc.), thrust; 2. Number two, parry left; 3. ASSAULT.
84. In the twist the rifle is crossed over the opponent's rifle or
bayonet and his bayonet forced downward with a circular motion and a
straight attack made into the opening. It requires superior strength
on the part of the attack.
Example: Being at the engage, 1. Number one, twist, and at stomach,
thrust; 2. Number two, low parry left; 3. ASSAULT.
FEINTS.
85. Feints are movements which threaten or simulate attacks and are
made with a view to inducing an opening or parry that exposes the
desired point of attack. They are either single or double, according
to the number of such movements made by the attack.
86. In order that the attack may be changed quickly, as little force
as possible is put into a feint.
Example: Being at the engage, 1. Number one, feint head thrust; at
stomach, lunge; 2. Number two, parry right and low parry right; 3.
ASSAULT.
Number one executes the feint and then the attack. Number two executes
both parries.
87. In double feints first one part of the body and then another is
threatened and a third attacked.
Example: Being at the engage, 1. Number one, feint straight thrust at
chest; disengagement at chest; at stomach, lunge; 2. Number two, parry
right, parry left, and low parry left; 3. ASSAULT.
88. An opening may be offered or procured by opposition, as in the
press or beat.
89. In fencing exercises every feint should at first be parried. When
the defense is able to judge or divine the character of the
attack the feint is not necessarily parried, but may be nullified by a
counter feint.
90. A counter feint is a feint following the opponent's feint or
following a parry of his attack and generally occurs in combined
movements.
COMBINED MOVEMENTS.
91. When the men have become thoroughly familiar with the various foot
movements, parries, guards, attacks, feints, etc., the instructor
combines several of them and gives the commands in quick succession,
increasing the rapidity and number of movements as the men become more
skillful. Opponents will be changed frequently.
1. Example: Being at the engage, 1. Number one, by disengagement at
chest, thrust; 2. Number two, parry left, right step (left foot
first), and lunge; 3. ASSAULT.
2. Example: Being at engage left, 1. Number one, press and lunge; 2.
Number two, parry right, left step, and thrust; 3. ASSAULT.
3. Example: Being at the engage, 1. Number one, by disengagement at
chest, thrust; 2. Number two, parry left, front pass, and at head butt
strike; 3. Number one, right step; 4. ASSAULT.
92. Examples 1 and 2 are typical of movements known as cross counters,
and example No. 3 of movements known as close counters.
93. A chancery is an attack by means of which the opponent is
disarmed, which causes him to lose control of his rifle, or which
disables his weapon.
94. When the different combinations are executed with sufficient skill
the instructor will devise series of movements to be memorized and
executed at the command assault. The accuracy and celerity of the
movements will be carefully watched by the instructor, with a view to
the correction of faulty execution.
95. It is not intended to restrict the number of movements, but to
leave to the discretion of company commanders and the ingenuity of
instructors the selection of such other exercises as accord with the
object of the drill.
96. As satisfactory progress is made the instructor will proceed to
the exercises at will, by which is meant assaults between two men,
each endeavoring to hit the other and to avoid being hit himself.
Fencing at will should not be allowed to degenerate into random
attacks and defenses.
97. The instructor can supervise but one pair of combatants at a time.
Frequent changes should be made so that the men may learn different
methods of attack and defense from each other.
98. The contest should begin with simple, careful movements, with a
view to forming a correct opinion of the adversary; afterwards
everything will depend on coolness, rapid and correct execution of the
movements, and quick perception of the adversary's intentions.
99. Continual retreat from the adversary's attack and frequent dodging
to escape attacks should be avoided. The offensive should be
continually encouraged.
100. In fencing at will, when no commands are given, opponents facing
each other at the position of order arms, salute. They then
immediately and simultaneously assume the position of guard, rifles
engaged. Neither man may take the position of guard before his
opponent has completed his salute. The choice of position is decided
before the salute.
101. The opponents being about two paces apart and the fencing salute
having been rendered, the instructor commands, 1. At will, 2. ASSAULT,
after which either party has the right to attack. To interrupt the
contest the instructor will command, HALT, at which the combatants
will immediately come to the order. To terminate the contest, the
instructor will command, 1. Halt, 2. SALUTE, at which the combatants
will immediately come to the order, salute, and remove their masks.
102. When men have acquired confidence in fencing at will, one
opponent should be required to advance upon the other in quick time at
charge bayonet, from a distance not to exceed 10 yards, and deliver an
attack. As soon as a hit is made by either opponent the instructor
commands, HALT, and the assault terminates. Opponents alternate in
assaulting. The assailant is likewise required to advance at double
time from a distance not exceeding 20 yards and at a run from
a distance not exceeding 30 yards.
103. The instructor will closely observe the contest and decide
doubtful points. He will at once stop the contest upon the slightest
indication of temper. After conclusion of the combat he will comment
on the action of both parties, point out errors and deficiencies, and
explain how they may be avoided in the future.
104. As additional instruction, the men may be permitted to wield the
rifle left handed—that is, on the left side of the body, left hand at
the small of the stock. Many men will be able to use this method to
advantage. It is also of value in case the left hand is wounded.
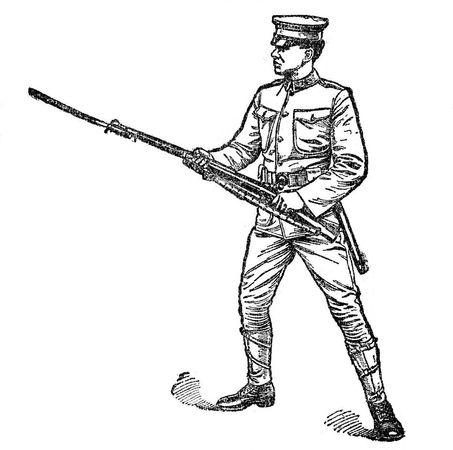
Fig. 26, par. 104.
105. After men have fenced in pairs, practice should be given
in fencing between groups, equally and unequally divided. When
practicable, intrenchments will be used in fencing of this character.
In group fencing it will be necessary to have a sufficient number of
umpires to decide hits. An individual receiving a hit is withdrawn at
once from the bout, which is decided in favor of the group having the
numerical superiority at the end. The fencing salute is not required
in group fencing.
RULES FOR FENCING AT WILL.
106. 1. Hits on the legs below the knees will not be counted. No hit
counts unless, in the opinion of the instructor, it has sufficient
force to disable.
2. Upon receiving a hit, call out "hit."
3. After receiving a fair hit a counter attack is not permitted. A
position of engage is taken.
4. A second or third hit in a combined attack will be counted only
when the first hit was not called.
5. When it is necessary to stop the contest—for example, because of
breaking of weapons or displacement of means of protection—take the
position of the order.
6. When it is necessary to suspend the assault for any cause, it will
not be resumed until the adversary is ready and in condition to defend
himself.
7. Attacks directed at the crotch are prohibited in fencing.
8. Stepping out of bounds, when established, counts as a hit.
SUGGESTIONS FOR FENCING AT WILL.
107. When engaging in an assault, first study the adversary's position
and proceed by false attacks, executed with speed, to discover, if
possible, his instinctive parries. In order to draw the adversary out
and induce him to expose that part of the body at which the attack is
to be made, it is advisable to simulate an attack by a feint and then
make the real attack.
108. Return attacks should be frequently practiced, as they are
difficult to parry, and the opponent is within easier reach
and more exposed. The return can be made a continuation of the parry,
as there is no previous warning of its delivery, although it should
always be expected. Returns are made, without lunging if the adversary
can be reached by thrusts or cuts.
109. Endeavor to overcome the tendency to make a return without
knowing where it will hit. Making returns blindly is a bad habit and
leads to instinctive returns—that is, habitual returns with certain
attacks from certain parries—a fault which the skilled opponent will
soon discover.
110. Do not draw the rifle back preparatory to thrusting and lunging.
111. The purpose of fencing at will is to teach the soldier as many
forms of simple, effective attacks and defenses as possible.
Complicated and intricate movements should not be attempted.
HINTS FOR INSTRUCTORS.
112. The influence of the instructor is great. He must be master of
his weapon, not only to show the various movements but also to lead in
the exercises at will. He should stimulate the zeal of the men and
arouse pleasure in the work. Officers should qualify themselves as
instructors by fencing with each other.
113. The character of each man, his bodily conformation, and his
degree of skill must always be taken into account. When the instructor
is demonstrating the combinations, feints returns, and parries the
rapidity of his attack should be regulated by the skill of the pupil,
and no more force than is necessary should be used. If the pupil
exposes himself too much in the feints and parries, the instructor
will, by an attack, convince him of his error; but if these returns be
too swiftly or too strongly made the pupil will become overcautious
and the precision of his attack will be impaired. The object is to
teach the pupil, not to give exhibitions of superior skill.
114. Occasionally the instructor should leave himself uncovered and
fail to parry, in order to teach the pupil to take quick advantage of
such opportunities.
SUGGESTIONS.
Instruction in bayonet exercise and bayonet fencing should be
conducted with a view to teaching the aggressive use of the bayonet.
Unless troops are so thoroughly trained with the bayonet that they
believe that with it they are superior to their opponents it will be
difficult or impossible to develop that morale which is necessary for
a successful assault. Men should be impressed with the importance of
acting always on the offensive in bayonet combat, of pushing their
attack with all their might. Troops which are successful in their
first few bayonet encounters will seldom thereafter be called upon to
use the bayonet—their opponents will not await the assault.
LOADINGS AND FIRINGS.
121. The commands for loading and firing are the same whether
standing, kneeling, or lying down. The firings are always executed at
a halt.
The instruction in firing will be preceded by a command for loading.
Loadings are executed in line and skirmish line only.
122. Rifles having been ordered loaded are kept loaded without command
until the command unload or inspection arms, fresh clips being
inserted when the magazine is exhausted.
123. The aiming point or target is carefully pointed out. This may be
done before or after announcing the sight setting. Both are indicated
before giving the command for firing, but may be omitted when the
target appears suddenly and is unmistakable; in such cases the battle
sight is used if no sight setting is announced. The troopers must be
practiced repeatedly in locating targets, making the appropriate sight
settings, and simulating fire on the target indicated.
124. The target or aiming point having been designated and the sight
setting announced, such designation or announcement need not be
repeated until a change of either or both is necessary.
Troops are trained to continue their fire upon the aiming point or
target designated and at the sight setting announced until a change
is ordered.
125. If the men are not already in the position of load, that
position is taken at the announcement of the sight setting; if the
announcement is omitted, the position is taken at the first command
for firing.
126. When deployed, the use of the sling as an aid to accurate firing
is discretionary with each man.
127. The correct estimation of distances is of great importance in
connection with all rifle firing except that at short ranges.
Instruction of the recruit in this phase of training must not be
delayed until range firing is taken up, but should be begun in the
early instruction and carried forward progressively, thus gradually
developing the faculties involved. In the same way the occasional
firing of a few shots, first with blank cartridges and later with ball
cartridges at short range and under conditions permitting very careful
detailed supervision of each man's position, will be found of
exceptional value as a preliminary exercise to the course of range
firing prescribed for recruits. Detailed directions for conducting the
instruction of the recruit in estimating distances and in rifle firing
are prescribed in the Small Arms Firing Manual.
TO LOAD.
128. Being in line or skirmish line at halt: 1. With dummy (blank or
ball) cartridges, 2. LOAD.
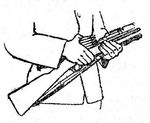
Fig. 27, par. 128.
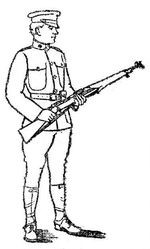
Fig. 28, par. 128.
At the command load each trooper faces half right and carries the
right foot to the right, about 1 foot, to such position as will insure
the greatest firmness and steadiness of the body, raises or lowers the
rifle and drops it into the left hand at the balance, left thumb
extended along the stock, muzzle at the height of the breast, and
turns the cut-off up. With the right hand he turns and draws the bolt
back, takes a loaded clip and inserts the end in the clip slots,
places the thumb on the powder space of the top cartridge,
the fingers extending around the rifle and tips resting on the
magazine floor plate; forces the cartridges into the magazine by
pressing down with the thumb; without removing the clip thrusts the
bolt home, turning down the handle; turns the safety lock to the
"safe"; and carries the hand to the small of the stock.
A skirmish line may load while moving, the rifles being held as nearly
as practicable in the position of load.
If kneeling or sitting, the position of the piece is similar; if
kneeling, the left forearm rests on the left thigh; if sitting, the
elbows are supported by the knees; if lying down, the left hand
steadies and supports the piece at the balance, the toe of the butt
resting on the ground, the muzzle off the ground.
For reference, these positions (standing, kneeling, and lying down)
are designated as that of load. (Figs. 15, 16.)
129. For instruction in loading: 1. Simulate, 2. LOAD.
Executed as above described, except that the cut-off remains "off" and
the handling of cartridges is simulated.
The recruits are first taught to simulate loading and firing; after a
few lessons dummy cartridges may be used. Later, blank cartridges may
be used.
130. The rifle may be used as a single loader by turning the magazine
"off." The magazine may be filled in whole or in part while "off" or
"on" by pressing cartridges singly down and back until they are in the
proper place. The use of the rifle as a single loader is, however, to
be regarded as exceptional.
TO UNLOAD.
131. UNLOAD.
Take the position of load, turn the safety lock up and move bolt
alternately back and forward until all the cartridges are ejected.
After the last cartridge is ejected the chamber is closed by first
thrusting the bolt slightly forward to free it from the stud holding
it in place when the chamber is open, pressing the follower down and
back to engage it under the bolt, and then thrusting the bolt home;
the trigger is pulled. The cartridges are then picked up, cleaned, and
returned to the belt, and the rifle is brought to the order.
TO SET THE SIGHT.
132. RANGE, ELEVEN HUNDRED (EIGHT-FIFTY, ETC.), or BATTLE SIGHT.
The sight is set at the elevation indicated. The instructor explains
and verifies sight settings.
TO FIRE BY VOLLEY.
133. 1. READY, 2. AIM, 3. Squad, 4. FIRE.
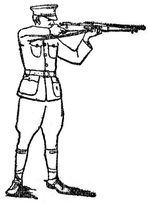
Fig. 29, par. 133.
At the command ready, turn the safety lock to the "ready;" at the
command aim, raise the rifle with both hands and support the butt
firmly against the hollow of the right shoulder, right thumb clasping
the stock, barrel horizontal, left elbow well under the rifle, right
elbow as high as the shoulder; incline the head slightly forward and a
little to the right, cheek against the stock, left eye closed, right
eye looking through the notch of the rear sight so as to perceive the
object aimed at, second joint of forefinger resting lightly against
the front of the trigger and taking up the slack; top of front sight
is carefully raised into, and held in, the line of sight.
In aiming kneeling the left elbow rests on the left knee, point of
elbow in front of kneecap. In aiming sitting the elbows are supported
by the knees.
In aiming lying down raise the rifle with both hands, rest on both
elbows and press the butt firmly against the right shoulder.
At the command fire, press the finger against the trigger;
fire without deranging the aim and without lowering or turning the
rifle; lower the rifle to the position of load and load. (Figs. 17,
18, 19.)
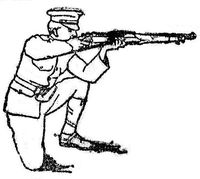
Fig. 30, par. 133.
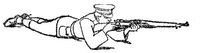
Fig. 31, par. 133.
134. To continue the firing: 1. AIM, 2. Squad, 3. FIRE.
Each command is executed as previously explained. Load (from magazine)
is executed by drawing back and thrusting home the bolt with the right
hand, leaving the safety lock at the "ready."
TO FIRE AT WILL.
135. FIRE AT WILL.
Each man, independently of the other, comes to the ready, aims
carefully and deliberately at the aiming point or target, fires,
loads, and continues the firing until ordered to suspend or cease
firing.
136. To increase (decrease) the rate of fire in progress the
Instructor shouts: FASTER (SLOWER).
Men are trained to fire at the rate of about three shots per minute at
effective ranges and five or six at close ranges, devoting the minimum
of time to loading and the maximum to deliberate aiming. To illustrate
the necessity for deliberation, and to habituate men to battle
conditions, small and comparatively indistinct targets are designated.
TO FIRE BY CLIP.
137. CLIP FIRE.
Executed in the same manner as fire at will, except that each man,
after having exhausted the cartridges then in the rifle, suspends
firing.
TO SUSPEND FIRING.
138. The instructor blows a long blast of the whistle and repeats
same, if necessary, or commands: SUSPEND FIRING.
Firing stops; rifles are held, loaded, and locked in a position of
readiness for instant resumption of firing, sights unchanged. The men
continue to observe the target or aiming point, or the place at which
the target disappeared, or at which it is expected to reappear.
This whistle signal may be used as a preliminary to cease
firing.
TO CEASE FIRING.
139. CEASE FIRING.
Firing stops; rifles not already there are brought to the position of
load, the cut-off turned down if firing from magazine, the cartridge
is drawn or the empty shell is ejected, the trigger is pulled, sights
are laid down, and the rifle is brought to the order.
Cease firing is used for long pauses to prepare for changes of
position or to steady the men.
140. Commands for suspending or ceasing fire may be given at any time
after the preparatory command for firing whether the firing has
actually commenced or not.
TARGET DESIGNATION.
141. In the training of men in the mechanism of the firing line, they
should be practiced in repeating to one another target and aiming
point designations and in quickly locating and pointing out a
designated target. They should be taught to distinguish, from a prone
position, distant objects, particularly troops, both with the naked
eye and with field glasses.
Owing to the invariable custom of attempting to conceal fire trenches,
it is necessary to have some ready method of indicating the exact
location of an indistinct pit or trench occupied or supposed to be
occupied by an enemy in order that effective fire may be opened. The
so-called clock system furnishes one of the simplest devices for so
doing. Two methods of applying this system are indicated below.
First method: That in which an imaginary clock dial is assumed to be
horizontal, its center at the firing point and the center-XII line
of the dial perpendicular to the front of the firing line.
To designate a target the commander announces, for example: Target at
11 o'clock, range 800 yards, a trench. Each man looks along the
center-11 o'clock line of his imaginary dial, estimates the distance
(800 yards) along that line, and thereby locates the trench.
In this method it is necessary that the target be visible to
the naked eye and that each man be able to estimate distances with
fair accuracy.
Second method: That in which an imaginary clock dial is assumed to be
vertical, its center being at a prominent, distant point selected by
the commander and called the reference point.
To designate a target the commander announces, for example: Reference
point, that clump of trees on hill crest. When the men have located
the reference point he announces: Target at 4 o'clock, 2 finger
widths, range 1,000 yards, a gun pit. By a finger width is meant the
distance on the face of the assumed vertical clock (actually on the
landscape) intercepted by the breadth of a man's finger held
perpendicularly to his hand and arm, the latter being fully extended
in the direction of the reference point.
Each man looks along the center-4 o'clock line of the imaginary
(vertical) dial, measures, on this line, a point distant 2
finger-widths from the reference point (the center of the dial), and
thus locates the gun pit.
A combination of the two methods may be necessary when, in using the
second method, the reference point is not readily identified. Thus, in
the case mentioned, it may, for example, be necessary to say:
Reference point at 1 o'clock, clump of trees on hill crest.
In both methods the sequence of commands laid down should be observed.
Various devices for pointing out indistinct targets may be improvised
and used.
THE USE OF COVER.
142. The recruit should be given careful instruction in the individual
use of cover.
It should be impressed upon him that, in taking advantage of natural
cover, he must be able to fire easily and effectively upon the enemy;
if advancing on an enemy, he must do so steadily and as rapidly as
practicable, taking advantage of any available cover while setting
the sights, firing, or advancing.
To teach him to fire easily and effectively, at the same time
concealing himself from the view of the enemy, he is practiced in
simulated firing in the prone, sitting, kneeling, and crouching
positions, from behind hillocks, trees, heaps of earth or rocks, from
depressions, gullies, ditches, doorways, or windows. He is taught to
fire around the right side of his concealment whenever practicable,
or, when this is not practicable, to rise enough to fire over the top
of his concealment.
When these details are understood, he is required to select cover with
reference to an assumed enemy and to place himself behind it in proper
position for firing.
143. The disadvantage of remaining too long in one place, however good
the concealment, should be explained. He should be taught to advance
from cover to cover, selecting cover in advance before leaving his
concealment.
It should be impressed upon him that a man running rapidly toward an
enemy furnishes a poor target. He should be trained in springing from
a prone position behind concealment, running at top speed to cover and
throwing himself behind it. He should also be practiced in advancing
from cover to cover by crawling, or by lying on the left side, rifle
grasped in the right hand, and pushing himself forward with the right
leg.
He should be taught that when fired on while acting independently, he
should drop to the ground, seek cover, and then endeavor to locate his
enemy; also that in the sun he is visible to a much greater degree
than when in the shade.
The instruction of the recruit in the use of cover is continued in
combat exercises of the squad and platoon, but he must then be taught
that the proper advance of the platoon or troop and the effectiveness
of its fire is of greater importance than the question of cover for
individuals should the two considerations conflict. He should also
be taught that he may not move about or shift his position in the
firing line except to get a better view of the target.
OBSERVATION.
144. In order to develop the faculty of rapid and accurate
observation, which is of great importance in campaign, the recruit
should be trained in taking notice of his surroundings, at first from
selected positions and later at the various gaits.
He should be practiced under various conditions of weather in
recognizing colors and forms; in pointing out and naming military
features of the ground; in observing the effect of the direction of
light on distinctness of objects; in recognizing at gradually
increasing distances the animate and inanimate objects ordinarily met
with in the field; in counting distant objects; and in estimating the
size of groups, such as herds of animals and bodies of troops.
MANUAL OF THE PISTOL.
145. Instruction under this head is first given on foot, the recruit
having previously been made familiar with the mechanism of the pistol,
the names of the principal parts, and the method of cleaning,
assembling, and operating it.
When a lanyard is used the snaps are attached to the butt of the
pistol and the magazine, the lanyard is passed over the head, and the
sliding loop drawn snug against the right armpit. The lanyard should
then be of just such length that the arm can be extended without
constraint.
For dismounted instruction with the pistol the troopers may be formed
with or without intervals.
During instruction in the manual of the pistol given when dismounted
with intervals each trooper terminates the first execution of raise
pistol by carrying his right foot 24 inches to the right and placing
his left hand in the position of his bridle hand. This position is
then retained until return pistol is executed, when the position of
attention is resumed.
At all other times when movements in the manual of the pistol are
executed dismounted the left hand is raised to the position of the
bridle hand whenever used to manipulate the mechanism and is then
dropped again to the side.
146. Except in the act of firing, the automatic pistol, when actually
on the person, whether loaded or unloaded, will be carried cocked and
locked. At all other times the hammer will be lowered fully down.
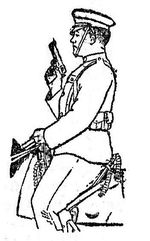
Fig. 32, par. 147.
147. The pistol being in the holster, to raise pistol: 1. Raise, 2.
PISTOL.
Raise: Unbutton the flap of the holster with the right hand and grasp
the stock, back of the hand outward.
PISTOL: Draw the pistol from the holster; reverse it, muzzle
up, the hand holding the stock with the thumb and last three fingers,
forefinger outside the guard, barrel to the rear and inclined to the
front at an angle of 30°, hand as high as the neck and 6 inches in
front of the point of the right shoulder. This is the position of
raise pistol. (Fig. 32.)
148. Being at raise pistol, to inspect pistol: 1. Inspection, 2.
PISTOL.
(a) When a magazine is in the pistol: Push down the safety lock and
lower the right hand to within easy reach of the left, pistol pointed
upward and to the right front at an angle of about 30°; grasp the
corrugations of the slide with the left thumb and forefinger, thumb to
the right; thrust upward with the right hand, thus drawing back the
slide until the slide stop is engaged (fig. 35); resume raise pistol
(fig. 33).
(b) When no magazine is in the pistol: Push down the safety lock and
lower the pistol to the left hand, rotating the pistol so that the
sights move to the left, barrel pointing downward and to the left
front, stock pointing upward and to the right front; with the left
thumb and forefinger grasp the corrugations of the slide, back of the
left hand down (fig. 34); change the grasp of the right hand slightly
until the thumb presses against the rounded surface of the
slide stop; thrust downward and to the left front with the right hand,
thus drawing back the slide, and at the same time press the slide stop
with the right thumb against the slide until it engages; resume raise
pistol.
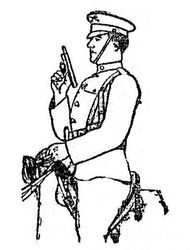
Fig. 33, par. 148a (a).
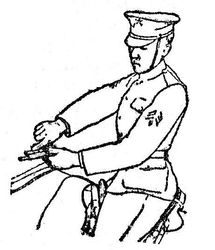
Fig. 34, par. 148b (b).
Inspection pistol is never executed with a loaded pistol or with a
loaded magazine in the pistol.
149. 1. Return, 2. PISTOL.
(a) Being at raise pistol; lock the pistol, if not locked; lower the
pistol to the holster, reversing it, muzzle down, back of the hand to
the right; raise the flap of the holster with the right thumb; insert
the pistol in the holster and thrust it home; button the flap of the
holster with the right hand.
(b) Being at inspection pistol; (with a magazine in the pistol)
lower the pistol to the left hand and grasp the slide as prescribed
for inspection pistol without magazine (par. 148b, fig. 22); thrust
downward and to the left front with the right hand, thus relieving the
pressure on the slide stop, and at the same time disengage the slide
stop with the right thumb; release the slide; reverse and lock the
pistol; place it in holster as prescribed in (a). If there is no
magazine in the pistol, lower it to the bridle hand as in load (par.
151); draw back the slide and release it; lock the pistol and place it
In the holster.
When the last shot is fired the slide stop engages automatically.
Return pistol is then executed as from inspection pistol (b).
150. Being at raise pistol, to insert a magazine in the pistol: 1.
Insert, 2. MAGAZINE, or 2. LOADED MAGAZINE.
(a) When a magazine is in the pistol: Lower the pistol into the left
hand, rotating it so that the sights move to the left; grasp the slide
with the left hand, back of the hand down, barrel pointing downward to
the left front, stock pointing upward to the right front; release the
magazine catch with the middle finger of the left hand; withdraw the
magazine with the right hand; insert the designated magazine and
resume raise pistol. If there be no empty space in the magazine pocket
when the magazine is withdrawn from the pistol, the magazine may be
held between the left thumb and the stock of the pistol until the
magazine has been taken from the pocket and inserted; the
magazine withdrawn from the pistol is then inserted in the magazine
pocket.
Whenever the magazine catch is released, the right hand should be so
placed as to limit the motion of the magazine and prevent its falling
out.
(b) When no magazine is in the pistol: Lower the pistol into the
left hand and grasp it as before; insert the designated magazine and
resume raise pistol.
A loaded magazine will never be inserted without specific command.
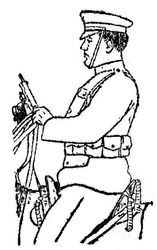
Fig. 35, par. 151.
151. Being at raise pistol with a loaded magazine in the pistol, to
load: LOAD: Push down the safety lock and lower the pistol to the
bridle hand as prescribed for inspection pistol when a magazine is in
the pistol (par. 148a (a)); operate the slider, engage the safety
lock with the right thumb, and raise pistol. (Fig. 35.)
To simulate loading for instruction, first withdraw the empty
magazine.
The command load may be given in connection with the insertion of the
magazine, for example: 1. Insert, 2. LOADED MAGAZINE; 3. LOAD.
After inserting magazine, reverse the pistol and load as above
prescribed.
152. Being in any position, to eject the cartridge from the receiver:
UNLOAD.
Pass the pistol into the left hand as in insert magazine; release the
magazine catch with the middle finger of the left hand, slightly
disengaging the magazine; push down the safety lock with the right
thumb; operate the slide to eject the cartridge; engage the magazine;
raise and lock the pistol.
153. Being in any position, to withdraw the magazine from the pistol:
WITHDRAW MAGAZINE.
Handle the pistol as in insert magazine; release the magazine catch;
withdraw the magazine and execute raise pistol.
Recruits are taught the motions of loading and firing without
cartridges, and preferably without a magazine in the pistol to avoid
wear on the magazine lips. Loading and pointing practice should be
had at all gaits.
154. The hammer is always lowered preparatory to placing the
pistol in the arm rack or other place of deposit.
155. Being at raise pistol, to lower the hammer:
(a) Using both hands: Push down the safety lock; assume the position
of load; seat the right thumb firmly on the hammer and hold it there;
raise the left hand, to the right and press the grip safety with the
left thumb; insert the forefinger inside the trigger guard; press the
trigger and carefully let the hammer down with the right thumb. Resume
raise pistol.
(b) Using but one hand: Raise the right hand until the muzzle of the
pistol is well above the head; disengage the safety lock; seat the
ball of the right thumb firmly on the hammer; bear down the grip
safety by pressure on the hammer; press the trigger and carefully let
down the hammer with the right thumb.
156. To charge the magazine: Hold the magazine in the left hand, open
end up, rounded side to the right. Take the cartridge in the right
hand, thumb on the rim, bullet end pointing to the right; place the
rim on the end of the magazine follower; force down the magazine
spring and slip the cartridge to the left of the magazine. The next
cartridge is similarly slipped in by placing it on the cartridge just
inserted and forcing down the spring.
The magazine may be charged with any number of cartridges from one to
seven.
Before dismissing the squad, pistols will be inspected, and if found
loaded, will be unloaded and magazines withdrawn to prevent loaded or
partially loaded magazines being left in the pistol. Except at target
practice, on guard duty, or active service, the pistol is habitually
carried unloaded with empty magazine.
EMPLOYMENT OF THE PISTOL.
157. The pistol is primarily a weapon for use at very close range. Its
characteristic employment by cavalry is in mounted firing from a horse
moving at a rapid gait. Under such conditions its effectiveness is
almost negligible at ranges over 25 yards against individuals or over
50 yards against a line in close order except in the hands of
exceptionally skilled shots, and the effectiveness rapidly decreases
at ranges over 5 to 10 yards. These limitations on the use of the
pistol are due not to its short range as a weapon but to the
difficulties of directing it accurately under the conditions of use.
While the pistol is a weapon employing fire action, its tactical
employment is more nearly analogous to that of either the saber or
bayonet than to that of the rifle.
158. From the preceding paragraph it results that there is no need, in
connection with the employment of the pistol as a weapon of mounted
combat, for commands that purport to designate a target or to indicate
range or other details for the direction of fire. The only commands
ordinarily needed are those required for instruction purposes. (See
Small-Arms Firing Manual.)
159. The effectiveness of the individual trooper in mounted pistol
combat depends upon:
(a) Thorough familiarity with the weapon and facility in
manipulating its mechanism under all conditions. This is acquired by
training in the Manual of the Pistol. Constant practice is necessary
in rapidly drawing the pistol from its holster, loading it,
withdrawing magazine, and inserting magazine, at first at a halt,
later in motion, and finally at rapid gaits.
(b) Skill in firing the pistol. This is acquired by actual practice
in the preliminary exercises and range firing as prescribed in the
Small-Arms Firing Manual.
(c) Control of the horse. This is acquired in the School of the
Trooper.
(d) The thorough inculcation in the trooper of the habit of
withholding his fire until within close range. This can well be
accomplished in individual training by exercises in firing or
simulating fire at one or more silhouette targets. The trooper
approaches at a gait graduated in accordance with his state of
training and is required to withhold his fire until he passes a
certain line.
160. The other elements that enter into effective use of the pistol as
a mounted weapon relate to the formations and tactics employed rather
than to individual training. They pertain, therefore, to collective
rather than individual instruction.
161. If any command be required in connection with the
characteristic use of the pistol in mounted combat, it consists simply
of an indication of the moment at which fire may begin. For this
purpose the command COMMENCE FIRING may be employed in any case for
which a command may be desirable.
MANUAL OF THE SABER, DISMOUNTED.
162. For this instruction, dismounted, the saber in the scabbard is
carried in the left hand.
In the position of attention the saber will be held upright by the
side, guard to the front, the shoe of the scabbard resting on the
ground close to the left foot and just in front of the heel. The left
arm will be extended, the fingers and thumb grasping the scabbard,
back of the hand outward.
In the necessary movements on foot with the saber in hand the saber is
carried with the hilt to the front and higher than the shoe of the
scabbard.
Officers, dismounted, may carry the saber in the hollow of the left
arm, elbow bent, forearm horizontal, guard of the saber to the front,
blade vertical. An officer or noncommissioned officer habitually draws
saber before giving any commands involving the use of that weapon by
those under him. Officers and noncommissioned officers out of ranks
draw saber only on occasions when the men draw saber unless otherwise
prescribed. The saber may be drawn for signaling.
163. The saber is intended for mounted combat. The instructor will
impress upon the recruit from the first that the use of the saber in
war is ordinarily limited to occasions of mounted combat, and that
instruction on foot in its use is merely preliminary to the mounted
training which the recruit will receive later.
164. For dismounted instruction, if the squad is in ranks the
instructor causes intervals or distances (pars. 85-88) to be taken
before drawing saber.
165. 1. Draw, 2. SABER.
At the command draw, grasp the scabbard with the left hand about 4
inches from the mouth, place the left hand against the thigh, and
carry the hilt to the front; turn the head slightly to the left
without deranging the position and glance at the saber knot; engage
the right wrist in the saber knot and give it two turns
inward to secure it; grasp the hilt with the right hand and draw the
saber about 6 inches from the scabbard and look to the front.
At the command saber, draw the saber quickly, raising the arm to the
front and upward to its full length, saber in prolongation of the arm.
Make a short pause with the saber raised, then bring it down with the
blade against the hollow of the right shoulder, guard to the front,
right hand at the hip, the third and fourth fingers on the back of the
grip and the elbow back.
The left hand holds the scabbard as at attention.
This is the position of carry saber dismounted.
166. 1. Return, 2. SABER.
At the command return, grasp the scabbard as in draw saber and carry
the opening to the front. Carry the saber to the front with arm half
extended until the thumb is about 6 inches in front of the chin, the
blade vertical, guard to the left, the thumb extended along the side
of the grip, the little finger joined with the others.
At the command saber, move the wrist to opposite the left shoulder,
lower the blade and pass it across and along the left arm, point to
the rear. Turn the head to the left, fixing the eyes upon the opening
of the scabbard: raise the right hand and insert the blade in the
scabbard and push it home. Disengage the wrist from the saber knot and
resume the position of attention.
167. Being at carry saber: 1. Present, 2, SABER.
Without changing the position of the left hand, execute at the command
saber what is prescribed in par. 166 at the command return, except
that the grip is held in the full grasp. The saber is said to be held
in the full grasp when all four fingers grasp the grip, the thumb
extending along the back in the groove, the fingers pressing the back
of the grip against the heel of the hand.
Officers at the command: 1. Present, execute present saber as
described above; at the command: 2. SABER, they lower the saber until
the point is 12 inches from the ground and directed to the front,
guard to the left, right arm straight, hand beside the thigh. Mounted,
the point Is lowered to the level of the stirrup.
168. Being at carry saber: 1. Port, 2. SABER.
Carry the right foot about 24 inches to the right, bring the left hand
to the position of the bridle hand and raise the saber to a vertical
position, guard to the front, grip held in the full grasp, right hand
about 12 inches in front of the shoulder.
To resume the carry: 1. Carry, 2. SABER.
169. Being at carry saber, or in any position: GUARD.
Carry the right foot about 24 inches to the right and bend knees to
simulate the position mounted. Incline the body to the front from the
waist (not the hips). Let the blade fall to the front to a position
nearly horizontal, elbow well away from the body, forearm and saber
forming one straight line, guard to the right, point at the height of
the adversary's breast, the left hand in the position of the bridle
hand. (Fig. 24.)
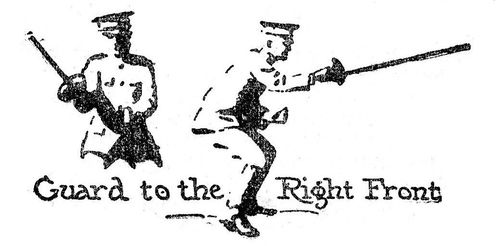
Fig. 36, par. 169.
170. Being at carry saber: 1. Inspection, 2. SABER.
Carry the right hand upward, arm half extended until the thumb is at
the height of the chin, grip held in the full grasp, blade vertical,
guard to the left. Make a slight pause, then loosen the grasp on the
grip and turn the saber with the guard to the right. Again make a
slight pause, then resume the first position and return to the carry.
171. Saber exercise is conducted, and instruction given, as prescribed
in the Saber exercise. For Manual of the Saber Mounted, see par.
245.
General Provisions.
172. Object.—The primary object of this school is to train the
trooper in horsemanship and in the ready use of his weapons while
mounted.
173. The instructor.—It is essential that the instructor (par. 37)
be a skilled and experienced horseman, properly mounted. He should
always supplement the original explanation of a movement by executing
it himself, so that the recruits may actually see the result that is
desired and the means by which it is effected.
174. Cautions to instructors.—The instructor must first develop the
confidence of the recruit, give him a proper seat, and make him supple
on the horse. Progress should be suited to his capacity and exempt him
as far as practicable from falls or other accidents. Instruction in
the use of the aids and in the means employed to train the horse to
obey them will follow.
When the recruit has acquired confidence in his ability to ride and
control his horse he will be instructed in the use of arms mounted.
Instruction is given individually; every new movement is made the
object of a particular lesson given to each trooper in turn.
During the exercise the instructor avoids general remarks and (in so
far as possible) unfamiliar terms; in the correction of faults he
addresses by name those committing them.
He passes frequently from one trooper to another repeating advice and
endeavoring to impress upon the troopers the principles embodied in
the regulations. In doing this he need not use the language of the
text.
The instructor may be on foot or mounted. For the first lessons it is
advantageous to remain on foot so as better to explain movements and
correct faults.
Steady, well-trained horses are selected for the first lessons. The
troopers exchange horses from time to time during the lesson on
indication from the instructor.
There should be frequent rests, especially with recruits.
During these rests advantage may be taken of the opportunity to
question the troopers respecting the instruction they have received.
In all exercises the instructor varies the gait so as not to weary the
troopers or the horses. The instruction is conducted without hurry.
The daily work begins and ends at the walk.
175. The standard required of troopers.—To be a good military
horseman each trooper should—
(a) Have a strong seat.
(b) Be able to apply correctly the aids by which a horse is
controlled.
(c) Be capable of covering long distances on horseback with the
least possible fatigue to his horse and to himself.
(d) Be able to use his horse to the utmost advantage in a mounted
fight.
(e) Be capable of riding across country.
(f) Under proper directions, be able to train an unbroken horse in
garrison and in the field, understand how to detect and treat the
minor ailments to which the horse is liable, and be a good groom.
All officers, in addition to being good military horsemen and
instructors in riding, must be able to train remounts and to direct
their training.
177. General provisions.—For the preparatory exercises the horses
are saddled and equipped with the snaffle bit only, saddles stripped.
Spurs are not worn.
These exercises are conducted at first in a riding hall or on an
inclosed course out of doors.
References to the riding hall are to be understood as ordinarily
applying equally to any out-of-doors inclosure or to the space
included in any course marked off for instruction in equitation (pars.
269, 296).
At first, the troopers, dismounted, lead their horses to the riding
hall and return them to the stable in the same manner. When they have
received sufficient instruction they go and return mounted.
As soon as the instruction has advanced sufficiently to permit the
use of such commands and methods, the instructor will confine
himself to the commands and means prescribed in the School of the
Trooper.
TO FOLD THE SADDLE BLANKET.
178. The blanket, after being well shaken, will be folded into six
thicknesses, as follows: Hold it well up by the two corners, the long
way up and down; double it lengthwise (so the fold will come between
the "U" and "S"), the folded corner (middle of blanket) in the left
hand; take the folded corner between the thumb and forefinger of the
right hand, thumb pointing to the left; slip the left hand down the
folded edge two-thirds its length and seize it with the thumb and
second finger; raise the hands to the height of the shoulders, the
blanket between them extended; bring the hands together, the double
fold falling outward; pass the folded corner from the right hand into
the left hand, between the thumb and forefinger, slip the second
finger of the right hand between the folds and seize the double folded
corner; turn the left (disengaged) corner in and seize it with the
thumb and forefinger of the right hand, the second finger of the right
hand stretching and evening the folds; after evening the folds grasp
the corners and shake the blanket well in order to smooth the folds;
raise the blanket and place it between the chin and breast; slip the
hands down half way, the first two fingers outside, the other fingers
and thumb of each hand inside, seize the blanket with the thumbs and
first two fingers and let the part under the chin fall forward; hold
the blanket up, arms extended, even the lower edges, seize the middle
points between the thumbs and forefingers, and flirt the outside part
over the right arm; the blanket is thus held before placing it on the
horse.
While retaining the general method of folding the blanket as above
indicated, troop commanders will require the blanket to be refolded
frequently with a view to equalizing the wear on the different
sections of the blanket.
TO PUT ON THE BLANKET AND SURCINGLE.
179. The instructor commands: BLANKET.
Approach the horse on the near (left) side, with the blanket folded
and held as just described; place it well forward on his back
by tossing the part of the blanket over the right arm to the off
(right) side of the horse, still keeping hold of the middle points;
slide the blanket once or twice from front to rear to smooth the hair.
Being careful to raise the blanket in bringing it forward, place the
blanket with the forefinger of the left hand on the withers and the
forefinger of the right hand on the backbone, the blanket smooth; it
should then be well forward with the edges on the left side; remove
the locks of mane that may be under it, pass the buckle end of the
surcingle over the middle of the blanket and buckle it on the near
side a little below the edge of the blanket.
TO PUT ON AND TAKE OFF THE WATERING BRIDLE.
180. The instructor commands: BRIDLE.
Take the reins in the right hand, the bit in the left; approach the
horse on the near side, slip the reins over the horse's head and let
them rest on his neck; reach under and engage the snap in the right
halter ring; insert the left thumb in the side of the horse's mouth
above the tush and press open the lower jaw; insert the bit and engage
the snap in the left halter ring. The bit should hang so as to touch,
but not draw up, the corners of the mouth. At the command unbridle,
pass the reins over the horse's head and disengage the snaps.
TO SADDLE.
181. (a) (McClellan saddle.) For instruction the saddle may be
placed four yards in rear or front of the horse. The stirrups are
crossed over the seat, the right one uppermost; then the cincha and
cincha strap are crossed above the stirrups, the strap uppermost. The
blanket having been placed as previously explained, the instructor
commands: SADDLE.
Seize the pommel of the saddle with the left hand and the cantle with
the right, approach the horse on the near side from the direction of
the croup and place the center of the saddle on the middle of the
horse's back, the end of the side bar about three-finger widths
behind the point of the shoulder blade; let down the cincha strap and
cincha, pass to the off side, adjust the cincha and straps, and see
that the blanket is smooth; return to the near side, raise
the blanket slightly under the pommel arch so that the withers may not
be compressed; take the cincha strap in the right hand, reach under
the horse and seize the cincha ring with the left hand, pass the end
of the strap through the ring from underneath (from inside to
outside), then up and through the upper ring from the outside, if
necessary, make another fold in the same manner.
The strap is fastened as follows: Pass the end through the upper ring
to the front; seize it with the left hand, place the fingers of the
right between the outside folds of the strap, pull from the horse with
the right hand and take up the slack with the left; cross the strap
over the folds, pass the end of it with the right hand underneath and
through the upper ring back of the folds, then down and under the loop
that crosses the folds and draw it tightly; weave the ends of the
strap into the strands of the cincha.
Another method of fastening the cincha strap is as follows: Pass, the
end through the upper ring to the rear; seize it with the right hand;
place the fingers of the left hand between the outer folds of the
strap; pull from the horse with the left hand and take up the slack
with the right; pass the end of the strap underneath and draw it
through the upper ring until a loop is formed; double the loose end of
the strap and push it through the loop and draw the loop taut. The
free end should be long enough to be seized conveniently with the
hand.
Having fastened the cincha strap, let down the right stirrup and then
the left.
The surcingle is then buckled over the saddle, and should be a little
looser than the cincha.
The cincha when first tied should admit a finger between it and the
belly. After exercising for a while the cincha will be found too loose
and should be tightened.
(b) (Service saddle, model of 1912.) Troops equipped with this model
will saddle as prescribed for the McClellan saddle with the following
modifications;
Place the saddle on the blanket so that the front edge of the side bar
approaches the shoulder blade without pressing upon it. After the
saddle has been so placed, let down; the girth; pass to the off side,
adjust the girth and saddle skirt, and see that the blanket
is smooth, return to the near side and push the blanket well up into
the pommel arch; reach under the horse, seize the girth with the left
hand and bring up its free end to the near side of the saddle; with
the right hand raise the saddle skirt and buckle the girth straps to
the corresponding buckles of the girth, beginning with the forward
strap, lower the saddle skirt and let down the stirrups, beginning
with the right stirrup. The girth should ordinarily be about 4 inches
in rear of the point of the elbow.
182. To approximate the length of the stirrup straps before mounting,
they are adjusted so that the length of the stirrup strap, including
the stirrup, is about 1 inch less than the length of the arm, fingers
extended.
TO UNSADDLE.
183. The instructor commands: UNSADDLE.
(a) (McClellan saddle.) Stand on the near side of the horse;
unbuckle and remove the surcingle; cross the left stirrup over the
saddle; loosen the cincha strap and let down the cincha; pass to the
off side, cross the right stirrup, then the cincha; pass to the near
side, cross the cincha strap over the saddle; grasp the pommel with
the left hand, the cantle with the right, and remove the saddle over
the croup and place it in front or rear of the horse as may be
directed, pommel to the front; grasp the blanket at the withers with
the left hand and at the loin with the right, remove it in the
direction of the croup, the edges falling together, wet side in, and
place it on the saddle, folded edge on the pommel.
If in the stable, place the saddle on its peg when taken off the
horse.
(b) (Service saddle, model of 1912.) Stand on the near side of the
horse; cross the left stirrup over the saddle; raise the saddle skirt
with the left hand, and with the right unbuckle the girth straps,
beginning with the rear strap; let down the girth; pass to the off
side; cross the right stirrup and then the girth over the saddle; pass
to the near side, grasp the pommel with the left hand, the cantle with
the right, and remove and dispose of the saddle as prescribed in
(a).
The service saddle, model 1912, should be hung on a bracket,
sufficiently wide for the saddle to rest on its side bars. If a
narrower support is used, the saddle will rest on the low point; in
the leather seat and become misshapen.
TO PUT ON AND TAKE OFF THE BIT AND BRIDOON BRIDLE (MODEL 1909).
184. Before bridling the curb chain is unhooked on the near side The
instructor commands: BRIDLE.
Take the reins in the right, the crownpiece in the left hand; approach
the horse on the near side, passing the right hand along his neck;
slip both reins over his head and let them rest on his neck; take the
crownpiece in the right hand and the lower left branch of the curb bit
in the left hand, the forefinger against the mouthpiece, the snaffle
bit above and resting on the mouthpiece of the curb bit; bring the
crownpiece in front of and slightly below its proper position; insert
the thumb into the side of the mouth above the tush; press open the
lower jaw and insert the bits by raising the crownpiece; with the left
hand draw the ears gently under the crownpiece, beginning with the
left ear; arrange the forelock, secure the throatlatch, and hook up
the curb chain on the near side below the snaffle bit.
The bridle is adjusted as prescribed in par. 302.
The throatlatch should admit four fingers between it and the throat.
185. At the discretion of the instructor, the halter may be taken off
before bridling, the reins being first passed over the neck; the
hitching strap, if not left at the manger or picket line, is tied
around the horse's neck; if the horse be saddled, in the near pommel
ring.
186. The instructor commands: UNBRIDLE.
Stand on the near side of the horse; pass the reins over the horse's
head, placing them on the bend of the left arm; unhook the curb chain
on the near side; unbuckle the throatlatch, grasp the crownpiece with
the right hand and, assisting with the left hand, gently disengage the
ears; gently disengage the bits from the horse's mouth with the left
hand by lowering the crownpiece; place the crownpiece in the palm of
the left hand, take the reins in the right hand, pass them
together over the crownpiece, make two or three turns around; the
bridle, then pass the bight between the brow band and crownpiece and
draw it snug.
The bridle is hung up by the reins or placed across the saddle on the
blanket.
If the horse has no halter on, unbridle and push the bridle back so
that the crownpiece will rest on the neck behind the poll until the
halter is replaced.
187. Stand to horse: At this command each trooper places himself,
facing to the front, on the near side of the horse, opposite his head,
and takes the position of attention, except that the right hand,
nails down, grasps the reins, the forefinger separating them, about 6
inches from the bit. The bights of the reins rest on the neck near the
pommel of the saddle.
188. To lead out: The troopers being at stand to horse, to leave the
stable or picket line, the instructor commands: LEAD OUT.
Each trooper, holding his right hand well up and firm, leads his
horse, without looking at him, to the place designated by the
instructor.
189. Upon entering the riding hall or inclosure the instructor
disposes the troopers upon a line at intervals of 3 yards, the
troopers at stand to horse, the horses correctly disposed and
perpendicular to the line of troopers.
A horse is correctly disposed when he stands squarely on all four
feet, having his head, neck, and body in line.
190. Stirrups: The stirrups are properly adjusted when, the trooper
being properly seated with the feet removed from the stirrups and the
legs falling naturally, the tread of the stirrups is about 1 inch
above the top of the heel of the shoe.
The stirrups should bear only the weight of the lower leg; about
one-third of the foot should be inserted in the stirrup, so that the
ball of the foot rests on the tread, the heel lower than the toe.
The flat of the stirrup strap should rest against the leg of the
mounted trooper. To accomplish this the trooper's toe should be so
inserted in the stirrup as to place the front branch of the latter on
the outside. By the front branch of the stirrup is meant the forward
branch as the stirrup hangs before the trooper mounts.
Placing too much weight on the stirrup disturbs the seat and
contracts the leg, hindering it's freedom of action.
If the toe is not inserted far enough the trooper risks losing his
stirrup; if inserted too far suppleness is diminished.
The heel is carried naturally lower than the toe if the ankle joint is
not rigid.
For the extended gallop, in the charge, for the use of weapons, and
for leaping obstacles the foot is inserted fully in the stirrup.
191. To mount: Being at stand to horse, MOUNT.
(a) Face to the right, drop the right rein, grasp the left rein in
the right hand, take two steps to the right, sliding the hand along
the left rein, make a half face to the left When opposite the girth;
with the aid of the left hand take both reins in the right, forefinger
between the reins, the right hand on the pommel, the reins coming into
the hand on the side of the forefinger, and held so as to feel lightly
the horse's mouth, the bight falling on the off side. Place the left
foot in the stirrup, assisted by the left hand if necessary, and bring
the left knee against the saddle; grasp a lock of the mane with the
left hand, lock coming out between the thumb and forefinger.
(b) Spring from the right foot, keeping the hands firmly in place,
the left knee bent and pressed against the saddle, bring the right
foot by the side of the left, body inclining slightly forward; pass
the right leg, knee bent, over the croup without touching it, sit down
lightly-in the saddle; let go of the mane; insert the right foot in
the stirrup, assisted by the right hand if necessary; take a rein in
each hand, the rein coming into the hand under the little finger and
passing out over the second joint of the forefinger, the thumbs closed
on the reins, the bight of the reins falling to the right.
The reins should be so held that the trooper feels lightly the horse's
mouth, the fingers closed until the nails lightly touch the palms of
the hands; the reins well up in the crotch of the fingers; the backs
of the hands vertical and in prolongation of the forearm; the wrists
flexible; the elbows near the body and low, so that the forearms will
be in prolongation of the reins; the hands about 9 inches apart.
The instructor takes care that the recruit in adjusting the
reins provokes no movement of the horse and deranges in no manner the
position of the horse's head.
The instructor cautions the trooper to avoid touching the horse with
the left toe in mounting; this fault begets nearly all the resistance
of horses to standing quietly while being mounted.
The modifications incident to mounting and dismounting a horse
equipped with the double snaffle or bit and bridoon are indicated in
pars. 271, 303, and 307. The troopers are also trained to mount on the
right side.
192. To dismount: Being halted, DISMOUNT.
(a) Seize the reins with the right hand in front of and near the
left, forefinger between the reins, the reins entering the hand from
the side of the forefinger; drop the reins with the left hand; place
the right hand on the pommel; grasp a lock of the mane with the left
hand, the lock coming out between the thumb and forefinger; take the
right foot out of the stirrup.
(b) Rise upon the left stirrup, pass the right leg, knee bent, over
the croup without touching the horse, and bring the right foot by the
side of the left, the left knee against the saddle, the upper part of
the body inclined slightly forward; descend lightly to the ground and
take the position of stand to horse.
The troopers are also trained to dismount on the right side.
193. Commanding officers may authorize the following alternative
method of mounting and dismounting by officers and enlisted men on all
occasions except those when it is required that mounting and
dismounting be executed in unison at the corresponding command (par.
354). Instruction, in the methods authorized in this paragraph is
optional.
Being at stand to horse, at the command MOUNT, face to the right, drop
the right rein, take a step to the right to be opposite the shoulder
of the horse; at the same time seize the bights of the reins in the
right hand and pull them taut enough to give a gentle, even bearing on
the horse's mouth; grasp the reins with the left hand, with the little
finger between them, and the bight coming out between the thumb and
forefinger, which also hold a lock of the mane. Place the left foot
in the stirrup, assisted by the right hand if necessary, and
bring the left knee against the saddle.
Place the right hand upon the cantle, rise by an effort of the right
leg, aided by the arms, the left knee bent and pressed against the
saddle, the upper part of the body inclined slightly forward to keep
the saddle from turning; bring the right foot by the side of the left;
change the right hand to the pommel, pass the right leg, knee bent,
over the croup without touching it, and sit down lightly in the
saddle. Put the right foot in the stirrup, assisted by the right hand
if necessary.
At the command DISMOUNT, pass the right rein into the left hand and
grasp with this hand a lock of the mane, place the right hand on the
pommel, and remove the right foot from the stirrup; pass the right
leg, knee bent, over the croup without touching the horse and bring
the right foot by the side of the left, the left knee against the
saddle, the upper part of the body inclined slightly forward, right
hand on the cantle. Descend lightly to the ground and take the
position of stand to horse.
194. To take the reins in one hand and to separate them: At the
command IN LEFT HAND TAKE REINS, place the left hand opposite the
middle of the body, pass the right rein into the left hand, separating
it from the left rein by the little finger; let the right hand fall by
the side.
195. At the command IN BOTH HANDS TAKE REINS, grasp the right rein
with the right hand and replace the hands 9 inches apart.
The reins are taken in the right hand and again separated in a similar
manner.
196. To adjust the reins the trooper brings the wrists together and
grasps with one hand, above and near the opposite thumb, the rein that
he desires to shorten.
197. The instructor causes the reins to be dropped and retaken by the
commands DROP REINS and REINS.
At the first command, the trooper drops the reins behind the pommel
and lets the hands fall by the side.
The reins are dropped as an exceptional measure, and always with
precaution against accident.
198. Position of the trooper, or attention (mounted): The
position described below should be considered a standard toward which
all troopers should gradually approximate.
The buttocks bearing equally upon and well forward in the middle of
the saddle.
The thighs turned without constraint upon their flat side, clasping
the horse evenly and stretched only by their own weight and that of
the lower legs.
The knees bent and flexible.
The lower legs falling naturally, the calves in contact with the horse
without pressure, the toes dropping naturally when the trooper is
without stirrups.
The back supple and never hollowed.
The upper part of the body easy, free, and erect.
The shoulders thrown back evenly.
The arms free, the elbows falling naturally.
The head erect and turned to the front, but without stiffness.
Eyes alert, well up, and directed to the trooper's front.
The reins held as heretofore prescribed.
This position may be modified by the instructor to suit varying
conditions and unusual conformations. When not at attention, the head
and eyes are directed so as best to favor alertness and observation.
In other respects the position should be practically unchanged.
199. The body and lower legs are movable and should be under the
control of the trooper, either acting intermittently as aids for
guiding the horse or as a means of binding the rider to the horse
while following his movements.
The thighs, on the other hand, should remain fixed immovably to the
saddle, except while posting at the trot. This fixity should be
obtained not by the pressure of the knees but by the clinging of the
buttocks, which is secured by the suppleness of the loins and the
relaxation of the thighs. It is acquired very rapidly by daily
"rotation of the thighs," which gradually presses the large thigh
muscles to the rear and permits the femur to rest solidly against the
saddle.
The trooper should sit with his buttocks well under the upper part of
his body and especially avoid bowing the back by thrusting the
buttocks to the rear and the lower part of the spine to the front.
Sitting well forward in the middle of the saddle will tend to
assist the trooper in avoiding the defect just referred to. If the
buttocks are thrust back too much the trooper can not conform to the
movements of the horse and carries forward the upper part of his body.
If the thigh is too nearly horizontal, the trooper is doubled, up and
his power of action diminished; if the thigh is too nearly vertical,
the trooper is on the crotch and lacks ease.
To sum up: The trooper should take a relaxed sitting position,
squarely on his buttocks, with the thighs inclined downward.
The various defects of position are overcome by suitable suppling
exercises (pars. 209-220).
200. The aids.—The legs, the reins, and the weight are the means of
controlling the horse in riding. They are called the aids.
201. The legs: The legs serve to urge the horse forward, to increase
his pace or gait, and to engage the hind quarters or move them
laterally. The legs act by the pressure of the calves. If pressure
alone is insufficient the trooper increases the action by blows with
his calves.
It is essential to obtain from the horse perfect obedience to the
action of the legs. He should respond to the simultaneous and equal
action of both legs by engaging his hindquarters and moving forward;
to the predominant action of one leg by moving his haunches to the
opposite side.
202. The reins: The reins serve to prepare the horse to move, to
decrease or increase his pace, to change the gait, or to change
direction.
Contact is a light bearing of the mouth of the horse on the hand of
the rider. It should be constantly maintained.
The reins are held in the full hand, the thumb pressing them lightly
upon the second joint of the forefinger. By means of closing and
relaxing the fingers and flexing the wrist, arm, and shoulder, the
trooper, while maintaining contact and keeping the reins taut, follows
easily the movements of the head of the horse without anticipating or
interfering with these movements. The hand is then said to be passive.
It is kept so as long as the trooper is not required to change the
pace, gait, or direction.
203. The direct rein: When the trooper, with the hands
separated and the reins adjusted, closes his fingers upon the reins
without raising the hands he exercises an action from front to rear,
called the effect of the direct reins. This effect, when on one rein
only, is called that of the right (or left) direct rein.
204. The leading rein: When the trooper carries the right hand to the
right and forward in a manner to preserve contact but not to increase
pressure on the bit the effect is called that of the right leading
rein.
The back of the hand should remain vertical, the wrist in prolongation
of the forearm, the elbow remaining near the body.
The horse's head and neck are drawn to the right, the shoulders
follow, and he turns to the right.
205. The bearing rein: When the trooper carries the right hand
forward, upward, and to the left in a manner to preserve contact, but
not to increase pressure on the bit, the effect is said to be that of
the right bearing rein.
The back of the hand should remain vertical, the wrist in prolongation
of the forearm.
The horse's head is turned slightly to the right, but the effect is to
the left; the neck bends and is convex to the left and is followed by
the shoulders. The horse turns to the left.
The action of the bearing rein is much more powerful than that of the
leading rein, and is used to the exclusion of the latter to turn the
horse when riding with the reins in one hand.
206. The indirect rein of opposition: When the trooper carries the
right hand to the left in a manner to press the shoulders to the left
and to produce a diagonal traction on the rein in the direction of the
left shoulder or haunch the effect is called that of the right
indirect rein of opposition.
Its effect may be produced in front of the withers if the hand be
slightly raised; in rear pf the withers if the hand be slightly
lowered. It is frequently used by the trooper when riding with one
hand (as he must do in order to use his weapons), and its effect
should be studied and practiced from, the beginning.
207. Manner of applying the aids: The action of the reins and legs
and weight should not be continuous. The trooper alternately
closes and relaxes the fingers, the hands preserving contact in the
intervals between the actions. In the same manner he uses the legs,
neither gripping nor releasing altogether, but preserving light
contact in the intervals between the blows with the calves. The weight
likewise is used in a similar manner, being quickly applied to the
front, to the rear, or to a side, alternating with returns to the
normal position.
If an action of the aids is prolonged the horse has opportunity to
establish the corresponding resistance, but if produced by repeated
applications the effect is very marked.
All action of the aids should diminish in intensity when obedience
begins and cease entirely as soon as the desired result is secured.
Troopers must be thoroughly trained in riding with the reins in one
hand.
208. The instructor, in teaching troopers to avail themselves of their
legs and reins, is governed by the preceding considerations, and from
the first watches vigilantly the action of the aids.
The hand should always be kept low. The most thoughtful care should be
exercised in the combined application of the aids, so that they may
not be opposed to each other in their action; that is, one favoring
the intended movement, the other opposing it.
The instructor impresses upon the troopers that their hands must be
kept still; that is, free from bobbing up and down, and pulling, and
from giving and taking when there is no reason therefor.
Likewise their legs should remain in light contact with the horse's
sides and the heels not be used to kick the horse constantly in a
nervous manner.
Moreover, that the effects of the aids may be perfectly clear, and
that there may be no contradiction between them, there should never be
simultaneous action of the direct reins demanding slowing up or
halting and of the legs provoking a forward movement. This condition
is essential for preserving the composure indispensable to the horses
of the troop.
242. Posting: Posting is habitually employed when the troopers have
stirrups and understand their use.
It is executed as follows: The horse moving at a trot, the
trooper inclines the upper part of his body forward, then supporting
himself on the stirrups while maintaining the clinging of his knees he
rises under the impulsion of the horse, maintains his position
detached from the saddle while the succeeding impulse is produced,
again sits down in the saddle, and continues in this way, avoiding
alternate impulses.
At the beginning the mechanism of posting is made easier to the
trooper by causing him to stroke the horse's neck or to grasp a lock
of the mane with either hand, thus determining the forward inclination
of the body.
Its proper execution requires that the seat be raised moderately, that
contact with the saddle be resumed gently and without shock, that the
full support of the stirrup be obtained while keeping the lower leg
steady, that the ankle joint be supple, and that the heel be kept
lower than the toe.
243. Care of horses and saddlery: The recruits will be given talks and
practical illustrations in every phase of the care of horses and the
care of saddlery. This in addition to their daily attention to those
subjects as a matter of routine.
244. The use of arms, mounted.—During the period in which the
instruction in the school of the trooper is held, there must be
thorough instruction in the use of arms mounted. After the first few
drills there should be daily instruction in some phase of this
important part of the trooper's training. Progress in the more
advanced steps of this instruction must necessarily depend upon the
trooper's progress in horsemanship; but by making the dismounted
instruction thorough and keeping it well in advance of the
corresponding parts of the mounted program, many difficulties will be
obviated and much time saved. Success with the pistol and saber will
be dependent upon that familiarity with their use that can be gained
only by daily practice extending over a considerable period. The
dismounted instruction already prescribed in connection with the use
of the weapons must be supplemented by thorough mounted work at all
gaits, when passing obstacles, etc. The trooper must learn to control
his horse thoroughly with one hand while carrying and using his weapon
in the other; he must learn to handle his weapon mounted with a
minimum of danger to himself, his comrades, or his horse. The
principal drill on at least one day of each week during the
entire period devoted to the school of the trooper should ordinarily
be devoted, to the above instruction, thus supplementing and testing
the results accomplished in the shorter daily drills. At this weekly
drill the troopers should habitually appear fully armed and equipped,
the saddles being packed as for field service.
The employment of the saber mounted is taught as prescribed in the
Saber Exercise; the use of the pistol in firing mounted, as prescribed
in the Small-Arms Firing Manual.
245. Manual of the Saber, Mounted: The saber suspended from the left
side of the saddle—
1. Draw, 2. SABER. Pass the right hand over the reins and execute with
it rapidly what is prescribed for drawing the saber on foot; place the
pommel near the hip and resting on top of the thigh, flat of the blade
against the point of the shoulder. This is the position of carry
saber, mounted.
246. The saber suspended from the right side of the saddle—
1. Draw. Turn the head to the right without deranging the position of
the body and glance toward the hilt; engage the right wrist in the
saber knot; pull the hilt forward; seize the grip in the full hand,
nails to the right; draw the blade 6 inches from the scabbard, and
look to the front.
2. SABER. Draw the saber as prescribed on foot and take the position
of carry saber.
247. The troopers are also exercised in drawing the saber as quickly
as possible at the single command: DRAW SABER.
248. To return saber: The scabbard suspended from the left side of
the saddle—
1. Return. Execute as prescribed on foot.
2. SABER. Execute as prescribed on foot, supporting the back of the
blade against the left forearm until the point is engaged in the
scabbard.
This command is given only at a halt or when marching at a walk.
249. The scabbard suspended on the right—
1. Return. Execute as prescribed on foot.
2. SABER. Carry the wrist opposite the right shoulder; lower the blade
to the right of the horse's neck; let the grip turn in the hand so
that the hand grasps the guard at the pommel, back of the hand up;
turn the head to the right and fix the eyes on the opening of
the scabbard; raise the hand; insert the blade and push it home;
disengage the wrist from the saber knot; and turn the head to the
front.
When the saber is carried on the right the return saber is executed,
so far as possible, at the halt.
250. Inspection saber and present saber are executed as when
dismounted.
251. Guard.—Thrust the feet home in the stirrups and crouch
slightly in the saddle, bending forward from the waist. Otherwise as
explained dismounted.
In the charge in close order the trooper (in single rank) assumes the
position indicated in par. 297, the body almost in a horizontal line
over the horse's neck, the arm fully extended to the front, the saber,
in the full grasp, in prolongation of the arm, guard up, finger nails
to the right, point at the height of the eye. When difficult ground is
encountered the trooper takes the position of guard while passing it.
If charging in double rank, the front-rank troopers conform to the
positions indicated for single rank. Those troopers who are in the
rear rank or who are directly in rear of others, take the position of
port saber.
In the mêlée the troopers take the position of guard toward the
nearest enemy, crouching slightly in the saddle and alive to all
possible attacks.
Manual of the Pistol, Mounted.
252. The modifications of the dismounted manual, incident to, the
employment of the pistol mounted are explained in the corresponding
paragraphs of the Manual of the Pistol, Dismounted (pars. 145-156).
THE RIFLE.
(For troops armed with the Cavalry Equipment, Model of 1912.)
253. Before standing to horse the trooper attaches his rifle to his
belt by passing the muzzle up through the belt ring and engaging the
snap hook of the belt ring into the trigger guard.
Being at stand to horse, upon any preparatory command, except
for mounting or securing horses unsling the rifle from the belt ring
and take the position of order arms, removing the snaffle reins from
the horse's neck and passing the right arm through them if necessary.
If a command to secure horses is given, link or couple first and then
unsling the rifle.
To mount, proceed as without the rifle. When seated in the saddle,
grasp the rifle at the bolt with the left hand, barrel to the front,
place the butt of the rifle in the bucket, steadying the latter with
the left foot if necessary and take the position of the trooper
mounted.
To dismount: At the preparatory command, seize the rifle at the bolt
with the left hand, give it a quick, forcible pull, lifting the butt
from the bucket, and let the rifle hang from the belt.
(For troops armed with equipment corresponding to the McClellan
saddle.)
254. At stand to horse, the rifle is held on the left side of the
trooper in a position corresponding to order arms (par. 93), as
modified by substituting the word left for right wherever the latter
occurs.
In leading out, and on all occasions when the trooper leads his horse
for short distances, the rifle is carried at the left trail (par. 108)
unless otherwise prescribed.
255. In mounting, the rifle is inserted in the scabbard after the
trooper steps back opposite the girth and before he takes the reins in
his right hand (par. 191).
On dismounting, each trooper, after placing the bights of the reins on
the horse's neck, and before stepping forward to take the position of
stand to horse (par. 192), takes the rifle from the scabbard and
assumes the left trail. A modification of this provision applies when
the trooper dismounts for inspection. The rifle is never carried on
the saddle when the trooper is dismounted, except as specially
authorized at inspections, with the equipment corresponding to the
McClellan saddle (par. 262).
256. Inspection of arms and equipment, mounted.—It is assumed that
the troopers before being formally inspected mounted and under arms,
will have advanced in elementary collective instruction to a
point when they can be formed and aligned: as a mounted squad (par.
350). Should this not be the case, the instructor will place the
troopers in line with intervals in advance of the inspection.
References to the guide and to alignment will then be disregarded and
the command front will be omitted.
The inspection is described below upon the assumption that all arms
are inspected. The inspection of pistols is explained for both the
mounted and dismounted execution. The necessary modification in case
the inspection of any weapon be omitted is indicated in par. 266.
257. When arms are inspected mounted they are always inspected in the
order: Saber, pistol. When inspected dismounted they are always
inspected in the order: Rifle, pistol. Sabers are not inspected
dismounted, nor are rifles inspected mounted. Pistols may be inspected
either mounted or dismounted.
258. The troopers being mounted and fully armed and in line: 1.
Prepare for inspection, 2. MARCH, 3. FRONT.
At the second command all align themselves on the guide: The
inspector, having verified the alignment, takes position 3 yards to
the right and front of the right trooper, facing to the left, and
commands: FRONT, followed by: 1. Draw, 2. SABER (par. 165).
259. If it is not intended to inspect the pistols mounted, the
inspector cautions PISTOLS WILL NOT BE INSPECTED MOUNTED, and
approaches the right of the rank.
260. As the inspector approaches, the first two troopers execute the
first motion of inspection saber (par. 170), the first trooper, as the
inspector comes in front of him, executes the second and third motions
of inspection saber; the second trooper, as the inspector comes in
front of him, executes the second and third motions of inspection
saber, the first trooper at this instant resuming the carry and the
third trooper executing the first motion of inspection saber. The
first trooper then returns saber. As the inspector comes in front of
the other troopers the movements are executed successively as just
explained.
261. The inspector, having completed the inspection of sabers, passes
in rear from the left to the right of the rank. As he
approaches the right of the rank the first two troopers (in the
absence of indication to the contrary) (par. 259) execute inspection
pistol (par. 148). Each of the other troopers, in order from right to
left, successively executes inspection pistol in time to complete the
execution just before the inspector arrives in front of him. Each
trooper executes return pistol as the inspector passes to the trooper
next on his left.
262. To inspect the rifles, to inspect the pistols dismounted, or to
inspect the dress and equipment of the squad more minutely, the
inspector dismounts the squad without forming rank.
Troopers when dismounted following the command prepare for inspection
take a special position; and a special exception is made in this case
to the rule requiring the rifle (if not slung) to be taken from the
scabbard upon dismounting (par. 255). Upon dismounting while at
prepare for inspection each trooper takes the snaffle reins off the
horse's neck, passes the right arm through the reins (the bight of the
reins resting on the shoulder) and takes a position similar to stand
to horse. The rifle is not unslung (or removed from the scabbard)
unless it has been specially designated for inspection; it is then
reslung or returned to the scabbard as soon as its inspection is
completed.
A trooper dismounted at prepare for inspection, if his right hand be
free, grasps the reins as in stand to horse. The snaffle reins once
taken from the neck as above are not replaced until the first command
for mounting.
The above position is habitually terminated by the first command for
mounting or by stand to horse.
263. If the inspector wishes to inspect the arms after dismounting, he
cautions, immediately following the commands for dismounting: RIFLES
AND PISTOLS (or RIFLES, or PISTOLS) WILL BE INSPECTED.
Each trooper at once unslings his rifle (or takes it from the
scabbard) and resumes his position similar to stand to horse, his
rifle at the order, the reins as described in par. 262.
264. As the inspector approaches the right of the rank the trooper on
the right executes inspection arms (par. 112).
The inspector takes the piece, grasping it with his right hand just
above the rear sight, the man dropping his hands. The
inspector inspects the piece, and, with the hand and piece in the same
position as in receiving it, hands it back to the man, who takes it
with the left hand at the balance, executes port arms, and slings the
rifle or places it in the scabbard, according to his equipment.
As the inspector returns the piece the next man executes inspection
arms, and so on through the troop.
Should the piece be inspected without handling, each man proceeds as
above as soon as the captain passes to the next man.
265. As the inspector approaches the right of the rank of odd numbers,
after completing the inspection of the rifles of the even numbers, the
first two troopers of the rank execute inspection pistol.
To inspect the pistol closely the inspector grasps it with his left
hand above the trooper's hand, makes such examination as is desired,
and hands the pistol back to the trooper in the same position as that
in which the inspector took the weapon. The trooper takes the pistol
with the right hand as in inspection pistol and executes return
pistol. Should the pistols be inspected without handling, each man
executes return pistol as the inspector passes to the next trooper.
266. If no indication be given for the inspection of rifles they
remain slung or in the scabbard, according to the equipment carried.
If only rifles are ordered inspected, pistols are not presented for
inspection and rifles are slung or returned to the scabbard as soon as
inspected.
If only pistols are ordered inspected, they are presented by the two
troopers on the right when the inspector approaches the rank the first
time after dismounting.
267. During the inspection of arms the inspector, observes the
appearance of the men, horses, equipment, and clothing.
After the inspection of arms is completed he makes such further
inspection of equipment, clothing, etc., as he may consider desirable.
During this part of the inspection the troopers may be permitted to
stand at ease.
268. If an inspection of arms of a detailed character be made in
connection with a dismounted formation it is conducted by the above
commands and in accordance with the above methods in so far as
applicable. Rifles are presented for inspection as described
without special indication when the inspector approaches the rank
after commanding FRONT (par. 258). Except when rifles are slung as
provided in the next sentence, each trooper executes order arms as
soon as his rifle is returned to him. Should the troopers be armed
with both rifle and pistol, each trooper slings his rifle as soon as
inspected if the equipment in use so permits; otherwise the rifles are
stacked (par. 115) by command after being inspected. The pistols are
then inspected, after which take arms (par. 116) is executed before
the troopers are dismissed.
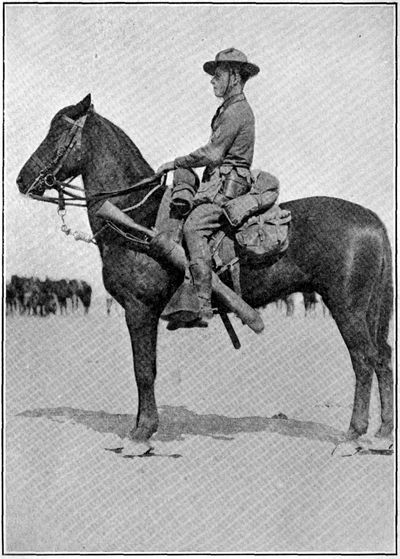
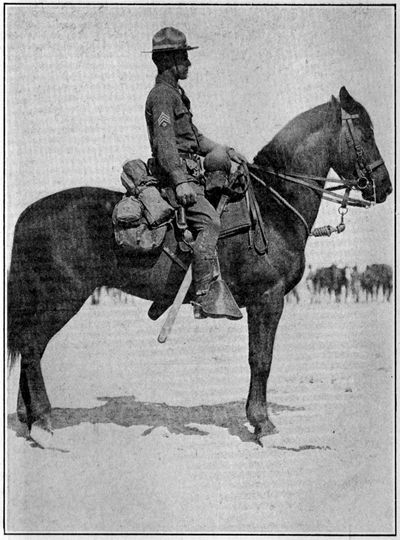
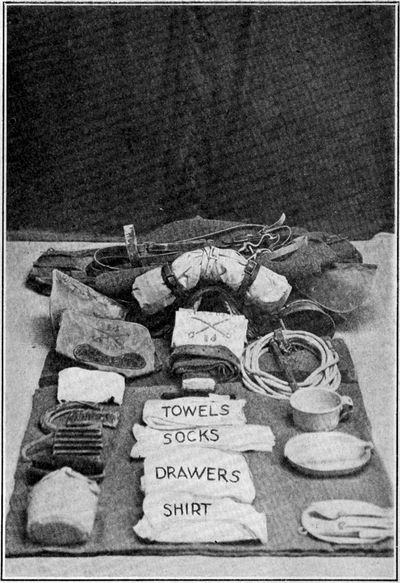
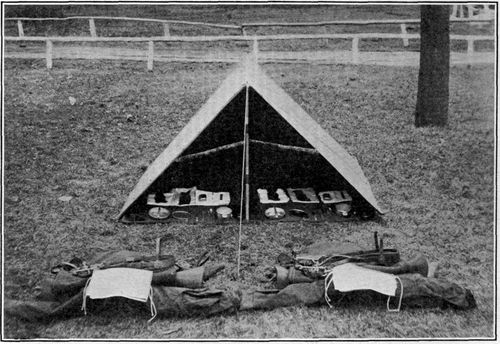
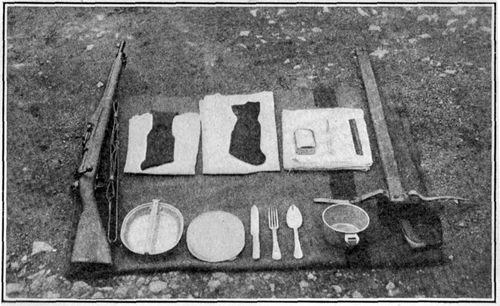
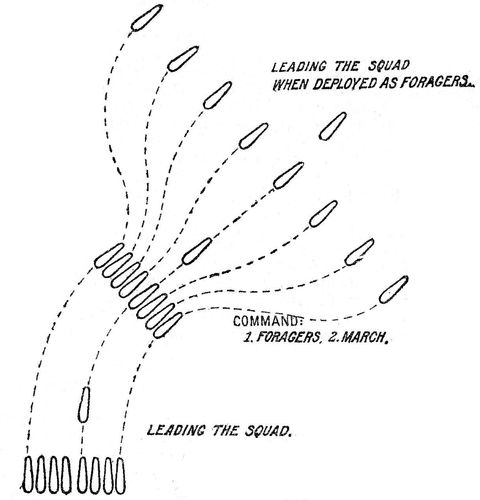
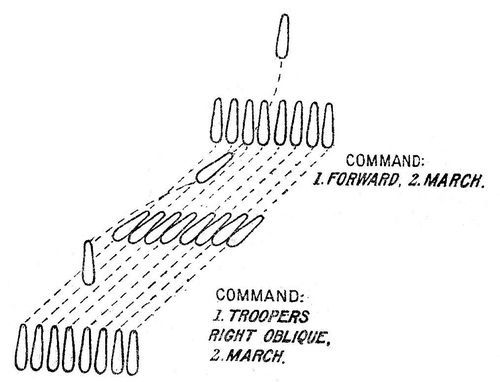
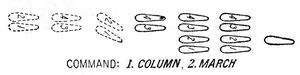
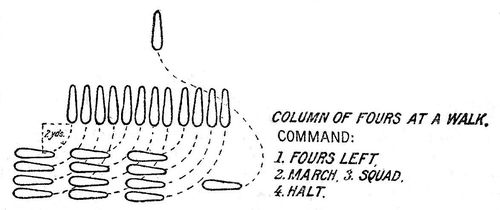
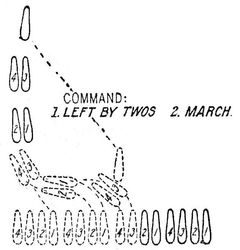
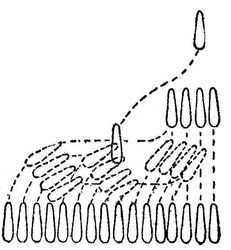
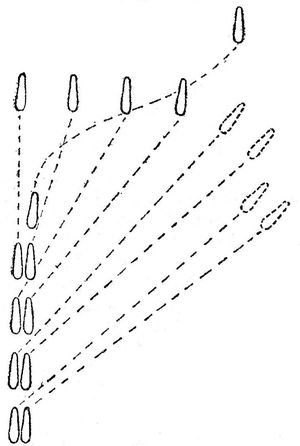
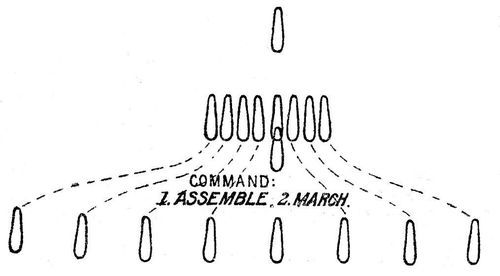
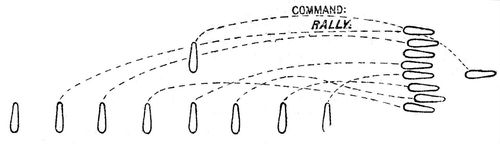
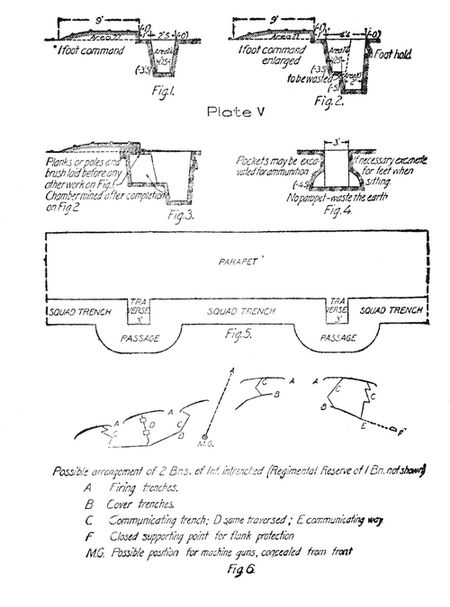
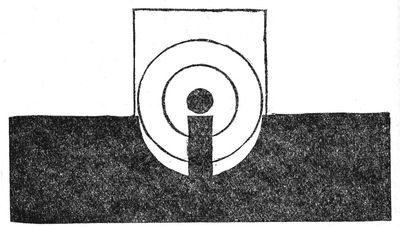
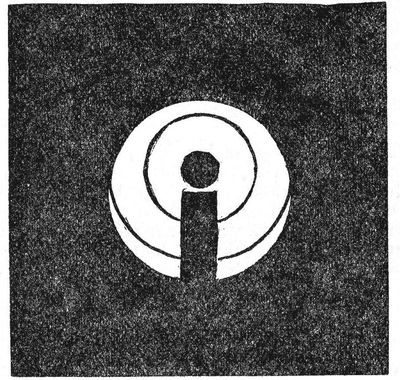
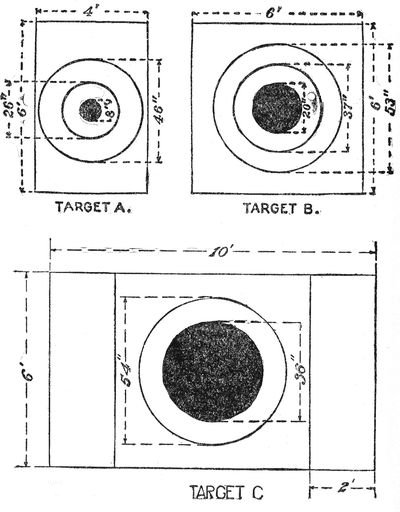
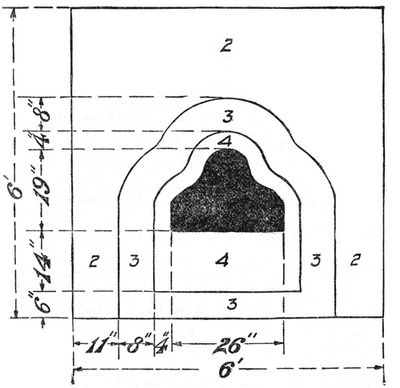
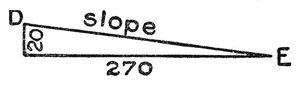


 they show a 2° slope, etc. A slope
of 1° is a rise of 1 foot in 57. To use this scale of slopes, copy it on the
edge of a piece of paper just as you did the scale of distances and
apply it directly to the map.
they show a 2° slope, etc. A slope
of 1° is a rise of 1 foot in 57. To use this scale of slopes, copy it on the
edge of a piece of paper just as you did the scale of distances and
apply it directly to the map.