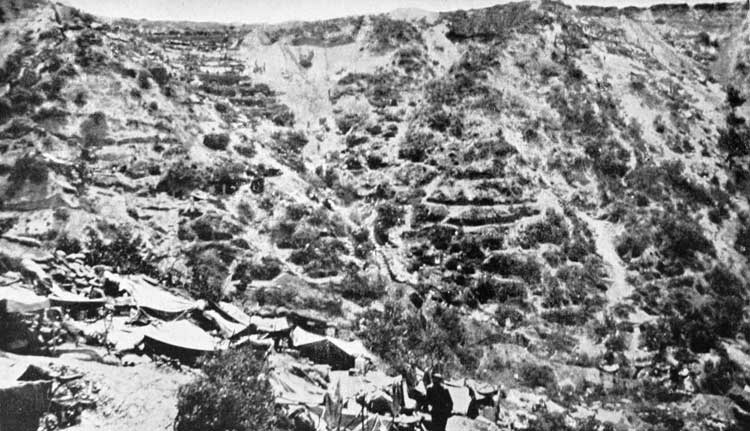
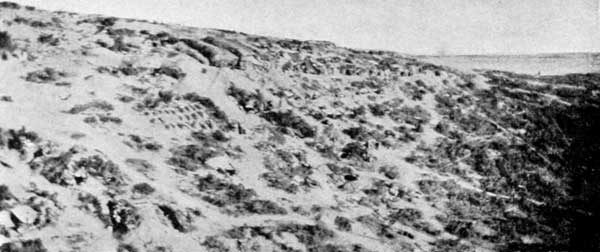
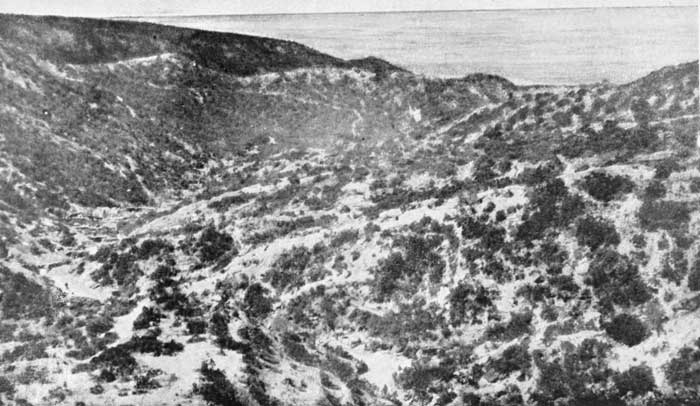
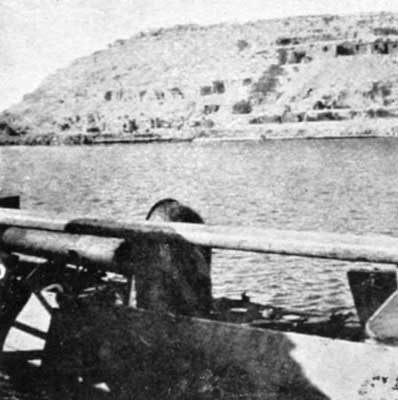
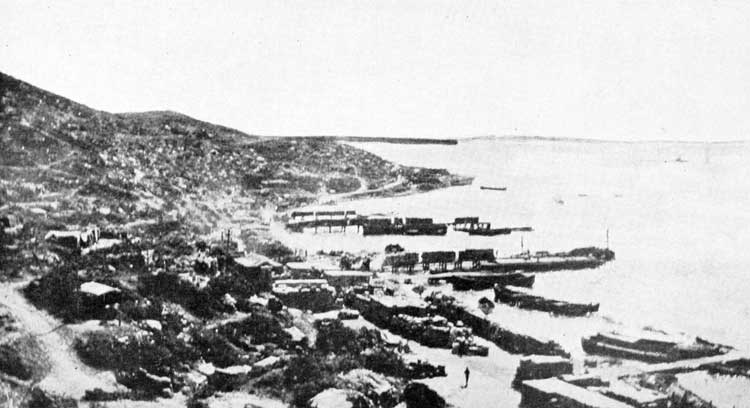
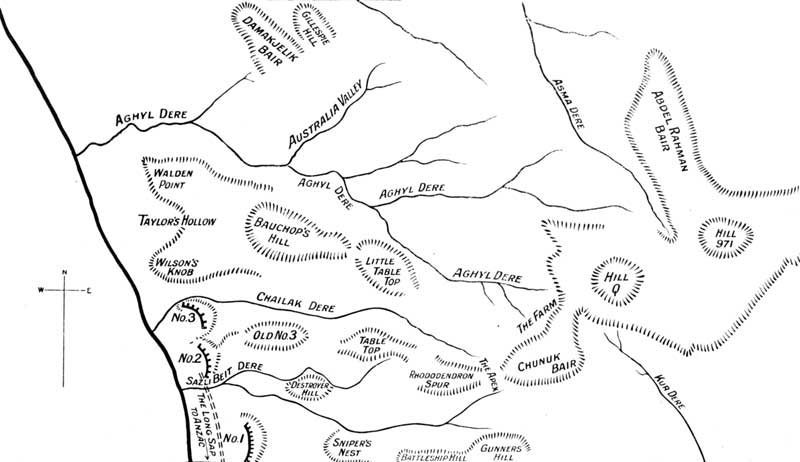
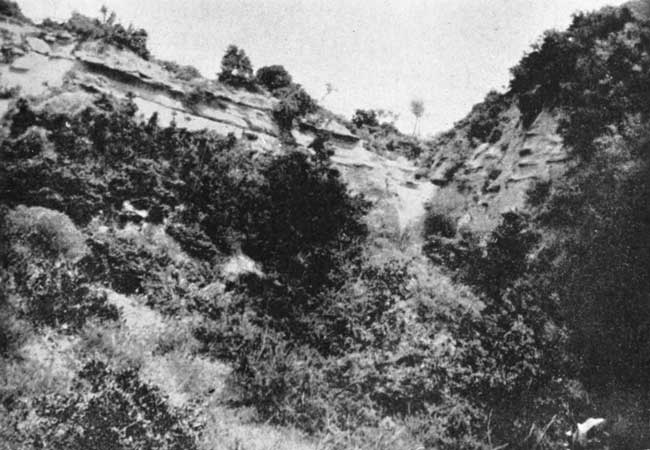
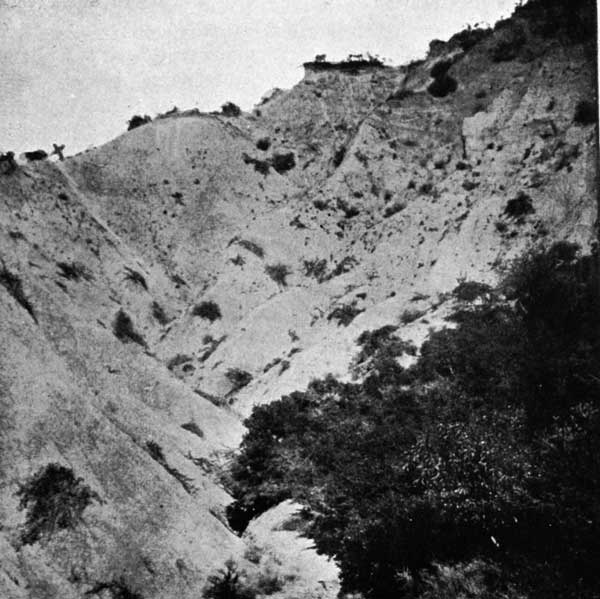
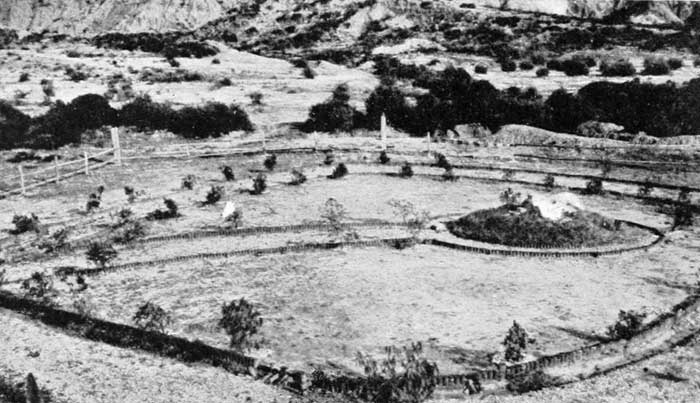
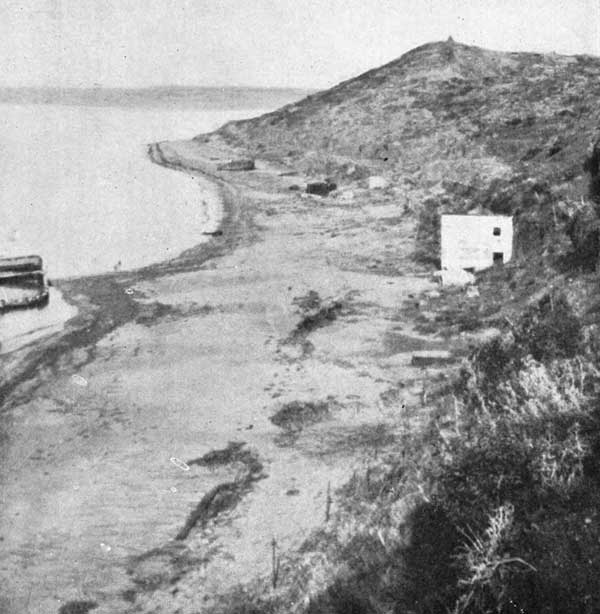
The Return to Anzac.
Three years in succession the valleys of Anzac were flooded with the
crimson poppies of the Aegean Spring. During these three years the New
Zealanders in France and Palestine shared in the vicissitudes and the
dearly-bought victories of the Allied Armies.
While the soldiers were fighting, some of the politicians of England—a
few of whom had been prominent in reducing Army and Navy expenditure
before the war—enquired with great deliberation into the rights and
wrongs of the Gallipoli campaign. Money that would have been better
spent in hand grenades in 1915 was lavishly poured out in trying to
discover who was to blame for this and who should be censured for that.
It may be said with pride that the people of New Zealand—and the
people of Australia, too—did not indulge in recrimination. They knew
that the armies were not to blame, and were content to leave it at that.
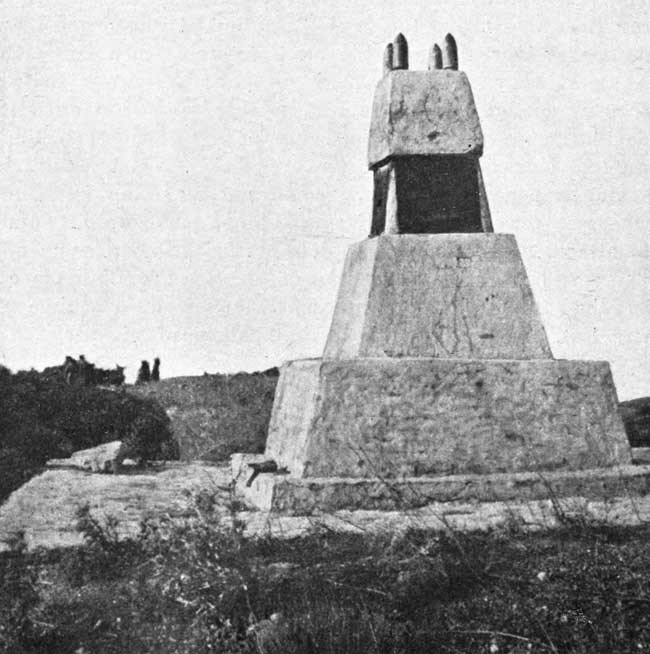
While commissions investigated ancient history the triumphant Turks
erected great monuments on the Peninsula—monuments to commemorate the
defeat of the infidels.
But the months slipped by, and nearer and nearer crept the forces
enveloping the Central Powers. The Bulgars felt the pressure first.
When they finally broke and fled up the Seres Road, our airmen bombed
them unmercifully. Caught in their mountain passes, they were killed in
thousands by our low-flying planes. So was Bulgaria finally bombed out
of the war by British airmen.
On October 26, 1918, British cavalry and armoured cars entered Aleppo
and cut the Constantinople-Baghdad railway. On October 29, General
Marshall's forces on the Tigris severed the Turkish communications at
Mosul. The Turkish armies were everywhere helpless.
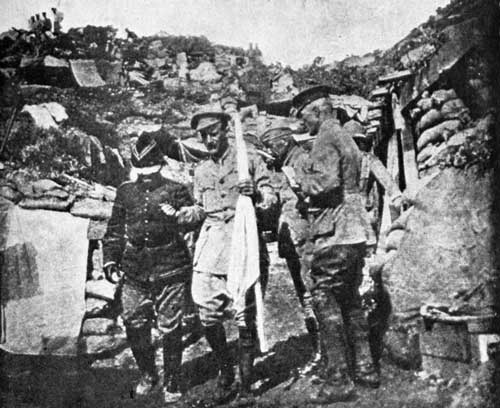
One day at the end of October a little launch with General Townshend
on board slipped out from Chios down near Smyrna, carrying a white
flag. A representative of Vice-Admiral Calthorpe, the British naval
commander in the Aegean, conducted the liberated hero of Kut-el-Amara
and the fully-accredited representatives of the Turkish Government to
Mudros—the Mudros of our rendezvous and of our Rest Camp—where the
Turkish representatives signed the Armistice terms, preparatory to an
unconditional surrender. This was on the evening of October 30. The
Armistice came into effect at noon on the following day.
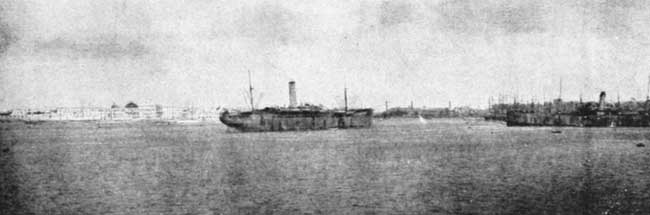
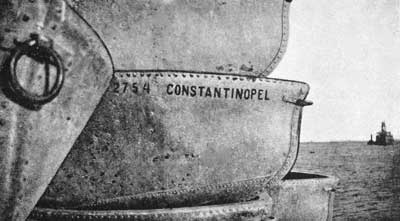
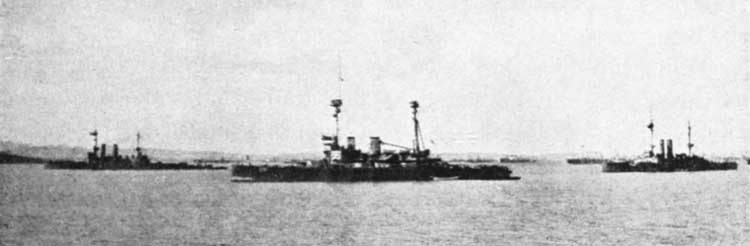
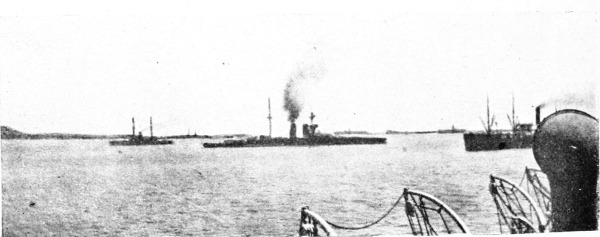
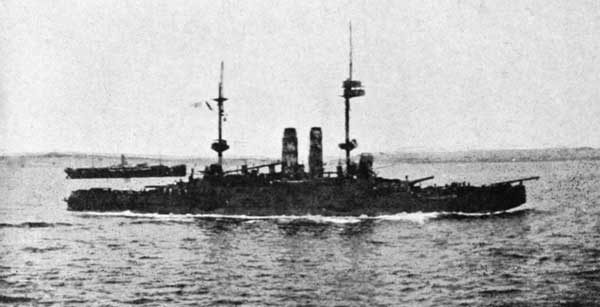
The end of 1918 saw British and French warships lying off the Golden
Horn and British soldiers on guard at the forts of Chanak and Kilid
Bahr.
Was it not prophesied that one day a New Zealander would sit on London
Bridge and survey the ruins of the metropolis? In the year of grace,
1918, the real modern New Zealanders—with the dust of the desert
still on their faded tunics, complete with their wristlet watches and
folding kodaks—stand on the famous Galata Bridge and snapshot the
imperturbable Turkish boatman who seem but faintly interested in the
doom of the Ottoman Empire. There in their old slouch hats stand the
war-worn troopers—young crusaders who have contributed their full
share to the humbling of those despots who for centuries have been the
curse of Western Europe.
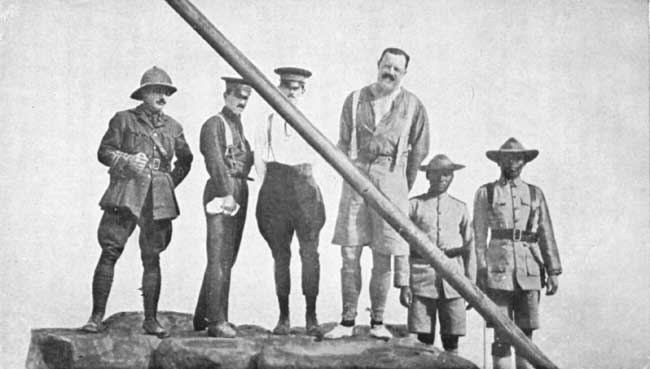
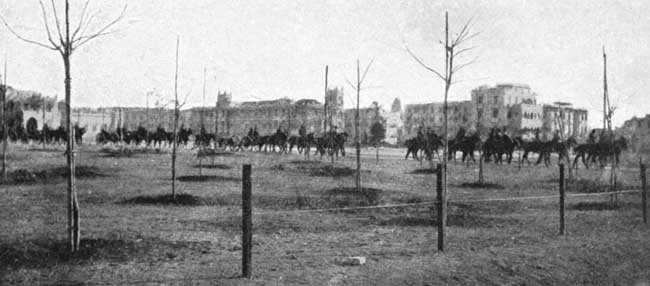
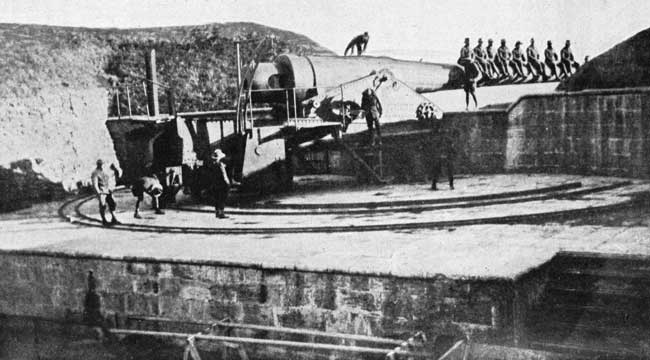
Among the troops to re-occupy Gallipoli were the Canterbury Mounted
Rifles, who, in December, disembarked at Maidos, and with their
comrades of the 7th Australian Light Horse, did not hesitate to sit as
conquerors on the giant guns of Kilid Bahr.
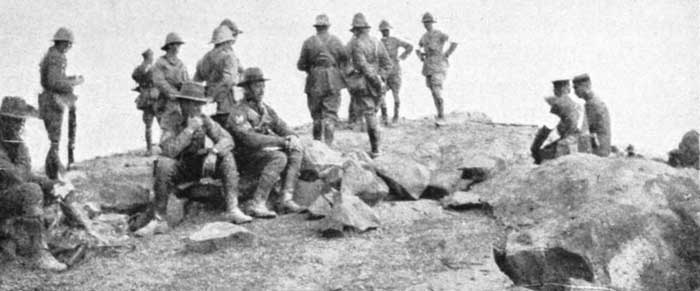
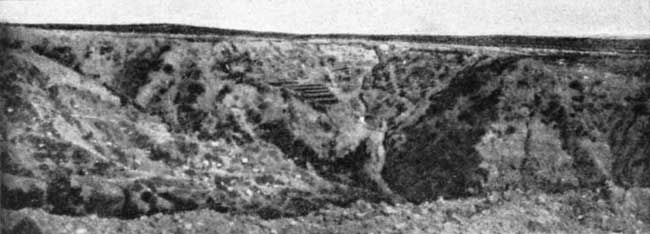
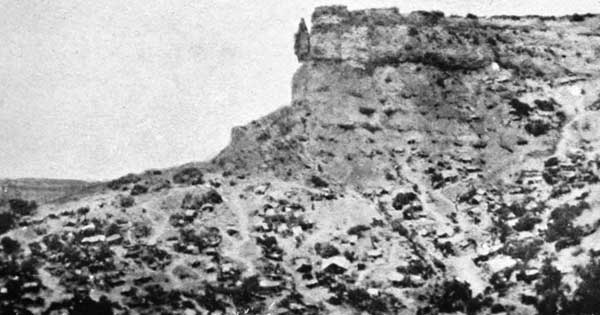
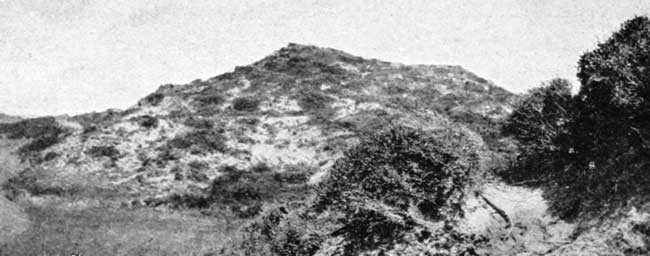
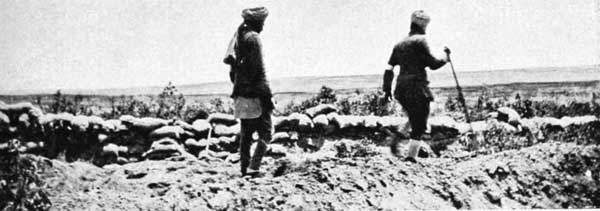
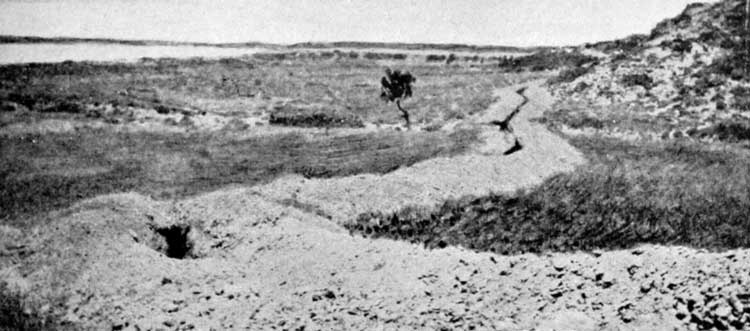
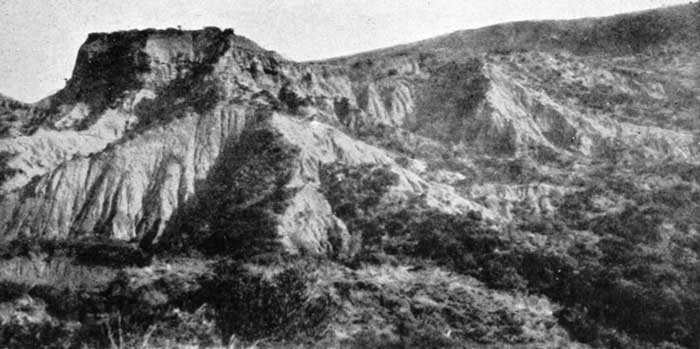
Up the valley towards Lone Pine they rode, until they came to the
Turkish victory monument erected on the site of the famous Australian
salient. Then over to Koja Chemen Tepe, to stand in silence where
British soldiers had never stood before. This was the moment of
triumph: this was the prize for which we had striven in 1915, and
now, after all these years, the prize was ours—on the one hand the
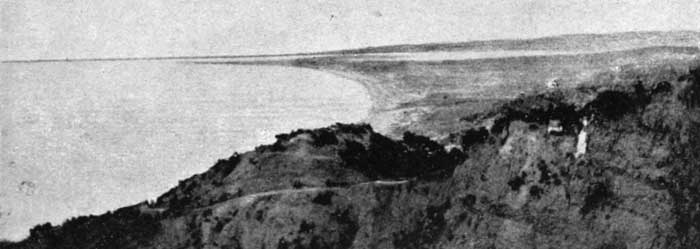
great forts and Point Nagara running out into the rushing waters of
the Narrows; on the other side the great panorama of the Aegean
Sea—Samothrace and Imbros in the distance; the Salt Lake and the
fatal plains of Suvla; away South, the forbidding hump of Achi Baba;
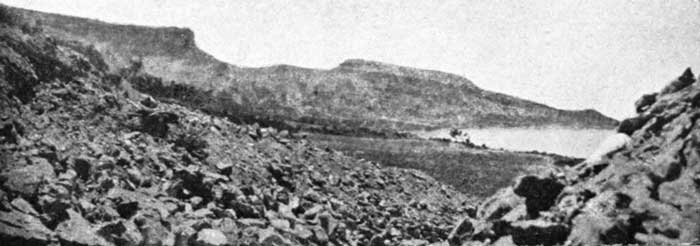
and closer in, the Anzac beaches, Russell's Top, the tangled steeps of
Walker's Ridge, The Farm, and the ridge of Chunuk. These men of the
Canterbury Mounted Rifles were the triumphant victors, but slowly
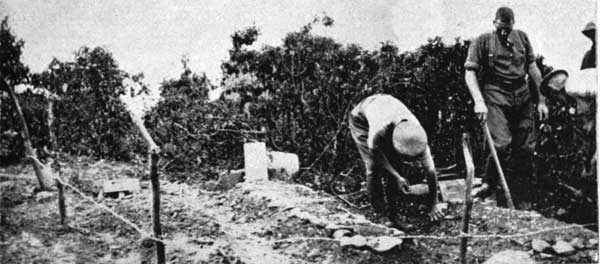
they rode down the winding ways of dry watercourses looking for the
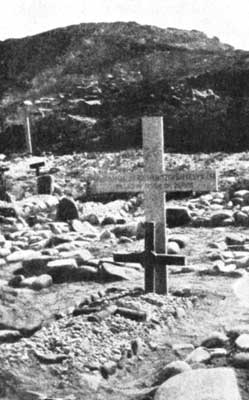
last resting places of brothers and comrades-in-arms. Never a yard but
somebody stopped and silently searched for an identification disc.
And here on the Nek was the great monument erected by the Turks in
honour of their victory in December, 1915!
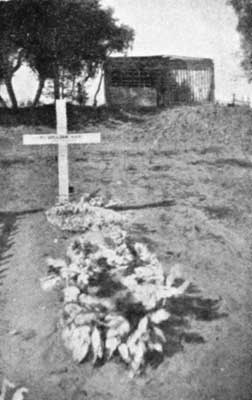
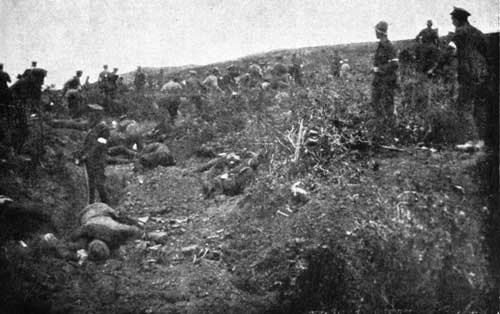
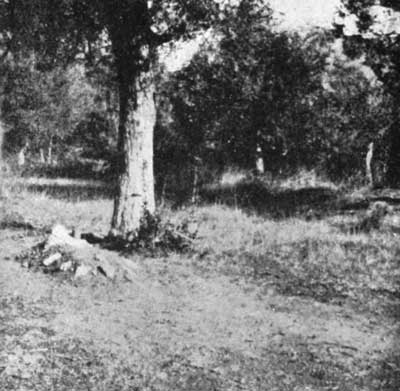
Down the Aghyl Dere where the gallant Overton rests under the shade of
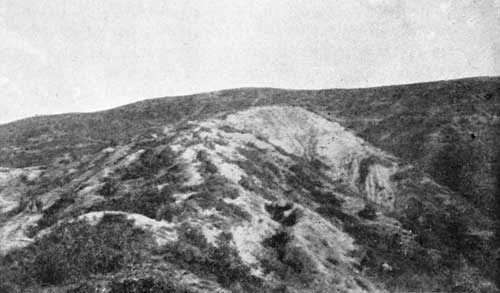
the Turkish trees; out to Hill 60 where the white bones lie in heaps;
along to Ari Burnu where the graves are thickly crowded; and so to
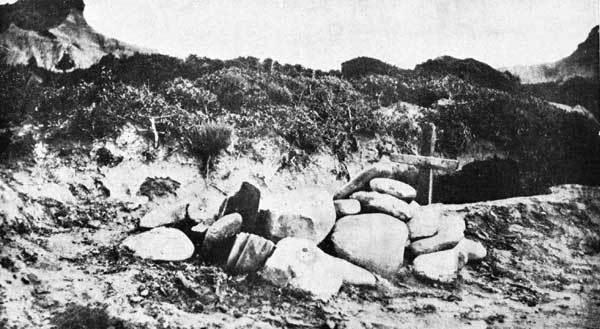
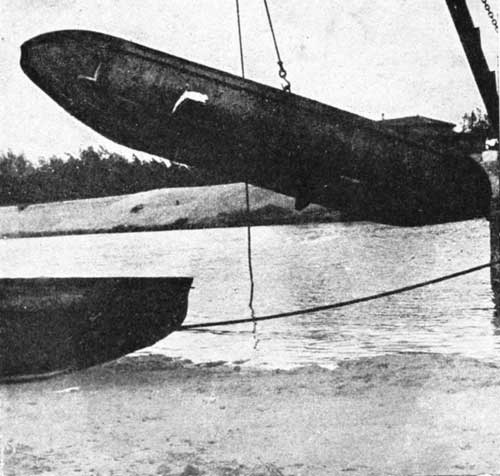
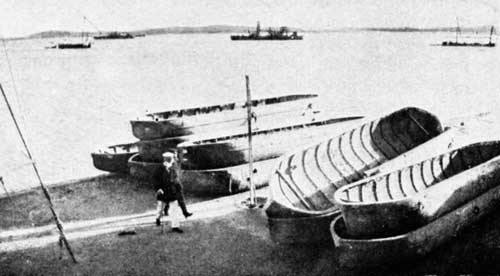
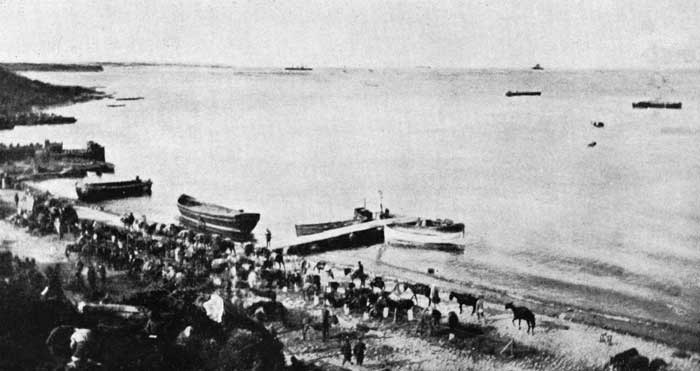
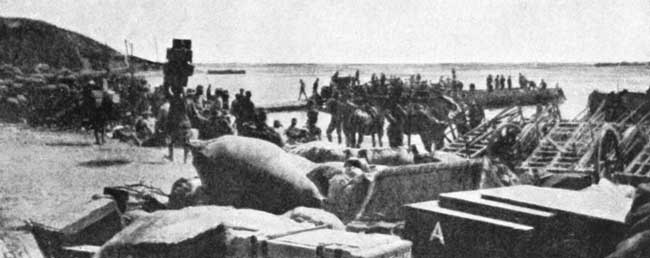
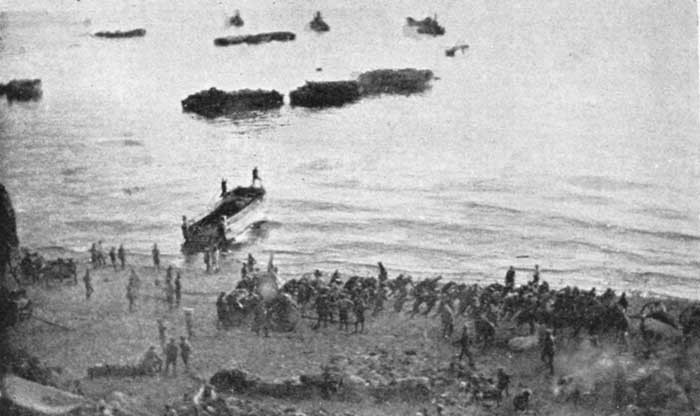
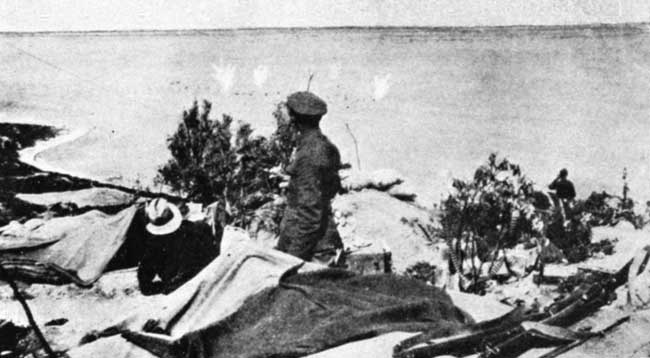
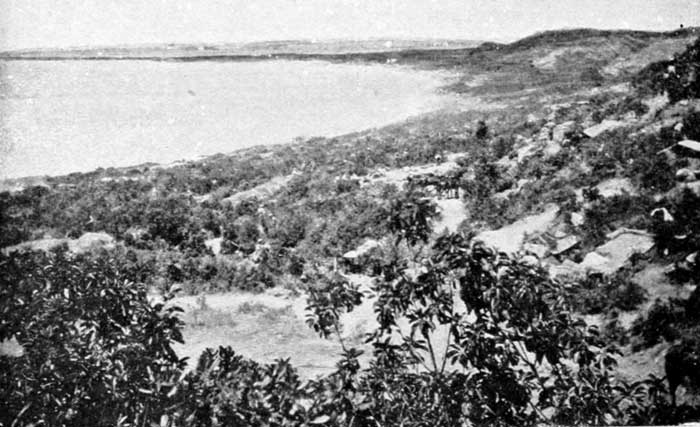
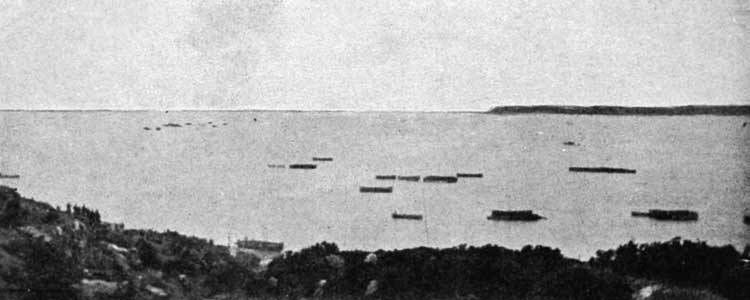
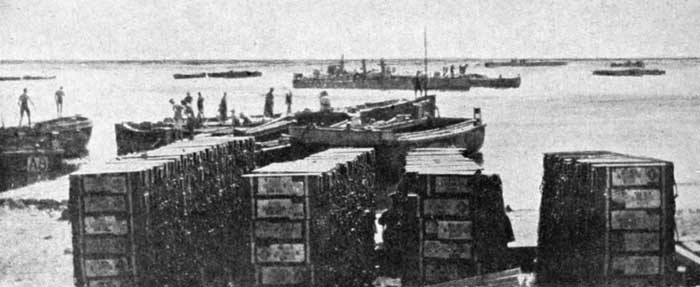
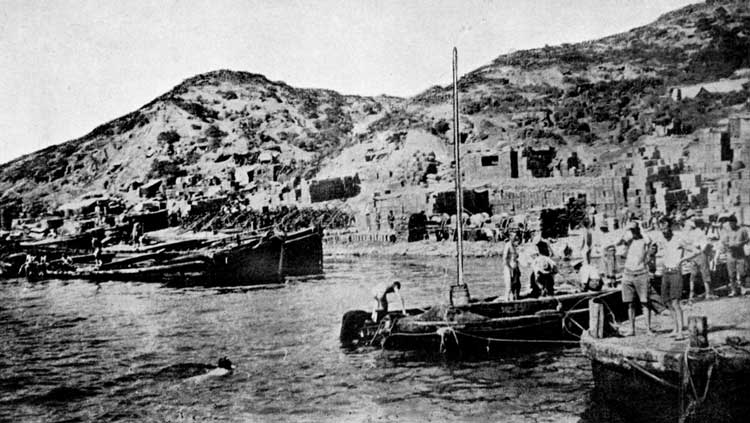
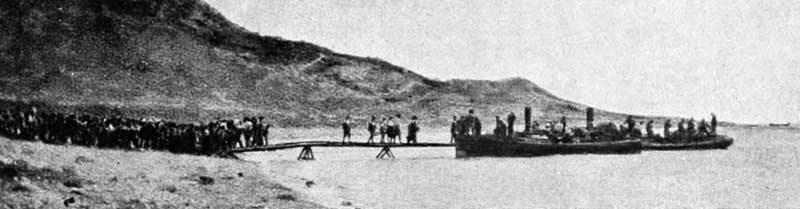
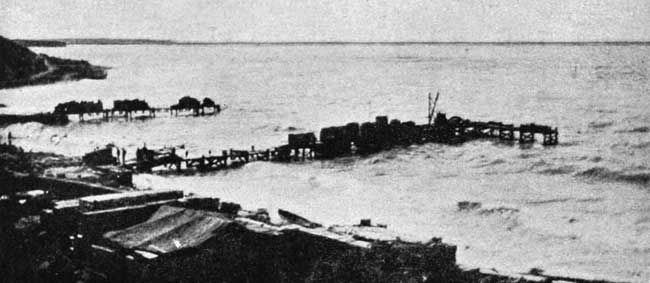
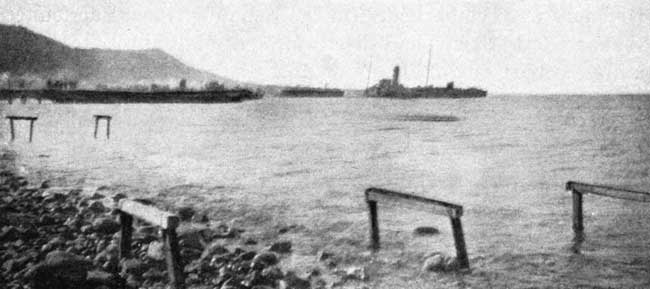
Anzac Cove itself. Here, pathetic beyond words, were the skeletons of
old barges and boats—rotting in the smooth white sand once pockmarked
by thousands of hurrying feet; here on the sandy beaches the Turk paid
the men of Anzac the greatest compliment, for they had wired the beach
against another landing! Did not the daredevils say they would come
back? Was it not wise to prepare for possibilities? But the soldiers
who went so quietly away in December, 1915, chose to come another way
as victors.
This is the end of the Gallipoli campaign. The men of New Zealand were
there at the start—here they are as the victors at the end.
And now that the struggle is over, now that the great guns of Chanak
are silent, and the hillsides once peopled with busy men are again
given over to the song birds and the wandering Turkish shepherds—what
is the gain to the world? What is the gain to New Zealand?
For assuredly there is some gain? Our eight months struggle—even if
it grievously tried us—undoubtedly weakened the military power of
the Turks. But it did more. It taught the New Zealander many things.
It taught him lessons that stood him in excellent stead on the
battlefields of the world. It taught him to respect his own strength
and capabilities. For before the war we were an untried and insular
people; after Anzac, we were tried and trusted. Before Anzac we had few
standards; after Anzac, we knew that, come what may, if it were humanly
possible—and often when it seemed almost impossible—New Zealanders
would not be found wanting, but would prove irresistible in attack,
steadfast and stubborn in defence—and what more can anyone ask of
soldiers?
Even as in the war we lost our insularity and found our national
spirit, so at Anzac we found our brothers-in-arms, the gallant sons
of Australia; and we did our work together—for if the initial "A"
stands for Australia, New Zealand furnished the very necessary pivotal
consonants. So in the future we must stand together and carry the white
man's burden in these Southern Seas.
And if Anzac means suffering, a hopeless longing, aching hearts and a
keen sense of loss to many in this land of ours, the gain cannot be
measured—for the miner at Quinn's Post did not sweat at the tunnel
face in the interests of self; the middies of the picket boats and
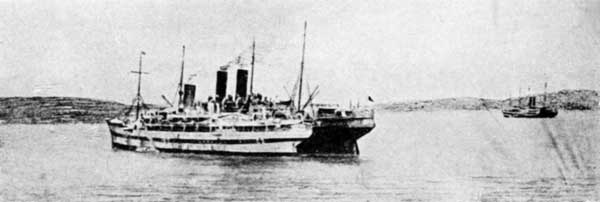
the men of the trawlers were not working for dividends; the nurses on
those hospital ships did not toil the long nights through for praise
or notoriety; the women who waited so bravely and patiently at home in
hourly dread of the telegraph boy, thought nothing of themselves. One
and all made their willing sacrifices for the common good. And that is
the message of Anzac to the people of New Zealand: Place the interests
of the community before the interests of self, follow in the footsteps
of the early pioneers, and make New Zealand a sweeter place for the
little children.
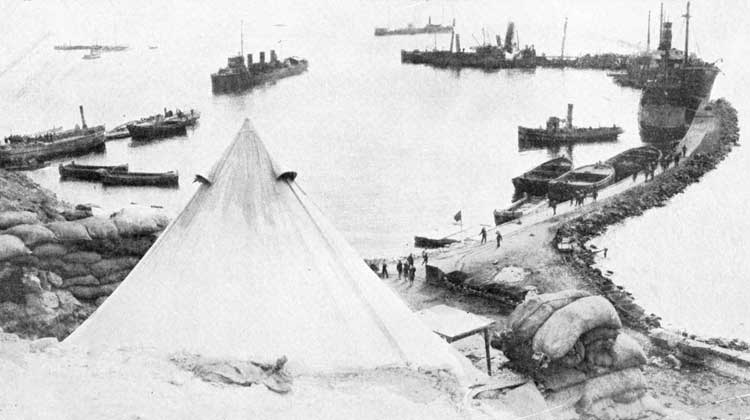
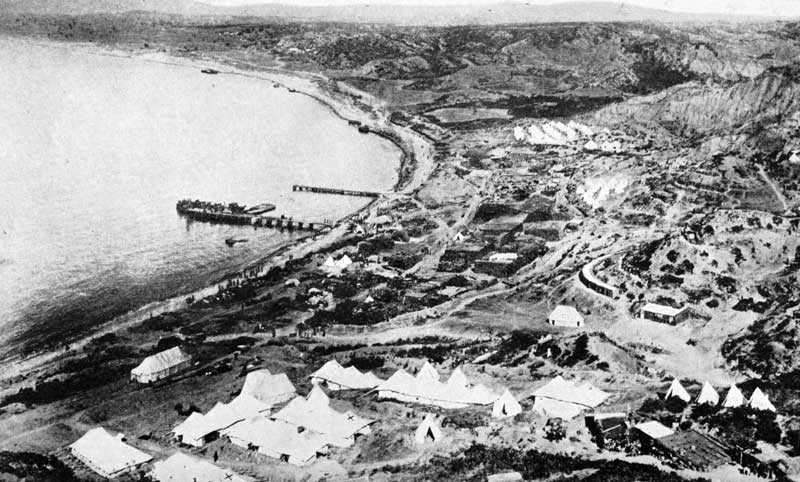
Anzac Cove.
New Zealand Transports of the Main Body.
In addition to the units mentioned each transport carried the usual
details—Naval Transport Officer, Medical Officers, Chaplains, etc.
N.Z.T. No. 1 (s.s. "Moeraki") and N.Z.T. No. 2 (s.s. "Monowai") took
the Samoan Force in August, 1914.
Transports Carrying the New Zealand and Australian Division from
Alexandria to Gallipoli, April 1915.
Establishment of Main Body, N.Z.E.F.
Additional Units Formed in New Zealand.
Additional Units Formed by N.Z.E.F. (Egypt).
The Men of Anzac.
Although this volume deals specifically with the doings of the New
Zealanders at Anzac, the Colonials who were there quite recognize that
they played only a part in the Great Game. They fully appreciate the
magnificent work of the Navy and of their French and British comrades
who braved the same dangers, and worked together against the common foe.
The Men of Anzac know that a war correspondent cannot be in three
places at once. What he sees he describes, and what he does not see he
obviously must collect information about, and cannot do justice to. So
perhaps the glory of the Anzac landing was magnified at the expense
of the men who landed at Helles. Australians and New Zealanders alike
agree that the Helles landing called for a greater show of discipline
and self-sacrifice than was needed at Anzac—for Anzac was a surprise
landing, Helles was not. But considerations of space, and the fact that
volumes have already appeared dealing with the work of our British,
French and Indian comrades, precludes full justice being done to their
work in these pages.
In our own army there are two groups of soldiers that have to a certain
extent been overlooked.
Even in the Colonial Armies we depended for light and a certain amount
of leading on British Regular Officers—officers loaned before the
war to the Colonial Forces,—and it is right that mention should be
made of them here. For what in the days of its infancy would the
N.Z. Expeditionary Force have been without the services of Colonel
Braithwaite—"Dear Old Bill"—Colonel Johnston of the Gunners;
Colonel Pridham of the R.E's; Major Temperley of the Infantry Brigade
Staff, and a dozen others? They contributed much more than has been
acknowledged to the initial successes of our New Zealand Army.
Of the second group it is difficult to write. It may have been noticed
that most of the soldiers mentioned in this volume are men who were
killed in action. There is perhaps more in this than meets the eye.
For the men killed in action and the mortally wounded are those who
put the fear of death into the Turk—men who by their impetuosity and
their eagerness to close really established the Anzac front line.
This meant personal leadership and absolute contempt for death. These
men were often not officers—often they were privates, but natural
leaders nevertheless. They were not necessarily university men or large
employers of labour—sometimes they were miners and taxi-drivers—they
were of the glorious democracy of the Front Line. Anyone, whatever his
rank or social standing, could have demonstrated his claim to be a
leader of men at Anzac.
We know that the list of decorations does not recognize all the gallant
deeds performed on the field of action; and those left alive in the
following list of soldiers decorated would be the first to admit that
they knew of men long since killed who deserved greater reward. Think
of a few of them: Lieut.-Colonel Stewart, of the Canterburys, who died
on the day of the landing fighting for Walker's Ridge; Lieut.-Colonel
Malone who died on the crest of Chunuk; Lieut.-Colonel Bauchop,
mortally wounded in the advance that smashed the Turkish line; Major
Statham, impetuous leader of men who died in the forefront of the
battle—each of these admittedly heroic souls passed away without
receiving a decoration.
And these officers were only worthy of the men in the ranks—men who
if they had lived, might have become great and famous soldiers, but
who sacrificed themselves thus early in the struggle so that we who
survived might carry on: Sergt. Wallace, one of our most promising
Rhodes Scholars, who came straight from Oxford to a soldier's death
while sapping out in front of Pope's; and the well-beloved Arthur
Carbines, who, disregarding the terrors and the dangers on the crest
of Chunuk, died so tragically endeavouring to rescue the body of his
Colonel, the gallant Malone—these men are typical of the scores who
received the small wooden cross which is the only distinction that the
gallant thruster is likely to receive; and some do not have even a
wooden cross, but die so far forward that they are buried by the Turks
in nameless graves and to these is the greatest honour!
New Zealanders decorated and mentioned in despatches.
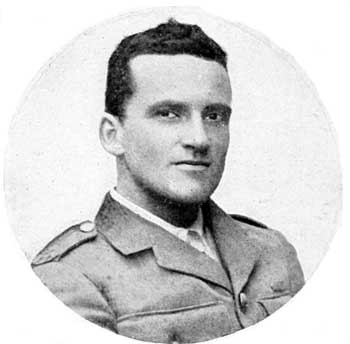
Corporal C. R. G. Bassett, V.C.
(Now Lieutenant Bassett, V.C.)
VICTORIA CROSS.
Corporal Cyril Royston Guyton Bassett, N.Z. Divisional Signal Company:
"For most conspicuous gallantry and devotion to duty on the Chunuk
Bair ridge in the Gallipoli Peninsula on the 7th August, 1915.
After the New Zealand Infantry Brigade had attacked and established
itself on the ridge, Corporal Bassett, in full daylight and under a
continuous and heavy fire succeeded in laying a telephone-line from
the old position to the new one on Chunuk Bair. He had subsequently
been brought to notice for further excellent and most gallant work
connected with the repair of telephone-lines by day and night under
heavy fire."
London Gazette, 15th October, 1915.
KNIGHT COMMANDER OF THE MOST HONOURABLE ORDER OF THE BATH. (K.C.B.)
Major-General (temp. Lieutenant-General) Sir A. J. Godley, K.C.M.G.,
General Officer Commanding, N.Z. Expeditionary Force.
KNIGHT COMMANDER OF THE MOST DISTINGUISHED ORDER OF SAINT MICHAEL AND
SAINT GEORGE. (K.C.M.G.)
Colonel (temp. Brigadier-General) Sir A. H. Russell, General Officer
Commanding, N.Z. Division.
COMPANIONS OF THE MOST HONOURABLE ORDER OF THE BATH. (C.B.)
Colonel E. W. Chaytor, N.Z. Staff Corps, New Zealand Expeditionary
Force (Staff).
Lieutenant-Colonel J. Findlay, Canterbury Mounted Rifles Regiment.
Major (temp. Brigadier-General) F. E. Johnston, N.Z. Infantry Brigade
(The Prince of Wales's Own, North Staffordshire Regiment).
COMPANIONS OF THE MOST DISTINGUISHED ORDER OF SAINT MICHAEL AND SAINT
GEORGE. (C.M.G.)
Lieutenant-Colonel W. M. Alderman, Auckland Infantry Battalion
(Commonwealth Military Forces).
Lieutenant-Colonel C. M. Begg, N.Z. Medical Corps.
Lieutenant-Colonel (temp. Brigadier-General) W. G. Braithwaite,
D.S.O., Headquarters, N.Z. Expeditionary Force (Royal Welsh Fusiliers).
Lieutenant-Colonel A. B. Charters, Otago Infantry Battalion.
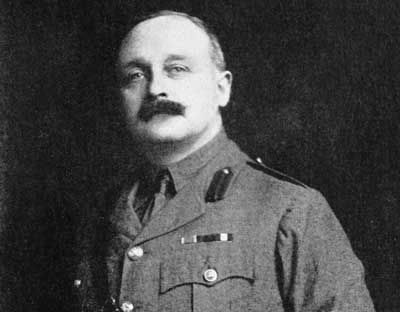
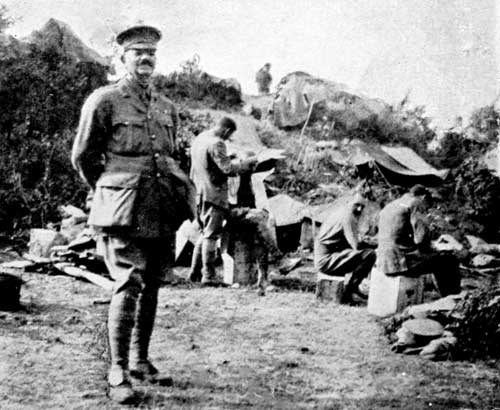
[Photo by Bartlett & Andrew.
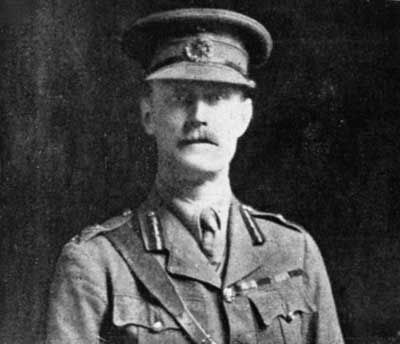
Lieut.-Colonel W. G. Braithwaite, C.M.G., D.S.O.
(Royal Welsh Fusiliers)
Major (temp. Lieutenant-Colonel) J. J. Esson, Staff Headquarters N.Z.
Expeditionary Force.
Lieutenant-Colonel P. C. Fenwick, N.Z. Medical Corps.
Lieutenant-Colonel J. G. Hughes, D.S.O., Canterbury Battalion (N.Z.
Staff Corps).
Reverend J. A. Luxford, Chaplain, 3rd Class, N.Z. Chaplains Department.
Lieutenant-Colonel W. Meldrum, D.S.O., Wellington Mounted Rifles.
Lieutenant-Colonel W. H. Parkes, M.D., N.Z. Medical Corps.
Lieutenant-Colonel A. Plugge, Auckland Battalion.
Major (temp. Lieutenant-Colonel) G. S. Richardson, N.Z. Mediterranean
Expeditionary Force, (N.Z. Staff Corps).
Lieutenant-Colonel F. Symon, N.Z. Field Artillery (Royal N.Z.
Artillery).
Lieutenant-Colonel R. Young, Auckland Battalion.
COMPANIONS OF THE DISTINGUISHED SERVICE ORDER. (D.S.O.)
Major H. E. Avery, No. 1 Company Divisional Train (N.Z. Staff Corps).
Honorary Captain W. T. Beck, N.Z. Ordnance Corps (attached N.Z. Staff
Corps).
Major C. H. J. Brown, Canterbury Battalion (N.Z. Staff Corps).
Captain A. C. B. Critchey-Salmonson, Canterbury Battalion (Royal
Munster Fusiliers).
Major N. S. Falla, N.Z. Field Artillery.
Captain B. S. Finn, N.Z. Medical Corps.
Lieutenant-Colonel R. R. Grigor, Otago Mounted Rifles.
Major N. C. Hamilton, N.Z. Army Service Corps (Army Service Corps).
Major Herbert Hart, Wellington Battalion.
Major N. F. Hastings, Wellington Mounted Rifles.
Major H. C. Hurst, Canterbury Mounted Rifles.
Major G. A. King, Headquarters N.Z.M.R, Brigade (N.Z. Staff Corps).
Major Eugene Joseph O'Neill, F.R.C.S., N.Z. Medical Corps.
Captain (temp. Lieutenant-Colonel) C. G. Powles, Headquarters, N.Z.M.R.
Brigade (N.Z. Staff Corps).
Major G. S. Smith, Otago Battalion.
Major I. T. Standish, N.Z. Field Artillery (Royal N.Z. Artillery).
Major (temp. Lieutenant-Colonel) F. B. Sykes, N.Z. Field Artillery
(Royal Artillery)
Major W. McG. Turnbull, Otago Battalion (N.Z. Staff Corps).
Major Fred Waite, N.Z. Engineers.
Major R. Wyman, Auckland Mounted Rifles Regiment.
Major R. Young, Wellington Battalion.
MILITARY CROSS. (M.C.)
Captain L. G. D. Acland, N.Z. Army Service Corps.
Lieutenant W. G. A. Bishop, Otago Infantry Battalion.
Captain D. B. Blair, Canterbury Mounted Rifles, (N.Z. Staff Corps).
Lieutenant G. R. Blackett, Canterbury Mounted Rifle Regiment.
2nd Lieutenant R. T. R. P. Butler, N.Z. Engineers (Royal Engineers).
Captain G. E. Daniell, N.Z. Field Artillery (Royal N.Z. Artillery)
Reverend P. Dore, Chaplain, 4th Class, N.Z. Chaplains Department.
Captain T. R. Eastwood, Headquarters Staff, N.Z. Expeditionary Force
(The Rifle Brigade, Prince Consort's Own).
Captain T. Farr, N.Z. Field Artillery.
A. Greene, Chaplain, 4th Class (Salvation Army), N.Z. Chaplains
Department.
Captain R. N. Guthrie, N.Z. Medical Corps.
Captain P. B. Henderson, Canterbury Infantry Regiment (N.Z. Staff
Corps).
Captain G. H. Holland, Auckland Infantry Battalion.
2nd Lieutenant R. McPherson, N.Z. Field Artillery.
Lieutenant A. N. Oakey, N.Z. Engineers.
8/1048 Sergt.-Major A. W. Porteous, Otago Infantry Battalion.
Captain J. M. Richmond, N.Z. Field Artillery (N.Z. Staff Corps).
Captain J. M. Rose, Wellington Infantry Battalion (N.Z. Staff Corps).
Captain L. M. Shera, N.Z. Engineers.
2nd Lieutenant W. H. Stainton, N.Z. Maori Contingent.
Captain H. Stewart, Canterbury Infantry Battalion.
Captain N. W. B. B. Thoms, Headquarters N.Z. and A. Division (N.Z.
Staff Corps).
Lieutenant F. K. Turnbull, Wellington Infantry Battalion.
Lieutenant F. M. Twistleton, Otago Mounted Rifles.
Captain J. A. Wallingford, Auckland Infantry Battalion (N.Z. Staff
Corps).
Captain F. A. Wood, Auckland Mounted Rifles (N.Z. Staff Corps).
DISTINGUISHED CONDUCT MEDAL. (D.C.M.)
4/85a Sergeant A. W. Abbey, N.Z. Engineers.
13/5 Trooper L. J. Armstrong, Auckland Mounted Rifles.
6/884 Sergeant A. A. Atkins, Canterbury Infantry Battalion.
10/1731 Private C. R. Barker, Wellington Infantry Battalion.
6/194 Private H. Barlow, Canterbury Infantry Battalion.
10/274 Corporal P. H. G. Bennett, Wellington Infantry Battalion
8/1370 Acting Sergeant-Major P. C. Boate, Otago Infantry Battalion.
9/129 Sergeant J. Campbell, Otago Mounted Rifles.
3/317 Private J. F. Cardno, N.Z. Medical Corps.
4/363 Sapper A. L. Caselberg, Signal Troop, N.Z. Engineers.
2/83 Driver N. Clark, N.Z. Field Artillery.
3/158 Private J. Comrie, N.Z. Field Ambulance.
13/606 Private L. Crawford-Watson, N.Z. Medical Corps.
4/506 Sapper B. L. Dignan, Divisional Signal Company, N.Z. Engineers.
2/444 Acting Sergeant C. J. K. Edwards, N.Z. Field Artillery.
4/188a Lance-Corporal F. J. H. Fear, N.Z. Engineers.
6/227 Private A. J. Findlay, Canterbury Infantry Battalion.
12/1627 Sergeant J. H. Francis, Auckland Infantry Battalion.
8/465 Quartermaster-Sergeant L. S. L. L. Graham, Otago Mounted Rifles.
7/516 Corporal G. G. Harper, Canterbury Mounted Rifles.
7/517 Sergeant R. P. Harper, Canterbury Mounted Rifles.
8/872 Sergeant A. G. Henderson, Otago Infantry Battalion.
3/168 Private W. J. Henry, N.Z. Field Ambulance.
2/147 Acting Sergeant J. F. Hill, N.Z. Field Artillery.
4/203a Sapper E. A. Hodges, N.Z. Engineers.
2/115 Bombardier D. C. Inglis, N.Z. Field Artillery.
14/43 Sergeant F. Jenkins, N.Z. Divisional Train.
9/1316 Sergeant J. Little, Otago Mounted Rifles.
10/2228 Private F. Mahoney, Wellington Infantry Battalion.
8/33 Sergeant F. Mitchell, Otago Infantry Battalion.
3/269 Sergeant-Major F. W. Moor, N.Z. Medical Corps.
8/1302 Private R. C. McLeod, Otago Infantry Battalion.
7/764 Trooper D. J. O'Connor, Canterbury Mounted Rifles.
10/1307 Private F. O. O'Connor, Wellington Infantry Battalion.
16/407 Private Tau Paranihi, Maori Contingent.
7/583 Trooper H. Pidgeon, Canterbury Mounted Rifles.
2/1252 Gunner J. Rankin, N.Z. Field Artillery.
12/1015 Corporal W. J. Reid, Auckland Infantry Battalion.
6/1129 Corporal H. Rhind, Canterbury Infantry Battalion.
11/442 Sergeant-Major W. Ricketts, Wellington Mounted Rifles.
6/978 Sergeant W. J. Rodger, Canterbury Infantry Battalion.
4/208a Corporal C. W. Salmon, N.Z. Engineers.
4/60a Corporal C. W. Saunders, N.Z. Engineers.
6/1399 Sapper E. G. Scrimshaw, N.Z. Engineers.
3/95 Lance-Corporal W. Singleton, N.Z. Field Ambulance.
8/1837 Lance-Corporal H. D. Skinner, Otago Infantry Battalion.
12/1799 Corporal H. Spencer, Auckland Infantry Battalion.
3/447 Lance-Corporal G. Steedman, N.Z. Field Ambulance.
6/1156 Private T. Stockdill, Canterbury Infantry Battalion.
10/1674 Private J. W. Swan, Wellington Infantry Battalion.
6/157 Sergeant B. N. Tavender, Canterbury Infantry Battalion.
12/1062 Private G. A. Tempany, Auckland Infantry Battalion.
2/146 Bombardier J. P. Thomson, N.Z. Field Artillery.
12/472 Sergeant R. Tilsley, Auckland Infantry Battalion.
12/1020 Corporal F. W. Watson, Auckland Infantry Battalion.
4/450 Sapper K. T. Watson, N.Z. Engineers.
6/741 Private C. M. Wilson, Canterbury Infantry Battalion.
14/76 Lance-Corporal J. Wimms, N.Z. Divisional Train.
11/941 Trooper J. H. Winter, Wellington Mounted Rifles.
MENTIONED IN DESPATCHES.
[A] Mentioned twice.[B] Mentioned three times.
4/85a 2nd Corporal A. W. Abbey, D.C.M., N.Z. Engineers.
[A]Captain L. G. D. Acland, M.C., Divisional Train, N.Z. Army Service
Corps.
4/513 Sergeant G. D. Alexander, N.Z. Engineers.
13/64 Sergeant F. Allsopp, Auckland Mounted Rifles.
13/5 Trooper L. J. Armstrong, D.C.M., Auckland Mounted Rifles.
10/1731 Private C. R. Barker, D.C.M., Wellington Infantry Battalion.
Lance-Corporal P. G. Barratt, Wellington Infantry Battalion.
Lieut.-Colonel A. Bauchop, C.M.G., Otago Mounted Rifles.
Captain W. T. Beck, D.S.O., N.Z. Army Ordnance Corps (attached N.Z.
Staff Corps).
Lieut.-Colonel C. M. Begg, C.M.G., N.Z. Medical Corps.
3/233 Lance-Corporal T. Biggar, N.Z. Medical Corps.
Lieut. W. G. A. Bishop, M.C., Otago Infantry Battalion.
Lieut. G. R. Blackett, Canterbury Mounted Rifles.
Captain D. B. Blair, M.C., Canterbury Mounted Rifles (N.Z. Staff
Corps).
8/1370 Sergt.-Major P. C. Boate, D.C.M., Otago Infantry Battalion.
7/311 Trooper J. M. Boocock, Canterbury Mounted Rifles.
[B]Lieut.-Colonel W. G. Braithwaite, C.M.G., D.S.O. (Royal Welsh
Fusiliers).
Major (temp. Lieut.-Colonel) C. H. J. Brown, D.S.O., Canterbury
Infantry Battalion (N.Z. Staff Corps).
2nd Lieutenant R. T. R. P. Butler, M.C., N.Z. Engineers (Royal
Engineers).
9/129 Sergeant J. Campbell, D.C.M., Otago Mounted Rifles.
10/706 Private A. V. Carbines, Wellington Infantry Battalion.
8/911 Sapper S. Carlyon, N.Z. Engineers.
13/535 Trooper N. D. Champney, Auckland Mounted Rifles.
Major F. Chapman, Auckland Mounted Rifles.
Lieut.-Colonel A. B. Charters, C.M.G., Wellington Infantry Battalion.
Colonel E. W. C. Chaytor, C.B., N.Z. Staff Corps.
2/83 Fitter N. Clark, D.C.M., N.Z. Field Artillery.
3/158 Private J. Comrie, D.C.M., N.Z. Field Ambulance.
Lieutenant A. E. Conway, Canterbury Infantry Battalion.
Captain C. F. D. Cook, Wellington Infantry Battalion.
11/520 Corporal F. R. Corrie, Wellington Mounted Rifles.
Lieutenant J. G. Cowan, Otago Infantry Battalion.
Major E. P. Cox, Wellington Infantry Battalion.
13/606 Private L. Crawford-Watson, D.C.M., N.Z. Field Ambulance.
Captain A. C. B. Critchley-Salmonson, D.S.O., Canterbury Infantry
Battalion (Royal Munster Fusiliers).
10/729 Private C. Crone, Wellington Infantry Battalion.
Major W. H. Cunningham, Wellington Infantry Battalion.
Captain G. E. Daniell, M.C., N.Z. Field Artillery (Royal N.Z.
Artillery).
12/1185 Private D. Davidson, Auckland Infantry Battalion.
[A]Major T. H. Dawson, Auckland Infantry Battalion.
4/506 Sapper B. L. Dignan, D.C.M., N.Z. Engineers.
Rev. P. Dore, M.C., Chaplain, 4th Class, N.Z. Chaplains' Department.
10/966 Corporal A. G. Duncan, Wellington Infantry Battalion.
3/144 Private A. F. D. East, N.Z. Medical Corps. #/ /#
Captain T. R. Eastwood, M.C., Headquarters Staff, N.Z. Expeditionary
Force (Rifle Brigade, Prince Consort's Own).
Captain H. M. Edwards, N.Z. Engineers (Royal Engineers).
7/800 Trooper J. Edwards, Canterbury Mounted Rifles.
Major J. McG. Elmslie, Wellington Mounted Rifles.
Major (temp. Lieut.-Colonel) J. J. Esson, C.M.G.
Major N. S. Falla, D.S.O., N.Z. Field Artillery.
Captain T. Farr, M.C., N.Z. Field Artillery.
Major F. A. Ferguson, N.Z. Engineers (Royal Engineers).
[A]6/227 Private A. J. Findlay, D.C.M., Canterbury Infantry Battalion.
Lieut.-Colonel J. Findlay, C.B., Canterbury Mounted Rifles.
Captain B. S. Finn, D.S.O., N.Z. Medical Corps.
Lieut.-Colonel N. Fitzherbert, Wellington Infantry Battalion.
7/441 Sergeant R. A. Fleming, Canterbury Mounted Rifles.
2nd Lieutenant E. N. Gabites, Otago Infantry Battalion.
Lieutenant L. J. Gibbs, Canterbury Infantry Battalion.
6/234 Sergeant D. D. Gill, Canterbury Infantry Battalion.
[A]Major-General (temp. Lieut.-General) Sir A. J. Godley, K.C.B.,
K.C.M.G., General Officer Commanding N.Z. Expeditionary Force.
2nd Lieutenant T. M. P. Grace, Wellington Infantry Battalion.
9/465 Sergeant-Major L. S. L. L. Graham, D.C.M., Otago Mounted Rifles.
Major S. A. Grant, Auckland Infantry Battalion (N.Z. Staff Corps).
Rev. W. Grant, Chaplain, 3rd Class, N.Z. Chaplains' Department.
A. Greene, Chaplain, 4th Class (Salvation Army), M.C., N.Z. Chaplains'
Department.
7/340 Sergeant A. R. Greenwood, Canterbury Mounted Rifles.
3/251 Private J. Greenwood, N.Z. Medical Corps.
Major R. R. Grigor, D.S.O., Otago Mounted Rifles.
Captain R. N. Guthrie, M.C., N.Z. Medical Corps.
Lieutenant W. Haeata, Auckland Mounted Rifles.
2nd Lieutenant C. St. C. Hamilton, Otago Infantry Battalion.
[A]Lieut.-Colonel N. C. Hamilton, D.S.O., N.Z. Army Service Corps (Army
Service Corps).
7/516 Corporal G. G. Harper, D.C.M., Canterbury Mounted Rifles.
7/517 Sergeant R. P. Harper, D.C.M., Canterbury Mounted Rifles.
Captain E. S. Harston, Wellington Infantry Battalion.
Major H. Hart, D.S.O., Wellington Infantry Battalion.
Major N. F. Hastings, D.S.O., Wellington Mounted Rifles.
Major W. H. Hastings, Headquarters Staff, N.Z. Expeditionary Force
(92nd Punjabis, Indian Army).
Captain B. S. Hay, Otago Mounted Rifles.
10/723 Private H. E. Hayden, Wellington Infantry Battalion.
Lieutenant C. Hayter, Canterbury Mounted Rifles.
3/170 Private W. Heaver, N.Z. Field Artillery.
Captain P. B. Henderson, M.C., Headquarters N.Z. Mounted Rifles Brigade
(N.Z. Staff Corps).
8/1504 Private W. J. Henry, D.C.M., N.Z. Field Ambulance.
2/147 Sergeant J. Hill, D.C.M., N.Z. Field Artillery.
4537a Sergeant P. Hill, N.Z. Maori Contingent,
Captain F. L. Hindley, Canterbury Mounted Rifles.
Major (temp. Lieut.-Colonel) J. G. Hughes, C.M.G., D.S.O., Canterbury
Infantry Battalion (N.Z. Staff Corps).
Major E J. Hulbert, N.Z. Engineers.
Major H. C. Hurst, D.S.O., Canterbury Mounted Rifles Regiment.
Major G. F. Hutton, Canterbury Mounted Rifles (Royal Welsh Fusiliers).
2/115 Bombardier D. Inglis, D.C.M., N.Z. Field Artillery.
Captain W. Janson, Wellington Mounted Rifles. #/ /#
7/128 Trooper D. Jenkins, Canterbury Mounted Rifles.
10/824 Company Sergt.-Major A. Johnson, Wellington Infantry Battalion.
[A]Major (temp. Brigadier-General) G. N. Johnston, N.Z. Field Artillery
(Royal Artillery).
10/392 Private S. Johnston, Wellington Infantry Battalion.
3/180 Private H. W. Keesing, N.Z. Medical Corps.
Captain V. A. Kelsall, Wellington Mounted Rifles. Captain G. A. King,
D.S.O., Headquarters N.Z. Mounted Rifles Brigade (N.Z. Staff Corps).
2nd Lieut. J. B. Le Mottée, Canterbury Infantry Battalion.
Captain R. Logan, Wellington Mounted Rifles.
Rev. J. A. Luxford, Chaplain, 3rd Class, C.M.G., N.Z. Chaplains'
Department.
10/2228 Private F. Mahoney, D.C.M., Wellington Infantry Battalion.
[A]Lieut.-Colonel W. G. Malone, Wellington Infantry Battalion.
Colonel N. Manders, N.Z. Medical Corps (Royal Army Medical Corps).
12/1710 Private C. J. Maroni, Auckland Infantry Battalion.
9/445 Sergeant-Major V. Marshall, Otago Mounted Rifles.
13/272 Trooper A. Mason, Auckland Mounted Rifles.
Lieutenant-Colonel W. Meldrum, C.M.G., Wellington Mounted Rifles.
8/33 Sergeant F. Mitchell, D.C.M., Otago Infantry Battalion.
3/269 Warrant-Officer F. W. Moor, D.C.M., N.Z. Medical Corps.
Lieutenant-Colonel A. Moore, D.S.O., Otago Infantry Battalion (Royal
Dublin Fusiliers).
Captain K. McCormick, N.Z. Medical Corps.
Reverend A. Macdonald, Chaplain, 4th Class, N.Z. Chaplains Department.
Major C. McGilp, N.Z. Field Artillery.
2nd Lieutenant E. J. McGregor, Auckland Mounted Rifles.
Temp. 2nd Lieutenant R. McPherson, M.C., N.Z. Field Artillery.
10/1109 Private J. Neale, Wellington Infantry Battalion.
Major C. R. Neale, N.Z. Veterinary Corps.
4/655 Sergeant S. Neels, N.Z. Engineers.
Lieutenant M. G. R. Newbold, N.Z. Engineers.
Major C. N. Newman, N.Z. Field Artillery.
4/115 Sergeant H. W. Newman, N.Z. Engineers.
Lieutenant T. H. Nisbet, Otago Infantry Battalion.
12/606 Private E. L. Noakes, Auckland Infantry Battalion.
Lieutenant A. N. Oakey, M.C., N.Z. Engineers.
[A]Major E. J. O'Neill, D.S.O., M.B., N.Z. Medical Corps.
Major P. J. Overton, Canterbury Mounted Rifles.
2nd Lieutenant W. T. Palmer, Auckland Mounted Rifles.
16/407 Corporal Tau Paranihi, D.C.M., N.Z. Maori Contingent.
Lieutenant-Colonel W. R. Pearless, N.Z. Medical Corps.
4/827 Sergeant A. G. Picken, N.Z. Engineers.
Major W. R. Pinwill, Headquarters Staff, N.Z. Expeditionary Force
(Liverpool Regiment).
[A]Lieutenant-Colonel A. Plugge, C.M.G., Auckland Infantry Battalion.
8/1048 Sergeant-Major A. W. Porteous, M.C., Otago Infantry Battalion.
Captain C. Guy Powles, D.S.O., Headquarters, N.Z.M.R. Brigade (N.Z.
Staff Corps).
Lieutenant A. H. Preston, Wellington Infantry Battalion.
Lieutenant-Colonel G. R. Pridham, N.Z. Engineers (Royal Engineers).
7/108 Sergeant F. L. Rees, Canterbury Mounted Rifles.
Major H. G. Reid, N.Z. Army Service Corps (Army Service Corps).
10/778 Private J. R. Reid, Wellington Infantry Battalion.
Lieutenant A. T. G. Rhodes, Headquarters Staff, N.Z. Expeditionary
Force (Grenadier Guards). #/ /#
Major (temp. Lieutenant-Colonel) G. S. Richardson, C.M.G., Headquarters
Staff, N.Z. Expeditionary Force (N.Z. Staff Corps), attached Royal
Naval Division (Staff).
Captain J. M. Richmond, M.C., N.Z. Field Artillery (N.Z. Staff Corps).
11/442 Sergeant W. Ricketts, D.C.M., Wellington Mounted Rifles.
13/438 Trooper R. R. E. Rollett, Auckland Mounted Rifles.
11/736 Sergeant B. Ronaldson, Wellington Mounted Rifles.
Captain J. M. Rose, M.C., Wellington Infantry Battalion (N.Z. Staff
Corps).
[A]Colonel (temp. Brigadier-General) Sir A. H. Russell, K.C.M.G.
4/208a Corporal C. W. Salmon, D.C.M., N.Z. Engineers.
4/60a Corporal C. W. Saunders, D.C.M., N.Z. Engineers.
6/1399a Sapper E. G. Scrimshaw, D.C.M., N.Z. Engineers.
Captain L. M. Shera, M.C. N.Z. Engineers.
Captain A. V. Short, N. Z. Medical Corps.
9/343 Corporal A. Simon, Otago Mounted Rifles.
3/95 Lance-Corporal W. Singleton, D.C.M., N.Z. Field Ambulance.
8/1837 Lance-Corporal H. D. Skinner, D.C.M., Otago Infantry Battalion.
Major G. S. Smith, D.S.O., Otago Infantry Battalion.
Captain R. B. Smythe, Headquarters N.Z. and A. Division (N.Z. Staff
Corps).
12/1799 Sergeant H. Spencer, D.C.M., Auckland Infantry Battalion.
Major I. T. Standish, D.S.O., N.Z. Field Artillery (Royal N.Z.
Artillery).
Lieutenant W. H. Stainton, M.C., N.Z. Maori Contingent.
Major F. H. Statham, Otago Infantry Battalion.
3/447 Lance-Corporal G. Steedman, D.C.M., N.Z. Medical Corps.
13/237 Trooper K. M. Stevens, Auckland Mounted Rifles.
Captain H. Stewart, M.C., Canterbury Infantry Battalion.
Lieutenant-Colonel D. McB. Stewart, Canterbury Infantry Battalion.
6/1156 Private T. Stockdill, D.C.M., Canterbury Infantry Battalion.
Lieutenant J. K. D. Strang, Otago Mounted Rifles.
6/770 Lance-Corporal W. H. Studley, Canterbury Infantry Battalion.
10/1674 Corporal J. W. Swan, D.C.M., Wellington Infantry Battalion.
Major (temp. Lieutenant-Colonel) F. B. Sykes, D.S.O., N.Z. Field
Artillery (Royal Artillery).
Lieutenant-Colonel F. Symon, C.M.G., N.Z. Field Artillery (Royal N.Z.
Artillery).
6/157 Lance-Corporal B. N. Tavender, D.C.M., Canterbury Infantry
Battalion.
Lieutenant G. N. Taylor, Canterbury Mounted Rifles.
23/1213 Private G. A. Tempany, D.C.M., Auckland Infantry Battalion.
Major A. C. Temperley, Headquarters Staff, N.Z. Expeditionary Force
(Norfolk Regiment).
Captain N. W. B. B. Thoms, M.C., Headquarters Staff, N.Z. Expeditionary
Force (N.Z. Staff Corps).
6/1131 Private A. Thomson, Canterbury Infantry Battalion.
2/146 Bombardier J. P. Thomson, D.C.M., N.Z. Field Artillery.
8/494 Corporal T. A. Timpany, Otago Infantry Battalion.
9/91 Trooper A. K. Topi, Otago Mounted Rifles.
12/267 Bugler D. B. Treacher, Auckland Infantry Battalion.
Lieutenant F. K. Turnbull, M.C., Wellington Infantry Battalion.
Major W. McG. Turnbull, D.S.O., Otago Infantry Battalion (N.Z. Staff
Corps).
Lieutenant F. M. Twistleton, M.C., Otago Mounted Rifles.
16/161 Company Sergeant-Major H. R. Vercoe, N.Z. Maori Contingent.
[A]Major F. Waite, D.S.O., N.Z. Engineers.
Lieutenant W. H. Walker, N.Z. Maori Contingent. #/ /#
4/72a Sergeant A. Wallace, N.Z. Engineers.
Captain J. A. Wallingford, Auckland Infantry Battalion (N.Z. Staff
Corps).
12/1020 Corporal F. W. Watson, D.C.M., Auckland Infantry Battalion.
[A]Major J. H. Whyte, D.C.M., Wellington Mounted Rifles (N.Z. Staff
Corps).
11/654 Sergeant J. W. Wilder, Wellington Mounted Rifles.
Lieutenant G. L. Wilson, Otago Infantry Battalion.
Captain E. R. Wilson, Wellington Infantry Battalion.
14/76 Lance-Corporal J. Wimms, D.C.M., N.Z. Divisional Train.
11/941 Trooper J. H. Winter, D.C.M., Wellington Mounted Rifles.
Captain F. A. Wood, M.C., Auckland Mounted Rifles (N.Z. Staff Corps).
[A]Lieutenant-Colonel R. Young, C.M.G., D.S.O., Wellington Infantry
Battalion.
The Place-Names of Anzac.
Some unfortunate tracts of country are destined from their situations
to be the battlegrounds of the world. Old world names, before this war
but the memory of former campaigns, have once again become household
words. So Mons and St. Quentin, Kantara and Damascus, have become
familiar to the boys of the present generation, for have not their
elder brothers been on police picket in the back streets of every one
of them?
But war sometimes chances to descend on poor, unsettled and otherwise
unimportant territory. Such a place was Anzac—rough and hungry clay
hillsides, no habitations in its area except the lonely Fishermen's Hut
near the mouth of the Sazli Beit Dere, and a poor shepherd's hut at
the foot of Monash Gully. Into this desolate country, with only a few
ridges and watercourses important enough to be marked on the map, came
legions of foreign soldiers who peopled every scrubby ridge and winding
gully.
The necessity for place-names became very pressing. Retaining such of
the native ones as were shown on the maps, a multitude of Australian
and New Zealand names appeared spontaneously at Anzac, just as the
English and French names appeared at Helles.
Difficulties often arose. An Australian unit holding a part of the
line had local names for every place within the sector, whereas a New
Zealand unit taking over manufactured or evolved names quite different.
The preparation of a trench map or operation orders written by the
Staff fixed the name for all time. Place-names like "The Sphinx" are
evidence of this.
Ismail Oglu Tepe with its wavy crestline, naturally became the "W"
Hills of Anzac. From Walker's Ridge the description point—"W"
Hills—never failed to be recognized.
Most places in Anzac are named after men or units. This is natural.
But sometimes accidents crept in here, too. For instance, an attack of
measles made what might have been "Johnston's Ridge," into "Walker's
Ridge."
The word "Anzac" arrived in quite a different way. "Anzac" obviously
suggested itself. But numerous stories are current as to its origin,
and doubtless many of the stories are correct. Statements on this
subject have been made by the two most important Generals connected
with the campaign, and their claims may easily be reconciled.
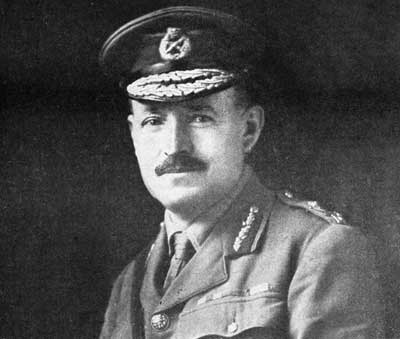
1. In the "Anzac Book" General Birdwood stated that when he took over
the command of the Australian and New Zealand Army Corps in Egypt, he
was asked to select a telegraphic code address for his Army Corps, and
adopted the word "Anzac." Later on, after the landing, he was asked by
General Headquarters to suggest a name for the beach, and in reply he
christened it "Anzac Cove."
2. General Ian Hamilton wrote in his preface to "Crusading at Anzac,
A.D. 1915," by Signaller Ellis Silas: "As the man who first, seeking
to save himself trouble, omitted the five full stops and brazenly
coined the word "Anzac," I am glad to write a line or two in preface
to sketches which may help to give currency to that token throughout
the realms of glory."
In compiling this list of place-names and their origins, the aim has
been to set down only those names that were generally accepted and used
at Anzac. Official trench maps, operation orders, books, pamphlets, and
captured Turkish maps have been searched and verified. I am greatly
indebted to the work of my friend Sapper Moore-Jones in his unrivalled
"Sketches Made at Anzac." Besides being works of art, these sketches
are particularly valuable as showing in faithful detail the land
features of the Anzac area, with many of the place-names in use during
the operations.
It is not necessary to burden this volume with a complete Turkish
dictionary, but the following words, with their equivalents in English,
may be found of value:—
| Bair . . . Spur |
Kuchuk . . . Small |
| Biyuk . . . Large |
Kuyu . . . Well |
| Burnu . . . Cape |
Ova . . . Small |
| Chair . . . Meadow |
Sirt . . . Summit |
| Dagh . . . Mountain |
Tepe . . . Hill |
| Dere . . . Valley with stream |
Tekke . . . Shrine |
| Kale . . . Fort |
|
Abdel Rahman Bair.—The great northern spur of the Sari Bair
range.
Anafarta.—(1) The Turkish name for the Suvla front.
(2) There are two villages inland from Suvla Bay called Biyuk Anafarta
and Kuchuk Anafarta.
(3) A long-range gun firing from the hills was called "Anafarta Annie."
Anzac.—Formed from the initial letters of Australian and New
Zealand Army Corps. First used (written A. and N.Z.A.C.) in Egypt,
when the Army Corps was formed. It soon became A.N.Z.A.C., and the new
word was so obvious that the full stops were omitted.
Anzac Cove.—The little bay where the principal landing was
made on April 25, 1915.
The Apex.—High up on Rhododendron Spur, and the furthest point
inland retained by the Anzac forces after the attack on Chunuk Bair.
An earlier name, little used, was "The Mustard Plaster."
Ari Burnu.—The northern horn of Anzac Cove. The Turk called
the Anzac area the Ari Burnu front.
Asma Dere.—One of the upper reaches of the Azmak Dere,
starting in the foothills of the Abdel Rahman Bair.
Azmak Dere.—A watercourse leading from Biyuk Anafarta, running
to the south of Ismail Oglu Tepe and debouching on to the Suvla flats.
There is another Azmak flowing into the north of the Salt Lake at
Suvla.
Australian Valley.—One of the northern branches of the Aghyl
Dere, named after the 4th Australian Infantry Brigade.
Baby 700.—A Turkish position between The Nek and Battleship
Hill.
Battleship Hill.—High ground within the Turkish lines between
Baby 700 and Chunuk Bair. Turkish reserves sheltered behind it, and
were frequently shelled by the warships.
Bauchop's Hill.—A hill between the Aghyl Dere and the Chailak
Dere. Named after the gallant colonel of the Otago Mounted Rifles, who
was mortally wounded here on August 8.
Beach Road, The.—The road running along the sea beach from Ari
Burnu toward No. 2 Post.
Bedford Ridge.—A ridge opposite Cheshire Ridge on which were
situated our three isolated posts: Newbury's Post, the southern one;
Franklin Post, the central one; Warwick Castle, the northern one.
Blamey's Meadow.—Overlooked by Tasmania Post. Named after
Major Blamey, an Intelligence Officer who carried out extensive
reconnaissances in Turkish territory towards Maidos.
Blockhouse, The.—A Turkish position opposite the Apex. This
blockhouse was built after the Turks swept us off Chunuk Bair in
August.
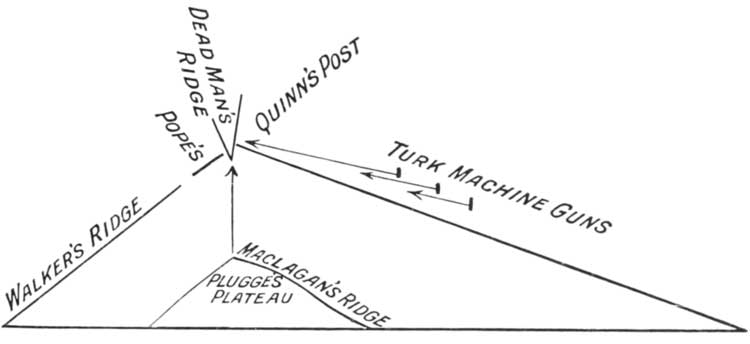
Bloody Angle.—The gully between Dead Man's Ridge and Quinn's
Post. The 4th Australian Brigade and the battalions of the Royal Naval
Division suffered heavy losses here on the night of May 2/3.
Bolton's Hill.—Named after Colonel Bolton, 8th A. I. Battalion.
On the extreme right flank; part of the front line of the Australian
position.
Biyuk Anafarta.—See Anafarta.
Braund's Hill.—A hill behind the centre of the Australian line
on the right, and overlooking Shrapnel Valley. Named after Colonel
Braund, of the 2nd Australian Infantry Battalion. Colonel Braund was a
member for Armidale in the New South Wales Parliament, and was killed
soon after the landing.
Broadway.—The wide sunken road leading from the top of Walker's
Ridge round the back of the firing line on Russell's Top.
Bridges' Road.—A road leading to the right from Shrapnel Valley
towards Wire Gully. Named in memory of General Bridges, the Australian
Divisional Commander, who was mortally wounded in Shrapnel Valley.
Brighton Beach.—The long stretch of beach running southwards
from Hell Spit towards Gaba Tepe. Brighton is the well-known watering
place near Melbourne, named after the English seaside resort.
Brown's Dip.—A depression just behind the Australian trenches
opposite Lone Pine, where the Turkish and Australian dead were buried
after the struggle for Lone Pine. The lower part of Brown's Dip was
known as Victoria Gully.
Bully Beef Gully.—A gully running up from the centre of Anzac
Cove past Army Corps Headquarters. As stores on the beach would be
threatened by rough weather, beef and biscuits were stacked in this
valley.
Bully Beef Track.—A communication trench running from the right
of Russell's Top to the head of Monash Gully.
Bully Cut.—A deep communication trench cut to enable troops to
avoid a much-sniped section of the Aghyl Dere.
Camel's Hump.—A Turkish position just below Snipers' Nest.
Canterbury Gully.—A small gully between Plugge's Plateau and
Shrapnel Valley, where the Canterbury Infantry Battalion rested when in
reserve from Quinn's Post. Often shown on the map as Rest Gully.
Canterbury Slope.—On the slopes of Rhododendron Spur.
Canterbury Knob.—A famous machine gun position on the right
flank of the Apex position and overlooking the head waters of the Sazli
Beit Dere. Known to machine gunners as Preston's Top after the gallant
Lieut. Preston (killed in France) who first placed machine guns there
on August 7.
Canterbury Ridge.—A name given to Rhododendron Spur during the
early days of August. The Canterbury Infantry occupied this ground on
the morning of August 7.
Chailak Dere.—A narrow valley falling down from Chunuk Bair,
past the north side of Table Top and between Bauchop's Hill and "Old
No. 3 Post."
Chatham's Post.—The southern limit of the Anzac line. Named
after Lieut. Chatham, of the 5th Australian Light Horse.
Chessboard, The.—A criss-cross network of Turkish trenches
opposite Pope's Hill and Russell's Top.
Cheshire Ridge.—A ridge between the upper reaches of the
Chailak Dere and the southern fork of the Aghyl Dere. Named after the
8th Cheshires who were in the 40th Brigade of the 13th Division. Its
respective parts were known as Upper and Lower Cheshire. Durrant's Post
was in the centre.
Chocolate Hills.—A range of hills inland from Suvla Bay, south
of the Salt Lake. These hills were brownish red, and later swept with
fire. One part was covered with scrub and, not being burnt, was known
as Green Hill.
Chunuk Bair.—A ridge about 860 feet high on the Sari Bair,
below Hill Q, and above Rhododendron Spur.
Clarke Valley.—Between Victoria Gully and Shell Green. Colonel
Clarke had the 12th Australian Infantry Battalion.
Cornfield, The.—A small patch of cultivated ground on the
right flank just above Shell Green.
Courtney's Post.—One of the three famous posts at head of
Monash Gully. Lieut.-Colonel R. E. Courtney, of the 14th Australian
Infantry Battalion, was in command here in May. He died at Melbourne
on October 22, 1919.
Daisy Patch, The.—A piece of old meadow at Cape Helles.
Damakjelik Bair.—On the left of the Anzac line; the objective
of the Left Covering Force on August 6.
Dawkins' Point.—On Brighton Beach, about 600 yards south of
Hell Spit. Named after an officer of the Australian Engineers.
Dead Man's Ridge.—A much-contested Turkish salient running in
between Pope's Hill and Quinn's Post. So called because of the bodies
of New Zealanders, Australians, and men of the Royal Naval Division
which lay there from May 2/3 until the Armistice.
Destroyer Hill.—A small hill overlooking the Sazli Beit Dere
and midway between Rhododendron Spur and No. 1 Post. Often heavily
shelled by the torpedo destroyers.
Durrant's Post.—A post on Cheshire Ridge. Major Durrant was an
officer in the 4th Australian Infantry Brigade.
Farm, The.—A hotly contested corner of the Chunuk Bair
battlefields. Just underneath the ridge of Chunuk Bair. It eventually
remained in the hands of the Turk.
Fishermen's Hut.—A rude hut or huts near the coast, at the
foot of the Sazli Beit Dere.
Gaba Tepe.—A headland about a mile and a quarter south of the
Anzac right flank. The Anzac landing was originally known as the Gaba
Tepe landing. Most of the earlier gazetted decorations were prefaced
"in the neighbourhood of Gaba Tepe," which really means Anzac.
Gillespie Hill.—A part of Hill 60. On the left of the Anzac
theatre. Named after Lieut.-Colonel Gillespie, of the South Wales
Borderers.
Hampshire Lane.—A communication trench leading from the Aghyl
Dere towards Sandbag Ridge.
Happy Valley.—The valley just north of Walker's Ridge, and
immediately below Turk's Point. In the spring the lower reaches were a
mass of flowering shrubs, beautiful grasses, and fragrant wild thyme.
Hay Valley.—A southern arm of the Aghyl Dere; branching to
the left it was known as Stafford Gully, and to the right, Hotchkiss
Gully. Captain Bruce Hay, N.Z.S.C., was killed while leading a
squadron of the Otago Mounted Rifles in the attack on Bauchop's Hill.
Hell Spit.—The southern horn of Anzac Cove. Jutting out into
the sea, it was a convenient mark for the Turkish gunner of the Olive
Groves and Gaba Tepe.
Hill Q.—Sometimes known as Nameless Peak. Midway between the
heights of Hill 971 and Chunuk Bair. About 280 feet.
Hill 60.—The height in metres of the hill known as Kaiajik
Aghala, near which was the important well Kabak Kuyu.
Hill 100.—High ground between the Asma Dere and the head of
the Kaiajak Dere; held by the Otago Mounted Rifles at the evacuation.
Hill 112.—Ismail Oglu Tepe, which see.
Hill 971.—The most important tactical feature on Gallipoli
Peninsula. The highest Peak of the Sari Bair range, 971 feet high.
Known to the Turk as Koja Chemen Tepe, and shown on the later maps as
Hill 305, from its height in metres.
Hotchkiss Gully.—See Hay Valley.
Howitzer Gully.—The northernmost gully running up towards
Plugge's Plateau from Anzac Cove. Here the 4.5 Howitzer Battery, under
Major Falla, made its welcome appearance the morning after the Anzac
landing.
Hughes Gully.—Part of the Sazli Beit Dere running to the north
opposite Destroyer Hill, towards the front of Table Top. Lt.-Col. J.
G. Hughes, C.M.G., D.S.O., was in command of the Canterbury Battalion
during the August offensive.
Ismail Oglu Tepe.—See "W" Hills.
Johnston's Jolly.—A Turkish position between Lone Pine and
German officers' trench. Named after Colonel G. J. Johnston, Brigadier
of the 2nd Australian Artillery Brigade.
Koja Chemen Tepe.—See Hill 971.
Koja Dere.—A Turkish village two miles due east of Lone Pine.
Here were concentrated a large proportion of the enemy's reserves.
Koja Dere (sometimes spelt Kurija Dere) was the site of the Turkish
Army Headquarters in the southern sector of the Ari Burnu front.
Kaiajik Aghala.—See Hill 60.
Kuchuk Anafarta.—See Anafarta.
Kabak Kuyu.—A valuable well in the neighbourhood of Hill 60.
Kur Dere.—A valley between Chunuk Bair Hill Q, on the enemy's
side of the watershed. Mentioned as one of the objectives in the
operation order for August 6.
Lala Baba.—The highest ground between Nibrunesi Point and
the Salt Lake. This observation post was raided several times by New
Zealanders before the Suvla landing. On it a German flag was flown
after the evacuation.
Leane's Trench.—A set of Turkish trenches near Tasmania Post,
taken on July 31 by Western Australian troops under Major Leane, who
was killed during the operations.
Little Table Top.—A small, flat-topped hill north of the
original "Table Top," which was sometimes called "Big Table Top."
Long Sap, The.—A communication trench running from Anzac Cove,
near Ari Burnu, along the foothills out to No. 2 Post.
Lone Pine.—A set of Turkish trenches south of Johnston's
Jolly, taken and held by the Australians during the August fighting.
Seven Victoria Crosses were won here by Australians.
Malone's Gully.—A dry watercourse between Happy Valley and No.
1 Post, leading up towards Baby 700. Named after the gallant Colonel
of the Wellington Infantry Battalion.
Mal Tepe.—A small hill inland from Gaba Tepe, on which the
Turks had guns. One of the objectives mentioned in the operation order
for the Anzac landing.
Monash Gully.—See Shrapnel Valley. Brigadier-General Monash
commanded the 4th Australian Infantry Brigade, which first held the
head of Monash Gully.
Mortar Ridge.-A ridge behind German Officers' Trench. Under the
reverse slope of Mortar Ridge were innumerable dugouts protecting the
Turkish reserves.
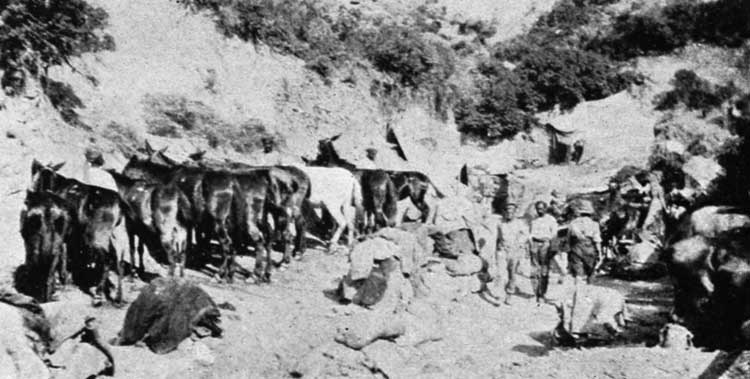
Mule Gully.—A ravine running up behind Walker's Ridge. Under
the shelter of the high banks the mules of the Indian Supply and
Transport Corps were protected from fire.
Mustard Plaster, The.—See the Apex.
Maclagan's Ridge.—The ridge running from Plugge's Plateau down
to Hell Spit. Named after the landing in honour of Colonel Sinclair
Maclagan, D.S.O.
Maclaurin's Hill.—Just south of Steel's Post. Colonel
Maclaurin, the Brigadier of the 1st Australian Infantry Brigade, was
killed in Monash Gully two days after the landing.
McCay's Hill.—On the right flank, north of White Valley. Named
after the Brigadier of the 2nd Australian Infantry Brigade.
No. 1 Post.—On the left flank of Anzac. Sometimes known as
Maori Post, from it being garrisoned by the Maori contingent.
No. 2 Post.—Called Nelson Hill in the earlier days because
held by the 10th (Nelson) Mounted Rifles; then taken over by the Otago
Mounted Rifles; eventually became Divisional Headquarters for the
August operations.
No. 3 Post.—Established just north of No. 2 Outpost, when Old
No. 3 was abandoned.
Nameless Peak.—See Hill Q.
Nek, The.—A narrow tongue of No Man's Land, running from
Russell's Top towards the Turkish trenches.
Nelson Hill.—See No. 2 Post.
Nibrunesi Point.—The southern horn of Suvla Bay, shown on some
Turkish maps as Kuchuk Kemekli.
North Beach.—See Ocean Beach.
Ocean Beach.—The stretch of sea shore between Ari Burnu and
No. 2 Post. Sometimes known as North Beach.
Old No. 3 Post.—High ground above Fishermen's Hut. Captured
and held for two days by the N.Z.M.R. in May, but eventually abandoned
to the Turks; retaken during the August advance.
Olive Groves.—Clumps of trees inland from Gaba Tepe. "Beachy
Bill" and other obnoxious Turkish guns were "dug in" in the vicinity.
Otago Gully.—Near No. 3 Post. The Otago Mounted Rifles had
their headquarters hereabouts during June and July.
Overton Gully.—A gully named to commemorate Major Overton,
Canterbury Mounted Rifles, a keen officer who directed the scouting
and reconnoitering on the left flank. He was killed on August 7 while
leading Cox's Indian Brigade up the Aghyl Dere.
Owen's Gully.—A gully in Turkish territory between Johnston's
Jolly and Lone Pine; named after Brigadier-General Cunliffe Owen, the
artillery commander of the A.N.Z.A.C.
Phillip's Top.—Near the bottom and on the southern side of
Shrapnel Valley there was a low ridge called "The Razor Back," which,
running up towards the firing line, became known as Phillip's Top,
after Major Phillips, of the Australian Field Artillery.
Pimple, The.—A salient in the Australian line just opposite
the Turkish Lone Pine trenches; this Pimple became the Lone Pine
Salient.
Pine Ridge.—A Turkish position opposite the extreme right
flank of Anzac.
Plugge's Plateau.—The high ground immediately inland from
Anzac Cove, the southern spur running down to Hell Spit being named
Maclagan's Ridge. Plugge's Plateau is called after the O.C. Auckland
Infantry Battalion.
Point Rosenthal.—On the ridge below Bolton's Hill. Colonel
Rosenthal commanded the 1st Australian Artillery Brigade.
Pope's Hill.—An isolated post at the head of Monash Gully; on
its right was Dead Man's Ridge; on its left a deep canyon separating
Pope's from Russell's Top. Colonel Pope was the gallant white-haired
commander of the famous 16th Australian Infantry Battalion.
Poppy Valley.—There were many "Poppy" Valleys and "Poppy"
Fields in the Anzac area, but the only one to get on the map was in
the Turkish territory between Harris' Ridge and Pine Ridge, on the
extreme southern flank of Anzac.
Queensland Point.—That lower part of Maclagan's Ridge which
resolves itself into Hell Spit. The Queensland Infantry landed here
early on April 25.
Quinn's Post.—At the head of Monash Gully; the most famous
post in Anzac, the salient of the Anzac line. Named after Major Quinn,
of the 15th Australian Infantry Battalion, who was killed defending
the post. For the first few days this ground was held by Major Rankine
("Bobby") of the 14th Battalion A.I.F. He then handed over to Major
Quinn.
Reserve Gully.—A "rest" gully in the low ground between
Plugge's Plateau and the Sphinx. It eventually became unsafe, being
periodically searched by the guns from the "W" Hills.
Rest Gully.—See Canterbury Gully.
Rhododendron Spur.—A prominent spur running westward from
Chunuk Bair, and between the Chailak Dere and the Sazli Beit Dere, the
point nearest Chunuk Bair being called the Apex. It was first called
Rhododendron Spur by Major Overton, who saw in the scrubby arbutus
some resemblance to a rhododendron.
Rose Hill.—A northern underfeature of Bauchop Hill, below
Little Table Top and above Hotchkiss Gully. Guns placed here defended
the ground between The Blockhouse and our position on the Apex. Major
Rose was a New Zealand machine gunner in charge of the 4th Australian
Infantry Brigade machine guns.
Russell's Top.—The highest point of Walker's Ridge, where
Brigadier-General Russell, commanding the New Zealand Mounted Rifles,
had his headquarters during May, June, and July.
Ryrie's Post.—On the right of the Australian line; named after
Brigadier-General Ryrie, 2nd Light Horse Brigade.
Sandbag Ridge.—A salient in the new Anzac line near Hill 100.
Sari-Bair.—The tangled mass of hills and watercourses inland
from Anzac and Suvla, culminating in Hill 971.
Sazli Beit Dere.—A watercourse, dry in summer, originating in
the slopes of Chunuk Bair, and entering the sea near Fishermen's Hut.
Scimitar Hill.—A round hill north of the "W" Hills, on which
was a curved strip of yellow earth resembling a Turkish sword; shown
on some maps as Hill 70, from its height in metres.
Scrubby Knoll.—A Turkish position about 1500 yards due east of
Courtney's Post.
Shell Green.—A small area of cleared cultivable ground on the
extreme right of Anzac, between Clarke Valley and Ryrie's Post.
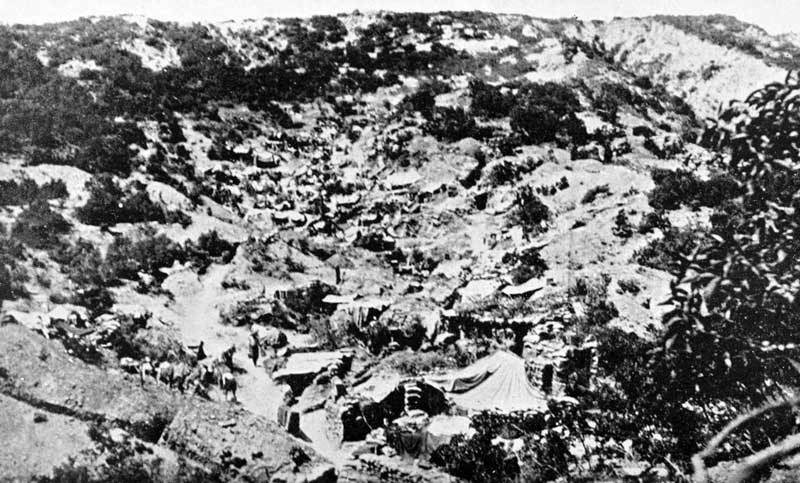
Shrapnel Valley.—The road to the centre of the Anzac position;
heavily shelled by the Turkish artillery from the first day. Known to
the Turks as Kamu Kapu Dere. The upper portion of the valley was known
as Monash Gully.
Snipers' Nest.—A scrubby hill about 1000 yards from the sea,
from which Turkish snipers made the beach north of Ari Burnu unsafe
for bathing or traffic.
Smyth's Post.—A post in the Australian sector, named after an
Australian officer.
Sphinx, The.—A peculiar knife-edge spur jutting out seawards
from Walker's Ridge. During the early days it was known by many names
such as the Sphinx, the Knife Edge, the Cathedral, the Snipers'
Crevice, &c., until it was entered on the map as the Sphinx. A legend
that from a crevice a sniper picked off men for the first few days,
until shot by Captain Wallingford, the well-known machine gunner, has
no foundation in fact, except that some wild pigeons which had their
home there were thought to be carriers.
Stafford Gully.—See Hay Valley.
Steel's Post.—The post south of Courtney's, named after
Major Steel, of the 14th Australian Battalion. For the first week,
Courtney's and Steel's were included in Steel's Post; but Lt.-Col.
Courtney took over the left section which was renamed Courtney's.
Susuk Kuyu.—A well just north of Hill 60, where the Anzac
forces got in touch with the Suvla forces after the Suvla landing.
Table Top.—A flat-topped hill, 1400 yards inland from the
sea, just south of Chailak Dere and at the foot of Rhododendron Spur;
captured by the Wellington Mounted Rifles on the night of August 6/7.
Tasmanian Post.—A post held by the Tasmanians on the right of
the Anzac front line, just north of Ryrie's Post.
Taylor's Hollow.—A depression just below Bauchop's Hill; named
after Lieut. Taylor, of the 10th (Nelson) Mounted Rifles, who made
numerous reconnaisances in the vicinity.
Turks' Hump.—A Turkish position on the lower slopes of
Gunners' Hill, opposite Canterbury Knob.
Turk's Point.—Part of the left of the original Anzac line,
overlooking the head of Malone's Gully.
Valley of Despair, The.—A valley in Turkish hands opposite our
extreme right flank, running from near Lone Pine down towards the sea.
Victoria Gully.—See Brown's Dip.
Walden's Point.—North of Taylor's Hollow. Waldren, whose name
was always mis-spelt "Walden," was a very daring sniper who did much
reconnoitering on the Suvla Flats as a machine gun officer of the
Maoris. He was killed on the Apex.
Walker's Ridge.—The left flank of the original Anzac line.
Brigadier-General Walker was attached to Army Headquarters, but as
Colonel Johnston was down with measles on the morning of the Anzac
landing, General Walker took command of the Brigade.
Walker's Pier.—A wharf erected north of Ari Burnu, between
Mule Gully and Reserve Gully.
Wanliss Gully.—A gully breaking the Anzac line just opposite
German Officers' Trench. This section was at one time under the
command of Colonel Wanliss, 5th Australian Infantry Battalion.
Warley Gap.—The gap in the line at Sandbag Ridge.
Waterfall Gully.—A small sheltered gully in Bauchop's Hill,
where newcomers bivouacked. The Headquarters of a Turkish unit was
captured here on August 6/7.
Watson's Pier.—The first wharf built at Anzac Cove by the New
Zealand Engineers. Captain Watson was an officer of the Australian
Signal Service, who overlooked the work when N.Z.E. officers could not
be spared.
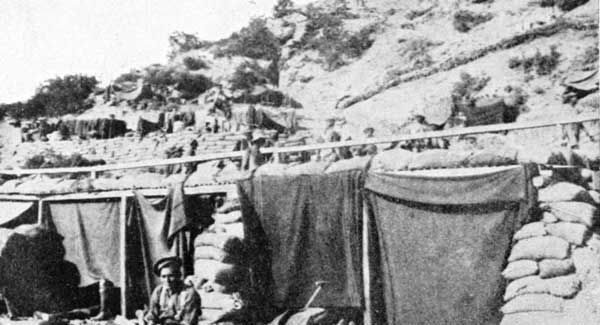
Wellington Terrace.—The cliff side under the shadow of
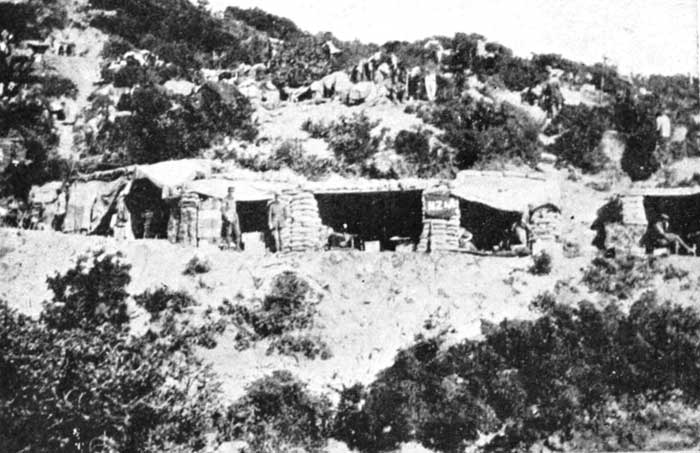
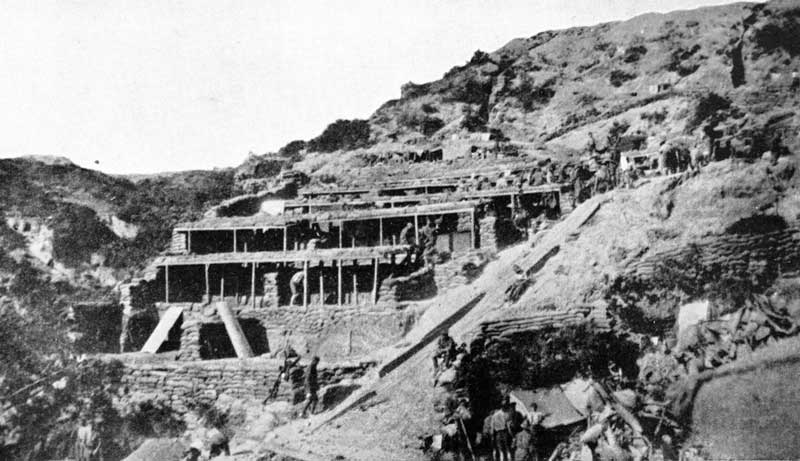
the Sphinx, studded with dugouts; originally a rest camp for the
Wellington Regiment, who saw some resemblance to their native
hillsides.
White's Valley.—A valley turning to the right off Shrapnel
Valley, north of McCay's Hill; named after Lieut-Colonel White, of the
8th Australian Light Horse.
Wine Glass Ridge.—A Turkish position opposite the Anzac right
flank.
Williams Pier.—A pier on North Beach.
"W" Hills.—A low ridge 112 metres high, about a mile due north
of Hill 60; shown on Turkish maps as Ismail Oglu Tepe, but better
known to the Anzac troops as the "W" Hills. When looking north from
Russell's Top, the spurs of this feature formed the line W, while the
re-entrants formed the shadows.
A Gallipoli Diary.
War has many phases. Within the compass of a volume such as this, it
is not possible to describe in detail all those events bearing on the
subject of the Gallipoli campaign. Neither is it possible—though the
temptation is great—to deal with the glorious achievements of our
silent Allied Navies, and the accomplishments of our heroic French,
British, Indian and Australian comrades.
The following diary has been compiled so that the bearing of all the
multifarious happenings:—naval, military, and political—may be seen
in their proper setting in regard to the campaign.
1914.
| June |
28. |
Assassination of Archduke Ferdinand at Serajevo. |
| July |
28. |
Austria declared war on Serbia. |
| |
30. |
Preliminary arrangements made in New Zealand for a volunteer
Expeditionary Force. |
| Aug. |
2. |
Germany declared war on Russia. Germans entered France.
Russians entered Germany. |
| |
3. |
Germany declared war on France. |
| |
4. |
Britain declared war on Germany. |
| |
5. |
"Goeben and "Breslau" at Messina, Italy. |
| |
7. |
The New Zealand Government cabled to the Imperial Government
offering the services of an Expeditionary Force. |
| |
8. |
British Expeditionary Force landed in France. |
| |
10. |
"Goeben" and "Breslau" reported at Constantinople. |
| |
12. |
Services of N.Z.E.F. accepted by Imperial Authorities. |
| |
15. |
Samoan Force of 1350 New Zealanders and four guns sailed. |
| |
28. |
German Samoa surrendered. |
| Sept. |
24. |
Main Body embarked on transports. |
| |
25. |
Force ordered to await a more powerful escort. |
| Oct. |
14. |
"Minotaur" and "Ibuki" arrived in Wellington Harbour. |
| |
15. |
Main Body again embarked on transports. |
| |
16. |
Convoy sailed from Wellington. |
| |
21. |
Arrived at Hobart. |
| |
22. |
Left Hobart for Albany. |
| |
28. |
Arrived at Albany. |
| Nov. |
1. |
Australian and New Zealand convoy left Albany. |
| |
|
British Naval defeat at Coronel. |
| |
2 |
Martial law proclaimed in Egypt. |
| |
|
First shelling of the Dardanelles Forts by French and British
Squadrons. |
| |
5. |
Britain and France officially declared war on Turkey. |
| |
9. |
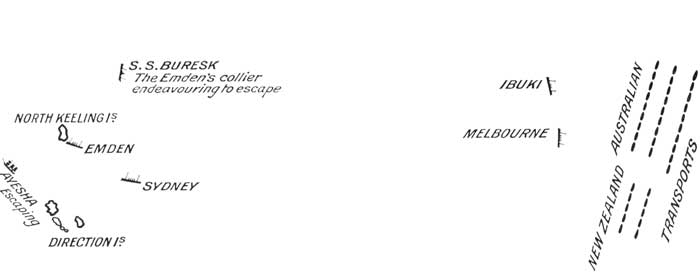
H.M.A.S. "Sydney" destroyed the "Emden" at the Cocos Islands. |
| |
13. |
Convoy crossed the Equator; the "Hampshire" joined the convoy. |
| |
15. |
Arrived at Colombo. |
| |
17. |
New Zealand transports left Colombo for Aden. |
| |
25. |
New Zealand transports arrived at Aden. |
| |
26. |
Combined Australian and New Zealand convoy left Aden for Suez. |
| |
28. |
Received wireless to prepare for disembarkation in Egypt. |
| |
30. |
Arrived at Suez. |
| Dec. |
1. |
New Zealand ships passed through the Suez Canal. |
| |
3. |
Commenced disembarkation at Alexandria. |
| |
4. |
First troop train arrived at Helmieh station for Zeitoun Camp. |
| |
8. |
German Naval defeat at the Falkland Islands. |
| |
|
Australian Light Horse Brigade and Ceylon Planters Rifle Corps
attached to N.Z.E.F. |
| |
12. |
British Section trained on Salisbury Plain left Southampton for
Egypt. |
| |
13. |
Lieut. Holbrook in BII. torpedoed the "Messoudieh" in the
Dardanelles. |
| |
14. |
Second Reinforcements left New Zealand. |
| |
18. |
Proclamation of a British Protectorate in Egypt; the Khedive Abbas
deposed. |
| |
19. |
His Highness Prince Hussein proclaimed Sultan of Egypt. |
| |
23. |
March of N.Z. Troops through the streets of Cairo. |
| |
24. |
British Section arrived at Zeitoun Camp. |
| |
25. |
Christmas Day spent on the Desert. |
1915.
| Jan. |
18. |
Division now styled the "New Zealand and Australian Division." |
| |
25. |
N.Z. Infantry Brigade ordered to Suez Canal. |
| |
26. |
Infantry Brigade left Zeitoun for Ismailia. and Kubri. |
| Feb. |
1. |
Advance parties 4th Aust. Inf. Bde. arrived at Zeitoun. |
| |
3. |
Turks attacked Suez Canal. New Zealanders engaged; one man died of
wounds and one wounded. |
| |
14. |
Third Reinforcements left New Zealand. |
| |
19. |
Naval attack on the forts at the entrance of the Dardanelles. |
| |
26. |
N.Z. Infantry Brigade returned from Suez Canal to Zeitoun. |
| March |
18. |
End of Dardanelles Naval attack. "Queen", "Irresistible" and
"Bouvet" sunk. |
| |
26. |
Third Reinforcements, consisting of 63 officers and 2417 other
ranks arrived at Zeitoun. |
| |
29. |
Inspection of Division by Sir Ian Hamilton. |
| April |
9. |
N.Z. & A. Division, less mounted units, entrained for
Alexandria. |
| |
10. |
First transports left for Mudros. |
| |
15. |
Transport "Lutzow" with Divisional Headquarters on board arrived
in Mudros Harbour. |
| |
17. |
Transport "Lutzow" with Divisional Headquarters on board arrived
in Mudros Harbour. |
| |
17. |
Fourth Reinforcements left New Zealand. |
| |
24. |
French, British, Australian and New Zealand transports left Mudros
Harbour. |
| |
25. |
French landed at Kum Kale. |
| |
|
British landed at Cape Helles. |
| |
|
A. & N.Z. Army Corps landed at Anzac Cove; 3rd Australian Infantry
Brigade forced a landing at dawn. |
| |
|
N.Z. Divisional Headquarters and details ashore at 10 a.m.; Auckland
Battalion all ashore by 12 noon; No. 1 Field Company N.Z. Engineers
and Canterbury and Otago Infantry came ashore during the afternoon. |
| |
|
Wellington Infantry landed during the night. |
| |
26. |
6 a.m. two guns of N.Z. Howitzer Battery landed and came into
action. |
| |
27. |
2nd Battery N.Z.F.A. landed at 3 a.m. |
| |
|
Heavy attack against centre and Walker's Ridge beaten off 9.30 a.m. |
| |
28. |
Portsmouth and Chatham Battalions (Royal Marine Brigade) arrived 6
p.m. |
| |
|
Heavy attack against centre and Walker's Ridge beaten off 9.30 a.m. |
| |
|
No. 2 Company Divisional Train arrived at night. |
| |
29. |
Heavy Turkish attacks all along the Anzac Line. |
| |
|
A Naval Brigade (Nelson and Deal Battalion) arrived at night. |
| May |
2. |
Turkish observation post destroyed at Lala Baba by New
Zealanders. |
| |
2/3. |
Our attack at head of Monash Gully failed. |
| |
3. |
Turk warship in straits fired on transports; "Annaberg" hit. |
| |
4. |
Australian attack on Gaba Tepe beaten off. |
| |
5/6. |
N.Z. Infantry Brigade and 2nd Australian Brigade left for Cape
Helles. |
| |
6. |
3rd Reinforcements arrived Anzac—sent down to Helles. Combined
French, British and Colonial Forces commenced attack on Krithia. |
| |
7. |
New Zealanders in support of 29th Division. |
| |
|
Sinking of "Lusitania" in the Atlantic. |
| |
8. |
Great attack on Krithia not successful. |
| |
10. |
Australians at head of Monash Gully attacked Turks, but withdrew. |
| |
12. |
N.Z. Mounted Rifles (1500 men) arrived at Anzac to fight as
Infantry. |
| |
|
Gen. Chauvel with 1400 men of the Australian Light Horse arrived. |
| |
14. |
H.M.S. "Goliath" sunk at mouth of straits. |
| |
|
Queenslanders made a sortie from Quinn's Post. |
| |
15. |
General Birdwood slightly wounded in the head at Quinn's Post. |
| |
|
General Bridges mortally wounded. |
| |
16. |
6-inch Howitzer with R.M.L.I. crew arrived in support of the
Division. |
| |
|
Machine Gun detachment Otago Mounted Rifles arrived. |
| |
17. |
2nd Australian Infantry Brigade returned. 3 guns of 2nd Battery
N.Z.F.A., man-handled up to Plugge's Plateau. |
| |
18. |
Heavy Turkish attacks. |
| |
|
German Taube flew over Anzac. |
| |
19. |
Turks fail to drive A.N.Z. Corps into the sea. |
| |
|
N.Z. Infantry Brigade returned from Helles. |
| |
20. |
Otago Mounted Rifles (dismounted) arrived. Turks first ask for an
armistice. |
| |
27. |
H.M.S. "Triumph" torpedoed off Gaba Tepe. |
| |
28. |
Late at night Turks fire mine in front of Quinn's Post. |
| |
|
Canterbury Mounted Rifles take "Old No. 3 Post." |
| |
29. |
Attack on Quinn's Post—Major Quinn killed. |
| |
|
Major Bruce, 26th Indian Mountain Battery killed. |
| |
31. |
Turk blockhouse blown up in front of Quinn's by two sappers. |
| June |
3. |
2nd Field Company, N.Z.E., arrived. |
| |
4. |
Slight advance made at Cape Helles. |
| |
|
Canterbury Infantry raided from Quinn's Post late at night. |
| |
5. |
Another sortie against German Officers' Trench opposite Courtney's
post. |
| |
7. |
Fourth Reinforcements arrived Anzac Cove. |
| |
|
Sortie from Quinn's Post night of 7/8th. |
| |
8. |
First Monitor appeared off Anzac. |
| |
10. |
Scouting parties of N.Z.M.R. driven back to No. 2 Post. |
| |
12. |
4.5 Howitzer taken from Howitzer Gully up to Plugge's Plateau. |
| |
21. |
French captured the Haricot Redoubt at Cape Helles. |
| |
28. |
A marked advance made in the Helles sector. |
| |
29/30. |
Turks again unsuccessfully endeavoured to drive the infidels
into the sea. The last Turkish attack on Anzac. |
| July |
2. |
Determined Turkish attack at Helles unsuccessful. |
| |
4/5. |
Another heavy attack beaten off the British at Cape Helles. |
| |
10. |
Turks at Cape Helles asked for Armistice to bury their dead.
Armistice refused. |
| |
11. |
N.Z. Hospital ship "Maheno" left Wellington. |
| |
12. |
General Masnou, commanding the 1st French Division at Helles,
mortally wounded. |
| |
31. |
200 men of the 11th West Australian Battalion took Turkish trenches
opposite Tasmania Post. |
| Aug. |
3. |
13th (New Army) commenced landing at Anzac. |
| |
5. |
Fall of Warsaw. |
| |
6/7. |
British delivered holding attack at Cape Helles. |
| |
|
Australians made heroic attack at Lone Pine, Quinn's Post and Russell's
Top. |
| |
|
Old No. 3 Post retaken and Table Top and Beauchop's Hill taken by
N.Z.M.R. |
| |
|
Damakjelik Bair captured by Left Covering Force. |
| |
7. |
New landing at Suvla Bay before dawn. |
| |
|
Rhododendron Spur in the hands of New Zealanders. |
| |
8. |
New Zealanders storm Chunuk Bair. |
| |
|
New Army remains inactive at Suvla. |
| |
|
Fifth Reinforcements reach Anzac and go into the firing line. |
| |
9. |
Ghurkas reach the Saddle between Hill Q and Chunuk Bair. |
| |
|
New Zealanders cling to the shoulder of Chunuk Bair; relieved at night
by New Army Troops. |
| |
10. |
New Army Troops driven from Chunuk Bair by Turkish counter attack. |
| |
11. |
Advance from Suvla definitely held up. |
| |
14. |
Sixth Reinforcements left New Zealand. |
| |
21. |
First attack on Hill 60. |
| |
|
Italy declared war on Turkey. |
| |
26. |
"Maheno" arrived off Anzac. |
| |
27. |
Battle renewed for the possession of Hill 60. |
| |
28. |
New Zealanders held on to and consolidate their position on Hill 60. |
| Sept. |
|
Sept. Troops go to rest camp at Sarpi. |
| |
19. |
Von Mackensen renewed attack on Serbia. |
| |
20. |
Bulgaria Treaty with Turkey announced, thus opening the Balkan
corridor. |
| |
29. |
British and Indian troops enter Kut-el-Amara. |
| |
30. |
10th (Irish) Division left Suvla for Salonika. |
| Oct. |
3. |
2nd French Division left Helles for Salonika. |
| |
7. |
Britain offered Cyprus to Greece. |
| |
9. |
Belgrade captured by Austro-Germans. |
| |
11. |
Lord Kitchener asked Sir Ian Hamilton the estimated cost of
evacuation. |
| |
12. |
Sir Ian Hamilton replied that evacuation was unthinkable. |
| |
14. |
In the House of Lords, Lord Milner and Lord Ribblesdale urged the
evacuation of Gallipoli. |
| |
15. |
Britain declared war on Bulgaria. |
| |
16. |
Lord Kitchener telegraphed recalling Sir Ian Hamilton. |
| |
17. |
Sir Ian Hamilton issued his farewell order. |
| |
20. |
General Munro, in London, received instructions to proceed to the
near east and take over command of the M.E.F. |
| |
23. |
Wreck of Marquette—10 nurses drowned. |
| |
30. |
General Sir Charles Munro first visits the Peninsula. |
| Nov. |
2. |
4th Australian Infantry Brigade arrived from Sarpi Rest Camp. |
| |
6. |
Nish captured by the Austro-Germans. |
| |
10. |
N.Z. Mounted Rifles arrived from Mudros Rest Camp. |
| |
13. |
Lord Kitchener visited Anzac. |
| |
17. |
Lt.-Col. Braithwaite, D.S.O., assumed command of N.Z. Infantry
Brigade. |
| |
22. |
Battle of Ctesiphen. |
| |
24. |
Period of silence ordered: lasted 72 hours. |
| |
|
Major General Russell took over N.Z. and A. Division. |
| |
26. |
Major General Godley assumed command of Army Corps. |
| |
27/8. |
Commencement of the Great Blizzard. |
| Dec. |
3. |
General Townshend besieged at Kut-el-Amara. |
| |
8. |
General Munro ordered General Birdwood to proceed with the
evacuation of Anzac and Suvla. |
| |
10/11. |
All sick, wounded, surplus troops, vehicles and valuable stores
removed. |
| |
12. |
Announced at Anzac that a winter rest camp would be formed at
Imbros. Surplus guns removed. |
| |
15. |
Detailed orders issued for the evacuation. |
| |
16. |
All ranks were warned of the impending operations. |
| |
19. |
The last night of the evacuation of Anzac and Suvla. |
| |
20. |
Evacuation of Anzac and Suvla completed by daylight. Troops
disembarked at Lemos. |
| |
21. |
Brig.-Gen. F. E. Johnston returned to Mudros and took over N.Z.
Infantry Brigade; Lt.-Col. W. G. Braithwaite proceeded to Egypt to take
over N.Z. Rifle Brigade. Col. E. W. C. Chaytor took over N.Z. Mounted
Rifle Brigade. |
| |
25. |
Christmas Day mostly spent at sea on transports returning to Egypt.
Troops transferred to Egypt between December 21 and 31. |
1916.
| Jan. |
9. |
Evacuation from Cape Helles completed. |
1918.
| Sept. |
29. |
Surrender of Bulgaria. |
| Oct. |
31. |
Surrender of Turkey. |
A Note by the Author.
Thanks are due, and are here tendered, to Generals Sir Ian Hamilton and
Sir William Birdwood for their most interesting forewords. They with
their authority and special knowledge, have said what might have been
difficult for a New Zealand officer.
I might also be permitted to say that from Sir James Allen I have
received most sympathetic encouragement. Any criticisms that I have
made appear without alteration, as the opinion of myself speaking for
the soldiers. My only aim has been to put the case before the people of
New Zealand as it occurred to the soldiers serving overseas.
The writing of this volume has not been easy. The records of the
New Zealanders at Gallipoli are far from complete, as Embarkation
Rolls, War Diaries and Returns of Casualties were kept by soldiers
who frequently became casualties; often the stress was so great
that the continuity of these records was broken. As the Company or
Regimental records box was sometimes lost altogether, it is difficult
to reconstruct the story. But by the aid of diaries, soldiers' letters,
personal experience and the willing assistance of old comrades, this
story of the New Zealanders at Gallipoli has been written. It would
be easier to write a history of the Crimean war, for the soldiers who
fought at Inkerman are nearly all dead, but many of the veterans of
Gallipoli happily survive and are keen critics. I can only throw myself
on their charity.
For considerable help, particularly in the later chapters, I am
indebted to Major Wallingford, M.C., Lt.-Colonel Powles, C.M.G.,
D.S.O., Lt.-Colonel Grigor, D.S.O., Major Lampen, D.S.O., Major Blair,
D.S.O., M.C., and Colonel Findlay, C.B.; to my thousand and one other
helpers—distinguished generals, unknown soldiers, and harassed
typists—I can only say "Thank you!" They will understand that a record
of their names would be almost a nominal roll of the Main Body and the
Staff of Base Records.
The photographs are unique in that they were all taken by soldiers
serving in the line. Working on my own collection as a basis I was
fortunate enough to secure those of Captain Boxer, N.Z.M.C., and
Sergeant Tite, N.Z.E., whose beautiful photographs will be found
duly acknowledged. Just before going to Press I received a number of
photographs taken by members of the Canterbury Mounted Rifles, in
December 1918, and to Colonel Findlay and Captain Douglas Deans special
thanks are due. Wherever possible photographs have been acknowledged,
but some of which I cannot trace the owners are included. From these
I shall be glad to hear, so that acknowledgment may be made in future
editions. It is only right to say that whenever I have asked a soldier
or a sailor for permission to use photographs, that permission has been
freely given. In not one case has there been a refusal—for that is the
way of the men of Anzac.
My rough maps and sketches have been transformed into works of art by
A. E. West, Esq., and W. Bedkober, Esq. All distances in the Anzac area
should be measured on the large folded map at the end of the volume.
I cannot say how indebted I am to J. Jeffery, Esq., of Anderson's Bay,
Dunedin, for valuable suggestions, and to W. Slater, Esq., who has
helped me with the proofs.
Waiwera South,
November, 1919.
AUCKLAND, CHRISTCHURCH, DUNEDIN.