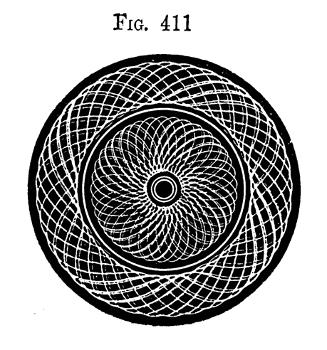
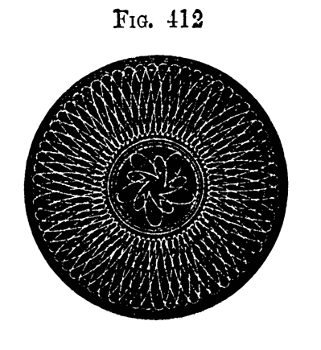
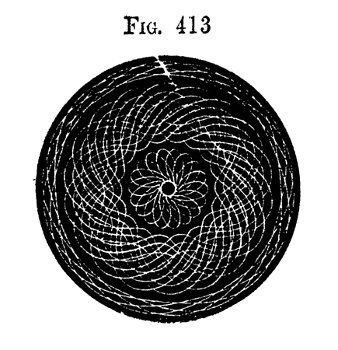
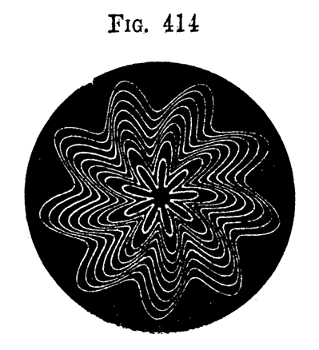
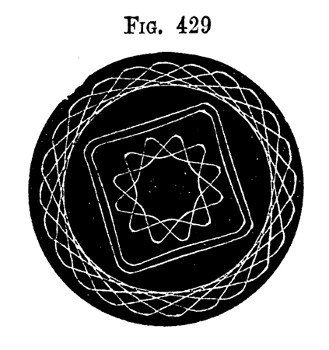
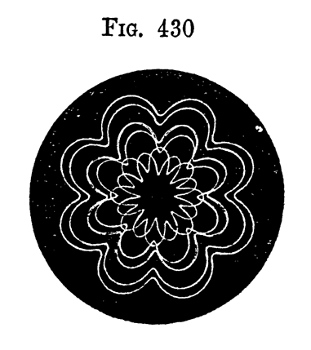
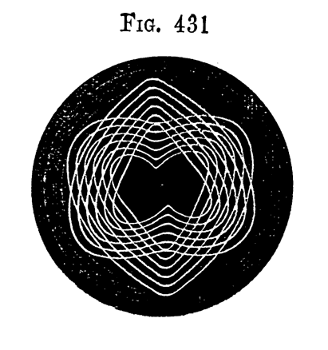
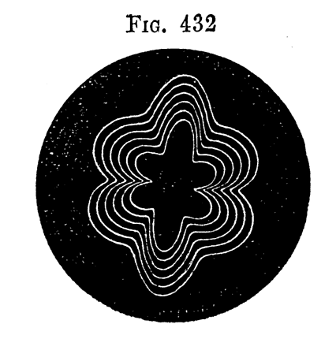
THE LATHE AND ITS USES. — Chucks. — Hand Turning of Wood. — Hollowed Work. — Cutting Screws. — Hollowing Out Soft Wood. — American Scroll Chuck. — Metal Turning by Hand Tools. — Overhead Apparatus. — Self-acting and Screw-cutting Lathes. — Wheel Cutting in the Lathe. — Fret Saws to Mount upon the Lathe Bed. — Turning Spheres. — Hoblyn's Compound Slide-Rest. — Chucks with Slides and Compound Movements. — Turning Ovals, etc., by Means of a Template. — Eccentric Chuck. — Curiosities. — Grooving and Mortising Small Work. — Ornamental Turning. — The Eccentric Cutter Frame. — Segment Engine. Fig. 287 . — Holtzapffel's Rose Cutter Frame. — Universal Cutter Frame. — Rose Engine. — Rectilineal Chuck. — Epicycloidal Chuck. — The Spiral Chuck ( Fig. 319 ).
The Lathe has now for many years been steadily making its way from
the workshops of our leading artisans to those of the amateur and
lesser stars of the mechanical world. This is but the natural result
of the various additions and improvements which have been introduced
into its construction from time to time. The unworkmanlike and
clumsy tool of olden days has long since been superseded by one of
admirable finish and perfect aptitude for its designed uses; and
now that its construction is no longer dependent upon the skill of
the workman alone, but upon machinery moving with the precision of
clockwork, the fitting of the various parts is accomplished with
the greatest ease and certainty. The sale being thus extended, the
price has considerably diminished—the monopoly enjoyed by one or two
makers no longer exists; and there are few of a mechanical turn of
mind who cannot now provide themselves with a lathe suited to their
requirements.
Nevertheless, the adepts in the art of turning are by no means so
numerous as might be expected, and, among amateurs especially, it is
rare to find work executed in first-rate style by simple hand tools
requiring skill and practice in their use, so that it not unfrequently
happens that a workman who can turn out exquisite specimens of ivory
carving and ornamental lathe work, is but a fourth-rate hand with the
gouge and chisel.
But however beautifully executed such ornamental work may be, the
credit is rather due to the tool than the workman, and a
well turned box with accurately fitting cover may bespeak more skill
in handiwork than the above elaborately designed specimen.
Moreover the one requires lathe fittings, which are not always to be
had unless the purse is well filled, whereas the general mechanic
(amateur or professional) can provide the tools needed for the other;
hence we propose first of all to give some practical hints on plain
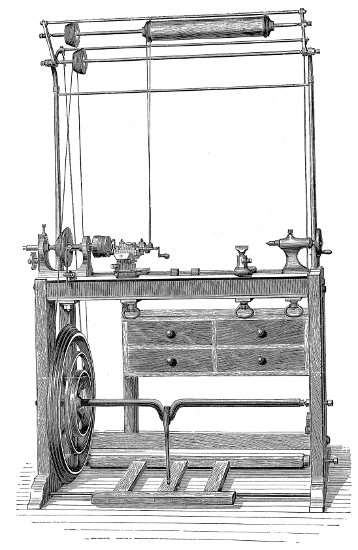
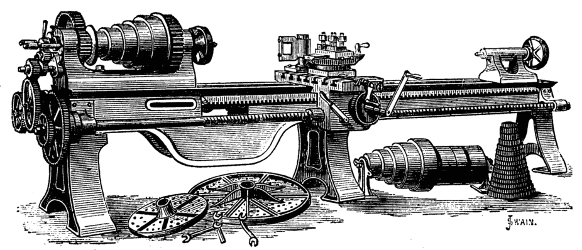
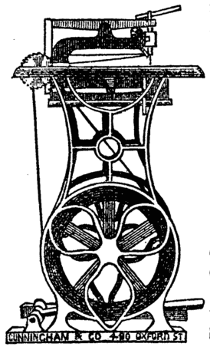
hand turning of wood and metal. The ordinary form of foot lathe is
well known and requires no special description, it is represented in
the frontispiece of this volume. There are, however, certain points
of detail in its construction, to which it is necessary to direct the
reader's attention.
First and foremost comes the mandrel, of which there are several
patterns, according to the special purpose for which the lathe may be
intended.
Now of whatever form it may be made this is the essential part of
the lathe, and must run with the utmost truth in its bearings.
Imperfection here will be imparted to all work executed upon it, and
accuracy in this part alone will make up for any slight defects that
may occur in less important parts of the machine.
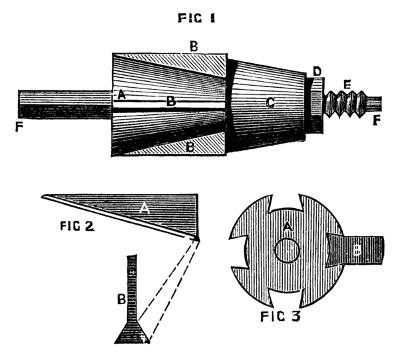
For ordinary work in wood alone or in brass the best form is
represented in Fig. 1.
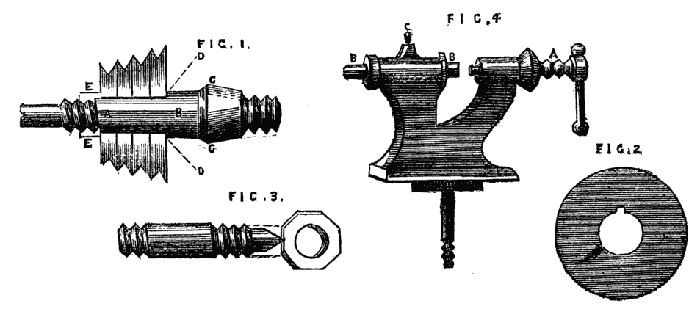
Figs. 1,2,3,4.
The part a, b, should be cylindrical, with a feather let in to fit
a slot in the pulley shown in Fig. 2. This pulley, whether of hard
wood or metal, is thus slipped on the mandrel as far as the collar
d, d, and a nut e, screwed up tightly at the back of it, fixes
it securely in its place, from which it may be moved if requisite
and replaced without fear of being out of truth. This cannot be done
if the mandrel is squared at a, b, and the pulley driven on with a
hammer, as commonly done by inferior workmen. The part c, is made
conical, to fit a hardened steel collar of similar shape. The angle
of this conical part is of some importance, as if it is too small the
mandrel is apt to jam and stick tight in its bearings. 35° will be
found to work well. With regard to the length of this conical part,
opinions differ considerably, but it must be remembered that friction
is independent of the extent of the bearing surfaces and depends
on the force with which they are pressed together (in the present
case it depends on the tension of the lathe cord and the weight of
the material to be turned), so that a tolerably wide margin may be
allowed in this matter. Practically the question is decided by the
thickness of the casting of the poppet head, which is regulated by
the required strength and size of the lathe. The collar is sometimes
of hardened steel, sometimes of brass. The latter would theoretically
cause less friction than the former, but practically nothing can beat
a well finished collar of hard steel. Collars of this material made by
the original Holtzapffel two generations back are now as good as ever,
perhaps even better. The centre, which screws up against the left-hand
end of the mandrel, should be of the form shown in Fig. 3—a plain
cylinder with a screw cut at each end to receive clamping nuts. The
central part is rather larger than the screwed parts, and passes truly
through the poppet head. This form is much better than a simple screw
with points, as the latter is not likely to keep the line of centres
in being screwed up into its place.
It will be found of great convenience to have the screw on the nose
of the mandrel (and indeed all screws about the lathe) of standard
Whit worth pitch, as taps for the chucks are thus readily obtained,
and nuts and screws of the various sizes may be also procured to
remedy breakages and losses. Upon this subject, however, we shall have
occasion to treat more fully when we pass from the description of the
lathe itself to the work that is to be accomplished by its aid.
The only form of back poppet that need be particularised is that made
with cylinder and leading screw. The simple pointed screw passing
through the lathe head tapped to receive it, not only requires
no special description, but it is only calculated for lathes of
the commonest design, as it is seldom that the line of centres is
accurately maintained by the point at every part of the revolution
of the screw. Moreover, the latter soon works loose in the poppet,
and for anything like accurate work becomes speedily useless. The
cylinder and pushing screw is indeed far superior to the form just
alluded to, and where cheapness is an object it has its advantages
over the first-named and best form. It is represented in Fig. 4. The
cylindrical part is shown at B, and may have at one end the usual
point, and at the other a small conical hole or hollow centre. It may
then be reversed in its bearings at pleasure, or other cylinders with
different shaped ends can be substituted, as may be found convenient.
Of course the pushing screw A is for the purpose of advancing the
cylinder, which is clamped by the small screw at C. The cylinder and
leading screw are shown in detail in Fig. 5, which is the poppet
head bored throughout to receive the spindle or cylinder A. At the
right hand this bore is enlarged to form a recess, B, to receive
the head of the leading screw, C. This screw is generally made with
a left-handed thread, so as to withdraw the back centre when turned
from right to left. The spindle A, A is bored, and a left-handed female
thread is cut from end to end—this however is turned off at the place
destined to receive the movable point or centre, and a hole slightly
tapering is cut, or if preferred a cylindrical hole is made and tapped
for the same purpose. The spindle has also a slot cut from end to end,
into which a screw enters from the poppet, preventing the spindle from
turning round while the internal screw is revolving by means of the
small wheel and handle fixed to its right hand end. The spindle is
now put in its place, the screw inserted and turned till the head or
flange, C, rests in the recess before mentioned—a flat plate, F, is
then attached to the back of the poppet by three or four screws, the
head of the leading screw passing through its centre; the small wheel
is then attached and the whole is complete.
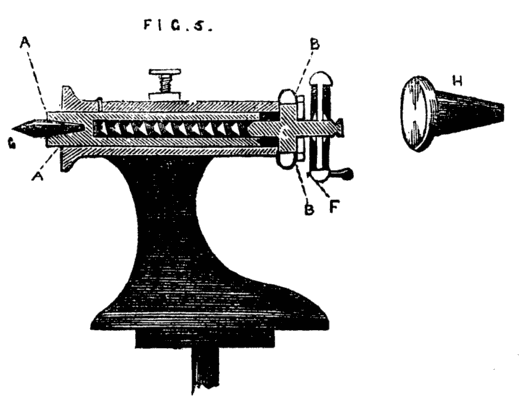
Fig. 5.
It is evident that by turning the wheel the internal screw is put
in revolution, and as it is prevented by its flange from assuming
any motion in the direction of its length, the movable cylinder will
instead be withdrawn or thrust forward.
This form of poppet is the best that can be adopted and is of general
use in all first-class lathes. In addition to the movable point g, a
flange similar to H should be fitted. This will be found of great use
when the lathe is used for drilling, the piece of work resting against
it, while the pressure is regulated by the leading screw.
There are, in addition to the flange and pointed centre, other pieces
of apparatus that can be substituted, as occasion may require, and
these will be hereafter described in this series. With regard to the
common rest for hand turning a lengthened description is unnecessary.
The T or tee should for wood turning be of the form shown in Fig. 6 at
A. It is often made as B, which is a very inconvenient pattern, as the
cross piece on which the tool rests cannot be advanced sufficiently
close to the work if the latter exceeds a diameter of two or three
inches. For metal turning the top of the rest should be flat, and
about one inch broad, as the heel of the hook tools used for turning
iron must be able to take a firm bearing upon its surface. Sometimes
a plate of brass is riveted on the flat top, as the tool takes a
firmer hold on this metal, and when the latter becomes defaced and
channelled it can be renewed without the cost of a new casting in
iron. The turner should be provided with two or three tees for metal
and for wood,—one may be long enough to have two legs and require
two sockets, as shown at C. This is convenient in turning long pieces
of wood,—a very short tee, not more than an inch in length, should
also be provided, and if one tee is specially kept with a very level
and smooth edge, it will be found of great advantage in chasing
screws—indeed the latter work can hardly be managed at all if the top
of the rest is damaged and uneven. The next part requiring description
is the boring collar, without which even a hand turning lathe can
hardly be considered complete. This boring collar is intended so to
support one end of the work, instead of its being held by the back
centre, as to enable the workman to get at the end of it for the
purpose of drilling it. Suppose for instance the work in hand is a
tool handle, and that it is so far finished as only to require the
hole for the reception of the tang of the tool. If this is bored by
hand with a gimlet, it is seldom that the hole will be truly in the
axis of the piece, but when this is done in the lathe by the help
of the boring collar the bore will be truly central, and the tool
when in place will fall in the same line with the handle. This will
conduce to the correctness of the work in hand more than the amateur
or other workman might suppose, and a row of tools thus truly handled
and in good condition generally bespeaks an efficient and careful
artisan. There are several plans for boring collar of nearly equal
efficiency, and we shall describe one or two of the most common, and
also one invented by the author, and which, if carefully made, is of
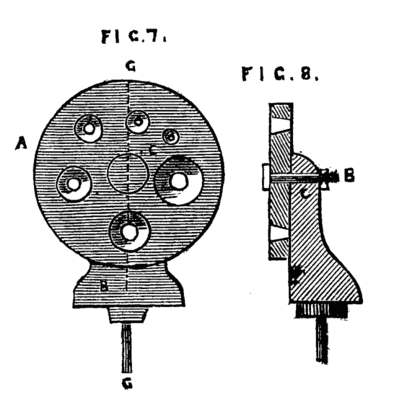
great service. Fig. 7 represents a poppet head, B, which is but half
the height of the other poppets of the lathe—a side view of this is
shown at B, Fig. 8. Near the top of this poppet is a hole through
which passes a bolt C, by which and its nut the circular plate A can
be securely clamped in any desired position, as it revolves freely on
the bolt as a centre pin. This plate is bored with a series of conical
holes, which are so arranged that their respective centres will be in
a line with the centres of the mandrel when any one of them is brought
into a position corresponding with the line c, c. The hole thus
brought into position for use (having been selected according to the
size of the work to be bored), takes the place of the back centre;
the end of the work rests in the cone, which is greased or soaped to
reduce friction, and the rest being fixed at the other side of the
boring collar, the drill can be readily used, and the bore afterwards
enlarged if necessary with any convenient tool. This boring collar is
generally made of iron, but a substitute of hard wood will frequently
serve the purpose, and can be made by the amateur, who may be unable
to obtain one of more durable material. If made of wood the best
unguent will be soap or black lead, such as is used for grates, or a
mixture of the two. This black lead or plumbago (it has no lead in its
composition) will always be found serviceable where wood works upon
wood, and also to give a smooth surface to wooden patterns for casting.
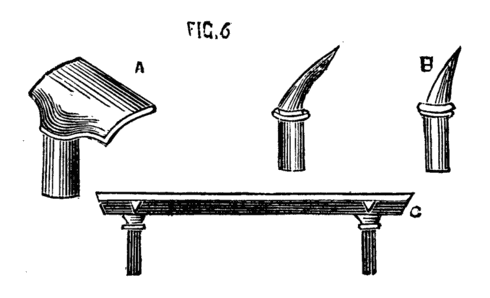
Fig. 6.
Figs. 7,8.
Where cost is an object, a simple substitute for the boring collar
is frequently made by the ordinary workman by a piece of board one
inch thick, shaped like Fig. 9, with a single hole of the size most
generally required; and the work is then fitted to the boring collar,
instead of the latter to the work. In turning tool handles, for
instance, where a few dozen are required all of the same size, or
nearly so, a device of this kind, which can be made in a few minutes,
is sufficiently effective. This form has been modified in two ways,
and either will be found convenient. In the first, the conical hole
is made of the largest size likely to be required, a set of boxwood
plugs are then turned to fit this hole and are themselves bored in a
similar way to suit various sizes of work. The form of these plugs is
shown in Fig. 10, which is a side sectional view, and at B, where the
same is shown in perspective. Two small screws or pins b, c, Fig. 10,
fitting into the holes a, a, Fig. 9, prevent these flange-shaped
plugs from turning round in the board as the work revolves. The
pattern of A, Fig. 9, may be varied, and is better made of hard wood,
and of a form which will afford a good bearing upon the lathe bed.
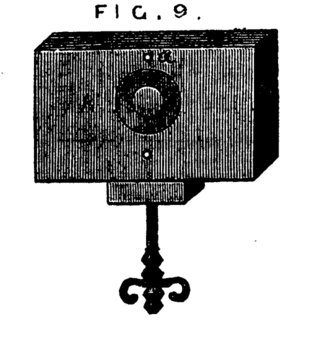
Fig. 9.
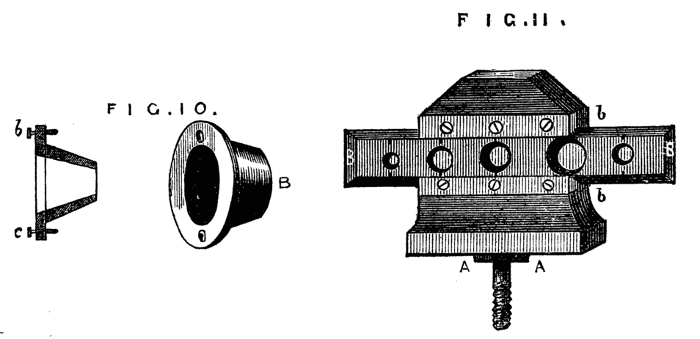
Figs. 10,11.
The second modification is more difficult to make, but equally
effective. It is shown complete in Fig. 11. This form, arranged by
the writer, has many advantages over the two last-named, and is very
serviceable. A is the poppet, of the full height of the ordinary
lathe heads, or a couple of inches higher. B, the slide forming the
support of the piece to be bored. The form of the poppet without this
attachment is shown in Fig. 12. If for nice work it should be made
of metal and the face of it planed, but for general purposes hard
wood will suffice. b, b, Fig. 11, are two pieces of brass forming a
groove or guide in which a slide B, with dovetailed edges is fitted
to work. This slide is bored, like the ordinary collar, with conical
holes of different sizes, and should be made of metal and planed on
back and edges. Over each hole is a mark, and this is to be brought to
a similar mark on the face of the poppet. The plate is then clamped
in position by a screw at the back of the poppet. One or more of such
slides may be fitted at pleasure, and in case of wear or damage these
are the only parts requiring to be renewed.
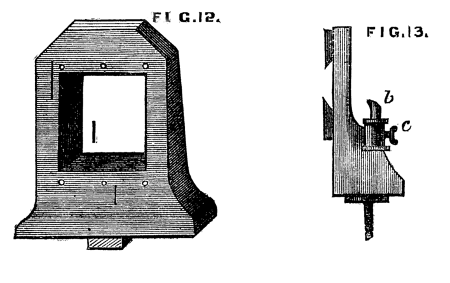
Figs. 12,13.
It is a good plan to arrange a socket and tee of a rest as b, c,
Fig. 13, at the back of this boring collar, especially as the position
of the tool will be always the same, so that the rest may be a
permanent part of the poppet. There is sometimes a difficulty with the
ordinary form of boring collar in advancing the rest T sufficiently
near the work (the foot of the poppet, and that of the rest preventing
it, by coming in contact.) There is another modification of boring
collar, forming at the same time a guide for the drill, which in
slender work, where the tool is long and fine, becomes almost a matter
of necessity.
This consists in making such a guide cone as mentioned and shown
in Fig. 10, B, but with a continuation containing a smaller hole
for the drill, as Fig. 14. Both this and the other shorter cones
above-mentioned may be made to screw into the poppet A, Fig. 9,
instead of being kept in place by the pins at a, a, of that figure.
In that case however the hole in the poppet must be cylindrical and
only used as a support for the cones themselves. In addition to
the use of these boring collars already alluded to, they serve for
the purpose of turning up the points of screws like those of lathe
centres. These are first formed between centres with carrier chuck,
the back poppet is then removed and the extreme point fitted through
one of the holes of the boring collar and the marks of the centre
turned off.
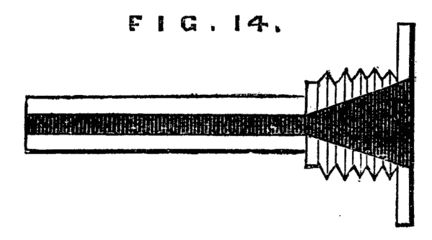
Fig. 14.
Another useful adjunct to the lathe is the back rest for supporting
long and slender articles, which would otherwise bend under the
pressure of the tool. The ordinary and simplest form is shown in Fig. 15,
and this is of general use with brush handle makers and others
whose work is confined to a few sizes and shapes only. A better form
is shown in Fig. 16. A support of wood or metal shaped like A is
clamped to the lathe bed. Through the upper part the slide B passes
and is wedged up so as to support the work—or the socket of a lathe
rest may be arranged to take the upright part A, which must then be
rounded, as shown at C.
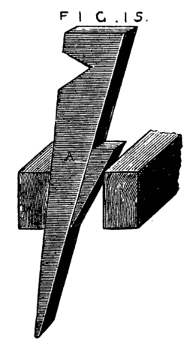
Fig. 15.
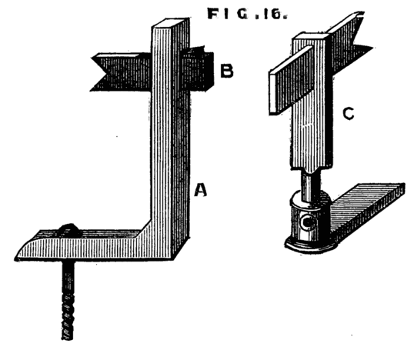
Fig. 16.
A modification of the latter, communicated to the English Mechanic,
is shown in Fig. 16A. Its construction and mode of application is
sufficiently evident without a detailed description. Fig. 16B is
another form made in metal. It consists of two similar plates with a
triangular opening A, through which the work is passed, and which has
an oval slot D, by which the apparatus is secured to the short poppet
of the boring collar. Between the two plates slides a third, partly
visible at C, which can be clamped by a screw at B, this screw also
serving as a stud by which the plate may be moved. The work is allowed
to take up its own bearing in the triangular opening as it revolves in
the lathe. The clamping screw of the poppet is then secured, and the
centering thus made certain. The plate C is then made to descend so as
to touch the work, and clamped in that position. This is a very good
central support for long slender articles.
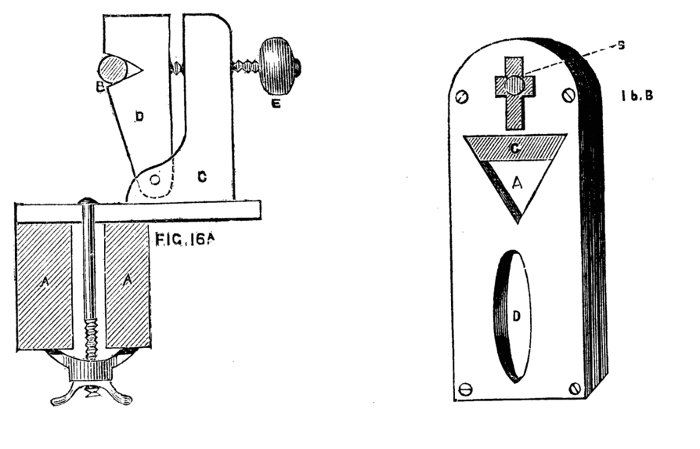
Fig. 16A,B.
There is a plan practised by German turners by which the back rest
is in a measure superseded, and which may be mentioned here. It is
simply the peculiar method of using the left hand. This is placed on
the piece to be turned so that the fingers partly encircle the work
while the thumb rests in the hollow of the gouge, or upon the end of
the tool. The fingers thus form a back rest and keep the work pressed
against the cutting edge, which is further steadied by the thumb. As
the tool traverses the work the left-hand accompanies it, and with
a little practice a ramrod or similar long and slender article may
be readily and accurately turned. This position is shown in Fig. 17,
and though the novice will find it difficult to work thus, it is well
worth the trouble of mastering, as the method once acquired will be
found of very great service.
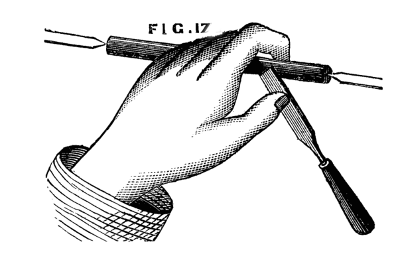
Fig. 17.
We have now described more or less in detail the principal parts of
the lathe as adapted for hand turning. Before we dismiss this part
of the subject, however, it will be necessary to say a few words
respecting the bed and lower fittings, the flywheel, treadle, and
their adjuncts.
Beyond question the iron bed, planed as it now is at a moderate price,
by machinery, is the best that can be adopted, especially if it is
intended eventually to fit up the simple tool with slide rest and
superior apparatus. Nevertheless, the pocket must in this case also
frequently decide the question of material. If wood is preferred by
necessity or otherwise, it should be hard wood, beech, or Spanish
mahogany, unless it is proposed to plate the surface with iron. This
latter plan costs little and, besides stiffening the bed, it prevents
the wear and tear caused by the constant shifting of the back poppet
and rest. A flat strip of iron one inch or an inch and a half wide
can be picked out from the stores of any village blacksmith straight
and level as it came from the rolls of the manufacturer. Selecting a
piece of the required length and breadth, the eighth of an inch thick
or rather more, the purchaser will have holes drilled and countersunk
at intervals of nine or ten inches, to receive ¾-inch screws.
These strips will have to be laid upon the top of the bed, at its
inner edges; they need not be let in flush with the surface unless
appearance is studied.
They must then be screwed down firmly, and by means of a file worked
by both hands up and down their length (not across them) a good
surface may be readily obtained. If the iron is let into the bed this
filing will abrade the wood work, which is the reason why we prefer
screwing it on the surface. This method produces a very excellent and
durable lathe bed, and it will be free from much of the tremor which
is so disagreeable while working upon a lathe entirely of cast iron
unless the bed of the latter and the standards are more substantial
than is usual with small lathes.
The standards supporting the axle of the fly wheel and bed may in like
manner be of wood or iron. Even when the bed is of iron these may
be of hard wood, although it is customary to make them of the same
material as the bed. If of beech, oak, or mahogany, as in some of
Holtzapffel's best lathes with iron beds, the tremor before alluded to
will be considerably lessened. Iron is nevertheless very neat, and is
quite the fashion with the majority of makers, but is too often faulty
in respect of solidity.
The standards as a rule are too slight, an elegant pattern being
studied to the sacrifice of substance and weight, The bed and stand of
a lathe cannot be too strong and stiff.
Respecting this matter of stiffness and solidity we seldom find it
sufficiently considered, and, even with practical workmen, a defect in
this particular is more frequently acknowledged and put up with than
remedied, although the comfort of a steady lathe is beyond question,
to say nothing of its superiority when good workmanship is studied
(as it always should be). The old French lathes made in the form of
a thick table with four stout legs, forming the bed and back-board,
are by no means to be despised as patterns; and instead of the usual
method of making but one standard at end of the bed, there can be no
question that two additional ones add considerably to the stability of
the machine.
The fly wheel should be sufficiently heavy and have three speed
grooves on the rim and two additional ones to produce a slow motion,
which is required for turning metal. The latter may be worked with
ease in this way when the article to be turned is small, but if
heavy work is likely to be encountered the back geared lathe, to be
hereafter described, must be substituted, and the slide rest will then
also replace the hand tools. The crank axle is generally supported by
two centre screws, the points being hardened, and also the ends of
the axles, which are accordingly made of steel, and the holes for the
centre screws neatly drilled and countersunk.
This is however not the most perfect method, and as we are speaking of
better class lathes, as well as those of more common and cheaper make,
we must by no means omit to speak of a very superior way of fitting
the crank axle. The latter must be turned at both ends, the wheel
bored and slipped on, and keyed in its place.
Two wheels of brass about two inches diameter, must then take the
place of the centre screws. These are called friction wheels, and they
must be placed sufficiently near each other to support the end of the
axle between them, as shown in Fig. 17B, a and b. A pair of these
must be thus fitted to each standard, and after the axle is placed in
position a third may be placed above it to prevent the lathe cord from
lifting the axle out of place by its tension. The axle and friction
wheels will thus work together with an exquisitely smooth rolling
motion—there will be no tendency to thrust the lathe standards apart
as must result from tightening the ordinary centre screws, and the
friction of the axle on its bearings will be reduced to a minimum.
Any person acquainted with the use of the lathe may readily fit up
these friction wheels, and the time and trouble so expended will be
amply repaid by the superior ease with which the lathe can be used. We
may say the same of the chain and eccentric, which can replace with
similar advantage the crank and hook in ordinary use.
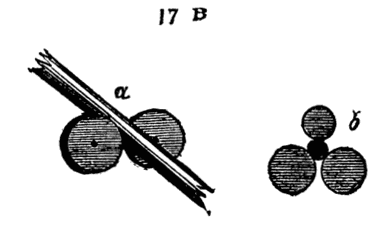
Fig. 17B.
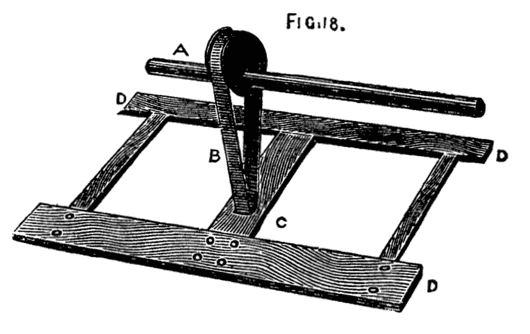
Fig. 18.
For the latter the following arrangements are necessary. A is the
eccentric keyed to the crank axle, and may be either in the middle
of the same or, as in Muir's patent lathes, at one end outside the
standard. Around it passes the endless flat chain B (known as crank
chain). This also passes round a roller in the treadle shown at C.
This chain does not act as a mere link, but when the lathe is in
action it moves round and over the eccentric and treadle roller. The
motion of the whole is smooth and regular, and, what is almost as
important, noiseless. In Muir's and other lathes the crank chain
is used without the eccentric, being applied to the crank instead.
Perhaps there is not much to choose between the two, but no one who
has studied the eccentric and observed its exquisitely gentle and
smooth motion in an ordinary engine can have failed to be struck by
these valuable qualities. It must however be remembered that its throw
is half that of a crank of the same eccentricity and the latter will
have the advantage in power size for size.
In whatever position the lathe may be set up let the rise of the
treadle be moderate. It is exceedingly disagreeable to work at a lathe
where the rise of the foot board is so great as to bring the knee into
contact with the lathe bed, a consummation not infrequent in country
made ones.
This is only to be escaped by giving up a certain portion of power.
Let A, B, Fig. 19, be the line of the treadle when at rest; c,
the crank. To gain power we should let part A, E, be longer than E, B,
as in the sketch. But let this arrangement be made, and when the
crank is at its highest point, the line G, B, will show the position
of the treadle and foot board. Hence this kind of leverage is not
practicably available to any extent, and the length taken from foot
board to link may with advantage be even less than that from link to
the axle on which the treadle works. In lathes, of all machine tools,
it is essential that the workman should be able to stand easily, that
the movements of the leg and body should not be communicated to the
tool, the play of the treadle and such items of detail being of more
consequence than might at first sight appear, and any method tending
to diminish friction, vibration, and noise is well worth consideration
in planning this machine.
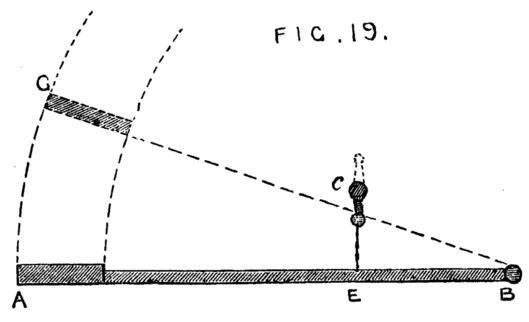
Fig. 19.
We may now suppose the reader the happy possessor of a well made foot
lathe, long or short in bed, high or low in poppet, according to his
need, but, of whatever size, carefully made and firmly fixed in a
well-lighted place, and if possible on the basement floor—an upstairs
workshop is objectionable owing to the certain vibration of a boarded
floor. He will now require certain chucks and tools, many of the
former of which he will have to make for himself.
No lathe can be considered well fitted until it is supplied with a
large number of chucks, by which strange term are signified the
various appliances for fixing to the mandrel the article to be
turned. When it is considered how varied are the forms which present
themselves to the turner, it may readily be conceived that much
ingenuity has to be exercised in contriving methods for mounting his
work in the lathe; and when in addition to variety of form, variety
of size has to be taken into consideration, it is plain that a
large assortment of chucks is a necessary item in the workshop of the
turner. A vast number of these chucks are of necessity made of wood,
as required, and such wooden ones are altered from time to time to
suit different-sized work, till they eventually become so completely
used up as to be only fit for the fire. In addition, however, to
these, there are certain chucks of metal (chiefly brass or gun metal)
which should always be ordered with a lathe, or fitted to it before
any work (even the making of wooden chucks) can be satisfactorily
accomplished. The first of these, is represented in Fig. 20, the part
A, screws to the mandrel; while the work is attached to the taper
screw B. The use of this chuck is to hold short pieces or flat discs,
which allow of a hole in the centre and require to be turned on the
face. It is only used for wood-work. This is the chuck to be selected
when it is desired to make a wooden chuck. A piece of sound wood
being chosen of the requisite size, and roughly rounded by the axe or
chisel, a hole is made in one face by a gimlet rather smaller than
the tapering screw. The piece is then firmly screwed to the latter,
the opposite end dressed with gouge and chisel, and the rest being
placed across the end, a hand-drill for wood is brought to bear upon
the piece. The hole thus made in the centre is then enlarged by any
convenient tool until its diameter is only a little less than that of
the screw cut on the lathe mandrel. An inside screw tool is then made
use of to cut a thread of the same pitch as that of the mandrel, or a
tap of similar size and pitch screwed into it (the former is the best
but most difficult method to a novice), the piece detached from the
taper screw chuck, which is removed, and the wood attached to the nose
of the mandrel on which it may now be accurately fitted and finished
to the requisite form and hollowed out or otherwise, as may be
necessary. Numberless articles may be in a similar manner turned upon
the above chuck such as the bottoms of candlesticks, ring or other
stands, bread-platters, small wheels, and so forth; it may therefore
stand as number one of these adjuncts to the lathe.
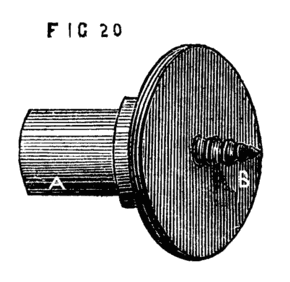
Fig. 20.
Fig. 21 is the face plate, another most serviceable chuck of almost
universal application in such work as surface-turning and boring, and
where a hole in the centre is inadmissible. To this belong various
dogs or cramps, a few forms of which are shown at a, b, c, d.
These hold the work firmly down to the surface of the plate, being
tightened from behind by screw nuts. It will be seen that there are
four slots and numbers of holes in the face plate, some of the latter
being tapped for screws. These slots and holes may be increased in
number, and some of the latter may be square instead of round, and
the cramps may be of all shapes and sizes, because sometimes it may
be required to hold down a flat piece of brass the eighth of an inch
thick only, and the next job may be to hollow an irregular block of
wood of three or four inches in thickness, or it may be necessary to
bore out the boss of a wheel, or to turn the rim—all of which, and a
hundred others, are cases in which the aid of the face plate will be
in requisition.
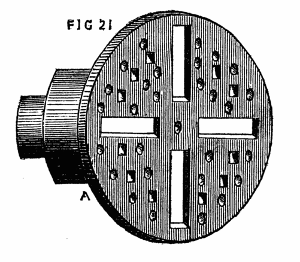
Fig. 21.
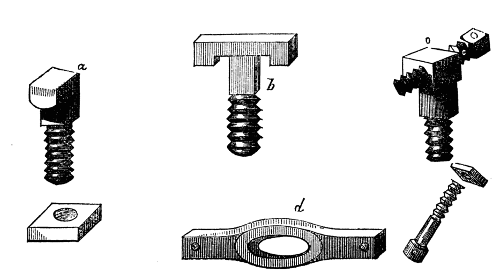
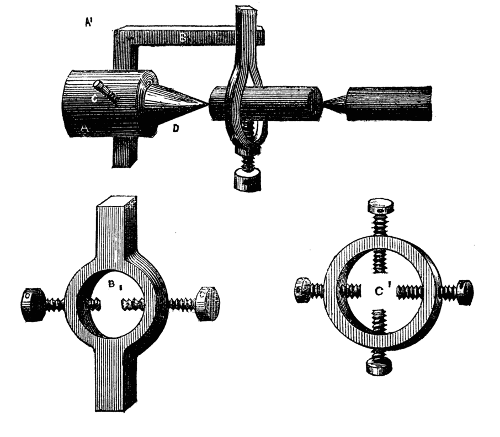
Fig. 22 is the chuck specially used for turning rods of metal. It
consists of two parts, the body A, which screws to the mandrel, and
the piece B, which passes through a slot and is clamped by a small
screw at one side c. To these must be added the carrier which is
of such forms as A1, B1, C1. Above is shown a rod of metal to be
turned with this chuck in position for use. Of this we shall have to
speak again when we arrive at the subject of metal-turning. There
should be several sizes of carriers kept in stock, from ¼in. in the
largest part of the ring to 2in. or 3in., or even much larger for
heavy work. The amateur will, however, scarcely need these larger
ones. The usual method of making the wood-holding chuck for work that
is to be also supported by the back centre, is to have a socket cast
like Fig. 23, C, with a central hole to take the fork A, which is held
in place by a set screw. This socket is useful for other purposes as
it will hold short pieces of iron to be turned, but the fork is far
inferior for general work to the piece b; this is made of iron, and
the end of the cross (against which the wood to be turned comes) is
sharpened but must not be too sharp. The end of the piece of wood
has then two saw-cuts made at right angles to each other into which
the sharpened edges of the cross fall, Fig. 23 D, and the whole will
turn together without any chance of slipping. It often happens, when
the ordinary fork is used, that if the tool chances to hitch in the
work, the latter is either thrown quite out of the lathe, or the
centre of the fork retains its place, while the other two points slip
and score the work. This can never happen with the form B, which is
the most reliable pattern that can be devised for work of this nature.
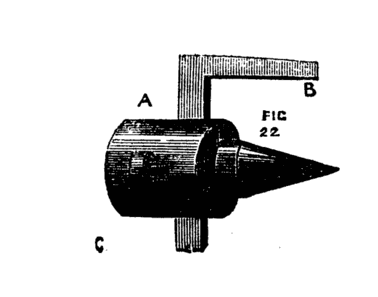
Fig. 22.
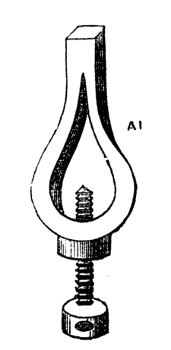
Fig. A1.
Figs. B1, C1.
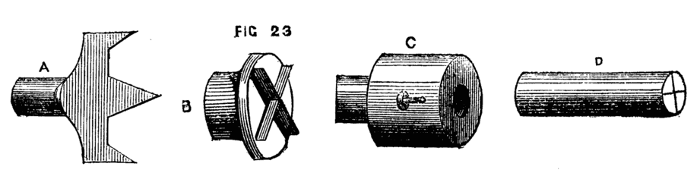
Fig. 23.
Fig. 24 is to some extent self-centering. A piece of wood hollowed out
conically has three nails, or three-square saw-files so placed within
the cone as to present three sharp edges inwards. Any piece of wood,
if not too hard, will, if placed with one end in the chuck, while the
back centre is screwed against the other, centre itself in some part
of this cone, and, being at the same time held by the three sharp
edges, will necessarily revolve in the chuck. There are many cases in
which even in this rough form such a chuck will prove useful; but if
it were cast in metal and the three edges formed by slips of steel,
and the whole accurately turned, it would be a very efficient and
good self-centering chuck. In its more common form it is largely used
by the turners of mop and broom handles, who work rapidly and cannot
afford to waste time in chucking their work. With the above, the
lathe, if worked by steam or water power, is not even stopped,—the
screw of the back centre has a quick thread, so that a single turn
to or fro fixes or releases the work; and thus, one handle being
finished, another piece takes its place in the chuck, is fixed by a
half-turn of the back screw, and being set in rapid motion is turned
and completed by a practised hand in a couple of minutes or less.
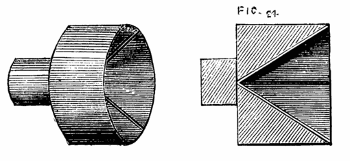
Fig. 24.
Fig. 25 represents another useful chuck, generally of boxwood, called
the barrel stave chuck. It is turned conical, the largest part being
towards the mandrel; it is then wholly or partially drilled through,
after which saw-cuts are made longitudinally, as in the drawing. These
allow a certain degree of expansion when a piece of work is fitted
into it, and it is tightened round the latter by driving on a ring of
iron or brass. This ring is sometimes cut with a coarse thread inside,
and a similar thread being chased on the outside of the chuck, it
is screwed upon the cone instead of requiring to be driven by blows
of a hammer. One important use of this chuck is to re-mount in the
lathe, for ornamentation by the eccentric cutter or other apparatus,
any finished work that could not be readily chucked in any other
manner, or to hold rings requiring (like curtain rings) to be turned
on the inside. Such articles will, from the nature of this chuck, be
truly centred at once; and their exterior parts will not be liable
to injury, as they would be by being driven into an ordinary chuck
hollowed out to receive them.
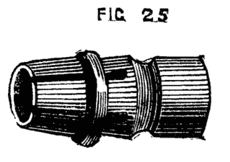
Fig. 25.
Another useful chuck for turning short pieces of metal such as bolts
and binding screws, and which is in a great measure self centering
is made of cast iron, and is usually called the dog-nose chuck,
represented in Fig. 26. This is made with movable jaw hinged, as more
plainly seen in B. The screw clamps these jaws firmly together, and
any small piece of work is thus securely held. The centering, however,
is not accurate, though sufficiently so for many purposes. The die
chuck (Fig. 27) is accurately self-centering, and although somewhat
expensive, is a valuable addition to the lathe. This chuck consists,
first of all, of a socket for screw to fit the mandrel, and round
flat plate of brass cast in one piece, as in Fig. 28. This must be
carefully turned and faced in the lathe. Two pieces of iron or brass
are then screwed to the face, as B, B, 28A, leaving a space between,
the sides of which are to be truly parallel. These pieces may either
be chamfered to form V-pieces, or may be rectangular on their inner
edges; at C, C, a part of each is cut away, and the outer or back
plate is also filed down to receive the small plates D, D. E shows a
groove in which a screw lies, half of which has a right and half a
left handed thread; this is shown in Fig. 29. It will be evident that
if this screw is placed in the groove of the bottom plate, and its
ends pass through the pieces D, D, which are screwed to the plates,
it can revolve in its bearings, but will have no endwise motion;
the collar F resting in a recess under the top plate D. This screw
passes through a projection in the back of the pair of dies, which
projection also goes into the same slot in the back plate in which
the screw works when turned by the key (Fig. 27, B.)
The above being nicely fitted, the dies moving evenly but stiffly in their places, the
plain top is screwed on, keeping all firmly together. This plate has
a long opening or slot (Fig. 27), through which the jaws of the dies
and part of the screw are visible. The ends of the screw should not
project, as any such projection is calculated to bring to grief the
knuckles of the turner—a consideration worth attention in every form
of chuck—the squared ends of the screw lie in a recess in the small
plates, as shown in the section of one of these plates (Fig. 28X).
Into this recess the key fits over the screw end; and by turning this
the dies are simultaneously moved asunder, or closer together so as to
grasp centrally as in the jaws of a vice, any small article, such as a
screw or short rod of metal placed between them, A similarly contrived
chuck is often used under the name of a universal chuck, for holding
pieces of large diameter, and is very useful for taking pieces of
ivory which have to be hollowed or otherwise worked, as will hereafter
be detailed. In this case the jaws may be semicircular in form, as Fig. 30.
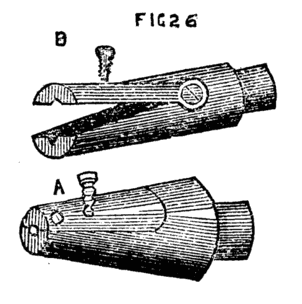
Fig. 26.
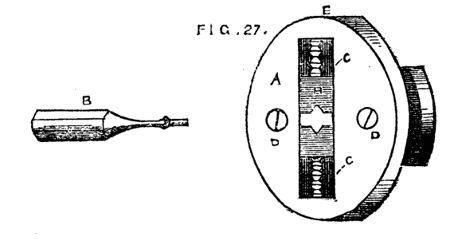
Fig. 27.
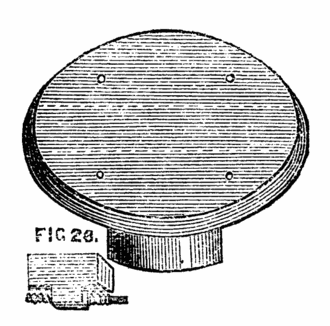
Fig. 28.
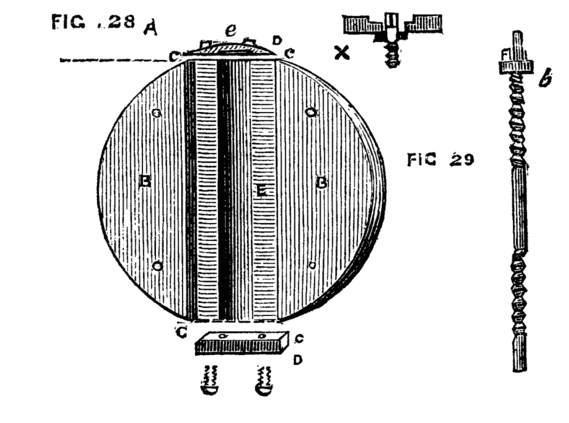
Figs. 28, 29.
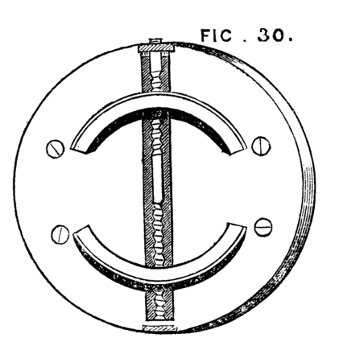
Fig. 30.
It is however, evident that these two chucks have a rather limited
range. The first can only be used for small work, and the only case
in which the latter can take firm hold all round the work is when
the jaws are just so far apart as that they form portions of the
circumference of one and the same circle. Practically they will hold
the work tightly under an extended range of sizes, and they are thus
of great use to the turner. The following is however more perfect in
operation, from the fact that it has four jaws instead of two which
meet concentrically. This may be made either with two long screws at
right angles to each other, with right and left-handed threads to
each, as in the die chucks, or more simply and, in some respects more
satisfactorily, with four distinct screws, all of the same pitch, and
all with squared ends of equal size, to allow of the same key being
used to turn them. It is possible to use such a chuck as an eccentric
chuck if desired, which is certainly a recommendation in its favour
over those which work always concentrically. The face of this chuck is
shown in Fig. 31. The ends of the four screws have a bearing in the
small centre plate b, whilst the collars or flanges rest in a recess
under the several plates c, c. The face of this chuck is graduated
by each die, so that it is easy to set the jaws concentrically or to
place one or more eccentrically to take in work of other shape than
round or square. The jaws of this form of chuck are used for two
purposes, either to hold work inside them like a vice, or externally.
A ring, for instance, requiring to be chased on the outside is slipped
over the jaws, which are then caused to recede from the centre so as
to hold the work securely. If the latter does not run truly, one or
more of the screws can be slackened, and the opposite ones tightened,
or if the eccentricity appears to be in an intermediate part, two
adjacent screws will have to be thus slackened and the others
tightened. On the whole this is a most useful pattern of chuck.
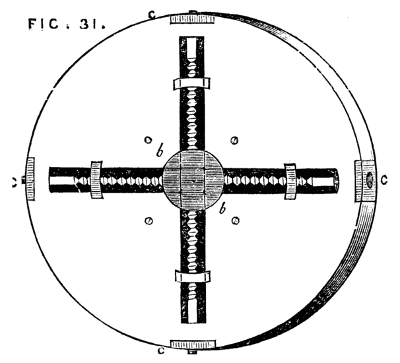
Fig. 31.
The following is a very excellent self-centering chuck now coming
into extensive use. It has been noticed in more than one periodical.
The description annexed is extracted from the pages of the English
Mechanic. "The chuck hereby illustrated seems to be a very convenient
form, easily adjusted and holding the drill securely. It is also
well adapted for holding wire to be threaded. Every piece of which
it is composed is of cast steel well hardened. It can be furnished
with a shank to fit the hole for the centre, screwed on the spindle,
or slipped on the centre. No wrench is necessary, the gripe of the
fingers being sufficient to secure the shank of any drill. The
inventor claims that he has used a one-inch drill, in tenacious
wrought iron in one of them, receiving a shank of only three-eighths
of an inch diameter without using a wrench."
Fig. 31A represents the shell of the chuck with milled bosses for the
fingers. The core, B, is threaded and receives a steel wire spring
which is inserted into the rear of each jaw, so that when relieved
from pressure, the jaws open automatically.
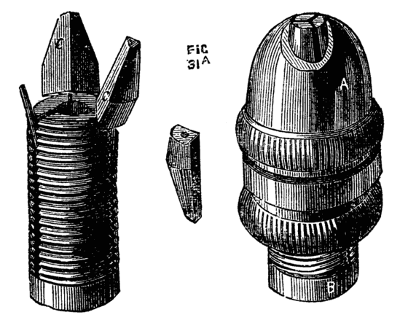
Fig. 31A.
With this brief explanation, the operation of the chuck can be easily
comprehended. These chucks are made of two sizes, one with an opening
of three-eighths of an inch, and the other of three-sixteenths of an
inch, and they can be made of larger sizes. Patented by L. H. Olmsted,
Stamford, Connecticut, United States America.
Another chuck of self centering design, has likewise appeared in the
periodical above named, into which it appears to have been copied from
an American paper.
The accompanying engravings illustrate some improvements in the
arrangement of chucks which have been recently patented in this
country, the inventors being Messrs. Smith and Haight, both of New
York, U.S. The first part of the invention refers to an arrangement
of adjustable chuck, by means of which tools and other articles of
different diameters may be held firmly in the jaws of the chuck. Fig. 31B
is a longitudinal view of the chuck, partly in section. The
spindle, a, is fitted so that it may be inserted tightly in the
mandrel of the lathe. On the front end of the spindle is a conical
screw on which is fitted the cap, b; this part is formed with an
opening at the front end, having three longitudinal slots in it. In
each of these slots an adjustable jaw, c, is fitted, the inner part
of which is threaded with a female screw, to fit the conical screw on
the spindle, a. An outer casing d, encloses the front part of the
chuck, and behind this is fitted a loose collar, which is screwed into
the casing d, so as to connect the parts firmly together. By turning
the cap, b, with the casing, d, and collar, in one direction, the
jaws, c, are moved forward and project out through the openings, and
they may thus be adjusted to grip a tool or other article of small
diameter. The opposite motion of the cap causes the jaws to recede,
and in this way they may be adjusted to grasp articles of different
diameters.
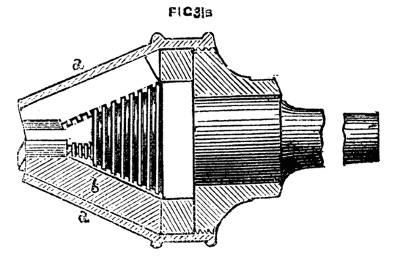
Fig. 31B.
Another arrangement of the adjustable chuck is shown in Fig. 31C,
which is a front view, and Fig. 31D, a longitudinal section of the
same. A, is the body of the chuck, the front part of which is formed
with a rim or flange, in which are three radial recesses having
fitted therein the sliding jaws, B. In the rear of each jaw is a
bearing, in which is fitted a pin carrying a small lever, C, the
front end of which is rounded, as shown in the section, and enters a
slot made in the jaw, B; so that when the levers are moved outwards
they cause the jaws to contract or move towards the centre. The
back part of the body, A, of the chuck is threaded, and on this part
is fitted a collar, D, and in front of this is a sliding collar, E,
which is connected to the collar, D, by means of a pin which enters
a groove formed in the latter. The sliding collar is prevented from
turning round on the body, A, by means of a feather, which works in a
longitudinal groove formed in the inner circumference of the collar.
Three inclined planes, F, are formed on the periphery of the collar,
E, which extend to the backward ends of the levers, C, so that by
moving the collar to and fro, the jaws, B, are caused to contract or
expand, according to the size of the article to be grasped. A short
cylindrical block, G, made of a conical figure internally is fitted
loosely within the chuck, A, and serves to centre the end of a drill
or other short article, but may be removed when it is desired to pass
a rod or other article through the body of the chuck. To provide for
the easy turning of the collar, D, it is shown as fitted with a hand
wheel, H. With this arrangement of the several parts, the jaws of the
chuck readily adapt themselves to drill or bit shanks as well as to
articles of parallel form, or of a tapered or irregular figure.
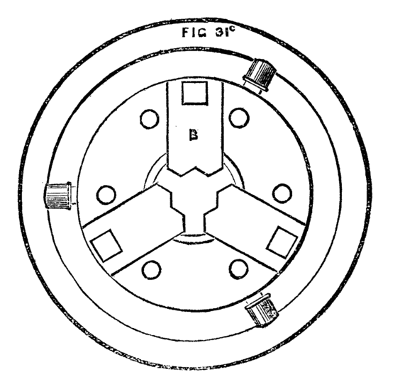
Fig. 31C.
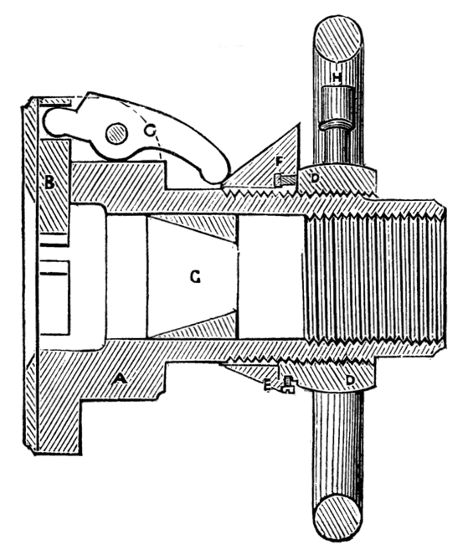
Fig. 31D.
The chucks last named belong to the class of compound or mechanical
tools; and though their usefulness is beyond question, they need
not be considered absolutely necessary, as the work which they are
designed to facilitate can be and often is done without their aid.
Indeed, success in the art of turning by no means depends absolutely
upon the possession of expensive apparatus, and the amateur or
mechanic will find the advantage of ransacking his own brain for the
devising of divers makeshifts and off-hand contrivances—especially
in this chuck-making department.
Among the simple expedients the following will be found well worthy of
adoption.
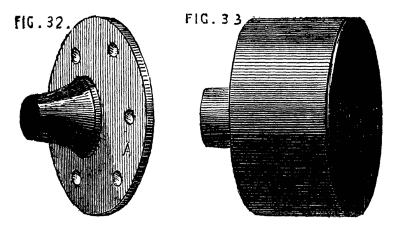
A, Fig. 32, is a simple flange or flat brass plate with a boss behind,
similar to a small face plate, and is to be turned up, drilled, and
tapped to fit the mandrel. If the latter has a diameter of ¾ of an
inch, a few of these brass pieces should be cast from a set of wooden
patterns ranging from two to three or four inches across the diameter
of the plate, and, after having been fitted to the mandrel and turned,
four holes, countersunk for wood screws, should be made, as shown in
the sketch. These are intended to do away with the necessity of boring
out and tapping each individual wooden chuck. They can be readily
attached to any piece of wood by four screws, and a few minutes will
be sufficient to adapt the same to any required purpose. A flat piece
of board, for instance, itself too thin, or of too soft substance to
permit of its being attached to the mandrel in the ordinary way, can
thus be made into a temporary face plate, or a ring cut out of it, or
any desired operation performed upon it. Indeed, these socket pieces
will be found serviceable on many occasions, and will do away with the
necessity of a large set of cup chucks.
Figs. 32, 33.
A few of the latter, however, are very useful and will cost but
little. The castings are sold by weight, and the turner will
experience no difficulty in fitting and finishing them for himself.
Fig. 33 is the form of these, and needs no description. The substance
may be from ⅛ to ¼ of an inch, and need not be more, as that
thickness will stand any reasonable shock caused by driving a piece
of wood into the chuck, and it is always well not to overweight the
mandrel with chucks of undue size or substance. The addition of
three to six screws to one or two sizes of the cup chuck extends its
usefulness. This form is represented in Fig. 34, A and B. In this
case, the casting may be rather more substantial (¼ to ⅜ of an
inch in thickness). The screws must be strictly radial, pointing to
the centre of the circle, and their ends must be turned off or filed
flat. Their heads may be squared to enable a key or pair of pincers to
be applied, or round with a hole through them. It is better to make
this kind of chuck with six screws—three in one plane, and three
again between these in another plane behind them. In fitting a piece
of work into the chuck, it will not at first be found an easy matter
to make it run truly. The best way is to centre it as nearly as can
be guessed, by means of the three screws nearest to the open end of
the chuck, and then, placing the latter on the mandrel, set the lathe
in slow motion and correct the eccentricity of the piece by means of
the three inner screws. Even after this it is probable that a little
alternate slackening and tightening of the different screws may be
necessary; but a little practice will quickly enable the turner to set
a piece of work in the true axial line of the mandrel without much
difficulty, and the work will then be held very securely. Any short
piece, such as the ring of an eccentric to be bored truly inside, may
be held by the outer set of screws alone; but if such a piece of work
as a small cylinder is to be bored, the six screws must be brought
into action. Here let the hint given when speaking of projecting
screws, be repeated, Beware of the knuckles, which are peculiarly
liable to be damaged in making use of these chucks. The shirt sleeve
or coat, moreover, does not always enjoy perfect immunity from similar
danger, and both should be kept out of harm's way, not for their own
sake only, but because the arm may be brought into violent contact
with the rest if the sleeve should get entangled (the momentum of the
flywheel being great, and therefore not to be checked entirely at any
given moment). A single rap of the above nature is not a delightful
even if salutary lesson to the novice.
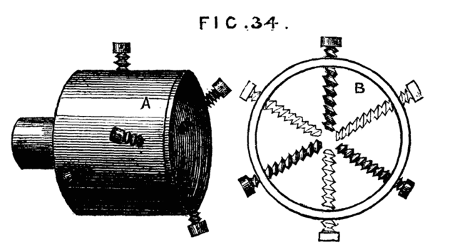
Fig. 34.
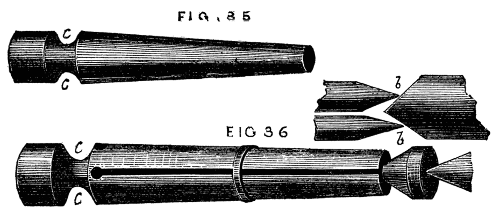
To hold rings and washers a tapering mandrel, Fig. 35, is used;
and of these it is necessary to keep a few different sizes to suit
different diameters. These may be made of iron or brass if for
permanent use, but box or other hard wood is a ready substitute, and
may be turned down for smaller work when the surface gets spoiled by
use. The expanding mandrel, "Hicks' patent," which will be treated of
hereafter, is a convenient substitute for the simple conical form here
spoken of; and in manufactories where large numbers of mandrels have
to be kept of various sizes, a great saving of time, money, and labour
is effected by their use. For amateurs and artisans in a smaller
way of business the simpler form is generally sufficient. A slight
modification is here appended, by which the common form may sometimes
be made more efficient in the holding a ring tightly while undergoing
the operation of turning, and this can be made applicable to metal
mandrels, though specially intended for wooden ones. Fig. 36.
Figs. 35, 36.
The mandrel having been turned conical (N.B., the angle of the cone
must be small, so that the size will diminish very gradually from the
largest end), the wood is divided by a fine saw, just as the chuck
already described with the outside rings was sawn into segments, a
conical hole having been first made at the smallest end, as shown
in the section b, b. Into this a short cone of larger angle is to
be fitted, against the end of which the point of the back centre
will press, tending to drive it into the mandrel, which will thus be
made to expand. The ring to be turned will prevent the mandrel from
splitting by the wedge-like action of the plug, unless the said ring
is of light substance, in which case this form must not be used. The
work will, by the above method, be securely and centrally held and not
liable to slip towards the small end of the chuck.
In the Fig. 36, a groove, c, c, is shown at the bottom of the
saw-cuts. This should also be made round the boxwood spring chucks
with rings, as it gives more freedom of expansion to the segments.
With such a groove and the chuck itself completely hollowed out,
the pressure of a strong india-rubber ring will be sufficient to
hold work whilst being polished: and this will, when the latter is
delicate, be even superior to the screwed rings, as the pressure
will be more gentle and equable. India-rubber rings for this purpose
must not be thin and flat, like those used for bundles of papers or
letters, but made of round material, the thickness of a quill or even
larger. They may be had of all sizes at an india-rubber warehouse
in Holborn, at the bottom of the hill on the left hand side going
eastward, and not far from Negretti and Zambra's shop. The writer is
not acquainted with the name of the proprietor.
Having had occasion to speak of tapping chucks of metal to fit the
mandrel, it will be as well to speak here of the requisite tools for
effecting this.
In the case of iron chucks it is not likely, as a general rule, that
the amateur or workman will obtain access to a screw-cutting lathe,
and to cut an internal thread by hand with the chasing tool is hardly
feasible, though readily accomplished in the case of brass chucks.
When, therefore, a lathe is purchased, a set of taps of the diameter
and pitch of the screw on the mandrel should be provided. Of these
there must be three—an entering taper tap, an intermediate one
rather less tapering, and a plug tap, which is cylindrical. And here
we must enter a caution. Do not let the tapering taps be too long.
For instance, let it be required to tap the boss of a face plate in
which the hole cannot be drilled through the plate. It is first bored
out to the size of the bottom of the mandrel threads, or rather
less. Tap number one must then be screwed into it; but if this is too
long, so that it cannot enter to the end of the threads cut upon it,
the second tap will be too large and will not enter properly, but
will most likely start a new thread for itself and spoil the first.
Fig. 37, a, b, c, shows the form required; d, the form to be
avoided, except in cases where, as in the cup chucks, a hole can be
made quite through the article, so that the tapering tap can be worked
to the line x, y, or nearly so. The long tap, gradually tapering
as it does from end to end, is of course the easiest to use, and for
nuts and such like is far the best; the conical tap of larger angle
requires more power, but in the case named it is a matter of necessity
to use it; and, if preferred, a set of four taps instead of three will
remedy any difficulty. The novice must take great care to place the
tap perpendicular to the face of the chuck, or the shoulder will not
fit close to that on the mandrel. If much difficulty is experienced,
such an arrangement as Fig. 38 may be of service. A represents the
standard of an upright drill-post, of which B is the bench, C the
screw by which to depress the drill and keep it to the cut. For the
latter, and brace by which it is worked, substitute the tap, and place
a spanner or wrench round the head of it. In the centre mark, which
is generally left from the turning, place screw point c. By means
of a plumb line or square, D, test the perpendicularity of the tap;
and as the latter penetrates, keep it to its work by the screw C; oil
the tap freely, and the chuck will be easily and accurately cut with
the required thread. Some kind of clamp will of course be required to
secure the chuck to B, while it is being tapped.
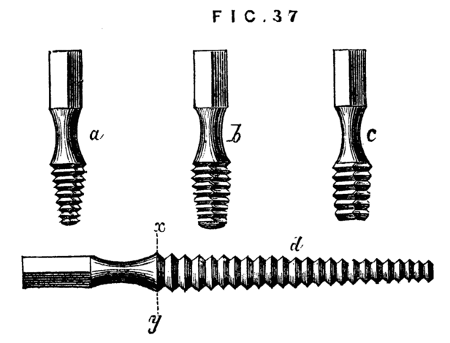
Fig. 37.
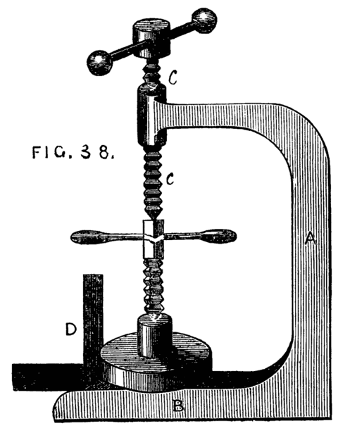
Fig. 38.
The upright drill should always have a place in the workshop. It is
much easier to drill with it than in the lathe, and the mandrel will
thus be saved considerably. The latter should never be used except
for light work. A variety of drilling apparatus will hereafter be
described in this series, so that we need not now write more upon this
part of our subject.
Somewhat akin to the chuck described as the cup chuck with six screws,
is a chuck mentioned in an old French work,[1] the purpose of which
is to turn up a cylinder, with a point at the end, so as to insure
the axial line being kept. In the ordinary course, the cylinder would
be turned up with the point and carrier, or driver, chuck already
described; the conical point would be then turned down as far as
possible, and the mark of the back centre afterwards turned off by
means of the boring collar. It is by help of a miniature lathe and
boring collar in one piece that the pivots of the balance of a watch
are finished. In both cases the work may be well done by the same
process. The chuck now to be described requires no boring collar,
but at the same time it does not seem to be well suited for any but
light work; in which latter case however it would be advantageous,
and must therefore have a place in our present paper. The body of
the chuck is shown in section, in Fig. 39. A is the socket with
screw to fit on the mandrel of the lathe. It will be seen that the
chuck itself is hollowed out cylindrically, and in this cylindrical
cavity slides a plug, c, bored conically, which can be fixed by a
thumb-screw, h, traversing a slot in the body of the chuck. This
cone is destined to receive one end of the cylinder to be pointed,
which will, according to its diameter, centre itself in some part of
the conical hole in the plug. The latter is made movable, so as to be
adapted to the length of the article to be turned. At the outer end
of the chuck is a groove dovetailed to receive a slide, shown clearly
in the cross section B. The slide must be of sufficient substance to
allow a clamping screw, f, to be tapped into it at one end, which
screw must be long enough to reach when fully advanced nearly to the
apex of the triangular opening seen in the slide. The action of the
whole contrivance is as follows:—The cylinder to be pointed is placed
in the conical cavity of the plug—the latter slid to or fro till
the point to be turned projects a short distance beyond the mouth of
the chuck through the triangular opening in the front slide; when it
is fixed by a turn of the screw, f, which forms the third point of
resistance, the sides of the triangular opening forming the other
two. As the point or apex of the triangle is always in the diameter
of the cylindrical chuck, it will only be necessary to move the slide
itself in order to bring the axis of the cylinder to be turned in a
line with that of the mandrel. As soon as this is accomplished so that
the piece runs truly, the screw, g, is turned, and the slide fixed
in position. A good deal of ingenuity is displayed by the inventor of
this chuck, a description of which was published twenty years ago, and
there are very many cases in which it will be called into requisition
by the mechanic. With a little care, moreover, the amateur might make
one for himself—the body of brass or gun metal, the plug and sliding
part of iron or steel.
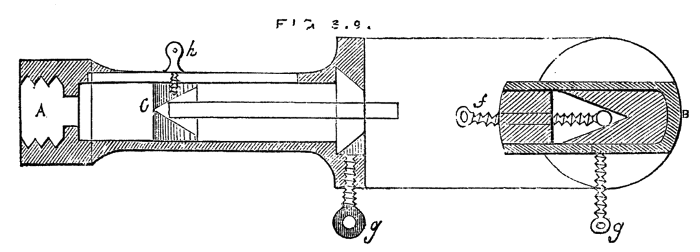
Fig. 39.
Amongst the various devices connected with the lathe, many of which,
even as makeshifts, are valuable to the turner, is one not generally
known for keeping up the tension of the lathe cord in whatever groove
of the fly wheel or pulley it may be placed. The plan is not more
ingenious than practical, and the writer is acquainted with one
workman, a gasfitter by trade, who has had it in constant use for
many years. Directly over the mandrel pulley is another of larger
diameter, in which are two grooves of equal depth, fig. 40. This
upper pulley is suspended on a movable arm, D, which is pivoted at
E, and kept up by an india-rubber spring, F, or, as in the original
plan (before these rubber cumulators were known), by a cord passing
over a pulley, and having a heavy weight attached, as shown by the
dotted lines. In the fig. A represents the fly wheel, B the mandrel,
C the upper pulley. The lathe cord is very long, and passes upwards
from A, over the upper pulley in groove 1, down again and round the
mandrel, a second time over groove 2 of the upper pulley and down to
the fly wheel. The tension of the cord is thus always the same, and is
regulated by the spring or weight. If the cord is slipped to a smaller
part of the lathe pulley, the slack is instantaneously taken up by the
descent of the weight, and rising of the arm D, which in like manner
yields to allow the cord to be slipped to the larger groove of the
mandrel pulley.
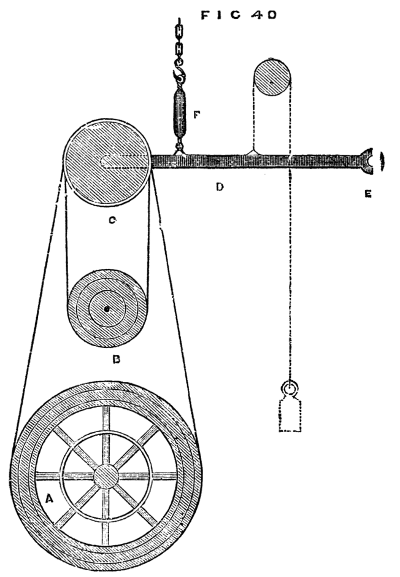
Fig. 40.
There are many other useful contrivances for chucking work in the
lathe, a few of which will be noticed on a future page. The main
thing to be attended to is the holding securely as well as centrally
the object to be turned. If this is attained, the precise form of
chuck is of little importance, and it matters not whether it be
made of metal or wood. The latter has indeed, in some respects, an
advantage resulting from its elasticity and the ease with which its
form is modified.
We have now described the simple foot-lathe and chucks adapted for
hand turning, but of the latter a great number may be provided,
and will, in fact, accumulate as the turner proceeds to work upon
objects of varied form and size. No chuck once made should be thrown
away until it has become so reduced, from repeated alterations, as
to be no longer serviceable. And now, before we commence actual
turning, it will be well to offer a few concluding remarks upon the
selection of a lathe. It will be evident from our previous remarks
and illustrations that there is room for great diversity in the size
and quality of this machine, and it is astonishing what excellent
work is often turned out by an experienced hand from a lathe of the
worst description. The simple pole-lathe, which is so out of date
that we did not deem it worthy of notice in this series, with its
reciprocating motion, like the little tool of the watchmaker, has,
before now, supplied the cabinet maker with first-class work, and not
many years since we ourselves stood before just such a clumsy tool,
taking first lessons in the art. Our next step was to a lathe with
wooden poppets, and flywheel of the same material, a mandrel made by
a country blacksmith, which scarcely did even him credit; the value
of the whole, with stand and beechen bed complete, was £2 sterling,
and sufficiently dear at that price. Now, we do not recommend such a
tool, and in the present day a much better may be had at that price,
but, notwithstanding its evident defects, very tolerable work may
be produced from it. We state this to deter the reader from a very
common fault—namely, the purchase of an expensive tool and elaborate
fittings when the purse is shallow, and the skill shallower still. In
fact, any amount may be spent in lathes, and in fitting up a workshop,
but to gain real pleasure and satisfaction from the pursuit of the
mechanical arts, the outlay should not be more than the probable
result in work fairly warrants. A hundred pounds is often expended
in the purchase of a lathe, and a hundred shillings would more than
purchase the work done by it. We speak from our own experience in this
matter, and believe our advice proportionately valuable; and we well
know the satisfaction that ensues when good work has been produced in
spite of the defects in the appliances at command. If the means do
not admit of the purchase of a good lathe necessity must decide the
question, and an inferior one must take its place in the workshop.
Nevertheless, we would rather counsel a certain amount of delay, and
economy and hoarding, that a good foundation may be laid and a lathe
purchased of such average excellence that future additions may convert
it into a really serviceable tool.
It would be invidious and perhaps rather unfair in this little work to
send the reader to any particular lathe-maker. There are several good
and two or three first-class ones in London, and if prices range high,
the work is at any rate of undeniable excellence.
There are also many cheaper firms than those alluded to, where the
work is rather of rough-and-ready style; all depends on what class
of work the would-be purchaser proposes to engage in, whether he
intends to confine himself to plain hand-turning in wood, to the
construction of steam engine, and other models of machinery in metal,
or to the more beautiful finished work in hard wood and ivory, which
develop the full power of the machine itself, and the skill of the
accomplished turner. In the former cases, a very plain and inexpensive
lathe will suffice. In the latter, it is absolutely necessary to
purchase one of the best construction, at a tolerably high figure.
The best advice to those of slender means, and who, therefore, vastly
predominate, is to sacrifice all else to the mandrel and collar. The
latter may be bought at from twenty to thirty shillings, ready for
mounting in detached wooden headstocks, and will be far superior to
any that an ordinary smith can produce. In this case, the two poppets
that carry the mandrel and centre screw should be connected together
by a block of wood between them, which latter may be rounded off and
shaped to something near the form of a cast-iron headstock.
The only care necessary in mounting such a mandrel, will be to keep
the axial line parallel to the lathe-bed, and directly over the centre
of the latter. Whether the mandrel is thus a separate purchase, as may
happen from necessity, or obtained as part of the lathe, and fitted in
a cast-iron headstock, it should certainly be hardened, and also the
collar, if of steel. Both will take a higher polish for this process,
and will run easier in consequence. The cost of such a mandrel is
rather greater, because many warp or split in the process, and have
to be thrown aside; and the labour of grinding mandrel and collar
to an exact fit, is considerably increased. The gain, however, is
greater than the loss to the purchaser, and the extra outlay must not,
therefore, be grudged. It is very annoying to find a conical mandrel
worn down by the collar after a twelvemonths' work; for a collar is
thus formed on the conical part, so that it cannot be tightened up by
the back screw.
The first tool to be noticed is the gouge, the form of which is a
longitudinal section of a tube, and is shown in Fig. 41. Of this
tool not less than three sizes should be selected, of the respective
diameters of one inch, half-inch, and a quarter or three-eighths.
When purchased, they require grinding, the bevel being too short. It
is essential that this tool and the turning chisel have a long bevel,
so that the cutting edge should be a very acute angle. (Fig. 41, not
like 42.) It is impossible to do good work with the latter form of
tool which is, nevertheless, of frequent occurrence in the workshops
of amateurs. Both gouge and chisel must be sharpened on an oilstone
(Arkansas or Turkey will be found the best) to a keen edge, and no
pains must be spared in preserving the tools in this condition. Three
sizes of chisel to match the gouges should be selected. The latter
tool is not made like that intended for carpenter's use, with the edge
at right angles to the sides, but is sloped like Fig. 43, so as to
present an obtuse angle A, and an acute one B, and the cutting edge
is central, the bevel being alike on both sides, so that the tool may
be turned over, and used with either of the flat sides upwards. The
handles of gouges and chisels should be much longer than those used
by carpenters, and nicely rounded and shaped in the lathe. The most
difficult thing to turn being a cylinder of soft wood; a description
of the method of effecting this will be the best means of initiating
the novice in the art of turning. In all the most perfect work by
practised hands, there is a sharpness of edges and roundness of
mouldings, that are exceedingly agreeable to the eye, and bespeak
at once keenness in the tool with which the work has been done,
and steadiness in the hand of the operator. The novice must aim at
similar perfection, and to this end he must determine to avoid the
use of sand-paper, and trust to his management of exceedingly keen
tools to put a workmanlike finish to his work. To commence with the
proposed cylinder. Let a piece of sound beech be selected for the
first essay, as being less difficult to manage than deal, the grain
of the latter tearing up in long shreds under the action of the tool.
The first thing to be done, after sawing off the necessary quantity
of sufficient diameter for the proposed work, is to round it off
roughly by means of the hatchet and draw-knife, or spoke-shave. The
next thing is to mount it in the lathe. For this purpose the prong
chuck, or, better still, that represented as an improvement on the
latter, and shown in Fig. 23B, must be screwed on the mandrel, and
the work made secure by the aid of the back poppet centre. Care should
be taken that the piece runs truly between the points of support, and
that it revolves steadily without shake. There is no real necessity
for using the compasses, or other contrivance for finding the exact
centre at each end, as sometimes recommended, neither, indeed, is it
always possible thus to find the axial line. It is easy to fix it at
first lightly in its place, and ascertain by a turn or two of the
mandrel, how nearly it runs as it ought to do. If it seems tolerably
true, a turn of the back centre fixes it securely, if not, it can be
shifted in any direction at pleasure. The tyro ought, however, to
be warned that he is likely to be deceived in the size of the rough
piece, and that he may very probably think it of sufficient diameter
for the proposed work when in reality it is too small. Practice, or
the use of the callipers, which are bow-legged compasses for measuring
the diameters of work, will soon settle the question. The piece being
properly fixed in the lathe, the latter is to be set in motion by
means of the treadle, the rest having been first fixed as near as
possible without touching the piece, and the T clamped parallel to it.
If the tyro wishes to become a proficient, no pains must be spared
to acquire the knack of working the treadle without moving the body
to-and-fro. He must learn, therefore, to stand firmly on one leg, and
after the wheel has been put in motion, he must let it and the treadle
have its own way. He will thus soon feel when the crank has passed
the dead point at the highest point of revolution, and the proper
moment to bear down with the foot. It is not necessary to describe the
precise movement, as a few trials will teach the method much better
than any written description. At first it is hard work, and constant
change of leg from the right to the left, and back again, will have to
be resorted to to diminish the fatigue. Practice will, however, remove
all difficulties, and allow the whole undivided attention to be given
to the management of the tool.
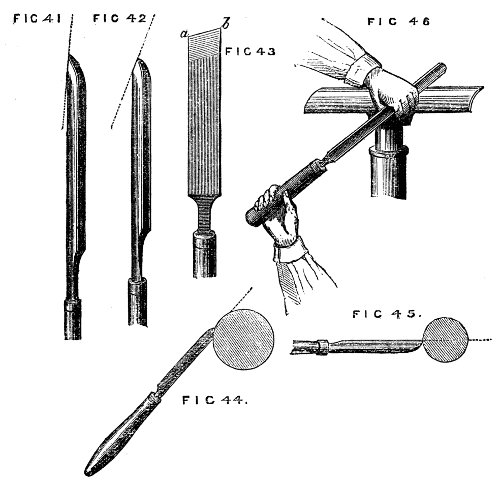
Fig. 41, 42, 43, 44, 45, 46.
The gouge must be held down firmly on the rest with the hollow side
upwards, and the bevel of the edge forming a tangent to the work, Fig. 44.
In this position it will cut freely and smoothly, and the edge
will be preserved. If held horizontally, as in Fig. 45, it is evident
that the fine edge of the tool will be immediately destroyed by the
rapid blows it will receive as the rough wood revolves in contact with
it. Its tendency in the latter position will be to scrape, instead of
cutting, and the fibres of the wood will thus be torn out in threads,
and the surface of the work be roughened. The gouge, then, being
placed in the former tangential position, the right hand grasping the
handle, the left the blade, as in Fig. 46, the tool is to be slowly
slid along the rest, and a series of light shavings, more or less
continuous, will be removed from end to end of the piece. Let the
workman bear in mind that the tool is to take a firm bearing on the
rest, and that it must not move to-and-fro with the inequalities of
the piece to be turned. It is not necessary to remove large chips
unless the turner has acquired from practice perfect command over the
tools, and for the adept this chapter is not written. After the most
prominent inequalities have been removed, the side of the gouge will
come into use instead of the extreme end, and with this the work may
be rapidly reduced to its intended size, always allowing, however,
for the final cut with the chisel. Before the latter is taken up,
the piece of work is to be rendered as level and true as can be done
by the aid of the gouge alone; indeed, if the latter is of tolerable
size, and skilfully used, a finish can be put upon the work by it
almost equal to that which the chisel can produce and if the work
in hand were a moulded pattern, with hollows and raised work, great
part would have to depend on the gouge alone. In the present case the
chisel must be used, and the method is as follows: Take a hold with
both hands, as directed for the management of the gouge, but instead
of the flat part lying evenly on the rest, the tool must be partly
raised from it, so that only the lower edge takes a firm bearing.
By this means the upper angle of the cutting edge (generally the
most acute) is kept clear of the wood, and the latter is cut away
only by means of the middle and lower part of the edge, as shown in
Fig. 47. If placed as in Fig. 48, the acute angle, a, is sure to
catch and stick into the work, spoiling in two seconds all that has
been done. The chisel can be used with either of its flat sides
upwards, and moved along the rest from right to left, or from left to
right, or turned upside down, as Fig. 49, so that the acute angle is
downwards. These positions are shown in the Fig. 47 to 51. The only
care necessary is to keep the upper point clear, allow the chisel to
rest as flatly on the wood as the above precaution will permit, and to
take as fine and continuous shavings as possible. The chisel will
be found to draw itself along in some degree as the cut proceeds, and
when this action is felt, it is doing its work properly—still, it is
a difficult thing to use a chisel well, and the tyro will fail many
times and oft before he will succeed.
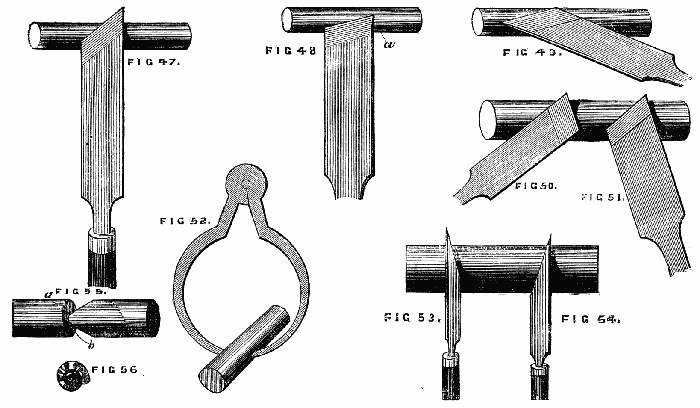
Figs. 47, 48, 49, 50, 51, 52, 53, 54, 55, 56.
The chances are that this initiatory lesson will result in anything
but a correct cylinder—the surface will not be true like a ruler,
but if tried by a straight edge it will be seen to be wavy. Tested by
the callipers, Fig. 52, one part will be larger than another, even if
the extreme portions be tolerably true to the proposed gauge. Now,
the best turner on earth found just these difficulties, and nothing
but perseverance and resolute determination will overcome them.
Never mind spoiling the first piece of work, give up making it of a
determined size, but do not give up making it a true cylinder. Keep
the callipers at work, and gently level the prominent parts (you must
work down to the size of the deepest hollow, for you cannot fill up
such valleys like a railway engineer; you must throw down the adjacent
hills instead), proceed gently, little by little; make the tool obey
you, show it (as Ruskin speaks of pencil and brush) that you will
not yield to its caprices and "henceforward it will be your most
obedient servant." Having done the best you can with the surface of
your cylinder, proceed to square up the ends, and mind the angle at
this part is a right angle, square and sharp, not rounded off. Now
this again requires care and a knowledge of the proper method. You
will work chiefly with the lower corner of the chisel, and we shall
best describe the management of the tool by supposing the cylinder
an inch too long, and that the extra piece is to be removed. Now
there are three positions in which the chisel can be placed to bring
its lower corner in contact with the cylinder. First, with the blade
perpendicular to the work; secondly, with the blade inclined to the
left, Fig. 53, as if to round off the end of the piece; thirdly,
inclined to the right, Fig. 54. Held perpendicularly it will cut a
fine line, but penetrate slightly; alternately in the other positions
it will remove a V-shaped piece, and thus the cutting off is to be
begun. One side of the cutting, however, has to be perpendicular, the
other may be as sloping as convenient. Now, it is to be remembered in
cutting the upright side, which is the end of the roller, the chisel
is to incline rather to the right, for this reason,—if it incline
to the left a momentary inattention will cause it to take the path
a, b, Fig. 55, the tendency being to cut a spiral track towards
the left. The experiment may be made by gently resting the edge thus
inclined on any part of the roller, when it will describe a spiral
at once. To the right, then, the chisel must slightly incline, and
it will cut off a thin curling shaving like Fig. 56, leaving the end
of the piece quite smooth and shining. When the piece is nearly cut
off, great care and lightness of hand must be used, as the central
portion will have become weak and ready to break off before the work
is finished. When it will no longer bear the chisel, take it out of
the lathe, break it off, and neatly finish with the sharp chisel the
central portion, and your first lesson is learnt. There is certainly
very little of interest in turning an imperfect cylinder, for it is
useless when done, but the alphabet of the art, though not amusing,
must be first thoroughly mastered, and the rest will follow in due
course. If, however, the work seem unreasonably dull and stupid,
the cylinder may be converted into a tool handle, which will be at
any rate a useful article, besides affording practice. No special
directions are needed in addition to the above, except in respect to
the ferrule. This is to be cut off a piece of brass tubing or an old
gun barrel, or it may be had at the tool shops ready cut to any size.
Begin by turning down the place for this ferrule, taking care not to
cut it too small or the ferrule will drop off. Take the piece out of
the lathe, and with a mallet hammer on the ferrule. Return it again,
taking care to centre it in the old marks, and finish the handle. The
brass or iron may be polished with a file for this first attempt.
It is now necessary to speak of hollowing out wood for the purpose
of making boxes, cup chucks, &c., and the latter, which may be made
in any quantity, and of all sizes, will afford excellent practice in
this part of the turner's art. The majority of work of this kind is
done rather by scraping or fretting out than by cutting; side tools
of the forms of Figs. 51 and 56 being used for the purpose. These
however, are specially adapted for ivory and hard woods, the grain of
which, being very compact and close, is not torn out in shreds by the
action of such tools, as would be the case with softer woods. Where
the latter material is used in quantity, as in the manufacture of
wooden bowls, hook tools, like Fig. 57, are made use of, which cut on
their upper edges. These are exceedingly difficult to use, though the
practised hands of those brought up to the art, make them cut with
a surprising ease and rapidity—fairly surrounding the lathe with a
ceaseless cloud of fine shavings removed in the progress of the work.
The difficulty experienced in the use of these tools is not confined
to the novice, for the majority of turners accustomed to hard wood
often cut a sorry figure in the manipulation of softer material with
the aid of the tools in question. The hard and soft wood turners form,
in point of fact, two distinct branches of the trade. We have in part
anticipated this section, by speaking of the making a wooden chuck
when describing the use of the metal chuck with taper screw. We shall,
therefore, proceed to describe the best method of turning a plain
wooden box with cover, but not screwed; the latter being reserved for
more extended notice hereafter. The best material to work upon is
sound Turkey boxwood, and care must be taken that it is quite dry
and well seasoned, or, after it is worked up with, it may be, great
care and trouble, the box will split, or the cover become so loose
as to fall off, either fatality being sufficiently vexatious. We may
mention, in passing, that hard woods of all descriptions may be had
in large or small quantities of Messrs. Fauntleroy[2] and Co., 110,
Bunhill-row, Finsbury, or of Jacques and Sons, Covent-garden. Most of
the lathe-makers also supply it, especially Holtzapffel and Co., of
Charing-cross, but the first-named is a large dealer, wholesale and
retail, and his charges are moderate.
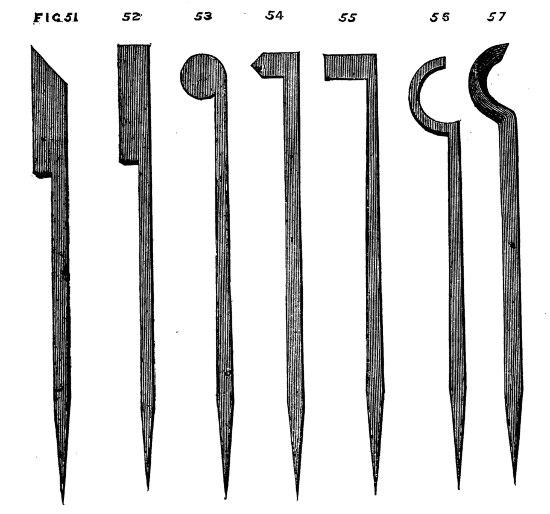
Figs. 51, 52, 53, 54, 55, 56, 57.
Supposing a selection made of size proportionate to that of the
intended box, including cover and a tolerable margin for waste and
accidents, proceed as before to rough it down between two centres
and thus to reduce it to a cylindrical form—there is, however,
no occasion to use the chisel at present, as we only need a rough
cylinder. Remove this from the lathe, and if you have no brass cup
chuck into which you can fit it, proceed to make one out of a piece
of beech, ash or, if you have plenty, boxwood. Do not hurry the
work, but cut the chuck out neatly, screw and fit it, as previously
directed, on the nose of the mandrel. We shall suppose it as yet
merely a short neat cylindrical block, quite solid. Place the rest
with the tee across the end of the piece of wood, the top edge a
little below the centre (by the thickness of the blade of the tool).
For the latter select one of the three following—either will answer
well—58, 59, 60. With one or the other drill a hole in the centre,
keeping the tool quite horizontal across the rest. Enlarge this hole
by a left side tool, working from the centre of the piece towards the
outside, not taking the whole depth at once, but a quarter or half an
inch at a time. You must hollow it out about one inch, and see how
nicely you can fit the hollow to the size of the piece you are going
to turn. You will, of course, have squared up one or both ends of the
latter, which must now be driven tightly into the hollow chuck. If you
squared the ends of the cylinder correctly and left also the bottom of
your chuck level and true, you will be gratified by seeing the piece
run evenly at once.
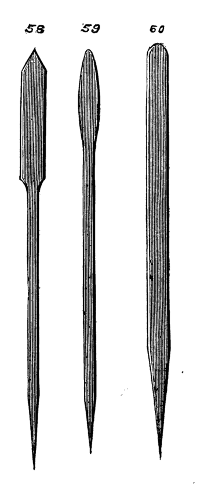
Figs. 58, 59, 60.
Fig. 61 shows a section of the chuck with the piece to be turned
fitted inside it. Now take the gouge and chisel and reduce the piece
to a plain cylinder, and take special care to square up the outer
end. This may be done by the aid of a carpenter's chisel held across
the rest, like the side-tool. If the end is much out of truth you had
better use first the round-ended tool, Fig. 60, but if you have worked
carefully from the commencement this will be unnecessary.
To ascertain the correctness of this part, apply a small steel square
like Fig. 62, the blade of which slides through the brass part and is
clamped by a small screw at the side. We show the method of applying
this tool to gauge depth, test right angles, &c., in Figs. 63 and 64 .
It is a most convenient and necessary instrument, and should be at
once provided. Having thus ascertained that the end of your cylinder
is at right angles with the side, take the point tool, Fig. 58, or the
acute corner of your chisel, and, setting the lathe in motion, mark
off the intended depth of the cover, as D, C, Fig. 61. (Observe,
it is the cover and not the box that first demands attention.) Now
proceed to hollow out the cover as you hollowed out the chuck, but
with greater care. You must allow in the thickness of the top rather
more material than you will eventually require, the thickness of the
sides, also, may be a trifle in excess, but take the utmost care to
make the inside rectangular, that is, the line f, g, perpendicular
to g, D. Upon the correctness of this the fit of the cover will
depend. This being done and tested as to truth with the square, as
before, you may cut off the cover with a parting tool, Fig. 65. This
tool is thin, with a cutting edge at the end, and is held edgewise
upon the rest. The blade is made rather thicker near the end, so that
as the tool penetrates the work it may not bind, but allow the small
chips made by it to escape freely. The rest must be removed from
its former position and placed parallel to the side of the piece,
and the tee at such a height that the latter may, when the tool is
held horizontally, point to the axis of the work. The tool should be
occasionally withdrawn, and the point, instead of being kept precisely
in one position, may be slightly raised and lowered from time to
time, describing a small arc. It will soon be ascertained in what
position it cuts most easily. There are different sizes of parting
tool, some very thin in the blade, for ivory and precious woods, some
thicker, for box and less valuable stuff, some with a notched end,
forming two points, for soft woods, the action of all being similar
to a saw tooth, or, in the last, to two adjacent saw teeth set out to
clear themselves in working. Care must be taken that the thin blades
do not bend and twist while cutting, especially after the cut has
become deep. To avoid this do not hurry the work, but take a little at
a time, and be careful to keep the tool with its sides perpendicular
to the rest. With these precautions the cover will soon be cut off
neatly. If care is not taken to allow for the necessary thickness of
the cover, the turner will be mortified by finding that instead of
the latter, he has merely cut off a ring, and he will have to expiate
his want of judgment by beginning a new cover and making a shallower
box. We name this to put him on his guard. Supposing the above work
satisfactorily accomplished—the top of the cover, however, being
(as will probably be the case) either convex or concave, requiring a
little touching up and finishing, it will be necessary to turn down
on the solid bit of wood left in the chuck the part A, B (Fig. 66),
on which the cover will eventually rest. On no account, however, must
this be now turned small enough, it must be left so large as not quite
to enter the cover, because if it is now nicely fitted, and the box
subsequently hollowed out, the cover is sure to be too slack, the
wood shrinking in the process of hollowing out. This shrinking may be
accounted for by supposing the rings of woody fibre, the result of
yearly growth, naturally elastic, with a tendency to contract, each
one, like a series of india-rubber bands, embracing that within it.
The central ones being removed by the tool, permit the outer ones
to contract, their particles approaching nearer to each other and
the structure becoming more dense. This tendency causes those radial
cracks so often seen in the ends of pieces of wood sawn from the trunk
or limbs of the tree. The outer parts becoming drier than the inner,
and prevented by the latter from shrinking, necessarily split, hence,
when it can be done, the centre of such pieces is bored out, while the
wood is yet full of sap, and the rest is thereby preserved. Where this
cannot be done the ends may be covered with glue or resin; or paper
may be glued on, to prevent access of air, and thus the drying of the
outer portion may be so retarded as only to keep pace with that nearer
the centre. The concentric rings thus shrink equally, and no radial
splitting takes place.
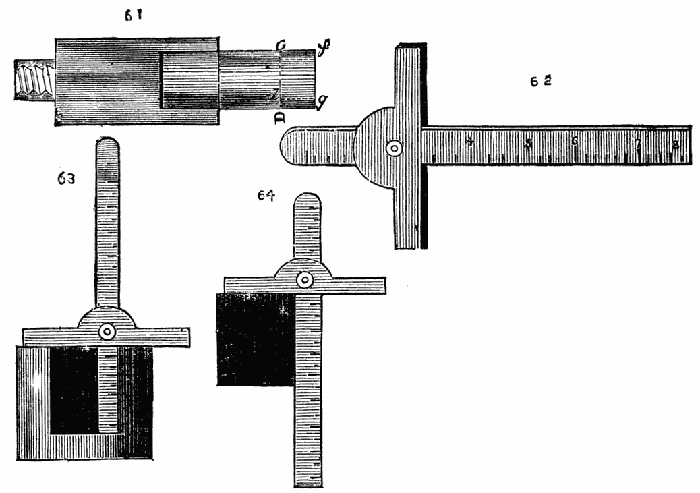
Figs. 61, 62, 63, 64.
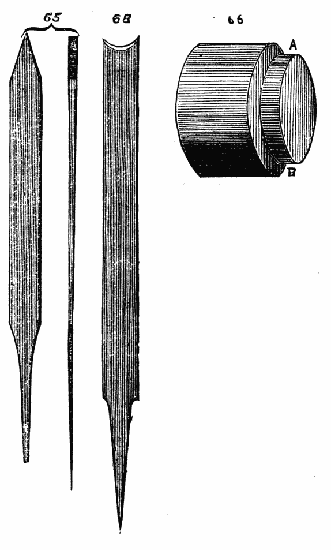
Figs. 65, 66, 68.
We will now return from this explanatory digression to the work in
hand. Having cut down the flange for the cover to nearly the required
size, proceed to hollow out the box. Work carefully, so that the
sides shall be smooth and perpendicular to the bottom, and the latter
plane and neat. Take care, as with the cover, to leave the necessary
thickness of bottom, allowing for the cut of the parting tool, and,
if possible, half an inch or more beyond it. Now finish that part on
which the cover is to rest. Take great care, as before, to secure
right angles, and cut away the wood little by little, trying on the
cover from time to time, until at last it will just go smoothly and
stiffly into its place. It must fit rather tightly, but take especial
care not to force it on, or you will split and spoil it. We shall here
introduce to the notice of the reader another form of callipers useful
in such work as the above, and in many cases absolutely necessary.
They are called in-and-out callipers, and are made as shown in Fig. 67.
These are so arranged that whatever interval exists between a
and b, exists also between c and d. If, therefore, the inside of
a box cover (or similar article) is measured by the latter, the other
end of the instrument will show the exact size to be given to the part
A, B, Fig. 66. The convenience of such an arrangement for an infinity
of cases will be apparent on an inspection of the figure.
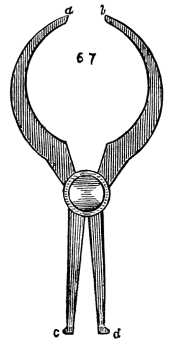
Fig. 67.
The cover of the box must now be put on, the lathe set in motion,
and the outside, and also the top of the cover, carefully turned and
finished. If the box is to be cylindrical, care should be taken that
it is truly so, and that the angle formed by the junction of the top
and sides is sharp. If sand-paper is used to finish the work, the
edges will be rounded and the workmanlike appearance spoiled. If,
therefore, the article is made of box or other hard close-grained
wood, this finishing-off may be done with a carpenter's chisel held
so as to act as a scraper. The turning chisel will answer the same
purpose, but it is a pity to spoil the edge, which should be always
preserved keen and fit for use. If the box is made of soft wood,
scraping will not answer; the turning chisel must then be made use
of, held as previously, described. If the cylindrical form is not
proposed, the sides of the box must be left thicker, and after the
cover is fitted on the outside may be moulded by the gouge and chisel,
and tools like 60 and 68 to 70, to any desired pattern. The only thing
remaining to be done is to cut off the box with the parting tool, the
same precautions being observed which we spoke of in separating the
cover. If there should be any defect in the bottom after the work is
detached, the box must be placed in a cup chuck turned to receive it,
and the above defects removed.
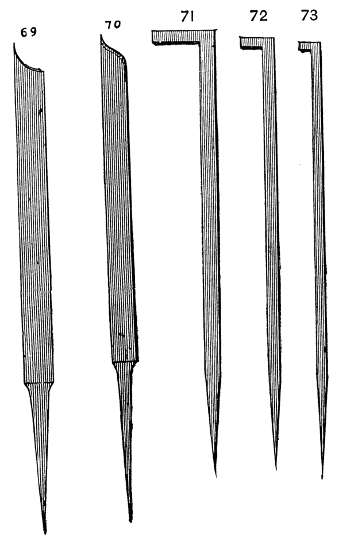
Figs. 69, 70, 71, 72, 73.
In hollowing out a piece of solid ivory or similar costly material, it
would be exceedingly wasteful if the central part were removed as in a
common box, by being reduced to small chips. It is possible to remove
the whole interior in a solid block, and with exceedingly trifling
loss of material. This is effected by means of side parting tools,
71, 72, 73. A common parting tool is first used and a groove cut
therewith in the face of the block to be turned. Fig. 74 represents
this face 75; the section after the groove is cut the depth of the
box required. The shaded part in the centre represents the part to be
removed. The smallest parting tool, Fig. 73, is now introduced, the
back of the tool being laid across the rest, so that the crook takes
a perpendicular position, A, B, Fig. 74. When at the bottom of the
groove the hook is turned to the left, so that it may cut a groove
underneath the block, until stopped by its shank. It is then withdrawn
and Fig. 72, and subsequently Fig. 71 introduced, and used in a
similar way. In Fig. 76 the black line shows the tool in position,
with the under cutting done by it. The sizes are thus increased until
the last tool removes the block entire.[3]
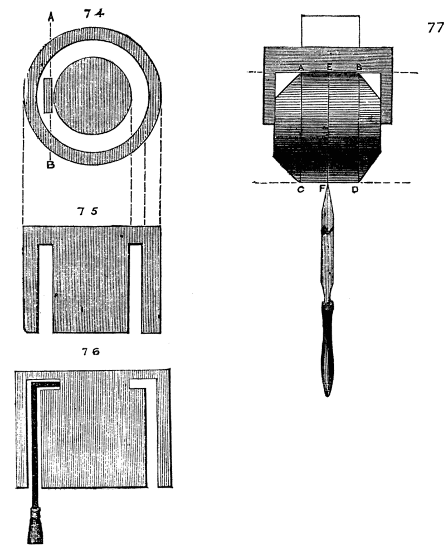
Figs. 74, 75, 76, 77.
We now propose to describe the method of turning a round ball or
globe, and, to make the work more interesting, it shall contain a
small box. The first thing necessary is to decide upon the diameter.
In the present case let it be an inch and a half. Turn a cylinder of
boxwood a little exceeding this, and cut off from it rather more
than an inch and a half in length. The excess is merely to allow for
waste. You will thus have a cylinder whose diameter equals its length.
Before removing it from the lathe, mark its centre by a groove with a
point tool—subdivide the outer spaces with five lines, and from the
latter remove the corners of the piece, thus reducing it to the form
77. Test the length and breadth by the callipers and take care that
the ends of the cylinder are at right angles to the sides. Now place
the piece in the chuck in the position shown in the figure, that is,
at right angles to its original position in the lathe. It must be
tested as to truth by holding a point tool on the central line E, F.
If correctly placed this will only make a dot when the lathe is put in
motion. If the piece does not lie evenly the point of the tool will
make a small circle—it must then be corrected with a light tap or
two, until it runs evenly.
If the inside of the chuck is rubbed with chalk the work will be less
liable to slip. The following operation, however, must be conducted
very gently and with exceeding care, or a satisfactory result will not
be produced. It will be observed that the central line having been
marked or cut upon the side of the cylinder is necessarily a circle,
and its revolution on its axis forms a sphere.
We have therefore only to cut away the piece truly down to this line
to finish what ought to be a perfect globe. Bergeron, however,
justly remarks that although the theory is correct it is next to
impossible to manage the tools with sufficient skill to complete in
this way a true sphere. One great cause of this difficulty, is that
as the work revolves in its new position the central line is not
visible as a line, but simply becomes the boundary of the sphere. This
may be in part done away by making a red line or black one (red is
the best) instead of a mark with the tool. The work will then appear
red as it revolves, and the gouge and chisel must be used to cut
away this red part, great care being taken only just to remove what
appears coloured. Thus you will in the end have cut the work away so
as barely to remove the line. Work from the central part outwards,
and always with exceeding care, and you will eventually succeed to
your satisfaction. It is, nevertheless, a very difficult bit of work
to finish even fairly well—mainly on account of the great obscurity
of your landmark, the red line. For the more perfect finishing of the
above a template of steel may be made like Fig. 78, with which to
test the work—its diameter is equal to that of the sphere, and it
will serve as a gauge or scraper. It should be made of saw plate if
intended for the latter purpose, otherwise sheet brass will answer as
well. After the semi-globe has been turned in the first chuck, it will
be necessary to turn another to receive the finished part, and for
the more perfect formation of the same a semicircular template of the
same gauge as the concave one first made may be provided, as the more
nicely the ball fits the chuck, the less chance there will be of the
work shifting during the turning of the latter half of the sphere.
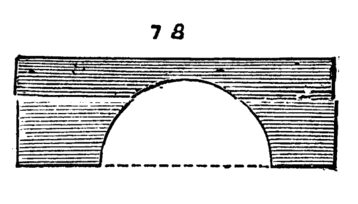
Fig. 78.
In order to obviate the difficulty of following the diametrical line
with the cutting tool, the following contrivance has been suggested
to the author by one who has followed lathe work as a profession
for many years, and is an adept at the art. The lathe band is to be
slightly slackened by partial untwisting (a turn or two will suffice),
if of catgut, so that it will carry round the pulley, if desired, but
will slip if the hand is placed on the latter. Thus, the tool may be
applied, and a light cut taken, and the work instantly stopped for
examination without stopping the lathe, as the flywheel continues to
revolve all the time. This examination can be repeated, if necessary,
every few seconds, by merely placing the hand on the pulley, and in
this way the work being carried on little by little, a good result is
attainable with comparatively little difficulty.
The best position for the rest during the above operations will be
across the face of the work, as in hollowing out boxes, working
carefully, little by little, from centre to circumference. Towards the
finish a scraper should be used, the common carpenter's chisel being
as good a tool as any. Now to proceed with the box. Before removing
the finished ball from the chuck, bore it through with tool Fig. 59,
enlarge with Fig. 51, and make the hole conical, unscrew the chuck,
with the ball remaining in it, and put on another with a piece of
boxwood large enough to make a plug to fit this hole. This plug, when
fitted, is to be hollowed out, and converted into a box, like Fig. 79.
The latter, when put in place, must fit so neatly that only a light
circle shows its position. To conceal it still more completely, a
series of circles are to be set at each of the six sides of the ball,
as shown at Fig. 80. To remove the box, the thumb is placed at the
small end, and pressure made. This forms a neat pocket needle-case,
and may be made of ivory as a present to your lady-love.
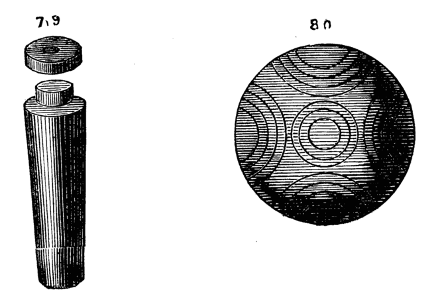
Figs. 79, 80.
There is no practical difficulty likely to be met with in the above
after the round ball is itself made, unless it may arise in respect
of the conical hole. Let this be turned out as directed, until at the
furthest (smallest) end it will just allow a gauge, like the annexed
figure, 80A, to pass through it.
Fig. 80A.
Having also gauged the large end of the hole to the desired size,
take care to finish the side evenly from one to the other. The gauge
may be a disc of tin on a wire, or, still better, a short cylinder of
box wood, on a similar handle, as there will be a little difficulty
in feeling whether the disc is placed at right angles to the axis
of the hole. Unless, however, you desire to work to a pre-arranged
exact measurement, the above precautions will scarcely be necessary,
inasmuch as the hole is first bored, and the conical plug afterwards
fitted to it. The ball may, therefore, be taken from the chuck, each
end of the bore measured, and the plug gauged at each end by the
callipers, and turned to an exact fit.
In the above account the unmathematical phrase of "six sides of the
ball" is used for want of a better; the meaning of the author
will, however, be evident.
The ambition of amateurs, especially, is very commonly centered in
a desire to cut screws in the lathe, and there is good reason for
this, because in the first place there is a difficulty presented
which it is pleasant to overcome, and in the next place, a screw is
of absolute necessity in the greater number of turned works. There
is an apparatus of simple but ingenious construction called a screw
box, which is commonly used by carpenters and others who have not
attained the skill necessary for chasing screws in the lathe, and
which is very convenient even for those who have obtained this power.
A sketch of this is given in Fig. 81. A, shows the tool complete, B
is a view after the top plate has been removed, showing the knife or
cutting tool, the latter being delineated alone at D on a large scale,
C is a section. To make this tool, which is within the power of any
person of average skill, a block of hard wood is first selected, and
drilled with a hole corresponding to the proposed size of the screw
to be cut. If no tap is at hand of the desired diameter and pitch,
this block must be mounted in the lathe, and the thread chased as we
shall presently describe. It is absolutely necessary that the block be
nicely squared up and level on the face. A small place must then be
cut to receive the knife, the edge of which is so constructed as to
form part of the thread cut away to make room for it. It is V shaped
like Fig. D, and very keenly sharpened. The method used to clamp the
knife in position, which is shown in Fig. D, permits the cutter to be
advanced or withdrawn until its position is accurately determined as
above. The top plate of wood is now fitted, and adjusted—the central
hole, which is not tapped, but as large as the outside of the
screw-thread to be cut, forming a continuation of that which is tapped
in the lower block. A slot b, Fig. A, forms a passage from the
knife, to allow of the escape of the chips. The piece to be cut into a
screw should be shaped like Fig. 82. The part a, will be left plain,
b, is that on which the thread is to be cut, and must be truly
cylindrical, and of such size as to just enter the hole in the top
plate of the screw box. The part c must pass through the threaded
part of the screw box, not loosely, but just so as not to damage the
threads in the least. The lower part of the central division is sloped
off as seen in the sketch. To cut the thread the screw blank is fixed
in the vice by its head, which, after being turned, should be planed
off at each side. The screw box being then placed upon it the lowest
and smallest part of the blank should just project, as in Fig. 83.
This part is intended to insure the perpendicular position of the
blank in respect of the screw box. The latter is then turned from left
to right until the screw is cut, which ought to come from the tool
clean and smooth. Box wood is especially suitable for this purpose.
This method is, of course, wholly inapplicable to anything but wooden
screw bolts, and for practice the tyro may set to work and make three
or four of the following screw clamps, which are useful to hold pieces
of wood that have been glued together. The tap for screwing nuts and
the jaws of these clamps, is similar to that used for metal, but, the
teeth, or cutting threads, are deeper and more pointed. The jaws of
the clamps shown in Figs. 84, 85, are usually made of beech, which
will take a very fair thread; or of birch, which is still better; and
the screws may be made of the same material, box being too costly and
scarce for such purposes. In making these clamps, there is to be no
thread cut on that part at which the handle of the screws project,
nor is there any thread on this part of the bolts, which pass through
a smooth hole in one jaw and lay hold of the other only. Other forms
will suggest themselves, but the two given will be found serviceable
patterns.
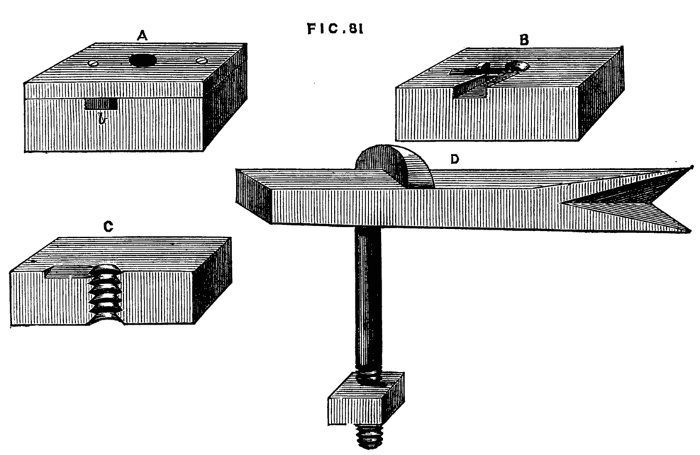
Fig. 81.
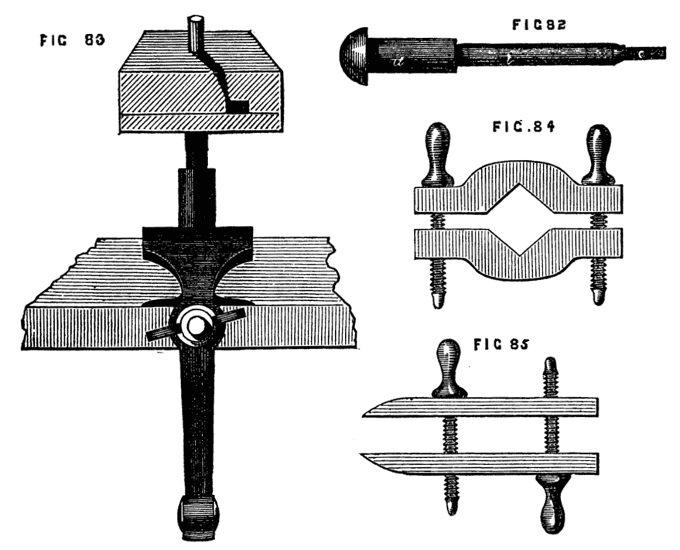
Figs. 82, 83, 84, 85.
The above method of cutting screws is not of anything like universal
application, nor specially the work of the turner; we shall now,
therefore, speak of cutting them by the chasing tool in the lathe. To
effect this with certainty requires much care and long practice, and
at first the attempt should never be made on a box or ornamental piece
of work, otherwise finished, but on a plain cylindrical bolt, such as
those of the clamps just described. For the inside, or female screw,
the making of chucks will afford endless practice, and a failure in
either of these will be of little importance. The screw tool for male
and female threads is represented in Figs. 86 and 87. It is of steel,
and as each tooth inclines in the direction and with the pitch of the
screw, it cannot be made with a file, but is cut by being held against
a revolving tap (or screw hob, which is of similar form.) There is
certainly a defect in the above common form of screw chaser, and a
slight modification, to be presently described, will be found easier
to use, and, in many respects, easier to make. To cut a thread with
the chasing tool, the top of the rest must be quite level and smooth,
so that the tool may readily slip along it. Suppose an outside thread
to be required on a cylinder of box or other close grained wood. The
rest being firmly fixed so that the upper edge is level with the axis
of the piece, and about half an inch from it, as Fig. 88, the tool is
advanced to touch the work, not in a line with the axis, but so as
to bring the part, a, in contact with it first, and the moment the
tool is felt to run along, which it will do as soon as this part of it
indents the wood, the handle is raised a little so that the points of
the teeth come into work. The tool in fact must describe the segment
of a circle, as shown by the dotted line. If this is done cleverly
the tool will not hitch, nor produce a drunken thread, but the latter
will come out clean and sharp. It is, nevertheless, necessary to
practise till the knack of thus chasing a thread is attained, and,
considering that once acquired, the necessity of traversing mandrel or
other expensive (and yet more or less defective) apparatus, no longer
exists, it is evident that the young aspirant should spare neither
time nor patience in becoming an adept in this useful art.
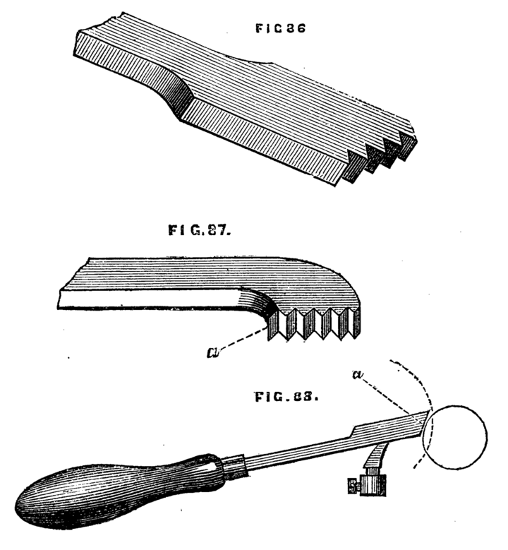
Figs. 86, 87, 88.
One great difficulty in cutting the screw-threads to the top of a box,
or the inside of its cover, arises from the necessity for stopping
short, and removing the tool instantly as soon as it touches the
shoulder, or the top of the cover. The latter should be made rather
deeper than is necessary, so that there may be a turn or two of screw
to spare. This will give more room for the play and removal of the
inside chasing tool.
The ordinary form of the latter is as shown in Fig. 87, the part under
the plane upper surface (a) being either slightly hollowed or flat,
generally the former, from having been cut by a revolving cylindrical
hub.
Now, although this form may be suitable for outside screw tools,
which have to work on cylindrical pieces, it does not appear equally
suitable for inside tools, which are to act on concave work. The
writer of this article has experimented upon many patterns of chasing
tool, and has found it perfectly easy to chase an inside thread with
an ordinary grooved tap, which seldom makes a false cut, or crosses
the threads. From this the idea naturally arose of a convex edged tool
for inside chasing, and a concave one for outside work, as Fig. 89.
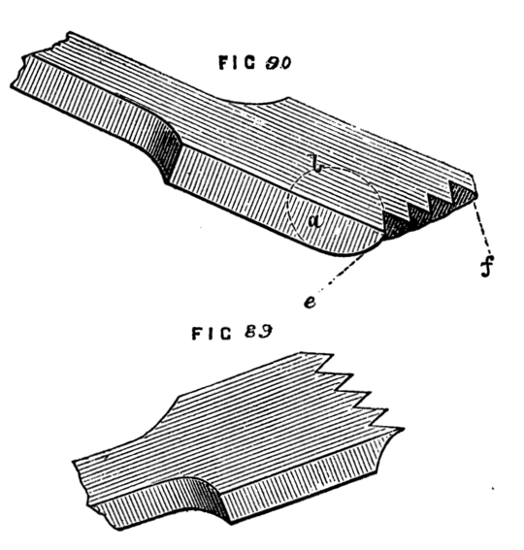
Figs. 89, 90.
Practically, however, the convex edge, Fig. 90, will answer
satisfactorily for an outside cylinder. In order to obtain an
efficient cutting edge from this form, the rounding must be very
slight. The out or inside tool is used with a rolling movement on
the rest as it advances. If for hard wood, a notch cut across in the
line e, f, Fig. 90, with a saw-file, will, by making a partially
cutting edge on the convex part, cause the tool to enter more readily
at starting. Tools like the above must be necessarily the work of
the amateur himself. The regular makers have a great objection to
make any tool or machine out of the ordinary routine. Hence the same
patterns are constantly reproduced year after year, until some one
connected with the manufacture invents an improved form, or some one
else of mechanical genius, and possessed of means, registers a new
design. Amateurs are apt to cavil at this system, and in some cases
it no doubt interferes with, and checks improvement in tools and
machines, but the evil is almost a matter of necessity. Tools are made
not singly, one of each pattern, but so many score or hundreds of one
form are forged out, and handed over to the grinding and finishing
department, and it would sadly interfere with the system and order
of the manufacturer to make a single tool or two for individual
purchasers of different pattern to those ordinarily used. If a design
is sent in by a retail dealer who can order a hundred or so at his
own risk, the above objection is obviated, and the new pattern of
tool or machine is at once introduced. If, however, any new design by
an amateur, being submitted to such men as Holtzapffel, Buck, Fenn,
or Whitworth, appears to them good and saleable, they will not
only not object to introduce it, but may possibly give a premium to
the inventor. We have thought it necessary to make these remarks to
obviate the possible disappointment of amateurs in this respect. It
is but natural to suppose that some ingenious device must have long
since arisen to obviate the difficulty of thus cutting screws by hand.
Every turner finds the difficulty, and few perhaps have failed to try
some plan or other to counteract it. There are two methods whereby
this can be done: one by causing the tool to traverse at a given rate
according to the proposed pitch of the screw, the other by giving
similar movement to the mandrel, while the tool remains still. For
such work as screwing the lids of boxes, the traversing mandrel is
commonly used, but for cutting long screws in metal, the tool is fixed
in a slide rest, and the latter is made to traverse, if necessary, the
whole length of the lathe bed, by means of a guide screw driven by
suitable gearing put in motion by the mandrel itself, the speed being
adjusted by a series of cog wheels which can be interchanged to cause
various rates of motion. The latter method belongs to machine lathes,
and will be treated of hereafter in this series.
The author has great pleasure in here introducing a device, not
exactly for cutting, but for starting the threads of a single, or
double screw, or, indeed, a quadruple one. It is the invention of a
gentleman whose nom de plume is East Norfolk Amateur, and was by him
kindly communicated to the English Mechanic, of June 21, 1867. The
description is here given in his own words:—
"I think the plan to be described will produce to a certainty any
required number of screws and turns to the inch. The screws are
entirely cut with a common comb tool, but started by a revolving
cutter set to the required angle, and applied firmly to the work, on
the T-rest. I call it 'the universal screw guide tool,' contrived
and made by myself, and I believe will prove as useful to others as
it has to me: the drawing will almost explain the tool. The cutter,
A, is 9/16ths of an inch in diameter, turned to a cutting edge, and
finely tempered. The stem, B, in which it revolves, is round, and fits
into the shoe, C, having a graduated collar, D, in front of C, to set
the cutter to the required pitch or angle, the set screw, E, makes it
fast; having turned a piece of rod, of brass, iron, or steel, a little
above the size necessary, and supposing a quadruple screw is to be
cut having ten turns to the inch, there would, of course, be forty
threads when complete; if one of these four can be truly traced, the
comb tool will easily follow by inserting the outside tooth, either
right or left hand, as found convenient, in the line traced, when the
other three will soon appear with perfect accuracy, provided the first
one exactly corresponded to five points of the comb, which is easily
accomplished after a few trials, and if not successful at first,[4]
can be removed by a dead flat file several times, without reducing the
rod too much. When found to exactly fit the five points, the cutter
may be applied with more force to leave a good chase for the comb. The
T-rest requires a smooth surface for the shoe, C, to slide freely on,
and to be set parallel with the work, and the tool held at a right
angle as it proceeds along the rest, or the lines formed would be
of unequal distance. After a little experience it will be found to
work with beautiful accuracy, and for those who have not screw-guide
mandrels, and are not practised hands at flying common screws, it
will be found a great assistance, as it sets to anything. I described
only the quadruple, but the same rule applies to all quick screws;
for a double the chase must correspond to three points, and so on for
any number, that is, one more point of the comb than the number of
screws to be cut, and for a common one the chase must fit the comb
altogether."
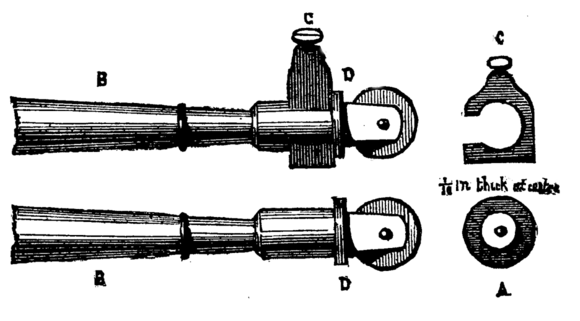
Figs. A, B, C, D.
The above simple apparatus will, it is believed, be of great service
to those who find difficulty in hand chasing of screws; it is,
however, necessary to speak of other methods, and especially of that
so universally used by the turners of "Tunbridge ware"—viz., the
traversing mandrel. This is represented in Fig. 91. A is the poppet;
B, the mandrel, no longer conical at the place where it traverses
the collar, but cylindrical, and passing through two cylindrical
collars. It is prevented from advancing towards the left in its
bearings by the shoulder, K, and in the other direction by a plain
cylindrical collar, or ferrule, C, which slips over the end, and is
secured by a nut, D. The whole is thus ready for use, as an ordinary
mandrel. To cause it to traverse from left to right, as it revolves,
the nut and collar, C, D, are removed, and a ferrule, or guide, F,
which has a screw of the desired pitch cut on its edge, is slipped
on the mandrel over a short feather against a shoulder, where it
is retained by a nut or pin. There are several such guide-ferrules
supplied with the mandrel of different pitches of screws. The nut G
is then removed and the piece E, which is of brass or gun metal ⅜
or ½ inch in thickness, with similar screw threads in each of the
hollows is attached. This guide is slipped on at H, and secured by
replacing the nut. The pin, which carries the guide, is frequently
made to slide up and down the face of the poppet, by the action of a
screw, M, working through a brass piece attached to that which carries
the pin. It is thus readily lowered out of gear or drawn up again
to touch the screw ferule. This is better than a pin screwed to the
head of the poppet, and is always adopted in the best lathes. In the
frontispiece is a photograph of this arrangement.
This guidepiece acts like a half nut, and as the mandrel revolves
it gears into the ferule and causes the required traverse. A single
point tool, therefore, held against the work will trace a screw of
the same pitch as that of the guides, and of a length equal to that
of the ferule. The above is not intended for cutting long screws,
which would have to be done in successive short lengths, but for
screws of box lids, chucks, and similar work it is a most excellent
contrivance, and peculiarly adapted for the use of the amateur. The
guide threads in the commoner patterns of these lathes are cut on
the mandrel itself, which is made of greater length than usual, and
these several guides are cut upon the part within the poppet heads,
as Fig. 92, which represents such a lathe as is sometimes used by
gasfitters and brass workers in general.[5] In the latter it will
be noticed that there is added a sustaining screw at the back of
the mandrel. This is a good addition, and indeed almost a necessary
one if the lathe is to be used for ordinary rough work, especially
drilling, as it takes off the pressure which must otherwise come
against the shoulder, K, Fig. 91, and it must be remembered that these
lathes are expensive, and, therefore, ought to be taken care of. The
amateur may also be warned against bad work; none but the first-class
makers can turn out a reliable lathe of this description. The collars
and mandrel require perfect fitting, and they must be quite hard,
because there is no possibility of tightening them when worn. They
must be kept well oiled, therefore, when in use, and the oil holes in
the top of the poppet should be fitted with brass covers, to prevent
any particles of metal, and especially emery dust, from working in
between collars and mandrel. Be sure to have one guide screw of
the same pitch as that on the nose of the mandrel, for the purpose
of tapping chucks to fit thereon. In using the traversing mandrel,
either the cord should be slackened so that the pressure of the hand
on the pulley may stop the revolution of the work in a moment, or
the flywheel should not be brought into use, the cord being instead
grasped by the left hand, because it is generally necessary to cut
to a shoulder or given point. It is, however, possible sometimes so
to arrange the guides by insertion of a washer or other expedient as
to cause the action to cease of itself at the required point. In a
future chapter, the cutting of long metal screws will be treated in
detail, but before concluding the present chapter, it may be useful
to say a few words concerning the nature of the screw itself as a
mechanical expedient. A screw may be defined as a continuous inclined
plane—or an inclined plane wound round a cylinder—the pitch being
the inclination of the plane, that is, the ratio of its height to the
length of its base. From the mechanical principle of the inclined
plane it follows that the greater number of threads in a given space
the greater is the power of the screw when used as in a press, or to
draw along its nut, as in the slide rest, in which endlong motion
in the screw itself is prevented. It seems, at first sight, easy to
devise a method for cutting screws of any desired pitch, but this is
far from being the case, and when it becomes necessary to increase the
number of threads to fifty, sixty, eighty, or even more to the inch,
with such accuracy that one turn of the screw shall always produce an
equal longitudinal movement of the nut, the most delicate machinery
scarcely suffices for the purpose. The microscope detects and shows
errors even in the best work, and it is questionable whether a perfect
screw of any length can be cut by machinery, as every imperfection
in the latter is communicated to the work done by it. If the amateur,
therefore, requires a screw for a slide rest, eccentric chuck,
microscope, or other delicate piece of machinery, or philosophical
instrument, he had better get it cut by some practical mechanician, in
the possession of the necessary apparatus.
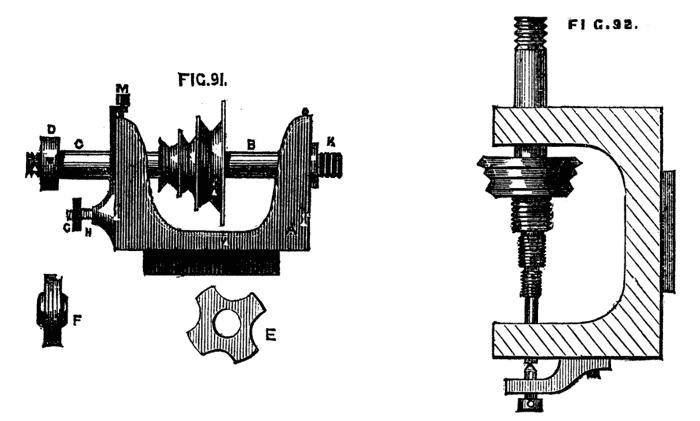
Figs. 91, 92.
In the "Manual Bergeron" is an ingenious contrivance, by an amateur,
which is worth notice, although unsuited for any work where extreme
accuracy of pitch is required in the screw. The following, Fig. 93,
is a description:—The mandrel is made to traverse in its bearings,
as before detailed in this series, but instead of its motion being
governed by guide hubs, it is dependent on the action of a pair of
differential pulleys, B. A bent lever, C, is pivoted at E to the
face of the poppet, having a bit of hardened steel fitted to work in
a semicircular groove in the mandrel itself, and so arranged that
on raising the tail or long arm of the lever the mandrel is thrust
forward from left to right, while a reverse action of this lever
causes a similar movement in the opposite direction. The movement of
the lever is thus regulated:—At the extreme end of the long arm is a
pulley and hook, as shown in the drawing; the double, or differential
pulley, is fixed to the end of the mandrel, and from the smaller
part depends a cord which passes thence through the pulley on the
lever, and is wound round the larger one on the mandrel when its end
is secured. On the hook is hung a weight. It will be evident, on an
inspection of the drawing, that on putting the lathe in motion the
cord on the differential pulley will coil itself round the largest
part of the same, and will draw up the end of the lever with a speed
proportionate to the difference of diameter between the larger and
smaller parts of the double pulley. The short end of the lever will
at the same time with similar proportionate motion move the mandrel
and work, and cause the fixed tool to cut a spiral or screw thread on
the latter—a good deal of ingenuity is displayed in the above, and it
has the advantage of being easily fitted up, but it is evident that
some alterations and additions would be required to adapt it to any
other use but that specified. A contrivance similar to Fig. 94, may
in some cases be a sufficient makeshift, when a more perfect one is
not at hand. A screw is here cut on the outside of the chuck, and a
kind of double tool is used, the tracer which is in contact with the
guide thread being adjustable as to its length, and the cutting tool
having a sidelong adjustment as well. The rest being placed between
the connecting bar of the tool and the work, the former will be held
with sufficient steadiness to enable the workman to traverse the
whole easily by hand. The use of this tool is of course limited, but
the plan is simple and fairly effective. The only really serviceable
plan is the slide rest, to be hereafter described. But one other plan
is here added, which is called "Healey's chuck." The description and
sketch are from Holtzapffel's work, in which it was however copied
from an older treatise. The author, it must be understood, has never
seen the contrivance himself, and there is a fault in its principle
of construction which must militate against its use except in a very
limited degree. Since, however, Holtzapffel has considered it worthy
of a place in his work, it is at any rate well to introduce it to the
reader, especially as its defects will not be of great importance
in tracing screws of half a dozen threads or so. The apparatus is
represented in Fig. 95. in plan. C is the chuck which carries the work
to be screwed, and T is the tool which lies upon R, R, the lathe rest,
that is placed at right angles to the bearers and is always free to
move in its socket S, as on a centre, because the binding screw is
either loosened or removed. On the outside of the chuck C is cut a
coarse guide screw which we will suppose to be right handed. The nut
N, N, which fits the screw of the chuck is extended into a long arm,
and the latter communicates with the lathe rest by the connecting rod
C, C. As the lathe revolves backwards and forwards, the arm, N (which
is retained horizontally by a guide pin, G), traverses to and fro,
as regards the chuck and work, and causes the lathe rest R, R, to
oscillate in its socket S. The distance S, T being half S, R, a right
hand screw of half the coarseness of the guide will be cut, or the
tool being nearer to and on the other side of the centre, S, as in the
dotted position T, a finer and left hand screw will be cut. The rod C,
C, may be attached indifferently to any part of N, N, but the smallest
change of the relation of S, T to S, R would mar the correspondence
of screws cut at different periods, and therefore T and R should be
united by a swiveljoint capable of being fixed at any part of the
lathe rest R, R, which is omitted in Mr. Healey's perspective drawing
of the apparatus.
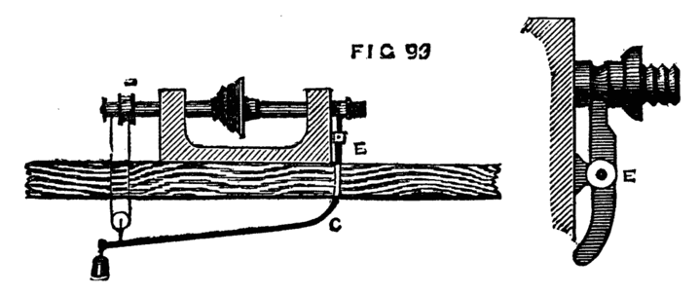
Fig. 93.
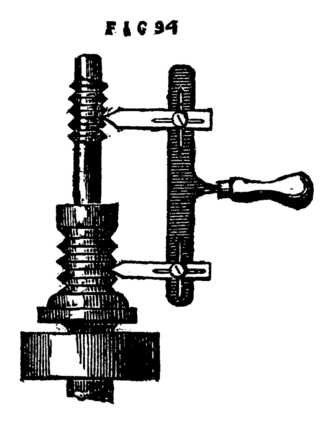
Fig. 94.
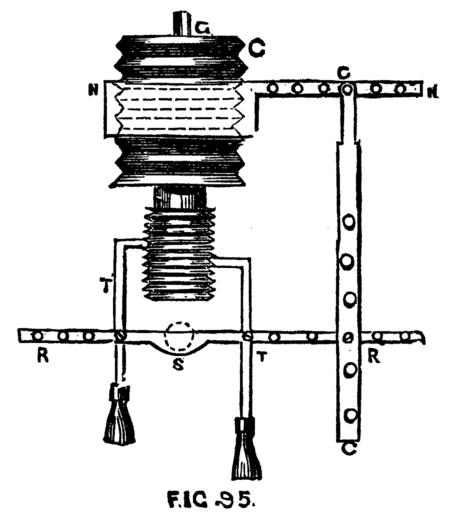
Fig. 95.
This is one of the least perfect modes of originating screws, it
should, therefore, be only applied to such as are very short, as,
owing to the variation in the angular relation of the parts the motion
given to the tool is not strictly constant nor equable. When in the
midway position the several parts should lie exactly at right angles
to each other in order as far as possible to avoid the error. The
inequality of the threads is imperceptible in a short screw. A little
modification of the screw-chuck of Healey would result in a more
correct and serviceable arrangement.
The disadvantage, for instance, of being obliged to set the T of
the rest across the face of the work is apparent at once, and it is
difficult to understand how such an arrangement could be made to
answer when the work might be of a length to require the support of
the back poppet. The following plan, Fig. 96, would obviate this and
the other disadvantages, and make a more efficient apparatus. B is the
chuck with screw chased on the outside, A the nut travelling upon the
same. To this is attached a bar H, which passes through the bar K,
to which it is clamped by the binding screw visible at H. Two short
pillars, F, F, are screwed into the bed of the lathe, in which there
might be more than one hole for each to permit the pillars to be fixed
at different distances from the line of centre. Through slots in these
passes the square bar of polished iron or steel E, supporting the
traversing rest socket, D, of which two other views are given at Figs. 97 and 98.
It will be evident on inspecting the drawing that as the
nut A travels to and fro, it carries with it in a line parallel to
the lathe bed the rest socket and T. To enable the workman to steady
the tool, the latter should rest against two short pins fixed in the
top surface of the rest in holes made for the purpose; with the aid
of these the tool will be made to traverse the work with great ease
and regularity. In chasing a right-handed screw, the tool would have
to lie on the left side of the pins, and the latter would insure its
traversing with the rest. A longer T (or half T) being turned in its
socket to stand across the face of the work will enable an inside
thread to be cut with the ordinary tool either of one or more points.
Of course, in this modification of Healey's chuck, the screw cut will
be of the same pitch as that of the chuck itself; but as the latter
may be of boxwood, there would be no difficulty in having from three
to six with the most generally useful pitches of screws, as the arm
may be screwed into the near side of the nut, and, therefore, it,
and all the other parts of the apparatus, would answer for the whole
set of chucks. If the work to be screwed is merely a box cover, or
some such work where great length of screw is not required, it is
evident that to rig up this kind of contrivance, or Healey's, or
indeed anything of similar elaboration, would appear like summoning
a gang of navvies to remove a mole-hill. Hence, if a traversing
mandrel cannot be obtained, by far the simplest plan is the chasing
tool used by hand; it is therefore well worth while to get into the
knack of using this tool. To give confidence (which is essential to
success, the least nervousness generally proving fatal to such work)
the part on which the screw is to be cut may be left larger than will
finally be necessary. The screw is then commenced, and if a failure
takes place it is again levelled, but if, as is more probable, the
attempt is successful, the chisel and chase are alternately used, the
cuts of the latter not being obliterated by the former but always
left sufficiently deep to form a guide until the desired object is
satisfactorily accomplished.
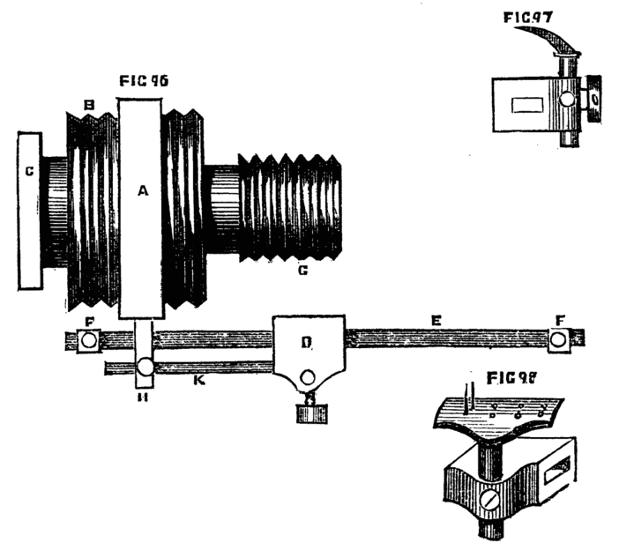
Figs. 96, 97, 98.
Having treated of screw cutting so far as we are able without
trespassing on that section of the present series which is to be
devoted to machine work with slide rest and change wheels, we shall
enter on the matter of spirals, or Elizabethan twists, the method of
making which was long kept a secret by the trade. These twists are
essentially screws of very extended pitch, and generally rounded
threads. The latter sometimes embrace the central cylinder or core,
and sometimes are detached so as to assume a more open form like a
corkscrew, and in the latter case two, three, or more threads can be
cut, so that the spirals appear to intertwine. These spirals, too,
are frequently ornamented with the aid of the eccentric chuck, and
thus the work becomes fit for the adornment of the drawing-rooms
of the highest in the land. No turned work can in short exceed in
beauty these delicate and elaborate specimens of the turner's art.
To commence with a single twist of one thread. A cylinder of the
requisite length must first be turned. The number of turns the
thread or cord of the spiral is to make in a given space must next
be determined. We will suppose the cylinder one foot long, exclusive
of any mouldings or tenons at the ends, and that the spiral is to
make three turns round it, that is, one turn in four inches of its
length. Divide the cylinder into three equal parts by the lines B, C,
Fig. 99. Next rule equidistant lines D, E, F, along the cylinder in
the direction of its length; in the present case let there be four
such lines. The three divisions first made must be subdivided each
into four (always the number of the longitudinal lines). The angles
of the parallelograms thus formed must then be connected diagonally
as shown in the figure, which diagonals being continued, will be
found to describe a spiral line. A second similarly constructed
spiral determines the thickness of the thread or cord of the twist.
These spirals may now be cut with a tenon saw, and all the material
outside the cord carefully removed with the gouge, so as to form
a semicircular hollow between the threads. This cannot be done by
putting the treadle and flywheel in motion, but the work itself must
be grasped with the left hand, while the right holds the gouge upon
the rest and guides its edge. After the work has thus been roughed
out, it must be finished by rasps and files, or by a kind of plane
with a semicircular cutting edge. While the latter is being used, the
flywheel must be brought into action, so that the work may be made to
revolve with sufficient rapidity to ensure a clean and smooth cut. A
hollow plane may be used to round the cord of the twist, and the whole
finished with glass paper and polished.
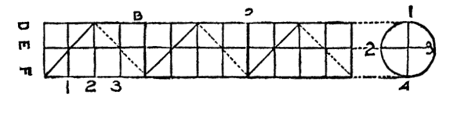
Fig. 99.
The "kind of plane" named was designed by a regular workman for his
own use, and was made thus and grasped in the fist, or rather hollow
of the hand. The iron was like c, sharp at one edge, the block of
wood being slightly bevelled off in front of the cutting edge. The
workman, who made scores of these twisted works for the trade, of all
dimensions, would run this along the hollows, while the lathe was
in motion, with great speed and accuracy. He marked the spirals as
described, and then grasping the work in the left hand, and the gouge
in the right, turning the work round with the former (the cord thrown
off the wheel), he cut out the wood boldly in large pieces with little
apparent care, and perfect ease. Then came the plane described above.
Fig. 100 shows a simple spiral thus made. If the piece to be turned
is dark it is not easy thus to mark out the divisions. In that case
the following method will answer equally well. It is the plan used
and contrived by the writer,[6] and specially handy when a number of
similar twists are to be cut, as in ornamented pieces of furniture.
A, Fig. 101, is a straight edge of hard wood, through which, at any
given angle (regulated by the number of turns the cord is desired to
make in a given length of cylinder), a knife edge is fixed. If this is
held as in the figure, and the blade is pressed down upon the cylinder
to be cut, the lathe being put in motion, a very correct spiral will
be traced, which can be at once deepened by a tenon saw as before.
The thickness of the cord being determined it only remains to place
this tool again upon the work so that the second line shall be traced
at the required distance from the first. A second, or any number of
cords, may be thus traced in succession parallel to each other by this
simple method. By a slight modification of this instrument, which
allows the knife to be clamped at any desired angle with the straight
edge, the inclination of the cords, and, consequently, the pitch of
the spiral can be varied at pleasure, and a second blade can be added
to trace the second line, determining the thickness of the cord with
one movement of the tool along the cylinder. The edge of the knife may
be across the rest, the piece of wood just overlapping the T on the
side next the workman, if the blade is long enough to reach across the
work when thus held. The tool will be steadier and perhaps more easy
of management in this position. One hand should then lightly press the
back of the knife, while the other retains the wood against the rest
as a straight edge. East Norfolk Amateur's design of a screw guide is
on the same principle, the only difference being the substitution of a
revolving instead of a fixed knife edge. In using either it requires
some care to allow the tool free traverse, as the least check would
spoil the thread.
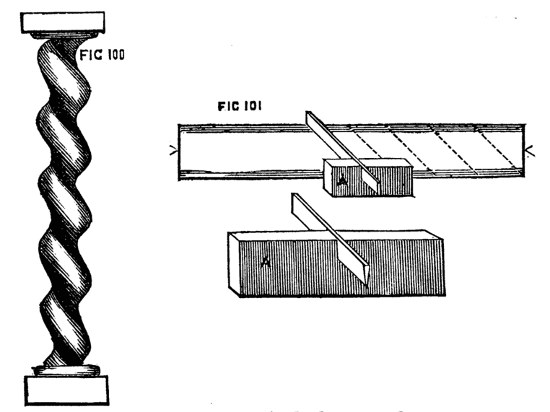
Figs. 100, 101.
The next class of spirals is that in which no central core exists,
but the coils stand separate and distinct, two or more rising from
the same base. The coils are sometimes flat, sometimes rounded, and
still more frequently, in the best work, exquisitely, and (as a
casual spectator would say) impossibly carved. The process is as
follows:—Turn a cylinder of ivory or hard wood, forming at the end
any required mouldings as a base and capital. Determine the number of
coils and the pitch, and by one of the previous methods mark out the
same. The cylinder is now to be bored out from end to end, leaving
sufficient for the thickness of the required cords. This bore may
with advantage be slightly larger at one end than at the other, so
that a mandrel of wood may be fitted into it, to be afterwards easily
withdrawn. This will certainly be necessary if the ivory cords are
to be of light substance, as they require support to enable them to
bear the action of the tool. After the cylinder has been bored as
above directed, let a mandrel of common wood be inserted, and the
lines, marked as shown, be cut quite through. The intermediate parts
between the intended threads must then be removed carefully (with a
round rasp, if of ivory) with any convenient tool if of wood. The
cords must then in a similar way be rounded or otherwise moulded, and
afterwards the common and now damaged mandrel removed. In the case of
ivory the piece of work will not only be strengthened by the insertion
of a polished mandrel of ebony, but its appearance will be improved.
Sometimes, however, it may be preferable to line it with red velvet or
silk, or it may be left entirely open. The further ornamentation of
the cords, depending on the eccentric chuck or eccentric cutters, will
not be described in the present paper. These open spirals are worth a
vast amount of patience and trouble, which their elegant appearance
when finished will amply repay.
The reader is not to suppose that this method of cutting spirals by
rasp and file is the only or best method, especially when ivory is
the substance operated upon. Further on will be described various
modes of accomplishing the same ends by self-acting machinery, and
by the spiral apparatus designed for use with the ordinary lathe,
but all these need the slide rest, whereas it is quite possible in
the foregoing manner to make spirals by hand tools alone, which for
correctness and finish may vie with those which may have been worked
with more elaborate and costly apparatus.
Before quitting the subject of plain hand turning in wood, a few
more words may be necessary in respect of certain details of lathe
manipulation, foremost among which comes Chucking work. This is often
carelessly done, especially by amateurs, who, in consequence, are
frequently annoyed by the shifting of the material under the influence
of the cutting tool. If this is hard and valuable—as are many of
the best woods for ornamental turning—the fork or prong chuck will
not enter sufficiently to sustain the piece, and at the same time
the stuff is too valuable to allow of the waste incurred in screwing
it direct to the mandrel, or inserting it sufficiently far into a
brass cup chuck. In such cases the best plan is to screw a piece of
common wood upon the mandrel, face it truly, and cut a few shallow
concentric circles upon the end thus levelled, both for the purpose of
a guide to centrality, and also to give a hold to the glue by which
the more precious material is to be attached to it. For this purpose,
both chuck and work are to be well warmed, and the glue—boiling
hot—brushed upon the parts to be united. The latter are then to be
rubbed together a few seconds, and when the piece to be turned runs
truly, the back poppet with boring flange attached—if the right hand
end of the piece is level, otherwise, the point allowed to remain—is
to be brought up and screwed as a clamp against it till dry. This
process requires time, but is well worth the trouble, as the material
will be securely held, and can be safely operated on. None but those
who have had to contend personally with a tyro's difficulties, and
have, in consequence, seen the work shift in the chuck when nearly
completed, can truly appreciate the advantages of efficient chucking.
In the case detailed, there is absolutely no waste of material, no
possibility of the work becoming loose or out of truth; and the
ornamentation by eccentric cutters, drills, and so forth, can be
proceeded with, and carried out with that confidence which never fails
to promote good workmanship. Even with the above arrangement the back
poppet should be used while the excrescences are turned down, and
retained as long as the gouge has to be used in bringing the design
into an approximation to its intended form. This should be removed,
however, before taking the final cut, as the work will generally seem
to drop a little when the support is taken away, in consequence of
the mandrel, which has been forced against the back centre, returning
to its place in the collar.
Pieces of six or seven inches in length, and of one or two inches
diameter, requiring to be hollowed out, may frequently be turned by
reversing the usual method and boring out the interior, previous to
shaping the outside. A case for pencils, for instance, or a bodkin
case, may be thus worked:—Mount in the square hole chuck, an American
screw auger, sets of which are now to be had beautifully finished and
polished. The kind meant has a scooping kind of edge above the screw,
Fig. 102, and cuts cleanly and rapidly. The piece of wood—soft wood
alone is meant—is brought against the tool, being grasped by the
left hand, while the back centre, with flange, is steadily advanced
with the right hand against the opposite end. This auger will run
straight through several inches without requiring to be withdrawn, as
the borings pass freely along the polished threads of the instrument
and escape. If necessary, however, it can be readily withdrawn by
reversing the action of the lathe, and replaced without difficulty.
The piece thus bored may then be mounted in the lathe and finished on
the outside. To do this satisfactorily, an arrangement is requisite
by which the centrality of bore is insured, else in the process of
cutting the external surface, the material will, in all probability,
be cut through in one part, while in another it will remain of
considerable thickness. If the piece is bored quite through, so as to
become a tube, Fig. 103 will be satisfactory, as the cones preserve
centrality, whilst the use of the carrier will prevent the necessity
of screwing the cones up so tightly as to endanger splitting the wood.
This is the best way to chuck small cylinders and brass tubes. The
more obtuse the angle of the cones the better.
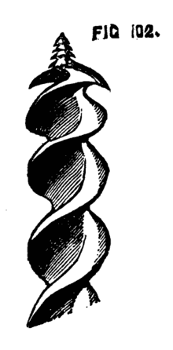
Fig. 102.
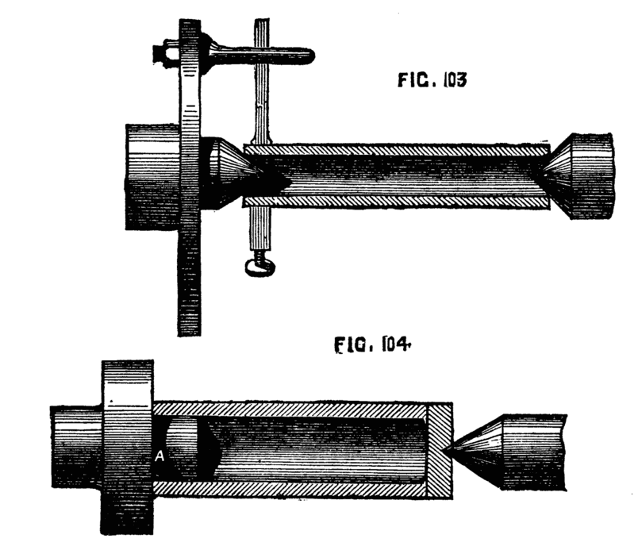
Figs. 103, 104.
In this method the bottom of the case must be turned as a plug and
glued into its place. If the bottom of the case is left solid, an
arrangement like Fig. 104 will answer well. The plug chuck, A, must
not be at all conical, and the part that enters the work must be at
least an inch long. If this is attended to, and the face of the work
and of the chuck is square, the tube will be truly centred, only
requiring the back poppet to take off the strain upon A, when the
tool is applied. If A is chalked, there will be no slipping, provided
it has been accurately fitted. Observe, nevertheless, that as a
general rule, hollow work should be placed inside and not upon a
chuck, unless you have to work upon the whole exterior surface. By
this plan, there will be no likelihood of splitting the object, an
undesirable consummation which not unfrequently takes place when the
contrary method is pursued.
Thin discs of wood or brass are most conveniently turned upon a
face-plate, to which they can be attached by turners' cement, already
described. If, however, one surface only has to be worked, and the
plate is not of less thickness than ⅛th of an inch, it may be
mounted on a flat chuck with small projecting points, the back poppet
being used to keep it firmly against the face of the chuck. Even a
plate of brass may be thus turned if placed first of all against the
chuck and gently tapped so as to mark the position of the points, and
then drilled to suit them. Bread-platters are thus easily chucked,
first of all face downwards, and then reversed with the bottom
against the points, so that in the latter position, the chisel or
broad may be applied to the face and the marks removed. The larger
designs on these platters are carved by hand after their removal from
the lathe, and the small figures forming the ground, which often
appear round the main design, are made by figured punches.
Chucking Egg Shells:—The method of doing this so as to enable the
turner to cut the shell evenly in two parts, is given by Holtzapffel,
in his "Mechanical Manipulation," and has been copied elsewhere. It
is ingenious and effective. The object is simply to obtain a pair of
delicate vases, to be edged with ivory, and mounted on a pedestal, as
a curiosity. The following account is from the pen of the inventor,
Mr. G. D. Kittoe, as communicated to Mr. Holtzapffel:—"In the
accompanying figure—Fig. 105—is represented the nose of a lathe,
with an egg chucked ready for cutting." Fig. 106 is the chuck used
first "to prepare the egg, to be mounted in the above way. The latter
is generally termed a spring chuck, and is made by rolling stout paper
with glue upon a metal or hardwood cylinder, the surface of which
has been greased to prevent the paper sticking to it, and upon which
it must remain until perfectly dry, when it may be removed and cut or
turned in the lathe as occasion may require." [N.B. Nothing is said
in the above account of the evident necessity of fixing the paper
cylinder to a wooden block, in which a screw must be cut to mount it
on the nose of the lathe.] "This sort of chuck is very light—easily
made and well adapted for the brittle material it is intended to hold.
Before fixing the egg in it, the inner surface should be rubbed with
some adhesive substance (common diachylon answers exceedingly well);
when this is done the egg should be carefully placed in the chuck,
the lathe being slowly kept in motion by one hand whilst with the
other the operator must adjust its position until he observes that
it runs perfectly true, then, with a sharp pointed tool he must mark
the centre and drill a hole sufficiently large for the wire in the
chuck, Fig. 105, to pass freely through. When this is done the egg
must be reversed, and the same operation repeated on the opposite end,
its contents must then be removed by blowing carefully through it.
It is now ready for cutting, for which purpose it must be fixed in
the chuck, Fig. 105. A is a chuck of box or hard wood having a recess
turned in it at a, b, into which is fitted a piece of cork as a soft
substance for the egg to rest against. B is a small cup of wood with
a piece of cork fitted into it serving the same purpose as that in
A. A piece of brass, d, is to be firmly screwed into the chuck A,
and into this a steel wire screwed on the outer end, on which a small
brass nut e is fitted to work freely in a recess in the piece B.
When the egg is threaded on the wire through the holes previously made
in it, this nut is to be gradually tightened up until it presses the
cup B against the egg sufficiently to hold it steady and firm enough
to resist the action of a finely-pointed graver used to cut it. The
tool requires to be held very lightly, as a little undue violence
would crush the shell. Neither should the latter be pinched unduly
tight in the chuck, as otherwise when the point of the tool divides
the shell the two parts might spring together, and be destroyed by
the pressure. It requires some delicacy of hand to attach the rings
to the edges of the shell to constitute the fitting. The foot and top
ornaments are fixed by very fine ivory screws, the heads of which are
inserted within the shell."
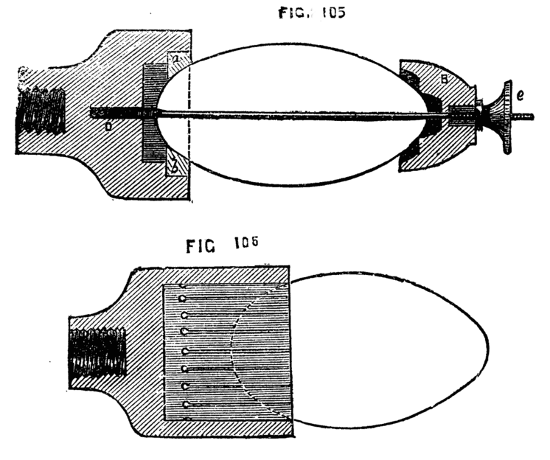
Figs. 105, 106.
Box wood is decidedly the best material for ordinary chucks, as it
takes a screw almost as well as brass, is pleasant to work, holds
the material firmly, and is of good appearance, which last is not
unimportant to those who possess good lathes, and like to see
everything in decent order about the workshop, and it is certain
that a disorderly workman will commonly produce slovenly work. This
wood, however, though tolerably plentiful, is sufficiently costly to
be worth preserving, and by a little management chucks may be made
to answer for a longer period than might be at first supposed. A
chuck, for instance, too large to hold the work, may be plugged with
a worn-out chuck of smaller bore, or with wood of inferior character,
to save the necessity for hollowing out a new piece of box wood. The
latter material, moreover, excellent as it is, may be replaced by
other kinds of wood, provided the latter will bear a good screw.
Beech, if dry, will answer very well for the purpose.
Pear is tough and screws well.
Apple is little inferior.
Ilex or evergreen oak is sufficiently hard and tough and will be
found quite satisfactory. Elder of large size is good, and screws well.
Sycamore screws well, but is not always equally tough.
All hollow or cup chucks should be furnished with rings of iron or
brass to prevent splitting. About six sizes of rings will suffice
for a great number of chucks. Bergeron, speaking of the barrel stave
chucks already alluded to, prefers the encircling rings plain and not
screwed. He gives the following reason:—"If a piece of work entered
in such a chuck does not run quite truly, a tap on the ring in the
proper place will, by closing the sawgates more in that part, rectify
the error, whereas with a screwed ring this is impossible." There is
reason in this, but at the same time it would be easy to unscrew the
ring a turn or so, give a light tap to the work, test its position
by putting the lathe in motion, and when true fix it securely by
screwing up the ring. There is, however, one precaution to be taken
in making these useful chucks—namely, to cut the staves of equal
width, else they will not yield equally to pressure, and the work
will not be so readily centred truly. A grip chuck of inexpensive
make (one additional pattern of which is introduced from a design by
contributors to the English Mechanic) should always be provided. A
rough block of ivory for instance may be seized in its jaws, and the
exterior useless part cut off by a parting tool as a ring, leaving the
nicely rounded material ready for chucking. Ivory nuts or corosos
which are peculiarly awkwardly shaped for mounting in the lathe, may
also be thus seized, and one portion faced up and rounded so as to
allow of being fixed on a face chuck by glue or cement, or fitted into
a cup chuck. Rough pieces, too, thus mounted may be faced up, bored
and tapped to fit the mandrel as chucks, and a thousand similar works
may thus be handled. The simple grip chuck in question is important
as having the very useful addition of a centre point which the writer
would, if he did not abominate and eschew puns, direct attention to,
as the chief "point" of interest—"I call it," says the inventor,
a "Universal Self-Centering Grip Chuck." The drawings 1, 2, and 3,
almost speak for themselves, to practical turners.
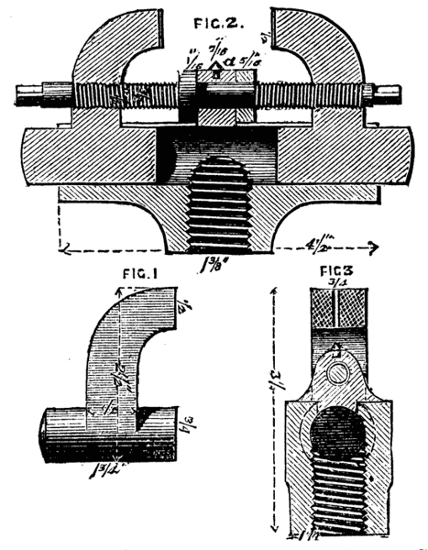
Figs. 1, 2, 3.
1, is an elevation of one of the grips. 2, a section through centre
of chuck. 3, a side section of ditto. The body of the chuck is made
of cast iron, to screw on to the mandrel; and the grips, 1, are moved
simultaneously by a right and left-handed screw acting in a circular
groove. The jaws of the grip are serrated and tempered, the same
as in ordinary vices. In the centre of the grips, when closed, a
three-sixteenth hole is bored true to the centre of the lathe. Behind
this there is a true centre point screwed into the body of the chuck,
as marked at a. The above hole and this centre point are to be
particularly attended to, as on their truism depends the correctness
of your work.
If I want to turn a solid cylinder I make the usual centre at each
end; put one on the above centre point and the other on the back
centre of lathe, and then screw up the grips tight; but if the work is
short you need not apply the above centre point or the back centre,
as the grips are alone sufficient. The hole in the jaws of the grips
admit of any kind of drill or other tool being put into them without
using any centres, and the grips will admit anything up to two inches.
In fact, I do almost every sort of thing with this chuck, and I think
amateurs, if not others, will find it a most valuable and handy
contrivance.
Fig. 108, A and B, represents a modified form—a chuck already spoken
of and recommended for ordinary plain turning, in which the work
is supported at both ends. The present form is to a great extent
self-centering and will hold the work also without the saw-cuts
otherwise needed, the sharp edges of the double fork entering the work
with the pressure caused by the back centre. The chuck is useful not
only for ordinary work, but for re-mounting pieces centrally, which
it may have been necessary to remove when partly finished, and to
return to the lathe for completion. A still further addition to this
chuck of a steel point sliding through the centre, as in the section,
Fig. 109, makes it a very complete and serviceable apparatus, as by
this means it is easy to reverse the work without destroying its
centrality. The point is intended, as in the chuck of Wilcox, to slide
back stiffly (being if necessary kept up by a spiral spring as shown),
as it is only intended as a guide to assist in mounting the piece. If
the mandrel is not bored the chuck must be long enough to receive the
pointed wire within its substance. This will be found in every way a
most serviceable chuck. It may be of iron or brass, or even of wood,
if a round plate of brass is mounted on its face, to which the holding
pieces can be soldered or brazed.
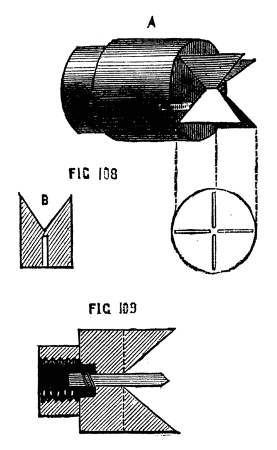
Figs. 108, 109.
This is done, as already described, by the regular soft wood turners
in Tunbridge and elsewhere, by means of hook tools. A great number
of workmen, however, use only the gouge, and for boring out chucks,
hollowing boxes, small bowls, and similar work, the latter tool will
be found effectual if rightly held and carefully managed. It must not,
however, be applied to the inner surface of the work at the point
usual with scraping tools, but beyond the centre, Fig. 109A. The
rest, B, does not require to be turned across the face of the work,
but remains parallel to the bed of the lathe. The blade of the gouge
is to press against the near side of the hollow as the work proceeds,
which considerably aids in securing the position of the tool. The back
of the gouge is to face the bottom of the hollow (next the mandrel),
but the tool is generally rolled on the rest a little, so that its
hollow side is often more or less below, towards the lathe bed, and
the point is also lightly raised as it approaches the finish of the
cut. Begin with the tool almost horizontal, and at the centre of the
piece, the back against the wood, and, depressing the handle as the
shaving is removed, finish at the top outer edge of the hollow,
rolling over the tool, so that it shall leave the work with its back
upwards and hollow downwards. Thus used it will not stick in its
course, and, after a few trials, will be found to cut out the wood
cleanly and rapidly.
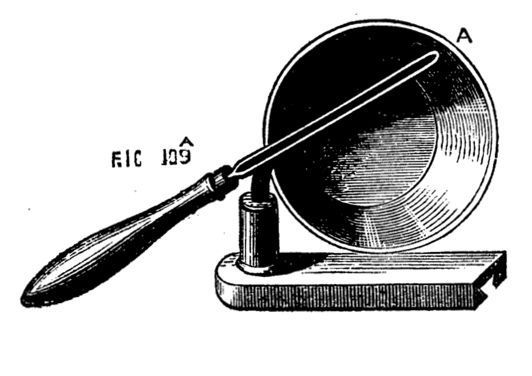
Fig. 109A.
Another grip chuck, or self-centering scroll chuck may here be
introduced, from the source of information previously alluded to. The
writer thus describes it—
This chuck is made upon the same principle as the Warwick Drill
Chuck—namely, a flat spiral so acting on three jaws sliding in radial
grooves as to make them recede from the centre to admit any object
between certain sizes, and then to be tightened upon it. Fig. 1 is
a plan of a 4-inch chuck. Fig. 2 is a vertical section of the same.
Fig. 3 is a view of the outside of the chuck, and Fig. 4 is a separate
section of the principal part a, a, taken through the line z, z
(Fig. 1).
In Fig. 2, a, a is this piece, b, b, has the spiral cut on it
which actuates the jaws 1, 2, 3 (Fig. 1), c, c screws on the piece
a, a to keep b, b in its place and d, d is the plate which
screws on the mandrel, and which is fixed to c, c, by three
countersunk screws, one of which is shown in section.
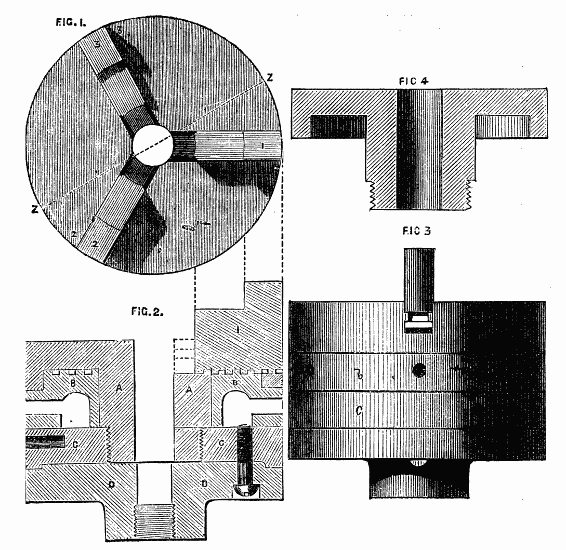
Figs. 1, 2, 3, 4.
If the foregoing observations are carefully studied the further
practice of plain hand-turning in wood will not be difficult, and
we shall proceed to speak of metal turning, before passing to a
description of the Slide Rest and other apparatus usually added to
the lathe. We may, however, observe here, that, for ivory and hard
wood—especially the former, the first roughing down cannot be done
with the gouge. A point or small round-ended tool must in these cases
take its place, to be succeeded by one or more of those tools which
rather scrape than cut, as described in detailing the process of
hollowing out boxes and similar work.
The first requisite for the above work is a well made and sharp tool,
for, strange as it may appear, a keen edge is as necessary for making
good work in metal as in turning wood. The principle of this cutting
edge must be well understood, and this has been well explained by
Nasmyth and others.
The remarks of the above eminent mechanic upon this subject, as also
those of Professor Willis and Mr. Babbage have been embodied in a
very excellent paper by Dodsworth Haydon, Esq., an amateur, and will
be found in the Appendix to this work. The whole principle of the
formation and application of cutting tools is explained in that paper,
so that it only remains to treat briefly of a few special forms of
tools which are required for metal-turning in the lathe, whether by
hand or by the aid of the slide-rest. In the first place, however,
a word or two may be necessary as to the kind or quality of steel
required for such tools. What is called Blister steel may be at once
passed over as unfit for the formation of tools—it is, however, the
raw material (so to speak) from which, by the process of reheating
and welding, the next quality, called Shear steel, is made. When bars
of this are similarly heated and again welded into a homogeneous mass
under the tilt-hammer or between rollers, double shear-steel is made,
which is of extensive use for cutting tools, and must, moreover, of
necessity be used in almost every case where there is to be an iron
shank, for economy's sake, the steel being then welded to the iron,
and forming that part of the tool intended for the edge. The third
and best kind of all is Cast-steel, formed of blister steel, melted
at an intense heat and run into iron moulds. This, however, can be
welded only with great difficulty, and hence the whole tool, whatever
its length, must be of the same material. This can be purchased in
bars of a convenient size of round, triangular, square, or other
section, and needs only the careful use of the hammer, file, and
grindstone to become a tool of any required pattern. It would be very
advantageous to an amateur to master the art of forging in a small
way to enable him to make his own tools, for he may sometimes require
them of unusual form, and if he lives far from a manufacturing town
he will find it very difficult to get them fashioned to his liking.
Cast-steel will not allow of the welding heat applied to iron—it will
burn, and cannot then be made to recover its proper consistency, and
is for ever useless for the purpose in question. Double shear will
take a moderate white heat, while cast-steel must not be brought to
a higher temperature than that indicated by bright red—a point never
to be forgotten when shaping a tool at the forge. There are in every
workshop a number of files laid aside as worn out. These being made of
the best cast-steel, are invaluable to the turner in metal, as they
supply the best material for his tools at no cost whatever. To begin
with the saw files (called, by a horrible perversion of mathematical
definition, "three square"). Here you possess a tool at once for the
mere trouble of grinding off the teeth and reducing the sides to a
smooth surface. Each angle is equally useful—each 60°, which, as the
paper above alluded to demonstrates, is the best angle for cutting
iron. On brass, however, its use is by no means to be recommended,
being, as Holtzapffel remarks, "too penetrative and disposed to dig
into the work." It is to be used upon iron in the position shown in
Fig. 110, where A is the rest, B the cross section of the tool, C the
diametrical line. The side, of which D is a continuation, is to form
very nearly a tangent to the circumference of the work, being, as
explained in the Appendix, only 3° from that position. Worn out square
files being of rectangular section, are exactly suited for brass
turning, for which metal a cutting edge is required of 80° to 90°, the
former for the first or roughing down cut, the latter for finishing.
The position of such tool is shown in Fig. 111.
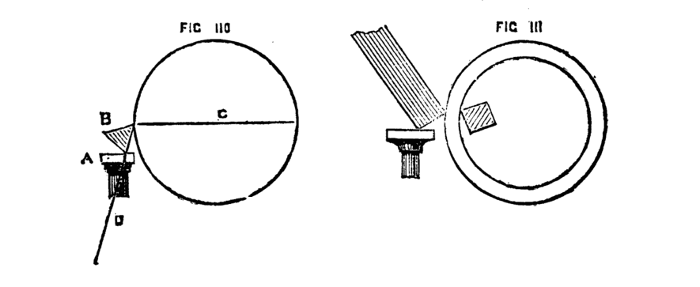
Figs. 110, 111.
The flat files are not altogether so useful for making turning tools
as those alluded to; they are too thin in proportion to their breadth.
Their sides, moreover, generally speaking, are not rectilineal, but
curved, so that they are more fit for grinding off at the ends to
form brass-turning tools with rectangular edges. They may, however,
by careful forging, be made to assume a square section, and thence
be formed as desired; but a rectangular bar of steel, ready-made, is
then to be preferred. A round or rat's tail file is of far greater
service than the last-named—not, indeed, in its own shape, for the
reasons stated by Mr. Haydon, but as being capable, with very little
labour at the forge, of being converted into a bar of square section.
The first tool to be made from such a bar is the graver, the tool
of the watchmaker, and not less useful to the general mechanician.
This is formed by grinding the end of a square bar diagonally, so as
to produce a lozenge-shaped face. The angle to be preferred in this
operation is 45°, which will give two cutting edges of 60°. The latter
may be varied at pleasure by varying the angle at which this face is
ground, as explained in the chapter which treats upon this question.
The graver will do all kinds of outside work, light or heavy, as it
may be made of any size. It is represented in Fig. 112. Fig. 113 is
the heel-tool shown in position for work; 114 and 115, two forms of
nail-head tool very commonly used, but both requiring great attention
to the angles of the cutting edge to become effective. All the above
are for outside work, and are to be so held that the side next to
the work—the sole of the tool in Fig. 113—forms very nearly a
tangent to the work—a position, as Holtzapffel remarks, strangely
similar to that required by the soft wood chisel and similar tools.
The heel-tool, indeed, if more keenly sharpened, will cut soft wood
(on the face) with great rapidity, and is in principle similar to the
broads used for that purpose. It is, however, an unsafe tool, owing
to its great tendency to dig into the work. It is a good plan to make
extensive use of various shapes of hand-tool before passing to the
slide-rest, because the hand feels exactly the resistance which the
tool meets with, and the best form and position is thus practically
tested, and will be found to bear out to the utmost the theory
advanced in this work, and founded on mathematical truths worked out
and applied by Willis, Babbage, and others.
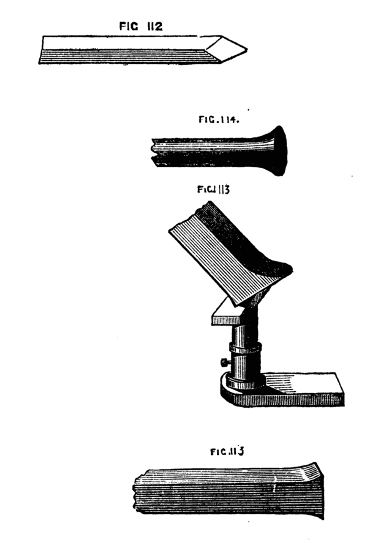
Figs. 112, 113, 114, 115.
Inside tools must of course be made upon the same principles as the
last, the particular form alone being modified to enable the cutting
edges to penetrate into the various nooks and corners that may occur
in such work. The inside tool for iron (Fig. 116), with cutting angles
of 60°, is of a general and useful pattern. It must be so curved and
so placed that both cutting edges come into action, one on the
face and one on the side of the cut, a condition explained in the
Appendix as essential to all good work. It being quite impossible
to cut metal like wood, and necessary to allow sufficient time for
such work, a pointed tool is in most cases preferable to one of a
semicircular or rectangular form of edge, and the greater part of
the heavy work done in large factories is thus executed. Inasmuch,
however, as such a tool, well formed on correct principles, may be
made to take a tolerably deep cut, the shaving detached will be of
sufficient thickness, and consequently sufficient width to reduce
work a satisfactory quantity at each cut. The cut, too, must be
continuous wherever possible, the tool being slowly and steadily
advanced the whole of the acquired distance without being removed,
and then re-entered for a second cut. The result should be a smooth,
even surface, and that great exertion is not required when thus
working with hand-tools is sufficiently evidenced by a remark of Mr.
Haydon to the writer, "I have often detached, with a graver alone, a
tolerably thick shaving of iron, two feet and more in length." From
what has been said, it will be understood that in hollowing out a
piece of metal such as a chuck, the tool should not be made with a
long cutting edge, such as would be used if it were intended to
scrape the whole depth of the side. A broad shaving is not to be
thus aimed at, nor is the inside only to be thus attacked, but
the tool advanced gradually inwards from the face of the work till
it reaches the bottom, thus (to repeat the important point again)
cutting at the same time the front and side of the shaving. The
half-round or cylinder-boring bit already described is, of course, an
inside turning tool, but is used with the aid of the back centre. In
principle it follows other inside tools, the end being bevelled or
sloped off 3°, and the side being 90°. The latter is to be regarded
as a blunt cutting tool, being the largest angle that can be used;
but, nevertheless, this bit must be regarded as cutting in the two
required directions—forward and sideways. If a regular Goniometer for
measuring angles is not to be obtained, nor any apparatus for grinding
a tool to the required bevel, an addition to Nasmyth's tool-gauge,
described in the Appendix, may be made by constructing in tin a set
of templates, with the angles marked upon them. The easiest way is to
mount on the lathe a few round sheets of tin, and mark the degrees
by the division-plate, the outer circle of which contains 360°.
The tin may then have pieces cut out, as shown in Fig. 117, to be
applied as gauges over the ends of the tool, or solid pieces of the
required sections (those which are removed in forming the above) may
be retained. It will, perhaps, be as well to finish up both neatly,
taking care to mark the angles on each. The degrees most required are,
as explained, 90°, 60°, 80°, and 3°; but intermediate numbers may be
prepared, and will often be found convenient. An inside tool for brass
must retain the angles 80° to 90°, the latter acting as a scraping
tool to put a finish to the interior of work roughed out by a tool
of the lesser angle. There are not many forms in general vogue, for
brass work, whether internal or external. The round, the flat, and the
point tools (Figs. 118 to 121) are more or less capable of hollowing
out work, as well as surfacing. With the first ground to an angle
of 80°, brass chucks can be hollowed, and, with the second at 90°,
finished; and if there chance to be any internal angles out of reach
by the point-tool, it is only necessary to use a similar one bent
round at the end towards the left. Much of the turner's success in
brass work depends upon the quality of the metal, which is often very
hard and unequal in texture and perhaps blown and honey-combed. It is
always the best plan to send patterns of any work of importance to
some well-known firm, instead of trusting to a country foundry, whose
business, if worthy the name, is generally iron work, and who only run
brass once in a way, and make a terrible mess of it, too. The same may
be said respecting iron castings. It is worth while, as an experiment,
to test with turning tools the quality of a country casting, pulley,
or what not, by the side of a similar work really made of malleable
iron, such as is now so extensively used by the sewing-machine makers.
Tools that will stand the first and make good work deserve a place in
the British Museum, with a portrait of the turner!
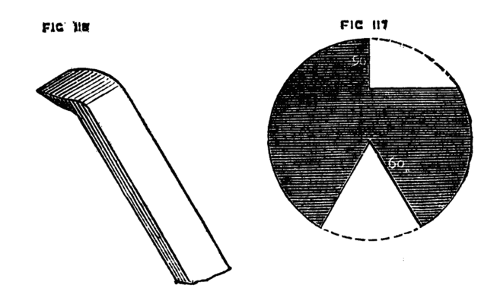
Figs. 116, 117.
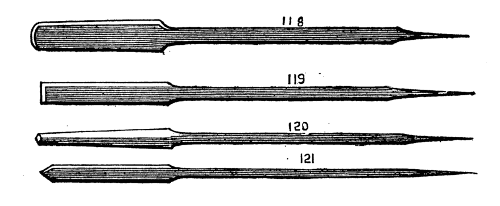
Figs. 118, 119, 120, 121.
For light brass work, such as small model engines now so generally
sold, a description of lathe may be used of which no mention has yet
been made—namely, a bar lathe Fig. 122. Such a tool may be made for
£3 or £4, and will be found sufficient for such work as specified.
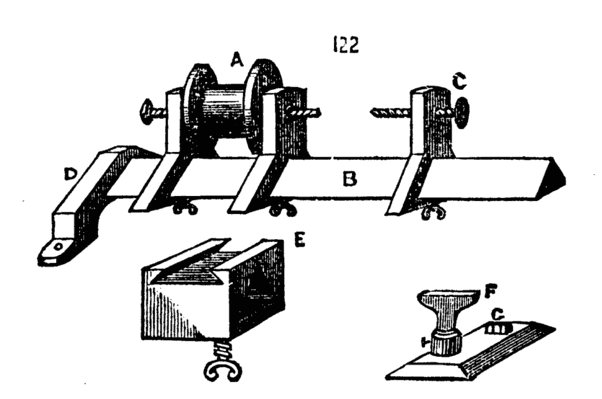
Fig. 122.
In place of the double bed a triangular bar of cast iron is used, on
which the poppets slide, and are clamped. D shows one of two sockets
with feet which hold the ends of the bar, and by which the lathe can
be mounted on any stout plank or on the window sill. The pulley A is
made for a strap, because this allows of a plain flywheel, which is
much cheaper than those which are bevelled and turned. The rest is
shown at E and F. The part E slides upon the bar like the poppet—at
the top is a dovetailed groove to receive the slide F, which carries
the socket for the tee, and is fixed by a turn of the screw seen on
the top of it. There is much to be said in favour of triangle bar
lathes, they are very stiff, and can be fixed anywhere. The flywheel
can be supported on a separate frame, which is an excellent plan, for
the jerk of the treadle and crank is not communicated to the poppets
and mandrel. In Maudslay's triangle bar lathe, which was made for
amateurs, a slide rest was attached, and the whole work was first
class—of late they have gone out of fashion, but are nevertheless
good tools.
Fig. 123 represents another very simple form of lathe for turning
small articles of brass. It may be said to be one remove from the
watchmaker's bow lathe, as it has no true mandrel or treadle; the
small flywheel being attached to an arm at the back and worked by
hand. The left hand is used for the latter purpose while the tool
is held in the right. Through a tapped hole in the left hand poppet
passes a steel pin shown at E, on a larger scale; this screws into
the poppet after passing through a brass pulley B; this bolt ends
in a point, and an arm fixed into the pulley becomes a dog to act
against a carrier screwed on to the work as in turning iron. Thus
the mandrel and point are fixtures, and the pulley only turns when
motion is communicated to it by a catgut from the flywheel behind
it. The back poppet and rest, which last is shown separately, slide
on the rectangular bar; the latter is about two inches wide, and
three eighths thick, and is made with feet to screw to any convenient
support. This lathe is especially adapted for work of small size which
can be centred at both ends, and on which a carrier can be fixed
to bear against the pin, E, of the pulley; nevertheless it is even
possible to use chucks, if cast in metal with a pulley to each like G.
A spindle must in this case be made like H, on which the chuck must
be slipped, and fixed by the nut in the hollow of the chuck. Although
however this form of lathe is sometimes met with, and may be used as a
makeshift, a small triangle bar or 3in. lathe of the usual form is far
preferable.
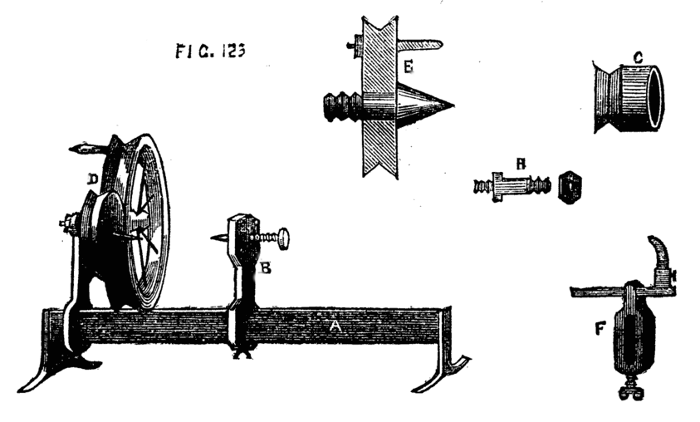
Fig. 123.
In centering a bar of iron in the lathe too much care cannot be
exercised in causing it to run evenly. The ends should be drilled,
first with a small, and afterwards with a larger drill, so that a
countersunk hole may be obtained in order to keep the point of the
lathe-centre from touching the bottom of the hole. If this is not
done the friction of the work upon its bearing will soon spoil the
lathe-centre, and the work itself will speedily get out of truth, and
it will not be possible to screw up the spindle of the back poppet
so as to correct this. Of course in turning up very small work this
drilling cannot be done. A simple hole must then be made, sufficient
for the safe support of the work while being turned, but even in this
case the angle of the drill point should be less than that of the
conical centre of the lathe, the point of which will then run free.
To mark the true centres of a round bar of metal a punch has been
devised like Fig. 124. This is figured in Bergeron's work, and is
very serviceable. To insure its working truly be careful that the bar
of metal is filed flat on the ends, and that the surface of the latter
is at right angles to the length of the bar. It is then only necessary
to place the end of the piece in the conical part of the cup (which
will be best effected by fixing the bar in a vice) and by raising the
spring and letting it go sudden by a sufficient mark will be made to
guide the point of the drill.
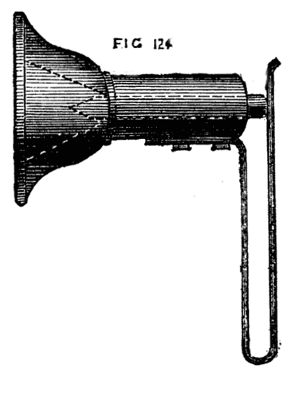
Fig. 124.
The proper place at which to commence turning an iron bar is at one
end, the rest being placed so as to bring the tool just upon the line
of centres; if applied lower the tool would take too deep a hold, and
would either be broken or lift the bar out of the lathe, damaging the
centre points. The ends of the bar should be squared up before the
circumference is turned, and on no account must a file be used after
the turning tool has done its work. It is only at the commencement
before a cutting tool has been applied, that an old file may be made
use of to take off the scale and roughness left from the forging or
casting.
Brass may be attacked upon or just below the line of centres, because
the form of tool is such as cannot penetrate deeply. This metal is
perhaps easier in some respects to turn, but the tool is apt to form
undulations on its surface (is apt to chatter). This is due, partly
to the impossibility of obtaining continuous shavings, and partly to
the vibration of the tool, and when once this has taken place there
is a tendency to deepen these channels, which makes it difficult to
produce a plane and even surface. If a rectangular tool is used in
the position already shown and described under the head of tools for
metal turning, this chattering will be avoided. If it takes place, the
undulations should be worked off by gentle usage of the angle of the
tool, the rest being placed close to the work, and only a light cut
taken.
With regard to the method of mounting a piece of brass in the lathe,
any convenient chuck may be used, but sometimes the piece is short
or irregular and requires to be bored out. In this case use solder
and firmly attach the piece to a face plate of brass. The easiest way
is to smear the two faces to be joined with sal-ammoniac made into a
paste with water, and laying a piece of tin-foil between the surfaces,
which must be quite clean and bright, apply heat. The tin will melt
and a perfect union will be effected. When the piece is finished it
is re-heated and detached. This may be considered a wrinkle worth
knowing. The flat flanges of brass spoken of under the head of chucks
are just suited for this method of working, and they are not damaged
by the process, as the solder can be wiped off quite clean when
the chuck is made hot. This is a good way to mount small cylinders
of brass for model engines, as they can be bored and turned on the
outside at one operation with great ease and certainty. If a piece is
to be drilled or bored in the lathe, the following is the arrangement
to be adopted. Fig. 125, A is the face plate, B, the piece to be
drilled, C the drill, which is advanced by screwing up the point, E,
of the back centre; D is a hand vice or similar article to prevent the
drill from revolving with the work. If it is more convenient to fix
the drill itself in a chuck, the point of the back centre is to be
removed, and a flange of brass or iron substituted, as A, Fig. 126. If
the drill is to penetrate quite through the work a piece of wood must
be interposed between the latter and the flange to receive the point
of the drill and protect it from injury. The pressure should be so
regulated as to be constant and equal without being excessive, or the
drill will be bent or broken. Boring is simply drilling on a larger
scale, and is of such general use as to require detailed notice.
In the first place there are several tools used for the purpose,
according to the size of the work. The first is the cylinder bit,
Fig. 127. This is a most excellent tool, as it will work very truly,
and can hardly get out of place if properly directed at starting. The
cutting part A is half a cylinder, the centre being just left visible,
the end is not quite at right angles with the length of the tool,
but is sloped off a little and bevelled also slightly below.[7] This
forms the cutting edge. The other end of the tool has a central hole,
drilled to receive the point of the back centre by which it is kept to
its work. To use this tool, let the piece to be drilled be placed in a
chuck, and a recess turned in it of the same diameter as the cylinder
bit, the latter is then placed in this recess B, and when screwed up
it cannot possibly rise or shift its position; a hand-vice or spanner
is then fixed as shown in Fig. 125, and the lathe put in slow motion,
oil or soap and water being freely used to lubricate the tool. Either
a solid piece of metal, or a hollow casting can be thus bored.
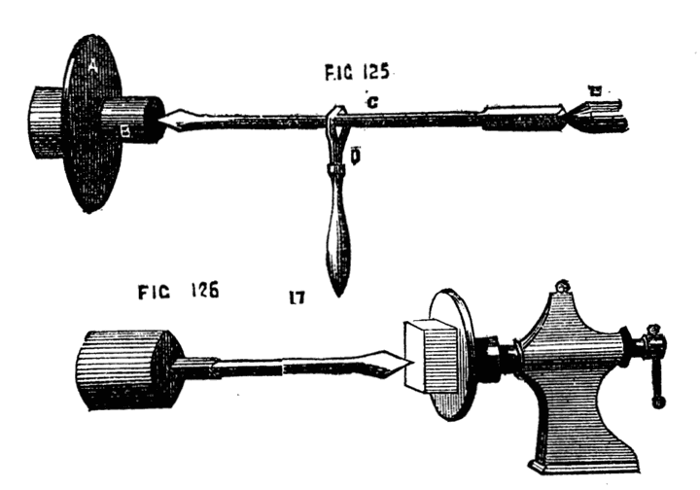
Figs. 125, 126.
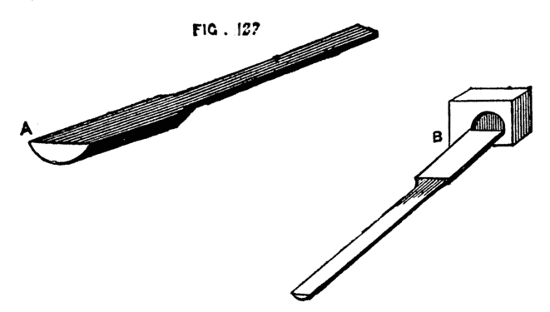
Fig. 127.
These cylinder bits can be had of all sizes, from one-eighth of an
inch upwards.
Pipe stems are bored with the smallest of these tools. For this
purpose they are made of round steel wire, which is sometimes merely
flattened with a hammer at one end to spread and enlarge it, this
part being afterwards rounded on the underside with a file, and with
the same tool finished on the upper flat face. These slender drills
require to be delicately used, and are conveniently held in a pin vice
or pair of pin pliers, the handle of which being hollow, allows the
greater part of the drill shank to lie within it, a small part only
being drawn out at a time for use; thus the drill will be kept from
bending, and will work quickly and well.
Of recent inventions in the matter of drills, the most important is
the Morse American twist drills sold, in sets, at 30s. on a neat stand
with a self-centering chuck, complete. The form is that of a cylinder
with spiral grooves cut round it of extended pitch. The cutting edge
is as difficult to draw as it is to describe, and must be seen to be
understood. It is chiefly formed by the meeting of the spiral grooves
and the solid end, the latter forming a blunt angular point rendered
cutting by the edge of the grooves. They should have a place in every
workshop.
The next tool to be described is also much used, especially in
agricultural implement manufactories, for boring out the brasses,
or bearings. It is called a rose bit, or grinder, and is shown in
Fig. 128 A and B. In this case also a recess is cut in the work as a
guide, and as the tool fills up the whole interior as it proceeds, no
change of position can occur. The rose bit is used as shown in 125. A
bit of this pattern is very useful for brass work of all kinds, such
as the cylinders of small engines, bosses of wheels, bearings and
collars, and one of these tools of the exact size for hollowing out
the sockets of brass chucks, previously to their being tapped, will be
found serviceable. The third kind of boring tool is made with movable
cutters, which can be removed at pleasure, to be sharpened or replaced
by more convenient ones. The simplest consists of a cutter bar, A,
Fig. 129, with a slot in it to hold the tool, which is fixed by
driving a wedge at the back of it. The tool here shown has two cutting
edges, b and c which should be shaped according to the principles
already enunciated respecting hand tools for iron and brass. The
cutter bar is usually fixed between the lathe centres, and turned by
a driver chuck and carrier, while the cylinder to be bored is clamped
to the slide rest, and thereby advanced against the cutting edge. This
form is chiefly used upon work that has been cast hollow, or drilled.
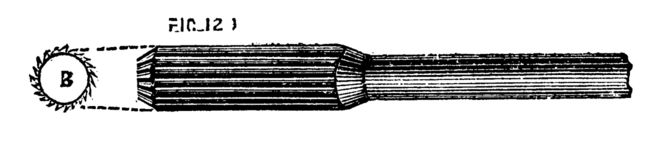
Fig. 128.
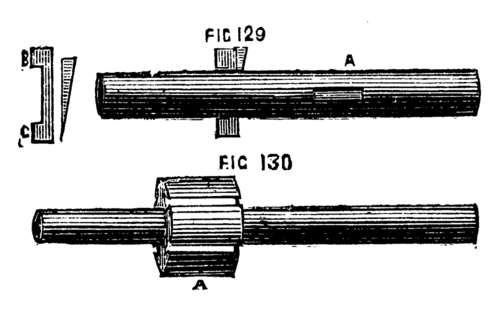
Figs. 129, 130.
Fig. 130 is another form of boring tool for large and heavy work. A
boss, A, is fixed to the cutter bar, having a series of dovetailed
grooves, or slots, on its surface, in which cutters are fixed by
wedges. In this and every similar form, it is expedient always to
complete the circle, or, at any rate, two-thirds or three-quarters
of it, by driving in blocks of wood in the slots not occupied by the
cutters. This preserves the concentricity of the tool. One edge of
these movable cutters should be radial to the centre of the bar, or
boss, the other rather less than a right angle, which will ensure a
good cutting edge. The best lubricant is oil for the first cut, and
soap and water, or pure water, for the finishing cut. The surface will
thus be left bright. It is not well to finish with emery any collar
in which an axle is to work (as the collar in which the mandrel of
the lathe runs). This substance imbeds itself in the pores of the
metal, and by forming a grinding surface, considerably increases
the friction and wear and tear of the parts.[8] Although boring and
drilling are capable of being done in the lathe, a far superior plan
is to employ an upright boring apparatus, as is now generally used in
making steam cylinders. The work is not then suspended between two
points, or carried on the slide rest, but takes up a firm bearing on
a fixed support, and the boring tool descends by a pressure screw, or
self-adjusting contrivance, as the work proceeds.
We have spoken of the slow motion as necessary for turning metal work.
This is represented in Fig. 131 A B C D. The first is a plan seen from
above. The poppet is cast double like F, so as to afford a bearing
for the mandrel, and a second for the back spindle seen at A. This
back spindle, it will be observed, passes through its two collars or
bearings, and can slide freely in them from side to side. This can,
however, be prevented by dropping a pin through a hole in the top of
the poppet, which falls into a semicircular groove in the spindle. The
pulley is securely attached to a small cog wheel, and can be firmly
united to a larger one, as seen at A2, and separately at C and D.
This pulley and small cog wheel run loosely on the mandrel, and do
not revolve with it until clamped to the wheel, C, which is itself
keyed to the mandrel. Suppose them to be thus free to revolve, and the
wheels in position shown in the plan, A. On putting the fly wheel in
motion, the pulley will revolve on the mandrel, carrying with it the
small cog wheel, which in turn will act on the large wheel on the back
spindle. The small cog wheel on the latter will thus put in motion the
large one geared with it, the which being keyed to the mandrel, will
put the latter in motion. There are many ways of clamping the pulley
to the large cog wheel, perhaps the following is as good as any. It
must be so clamped for wood turning when the back spindle is to be
slipped on one side out of gear.
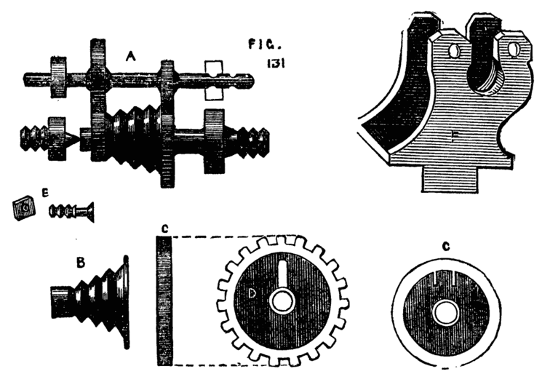
Fig. 131.
In the face of the pulley, which is concave, is a piece of brass flush
with the rim, and which forms a dovetailed groove, into which the head
of a clamping screw, E, fits. This screw projects through a slot in
the wheel D. When it is required to fix the pulley, this screw is slid
up towards the rim till the head rests in the dovetailed projection,
and it is clamped in that position by a nut. When it is desired to
put the back action into gear, this nut is loosened, the screw-bolt
dropped towards the axle (thus freeing the head from the dovetail),
and again fixed by the nut. The wheel and pulley are thus independent
of each other, the back spindle is slipped sideways into gear, and
held by the pin, and the slow motion will be obtained.
There is one fault in the arrangement of the back geared lathe that
with amateurs in a private house is especially disagreeable, and it is
questionable whether in large machinery establishments it might not
with great advantage be corrected. In the action of toothed wheels,
nuts and screws, and similar gearing, there occurs what is called
back lash. If, for instance, the tool holder of a slide rest is
advanced, and then the action is to be reversed, the movement of the
nut and tool holder does not commence simultaneously with the movement
of the screw. This is due to the play, or necessary looseness of the
working parts, the pressure coming on one side of the thread when the
screw is turned in one direction, and on the contrary side when the
motion is reversed. In toothed wheels a similar defect exists, and
gives rise to that disagreeable and ceaseless noise which assails the
ear on entering a building where machinery is in motion. This may
be avoided by the use of frictional gearing, a simple but excellent
mechanical contrivance which deserves far more extensive notice than
it has yet received. It is the invention of a Mr. Robertson, and
is patented. A lathe fitted with it would be almost noiseless, and
would work with a delicious smoothness, very conducive to the comfort
of the workman. This gearing, represented in Fig. 132, is merely
the substitution of V shaped or semicircular grooves for cogs, the
former running round the periphery of the wheel like the grooves in
an ordinary lathe pulley. In this method of gearing, it would be
necessary to move the back spindle to-and-fro, the usual horizontal
movement not being possible. This is easily effected by a screw or a
cam, either of which might be made to act on the frame which carries
the back spindle, and which may then work on a centre, as Fig. 133,
where A is the poppet, B, the support of the spindle, D, a cam; when
the handle of the latter is raised, the standard, B, is allowed to
fall back out of gear into the position shown by the dotted line, C.
A screw movement would have the advantage of enabling the workman to
regulate with greater precision the pressure of the friction pulleys
against each other. The drawing shows the grooves of these pulleys
larger and deeper than usually made. They are generally rather shallow
and numerous, and it is astonishing with what firm hold they grip each
other without that violent pressure which it might be imagined would
be necessary to prevent slipping when in use.
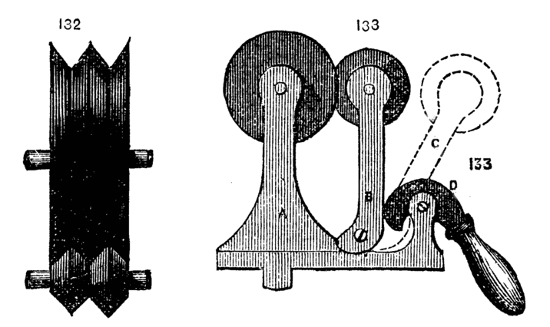
Figs. 132, 133.
The ordinary slide rest for hand lathes is made as follows:—That for
ornamental turning will have a separate notice. Fig. 134, shows the
slide rest viewed from above, and it is evident if the tool is clamped
to the holder F on the top plate, it can be advanced from end to end
of the top slide B, and also (with the upper frame itself) along the
lower frame A, A, these movements being at right angles the one to the
other. For parallel work this is sufficient. In this compound rest a
third motion is arranged for turning cones or taper plugs like those
of stop cocks, taps for screw plates and such like articles. For this
purpose the upper frame is cast like Fig. 135, with a flat surface,
but with two ribs underneath, uniting the frame to a circular plate
with two concentric slots in it. This plate revolves on the plate G
G, turning on a central pin, and it can be clamped by the two screws
which pass through the slots into the plate in any desired position;
once clamped at the required angle a piece of metal can be bored
with a conical hole and a plug turned to fit it without possibility
of failure. The details of construction allow of considerable
variety, and different makers keep to their respective patterns; the
main desideratum is strength and solidity, combined with accurate
adjustment of the moving parts. The V's, underneath the frames,
and the edges of the latter, must fit, so as not to be tighter in one
place than another, and the upper and lower frames must cross each
other accurately at right angles. It is likewise essential that the
tool traverse the work in a perfectly horizontal line. Every part
must, therefore, be accurately made by means of the lathe and planing
machine, and the whole carefully put together. Notwithstanding the
above desiderata, a slide rest is not necessarily beyond the skill of
the amateur. We have, indeed, seen one thus made quite equal to the
work of a professed mechanic, though the file and scraper had to take
the place of the planing machine. The rough castings can be bought
for about half-a-crown, suitable for a five-inch centre lathe, and it
would be much better to try and fit up a set of these castings than
to attempt such a substitute as a wooden slide rest. The latter has
nevertheless been made, and we remember seeing one of mahogany edged
with brass, the work of a cabinet maker, which did good service in
turning and ornamenting wood.[9] This, however, was upwards of twenty
years ago, since which time the facilities for obtaining slide rests
of metal, properly constructed, have materially increased. As the
dovetailed edges of the slides wear away by use, it is necessary to
provide means for tightening up the V-pieces. This is shown
in Fig. 136. The holes in the V-pieces through which the
top screws pass are not round, but oval, so as to admit of lateral
movement.
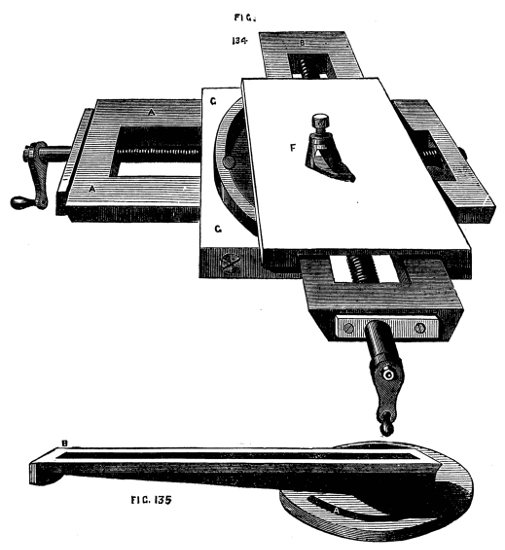
Figs. 134, 135.
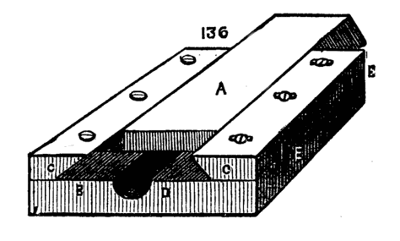
Fig. 136.
Two large headed screws, E, E, are tapped into the place on which
the V-pieces rest, and when these are screwed up, their
heads (which are sunk for the purpose in two recesses in the lower
plate) press against the V-pieces, driving them closer to the
dovetailed slide. When thus adjusted the top screws are made use of
to fix the strips c, c. By this method the slides can be adjusted
to work with the utmost ease and accuracy, without shake or side
play. The edge of the circular plate and the heads of the leading
screws are very frequently marked in graduated divisions, so that
the advance of the tool or the angle to be made with the work by the
tool can be accurately measured and preserved. There should at any
rate be a mark on the circular plate to show when the rest is set for
parallel work. There are several patterns of tool holder, of which
the forms shewn are convenient for light work. The one shown in 138
& 139 on the rest is somewhat different. The plate F, Fig. 134, is
cast with a boss and socket, like that of an ordinary rest. In this
socket the tool holder fits, and can be not only turned round so as
to set the tool at any angle, but also slightly adjusted in height,
which is a great advantage. The tool is clamped by a single screw
as shown in the sketch. The drawback to this form, and that on the
rest, is this single screw, which will indeed hold the tool when the
work is easy, but will not always retain it with sufficient firmness
when the work is rough, or of tolerable size. In large workshops one
usually meets with the holder represented in Fig. 140. A plate, A,
with central block B, and slide C, are in one casting. Through A pass
eight screws. The tool lies on either side of the central square block
and is clamped with three screws, it has thus a fair bearing on two
sides, and the screws form a third above, so that accidental shifting
of the tool during the progress of the work is hardly possible. The
tool holder of Professor Willis, which is described in the Appendix,
is perhaps the best of all at present in use. It holds the tool firmly
at any desired angle.
Fig. 138.
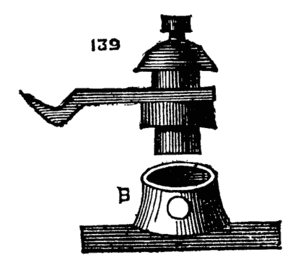
Fig. 139.
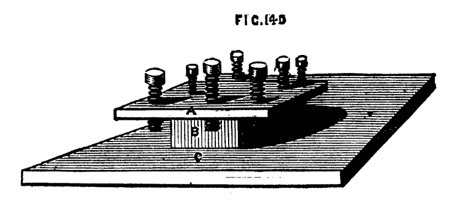
Fig. 140.
It is quite possible that the novice who has seen mere boys working
with slide rests at manufactories will be disappointed at his own
first attempts to use this piece of machinery. All the difficulty lies
in the shape and set of the tool. When turning metal with hand-tools
it is easy to feel one's way. If the cut is not satisfactory, the hand
at once modifies the angle of the tool, and regulates its direction
to a nicety, but the slide rest cannot thus adapt itself to its
work. It must be set with its slides in position, and the tool once
fixed must pursue its own course. Hence it requires a very accurate
knowledge of the nature of cutting tools, such as we have given in the
Appendix to this work. If the tool is well placed upon the axis of
the work for iron, a little below it for brass—it will cut cleanly
and easily, without rubbing or jarring, both of which are proofs of
either a wrong angle of edge, or a wrong form of tool. The work should
proceed with as much apparent ease as if the metal were an apple, and
the shaving should curl off like its peel. Moreover, this case is not
merely apparent, it is perfectly easy to cut iron, and the strain on
the tool, whether held by the hand or by slide rest, is comparatively
slight, if the tool is properly made and held. Fig. 141 is quite the
best form of tool for surfacing cylinders with the slide rest. It
is to be so placed that both edges are made to cut near the point;
hence the crank should slightly curve away to the left. It is not
possible to cut metal quickly, be content with fine clean shavings
curling off freely. You will soon see whether you can take a deeper
cut with safety. The tool here sketched is not at all likely to dig
in and hitch in the work; if it is not properly placed it will spring
and jump, or its side will rub against it, and no cut will be made.
To describe the exact position is very difficult, but the principle
once grasped, little difficulty should be experienced in making and
setting to work any tool, whether for inside or outside work. The
rule of thumb was all well enough in olden days and in the infancy
of the art of metal working, but it is time to discard it; to master
and man it is equally advantageous to do so. Indeed, in some of our
leading firms, the old system of follow-my-leader, when the leader
was as ignorant of his work as the follower, is waning, and the "how"
is now, as it ought to be, coupled with the "reason why." One of the
best papers ever written on this subject is to be found in Weale's
series, "Mechanism and Construction of Machines," by T. Baker, and
"Tools and Machines," by J. Nasmyth, 2s. 6d. The latter part is that
specially referred to, and is well worth the whole price of the work.
The remarks, however, of that eminent mechanic are embodied in the
paper in the Appendix, and therefore, after the reader has studied the
latter, he should make trial for himself of the principles laid down.
Expend a quarter or a half an hour experimenting thus, with keen and
obtuse tools, held at divers angles, and you will see and understand
what is meant by setting a slide rest, or hand tool to cut metal as it
ought to do.
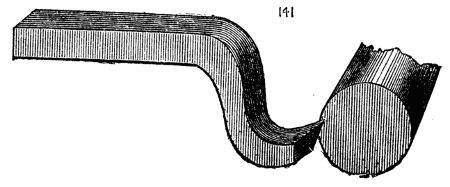
Fig. 141.
Fig. 141 is too much cranked; half the length of the
hanging part would amply suffice.
Supposing the tool fixed in the tool holder in the position indicated,
and just overlapping the circumference at one end (the right). Take
hold of the handles, one in each hand, and with that which advances
the tool from end to end of the bar try very carefully whether the
tool will cut cleanly by making a turn or two while the lathe is in
slow motion. If the tool bites too deeply, turn the other handle
and ease it. If you still find the tool sticking into or scraping
the work, instead of bringing off a fine shaving, look well to its
position, and observe whether the edge is well placed on the axis of
the piece. If it has been hitching in the work it is probably too low,
if rubbing it, too high, and touches at some point below its edge.
It is presupposed, of course, that the tool is made correctly as to
angle of cutting edge. Do not lower the point by packing the end of
the shank; pack the whole length or none. It is astonishing what
a great difference is made to the cutting power of a tool by slight
adjustments of this kind, and how smoothly a tool will work with
proper attention to these details, which would otherwise be probably
cast aside as unfit for the work. Hence the greater ease in managing
a hand-tool. The hand feels the error, and at once, if experienced,
corrects it by an almost imperceptible movement—slightly raising or
depressing the handle or gently varying the angle sideways on the
rest. When once the tool is found to cut as it ought to do, nothing
remains but to turn the handle in the right hand, and thus cause the
tool to progress steadily along the work from end to end. Then free
it by a half turn of the other handle, reverse the movement until the
tool has arrived at its old place, and having slightly advanced it to
take a fresh bite, repeat the process until the whole bar is reduced
to the required size. If the piece is slender and bends away from the
tool, add to the slide rest a support; let it be fixed opposite to
the tool, and it will keep the work steadily up against the cutting
edge. It can be fixed (if a hole is made for the purpose) anywhere
about the slide which traverses in the direction of the length of
the work. It is well to drill and tap a few holes about the slide
rest, and some along the side of the bed of the lathe. These will be
found very useful at various times for fixing apparatus. For, be it
observed, (and we shall recur to this with some practical hints by and
by) the lathe may and ought to do many kinds of work beyond ordinary
turning. It may become a machine for planing, slotting, drilling,
wheel cutting, &c., and is to be pressed into the service of the
jack-of-all-trades, without compunction.
When ordering a slide rest let steel screws and nuts be specified, and
gun metal V-pieces, and let the parts be strongly made (too strong
for the supposed work); for the latter may unexpectedly turn out to
be sometimes rather heavy. We have found the top plate of a 3in.
slide-rest so weak that when the tool was clamped on the top of it,
by the screw of the tool holder, the slide itself became jammed; a
defect quite beyond remedy, except by the substitution of a new and
stiffer plate. The same advice may be given respecting the tools. Let
these also be strong; neat and pretty tools are all very well, but
you seldom see them in a workshop; you don't require pretty tools,
but good and serviceable ones. Nevertheless, let the material be of
the best quality possible; and that you may not be ever at a loss,
you should learn to make tools yourself. Procure some small square
and round steel bars; save up as directed your old files, and you
need but heat them red hot (not on any account white hot), and with
hammer and file shape them to your mind. Then temper to a deep straw
colour, and after being accurately ground and finished on the stone,
they will be fit to use upon any metal. The form of tool given as the
best for slide rest work may be exchanged, when the bar is nearly
turned, to the required size, for a fresh one, keen, sharp, and of
an almost flat edge instead of point. A tool, of which the edge is a
segment of a very large circle, will serve the best as a finishing
tool, just to take off the lines left by the pointed tool. With
regard to lubricating the work, we may observe that the chief object
is to prevent the point or edge of the tool from heating and losing
temper; oil, water, or soap and water will therefore answer, but it
is a curious fact that oil will not produce so polished a surface as
water will. We should advise in all cases soap and water. Soft soap
is best, boiled in water, and allowed to cool. The drills with which
the huge armour plates of ships six inches thick are drilled are thus
lubricated, and instead of throwing out dust in a wet state as usual,
these large drills fairly turn out curled shavings similar to those
produced by the planing tool. It is by no means a bad plan to lay the
shank of the tool which falls upon the top plate of the rest, upon a
piece of leather, wood, or sheet lead. The surface of the iron, when
planed and finished, is often too smooth, and the tool will sometimes
slip from this cause, unless screwed unduly tight, to the detriment of
the rest. By the above plan this annoyance will cease at once.
We will now say a word about hollowed work. Finishing a chuck will
serve our purpose, and here be it advised not to go to much expense
about chucks—get those which must be of brass in the rough, and
practice metal turning by finishing them yourself. If no slide rest
is available do it by hand. However, we are supposing the slide rest
to have been procured, and may therefore proceed to use it. First
you must drill the back part of your chuck as directed in a previous
chapter. The drill is to be the size of the diameter of the hollows
in the mandrel screw, that is, smaller by the depth of a thread, than
the full size of the nose. Having drilled it, proceed with the most
tapering of your taps, which we suppose to be provided to form the
internal thread (external if your mandrel has female screw, in which
case, instead of a drilled hole, the chuck will have a projection to
be turned truly cylindrical, and a screw cut outside with stock and
dies or chasing tool).
Follow up with the intermediate and finish with the plug tap. If you
were careful to square up the shoulder, the drill having been likewise
placed perpendicularly to the face of the chuck, the latter will fit
truly up to the collar or shoulder on the mandrel. If not, you must go
to work again, and square up the back of the chuck till a good fit is
produced.
Now, if you have a compound slide rest—that is, one in which the
slides turn on a centre pin—you can loosen the screws and turn it
a quarter of a circle. If not, you simply put the tool into the
holder, at right angles to its former position, so that the movement
of that slide which is parallel to the lathe bed will become that
requisite to advance the tool into the hollow of the chuck. Whichever
way you set to work put in a side tool, like Fig. 142, and, as it
is a brass chuck, remember that the bevel underneath is to be very
slight. Introduce the tool so as to take a light cut at first, until
the roughness is taken off, after which you may cause it to bite more
freely. Repeat this until the chuck is sufficiently hollowed out, when
you may substitute a similar shaped tool, but with a flat or slightly
rounded edge, to take off the marks left by the point tool. To finish
the bottom of the inside you will require a tool which cuts on the
end, but it should not have a perfectly flat end—at any rate, not
until, by means of a pointed or small round-ended tool, you have cut
away the roughness left from the process of casting. This has always
in its interstices a number of grains of sand fused, and very hard and
detrimental to cutting edges of all kinds. The point tools dig these
out very effectually, and should always precede those of other forms.
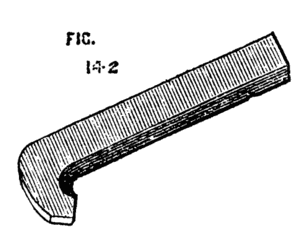
Fig. 142.
The outside must be turned in a similar manner, and a hole drilled
to receive a pointed bar or wrench, for the purpose of unscrewing it
when screwed up tightly. To turn up a face plate of iron or brass
proceed in a similar way, but commence from the centre with a point
tool. This tool is the best for taking off the rough outside of hard
wood, instead of the gouge, as well as for removing the roughness of a
fresh casting. It is absolutely necessary that the faces of these flat
chucks, or surface chucks, be truly at right angles with the mandrel;
hence it is very difficult to turn and finish them by hand. We may
here also state the necessity of knowing when the slides of the rest
are at right angles to each other, without which no work can be turned
correctly. It is necessary to ascertain this by help of a small steel
square. Once fixed truly, it is only necessary to make a mark on the
quadrant (which should be marked in true degrees), by which the same
position can be found again at any time. We have spoken here of the
quadrant—we mean the arc, or arcs with slot—allowing the circular
movement of the compound slide rest. The chief use of these is to
enable the workman to turn true cones instead of cylinders, which
latter will only be produced when one slide is parallel to the lathe
bed. Such is the common use of the slide rest; and it will be evident
from these few remarks that there is an infinity of work, not only
produced with ease by its aid, but which cannot, even with expenditure
of time and labour, be produced without it; hence we advise this to be
the chief ambition of the tyro after he has mastered the difficulties
of ordinary hand turning (and not before). The cost of a fair one
for 5-in. lathe will be £5, or thereabout. At Munro's, £7 or £8; at
Holtzapffel's, £10 or £12. Both the latter are of course perfect.
We have directed to tap the chuck where it is to be screwed to
the mandrel with a set of three taps, or to cut it with stock and
dies if an outside thread is required. In both cases more true and
satisfactory work may be produced by the chasing tool. We speak of
the latter as used by hand; an account of cutting the threads by
help of the slide rest we reserve for the present. Mount the work
in any convenient way, either driving it into a wooden chuck, or by
clamping it to the face plate if you have one. Now in this way you
have advantages. In the first place you need not have a drill the
exact size, though it is convenient to have such a one, and also a
cylinder bit. You can drill and enlarge the hole by the slide rest
tools, and you can also with the slide rest ensure the perpendicular
position of the hole with respect to the end. Thus it is sure to fit
up close and snug to the shoulder of the mandrel. When bored thus
it will be in position for chasing. It is not difficult to chase a
thread in brass, as it does not chip away like wood, but cuts clean
and sharp. Follow the directions already given and you will succeed in
a few turns in getting the tool to run. Then let it have its own way;
hold it lightly, but steadily, and do not force it either to cut too
deeply, or to advance too quickly; it will run along of itself after
the faintest thread is cut or scratched, and the lathe can be worked
by means of the treadle all the time as soon as you have attained the
knack of dropping the chaser into its place at the commencement of its
cut, and suddenly withdrawing it when it has reached the bottom of the
hole. A chuck thus turned and screwed entirely in the lathe is sure
to prove a good fit, and there can be no better practice than to cut
screws in all your brass and boxwood chucks in this way. A very good
chuck to hold flat plates of brass was invented by a Mr. Wilcox, of
Bishop's Stortford, some years ago—an amateur of rare ingenuity and
mechanical knowledge, and who made all his own apparatus for plain and
eccentric turning. The chuck, Fig. 143, as described by him in some
unpublished manuscript, is made of boxwood, or may be of metal. It
is a plain disc or surface chuck with three slots A B C. and a steel
centre. This last must penetrate rather deeply into the wood of the
chuck, but is only kept up so as to project from the surface by a
spiral spring below it. Hence, when pressure is made upon its point by
the application of the object to be turned, the pin recedes into the
body of the chuck, suffering the work to lie flat on its surface. In
the three slots are three screws, with nuts at the back of the chuck
the screws pass through two pieces of brass, forming a pair of jaws,
one of which is shown separately.
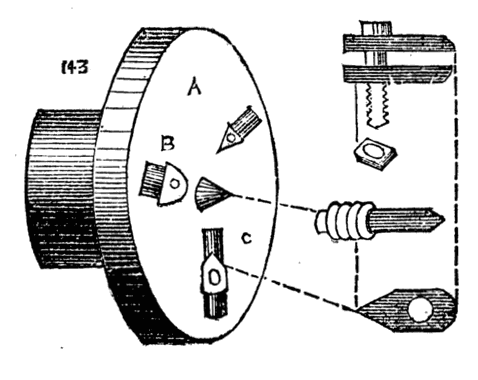
Fig. 143.
Fig. 143 shows the chuck complete. Suppose we have to face up a round
disc in its central part, or to perform any surface work in which the
jaws will not be in the way of the tool, the centre of the plate is
marked at the back of it, and this mark laid on the central pin. The
work can be clamped down by the three jaws, and the necessary work may
be done. Now so far the chuck is but a simple affair, and the receding
pin does not show itself to such great advantage; we will therefore
suppose a plate is to be drilled at several spots; let these be marked
at the back by a centre punch. It is now only necessary to bring these
marks in turn upon the central point, and clamp the plate in position.
Bring the point of the drill against the work and keep it up to cut by
the back poppet screw. In the same way eccentric work or any operation
may be done to such a plate, with the certainty that the point to be
thus worked upon is precisely central with the axis of the pulley,
or mandrel. Many similar applications of this chuck will present
themselves to the reader upon due consideration. We present the chuck
in this place because we have had occasion to speak of drilling as
connected with the slide rest, and there are many pieces of work that
could not otherwise be conveniently held in the desired position.[10]
It now becomes necessary to speak of another addition to the lathe,
by means of which the use of the slide rest is considerably extended.
We mean the overhead motion. Of this there are several patterns, and
we have sketched three of these. As to their respective merits we can
hardly venture to speak. They all answer equally well the purpose for
which they have been designed, and the turner must select according to
his fancy, or, if he please, design a better for himself. A, Fig. 144,
represents the lathe bed. From the left-hand standard rises a round
iron rod, not less than one inch in diameter. This is not generally
fixed, but is attached to the standard by two staples, a, b, which
hold it securely in an upright position, but allow it to turn with
its projecting bar F, F, after the manner of a crane. It may thus be
turned back, out of the way, or brought into any desired position. The
part F, F is made to slide up and down on the part B, and is fixed by
a clamping screw D. Thus, if the cord should break and require to be
shortened, the arm can be brought nearer to the bed of the lathe. Upon
F, F slide two rings, or rather short pieces of tube, from which depend
two India rubber springs (door springs), E, E, now procurable at any
ironmonger's at one shilling each. From these hang double pulleys, or
better still two single ones. These pulleys, with their attachments,
are adjustable at any position on the arm F, F, which may be round or
square. If considered desirable, a second standard can be added, so as
to uphold both ends of this bar; but it is hardly necessary, as the
latter is seldom required of greater length than half that of this
lathe-bed. It is evident that the above addition to the lathe can be
made complete for a few shillings. The following are more expensive,
but more general, the writer having devised the above to suit his own
fancy, and for his own use. In Fig. 145 A represents the standard as
before, the top of which is forked, as shown at E, and sustains the
ring, free to revolve in its arms, as seen in the sketch. Through
this passes a bar, B B, with a heavy ball C cast on its end to act
as a counterbalance to the longer arm and its connections, and to
keep the cord stretched. By sliding this bar either way through the
ring which supports it, the tension of the cord can be increased or
lessened.[11] When in position it must be very securely fixed by the
screw T, which should not simply press against it, but enter one of a
row of depressions made for the purpose. The pulleys C, D are double,
as in the previous plan of overhead, and are likewise adjustable at
any position on the bar B, B. The only drawback to this pattern is the
danger of the heavy ball slipping out and falling. We prefer to hang
a weight from the end of the lever, as shown by the dotted line. This
may be within a few inches of the floor, and if it should fall no
harm can ensue. The third pattern, Fig. 146, is the most expensive,
but although it is of a more finished appearance, and wears an aspect
more stiff and stable, it is not practically any better than the last.
From a standard A, with overhanging bar F, F, is suspended a frame H,
by means of two coiled springs in brass boxes B, B, which keeps up the
necessary tension on the cord, or rather cords, for in this case two
are needed—one from the flywheel to the small pulley, and a second
from the roller to the slide rest.
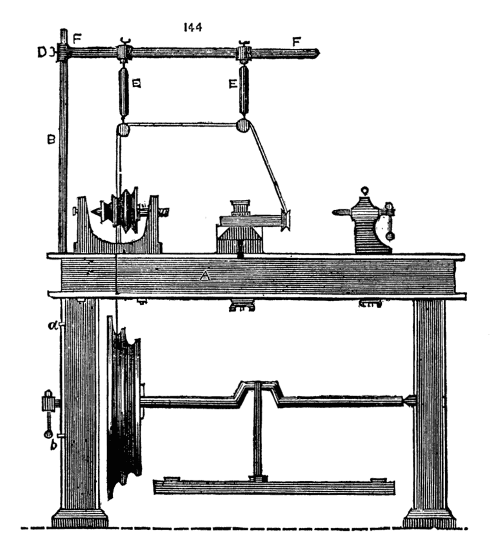
Fig. 144.
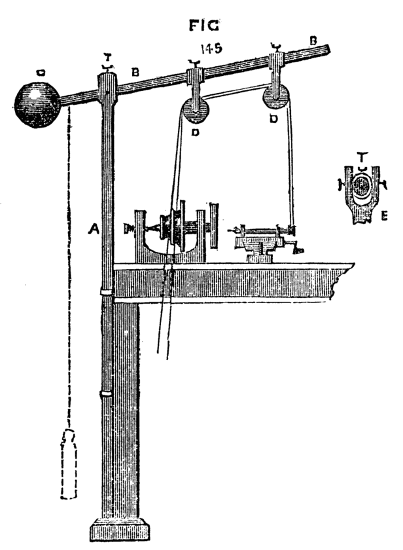
Fig. 145.
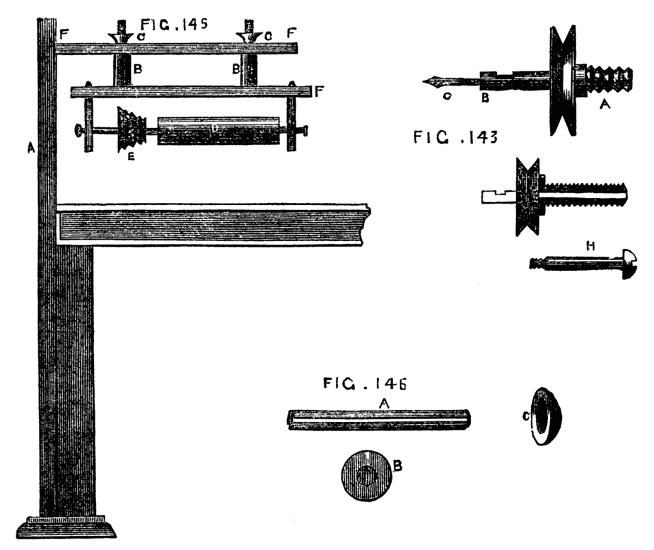
Figs. 143, 146, 148.
This roller, which may be grooved or plain, may be replaced by a
second small pulley, which is capable of being slid along the round
bar which forms its axle and turns with it between the centre screws.
In this case the bar is made with a groove or channel along its
length, Fig. 147, and a pin projecting from the central hole in the
pulley enters this groove. Thus the two will turn together, and at
the same time the position of the pulley is adjustable at pleasure.
The tension of the springs B, B, is increased or lessened by a turn
or two of the nuts C, C, just in the same manner as the spring of
the safety valve is adjusted on the boiler of a locomotive.[12] The
application of the overhead motion is plainly shown in Figs.143 and 144.
The work is fixed in the lathe, and the mandrel kept stationary.
The cord passes to the overhead directly from the fly wheel, and
thence to a pulley on the screw of the slide rest, as in 143, to a
drill, as in 144, or to any other apparatus at pleasure. To fit the
work in the lathe in such a manner as to enable any point in the face
or side to be operated upon, a division plate and index are required.
The first is a round plate of brass or gun metal, 1/16th of an inch
thick, drilled with holes in concentric circles. The index is a steel
spring with a projecting point, which, entering any one of the holes,
retains the plate, and with it the pulley, on the face of which it is
fixed immovable. There are generally four circles of holes, the number
in each selected with reference to its divisibility by the greatest
possible number of divisions—thus 360, which is usually on the
outside or largest circle, can be divided without a remainder by 2, 3,
4, 5, 6, 8, or 9—144 is a good number for the second circle, being
divisible by 2, 3, 4, 6, 8, 9. The other two may be 112 and 96. The
uses of the division plate are many. Eccentric cutting and drilling
could not be done without its aid, and wheel cutting for clocks, or
for making cycloidal and other chucks, is entirely dependent on this
contrivance.
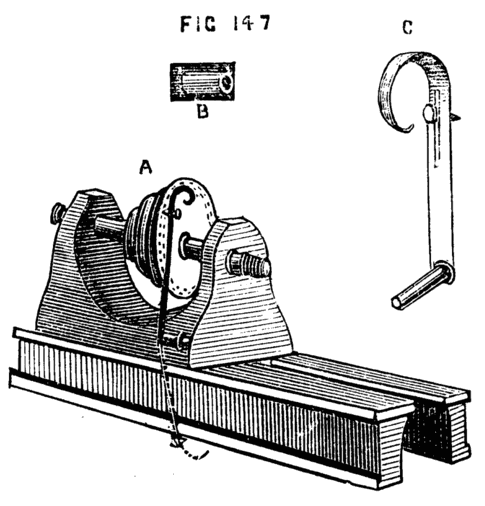
Fig. 147.
The division plate and index are shown in Figs. 147, A, B, C. The part
B is a knob with a round hole through it, to take the tail of the
spring C. This is shown again at C on a larger scale, to bring to view
a slot which allows of some slight adjustment of the point, to suit
the different-sized circles. The milled-headed screw clamps the point
at any desired part of this slot. When not in use, the spring is drawn
back so as to release it from the division plate, and turned down in
the position shown by the dotted line.
The overhead apparatus is applicable not only to revolving cutters in
the slide rest, but to other contrivances available where the latter
is not possessed. There are many cases in which the back poppet may be
brought into use to hold revolving drills, or stationary tools, if the
resistance to their action is not too great. The only damage that can
well happen in this method is to the pin working in the slot on the
outside of the spindle. If this is of steel and tolerably stout and
strong (being very short it cannot be subject to any very injurious
strain), no harm is likely to result. With this it is possible to
drill very neatly, and also to do a little eccentric cutter work,
under certain conditions to be described. Screwing, or rather chasing,
may likewise be done very passably. We do not, of course, advise this
course when the more perfect slide rest is at hand, but there are many
who are obliged to put up with all sorts of homemade contrivances, and
to press into service for divers operations apparatus and tools not
precisely meant to be thus used, and it is as well to learn how to act
under an emergency, even if the practice is not intended to be carried
out generally. The drill stock is shown in Fig. 148, in which the
screw A fits into the spindle of the back poppet. If the hole in the
latter is conical instead of cut with a screw thread, the drill must
be made accordingly.
The pulley of brass has a hole drilled through it, and the screw is
also drilled, the hole in the latter being rather larger than that
in the pulley (which is tapped). The steel pin H, shown white in
the sectional drawing, passes truly through the centre of the screw
in which it revolves, and is screwed into the pulley. The socket
of steel to hold the drill is then screwed or soldered into the
opposite face of the pulley. The black part shows a flange on the
screw which abuts against the cylinder of the poppet into which it is
screwed. Thus the pulley, being attached to the cord from the overhead
apparatus, is free to revolve upon the steel pin with great rapidity,
and will carry round any drills or cutters placed in the socket B. The
simple straight drill being thus worked and advanced by the leading
screw of the poppet, will suffice for holes in any work held on the
mandrel. On page 335, vol. ii., of the English Mechanic, this method
is mentioned, and also a similar pattern of slide tool to be used for
boring, being, in fact, the head and spindle of the back poppet, but
instead of the standard and sole, a pin, like that of a T, to
fit the socket of the rest. This has the advantage of the back poppet,
but must be made on purpose, and if any special slide tool is added,
a proper slide rest is by far the best. Our present purpose is to
describe the use of the back poppet as a substitute for a better tool.
With the following modification of the eccentric cutter, a fair amount
of good ornamental work may be done. Fig. 149 represents the back
poppet with the apparatus in position. The various parts are shown
separately in A, B, C, D. A is a small frame, two or three inches
long, and ¾ to 1 inch wide, cast in iron, with a circular piece
at the back, 1½ or 2 inches diameter. This circular piece is to
be accurately divided on the edge with any even number, which is
divisible as above explained. This is turned and drilled through the
centre. B is a flange-shaped piece to screw to the poppet as before,
and this is also accurately drilled, and the two are attached by a
central steel pin, so that the two flanges can turn face to face, the
outer one with frame revolving against the other. The pin must be
put in its place in B, and turned at the same time as the face of B,
that it may be truly central. The divisions on the edge of the outer
flange are to be drilled like the division plate of the lathe, or cut
into cogs, and in either case can be held at any point by a spring
detent or index attached. C shows the front of the frame, with a screw
down its centre and traversing slide f. The head of this screw is
divided, and a small brass index marks its position; one side of the
frame may likewise be divided. The small brass pulley and drill socket
are fixed to revolve in the traversing nut or slide f, as shown in a
side view at D. Drills of all shapes, as E 1, 2, 3, 4, may be fixed in
the socket at pleasure.
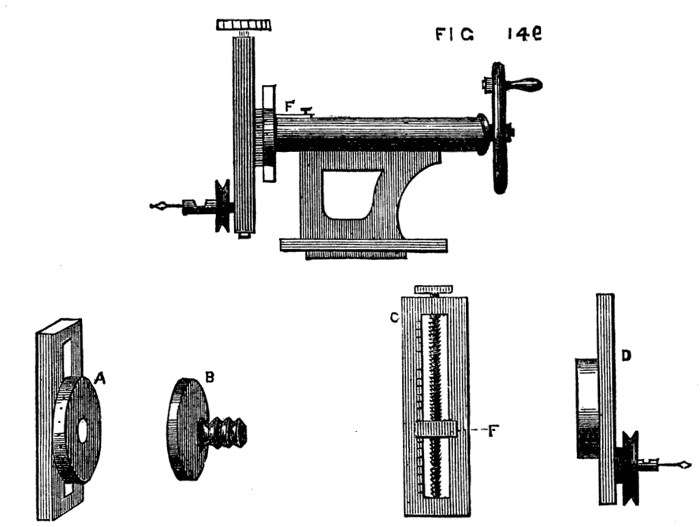
Fig. 149.
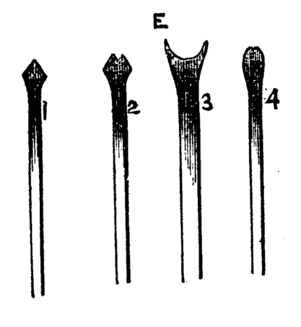
Fig. 149E.
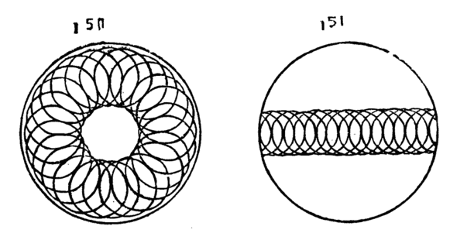
Figs. 150, 151.
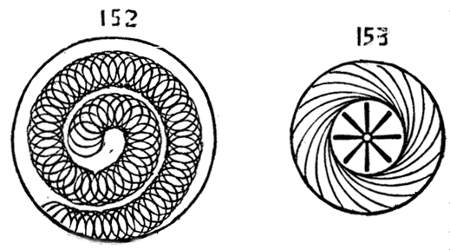
Figs. 152, 153.
It is evident that the cutter frame last described having a division
plate of its own dispenses with the necessity of one on the pulley of
the mandrel. Indeed it was the impossibility of supplying the latter
on the face of the cogwheel of the author's back-geared lathe that
necessitated the substitution of that alluded to. The latter may
consequently be omitted if applied to a lathe already fitted with
division plate and index. With crank-form drills the cutting edges
of which may be as E 1, 2, 3, 4, or other form, such patterns can be
cut, as shown in Figs. 149, 150, 151, 152, which are merely samples
of the simplest combinations of circles intersecting in straight,
spiral, or other lines. Although not now treating of eccentric work,
we may state in passing that to produce the pattern round the edge
of 150 the division plate of the instrument only is required. Select
a crank-form drill which by its revolution will produce the required
size of circle. Turn the divided screw head until you find upon trial
that the circle will come at the required distance from the edge,
and putting the lathe in motion cut the first circle. The work on
the mandrel is understood to be stationary, the mandrel being fixed
so as not to turn. The cutter frame is now turned on its axis, one,
two, or more of its divisions, and fixed by its detent, and a second
circle cut intersecting the first. This is repeated till the whole
circle is completed. The straight line of circles in Fig. 151 is cut
as follows:—The first circle is made as before, but the cutter-frame
should be placed so as to stand either horizontally or vertically.
Between each cut the divided screw-head is moved so many points
according to the proposed fineness of the pattern, and no movement
of the cutter frame on its axis is to be made. The spiral, 152, is
simply the result of a combination of the two movements. Start from
the centre by turning the screw head until the shank of the crank-form
drill is coincident with the axis of the mandrel. Cut the central
circle. Thence for each successive circle turn the screw head and the
frame an equal number of points, and the pattern will be formed. If
the divided screw head is made to take off and a handle substituted,
stars formed of channelled lines, or radial flutes can be made as Fig
153, but in this case the crank form drill is replaced by a plain
straight tool with a rounded end like 149 E 4. Set the tool as for
pattern 150 straight across the face of the work, put the drill in
rapid motion, let it be advanced by the leading screw of the poppet so
as to penetrate slightly, and with the handle that has been attached
to the screw of the cutter frame cause it to traverse the face of the
work as it revolves. When one flute is thus cut, turn the frame on its
axis as many points as required, and proceed with number two, and so
on to the completion of the star. It is not necessary at present to
describe other patterns. Fig. 153 is therefore merely given without
special details of the method of producing it.
We must now return from this digression to speak of other applications
of the slide rest. It is evident that when connection is made between
the overhead and a pulley on the screw of the slide rest, the latter
becomes self-acting. The speed is, however, far too great, and in
addition, the mandrel is stationary. The above connection, therefore,
is not practically possible, and the overhead is only connected with
the pulleys of revolving drills and cutters fixed in the tool-holders
of the rest. It is, however, very important to be able to form some
such connection between the lathe mandrel and the screw of the rest,
for the purpose of cutting screws or spirals. A little consideration
will show the principle of this arrangement, from which some practical
plan is not difficult to design. If, for instance, the tool simply
remains in contact with a cylinder while the latter revolves with the
mandrel, a simple line will be cut round its circumference; but if,
while the mandrel revolves once, motion is given to the screw of the
rest by which the tool is made to traverse a distance of one-eighth
of an inch, the commencement of a spiral having that pitch will be
made. A perfectly smooth surface, as it leaves the lathe, in which a
slide rest has been used with a point tool, is in reality cut with a
very fine screw thread readily discernable under the microscope. We
have, therefore, only to devise some method of giving regular motion
to the screw of the rest while the work revolves as usual, in order
to turn plain surfaces, screws, or spirals. For the purpose of plain
turning a plan is sketched by Nasmyth in the last chapter of "Baker's
Mechanics," in Weale's series. A spur wheel is represented fixed to
the slide rest screw, the teeth of which are alternately caught at
every turn of the work, by an arm fixed to the latter, after the
manner of a lathe carrier. This plan is simple, and might be to some
extent used, but for one defect, due to the fact that the slides
of ordinary rests are the reverse of what is required to make this
plan available. The screw which advances the tool towards the work
is generally underneath that which moves the tool along the surface
of the work. The result is that, when the tool-holder is advanced
to take the deeper cut the spur wheel is brought nearer to the arm
which acts upon it, and greater traverse is thus given to the screw.
This is shown in Fig. 154. A is the spur wheel, B the cylinder to be
turned, C the arm or carrier. The arrow shows the direction of the
movement. Now, if the lathe is put in motion, the arm will remain
in contact with one tooth of the wheel until both arrive at b,
giving a certain amount of motion to the screw, and thence to the
tool-holder. After one cut is thus taken, the lower screw of the rest
is turned to advance the tool nearer to the work, the effect of which
is to cause the arm to extend further over the wheel. Suppose its
position represented by the dotted line, it will remain in contact
with the tooth till both arrive at c, having thus traversed a
larger arc, and given more movement to the tool. Now if the frames
of the slide rest were made to cross in the contrary direction so
that the screw to advance the tool towards the work was above that
which gave the traverse in the direction of the bed, this objection
would no longer hold, and the above gearing would answer very well,
since the necessary advance of the tool would not affect the relative
position of the spur-wheel and carrier. In Fig. 5 of the same book,
in which the gearing is effected by two cogwheels, this alteration
in the rest appears in the drawing. In this case the work and rest
are connected for screw cutting, and the arrangement is satisfactory
and simple, and for the amateur especially is the simplest and best
that can be devised. The range of screw pitches is however limited,
and the rest must have a left-handed screw, or the result will be a
left-hand thread to that which is cut. Hence another device has been
arranged, represented in Fig. 155, A, B, C. A shows the apparatus
complete. B is an arm of iron or brass which is about ¼ inch thick
or rather more. This is first slipped over the mandrel screw in front
of the poppet and fixed in any desired position by a screw passing
through the slot a, into the face of the poppet. This slot allows
the arm to be raised or lowered at pleasure and adjusted, as will be
presently described. In the slot formed in the long arm B, pins D with
nuts, fit, on the rounded part of which cogwheels, b, c, d,
are made to revolve and to gear with each other, and with a similar
wheel attached to the back of the chuck, C. The centre of the outside
wheel, whether one, two, or three are used, is connected to the screw
of the slide-rest. For the production of a right-handed screw, the
intermediate wheel comes into play, simply to reverse the direction
of the motion imparted to the screw of the slide rest. The number of
teeth which it may contain is of no importance, the calculation of
the change wheel teeth being only necessary with the first and last.
The central one is called an idle wheel, though its work is equal to
that of the rest. Thus, suppose the wheel on the chuck to contain 40
teeth, and the third wheel 20, while the former revolves once, the
third will, if in immediate contact with it, revolve twice, introduce
an idle wheel with 10 teeth between these two. The wheel, with 40
teeth, revolving once, the idle wheel will revolve 4 times—the third
wheel twice, just as if the idle wheel was not in use. In any train of
wheels, if we regard relative speed, any number between the first and
last become similarly idle wheels, and the ultimate result is the same
as if the first and last were in immediate contact.
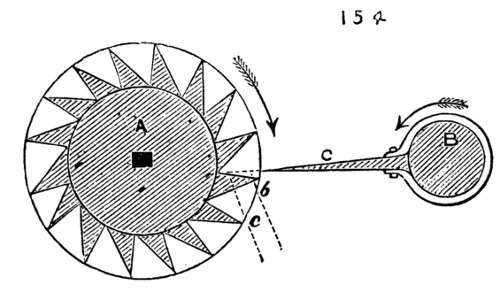
Fig. 154.
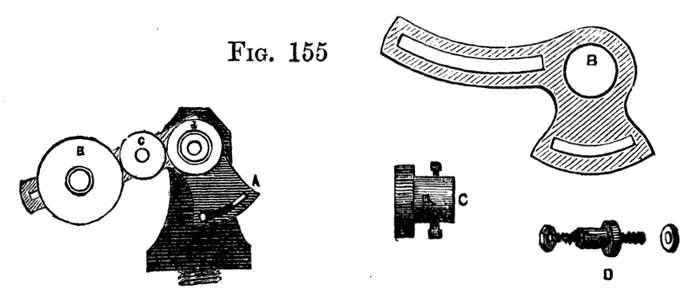
Fig. 155.
Take, for example, the following train of five wheels, even
numbers being given for the sake of clearness, to represent the
circumferences or number of cogs in each, Fig. 156. We have here, as
the first and last, 6 in. and 120 in., and, if in contact, the first
must revolve 20 times, while the latter revolves once. Interpose the
three idle wheels of 10, 30, and 60 in. respectively. During one
revolution of the largest wheel, the second will revolve twice, the
third four times, the fourth twelve times, the fifth twenty times, the
same precisely as if the first and last had been in immediate contact.
The range of a slide rest-screw is quite long enough for many purposes
of the amateur, and a connection thus made between the mandrel and
such screw is what may be termed a miniature of the arrangement
adopted in the large self-acting lathes. In the latter, however, a
leading screw is added the full length of the bed along which the
slide rest travels bodily. We may, therefore, consider the screw of
the slide-rest a leading screw, and make use of the rules applied in
the case of large lathes to decide the proportions of wheels required
to cut a given screw. It is plain that when the pitch of the required
screw is greater than that of the leading screw, the revolution of the
latter must be at a quicker rate than the former. If, for instance,
a spiral is to be cut, like the Elizabethan twist, containing but
one perfect thread in two inches, while the leading screw contains
twenty threads in the inch, or forty in the 2 in., the latter must be
arranged to make forty revolutions while the former makes one, because
it takes 40 revolutions to carry the tool along 2 in., which is the
pitch of the required spiral. The two outside wheels must therefore
bear that proportion to one another. Forty to one, however, would be
a practically difficult ratio, to place as described, even a pinion
of ten teeth on the leading screw requiring 400 teeth on the chuck.
Hence a different arrangement would be necessary if such very great
difference exist between the pitch of the leading or rest screw and
that to be cut. The same obvious difficulty would occur where a very
fine screw is required, and the pitch of the leading screw is coarse.
This will have to be referred to again. One example, therefore, of the
method of overcoming this difficulty will suffice. A train of wheels
is shown in Fig. 157, of which A has 60 teeth, B 10 teeth, C, on the
same axle and united to C, 30 teeth, D 20 teeth. While A turns once,
B will turn six times, C necessarily six times also, D nine times. In
this case, if the first and last had geared together D would have made
but three turns, while A made one.
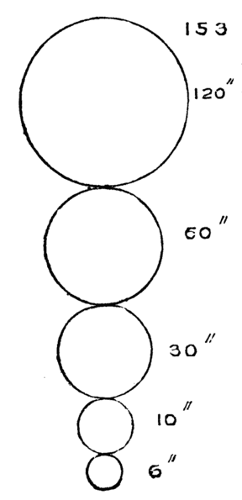
Fig. 156.
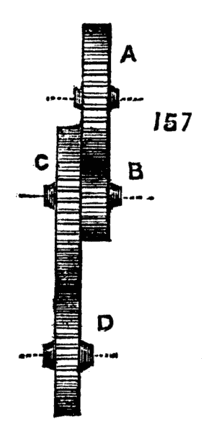
Fig. 157.
The following is an easy method of calculating a series of such change
wheels:—
Write down the number of threads in the screw to be cut, and also
the number of threads in the leading screw; multiply both by any
convenient number likely to give such results as to tally with the
cogs in the set of change wheels. Suppose it is desired to cut eight
threads to the inch, and that the leading screw has two threads in
that length. Then:
| 8 |
×10 |
|
80 |
or |
8 |
×15 |
|
120 |
or |
8 |
×20= |
160 |
&c. |
| 2 |
|
20 |
2 |
|
30 |
2 |
40 |
If you have either couple of these wheels, you can put one on
the leading screw, and another on the mandrel, and fill up the
intermediate space with dummies.
If the above is inconvenient, or the wheels are not to hand exactly
as required, proceed thus. If you have the wheel for the mandrel, and
the one you wish to use for the leading screw has only half the proper
amount of teeth, it is evident that the leading screw would revolve
twice as fast as required, for they are proportioned as two to one—or
if I have the proper wheel for the leading screw, and the wheel I
wish to use for the mandrel has twice the proper number of teeth, it
amounts to the same thing. You can get over the difficulty by using
any two wheels which are in the proportion of two to one (say 20 and
40, 30 and 60, 40 and 80, &c.), and coupling the two firmly together,
so that the larger wheel of the two works into the mandrel wheel (or
dummy working into the mandrel wheel) and the smallest into the screw
wheel (or its dummy); if the speed is wrong in the contrary way, so
that the case is reversed, the coupled wheels are made to gear in a
reversed direction; and whatever may be the amount of error, whether
such as to cause either mandrel or screw to revolve ⅛, ¼, or
¾ too slow or too fast, the same arrangement may be pursued, the
coupled wheels bearing that proportion to each other. The above method
was communicated to the English Mechanic by a working man, James
Connor, and is perhaps as easy as any; but tables are published of
change wheels for any pitch, with any thread of leading screw. Where
it is not possible or inconvenient to apply the above arrangement,
and where only a few pitches are likely to be needed, another method
can be arranged by connecting the lathe pulley to the overhead motion
and thence to the screw of the rest. Such an arrangement is shown
in Fig. 158. A is the fly wheel, B mandrel pulley, C, D, pulleys on
the overhead, E pulley and screw of the slide rest. To facilitate
calculation, let diameter of C equal that of the part of the mandrel
pulley that drives it, by which it will revolve in the same time. The
calculation of the sizes of pulleys, D and E, will be the same as for
the cogwheels of the screw-cutting lathe, circumference and number
of cogs being, so far as calculation is concerned, the same thing.
Let the leading screw have eight threads to the inch, and let it be
required to cut a spiral of two threads to the inch. Proceed as before
by dividing the required number of threads to be cut by the number
on the leading screw 2-8 = ·25. The pulley on the leading screw will
be therefore one quarter the size of that on the overhead (which is
virtually that on the mandrel as it revolves at an equal speed with
the latter). The overhead pulley may be conveniently twelve inches
diameter, and that on the screw three inches. While the mandrel makes
one revolution the screw will make four, advancing the tool half an
inch, and cutting one thread of a spiral in that distance. The next
revolution will advance the cutter a second half inch, cutting a
second complete thread of spiral. Two threads will, therefore, have
been cut in the space of one inch as desired. By the above method
short screws and spirals of divers pitches may be cut at pleasure.
The practical difficulty in this plan is due regulation of the
various speeds.
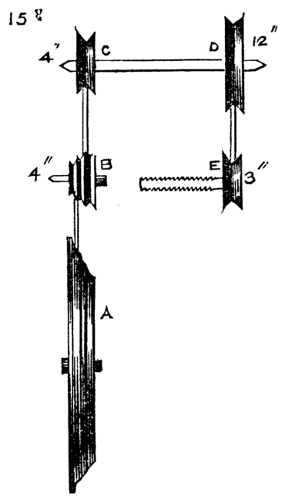
Fig. 158.
We here introduce a modification of self-acting lathe for cutting
Elizabethan twist described by Mr. Wilcox in his MS. before alluded
to. The work is here done by a leading screw and toothed gearing, the
principle being that of the ordinary machine lathe. A chuck, A, with
cogwheel attached holds the work as usual, the back centre being also
required. The cogwheel gears with one of less diameter attached to the
end of the guide-screw B. On the latter works the rest C, in which
is a nut of the same thread as that on the guide screw, and which
holds the tool in a notch or hollow upon its upper part. The tool is
then used by hand, but is guided in its course along the surface of
the work to be turned. This guide screw, with the rest and cogwheel,
is mounted on a board as a separate piece of apparatus, and is, when
used, clamped on the lathe bed. As the rest is after all little else
than a large nut, it must be prevented from turning round, and must be
arranged to bear the pressure of the tool, relieving the long screw
from the strain that would be thus caused. This is effected by a long
flat bar—like the rest of a chair maker's lathe—extending the full
length of the bed shown here at E, and supported by standards F, F. A
projecting part of the rest bears upon this, and slides along it with
the tool. The work is begun with the rest on the right hand, and some
care is necessary as it nears the cogwheel on the left, when the work
must be stopped and the whole run back by hand to its starting-place.
This is one chief defect in this apparatus, for the rest very quickly
traverses the length of the screw, and great delay is caused by having
thus constantly to stop the lathe and reverse the motion. The closest
attention is also necessary to prevent the rest from overrunning its
mark and striking the cogwheel. It is evident that by using different
pitches of cogwheels, many screws of varied threads can be cut in the
above lathe. There is, however, another defect in the above tool not
noticed by the writer of the MS. from which the description is taken,
namely, the difficulty (common to all such contrivances for turning
wood), of obtaining the requisite speed. If the work is put in rapid
motion, without which wood will not be cut clean, the movement of the
rest will be so rapid also, from the effect of the multiplying wheel,
that the tool will be carried from end to end in a few seconds. We
will therefore proceed to describe a modification of this and similar
apparatus, which allows the tool a slow traverse lengthwise of the
work, but gives it immense rapidity in the necessary direction. The
following is applicable to the lathe described above, to the ordinary
slide rest worked by hand, or to the large self-acting screw-cutting
lathes used in manufactories, and is specially adapted for cutting
spirals or other patterns in wood. In the Fig. 160, A represents a
shank, which may be made of any shape to fit particular patterns of
tool holder. This shank is turned up and becomes a cylinder at B, like
that of the ordinary revolving cutter. This part is bored, and fitted
with a steel spindle, which should be of strength proportionate to
the size of stuff likely to be operated on. One end of the spindle is
fitted with a brass pulley, from which a cord is to be attached to the
overhead apparatus, the other end terminates in a round or hexagonal
boss, D, round the margin of which are securely held, by means of
bridles B1 or other simple contrivance, a pair or more of small sharp
gouges. This apparatus is put in the tool holder of the slide rest,
set to the angle that corresponds with that of the screw or twist,
and put in rapid revolution by means of the overhead apparatus. The
whole rest, or merely the upper part, is then put in motion by one of
the before-named means, and the tool advanced to make a cut. However
slow the movement of the rest may be, the cutters move with such
velocity as to make clean and beautiful work.[13] This may be applied
to the slide-rest of the twist lathe, just described, or any similar
apparatus. In the overhead, a roller, supplying the place of the
second pulley, as described in a previous page, will allow the second
cord sufficient power of traverse to keep up a proper position in
reference to the pulley C. Revolving cutters on the same principle as
the above, have of late years come into extensive use in wood-cutting
and carving machinery. The steam planes now used in the preparation
of flooring boards, the spoke turning lathe, moulding and shaping
machines for wood are all thus fitted. The gouges or other cutters
used must not be placed radially, but as tangents to the circumference
of the boss in which they are fixed. An improvement upon the simple
bridle to hold the cutters would be the substitution of Babbage's
tool holder, four radial arms being substituted for the metal boss
above alluded to. This tool is described and figured in Holtzapffel's
"Mechanical Manipulation," to which the reader is referred for an
accurate description. It chiefly consists of a shank turned up at the
end like Fig. 161, the outside, at B, being rounded to fit hollow
gouges such as Fig. 161H; against this the hollow of the gouge is laid,
and opposite to it, at C, a small piece like D. A band or hoop, E, is
now placed over both the above, and between the two a wedge-shaped
piece, F, which is intended to bring a strain upon the hoop and
tighten it round the gouge. This last piece is attached to the shank
or holder by a screw passing through it into the shank. The tighter
this screw is worked the lower the central wedge is drawn down, and
the tighter the hoop is made to embrace the tool. This holder is also
modified to suit flat chisels. The tool cannot possibly slip, but
can be released in a few seconds if desired. Such a termination of
two, three, or four arms revolving on a spindle in place of the boss
would form the best possible circular cutter for shaping lathes. The
above lathe for producing Elizabethan twist introduces the reader
to self-acting, screw-cutting, and machine lathes, such as are used
in all large manufactories. Hand-turning, indeed, except in such
light work as turning up the heads of small bolts, and finishing up
work which, from peculiarities of form, cannot easily be done by
self-acting tools, has become a thing of the past in factories of any
pretensions; hand labour, in fact, not only no longer pays, but is
quite insufficient to meet the requirements of the present age. Take,
for example, a piston-rod requiring to be as "true as a hair," to use
a common expression, from end to end. The traverse of an ordinary
slide-rest would only enable us to turn a short length at a time,
and the result, when accomplished, would not be satisfactory. With a
self-acting lathe the tool traverses in a perfectly straight line from
end to end, is returned to its starting-point by a quick traverse, and
the movement repeated until the proper dimensions are attained. The
process is not absolutely rapid, because time is requisite in cutting
iron and steel, but the work is executed as speedily as the nature of
the metal to be cut will allow, and the execution is perfect. Of late,
however, even the above has been improved upon, for two cutters are
used at once—one on each side of the bar, so that by one traverse
of the rest a cut of double depth is taken, and the tendency of the
work to spring away from one tool is counteracted by the operation of
the other. But we require something more than speed in the present
day. We must have work of absolute truth of measurement. What would
our ancestors, or the immortal Watt himself, think of measuring work
to the hundredth part of an inch, yet it can be and is done to the
thousandth part. I believe I am correct in saying that Whitworth
constantly gauges work to that or even a higher degree of nicety. It
is not too much to assert that the best engines of the present day
really work with the precision of clockwork, and even the bore of
an Armstrong or Whitworth gun is executed with no less accuracy and
precision. Look again at that ponderous affair, the steam hammer,
so ponderous as to require a depth of solid masonry and timbers to
sustain the force of its terrific blows. In a few minutes a solid
mass of metal is reduced to a flat plate such as would have taken the
united strength of a dozen men wielding the heaviest sledge-hammers
for an hour at least. The ground beneath the feet of the spectator
trembles at every blow of the machine. The work is done, and behold!
with a touch the same ponderous concern becomes a nutcracker, not even
injuring the kernel when it breaks the shell. Such is one of a hundred
specimens of accurate workmanship carrying out in practice the clever
designs of the mechanical engineer. Sweep away self-acting machinery,
and such work would become a simple impossibility. Again, so long as
turning, boring, planing, and such work was performed by hand alone
(even after the introduction of the slide principle), an attendant was
required at each machine. Now that the latter is contrived to regulate
its own movements, one man at two or three lathes is sufficient. Thus
the same article that was once imperfect and costly, owing to the
demand on skilled labour, which was difficult to procure and at best
inefficient when procured, has now become cheap, and to all intents
and purposes perfect; and although the demand for such work increases
year by year, self-acting machinery being constantly improved and
simplified, enables the manufacturer to keep pace with the demand.
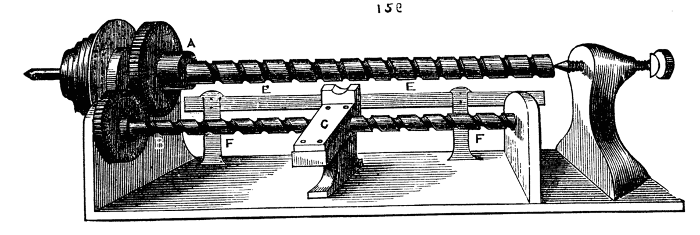
Fig. 159.
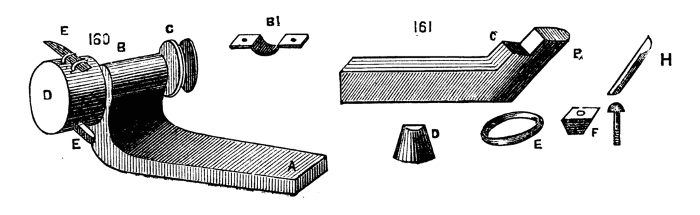
Figs. 160, 161.
The advantages of self-acting machinery are of course chiefly confined
to the trade, and it is not often that the mere amateur requires such
aid. Indeed, the expense necessarily attendant on the fabrication of
these machines deters the great majority from making such a purchase.
The first requisite for fitting up a lathe for screw-cutting and
plain turning is the fitting a guide-screw, and adding a saddle to
the slide-rest. But it must be observed that the ordinary mandrel of
small foot-lathes, which works in a collar and back centre, is not
convertible, and must be replaced by one working through two collars,
so that a part may project at the opposite end to that intended for
the chucks. On this projection various cogwheels have to be fitted.
Now there are divers patterns of mandrel suitable for the above
purpose; some are perfectly cylindrical, some have one conical part,
some are fitted with a second cone, independent of the mandrel, and
which slides upon it, and can be adjusted by means of regulating
nuts. This latter being a good pattern, when well constructed, we
shall first describe in detail. In Fig. 162 is shown A, the mandrel
complete, with fittings in section, but without any of the change
wheels. The cone a is forged on the mandrel, which then becomes
cylindrical. The cone is figured too large in proportion to size of
mandrel; the latter should be represented as much more substantial.
At b the second cone slides on, the latter shown again at B. It is
bored truly, and a slot cut to fit a feather on the mandrel. Thus it
will slide along it, but must necessarily turn with it. Beyond D on
the left are two screwed parts, one slightly larger than the other,
one being made with a left-handed, the other with a right-handed
thread. On these screw the two nuts, d, e, which drive the movable
cone towards the right, causing it to fit more tightly into its
collar, and also by the same movement tightening the fixed cone in
its bearings. The mandrel is thus readily adjustable in the collars,
and can be made to run very truly and easily without shake or endlong
movement. Any pressure, however, against the front, such as would
be caused by drilling, would jam the front cone in its collar, and
tend to loosen the other. This is counteracted by the part f, g,
with its screw, h, against which the end of the mandrel bears. That
this form requires good workmanship is evident, for there are three
points, or bearing surfaces, to be brought into a correct line, and
the slightest deviation will cause the mandrel to jam in some part of
its revolution. The nuts screw up in opposite directions to counteract
the tendency in either to screw up more tightly, or to become looser
by the revolution of the mandrel. On the whole the above is a good
form of mandrel; if it has a fault, it is a slight tendency to work
heavily. The next form is that of the ordinary mandrel, with single
cone, but a second collar is added, which is cylindrical, through
which the mandrel passes, and it then abuts on the sustaining screw
as before. This is shown in Fig. 163, with the addition of the wheel,
which is to be connected by intermediate wheels and pinions with the
leading screw. If the conical collar is replaced by a cylindrical
one, so that two similar bearings are made use of, a shoulder becomes
necessary to prevent the mandrel from slipping endwise. The collars
must also be split as in Fig. 164, so that they can be tightened up as
they become worn. Either of the above forms of mandrel can be used;
each has its advocates, and not unfrequently all may be found in
different machines in the same manufactory. The bed of a self-acting
lathe requires to be accurately surfaced, and formed by the planing
machine with two V's or edges bevelled underneath, as 165 b, b. The
saddle of which we have spoken is a flat plate of cast iron fitted
with V pieces to match the bevelled edges of the lathe bed, along
which it slides truly, its under-edge being planed. To this plate the
slide rest is attached securely, either turning when required on a
central pin, and being clamped at any desired angle, as before stated
when treating of the compound slide rest, or, when this movement
is preferred to be given to the upper slide, fixed permanently by
nuts and screws. The saddle is represented detached in Fig. 166. The
principle of the self-acting lathe is very simple. Motion is given
to the screw by means of cog wheels geared with the mandrel, a nut
fitting the screw is attached to a hanging bracket of the saddle, and
this with the rest is thereby carried along the bed. It is necessary,
however, to add some contrivance for instantly throwing the screw out
of gear, without the necessity of stopping the lathe itself. There
are many ways of effecting this, the most common being the use of a
split nut, which embraces the leading screw when the two halves are
brought together upon it, but which is instantly freed by separating
them through the action of levers and cams, or other simple mechanical
contrivance. In Fig. 167, a is the bottom of the saddle from which
depend the brackets E, E. The nut B, B, which is divided across the
middle, slides up and down between these brackets, D being the leading
screw which they embrace when closed. The movement of the halves of
the nut is effected by the lever c, in the form of the letter T
moving on a centre pin at K, and having two links, D, D, attached to
the halves of the nut at one end, and to the ends of the cross lever
at the other. A connecting bar pivoted to the part, L, is attached
to a lever and handle, by which motion is communicated to the lever.
When this rod is moved in the direction of the arrow the links will
cause the nut to close and vice versa. The next form, 168 and 169,
represents the split nut attached to two arms, A, A, hinged together
at E. B, B, are slots in which work the pins attached to the cross
head of the levers C, C. A heavy knob of iron keeps the latter in
the position to which it may be moved. In 168 the pins keep the arms
and nuts apart. When the lever is thrown over, as in 169, the nut
is securely closed and held in gear. This form requires to be fixed
to the lower part of a bracket attached to the saddle of the slide
rest, such as is shown at B, C, Fig. 170. In this figure, A is the
bottom of the saddle E, E, the V piece, that on the left, having an
adjusting screw to tighten it on the lathe bed when necessary. At F
is a projecting piece of the saddle fitting accurately between the
lathe bed, and kept down by a screw with bed plate underneath. This
serves to steady the movement of the saddle and relieve the pressure
and strain upon the V pieces. The bed-plate may be cut out to fit the
lower part of the bed on which it slides, both being planed for the
purpose, as shown at H.
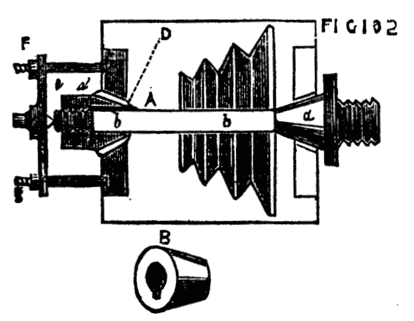
Fig. 162.
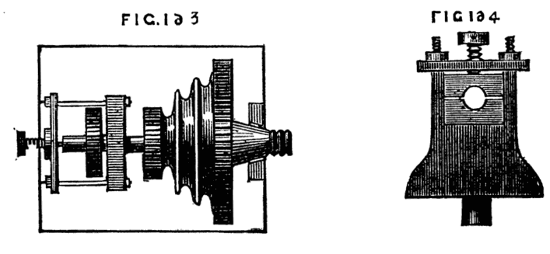
Figs. 163, 164.
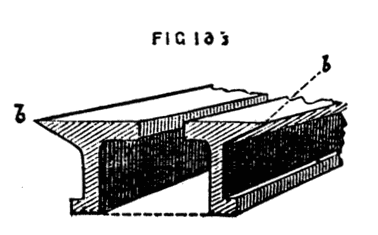
Fig. 166.
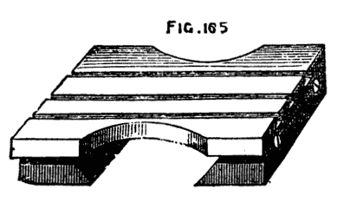
Fig. 165.
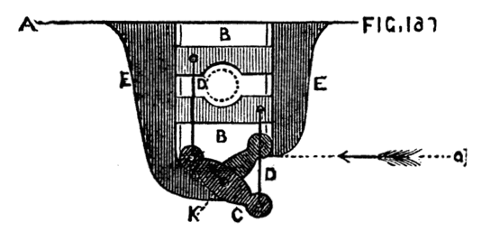
Fig. 167.
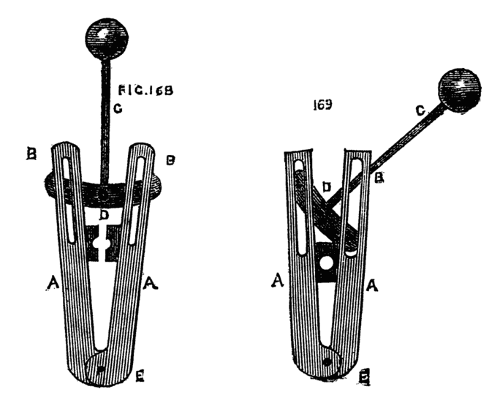
Figs. 168, 169.
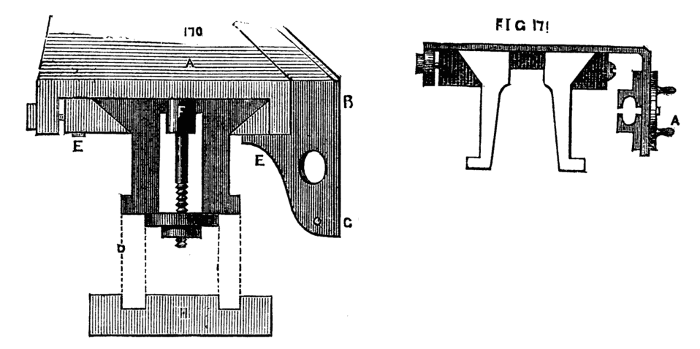
Figs. 170, 171.
In Fig. 171 the half nuts slide up and down on the front of the
saddle, and are moved by a circular plate on the outside. The action
is very similar to that of Fig. 167, intervening links, attached to
the plate and to the halves of the nuts, giving motion to the latter
as required. Cams and eccentrics of varied forms are also made use
of for the same purpose, every lathe maker devising new and improved
movements from time to time. There is indeed little difficulty in
arranging a satisfactory method, the best being that which is under
easy control, of adequate strength, and not likely to be easily
disarranged by the rough treatment it is liable to receive at the
hands of the workman. The leading screw may either be placed on the
outside, in front of the bed next to the workman, or inside between
the bearers. The former is preferable as being more accessible, but
it is rather more exposed to injury. When between the bearers the
large saddle of the slide rest serves to protect it from the falling
chips and shavings of metal which, mixing with the oil, are apt
to clog the threads and add to the friction of the parts, besides
increasing considerably the wear and tear, and no accidental blow is
likely to reach the screw thus protected on both sides by the lathe
bed. Nevertheless, all the various parts of a machine should be made
as accessible as possible, and, with the exercise of ordinary care in
its preservation, the position outside is on the whole the best. If
the lathe bed is very long, it may be desirable to support the screw
by allowing it to rest on friction wheels fixed to the saddle at both
ends, or by allowing it to pass through a pair of brasses. Thus, as
the saddle is often two feet in length, such bearings at each end,
with the split nut between the two, form points of support which go
far to prevent the screw from jagging or bending in the middle from
its own weight.
The general arrangement of self-acting tools is similar with all the
makers. Fig. 172 is a drawing of such a tool from a sketch of Eades &
Son, an old firm in Lichfield-street, Birmingham, the screw being here
placed in front. Whitworth, the eminent mechanician of Manchester,
makes many lathes with the screw between the beds. He also uses a
double slide rest, with a tool working at each side of the piece to
be turned, which cannot thus spring away from the cut. This is called
a duplex slide rest. By this method double the cut is taken, and the
strain upon the work lessened. In addition to the screw there is
usually a rack attached to the lathe bed, on the furthest side, and a
cog wheel working upon this, attached to the back of the slide rest
saddle, is turned by a handle in front of the rest, Fig. 173. This
enables the workman, after having, by means of the screw, completed
the cut to the end of the work, to run the rest back again very
quickly, having first released the split nut from the screw. The tool
is thus brought into position for the next cut far more rapidly than
could be managed by reversing the motion of the screw. This is called,
therefore, the quick return motion, and is almost always attached to
the larger class of machine-lathes. Before entering upon the details
of other forms of gearing, and the arrangement of change-wheels for
cutting screws or for plain turning, we shall introduce a few remarks
upon the often-repeated question as to the advisability of self-acting
lathes for the purposes of the amateur. It must be remembered that
the chief object of such a lathe is the manufacture of large screws,
long shafts, and such work as the piston rods of engines, requiring
perfect accuracy from one end to the other. Boring cylinders and
similar work is now generally done in an upright or vertical boring
machine, which is for many reasons more convenient. This class of
work, of course, the amateur has nothing to do with. The traverse of
an ordinary slide rest is generally adequate for surfacing or boring
to a length of six inches, which is sufficient for most purposes, and
can readily be done by turning the leading screw of the rest by
hand. Then, as regards screw cutting in the lathe, it is questionable
whether it is not easier to turn up the blank and cut with stock and
dies. The thread thus formed is a copy of that of the tool, and the
latter, as made by Whitworth and other first-class makers, is as
perfect as machinery directed by talented workmen can produce. If
it is really desirable, however, to make use of the lathe for this
purpose, the plan already suggested is generally applicable, namely,
gearing the leading screw of the slide rest to the mandrel, either
by means of change-wheels attached to an arm, or by connection with
the overhead pulleys. There is, in addition, a plan of attaching a
pair of dies to the tool holder of the rest, after detachment of
the screw from its nut, which may be available in some cases. There
are also screw plates made in two halves, the plates being divided
lengthwise and clamped together at pleasure, admitting of application
to any screw-blank while revolving in the lathe; and, lastly, pairs
of dies, fitted like pliers, can be similarly used by hand without
any slide rest. On the whole, then, it will hardly pay to give £50,
or £60, for a screw-cutting lathe that is merely destined for small
work; that can be done sufficiently well in a common lathe with
hand motion to the rest. For cutting short screws, such as those of
boxes, a convenient and practically useful contrivance is still a
desideratum. The traversing mandrel is, no doubt, the best, but it is
an expensive pattern, if well made, and it is necessary to sacrifice,
in a measure, general utility to questionable and certainly partial
advantage. Turning is, moreover, an art, and to attain skill in it,
perseverance and practice are necessary—hence the zest experienced
in its pursuit by the real lover of it. This perseverance pays, and
to attain the skill required to trace a short screw with the chasing
tool is within the reach of any one who desires to accomplish it. The
art once acquired, the desire for a traversing mandrel ceases; for
no good workman would accept a contrivance of the kind when he can
more easily and quickly accomplish his end without it. Writing this
for the special benefit of amateurs, we would strongly advise them
not to throw away money to purchase the means of doing what after
all they will probably never, and certainly only seldom, carry into
practice. The pleasure afforded by all the mechanical arts is greatly
enhanced by meeting with and triumphantly surmounting all sorts of
difficulties. Let it be a standing rule of our readers to make use
of the appliances at hand instead of seeking others which only save
trouble and render skill unnecessary. What can be more aggravating
than for an amateur, with his hundred guinea lathe and chests of
tools, to be obliged to take his work to a mechanic, and to see him,
whose whole stock might be bought with perhaps a tenth part of the
money, take in hand and finish with ease what has baffled the skill
of his more wealthy patron? The common fault of the amateur is undue
hurry. To him time is seldom an object, yet the mechanic, to whom it
is so precious, readily spends more upon his work. He never hurries,
never compromises, but with lathe and file fits the several parts of
his work with the most patient care and practised skill. The result is
at once seen when his productions are placed side by side with those
of the zealous but too hasty amateur.
It remains, as previously described, to arrange certain cogwheels
gearing with each other upon the spindle of the mandrel and upon the
end of the screw, to enable the workman at pleasure to vary their
ratio of speed, in order to give him the means of regulating the
pitch of thread to be cut. For this purpose a set of change wheels is
supplied with the screw-cutting lathe, the number of cogs in which
usually commencing at fifteen, increase by five, until the number
one hundred and twenty is reached, then increasing by ten up to the
complete set. Duplicates of some numbers are also convenient. The
method of finding the proper sized wheels is, of course, based upon
the proportion borne by the required pitch to that of the leading
screw and one form of calculation for the purpose has already been
given. Thus, supposing the leading screw to have two threads to the
inch, it must revolve twice to move the tool that distance, and if
we wish to cut a screw of ten threads to the inch, the work on the
mandrel must revolve ten times while the leading screw revolves twice,
or, which is the same thing, the mandrel must revolve five times while
the screw revolves once. The cogs in the wheels must therefore be in
the proportion of five to one, say fifty on the screw and ten on the
mandrel, with an idle wheel on the stud to cause the motion of the
tool to be such as will cut a right-handed thread, or to cause the
mandrel and screw to take the same direction. Now, it seldom happens
that two wheels and an idle one will give the requisite speed to the
tool, and the number of cogs required soon mounts to inconvenient
numbers. In this case, therefore, according to a principle already
laid down, a stud-wheel with a pinion attached to the same, is
placed in the train of wheels, and the object readily attained. A
modification of the rule of calculation may make the system of change
wheels still clearer. Let the pitch of guide screw be as before,
namely, two threads to the inch, and let five be required. Place the
numbers thus, 2-5, and divide both into their factors, twice one, or 2
× 1, and twice two and a half, or 2½ × 2.
2 1
/
2½..2
Now, it is certain you can have no wheels containing half notches, nor
of such small numbers of cogs, therefore multiply by any convenient
numbers—ten, for instance, which give
20..10
/
25..20
This is all that is needed. Put a wheel of twenty
cogs on the mandrel, and let it work into one of twenty-five on the
stud, the latter carrying a pinion of ten cogs, driving one of twenty
cogs on the screw. To prove this, as before, the screw must make two
revolutions to carry the tool one inch, and during that time the
mandrel (carrying screws to be cut) must make five revolutions. Let
the screw wheel revolve twice, the pinion of ten teeth will revolve
four times (twice 20 = 40 and four times 10 = 40); but as the stud
wheel and pinion are as one, and revolve together, the stud wheel
must also revolve four times (4 × 25 = 100). Thus the mandrel wheel
will revolve five times as required (20 × 5 = 100). No other method
is so easy to understand and work as the above. To give full details
and provide working drawings of the various screw cutting lathes
by different makers would be to extend the present series to an
unnecessary limit, but we shall nevertheless describe another method
by which these lathes with traversing rests are made self-acting when
screw cutting is not required. Instead of a leading screw extending
from one end of the lathe to the other, there extends a bar of steel
about the diameter of the screw with a key groove or slot from end
to end. This bar is supported in bearings at each end, and carries
upon its surface a ferrule of steel with a screw cut upon its outside
similar to Fig. 174, where A is the bar and B the ferrule. The pitch
of screw is coarse, being similar in its object to the guide screw
previously described. A pin fixed into this ferrule falling into the
slot permits it to travel along the bar but causes both to revolve
together when the bar is put in motion by means of a cog wheel or
strap pulley at one end. Along the same side of the lathe bed, and
level with the surface, is a rack, C, upon the face of which works a
pinion, D, carrying on the same axis a cog or rather worm wheel, E,
to gear with the screw ferrule. The bearings of this axis are secured
to the saddle of the slide rest. Consequently, when the bar revolves,
the screw is also put in motion, the wheel, A, Fig. 175, and pinion,
B, partake of the movement, and the latter traverses the face of the
rack, carrying the saddle with its rest and tool holder along the bed
of the lathe. By this movement the screw ferrule traverses the bar as
it revolves, thereby virtually becoming a long leading screw. In Fig. 176,
which is a view from above, looking down upon the lathe bed, A
is the rack, B, B, the saddle cut away to show the rack and pinion C;
E is the worm wheel, D the long bar, the screw ferrule, being under
the worm wheel, is not visible. As above arranged it is evident that
the ferrule might escape from the worm wheel instead of proceeding on
its proper course. This is prevented by its lying in the hollow of
a bracket attached to the rest, as Fig. 177, A and B. This retains
it in contact with the worm wheel, and also becomes a support to
the long bar. Fig. 174 shows the side of the lathe that is furthest
from the operator. The axle of the worm wheel and pinion carries a
handle on the near side to give the workman power to use the rack by
hand as a quick return movement. The above is frequently attached to
those lathes provided with a long screw, the latter being on the near
side and the bar on the other. Thus, the same lathe can be used for
ordinary or screwed work. Whitworth, however, commonly uses the long
screw placed between the beds or bearers of the lathe for screwing
and surfacing, instead of adding the apparatus just described. A long
screw being, however, an expensive affair, ought to be carefully
cherished, and when the work is such as the bar will suffice to
accomplish, it may be well made use of to preserve the screw. There is
an arrangement for forward or cross-feed in the above apparatus, the
principle of which is the connection of the cross screw of the rest
by means of a pinion, either with the worm wheel or with a cogwheel
on the same axle. When this is put into gear the rack and pinion are
disconnected. It is also necessary to provide a method of reversing
the motion of the long screw bar, especially when the cross feed is
used in surfacing. There are several modes of accomplishing this,
the best being the following, Fig. 178, which is a simple expedient
applicable to lathes or other machines. A is the end of the screw rod,
with bevel wheel attached, B, C, are similar wheels on the axle, D,
the latter being movable endwise in its bearings by means of the lever
handle; E, D, is the driving axle. By moving the lever to the right
B is geared to A. A movement to the left brings C into connection.
Between the two, both wheels are thrown out of gear, and though they
may continue to revolve, the screw bar will remain still. By this
contrivance the motion of the leading screw is reversed or stopped
in a second, with the advantage of its being unnecessary at the same
time to stop the working of the lathe altogether. It has probably
struck the reader that as the size of the change wheels are various,
there would be in some cases an impossibility of their touching so
as to gear together. This is partly remedied by the interposition of
dummies, or idle wheels, and partly by the following arrangement. The
stud wheel, or dummies, as the case may be, are not upon axles fixed
to the lathe-head or end standard, but upon such an arm as Fig. 179,
which turns upon a pin at A, and carries in the slot the pins upon
which the different wheels centre. These pins being made similar to B, C,
can be placed at any position in this slot, and are fixed by a nut
underneath. This arrangement gives considerable power of adjustment,
and enables the workman to place together wheels of various sizes
according to his need. It would not be by any means difficult to
arrange the above lathe for screw-cutting, especially if the pitch
of the required screw is not of great importance. An amateur's lathe
might be thus fitted to serve a good many purposes, although a leading
screw is to be preferred as the more complete and perfect arrangement.
It cannot, however, be denied that there is great friction produced
by the worm wheel and endless screw, which soon tells its own tale by
the wear and tear produced, and the power is not so economically used
as it is when the screw works in a nut. Expediency, however, in this,
as in many similar cases, must decide for or against the arrangement
in any particular case. It is, at any rate, a good addition to a
lathe provided with an ordinary leading screw, more especially in the
facility with which it can be arranged as a self-acting cross-feed to
the rest when used for surfacing.
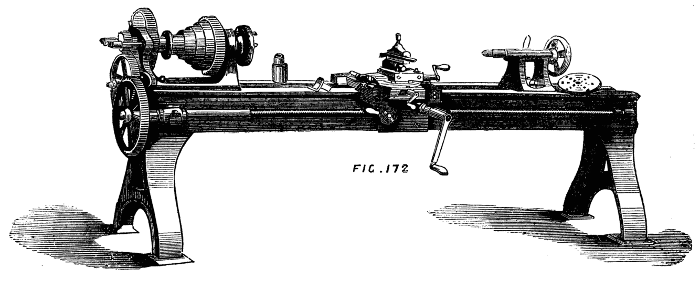
Fig. 172.
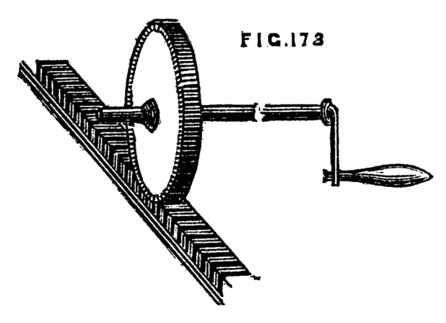
Fig. 173.
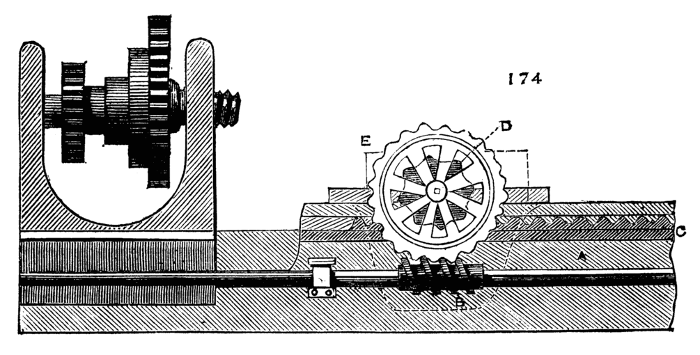
Fig. 174.
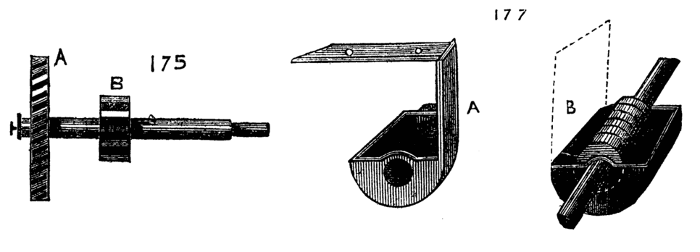
Figs. 175, 177.
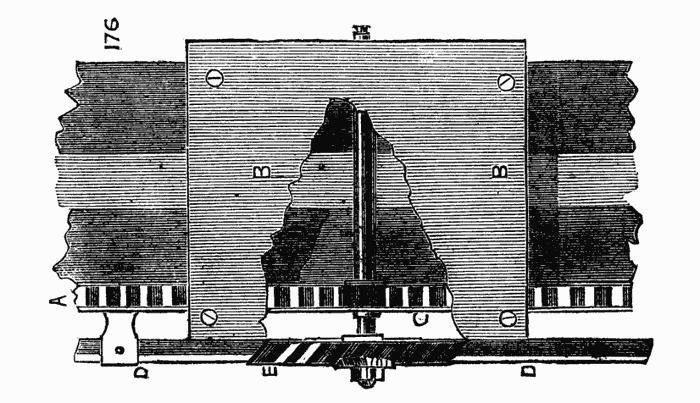
Fig. 176.
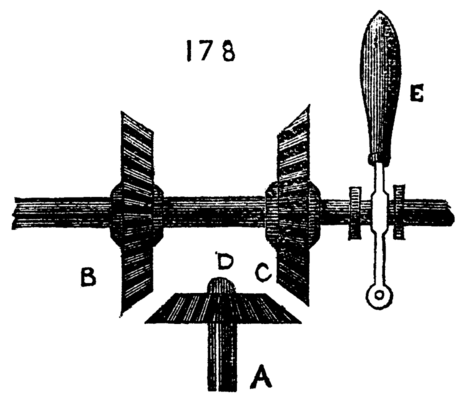
Fig. 178.
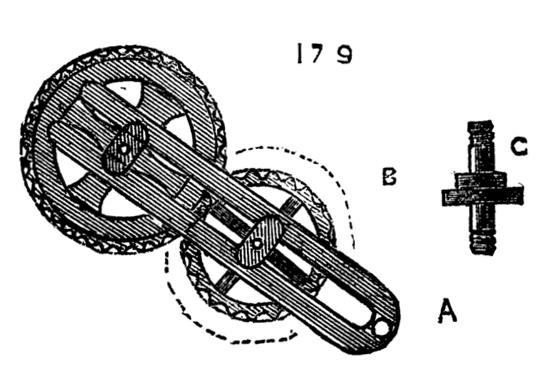
Fig. 179.
Among the various uses to which a lathe may be put, wheel-cutting
is one of the most important, so many pieces of mechanism requiring
cogged wheels of various pitches and forms of tooth. By the aid of
the slide rest such an apparatus as figured may be readily arranged,
and the work rapidly and accurately performed. The guide by which the
cogs and spaces are determined is the division plate already alluded
to, and which is not visible in the present drawing, but the index of
which is shown at G. C is the cutter frame with a side pulley (one on
each side) to conduct the catgut band from the revolving spindle to
the overhead motion on to the flywheel. The spindle carries a pulley
for the cord and a cutter wheel, I, to which an exceedingly rapid
evolution is given. There are many patterns of these wheels, the edges
of which, cut into teeth like a fine saw or file, are the exact form
of the spaces required between the cogs; hence, some are rectangular,
some have a triangular section. The thicker the wheel to be cut the
larger should be the cutter, so that the bottom of the cut may be
virtually level. In Fig. 181 another form of cutter is shown, which
if put into sufficiently rapid motion answers as well, if not better,
than the wheel-shaped cutters. It is a simple short bar of hard steel,
with the edges bevelled in alternate directions, fitted into a slot
in the spindle and held by a wedge or screw. The shape of the end is
as before, a cross section of the space between two teeth. The cutter
frame is here arranged to fit into the ordinary tool-holder of the
slide rest, but the form may, of course, be varied at pleasure. It
will be noticed that the slide rest, as delineated here, is different
to that of which details have been given. It is made without the sole,
and fits into the socket of an ordinary rest. Thus it can be turned
on a centre, and becomes, to all intents and purposes, a compound
slide rest. It is on this plan the small ornamental turning rest of
lighter construction is made. The spindle fitting the socket projects
from the centre of the lowest frame, and is cast in one piece with it.
If the apparatus is compactly and strongly made, it becomes a very
serviceable form, and is much used for the small lathes in sea-going
steamers. The sides are made very short, so that the extent of
traverse is small. We may here mention an addition to the rest socket,
enabling the workman to raise this kind, or that used with drills and
cutters, which is simple and convenient. Inside the iron socket a few
turns of a screw are cut, and a second socket of brass with an outside
thread is made to fit into it Figs. 182 A and B, the latter being a
section. The edge of the inside socket is sometimes milled round, to
facilitate holding it by the thumb and finger. In this way the height
of the slide rest, or tee of the common rest, is adjustable to a great
nicety.
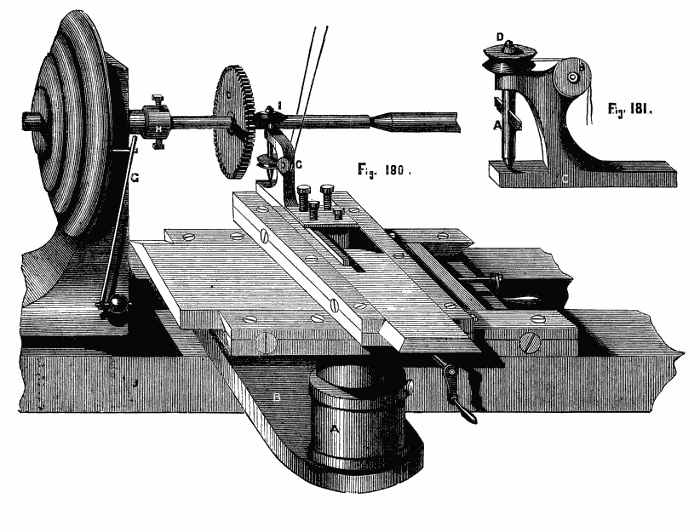
Figs. 180, 181.
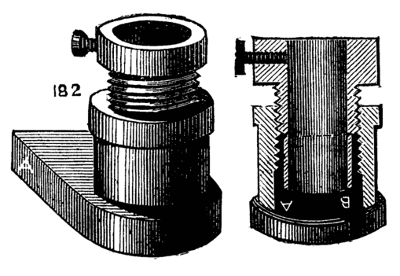
Fig. 182.
When a wheel is to be cut of large size, or of substance exceeding
that of clock-wheel work, the above method is not suitable. The wheel
is then generally laid flat, and the cogs are shaped by a slotting
machine, the chisel of which has a vertical motion. The lathe is
then no longer used; as a separate machine is more convenient and
economical.
A most serviceable addition to a lathe, especially an amateur's foot
lathe, is the circular saw, with guides for cutting parallel, taper,
or mitred work. Great rapidity of work is thus combined with perfect
accuracy. A five-inch lathe will of course take a saw nearly ten
inches diameter, but it is not advisable to attach one of quite this
size, for the larger the saw the greater is the leverage against which
the turner has to contend, and the friction caused by a deep cut in
stuff of two inches diameter is quite sufficient to make the labour
considerable. When such work is necessary, it must be very gently
brought to bear upon the saw, and the flywheel of the lathe should
be heavy. The cord should also pass from the latter to the slowest
division of the pulley. If the workman, amateur or professional,
desires a lesson in practical mechanics, he has nothing to do but turn
a piece of ash six inches in diameter, with the lathe-cord extending
from the flywheel to the smallest part of the pulley, the diameter of
which is about half that of the object to be turned. This will teach
him what hard work is. Then let him try the job with the cord, from
the smallest part of the flywheel rim, to the largest diameter of
pulley. The change to a slower motion and greater power will not be
disagreeable. It must be remembered that a circular saw of six inches
diameter will not penetrate three-inch stuff, owing to the boss or
nut by which it is attached to its spindle. The above size will not
make good work of stuff exceeding two inches in thickness, and even
less thickness would be preferable. As to the size of saw, indeed,
that is most suitable to a five or six-inch foot lathe, much depends
upon the proposed work, and still more upon the weight and size of
the flywheel. As a general rule it is better to err upon the size
of smallness. The service to which this tool is commonly put is but
light; sawing narrow strips of mahogany, such as used at the angles
of bird-cages, cutting strips or segments of ivory (for which let the
saw be kept wet) sawing out mitred or dovetailed joints, and similar
work is within the compass of a five or six inch saw, and it is better
not to exceed this. The teeth should be tolerably fine for hardwood
and ivory, and coarser for deal and soft woods. Smaller saws of hard
steel, and made of thick plate, are used for metal.
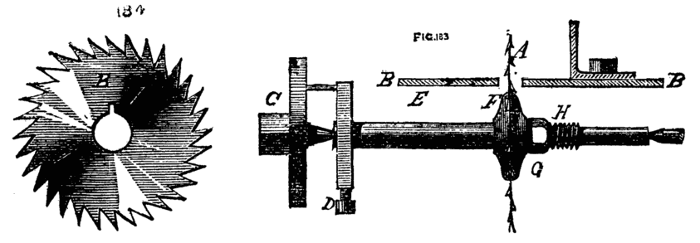
Figs. 183, 184.
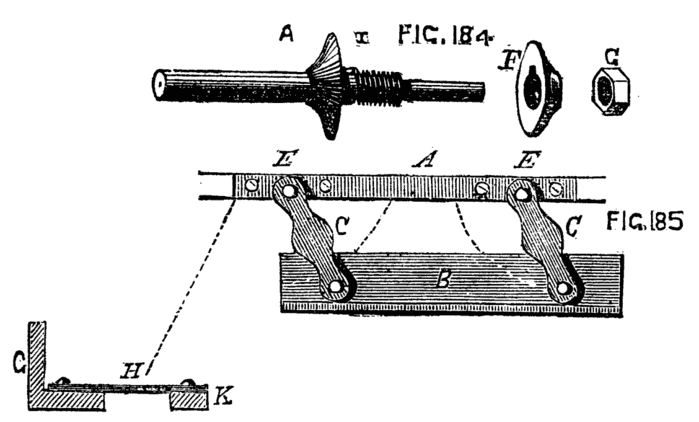
Fig. 184, 185.
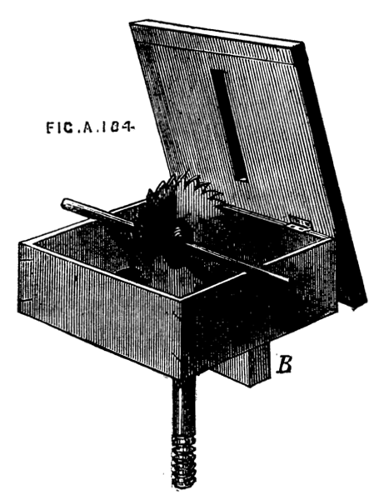
Fig. 184A.
The method of mounting saws of small size, such as are suited to be
worked by the treadle of a foot-lathe, is shown in Fig. 183. E is
a steel spindle, of which the diameter equals that of the central
hole in the saw B. At F, about the middle of the spindle, is a fixed
flange, at the base of which is a short feather or inlaid key, X 184,
which fits the small slot seen in the centre of the saw and reaches
also within a similar slot in the movable flange, G, but it must not
be so long as to come through to the back of the latter. This flange
and nut H having been removed, the saw is slid upon the spindle till
it rests against the fixed flange; the movable one is now to be
brought against it and clamped by the nut. The spindle is sometimes
made with a square end to fit the square hole chuck, and centred at
the other, or it is drilled at both ends, so as to be driven by the
carrier or driver chuck, C, D. It must be so placed as to run towards
the operator. The above arrangement must now be made complete by
the addition of a platform, B, on which to lay the work that is to
be sawn, and on which some contrivance can be adjusted to guide the
passage of the saw through the same, so as to cut the work in parallel
pieces, or at any desired angle, such as would be necessary for mitred
joints. For the general uses of the amateur a mahogany or hardwood
platform is as good as any, and such as is delineated in vol. ii.
of Holtzapffel's valuable work is perhaps the best arrangement. The
saw table rests on the opposite ends of a kind of open box, which
is represented without the two sides, although they may be added if
desired, and the whole when removed from the lathe would then form a
case for the saws, or serve other similar purpose. The platform is
hinged, so as to overlap, as seen in the Fig. 184A, and there
is in the middle of it a slit cut by the saw itself, which, when it
is mounted on its centres will be in the position shown. If sides are
added a notch must be made in the upper edge of both for the passage
of the spindle. The fillet B fits between the bearers of the lathe,
securing the parallelism of the whole. When made with four sides the
box must first be placed on the lathe bed and loosely held by the bolt
beneath. The saw is then mounted, and the box adjusted to its place
and fixed. The cover is then (if for the first time) brought carefully
down upon the saw, and the lathe being put in motion the slit is made,
and its position will be truly at right angles with the spindle and
the lathe bed. Of course, in future operations the platform is lowered
over the saw before the holding down bolt is permanently screwed
up. The sides of the saw-kerf may be edged with brass if preferred,
but on the whole the plan is not to be recommended, for if, as will
occasionally happen, the saw should get slightly out of truth, or
vibrate a little when in use, the teeth will come into contact with
the metal and be blunted or broken. If the saw-kerf by constant wear
should widen too much, the whole platform is renewable at little
cost, or a new piece can be let in, and a fresh saw-kerf made. There
are several guides for parallel work. The one shown in Fig. 185 is
precisely such as is to be seen in the ordinary parallel ruler—A is
the back bar screwed to the platform at the right-hand edge; B the
guide or fence which, when the connecting links C, C are perpendicular
to A, should touch the saw; D, D are arcs of circles of which E, E
are the centres. They may be arcs of brass pivoted to the links and
passing through a slot in the bar, A, A, or may themselves be cut as
mortises in the platform, in which fit a pair of bolts with thumb-nuts
passing through the links, by which to clamp the fence in any desired
position. This form of parallel guide is not very substantial, and is
not correct in practice unless the pins are very nicely fitted, and
the links precisely of a length. The second figure shows the sectional
form of the fence G, the links being represented at H, and the fixed
bar at K. The following is a more solid and unyielding guide, and
much to be preferred. Holtzapffel attributes it to Professor Willis.
It is merely a modification of the T-square as used with the ordinary
drawing board with an arrangement for fixing it in the required
position. The present arrangement differs from that in Holtzapffel's
work in the manner of fixing it and the addition of a second T-piece
on the side next the workman. In Fig. 186 A is the upright part of
the fence, B the bottom or sole, to which is attached at each end
the T or cross pieces, E, E, which slide along the straight edges of
the platform and secure the constant parallelism of the fence to the
surface of the saw; C is the groove or slot, in which a screw, D,
traverses, and the fence is thus fixed by a turn of the thumb-nut,
D. This fence can by no possibility get out of truth; it is easily
removed by taking out the single screw, and it is far more simple and
more easily made than the one previously described. The nearest edge
of the platform may be marked in inches and eighths, and the fence
can then be instantaneously adjusted for sawing pieces of any desired
width. It is not always, however, that straight, rectangular, or
parallel strips are required, and an additional arrangement is needed
to form a guide for sawing angular pieces. Now it is not sufficient to
lay the guide fence at a given angle, for if the latter were arranged
for that adjustment by taking off the tees and causing it to turn
upon the screw which secures it in place, and a piece of board were
placed against it to be sawn, the latter would press against the saw
sideways as seen in Fig. 187. The guide fence for angles must itself
therefore travel in a line parallel to the saw and carry with it the
piece to be cut. The simplest and usual arrangement is that given
in Holtzapffel's work. A dovetailed groove in the platform running
in a direction parallel with the saw carries a sector attached to a
bar which fits the groove, and this bar is free to move forward or
backward without lateral movement. The piece to be sawn is thus rested
against the fence forming the straight face of the sector, and the
whole is moved forward together against the edge of the saw. Fig. 188
explains this. It will be seen that several grooves are made side
by side, all of which fit the slide alike, and by moving the latter
into either of these a lateral adjustment is effected to suit pieces
of different widths. The sliding strip should be made of hard wood
and nicely fitted, and may be lubricated with soap, or polished with
black lead, either of which will cause it to slide with diminished
friction. Fig. 189 shows a somewhat different arrangement, by which
more lateral adjustment may be given. The sector is replaced by a
T-square, the blade of which has a slot through which a screw passes
into the sliding bar. A second jointed rod is added, passing through
a staple in the slide, and by a screw in the latter the T is fixed as
required. The staple must turn on a centre to accommodate itself to
all positions of the T-square, and a second eye may be placed on the
opposite arm to allow the guide rod to be removed to that side, which
is sometimes more convenient. The sector also may be made adjustable
as in Fig. 190, and clamped by a simple screw in the slot. Either of
the above methods will allow sufficient range for small work, such as
is likely to be the object of amateurs or those who add small saws to
the foot lathe. The guide for angular pieces may indeed be in many
cases dispensed with by making use of patterns of wood chiefly in
the form of triangles; these sliding against the parallel guide, and
carrying the work with them, will answer well in a number of cases
where other provision for such work has not been made in arranging
the saw table. It must be remembered, however, that in this case the
length of the piece (supposing it to be the side of a picture frame
to be mitred) is limited to the space between the fence and the saw,
which in the more perfect arrangement is an evil plainly avoided.
It may sometimes be necessary to cut pieces with various angles not
in the same plane. By using the hinged platform, and adding a screw
attached to the front of the box, and standing perpendicularly, the
front of the table can be raised to a given angle, but those who are
likely to enter extensively into the cutting mathematical figures
are referred to vol. ii. of Holtzapffel's work, where the subject is
fully explained and illustrated. The following remarks upon the proper
speed of saws and sizes of teeth are copied from that work, and may
therefore be relied on:—
"The harder the wood the smaller and more upright should be the
teeth, and the less the velocity of the saw.
"In cutting with the grain the teeth should be coarse and
inclined, so as rather to remove shreds than sawdust.
"In cutting across the grain the teeth should be finer and more
upright, and the velocity greater, so that each fibre may be cut
by the passage of some few of the consecutive teeth rather than
be torn asunder by the passage of one tooth only.
"For gummy or resinous woods and ivory, the saw teeth must
be keen, and the speed comparatively slow, to avoid the
dust becoming adhesive (by reason of the heat engendered by
friction), and thus sticking to, and impeding the action of the
saw."
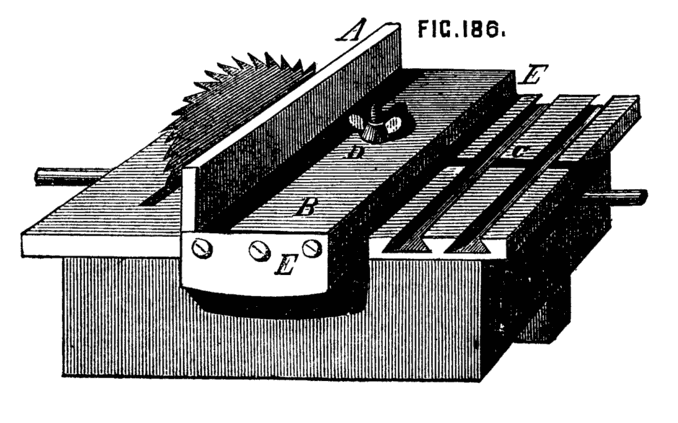
Fig. 186.
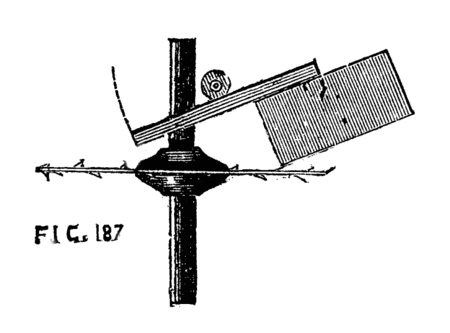
Fig. 187.
Fig. 188.
Fig. 189.
Fig. 190.
By raising the platform so as only to expose a small portion of the
saw, it is easy to cut rebates, grooves for tongueing, and other work
of a similar kind. The above arrangement of hinged table facilitates
this application of the saw.
Convenient as the circular saw is when fitted as an adjunct to the
lathe, its use is confined to pieces which are rectilineal. Curved
lines cannot be cut by its means, and as it must frequently happen
that portions of the proposed work are composed of arcs of various
dimensions, it becomes necessary to provide the means of cutting them
out. We may remark here, that although the circular saw, and that of
which we are about to speak may be fitted to mount on the ordinary
lathe bed; it is better for many reasons to have a separate stand,
made like that of the lathe, but smaller, and fitted with crank,
treadle, and flywheel, to serve for the various purposes of sawing,
grinding, or polishing; the latter operations especially soiling and
tending to damage the lathe. The above description of the methods of
mounting circular saws will answer for a separate stand, as will the
following details of saws for curvilinear work. In respect of the
latter we have to provide for the perpendicular motion of the blade,
which is necessarily thin and narrow, and also for stretching the
blade so as effectually to prevent it from bending or buckling—guides
are not required in general, as the work is moved about by hand in all
directions according to the intricacies of pattern to be traced. For
plain circular pieces, however, a very simple expedient is sometimes
used, which will be described in its proper place, when treating
of Bergeron's scie mecanique. The guides for parallel motion are
various, and a selection may be made from the following Fig. 191.
No. 1 is the arrangement used by Professor Willis, and detailed in
Holtzapffel's work. A, A are wooden springs, one above, the other
below the platform B. C is a guide pulley, D an eccentric. The catgut
band which gives motion to the saw may be passed round this, or
affixed to a metal ring as in the eccentric of a steam engine—or
may be attached to a ring slipped over the pin of a crank disc, as
shown at E. This pin being adjustable, permits the traverse of the
saw to be regulated, which gives it perhaps an advantage over the
first method. In the above the motion of the saw is not truly in a
right line, but the deviation in so short a traverse is unimportant.
The reader may, perhaps, imagine wooden springs a somewhat primitive
expedient, but this is by no means the case, as they will retain their
elasticity longer than metal ones when they are subjected to the
rapid vibration which they are called upon to undergo. No. 2 is the
parallel guide, used by Mr. Lund, and also described by Holtzapffel;
the metal springs, however, shown by the latter being here replaced
by india-rubber, which is now formed into springs of various sizes and
powers suitable for our present and many similar purposes. A, A, and
D, here form guide pulleys, the saw, E, being suspended from the first
by the two catgut bands, on the ends of which are the india-rubber
springs, F, F. The lower end of the saw is attached to another catgut
band which passes over the pulley, D, and thence to the eccentric
or crank disc as before. The platform is at B, B. Number 3 is an
arrangement similar to the beam of Newcomen's engines. The arc at
the end of the oscillating rod, and from the furthest point of which
the saw is suspended, forms the guide for parallelism. Underneath
the platform the pulley and eccentric may be used as before, and the
saw is raised by the spring attached to the arc as shown. It will be
evident on inspection that this arrangement is similar in principal to
the last, as the arc forms part of a large wheel of which the centre
is the point of oscillation. Watt's parallel motion, represented
in the next diagram, is also suitable, the saw being attached to
the centre of the short link—the springs being so contrived as to
act upon the ends of the longer bars. With regard to the means of
producing the necessary rapidity of movement, the above-described
eccentric or crank disc can hardly be surpassed. In the saw patented
lately by Mr. Cunningham, the disc is attached to the mandrel like a
chuck, and the crank pin is connected to the oscillating rods that
carry the saw by an intervening rod or link.
Fig. 191, no. 1 and 2.
Fig. 191, no. 3 and 4.
Fig. 192.
The whole is represented in Fig. 192, which is copied from the
inventor's circular. There is a satisfactory parallel motion, and
an india-rubber ball with a small tube attached is pressed at every
stroke to blow away the sawdust. The whole plan and details are as
good probably as can be devised, and as an addition to the lathe this
saw is invaluable. Another form of mechanical saw to work with the
foot, but without any flywheel, is figured by Bergeron, and is thence
copied into Holtzapffel's book, and would therefore have been omitted
here were it not that the price of Holtzapffel's work places it beyond
the reach of many whom it is specially qualified to instruct; and that
the former is in French and has not been translated. Therefore, as the
arrangement of saw is exceedingly good, the writer has determined to
introduce it here. Its construction is simple enough to be within the
reach of any amateur in carpentry, and the only metal work required
consists of a few iron rods screwed at the ends, such as the village
blacksmith can readily supply. The saws are precisely those sold as
turn or web-saw blades. It must be understood that the use of this
tool is not the same as that to which fret or buhl saws are applied,
but merely the cutting of boards in strips or curved pieces, such as
the felloes of small wheels, circular plates to be finished in the
lathe, as bread platters, or such other curvilinear works as the chair
or pattern maker is accustomed to cut out with the several sizes of
frame saws.
A, B, Fig. 193, is a stout bench with cross bar, C, underneath, cut
away to allow of the movement of the treadle and its rod. On the top
of the bench is a pillar, D, to support the spring bow E, by which
after depression the saw is raised to its original position. F, F, and
G, G, are guide rods (not continuous). The lower ones are fixed to the
cross bar, c, and under side of the bench. The upper form the sides
of a rectangular frame, H, H, of which the top and bottom bars of wood
are dovetailed at the back to slide up and down the chamfered bar
behind them, K. The frame thus allows of being raised or lowered, not
only to suit work of various thicknesses, but also to act as a stop to
prevent the saw from lifting the work as it ascends. The lower bar
is extended on one side as in the figure, and is divided into inches,
and on this graduated part is a slide with a point below, which can
be fixed by a screw. This is, as the drawing plainly shows, intended
for the guidance of the wood in cutting circular pieces. The saw is
similar to the ordinary framed saw used by chair makers, but has two
blades, and one central stretcher. The saw for curved work is narrow,
that for straight cutting is broader. Near the latter a parallel
guide is fixed, as described when treating of circular saws. This
simple contrivance, although planned so many years ago, is of great
value, and deserves to be far more generally known. To the joiner and
cabinet-maker it would form a most useful addition to the usual tools
of the workshop.
Fig. 193.
Akin to the circular saw are the various revolving cutters used either
for the purpose of ornamentation or for grinding, such as circular
files for flat surfaces, in which the teeth are cut upon the face or
tool-cutters of particular sections for cutting the teeth of wheels,
in the manner already described, to which may perhaps be added milling
and embossing tools, although the action of the latter is rather that
of a revolving die by which the work is stamped or indented with the
pattern formed upon the edge of the cutter. The small grindstones and
emery laps belong also to this section, as their action results from
the abrasion of the material by means of the combined cutting power of
innumerable small points or miniature teeth formed by the particles of
emery or other material attached to the surface of the laps.
Most of the steel cutters may be made by the amateur, the metal
being turned to the required shape and the teeth cut by small files
or punches while the material is in a soft state. The little discs
are then hardened and mounted, by a central hole previously made, on
suitable spindles, the latter being either attached at one end to
the mandrel as arbor chucks, or centred at both ends and driven like
miniature circular saws. The ornamental cutters for embossing, Fig. 193B,
A and B, are turned to the form of short cylinders,
and the patterns cut by punches. These and the milling tools are
mounted alike, Fig. 194. The rest is placed a short distance from the
work, and the tool revolves against it. Some pressure is necessary to
imprint the design, and this is easily obtained if the cutter wheel
is placed so as to attack the work below the axis; the rest then
becomes a fulcrum, and the shank and handle of the tool acting as the
long arm of a lever supply the required force with little exertion
on the part of the operator. In this way the milling is done on the
edges of screw heads, and the embossed patterns on soft wood boxes.
It is not easy to understand how the patterns in these cases are
produced clearly without one part cutting into and effacing another,
unless the size of the work is exactly a multiple of that of the
tool. The error is plain if the work is stopped exactly at the end
of the first turn, but in successive revolutions this error becomes
gradually obliterated, and the pattern is eventually impressed clear
and well defined. The same shank is arranged for different patterns
of wheel-cutters, as the pin which forms the central axis is readily
withdrawn and is made to suit the holes in several sets of discs.
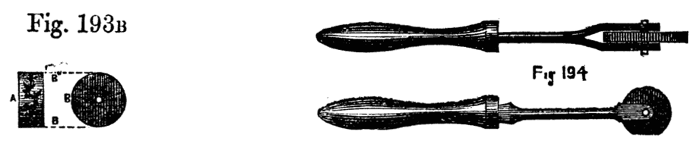
Fig. 193B, 194.
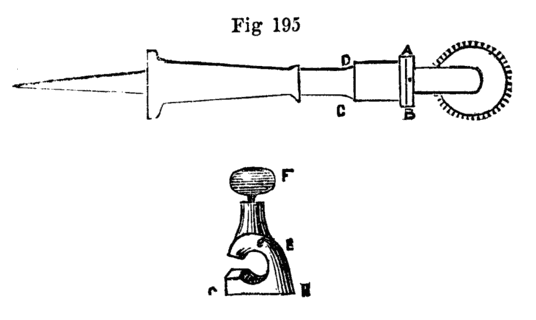
Fig. 195.
By the aid of the above simple tool a neat finish is readily given
to many small works in wood and metal. A modification of the beading
tools is here shown very similar to the screwing guide already
given, but made with figured instead of sharp-cutting edge. This was
communicated to the English Mechanic, Nov. 2, 1866. E, 195, is the
guide which is placed on the handle A, B, C, D, and fixed by screw F.
The mark i, on the guide, is placed against the rim, A, B, which is
graduated and numbered. Each figure, as it is brought up and placed
opposite i, will cut a different pattern when the guide is fixed.
The tool must be held very firmly on the rest (the bottom of the guide
G, H, being flat, is carried on the rest), the tool is advanced to
the wood. The tool must be worked very steadily; but with a little
practice, any amateur will soon use it perfectly, and produce many
very pretty patterns. It is evident that provision is here made for
placing the cutter at different angles to the work, by which means
the circles of patterns may be traced spirally and in other positions
varying from the ordinary one at right angles to the axis of the work.
The laps alluded to, which are to be mounted on spindles like the
circular saw, are composed of wood and metal of determinate forms.
First, there is the thin sheet-iron slitting wheel used by lapidaries,
and which, when charged with emery, or sand and water, forms the
nearest approach to the circular saw. It is, in fact, the circular
saw of the stone worker, the ordinary saw used in their trade being a
flat blade without teeth, stretched in a wooden frame and similarly
fed with sharp sand and water in lieu of being made with teeth, the
latter being replaced by the grittiness of the material. The circular
plate of iron, brass, or lead alloyed with antimony, mounted on a
spindle vertically, is used in a similar manner for grinding flat
surfaces with the aid of emery, crocus, oilstone powder, and other
substances, and the same is used edgewise for other work, as grinding
and polishing tools, the section of the lap being such as will form
the article required by reproduction of the revised plan of its own
edge. Thus a lap running horizontally with a convex edge will produce
the concave form required in beading tools, the latter, however, are
more conveniently ground on brass cones mounted like the arbor chucks
used for turning washers, rings, &c. The face of the tool or flat side
is held towards the small end of the cone, and the latter is armed
with flour emery. See Fig. 196.
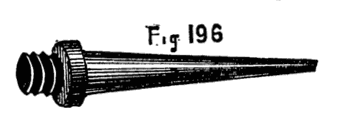
Fig. 196.
Before describing the eccentric and other compound chucks, a few
examples will be given of the method of turning some of those forms
in which the circle does not appear, where, in short, the boundaries
of the figures are straight lines. It seems at first sight impossible
to produce in the lathe by any simple means such solids as are formed
from squares or triangles, of which the cube or die is the most common
and most generally understood. This can, however, be accomplished,
and a number of mathematical problems may be clearly demonstrated to
the eye by such works skilfully made in the lathe. In this kind of
work it is absolutely necessary to strive after perfection. In short,
as Bergeron rightly says, the work imperfectly done is simply worth
nothing at all; but when accomplished with exactness, nothing can be
more worthy of a place in a cabinet of curiosities. The usual method
of turning a cube is by shaping it out of a perfect sphere, but as the
latter can hardly be made without a special slide rest made for the
purpose, a method of turning the cube by hand alone will be given,
the foundation of it being that which the lathe so readily produces,
namely, a cylinder. By far the most proper material for the work in
question is sound boxwood, and special care is to be taken to keep all
angles as sharp as possible, and therefore to cut clean with sharp
tools, and to avoid as far as possible the use of sand or glass paper.
Fig. 197 shows a square described in a circle. The non-mathematical
reader may be told to draw through the centre two diameters at right
angles to each other, and to complete the square, as in the figure,
by joining the extremities. The largest square that is possible to
be drawn in the circle is thus described. This square will form one
face of the cube, and the diameter of the piece of wood must be
regulated according to the proposed size of the finished work. It is
evident that this diameter is equal to the line drawn from corner
to corner called the diagonal of the square. Now, in turning a ball
or sphere, a cylinder would be turned of the exact length of A, C,
because every measurement taken on a diameter of the sphere would
be of that length. In the present case, however, the cylinder must
be of the same length as the line A, B. Turn, therefore, with great
care a cylinder of any desired size, gauging it carefully with the
callipers and squaring off the ends truly. On one end, in which the
centre point just remains visible, draw diameters and construct the
figure 197. Turn out a chuck to fit it exactly, and let the bottom
of this chuck be truly square. Take the precise length of the line
A, B, with finely pointed compasses that can be fixed with a screw,
and measure off the same, and mark it on the side of the cylinder.
When the figure is placed on the chuck, a mark must be traced round
it at this point, A, B, Fig. 198, and this must remain to the end.
It may be made with a hard pencil or steel scriber, and, though
distinct, must be very fine. It is at this line the wood will have
to be cut off, but in this operation keep beyond it so as not to
erase it. While the piece is in the chuck, rule lines, as E, G, from
the points C, D, E, F, 198. Bisect also the length of the cylinder
by the line, H, K, also finely drawn. Draw two more diameters, as
shown by the dotted lines bisecting the sides of the cylinder, which
is now divided round its circumference into eight equal parts. The
lines, E, G, &c., can be ruled along the edge of the rest, or, if the
latter is untrue, the cylinder may be laid on a plane surface, and
a scribing block, or gauge, Fig. 199, may be drawn across it, or,
lastly, a small steel square may be used; one part being carefully
placed on the lines at the end of the piece in succession, the other
part will lie evenly along the side, and will form a ruler by which
to work. A division plate on the lathe pulley will facilitate the
above measurements, but they can be readily made without it, and once
carefully marked, all the guides required for cutting out the cube
will be complete, and the work can be proceeded with, with confidence
and decision. Proceed, therefore, to cut off the piece at A, B, with
a parting tool, but with the precaution already named of not erasing
the line by so doing. Now prepare a chuck which will take the piece
lengthwise, Fig. 1992, and insert it in that position to the depth
of the diameter so as to hold it securely, and the central line will
show whether it lies evenly (which is, in fact, the use of this
line). If even, a point-tool held on this line will form a mere dot
upon it; if uneven, it will make a circle as it revolves. Place the
rest across the face of the work, and, beginning at the centre, cut
carefully towards the outside until you have cut away the wood as far
as the line, A, B. You will thus complete one face of the cube, and
an inspection of the end of the piece, shown black in the sketch to
show the quantity removed, will prove that you thus produce a right
line, C, D. Take out the work, and reverse it, and operate similarly
on the opposite face; but in every case do not quite obliterate the
lines first marked as guides. You have now a piece shaped like Fig. 200,
A and B, and must make a smaller chuck to hold it; you have then
to cut away in a similar manner the remaining parts of the cylindrical
portion, and the cube will be complete. To finish the sides more
neatly, lay upon the table the finest sand paper, and tack it at the
corners, and with gentle movements work down precisely to the guide
lines. This requires extreme care, for if once the piece is but in
the slightest degree tilted up, an angle will lose its sharpness, and
the beauty of the work will be marred. Hence we recommend to cut with
sharp tools, instead of trusting to the finishing process. To cut,
however, exactly to the line is very delicate work, and to the less
practised hand the use of the sand paper on the faces in succession
may be the necessary expedient. The main secret of sharp edges in
works of wood and metal is to finish with hard substances, as emery
stick or glass paper glued to a piece of wood, or the same nailed on
the bench, and to try always to work on the centre, leaving the edges
or angles to take care of themselves. When the reader has made a cube,
as above, that will bear delicate measurement, he will be more than
usually gratified, and will be qualified for still more difficult
work. A chuck figured by Bergeron, Fig. 201, is very convenient, as
it holds the work truly central; the jaws work simultaneously by a
right and left-handed screw as in the die chuck. It is, however,
perfectly easy to do good work without it, but the chucks should
be carefully made, turned very flat at the bottom, with side truly
perpendicular. A little extra care bestowed upon chucks will save
many disappointments, and conduce to good work. The formation of a
four-sided solid, consisting of triangles solely, in the lathe is a
work of difficulty, owing to the impossibility of fixing the work
satisfactorily in an ordinary chuck. The natural way to form such a
solid is to turn a cone A, B, Fig. 202, and on its base to mark a
triangle of the required size. It is then necessary to place the cone
in a chuck, so that the ends of one of the lines thus marked and the
apex of the cone are precisely level with the surface of the chuck, as
shown in Fig. 203. But it is evident that adequate support is not thus
obtainable. The apex of the cone cannot, in point of fact, be inside
the chuck at all, as it is necessary to cut clean to its extremity,
and even the base of the cone is imperfectly held at two points.
Hence it becomes necessary to make use of "turner's cement," and to
imbed the work fairly in it, while both are warm, to such a depth as
will hold it securely and still allow the guide lines to be seen.
The latter should be carried from the three angles of the triangle
marked on the base to the apex. On the whole, this is the easiest
method of fixing such work in the lathe; and if the piece is itself
warmed before being placed, there will be time to adjust it precisely
before the cement is cold. To do this, place the rest parallel to the
lathe bed, hold a pointed tool steadily upon it, and note whether,
as the work slowly revolves, the three points in question, viz.,
the two angles of the triangle and the top of the cone, are in one
plane. When they are so placed, the rest is turned to face the work,
and the material is carefully cut away till the gauge lines are just
reached.[14] A pyramidical solid with a square base may be similarly
turned. The following is the method of preparing the above turner's
cement:—Burgundy pitch, 2 lb.; yellow wax, 2 oz. Melt together in a
pipkin, and stir in 2 lb. of Spanish white. When the whole is well
mixed, pour it out on a marble slab and roll it into sticks. Fine
brickdust, whiteing, or any similar substance finely pulverised, will
answer equally well to add to the pitch and beeswax. This cement is
very useful, as it will hold the work firm enough to turn carefully,
and nevertheless a slight blow will loosen it. To clean it off, warm
or dip the work in hot water and wipe quickly with a piece of cloth.
The above is from the "Handbook of Turning," the author of which has
copied from Bergeron both the recipes given in his work; the one here
described is stated to be specially serviceable in cold weather. It
is perhaps rather less brittle than the first of Bergeron's, and for
this cause is the best for general use. Holtzapffel sells this at
one shilling the stick, which is of convenient size and generally of
excellent quality. Bergeron gives a method of turning pilasters or
balustrades, which is of great ingenuity, and applicable to work of
various sections. The rectangular and triangular sections illustrated
are not, indeed, strictly rectilineal figures, as the sides of the
balustrades thus formed are not flat but rounded surfaces; they are,
however, sufficiently curious, and when well turned are interesting
specimens of lathe work. Bergeron's description relates to the pole
lathe, or to work mounted between two centres with a pulley cut on
the work itself to receive the lathe cord. The ordinary method of
mounting on a foot-lathe will, of course, be much better and the whole
operation of more easy performance. Let it be required to turn a
moulded pillar or balustrade of the section Fig. 204, viz., a triangle
with slightly curved sides. A piece of wood of the requisite length
is planed up accurately to a triangular form, or, as it generally
happens that a set of such pilasters are required, a number of such
pieces are prepared which must be accurately planed to the same size,
for which purpose a gauge or template, Fig. 205, should be made
use of. Six or eight of these, if not too large, may be operated
upon at the same time; but as six pieces of two inches across each
face require a cylinder of about eight inches diameter, the number
must depend on height of centres. The larger the cylinder, however
(which, in fact, forms a chuck), the more nearly will the sides of
the finished work approach to plane surfaces, as they will form arcs
of a larger circle. Let a cylinder, then, be turned of sound wood
with a reduced part at one end so as to form a shoulder. Divide the
circumference into twice as many equal parts as there are pieces to
be turned, the divisions being equal to one of the sides of these
pieces as measured in a cross section. These divisions are to mark the
positions of the grooves or channels in which the triangular strips
are destined to lie. Half the circumference will be so cut out, the
alternate divisions being left. Thus, to turn four pieces, each two
inches wide, a cylinder of sixteen inches will be required, affording
four grooves two inches wide, and four intermediate pieces forming the
partitions between the grooves. The latter must, by means of the saw
and chisel or other tools, be made to receive the strips exactly, and
the ends of the latter being carefully squared off, are to be made
to rest against the plate C, Fig. 206, which is cut out and screwed
against the shoulder, after the above-mentioned grooves have been cut.
The whole are then secured by two rings, with screws. Probably the
stoutest india-rubber rings now made would answer as well as the iron
clamps in Bergeron's description. Lay the strips in their places, but
as they are flat they will not form part of the cylindrical surface,
but will lie lower, as Fig. 207, or higher, Fig. 208; the latter is
the best, and the pieces may, for this cause, be cut out a trifle
deeper than ultimately required and they may be planed down a little
to remove the angles and assimilate them to the cylindrical surface.
The whole may then be turned together so as to form a plain cylinder,
the clamping rings, Fig. 209, being shifted when requisite. The whole
is now to be formed into a balustrade, but as the proportions of the
mouldings of such a large cylinder would not suit the small pieces,
the hollows must be less deep, and the raised parts less prominent
than they would ordinarily be made. The clamps are now to be loosened,
and the pieces reinserted with another face upwards, the flange or
plate against which their ends rest forming a gauge or stop to ensure
their position, without which precaution the mouldings would not
eventually meet at the angles. In cutting a fresh side the utmost
care is requisite, for if the work on the original cylinder is cut by
the tool, it will be impossible to restore it, and the work will be
spoiled. In replacing the strips, let the finished part lie below, so
as to come first in contact with the tool, by which the angle will be
clean. Extra care is for this purpose required in cutting the last
side. It appears to the writer that another precaution should be taken
which Bergeron omits, namely, to arrange the mouldings so that certain
parts are left of the original size of the wood, in order to retain
a certain number of points of contact with the sides of the grooves,
so that the strips shall not fall deeper into them than at first. The
extremities of the strips should certainly not be left smaller than
the central portion, or the pieces will rock on the latter while in
process of being turned. The two ends, therefore, should be allowed
to retain their original triangular form, forming base and capital
of the pillar, or the pattern may be so planned that, after the
extremities have been left as supports they may be cut off when the
work is complete. Care must be taken, in working as above, to have
the cylinders so large above the estimated size that the inner apices
of the triangles do not nearly meet at the centre, else the whole
chuck would be very weak and split into triangular strips. The lathe
called a spoke-turning lathe would accomplish this kind of work in
a far more easy and speedy manner. The balustrade would have to be
made by hand as a pattern, and cast in metal, and any number could be
produced precisely similar. The lathe in question is on the following
principle:—The frame carrying the tool (a set of revolving gauges)
is made to oscillate backwards and forwards to and from the piece to
be operated on. This is accomplished by its having attached to it a
roller or rubber working against the cast-iron pattern placed parallel
to the work, and below or one side of it. The rubber and frame are
kept against the pattern by a strong steel spring. The cutters also
travel in a direction parallel to the axis of the piece. Hence any
elevated part of the pattern causes the tool to recede from the work
in a corresponding degree, and a hollow allows a nearer approach
of the tool. Thus, as the tool is carried by a screw slowly from
end to end of the work, it is made to advance and recede in exact
correspondence with the form of the pattern. An immense deal of work
is done in this way, such as balustrades, spokes of wheels, the long
handles of the American felling axes, and similar irregular forms.
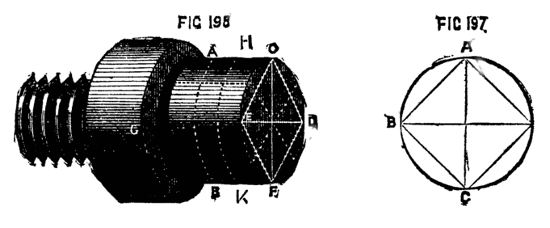
Figs. 197, 198.
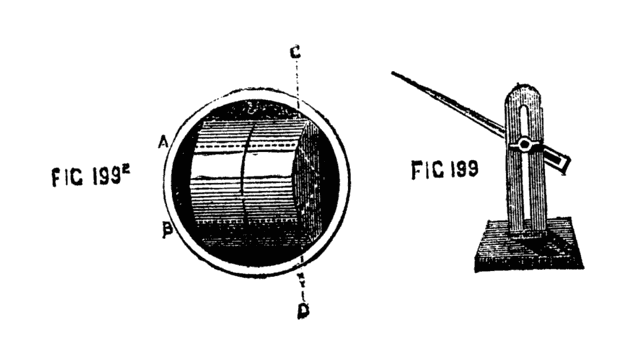
Figs. 1992, 199.
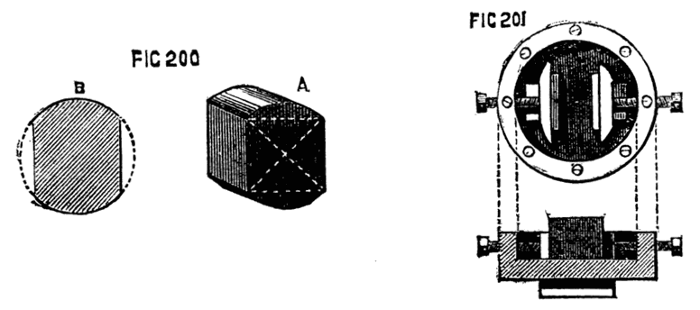
Figs. 200, 201.
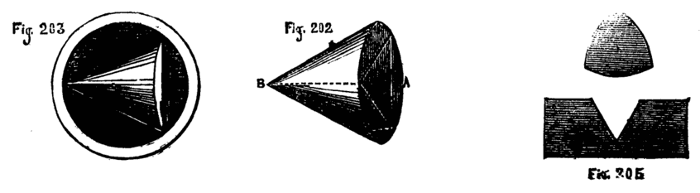
Figs. 202, 203, 205.
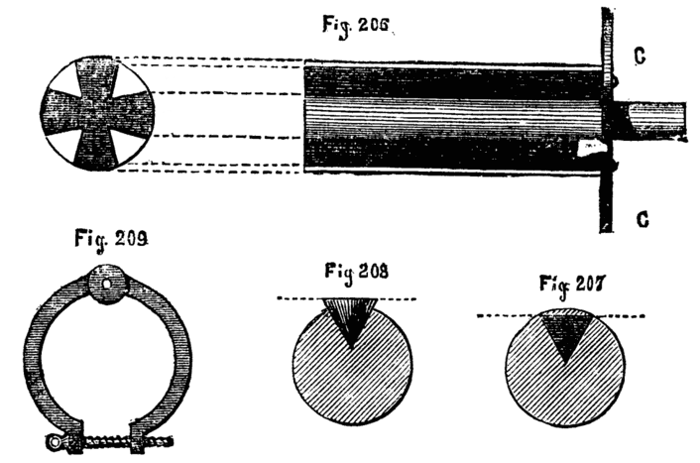
Figs. 206, 207, 208, 209.
The principle, indeed, is not new, as the rose engine is a similar
tool, and, so long back as Bergeron's time, pattern plates were used
giving any desired motion, endlong or otherwise, to the tool, or,
which in effect is the same, to the work to be operated on.
We must now recur to the sphere of which we have already spoken. The
method previously given for producing it is not sufficiently accurate,
although a very close approximation can thus be made to the perfect
figure. It is probably impossible without special apparatus, rendering
the tool independent of the hand, to turn out an absolutely correct
sphere—indeed, it is a sufficiently delicate operation, even with the
following or similar apparatus. For ordinary purposes, indeed, where
the object is simply to produce a croquet ball, a spherical box, or a
globe to be afterwards covered with paper, or any such work, the plan
already given will generally suffice, and, indeed, is very extensively
used. Some practised workmen, too, will, without even the aid of ruled
lines, turn out spheres of average excellence by the eye alone, aided
by a template. When, however, it is proposed to hollow out a sphere
so as to leave a mere shell of ⅛ in. or less, and perhaps include a
number of such shells one within the other, and a star in the centre
of all, it evidently becomes necessary to work with greater accuracy,
and still more so with respect to billiard balls, in which even the
slight variation caused by increased temperature will seriously affect
the result of the most skilful play, and cause the very best players
to fail. The principle of the spherical rest is displayed by the
diagram, Fig. 210.
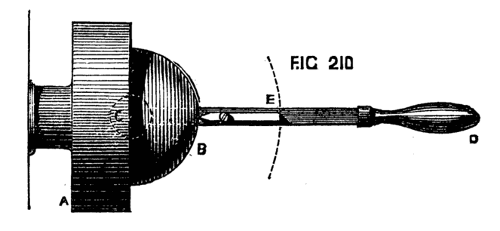
Fig. 210.
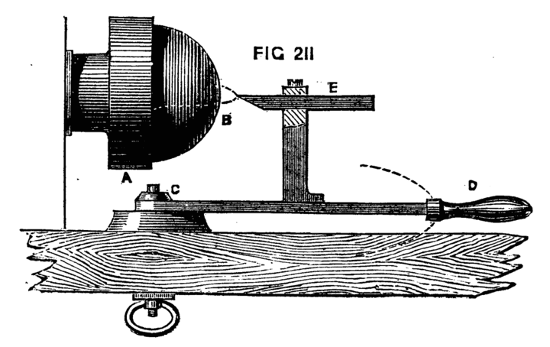
Fig. 211.
A is the chuck carrying the ball to be turned, of which C is the
centre. In a right line with the latter, and below it, is a pin fixed
to a block between the bearers of the lathe, and on this the arm, D,
turns. The latter carries a tool-holder in which a pointed tool, E, is
fixed. The point of this tool will evidently move in a circle, when
the arm is moved by means of the handle, D; and, as the centre of the
circle is exactly under that of the proposed sphere, the latter will
be correctly shaped when the lathe is put in motion. Fig. 211 gives
another view of the tool-holder. It is essential that the point of the
tool should be in a line with the centre of the lathe mandrel, so that
it shall act on a diametrical plane as it is carried round the work.
Such is the principle upon which a practically useful tool for turning
spheres has to be arranged.
The faults in the above simple machine are many. In the first place
no provision is here made for the advance of the tool towards the
work. In the second place the requisite firmness and stability cannot
be obtained by merely causing the bar to revolve upon a centre-pin;
and thirdly, as the tool post is fixed to the horizontal bar, the
diameter of the ball must be limited. In point of fact, therefore, the
above arrangement would not answer, and it is only described in order
to illustrate the principle of all inventions for the production of
spheres in the lathe. To give steadiness of action the pin forming
the centre of motion is connected with a circular metal plate truly
turned, upon which a second similar plate works, and to the latter is
attached the tool-holding apparatus. It is difficult to make choice
of a circular or spherical rest so as to give it precedence, since
most of the patterns ordinarily made are good. To obtain the requisite
movement is, indeed, by no means a matter of difficulty; and one or
two adjustments in respect of the height and radius of the tool being
provided, a very simple apparatus will answer the purpose. To commence
with Bergeron's, which, though venerable, is by no means inefficient.
This is represented in Figs. 212 and 213. A, B, is the base, the
tenon, B, accurately fitted to slide between the bearers of the lathe,
the whole being held down as usual by the bolt and nut, c. The top
part of the base is surmounted by the accurately faced plate 214, on
which a side sectional view is given in Fig. 215. This is fastened
to the base plate (which, in Bergeron's description, is of wood) by
four countersunk screws. It is turned with a recess, so that the
outer part stands up in the form of a rim, and from its centre rises
a conical pin, b, the upper part of which is first octagonal, and
then rounded and tapped. It is this strong pin which forms the centre
of motion, and it must stand with its axial line precisely in the
centre of the lathe bed, so that if the plate were slipped close to
the poppet head this line would bisect the nose of the mandrel. This
is essential in all patterns of spherical slide rest. Upon the lower
circular plate rests that represented in Fig. 216, A and B, the latter
being the sectional representation. This plate is drilled in the lathe
with a central hole, the lower part conical to fit the pin in the
base plate, the upper part countersunk as in the figure, to receive
the octagonal part of the pin and the nut. The projections a, and
b, in B, represent the projecting rim, a, in the Fig. 216, A, and
this is made to fit very nicely within the rim of the lower plate,
while the adjacent part, c, rests upon the rim itself. The accuracy
of these bearing surfaces is of the utmost importance, It is evident
that this arrangement is calculated to give great stability during
the revolution of the upper part of the rest, which is fixed securely
to the plate last named. This plate has a hollowed edge cut with a set
of fine teeth to be acted on by the tangent, screw D, Figs. 212, 213,
and shown in Fig. 217 on a larger scale. The bearings of this screw
are attached to the base plate, and the screw is prevented from moving
endwise by collars as usual.
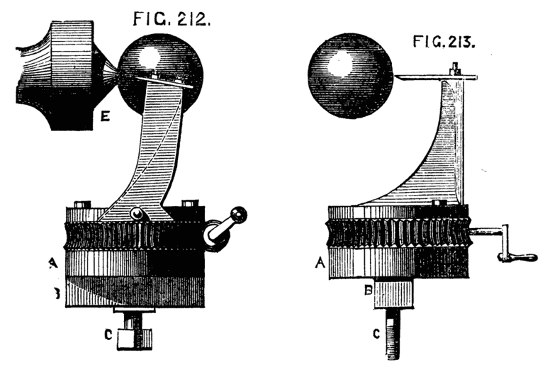
Figs. 212, 213.
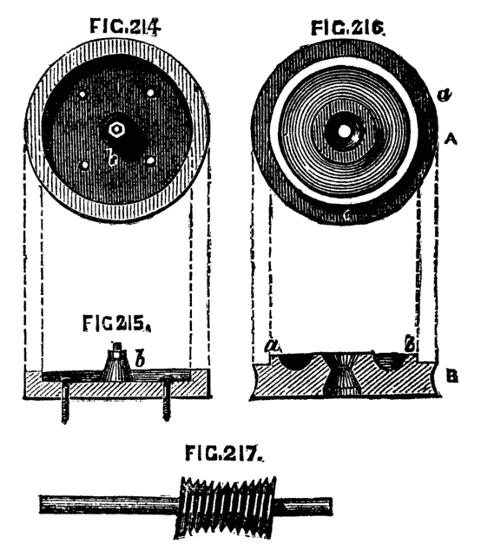
Figs. 214, 215, 216, 217.
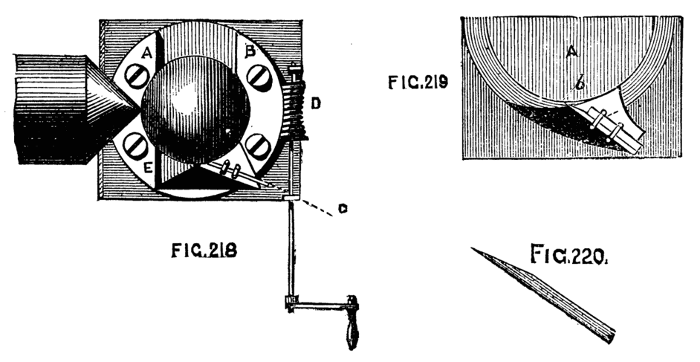
Figs. 218, 219, 220.
On the upper surface of the top plate are fixed parallel bars
chamfered beneath like those of a slide rest, and between these the
tool holder slides, the advance of the latter being effected by a
screw precisely as in the slide rest already described. In the plan of
this instrument, as seen from above, Fig. 218, A, B, are the bars. The
tool is seen in position at C, the tangent at D. A scale is attached
to the sliding part of the tool holder for determining the size of
the sphere. The tool is again seen in position in 219, and detached
in 220. In Bergeron's description of the above spherical slide rest
the method of using the apparatus is thus described:—"Commence by
placing in a chuck a cylinder of some sound wood, and reduce it to
a convenient diameter, which should be a little greater than that
of the proposed ball. With the gouge work down this, and give it
roughly the form of a ball attached to a cylindrical base." This base
serves to sustain the ball during the operation, and the form of
an inclined plane is to be given to it where it is attached to the
ball, as seen in the drawing, to facilitate the passage of the tool.
After this preliminary work, place the instrument on the lathe bed,
and cause the tool holder to advance by means of a screw (the one
attached to the lower slide, not the tangent screw) until, reckoning
from 0in., the starting point, the index attached to the sliding
part has travelled over the graduated divisions of the scale, so as
to denote the size of the ball in its present rough state. Then
slide the instrument along the lathe bed, until the tool, accurately
adjusted as to height, just touches the ball at the quarter circle.
This will be better understood by the diagram Fig. 221, in which A, B,
are the lathe bearers; C, the tool in position; D, the ball; E,
the chuck or the base of the cylinder. Having previously determined
the size of the finished ball, the work may now be carefully begun by
clamping the rest underneath the bed, and making use of the tangent
screw. Little by little the work is to be reduced, taking care not
to cut too near the base on which the ball is yet carried. This
base is to be cut away little by little as the tool comes round,
and at the last cut the ball will drop off finished, and it is not
to be further touched with sand paper or other material. Hence, as
it approaches the finish, the tool must be delicately and steadily
made to traverse, so as to leave a finished surface as it advances.
Bergeron adds certain precautions as follows:—"If the material is
very rough from the gouge, so that at any point the tool is likely to
meet with such resistance as would endanger the work, such part may be
pared down again by using the machine as a common rest for gouge or
chisel; for the apparatus once arranged should not be altered nor the
fixed tool shifted until the work is done. The tool throughout is to
be advanced very gently forward at each turn by means of the screw,
which causes the parallel movement, and the tool is to be accurately
adjusted so as to be exactly in a line with the centre of the mandrel;
it is also to be very keenly sharpened, and even polished." The first
impression given by an inspection of the above figures is that the
ball would be liable to drop off before it could be fairly severed by
the tool. The writer determined to test this objection personally.
He selected a piece of sycamore, which is very fit for the purpose,
and useful as a kind of medium between hard and soft woods. A ball
was turned by hand from this material having a diameter of about two
inches. The neck by which it was held was retained of the size of a
cedar pencil during the final shaping of the rest of the ball. It
was of course not thus reduced until the ball was nearly spherical.
Gradually the neck was cut away until it was perhaps as small as
the lead of a pencil, yet still the ball retained its position, and
the final stroke cut it off truly and tolerably cleanly, E, 212 and 213.
It is really astonishing how small a portion of sound wood will
retain a ball so turned, but the lathe should not be allowed to stop,
else the tendency to hang down or sag would overcome the sustaining
power of the fibres. Bergeron states, indeed, plainly, that the
process answers satisfactorily, and as a man of large experience his
opinion is certainly reliable. Nevertheless, since sand papering or
after process is to be eschewed, it does appear to the writer that
the final cut would leave a minute portion untouched requiring to
be afterwards removed. Not having one of the rests in question the
writer's opinion is to be taken quantum valeat. The spherical rest
more commonly used is that represented in the "Handbook of Turning,"
since it is necessary not only that the machine should be efficient
for turning a sphere, but likewise applicable to the ornamentation
of the same by the revolving cutter and other apparatus used in such
processes. This and some other forms will presently be described, and
also an ingenious adaptation of the ordinary slide rest by means of
guide pieces or templets to work of this character. A very good form
of chuck for holding spheres during the operation of hollowing them
out or forming stars or cubes within them will, however, be first
introduced here as described by Bergeron. It will be at once seen how
simply and efficiently a ball can be thus held during such processes.
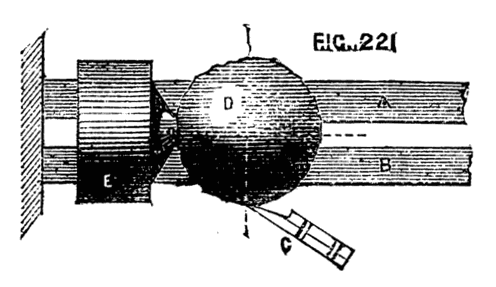
Fig. 221.
Fig. 222 represents a chuck for holding balls, A being a sectional
view, B an elevation. In the first, b, b, represents the body of the
chuck, made as usual to screw on the mandrel. At a, the chuck is
formed with a shoulder like an ordinary box. This part of the chuck is
to be hollowed out to fit the ball on which it is intended to operate.
On the side of the chuck at b, is to be cut a screw of medium pitch.
Mounting another piece of wood in the lathe a kind of cover, c, c,
is now to be made to fit over the body of the chuck like the cover of
a box, but hollowed out to the curvature of the ball. A ring of brass
or wood of section D being screwed on the inside to the pitch of the
male screw on the outside of the chuck will hold the three separate
parts of the apparatus firmly together. Let them be thus arranged and
finished as one piece on the mandrel. Afterwards drill a hole in the
centre of the part which forms the cover, and enlarge it so that its
diameter shall slightly exceed that of the openings necessary to be
made in the ball for the purpose of hollowing out and forming within
it stars, or lesser spheres, box, cube, or other design, at pleasure.
In this chuck the ball will be held not only centrally but securely.
It is of course necessary to have a chuck specially made for each
different sized ball, but when it is considered that such things as
these are merely turned as curiosities and to prove the capabilities
of the workman, it is not probable that more than two or three sizes
of chuck will be needed, and the difficulty of making them is not
great nor the necessary expenditure of time, either. They should be
made entirely of sound boxwood, and so arranged as to the size of the
respective parts that when the ball is inserted and the cover placed
on, the latter shall not quite reach the shoulder on the base of the
chuck. In the spherical rest of more modern times the principle of
that already described is almost necessarily retained. It is figured
in 223. The sole A is formed like that of an ordinary hand rest, so
that it can be advanced across the lathe bed, and secured by the nut
and screw underneath as usual. From this rises a central circular
plate, which need not be more than a quarter of an inch thick, but
turned truly flat, that it may be parallel with the surface of the
lathe bed. From this rises the conical central pin upon which works
the plate B, the edge of which is racked to be moved by the tangent
screw C. Across this circular plate is securely fixed the chamfered
frame D surmounted by the part E which carries the socket and tool
receptacle, the details of which will be entered into when describing
the rest for ornamental work.[15]
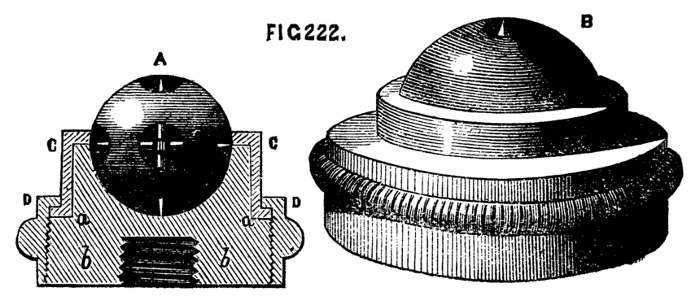
Fig. 222.
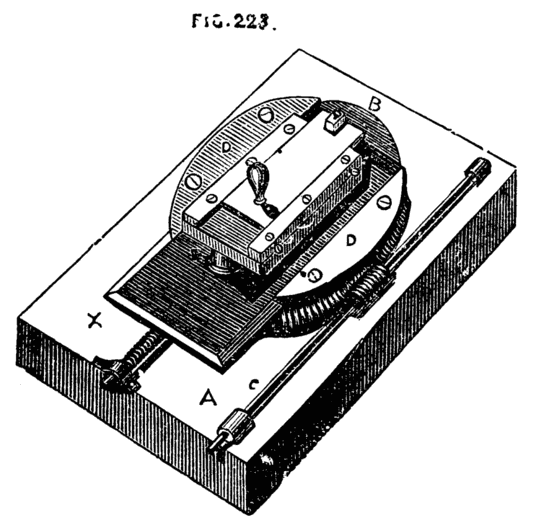
Fig. 223.
The method of turning from a pattern acting on the tool has been
alluded to. In some cases a similar method is pursued, in which the
hand supplies the place of automatic machinery, an instance of this
is the application of pattern plates or templets to the small slide
rest now to be described, by which not only parallel or spherical
work may be done, but the elevations and hollows in moulded work may
be followed without difficulty. The pattern plates can be made by
the amateur or workman so that not only is no extra cost incurred,
but any desired form can be given to the work and as many duplicates
made as may be requisite. The simple slide rest itself is represented
in Fig. 224. The lower iron or steel frame is rectangular, chamfered
underneath, and is cast with a projecting part B underneath to the
socket of the hand rest. There is, therefore, no sole or saddle
required, and the height is adjustable at pleasure to suit 3, 4 or
5-inch centres. C is a plate of brass, cast with one V-piece similar
to D, the second E being removable at pleasure, or both V-pieces or
guide bars may be attached by screws. They are attached by two or
three screws passing through oval holes in the plate and tapped into
the bar, so that a little play to or fro is allowed, by which they
can be adjusted to grasp with more or less friction the iron bevelled
frame. They are kept up to their places by a pair of large headed
screws tapped into the edge of the brass plate and marked e, e, in
the drawing of the rest. On the top of the brass plate is fixed in
a like manner another pair of chamfered bars similar to those of a
slide rest for metal, but in the ornamental turning slide rests, where
lightness and accuracy are more needed than strength, the parts are
proportionally smaller. The frame, for example, may be six inches
or six and a half inches in length by two in width, the brass plate
two inches square, or perhaps two and a half by two, the longest
measurement in the direction of the upper guide bars, between which
the tool receptacle will slide. This will be quite large enough for
a five-inch lathe, although the measurement may be more or less if
desired. If taken as above, the iron frame may be half an inch deep
and the face of each side of similar size, leaving one inch between,
in which the screw will lie. 224 B shows the under side of the frame
with a cross piece to which the part, B 224, is attached. The guide
bars for the tool receptacle may be similarly small and light. If
the plate is ¼ in. thick and two in width the bars may be ⅜ in.
stuff before being bevelled, the attaching screws can then be ⅓ in.
or 3/16 in. in the shank, the heads being large and flat, and not
countersunk. It is probable that many amateurs would like to attempt
such a rest themselves, hence we have given the above details. We
must however, warn them that as the above is for ornamental turning,
where accuracy is of the utmost importance, great care must be
exercised in the work, and the various parts must be fitted to the
utmost perfection. The upper face of the lower frame must be quite
level, and the sides quite parallel, and the upper or cross slide must
be fitted precisely at right angles to it. Above all, the screw by
which the upper part is advanced in either direction requires great
precision. It should be made with a fine thread deeply cut, and must
fit its nut under the brass plate, D, without shake. The nut itself
should be long, and must be carefully bored and tapped; it should
be also sawn through its length underneath, to give it a spring, so
that it may grasp the screw tightly yet easily, and this will also
compensate for wear. This will be understood when it is stated that
the milled head by which the screw can be turned is graduated round
its circumference, as is also the face of the bed or lower frame of
the rest. Hence to give the head a turn, or half, or a quarter turn,
must draw the sliding plate exactly the same distance to or fro, at
whatever part of the frame it may be at the time. This necessitates
all the threads being precisely alike. [We say precisely with a
certain mental reservation, for, strictly speaking, perfection is
hardly possible, and the skill and science brought to bear upon screw
cutting when perfect work has been necessary, as for astronomical
instruments, would hardly be credited, so extremely difficult is this
part of the mechanical art.] It would be better for the amateur to
get the screw and nut cut by Holtzapffel, Munro, or other first-class
maker, who has the requisite means and can command the highest skill.
Between the upper guide bars are fitted various tool receptacles. The
only one which need as yet be spoken of is that which holds the little
inch-long tools for ordinary work or for use with the eccentric chuck.
This consists of a brass plate bevelled to fit the chamfered bars, on
the end of which is a small piece of steel with a rectangular hole and
set screw, as seen in the drawing marked X. This plate has a tailpiece
of rather thicker metal, through which pass two set screws, which
regulate the depth of the cut to be made, their points bearing against
the end of the brass plate on which this tool receptacle works. No
screw is attached to move this upper slide, but a wooden handle
projects from it at right angles to be moved by hand, or a lever Y is
made use of. This has two projecting pins, the front one taking one
of the holes, 1, 2, 3 of the slide, the other one of a set of similar
holes in the top of the chamfered bars. By this the slide can be
advanced with ease and great steadiness. We now come to the pattern
plates or templets F, alluded to. These are formed of sheet iron about
1/20 in. to 1/16 in. thick, and must be long enough to reach from one
end to the other of the iron frame A, underneath which at each end are
two holes a, a., Fig. 224 B, to receive screws by which the templets
are attached by means of the slots, b, b. The outer edge, a, of
templet is the pattern to be copied. The dotted lines in Fig. 224 show
a plate in position. The tailpiece of the tool holder to be used has
a projecting stud, or is made with a screw with or without the roller
seen at H, and this is kept in contact with the templet by the hand
or by a spring, so that when the slide traverses the lower frame the
tool-holder necessarily follows all the curves of the pattern plate.
An inspection of K will make it evident that the projecting screw must
be so regulated as to length as to allow the tool-holder to go to the
extremes of the projections and hollows. It must therefore in the
pattern shown be at least as long as the line a, b, Fig. K, and a
tool-holder of sufficient length must for similar reasons be selected,
or the tailpiece might touch the fixed plate on which it works before
the guide pin had penetrated the deepest hollow of the pattern. With
these precautions nothing can exceed the ease with which this clever
adaptation of the slide rest is made and used, the greatest advantage
being that the workman can make his own templets to any curve or
series of curves that may be desired.
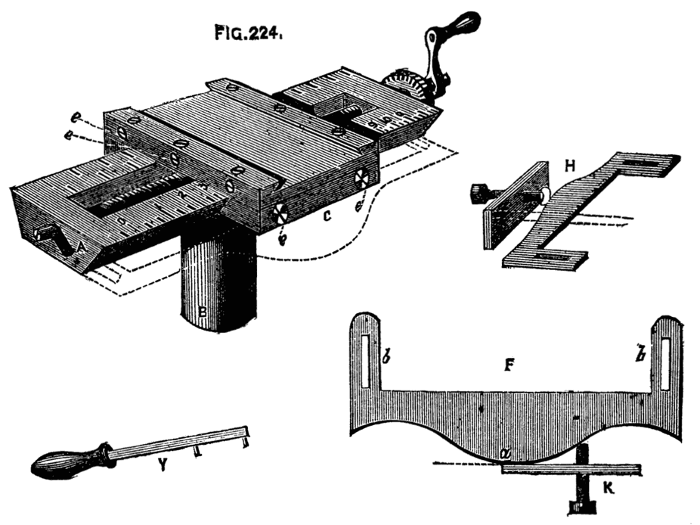
Fig. 224.
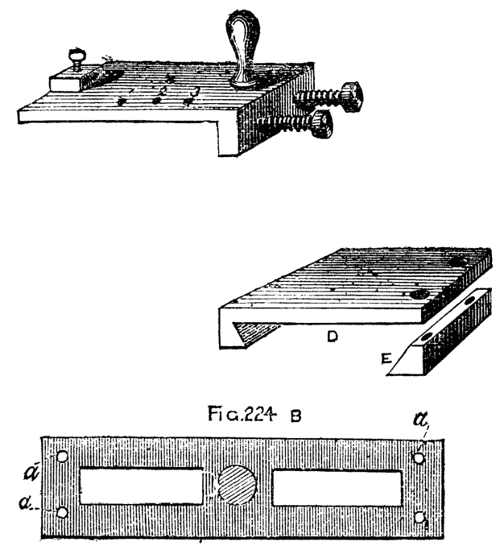
Fig. 224B.
At a later page is described a slide rest with the arrangements of
the tool-holder somewhat improved, and calculated for the reception
of larger tools and apparatus. The little rest here described is,
however, very light and useful.
A compound spherical slide-rest, for ornamental turning lathes, which
has been patented by Mr. Hoblyn, Rickling-green, Essex, is capable
of turning and ornamenting accurately spheres and any segments of
circles convex or concave, either on the surface or cylinder; also,
it is stated that by the addition of templates any other curves,
not segments of circles, can be turned out, in addition to the work
performed by an ordinary compound slide-rest. In our illustrations,
Fig. 1 is a side view, and Fig. 2, an elevation of the rest. A is
the lower, and B the top plate, C the carriage, and the saddle as
usual. The lower plate, of iron, is planed on bottom and sides,
and has a longitudinal bevelled slot in the bottom to receive the
fastening bolt, so that the plate can be tightened up at any point
on the lathe bed. At one end of this bottom plate is a piece raised
the whole of its breadth, accurately turned and faced, with a stout
turned pin, b, for a pivot in the centre. A wheel, c, is placed
around this raised piece, having any specified number of cogs, and on
its top any specified number of small holes drilled to receive two
pins as segment stops. The top plate is slightly narrower than the
bottom one, and has on its underside a corresponding surface to that
raised on the plate A, turned and faced with countersunk hole in the
centre to fit on the pivot b, on which it is tightened by a screw
and washer. The top of B is placed to receive two parallel bars of
brass, bevelled on the inner edge, so as to form sliding bars for the
carriage C, one bar being a fixture, the other capable of adjustment
by tightening screws. The sides are also accurately planed, and on
one a tangent screw, e, is so fixed as to be put in and out of gear
with the brass wheel, c, for the purpose of driving the top plate
round the pivot b. In the raised surface of B, is a countersunk
slot forming a quarter circle, with screw passing through it into the
bottom plate; by this means the top plate can be firmly fixed at any
angle to the bottom plate for the purpose of slide-rest turning. A
small pointer, f, works clear of the brass wheel in the capacity
of segment stop—two small pins being placed in the specified number
of holes in c. On the opposite side of the screw, e, on the top
surface, a screw, g, works in two standards screwed into the plate
through slots in the bar, which works through a traveller, h, firmly
attached to the carriage, C, and therefore capable of driving the
carriage in a rectilinear direction—for slide-rest purposes. This
carriage, C, consists of an iron plate i, with standard k, top
plate l, with parallel brass bars to receive tool receptacle m,
the bottom plate and standard being in one piece with the plate,
planed side and bottom, so as to slide truly between the parallel bar
on B. The standard has its surface accurately turned with a pin in
centre to form pivot. The top plate is planed true, bottom, sides,
and top, and has a countersunk hole in the exact centre, so as to
work on the pin, and tightens up with a large nut. In the plate is a
countersunk slot forming a quarter-circle, with screw passing through
into the standard, to set the tool receptacle either parallel with
B for spherical turning, at right angles to B for slide turning, or
at any angle for thick and thin cuts, and similar patterns when used
either as a spherical or slide rest. The parallel bars are to be
similar to those on B, to enable the tool receptacle to be advanced or
retired by screw or lever. This part of the machine can be adjusted
for height of centre thus:—The standard k to be a hollow cylinder
with fixing screw on one side; the plate i to be made with turned
pin on bottom, to fit into standard; elevating screw; saddle as usual,
but with the addition of a small hole drilled in one of the sides, and
a corresponding one in the side of the lower plate A, so placed that
when a pin is fixed into these holes the pivot is exactly central to
the lathe centre.
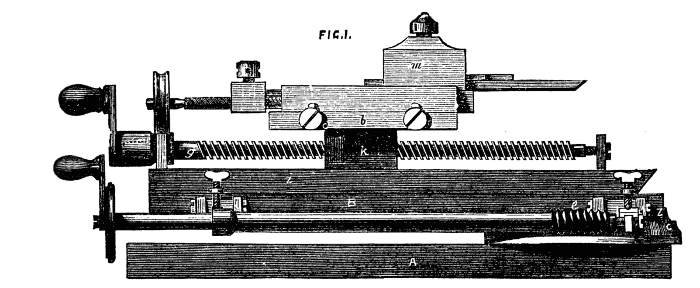
Fig. 1.
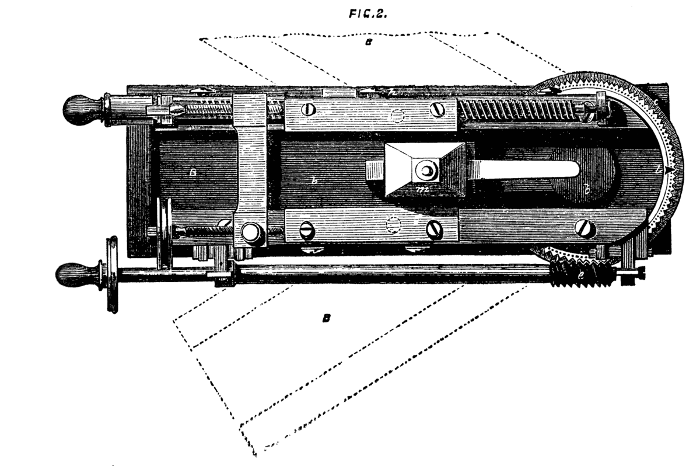
Fig. 2.
The way of using the spherical rest is thus described by Mr.
Hoblyn:—"When altogether, and the point of tool adjusted by means of
a square exactly over centre of pivot, it is evident, if the top plate
moves round, the point of the tool will still be in the same place;
but if we retire the point one half-inch, on moving the plate right
round it would describe an inch circle, so that if the centre of pivot
be exactly under the centre of the lathe, and we move the rest the
half-circle, it will cut a perfect ball (or any part of one, if the
cut be less than half a circle) of such size as the distance doubled
of point of tool from centre of pivot. Therefore, by adjustment of
the lower plate on the lathe bed according to the size of material
(this, of course, does not allude to the act of turning a ball, when
the centre of pivot must be exactly under centre of lathe), adjustment
of carriage from centre according to the size of circle required, and
adjustment of tool for depth of cut, we are enabled to turn any convex
curve. To turn the concaves, instead of retiring from centre of pivot,
it is only requisite to advance the point beyond the centre to the
distance required, when the same rules apply as to the convex curves.
In turning the concaves, however, it is necessary to turn the plates
half-round, so that A and B are in the same straight line, instead of
over each other. This enables you to work on any sized piece of wood,
the object of the longitudinal slot in the lower plate being to enable
you to adjust your previously arranged curve to any sized wood or
ivory that your lathe will take, less 2 in., the height of machine.
The desired curve having been turned, take out the chisel, and place
in the receptacle any ornamenting instrument, drill, eccentric, &c.;
advance the point till it touches the work, then set your screw for
depth of cut, and work according to fancy. Whatever it is it must be
mathematically correct on the curve, as you have not altered it in
any way. You then remove your rest to cut the next desired curve, and
proceed as before. The best way to execute a piece of work is first to
make a sectional pattern of your design, either by drawing or cutting
it out with scissors from a double piece of paper, when, of course,
both sides come the same, the line where the paper is doubled being
the line of centre of lathe. You can then, with a pair of compasses,
ascertain with accuracy the necessary size of circle, and the position
of centre of pivot to procure the desired curves. You may also produce
a very good effect by a combination of two different curves in this
way:—Let your ornamental instrument be the universal cutter; working
horizontally follow up your curve with it, but, instead of cutting
right out on your curve, let the instrument finish of itself in wood
previously turned so as to fit its curve, when you get the lesser and
greater curves following in unbroken succession. With the eccentric
chuck numberless effects of the most curious description may be
produced, even work supposed to be only possible with a rose engine.
We believe the tool is to be seen at the shop of Mr. Evans, 104,
Wardour-street.
To turn a sphere by means of a template attached to the slide rest as
described, the following adjustment of the rest and mode of proceeding
should be followed. A, B, Fig. 225, is the chuck containing the
material, H, to be worked into a sphere. Upon this the length, or
diameter (equal to that of the template, as will be explained), is
to be marked at K, K, which being divided equally by the line L, L,
will give the dimensions of the ball as if it were about to be turned
by hand. The corners are to be turned off with the gouge, as far as
shown, K being equal to e L, and K f equal to K e. The outline
of the ball will with these measurements not be touched. The angles
left may also carefully be removed, but (as shown by the figure) this
operation must be conducted with great care. A template must now
be made containing a full semicircle, every part of which can be
traversed by the stud or screw upon the under part of the slide, or
the ball will not be severed by the final cut. It is evident that the
traverse of the slide during the operation will be the full radius
of the ball, and in this, and indeed all cases of deep recesses, and
greatly projecting mouldings, the ordinary tool-holder with tailpiece
had better be removed, and replaced with a slide like M, having a pin
straight through it to rest in contact with the template. This will
preclude the necessity for the long stud or screw spoken of before
as necessary when the slide with the tailpiece is used, but the
tool cannot be advanced independently of the template as when the
other form is used. Fix the rest so that when the top slide is at its
central position the tool may stand as in the sketch exactly upon the
central line of the ball. Take care that thus placed the tangent-pin
of the slide is on the central mark of the template. The long frame
of the rest must likewise be parallel with the bed of the lathe,
keeping the top slide pressed against the template with the left hand,
while the top part traverses the frame under the action of the screw
moved by the right hand, the ball will be correctly cut.[16] One or
two cautions must, however, be given here, to ensure a satisfactory
result. In the first place the cylinder from which the ball is to
be made must be exactly of the diameter of the semicircle on the
template. H, H is the cylinder to be turned to a sphere, G, G, B shews
the position of the tool at starting, the dot on A, the templet, the
tangent pin of the slide, Fig. 226. As the work proceeds the tool will
take the several positions shown, the dotted lines, D, being equal and
parallel. The tool will thus repeat the form of the template. Let the
latter remain as before, but let a smaller cylinder be inserted in
the lathe, or, which is the same thing, let the tool be now lengthened
so as to start at C on the inner dotted line. When the pin, F, has
reached K, which should be the axis of the ball, the tool will be
at M, quite out of cut. Fig. 227 represents three forms of tool in
contact with the ball at two points. The first two will evidently be
out of cut at the axial line, as the side of these bevels will then
touch the piece to be turned. C is a form that will remain in contact
from the diameter to the axial line. The left side of the edge is
slightly overhanging the side line of the tool, D.
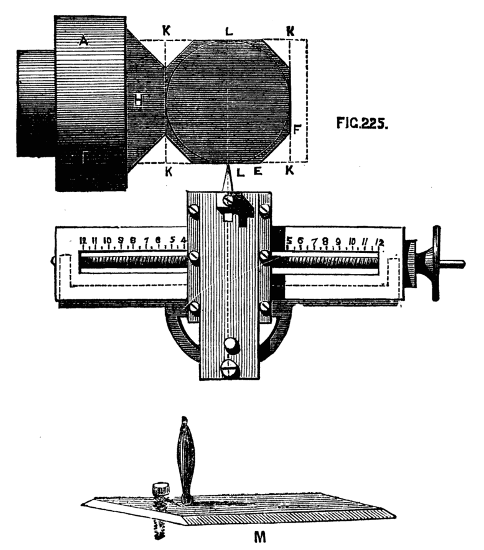
Fig. 225.
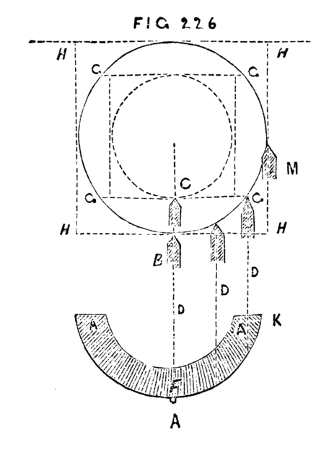
Fig. 226.
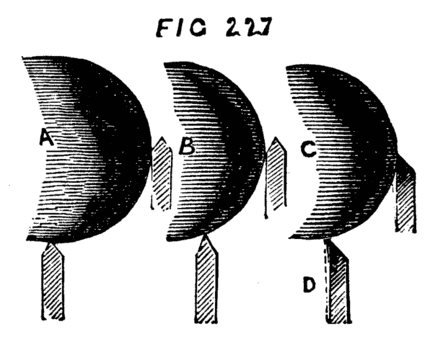
Fig. 227.
When the part shown has been cut this tool must be removed and a
similar tool bevelled in the reverse direction, adjusted by reference
to the central line of the ball as before.[17] It is recommended to
roughly shape the work with the gouge, and partially to cut it off
with the parting tool so as to relieve the tool as much as possible,
and when the last finishing cut is to be taken a freshly sharpened
tool is to be made use of. It is evident that in the above and
similar work the rest may be placed across the end of the cylinder if
preferred to turn the right hand hemisphere, but it would have to
be moved for the second half, which should be avoided, if possible.
The advantage which the circular rest has over the above is due to
the fact that the tool and rest once in position, neither has to be
readjusted until the work is complete. The slide rest and semicircular
template forms, however, if judiciously used, a very serviceable
substitute and makes very satisfactory work. Whether or no the reader
has a complete rest for spherical work, he should decidedly provide
templates to use as above. They are not only useful for turning or
ornamenting spheres, but any forms whatever that may be desired, and
they possess this special advantage, that when a dome or other pattern
has been thus turned with a plain tool the same template used with
revolving cutters will enable the work to be ornamented with perfect
ease, doing away in a great measure with the need of a dome chuck.
Suppose, again, that a number of pieces are desired precisely similar,
as a set of pawns for a set of chessmen, a sectional drawing made and
transferred to a piece of sheet-iron, and the latter cut to form a
pattern plate, will enable the most unskilful to work satisfactorily.
Nothing more need be said of the uses of templates, and for the
present the subject will be dismissed, though it may possibly be
referred to again in a future page.
The first of the chucks comprised under the above head is the oval or
elliptical chuck, and it is introduced first in order because it is
not essentially a machine for ornamental turning, as are the eccentric
and others of this class. There are many plain works required of
elliptical section, as bradawl and other tool handles, for which a
very simple arrangement is required.
The principle of the oval chuck is as follows:—There is an
arrangement of slide, by which as the piece revolves it is drawn
gradually further from the tool during half a revolution, and in
a similar manner caused to approach it during the remaining half
revolution, each point in the circumference alternately partaking of
such movement; the whole of these points together, which, of course,
form the circumference, will become an ellipse. Let D, Fig. 228, be
the centre of the mandrel, A, B the direction of the slide moving
up and down in a right line, and carrying the work upon a screw
in the centre of it. C, E become centres, and may be taken as the
extremes, for as the work revolves a succession of centres are formed
and instantaneously changed. The figure produced will be the oval
shown. To render this, however, clearer, Fig. 229 may be taken, which
represents the chuck in its most simple form with separate details of
the parts which compose it. A is the chuck with central slider and
chamfered bars, as described in speaking of the slide and rest and
previous apparatus; B is the slide detached; D, front view of the
same. The short arms a, b, pass through slots in the back plate as
seen at C, which shows this plate with slide removed. Through these
short arms pass a pair of adjusting screws; or still better a and
b are themselves cross arms or pallets extending the width of the
plate as seen next drawing, and in the chuck of Muir which follows.
They are merely flat plates of steel embracing the guide ring, so that
some point in their inner surface may rest against it during every
part of the revolution of the chuck.
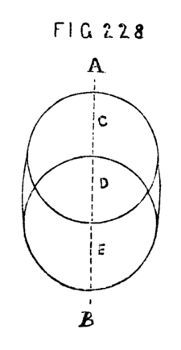
Fig. 228.
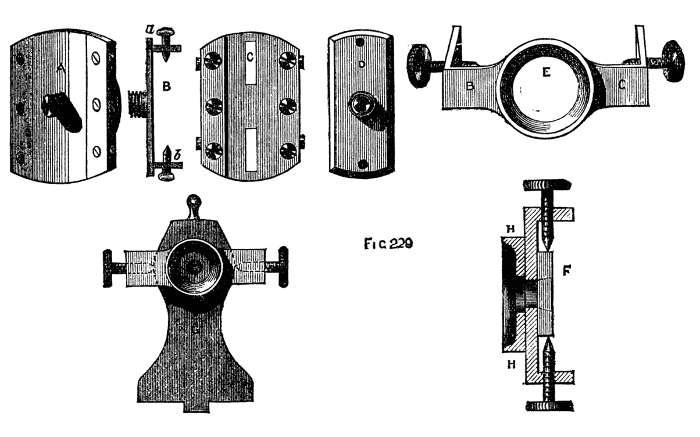
Fig. 229.
The guide ring here alluded to is shown at E, and also at G, fixed in
its place upon the poppet. It is in the form of a raised ring with
arms, B, C., which are turned at right angles near their ends, and
through which pass adjusting screws with conical points. This plate
is flat at the back and bears against the face of the poppet, the
mandrel nose falling into the central opening E. It is kept in place
by the points of the screws falling into conical holes at the sides
of the poppet head. At F is a side sectional view of this plate,
with its raised and accurately turned ring, H, and at G is seen the
poppet with the plate attached, the left arm being dotted to show
the position of the adjusting screw. It is this ring and plate which
regulate the movement of the slider, and, with it, of the work, the
latter being attached to the screw in the centre of the sliding plate,
which screw is a counterpart of that upon the nose of the mandrel.
Suppose the chuck A screwed to the mandrel, and the ring accurately
concentric with the mandrel, in which position, the pallets must touch
at two opposite points. In the best chucks there is an adjusting screw
to each, by which the contact can be regulated. In this position
any object of a circular form can be turned, for the slider remains
in one position, and its screw, upon which the work is fixed, is a
continuation of the mandrel. But if now the adjusting screws of the
part E are turned, the one being loosened and the other tightened,
the guide ring will no longer be concentric with the mandrel, and,
as the screws of the slider bear upon it, the slider will during
its revolution be moved to and fro to a distance regulated by the
eccentricity of the guide ring. The combination of this circular
motion of the chuck and rectilineal movement of the slider will
produce an ellipse, and a stationary tool applied to the work will cut
it, into that form.
The above simple arrangement of oval chuck suffices only for plain
work. The only figures that can be described by its means, upon the
cover of a box, for instance, being a series of ellipses of which
the longest diameters fall in the same right line, and of which the
centres are coincident with the axis of the mandrel, as Fig. 229.
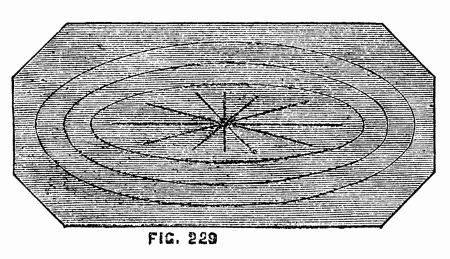
Fig. 229.
Even these, however, cannot be done without some compensating
arrangement, as the minor axis does not diminish in length at the same
rate as the major—hence the ellipses get narrower and narrower until
the central one becomes a mere right line. This is referred to again
in the ornamental section of this work.
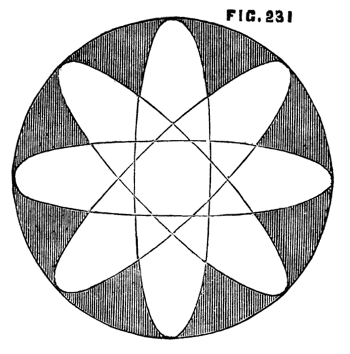
Fig. 231.
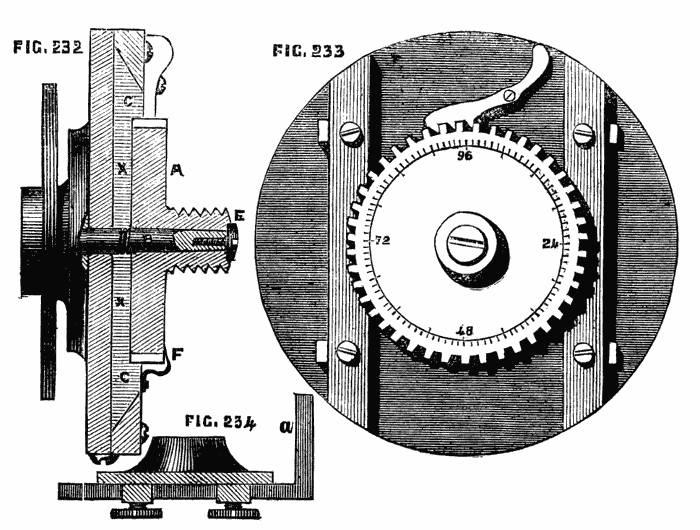
Figs. 232, 233, 234.
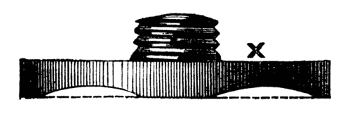
X
Combinations like 231, in which the ellipses intersect, cannot be
so obtained. Hence the oval chuck is provided with a wheel, either
racked to work by a tangent screw or fitted with a spring catch, by
which it becomes a dividing plate. This wheel revolves on a central
pin[18] fixed to the middle of the sliding plate, and carries a screw
of the same pitch as that upon the mandrel to which other chucks can
be attached. By this means the axial lines of the ellipse can be
varied in direction. This addition is shown in Fig. 232, which is
a section, and 233, which is a front view. In the former, A is the
wheel, which, as previously explained, should be so arranged as to
contain a number of cogs divisible by as many figures as possible; 96
is such a number, being divisible by 2, 3, 4, 6, 8, 12; 72 is also
a good number, as it will divide by 2, 3, 4, 6, 8, 9. If the edge
is racked and moved by a tangent-screw with divided head a greater
range can be taken and finer work done. In this case the face of the
wheel can be marked with divisions, and a fine steel pointer, as
shown at F, added to count by. The pin B, which is firmly attached to
the centre of the slider plate, must be strong, and the lower part
at least should be conical. It is drilled and tapped at the smallest
end, and when the circular plate with its screw is slipped upon it, a
screw, E, the head of which is countersunk into the face of the large
screw, retains it in place. The slide, C, has a recess turned to fit
the wheel plate, and the latter is cut as shown at X, which ensures a
more accurate bearing than if it was left flat on the lower surface.
In making this chuck certain precautions are necessary. In the first
place, the guide ring fixed to the poppet must be exactly concentric
with the mandrel when in its central position; and when it is drawn by
the adjusting screws to the right or left the central line must remain
parallel with the surface of the lathe bed. To ensure this centrality
it is necessary to turn its outer surface when it is in position on
the lathe head. So at least says Bergeron; and it is perhaps the best
method whereby to ensure the accuracy that is required.[19] For this
purpose Bergeron directs the use of a cutter similar to Fig. 234
attached to the mandrel as a chuck, the edge which is on the inside of
the bent part at a acting on the exterior of the ring as the mandrel
revolves. The screws allow the tool to be advanced closer to the ring
as the work proceeds, while they secure it at any desired point. Such
a contrivance as this, used merely as a finishing tool to correct any
slight error, is no doubt sufficiently satisfactory. The various parts
of this and other compound chucks should be first turned separately
to near the required size, and accurately finished when in their
respective places upon the chuck. Any parts which present a difficulty
from the impossibility of retaining them in place while operated upon,
may be soldered with tinman's solder, and thus turned, after which
the application of moderate heat will detach them, and the fluid
solder can at the same time be wiped off with a pledget of tow or
cotton waste. As many of our readers may wish to make such apparatus
as the above, it may be desirable to add a few directions for the
preparation of chamfered edges such as those of the slide and guide
bars, the latter of which should be of iron or steel. Let the slide,
for instance, be cast as a rectangular plate and the two flat surfaces
be roughly levelled with a file. One of these must now be made
perfectly true, either by mounting it with solder upon the face plate
of the lathe, and levelling it with the aid of the slide rest, which
is perhaps the safest plan, or by careful working with the file, using
a straight-edge in all directions, and finishing by careful grinding
upon a flat stone slab with water, or on a wooden grinder charged
with emery and oil. After one side is finished, the opposite face may
be similarly treated; but for this the plate may be secured to the
finished surface of the lower plate of the chuck itself, and turned
with a tool fixed in the slide rest. The edges must now be filed truly
at right angles to the sides, care being taken to keep the long sides
of the plate parallel. (The short sides or ends will be rounded by
being turned true with the edge of the chuck.) The work must now be
tested with the straight-edge and small steel square, and any error
carefully corrected. Of course, if the reader is the happy possessor
of a planing machine, all these operations will be facilitated and
accuracy more likely to be ensured. It may here be mentioned that,
to supply the want of such planing machine (a want often felt by
amateurs who have not mastered the use of file and scraper), Monro, of
Gibson-street, has cleverly added a planing apparatus to the ordinary
foot lathe, rendering the latter tool complete for all purposes of
amateur engineering.
This handy apparatus will be found on a later page fully described and
illustrated by a photograph of the machine. The writer has seen it and
used it, and can testify to its satisfactory working, as a lathe thus
fitted does not run heavier or require greater exertion than when used
for ordinary turning.
The next step will be the chamfering of the edges of the plate. Let
235 represent the plate in its present condition, with rectangular
edges. To produce a chamfer of 45°, draw a line, a, b, at a distance
from the edge equal to the thickness of the piece. If a smaller angle
is desired, the line must be drawn further back. An angle of 30° to
35°, is, in the writer's opinion, better than one of 45°, as the
chamfered bars will then have a wider bearing on the upper surface of
the plate, tending to hold it more securely down upon the lower part
of the chuck. Nothing remains but to file carefully down from the
line thus drawn to the lower edge, by no means a difficult operation
if care is exercised not to obliterate the mark, or to trespass the
least beyond the assigned limit. A template, cut like Fig. 236, of the
desired angle, will be a gauge for the edges of the plate, as well as
for those of the chamfered bars, and will serve to make assurance
doubly sure. The arms which stand out at the back of the slider to
embrace the guide ring are not fastened to the plate immovably, but
with power of adjustment. A pair of short slots are made in the
slider, into which a square projection from the arms fits, and the
whole is clamped by a screw, as shown in 237, A, B, and C.
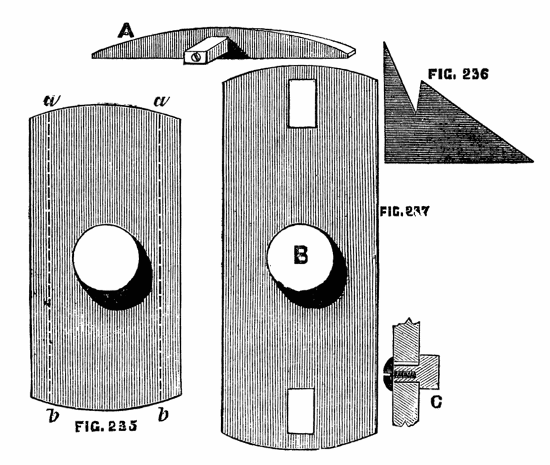
Figs. 235, 236, 237.
A more accurate method is shown in the Ornamental Section
for finer adjustment than can be secured in this way, but for a home
made chuck the above will suffice and is the easiest plan to carry
into effect. To use this chuck, the guide is first arranged, so that
its ring is concentric with the mandrel. A mark is generally made
upon it, and also upon the lathe-head, by which this position can be
readily insured. The chuck is then screwed upon the mandrel, and the
arms adjusted, as just described, so as to embrace accurately, but
not too tightly, the guide ring. They are then, once for all, fixed
in that position by the screws alluded to. A few drops of oil are
necessary to lubricate their inner surface and the exterior of the
guide, and the latter being withdrawn by its adjusting screws to the
desired eccentricity, the work may be proceeded with. A rough piece
of wood, however, should always be first turned to a cylindrical
form, as an oval chuck being an expensive article is to be carefully
preserved, and not exposed to the shocks inseparable from the process
of roughing down the work. Moreover, there should always be one or
two screws passing through the slider into the back plate, to take
away the strain from the chamfered bars, which can be removed when
the slider is to be brought into action. Two precautions are here
laid down respecting oval turning, which, in all probability, a
tyro would not suspect to be necessary until taught by failure. In
the first place, at whatever point of the circumference the tool is
held, at that point it must remain, or rather, it must remain in the
same horizontal line, being neither raised nor depressed. Hence, for
all work where accuracy is needed, oval turning should be done with
the slide rest. In the second place, when it is desired to place a
succession of ellipses one within the other on the face of the work,
like Fig. 229, it will not be sufficient to place the tool nearer to
the centre for each ring, but the eccentricity of the guide ring must
be reduced at the same time; otherwise, when the middle is reached, a
straight line will be the result, instead of the proposed ellipse, as
already stated. The lathe should not be driven at a very high speed,
and the moving parts should be lubricated from time to time. There are
other ways of compensating the error produced by the oval chuck, or
elliptic cutting frame, which however are so entirely connected with
ornamental turning that they are reserved to be introduced into that
section. A contrivance for turning ovals invented, and communicated to
the English Mechanic by a Suffolk amateur, deserves a place here. It
is thus described by the inventor:—
Ovals are generally turned by causing the work to move in and under
guidance of an "oval chuck".
There seems no reason why the same result should not be arrived at by
communicating a movement to the rest supporting the cutting tool in
the following manner:—Let A, A, be lathe bearers, B, pulley, C, screw
of mandrel, D, template fixed thereon, E, friction wheel on the end of
bar F, G rest (a board of any convenient width) moving on pivots at
H. The friction roller, E, is to be kept in contact with the template
by the cord running over the pulley T, stretched by the weight L. The
rest will thus oscillate under the guidance of the template, which may
be either oval or rose engine pattern, and the cutting tool form the
pattern of the template used. There might be other modes of causing
the rest to oscillate on the same principle. The lathe would require a
slow motion, the same as with an oscillating mandrel.
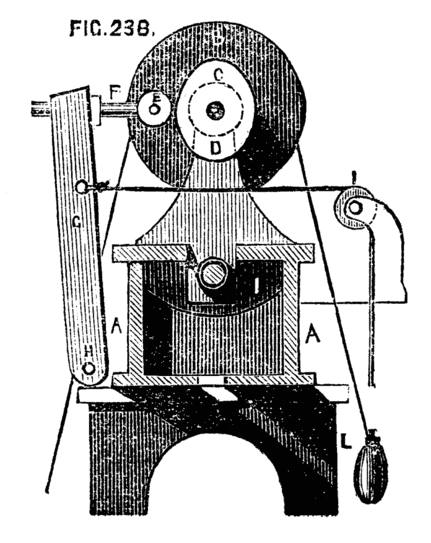
Fig. 238.
Next in order of the compound chucks stands the eccentric, the use
of which is not entirely confined to mere ornamentation, as it is
often very convenient to the turner to have the power of shifting the
centre of his work. Thus, a solitaire board may be drilled with
the necessary cup-shaped holes, or any work of a similar character
completed by the help of this chuck without the necessity for
constant re-centering. The general work of the chuck in question
is nevertheless ornamentation, for which it is peculiarly adapted
either alone or in combination with other compound chucks, or overhead
apparatus. The sliding plate of this chuck works between chamfered
steel bars, the same as in the oval chuck. There is, however, no guide
ring on the lathe head to regulate the movement of the slide, and
therefore also no necessity for the projecting arms at the back. The
slide, in fact, is moved by a screw with a graduated head, similar
to those already described. Fig. 239 represents the common form of
this chuck, in which the wheel which forms a dividing plate is moved
by a tangent screw. The sliding plate is shown slightly drawn out by
its screw, the degree to which it is moved being that of its required
eccentricity. When the plate is drawn back to correspond with the
base plate, the centre will be in a line with that of the mandrel,
and any work turned upon the chuck in this position of the slide will
be cylindrical. The central screw of all these compound chucks being
alike and of the pitch of that on the mandrel, any of the ordinary cup
chucks can be used with them to hold the work; or the eccentric chuck
can be screwed to the elliptic, cycloidal, or any other in the set, by
which means an endless variety of curves can be described. The effect
produced by the simple eccentric chuck now described is as follows,
the slide rest being used with it as a matter of course. Let a piece
of box or other wood be fixed by means of a cup or other chuck upon
the screw of the eccentric chuck, and the slide rest with a single
point tool be brought in front of it. By means of this the work must
be carefully faced, and made uniformly level. A ring A, Fig. 240, may
now be cut, which will be concentric with the mandrel. The slide of
the chuck being now drawn down by a few turns of the leading screw
(the tool and rest being kept in its original position), the centre
of the work will thereby be shifted, and the tool being advanced to
touch the same, the circle B will be formed of the same size as the
first, but necessarily cutting it at two points. Another turn of the
screw will enable C, and similarly D, or any number of circles to be
successively formed. The centres of these circles will be in a line
across the face of the work. The ratchet wheel is added to enable
the turner to arrange his circles round a common centre, instead of
being thus obliged to keep them in a right line, and it will presently
be seen what a beautiful variety of interlaced circles can thus be
accomplished. The dividing wheel is, as previously explained, divided
on its edge into an equal number of teeth, or racked for a tangent
screw and divided on the face and edge. We shall suppose the number of
divisions to be 120. Face the work afresh, and, drawing back the slide
until the centre is concentric with the mandrel, as at first, cut a
boundary circle, A, Fig. 241. Move the slide of the chuck a few turns,
as before, and cut an eccentric circle. Now move the dividing wheel
thirty teeth, and cut a second, and, advancing by thirty each time,
cut a third and fourth, and Fig. 241 will be the result; the centres
of the eccentric circles falling upon four points of the inner dotted
circle, which is itself concentric with that first made.
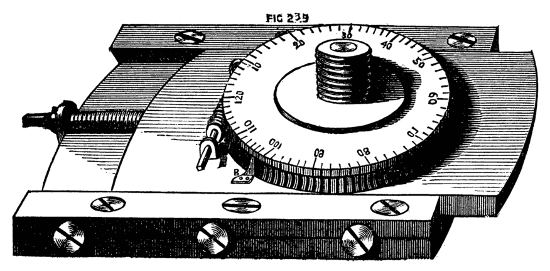
Fig. 239.
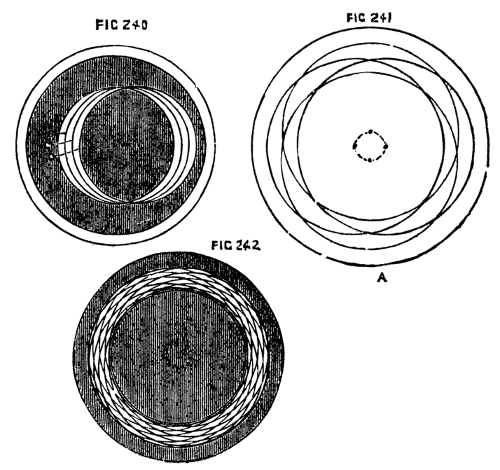
Figs. 240, 241, 242.
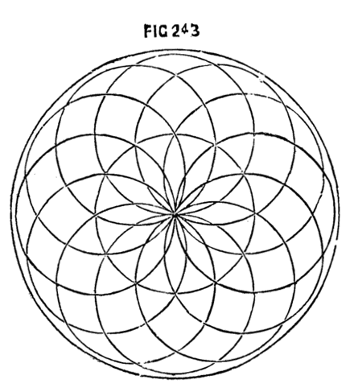
Fig. 243.
If the same process is followed, but the number of the circles
increased, a very neat snake-like ring will be formed, constituting
a border, in the inside of which other combinations may be made. In
Fig. 242, twelve interlacing circles are shown; in Fig. 243, twelve
circles, described upon centres, which lie upon the circumference of
a central circle of equal size. This last pattern, when more finely
executed, by doubling or trebling the number of eccentric circles,
forms the device generally cut upon watch cases, under the name of
engine-turned. The best way to try patterns, is to cover the face
of a piece of boxwood with paper, using a pencil in the tool-holder
of a slide rest instead of a cutting tool. If a softer disc is used
instead of box, round pieces of paper or thin card can be fixed
upon it with ordinary drawing pins; and if the first pattern is
unsatisfactory, a second, and any successive number of pieces, can
be mounted, and fresh patterns traced by the same means. It would be
mere waste of time to multiply specimens of the patterns that may be
executed by the aid of the chuck just described; and, indeed, this
could only be done by cutting in the lathe itself the blocks from
which such specimens must be printed. For the present, at any rate,
the principles only by which such devices may be executed will
be given (as above,) and the designs will be left to exercise the
ingenuity and taste of the reader.
It happens, moreover, that few as are the works devoted to the
general principles and practice of plain turning, more than one has
been published on ornamentation by the eccentric and other compound
chucks, in which a variety of executed patterns appear, of more or
less beauty; and in the English Mechanic has lately been printed a
selection of exquisite designs by Mr. G. Plant, whose chuck, indeed
(to be presently noticed), bids fair to supplant the most simple one
now described. The chief recommendation, perhaps, in the latter, is
its great simplicity, as it may be made by any amateur sufficiently
practised in the use of tools; whereas the geometric chuck is too
complicated to permit this. It will be observed, on inspecting the
drawing, Fig. 239, that the divisions on the face of the wheel are
continued on the side above the part that is racked; this permits them
to be seen when the piece of work overlaps the circle of the wheel.
The steel point shown at B, answers as an index, either to the surface
marks, or to those on the side. The tangent screw is now generally
fitted in a small frame, which is itself pinned at one end to the top
plate, and kept up to the dividing wheel by an eccentric cam. This is
not shown in the drawing; the plan is nevertheless good, as the screw
is instantaneously released from gear at pleasure, when the wheel
may be turned by hand to any desired position; after which a slight
movement of the cam brings up the screw, and all is made ready for
work. The eccentric chuck becomes available for such work as shown
in Fig. 244, representing the bottom of a candlestick, ringstand,
or similar article. In this case the centres of the eccentric work
(now cut quite through) are on the circumference of a circle larger
than, and outside, the work itself. Instead of cutting through the
whole thickness of the stuff the outer circle may remain such, and
the blackened part may represent an inner raised surface, when the
contrast formed by the sharp edges round the pattern with the smooth
circular part will be very agreeable to the eye. To improve still more
this design, the outer part may be ebony nicely moulded and edged with
ivory, and the raised part ivory; or the same may be alternations of
ebony and holly, which will form a contrast almost equally agreeable.
A small chisel-ended tool must be made for this work if the whole is
in one block, as it will be necessary to leave a level surface upon
the face of the lower part. There are an infinite number of designs
of similar nature, which will occur to the reader when the principles
of the chuck have been mastered, some of which would at first sight
appear to have been worked by other means. Fig. 245, for instance,
which is but a modification of the last, scarcely looks like lathe
work, but can be cut more rapidly this way than any other—of course
the fret saw will do similar work, but it would first have to be
marked out, and afterwards the marks of the saw teeth removed, whereas
the above is cut and polished at once. It may here be observed that
the eccentric chuck itself is used to fix the position of the
various circles to be cut, whereas the size of these circles is
determined by the slide rest. Thus in Fig. 246, while the centre of
the chuck is concentric with the mandrel, bring up the tool in the
rest and cut the circle F, G, H, of which B is the centre; draw down
the slide of the chuck until its centre is at C, leaving the slide
rest as it is, and the circle F, E, D, will be formed of equal size
with the first. Now move the screw of the slide rest so as to draw
in the tool towards the centre of the lathe bed without altering the
chuck, and the small circle will be the result, whose centre (being
dependent on the chuck alone) is the same as that of the larger
circle. Bearing in mind this principle, that the chuck determines the
various centres only, and the slide rest the radii, little difficulty
will be experienced in devising and executing designs. Such is the
simple eccentric chuck, of which the use is tolerably extensive; but
there are, nevertheless, certain positions in which the eccentric
designs are required, which cannot readily be obtained by its means.
Fig. 247 is one of these, in which a moment's inspection will show
the necessity of two distinct movements of the slide at right angles
to each other. Hence a second slide is attached to the first at right
angles, much the same in effect as a second chuck screwed upon the
first but standing across it. This is the compound eccentric chuck
to be subsequently described in detail. There is one drawback to the
use of these chucks, namely—their excessive weight, which causes
a great deal of vibration in the lathe itself, especially when the
eccentricity of the slide or slides is great. An accidental blow
moreover from the chuck under the above condition would be very
severe. Hence the various cutters eccentric and others, worked by
the overhead apparatus already in part described are infinitely more
pleasant to use and even more effective and more easily managed.
The eccentric chuck can be used in combination with these, and the
capabilities of the two will thus be vastly extended, but in this
case the chuck is kept stationary while motion is given to the tool,
and the defect just alluded to no longer exists. In cutting patterns
upon hard wood and ivory a common defect is shallowness of work, the
cuts should not be so light as to give merely an effect of a design
scratched upon the surface. The cut should be deep and clean, and
the tool not only sharpened but polished so as to leave the device
boldly executed, the small triangular and other shaped pieces left
between the cuts standing up clear and solid. Some patterns, as the
shell, which will be presently spoken of, require to be deep at one
part and shallow at another. Some devices look best when cut with a
point tool with double and others with single bevel to the edge, and
the same design worked with different tools will appear almost like
two distinct patterns.
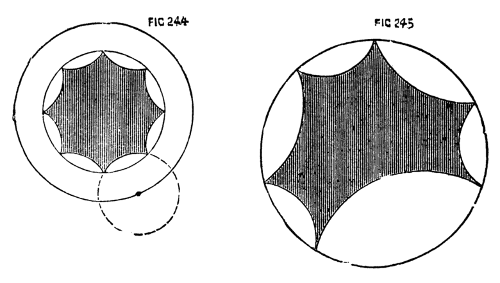
Figs. 244, 245.
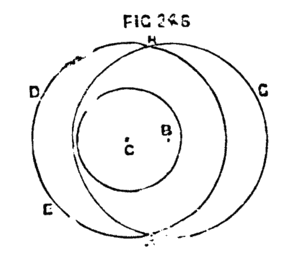
Fig. 246.
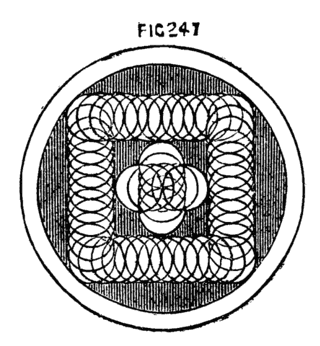
Fig. 247.
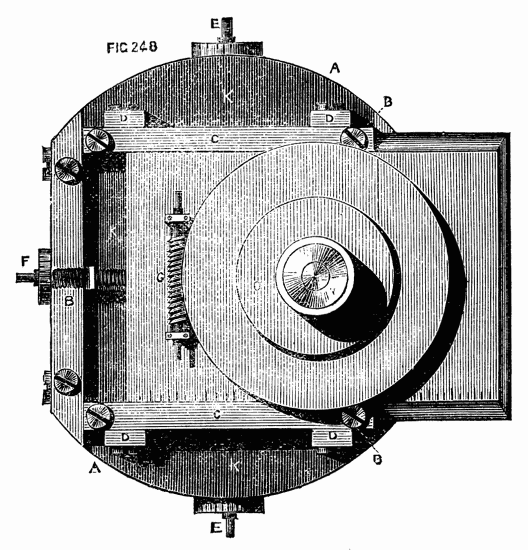
Fig. 248.
The double eccentric is represented in Fig. 248. The part A is the
foundation plate, with a projection at the back, tapped to fit the
mandrel. B, B, the lower guide bars; K, K, the lower sliding plate.
All the above parts are precisely similar to those of the simple
eccentric chuck. Upon the face of this lower slide are attached two
chamfered guides, C, C, at right angles to the first. They are kept
in place by screws passing through oval holes on their faces, and
tightened when required by screws, tapped into four little square
blocks, D, D. Between these guides slides the upper plate, which
carries the screw for chucks, and the dividing wheel as before worked
by a tangent screw, G; to either end of which a key is fitted. The
leading screws, E and F, which move the two slides, have squared
ends projecting both ways, so that the plates can be made to work
eccentrically in either direction, which is sometimes an advantage.
The chucks do not screw down upon the face of the division plate,
on account of their projecting parts at the back; and very commonly
a round plate, O, somewhat smaller than the wheel and about ¼ in.
thick is attached to the face of the latter to raise the work still
higher, so that the dividing plate can be readily seen. The more
compactly, however, the parts of this chuck are made, and the less
the work projects from its face the better; as there will be the less
strain upon the central pin, and upon the plates and their guide bars
when the tools are applied to the work.
To be able thus to place in the centre of rotation any given point in
a piece of work, whatever may be the form of its boundary lines, is
of immeasurable advantage, even though the capabilities of this chuck
are confined to objects of plane superficies, it being impossible
to reach by its means the side of a cylinder, or the surface of a
sphere or spheroid. It is evident that any line upon the face of a
box, for instance, whether the latter be square, round, octagonal, or
of any other form, may be followed with two movements of the slides,
combined with the rotatory movement of the dividing wheel. Thus, a
border of interlacing circles may be carried round the edge of such
a box, Fig. 248; or, a series of such circles forming constantly
diminishing octagons, hexagons, squares, &c., may be thus readily
executed. Nevertheless, what was said of the simple eccentric chuck,
applies with even greater force to the compound eccentric. It is a
heavy piece of apparatus, requiring a lathe with substantial poppets
and bed; the whole well braced to the floor and wall, to withstand the
excessive vibration caused by the revolution of the apparatus. It was,
indeed, in view of this and similar appliances that we insisted in our
initiatory paper upon the great importance to the workman, of adequate
strength and solidity in the various parts of the lathe itself.
In Fig. 249, we give a simple specimen of work to be executed by the
compound eccentric chuck.
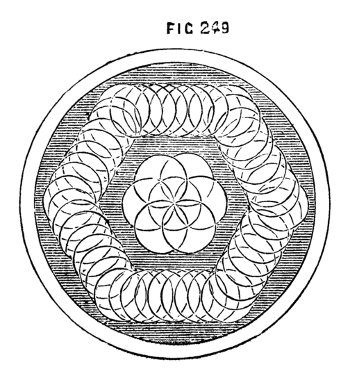
Fig. 249.
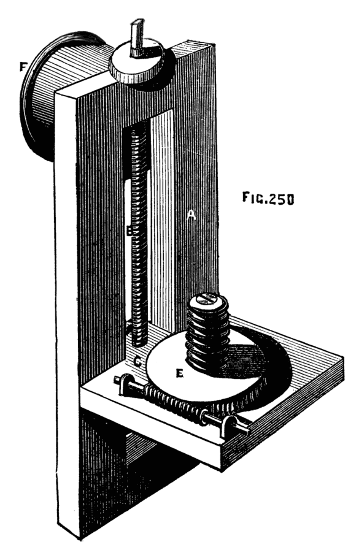
Fig. 250.
The compound geometric chuck of Ibbetson, manufactured by Holtzapffel
and Co., is a double eccentric considerably improved and of very
extensive application. A full description of it is published in a
book written by the inventor, in which an immense number of patterns
executed by its means is given with detailed directions for their
execution. As these patterns are almost essential to a description of
the apparatus as exemplifying the working of its several parts, the
reader is referred to the book in question, or to a translation of it
into French in the supplement to Bergeron's work. To enable the turner
to execute patterns on the side of cylindrical pieces a chuck is used
called a dome chuck, similar to Fig. 250. A rectangular frame of
brass, A, carries a sliding plate C, at right angles to it, the latter
having a tailpiece which fits accurately between the frame, and is
tapped to receive the finely cut leading screw with divided head, B. A
nut at the back of the frame clamps the slide in any desired position.
Upon the upper face of the latter is a wheel racked on the edge so as
to be moved by the tangent screw, E. This wheel, like that of the
oval and eccentric chucks, turns on a strong conical central pin, and
has a screw attached of the same pitch as that on the mandrel. The
chuck is screwed to the mandrel by the projecting flange, F. The work
is thus mounted at right angles to its ordinary position.
By this arrangement any point in the side of a cylinder can be brought
in contact with a tool fixed in the slide rest, and by means of the
graduated screw heads of the latter and of the chuck various devices
can be accurately made. This chuck may be used alone or in combination
with the eccentric, and the quick revolution of such cumbrous pieces
that would be a great drawback to their use is less frequently
required, now that the following apparatus has been added to the
lathe, and eccentric revolving cutters, with drills and other tools,
have taken the place of heavier and more inconvenient apparatus. It is
indeed much more convenient in the majority of cases to keep the work
itself fixed, and to operate upon it by tools put in rapid motion,
because the latter, from their excessive velocity compared with that
which can be conveniently given to the material, make better work, and
at the same time from their lightness impart no tremor to the lathe
while in motion. The cuts thus made are in consequence very clean
and smooth, and free from those slight undulations apparent when any
vibration takes place in the lathe itself. The different varieties of
overhead apparatus have been already described and illustrated, and it
only remains to describe more in detail the revolving cutter frame,
drills, and other apparatus used therewith.
The following pieces fit into the top of the slide rest in what is
called the tool receptacle, and are advanced to the work by means
of a lever as already described. Fig. 251 is the revolving cutter
frame, the spindle of which is put in rapid motion by a cord from
the flywheel passing to the small pulley through the medium of the
overhead apparatus, as shown in a previous page. For the purpose of
cutting small intersecting circles, a forked drill, Fig. 252, or
a crank formed drill, 253, will suffice, and if these are made to
cut deeply the result will be a succession of hemispherical knobs or
beads (these must not intersect). A drill like Fig. 254 will give a
knob raised in steps, and it is plain that by cutting the end of the
drill to a section of the required moulding the latter may be rapidly
executed. The flat inch long cutters used with the geometrical chucks
(when the work revolves instead of the tool) are, of course, made of
a variety of forms upon the same principle. Cases of these drills
and cutters beautifully finished are sold by all the leading dealers
in turning lathes and apparatus. It is essential that these tools be
kept very sharp, and that their cutting edges should be polished if
first-class work is to be done. The difference in the appearance of
execution is very evident when the cutter is thus perfect, as every
cut bears a high polish, which cannot otherwise be imparted. Nothing
can be applied to finish eccentric work except friction with a hard
brush, and even this is much better avoided, as rubbing of any kind
tends to round edges which should be kept sharp and to obliterate
the finer and more delicate lines. It is likewise the best plan to
finish with any particular tool all the work to be done by it without
removing it from the tool holder for the purpose of sharpening. If,
however, this is necessary the following contrivance must be used to
insure the precise form which the cutter had at the commencement of
the work. This being likewise necessary with respect to the fixed
tools for ornamentation, the apparatus requisite in either case will
be introduced here, the drawings and description being extracted from
Holtzapffel's valuable work already alluded to.
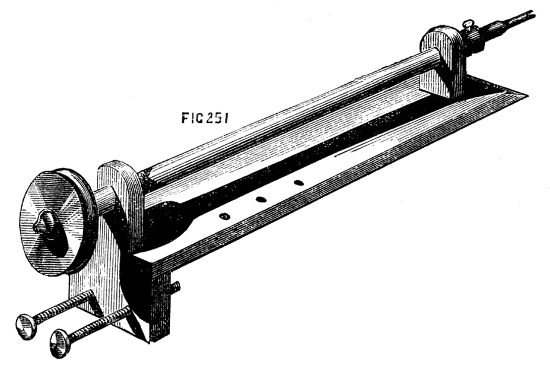
Fig. 251.
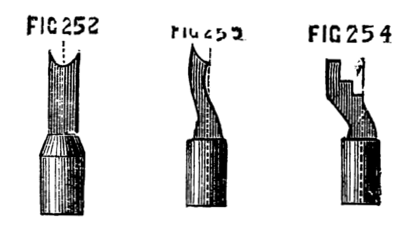
Figs. 252, 253, 254.
Fig. 255 is arranged for flat tools of various angles, or drills with
single joints. A, is the stand of brass, with two turned and hardened
steel legs. To this is hinged at G, by a screw joint, the part K, the
upper part of which forms a semicircular arc, C. A second arc, B is
fixed at one end to the stand A, and passes stiffly through a mortise
at the top of K. The latter can be raised, therefore or lowered at
pleasure upon this second graduated arc, and clamped at any angle
by the screw H. To the lower part of K is pivotted the tool holder,
D, the upper part of which is pointed, and screws as an index upon
the arc C, showing the angle at which it is placed. This tool holder
is clamped by a nut at the back, which fits the end of a screw seen
near the point. The figure below shows a tool holder which fits into
the projecting parts of D, and serves to hold the small flat tools.
Below is a similar holder, used for round-shanked drills. F is one of
three flat slabs upon which the tools are to be ground, there being
one of iron, one of brass, and one of hard wood with a flat strip of
oilstone imbedded in it, flush with its upper surface. The tool and
its fittings are generally arranged in a box with three drawers; these
contain the slabs of oilstone and metal, with the powders necessary
for grinding and polishing. To use this instrument, the point of D
is adjusted to the required angle for one side of the point of the
tool. (It is shown at 40 deg. in the sketch.) The latter is then
placed in the holder, and made to project until, when the angle of the
chamfer is adjusted on the arc B, the part A is level, and therefore
parallel to the surface of the grinding plate. The whole thus forms
a tripod, the third leg of which is formed by the tool itself. The
latter is first rubbed on the oilstone with a little oil. It is then
finished more perfectly on the brass slab, dressed with oilstone
powder and oil. Previous to this the tool is moved one or two degrees
more upright by the arc B. A narrow facet is thus ground, having a
dull grey polish. The tool is now carefully wiped clean, and polished
with crocus and oil upon the slab of iron. If the point of the tool
is central, with a chamfer both ways, the point of the tool holder
is first adjusted on one limb of the arc and the tool ground, and
then the same adjustment made on the opposite limb, so that the other
side of the point can be operated upon. Thus tools of any angle and
any bevel may be sharpened to a nicety without fear of altering the
original form of the point, and this may be done, if necessary, during
the process of eccentric turning, although, as before stated, it is
better to fix the tools well sharpened at the commencement of the
work, and not remove them until at least one complete set of circles
or other patterns have been cut.
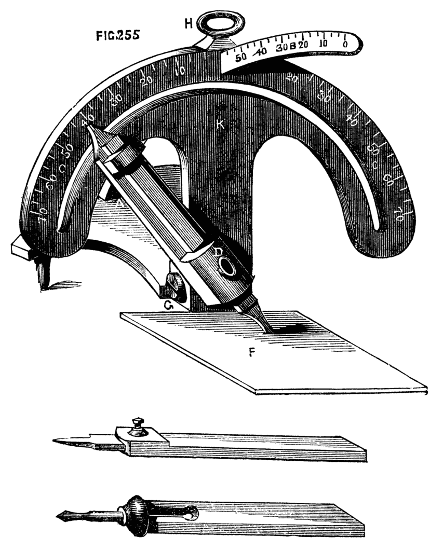
Fig. 255.
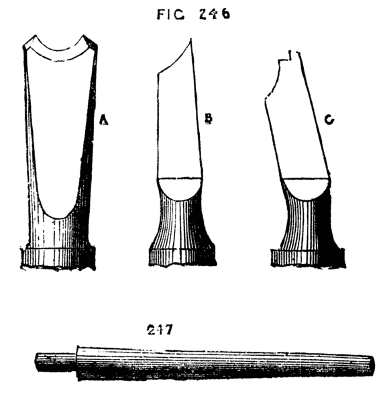
Figs. 246, 247.
The instrument just described is evidently unsuited for the drills and
bead tools which present a concave edge like 246 A, B, C, enlarged
sketches of tools copied from Holtzapffel's work. For these the
latter directs to use large or small cones (247) of iron and brass,
to be dressed, the first (which is the polisher) with crocus, the
second with fine emery and oil, the flat side of the tool being held
towards the point of the cone, the bevel towards the thick end. Part
of the edge of C must be delicately sharpened by hand, as no guide
can be used for the step-like portion of the edge. The cones for
sharpening are either mounted in the usual manner, by one or both ends
in the mandrel of the lathe, or fitted into the spindle of a small
drilling lathe-head, the pulley of which is connected by a catgut
band with that of the mandrel of the small lathe-head, being fitted
with a tailpiece to fit the rest socket, or otherwise mounted on the
lathe-bed. The smaller cones especially require to be driven at a high
speed. When larger circles or mouldings are to be cut, these small
crank-form drills are no longer available, and are replaced by a very
simple, but most effective contrivance called the eccentric cutter,
by which any work that is within the scope of the eccentric chuck
and fixed tool may be executed with great precision and rapidity.
This is represented in Fig. 248[20]—a small oblong frame of brass,
about two or two-and-a-half inches in length, and half an inch or
so in breadth is traversed by a fine screw, prevented from moving
endwise by a collar, as in the slide rest (of which, indeed, this is
a miniature). A slide, C, with a little tool holder at the top of it,
is moved along the frame by the leading screw, the head of the latter
being graduated, and also the upper surface of one or both sides of
the frame. The projection A, fits into the end of the drill holder,
and is secured by a screw. Circles of a diameter equal to B, B" may
thus be cut, and their effect varied by placing tools of any form of
edge in the tool holder. Such a tool as A, will thus no longer cut a
minute circle forming a hemispherical raised knob, but will form a
circular moulding, such as that shown in part at Fig. 249, except when
the tool holder is on the middle of the frame and the tool concentric
with the mandrel. The single point tools, however, with single or
double bevel, are more commonly used, in this cutter, as mouldings
can be turned as efficiently with hand beading tools, with or without
the eccentric chuck, according to their required position. It may here
be mentioned that eccentric work should always be cut on wood of one
colour, or on ivory, as the veinings of the richer fancy woods, which
are so beautiful in other cases, only serve to confuse the tracery
made by the eccentric cutter. Of all woods for fancy work with the
eccentric chuck or cutter, nothing equals African black wood. It is,
however, costly, and only ranges to a diameter of five inches, as
great part is unsound. The rind is hard, thick, and white, similar to
boxwood. Next to this for such work stands, perhaps, cocus, or cocoa
wood, which is not the tree bearing the cocoa nut, the latter being a
palm, which is more like cane in texture. One of the most effective
patterns to be formed by the eccentric cutter is the shell, Fig. 250,
in which one side, or rather one portion of the circles composing it,
is very deeply cut, while the opposite part is shallow. This can be
simply effected by throwing the sole of the rest out of the level,
by placing a thin piece of wood or metal across the lathe bed, so as
to tilt up the rest and place it (with the cutter) in an inclined
position. The tool will thus begin to cut at one part before it
touches the surface elsewhere, and the desired effect will be readily
produced. In using the eccentric cutter great rapidity of motion
must be given to it, but the tool must be advanced very carefully,
or it will be broken. The lever handle is the best to use for the
purpose. Akin to the shell pattern are those in which part only of
the circles are cut, leaving an effect shown by the border round Fig. 250.
This is produced in the same way as the last, being, in fact, a
ring of shells in their initiatory stages. This is a very effective
snake-like pattern, when fairly and cleanly cut. When the eccentric
cutter is used, it must be remembered that the principle of work is
not quite the same as with the eccentric chuck. With the latter it
was stated that the size of the circles depends on the slide rest and
the position of their centres on the chuck. In the present case the
eccentric cutter regulates the sizes, and the screw of the slide rest
itself the positions of the centres of the circles, since the part
A of the cutter will always be in the centres of the same, and this
part is attached to the rest. It will be understood that this remark
respecting position of centres only relates to circles lying on the
diameter of the work, such as Fig. 251, the distance between a and
b will be taken from the division plate on the pulley of the lathe.
The way to cut the above, for example, will be as follows:—Place
the slide rest so that when the cutter tool is in the centre of the
frame it shall be concentric with the mandrel. In this position it
will only make a dot in the centre of the work. Turn the screw of the
cutter frame until you have a radius sufficient for the centre circle.
Set the mandrel pulley with the index in No. 360, put in motion the
overhead apparatus and cut the circle, move the screw of the slide
rest a few turns (thus fixing the centre of the second circle),
until you find that the cutter will form the circle cutting the first,
and passing through its centre. (Observe, this being the size of the
first, the screw of the cutter frame is not turned.) Cut the circle
in question, move the mandrel pulley a quarter round, so that the
index is in No. 90, and cut another; repeat the process twice more,
and 1, 2, 3, 4, will be cut. The position of the centres of Nos. 5,
6, 7, 8, will now have to be determined as before, by working the main
screw of the slide rest; but, as their size is less than the preceding
set, the screw of the cutter frame must likewise be turned to diminish
them to the required degree. When by these combined movements their
position and size have been determined, they must be cut by the aid
of the division plate, in the same manner as the last, and so on,
till the whole have been cut. With respect to the ratio in which the
circles diminish, and the precise sizes of them, no rule can be given,
as this must depend on the taste of the operator. The sole object in
this place is to show the principles whereby these patterns are to
be executed. A good deal of care is requisite in practice, and the
memory has to be often rather severely tasked. The best plan is always
to try a proposed pattern upon boxwood or paper, before risking it
upon more valuable material; and, where it can be done, it is well to
write down the numbers to be used on the various division plates. A
single false cut, it must be remembered, will spoil the whole work,
at a great waste of time, loss of material, and annoyance, only to
be appreciated by those to whom such an untoward accident may have
happened. The drilling apparatus, without the eccentric cutter, but
fitted with a round-headed drill, is used for the production of fluted
works, such as that shown in Fig. 252, A and B. The drill being
inserted in the end of the spindle, and its point or end (of any
desired form, either round, flat, or pointed) being brought opposite
one end of the flute, the lathe is to be put in motion as in ordinary
ornamental drilling, the mandrel being, of course, held fast by the
index and division plate. At the same time that the drill in rapid
motion is brought against the work by the lever handle, the screw
of the slide rest is slowly turned, and thus the groove or flute is
drilled out by the combination of longitudinal and vertical action.
The number of flutes in any given size of cylinder is determined,
first by a horizontal sectional plan on paper, and regulated
accordingly by help of the division plate and index. In making such
an article as Fig. 252, it will economise material, whether ivory or
blackwood, or a combination of the two, to form it of at least three
pieces, making the divisions at C, D. Care should be taken to leave
below the bowl, which should be as thin as paper if of ivory, the
part C on which the beads are to be drilled. The pedestal can then
be screwed into this, and will not penetrate the bottom of the bowl.
Ivory may be screwed in an ordinary set of stocks and dies if care is
taken not to screw up the latter too quickly. Lard may be used as a
lubricant in cutting this material, whether for sawing or drilling.
The part with raised mouldings between A and D is ornamented with
a vertical or universal cutter, and for greater ease and exactness
a template may be used in the slide rest by means of which all the
curves of the moulding may be accurately followed by drill or cutter.
The minute beads round the edges of the small mouldings are made with
two sizes of A, Fig. 246; a little knob is thus formed rising from a
hollow. The small knobs used as feet may be rapidly formed by a hand
beading tool of semicircular section, similar also to A, Fig. 246. A
pin may be left on each, or they may be drilled and attached by small
screws of brass wire made on purpose. The following cement will enable
the turner to make an ivory bowl for the above ornament so thin as to
be transparent; indeed it may be thus made so thin as to bend under
the fingers, although such extreme tenuity is not required in the
present case.
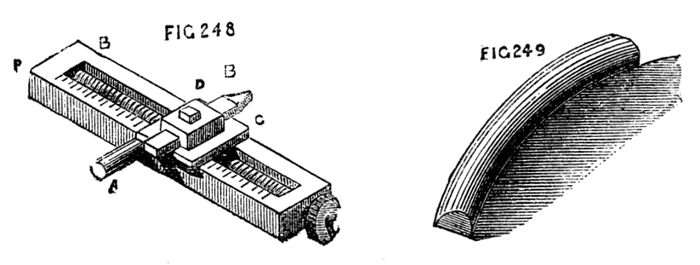
Figs. 248, 249.
Fig. 250.
Fig. 251.
Fig. 252.
Take the finest sifted lampblack and make it into a paste with glue,
about as thick in consistency as paint. After turning the ivory
tolerably thin, paint this on the inside; let it dry, and repeat the
process till sufficient is laid on to form a kind of hollow core,
of strength sufficient to support the ivory against the action of
the tool. The material may now be thinned and ornamented from the
outside. When finished, soak a few minutes in warm water, and then
agitate in cold; it will become quite clean as before.
By altering the direction of the motion of the revolving cutter, the
several cuts made by it will assume a different character, and the
work will present a series of hollows scooped out, so to speak. The
cutter, 253, being fixed in the tool holder of the top slide, will
work vertically only, and produce patterns similar to Fig. 254, of
the nature of basket work. This is exceedingly effective, and, as it
may be cut so deeply as to penetrate the material of hollowed works,
the latter may be lined with red or other bright coloured silk or
velvet, and a variety of designs thus worked out. It is very necessary
in using the vertical cutters to move the tool holder forward very
gently, giving it at the same time great rapidity of revolution.
Without this it will at once stick fast in the work. The character
of the designs may, of course, be infinitely varied by using cutters
of different sections, as in the case of work done with fixed tools
with the aid of the eccentric chuck. The same cutters will, in fact,
serve both purposes. Fig. 255 represents a tool similar to the last,
but arranged to cut horizontally. With this, fluted work can be
done: but it is evident that the cord from the overhead apparatus
cannot here be directly applied, owing to the horizontal position
of the driving pulley. Additional guide pulleys, therefore, become
necessary, and, when these have to be arranged, the apparatus is
generally modified, and the universal cutter is used, of which one
form is shown in Fig. 256, and though it is not so good a pattern as
that which is described in a later page, it is nevertheless suited
for use with the old pattern of slide rest already delineated. With
this the direction of the cuts may be varied at pleasure—they may
be perpendicular, horizontal, or radial, and, when the templates
before mentioned are added to the slide rest, an infinite variety of
devices may be cut upon spherical and curved surfaces, so that the
cutter thus modified is fully entitled to its title of "universal."
The design, Fig. 258, is entirely the work of revolving cutters and
drills used with a template of the required section. It is intended
for a lady's workbox, opening with a hinge on the line, a, b, and
containing in separate compartments the various articles required.
It may be made entirely of ivory, lined with red or blue satin, and
the flutes round the body may be cut through to allow the lining to
appear. In the latter case, however, if the box is of ivory, black
velvet may be used to enhance the contrast, and, as the glossy pile
would be outwards, a second lining of any desired colour should be
added with the best side inwards. The rings for the handles, as for
all similar purposes, can be quickly made with the tool, Fig. 259. A
hollow piece of ivory being taken, and turned smooth inside and out,
one side of the tool is applied, as in the figure, so as to cut half
through the work. It is then removed, and the opposite edge applied
to the inside until the ring falls off completely finished. It is
then cut through with a thin saw or knife, and inserted in the tailed
ring or other projection intended to receive it. Handsome works in
ivory should always be kept under glass shades. The universal cutter
shown in Fig. 256 consists of a plate with chamfered edges to fit
the tool receptacle of the slide rest, having near each end small
poppets which support the round rod connecting the pulley bearing
piece, A, with the part, E, which carries the tool, F, the latter
being attached by a small slot and set screw to a cylinder revolving
in E, and having at its upper end the driving wheel, C. At G is a
circular piece or wheel racked on the edge, and turned by the tangent
screw, G. The hinder poppet is rectangular, and has divisions marked
upon it on each side of the angle numbered from the apex. The racked
wheel may with advantage be similarly graduated. When the part E is
vertical the cutter will be in a position to work horizontally, and
the pulley support will be vertical. By turning the tangent screw,
both the parts move together; but if desired the pulleys can move
independently by unscrewing D and L. The angular poppet may be made
semicircular if preferred, the degrees being numbered either way from
0" in the centre. When the tool holder is horizontal, or approaching
that position, the nut, D, must be loosened, and the pulleys placed
so that the cord will not slip off. They may be dispensed with if the
apparatus is to be used only for vertical cuts (the holder,
E, will be horizontal); but if a radial pattern is to be cut, in
which the angle is to be constantly varied, the pulley piece must be
used and the pulleys re-arranged at D, as required from time to time.
There is a somewhat neat and serviceable little apparatus represented
in Fig. 259A, to take the place of the slide rest and its
revolving cutters, and although its powers are limited, much may be
done with it. The spindle A, works through brasses in the poppets, B, B, and is put in motion by a cord from the overhead passing over the
pulley in the centre. This spindle, which holds the crank-formed and
other drills in a socket at one end, moves freely through the bearings
endwise, and is kept back from the work by a spiral spring working
against the end of the handle, C. This handle does not turn with the
spindle, but is mounted like the handle of a carpenter's brace, or
that of an Archimedean drill stock. The whole apparatus fits into the
socket of the ordinary rest. A screw should have been shown in the
drawing, passing through B towards the pulley, to regulate depth of
cut.
Figs. 253, 254.
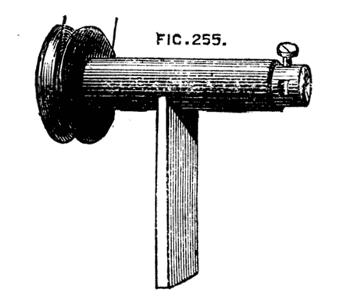
Fig. 255.
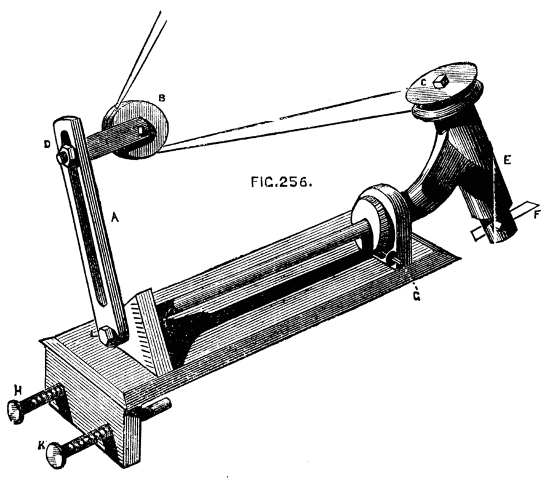
Fig. 256.
Fig. 258.
Fig. 259.
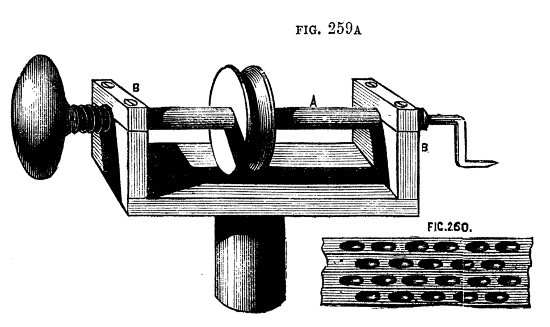
Figs. 259A, 260.
Once fixed by the screw of the latter in its intended position the
tool is advanced to the work in a straight line by pressing the handle
C, and is released from the cut as soon as this pressure is withdrawn.
With different sizes of cranked, forked, or round ended drills, a good
deal of ornamentation may be done with this simple tool, which is also
useful for ordinary light drilling. By putting in the socket a round
ended drill, and using the radial movement (turning the whole round in
its socket in the arc of a circle), short flutes can be drilled out
deep in the middle, forming basket work similar to Fig. 260, which is
exceedingly pretty when carefully executed. There is little difficulty
in making drills and cutters, as steel of all sizes in round and
square bars may be had at the chief tool shops, especially at Fenn's,
in Newgate-street. In making the revolving cutters, however, it is
necessary to observe the position of the axial line, which must
pass through the cutting edge. After the drill is roughly finished,
therefore, it should be mounted in the tool holder with which it is
to be used, and carefully tested upon a piece of unimportant work.
If in revolving against the latter it leaves a part of the material
untouched, the edge is not truly in the centre of rotation. The flat
side of the drills are to be diametrical, and hence, as Holtzapffel
remarks, these drills can only be sharpened on the end. The latter
authority also says most of the drills embrace (in contour of edge)
only about one-fourth of the circle, as when the drills are sharpened
with one bevel they can only cut on the one side of the centre, and
if the drills were made to embrace the half circle the chamfer of the
edge on the second side would be in the wrong direction for cutting,
and consequently it could only rub against the work and impede the
action of the drill. All ornamental cutters and drills should be kept
in a box with small separate divisions to fit the shanks, which are
all of one size. The points can then be seen and the selection made of
any required pattern.
Many turners take special interest in the production of objects in the
lathe, that at first sight appear impossible to be produced solely
by its means. Inasmuch as such works manifest the skill and patience
of the artificer, they will always meet with appreciation; and,
although otherwise useless, they serve as elegant objects of vertu,
and are well worthy a place among the rare ornaments of the drawing
rooms. When first the Chinese balls, consisting of a set of hollow
spheres one within the other, all exquisitely carved, were brought
to England, it was believed they were made in hemispherical pieces,
united round the equatorial line with some kind of cement, the joint
being carefully concealed. I am not sure that they are made in a lathe
in China; but, at all events, they are so made in England, and our
home productions almost rival those of that strange yet clever nation.
I say almost, because the carving in ivory done by the Chinese is in
some respects unequalled, nor do I suppose that work requiring in many
instances years of patient industry could be made to repay the cost
of manufacture in England. No sooner were these curiosities in vogue
here than all kinds of similar impossibilities were manufactured.
Stars with from three to a dozen rays made their appearance, enclosed
sometimes in similar sets of hollow spheres—the rays projecting
beyond the limits of the outer shell—others were wondrously enclosed
in cases with flat sides, cubes, pyramids, six, eight, twelve-sided
hollow cases, all turned fairly in the lathe, were produced with
similar contents, so that the apple in King George's dumpling became a
very secondary wonder. The starry inmates were evidently too large for
the houses; yet there they were—legs and arms, of course, sticking
out through doors and windows, simply because there was no room for
them inside. We will penetrate the mystery, commencing with a single
hollow ball containing a star of six rays, the bases of the latter
standing on a central cube.
In the first place a perfect sphere is required, and consequently the
slide rest and template, or spherical rest, must come into requisition
unless the turner can produce a ball by hand tools alone. Let this
sphere, or rather its boundary line, be drawn on paper of full size
with the compasses, Fig. 262, A, B, C, D. Draw the diameters
A, D, C, B, at right angles to each other. This will give you five points,
which on the sphere itself (on which these lines will have to be
drawn, including also another, answering to A, B, C, D) are centres of
six openings, here represented by the circles, through which the tools
have to be introduced to hollow out the sphere and form the star. The
points of the latter will be in the centres of these openings. Draw in
addition the plan of the central cube, and one ray of the proposed
star; next draw an inner circle, here dotted to mark the thickness of
the outer envelope. The object of this drawing is to enable you to
make a set of curved tools, one of which is shown black at E, and a
set are marked on a plate of steel, from which they must be cut out.
A close inspection of the figure will show that if ball, Fig. 262,
were turning on the point A, A D being its axis of revolution, tools
of the given section introduced at D would cut away the material
round the point or ray, leaving the latter standing;[21] and this
operation repeated at the five remaining openings would entirely free
the central cube with its rays according to the proposed design. The
tools have to be introduced in order, beginning with the smallest; and
although the above remarks will make clear the principle, there are
several points to be attended to in practice, and some few accessories
are required which will now be explained. It is evident that for
every different sized sphere fresh sets of tools will be requisite,
which will also vary in pattern according to the intended form of
the central base on which the rays stand; a cube or flat-sided solid
requiring one tool at least, with a rectilineal edge; spherical or
other solids demanding others whose ends are of different section.
Hence, in all cases, full-sized plans of the proposed work must be
drawn, and special tools designed therefrom.
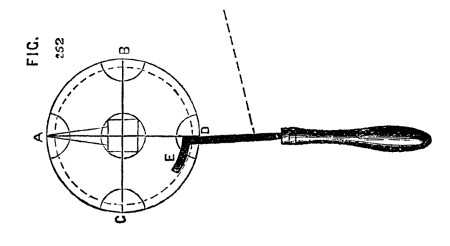
Fig. 262.
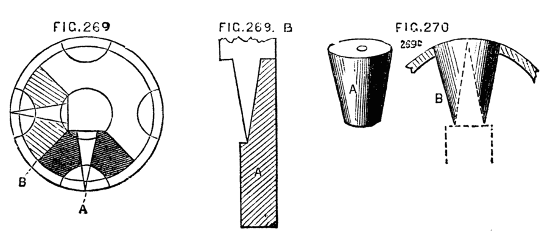
Figs. 269, 269B, 270.
Fig. 269A is introduced to show more clearly the result of
the application of the first set of tools, or rather of the first
application of the set, as the latter are used throughout.
The blackened part will be entirely cut away in this operation, the
shaded part meeting it will be removed when the tools are transferred
to the adjacent opening, the cuts meeting those first made. Hence
the tools need only reach from a to b, and can be more easily
introduced than if the curved part were longer. Gauges, Fig. 269B,
A, must likewise be made of thin brass or tin, that the
progress of the work may be examined, and each opening in the sphere
should likewise be measured with a gauge, or with compasses fixed to
one width by an adjusting screw.
The proper chuck for this work is the capped ball chuck already
described, by loosening the cap of which any one of the six openings
may be brought under the action of the tool, these openings being, in
fact, bored out simultaneously with the formation of the star. After
the first point or ray of the star has been completed, the ball may
be reversed and the opposite ray formed. These are now to be secured
by plugs, which are to be turned conical, to fit the opening of the
ball at one end, and of a length to rest upon the central cube at the
other, being also bored out to fit over the rays, which they should
embrace closely at top and bottom, even if not at the other points
of its length. (Fig. 269C, A and B.) This is to be repeated
as each ray is formed, so that the central star may be held in place
until the work is finished, when the plugs are removed, and the star
will be entirely detached. The above-named tools being straight on the
right hand side of the shank will not form a finished conical point
or ray. Hence it is recommended to file away that side, so that when
flat upon the rest, the back of the tool may be an exact counterpart
of a ray, Fig. 270, A. There is, however, no absolute necessity for
this, as the star point can be first made blunt, with perpendicular
sides, which can then be neatly finished by a separate tool made for
the purpose, and kept up to a very keen edge. The first and smallest
of the set of tools here shown, is the one with which the flat sides
of the cube are formed, and it must be bevelled from underneath, so as
to present a cutting edge on the end. The curved tools should cut on
the end and both sides of the crook.
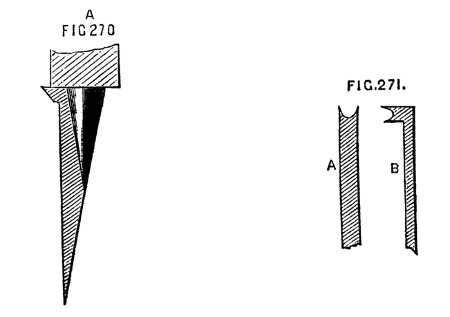
Figs. 270A, 271.
It is quite possible to make the above in mahogany, but a closer
grained wood is much to be preferred, as the tools used—which are
held flat upon the rest—are rather scraping than cutting, and
mahogany, and fibrous woods in general, cannot be thus worked neatly.
Boxwood is, in every respect, the best material to begin upon, ivory
and blackwood being reserved until the eye and hand have become
accustomed to such work. The whole operation requires great care, and
is rather tedious, but the result ought to be a sufficient reward.
The external surface may, of course, be ornamented with the usual
apparatus, but the star should be left clear and sharp. The edges of
the openings should have a light beading, cut with a bead tool, Fig. 271,
A and B.
Amongst the various purposes to which it is possible to apply the
lathe, may be noticed the drilling out grooves and mortises, a method
used in some of our Government arsenals, for cutting the recesses
for the reception of the Venetian lath work in cabin doors. The same
method is, of course, applicable to numberless similar cases, although
designed for the special object named. The apparatus is shown complete
in the drawing, Fig. 272, and the component parts in the succeeding
diagrams. A is a kind of compound slide rest, or vertical straight
line chuck, having a movement in a direction parallel with the lathe
bed at F; while the circular plate being pinned through its centre
to a slide, H, can be moved up and down by means of the handle G.
This circular plate can be set in any position, and has a projecting
shelf or rest to carry the work, which is steadied by guide pins, as
will presently be explained. The part F, has a bed similar to that
of an ordinary slide rest, which is clamped to the lathe bed by a
bolt and nut, as usual. This carries likewise chamfered bars, between
which slides the horizontal plate to which the vertical part of the
apparatus is attached. This is first a plate with chamfered edges,
Fig. 273 A, and a second similar but rather wider plate, Fig. 274 B, with
guide bars, likewise chamfered, to slide upon A. From the front of B
rises a stout pin, on which the circular plate, C, turns, which can
be clamped by a central nut, or otherwise, as in an ordinary compound
slide rest. This nut should not project above the general level of the
plate. On the face of the latter is, as previously stated, a rest, or
narrow metal shelf, D, and pins, e, f. The plate may be variously
arranged in this respect by substituting any kind of holdfast or
guide, according to the work desired to be done by its aid. The upper
slide is depressed by a hand lever acting on a pin fixed in the
sliding plate, Fig. 275; or, if preferred, by a similar lever, with a
quadrant and chain, or rack movement. The horizontal slide is worked
by means of a stirrup for the foot, with cord attached, acting on a
bell-cranked lever, seen in the first figure. To cut the grooves in
a bar, for Venetian blinds—as described—the lath to be drilled is
attached to a flat strip of thin iron, drilled with holes, Fig. 276 A,
as wide apart as the required distance between the grooves. It is then
laid against the shelf, and the guide pins are made to enter the holes
in the iron. The clamping nut of the round plate is loosened, until
the bar is set to such an angle that the grooves to be cut will form
vertical lines, Fig. 276. It is then clamped securely.
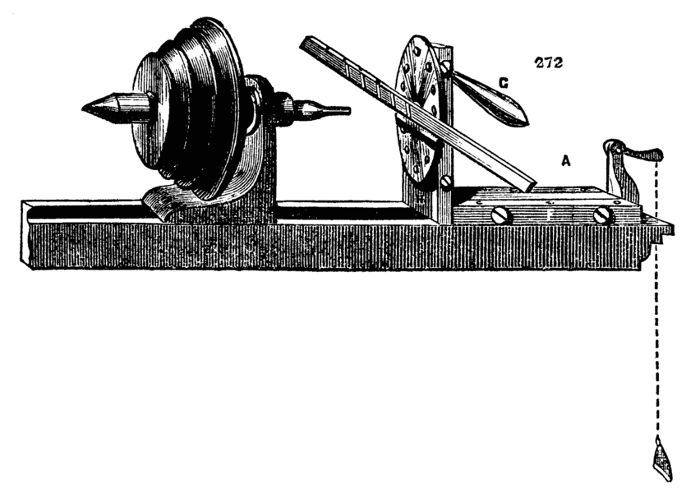
Fig. 272.
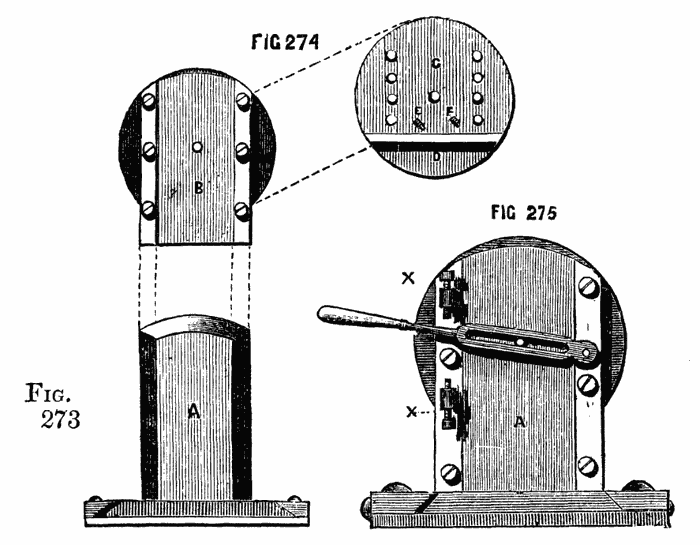
Figs. 273, 274, 275.
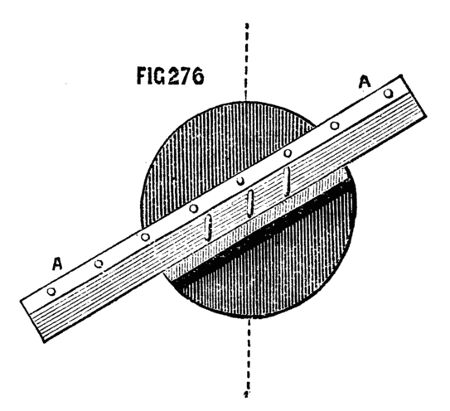
Fig. 276.
It is necessary to be able to adjust the piece to be cut, as regards
its height, above the lathe bed. This is effected in part by the
position of the movable shelf—fixed by pins—and partly by guide or
set screws, which regulate the traverse of the slides. Suppose the bar
adjusted as in Fig. 276, the groove to be cut being brought opposite
to the drill. The set screws—two of which are seen at x, x,
Fig. 275—acting on the handle, regulate the precise length of each groove.
A similar stop, connected with the horizontal part of the machine,
regulates the advance of the wood towards the drill, and thus the
depth of the cut. Hence it is only necessary to set these carefully
at starting—the pins on the guide plate insuring the proper width
between the grooves—and the lathe being put in motion, any number of
precisely similar grooves can be drilled with the utmost rapidity and
neatness.
An inspection of the drawings will show what numberless purposes may
be served by this simple apparatus, which may be modified in its
details, while its principle of action is maintained. The drill should
have a chisel and be kept to a keen edge. The lathe should be put in
rapid motion, and if the required cut is to be deep, it should be cut
at twice. The lower slide should return to its place by means of a
spring when the foot is raised, the vertical slide being movable in
both directions by means of the slotted part of the handle.
Note.—The above being taken from an apparatus for a
steam lathe, the stirrup action maybe used, as the foot is at
liberty. A foot lathe would require a slight modification. In
Fig. 275, the depressing handle is shown as if the chamfered
bars were fixed to the sole plate, and the plate A, were
movable, as is sometimes the case. When made according to the
above description, the handle would, of course, be pinned to
the fixed vertical plate, A, to which also the stops would be
attached, and the pin which passes through the slot of the
handle, must project from one of the chamfered bars. Either
plan may be followed, but the pattern described is calculated
for a stronger apparatus; inasmuch as the vertical plate can be
secured more firmly to the chamfered horizontal slide than the
mere pair of guide bars—the two might, in fact, be made in one
casting, if preferred.
The slide rest previously described, although applicable to the
purposes of ornamental turning, has one disadvantage. It is necessary
that the various pieces of apparatus to be used with it should have a
foundation plate with chamfered edges to fit accurately between the
guide bars. This is often inconvenient, and adds to the difficulty of
making, and consequently to the cost of such pieces. In addition to
this drawback, it may happen that one of these fittings by being more
frequently used becomes more worn than another, so that the guide bars
require constant re-adjustment, and their accuracy and parallelism
become impaired. To obviate these and similar inconveniences the
slide rest is now commonly made like Fig. 277, and a tool receptacle,
Fig. 278, is fitted to slide between M, M, and is so arranged as to
hold securely the universal cutters and other apparatus required
for ornamentation or for plain turning. These are all made with a
rectangular bar fitting the longitudinal channel in the middle of the
receptacle, and are secured by the following simple contrivance. It
will be seen by the drawing that the central channel is widened at
A, A, and that a groove or saw-cut B runs along the inside from end to
end. This groove is continued in a similar manner on the side next
to the reader. Fig. 280 represents an ordinary tool holder, with a
rectangular shank A, and clamping screw B, by which the tool c is
secured. The part A is laid in the central channel, and a small piece
of metal shaped like Fig. 279 is inserted in one of the open spaces,
A, A of the receptacle and slid along with its lower flange in the
saw-cut until clear of the enlarged part of the channel. It is thus
retained, and the clamping screw which passes through its centre is
brought to bear upon the piece to be fixed, which is thereby securely
held in its required position. Two of these holdfasts are generally
used at the same time. If the main bar of the tool holder is not
quite thick enough to be clamped, then it is only necessary to lay a
small plate below it. By the above simple means, the necessity for
fitting each individual piece of apparatus to work upon the chamfered
guides is done away. In order to ensure the position of the sole of
the rest at right angles to the lathe bed a kind of saddle, A,
Fig. 281, is used. This is of cast iron or brass, accurately planed on
the upper surface, and has a projection fitting between the bearers
of the lathe. The usual holding down-bolt passes through the hole in
the centre, securing the saddle and the rest at the same time. The
usual arrangement of a kind of double socket, the inner one rising at
pleasure by being tapped into the outer, has already been described,
and serves for accurate adjustment of the height of the rest. It is
convenient, in addition, to have a stop or set screw under the bed
of the rest, and a similar one on the top of the socket, so placed
that when the frame is swung round it shall stop precisely at right
angles to its former position. Thus, if the tool is first required
to be used upon the side, and then upon the face of the object to
be turned, these two positions are obtained at once, and can, if
necessary, be alternated without any re-adjustment of the moving
parts of the rest by the aid of the set square. The receptacle-holder
is generally advanced by the hand lever, Fig. 279, one pin of which
fits into the hole in the guide-bar as seen in the drawing, while
the other falls into a short slot e, made in the upper surface of
the receptacle, or of the piece of apparatus to be used in it. Of
course, this arrangement may be reversed, one or both pins being
fixed to the rest and its receptacle slide, and the holes made in
the lever. Sometimes, however, a slower and more regular movement is
required than it is possible to give in this way, and the lever is
replaced by the leading screw C, D, Fig. 278, the head of which is
removable, and can be replaced by a small winch handle. This screw
is tapped into the lug cast upon the receptacle, and its point is of
the form shown. The latter fits into a hole in the pillar A, 278, and
is retained by a pin, which falls into the groove, D, Fig. 278, and
prevents the screw from advancing or receding without carrying the
sliding plate with it. The pin being removed, the screw will no longer
act in this way, and the slide may be moved by the lever instead.
The other screw, E, F, of fine pitch, serves to regulate the advance
of the receptacle, and consequently the depth of cut of the tool—a
round head with divisions on its edge is attached to one end, which
abuts against the pillar B, Fig. 277, which latter has a mark on its
top to act as an index. Thus the advance of the tool can be regulated
to a great nicety, and successive predetermined and different depths
may be reached and repeated at pleasure, as is sometimes necessary.
C, C, Fig. 277, is one of a pair of stops which can be fixed by their
screws at any two points of the bed of the slide rest. These serve
to regulate the distance which the top slide and tool holder are
intended to traverse, as in drilling a number of flutes of equal
length, and many similar works. They are usually made of gun-metal,
the screws of iron or steel, or of a metal called homogeneous, which
may be described as between the two, and, being pleasant to work, is
worthy of notice. It is absolutely necessary that the slide rest for
ornamentation should be made with the greatest nicety. The slides must
work equally smoothly from end to end of their traverse. The pitch of
the screws must be not only fine, but even and regular, and the screw
itself of precisely the same diameter from end to end, else it will
work loosely through its nut in one place, and jamb in another. It is
extremely pleasant to feel the exquisite smoothness and oiliness, for
no other word will express it, of the movements of sliding parts in
the workmanship of Munro or Holtzapffel, especially if compared with
inferior work. Good amateur's work indeed is often far superior to
that which is sometimes advertised, and perhaps a few hints may not
be out of place here, relative to the construction of this necessary
addition to the lathe.
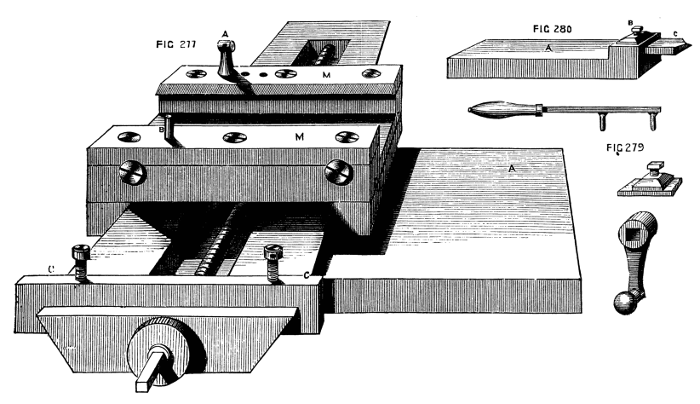
Figs. 277, 279, 280.
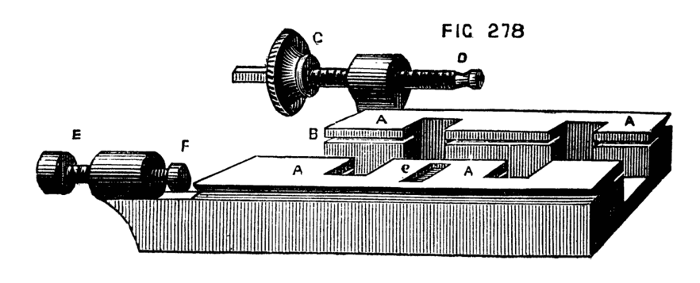
Fig. 278.
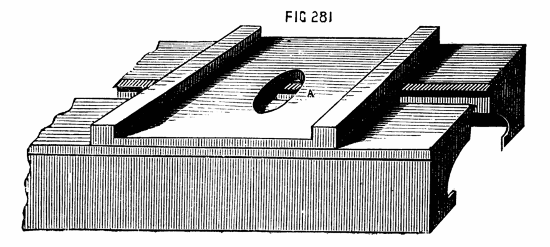
Fig. 281.
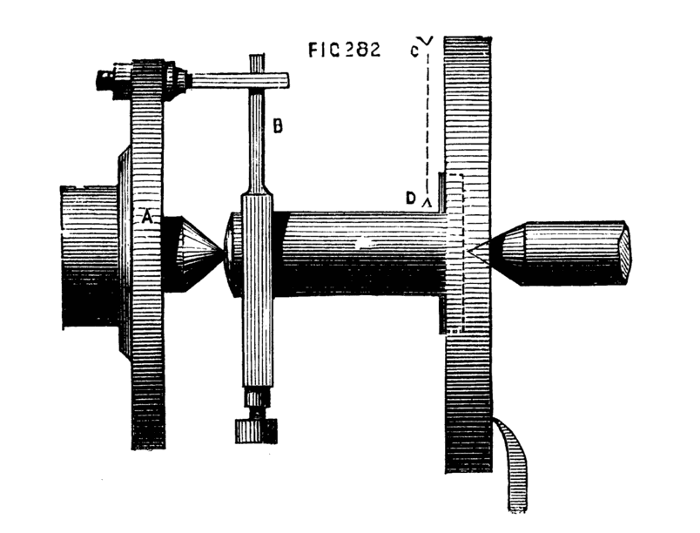
Fig. 282.
First of all, the frame of the rest must be accurately at right angles
to the spindle, which fits into the socket. These should, therefore,
be turned together, supposing the amateur not to have a planing
machine. The whole may be mounted as Fig. 282, where A represents the
carrier plate or chuck; B, the driver, the tail of which should be as
long or nearly so as the frame from c to D; F is the side tool to
be fixed in the slide rest for metal. The effect of this arrangement
is to plane the face of the slide with transverse strokes instead of
lengthwise. It may be afterwards finished and polished with oilstone
powder on a flat slab of planed iron. When the face is finished,
the whole must be reversed, the pin of the carrier plate will bear
against the frame, which thus acts as a driver, and the spindle must
be turned. In this way accuracy is ensured if the slide rest used is
carefully set. The chamfered sides of the slides are difficult to work
with the file, but may be so done with care, and with a template of
the desired bevel as a guide. The great secret is to take plenty of
time, not to press too much upon the file nor to move it too quickly
over the surface; fine even strokes, especially towards the finish,
must be given, and a final polish with oilstone powder and oil used
on a piece of a stick. In turning the screw a back stay must be fixed
opposite to the tool in the slide rest to insure the contact of the
cutting edge without bending the work.
Presuming that the screw will be cut with stock and dies, it may be
stated as a caution that the latter must not be tightened except at
the commencement of cutting the thread deeper. The return of the tool
by a backward motion (or unscrewing), should not be used as a cutting
action, and therefore, should be carried on with the dies in the same
position which they had during their descent.
At the beginning, therefore, of each downward movement the dies must
be tightened and oiled, and they must not again be touched till the
bottom of the screw has been reached, and the upward movement also has
been completed, so that they have arrived again at the starting point.
If tightened at any other time the screw will be either conical or of
a wavy section, either of which forms would be fatal to its use. The
castings for such a rest should be of malleable iron, if possible, as
being much more easy to work; the guide bars may be of gun metal, as
also the chamfered bars, which work on the main frame. This will give
a more finished appearance, and will on the whole be more durable and
satisfactory.
One of the most useful tools for ornamentation, especially of plain
surfaces, such as the top of a box cover, is the eccentric cutter,
Fig. 283. The shank, A, lies in the receptacle holder of the slide
rest, and is drilled throughout to receive a steel spindle, carrying
at one end a double pulley, B, to receive the cord from the overhead
motion, and at the other frame, E, with its leading screw, of which
the movable milled and graduated head is seen at H. This frame has
one surface, level with the centre of the main spindle, which is cut
away as shown, and, consequently, as the point of the tool is on its
flat side, which latter rests upon the frame (the bevel being below),
this point can, by the tangent screw, be brought into a line with the
centre of the main spindle, so that when the cord from the overhead
is passed round B, the spindle revolves with great rapidity, and the
point of the tool, K, in the position described, makes a simple dot.
By turning round the milled screw head, H, either by the thumb and
finger or by a small winch handle, fitted on the square part beyond
the head of the screw, the tool holder, D (which is in one piece with
the nut of the leading screw), is made to traverse the frame, and the
tool will cut a circle small or large according to the eccentricity
thus given to it. In Fig. 285 D, is the tool holder on the front of
the frame; C, the end of the spindle; L, a bell-shaped washer, which
is acted on by the small square-headed screw, drawing D towards the
frame and clamping the tool. The whole is in the figure of full size.
The tool holder is in one piece with the nut, through which passes
the leading screw, and which is continued as a screw for the action
of the bell-shaped washer and tightening nut; hence it is necessary
to allow a degree of play between the nut and leading screw, to
prevent bending the latter when clamping the tool. This is effected
by filing off the threads in the nut at the top and bottom, to render
the whole slightly oval. The remaining threads suffice for the action
of the leading screw: a very slight degree of play in the required
direction will be found sufficient. The powers of the eccentric
cutter frame will be found sufficiently extensive to make it a most
serviceable, perhaps necessary, piece of lathe apparatus. If it cannot
be said absolutely to supply the place of the eccentric chuck, it has
nevertheless the advantage of great lightness of construction, lowness
of cost, and ease of manipulation. The weight of the eccentric chuck,
whether single or double, as of all chucks in which sliding plates
are used, is a sad drawback to their value—a drawback unfortunately
beyond remedy, and specially felt when the slides are drawn out to
a great degree of eccentricity. Combined together, these two form a
compound eccentric chuck, and in this way are capable of nearly
everything in the way of eccentric ornamentation. Where the chuck
is not to be had, it is by all means advisable to procure the cutting
frame, for which the writer confesses a great partiality. It appears,
indeed, to him a far more rational proceeding, as it is also now of
extensive application, to act upon fixed work by revolving or moving
tools, instead of proceeding in the contrary way; and all these little
tools used with the overhead apparatus are so lightly and elegantly
constructed, and so well adapted for the parts they have to perform,
that the originator of them (native talent devised them), deserves
to be well and lastingly remembered; instead of which it is doubtful
whether his name is even known. (Sic transit is a quotation too
stale for this work.)
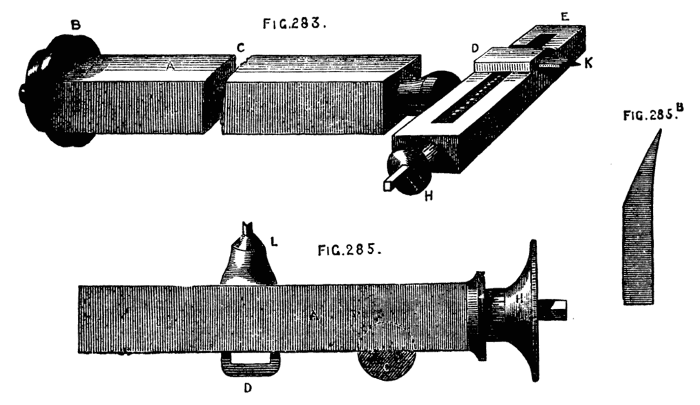
Figs. 283, 285, 285B.
To cut circles deeper in one part than another—the shell pattern,
for instance—with this tool, it is not necessary to alter the level
of the sole of the rest, as it is when the eccentric chuck is used
with a fixed tool, as it suffices to set the rest itself at an angle,
by moving it round in the socket, so that the revolving tool should
touch the face of the work sooner at one point than at an opposite
one. In the same way the work may be considerably undercut on one
side of the circles, by giving the angular set to the rest, and
placing a tool in the holder, with a point of the form shown at 285 B.
There is nothing prettier than this undercut work when well and
sharply done, for which purpose the tool should not only be rendered
keen on the hone, but burnished and polished on the brass and iron
slabs already described.
The following remarks on the work of this
cutter frame on flat surfaces only, will be useful to the reader
in designing and working out the various combinations of circles,
intersecting or otherwise, which it is calculated to produce. On a
surface represented by 286 A, the line of circles, a, a, is on a
diameter, and, supposing them to be described by the eccentric cutter
(or by a simple double-pointed drill), their centres are obtained by
means of the leading screw of the slide rest, moved the requisite
number of turns between each cut, while the work is retained in a
fixed position on the mandrel. But if the line of circles is on such
a line as b b, above or below the centre, and consequently not
on a diameter, it is plain that no movement of the slide rest or
cutter, or both, can avail to place them in position, except with
great difficulty and tedious working with the division plate of the
lathe and the screw of the slide rest. Hence the eccentric chuck must
be brought into play, and being fixed with its slide in a vertical
position, the screw is turned and the work is lowered thereby until
the line b, b, is on a level with the point of the tool. The
eccentric cutter or double drill will then suffice to work the row of
circles. When the centres of the circles are themselves on parts of
the circumferences of other circles, the division plate of the lathe
or of the eccentric chuck will be called into requisition, according
as these circles are concentric with the mandrel or otherwise. In
Fig. 286B, the curved lines are parts of circles of equal size with
that representing the surface of the work, and their centres lie on
one and the same diameter, viz., at opposite extremities of the line,
a, b. Being thus eccentric to the work, the division plate of the
chuck is used to arrange the intersecting circles of the pattern—its
slide having been first drawn down, until the centre of the arc to be
worked with circles is brought opposite to the tool. The work will be
in position when, on turning the mandrel slowly, the cutting point
of the tool passes across its centre. The division of the original
circle is in this instance into four parts, two of which are thirds,
and two sixths of its circumference. The arcs of circles are also
lines equal to thirds of the circumference of the work. It is well to
remember this division of a circle by other equal circles described
round it from points on its circumference, these circles passing
through the centre. The original circle will in this way be divided,
as shown at C, into six equal parts. To produce it with the aid of
the eccentric cutter is easy. Set the tool of the cutter first to the
centre of the work, so that on revolving it will make a simple dot.
This should always be done, whatever pattern is subsequently to be
cut. Fix the index of the division plate of the lathe at 360. Move
the screw of the slide rest until the point of the cutter, on being
advanced, rests on the circumference of the circle previously cut
upon the work, or on the circumference of the work itself, if the
divisions are to reach the edge. Screw back the tool (not the rest)
until its point reaches the centre of the work and cause it to revolve
so as to cut one arc. Move the lathe pulley forward to 60° and cut a
second arc, and so on, advancing 60° each time, and the figure will
be cut. This division of the circle will form the groundwork of many
handsome patterns. When the arcs thus formed are intended merely to
be the lines of centres, and not themselves to form integral parts of
the pattern, they should, nevertheless, be marked with a pencil in the
tool holder, if possible, as there will be less liability to error in
working the proposed pattern. In the present advanced stage of the
art of turning, mere surface work done by the eccentric cutter is
rather apt to be despised, owing to the extended powers of Ibbetson's
or Plant's geometric chuck; but, valuable as the two latter are, they
are necessarily so costly that few can obtain them, whereas the little
cutter frame is comparatively cheap, and it is really capable of very
exquisite work in skilful hands.
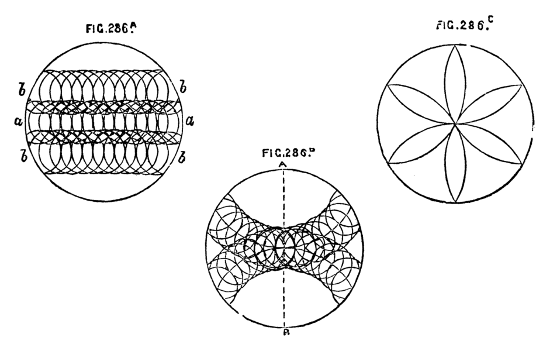
Fig. 286A, B, C.
In very many cases of ornamentation it is required that the mandrel,
instead of making an entire revolution, should stop at a given point
in both directions, so that, for instance, the turner should be able
to move it 60, 80, or 100 divisions to and fro, with the certainty
of its not advancing beyond that distance. This is effected by the
racked and divided brass wheel B, fixed on the mandrel against the
small end of the pulley. This wheel is sufficiently thick to allow of
racking part of its edge to be acted on when necessary by the tangent
screw, and leaving the other part for divisions, which are generally
seventy-two in number, and marked in figures at every sixth division.
On the other side of the plate are a number of holes drilled through
its whole thickness to receive stop pins, Fig. 289, P, which are sawn
through as shown, that they may spring, and fit the holes tightly.
There are seventy-two holes corresponding with the divisions. These
pins are about 3/16ths of an inch diameter, generally with flattened
heads, and a hole through them to receive a pin to aid in removing
them. The holes are sometimes made in the edge, instead of the side
of the segment plate, but the latter is the best position. At
Fig. 288, T, is seen the interior part of the poppet, with a piece of brass
let in, and fixed securely, in which are inserted two screws, against
which the segment stops abut, and prevents further rotation of the
pulley. Side by side with this latter piece is placed the frame which
carries the tangent screw. It is shown at Fig. 289. This frame is not
fixed to the base of the poppet, but pivotted at e, between two
short standards screwed into the poppet for that purpose. When not in
use, the whole frame, therefore, drops down towards the front, but
it can be raised by the small cam, K, Fig. 289, so as to gear with
the worm wheel. In many cases the latter is not used, but the pulley
turned by hand. The screw, however, gives a steadier and more easily
regulated movement, essential in delicate operations, and sometimes
convenient, even when the stops do not require to be inserted. The
use of the cam, acting on the frame which carries the tangent screw,
is now generally followed in the eccentric and oval chucks, and also
in the dome chuck. It enables the workman, by throwing out of gear
this part, to turn the worm wheel with the fingers, to set it at the
required number on the division plate, a slow process when effected by
the screw.
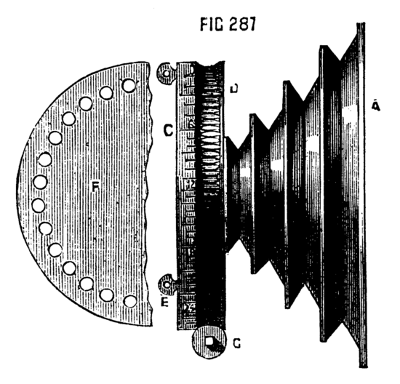
Fig. 287.
Fig. 289.
Fig. 288.
Among the newer devices for ornamental turning, must be mentioned the
rose cutter frame of Holtzapffel and Co., an ingenious adaptation
of the principle of the rose engine, without the drawback of
cumbersomeness and costliness. It works like the ordinary eccentric
and other cutters by a cord from overhead motion. The apparatus is
represented in Fig. 290, and its various parts in Fig. 291, &c.
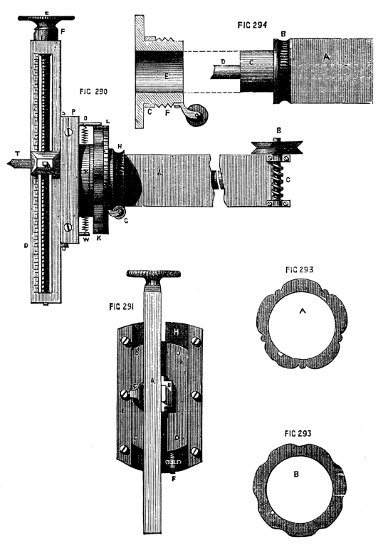
Figs. 290, 291, 293, 294.
In the first of these figures, A is the shank, fitting the receptacle
of the slide rest, and drilled to receive a hardened spindle, at one
end of which is a worm wheel, turned by tangent screw B C, and shown
again at A, B, C, Fig. 292. By this are turned the parts beyond K,
namely, the frame D, carrying the tool, as in the eccentric cutter,
adjacent parts S, representing chamfered bar, P, back plate, and
O, which is a round piece in one casting, with the back plate, and
having a hole through it for the coiled spring seen between O and N.
All these are secured to the spindle, and turn together as one piece
with it. Fig. 291 is a front view of these parts. H is the back plate
of brass, with steel chamfered bars on its face, E, E, as in the
eccentric chuck. Between these slides the plate, D, D, to the face
of which is attached the long steel frame, carrying the tool holder.
Close to the letter H, it will be noticed that a slot is cut in the
back plate, through which projects a hard steel pin, screwed into
the back of the sliding plate. This is seen at O, Fig. 290, and is
attached to one end of a coiled spring, the opposite end of which is
secured to a pin fixed in the back plate of this part. The pin O, is
thus kept in contact with the edge of the rosette or pattern plate,
K, and, as the whole turns with the spindle while the rosette is
fixed, the pin, or rubber, is compelled to follow the undulations of
the pattern, the motion being, of course, communicated to the tool.
An inspection of Fig. 294 will show the arrangement of the parts on
which the rosettes are fixed, and which is capable of turning, but
does not, unless the tangent screw and wheel, H, are brought into
requisition, as will be presently explained. The end of the main shank
of the instrument is round, as seen at C, the worm wheel B being
screwed fast, by four small screws, to the end of the square part of
the shank. Upon this rounded end fits what may be called the sleeve
E, to which is fixed the tangent screw, and on which also are placed
the rosettes. The latter have a large central hole, Fig. 293, A and B,
and fitting closely beyond the screw F, F, of the sleeve, and, being
prohibited from turning upon it by a small key or feather, are secured
by a screwed ring or ferrule seen at L, Fig. 296, the edge of which is
milled. At F, Fig. 291, is seen a short stop, or set screw, the head
of which is divided into ten degrees. By this, the rubber is prevented
from penetrating to the bottom of the undulations on the edge of the
rosette, and, if it is allowed only just to touch the summits of them,
the tool will cut a circle. Thus, as the screw stop can be accurately
set, one rosette will produce at pleasure graduated waved lines, the
waves growing less and less undulated as the centre (or circumference)
of the work is approached, giving a most delicate and chaste pattern,
and chased it certainly is.
Another variation of the pattern producible from any rosette results
from the frame of the tool holder being extended beyond the axis
of the spindle in both directions. When the tool is on that side
of the axis nearest to the rubber pin, the undulations of the
rosettes will be so followed as to produce their exact counterpart
on the work. When the tool-holder is on the other side of the axis,
the undulations become reversed, the raised parts of the rosettes
producing hollows and vice versa. It may here be mentioned that in
the case of the rose cutter, eccentric, and universal cutter, and
similar apparatus, the screw heads carry ten chief divisions and ten
smaller divisions. The screws are cut with ten threads to the inch,
so that one turn advances the slide, or the tool, or wheel as the
case may be, one-tenth of an inch. One large division, therefore,
produces a movement equal to one-hundredth, and one small division one
two-hundredth of an inch. If the screw is small it is generally cut
with a double thread equal to one-twentieth of an inch. It is evident
that in addition to the movements of the various parts of the rose
cutter, the turner also has in his power those of the slide rest, and
of the division plate on the lathe pulley, by one or both of which
further complications become possible. Six modifications of pattern
produced from one rosette alone are shown in Holtzapffel and Co.'s
catalogue, and these may be further multiplied according to the taste
and skill of the operator.
It is not possible to apply rapid movement to this rose cutter, else
the rubber would probably miss touching the rosette in places; hence
the tangent or worm wheel is used to give motion to the central
spindle. An end view of this is given in Fig. 292. The object of the
other tangent screw is, to move the sleeve and therewith the rosette
at pleasure, so that the higher parts of the undulations in the second
cut may, if desired, be arranged to meet the lower parts of the same
in the first cut or to fall intermediately. The effect of the gradual
shifting of the rosettes in this way is perfectly marvellous, and the
writer much regrets that he is unable to supply specimen plates, as he
is not in possession of the rose cutter. In the end of Holtzapffel's
latest edition of his catalogue are several such specimens, but
without any drawing or description of the instrument, the cost of
which is moreover omitted.
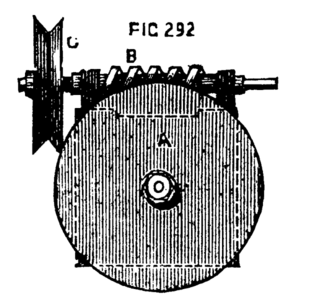
Fig. 292.
The centres of circles cut by this eccentric tool will be always
regulated in regard to position by the slide rest, because these
centres are, as explained, always in a line with the centre of the
spindle. Hence, to place a circle in any desired position, it is only
necessary to determine its centre, and, after drawing back the tool by
means of the screw till its centre runs truly as a mere drill, turn
the screw of the slide rest until the point touches the required spot.
This is represented in Fig. 284, in its latest improved form. It
consists of a shank, A, which fits the tool receptacle, and is bored
throughout its length for the reception of a central steel spindle,
to which is securely attached at one end the worm wheel, G, acting
as a dividing plate, and at the other the crank-formed frame, B, C,
with its small poppets, D, D. These are sawn lengthwise, and thus
spring upon the centre screws, which pass through them and carry the
revolving cutter spindle, K, L, M, in the centre of which is a slot to
receive the tool, the latter being clamped by the tightening screw,
L. There are certain points to be attended to in the construction of
this instrument, which must on no account be neglected. In the first
place, the screws which pass through the poppets must lie in the line
which would bisect at right angles that of the main spindle in the
same plane. A line, in fact (as dotted), passing from screw to screw
will pass across the centre of the end of the spindle. In the next
place, when the tool-holder, with its pulleys, is in place between D, D,
this line must be even with the top line of the central mortise,
H, for the point of the tool is level with its upper surface, it
being bevelled below; and it is essential that this point be capable
of being so placed as to form a continuation of the centre of the main
spindle. At E, E, are shown two of four thin pulleys. The two front
ones are removed to show the poppets. They should not be made thicker
than necessary, in order to avoid their interfering with the action of
the tool. Either pair will be used with either pulley, K, K, according
as the right or left side of the instrument is the highest, for, as
will be explained, the cutter frame is used at all angles between
the horizontal and the vertical lines, the cuts being consequently
inclined in either direction, left, or right, at pleasure. The centre
screws and points of the tool spindle must be carefully hardened.
Before commencing to use this cutter, it is necessary to test the
centrality of the point of the tool. Place the latter in its holder.
Let the part C of the instrument be turned till vertical; cause the
tool to revolve and to cut a light line or scratch on the face of the
work. By means of the tangent screw cause C to become vertical in
the opposite direction, so as to bring the other pulley upwards, and
with the small screws in the poppets set the revolving tool holder,
till the tool falls exactly on the line first made. It is, of course,
understood that the line in question passed through the centre of
the work. If in both positions of the tool the central point is passed
through, the cutter tool is correctly placed. The poppet screws are
for this purpose specially, though sometimes used to place the cutter
purposely above or below the centre of the work. Compared with the
old form previously given, this pattern of universal cutter is very
superior.
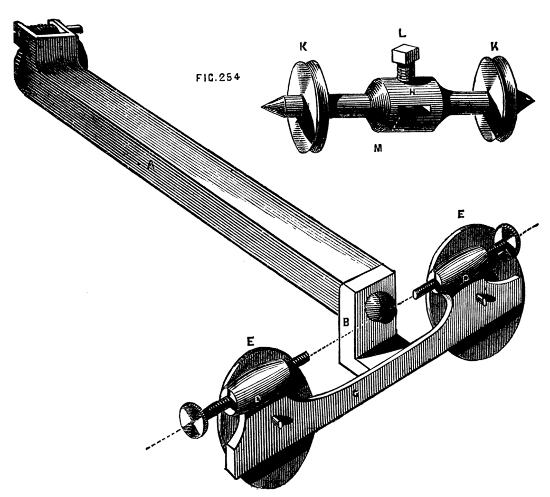
Fig. 284.
The rose engine, as hitherto constructed, has not been entirely
supplanted by the neat little apparatus already described, but is
still used almost universally by the watch case makers; and its
construction differs little, if at all, from that described by
Bergeron; although the slide rest used with it is somewhat modified
and improved. There are two kinds of rose engine, in one of which
the mandrel with its poppets and fittings oscillates between centres
fixed beneath the lathe bed; while in the other, the frame carrying
the slide rest is thus movable, the mandrel head remaining stationary
as in an ordinary lathe. In both cases the mandrel is allowed a
to-and-fro or pumping movement in its collars; as the rosettes used
are cut upon the face as well as upon the edge; and the rounded parts
of an article can be operated on as well as the plane surfaces.
The second pattern, in which the poppet remains a fixture, will be
first described, because it is capable of being applied to an ordinary
lathe for surface work, and if the lathe has a traversing mandrel, it
can be completely fitted for rose work.
The drawings and description annexed are from Bergeron's work; but the
slide rest there represented, and arrangement of screwed mandrel, are
omitted as obsolete:—
A strong iron frame, A, A, Figs. 295 A, 295 B, and 296, is made
with one of the ends carried up and branched, so as to embrace the
mandrel and rosette; which latter is attached to the back part of
the chuck which carries the work. The top of the frame is double, so
as to form of itself a lathe bed of small dimensions, upon which an
ordinary slide rest can be fitted. It must, however, be used with a
short socket, or it will be too high; as the top of the frame alluded
to stands slightly above the level of the bearers. B, is a point of
hardened steel which fits into a conical hole in the bottom of the
lathe poppet, or (if this is not long enough to reach a good way down
between the bearers) into a piece of iron arranged for the purpose
similar to that now to be described, and which is again shown in
Figs. 297 and 298. This is a kind of poppet in a reversed position, the
clamping nut and screw being above the bed, and the head with centre
screw below. The frame lies, therefore, between the mandrel head and
this reversed poppet, or between two of the latter, and oscillates
upon their centres whenever the projections or depressions of the
rosette compel it to assume such motion.
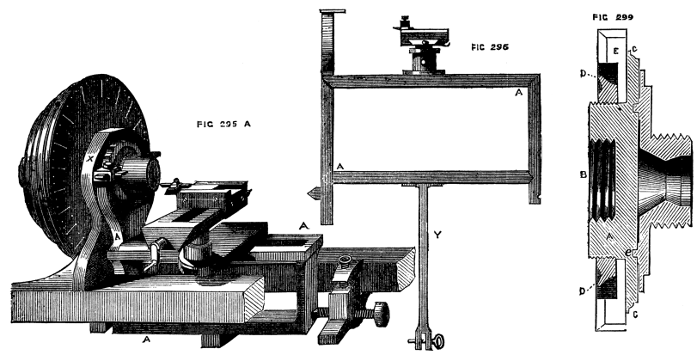
Figs. 295A, 296, 299.
Fig. 299 is a section of the chuck which carries the rosette, the
latter being shown in position. A, is the body of the chuck; B, the
inside screw to fit the mandrel. On the outside of this part are a
few turns of a somewhat finer thread, beyond which a plain part is
left next to the flange, C, and on this the rosette is placed, and is
clamped by the nut, cut outside into beads, or milled, or left plain
and drilled for the insertion of a lever pin; this nut is marked D
in the figure. It will be seen to lie within a recess formed in the
face of the rosette, E. The latter is shown in Fig. 300. A, is the
recess just alluded to; B, C, the pattern on the face and edge; D, the
large hole in its centre, allowing it to be slipped on the back of
the chuck. It is prevented from turning on the latter by a pin, which
fits into the small hole, F. From the front face of the chuck rises
a conical pin, G, similar to that on the eccentric chuck, over which
fits the circular division plate, I, with its projecting screw, H, to
hold the ordinary chucks. This plate is recessed at the back, leaving
a mere ring of metal, e, e, which fits a corresponding circular
groove, and secures the steady movement of the plate, which is fixed
by a conical washer and screw, as seen in the plate. This division
plate is formed with cogs, into which a stop falls, as described,
when treating of the eccentric, but the divisions are differently
arranged, the cogs being divided into sets of eight or ten teeth. Let
the whole circumference be first divided into six equal parts, and,
beginning at the first division, cut six or eight teeth, as if the
whole circle were to be divided into 60. Pass to the second portion,
and cut eight teeth, as if the circle were to be divided into 72. Let
the third carry eight teeth, with a pitch of 80 to the circle; the
fourth a similar number, with a pitch of 84; the fifth 96; the sixth
100 to the circle. These must be cut with the same cutter, so that the
spring click, or stop teeth, may fit any of the six sets. There will
be several undivided spaces, which are to be left plain. The several
sets are to be marked in numbers, so that the pitch may be discovered
at a glance, and the teeth in each being so few will hardly require
separate numbering. The part of the apparatus which carries the
rubber—that is to say, the heads of the branched part of the swinging
frame, are made flat on the top, which projects on three sides,
forming small tables on which the actual holder or clamp can be fixed
by a turn of the screw, X, in the first figure. The rubbers are merely
flat pieces of steel, with edges sufficiently sharp to penetrate to
the lowest depths of the undulations and recesses on the rosettes, but
rounded off and polished, so as not to cut and damage the softer metal
against which they act; other materials have been tried, as ivory, and
the harder tusk of the hippopotamus, but hard steel is most generally
preferred. It is, of course, necessary that the rubber press with
some force against the rosette, which force should, moreover, admit
of being regulated at pleasure. This is effected by a spring of steel
under the lathe bed, to the end of which is affixed the arm, W, which
has a ring handle nearest to the operator, and is perforated with a
row of holes from end to end. This arm is flat, and falls into a fork
at the end of the tail piece, Y, which is seen in the second figure
attached to the centre of the lower bar of the frame. A pin passes
through holes in this fork, and through one of those in the arm. By
this arrangement it is easy to regulate the force which the spring
shall exercise, as this will be increased by moving the pin nearer
to the spring, and diminished by placing it in a hole nearer to the
ring handle. In forming the rosettes great care should be exercised
to make the corresponding parts agree. The depth of similar hollows
must be precisely equal, and elevated portions intended to match, must
do so with great accuracy. Supposing, for instance, a rosette to be
made with ten elevations and ten recesses, all of equal curves. If
these are accidentally unequal, and it is desired to arrange a set of
these waved rings one within the other, so that the depressions of
the one shall be opposite to the elevations of the other, or so that
this effect shall take place gradually—if the curves of the pattern
are unequally cut the several portions of the device will not tally,
and an irregularity will be produced of disagreeable appearance; an
inspection showing at once that such irregularity is not part of the
device, but unintentional and erroneous. This leads to a consideration
of the division plate of this rose engine, and an explanation of the
object of its peculiar construction. The pattern of the rosette is,
as it were, in sections; either similar elevations and recesses are
alternately repeated, or there may be a variety of such, extending
over a part of the circumference, and forming a certain complete
device, which may then give place to a second pattern, extending a
similar distance; and these two may alternate regularly round the
circumference. Each of these sections must be of precisely similar
length, and the repetition of the pattern must also be precisely
similar, for the reason stated above.
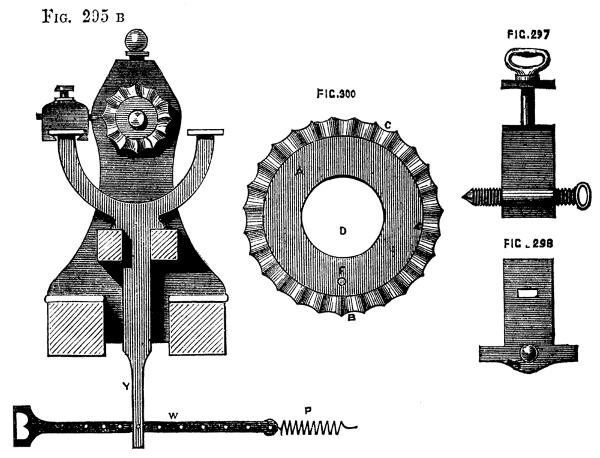
Figs. 295B, 297, 298, 300.
It is evident that all possible alternations of the device or set
of devices may be obtained by means of six or eight notches of the
division plate; for, by moving it forward to that extent, the whole
pattern may be compassed. In treating of the second form of rose
engine, and of the method of using it, this will again be adverted to,
and illustrated by an example.
Hitherto we have spoken only of the use of the pattern on the edge of
the rosette, but, as already stated, it is frequently repeated on the
face, and by this means it becomes easier to work upon the outside of
a cylindrical piece, as well as on the two ends. Patterns thus cut on
the face of a rosette tend, of course, to move the mandrel to and fro
in its collars, which is only possible when the lathe is made on the
plan of a screw-cutting or traversing mandrel lathe. The spring which
keeps the rubber in contact with the face of the rosette is shown at P.
The head on the top of the arm, which forms the clamp or holder of
the rubber, must be turned round to face the rosette, or a separate
rubber must be used, which passes through the clamp at right angles
to that used in surface work, and the frame must be prevented from
oscillating by a stop which fits between the bearers of the lathe, and
embraces the upright side of the frame. The top of the slide rest must
be turned round, or a side tool used. In this case, the rest and frame
with its rubber become fixtures, as in ordinary turning, the mandrel
and work being alone moved in correspondence with the pattern on the
face of the rosette. It would indeed be much better to do away with
the frame altogether, fixing the rubber to an upright pedestal mounted
on the lathe bed, and using the slide rest in the usual way, were it
not that in general the work is constantly being varied, the side
and face being worked in turn—and the apparatus is rather cumbrous
to remove and re-mount often. It is, nevertheless, easy to finish the
ornamentation of plane surfaces first, and then to remove the frame
altogether, and substitute a fixed rubber, as stated.
The rose engine now described has certain evident advantages over the
rose cutter frame, and is capable of the most exquisite devices. It
may be, perhaps, a mere question of taste, whether rose engine work
finely executed is not in point of beauty, superior to any that can
be done by geometric chucks, however elaborate. That it is so, is
decidedly the writer's opinion, more especially when this apparatus is
used in combination with the oval chuck. Moreover, there is nothing in
the form of rose engine described to make it a very expensive article,
or beyond the skill of an amateur; and with a set of only three
rosettes, the patterns may be varied continually, and multiplied—if
not ad infinitum—yet quite sufficiently for the display of skill
and taste of the operator.
In using the rose engine, it is necessary to carry the cord to the
pulley from a very small wheel on the axle. Sometimes the lowest speed
pulley of the flywheel may answer, but if the recesses of the rosette
are deep and sharp, or only slightly rounded, it may become necessary
to mount a still smaller wheel on purpose; else the rubber will jump
over and miss parts of the design, thereby spoiling the work. The
watch-case turners, indeed, altogether dispense with the flywheel, and
use instead a small pulley, fixed to the side of the lathe bed, and
turned by hand.
These artificers always use a more elaborate form of rose engine,
which will be presently described, and which is the most perfect in
detail of all similar contrivances, but it is necessarily costly, and
cannot be said to be well adapted for plain turning also, except in a
limited degree. The work, if not of soft material, like a watch-case,
should be turned first of all upon an ordinary lathe, the mandrel
screw of which is a counterpart to that of the rose engine, and the
latter should merely be used for the final cut, to perfect the form of
the material previous to its ornamentation.
In the Appendix will be found a new method of obtaining the required
oscillatory motion of the rose engine, which might apparently be
applied to tool holder[22] frame here described, or to the poppet head.
The rose engine proper is arranged with an oscillating poppet head
carrying the mandrel and its rosettes, the tool being stationary. The
following account of this machine, and the drawings, are copied almost
exactly from Bergeron. The modern rose engine is not indeed made with
the projecting lugs referred to as intended for the application of
the guide ring in oval turning, as this guide is now altered to fit
a poppet head of ordinary form, as already detailed. The pulley and
division plate are also of obsolete form, but as the main arrangement
of parts described are sufficiently similar to that now followed,
Bergeron's drawing and description have been retained. Fig. 302 is
a longitudinal view, and Fig. 303 a transverse view of the working
parts of this lathe. A, A are the poppets, which are in one casting,
with the connecting piece shown by the dotted lines, which latter
has a tail piece firmly attached to its centre, to which a spring
is affixed as in the lathe previously described. In the drawing the
cylindrical collars carrying the mandrel are split, so that in case
of wear they can be tightened in the usual manner by a screw at the
top of the poppet marked B, 303. The lugs, f, f, with square holes
e, e, are for the application of the guide for oval turning, the
latter being originally a ring with slotted arms on either side. The
points of oscillation are precisely similar to those of the rose
engine first described, two short poppets C, Figs. 302 and 303, having
centre screws, whose points fall into conical holes made in opposite
faces of the poppet, a little below the level of the lathe bed. These
are formed with a slit to receive the stop h, which is hinged at
the point o, and which, when raised by a wedge, catches into a
small projection p, thereby fixing the poppet in a perpendicular
position and preventing its oscillation. The rose engine can then be
used as an ordinary lathe, to finish the preparation of the work to be
operated on, which should, if possible, be commenced and mainly formed
on an ordinary lathe, the mandrel of which is a counterpart of that
of the rose engine. The tail piece, E, does not require a separate
description, being precisely similar to that already described. The
to-and-fro movement of the mandrel caused by the action of the
rubbers on the face of rosette, is also arranged in a manner similar
to the last. F is the spring, turning in the middle of its length
on a pin in a piece of iron fixed on the bed, so that if both ends
wore free it could swing backwards and forwards between the cheeks
of the lathe on this pin as a centre. The upper end of this spring
is branched in a semicircular form to embrace the mandrel, this fork
falling into a groove formed to receive it. It can thus be brought to
bear against either of the shoulders visible at this part. The lower
end of the spring fits into a notch, or rather a slot in the arm H
of the second figure; the handle of this arm being L in both figs.
This piece is pivotted at K, and at its other end falls into one of
the notches in the retaining plate, G, of the first figure. By this
plan the tension of the spring, can be brought against the mandrel in
either direction at pleasure, for if the lever is placed in one of
the left hand notches, the tendency of the spring will be to move the
mandrel towards the right, and vice versa. The tension of the spring
can also be regulated by the use of the groove B or X at pleasure. In
the second figure of Bergeron's the piece which at first sight appears
to be a continuation of the holding down bolt of the short poppet
carrying the centre screw, is the tail piece or lower end of the long
spring just described, and its reduced extremity is visible passing
through a short slot in the lever H, near the handle of which appears
the edge of the notched piece G of the other figure. All the above
parts are commonly of iron, the following are in brass or gun metal.
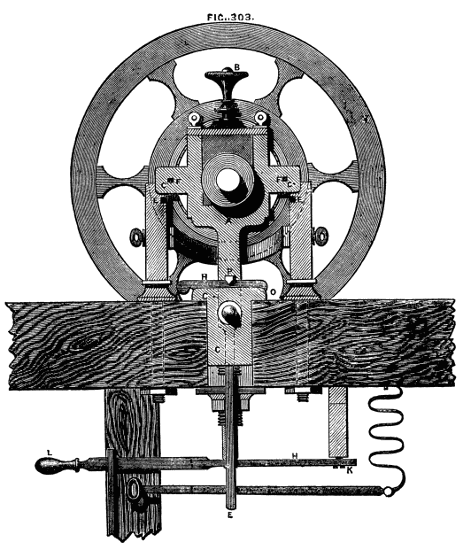
Fig. 303.
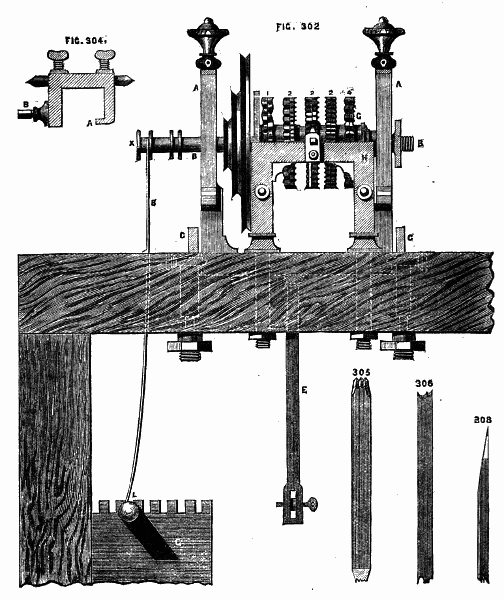
Figs. 302, 304, 305, 306, 308.
On the bed and parallel to it, two pieces of brass, or standards,
rise, similar to H in the first figure, the two being opposite to each
other, one on each side of the mandrel, as shown in the second figure.
Both these are firmly secured to the bed by long bolts and nuts, it
being of the utmost importance that they should not move or vibrate in
the least. They are in addition united to each other by two horizontal
braces, one of which is seen at N in the second figure. At l, l
are seen two rectangular notches, which are the ends of grooves made
in the upper part of the head piece, H, and which traverse its whole
length. They receive the crooked part, a, of the rubber holder,
Fig. 304, so that the latter can be slid along this bar, and brought
opposite to any one of the rosettes, after which it can be secured in
position by the screw, b, Fig. 304. The mandrel is thus arranged.
It is cylindrical, with a shoulder against which the chucks can rest,
as in an ordinary traversing mandrel, and a similar but reversed
shoulder at g, Fig. 302. Against the latter abuts the end of an
accurately turned sleeve of brass, which fits over the mandrel with
slight friction, so as to have no shake or play upon it. Upon this
sleeve the rosettes are placed. They fit accurately over it, and are
prevented from turning round upon it by a feather extending the length
of the sleeve, which fits into a corresponding notch cut on the inside
of the rosettes. These are arranged in pairs back to back, and each
couple is separated from the next by a short sleeve or ferrule, which
Bergeron recommends to be of wood, as tending to hold the rosettes
more securely than metal when pressed together by the nut at the end
of the set. The fibres of the wood are to be placed parallel with the
mandrel, because there is no shrinkage of this substance as regards
its length. The pulley is fixed beyond the rosettes on a part of the
mandrel filed into six faces for that purpose, and lastly comes the
nut, which secures all the parts to their several positions, but which
nevertheless does not so jam them together but that the mandrel can be
turned within the sleeve when the positions of the rosettes are to be
changed in the course of working a pattern. The division plate is not
attached to the pulley, though lying close upon its surface. It slips
on to the sleeve on which the rosettes fit, and its spring-catch only
on the face of the pulley. Thus the latter is held to the sleeve and
its fittings when the catch is down, so that all turn together, but,
when the catch is raised, the division plate, carrying with it the
rosettes, can be turned round upon the mandrel as may be required. It
is not necessary to repeat what has been said respecting the manner
of graduating the division plate, as that used with the lathe already
described is in that respect a counterpart of what is used with the
rose engine now treated of.
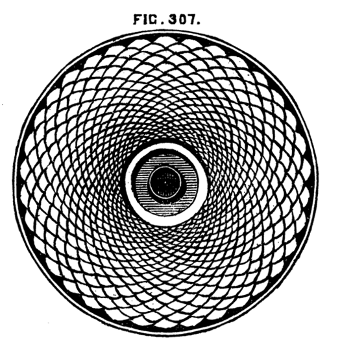
Fig. 307.
The following description of the method pursued in turning a pattern
shown in Fig. 307 will suffice to show the working of the rose
engine:—First, says Bergeron:—It is not enough to know the general
construction of the rose engine, it is necessary to know thoroughly
the particular one in use, i. e., as regards the details of its
construction, the slight defects or imperfections it may chance to
have, and the means whereby they may be lessened or corrected. It is
necessary, in addition, to know well, and to have always at hand, the
numbers of each rosette, or any rate to have a table of them which
can be readily referred to. It is equally necessary to recognise at
a glance the various sets of divisions on the division plate, for
which purpose, and that no mistake may be made, such numbers ought
to be engraved upon each. The same holds good with regard to the
slide rest, and, in addition, practice should be frequent upon box or
other inexpensive material by which the turner may have made himself
perfect in the several combinations possible, and the various effects
producible by the rosettes and different shaped tools over which he
has control. It is thus, by actual experiment only, that the turner
can become acquainted with the powers of his own lathe and apparatus,
and thus only, after working out the patterns already executed, will
he be in a position to design new ones, and to work with ease and
certainty. The rose engines are usually fitted with tools of variously
shaped edges, as shown in Figs. 305 and 306, by this means a pattern
of some width and great variety is of course produced at once, and
by one rosette. In the following, however, a tool with single point,
Fig. 308, is to be used. This simplest design is supposed to be on
the cover of a box or other plane surface, and it is evident that
the movement or oscillation required of the mandrel is that at right
angles to the bed of the lathe. To obtain this movement, when the
rubber is fixed in its clamp, on the side of the workman, as it is
necessary that the rubber should press against the rosette through the
medium of the spring, the handle of the lever, Fig. 302, must be drawn
forward towards the operator, and kept by a pin, as described, passing
through it and the tail piece of the mandrel frame. The tension must
not be too great, especially if the rosette to be used is deeply
indented, and care must be taken to free the frame from the action of
the stop, p, by removing its wedge before making any attempt to try
the pressure by moving the mandrel. The design under consideration is
produced from rosette numbered 2 in the drawing, and in fixing the
rubber care must be taken that it does not bear against the adjacent
rosette. Choose a rosette of forty-eight teeth or undulations, and
as the second circle of ornamentation exactly intersects the first,
the raised part of the one falling under the depression of the other,
and as it were halving it, the set of divisions on the click plate
to be used will be twice 48, or 96. Place the rest parallel to the
face of the work and so that the forward motion of the tool shall be
perpendicular to it. By means of the leading screw of the rest, place
the tool near the edge of the work and level with the centre, and
gently moving it forward and putting the lathe in motion, commence
the cut. After having made a light cut, without moving the tool, stop
the lathe and judge of the depth of cut, and if sufficient, screw up
the stop screw of the slide rest, to insure all the following cuts
penetrating to the same depth. Observe the position of the tool as
marked by the graduations of the slide rest, and then withdrawing
it from the cut, move the click plate one notch, which will divide
exactly in half the several undulations of the rosette. By the rest
screw move the tool towards the centre of the work and mark the
number of divisions passed over, so that the circles of undulations
may be equidistant, and cut a second. Now for the third, go back or
advance on the click plate one division, for the position of the
undulations in the third is precisely that of the first circle. It is
indeed immaterial whether an advance or retreat of one notch is made
in this case, but now is evident the reason for not dividing the plate
equally all round, five or six teeth being ample for each division. If
there are eight rosettes the plate should be first divided into eight
parts, and each rosette having a different number of undulations,
these eight parts should be divided into degrees proportionate to
the numbers on the rosette, the one being a multiple of the other.
In working the side of a cylinder, that of a box, for example, the
longitudinal movement of the mandrel is required, the poppet being
retained immovable by the wedge and stop. The tool is to be placed at
right angles to the side of the work, the rubber brought to bear on
the face of the rosette. The method of working will be self-evident,
after the description already given. It is impossible in a brief work
like the present, to go into details of other patterns referred to and
illustrated by Bergeron, one or two of which are nevertheless of great
beauty, and are executed with the aid of the eccentric chuck mounted
on the mandrel of the rose engine. There is, however, a different
class of work, to which reference will be made in our next, and we
shall also give a description of a simple addition to the slide rest,
used by watch case turners, which does away with the necessity of
counting the number of divisions upon this instrument when used as
above.
The slide rest used by the watch case turners is almost identical
in form with one figured and described by Bergeron. It is necessary
that the tool holder should have a circular motion, somewhat similar
to that of a spherical rest, in order to reach the sides and curved
surfaces of the articles to be engine turned; hence the tool
receptacle and its bed work upon a central pin. The pin here called
"the bed" is usually a flat brass plate of a quadrant form, the
central pin being at the apex, and carrying on its face the guides for
the tool receptacle. The pin on which it turns is a reversed truncated
cone rising from a similar flat plate, which itself forms the sole
of the rest, or traverses the lower frame as usual; when the tool is
beyond the central pin, it will ornament conical surfaces, and vice
versa. On the edge of the arc is a racked part, and a tangent screw
works into it. The tool is moved to and fro by a lever, as usual, the
depth of cut being regulated by a stop screw. These details being
already entered into, in treating of slide rests and chucks, need not
be more specially explained here; but a contrivance for regulating the
traverse of the upper part upon the frame underneath, is ingenious and
serviceable, and will therefore be described. The end of the leading
screw is fitted with a ratchet wheel of the same construction as
that of the ratchet brace for drilling, patented by Fenn, of Newgate
Street, to which in the same way a handle and spring are attached,
as shown in the drawing, Fig. 309, A, and Fig. 310. The handle rises
between two semicircular plates drilled in the face, with holes for
the reception of stop pins, B, C. These regulate the traverse of
the handle, and thence of the screw. If the former, therefore, is
thrown over till the left stop is touched, and then pulled forward to
the other stop, between each cut of the tool, the latter will leave
equidistant spaces upon the work, without need of counting divisions
at each cut. As a traverse of one inch or more of the lever handle
at the place of the stop pins only moves the screw a very minute
quantity, the holes for the pins need not be very close together even
for fine work. This is a very simple contrivance, and perfect in
action, enabling the operator to work with ease and certainty, and
with great speed.
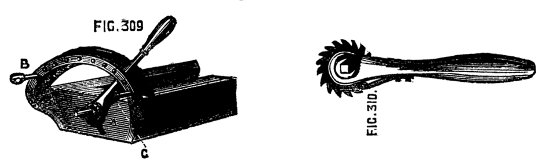
Figs. 309, 310.
Fig. 311 represents a modification of the eccentric chuck, when the
latter is used as a fixture, to present to revolving cutters and
drills the different parts of the work which is to be operated on. The
eccentric chuck is commonly made to slide in one direction only, and
the traverse is limited. In the present case there is ample traverse
in both directions, the slide being arranged to descend to the lathe
bed, and upwards to an equal degree. A is a cross section of this
chuck, the length of which is 7½ inches. It is very strongly made
in brass, and is altogether much more substantial than the eccentric
chuck. B and C are the guide bars, between which works the sliding
part. The nut of the leading screw is below this as usual. The tangent
wheel has 120 teeth, and is thus divided: 0—12—24, &c. The tangent
screw head is divided thus: 0—1—2—3—4—5, with half divisions,
marked but not numbered. This rectilineal chuck is most commonly used
in a vertical position, but may be otherwise placed. In using it for
any work likely to bring a strain upon it, the ordinary spring index
attached to the lathe for use with the face plate, should not be
entirely relied on to keep it in position. It is safer to make use in
addition of the segment engine stops or other available contrivance.
The special function of the chuck is the production of straight lines
on the face of work forming stars or radial flutes, which can be
worked with a drill. Fluting is also readily done by its aid, with the
addition of the vertical eccentric, or dome chuck, already described.
Its use is, however, by no means confined to ornamental work—small
tenons, mortises, and even dovetails are producible by it; and in
fitting together the various parts of temples, shrines, and similar
complicated specimens, its uses will be innumerable; and here may be
noted the extension of the lathe and its apparatus to work apparently
in no way suited to it. It has now become more of a universal shaping
machine than it used to be, owing to the great accuracy of the work
done by it, and the variety of fittings that can be added to it. In a
later page will be found a drawing and description of a new device of
the kind—a planing machine, devised by an ingenious and first-class
maker, Munro, of Lambeth, and patented by him. Mention is made of it
in this place, because the rectilineal chuck is in some degree capable
of similar work. The slide moved up and down by a screw the handle
of which is of extra length to allow the vertical traverse, is also
capable of being moved by a cam-eccentric chain or rack and cogged
wheel, so that by pulling down a handle the slide may be made to slide
up and down more rapidly than by the screw motion; any piece of wood
of rectangular or other figure may thus be planed on the face, by
being fixed on the rectilineal chuck, and acted upon by a fixed tool
in the slide rest, the latter affording the horizontal traverse of
the tool across the face of the work, the former the perpendicular
movement of the material. If a slide rest is thus arranged in
combination with the chuck in question, and the lathe bed is imagined
to be set up on end with the chuck downwards and horizontal, the
whole will become, in fact, a precise counterpart of those planing
machines, the bed of which traverses to and fro, with the work under
a fixed tool. Munro's arrangement is, of course, of far more extended
application, and more suited for metal work; but for lighter and more
delicate operations of a similar kind the rectilinear chuck and slide
rest will be found very serviceable. It is with such an adaptation of
this chuck as has been alluded to, namely, a quick speed movement of
the slide by a lever handle, that the rays are drawn so exquisitely
fine and close upon the faces of many gold dial plates of watches,
the handle being arrested by a stop at any given point, so that these
rays shall not transgress their appointed limits. It will be hardly
necessary to allude to those other applications of this apparatus, or
other particulars in which it is identical with the eccentric chuck,
as the description already given of the latter applies to both alike,
the extra traverse of the present in both directions being its chief
distinguishing feature.
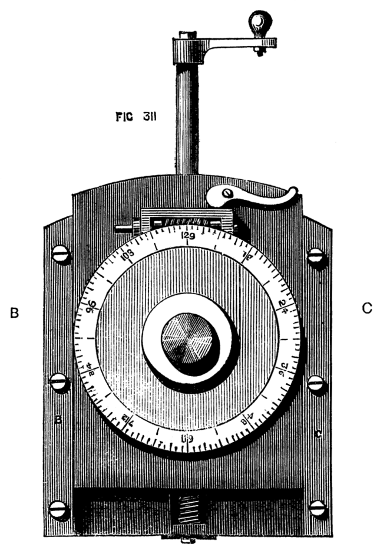
Fig. 311.
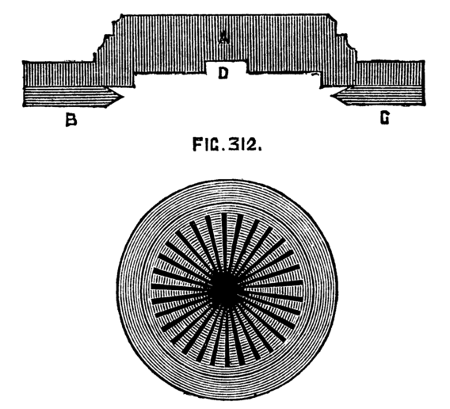
Fig. 312.
This chuck has been in use for many years, and has in consequence
been of late rather neglected. It is, nevertheless, the parent of
those more elaborate contrivances included under the general title of
Geometric Chucks, of which Ibbetson's stands first in order of date,
and possibly of merit, though this last qualification may admit of
question. The epicycloid, defined mathematically, is a curve described
by the revolution of a point in the circumference of a circle, when
the latter is made to roll upon the concave or convex side of another
circle. A pin in the rim of a wheel revolving round and in contact
with another wheel, therefore, describes this curve, which constitutes
two or more loops, as will be seen by the annexed illustrations. The
number of these loops is variable, and the chuck will produce almost
any number by changing the pinions, and thus altering the relative
velocities of the revolving parts. The following description will
make the action of this chuck clear, and enable any good mechanic to
construct one for himself. In the first place, the above remarks show
a necessity for a fixed wheel, round which another may revolve.
Fig. 313 represents this attached to a plate of brass, which can be fixed
to the lathe head, the mandrel passing through its centre. This is
the original pattern of plate, and need not, of course, be adhered
to, as the form can be modified to suit the lathe to which it is to
be applied. It is merely necessary to affix such a wheel to the face
of the poppet, so as to be concentric with the mandrel [a plan done
away with, however, or rather reversed, in Plant's geometric chuck].
The epicycloidal chuck, which screws to the mandrel as usual, consists
of a foundation plate of brass, A, Fig. 314, behind which is mounted
the cogwheel, B. The axis of this wheel passes through the plate,
and is carried by another plate, e, which is curved and adjustable
upon the former. The axis of this wheel carries a small pinion, D, so
that the whole turn together. This pinion being one of a set of change
wheels, necessitates the possibility of adjusting the plate which
carries its axis, as all the several change wheels must gear with E,
which always retains its position on the chuck. The sliding plate in
question being put in place, is clamped by the screw F. A plate of
iron, G, of the form shown, and of sufficient thickness for the secure
attachment of the wheel and of the screw which carries the ordinary
chucks, is fitted to turn on the axis of the wheel E. Its larger end
traverses within the arc H, which is graduated. The arc is bevelled
underneath, serving to hold down securely to the foundation plate the
piece of iron which is chamfered to fit it. At the left side of the
back plate is seen a stop, L, which is placed in such a position, that
when the iron plate rests against it, the screw M is concentric with
the mandrel, and work may be turned as upon an ordinary chuck. To
throw the iron plate, and consequently the nose of the chuck, on one
side, or in other words to place the work eccentrically, the screws
which retain the arc are loosened and the adjustment made by hand. The
eccentricity is marked by an index on the iron plate, which points
to the graduations seen upon the face of the arc. The eccentricity
being determined, the arc is again screwed down to retain the movable
plate in its new position. [Although this is Bergeron's method, it
appears vastly inferior to the plan of racking the edge of the iron
plate, and moving it to any required degree of eccentricity by the
aid of a tangent screw.] When made as above, the chuck will produce
loops varying in number according to the relative dimensions of the
pinion (or change wheels gearing with E) and the central wheel, M.
If the latter has 120 teeth, and the change wheel 60, two loops will
result. If the pinion has ten teeth, the number of loops will be 12,
and so forth. The practical limit to the number depends on the
possibility of diminishing the pinion in size and number of cogs,
and still keeping the latter of such size and pitch as to gear with
E. If, therefore, a larger number of loops is required than can be
obtained thus, it becomes necessary so to modify the form of chuck as
to permit of intermediate change wheels, and when the modification is
carried out, we have the geometric chuck, the most perfect, but the
most complicated and expensive of all. To understand the nature of the
work, the following is given in clear language by Bergeron, and will
sufficiently explain and simplify matters.
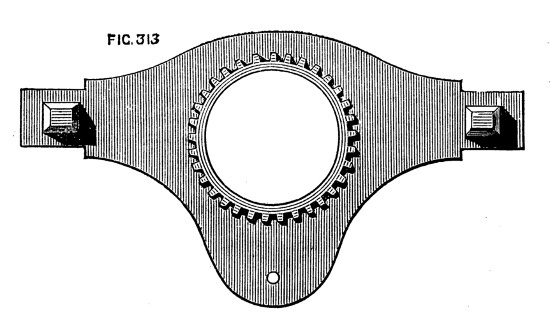
Fig. 313.
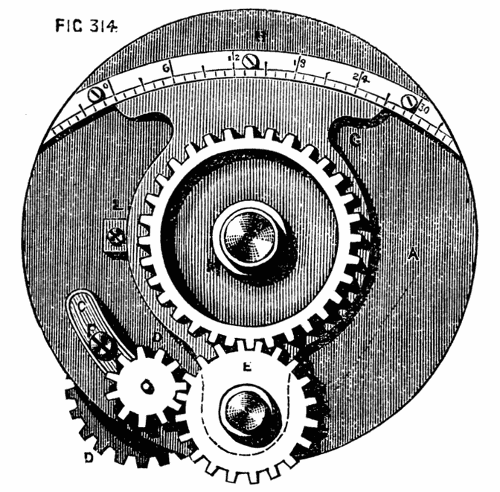
Fig. 314.
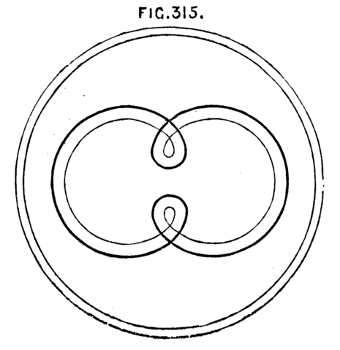
Fig. 315.
If one considers the movement of the piece (of work) when the wheel
M is concentric with the mandrel, it will be perceived that although
it makes two revolutions upon its axis, yet inasmuch as it has no
eccentricity it will describe no particular curve or figure; but if an
eccentricity of three divisions is given to it, two buckles or loops
will result as in Fig. 315. Before cutting the material, however,
approach the tool as near the work as possible, and putting the lathe
in motion, observe whether the buckle[23] passes too near the centre
or too far from it, and also how near it goes to the circumference.
If another change wheel with forty teeth instead of sixty is
substituted, the slide C, being adjusted accordingly, three loops
will be described (forty being one-third of one hundred and twenty),
but it is always necessary before actually cutting the material, to
try whether the buckles will pass near to the centre without going
beyond it. The result of the latter movement will be shown presently,
as it entirely alters the appearance of the pattern. The divisions
commence on the arc at the left hand, the index resting at 0° when the
plate is against the stop L, and the screw of the chuck concentric
with the mandrel. The preceding figure of three loops will become
similar to Fig. 317, retaining the same wheels and some degree of
eccentricity, but by means of the slide rest moving the tool towards
the circumference, so that the buckles overlap the centre. The effect
thus produced is, that of a set of three curvilineal triangles of
which the apex of one falls upon the base of the next. The use of this
chuck is stated to require upon the part of the operator more care
than any other, as regards the derangement of work or tool in the
least during the operation, as, if either is once moved in the least
out of position, it will be found next to impossible to strike the
line again, owing to the peculiar nature of the curve, for although
the tool may be replaced upon any one part of the line already cut
with the intention of deepening—it is by no means certain that it
will trace the same curve again. This curve, says Bergeron does not
produce an agreeable effect on the cover of a box, unless it is
very finely cut, the tool, therefore, should be very sharp in the
angle and very keen. Bergeron specially mentions this in reference
to filling the cuts with thin strips of horn or shell, a method of
inlaid ornamentation not much known or admired in the present day, but
to which allusion may probably be made again in this series. To form
the second set of loops, which are parallel with the first in these
designs, it is only necessary to use the leading screw of the slide
rest, to move the tool nearer to or further from the centre, while the
eccentricity and the arrangement of change wheels remain as before. It
is scarcely necessary to detail the formation of the larger series of
four loops and upwards, as these are simply the result of different
sized change wheels: the following principles, however, by which
the buckling of the several loops is controlled or prevented, may
perhaps be serviceable. "When, for example an eccentricity of sixteen
divisions is used—if the tool is placed at a distance of two such
divisions from the centre of the piece, a line only will be produced
of as many curves as the wheel or pinion D would produce buckles.
If the tool is moved further from the centre by a quarter division,
the angles (connecting the curves) will be more defined, but still
no buckles will be made. A little further movement of the tool will
produce very small buckles which will thus gradually increase as the
tool is set further and farther from the centre—until at last when
the curves pass beyond the centre, the result is arrived at already
shown in Fig. 317. Another form
of this chuck is shown in 318, in
which, instead of the iron plate being pivotted for the purpose of
eccentricity upon the axis of the wheel E, a parallel slide motion is
given to the main wheel by guide bars, as in the eccentric and oval
chucks. This form is figured in "Lardner's Cabinet Cyclopædia." The
large front wheel carrying the screw for chucks is pivotted to the
slide C, and protected by a plate D which nearly covers it. The wheel
L, is arranged to follow this slide, so as to remain in gear with the
large wheel without leaving the fixed wheel or ring on the face of
the poppet. In both patterns of this chuck the front wheel is used
as a division plate, being moved in either direction as many cogs as
desired to produce interlacing of the looped designs. It is better,
however, to add a racked division plate and tangent screw, as in the
eccentric chuck to act as one piece with the chuck screw, and with
the latter turning on a conical pin in the centre of the large wheel
underneath. The above apparatus requires to be used with a slow motion
owing to the complication of parts, and the whole ought to be so well
constructed, that the various wheels revolve with perfect smoothness
and without shake or noise.
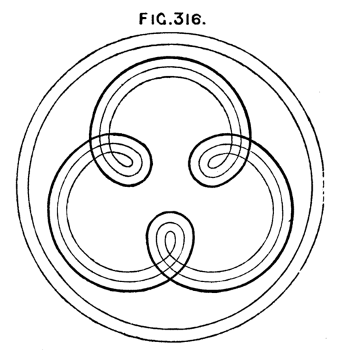
Fig. 316.
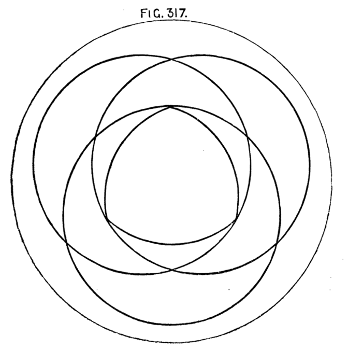
Fig. 317.
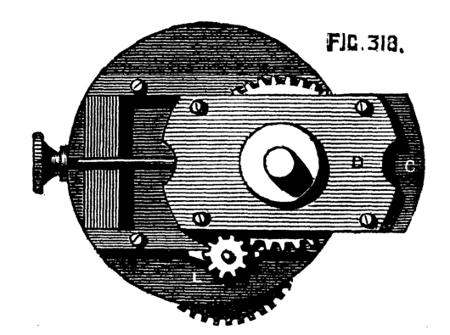
Fig. 318.
There is no class of work on the whole more interesting than that
executed by the aid of the spiral chuck, especially with an addition
to be described here. This apparatus has grown, almost as a matter
of course, from the adaptation to the ordinary lathe of the system
of change wheels for the production of screws of various pitches. A
spiral is, in fact, a screw with very extended pitch, the threads
either closely enwrapping a cylinder which forms the core or body of
the screw, or being entirely separate and independent of such core,
the latter being by far the most light and elegant. The chuck here
described is used with the same arm or bracket as has been already
spoken of, standing out from the poppet to carry change wheels, and
is itself adjustable to suit different diameters of the same. In
the sectional view of this chuck given here, A, H, is the body with
internal screw as B, to fit the mandrel. The cog wheel of the chuck
which gears into the first on the movable arm or standard, is cast
with a large central hole to allow it to be stopped on at D, where it
is retained by a nut C. This permits a change of such wheel for one of
different size or for the apparatus to be presently described.
Thus far the chuck is only applicable to the production of screws
or spirals with a single thread. F, is a dividing plate with racked
edge acted on by the tangent-screw E, and carrying the screw, G, a
counterpart of that upon the mandrel. This plate carries 96 divisions
or teeth. The latter may be used with a spring click if preferred; but
the racked edge gives perhaps the more delicate power of adjustment.
The spiral chuck constructed in this way is capable of producing
any required number of screw threads or spirals, solid or detached,
and of any ordinary pitch. It is, however, chiefly intended for the
production of spirals or twists for articles of virtu. The method
of proceeding has already been described in a previous page. It is
one rather of care than skill, as the lathe apparatus ensures the
correct movement of the tool where the shape of the latter determines
the form of thread, angular, round, or moulded at pleasure. A few
of the tools required are shown in the drawing. For finishing the
rounded threads, Nos. 3 and 4 may be used, which are similar to those
required for turning ivory rings, the one completing half the thread,
the other applied in the opposite direction, meeting the cut of the
first and finishing the operation. As it is necessary to get round to
the back of the threads in this case, no inner mandrel can be used to
support the work, and, therefore, great care and delicate handling
are necessary to prevent breaking the twists. The stops should also
be used upon the bed of the slide-rest, to limit the traverse of the
tool and prevent it from striking the shoulder, and destroying any
bead or other moulding formed there. This is more specially needed,
when there are two or more such twists rising from the same base (that
is when there are two or more threads to the screw). The additional
apparatus now to be described, adds considerably to the powers of the
spiral chuck. It is called the reciprocating apparatus, and its effect
is, to cause a to and fro movement of the work, at the same time that
the motion of the tool is continued in a horizontal direction.
Fig. 320 shows the simplest of the effects thus produced. The screw is
commenced and carried to any desired distance on the cylinder. The
action and horizontal traverse of the tool is continued, but that of
the cylinder reversed, and the cut is thus carried upwards. The tool
may be a revolving cutter, the action of which, being continuous and
in the same direction, would seem preferable, as the greater the
speed with which the tool attacks the material the better is generally
the result in work of this kind. A fixed tool, moreover, must have a
central edge chamfered above and below, and there is also a tendency
with any such fixed tool to unscrew the chuck, as the resistance
occurs in that direction in the upward cut.
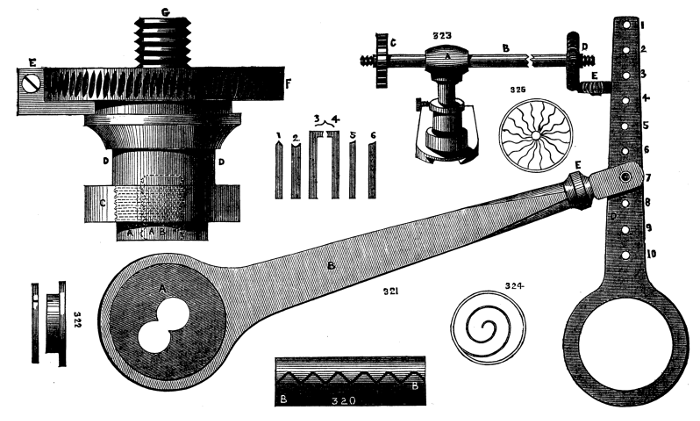
Figs. 320, 321, 322, 323, 324, 325.
The details of the arrangement are as follows:—The several parts
being drawn of full size, Fig. 321 A is an eccentric capable of
slight adjustment by the use of either hole, one being further from
the centre than the other. Fig. 322 gives another view of this
eccentric, which is precisely similar to that used in model engines.
It is turned as a circular plate of gun-metal, with one flange. The
plate being five-tenths of an inch thick, a second plate, forming
another flange, is attached by four small screws, after the ring of
the eccentric is in place. This ring is of iron, or, still better,
of steel, and is made in one piece, with the arm B, which is six
inches long; the main part of it is flat, but it is rounded towards
the end, and turned at E, after which it is again flattened to work
against the arm D, or still better forked to embrace the latter. It
will be seen that D is also a flat plate, with a turned ring similar
to the first, but without the enclosed eccentric. In this is drilled
a series of ten holes, into any of which a pin can be fitted, so as
to unite the arms B and D, the pin becoming a hinge or centre of
oscillation. The circular ring of the part D fits on the part D, D
of the chuck, on which it can be secured by the ferrule C, the arm
D being then in a vertical position. The holes in the eccentric can
(either of them) be fitted over and secured to the end of the leading
screw of the slide-rest. The handle being then placed on the other
end of the screw and turned by the hand, the eccentric will cause the
arm D to oscillate to and fro through the medium of the connecting
rod B, thereby giving to the chuck, and to the work attached to it,
a similar to and fro movement. The extent of this movement depends
upon the length of the lever D brought into action. With the pin in
the holes 1, 2, 3, the oscillation will be inconsiderable, but with
the pin in either hole numbered 8, 9, 10, it will be much increased.
In the first, therefore, a short wave, Fig. 320, will result; in the
second case these will be more like Fig. 320 B. This apparatus will
completely alter the character of a spiral, which, if cut through a
hollow cylinder (as in the case of detached twists) becomes a zigzag
of curved sides curious enough to behold. The apparatus, it must
be understood, is worked entirely by the handle of the slide-rest,
the lathe-cord being thrown off unless the latter is carried to the
overhead instead, to put in action revolving cutters. The reciprocal
action is, in fact, a self-acting segment engine.
It has been already stated that for the production of spiral work
revolving cutters are preferable to fixed ones, unless, indeed, it is
required to finish up a perfectly round thread, when Figs. 3 and 4
of the tools drawn are required. Revolving cutters must be placed in
the frame of the universal cutter and set to the rake of the thread.
Drills may be used for the reciprocating movement, as they make very
clean work, and the rake need not with these be attended to. In face
work drills are specially to be used to produce patterns like
Fig. 325, and others derived from this simple one. An additional apparatus,
represented in Fig. 323, is required for the latter process, to enable
the rest to be turned in its socket so as to face the work, and
notwithstanding the alteration of its position still to keep up the
gearing of the wheels. A rest socket to be made and mounted as usual
is fitted with a stem surmounted by an accurately drilled boss A,
through which passes a spindle fitted with the wheel C, to gear with
that on the arm carrying the change-wheels, and which may be changed
for one of larger or smaller size. This is for cutting such work as
Fig. 324, representing, of course, only a single spiral, very open and
of itself of no beauty, but which by intersection of other spirals
can be converted into a pattern of great elegance. When it is desired
to produce the waved spiral the eccentric is fixed to the rod instead
of the wheel C, and the work proceeds the same as when a cylindrical
surface is to be worked. In the Fig. shown the division plate of this
chuck is of course used.
Fig. 1.
Fig. 2.
Fig. 3.
Fig. 4.
Fig. 5.
Fig. 6.
It is evident that the variations producible by working intersecting
spirals and waved lines are very numerous, and these may be
additionally varied by the combination of eccentric and spiral
movements.
The following six patterns are re-engraved from Valicourt's Hand
Book, which is almost identical with that of Bergeron. They were not
engraved in time to be inserted under the head of eccentric chuck
work. The notation and description annexed is from a manuscript book
kindly lent to the writer by an amateur. "Bed-plate," 4 deg., must
be taken to mean that the work is shifted (on one of the beds of the
chuck) four of the marked divisions for eccentricity, counting from
the axial line of the mandrel.
"Slide rest, 4 deg.," means that the cutting tool is moved four
corresponding divisions in its bed for radius of the circle to be cut;
and so throughout.
"4 *," means four times repeated.
The cutting tools, unless otherwise expressed, are double angled, and
"25 cutting tool," means 25 deg. of cutting edge.
Holtzapffel's scale of divisions is
The scale used in Valicourt is

which is that here quoted.
If bed-plate and slide rest are both equally diminished at each cut, a
shell results, with the close part internal. If bed-plate is increased
and slide rest diminished, the close part of the shell is external.
SPECIMEN I.—Tools 25, 32, 36; Click-plate 96 or 288.
| Bed-plate moved. |
Slide rest moved. |
Circles done. |
|
Tool. |
| 3 |
2 |
12* |
(1 done 7 missed) |
25 |
| 6 |
1 |
12* |
(1 done 7 missed) |
|
| 10 |
3 |
48* |
(1 done 1 missed) |
36 |
| 3 |
16 |
24* |
(1 done 3 missed) |
|
| 23 |
4½ |
4* |
(16 done 8 missed) |
|
| 29½ |
2 |
96* |
|
25 |
| 33 |
1 |
96* |
|
|
| or 33 |
⅝ |
288* |
|
|
SPECIMEN II.—Tools 28, 36; Click-plate 288.
| Bed-plate. |
Slide rest. |
Circles done. |
|
|
Tool. |
| 1 |
½ |
12 |
|
|
28 |
| 4 |
1½ |
12 |
|
|
| 7½ |
2 |
4 |
|
(8 done 4 missed) |
36 |
| 13 |
3½ |
24 |
|
|
28 |
| 19¾ |
3½ |
4 |
|
(16 done 8 missed) |
36 |
| 19¾ |
½ |
4 |
|
(in spaces) |
|
| 21¾ |
1 |
4 |
|
(above last) |
|
| B 17¾ |
1 |
4 |
|
(below last) |
36 |
| 30 |
½ |
12 |
|
(20 done 4 missed) |
28 |
| 29⅜ |
½ |
12 |
 |
( 1 " 18 " )
( 1 " 4 " ) |
|
| 28¾ |
½ |
12 |
|
Ditto. |
|
| 28⅛ |
½ |
12 |
|
|
|
| 27½ |
½ |
12 |
|
(15 done 4 missed)
( 1 " 4 " ) |
|
| 26⅞ |
½ |
12 |
|
(1 " 18 " )
(1 " 4 " ) |
|
| 26¼ |
½ |
|
|
As before |
|
| 25⅝ |
½ |
|
|
Ditto. |
|
| 25 |
½ |
12 |
|
(20 done 4 missed) |
|
From B to here, border, if with 96 click-plate, not good-looking; tool a boring-bit.
| 331/16 |
⅞ |
12 |
|
(7 done 1 missed) |
|
| 319/16 |
13/16th |
12 |
|
(1 " 5 " )
(1 " 1 " ) |
|
| 291/16 |
¾ |
12 |
|
(1 " 1 " )
(5 " 1 " ) |
|
| 279/16 |
11/16th |
12 |
|
(1 " 1 " )
(1 " 5 " ) |
|
| 25¾ |
¾ |
12 |
|
(1 " 1 " )
(7 " 1 " ) |
|
SPECIMEN III.—Click-plate 96.
| Bed-plate. |
Slide rest. |
Circles done. |
|
Tool. |
| 1¼ |
1⅛ |
8 |
|
36 |
| 4¼ |
2⅛ |
24 |
|
|
| 5⅛ |
11¾ |
24 |
|
|
| 21½ |
4¾ |
96 |
|
|
| 27¾ |
1½ |
96 |
|
28 |
SPECIMEN IV.
The centre of this is a star of six curved rays, described by fixing
the cutter at the centre and turning the mandrel by hand through so
many divisions—for convenience so many 48ths of the circumference.
These rays are marked by B. (The segment stop is constructed for this
very kind of work, and is to be used in the present case):—
| Bed-plate. |
Slide rest. |
Arcs done for star. |
| 5 |
B 5 |
6 (12/48ths of the circle) |
| 5 |
B 5 |
12 (11/48ths " ) |
| 5 |
B 5 |
12 (10/48ths " ) |
| 5 |
B 5 |
12 ( 8/48ths " ) |
| 14⅛ |
5 |
24 (2 done, 2 missed) |
| 19¾ |
½ |
96 |
| 24¼ |
4 |
32 |
| 29½ |
2½ |
32 (intersecting) |
| 30½ |
2 |
32 |
SPECIMEN V.—Catherine wheel; tool 28.
The ground grailed by concentric circles contiguous to each other. The
arcs by fours, all of same radius.
| Bed-plate. |
Rest. |
Arcs done. |
| 0 |
½ ¾ 1¼ &c. (for grailing) |
|
| B 30 |
30 |
12 (16/48) |
(Repeat at three next divisions.)
SPECIMEN VI.—Tools 28, 36; Click-plate, 288.
| Bed-plate. |
Rest. |
Number. |
|
| 1¼ |
1 |
8 |
done |
| B 12 |
12 |
127/48 |
(to meet next circle) |
| 4⅜ |
17 |
24 |
|
| 30 |
½ |
12 |
|
| 29½ |
1 |
12 |
|
| 29 |
1½ |
12 |
|
| 28½ |
2 |
12 |
|
| 28 |
2½ |
12 |
|
| 27½ |
3 |
12 |
|
| 27 |
3½ |
12 |
|
| 26½ |
4 |
12 |
|
| 23½ |
1 |
12 |
|
| 25 |
1 |
12 |
(between last) |
Although in the matter of beauty the patterns here given are by no
means comparable to many others, especially to some lately published
from blocks cut by Mr. George Plant, for the English Mechanic;
they are, by their comparative simplicity, well selected to give the
learner a good idea of designing and working with the eccentric chuck.
It is not, indeed, proposed by the writer to multiply patterns, as
mere copying of such is of small interest to those who are really
endued with taste and skill; and the variations producible by
combinations of different numbers of divisions of the click-plate and
slide rest are of such infinite number, that printed designs of a
score or two would not serve to teach the nature of this work better
than the half dozen now before the reader. When a new chuck, indeed,
is brought out, it is well to give a few specimens of its work, to
show the possible purchaser its value as a means of ornamentation and
the extent of its capabilities; but when these are understood, the
purchaser had much better design for himself, instead of becoming a
lazy imitator and copying patterns laid down by others. Details of
designs that are presented in a tabular form remind us sadly (for we
are married) of the old "knit one, drop two," "purl" or some such
mysterious and, to us, detestable jargon wherewith ladies were, or
are, wont to worry the ears of mankind.
The chuck of Professor Ibbetson, and the elliptic cutting frame
of Captain Ash, are not introduced here, partly because this work
has reached its intended limit, and partly because the inventors
themselves have published separate works entirely devoted to a
description of the arrangements and capabilities of their respective
chucks. A brief notice is appended of Plant's geometric chuck,
contributed by the inventor to the pages of the English Mechanic.[24]
The author now concludes his pleasant labours, the result of which
is contained in the preceding pages. These labours have been
lightened, and the work itself benefited, by several kindly-written
remarks received from various readers of the English Mechanic,
while the articles were in course of production in that paper.
Criticisms and suggestions also came to hand in which no such kindly
feelings appeared. These also have, nevertheless, had an equal share
of attention, and where they appeared to be of value they have
been turned to profit, and have resulted in various more or less
important alterations and additions. "The Lathe and its Uses," thus
re-arranged and modified, must now take its chance in the world with
other productions of a similar character; and the writer hopes it
may suffice to help those who need such assistance, and may be well
received by others who though able to walk alone may yet cherish a
kindly feeling for the friendly walking-stick.