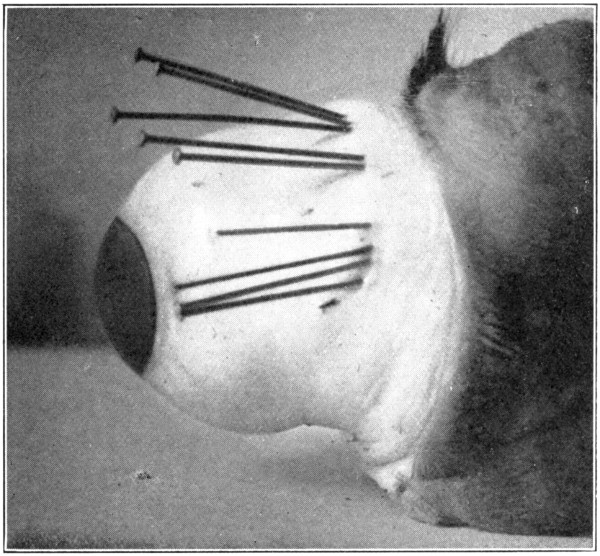
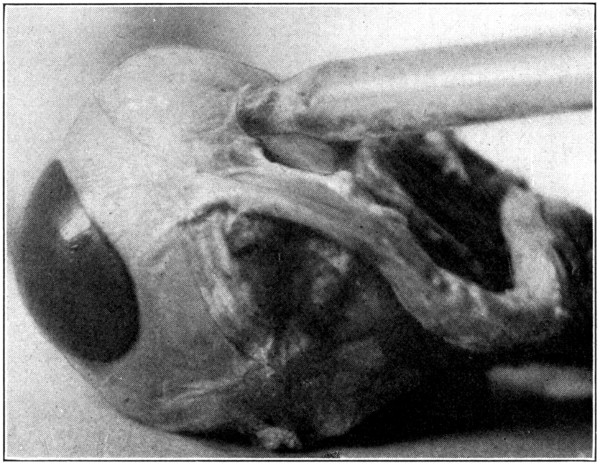
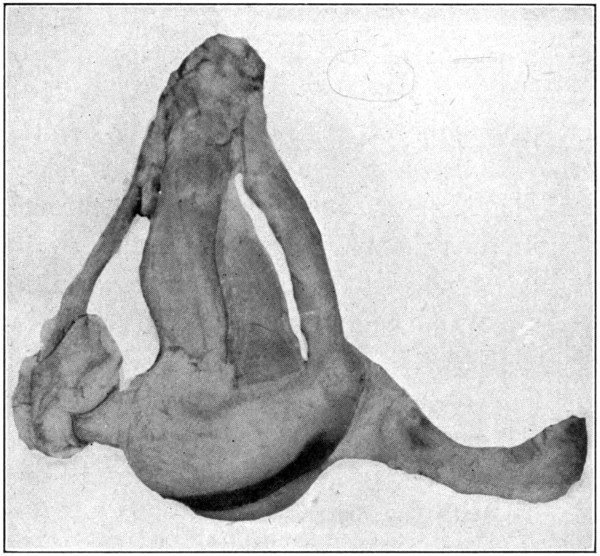
For the study of the interior of the eye and
its contents in situ either a fresh or a hardened
eye will do; a hardened eye is preferable.
In the dissection for isolating the hyaloid
membrane, vitreous, lens, and other parts,
the anterior and posterior halves of the evacuated
eye may be separated entirely, and each
half studied. However, the choroid and the
retina will be more or less mutilated, and the
vitreous and other parts will be removed. The
absence of these parts will prevent one from
receiving a definite idea of their anatomical
relationships. Therefore, it is better to work
with an entire and complete eye.
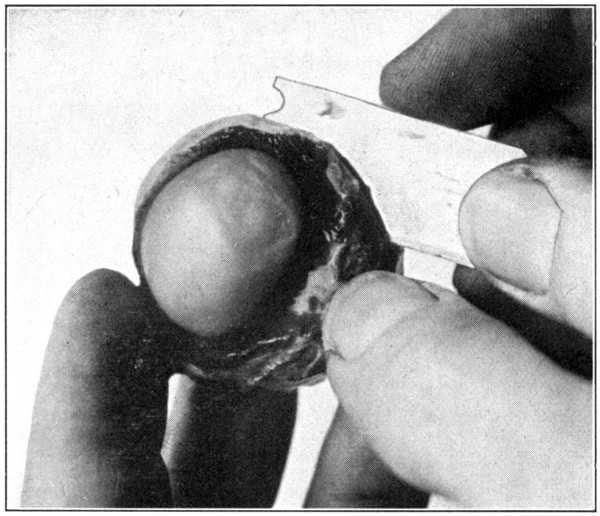
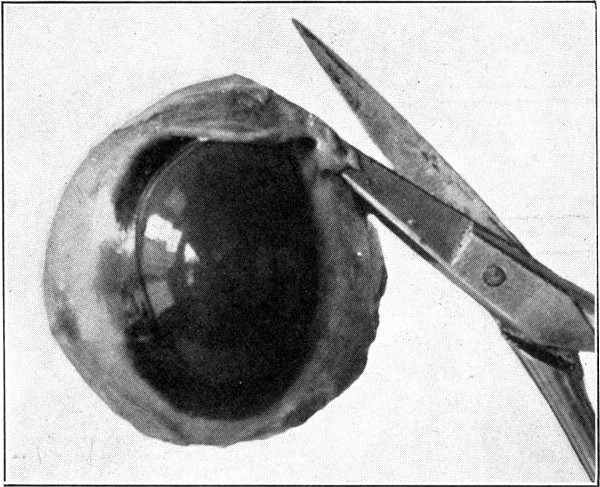
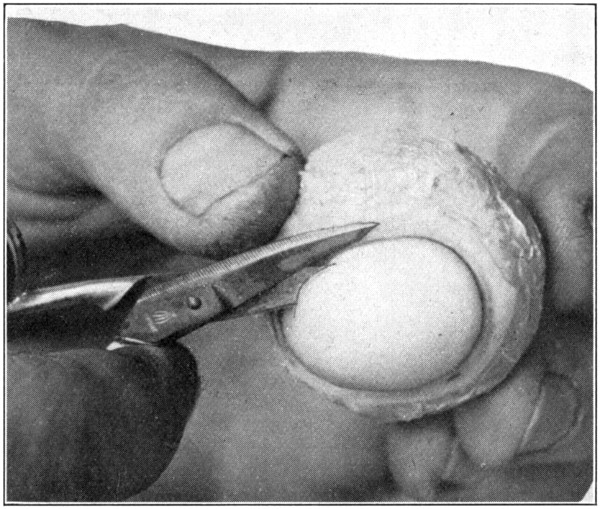
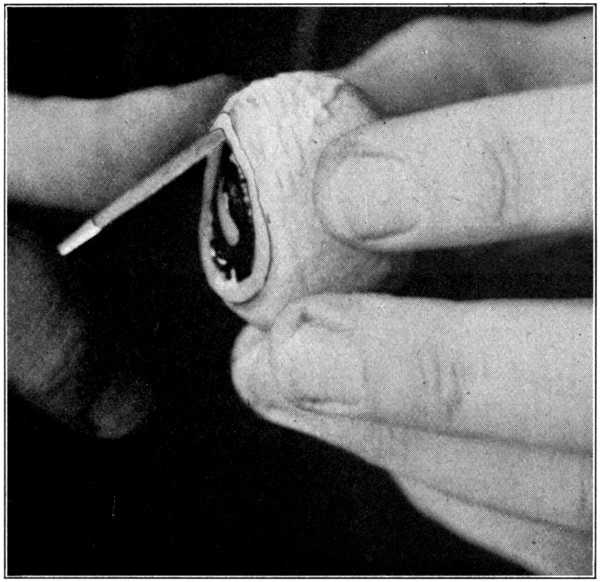
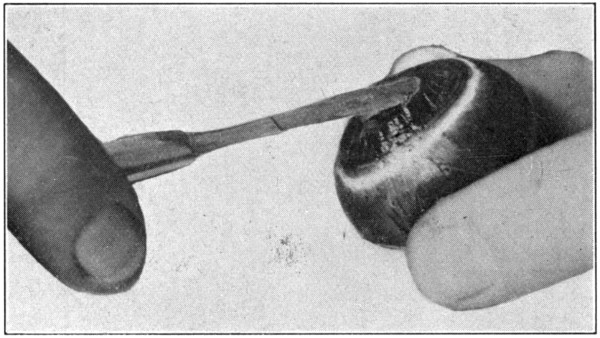
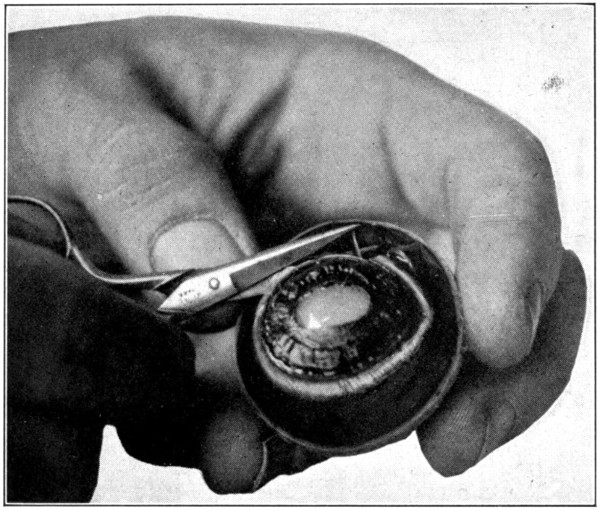
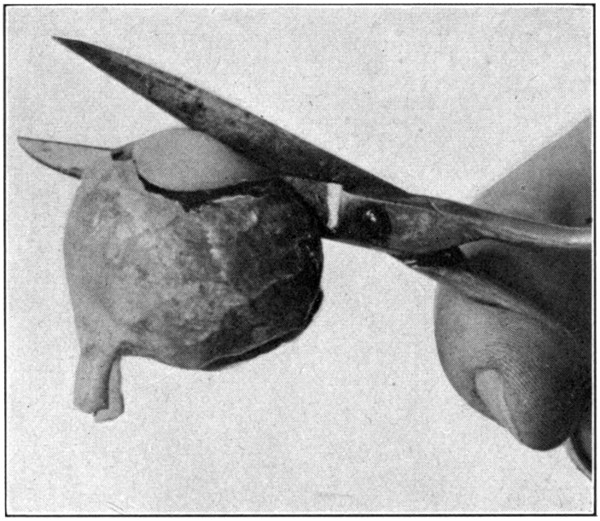
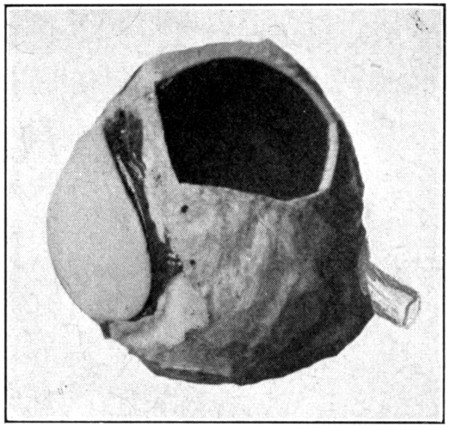
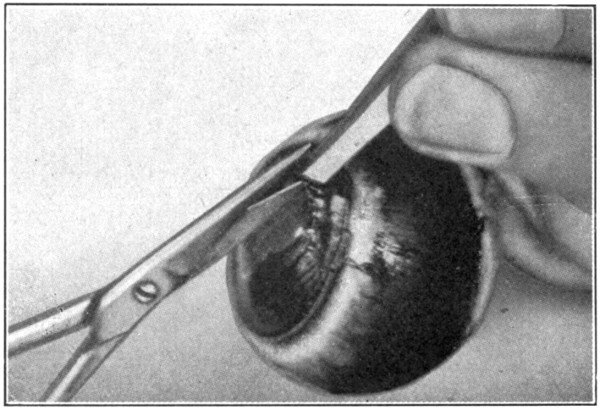
Fig. 9—Showing method of cutting eye into anterior and posterior
sections with safety-razor blade.
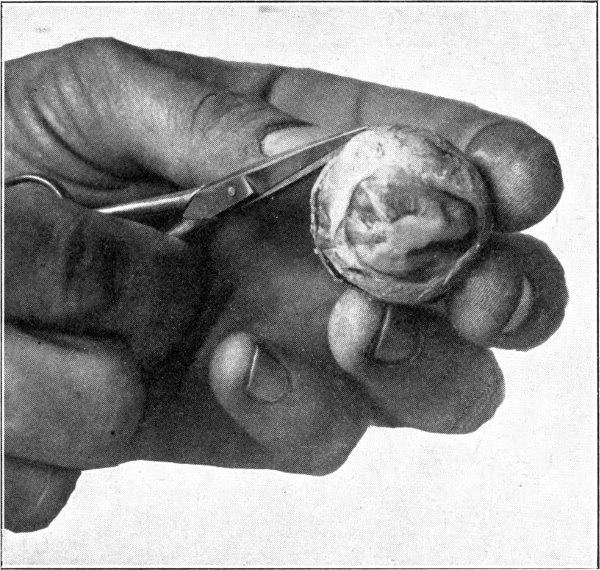
Remove all the muscles and fatty tissues
from the outside of the globe; then cut it in
half through the equator, thus dividing it into
an anterior and a posterior half. The cutting
of the sclerotic, as well as the underlying tissues
and the vitreous, should be done with the
large scissors; using a knife or scalpel will
tend to disturb the positions of those tissues
or so tear them that they will not be of much
use for purposes of study. An ordinary safety-razor
blade makes an excellent instrument for
separating the eye into two halves, because it
cuts through the tissues without tearing them
in any way. (Fig. 9.) The rather dark colored,
viscid fluid that escapes when the eye is
halved is the perichoroidal lymph, not the
aqueous, as is sometimes stated.
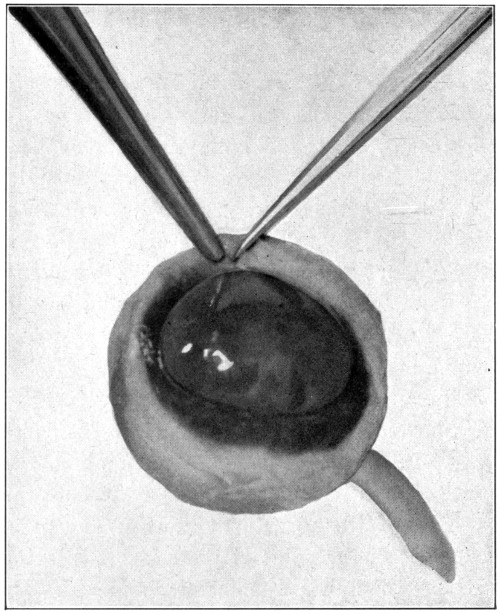
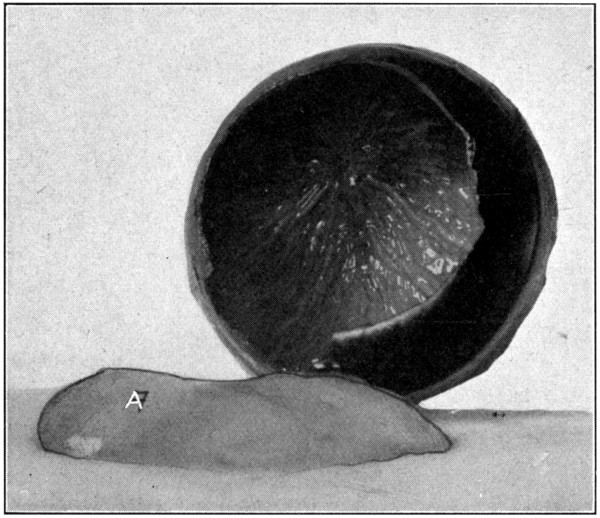
The posterior half is taken first because it
is the simplest and easiest of the two halves
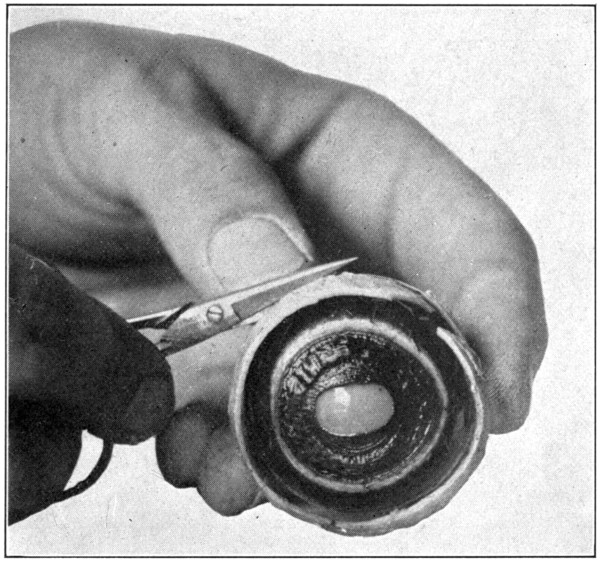
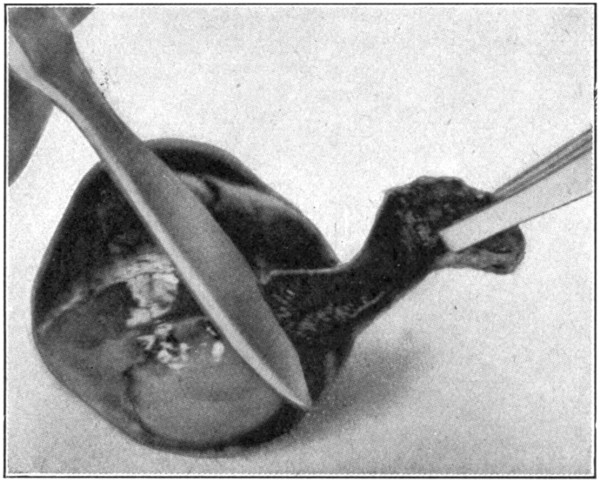
to dissect. In this half of the eye the retina
may be readily seen through the vitreous; the
choroid and its apparent iridescent colors
through both vitreous and retina. (Fig. 10.)
Remove the vitreous by simply tilting this
half of the eye, and with the finger push out
the vitreous.
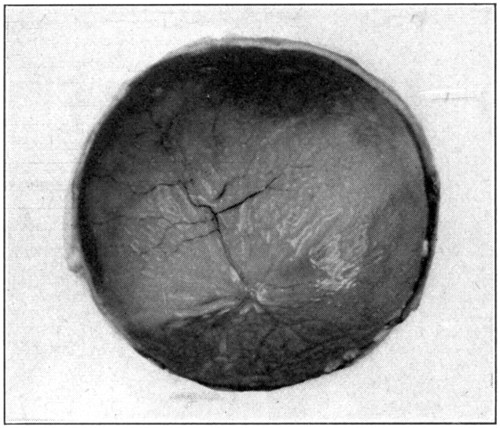
Fig. 10—The retina, retinal vessels, and
iridescent choroid showing through
the vitreous.
Sometimes the vitreous will adhere very
closely to the retina. This occurs especially
when the eye has been in formaldehyde for a
long time. In such a case the removal of the
vitreous without injuring the retina requires
patience and care. The use of the scalpel and
the scissors may become necessary. Another
very good way to remove the vitreous is to
take hold of the sclerotic, turn it so that the vitreous
is downward, and then shake gently until
the vitreous separates itself from the retina
and, drops out. After the vitreous has been
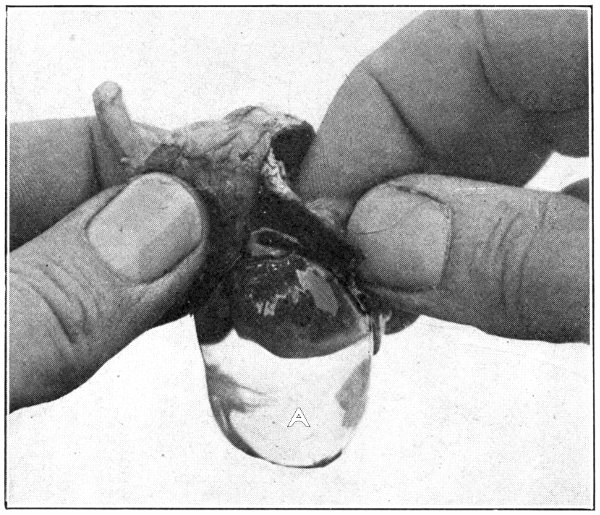
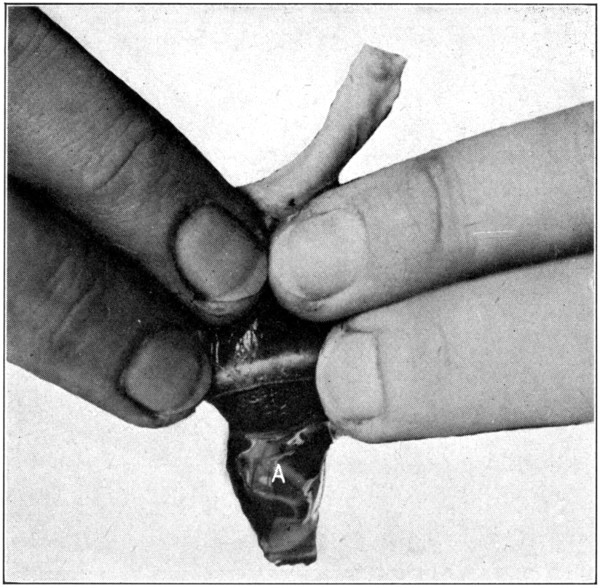
removed, notice its glassy appearance; hence
its name—hyaloid body. Try to pull it apart
with the fingers, and it will be noticed that it
seems to be held together by more or less of a
network of fibres. (Fig. 11.)
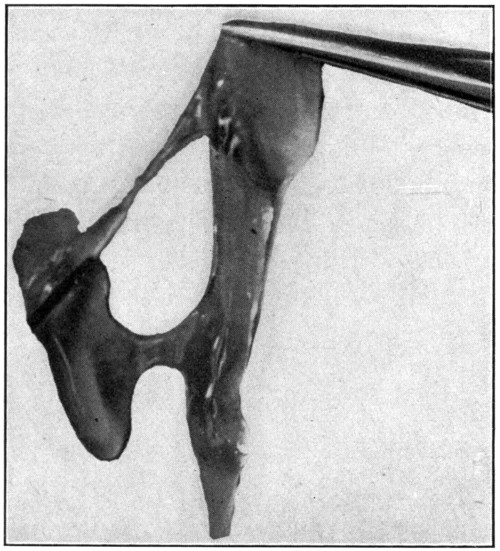
Fig. 11—Showing how vitreous seems to be held
together by a network of fibres. (Page 41.)
Whichever method for removing the vitreous
is followed, the retina will be left rather badly
wrinkled and out of place. If the last-mentioned
method, which is really the best of the
three described, is the one adopted, the retina
will be left in an entirely collapsed and folded
form. In any case, to straighten out the retina
against the choroid, immerse the whole
posterior half in water, inside uppermost. The
retina will then slowly unfold itself and lie
flat against the choroid. With the tweezers remove
the whole half from the water; tilting it
slowly to empty it of all the water, and, having
done so, turn it down upon the table rather
forcibly in order to help it drain itself of all
the water.
Notice the thinness of the retina, and, also,
that the seeming iridescence of the choroid
shows through. The optic disc, which is the
point of entrance of the optic nerve, and the
optic cup are easily recognized, though neither
will be seen as large as when viewed in the
living eye with an ophthalmoscope. The
blood vessels of the retina, as they ramify
outward or forward, after their entrance
through the optic nerve through which they
pass, are also very plainly seen. A closer
inspection will show, in the very centre of
the “entrance” of the optic nerve, a whitish,
pointed vessel, about 1 or 2 mm. long.
That is the sloughed-off and atrophied end
of the hyaloid artery, which, when the eye
was in an embryonic state, ran forward from
the central artery of the retina through the
hyaloid canal to the posterior surface of the
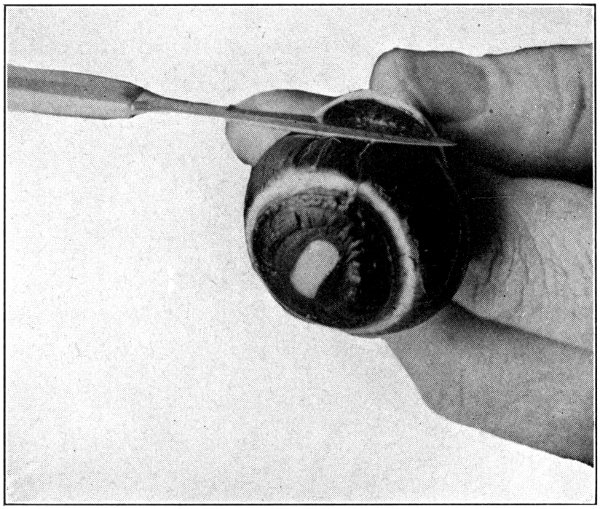
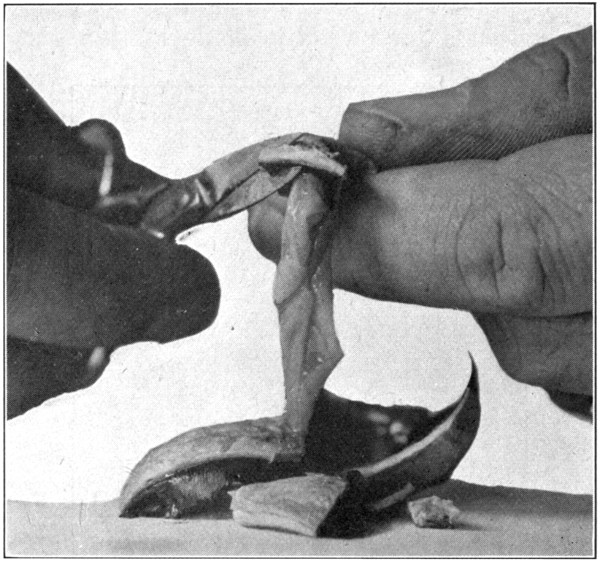
lens. With the forceps pick up the peripheral
edge of the retina, and, by pulling gently upward,
tear it away from its apparent place of
attachment to the “entrance” of the optic
nerve. (Fig. 12.) When this has been done,
there will be seen some threads protruding
from the optic nerve. Filling the half with
water will tend to separate these strands,
which are optic-nerve elements.
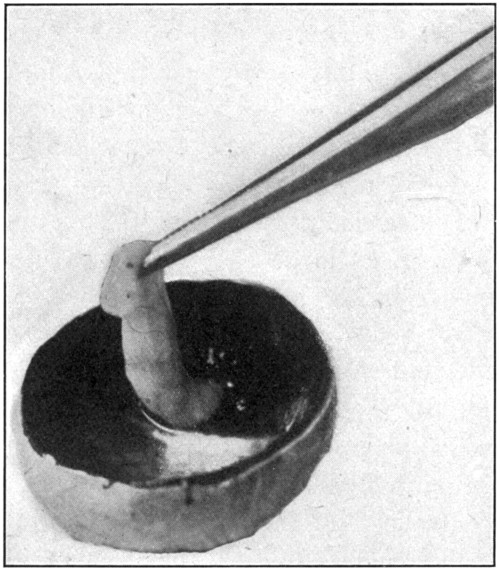
Fig. 12—Picking up the retina in order to tear it away
from the entrance of the optic nerve.
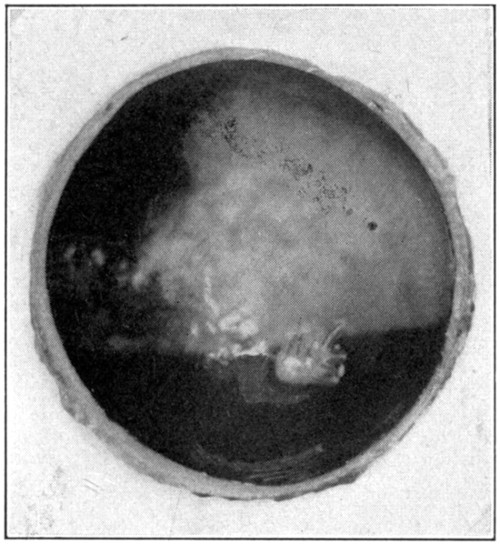
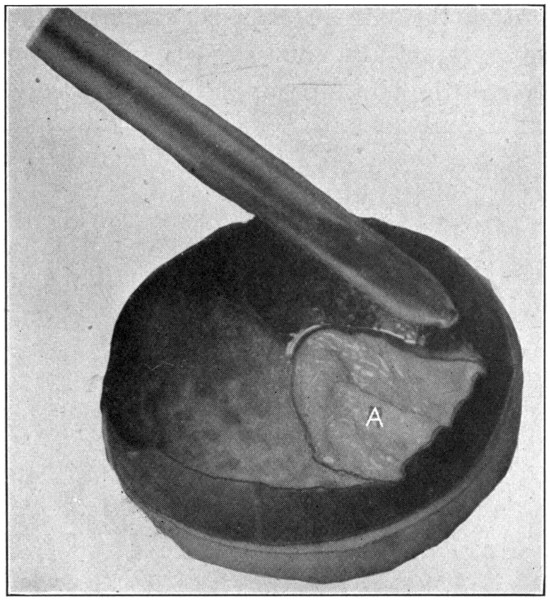
Fig. 13—The lighter area is the
field of iridescence of
the choroid.
After the removal of the retina, the iridescence
of the choroid (tapetum lucidum)
(Fig. 13) may be examined with a hand lens,
or, after its removal, a piece may be cut
and placed under a microscope. This iridescence
is, of course, not present in the human
eye. (“Physiology of the Senses,” McKendrick
& Snodgrass, page 101.)
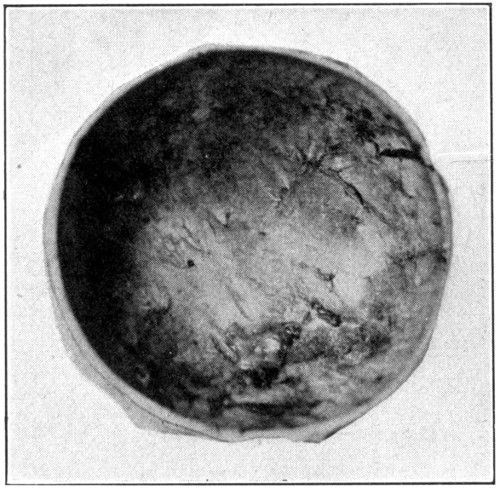
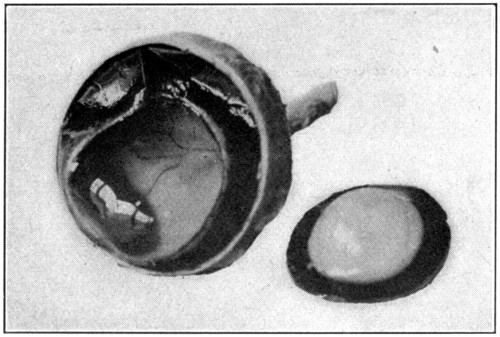
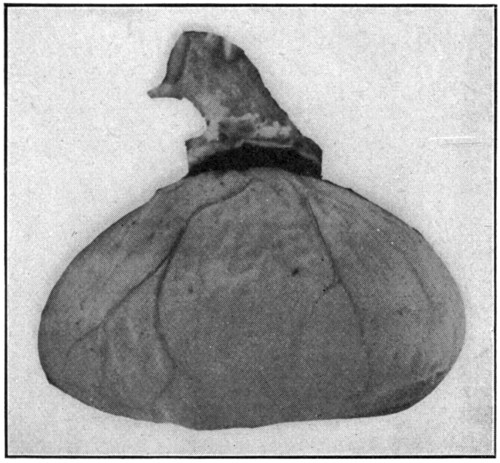
Fig. 14—Excavated posterior half of
the sclerotic.
After the choroid is removed, which is accomplished
in the same manner that the retina
is removed, the inner side of the sclerotic is
laid bare to view. The brownish color is
mostly due to the presence of a small amount
of pigment in the cells of one of the inner layers,
it is also due, to a slight extent, to the
staining influence of the perichoroidal fluid.
(Fig. 14.)
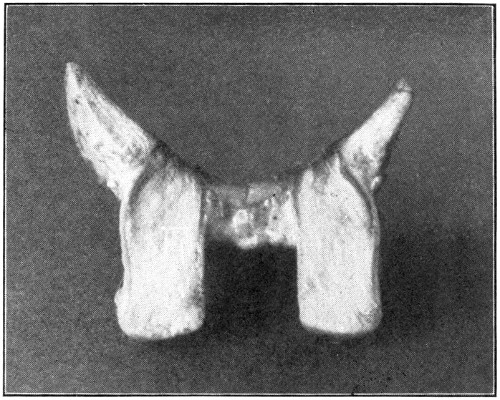
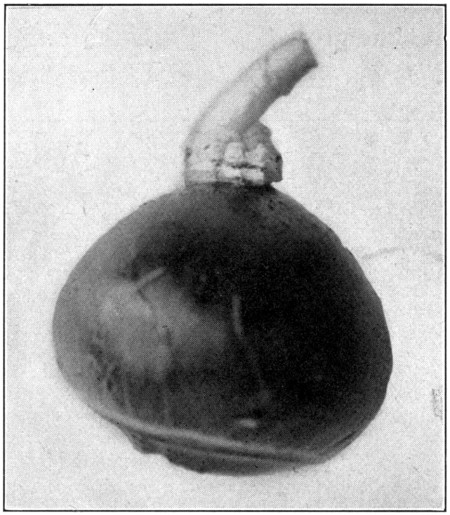
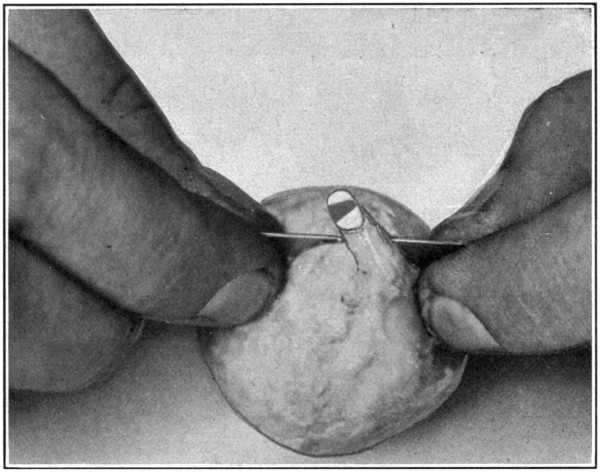
Fig. 15—Enlarged to show the entrance of the optic
nerve. (Page 48.)
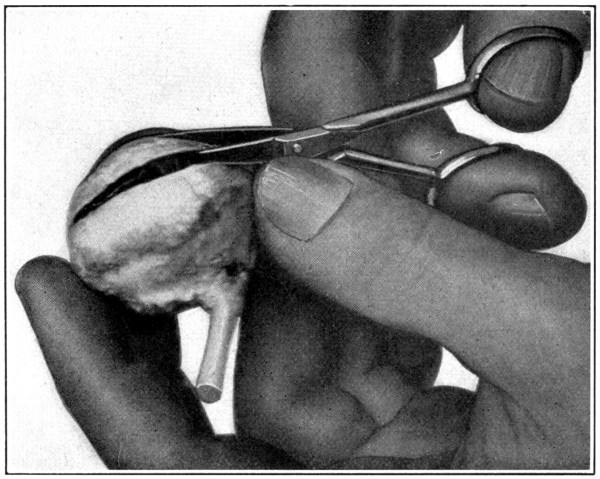
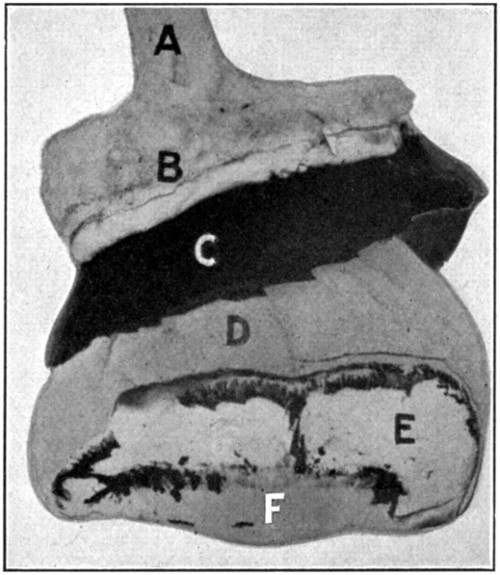
The excavated posterior half may be used
now to show and to study the construction of
the optic nerve. In cutting the optic nerve
away from the sclerotic leave at least 5 mm. of
the sclerotic attached. It will make handling
easier. With the thumb and forefinger of the
left hand hold the nerve in such a way on the
table that it will be straightened out lengthwise,
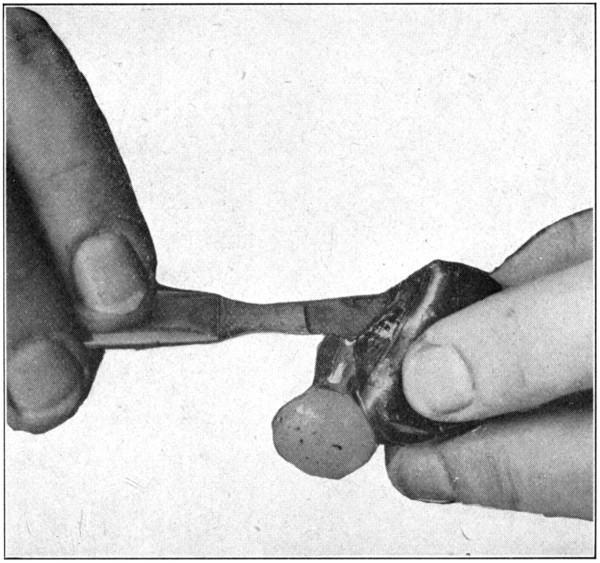
and then, using the scalpel or a safety-razor
blade, the latter being preferable, cut the
nerve in two longitudinally. (Fig. 15.) The
cutting must be done with one movement,
otherwise the nerve will be hacked, and will
not make a good specimen. This specimen
will show the way the nerve fibers are arranged.
A cross section should be cut from
the optic nerve of another eye, and then the
two sections should be compared. The cross
section will show the sheath of the nerve a
little better than will the longitudinal section.
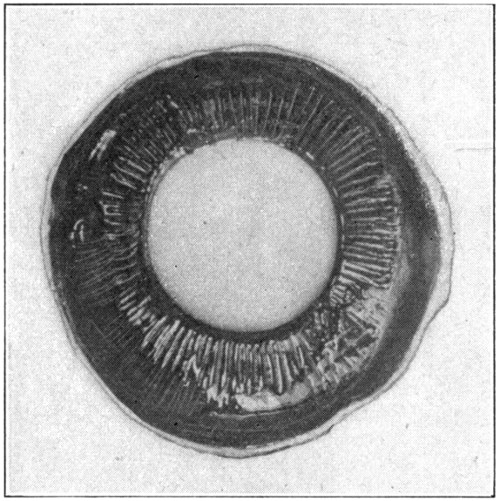
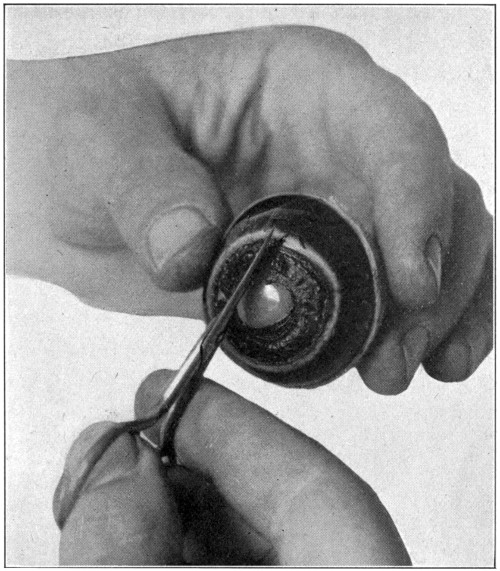
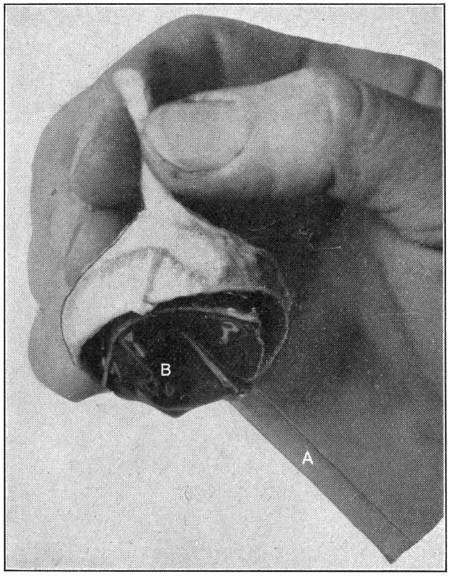
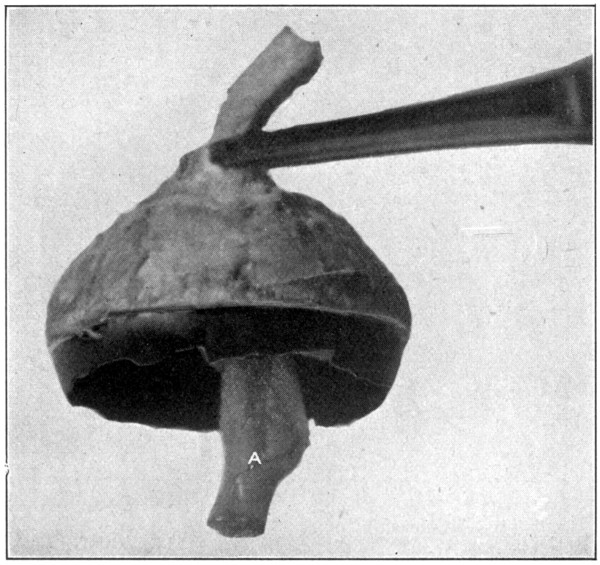
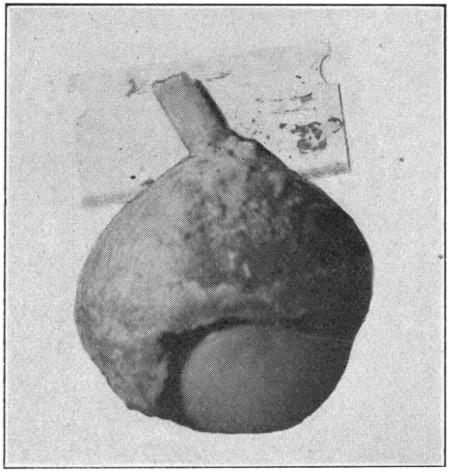
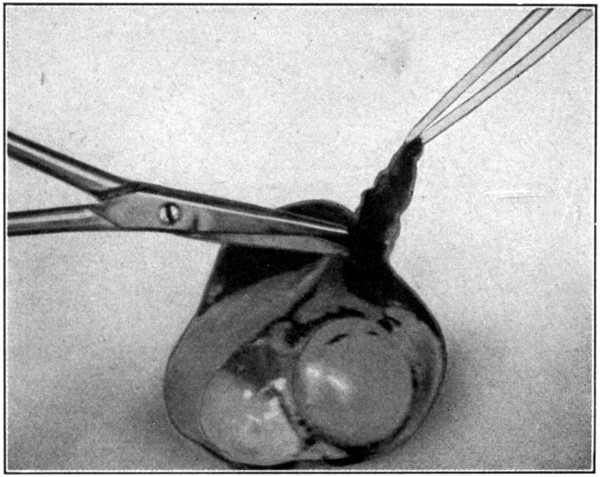
Fig. 16—Showing ciliary processes
and crystalline lens.
In cutting the longitudinal section, one is
sometimes so fortunate as to cut through the
central blood vessels of the retina. These vessels
will show up then as a rather thin dark
streak about 5 or 6 mm. long.
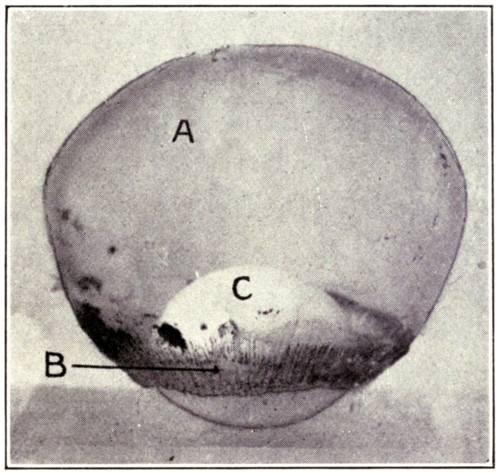
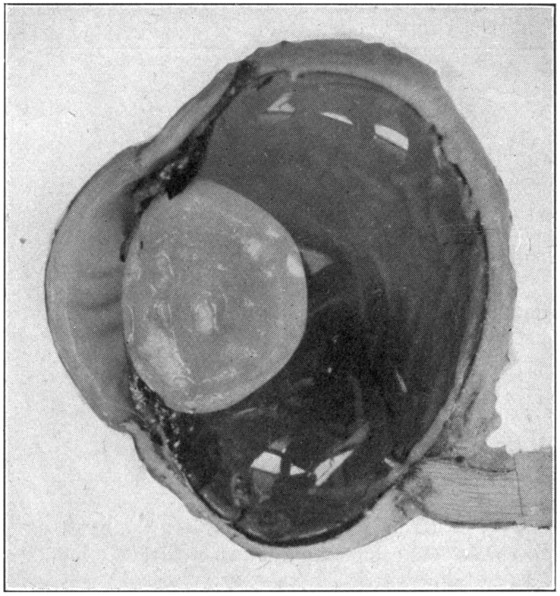
The anterior half will show the lens in situ,
the ciliary processes, the posterior aspects of
the iris and the lens, the corona ciliaris, the
orbicularis ciliaris, and the ora serrata. (Fig.
16.) If the eye has been cut in two too far
forward of its equator, the ora serrata will
not be present. The ciliary processes and posterior
aspect of the lens may be seen to better
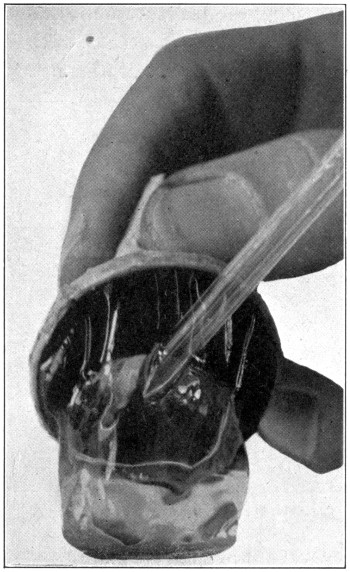
advantage when the anterior half of the vitreous
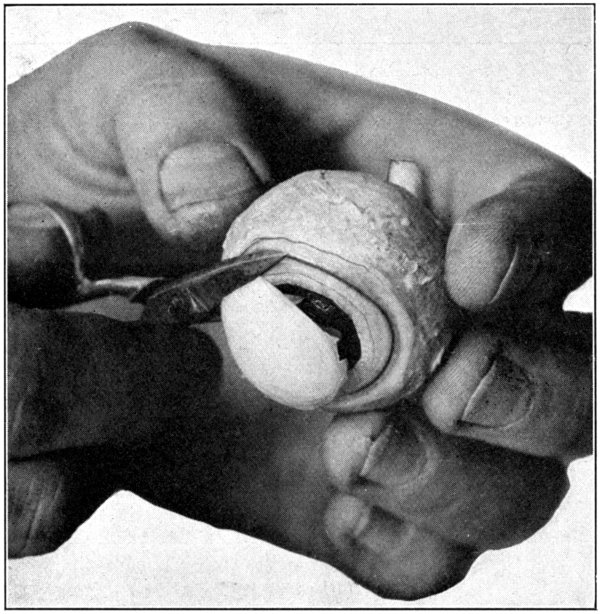
is removed. This is done with the dull-pointed
tweezers, by catching hold of the vitreous
at any part of its free or cut margin, and
stripping it off both the ciliary processes and
the lens, using a prying, pulling movement to
do so. (Fig. 17.) The two layers of the pigment
cells, pars ciliaris retinae, which cover
the inner surface of the processes, may be removed
by picking them away carefully with
the tweezers. The processes then will be seen
to be a whitish color. The pupillary edge
of the iris rests upon the capsule of the lens,
but the nearer the approach is to the choroidal
edge the farther the iris is from the lens; thus
are formed the anterior and the posterior
chambers of the eye. The dissection of the
sagittal section of the eye, explained further
on, will show these two chambers in section.
One will gain a much clearer conception of
their construction in that section than in the
“anterior half” specimen.
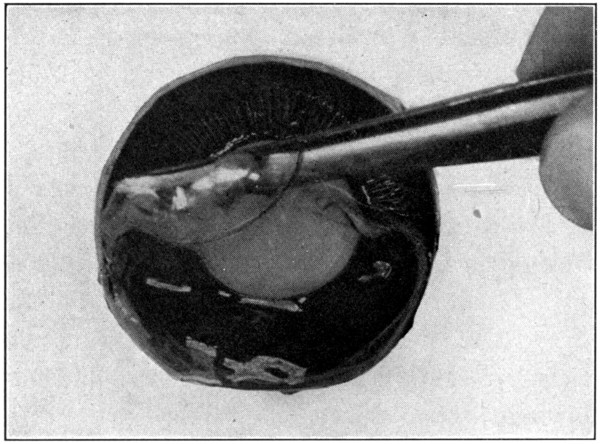
Fig. 17—Anterior half, showing how to pull off vitreous.
(Page 49.)
Now, remove the lens, using the point of
the scalpel to cut through the suspensory ligament
close to the lens. When this has been
done there will be seen in the anterior chamber
a thin, watery liquid—the aqueous humor.
The corona ciliaris and orbicularis ciliaris
may be better seen and studied if viewed
through a hand lens.
To see the iris, take hold of the cut edge of
the choroid, and, gently pulling, separate it
from its attachment to the corneo-scleral junction.
The white ring on the anterior surface
of this part of the second coat of the eye is
the ciliary ring. With a scissors, cut around
this ciliary ring at its outer edge. This specimen
will show the anterior surface of the iris,
and on the posterior side it will show the close
relationship between the iris and the ciliary
processes. A hand lens will help greatly to
bring out the very interesting fine points.
After the anterior portion has had everything
removed from it there will be left
nothing but the first coat or tunic of the eye—the
anterior portion of the sclerotic and
the cornea. The way the cornea seems to fit
into the sclerotic is not quite as one is led to
believe when told that it fits into the sclerotic
much the same way in which a watch crystal
fits into a watch.[3] Holding this part of the
eye up to a strong light one will see that the
sclerotic seems to overlap the cornea in the
vertical axis.
By using the tweezers the cornea may be split.
Nothing in the way of locating its layers can
be recognized, however, unless a section is
made for microscopic examination. The epithelial
may be scraped off when the cornea is
a trifle dry. This is the ocular epithelium reduced
to a layer of flattened cells.
If the preceding dissections have been done,
the crystalline lens will already have received
some notice. To study the lens properly one
should use an eye that has not been hardened
and also an eye or the lens of an eye that has
been in a 5 per cent. solution of formaldehyde
for about two weeks.
The lens in the unhardened eye will prove
too friable to permit much handling. The dissection
should be made, however, in order to
give opportunity to notice the crystalline clearness
of the lens substance, its great magnifying
power, its attachments, its capsule, etc.
For this purpose it is necessary to proceed
only as in the dissection for the “hyaloid membrane,
etc.” That is, use an eye that has been
kept in a cool place for several days, and then
open it, and remove hyaloid, vitreous, and lens
intact, as in the first dissection taken up in
this book. To examine the specimen in detail,
turn it so the lens will be uppermost.
(Fig. 18.)
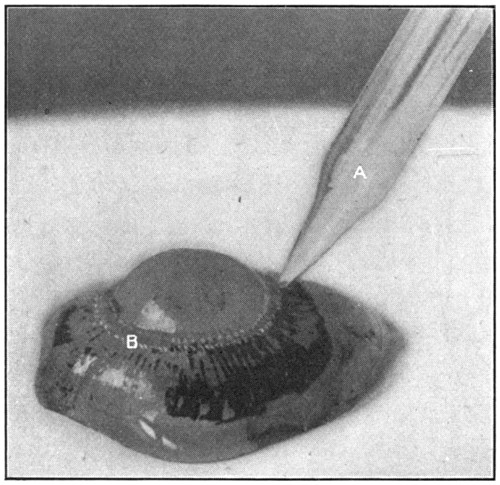
To remove the lens it is necessary to separate
the suspensory ligament, using for this
purpose the small-pointed scissors. The capsule
may be removed by picking it up on the
periphery of the lens, and stripping it off. It
will peel off about the same way that the outer
skin of a bean or pea does.
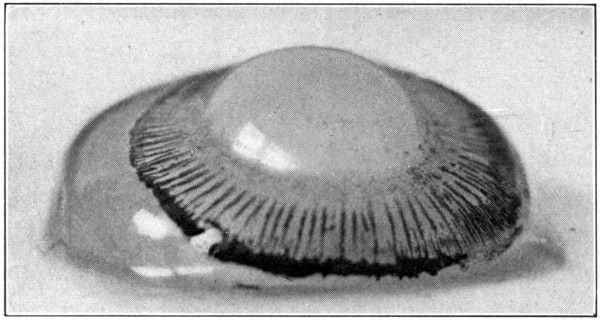
Fig. 18—Enlarged to show the processus zonuloe. (Page 53.)
The tri-radiate lines on the posterior and
the anterior surfaces of the lens will not be
as clearly discernible as in the lens coming
from the hardened eye. Close inspection and
the use of a hand lens will help bring them
out more clearly.
Now, with the point of the scalpel try to
separate the outer layers (cortex) from the
harder inner layers (nucleus). This will
not prove very successful but is suggested for
the purpose of comparison when the same
thing is done to the hardened lens.
It will be found that the lens after having
been in the formaldehyde solution is no longer
crystal like, but more or less translucent.
When viewed from either the anterior side or
the posterior side, the tri-radiate lines on each
surface will be seen to begin at the poles of
the lens and radiate outward toward the lens
equator. Holding the lens up to a strong
light will show that though the lines on either
surface form angles of 120 degrees, the angles
formed by the lines on one side with the lines
on the other side are 60 degrees. On the anterior
surface of the lens the vertical line extends
upward from the pole; on the posterior
surface downward from the pole.
To study the laminated structure of the lens,
it is best to boil the lens. The best way to do
that is to drop the lens from either a hardened
or unhardened eye into boiling water. Let it
boil in the water for about two and a half to
three minutes. Longer than that time will
cause the lens to be put out of shape, and make
it so fragile that it can no longer be handled
without having it fall apart. If the lens comes
from an unhardened eye it might be best to
boil it not more than about two minutes.
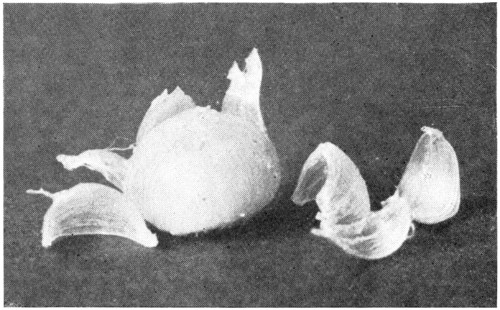
Fig. 19—Showing the way the onion-like layers of
the lens may be peeled off.
Insert the point of the scalpel carefully at
one of the poles, and lift gently in the direction
of one of the radiating lines. This will
tend to raise one of the concentric layers,
which can be easily peeled off. Repeat this in
the direction of the other two radiating lines.
Examining, with a hand lens, the exposed surfaces
and the layers, as they are taken off,
will show the arrangement of the lens fibres,
and will also show plainly their directions.
(Fig. 19.) To get another view of the onion-like
layers of the lens, cut through it with a
safety-razor blade, either longitudinally or
equatorially. (Fig. 20.) The better way is to
have enough lenses to make one of each kind.
Never try to work with only one piece of
material. If the lens is first stained with chromic
acid the layers may be seen better, or, a
simpler way is to drop the lens, before cutting
it in two, into a carmine solution; red ink
slightly diluted, will do.
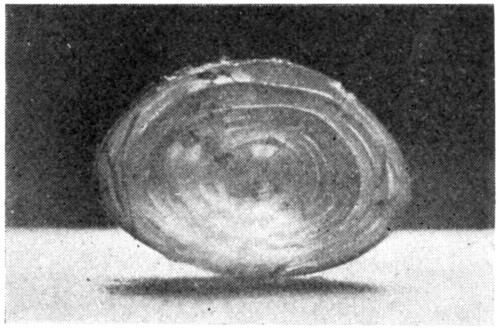
Fig. 20—Section through lens showing
its concentric layers.
A lens that has been boiled and partly dissected
may be placed in a 5 per cent. formaldehyde
solution, and kept indefinitely. The lens
fibres, concentric layers, and lens laminae in
such a specimen will always be interesting.
A lens that has lost its transparency because
of hardening in formaldehyde or boiling
may be made clear and nearly transparent
again in the following way: First: Place the
lens in a 50 per cent. alcohol for several hours.
Second: Remove the lens, and let it drain on a
piece of blotting-paper; then place it in a 75
per cent. alcohol. Third: Remove the lens, as
before, then place it in an 85 per cent. alcohol.
The lens may be left in this alcohol from
ten to twelve hours, after which length of time
it should be removed and drained. Fourth:
Place the lens in an absolute alcohol, and leave
it there for ten or twelve hours. Several hours
longer will not injure the lens, nor interfere
with the success of the work. Fifth: Remove
the lens from the absolute alcohol. Place it
upon a piece of blotting-paper, moving it to
another place on the blotting-paper whenever
the paper around the lens seems to have taken
up as much moisture as it can hold. Be sure
that the lens has given up nearly all, if not all,
moisture. “Running through the alcohols,”
as this process is called, is for the purpose of
dehydrating the tissue. It will be on the side
of safety to let the lens lie exposed on the blotting-paper
for an hour. Sometimes, if the
capsule has not been removed, a small quantity
of alcohol will remain between the lens
and the inner surface of the capsule. This
must be removed. It may be done by either
puncturing the capsule with a pin or needle,
and squeezing out the fluid, or by removing the
capsule entirely. The latter is preferable.
Now drop the lens into xylol. Benzine will
answer, though it will not produce quite so
clear a lens as the xylol does. At the end of
24 or 36 hours the softer cortex will show quite
clear, while the harder nucleus will be still
cloudy. At the end of a week the whole lens,
if it is a small one—pig, calf, sheep—will have
become quite clear and transparent; if from a
beef eye it will take longer. It sometimes takes
nearly two weeks. In the case of a boiled lens
it will take much longer to clear; it may take
a month.
Cedar oil may also be used for the purpose
of clarifying or “clearing” the lens. Harden
in the usual way, run through the alcohols, and
then place in cedar oil. The oil, however, will
stain the lens a yellowish brown, and the lens
will not be as transparent and clear as when
xylol is used.
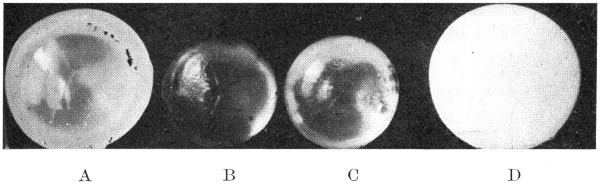
Fig. 21.
A. Lens hardened in formaldehyde.
B. Lens hardened in formaldehyde, run through the alcohols,
and cleared in xylol.
C. Lens hardened in formaldehyde, run through the alcohols,
and cleared in cedar oil.
D. Boiled lens.
The longer a lens is left in either of these
two clarifying fluids the harder and smaller it
will become. At the end of a month or six
weeks the lens will have become so hard that
it can no longer be cut through with a knife.
If it is desired to halve it, a scroll saw will
be found to be the best thing to use for this
purpose. (Fig. 21.)