Punctuation has been standardised, and possible typographical errors have been changed.
Archaic, variable and inconsistent spelling and hyphenation have
been preserved.
SURVEYING AND LEVELLING
INSTRUMENTS
SURVEYING AND LEVELLING INSTRUMENTS Theoretically and Practically Described.
FOR CONSTRUCTION, QUALITIES, SELECTION, PRESERVATION,
ADJUSTMENTS, AND USES; WITH OTHER APPARATUS AND APPLIANCES
USED BY CIVIL ENGINEERS AND SURVEYORS IN THE FIELD.
BY
WILLIAM FORD STANLEY
OPTICIAN, MANUFACTURER OF SURVEYING AND DRAWING INSTRUMENTS,
AUTHOR OF A TREATISE ON DRAWING INSTRUMENTS,
PROPERTIES AND MOTIONS OF FLUIDS, NEBULAR THEORY, ETC.
FOURTH EDITION
Revised by H. T. TALLACK.
LONDON: E. & F. N. SPON, LTD., 57, HAYMARKET, S.W.
NEW YORK: 123, LIBERTY STREET
AND OF
W. F. STANLEY & CO., LIMITED
286, High Holborn, London, W.C.
1914
PREFACE TO FIRST EDITION.
Notes were taken for many years before the production of
this work of queries that came before the author for reply
relative to functional parts of surveying instruments. These
bore most frequently reference to optical and magnetic
subjects, and to the qualities and action of spirit level tubes,
also occasionally to graduation and the qualities of clamp and
tangent motions. It was therefore thought that it would be
useful to give notes upon these subjects in detail as far as
possible in the early chapters. As the work proceeded it was
found that this plan saved much space in avoiding the
necessity for separate descriptions when parts of complex
instruments were afterwards described.
To show the state of the art and render the work useful,
it was necessary that the structure of surveying instruments
should be given with sufficient detail to be worked out by the
skilful manufacturer. Beyond this it was thought to be most
important that the professional man, who must have limited
experience of the qualities of workmanship, should be supplied
with as many simple tests as possible for assuring the qualities
of the instruments he might purchase or use, with details also
of their adjustments. This matter is therefore carried into
detail for one instrument at least of each class, as very little
general information is to be found on the subject in our
literature. In fact, large groups of instruments in extensive
use, such as those used for mining surveying, and subtense
measuring instruments, have remained heretofore nearly undescribed
in our language.
The technical principles followed in working out details
in these pages are given by illustrations of such parts of
important instruments as present any difficulty of observation
from an exterior view of the engraving of the entire instrument.
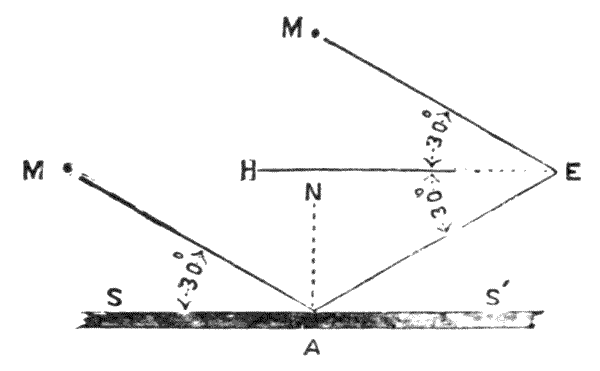
The plans of construction in general use are selected
for illustration. Certain constructions that are liable to failure
are pointed out. Many recent improvements in instruments
are recognised and some are suggested, but no attempt has
been made to record the little differences of construction,
often meritorious, which give only a certain amount of style
to the work of each country and of each individual. Upon
this point it must occur that the work done in any workshop
must vary from other work according to the skill and
judgment of the master. It is intended, therefore, that
distinctly typical instruments only should be described, in
a manner that details may be worked out therefrom. To
make this matter as clear as possible, with few exceptions
these pages were written with the instruments described upon
my table, and the illustrations, when not taken directly from
the instruments, were taken from workshop drawings to a
reduced scale.
In practice it is found that instruments performing similar
functions may be very much varied in construction, bearing
reference frequently to the conditions under which they are to
be used. The same may be said of the functional parts of
instruments. We may also observe that English instruments
differ in detail from foreign ones, and upon this point
there is no doubt much may be learned by comparison
of some details of English with foreign work, although our
own is admitted to rank high. Comparisons are therefore
freely made in the following pages, and suggestions offered
after study abroad of foreign work, and careful inspection
of nearly the whole literature upon the subject, in which
it is very observable that some modern continental books,
treating upon parts of the subject, are much in advance of
our own.
The surveying instruments described in these pages are
nearly limited to those used in the field. Instruments for
plan drawing and calculation of areas, which the surveyor
uses in the office, have been described in the author's work
on Drawing Instruments (now in Seventh Edition), to which
this is intended to be the complement of the subject.
To render the work as complete as possible, it was
thought necessary to give briefly the manner of using many
instruments in practical surveying. This part of the subject,
from the author's very limited experience in the field, is
largely taken from inspection of the best works on surveying.
The author, however, is very pleased to acknowledge the
kindness of many professional friends for assistance on this
and many other points, and for historical notes. For the
description of the 36-inch theodolite, given in Chapter VII.
(now X.), the author is indebted to the late Col. A. Strange,
F.R.S., who gave every detail of his design and discussed
many points. The author is also indebted to Mr. Thomas
Cushing, F.R.A.S., Inspector of Scientific Instruments for
India, who has given information and his opinions upon many
subjects from his large practical experience. Also to Prof.
George Fuller, C.E., who has kindly read proofs, examined
formulæ, and made some technical points clearer. Also to
Mr. W. N. Bakewell, M.Inst.C.E.; Major-General A. De
Lisle, R.E.; Right Hon. Lord Rayleigh, F.R.S., for assistance
on several technical points.
In this First Edition, entirely from manuscript, there will
no doubt be errors and omissions; therefore the author
will feel obliged by the receipt of any notes that he may
make use of for future corrections, should another Edition be
demanded.
W. F. S.
Great Turnstile, 1890.
PREFACE TO THIRD EDITION.
The note at the end of the First Edition of this work referred
to on the preceding page has brought the author many letters
from professional men, who have kindly taken interest in
the work by offering suggestions which are now incorporated
as far as practical in this Edition, and for which thanks are
tendered.
One important improvement of late years in the construction
of surveying instruments is due to the greater perfection
of modern machinery, and the adoption of special machines
to shape out many parts of the work from the solid which
were formerly screwed together in many pieces, which made
the instruments heavier and also liable to become loose
in parts by jars, so as to cause the necessity of frequent
readjustments.
Another important improvement in modern surveying
instruments is in their lightness, due to the discovery of
permanent aluminium alloys, by which many parts of instruments
that are shaped out in the solid may be reduced to
one-third the weight of the gun-metal castings formerly used
entirely for these parts.
In the present Edition, which represents forty-seven years
of experience of the author's life devoted to the details of the
subject, it is hoped that some permanent improvements in
surveying instruments may be shown, and that many new
designs now first described, founded upon this experience,
may merit trial.
The author is pleased to acknowledge the zealous aid
his working manager and at present co-director, Mr. H. T.
Tallack, has given in perfecting this work to bring it to its
present state.
W. F. S.
Great Turnstile, 1901.
PREFACE TO FOURTH EDITION.
Since the publication of the Third Edition of this work, the
author has been taken from us, and it has fallen to my
lot to revise it and bring it up to the present time. This
work I have approached with the greatest diffidence, having
to follow one who had such profound knowledge of the
subject, and I have earnestly endeavoured, as closely as
possible, to act as I think he would have done had he been
alive, and having enjoyed over twenty years of the happiest
and closest business relations with him—actively co-operating
in bringing many of the instruments to their present state, I
venture to hope that I have to some extent carried out what
his wishes would have been.
I have carefully read over and corrected the whole work,
and the additions to it are only in the nature of bringing it up
to date.
H. T. Tallack.
286, High Holborn,
June, 1914.
CONTENTS.
CHAPTER I.
PAGE
Introduction:—Historical
Sketch—Classification of the Subject—Purposes and Qualities of
Instruments—Workmanship—Metals—Aluminium—Framing—Tools—Axes of
Instruments—Soldering—Finishing—Bronzing—Lacquering—Graduating
—Engraving—Style—Glass-Work—Woodwork—Lubrication—Preservation
of Instruments—Packing
The Telescope as a Part of a Surveying
Instrument:—General Description—Qualities—Optical
Principles—Refraction of Glass—Limit of
Refraction—Reflection—Prisms—Lenses, Convex and Concave—Aberration—Formation of
Images—Dispersion—Achromatism—Curvature of
Lenses—Telescopes—Eye-pieces—Powers—Dynameter—Construction of the
Telescope—Diaphragm—Webs—Lines—Points—Parallax—Examination and Adjustment
The Magnetic Compass as a Part of a Surveying
Instrument or Separately:—Broad and Edge-bar
Needles—Manufacture of the Needle—Magnetisation—Suspension—Dip and
Adjustment—Lifting—Inclination—Declination—Variation—Correction—
Compass-Boxes—Description of Compasses—Ring Compasses—Trough Compasses—Prismatic
Compasses—Stand—Surveying with Compass—Pocket Compasses
Levels:—Methods of
Ascertaining—Level
Tubes—Manufacture—Curvature—Sensitiveness—Testing—Reading—Circular
Levels—Surveyors' Levels—Y-Levels—Parallel Plates—Adjustments
of Y-Levels—Suggested Improvements—Dumpy
Levels—Tripod Stands—Adjustment of
Dumpy—Collimator—Improvements in Dumpy Levels—Tribrach Head—Diaphragms—Cushing's
Levels—Cooke's Levels—Cheap Forms of Level—Hand
Levels—Reflecting Levels—Water Levels
Levelling
Staves:—Construction—Various Readings
Discussed—Sopwith's—Field's—Strange's—Stanley's New Metrical—
Simple Construction—Mining Staff—Papering Levelling
Staves—Preservation—Packing Pads—Staff Plate—Staff Level—
Practice of Levelling—Index of Bubble—Lamp—Curvature
Corrections—Station Pegs—Refinement of Levelling—Levelling Books
Division of the Circle and Methods Employed in
Taking Angles:—Dividing Engine—Surfaces for
Graduation—Vernier—Various Sections—Reading
Microscopes—Shades—Micrometers—Clamp and Tangent Motions—of Limbs—
of Axes—Use and Wear—Difference of Hypotenuse and Base
Theodolites:—Constructive Details
of 5-inch and 6-inch Transits—Special Additional Parts—Old Form with Four
Screws—Improved Form—Additional Parts—Plummets—Striding
Level—Lamp—Adjustments over a Point—Solar Attachment—Photographic Attachment
Plain Theodolites in which the Transit
Principle is not Employed:—The Plain Theodolite—Improved
Construction—Everest's Simple—Adjustments and Examination of Theodolites
Instruments to Measure Subtense or Tangential
Angles to Ascertain Distances:—Historical Notes of the
Method—Principles Involved—Stadia Measurements, Direct and by the Ordinary Telescope—Corrections for Refraction of the
Object Glass—Stanley's Subtense Diaphragm—Anallatic Telescope
of Porro—Tacheometers—Stadia—Omnimeter—Field
book—Bakewell's Subtense Arrangement
Instruments Constructed Especially for
Facility of Taking Inclinations:—Inclinometer
Theodolite—Gradiometer—Clinometers: Abney's—Troughton's—De
Lisle's—Stanley's—Barker's—Burnier's—Watkin's—Clinometer Sights—Rule Clinometer—Road Tracer
Instruments of Reflection:—Octant
or Quadrant—Reflecting Circle—Sextant—Principle—Parallax—
Construction—Examination—Adjustment—Artificial Horizon—Sounding
Sextant—Box-Sextant—Supplementary Arc—Improvements upon
this—Optical Square—Optical Cross—Apomecometer
Graphic Surveying Instruments and Appliances
Connected therewith:—Plane Tables—Alidades—Telescopic
Arrangements—Subtense Measurements—Various Devices for Holding the Paper—Continuous Papers—Adjustment of Tripod
Heads—Method of Using—Edgeworth's Stadiometer—Sketching
Protractor—Sketching Case—Camera Lucida, etc.
Instruments for Measuring Land and Civil
Works Directly:—Chains—Various Tellers—Standard
Chains—Arrows—Drop Arrows—Vice for Adjusting Chain—Caink's Rule for Inclines—Steel Bands—Wire Land
Measures—Linen Tapes—Offset Rods—Pine Standard Rods—Rods with
Iron Core—Beam Compass Rods—Coincidence
Measurements—Compensated Rods—Base Line Apparatus—Coast Survey
Lines—Perambulator—Pedometer—Passometer—Sounding Chains—Sounding Lines—Telemeters—Hand Rods—Rules
Measurement of Altitudes by Differences of
Atmospheric Pressure:—Historical Note—Mercurial
Barometer—Construction—Operation—Aneroid Barometer—Construction—Various Improvements—Hypsometer
HISTORICAL SKETCH—CLASSIFICATION OF THE SUBJECT—PURPOSES
AND QUALITIES OF INSTRUMENTS—WORKMANSHIP—METALS—ALUMINIUM—FRAMING—TOOLS—AXES
OF INSTRUMENTS—SOLDERING—FINISHING—BRONZING—LACQUERING—GRADUATING—ENGRAVING—STYLE—GLASS-WORK—WOODWORK—LUBRICATION—PRESERVATION
OF INSTRUMENTS—PACKING.
1.—Historical Sketch.—Although the aim of this
work is to show the state of the art it is intended to represent
at the present period, a large amount of literature, ancient
and modern, has been consulted for its production, principally
with the object that the authorship, as far as possible,
should be given of the instruments described which have
come into general use. Many of these instruments have
been brought to their present state of perfection by small
consecutive improvements upon older forms. Therefore, it
is hoped, a brief historical sketch of the literature of the
subject may be thought to form a fit introduction.
2.—Land surveying was possibly first practised in Egypt,
where landmarks were liable to be washed away or displaced
by the overflow of the Nile. That it was also used otherwise
is shown in that there is extant in Turin a papyrus giving the
plan of a gold mine of about 1400 B.C. The earliest surveying
instrument of which we have record is the diopter of
Hero of Alexandria, about 130 B.C. This instrument appears
to have been a wooden cross, with sights to take right
angles. In the astrolabe of Hipparchus, we have a divided
quadrant of a circle sighted from the centre. In Tycho
Brahé's Astronomica Instaurata Mechanica, 1598, we have
descriptions and engravings of the astrolabe of Hipparchus,
Ptolemy, Alhazen, and of his own instruments. These all
embrace the principle of the quadrant, but the sighting of
the star or object with the instrument by movable parts is
effected in various ways. These instruments were made at
first only for astronomical observations; but they appear to
have been applied, at a very early date, with slight modifications,
to topographical surveying.
3.—In Thomas Digges' Pantometrie, 1571, we have
several instruments described for surveying purposes:—The
geometrical quadrant is an arc of 90°, with sights to the 90°
radius, and a plummet from the radiant angle to read degrees
of elevation. The geometrical square, sighted upon one
edge, with an alidade centred from the corner from which
the 90° radiate to take horizontal angles. In another instrument
the two instruments described above are combined.
The theodolitus—the origin of the theodolite, a word probably
derived from theodicæa, taken in the sense of perfection, as
being the most perfect instrument. It consists of a complete
circle divided and figured to 360°, mounted upon a stand,
with a sighted alidade moving upon its centre and reading
across the circle into opposite divisions. An artificial horizon
is also described for ascertaining altitudes by reflection.
4.—In 1624, Edmund Gunter, to whom science is indebted
for the invention of the slide rule, sector, and chain of
100 links, published a work giving descriptions of the cross-staff,
his improved form of quadrant, with improvements on
some other instruments. In 1686 we have the first treatise
on mine surveying, the Geometria Subterranea of Nicolaus
Voigtel, published in Leipzig, in which we have the hanging
compass, still much in use on the Continent, described. Beyond
this, few improvements are recorded upon surveying
instruments in the seventeenth century.
5.—Near the commencement of the eighteenth century
we have a somewhat important work, published in Paris,
written by Nicolaus Bion, Constructions des Instruments de
Mathematique, 1718. This treatise was translated into
English by Edm. Stone, who made many additions to it in
1723. It formed an important work in its day, and is
excellently illustrated. In this we find an account of the
circumferenters, plane tables, magnetic compasses, and other
instruments then in use. The next important work treating
upon the subject is Gardiner's Practical Surveyor, 1737. In
this we have the theodolite much improved and brought to
nearly its present form by Jonathan Sisson, but it was not,
however, perfected until the introduction of the achromatic
telescope by John Dollond, about 1760. Gardiner gives also
a careful consideration of the best instruments employed
generally in the practice of surveying. Nothing from this
time appears except transcriptions and incidental descriptions
of instruments in works on surveying, until the publication of
Geo. Adams's important Geometrical and Graphical Essays,
Containing a Description of Mathematical Instruments, in 1791.
In this work we have an able discussion of the best surveying
instruments then in use. It was much extended in later
editions by the descriptions of the great improvements made
in the construction of instruments by Jesse Ramsden, as also
by the invention of the box-sextant by Wm. Jones. The last
edition carries the subject well up to date at the beginning of
the last century (1803).
6.—In the last century no original work appeared on
the subject till F. W. Simms's treatise on Mathematical
Instruments, 1834. This small work is limited to descriptions
of popular instruments for land surveying and levelling. It
was probably called hurriedly into existence to supply a want
at the commencement of the railway mania. Another small
popular work, by the late J. F. Heather, 1849, appeared in
Weale's Rudimentary Series. This was almost entirely compiled,
old and even then obsolete engravings being used. No
work in the English language, from an early date in the
last century, is found to treat the subject comprehensively,
or to bring it nearly up to date with the advanced work of our
best opticians of the period at which it was published.
7.—In Germany we have recent works of an altogether
higher order in Die Instrumente und Werkzeuge der hoheren
und niederen Messkunst, sowie der geometrichen Zeichnenkunst;
ihre Theorie, Construction, Gebrauch und Prufung, by C. F.
Schneitler, 1848; and a work upon the larger instruments,
Die geometrischen Instrumente, by Dr. G. C. Hunäus, 1864.
These works are original, and enter ably into constructive
details. The authors, however, do and mention, and were
possibly unacquainted with, many excellent instruments in the
hands of the British surveyor. As regards reflecting instruments,
which derive their first principles from Hadley's sextant,
there is no work in which these are treated so ably as that of
the Italian, Captain G. B. Magnaghi, in Gli Strumenti a
Reflessione per Misurare Angoli, 1875. The consideration of
these instruments is, however, in this work more in reference
to astronomical and nautical observations than to surveying.
8.—The important class of subtense instruments, the use
of which was first proposed by our countryman, James Watt,
in 1771, and brought out by Wm. Green in 1778, since reinvented
in Italy by J. Porro, 1823, of which we have a
description in his work, La Tachéomètre, ou l'Art de lever les
Plans et de faire les Nivellements, 1858, is now in extensive
use on the Continent, and to some extent in America. Their
use is becoming more general in this country but they are not
nearly so well known as they should be. One of the first was
Edgecombe's little-used stadiometer, of which we have descriptions,
without any recognition of the optical correction always
required to render this instrument practical; and some descriptions
of Eckhold's omnimeter, given generally with an
illustration of an early abandoned form of the instrument.
More recently we have the subject of subtense instruments
ably discussed in a paper by B. H. Brough, C.E., on "Tacheometry,"
as it is termed, read before the Inst. C.E.s, 1887.
9.—Classification.—The surveying instruments necessary
to be employed on any particular survey will depend, in a
great measure, upon the nature of the work to be performed.
Thus, if it is for a simple plan of an estate, the surveyor requires
to ascertain the positions of buildings and important
objects, the internal divisions of the land, and the surrounding
boundaries of the estate, placing all parts in their true horizontal
positions and bearings in relation to the points of the
compass. If it is for a topographical survey of great extent,
he requires these matters in less detail, but, in addition to the
above, means of finding the true latitudes and longitudes,
and the relative altitudes of the parts of his work. If for a
railway, a canal, or water-works, he requires to ascertain,
besides the general horizontal plan, especially the altitudes of
all parts of his work very exactly. If it is for coast survey, he
requires, besides the bearings, the exact relative trigonometrical
positions of all parts of the coast-line, as also the relative
soundings on the sea front. If for a mining survey, he requires
to ascertain, besides the horizontal plan, sections
showing the position and depths of strata, faults, veins, etc.;
and, as the work is principally underground, it is necessary
that he should be able to take his observations by artificial
light. It becomes, therefore, clear that special instruments
can be adapted, more or less perfectly, to these various kinds
of work without that amount of complication and of weight
which would be required in any single instrument constructed
to perform many of the above-named functions.
10.—Taking the subject in a general way, the instrumental
aid of the greatest importance in the work a surveyor has to
perform is such as will provide measurements of distances and
of angles by which he may be enabled to make a horizontal
plan or map of the ground he surveys to a measurable scale.
The method employed to secure this object is by taking linear
measurements in certain lines to fixed positions, or stations,
as they are termed, and by taking angles in relation thereto
from such stations to prominent points of view, which may be
either natural or artificial objects. To obtain this end, he
requires means of measuring such lines, and some instrument
that will take angles of position in the horizontal plane, or, as
it is termed, in azimuth.
11.—The instruments used in practice for measuring the
complete circle in angles of azimuth are the various kinds of
theodolites, including transits, omnimeters, tacheometers,
circumferenters, also mining-dials of various kinds, prismatic
compasses, and plane-tables. Instruments limited to measuring
angles upon the plane, within a segment of a circle, are
sextants, box-sextants, and semi-circumferenters. Instruments
adapted to take certain fixed angles only are the optical square
(90°), the cross-staff (90° and 45°), the apomecometer (45°
only). The theodolite being a universal instrument, is used
for taking angles in altitude as well as in plane. The sextant
is also adapted to this. Circumferenters and mining dials are
generally constructed to measure altitudes less exactly than
the theodolite. In extensive surveys of countries a constant
check is required by taking the latitude and longitude, for
which a good transit instrument is required to take observations
of celestial bodies, and a reliable chronometer.
12.—Practically for taking altitudes for railway, canal,
road, and drainage survey, a telescopic level is used, either
with or without a magnetic compass. For topographical work
and measurements of great altitudes in extensive surveys, the
theodolite, aneroid or mercurial barometer, or boiling-point
thermometer is used. In important surveys of mountainous
countries, all of these instruments are used, the one as a
check upon the other. For taking merely angles of inclination
of surface, angles of embankment or cutting, and dip of
strata, a clinometer of some kind is used. Some general
details of construction will be considered in this chapter before
proceeding with the details of the instruments mentioned
above, and some particulars also which it would be difficult
to introduce hereafter.
13.—Qualities of Work.—The qualities that instruments
should possess will be separately discussed, with the
description of each special instrument. It may be stated
generally that much of the quality of surveying instruments
depends upon the perfection of the tools used in their
manufacture, but very much also depends upon the character
of the man who produces them—not only upon his intellect,
but whether his chief object is the perfection of his work, or
the amount of profit he can obtain from it. It is generally
known in all branches, as a rule, that the cheaper kinds of
work, from the less care required in details, secure the greatest
profits. In the author's and some other optical works, a
completely fitted engineer's shop is employed to keep tools
in perfect order, make special tools, and produce the heavier
class of work, for which the engineer is better adapted than
the mathematical framer. It is also advantageous at all times
to have at least one skilled engineer, who is styled the engineer,
in a workshop where as many as fifty men are employed.
14.—Metals.—The alloys generally used in the construction
of surveying instruments are brass, gun-metal, bell-metal,
and occasionally electrum or German silver, silver, aluminium,
gold, and platinum. These are required to possess certain
qualities, and, where the magnetic needle is used, to be
perfectly pure or free from iron. The certainty of copper
alloys being quite free from iron is one of the great troubles
with which the manufacturer of magnetic instruments has to
contend when obtaining his castings from the ordinary commercial
founder. This has led the author, and some others
in his line of business, to cast their own metals as the only
means of getting them pure. Where the metal is had from
the commercial founder, every part of the casting should be
carefully brought within the influence of a delicately-suspended
magnetic needle. If the slightest attraction be found in any
part of the casting it should be rejected.
15.—Aluminium, from its much lower price of production
than formerly, and from its extreme lightness and freedom
from tendency to oxidation, except when exposed to sea
air, as the presence of common salt appears to completely
decompose the surface, is now recognised as a metal which
may be used for the manufacture of parts of surveying
instruments. This metal, in its pure state, is too soft and
malleable to be used advantageously for many parts of
these instruments. It, however, appears to alloy with many
metals, some of which increase its hardness and stiffness
without making its specific weight more than one-third
that of gun-metal, and without greater liability to oxidation.
The following alloys are now offered in commerce:—Aluminium-nickel,
al-chromium, al-tungsten, al-titanium.
These possess many distinct qualities, and may be found,
under judicious handling, useful for many parts of these
instruments. There is, however, from the fineness of grain of
aluminium, even in its alloys, a tendency to fret in surfaces
exposed to friction. This can be avoided in many cases by
lining such parts with a suitable metal without materially
changing the general lightness of the instrument. The author
has devoted much time to forming and testing aluminium
alloys, particularly with nickel, but there is no doubt there is
still much to be learned of the alloys of this beautiful metal,
as it is still, comparatively, so new to manufacturers. The
author has found many difficulties to be overcome in obtaining
fine solid castings, and, as far as his experience goes, there are
only very imperfect solders offered for it in commerce. It
therefore remains advisable to work up all parts in the solid
in this metal as far as possible, and where there is risk of
exposure to salt air to confine the aluminium alloys to such
parts of the instrument as may not be seriously injured
by surface oxidation. On the whole this metal is only
recommended where lightness is of more importance than
durability.
16.—The general object to be obtained in the distribution
of metals to the various parts of an instrument is to get good
wearing surface with solidity, and an even balance of the
moving parts with moderate lightness. In practice, such parts
as can be thoroughly hammered, drawn, or rolled in a cold
state will form stiff, elastic, and durable parts in brass. For
the composition of this metal the author uses copper ·69,
zinc ·30, tin ·01. The tin is used in place of the lead of the
ordinary founder, and produces thereby a stiffer alloy. For
such parts as require stiffness, where sufficient hammering is
impossible, or the metal is in considerable mass, gun-metal
should be used. The author has found the best practical
mixture for this—pure copper ·88, tin ·12. For centres
requiring great rigidity, as those of the theodolite, level, or
sextant, bell-metal is used by all the best makers. This should
be of such composition that it cannot be permanently bent
without immediate fracture. It should possess about the
hardness and stiffness of untempered steel. The best alloy
the author has found for the bell-metal for these instruments
is copper ·83, tin ·17. If very small castings are made with
this alloy they are somewhat brittle, probably from the rapid
cooling of the surface in the mould, therefore, for small
castings, a safer alloy is copper ·85, tin ·15.
17.—In making all the above alloys, for the best results
the metals are assumed to be commercially pure. The
introduction of a little uncertain scrap, which the ordinary
founder is so fond of using to make his metal run down, will
often foul a pot of metal. In all cases of copper alloys the
copper should be entirely melted before the addition of the
zinc or tin, after which it should be thoroughly stirred with a
charred stick or earthenware rod, and then be cast in small
ingots, to be re-melted and cast a second or, even better, a
third time before melting for the final castings.
18.—Workmanship.—It would be quite impossible,
within the limits of this work, to give such particulars of the
workmanship in surveying instruments as to enable a person
to manufacture them without practical knowledge of the
manipulation of the various branches of the art, but it is
thought that a general sketch of the various operations
entailed, which vary somewhat in different workshops, may be
useful. Some of these particulars may be also useful to the
surveyor, not only as general knowledge of the instruments
he uses, but in some cases of accidents and emergencies, and
for the sake of keeping his instruments in order when he is
far away from the manufacturing optician.
19.—Framing Work.—The ordinary turning and filing
of metals, and some knowledge of the workmanship of the
business, are assumed to be understood by those who may
use this book for special constructive details. The tools in a
mathematical or philosophical instrument-maker's workshop,
where high-class work is done, nearly resemble in every way
those of a good engineer's shop, except that on an average the
tools are much lighter, and run at a higher speed. Where the
works are extensive, steam-power, a gas engine, or electric-motors
are used. In small shops the foot lathe is the only important
tool. There is a great advantage in using power for good
work, as the oscillation of the tool, which is always caused by
the action of the foot, produces what is termed a chatter
upon the work. For turning brass and silver, a high speed
is desirable with a lathe of sufficient rigidity to give no sensible
vibration. A surface cut speed of about 250 feet per minute
should be aimed at. For turning gun-metal, German silver,
and mild wrought-iron, about 100 feet per minute is required.
For turning bell-metal and cast-steel, a very slow speed is
required—about 16 feet per minute. The lathe should therefore
possess means of ensuring these differences by back gear,
overhead motions or otherwise.
20.—Tools.—The lathe of the most suitable construction
for surveying instruments has the upper surfaces of the bed,
one side of Λ section, and the other flat—not both flat as in
many engineers' lathes. This ensures the certainty that rests
and other tools can be firmly clamped down without possibility
of lateral shake. The slide-rest should have a broad base and
be provided with direct perpendicular and rotatory motions,
with means of clamping the motive parts not in immediate
use, as smooth cuts can only be obtained on copper alloys by
perfect rigidity of all parts of the tools. The lathe should also
possess a bed-screw and overhead motions suitable for applying
flying cutters and milling-tools in every desired direction upon
the piece of work when it is once chucked in the lathe. A
universal shaping machine and a milling machine generally
replace the planing machine of the engineer. These tools
are sufficient for producing the flat surfaces for all ordinary
work. Even when power is generally used, small hand
planing and shaping machines, worked with a lever, are very
useful for working up single pieces and small parts. A circular
saw and a good grindstone are also indispensable. With good
rigid tools, well applied, very little work is left for the rough
or bastard file; on many instruments none whatever—only a
little fine scraping, superfine filing and stoning being required.
21.—The greatest technical skill required in the manufacture
of surveying instruments is in the principal axes of
these instruments, particularly in theodolites, tacheometers,
sextants, and some kinds of mining dials, wherein a class of
work is demanded which must be performed by a skilful,
experienced, and careful workman. The axis of these instruments,
as already mentioned, should be formed of a casting
of good bell-metal. This axis must be turned upon its own
centres, which should be drilled up sufficiently to keep a
steady bearing, so that the truth of the work is quite
independent of any fault there may be in the lathe. The
turning must be performed with a point-tool, the upper angle
of which should be about 60°. This should be kept constantly
sharp, and be allowed to take only the finest possible cut at a
slow speed. The slide-rest should be set to the exact angle of
the taper of the axis. The socket, if it is not very stout,
should be placed in a massive metal box and embedded in
plaster of Paris, which must be allowed to set perfectly hard
before use. The socket is turned out, if possible, or otherwise
it is roughed out with a hard steel fluted cutter, and finally
cut up by another fluted cutter which has been carefully ground
to the correct cone intended for the finished axis. The axis
is chambered back in its central part, so that it may fit
the socket for about from half to three quarters of an inch, only
at its extreme ends. After turning and boring as correctly as
possible, the axis and socket are ground together with soft
oil-stone dust to true form. After this, the surface is turned,
or scraped entirely off, with a sharp tool, and the axis is
again fitted by rubbing contact only. It is most important
to be sure that no grit remains embedded in the metal from
the grinding, as this will be sure to work out and abrade the
axis afterwards.
22.—The same care as is necessary to be bestowed upon
the centres of instruments, is required for tangent motion
screws when these act directly without counter springs. These
should be made, if possible, of hard drawn wire. They should
be turned on their own centres, the cut of the tool being
extremely light to avoid flexure, all screws of over 1/8-inch
diameter should be cut direct in a light screw-cutting lathe,
although it is advantageous to run a pair of dies lightly over
them afterwards to make the thread smooth, and ensure a
perfect fit in the nut.
23.—Soldering.—Besides the tubes of instruments, all
parts which are difficult or impossible to be formed advantageously
in a single casting, are hard soldered or brazed
together where this will render the part of the instrument
more rigid than by screw attachment. The pins of all screws
should be made of drawn metal, to which the part to form the
milled head may be a casting. Hard soldering in this country
is now generally performed with one of Fletcher's gas blow-pipes,
the parts of the instrument, if large, being embedded in
a pan of charcoal. The author uses a pair of gas blow-pipes,
taking the blast of a centrifugal blower driven by an electric
motor. These blow-pipes are placed opposite to each other,
so that the pieces being soldered together are entirely surrounded
by the flames projected from both sides. The flames
of the gas blow-pipe may, with this apparatus, be reduced to
mere points for small pieces. The solder employed for
ordinary work is fine spelter with a flux of ground borax.
The most convenient method of using this is to put about a
quarter of a pound of spelter and an ounce of ground borax in
a saucer, and add sufficient water to cover it. The borax and
spelter may then be taken up together with a small spoon and
placed directly upon the clean part of the metal which is to be
soldered. With deep or difficult joints it is well to soak the
whole of the pieces an hour or so in a saturated solution of
borax before commencing the soldering.
For soldering very small pieces, or for soldering steel to
brass, silver solder is better than spelter; it appears to bite
the steel more firmly and it runs at a lower heat.
24.—Soft Soldering, or what is termed in the trade
sweating, should be resorted to as seldom as possible. It is
necessary in making attachments to drawn tubes, as the heat
of hard soldering would destroy the rigidity of the tube, due
to the drawing processes. In this case, where soft solder is
employed, the tube should be, if possible, surrounded by a
band of solid metal, which forms a part of the attachment, or
the attached part should be well secured with screws, tapped
dry, before the soldering is commenced. Soft soldering on
brass is generally very deceptive; the solder may form a glaze
round the joint with no attachment within. Many surveyors
will recognise this who may have had one of the slop-made
soldered-up levels fall to pieces in their work by a simple jar
accidentally given to the instrument.
25.—Finishing mathematical work: the surface as it
leaves the superfine file is brought up by cutting it down to a
mat with Water of Ayr stone, and finally clearing with soft grey
slate-stone.
26.—Polishing.—Where brightness is desirable, particularly
for steel work, wash-emery and French polishing paper
are used. Heads of screws and small turned parts are better
finished off by a clean cut or with the burnisher on the lathe.
27.—Optical Black.—The interior parts of telescopes
are painted over with a dull black paint, the object of which
is to cut off the reflection of extraneous light entering the
object-glass obliquely. Optical black is made by finely grinding
drop-black in turps or spirits upon a stone with a muller,
this is afterwards strained through fine muslin; if it is
ground in turps a little good gold-size is added; if in
spirit, a little spirit varnish. The black should be tested. It
should appear quite dull, and yet be sufficiently firm to bear
the finger rubbing upon it without soiling. For eye-pieces,
the dull black generally employed is due to oxidation obtained
by burning off an acid solution of cuprous-nitrate in a gas
flame.
28.—Bronzing.—For the protection of finished metal
work in surveying instruments the surface is generally bronzed,
as it is termed, leaving bright only such parts as are required
to be easily seen, such as milled-heads, heads of screws, etc.
The dark gray of the bronze is also much more pleasant to the
eye than a bright surface, particularly when out in the sunlight,
so that bright instruments have gone nearly out of use.
The bronzing is effected by the application of a liquid that
will corrode the metal and, at the same time, leave a dark
pulverent deposit upon it. There are a great number of
bronzes to be had, but that which the author has found to be
the most permanent and safest from after corrosion is platinic-chloride,
dissolved in sufficient water. This bronze is well
known, but is not used so frequently as it should be from its
great expense. The bronzes which are to be particularly
avoided are those containing mercuric-dichloride. These
are very cheap, and they give a fine dark surface; but
they are certain to rot the brass and produce a pitted or
spotted appearance after the instrument has been much exposed.
The bronze, whatever kind is used, is put on with a
brush upon the surface of the metal, which must be quite clean
to receive it. After the colour is well brought up by passing
the brush over the work several times, the work is then
thoroughly gone over with a hard brush and fine black
lead until every trace of free corrosive liquid is removed, as
far as possible, from the surface, and the work is left quite dry
in all parts. Some makers put a thin coat of asphaltum,
dissolved in turpentine, over this, which produces a light black
surface. Some, to save trouble and expense, simply paint the
instrument with black varnish without bronzing. This looks
very smart at first, but the black is very liable to chip off in
use and make the instrument unsightly.
29.—Lacquering.—All parts of instruments intended to
be left bright, as well as all properly bronzed parts, are
separately covered with a thin coating of lacquer, the application
of which is technically termed varnishing. The metal is
raised to an equal temperature of about 200° Fahr., and the
varnish is applied with a fine, flat camel-hair brush. The
process requires considerable skill, so that only a few workmen
do it to perfection. Special varnishes are made for the
philosophical and mathematical instrument trades, all of which
have a base of fine shellac, dissolved in absolute alcohol.
30.—Engraving of figures, words, etc., where there is
much repetition, is best done by the engraving machine—general
work by the ordinary skilled engraver.
The method employed for the graduation of instruments
will be considered further on in the discussion of instruments
reading with a vernier scale.
31.—Style.—This must, of course, depend upon the taste
of the manufacturer. In modern machinery, and in scientific
instruments, there is a strong tendency to avoid all useless
mouldings or ornaments, and to finish all parts of the work
uniformly with clean smooth cuts. In surveying instruments
which have to be handled, it is desirable to avoid angles as
much as possible, both by form and by rounding off all corners
neatly, so as to produce a general feeling of smoothness
over the whole instrument; useless metal, as, for instance, in
milled heads of screws, should be hollowed away to avoid
weight, and this object should be observed in the general
distribution of metal, never neglecting at the same time to insure
the firmness of the instrument. Parts shaped out of the
solid may be made much lighter than when screwed together
in separate pieces and are of greater rigidity, and admit of
better style. The leading makers all have a style of their
own, some more graceful than others; most of the smaller
makers make bad copies of these designs.
32.—Glass-Work.—The most important technical work,
except perhaps the graduation in surveying instruments, is
found in the optical parts, of which only a brief description
can be given. The glass used for the lenses, particularly for
the achromatics, is that manufactured by Messrs. Chance
Bros., of Birmingham, or by M. Mantois, of Paris, both of
which firms use the process discovered by Guinard, of Solothurn,
in Switzerland, which was afterwards much improved
by Geo. Bontemps. This glass is nearly white and transparent,
of uniform density, and free from veins and striæ. It
is also perfectly annealed, which is important. The following
kinds of glass are usually employed for the object-glasses of
surveying instruments:—
Density.
Index of Spectrum Lines.
C
D
F
G
Hard Crown
2·485
1·5146
1·5172
1·5232
1·5280
Dense Flint
3·660
1·6175
1·6224
1·6348
1·6453
These particulars are given by the glass-makers who
supply the glass. For cheapness the optical crown-glass is
often replaced by common plate-glass. A specially clear
and hard glass is made by Shott, of Jena, but early
specimens of this glass did not appear to stand climatic
influences. This defect is now remedied, and the glass is
very pure in body, but not free from air-bubbles.
33.—Two pairs of tools are used for glass-grinding for
every curve. These possess two spherical surfaces, one of
each pair resembling a shallow basin, and the other, of the
same diameter, fitting into this. After turning the tools they
are ground together, and are afterwards kept in order by
constant regrinding together. These tools may be of cast-iron
or brass. The working surface of the tool is, of course,
of the reverse curvature to that of the glass to be ground in
it. When the glass is ground by hand, each tool possesses a
screwed socket by which it can be screwed to a stump or
post, fixed in the ground, or to a short knob-handle to be
used as the upper tool by hand. For working a glass, or
several glasses, it or they are cemented upon a hand tool or
holder, which is of less curvature than the working tool. The
working is performed by rubbing in a straight alternately with a
circular direction, with a certain stroke difficult to describe, at
the same time walking round the post to reverse all positions.
The grinding is continued over the spherical tool until the
surface of the glass is brought up to its curvature, being
supplied at first with coarse emery, 60-hole, which is kept in
a very moist state, and afterwards with finer emery, 100-hole,
and then by eight or ten still finer grades, carefully washing
off between the processes, and reserving the mud most carefully
for wash-emery, which is used in completing the grinding.
Where machinery is employed, hand motions are imitated as
nearly as possible by the motion of the tools, particularly for
the forming processes.
34.—The wash-emery is formed of particles which are
held suspended for a minute or so when the mud is stirred in
a large vessel of water. This water is drawn off for final
settlement to form the wash. The final grinding with the
wash is continued until the emery appears jet black on the
surface of the glass, which has then a semi-polished, almost
metallic, lustre.
35.—Polishing.—This is performed in various ways,
generally moist cloth is placed over the tool. The better
way is to cover the polishing tool with patches of hard pitch,
which are made to take the form of the hand tool by having
the fellow tool to that used in working pressed upon the surface
while the pitch is still warm, using a sheet of moist
tissue-paper to prevent adhesion. The polishing is effected
in the same manner as the grinding, but with peroxide of tin
(putty powder), or rouge.
36.—The great difference in the value of achromatic
lenses depends upon the truth of the curvature due to the
accuracy of the tools and the continuity of the grinding processes
until a perfect surface is produced before polishing, so
that a given lens may have treble the labour bestowed upon it
to one of inferior quality in the grinding only. Beyond this
its ultimate perfection will depend much upon the polish.
37.—It may be well here to note how this may be observed.
A good test is to throw the shadow of a thin object,
as that of a piece of wire upon the surface obliquely. This
should show clear edges when the lens is changed to all
positions for reflection. The test of polish is really only the
test of brightness of the surface of the glass, which may be
distinguished in many ways that will readily suggest themselves.
The importance of the perfect grinding is that to
which attention is desired to be drawn.
38.—Centring—Figuring and Testing.—After the above
described processes, the glass is centred by grinding off the
edges until its axis is exactly central with the periphery, so
that it can be mounted in its cell. It is then tested for figure.
The technical difficulties of figuring are too great to be discussed
briefly in this treatise; much of this work is performed
by the skilled workman in the manner he works his tool and
applies his grinding and polishing material, every stroke giving
a slightly different figure. Some method, however, may be
given of testing, which will be useful in estimating the quality
of a lens, irrespective of its manufacture. To test the objective
it may be mounted in its telescope and focussed upon
a star, or more practically in workshops, upon the reflection
of the sun as this is seen in the mercury of a small bulb of a
thermometer placed conveniently on a black background at
as great a distance as it is clearly visible in the telescope—a
common distance is 20 feet. The telescope is made to
traverse the sighted object so as to cross the field of view.
If the focus under this test remains constant, so that the
image of the sun in the mercury bulb appears sharp and without
colour, the objective is fairly corrected. Further information
on this subject may be gained from a very important
paper read by Sir Howard Grubb, the eminent optician,
before the Royal Institution.[1]
39.—The Woodwork of the Stands of instruments
made in this country is generally of straight-grained Honduras
mahogany. For occasional work the mahogany is better if
seasoned for three or four years in boards which are cut to
thicknesses increasing by quarter inches, so that about the
thickness of the finished work in one dimension may be used.
Where a number of stands of constant dimensions, as for
ordinary theodolites and levels, is required, it is better
to cut the mahogany a little over finishing size directly
from the fresh log, and then allow it to season three or four
years. In this manner any natural warp of the wood takes
place before it is worked up, which causes it to stand well
afterwards.
40.—Lubrication of Instruments.—For the lubrication
of all screws, good watch oil should be used. Where
this cannot be obtained, salad oil filled up in its bottle with
fresh-cut shavings of lead will produce a perfect oil free from
acidity. For working centres and collars, a grease is better—that
extracted from pork fat, by leaving it in the sunshine,
answers very well, but what the author has found best for the
purpose is pure vaseline. This keeps its greasiness, and appears
to be perfectly non-corrosive. For the collars of tangent
screws, a mixture of tallow, wax, and soap is employed.
This mixture does not fret out to cause a bite upon the surfaces.
As the instrument-maker leaves the working centres
of instruments they will generally perfectly maintain their
lubrication for four or five years, and it is not well to disturb
them; so that this note may be considered only for the
restoration of old instruments to order, or for cleaning them
up generally, which is nevertheless best done by skilful
hands.
41.—Preservation of Instruments.—Instruments that
have by any accident become splashed, or dirty by exposure
to rain and dust or otherwise, may be washed with damp
wash-leather. If a piece of soft, dry leather be afterwards
moistened with a little linseed-oil, and this rubbed over
the instrument when it is quite dry, it will restore the
original brightness, and tend to preserve it. For wiping
object-glasses some prefer a piece of clean old linen, others
an old silk handkerchief; either will answer if kept quite
clean. If the glasses are only dusty, the application of a
soft camel hair brush is all that is necessary, and this is
quite safe from carrying grit. If glasses are stained
by slight corrosion, this can be partially removed by clean
spirit. In replacing glasses, it is important to observe that the
notch marks, if any, on the edges of the glass agree, and that
the double-convex lens is placed outwards in the telescope.
42.—Packing of Instruments.—This is really a very
important matter seldom estimated at its proper value. An
instrument should lie or stand in its case in such a manner that
its most solid parts only take the bearing surfaces, and thus
perfectly secure it. When this is effected there should be no
possibility of an exceptional jar on any delicate part from the
jolting of the conveyance of the instrument. Great care
should be taken to note how the parts of the instrument were
originally arranged by the packer, and this arrangement should
always be followed in replacing the instrument in its case to
its position, into which it should fall with perfect ease.
Instruments are frequently strained by being placed wrongly
in their cases. Even with all these precautions, the wood of
the case may shrink or warp to a certain extent, particularly
in tropical climates, so that the instrument may be exposed to
external pressure from closing the case or otherwise, so as to
injure it or to spoil its adjustment. In such cases it is better
to examine the packing occasionally, and, if the case does
not easily and perfectly close, there is a risk that the instrument
is being strained. If this is the case, assuming the
instrument to be in its correct position, the bearing surfaces
should be lowered with the penknife or other tool, so that it
is just free, but not to shake. The author was the first to
place a piece of cork under each bearing surface. This gives
a certain amount of elasticity, with sufficient rigidity for
support, to preserve the instruments from injurious jar, and it
may afterwards be cut away more easily with the penknife
than wood.
43.—With complicated instruments there are always a
number of loose pieces which are used occasionally upon or
with the instrument. These, for compactness of packing, are
often placed one above the other, and are liable to get astray.
It is very desirable that complete parts should be arranged, as
far as possible, to go into their cases in any state of adjustment,—this
is, however, not always possible. As a rule,
before putting an instrument or any portions of it by, all
movable parts, such as the telescope, eyepieces, etc., should
be closed in their closest form. Parallel plates should be left
square to the instrument, with the screws loose. Generally
the packer leaves little liberty. Instruments are often packed
so that they will go into their cases only just in one state of
adjustment, and in one position of the movable parts. In this
case, great care must be taken at first in examining the position
in which the instrument and its parts arrive from the
maker. The late M. Gavard, of Paris, who was celebrated for
his delicate pentagraphic instruments, and to whom the writer
owes many useful hints, put initial letters on the parts of his
instruments, and placed printed labels on the parts of the
cases where these should go. Mr. Hennessey, First Assistant
in the great Trigonometrical Survey of India, gives some
excellent notes upon the subject of packing in his Topographical
Instructions for the use of the Survey Department. He
recommends upon opening a case that a sketch should be
made of the contents as they lie, and all possible particulars
should be recorded; but his most useful hint is, always to
replace an instrument gently, and in no case to use force if
the instrument will not fall into its place. Unless the packings
have been damaged in some way, the instrument will go easily
into its case, and if it does not, it shows that some part is not
in its proper position, and this must be carefully looked into
to avoid injury.
44.—Leather Over Cases.—For an instrument for use
in the field it is better to have a solid leather case over the
ordinary mahogany one. This acts as a kind of buffer, and
takes off the jar of an accidental blow upon the case, which
might otherwise injure the instrument. It also protects the
mahogany case from the warping effect of direct sunshine and
rain, and closes the meeting-joint to keep out the dust.
Solid leather cases are also general for all light instruments,
rendering a stiff case of wood or pasteboard unnecessary.
These admit most perfectly of straps being placed conveniently
to adapt them to the person for carrying.
Waterproof Covers.—In very rainy climates a waterproof
cover for a delicate instrument is desirable. This can
be thrown over the instrument instantly in case of a sudden
storm, and the instrument left ready for continuing the work
when it clears up.
CHAPTER II.
THE TELESCOPE AS A PART OF A SURVEYING INSTRUMENT—GENERAL
DESCRIPTION—QUALITIES—OPTICAL PRINCIPLES—REFRACTION
OF GLASS—LIMIT OF REFRACTION—REFLECTION—PRISMS—LENSES,
CONVEX AND CONCAVE—ABERRATION—FORMATION
OF IMAGES—DISPERSION—ACHROMATISM—CURVATURE
OF LENSES—TELESCOPES—EYE-PIECES—POWERS—DYNAMETER—CONSTRUCTION
OF THE TELESCOPE,
DIAPHRAGM—WEBS—LINES—POINTS—PARALLAX—EXAMINATION
AND ADJUSTMENT.
45.—General Description of the Telescope.—This
instrument forms part of the theodolite, level, some kinds of
miner's dials, sextants, plane tables, and other surveying
instruments. For this purpose it is made of similar construction
to that of the refracting telescope used for astronomical
purposes. The great object desirable in the telescope, when
used as a part of a surveying instrument, is that it shall assist
vision in obtaining the true direction, or pointing to the
position of an object in such a manner that it can be
employed to ascertain the angular position of two or more
objects in relation to the position of the centre of the instrument
upon which it is fixed; also to obtain relative altitude
to this centre in relation to a distant station by the reading of
a divided measure or staff placed thereon.
46.—The qualities desirable in a surveying telescope are,
that sufficient rays of light may be collected from the object
observed for it to be clearly seen as a whole, and in some
cases that sufficient magnifying power should be available, in
order that details or divisions painted upon a staff may be
sharply defined. The amount of light received by the eye
which is effective in producing distinct vision is in proportion
to the extent of active surface of the object-glass converging
the light rays. The magnifying power is regulated by the
sum of the convexities of the lenses of the eye-piece upon
principles to be explained. The surveying telescope is
required to possess only a very limited field of view, but
very great focal range, so that objects may be seen at any
distance.
By the necessary optical arrangement of the telescope,
which will be further described, the object observed is
generally inverted. This inversion of the image as it appears,
at first presents a little difficulty to the learner, but in
practice this soon becomes so familiar as not to be even
recognised mentally.
47.—Optical Principles involved in the Telescope.—To
commence with the optical construction of the telescope,
that this may be thoroughly understood, it is necessary to give
brief details of some first principles upon which it is constructed,
assuming that optics have not been made a special
subject of study.
48.—Refraction of Glass.—The properties of a lens
depend entirely upon the fact that a ray of light passing from
air obliquely into the surface of a dense transparent medium
(in this case of glass) and equally from the glass into air is
bent, or, as it is termed, refracted, to a certain angle at the
surface of contact of the air and glass. The ray of light
entering the glass is termed the incident ray, that proceeding
from it the emergent ray.
49.—There is no known medium, glass or other,
which refracts a ray of white light at one uniform angle.
The white ray is universally separated upon refraction,
or dispersed, as it is termed, into rays of all colours of
the rainbow. In considering refraction, therefore, in its
simplest aspect we are compelled to take the refraction of
one uniform ray which is distinguished by one colour, that
forms a part of the white ray, as for instance the red, yellow,
green, or blue, that is, a monochromatic ray, as it is termed,
which gives a sharp refraction of its own coloured light only
in its ray. Incandescent soda produces monochromatic rays,
but in practice an intense flame behind a bright-coloured
glass will answer the same purpose, as the coloured glass
may be arranged to absorb all, or nearly all, parts of the
white ray, except that of its own colour.
50.—Every transparent medium has a special quality of
refraction. Therefore, different kinds of glass refract in
different degrees within certain limited angles which will be
hereafter considered. The refraction is uniformly in the
plane containing the incident ray, and the perpendicular to
the surface separating the two media. Every medium refracts
monochromatic light equally according to the following law
for any angle of refraction:—
Whatever the obliquity of the incident ray may be, when
it passes from a rarer to a denser medium the ratio which the
sine of the angle of incidence bears to the sine of the angle of
refraction is constant for any two transparent media.
51.—The natural law by which the power of refraction
of any medium may be shown, and consequently the magnifying
power of a lens in the ratio of its curvative through
this refraction may be exemplified, is illustrated by the
diagram on the following page (Fig. 1).
PP′, a line perpendicular to the surface of the plane
of the medium (glass) with air above it, a ray of light would
pass directly P to P′ through the glass surface SS′ without
refraction, and so for all perpendicular incidences or emergences.
By this perpendicular line PP′, termed the normal,
all refractions are measured. The incident ray I to C is
refracted to R. Then if we call the angle ICPI, and the
angle RCP′R, it is found by experiment that the perpendicular
from I on PP′ (or sin I) bears a certain proportion
to the perpendicular from R on PP′ (or sin R) according
to the density of the glass. This proportion is generally
expressed by the formula—sin I = µ sin R. Another incident
ray I′ to C would be refracted to R′, and using similar
notation to the above we have sin I′ = µ sin R′, and from
this it follows that (sin I)/(sin R) = (sin I′)/(sin R′) = µ,
which is called the index of refraction. Thus, if in a certain glass
the sine of I measure 3 equal parts on any scale of length, and the
sine R 2 parts on the same scale, the index of refraction of this
glass would be 3 divided by 2 or 1·5.
If the above process be reversed, and the ray of light R
be refracted on passing from the glass to the air, it will be
projected to I in the emergent ray, and follow the same law
as that given above.
52.—Limit of Refraction—Reflection.—The sines to
the angles ICP and I′CP′ being constantly greater in proportion
to the obliquity in the case of glass we are considering
by 1/3 than the sine of the angles RCP′ and R′CP′ of the
rays of incidence thrown upward upon the surface SS′, it will
be seen that at a certain angle or that in which the sine is 2/3
the radius, namely, 41° 48′ 37″, the equation given above
makes sin I = 1 its maximum value; therefore, at any angle
of incidence greater than this, the sine of refraction to continue
in proportion would exceed the radius—an impossibility.
The refraction, if possible, would carry the ray into the
substance of the glass. This is therefore called the critical
angle or angle of total reflection. At this point we may consider
what must happen. By our rule, refraction must cease at the
angle refraction becomes impossible by increase of sine, and
as light cannot be extinguished in a transparent medium it
must be reflected. Thus the ray r cannot be refracted in the
proportion according to the rule given for sine I to sine R, as
this would exceed the greatest sine, that is SC the radius, this
ray will therefore be reflected at the surface from the point C,
and pass in the direction r′. This property of refraction,
continuing, as it were, into reflection, is made use of in
many instruments.
53.—It may be worthy of repeating, as it is a mistake
occasionally made by persons designing instruments for special
purposes (as telemeters), that the refractions are not equal
for varying angles of incidence, but only, as before stated, in
the ratio of the sines. Thus there is no refraction P to P′ a
certain refraction I to R, and a greater refraction I′ to R′, the
refraction constantly increasing with the angle of incidence.
54.—The Reflection of Light follows a very simple law,
viz.:—The angle of reflection of a ray of light from a reflecting
surface is equal and opposite to the angle of incidence upon it.
Thus, in Fig. 2, let a ray of light IA fall upon the reflecting
surface SS′ at 30° of inclination to this surface, then this
ray will be reflected from A to R at the angle RAS′, which
is also 30°. If an object be at O, and the eye at I, then the
object will appear as though it were at O′, as the eye only
recognises the object in the direction from which it actually
receives the light. The apparent angle S′AO′ is equal to
IAS, so that the point of a mirror from which an object
reflected is received is in direct line between the eye and
the apparent object. This observation will be found useful
in placing mirrors.
55.—Prismatic Reflection. The same law as given above
applies to internal reflection from glass. Let Fig. 3 represent
the section of a prism ff′, two plain surfaces of glass at right
angles to each other, and the third side making an angle of
45° with each of the other two. The ray i will therefore pass
perpendicularly through the plane f without refraction to meet
the plane 45° and the angle of reflection, being equal to the
angle of incidence, will leave this plane at 45°, and reach r.
The angle of glass here given of 45° being greater than 41°
49′, its extreme angle of refraction, the internal reflection
will be therefore perfect.
56.—Prismatic Reflection, as this is termed, is largely used
in optics in preference, where practicable, to open reflecting
surfaces, from the certainty of keeping the reflecting surface
clean; as dirt exterior to the reflecting surface of the prism
does not affect the internal reflection in any degree.
57.—The reflection is shown for clearness from the plane
(Fig. 2) as it actually occurs, or as it is measurable, independent
of theory. In optics it is found much more convenient
to take the reflection in relation to an imaginary line drawn
perpendicular to the plane. In Fig. 4 NA is termed the
normal. Taking the angles as before as 30° to the plane, the
optical expression of this would be 60° to the normal, and the
reflection of the incident ray IA to R would be in the angle
IAR 60° + 60° = 120°, the amount the incident ray is
deflected from its former course. This principle is important
to be understood in the construction of the sextant and other
reflecting instruments. In reflection the ray is found to
follow the shortest path,—that is, the path I to R by reflection
is shorter in the lines IAR, placed at equal angles to the
normal, than it would be by any other possible path. As,
for instance, it is shorter than IaR, shown by dotted
lines.
Fig. 4.—Measurement of angle of reflection in optics.
58.—Passage of a Ray of Light through a Prism or a
Lens—Convex Refraction. If we comprehend the law of
refraction exemplified above, art. 51, the path of a monochromatic
ray through a prism or a lens is easily determined,
taking into consideration the refraction index of the glass.
In Fig. 5 let a″a‴ be the base of an equilateral prism, which
base may also represent the axis of a lens linear or parallel
with the direction from the centre of the eye to O. Now, if
a ray of light pass from a small luminous object at O in the
path a′ to the prism, we may assume all other parts of the
prism covered, and the refraction of the glass be such that
the ray will pass through it from this position in a horizontal
direction, or that parallel to the assumed axis a″a‴, then
the same ray will pass through the prism to equal distance
from the centre of the prism,—that is, to the position of the
eye shown by the ray continuing in the path a, the angles to or
from the prism being equal; so that if we cover up all parts
of this prism except a line parallel with its base joining the
ends of the lines aa′, where it is shown passing through the
prism, any ray of light from O, under the conditions given,
will appear as a spot of light on the plane parallel to the base
of the prism; or if we place our eye at the position shown,
we shall see the image of the light O. If we take a prism of
the same kind of glass, but of less angle, whose base is b″b‴,
the refraction would then be less (that is in the ratio of the
sines), that is if the ray pass through the prism at less
distance from the base, so that the ray Ob′ would pass through
horizontally as before, and emerge from the prism in the
path b, also with equally less refraction, so that the ray would
reach the eye at the same point as the more refracted ray.
In like manner, if the prism were of still less angle with base
c″c‴ and pass through the prism at a lower position, the
refraction would be proportionally less, and therefore reach
the eye at the same point.
59.—If we take the half lens shown in section in the
figure, this may be considered to touch the surface of the
prisms described tangentially in the lines a″a‴, b″b‴, and
c″c‴, where the angles of contact of O, a, b, or c upon the
prism would be equal to those upon the lens for an infinitely
small extent of surface. Therefore, if we make the lens of
such form that a ray of light may pass from any single point
upon the line of its axis, and be refracted by every point of
the surface of the lens to a single point or focus on the
opposite side of the axis, such form would be a perfect lens.
For simplicity of demonstration the refractions given above
are made parallel with the axis of the lens. This parallelism
could only occur with the object and the eye at equal distance
from the centre of the lens, and with this distance also
proportional to the amount of refraction of the glass used in the
construction. If the rays were all parallel to each other upon
incidence they would still be bent in the same ratio (to the
sines of the angles of contact and departure), and this would
bring the focus nearer to the glass; but it is evident the
same principles would hold.
60.—As regards the action of the eye in this matter, it
can only recognise the direction from which it receives the
light, and not the processes the rays may have undergone
before reaching it. Therefore the ray proceeding from O in
the path b′, passing through the lens or prism and emerging
in the path b, is recognised by the eye as the ray b only. So
that the point of light O appears visually as proceeding from
the direction bs, and this convergence or expansion of the
point O, with its coincidence from the opposite side of the
lens, produces the effect of magnification of the object
represented by O.
61.—Concave Refraction.—In Fig. 6 a convex lens
is shown in which the parallel rays L are drawn to a focus
at F upon the principles just demonstrated. If the lens
were made concave, as shown in section Fig. 7, by the same
principles of refraction, it is evident that the rays would
diverge, as the refraction bends the ray uniformly towards
the thickest section of the glass. If two lenses are brought
together, one with convex face, and one of the same radius
of curvature, but with concave face, the rays in passing
through would not be refracted. In this case the lens would
be said to be corrected. A convex lens has a focus where the
rays converge. A concave lens is said to have a negative
focus equal to the focus of the convex lens, that will correct
it, or make it equal, as regards refraction, to plane parallel
glass.
62.—Spherical Aberration.—If the surfaces of convex lenses
are truly spherical, it is found, by an analysis too complex to
be described in this work, that the rays which pass through at
different distances from the axis converge to slightly different
points of distance. This subject was at one time seriously
discussed for the proper formation of objectives for telescopes;
but at present it is entirely neglected by the optician, as it
is found practically to be as difficult to make a lens truly
spherical as one of the convergent or divergent form required
under the special conditions present. The spherical form, as
it is approximately produced from the grinding with spherical
tools, being always nearly correct, the correct forms of object-glasses
are made by figuring, which has been already referred
to, art. 38. In eye-pieces the spherical aberration would
cause some confusion were the glasses not adjusted in such a
manner as largely to prevent this.
63.—The Formation of Images by Refraction from a
Convex Lens.—If we take any double convex lens, as that
shown in section Fig. 6, we find, if it is held towards the sun
at a certain distance from a solid surface, we form a burning-glass,—that
is, we produce an image of the sun where his rays
of light and heat are refracted by the whole of the surfaces
of the glass. The distance from the centre of the lens to
the point of greatest light is called the solar focus of the
lens,—that is, the point at which it concentrates or converges
parallel rays, and forms the image of the sun. With parallel
rays from the sun, the distance of focus is less than if these
rays were divergent in any degree. Consequently the solar
focus is less than that subtended by any object on the
earth.
Fig. 8.—Diagram of the convergence of rays of light.
64.—In the diagram, Fig. 8, a candle-flame at acb forms
its focus at a‴c‴b‴, where all rays converge to form an
image in the following manner:—Every point of the candle
throws its light upon every point of the surface of the lens,
and, therefore, throws the image of each point to its focal
position behind the lens, according to the direction of its
refractions; so that, if we take all the separate points of light
thrown from the candle, we then have a perfect image of it
formed by an infinite number of separate focal points, and as
the rays by their direction necessarily cross over the axis the
image is in an inverted position.
65.—The whole of these lines would form a confusion if
shown in a diagram. We may, therefore, take for illustration
the exterior of a cone of rays proceeding from three points
only. Thus the clear lines aa′ and aa″ from the point of the
flame would refract to the lower part of the image a‴. The
dotted lines bb′ would proceed to the upper part of the image,
as shown by the continuation of the dotted lines to b‴, whereas
the central dash lines c′c″ would form their images in the
centre following the dash lines to c‴, and thus, from the
number of luminous points, the whole image of the candle
would be produced at the foci b‴c‴a‴ in an inverted
position.
66.—Dispersion of Light.—The conditions stated above
for refraction of monochromatic light would not answer for
perfect vision, which is only possible in clear white light. It
therefore becomes necessary in practice to correct the quality
of dispersion which light suffers in refraction through any
dense medium. The evidence of dispersion by glass may be
shown by a prism, as in the following diagram:—
Fig. 9.—Diagram showing chromatism of light by the prism.
67.—In Fig. 9 let P represent the section of a prism of
glass, covered except at the narrow opening a. Let a strong
light, as shown, be covered, except from a narrow slit, then
the ray from the light, refracted from a towards a′ in the
prism, will be dispersed or split up at a into the colours of the
rainbow, shading from blue, green, and yellow, to red, within
the prism. Upon emergent refraction at a′ this dispersion
will increase so that an image of the slot near the light, if
thrown on a plane proceeding from the base of the prism to
the right, will be represented at BGR by a prismatic or
chromatic spectrum, as it is termed, shading off from blue to
green, yellow, red.
68.—Achromatism of the Prism in the same Quality of
Glass.—Taking the prism, Fig. 10, C as before, and applying
a second exactly similar prism C′ reversed upon the face of
the first—then at every part of the process of dispersion from
a point of white light under diffraction into the first prism,
will by equal diffraction, in passing through the second prism,
be brought to a point, where it will issue a white ray at the
point a″, as it entered at the point a; or, practically, the
emergent ray will be achromatised. This principle must be
followed in the manufacture of achromatic lenses, although
under various indices of refraction and dispersion from differences
in qualities of glasses. It is made use of in the
achromatism of eye-pieces, and in combinations, and assures
the achromatism of parallel glasses used for sextants under
different angles of incidence.
69.—The Achromatic Lens.—The achromatism of
a pair of lenses by which a large amount of refraction of
pure white light is obtained, depends upon differences in
the qualities of glasses which are due to their density and
chemical composition, so that in one glass a less amount
of dispersion is produced at an angle which gives an equal
amount of refraction than in another. The combinations of
glasses in use are crown and flint, as already described, art.
32, the crown being a light glass of soda and silica, the flint
being a heavier glass containing silica, potash, and lead. In a
certain kind of flint glass used for optical purposes, for a
prism giving only slightly greater refraction than one of crown
glass, the dispersion is about double. Therefore, we may
combine a pair of glasses so as to obtain a desired amount of
refraction from the combination if we make the crown glass
refract something over double the amount we require for
the perfected lens or prism, and diminish this quantity by the
reverse refraction of the flint glass, thereby correcting the
dispersion, as may be shown by the diagram on this page.
70.—In fig. 11 let C be a prism of crown glass giving over
double the amount of refraction to a prism of flint glass F,
but only of total dispersion equal to the thicker crown glass.
The compound white ray of light a will then be dispersed
upon refraction at the meeting faces of the two prisms, a
certain quantity represented by the cone of rays shown, and
again converge at a′, an equal quantity on emergence from the
exterior surface of the flint prism, so as to issue again a white
ray, of which this system of prisms has refracted, but not
dispersed, the light.
71.—That the same principles given above for the prism
will hold in the achromatic compound lens, is already
demonstrated by the comparison of lenses and prisms shown
in Fig. 5; but for the sake of clearness it may be again shown
diagrammatically in Fig. 12 for an actual objective, wherein the
parallel rays ab, proceeding from a distant object or star, are
shown refracted to a′b′, and coming to a focus at F, although
dispersed at the meeting surfaces of the two glasses, as shown
diagrammatically, by the internal cone of rays.
72.—Practically, the matter is not quite so simple as it
would appear to be theoretically, by the above-described conditions,
as we actually find the spectrum of a prism of flint
glass of equal dispersion to one of crown glass does not give
exactly similar extent of separate colours within its spectrum,
the medium ray of the spectrum in the flint glass being nearer
the blue than in the crown. Thus, this compound lens does
not perfectly correct by inversion as it does in the perfect case
discussed, and shown in Fig. 10. For this reason better
definition is found by slight displacement and slight difference
of total extent of dispersion of one of the spectra in coincidence
on the meeting planes between the lenses, leaving in all
cases a certain amount of residual colour, blue or red, uncorrected,
by making the glass under- or over-corrected, as it is
termed, which does not, however, seriously impair distinct
vision. It is quite possible that, by some future improvements
in the chemical constitution of the glass, this defect may be
remedied. English glass-workers prefer to over-correct,
German and French glasses are more often under-corrected.
73.—The measurements of refraction and dispersion being
both in one direction, may be taken together within certain
angular limits in one term in the construction of a lens as the
ratio of dispersive powers, the indices being certain dark lines
which are observed uniformly in the spectrum of the sun
projected from a narrow slit. These lines or bands in the
sun's spectrum are known to be due to metallic vapours which
are present in his atmosphere, and can therefore be reproduced
by the deflagration of like metals on a small scale. To certain
of these lines letters of the alphabet have been applied. Of
these letters, a pair of lines due to sodium vapour marked D,
and three lines due to hydrogen, marked C, F and G, are
commonly taken for reference of dispersion. Achromatism is
generally considered duly corrected when the lines C and G
are united. The middle of the spectrum between these lines
is about E; and chromatic dispersion of optical flint and
crown may be taken to be fairly corrected if the spectra are
coincident in colour at this line.
74.—Curvatures in the Achromatic Lens.—A large amount
of mathematical power has been expended upon this matter,
but the perplexity of the subject is due to small differences of
the material; and the impossibility of working absolutely
true spherical curves has rendered this work of little practical
value to the optician, who still resorts to the formulæ of
Dollond and Tully. Those who care to follow the subject
beyond the scope of this work will find numerous papers in
the Phil. Trans., and in the works of Herschel, Barlow,
Coddington, Robinson, and Stokes, wherein what is known
theoretically of the subject is fully investigated and discussed.
75.—For all small achromatics, such as are employed in
surveying instruments with Chance's hard crown and dense
flint, the following approximate formula is commonly employed,
expressed in terms of the radius of the curved surface
into f, the total focus of the finished objective, for first
working before trial:—
1st.—Outside surface,
f2
convex,
2nd.—Inside "
f3
convex,
crown.
3rd.—Outside "
f3
concave,
4th.—Inside "
4f
convex,
flint.
76.—By different makers the surfaces are changed as far
as reversing the curvature of the front glass, and indeed very
good glasses are made with the 1st, 2nd and 3rd = (f/2·5). In
all cases true convergence of the white ray is only obtained by
correction of the outer and inner surfaces, or by figuring, as it
is technically termed, in which the curvature is not only made
greater or less, but its character is altered generally in the
direction from circular to elliptical section. The qualities of
the object-glass cannot be over-estimated by the practical
surveyor. A heavy instrument with inferior object-glass may
be carried about for years, whereas a lighter instrument with
good object-glass would perform better work. Excellent
information upon this subject was given in a lecture before the
Royal Institution by the eminent optician, Sir Howard Grubb,
of Dublin.
77.—Optical Arrangements of the Telescope.—The earliest
form of telescope is that of Kepler, Fig. 13. In this the rays
from the object-glass cross in front of the eyeglass; consequently,
the image is inverted. This form is at present
little used except in combination with a separate eye-piece.
78.—Galileo's Telescope, Fig. 14.—In this the eye-piece is a
concave glass. This glass is placed inside the focal distance,
so that the rays from the object-glass are bent to less convergence,
that they may enter the pupil of the eye in a
direction possible to reach the retina. The image in this
telescope is maintained erect. This principle is used entirely
for field and opera glasses, also for sextants and some other
instruments where it is desirable to keep the image erect, and
small power is required, sufficient only to obtain more distinct
vision. The lines aa′ in Figs. 13, 14 are termed the axis of
the telescope.
79.—Optical Arrangement of the Huygenian Telescope.—In
surveying instruments, where angles and directions are not
taken by coincidence of direct and reflected images, it is
necessary that the direction of the axis of the telescope should
be clearly indicated. In this case the focus of a distant
object—that is, its exact image—is projected upon a plane
termed the diaphragm, Fig. 15, SS′ upon which a visible
object or index is placed, the position of which is picked up
by a secondary telescopic arrangement, or eye-piece as it is
technically termed.
80.—The arrangement of lenses in a surveying telescope
is shown in the illustration above, where OG is the object-glass
or objective, E the eye-glass, F the field-glass. The two lenses
E and F, in their mountings, form the eye-pieceEP. The
dotted line a is the axis of the telescope, SS′ is the focal plane
of the object-glass, where a metal disc is placed with an
opening in its centre—this is termed the diaphragm or technically,
the index-stop. Across the opening in the disc, spider's
webs or other fine visible objects are placed, to be described
further on.
81.—Both the object-glass and the eye-piece are fitted in
sliding tubes, which will be described presently, in such a
manner that they may be made to approach or recede from
the focal plane SS′. The nearest distance of the object-glass
to this plane is the solar focus, or the distance at which a
sharp image of the sun or a star placed in the axial line would
be formed. The greatest distance of the object-glass from the
focal-plane in most instruments is such that a clear image will
be given on this plane SS′ of an object placed at about
twenty feet from it.
82.—The Ramsden Eye-piece, the optical arrangement
of which is shown in Fig. 16, is also known as a positive
eye-piece. It consists of two plano-convex lenses, the convex
surfaces of which are turned towards each other. They are
separated by a distance equal to two-thirds the focal length
of either glass, and placed so that the diaphragm is one-fourth
this focal length from the field-glass.
83.—This eye-piece is considered not to be quite so
achromatic as another form known as the Huygenian eye-piece,
but its spherical aberration is less than any other, and
it gives what is necessary in all measuring instruments—a
flat field of view, requiring no change of position to see the
centre and border of the field with equal distinctness.
84.—The Field of View should be as bright as possible.
To ensure this, the field of the object-glass which is taken by
the eye-piece at the position of the front of the eye should
not be larger than the pupil. If the whole field of light
enter the eye as it should do, the brightness will then vary
directly as the square of the diameter of the object-glass,
and inversely as the square of the magnifying power. The
directions of the rays are shown by dotted lines as aa
and a′a′ for the Ramsden eye-piece in Fig. 16. This
eye-piece is sometimes called an inverting eye-piece. It is not
really so: the object-glass inverts its image and the eye-piece
picks up the image in its inverted position. Two or three
eye-pieces of this kind, of different magnifying powers, are
sometimes supplied with one surveying instrument. The same
form of eye-piece, being also a simple microscope, is used to
read the divisions on the divided circles of theodolites, sextants,
and other instruments, and for such purposes it is often
desirable to ascertain its focal length.
85.—The Focal Length of the positive or Ramsden eye-piece
is found by dividing the product of the focal lengths
of the two lenses by their sum, diminished by the distance
between them. Thus, if the focal length of each of the
lenses be 1·5 inches, the distance between them 1 inch:—
1·5 × 1·53 - 1
= 1·125 inches.
86.—The Magnifying Power of the Telescope.—The focal
length of the objective divided by that of the eye-piece
gives the power of the telescope. Thus, a 14-inch
telescope with the above eye-piece would have a power,
141·125
= 12·444, or 12½ nearly,
a very general lower power eye-piece with telescopes of
this focus.
87.—Dynameter.—The magnifying power of a telescope
may be ascertained, without any knowledge of the focus of
the glasses used in its construction, by the use of a dynameter.
This instrument, Fig. 17, consists of a compound microscope
in which a finely divided transparent scale is placed in the
mutual focus of its object-glass and of the eye-piece at a.
The divisions of the scale may be ·01, ·02, or ·001 inches
apart, adjusted so that a disc ·1 inch diameter at the exterior
focus of the eye-piece may read a given quantity upon the
scale. To use this apparatus, the flanged face is placed in
front of the eye-piece of the telescope, previously set at solar
focus. The telescope throws a circular image of its object-glass
through the eye-piece, where it is picked up by the
object-glass of the dynameter and brought to focus on the
scale a, where it appears as a circular disc of light. If this
image be measured by the scale, and the diameter of the
object-glass be divided by this measure, the quotient will be
the magnifying power of the telescope. There are several
other forms of dynameter.
88.—The Erecting Eye-piece, sometimes supplied
with theodolites and occasionally with other instruments, is
the ordinary one of the common telescope, Fig. 18. The
glasses are so arranged that the image brought to the focus
of the telescope inverted is again erected, so that objects
appear in their natural position. The complete eye-piece is
of the same optical arrangement as that of a compound
microscope. The arrangement of lenses is shown in the
engraving on next page.
Fig. 18.—Optical arrangement of erecting eye-piece.
89.—A object lens, B amplifying lens, C field lens, D eye
lens. Stops are placed at d and d′ to cut out extreme rays.
The image is formed by the objective at O, and the light
passes in the direction shown by fine lines, being thrown from
side to side of the lenses. The ray is achromatised proportionally
to its dispersion by the separate lenses, upon
principles discussed art. 68 and shown Fig. 10, as independently
of the small amount of opacity of the lenses, extreme rays are
cut off, so that central portions only are used. This eye-piece
suffers loss of light at each of the four lenses; therefore, a
telescope with it, for equally distinct vision to that obtained
by using the Ramsden eye-piece previously described, would
require a larger objective.
This eye-piece is rarely used now, excepting with American
instruments in which they are almost universal, as the very
slight advantage of seeing the image erect is far outweighed
by the loss of light it entails. The American manufacturers
place them inside the telescope instead of outside, thus the
telescopes look much the same as our ordinary ones, but
the focal length of the object-glass is shortened by the length
of the eye-piece, and as this takes up from three to four
inches, a telescope which would appear to be say 10 inches
solar focus is, in reality, only six or seven inches and consequently
only about two-thirds the power.
Fig. 19.—Diagonal eye-piece, full size; S G sun-glass.
It is astonishing that the Americans, who are usually so
quick in adopting the most practical appliances, are so slow
in seeing the advantage gained by the use of the now almost
universal inverting eye-piece.
90.—The Diagonal Eye-piece, Fig. 19, is used upon
transit instruments, theodolites, and occasionally upon mining-dials.
It permits the telescope to be used by the observer
looking at right angles to its axis. Thus, by the natural
direction of the eye, stars or the sun may be observed to near
the zenith, or the direction of a line cut by two lights at the
bottom of a shaft may be observed from above by the
telescope of a theodolite having a hollow centre on its
ordinary stand, to check the magnetic bearing of the needle
below ground, if this is assumed to be subject to local
disturbance. The socket of this eye-piece screws upon the
telescope and has a free inner tube for rotation, so that the
90° to the axis of the telescope may be placed at any angle
to the axis of its cylindrical circumference; as, for instance,
instead of being used vertically or for zenith stars, it may be
used horizontally, where precipitous ground would not permit
direct axial vision through the telescope. The reflecting
arrangement of this eye-piece may be adapted either to the
Ramsden or the erecting form. In either case the reflector is
placed in the central portion of the eye-piece. In surveying
instruments the reflector is generally a piece of polished
speculum metal for portable instruments, but a prism of glass
for larger fixed instruments. The general arrangement is
shown in the section of a diagonal Ramsden eye-piece on
page 42, full size. A object lens, D eye lens, adjustable for
distance from the reflector R, S outer casing which permits
adjustment for focusing, SG sun glass, the diaphragm being
in front of A.
91.—When a rectangular prism is used for the reflector, it
is worked with one plane 45°, as previously discussed, art. 55,
Fig. 3. In place of one or both the 90° faces these surfaces
are sometimes worked convex so as to form a magnifier, dispensing
with one of the convex lenses of the eye-piece. A
long diagonal eye-piece is necessary, where stars towards the
zenith are to be observed, to prevent interference of the limb
of a theodolite with the face of the observer.
92.—Reflecting Eye-piece is used to observe small stars,
as for instance the circumpolar stars in the southern hemisphere,
by illuminating the front of the webs or lines. A strong light
thrown down the telescope from a reflector to illuminate the
webs would tend to dim the effect of blackness of the sky and
render these stars indistinct. In the eye-piece, Fig. 20, a
piece of plain parallel glass is placed at an angle of 45° to the
axis. This permits the webs to be clearly observed through
the glass at the same time that it throws light from a lamp
placed at a distance from the glazed aperture L by reflection
of the surface of R sufficient for front illumination. The
amount of light required is regulated by the distance of the
lamp from L. This eye-piece is made to fit into the diagonal
eye-piece casing, as SFig. 19, E Fig. 20 being the position of
the eye, F field-lens.
Fig. 20.—Reflector in eye-piece to illuminate the front of diaphragm.
93.—Sun-glass.—Sextants and theodolites are supplied
with a very dark glass or a combination of dark glasses fixed
in a rim to form an eye-piece front, which screws or fits on in
front of any eye-piece, to take observations of the sun for
longitude or bearing, Fig. 19, SG. It needs no description,
but is necessary to be mentioned to complete the optical
arrangements of a telescope, as it is sometimes used for
surveying purposes.
94.—The Body of a Telescope that forms part of a
surveying instrument is constructed of a pair of triblet drawn
tubes, Fig. 21, TT′ T′. These tubes should be truly cylindrical
and straight, so as to fit smoothly together, the one
within the other, and slide in and out quite freely but without
any play. The inner tube should be as long as practicable, so
as to remain steady when racked out to the full extent required
to focus near objects. The object-end R is generally enlarged
so as to take the cell in which the objective O is placed, without
cutting off any part of the light, or entailing the weight of
larger tubes than is necessary to make use of the full field of
the objective. The objective is generally held in its cell by
an internally fitting screwed ring with milled edge, so that the
glasses may be taken out and separated to be cleaned, and be
easily replaced. Two notches or grooves are commonly made
in the edges of the glasses, each of which is deep enough to
take a small brass pin which is soldered to the inside of the
cell. The second notch indicates relative position, so as to
secure the glasses being replaced properly. In all cases the
double convex crown glass is placed outwards from the telescope.
A glass of large size should have a loose ring within
the cell to act as a spring to save distortion of the objective
from expansion or contraction of the metal; but this is not
necessary in small surveying instruments. In some common
telescopes the object-glass is burnished into its cell, in which
case the glasses of the objective cannot be separated for
cleaning.
95.—Stops.—Within the inner tube two or more thin
metal rings, termed technically stopsSS and S′S′, are placed
to cut off any extraneous light that may enter the telescope
obliquely, and which, if not stopped off, would produce a
fogginess over the whole field of view. It is important that
these stops should not cut out any part of the full aperture of
the object-glass if it be a good one. In the manufacture of the
telescope this is easily seen by looking in at the eye-piece of
the unglazed telescope to see if the stops clear the objective
cell. In the finished glazed telescope another method will be
discussed further on.
96.—The inner or the outer tube of the body of the telescope
slides towards or from the objective for focussing by
means of a rackR″ and pinionP. The rack is soldered to the
inner tube, and the pinion fitted in a cock-piece, as shown Fig.
22 C, on the outer tube. The pinion is moved by a large
milled head M. This fitting should be made with care. The
pinion should be very free, so that it does not lift the body at
any tooth, and at the same time there should be no shake on
the gearing. It needs considerable practice to rack a telescope
properly.
97.—The outward part of the object end of the telescope
is generally turned to fit the interior of a separate short tube,
shown at R, which is placed over it. The outer end is closed
by a ring to the size of the aperture of the objective. This is
termed a ray-shade or sometimes a dew-cap. The ray-shade is
extended when the telescope is directed to such an angle that
the sun's rays would fall upon any part of the objective, and
thereby cause internal reflections. A swivel shutter, Fig. 21,
R′, is placed upon the outward end of the ray-shade, which,
when closed, as shown in the cut, forms a cap to the telescope.
The eye-piece EP before described, art. 82, Fig. 16, is placed
in a tube constructed upon the end of the telescope, in which
it slides freely, to focus upon the diaphragm to be presently
described. The telescope is mounted sometimes solidly upon a
transverse axis, or it is mounted in turned bearings, or it has
two collars placed round it which are turned quite equal
and true, and are mounted on Y's to be hereafter described.
98.—Mechanical Adjustment of the Eye-piece.—In some large
instruments the eye-pieces are racked for adjustment in the
same manner as the object-glass already described. A better
plan is to have an inner tube to the socket tube cut with a
screw into this, and provided with a milled edge, so that the
eye-piece may be screwed gently to focus upon the webs of
the diaphragm.
99.—The Diaphragm of the Telescope is so constructed
as to permit the displacement of spiders' webs or
other fine objects in any direction at right angles to the axis
of the telescope, or in the vertical only in the dumpy level, to
be described, the object in all cases being to adjust the
crossing of the webs, lines, or points to the axis of the
telescope. It will be convenient here to discuss a general
form of diaphragm applicable to theodolites, mining-dials, and
plane-tables only, which gives movement in two directions at
right angles to each other.
100.—The diaphragm, Fig. 23, is formed of a stout disc
of brass having a centre hole of about ·30 inch diameter.
Upon the side which is placed next the eye-piece the hole is
brought to a thin edge by an internal bevel or countersink,
which leaves the hole much larger at its off surface, Fig. 24 P.
The disc is held in its place and adjusted by four capstan-headed
screws, termed collimating screws, two of which are
shown in section as CC′, the screws being tapped into
the rim of the diaphragm frame P. The screws are placed
through a stout collar. The theodolite diaphragm has generally
three spiders' webs or lines crossed in the manner shown in the
centre of Fig. 23. The eye-piece is screwed into the thick
plate, Fig. 24, TT′, and adjusts to the focus of the webs.
101.—Webs.—It is a somewhat delicate process to web a
diaphragm, but it is necessary that every surveyor abroad, out
of the reach of an optician, should understand the method if
his instrument were originally webbed. The webs are taken
from a small or young garden spider. The best are taken when
the spider has first commenced spinning. To wind off the
web a fork is bent up out of a piece of thin brass wire. A long
hairpin will answer for this purpose very well, or even a fork
formed of a thin branching twig of a shrub; but if this last be
used it should be thoroughly dry, or the webs will be broken
or be baggy by its warping in drying.
102.—The web in connection with the spider is first
attached to one prong of the fork by looping or by any sticky
matter, if the web be not sufficiently sticky naturally. The
spider is then suspended from the fork and jerked down a
foot or so, and the web is wound off as shown in Fig. 25.
The last length of web being attached by gum. A dozen or
so of the forks may be taken from the same spider before she
is exhausted. The webs are then gummed or varnished to the
sides of the fork, and are ready for use at any future time.
They are best preserved if placed in an air-tight box,
which may have slots in an internal fitting to hold them.
The small amount of spring given by the fork keeps the webs
always taut. Where a living spider cannot be found, the open
ties of an old web may be taken; but in this case, after the
web is wound on the fork, it should be carefully washed by
immersing it in clean water, and, if necessary, brushing it
gently under water with a light camel-hair brush, examining it
occasionally with a magnifier to see that it is sufficiently clean
and free from knots for its purpose.
103.—To Fix the Webs, lines are drawn on the diaphragm,
into which the webs are to fall. It is then varnished over the
divided side with Canada balsam, laudanum, or other quick-drying,
sticky varnish—at a pinch, sealing-wax dissolved in
strong whisky will answer. The outer, or the unused web
upon the fork, is lowered carefully over one of the most nearly
vertical lines, and lightly pressed down to assure its perfect
adhesion to the varnish. It is then either broken off or cut
loose. The second nearly vertical line is then webbed in the
same manner, and the horizontal line finally, being sure that
this last cuts the intersection of the others. The diaphragm
should then be put in a warm place to be allowed to
thoroughly set without disturbance before it is fitted in the
telescope.
104.—Platinum Wires are sometimes used in place of
webs. These wires are made by drawing a piece of fine platinum
wire, which has been previously soldered into a silver
tube, to the greatest fineness possible with the draw-plate, and
afterwards dissolving the silver off the platinum by nitric acid.
The platinum wire is thus produced of less than ·001 inch
diameter. For a time these wires were very popular, and it
was thought that they would supersede the use of webs, but
they do not appear entirely to answer expectation. The platinum
drawn in this manner appears to lose some part of its
elasticity. It is not easily attached, that is, it is liable to shift
from its fixing, possibly from its contraction and expansion
with change of temperature, not being of the same metal as
the diaphragm. It also oxidises a little or becomes in some
way corroded in use out of doors. It appears to answer better
for astronomical telescopes, but the finest platinum wire obtainable
is not so fine as a spider's web.
105.—Lines Ruled upon Glass.—A glass diaphragm is
frequently used in a surveying instrument to replace the webs.
Lines are ruled upon the glass in similar positions to the webs
already described. They appear quite sharp in the eye-piece,
and are more permanent than webs. Glass is also convenient
for permitting space lines to be ruled for subtense measurements,
a subject to be considered further on. The objections
that have been found to glass are that it obstructs a little light,
and is subject to dewing. The dewing is particularly annoying
when temperature is lowering quickly, as a diaphragm may
become bedewed many times in a few hours. In all cases
where a glass diaphragm is used it should be placed in a
ground metal fitting, so that it may be taken out in a minute
to clean and be replaced with perfect certainty of its adjustment.
It is a very convenient practice where webs are used
to have a spare glass diaphragm to replace them should they
become broken. This may be constructed by means of a
ground metal fitting to be put in a webbed instrument in
perfect adjustment in cases where it might be impossible to
find a new web.
106.—Points.—The author for a large number of instruments
employs very fine points in place of webs, which he
highly recommends. These are fixed for support upon the
margin of the diaphragm, and projected therefrom into the
field of view. The points are formed of a special alloy, 75
platinum, 25 iridium, which has the hardness of steel, and is
perfectly non-corrosive in air or moisture. They are made
sufficiently stiff to be dusted with a camel-hair brush, supplied
in the instrument case, without the slightest fear of disturbance
of position in the instrument. They form a perfectly permanent
index of sufficient stability to last in perfect adjustment as
long as the instrument lasts in wear. One objection is that
a point gives less field of observation for levelling than a
line, but this does not hold if there is tangent adjustment to
the instrument to bring the point up to its reading position.
The value of the reading from these points will be discussed
further on.
107.—Position of the Diaphragm in the Telescope.—If
the objective be accurately centred, and its
mounting true, the intersections of the webs, lines, or points
should come exactly in the axis of the telescope; but it
would never do to accept this without critical examination.
Therefore the webs may be placed approximately in the
centre, and adjusted true to the axis of the objective and the
telescope by what is technically termed collimation. The first
point, however, to be studied in this adjustment is to get the
eye-piece and the objective accurately in focus with the
webs. The same description of focussing which answers for
collimation will answer also for ordinary use of the telescope.
108.—Adjustment of the Eye-piece to the Webs is effected
by pushing in or drawing out the eye-piece in its tube with a
slight screwing motion until the webs, lines, or points appear
quite distinctly. To prevent confusion from the sighting of
objects, it is better to take off the ray-shade, to point the
telescope to the distance in opposition to the direction of the
sun, and to keep the telescope rack fully extended, so that it
is quite out of focus. When the light is not very bright a
sheet of notepaper or an envelope may be placed obliquely in
front of the object-glass to obtain a soft reflection from the sky.
This method is always employed by some observers.
109.—Adjustment to Focus of the Objective.—Parallax.—The
eye-piece remaining in focus, the telescope is racked out
until the object desired to be brought into view, either for the
collimation or for ordinary reading, is sighted. After this the
milled head is moved as slowly as possible until what is
thought to be the exact focus is obtained. The certainty of
exact focus is not easily obtained by direct observation, but it
may be obtained by what is termed observation for parallax,
which must be taken in all cases when adjustment is required
for collimation. Thus, having obtained the nearest possible
adjustment by sighting a small object or a division upon the
staff, bring the object to read exactly in a line above the horizontal
web in the centre of the stop or the corner against a
vertical web. If now the eye be moved up and down as far
as the range of the eye-piece will permit vision of the centre
of the webs, and the object sighted appears fixed at the same
position to the webs, the focus is perfect. If, in moving the
eye, the object sighted appears to follow its motion about the
intersection of webs, the focus of the telescope lies beyond
the webs; the objective must therefore be moved slightly
nearer the webs by turning the milled head very gently.
If, on the other hand, the object sighted moves in the
opposite direction to the eye about the intersection of the
webs, the focus of the telescope is towards the eye-piece, and
the telescope requires slightly racking outwards by moving
the milled head in the reverse direction. After a few trials
the object and webs appear stationary, however obliquely
observed.
110.—Collimation is the adjustment of the crossing of
the webs of the diaphragm to the axis of the telescope and its
object-glass. This is effected by adjustment of the opposite
collimating screws, Fig. 24, CC′, in two directions at right
angles to each other. Where the telescope is placed in Y's or
collars, this adjustment is made by placing the webs or lines
in focus of the eye-piece and the object-glass of the telescope
in focus upon a small distant object. Then if the telescope is
rotated in all directions, and the small distant object cuts the
crossing of the webs in all positions, it is said to be truly
collimated. It is necessary to discuss the structure of various
instruments to show the methods of collimating in special
cases; therefore this subject will be again brought forward.
111.—The Qualities of a Telescope of a surveying instrument
are best ascertained by its performance. The general
method is to place a staff at the full range, 10 to 15 chains,
and to see if the ·01 foot in fine bright weather is read clearly
and sharply. This outdoor observation is not always possible,
particularly in large towns, but it may very well be supplanted
by reading at a short distance. The author made for the late
Colonel Strange, F.R.S., whose knowledge of scientific instruments
was of the highest order, a test-card for the Lambeth
Observatory, to be placed at 25 feet from the instrument. This
card had on one part fine lines ruled ·01 inch apart. A 14-inch
telescope was considered sufficiently good if these lines
could be clearly separated at this distance by the telescope
when it was in correct focus. The dial of a watch, or an ivory
scale, answers very well as a test object, as sharpness of outline
is the point to be ascertained.
112.—A more refined technical method than that described
above, which also tests the general accuracy of the optical
arrangement of the telescope, is to fix a small disc of white
writing-paper, say 1/8 inch diameter, cut out with the point of a
pair of compasses with sharp outline, on a black surface of a
board, paper, or cloth. If this be placed as before, 30 feet or
more distant in a good light, and be correctly focussed in the
telescope, a sharp image of it should be obtained. This focal
position of the telescope may be temporarily marked upon the
inner tube with a fine soft black-lead pencil. If now the
object-glass be racked outwards or inwards from this line, say
for about a twelfth of an inch, and the image appears to be
surrounded with a uniform haze, the objective may be considered
to be correctly formed, or to be free from spherical
aberration, as it is termed, and the combination to be correctly
centred. If the haze appears more on one side than the
other the centring is defective. If the object remains fairly
sharp when out of exact focus the curves of the lens are
defective, as the shorter the range of focus the more perfect is
the correction from spherical aberration.
113.—If the curves are not sufficiently correct to bring the
image from all parts of the objective to a focus, such incorrect
parts are useless, and a good glass of smaller size would be
better. The fault is generally found in the marginal portion
of the objective, which requires the greatest skill of the glass-worker.
Therefore, a very good test to find whether the
whole of the aperture of the objective is in effective use is
to cut out a piece of card of the size of this aperture and to
cut a second piece out of the centre of this, of half the
diameter, so as to form a disc and a ring. If the objective be
now covered by the ring and accurately focussed upon a test
object, and this be then removed and replaced by the disc
fixed over the centre of the objective, and the focus remains
equally sharp, the curves may be said to be, practically, correctly
worked.
114.—As the central part of an objective is more easily
brought to correct curvature than the marginal parts it is not
uncommon in inferior instruments to make the aperture of the
central stop of the telescope cut off the margin of the objective.
This renders it only equal to a smaller glass.
115.—Whether the full aperture of a telescope is used may
be discovered by employing a second eye-piece—outside the
regular eye-piece that is placed in the telescope—to pick up
the image of the object glass formed through the eye-piece
which is placed against the telescope in the manner of using
a dynameter, art. 87. With the ordinary surveyor's level, two
eye-pieces are commonly sold; one of these may be placed
in the telescope and the other used to pick up the image of
the object-glass. With a theodolite one eye-piece may be
placed in the telescope, and one of the readers used to
magnify the divisions of the limb may be used to pick up the
image. The best manner of proceeding is to fix with water
or thin gum two or three small pieces of paper, say 1/20, 1/10, and
1/7 inch square, close against the edge of the cell upon the
face of the objective. Then focus the telescope on an object
at some distance, say a chain or two. Now use the second
eye-piece in front of the one in the telescope, and an image
of the object-glass will be seen; and if the aperture is fully
open all the pieces of paper in their places will be clearly
distinguishable. If one or other piece is invisible, the margin
of the glass is cut off to this extent. If the objects in front
of the telescope tend to confuse, a piece of white paper may
be placed obliquely to reflect the light of the sky into the
telescope, which will at the same time fully illuminate the
objective.
The discussion of the principle of the anallatic telescope,
used only with the tacheometer, is deferred to another chapter,
wherein subtense instruments are described.
CHAPTER III.
THE MAGNETIC COMPASS AS A PART OF A SURVEYING INSTRUMENT
OR SEPARATELY—BROAD AND EDGE-BAR NEEDLES—MANUFACTURE
OF THE NEEDLE—MAGNETISATION—SUSPENSION—DIP
AND ADJUSTMENT—LIFTING—INCLINATION—DECLINATION—VARIATION—CORRECTION—COMPASS-BOXES—DESCRIPTION
OF COMPASSES—RING COMPASSES—TROUGH
COMPASSES—PRISMATIC COMPASSES—STAND—SURVEYING
WITH COMPASS—POCKET COMPASSES.
116.—The Magnetic Needle, which forms part of a
great many surveying instruments, is made of the form
adapted to the special purposes of the instrument in which it
is placed. There are two prevailing forms commonly in
use—one in which the needle is made pointed at one or both
ends to read directly upon a divided circle fixed upon the
instrument, and the other form in which it is made to carry
and to direct a divided circle by its magnetic force.
The magnetism which gives directive force to the needle
has been found by experiment to reside in every separate part
of the magnet, that is, it is assumed to be a molecular force.
Therefore, it would not appear to be very important, within
certain limits, of what form the magnetic needle is made, and
this is found by experiment to be to a large extent true. The
only important conditions appear to be that the needle shall
be of such form that the inducing magnet, to be described,
arts. 120–123, which is used for magnetising may be brought
into contact upon every part of its surface, and that the
molecular continuity of the parts should mutually support the
general directive influence of the magnetism longitudinally in
parallel lines.
117.—Magnetic needles are generally made in the form of
flat bars, which are balanced upon a standing point falling
into a cup which forms the centre. When the greatest section
of the bar is placed horizontally it is termed a broad needle, as
shown Fig. 26. This may be made of the lozenge form
shown, or be parallel throughout. When the greatest section
is placed vertically it is termed an edge-bar needle, as shown
Fig. 27. The north pointing end of the broad needle is
commonly tempered dark blue, or has a deep cut across it, if
the needle is left open. This is not necessary if it carries a
ring. The edge-bar is generally used where it is required to
read into a fixed circle of division, in which case its ends are
brought to fine knife-edges.
118.—From the difficulty of reading a sharp point in
bright metal against the black line of a divided circle, the
author occasionally makes one point of the needle with a fine
cut, sawn vertically for a short distance from its end, so as to
form a kind of split which is afterwards closed, so that it
presents the appearance of a fine black line of the same
character as the divisions into which it reads. With this, as
shown Fig. 28, the reading is found to be much more easy.
The point is also more readily adjusted by grinding, as the
end of the needle being broad, less care is necessary to avoid
reducing it so much that it may leave the interior of the circle
short where it reads into the divisions. This form of needle is
not adapted to mining instruments, which have often to be
read in an oblique direction.
119.—In the Manufacture of the Needle it should be made
of the finest cutler's cast steel, or, better still, of steel containing
3 per cent. of tungsten. If not left in a parallel strip
as it is drawn or rolled, it should be brought as nearly to its
form as possible by forging at a low heat. The steel should
not be over-heated for hardening. It should be hardened in
cold water or oil, and be tempered afterwards down to a very
pale straw-colour—in fact, the temper colour should only
just appear. Long needles may have the temper sufficiently
lowered at the centre to set them approximately straight
during the tempering; but the temper should not be lowered
even in the centre below a pale blue, spring temper. After
tempering, the setting and working up to balance is best
done by grinding, and for the final adjustment, by stoning
with Water-of-Ayr stone.
120.—Magnetisation of the Needle may be performed in
many ways by means of a permanent magnet or an electro-magnet,
or electrically by means of a solenoid. When
the magnetism is induced from another magnet it is only
important that the properly hardened needle should be
regularly and equally magnetised over its surface by pressure
upon it of the proper poles of the inducing magnet—that
is, that the north pole of the magnet should induce magnetism
in the southern half of the needle only; and the south pole
in the northern half only.
121.—Method of Magnetisation by Single-touch.—This
method is more generally applied to touching up needles than
magnetising them at first. The northern pole of a strong permanent
magnet is stroked down the southern end of the needle
from its centre to its end three times on one side of the needle.
The needle is then turned round, and the northern end is
stroked down in like manner with the southern pole. The
needle is then turned over, and the process is repeated on the
other side. This may be done a second time and the edges
of the needle be stroked down also.
122.—Method with both Poles.—In this process the needle
is held down firmly with pegs on a board, and a strong horse-shoe
magnet with rather close poles is laid on the bare needle
without its cap, in a manner that both terminals press upon it.
It is then drawn backwards and forwards from end to end of
the needle several times, lifting the magnet finally from about
the centre. The process is then repeated on the opposite side
of the needle and its edges.
123.—Method of Divided-touch is a somewhat quicker
process, which does not entail removing the cap, the general
plan of which is shown in the engraving below. The poles of
the magnets, or one of them, is marked. Two good straight
bar magnets are used. The needle is fixed down on a board
and the poles of the two magnets are laid upon it at an angle
of about 30°, applying one north or marked pole, and one
south or unmarked pole. The magnets are then drawn apart
in a horizontal direction along the needle, with constant pressure
upon it, so as to reach the opposite ends of the needle
simultaneously, and then again pressed back to the centre.
After this operation is performed three or four times on one
side of the needle, it is turned over and the process is
repeated on the other side, being careful as before to use the
same ends of the magnets upon the same ends of the needle.
The operation may be repeated several times to be sure of
saturation of the needle. It is better to lift the magnets off at
the termination of the operation at the centre of the needle.
124.—It is found that the needle is magnetised a little
more quickly if it is laid upon a strong magnetised bar during
magnetising, or upon the ends of two bars, as shown in the
engraving, Fig. 29, or on the two ends of a wide horse-shoe
magnet.
125.—Needles are now more generally magnetised electrically
by placing them in a solenoid or coil of stout insulated
copper wire through which a strong direct current is passing
from a dynamo or powerful battery. This method is employed
in the best shops. The touch system above described is convenient
for the profession for remagnetising a needle when
weak, as a horse-shoe magnet at small cost may be kept for
the purpose. It is generally used in small shops, as being at
all times ready to hand, less expensive, and sufficient to ensure
saturation if it is skilfully done.
126.—With every care in the manufacture of the needle
there remains a little difference in the qualities of needles which
are apparently otherwise identical. Little local differences in the
quality of the steel, slight over-crystallisation from over-heating
in hardening or unequal tempering, or unequal magnetising,
are liable to form weak parts, or even what are termed
consequent points. These are points in which the magnet
possesses a reversal of its general longitudinal polarity. This
can be made quite evident by experiment, as it is possible to
make a needle not only with poles at each end, but with
intermediate poles which are easily detected by sifting iron
filings over it. The filings are found to adhere strongly at
other local points than those near the ends, where a good
magnet is alone strongly attractive.
127.—Mounting of the Needle.—The needle for a surveying
instrument has a female centre upon which it is suspended.
The centre, termed technically cap, is generally formed of a
hard precious stone, agate, chrysolite, ruby or sapphire, the
latter being best, simply from the high polish it attains in
grinding out with diamond dust. Rubies and sapphires are
like minerals, except in the colour, which varies very much;
the off-colour stones, which are of small value for jewellery, are
used for scientific purposes. The cap is mounted in a brass or
aluminium cell made as light as possible for sufficient stability.
The needle is supported upon a hardened steel point,
upon which it is perfectly balanced. The base of the point
is tempered down to a low degree in order to admit a
certain amount of bending to counteract the slight warping
which generally occurs in the hardening.
128.—Correction of Errors.—The needle, after it is
mounted, although in balance may not have the steel placed
symmetrically about its axis through slight curvature, unequal
thickness about the cap, or otherwise, so that the magnetic
direction is not perfectly linear between the points and the
centre. If the points and centre are not magnetically linear,
the correction for declination, which will be presently considered,
cannot be made accurately. On this account it is
better for the manufacturer to mount the needle on a
slate bed with two sliding heads that may be brought
up to the points of the needle. The heads have upon their
upper surfaces lines drawn perfectly linear with the centre
point of suspension of the needle, and a few lateral divisions
to these lines for determining errors. On this bed the needle
is placed upon the centre point to be examined how nearly its
reading points are true with the axis. The error being
recorded, the needle is demagnetised, and remagnetised end
for end, and again examined. Corrections are then made by
grinding or stoning from observations of bisections of the
points cut in the separate readings, until the needle is made
symmetrical and invariable, whichever end is magnetised for
the north or south.
129.—Lifting the Needle.—The needle of a surveying
instrument should never be supported upon its centre except
for the time it is in use for observation, as a fine steel point
against a hard stone must, by any jar in conveyance from
place to place, receive a certain amount of abrasion that will
make it duller. For this reason a lift for the needle is always
provided in scientific instruments. In the engraving, Fig. 30,
an edge-bar needle is shown in section with its lift. The lift
is made in the form of a bent lever, whose fulcrum is upon the
bottom of the box. On the left-hand side of the broken
line at B the needle is shown lifted. On the right-hand side
A the needle is shown at its position for use, floating just
slightly above the divided circle D. The pressure of the
milled-head screw C depresses the bent lever or lift on the
bottom of the box and thereby raises the point under the
centre of the needle. This point has a hollow cone formed
upon it which fits over the standing-point to keep the lift in
position. The cone fits externally into the cap to lift the
needle vertically. The screw C should always be clamped
down when the needle is out of use. In place of the screw a
wedge shaped sliding piece is sometimes fixed inside the compass-box,
which is moved by a stud projecting through the
outer case. Another plan of raising the lift is by a cam, or
what is technically termed a kidney-piece, applied to the exterior
part of the lift. Either of these plans answer, but the screw
first described, being the gentler motion, jars the needle least.
A screw is occasionally used longitudinally to the needle connected
with a cam lift, the object in all cases being to lift the
cap entirely clear of the standing-point.
130.—The Inclination or Dip of the Needle is the
position a needle balanced level upon a free centre before magnetisation
takes in the vertical plane after magnetisation. This
inclination or dip varies in different parts of the globe, and
at different times. At the present time at Greenwich (Jan.,
1914) the angle is 66° 50′ from the horizontal. It is uniformly
nearly nil at the equator, and increases until over one of the
magnetic poles, where it becomes vertical. There are two
magnetic poles in the northern hemisphere active in directing
the needle, one in Siberia, but the most active is about
Melville Island; also two in the southern hemisphere, which
are supposed to be nearly together, but the exact positions of
which are not ascertained. As we require only the horizontal
component in surveying and not the dip, it is necessary to
balance the needle in opposition to the direction of the dip
until it keeps in a horizontal position. This may be done by
making the needle lighter on the dip side—that is, the
northern in this hemisphere. But the plan adopted in all
scientific instruments is to place a rider over the needle, as
shown Fig. 30 under B. This clips the needle sufficiently to
hold it firmly to its place, and yet is loose enough to be
moved by the fingers to balance. The rider has to be
shifted when the instrument is taken into a country where
the dip is different from its position at home. When a
needle is taken abroad without any rider, it may be
balanced by means of a little sealing-wax placed upon its
uptending end.
131.—To get at the needle for suppression of dip when it
is placed in the compass-box, it is necessary to raise the spring
ring, which is placed over the glass to keep it down, by
inserting the point of a pocket-knife between the ring and
the glass, moving the knife entirely round it and using a
little twist upon it if necessary until the ring is free. This
must be done gently or the glass will break. The needle is
then adjusted to read correctly to the plane of the divided circle
and is replaced in its box. The glass is then replaced and
the spring ring is pressed down by passing the finger firmly
round it until it is tight upon the glass. Sometimes a little
extra pressure by a hard body is needed, but this must be
done with care or the glass will be broken.
132.—The Declination of the Needle, that is, its variation
in pointing in a true northernly and southernly direction, is
necessary to be known and considered by the surveyor where
the needle is used, both in relation to the locality and to the
time, as this declination not only varies in different countries
but also from year to year. For instance, this year (Jan., 1914) it
points 15° 12′ West at Greenwich. The following chart, Fig. 31,
gives the declination variation for 1914. The whole system
of declination lines is now moving westward at the rate of
about seven minutes per annum, but the rate varies slightly
and from year to year. The declination lines, independently
of correction, which will be presently considered, may not
be exactly represented by the symmetrically curved lines
shown in the figure. There are small local deflections from
the theoretical curves here given, which are permanent and
need local consideration when using the needle for obtaining
very correct bearing. These have been ably considered by
Professor Rücker and Dr. Thorp, but the subject is too
complicated to be entered upon here, except for this note
of observation.[2]
133.—For new countries, where the needle often becomes
most important from the impossibility of tying up lines by
direct observation through forests and other obstructions,
reference must be had to magnetic charts which give systems
of lines easily worked through by symmetry, even for unexplored
countries. At present the declination is west in
Europe and in Africa; east in Asia and the greater part of
North and South America.
Fig. 31.—Magnetic and Greenwich time chart for Great Britain, 1914.
134.—The Magnetic Variation of Declination in
Time, becomes important in reference to old plans in which
the magnetic north of the period has been plotted for the true
north very much to the pecuniary advantage of the legal
profession when engaged upon actions with regard to disputed
boundaries. The following table gives an idea of the variation
in declination for Greenwich approximately for a few
dates:—
Year
1580,
Dec.
11° 36′ E.
Year
1860,
Dec.
20° 40′ W.
"
1663,
"
0
"
1870,
"
20° 19′ W.
"
1700,
"
8° 20′ W.
"
1880,
"
18° 58′ W.
"
1818,
"
25° 41′ W.
"
1890,
"
17° 9′ W.
"
1850,
"
19° 31′ W.
"
1900,
"
16° 30′ W.
It will be seen by the above table that the needle pointed
due north in 1663, that it attained its greatest western declination
in 1818, and that it is now losing its westerly
declination at the rate of about 7′ annually.
135.—Annual Variation.—The declination is subject
also to a small annual variation which is greatest about spring
time, diminishes towards the summer solstice, and increases
again during the following nine months. It varies at different
periods, and seldom exceeds 16′ of arc.
136.—Declination Correction to true north may be
made for the compass by observation in this hemisphere of the
pole star, which is practically due north in January at 6 p.m.,
February at 4 a.m., March at 2 a.m., April at midnight,
May at 10 p.m., August at 4 a.m., September at 2 a.m.,
October at midnight, November at 10 p.m., December at
8 p.m. Most surveying instruments, except the transit
theodolite, are not made convenient for this observation.
More generally observations of the position of the sun may
be made where a sun-glass is provided to the telescope of
the theodolite, Fig. 19, SG, page 45, with the aid of a
chronometer or a good watch. For this observation we
may remember that the sun is true south at twelve o'clock
on the 16th April, 15th June, 1st September, and 25th
December. The following table may be useful for some
intermediate times to show how much the chronometer
(mean time) is faster or slower than the sun's southing
approximately at noon:—
Jan.
1
subtract
4
min.
July
15
subtract
6
min.
"
16
"
10
"
"
30
"
6
"
"
31
"
14
"
Aug.
14
"
4
"
Feb.
15
"
14
"
Sept.
13
add
4
"
Mar.
2
"
12
"
"
28
"
9
"
"
17
"
8
"
Oct.
13
"
14
"
April
1
"
4
"
"
28
"
16
"
May
1
add
3
"
Nov.
12
"
16
"
"
16
"
4
"
"
27
"
12
"
"
31
"
3
"
Dec.
12
"
6
"
June
30
subtract
3
"
"
31
subtract
3
"
137.—As variation in time of southing is from fourteen
minutes fast to sixteen slow, or a difference of thirty minutes,
correction becomes important, as the sun passes over 7½° in
this period. In these observations the diaphragm lines, webs,
or points must bisect the sun's disc. This is done more
exactly by taking the mean positions of the sun's eastern and
western limbs or its semi-diameter, which is given for every
day of the year in the Nautical Almanac.
138.—The Compass-box.—The needle, as it is generally
mounted for the theodolite, mining-dial, and many other
instruments, reads into a divided circle of 360°. The circle
is raised up from the bottom of the compass-box to the height
of the top of the needle, as shown in section Fig. 30, D,
and is generally silver-plated. The bottom of the compass-box
is sometimes divided with a compass-rose giving the points
N. E. S. W. The E. and W. in some cases are reversed from
their natural directive positions from the centre of the box, so
as to read the letter indicating the point nearest to the
division instead of that opposite to it. In modern surveying
instruments, however, no regard is paid to the points of the
compass, north being 0°, east 90°, south 180°, west 270°.
139.—In the manufacture of the compass-box very great
care should be taken that the metal is quite free from iron,
and that no iron comes near it. On this point the maker
cannot be too guarded. The author has in several instances
found the compass-box of perfectly free metal; but a single
foul screw made of commercial brass wire, being used to fix
the ring or the rose plate, has by its influence entirely destroyed
the value of the compass.
140.—In the construction of the compass-box the author
has found the most certain method of getting the divisions
correct with the centre is to make the division directly from
the standing-point of the compass, and not to try to get this
point correct to the divisions afterwards. The standing-point
may be fixed directly to the box by screwing, or be attached
to a brass plate before fixing. It is adjusted to the compass-box
by bending until the needle turns freely, but at the same
time nearly touches the circle. The needle is then removed
and the circle is divided with the point as its centre. Where
the divisions read to the point of the needle, or to a line
upon it without a magnifier, the divisions of the circle may
be made directly upon the lathe by a lever to the slide-rest
if the lathe has a well-divided headstock. When the
divisions are magnified and require great accuracy, or where
a floating ring is used upon the needle, the circle should
be divided upon the dividing engine, which will be described
further on, the centre used being still the point or pivot on
the bottom of the case, from which the divisions are to be
made radially.
141.—Preservation of the Magnetism in Needles.—It
is most important that the magnetism of the needle, particularly
in mining-dials where so much depends upon it, should
be preserved to near saturation in order to secure certain direction
in opposition to the friction of the centre, necessarily
always present. This is often much neglected from carelessness,
or want of knowledge of the principles of magnetic action. In
the first place we know that a bar of soft iron, possessing no
evident magnetism, if it be placed in the magnetic meridian
with proper dip, will after a time manifest strong magnetic
properties. Thus, such a bar in London placed due north
and south, with a dip of 67° to the north, becomes a weak
magnet. From this we may also infer, and this experiment
shows, that a needle placed in this position will not lose its
magnetism. But what is most important to observe is that
if the needle is placed in a contrary direction, as, for instance,
with its northern end towards the south, it is in constant
opposition to the influences of terrestrial magnetism, and will
certainly become weaker. Therefore, although it is necessary
to lift the needle when carrying the instrument, which must
necessarily place its poles in all directions, it is not at all
necessary that the needle should be lifted when the instrument
is put by out of use. Indeed, magnetism is materially preserved
by releasing the lift to let the needle take its true bearing.
This does not at all injure the standing-point, as there is no
movement upon it to cause wear. Of course if the needle is
at first magnetised beyond its permanent condition it will lose
this surplus magnetism, but the residual magnetism in this
position will remain nearly constant.
142.—A valuable precaution for a needle in constant
wear is occasionally, say twice a year, or much oftener if it
is used in a dusty mine, to take it out of its box and wipe out
the cap with the point of a small sable brush. The standing-point
may at the same time be sharpened if necessary by
gently rubbing it all round with a slip of oiled Arkansas stone
at its former pointing angle. The sharpness of a needle is
easily ascertained by sliding the thumb-nail over the point at
an angle of about 30° to it. If the point sticks and holds the
nail, it is sharp; if it glides upon it, it is dull. The author
has often had compasses of various kinds sent to him for
remagnetisation whose only fault has been dulness of centre.
143.—Ring Compasses.—In modern theodolites, levels
and prismatic compasses, the magnetic needle carries a light
divided circle, which is now generally made of aluminium on
account of the extreme lightness of this metal. A broad
needle is used of about ¼ inch in width and 1/18 inch in thickness.
There is considerable difficulty in mounting the circle
to get it truly concentric and correct for bearing, therefore
ring compasses are often found to be inaccurate. The author
has followed two methods of construction, either of which
answers fairly well:—The one is to leave a bar across the
compass when cutting out the compass ring from a plate of
aluminium. In this case, when the outer edge of the ring is
chucked in the lathe to be turned, a centre hole is also made
in the cross-bar which exactly fits over the cap of the needle,
so that the adjustment for centre is practically secured, and
attention is only necessary to get the adjustment correct for
bearing—that is, the 0° at true magnetic north to the axis of
the needle. Another method, which was suggested to the author
by the late Mr. Thos. Cushing of the India Office, answers
perfectly, and only entails a little extra trouble in setting for
dividing. This is to permanently mount the ring on the needle
without any means of after-adjustment, and to divide the circle
from a point placed in the axis of the dividing engine, upon
which the ruby centre is placed, being of course particular that
the zero line 0° cuts the magnetic axis true north in the
graduation.
144.—Mariners' Compasses, and an inexpensive class
of prismatic compasses, are made with a paper disc in place of
the ring above described answering the same purposes. The
paper disc is generally made in two thicknesses with a thin
sheet of talc placed between them. Mariners' compasses have
frequently the divisions painted directly upon talc for transparency
by lighting from beneath, also for general lightness
combined with stiffness.
145.—The reading of mariners' compasses, and the compasses
on levels where the needle carries a divided ring, is
taken from a line drawn vertically up the inside of the box or a
pointer. This lead line in the mariners' compass gives the
direction of the head of the vessel; a pointer in the level
compass gives a direction in line with the axis of the telescope.
In high-class theodolites, a microscope is used by the author
reading to a spider's web in the diaphragm.
146.—Trough Compass, sometimes termed a long
compass. Where an instrument possesses a double vertical
axis and a divided circle, as the theodolite, the division of the
circle may take the place of the divided ring of the compass
and save the repetition of the graduation, at the same time the
needle may often be made longer, as the bulk of the compass-box
is proportionately less. In fact in all cases where the magnetic
north only is required the trough compass is to be preferred.
The ordinary construction of this compass is in the form of a
narrow box, Fig. 32, A representing a plan, and B a parallel section
taken through it horizontally. About 10° are graduated on
each side of the meridian line, aa being adjusting screws to
bring the scale true with the needle.
Fig. 32.—Trough compass for attachment to an instrument.
147.—Magnification of Reading.—With the trough
compass it is very common to have some form of microscope
for reading the needle more exactly. This may be done by a
Ramsden eye-piece being placed directly over the needle, as is
common in some German instruments. A much more
convenient plan for certain instruments is to read the needle
longitudinally. This is generally done by means of a transparent
scale being placed across the end of the needle which
is divided upon glass or horn. This may read to either the
near or distant point of the needle. A very good form of
needle reading is found in some French instruments. This is
shown Fig. 33, where the compass is shown entirely enclosed
in a tube C which protects it from dust. The needle N has a
vertical point fixed upon its end at P which reads pretty closely
to a scale of 10° divided upon glass at G by the eye-piece E.
It has a lifter L pressed up by a milled-head screw M. Fig. 34
shows the graduated glass. This compass is attached beneath
the limb of a theodolite, or in any other convenient position
upon an instrument. The author has placed a compass constructed
upon this principle in a telescope, in such a manner
that the needle may be read with the eye-piece, so as to cut a
line with a distant object coincident with the line cut by the
principal telescope of the instrument at 0° of its graduation.
This plan will be more fully explained with tacheometers,
Chapter XII.
148.—The Prismatic Compass, shown Fig. 35, was
invented by Charles August Schmalcalder in 1812. It is the
most convenient portable instrument for reading magnetic
bearings. Angles may be taken with great rapidity within about
15′ of arc by holding the instrument in the hand, or perhaps
within 5′ if the instrument is of 4 to 6 inches diameter and
placed on a stand. It is a most valuable instrument for
filling in close details, such as may occur among buildings,
trees, etc., after the principal points have been laid down from
observations taken with the theodolite. The principles of the
reflection of a prism were discussed, art. 55, Fig. 3, p. 29.
149.—Prismatic Compasses are made from 2½ to 6 inches
in diameter. The compass needle is sometimes made to
carry a card dial for the 2½-inch size; for larger sizes the ring
is now made uniformly of aluminium. The reading of the compass
ring is effected by means of a glass prism, Fig. 36, P, which
is cut to 45° upon one face and 90° for the two others, one
90° face being worked convex, so as to give magnifying power
simultaneously with reflection of the ring at right angles, so
that the reading of the compass appears to stand erect before
the user of the instrument, and to be considerably magnified.
As the reading is made on the side of the ring nearest the
observer, the figures on the ring are engraved right to left.
The prism is placed in a box, with a vertical sight slit SS
over it, which cuts a line with the centre of the top of the
prism. The box with its prism moves upwards or downwards
in a sliding fitting SL by means of a thumb nail stud, which
adjusts the prism until it is in exact focus with the divisions on
the ring. The back of the prism-box has a hinge H, so that
this box may be closed down to the level of the compass-box
to render it portable when out of use. On the opposite side of
the compass-box to that upon which the prism is placed
a long vertical window SV is attached, having a central hair
placed so as to cut a direct line from the slit SS in the prism-box
across the axis of the needle. This window-piece is
jointed to turn down upon the face of the compass-box and
simultaneously to lift the compass needle off its centre by a
part of it pressing the outer end of the lifting lever L. To
prevent too great a continuity of the oscillation of the compass
needle and the ring, through unsteadiness of the hand in
holding it, a pin is placed at S, through the compass-box
under the window, which carries a light spring B that just
touches the ring lightly when the pin is pressed in, and
thereby brings the compass ring to rest, or fixes it for
reading with some degree of certainty. An open ring under
the prism-box is sometimes used for placing a piece of ribbon
through it, to attach it to some part of the person to save
dropping the compass accidentally when it is used in the
hand. When the instrument is out of use a metal cover is
provided to protect the glass. The instrument is uniformly
carried in a leather case with strap to pass over the shoulder.
As these instruments are often carried by military
surveyors, they are better made of a stiff aluminium alloy,
which makes the instrument less than half its ordinary
weight.
150.—Additional Parts commonly provided with the
prismatic compass are a mirror and sunshades, shown only in
section Fig. 36. The mirror M is carried in a frame attached
with a sliding piece to the window, upon which it can be
placed either upwards or downwards. It is jointed with a
hinge so as to be set at any angle. By reflection from the
mirror, bearings in azimuth are taken much above or below the
horizontal plane. Sun-glasses are also provided in front of the
prism, which are used for taking the sun's place either with or
without the mirror, a single sun-glass being also used very
comfortably for working towards the sun at all times. The
sun-glasses, which are simply small, dark-coloured glass circles
in frames, are not shown in the engraving.
151.—To Prepare to take Observations with the
Prismatic Compass. After the window and prism are opened
out, the prism is adjusted to read the divided ring sharply when
the compass is about level, by raising or lowering the prism P
by pressure of the thumb and forefinger of the right hand upon
the stud placed upon the prism slide fitting, shown below SL,
until the divisions appear clear.
152.—In Using the Prismatic Compass, the compass-box
is held with the thumb of the right hand under the prism
at SL and the forefinger upon the stud S. The object which
it is desired to observe is sighted through the slit SS, cutting
the left-hand side of the hair in the window SV, while the
division which comes opposite the reading point at its edge by
the reflection from the prism is noted. The ring when free
oscillates for a time, but is easily brought to rest for reading
by gently pressing the pin S upon which the forefinger is
placed.
153.—Where objects are observed for taking their bearings
above the horizontal plane, the length of the window will
be sufficient to take in a vertical angle of 20° to 30°; but
for such altitudes it is necessary to take very great care
that the compass is held level, to get magnetic angles even
approximately true. Below the horizon, angles can be
obtained with somewhat greater certainty by means of
reflections from the mirror. Altogether, except for taking
nearly horizontal angles, or for very close work in filling in
after the theodolite, it is much better to have the prismatic
compass mounted upon a tripod stand. With a stand, where
the angle in azimuth is much above or below the horizontal
plane, it is better to have a small glass level, described further
on, art. 181, to place across the compass when setting it up.
If the compass ring is very carefully balanced across 90° to
270° two bright wire points may be placed inside the compass-box,
level with the compass ring, which will answer for the
cross levelling.
154.—Stands.—The author has made a very simple and
inexpensive tripod stand for the prismatic compass, the head
of which consists of a ball and socket only, clamped by a large
milled-head screw. An axis through the ball permits horizontal
adjustment, shown in section, Fig. 37.
155.—Hutchinson's Prismatic Compass, Fig. 38, is
now very generally used by military men. In this compass
the metal cover is fixed on the top of the compass-box, and a
glazed opening is placed in the cover, occupying about one-eighth
of its area, near the prism. This opening gives sufficient
light to the compass card to permit it to be easily read,
and the loose cover is dispensed with; besides which, the
cover being fixed, this, as well as the whole instrument, may be
made much lighter, while retaining equal rigidity for wear. This
compass is not fitted with shade and mirror arrangements as
before described. Size, 2½ inches diameter, ¾ inch in thickness;
weight, only 8½ oz. in brass; 3¼ oz. in aluminium.
156.—Captain Burnier's Military Compass.—This
portable compass is more generally used on the Continent
than other forms. It is generally combined with a clinometer,
therefore the illustration is deferred, seq. with clinometers.
The compass ring is set up vertical to the plane of the needle,
and is read by an index point by means of a cylindrical lens.
It has a pair of sights formed of a slit near the eye-piece,
and a hair in the window as in the prismatic. When this instrument
is held horizontally, at about a foot distance from
the eye, the sight line and the index line read distinctly into
the graduations of the ring. A lifter is provided to raise the
compass off its centre, as with the prismatic compass, and a
spring clutch to prevent continuity of oscillation. It is
adapted to be set up on a plain rod stand, the socket fitting
to which is held in the hand when it is used as a hand
instrument.
Fig. 39.—Sketching protractor for use with prismatic compass.
157.—Surveying with the Compass only.—In modern
practice very little surveying is performed with the compass,
except for sketch or exploring maps and filling in details,
wherein the prismatic compass is useful. The magnetic
needle was formerly much used for surface work, and depended
upon almost entirely for underground work; but this
has been found practically in many cases unsafe, from the
uncertainty of magnetic variations, local and other, in the
district surveyed. Mining compasses, or dials, as they are
termed, are now in modern practice made with means of
taking angles with the compass, and independently of it.
This subject will therefore be deferred to a future chapter on
mining instruments.
158.—In Plotting Military Sketch Surveys from
angles taken with the prismatic compass, the paper employed is
ruled lightly all over with parallel lines an inch or less apart.
The angles taken with the prismatic compass from 0° to 360°
(northern zero) are set off with an ivory military protractor,
which has lines to correspond with latitudinal lines drawn
over its face at 90° to its base, so that the protractor may be
placed transverse to any line drawn on the paper with its
centre in any position. Particulars of this method are given
in every detail in Major Jackson's Course of Military Surveying,
and in my work on Drawing Instruments. The military
protractor is shown Fig. 39.
159.—For making a sketch plan with the prismatic compass,
a very convenient way is to use the tee-square, the upper
edge of the blade of which represents magnetic east to west,
the upper end of the board magnetic north and the lower end
south, according to the reading of the compass. The bearings
taken from any starting-point are set off on the plot by a semicircular
protractor with its base resting along the tee-square.
The northern angles are raised with the square at the left-hand
side of the board and the southern with it at the right. The
distances from the station for all bearings are measured and
set off by scale.
160.—It is indifferent how many stations are taken by the
prismatic compass. The measurements in any direction may
continue all round an estate, and will be found fairly correct if
carefully made, as the small personal errors in reading the prismatic,
which may be plus or minus, tend to correct each other
on the whole, and to tie up the lines.
161.—The rolling parallel rule may replace the tee-square,
if it is thought desirable to place the plan in a direction other
than that erect to magnetic north with the paper, or that it is
inconvenient to use the tee-square. In this case a few parallel
lines may be at first drawn correctly across the paper, at about
equal distances, with a sharp pencil E. to W. for references to
reset the parallel rule at any position desired.
162.—Pocket Magnetic Compasses.—The subject of
compasses will scarcely be complete without mention of the
small pocket compasses which are so useful and universal.
Several well-known forms are shown in the next illustration.
The square form shown first, Fig. 40, will be found the most
useful for very rough sketching. The edges may be sighted
for the direction of roads, etc., or the box may be placed
against a wall for taking the magnetic direction of a building.
In like manner also the compass-box may be laid on a drawing
and lines drawn along by the edges of the box to the magnetic
directions taken. This in most cases is sufficiently accurate
for architectural work, in which the exact direction is not
generally thought to be important. Fig. 41 is a French form
of compass with step reading level with the upper surface of
the needle. Fig. 42 is an old English form with enamelled
dial, with lifter under the bow of the handle. Fig. 43 is the
same make in a hunter case. In this the lifter rises upon
the case being closed.
163.—The author has made a small pocket magnetic
compass, which is represented in the illustration above. The
needle is placed in a long box. It reads at its point into a
single line when the needle is exactly parallel with the sides of
the box. The lid turns up endwise. The needle is lifted by
closing the box.
Fig. 45.—The author's under slide for setting off variation.
164.—In a form of compass similar to the above, the author
has added a thin slide to the under side of the box, by means
of which the magnetic variation may be adjusted, as shown
Fig. 45. This slide moves out just the amount of magnetic
variation, the stud S being made concentric for this adjustment.
If the slide box be made of ivory a few useful scales
may be divided upon it. The compass slips into a light
leather case, and is the most portable for its length of needle
of any compass made. The edges of the box are used as
directing lines, as above described for the square form. The
illustrations show a compass made for Great Britain, but a
similar instrument is also made universal. In this case the
box is a little wider, with the centre of the slide in the middle,
so that the magnetic variation can be set off west or east. A
rider also on the needle enables it to be balanced in southern
latitudes.
165.—Barker's Luminous Compass, with floating dial
of mother-of-pearl, one-half of this being engraved with black
figures and the other half painted black with the figures left
white, permits magnetic direction to be observed in the dusk
and by moonlight. These compasses, Fig. 46, are much
used by travellers. Mr. Francis Barker has also designed a
compass in which the needle carries a bar coated with luminous
paint.
CHAPTER IV.
LEVELS—METHODS OF ASCERTAINING—LEVEL TUBES—MANUFACTURE—CURVATURE—SENSITIVENESS-TESTING—READING—CIRCULAR
LEVELS—SURVEYORS' LEVELS—Y-LEVEL—PARALLEL
PLATES—ADJUSTMENTS OF Y-LEVELS—SUGGESTED IMPROVEMENTS—DUMPY
LEVEL—TRIPOD STANDS—ADJUSTMENT OF
DUMPY—COLLIMATOR—IMPROVEMENTS IN DUMPY LEVEL—TRIBRACH
HEAD—DIAPHRAGMS—CUSHING'S LEVEL—COOKE'S
LEVEL—CHEAP FORMS OF LEVEL—HAND LEVELS—TELESCOPIC
LEVEL—REFLECTING LEVELS—WATER LEVELS.
166.—A Level Plane is understood technically to be a
plane truly tangential to the theoretical spheroidal surface of
the earth, as represented by any spot upon the mean surface of
the ocean or of still water free from local attraction. The importance
of having the means of constructing efficient instruments
that can be conveniently employed to obtain the correct
relative altitudes of points or stations upon the earth's surface,
in relation to such a plane or datum, can scarcely be overrated.
Such instruments are not only used for topographical
surveys of countries, but also in designing and carrying out
public works adapted to the local conditions of natural inclination
of the land surface, for railways, drainage, irrigation,
canals, water-works, and other constructions.
167.—The force constantly at our command to enable us
to ascertain relative altitudes and to form mentally or graphically
local level lines on the earth, is that of gravity; and
it is only a question in any case how the action of this force
shall be employed. There are four principles which we may
accept as data for employing gravity, each depending upon a
natural phenomenon:—(1) The open upper surface of a liquid
unaffected by currents of air, or the influence of solid objects
in close proximity causing capillary action, or local attraction
of solid masses, represents a level plane. (2) The line of
a plummet unaffected by currents or lateral attractions forms a
vertical line to which the level plane is everywhere at right
angles. (3) The atmospheric pressure, from the approximated
equality of its density due to its weight in proportion to its height
over limited areas, gives pressure according to its gravity—therefore
altitude or difference of level relatively to lesser pressure
compared with a lower datum. This pressure is measurable with
a barometer or other form of pressure gauge. (4) The resistance
to ebullition in a liquid is inversely proportional to the
weight or pressure of the aërial fluid resting upon its surface.
This is measurable by the temperature at which liquids boil
under varying atmospheric pressures. Various instrumental
refinements have been discovered to render these natural
phenomena available in practical use for ascertaining difference
of height. The first and most exact method employed for
this purpose, by means of the liquid plane, will be considered
in this chapter. The other methods will be deferred to later
pages.
168.—In taking the level of a liquid surface contained in a
vessel, we have, as just stated, to keep this surface free from
the disturbing influence of air currents, and to surround the
surface with equal conditions of capillary attraction, or to
make these conditions equal in the direction in which we
desire to ascertain our level. This is found practically to be
best performed by means of a sealed glass tube, in which the
liquid will by gravitation naturally occupy the lower place, and
any air or lighter fluid contained therein the space above this.
169.—Level Tubes, or Bubble Tubes, as they are
technically termed, are used as a part of nearly all important
surveying instruments. One of these is represented Fig. 47.
The glass for the construction of these tubes is drawn at the
glass-houses in lengths of about 6 feet, and may be ordered of
any desired size and substance. The tubes are drawn of as nearly
straight and equal bore as possible. They are, nevertheless,
found to be, when examined after annealing, curved more or
less in various directions at different parts of their lengths.
They are found also generally to be slightly tapering from end
to end and of slightly unequal substance. In the manufacture
of level tubes parts of the tube are selected with approximately
regular longitudinal curvature, and these parts are cut off into
the required lengths by a triangular file dipped in spirits of
turpentine, to be ready for the future operations of grinding,
sealing, and dividing. After the tube is cut off and carefully
examined to get its most concave internal surface upwards,
this is then marked by a test mark, with the flat of a file, near
one end for future work and reference. The grinding of the
inside of the glass tube to true curvature is performed by
passing it over a brass mandrel or core, which is employed to
grind the glass by means of fine emery. The core is turned
slightly barrel-form to the longitudinal curvature intended for
the upper surface of the finished tube. It is made of full
three-quarters the diameter of the interior of the tube, and a
little longer than the entire tube. This core is attached by its
ends to two stiff but flexible wires of brass, about 8 B.W.G. for a
tube of ·7 inch diameter, and these wires are held firmly by their
ends in two vices, so that the core is slung, as it were, to permit
a certain amount of flexibility under the pressure of the
hand used in grinding. Some good makers do not use a
mandrel core, but only a strip of brass on the mandrel, extending
about 60° of the circumference. In this case the
strip has to be corrected for curvature during the grinding,
which plan is sometimes preferred for certainty. The grinding
of a tube cannot be commenced with coarse emery, such as is
used in the grinding of lenses, as the cut of a coarse emery will
quickly split the tube. After the glaze is removed there is not
so much risk, so that a little time may be saved by passing a
current of hydrofluoric acid gas through the tube; but more
careful testing is required afterwards, as the cut of the grinding
tool is not so evident at sight when the glazed surface is
removed.
170.—The operation of grinding is very much the same as
that described for lenses, p. 17. The surface is required to be
traversed in every direction longitudinally and transversely,
which is effected as far as possible by a twist of the hand
alternately to the right and left. The tube should also be
frequently taken off and turned end for end. Slight variations
of curvature are readily made by differences of pressure of the
hand on parts of the tube; and a little coaxing is allowed to
get the centre of the tube quick where the tube is to be used
for levelling only, and not for measuring small angles, so that
in this case the finished tube is slightly parabolical. The
finishing touch is produced with wash-emery. The inside
should be left smooth but not polished, as the slight roughness
of a fine ground surface assists the capillary action by causing
better adhesion of the spirit, and gives a quicker run to the
bubble. Where the tubes are required of a given radius they
are tested frequently, during the grinding, upon the bubble trier,
by placing two corks in the ends of the tube, which is nearly
filled first with water for rough trial, and then with spirit for
final correction.
171.—The Bubble Trier is a bar or bed 12 to 20
inches long, with two extended feet ending in points at one
end, and a micrometer screw at the other, the point of
which is a resting foot, thereby forming a tripod. This
stands on a cast-iron or slate surface plate. The micrometer
screw has a fine thread, and a large head with divisions upon
it to read seconds of arc. The tube is supported on the
bar by two Y's, which are adjustable for distance apart,
according to the length of the tubes to be tried.
172.—The Sensitiveness of a Level Tube, the upper curvature
and ground surface being equal, depends very much
upon the capillary action due to its internal diameter, the
larger tube, from the freedom of restraint by capillarity, being
the more active. As regards the ultimate settling to gravitation
equilibrium, perhaps there is no difference, but small
tubes are sluggish and take time to work. The following are
about the usual dimensions of the interior of sensitive tubes—8
inches × 1 inch diameter, 7 inches × ·9, 6 inches × ·8,
5 inches × ·7, 4 inches × ·6, 3 inches × ·5, 2½ inches ×
·45, 2 inches × ·4, 1½ inches × ·35, 1 inch × ·3. The
larger the volume the greater the expansion of liquid with
heat; the longer the tube the less torsion it is liable to suffer
from sealing, so that if possible, as expansion is a serious
defect, it would be better to have short tubes, if these could
be sealed without disturbance of curvature. Much shorter
tubes are used in America than in Great Britain.
173.—The Curvature of a Level Tube is worked to radius
according to the delicacy of the work to be performed with it
afterwards. The radii of curvature of different level tubes
used for scientific purposes vary from about 30 feet to 1000
feet or more. The radius of any curve may be conveniently
measured by the relation of its versed sine to its chord of arc,
the chord being the length of the tube. If this is first calculated
out, a piece of shellac may be attached by melting it down
upon the centre of the edge of a parallel glass straight-edge,
to represent by its thickness the versed sine. The spot of
shellac may be brought to the exact height required from the
straight-edge by filing and stoning, at the same time taking its
protuberance by a calliper gauge provided with vernier or
micrometer to read ·001 inch. The versed sine of a given
radius is formed for a given chord—
versed sine = rad - √(rad2 - (½ cho)2).
174.—The general instruction, however, given to the
maker is the distance of run of the bubble that is required to
give seconds or minutes of arc; and perhaps this is after all
the best test for accuracy of the tube which, like all other
articles in glass submitted to the process of grinding, is subject
to a certain amount of local error. By this method the local
error is discovered by testing with the bubble trier. When
the run is given, the radius of the curve of the tube may be
found if desired by the use of a common multiplier, as follows,
very approximately—
Arc equal to radius expressed in minutes, 3437·74677.
" " " seconds, 206264·80625.
The run of a good sensitive tube is frequently made 1/30 inch
to the second, here (omitting decimals)—
For scientific purposes a millimetre run per second is commonly
used, then—
arc sec (206264·8) × ·001 metre = 206·264 metres radius
or 680 feet nearly.
For an ordinary 12-inch dumpy level the tube is divided into
minutes at about 1/10 inch apart, radius 28 to 30 feet; for a
sensitive 14-inch Y-level of good construction the same
divisions may represent five seconds, radius of bubble tube
about 170 feet.
175.—The Divisions upon Ordinary Level Tubes are
made after the tube is finished, but with the highly sensitive
ones the divisions are made first. The run is taken from
ten to thirty divisions on each side of the centre of the tube,
where it is lightly marked with a marking diamond. These
spaces are then equally subdivided and etched in with hydrofluoric
acid or marked with a hard steel edge dipped in turps.
If further refinement be required, the errors of run in relation
to the divisions are tabulated from the testing of the tube
with the bubble trier. A less careful method is employed by
some makers of leaving the level tube undivided and fixing
an independent metal or ivory scale over it.
176.—Level tubes are generally filled with pure alcohol
for ordinary purposes; for trade purposes with methylic alcohol,
which is much cheaper. For very delicate tubes sulphuric
ether or chloroform is used. The sensitiveness of the bubble
depends very greatly upon the mobility of the liquid with
which it is filled, and to the quality of adhesion of the liquid
to the glass. The relative mobility of the above-mentioned
liquids is found by delicate tests with the bubble trier for
small distances under the microscope at a temperature of 60°
Fahr. Taking water as 100:—we find commercial methylic
alcohol 22, absolute alcohol 13, sulphuric ether 5, chloroform
3,—that is, for equal small runs taken in 15 seconds of time.
All bubbles appear to be more or less affected by temperature,
particularly where the spirit is not nearly absolute. In the
higher temperatures the bubbles are more active. The objection
to chloroform, where it is likely to be subject to great
changes of temperature, and where there is no provision made
for regulating the size of the bubble—the means of doing
which will be presently discussed—is that its expansion from
heat is so great that it is very liable to burst its tube. It can
therefore only be used with ordinary sealed tubes where these
are small and strong. Sulphuric ether has the same fault, but
in a lesser degree.
177.—The sealing of ground tubes requires the skill of a
very experienced glass-blower, and is a technical matter on
which no written instructions would be of value under any
conditions. A little strain is unavoidably put upon the tube
in sealing with the blow-pipe, so that the curvature to which
it is worked is more or less disturbed. For this reason level
tubes which are required to be of the highest degree of
accuracy are sometimes left as they are ground, and closed at
the ends by small discs of glass grooved to the end surfaces.
These are fixed on with glue, and when the glue is set are
bound over with silk and finally varnished; but this plan is
much too delicate for instruments for use in the field.
178.—Colonel Strange's Level Tube.—These tubes,
Fig. 48, are blown with an outward bead at each end of the
tube, two outwardly screwed collars, F, being first placed over
the tube before the blowing. The tube is then ground to
curvature. A plug, S, is formed for each end of the tube
from a plano-convex lens, ground to a bevel on the plano
side, and also ground into the end of the tube as a stopper.
A cap, C, is screwed over the end upon the collar. The
springiness of the cap keeps the stopper always tight. As
there is no blow-pipe used after the grinding, the tube remains
constant as it is ground, or it can be adjusted by grinding to
any desired sensitiveness. This cap, for security, is better
covered with silk tied over it, and afterwards well varnished.
In this class of tube there is always a little risk of evaporation.
The system is not adapted to instruments to be used in
the open air.
179.—Chambered Level Tubes.—As the run of a
bubble varies slightly with its size, for exact purposes and
extreme climates it is very desirable to be able to adjust the
size of the bubble to the surrounding temperature, so that it
shall be kept at about equal dimensions for all measurements
made with it. This becomes particularly important where
chloroform is used, from the expansion being very great. A
general way of doing this is to have a stopper ground into
one end of the tube, which is itself a small bottle, on the
under side of which a hole is ground, so that by turning the
tube over and raising it more or less, any amount of the
highly rarefied air it contains may be taken to form the bubble
that may be desired. The stopper is fixed with thin glue. The
general construction is shown below, Fig. 49. Of course
where such a tube is used there must be means of tipping and
turning the instrument in which it is fixed over, or the bubble
itself must have separate fixings. The portability of a surveyor's
level admits readily of the necessary tipping; with
theodolite levels at right angles to each other upon the vernier
plate it would be impossible.
180.—Extra Strong Level Tubes.—Colonel Scott's
very ingenious device of enclosing a level tube within another
tube of thoroughly annealed glass will be found valuable in all
cases where the tube is much exposed, or where it is difficult
afterwards to procure a new tube in the case of accident.
These tubes are at present only made by the author for Scott's
telescopic gun-sights, which are nearly like small theodolites.
The level tube, Fig. 50, is made as stout as possible to be
soundly sealed after filling. It is then enclosed in an annealed
tube, CC′, of about ·08 to ·12 inch in thickness, the interspace
between the two tubes being filled with Canada balsam. It is
then plugged with elastic marine glue, KK′ and cemented over
PP′. The annealed tube is of great strength, so that the
complete naked tube thus formed will bear dropping on the
ground, and also when attached to a large gun will bear the
violent vibration of firing without injury.
181.—The Level Tube may form a Complete Instrument
in itself.—In this case the lower surface is ground
to a flat plane to rest on any plane surface. This level is
generally contained in a small pocket case, and is most convenient
for adjusting instruments to level. It is commonly
used with the black glass artificial horizon, to be described.
182.—Mounting Tubes.—Level tubes when applied to
instruments are generally mounted in brass covering tubes.
Small level tubes under 2½ inches are conveniently mounted
in such tubes with a fixing of slaked plaster of Paris inserted
at each end of the brass tube. Larger level tubes should be
bound round with thin paper pasted round the ends, which is
allowed to get quite dry, to be afterwards fitted to the brass
tube with a file. Fitted in this manner the tubes admit of
adjustment to the difference of expansion of the metal and
glass by change of temperature without distortion. There is
no objection, however, to thoroughly fixing one end of the
tube with plaster if the other be left free, and this is perhaps
advisable for portable instruments.
It is convenient in mounting level tubes to place white
glazed paper under the bubble to reflect the light that passes
through it to ensure better observation.
183.—In Fixing Undivided Level Tubes, or replacing
them in instruments, it is important to observe that the side
with the test mark, which is a small ground facet, should be
placed on the top.
184.—In the Use of Level Tubes generally, it is not well to
have them of greater sensitiveness than the general construction
of the instrument upon which they are placed permits.
Thus the centre of a surveyor's level that may be under constant
strain from the unavoidable inequality of the pressure of
parallel plate screws, will appear never to reverse properly if it
has a very sensitive bubble, the cause of the irregularity being
entirely due to the distortion from the strain on the vertical
axis of the instrument. The same irregularity occurs in a
lesser degree with the Y's of a theodolite, where these and
the collars become corroded by exposure. The optician often
gets an undue amount of credit for perfecting such instruments
when he has merely replaced the sensitive bubble by a dull
one—that is by doing what is really in this case the best for
the instrument.
185.—When an instrument that depends entirely upon
the level for its possible working is to be used abroad, an
extra tube should be taken, as the level tube is very generally
more exposed and is more delicate than any other part of the
instrument. The tube may not only be accidentally fractured
with a slight bow, but even the heat of the sun's rays will sometimes
burst it.
186.—Reading the Bubble.—The exact position of the
capillary concave surface of the spirit in the tube is liable to
deceive the observer by the difference of refraction and reflection
it gives, whether the light is towards the right or left hand.
To avoid this cause of error it is better, in sunlight, to hold a
piece of white paper at a short distance over the end of the
bubble during the observation taken of its terminal reading
into the divided scale on the tube. It is also important to
note that the observer should stand at right angles to the tube
to see the position exactly where the upper capillary line of the
spirit cuts, as the tube itself refracts the light unequally.
It is not at all difficult to read the bubble if the observer stand
over it; but generally, as it is mounted upon an instrument, it
is at the height of the eye. In this position the hollow surface
round the bubble, caused by the adhesion of the liquid to the
sides of the glass tube, reflects the light in a manner that the
hollow may be taken for the end of the bubble, and a false
reading made. It is better if possible to take the convenient
side reading first, and afterwards get a glance at the upper
surface reading for certainty. In some cases this may be
much assisted by the employment of a small mirror of about
the size of a spectacle eye, which is carried open in the pocket,
or, as the author has made it, it may close in a horn case with
a pocket lens, as in the Fig. 52 shown below. C sheath,
M mirror, L lens.
187.—Circular Levels have been made tentatively for a
long period. They consist of a worked concave lens fitted
into a brass cell with indiarubber seating, the glass being
secured by burnishing over a bezel. This construction
answers very well when new, but the spirit the level contains
is certain to evaporate slowly under every possible care. Mr.
J. J. Hicks has patented a hermetically sealed circular level,
in which he has succeeded in working the upper surface of the
glass to curvature. These levels, of course, are not subject to
evaporation, and are very useful and portable for approximate
levelling—as for plane tables, cameras, etc.
188.—Surveyors' Levels, of which there are many
forms, consist essentially of a telescope with a diaphragm at
the mutual foci of the objective and the eye-piece, the axis of
the telescope being placed in a direction truly parallel with
the crown of a sensitive level tube. The telescope with its
level is mounted upon metal frame-work, carried up from
a vertical axis upon which the telescope rests. The vertical
axis is adjustable in relation to the axis of the telescope, so
that they may be brought perfectly perpendicular, the one to
the other. The whole instrument is also adjustable to a position
of verticality of its central axis, and the horizontality of
the telescope in relation to the surface of the earth in what is
termed the setting-up of the instrument; so that when it is set
up in this position levels may be taken from it in any horizontal
direction from one point of observation, by rotation of
the telescope about the vertical axis. Having these essential
objects in view in the construction of the level, the form of the
instrument may be varied as to details according to the
mechanical skill and taste of the maker and the special
demands of the civil engineer.
189.—In the design of a surveyor's level very important
considerations are:—That the metal should be so distributed
that every part is as light as possible, consistently with sufficient
solidity to take a moderate amount of accidental rough
usage, and ensure freedom from vibration; that the whole
structure should be in equilibrium about its vertical axis when
the telescope is extended at mean range, that is, at about the
focus of three chains—this is a quality often neglected; that
there should be sufficient light in the telescope, and that it
should possess a firm and durable stand. Every form of
level should embrace these qualities.
190.—The Oldest Form of Surveyor's Level is that termed
the Y-level, so named from the telescope being supported in
Y-formed bearings. This instrument was originally invented
by Jonathan Sisson, a leading instrument maker of the 18th
century. It was much improved and brought nearly to its
present state of perfection by Ramsden, to whom practical
opticians owe so much for many advancements of their science,
and to his liberal publication thereof. This instrument is now
very little used in Great Britain; but it still maintains its
original position, to a certain extent, on the Continent and in
America. In the eyes of the optician it is still the most
perfect level, possessing all the instrumental refinements of
adjustment he can desire. The reasons for its partial abandonment
by the profession will be discussed further on.
191.—The Y-Level in a modern form is represented in
the engraving below, Fig. 54. The Y's are shown at YY″
edgewise. They are supported by standards SR upon the
limb L. The telescope is surrounded by two collars which
are soldered upon it at positions exactly corresponding with the
Y's. The collars are turned perfectly cylindrical and parallel
on the surface with the axis of the telescope, and ground in a
gauge-plate to exact size so that the telescope may be turned
end for end in the Y's without altering the linear direction of
its axis in reversing it. The telescope is held from shifting
longitudinally in its Y's by a pair of flanges placed on the
inside of the collar pieces.
192.—The Y's are erected upon the limb, to which they
are each fixed firmly by a clamping nut R at one end, and a
milled head clamp at M. The telescope is held down by
strap pieces, each of which has a joint at one end and a loose
pin at the other, PP. The pin is secured from dropping when
out of use by a piece of cord attached to a part of the instrument
and to a loop through its head. At the top of the
inner side of the strap-piece under YY″ a piece of cork is
inserted in a cave. The cork by its elasticity keeps an equal
but light pressure upon the collar of the telescope. It will be
seen that by the above plan of holding the telescope, it is
so far free that it may be revolved on its axis, by which perfect
adjustment of the diaphragm to the axis of the instrument may
be made in any direction.
Fig. 55.—Section of parallel plate and vertical axis—arrangement
of Y and other levels.
193.—Parallel Plates as a mode of adjustment of the
vertical axis will be first described, as they present the oldest
form of setting up adjustment. The vertical axis of the
Y-level was formerly carried tapering downwards, and the
upper parallel plate was placed at about the centre of the
socket. Under this construction the socket was more liable
to strain from the use of the parallel plate screws. It is
more general now to construct the axis as represented in
the illustration above, Fig. 55, for Y and other levels with
parallel plates. This construction also renders the instrument
more portable, as the parallel plates and axis may
be detached and lie closer in the case; the plan is nevertheless
open to many risks, which will be referred to in
discussing a three-screw arrangement. The general construction
is shown in the figure, of which the left-hand side is
a half-section. A is a screw by which the parallel plates
are attached to the limb of the instrument; M a large milled
head, by means of which the screw can be brought up firmly
to its collar; SS′ the socket which is ground to fit the cone
C; C forms a part of the upper parallel plateUP; B a
ball pin which screws firmly into C; LPlower parallel
plate, part of which forms the ball socket, so that the
whole instrument rocks about the ball B as a centre, by
the action of the parallel plate screws PS; B′ female screw
for fixing this part, which is called altogether the parallel
plates, to the tripod head. A clamping screw is sometimes
placed upon the axis for slow motion. The parallel plate
screws are tapped, that is, have female threads cut into the
upper plate UP, and their points press the lower parallel
plate LP at certain points, there being a stop-piece placed
round the point of one screw to prevent rotation. The
pressure upon the screws can be increased as desired by
means of the milled heads, and the instrument made rigid in
proportion; but it is very undesirable that the pressure should
be greater than that just necessary to support the instrument
firmly, as it is easy by the power of the screws to
disturb the figure of the axis and thereby derange it.
The diaphragm of the telescope of the Y-level is generally
webbed with plain cross webs. The diaphragm and webs were
described arts. 99 to 106.
194.—The Setting-up of the Y-Level is necessary to be
understood before the instrument can be adjusted. The
same description which answers for the setting up for adjustment
will also answer for the setting-up of the instrument in
the field for actual work. In this description it will be convenient,
therefore, to consider the instrument as being in this
case in adjustment as it leaves the hand of the maker. The
after adjustments will be presently taken as from the original
state of the instrument, as the maker has to do them in the
first instance. Practically, the civil engineer has only to make
slight differential adjustments at any time, as an instrument,
by the solidity of its construction, will retain the general
adjustment nearly, upon which further adjustments take more
the nature of final corrections, which become necessary only
from accidental causes.
195.—Setting-up of the Y or other Level with Parallel
Plates.—The tripod stand is opened out so that the legs
stand, if on level ground, inclined towards the centre of the
instrument at an angle of about 70° to the horizon. The toes
of the legs are each separately pressed into the ground sufficiently
to make the instrument stand quite firmly. The instrument
is then taken from its case and screwed down tightly
upon the tripod head.
196.—The Eye-piece is Adjusted, art. 108, by sliding it
gently in and out until the webs can be seen most distinctly.
On a bright day a white pocket-handkerchief may with advantage
be thrown singly over the object-glass to prevent any
confusion from objects in the field of view during the focussing
of the eye-piece. For the setting-up adjustment of the
telescope, it is brought in position to lie directly over one pair
of parallel plate screws, Fig. 55, PS, SP.
Fig. 56.—Diagram plan of parallel plate screw milled heads.
197.—The milled heads only of these screws are represented
in plan in the diagram Fig. 56, aa′ being the opposite
pair over which the telescope will be assumed to be at first
placed. The level tube is now brought to adjustment by
bringing the bubble to the centre of its run by means of the
parallel plate screws aa′, by taking the milled heads of these
screws, one between the ball of the thumb and forefinger of
each hand, and rolling them simultaneously the one in one
direction and the other in the reverse. This action tips the
axis of the telescope in one direction or the other. Thus by
the screws being rolled inwards, as shown by the direction of
the arrows in the diagram, the left-hand side of the instrument
would be raised. If turned the reverse way, the right hand end
would be raised. The opposite end, from that to which the
bubble runs, always requires to be raised. Where the ground
is rather soft, adjustment when nearly correct may be made
partially by pressing down one or other of the legs; in this
case the telescope should be placed parallel with the toe of
the leg which is pressed down and the axis of the instrument.
198.—When the level tube is adjusted over the screws
aa′ it is then placed over bb′ and adjusted in a similar
manner, returning again to the position aa′ for final adjustment.
When the level is in perfect adjustment the bubble
should stand in the centre of its run in making a complete
circuit of the horizon by rotation of the instrument upon its
vertical axis.
199.—In and during the setting-up adjustment it is most
important that the screws should not be made tight enough to
cause, by their pressure upon the parallel plates, distortion of
the vertical axis. Should this occur, the instrument will not
level in all positions by the same setting. The action of the
screws also, from the great elasticity of the metal, should
distribute the pressure about equally between the opposite pairs
aa′ and bb′. The difficulty of accomplishing this with certainty
makes another form of adjustment, with three screws only,
preferable for setting-up, which will be considered further on.
Where the instrument is set up for use, if the adjustment of
the bubble be fairly correct to the centre of its run, the reading
of the staff may be sighted and the telescope brought to true
focus upon it by moving its milled head until the divisions of
the staff are as sharp as possible, and then moving the eye
upwards and downwards to be sure there is no error of
parallax, art. 109. After this the final adjusting of the bubble
should be made, noting particularly that there are the same
number of divisions in its run on each side from the centre if
it is a divided bubble.
200.—Adjustment of the Axis of the Telescope in true
parallel direction with the periphery of its supporting collars
in its Y's. This is performed entirely with the four capstan-headed
screws which adjust the diaphragm, one of which is
shown, Fig. 54, C. Having the adjustment of the eye-piece
in focus for the webs in the manner described, arts. 108, 109,
the object-glass focussed upon a distant distinct small object
or mark, and without parallax, the instrument which carries
the telescope is then exactly adjusted to make the intersection
of the webs cut the mark. The telescope is now turned half
round on its axis, so that the lower part becomes the upper,
and observation is again made of the distant small object or
mark. If the same intersection of the webs falls on the same
point of the object, the collimation adjustment is perfect. If
it does not do so, the upper capstan-headed screw at C, or the
under opposite one, is loosened by means of the small pin
provided with the instrument, and the opposite screw tightened
until the webs are brought over a point situated half-way
between the points cut by the first and second observation.
The telescope is again directed to the point first observed, and
the adjustment checked to see if it has been done correctly,
that is, if the level reverses, cutting the same point, or whether
it requires further adjustment by the same process as before.
The other web of the diaphragm, at right angles to the first,
is adjusted in a similar manner, but with the other pair of
capstan-headed screws.
201.—It is sometimes inconvenient to adjust out of
doors: this may be performed very well indoors. By daylight
a small cross may be made with ink on a sheet of white
writing-paper for the sighting object, which should be placed
at as great a distance as convenient, say 20 or 30 feet. By
night a pin-hole may be made through a piece of paper and a
candle or a lamp be placed behind it.
202.—Adjustment of Vertical Axis.—For this the eye-piece is
first brought to focus on the webs. The telescope is then placed
directly over one pair of parallel plate screws opposite each
other, and the instrument is levelled. The Y's are then opened
out; and the telescope is directed so that the intersection
of the webs cuts or covers any distinct small mark upon a
distant object, or preferably upon the centre reading of a foot
line upon a levelling staff. There is no objection to adjusting
slightly to this by the parallel plate screws, as this adjustment
is independent of the level of the instrument. The telescope
is then taken out of its Y's and is turned end for end and
replaced. The telescope is now turned half a revolution on
its vertical axis, and the webs are again brought to read on
the staff, if one is used. If they now fall upon the same spot
or foot line, the vertical axis is perfectly perpendicular to the
axis of the telescope in this direction. If the webs do not
fall upon the first reading or point, the amount of difference
of reading is recorded and this space is bisected; so that now,
if the telescope be adjusted by the milled head M, at its bearings
upon the limb upon which it is supported, for the webs to
cut the bisection, the axis will be perfectly perpendicular in
the direction of its bearing socket. The same process must
now be repeated with the telescope placed at right angles to
its first position, that is by bringing it over the other pair of
parallel plate screws which were not used at first. There is
at all times a certain amount of disturbance of the instrument
due to handling it; it is therefore necessary to repeat the
whole of the above process until the instrument reverses in
any direction, but this final adjustment is better deferred until
the adjustment of the level tube, to be next described, has
been made.
203.—Adjustment of the Level Tube.—The telescope is
placed as before over an opposite pair of parallel plate screws,
and these are adjusted until the bubble is in the centre of its
run. The telescope is then turned half a revolution, so that
it is placed over the same pair of screws in the reverse direction,
and the displacement from the bubble from the centre is
now noted. The capstan-headed bubble screws at the end of
the level B are then adjusted to one-fourth of the difference
observed, and the parallel plate screws are adjusted for the
other fourth, so that by these two adjustments the difference
of the run in the two positions is bisected. The same process
is repeated over the second opposite pair of parallel plate
screws. If this be very carefully done with a correctly divided
bubble, the Y's of the telescope may be opened out and the
telescope be reversed end for end in its Y's, and the bubble
remain true. But it is quite as well to go over all the adjustments
a second time, as before recommended.
204.—If the level is to be adjusted by night, this can be
done very correctly by a fine cross drawn on paper placed on
a wall, with a candle or gas burner shining brightly on it at
twenty feet or so distance from the instrument. For this
adjustment by night the instrument must be well constructed,
as the tubes require drawing out to their full extent for focussing
near objects. If the tubes are not quite straight, the
object-glass suffers considerable displacement in the drawing
out, or technically droops, which is a very common fault in
badly-made instruments.
205.—Where webs are used for the reading, they are
liable to become baggy or dirty, art. 101, and very frequently
to break; nothing can, therefore, be more useful than to be
able to re-web a stop in the evening, with command of the
easy and certain means of readjustment described, when far
from the optician's aid.
206.—As the Y-level is so perfect in its arrangement for
adjustments, and so nearly meets the optician's ideal, it will
be well to inquire what are the objections made to its use by
the majority of British surveyors. The first and most important
is that it possesses so many loose parts, to which the
practical man honestly objects. The author was, many years
ago, when Y-levels were more popular, trying to persuade
a cautious practical surveyor who appeared to be very anxious
for the certainty of his work, and who was going abroad, to
take a Y-level instead of a dumpy one he was selecting, when
he had his arguments stopped by the following question:—"Suppose
you were surveying in a tropical country, thousands
of miles and an ocean voyage from civilisation, where your
native porter objected to carry much weight, and your instrument
case had to be left at a back station—when your
umbrella was all the burden you felt you could support. In
this case, suppose your porter, whom you had lost sight of
for a short time, arrived with your level, minus the telescope—lost
by becoming loose, perhaps from having been
played with while he was resting—how would you praise
the Y-level?" This gentleman assured me that he did not,
and that this was a true account of his experience with
the last Y-level he possessed. Other objections, besides loose
parts, are that Y's and collars do not remain as perfect as
when they leave the optician—that they are liable to wear by
friction of constant movement in being carried about upon the
points in contact between them, and thereby form facets;
that the collars become corroded by exposure, and that they
have open spaces that collect sand from flying dust which
fixes itself into the collars and Y's, so that this arrangement
loses the perfection the optician claims for it. Further, that
the cross bubble, which is uniformly placed on the dumpy
level, effects a great saving of time over swinging the telescope
backwards and forwards with every movement of the adjusting
screws. Another feature is that in the dumpy level, to be
described, the vertical and horizontal webs of the diaphragm
cannot be disturbed from their position by rotation of the
telescope after the level is once set up; and this verticality
indicates conveniently at once whether the staff is held vertically,
which is otherwise a great difficulty with the ordinary
form of Y-level reading.
207.—Improved Y-Level.—The above-described
defects the author has tried to remedy by a modification
of the Y arrangement, by forming the Y's with much broader
bearings, and instead of the old loose pins screw fastenings
are fitted, which firmly lock the telescope in position with the
webs vertical. This, so far, obviates the danger from loose
parts, as by this arrangement the telescope also becomes
practically firmly fixed. In adjustment the collars are opened
out, and in closing press a stud into the telescope by which it
takes a given position. This enables a cross bubble, shown
on Fig. 57, to be also placed on the telescope for approximate
adjustment, which saves the frequent disturbance of the
telescope by making cross adjustments. The diaphragm of
this Y-level is exactly the same as that of the dumpy, to be
described art. 210. From the limb downwards the author
uses the same construction as he now employs on his improved
dumpy level. This will be described with that instrument
further on, art 231, seq. Also the setting-up adjustment with
it, which is different from that already described where parallel
plates are employed.
208.—Perhaps, upon the whole, the conditions which
formerly rendered the Y-level undoubtedly the best practical
level have so much changed that the more solid construction
of the dumpy may entirely supersede it, as it seems likely to
do in modern practice, and the optician will lose his ideal.
Some reasons for this may be stated, but whether sufficient
is a question. The manufacture of object-glasses of good
figure and proper centring was formerly understood by a few
scientific opticians, who were principally engaged upon
astronomical telescopes, so that, with the exception of those
made by Troughton and Simms, no very good and accurately
centred lenses were used in surveying instruments. With
bad centring alone, in ordinary telescopes, the webs in collimating
were drifted aside, and needed the Y system of
adjustment to make the telescope workable for levelling.
In the modern good object-glass, of which there are now
several makers, the centring is so nearly perfect that the
webs in adjustment fall in the centre of the diaphragm when
it is placed true to the cylindrical axis of the telescope. If
the webs are placed as suggested without further adjustment,
no very serious interference is caused by want of collimation
of the axis. With this fact in view, the instrument maker
needs leave little space for adjustment of the webs for
centre displacement to become a source of error to persons not
used to adjustments.
209.—Further, with a well-centred object-glass, as it
leaves the hands of the scientific optician, and a solidly constructed
adjustment to collimation being provided for in the
making of a level, true working may be done even if there is
a small error in the collimation. The late William Gravatt,
C.E., was of opinion that firm construction, compact form,
and plenty of light in the telescope were more important than
easy facilities of adjustment. There is no doubt he found the
less open adjustments the better in the hands of the imperfectly
trained assistants who were pressed into service during
the railway mania of 1848. At any rate, at this period we
have his invention of the "Gravatt," or, as it was afterwards
termed, the "Dumpy" level, which has remained with us with
slight modifications in its mechanical parts and with increasing
popularity until the present time. The late Mr. Troughton,
recognising the same facts, also made a level in which
there was no adjustment to the supports of the telescope after
it left the hands of the maker. In his level he also left no
adjustment to the bubble tube, which no doubt would prevent
tampering, but which could scarcely be called an improvement;
as this tube is liable at all times to be broken, therefore
to need replacing with another tube, which cannot be
made quite similar, and therefore needs easy means of adjustment
for a surveyor to replace it when abroad. This level
has gone out of use, but it is mentioned here, as the old
engraving of it remains in some of our modern text-books.
210.—The Dumpy Level.—One of the most important
structural improvements made by the late William Gravatt
in his dumpy level, was the addition of a cross bubble,
shown end-view in Fig. 59 at CB. This improvement over
the old form of Y-level permitted the setting-up of the instrument
to be completed approximately, without turning the level
a quarter revolution backwards and forwards several times
during the operation, as was necessary in the setting-up of the
Y-level. The compact form, lightness, and large field of view
in the telescope otherwise commended it to civil engineers,
when Gravatt had pointed out the possibility of sufficient
practical adjustment without resorting to the cumbrous proportions
of the Y-level as it was then made. Modern experience
has shown that the dumpy form of telescope could very
well be applied to the Y construction, and this has been
done, as shown in the preceding pages; but at the time the
dumpy was invented by Gravatt, the Y-levels were very commonly
made 20 inches or more in length of telescope, and
were altogether very flimsy affairs. Gravatt's 12-inch level
was found to be quite equal in power and of less than half the
bulk and weight. A 12-inch dumpy should read the ·01 foot
on a Sopwith staff, which is described in the next chapter, at 5
chains with a webbed or glass diaphragm, Fig. 61; with a
more open reading than Sopwith's staff a greater distance
than this. A 14-inch dumpy should read the ·01 foot at
10 chains.
211.—The Dumpy Level of modern form is represented
in the engraving, Fig. 59. It consists of a telescope, fully described
art. 94, which carries a ray shade RS at the object-glass
end, to work in the field to eastward or westward facing
a low sun. The eye-piece EP is adjustable to the webs in
the telescope by pressure in or out. Two straps or bands are
accurately fitted and soldered round the tube of the telescope;
one of these carries a hinge joint, and the other a pair of
locking nuts to support the level tube GG, and at the
same time permit its adjustment. The level casing tube has
two three-quarter bands, which slide upon it, pointed at one
end GG: these adjust to the length of the bubble for changes by
temperature. The lower part of each strap-piece is left a solid
block of metal, to give very firm support to the telescope as it
rests upon the limb L beneath. The limb may be either a
casting with a socket screw only in its centre, or a compass
box may be formed in the centre and the socket screw be
placed under this, as it is shown in the figure at S. The
attachment of the telescope support to the limb is made by
three screws, two of which draw the limb down, and one in
the centre presses it upwards, as shown in the section Fig. 60—CC′
telescope, TT′ drawing screws, P pressing screw.
212.—It will be seen that by this means firm adjustment
may be made either by raising or lowering one end of the
telescope, as also by a lateral rocking motion should the web
or bubble not be quite to position. This plan is certainly
moderately solid, and little fault can be found with it, except
that a little torsion may be put on the telescope by unequal
screwing, and that it appears slovenly in leaving an open gap
between the limb and block; therefore the author prefers in
his own form of level, which will be presently described, that
the block be solidly fitted down upon the limb, as is shown in
the section Fig. 60, and the telescope be placed permanently
exactly parallel with it. If the vertical axis be once fixed
truly perpendicular to the axis of the telescope as solidly as
possible there is very little risk of a bell-metal centre of ¾ inch
or so diameter being bent; therefore all parts may be closely
fitted between the axis and the telescope. Some makers,
instead of screwing down at both ends of the limb, make one
end a rocking centre and adjust only by screw at the other
end. This plan lacks a little of the stability looked for in the
dumpy system. The general construction of the vertical axis
is the same as that of the Y-level already described. The
parallel plates, tripod head, and tripod are also the same, art.
193, Fig. 55.
213.—As the telescope of the dumpy level does not
possess any simple means of determining the accuracy of the
fitting of its sliding tube, it is a very important point in these
levels that this fitting should be good, so that the object-glass
does not droop when extended. For this reason the inner
sliding tube of the telescope should be as long as possible, and
its adjustment by the rack sufficient to bring an object in
focus at 15 to 20 feet distance. This point is sometimes neglected.
The author was once amused by a young surveyor
bringing him an invention, which was to fix two points by the
side of the telescope to enable him to read at short distances.
It was seen on examination of his own level that his telescope,
a badly-fitted one, would not read at half a chain, hence the
ingenuity of his invention. In some cheaply made levels the
solid ring fitting to the telescope, above described, which connects
the limb firmly with the bubble tube, is replaced by
blocks soldered on the telescope with soft solder: the method
is very unsound from risk of imperfect soldering. The blocks
are very liable to become loosened by a jar.
214.—The diaphragm of the dumpy level is generally
webbed with two vertical webs and one horizontal. In use
the image of the staff is brought between the vertical webs,
which indicate whether it is held upright. The upper margin
of the portion of the horizontal web between the two vertical
ones is the index of level to which all readings are made,
either for adjustment or for reading the levelling staff in the
field. The somewhat loose and slovenly four-screw adjustment
for a level diaphragm used in rough work with capstan-head
screws, shown Fig. 23, p. 50, which is necessary for the adjustment
of the telescope in Y's, has been abandoned for many years
in the better-constructed dumpy levels by all good makers, and
the more solid construction, shown below, Fig. 61,
used in the place thereof. In this plan there is no lateral
adjustment: the diaphragm is carried as a frame in a dovetail
slide, and is adjustable by vertical screws only. The figure
shows the face of diaphragm:—BB′ slide pieces, A slide
moved by capstan-head screws.
Fig. 61.—Diaphragm of dumpy level with webbed stop.
215.—Subtense or Stadia Webs.—It is very advisable
in all levels to have two extra webs, or lines cut on glass, placed
one on each side of the central horizontal web or line, fixed at
such a distance apart that the image of 10 feet of the staff
when placed at 10 chains distance may exactly cut the inner
space between the lines. These webs or lines may be used
as a means of measuring distances often more exactly than can
be performed with the chain if the surface of the land is
irregular; or, in any case, they form a good check upon chain
measurement. If the webs or lines are separated so as to subtend
an arc whose chord is 10 feet at 10 chains, it is easily
seen that 1 foot of the staff will represent this chord at 1
chain, and that each ·01 of the foot on the staff will represent
1 link in distance. A diaphragm webbed or lined in the manner
described is shown in Fig. 62. There is some difficulty
in placing webs in exact position, and allowance should be
made for the optical conditions by the addition of a plus
factor. This important subject will be fully discussed hereafter
in Chapter XII.
216.—Tripods, or Stands.—This matter was deferred
when describing the Y-level. The same form of tripod is
used for both Y-level and dumpy. In this country the tripod
is generally made of straight-grained, well-seasoned Honduras
mahogany, which stands better than any other wood. When
the tripod is folded up for carrying or for putting by it forms
a cylindrical pole which is bellied out at about one-third its
length from the top, and diminishes downwards and upwards
from this point. For a 14-inch Y-level or dumpy the dimensions
of the tripod are about 3½ inches at its greatest diameter
when closed, tapering off to 2½ inches at both the top and the
bottom ends. For a 12-inch level the section is somewhat
less. Each leg of the tripod takes an equal section of the
cylinder, the inner angle meeting in the axis being at an angle
of 120°, as shown in section Fig. 65. Shovel-pieces are shown
in Fig. 59AA′ (p. 110), attached to the top of each leg by
four screws passing from the brass to the wood. There
should be also two screws from a brass plate inside the leg to
the shovel-piece, making connection brass to brass: this is important,
as fixings from the brass to the wood only become
loose and shaky by shrinkage. The shovel-piece is formed
into a strong tenon at its upper end, through which a bolt
passes connecting the book-pieces together. The book-pieces
are plates cut to an angle of 120°, so as to fall true on the
tenons of the shovel-pieces. Where hand-work is used for
making the tripod head, the book-pieces are attached by
three screws; where machinery is used, the head is made
in the shaping machine out of a solid casting, which is
much better. The tripod head carries a screw about 1½
inches diameter with coarse thread, which fits into a socket on
the lower parallel plate of the level, whether Y or dumpy.
There should always be a plain piece, technically a lead,
above the screw. This holds the instrument steady before it
is screwed down, and also leads the screw directly to its corresponding
thread, thus saving risk of crossing the thread. A
common defect in tripod heads is the thinness of the tenon, so
that the leg, if twisted, is felt to be rickety. This tenon
is better made wide, as shown in the staff head in Fig.
70A, seq.
217.—There is a little difference of opinion as to the form
of the woodwork of the tripod for 14-inch levels, some
preferring an open framed stand in place of the solid form
shown in section Fig. 65. These open framed stands are not so
compact to carry, and, as the author thinks, unnecessary for
levels of 12 inches and under where the tripod head is solidly
made. They are well adapted for larger levels and for
theodolites, therefore the description of a framed tripod will
be deferred to the discussion of these instruments further on.
A few engineers prefer yellow pine for the tripods instead
of mahogany: this is much lighter for its relative stiffness, but
it is rather soft for the fixing to the shovel-pieces, and therefore
scarcely so reliable as mahogany for durability. Where
lightness is important the author employs cedar, which is as
light as pine but harder.
218.—The lower points of the legs, technically toes, are
pointed to an angle of about 60°, and are shod on the insides
with steel plates to bite the surface upon which the tripod
stands when the legs are extended for use. Two brass rings
slip over and bind the legs together when the tripod is out of use.
219.—Many years ago the author introduced the plan of
having one of the legs to turn up at about 1 foot distance
from the toe. This is shown Fig. 63 at A, and in detail
section Fig. 64. The joint is made perfectly firm by a winged
screw at S, which screws from a boss cast on the hinge J to a
solid metal shoe P. When the leg is turned up, the screw
fixes it in the female screw S. This plan is very convenient
for use in mountainous districts, as it enables the level to be
set up fairly well without an uncomfortable angle to any of the
legs, or risk of the instrument toppling over. This plan is
now nearly superseded by a ball joint as a part of the setting-up
adjustment.
The tripod head shown under the level of Fig. 59 is by no
means the best, but it is the easiest made therefore, it is the
general trade form in use, both for the level and theodolite.
Some very superior forms will be discussed further on in description
of the instruments to which they are attached.
220.—The adjustments of the Dumpy Level.—As
this instrument does not possess the means of revolving the
telescope upon its axis as with the Y-level, the adjustments are
somewhat more complicated, and are performed in an entirely
different manner when they are to be made by the civil
engineer. The differences are not so great in the hands of
the optician, as he generally possesses a movable pair of Y's
upon which he can adjust the telescope conveniently for collimation
within his own works, by supporting the telescope
tube in Y's at a position exterior to the bands which surround
it. The tools for this adjustment the author has occasionally
supplied upon demand with the dumpy level. But what is
necessary here will be to give the mode of adjustment which
the civil engineer can accomplish at any time without supplementary
apparatus.
The bubble is handier to work with when adjusted to
reverse in the centre of its run, but it does not really matter, as
equally accurate work can be done with it in any other
position. Should the bubble not reverse in the centre
of its run, adjust the instrument by the levelling screws
until it reverses in some position. Say you start with bubble
in the centre, and on reversing, it runs towards the eye end of
the telescope six divisions, then alter the levelling screws until
it is only half this, or three divisions towards the eye end, then,
if properly levelled, the telescope will make an entire revolution
with the bubble in that position, which will prove that
the axis is vertical. The bubble can now be adjusted by the
opposing nuts at the one end by means of the tommy pin
(provided in the case) until it is in the centre of its run,
and it will then reverse in that position instead of three
divisions towards the eye end.
221.—Adjustment to Collimation.—Upon a fairly level
piece of ground the staff plate, fully described further on, is
trodden well down on the ground, and the level is set up at
say 3 chains from this, in which position the staff is read as a
back sight. Now in the opposite direction in the same line,
at 3 chains distance from the level, a second staff plate, or in
defect of this if the surface be not firm, a stake or a boulder, is
driven firmly down in the earth, and the staff is placed upon this
erect and face to the instrument as a foresight. The instrument
is turned half round and the second station is read.
These readings of the staves taken will be truly level with
each other, if the axis of the instrument has been set up quite
vertically, so that the bubble has kept its centre in all positions.
This is true although the axis may have been out of collimation.
This arrangement is shown in Fig. 66, L the first position
of the level taking sights at equal distance from S and S′.
Let the level be now removed to L′: if correct it should cut
the staves SS′ at equal distances above or below the first
readings at aa′, which are at equal distances from bb′ readings
from L′, therefore level and parallel with the first reading.
222.—In the dumpy level, as it leaves the hands of any
respectable maker, the subsequent adjustments required can
never be great, unless the level has suffered a serious fall so as
to bend the limb. The rewebbing the stop, if carefully done,
would require only a slight readjustment; but it may be convenient
to give an exact method for extreme cases, which may
be given in detail for clearness, and at the same time we may
also consider the influence of the curvature of the earth.
223.—Original Adjustment of the Dumpy Level to Collimation
with consideration of the Curvature of the Earth.—Suppose
the readings of the two levelling staves at 10 chains
apart, taken with the level placed at intermediate distance as
before, read 7·50 and 4·50, and that we now place the level
linearly at 1 chain outside the first reading and it reads the
near staff 6·50 and the distant staff 5·50, by the inclination of
the ground, this would be a + and a - reading; but we
require both readings of one sign, and as the distant staff
reading is much too high, it is clear we require - readings
for correction. The correction will be of the difference of
reading in proportion to the distances, calling the lower
reading minus—
That is -2′, as our readings are - and as the -2′ is in 10
chains, at 1 chain the distance of - the near staff = -·2, and
11 chains the distant staff = -2·2. The correction will therefore
be for the near staff 1 chain distant 6·50 - ·2 = 6·30, and
for the distant staff at 11 chains 5·50 - 2·2 = 3·30 = -1·2
below each of the first readings. If the telescope be now collimated
to the near staff reading 6·30, by adjusting the screws
immediately under it for distance between the limb and
the telescope, and the bubble be readjusted to the telescope
without moving the instrument or touching the parallel plate
screws, the adjustment will be perfect, less the small error due
to the earth's curvature in 1 chain. If the telescope be adjusted
to the distant staff 3·30, curvature of the earth will
be corrected by the level for 11 chains, which is 0·0106 foot
or ·01 nearly, the smallest reading we have on the staff.
224.—It was claimed by the late William Gravatt for
his method of adjustment,[3] which was equivalent to that given
above, but more complicated and with three staves, that the
fixed correction for curvature at 10 chains would be uniform
in the working of the level pro ratâ for all distances. There
is some difference of opinion on this subject: at any rate, a
10 chain correction would only be applicable to very approximately
level ground where average 10-chain stations could be
taken.
225.—Where space is not at command and curvature
correction is not desired, adjustments of the level may be
made with care at 1 chain distance on each side of the setting-up
of the level with one staff only, which can be moved from
one stake to the other, and with the final setting-up of the
instrument at 1 chain distance from these stakes as before,
art. 221. For this the staff only requires moving twice, if the
collimation adjustment is to the last reading only calculated
out as above. This close system has a certain amount of
merit, that by reading from one staff only for both stations it
is more accurate, as any inequality between the divisions of
two separate staves is avoided.
Fig. 67.—Collimator for adjustments to horizontality of the telescope.
226.—Collimator.—Optical manufacturers in populous
districts, and some observatories, as that of the India Store
Department at Lambeth, adjust by means of the collimator by
the exact method due to the late eminent German mathematician,
Carl F. Gauss, which is hence termed the method of
Gauss. The collimator consists of any good telescope
permanently adjusted to solar focus, with a webbed diaphragm
placed in the focus, where it may be illuminated by a lamp or
by the reflection of daylight, and provided with means of
bringing the telescope to a level position. As the collimator
is generally constructed, it consists of an 18-inch telescope,
Fig. 67, of the same description as that used for a Y-level,
described art. 94, in which the telescope is surrounded
by accurately turned collars formed to rest in Y's. The
Y's are supported upon a heavy cast-iron stand, of somewhat
triangular form, of nearly the length of the telescope, about 6
inches wide at one end and 2 inches at the other. The stand
has two feet extended to the full width at the wider end, and
one foot at the narrower end under the telescope. Each foot
has an adjusting screw. The complete collimator is supported,
at about the height of the telescope of the level on its stand,
on a very solid pier of stone or brickwork in cement capped
with a stout slate slab. The telescope is brought to perfect
collimation as with the Y-level, already described art. 200, and
the level is fixed true with the axis of the telescope, when the
collimation is perfect.
227.—A lamp or gas flame is placed at a short distance
from the eye-piece end of the telescope, so as to illuminate the
webs that they may be distinctly seen when looking into the
objective end of the telescope. In bright daylight, if there is
a skylight over, a reflector will answer the same purpose. At
the Lambeth Observatory a fine needle-point hole is used
instead of webs.
228.—The instrument to be adjusted may be placed at
any convenient distance from the collimator. For adjustment
of a level, where the collimator is already in adjustment, the
level is raised upon its stand until the axis of the telescope
sensibly coincides with the axis of the collimator; then if the
telescope of the level to be adjusted be focussed into the
objective end of the collimator, the illuminated webs will be
clearly seen; and if these webs be brought by adjustment of
the level exactly to coincide with its own webs, the collimation
lines of the two instruments are exactly parallel. In this
adjustment it is only necessary to be sure that the vertical axis
of the level is truly vertical, so that the bubble reverses without
displacement, in which case the whole instrument must
then be in perfect adjustment.
229.—It would be very difficult to use this method of
adjustment if it were necessary that the axes of the level and
collimator should exactly coincide. It is only necessary that
they should nearly coincide, on account of the imperfection of
object-glasses, which rarely work so well near the edge as
towards the centre; otherwise any directly parallel position in
front of the object-glass would answer, as the next diagram
will show. Let O, Fig. 68 be the object-glass of the collimator,
whose solar focus is at F. Then the rays PP, and all
other parallel rays falling on the object-glass, will be brought
to a focus at F; and reciprocally all rays departing from F in
passing through this object-glass will leave in parallel lines
PP. Let O′ be the object-glass of a telescope to be collimated,
F′ its solar focus. Then all rays from P to P departing
from F that fall within the parallel space P′P′ will be
brought to focus at F′. When the image at F is illuminated
by a lamp L, the webs or other index will be clearly seen by
the eye-piece at F′ when the two telescopes are exactly parallel
with each other. In this position the webs of the level are
adjusted to make this coincidence. It is easily seen that by
this method we eliminate all errors of atmospheric refraction,
and are quite independent of the state of the atmosphere for
obtaining distinct vision for adjustment.
Fig. 68.—Diagram of collimation by two telescopes.
230.—When two levels are at command, one a Y-level, or
even a dumpy in perfect adjustment, the one may be used as
a collimator to the other by setting them up at a distance
within their focal range on a firm basement floor. A candle
or a lamp will give sufficient light to illuminate the webs of
the instrument, which is used as a collimator, being certain,
of course, that this instrument is first placed in level adjustment
and set at solar focus, and that the instrument used as a
collimator has a good object-glass.
231.—Improved Dumpy Level.—The writer has made
some improvements in the dumpy level, which have so far met
with very general approbation from the profession, Fig. 70.
These improvements are directed to ensure much greater
sensitiveness in the longer bubble, therefore greater accuracy
in the work performed by it; more solidity of construction
without increase of weight; and permanence of reading index,
with some additional matters. In these improvements the
mounting of the longer level tube, instead of being placed in
a stiff joint at one end, or between rigid clamping nuts at both
ends, has a barrel-fitting at one end which is ground into a
parallel hole. This plan admits of circular self-adjustment to
the bubble tube, which the clamping of the nuts can never
twist or strain during vertical displacement; and the joint can
be made perfectly sound with certainty, which saves the risk
of accident to the bubble from expansion by heat and
some other conditions. A more recent form of cross level,
Fig. 69, shown in perspective near the ray-shade in the engraving
Fig. 70 has been designed by the author, in which the
level casing is bored entirely out of the solid. It is supported
upon the side of one telescope strap by three stout pins, the
centre one fitting its hole, and the two outer ones are loosely
held by cross screws to permit a small amount of adjustment,
which is all that is necessary. By this construction the level
fixings are made in five pieces only, including screws, instead
of thirteen as usual, at the same time making the
level more portable and solid for hard wear. The telescope
straps are fitted at their stumps solidly down upon the limb,
as shown Fig. 60, p. 112. Adjusting screws are placed
under this as in the dumpy level described, but the pressure
screw is not employed except in case of accident far
away from an optician, when it is found to be there ready for
use. The limb is framed out into two edge bars: this gives
greater vertical sectional strength and resistance to torsion
without increase of weight in the instrument. Where a compass
is used, this is included in the frame of the limb, as
shown in the engraving. The compass is read with a prism,
this being much more convenient and exact than looking down
upon the divided circle, the instrument being necessarily
placed for use at nearly the height of the eye. The compass
ring is made of aluminium.
232.—The further improvement, which the author considers
of the greatest moment, is that the vertical axis is fixed
directly and firmly upon the limb, and not through a loose
screw fitting for separation at this point as in the ordinary
dumpy. This is shown to be important in that, with the
dumpy, where a loose screw is employed, any little difference
of screwing down upon the axis when the instrument is set
up causes so much derangement of a sensitive bubble in
relation to the vertical axis, that the optician is bound to
use a rather dull bubble with the ordinary dumpy. Further,
a particle of grit or the slightest bruise on the collar in replacing
the instrument in its case throws it out of adjustment
at this important point. The objection to the author's
plan is that it makes the case for the instrument somewhat
larger; but the advantage of certainty of permanent adjustment
appears to him very far to counterbalance this objection
where accuracy is aimed at.
233.—Tribrach.—The setting-up adjustment of the instrument
is upon tribrach limbs with three screws only. These
screws can never strain the vertical axis, which in this instrument
is somewhat deeper and more firmly made than that of
the dumpy. In the old form of tribrach the points of the
screws were held down by a spring plate placed above them.
This plate, in carrying the instrument upon its stand over the
shoulder, which is the most comfortable way if the stations
are not far apart, was very liable to strain sufficiently for
the screws to get loose. The author patented a much
more solid method, by which the old spring plate is entirely
dispensed with. In this plan each screw has a ball at the
lower end, which is inserted in a tubular fitting formed
in a solid tribrach, made of exact dimensions to take it.
The tube is open on the upper side, as shown in longitudinal
section H, Fig. 71. Many years' experience and the
fact that numbers of makers have copied this form since
the expiration of the patent, shows this plan to be perfectly
successful. The general construction of the lower part of
this level may be seen from inspection: L limb, fitted with
compass; C axis, in one casting with the limb; S sprang,
carrying the socket and supporting the instrument. PH
shows the ball head arrangements to the screws. A central
screw in this part detaches the tripod. One point is shown
at P, of which there are three, to support the level upon a wall
or rock in cases where the tripod cannot be used—a most
important advantage in town levelling. The tripod head is
made much more firmly than that of the ordinary construction,
by extending two wing fittings from the top of the shovel-plates
as wide apart as possible, instead of the narrow tenon
fitting before described. The shovel-plates are screwed to the
staff by means of a stout nut-plate inside the tripod F. Those
who have experienced how much defective levelling is due to
a shaky tripod head will appreciate this precaution. The
general arrangement is also shown in Fig. 70A.
Fig. 71.—Details of Stanley's dumpy level: half elevation to left, half section to right.
234.—As the tribrach system of adjustment is of somewhat
recent adoption to ordinary surveying instruments in
this country, it strikes the stranger to it as being more
difficult in use. It is really the most simple and expeditious
system as is clearly explained by the foregoing diagrams, Figs.
72, 73 of the plan of a level, omitting its lower parts.
235.—The bubble of the level is placed parallel with two
of the screws of the tribrach, that is as B and C, Fig. 72,
and is adjusted to the centre of its run. It is then placed
at right angles to the first position, so that the screw A comes
directly under the bubble, to be adjusted by this screw only
until it again comes in the centre of its run. Fig. 73 shows
this second position with the screw A underneath. The
level should after this read all round true, but it is well to try
it round parallel with the different pairs of screws in all
positions to give small adjustment if required. Where there
is a cross bubble the level may remain for adjustment in
its first position, but it is well to try it all round, as the long
bubble is made uniformly the more sensitive.
236.—The Ray Shade to the telescope used in the above-described
level has two narrow slits opposite each other at
180°. A zero line is carried from one slit to a line on the ray
shade fitting when the slits are quite horizontal. Sights
through the slits at zero enable an approximate cross-level to
be taken. The edge of the tube of the ray shade is
divided 30° on each side of the zero line to 2°, so as to take
approximate lateral inclines of the surface of the land in levelling.
This useful plan of cross-sighting was originally proposed
by Gravatt.
Fig. 75.—Stanley's platino-iridium point level stop.
237.—The most important variation from the telescope of
the dumpy level described is in the diaphragm, where webs or
lines of any kind are entirely done away with, and are replaced
by a special form of index. This is represented in Fig. 75.
The movable part carrying the opening of the diaphragm is
placed in a sliding fitting, as previously described, art. 214, for
the dumpy level. The index which replaces the web is a
finely-pointed needle formed of platino-iridium (platinum ·75,
iridium ·25). This alloy has about the hardness of spring-tempered
steel, and is, as far as known, perfectly non-corrosive
in air or moisture. A pair of vertical points indicate the
position for holding the staff. It will be found by experiment
that the point reading is much more exact than with the web,
as irradiation due to edge reading of the web is entirely
avoided, and also the covering of the object as it would be
intersected by the web due to the angle its thickness subtends
upon the staff, which is very palpable at 10 chains distance.
The iridium point is sufficiently strong to be kept perfectly
clean by touching it occasionally with the point of a camel-hair
brush if it appear dusty. With care this point will last in
adjustment for as long a period as the level itself remains
in use. Upon first impression the point may not appear so
fine as a web, but practically it is more exact, as the previous
exaggerated images will show—Fig. 76 is the image of a
division of the staff partially covered by a web WW′; Fig. 77
that of a magnified image of the point P brought towards a
division for reading. It will be readily observed that the
fractional part of the 1/100 foot block, which the point P cuts,
is much more easily estimated than that in which the web
WW′ covers a part of a similar block.
Fig. 76.
Fig. 77.
Difference of reading with a web and a point, shown much magnified..
238.—In early levels of improved construction, as shown
Fig. 70, a difficulty was experienced in practice in bringing
the index point exactly up to the edge of the line as it is shown
in Fig. 77 at P. This difficulty has been obviated in recent
highest class instruments by making a tangent screw adjustment
to the axis as shown under the level in Fig. 78. There
was a great objection to the old form of tangent adjustment
by clamping on the axis, as this was found to disturb the
centre. In the plan shown in the illustration the clamp is left
free by jointing to the axis until it grips one of the
arms of the tribrach upon a vertical surface; in this way it
cannot disturb the axis. The level, Fig. 78, is shown mounted
on a framed stand, which is preferred by the Indian Government,
and is generally necessary for rigidity for large instruments
of over fourteen inches. This will be described
further on with theodolites, art. 447, on framed stands.
239.—Stadia Points.—The author commonly makes the
points, Fig. 75, VV′ stadia points, by making the distance of
the extreme ends of these subtend an angle, equal to 10 feet
of the levelling staff at ten chains distance, or 1 foot of the
levelling staff at 100 feet distance (+ a constant to be discussed
Chapter XII.), by which measurements of the distance of the
staff can by taken or checked by observation through the
telescope only.
240.—Quick setting-up Tribrach.—One objection
has to be made to the tribrach over the four-screw
system of adjustment, that the four-screw admits of greater
inclination to the tripod, which is important in hilly
countries. To remedy this defect the author designed a
ball arrangement to the axis, which permits the level to
be set 15° to the inclination of the tripod independently
of the screw adjustment, so that the level, when the tripod is
set at its best angle, may be brought immediately to nearly
its final position. The arrangement is shown in the engraving
Fig. 79. The axis carries a cup formed in the metal casting,
which can be clamped down upon a ball-shaped recess formed
upon the tribrach by means of a winged nut placed under
it, the wings of which project between the tribrach screws. A
very slight pressure is sufficient to firmly clamp the ball. This
form of level is now very popular with civil engineers. With
a point diaphragm and a tangent screw to the axis, not shown
in the engraving, it is, in the author's opinion, the best practical
level he has been able to design.
Since the last edition was written the reviser of this work
introduced, in conjunction with Mr. Stanley, his new solid
bodied engineer's level, which has practically revolutionized the
form of dumpy level and has proved such a success that more of
this form are now made than all other forms put together. In
this level, Fig. 80, the centre, body of telescope, object end
and bubble fitting are all combined in one piece of gun-metal,
so that although of vastly greater strength and rigidity it does
not weigh as much as the old form of tubular body with its
collar and stage. This does away with many separate pieces
which are usually soldered and screwed together. It thus
forms the strongest and most compact level yet made, and with
ordinary care it will last in perfect adjustment a lifetime. The
pinion for focussing is fitted to the side of the cast body,
instead of to a tube, thus greatly increasing its firmness. Its
form is equally adapted to the four-screw levelling if desired,
as shown on next page, Fig. 81, in which it will be seen the four-screw
levelling is of much improved form, giving greater
strength and far more wearing and bearing surface to the
levelling screws.
The reviser has also patented a new form of spherical
joint, which has met with equal favour. This improvement
consists of a section of a ball (screwed to fit the stand head)
fitted within the lower plate and a simple means of clamping
it in any position, which, when released allows of sufficient
rocking movement in any direction to compensate for any
uneven setting up of the stand. It does not add to the height
of the instrument, may be instantly set nearly level, and less
than half a turn of the levelling screws will bring the instrument
into true position. It is shown fitted to the new
engineer's level at Fig. 82 below, but is equally applicable to
any other form of instrument.
As ninety per cent. of the orders now for levels are for
the form shown at Fig. 82, the reviser ventures to think that
this must be favoured by the profession as the best practical
instrument yet made.
A further improvement has been made by making the
diaphragms interchangeable, so that any form of diaphragm
that is preferred may be instantly fitted without disturbing the
adjustment, and when lines on glass are used it may be removed
for cleaning, and replaced without interfering with the
adjustment.
The diaphragms illustrated below, Fig. 83, are usual
forms, and it is recommended that when webs are preferred
a glass one should be carried as a spare in case
of accidents.
241.—The further discussion of the subject of high-class
levels becomes somewhat difficult. Leaving out of consideration
the levels sold by the trading optician, who deals in the
commercial article but sometimes superadds a little fad, every
genuine manufacturer has his pet plans of carrying out details,
some of which may be very meritorious, but which could
scarcely be described without a fuller discussion than our
space permits. There is also, no doubt, a great number of
mistakes that have been made in the construction of surveyor's
levels. The direction in which the scientific optician
generally fixes his attention is to give the advantages of the
Y-level in the dumpy form, assuming the civil engineer holds
a certain amount of prejudice against the use of the Y, for
which, in its old form at least, the writer must admit that he
was fully justified. Whether the professional man, nevertheless,
will ever depart from the solid construction of the
dumpy remains an open question.
242.—Cushing's Level.—The level illustrated above,
Fig. 84, by the late Mr. Thos. Cushing, F.R.A.S., Inspector of
Scientific Instruments for India, would under any circumstances
claim attention, from this gentleman's well-known
high technical scientific attainments. It has also the merit of
being in practical use in India at the present time.[4] The
principal improvement in this instrument over the dumpy
form, which it otherwise represents, is in the construction of
the telescope, which is said to possess all the necessary adjustments
of the Y-level. The telescope is firmly fixed in
collars soldered to the tube, as in the dumpy. The tube at
each end is formed into a stout socket collar. These socket
collars are exactly alike, and are ground to fit either the
objective or the eye-piece end of the telescope, so that these
parts may be reversed, the one for the other. This reversing
is nearly equivalent to turning the telescope end for end in
the Y-level. The end also rotates in its fitting, which is
nearly equivalent to rotating the telescope half a revolution in
the Y-level. The reversible ends of the telescope are held in
their ground fittings by studs and slides (bayonet notches). It
is easily seen that by this plan adjustments may be made of
collimation and of fixing the line of collimation perpendicular
to the vertical axis, as with the Y-level, if the object-glass be
originally correctly centred. The stop is of the slide form
described for the dumpy, Fig. 61, and a glass diaphragm is
used. One important arrangement is also made in this part
of the instrument—which is necessary, as glasses become
frequently bedewed in the telescope—viz., that the eye-piece
end may be removed from its ground fitting and the
glass cleaned and replaced without disturbing the adjustment
in any injurious degree. The general construction of the
instrument can be seen from the illustration. The supports
of the telescope have a rocking axis at one end, and are adjusted
by capstan-headed nuts at the other. The adjustable
support for setting up the instrument is upon Everest's tribrach
system for theodolites, to be described further on, in
Chapter IX. The tripod head has also wider bearing than is
general, which is attained by extending the book-plates into
the form of a socket fitting. The illustration given is of a 12-inch
level; in the 14-inch an open framed stand is used in
place of the solid tripod, as in Fig. 78, which will be described
further on, for theodolites. The level is a decidedly good
one; but the author has experienced with it some slight
defects when compared with his own Y form. The ground
collars are a little inclined to bite, particularly if the instrument
has been laid by for some time, so that in reversing for
adjustment there is great risk of disturbing the instrument.
The glass index, although permanent, has the same defect as
the web—of covering the image of the staff reading. It also
obstructs a little light, and is subject to dew, which the point
system avoids. The weight of the instrument is increased by
the collar fittings.
243.—Cooke's Level.—An instrument somewhat equivalent
to the above has been patented by Messrs. T. Cooke & Sons.
In this, instead of the objective and eye-piece ends of the
telescope only being reversible in the collar fittings, as in
Mr. Cushing's level, the entire telescope reverses end for end
in an extra outer tube, which is fitted between the collars.
This tube also permits the rotation of the whole optical parts
about the axis of the telescope for adjustment for collimation,
although in a manner more frictional, and therefore more
likely to disturb the instrument than in the simple Y adjustment.
In this instrument, again, it is easily seen that it is the
perfection of the Y-level, without its outward appearance, that
is aimed at, and to gain this the weight is increased by extra
fittings and double tubes, which are liable to become fixed
by a slight dent upon the outer tube. Taken altogether it is
not quite so convenient or so simple as the best constructed
Y-level; but if it gives the adjustments the optician holds to be
most important, in a disguised form it may be acceptable to
the civil engineer. We may in this manner, perhaps, from the
optician's point of view, count it a certain gain in the same
direction as Mr. Cushing's level just described; but if we may
accept the late Mr. Wm. Gravatt's ideas, already mentioned,
the complication is unnecessary.
244.—A few other structural variations of details may be
mentioned, as these are constantly cropping up as new inventions.
The bubble tube is sometimes placed upon the
stage instead of being upon the telescope. This is thought to
protect it. It is not, however, so easy to read it in this
position. The compass is sometimes made a loose part—when
it is not required on the work its weight is saved.
Various forms of locking screws are made to the supports of
the telescope; these are only necessary to correct imperfect
work. The axis collar is sometimes extended to a limb
bearing. This is common in French instruments; it makes the
movement stiffer, and is quite unnecessary unless the axis is
made too short. A well-known German firm recently brought
out a level with internal focussing, by means of an auxiliary
lens mounted in a tube inside the telescope, moved by a
rack and pinion, but any internal lens is a source of trouble, as
it cannot be got at to be cleaned, and in hot, damp climates it
becomes bedewed. The device is very old, having been
patented in America many years ago and discarded.
245.—Supplementary Parts to Levels.—As a rule,
supplementary parts fixed to the instrument, beyond the
magnetic compass sometimes required, are very objectionable
if the object of the level is to be levelling, as these additional
parts inevitably increase the weight which has constantly to be
borne in carrying the instrument. Supplementary parts have
been carried, in various schemes, to the extent of combining
the entire level with the theodolite, at the same time nearly
combining the united weights of the two instruments. As a
rule, professional men rarely care for complex combinations;
and even after a limited popularity is granted to extra parts
not absolutely required, these are generally finally abandoned.
Mention of two such parts, therefore, only will be made, as
these owe their introduction to the late William Gravatt, and
are found applied to many levels in use, or at least contained
in the case with the instrument.
246.—Bubble Reflector.—This was formerly placed upon
all dumpy levels. It consists of a small mirror about 2
inches by 5/8 inch fixed in a frame that is jointed at its lower
end to a short piece of tube partly cut away so as to form
only a little over a semi-cylinder. This tubular part just
clips firmly upon the brass casing tube of the spirit level.
The reflector, when placed vertically on the level tube, can be
adjusted by its joint, so that the run of the bubble may be
observed by reflection in looking above the eye-piece to see
that it is in adjustment at the time of taking an observation.
Its use was thought to be a precaution in levelling, particularly
on marshy ground. The observation of the bubble is less
exact than by a side reading, and cannot be relied on.
247.—Sight Vanes.—Two sight vanes are placed above the
telescope, either as loose fittings or to hinge down upon the
level tube. One vane has a vertical narrow slit and cross
hair; the other has a window with a vertical horse-hair
placed in its centre. This arrangement gives sight of distant
landmarks in line with the direction of the telescope, upwards
or downwards, beyond its field of view. A slider, fixed upon
the window sight, reads at its upper edge into divisions cut on
the vane, by means of which an approximate rate of forward
inclination of the land may be taken. This sighting arrangement
adds about half a pound weight to the instrument. It
was useful with object-glasses of small field of view, but is
useless with good modern glasses of wide angle.
248.—Lower-class Levels.—A level is often required
by an architect or a contractor for works of limited area,
where it is quite unnecessary to go to the expense of a civil
engineer's level of refined manufacture. In such cases the
level may only be used occasionally and under favourable
circumstances, so that extreme solidity is not demanded,
neither is distant view in the telescope required. The level
generally made for such work is a simple dumpy, without
cross bubble, compass, or any extra fittings, and with one eye-piece
only.
249.—The instrument Fig. 85 illustrates the author's
newest design for a simple level. It has a light form of
tripod. The legs clamp directly between angle plates—these
are not quite so portable or so neat as cylindrical legs, but
they are easily made, very firm, and will bear considerable
wear and keep in order. A still cheaper form is made with
smaller telescope and turned legs for the tripod.
250.—The illustration Fig. 86 represents the cheapest
form of level with a tripod stand that has been constructed,
which contains the important factor of a telescope. The
telescope has a sliding fitting, which is moved by a knob outside,
this being made more quickly than a rack and pinion
fitting. The level tube is solidly supported in collars.
The adjustment is in one direction only, so that the bubble
must be set and examined at the time of reading the staff.
The instrument is supported on a sprang, jointed at one end
and held by a milled-headed screw at the other. Any
shakiness of the thread of screw there may be is taken up by
a stiff German silver spring between the sprang and the limb.
It is sometimes made with a ball and socket joint for first
adjustment, but this renders it nearly as costly as a superior
level. The tripod head is of simple construction. The
legs are oak or ash, and are clamped on the head by bolts.
This simple tripod is fairly firm in use. The level is good
enough for ordinary building works, laying short drains,
etc., within limited areas. It is much more accurate than
any form of open sighted level without telescope. Sir
George Leach has recently made a modification of this old
form of level by placing a pendulum to rock the axis to cross
level position, which is a refinement, although rather a costly
one.
251.—Sighted Pocket Level.—This consists of a tube,
which is generally drawn of square section. A pin-hole sight
is made in the closed end of the tube, Fig. 87, at E. The
field end of the tube is left open. The sight is taken
by looking through the centre of the pin-hole across the edge
of the reflector R. A level with a small bubble is placed
or inserted in the top of the tube at B. The metal casing of
this is cut away on the upper and under sides to render the
bubble visible from the interior of the tube by means of the
reflector R, which occupies one half vertical section of the
interior of the tube. This is placed at 45° to the axis. The
reflector is fixed upon an inner tube so that it may be withdrawn
to be cleaned. When the level is set horizontally,
a distant object in the direct sight line is seen through half the
tube, and simultaneously the reflection of the bubble in the
other half appears. A line engraved upon R indicates when
the bubble is central, and when these coincide the distant
object and the eye are level. The instrument is about 4
inches long, and weighs about 8 oz. in its case.
252.—Pocket Telescopic Level.—In the above-described
pocket level, where it is made short, the average
middle-aged man will not have sufficient accommodation of
vision to be able to see the bubble and the screen sharply defined
simultaneously with the distant object to which the level
is to be taken. In Captain Barrie's[5] level these objections are
avoided by making the reflector and bubble form part of a
telescope, Fig. 88. An achromatic glass of short focus is used,
and the eye-piece is of long focus so as to bring the bubble to
focus in the centre of the mirror, which is made of curved
form to decrease the apparent size of the bubble. The image
of the bubble does not give by bisection a very definite index.
The author has found that this level may be much improved
by placing a point in the telescope at the mutual foci of the
object-glass, eye-piece and the bubble. The appearance of
the mirror and point is shown at B. The point is shown by
a dot at P. The curved mirror R. The dotted line shows
the path of reflection from the bubble. This level will work
with very fair accuracy as a hand instrument. Size, about 4½
inches by ¾ inch. Weight in case, about 8 oz.
Fig. 89.—Reflecting level.
Fig. 90.—The same construction in protecting case.
253.—Reflecting Level.—This simple level, Fig. 89,
the invention of Colonel Burel, is one of the most portable.
When it is used with a fair amount of care it will give good
approximate results. It consists of a piece of parallel glass,
which has half the surface silvered to form a reflector. It is
suspended in such a manner that the glass hangs vertically by
gravitation. The position of the mirror to the plain glass may
be that shown in the engraving, or horizontally if preferred.
The mirror, Fig. 89, is inserted in a solid metal frame
suspended from a gimbal, which permits it to hang perfectly
free to the action of gravitation. The centres of suspension
are made with slightly-rounded knife-edges. A ring at the
upper part of the instrument is placed over the thumb or
finger to support the instrument when in use. A stout pin
passes through a prolongation of the lower part of the frame,
screwed or otherwise, which permits adjustment by filing to
bring the mirror when it is suspended exactly into a vertical
plane. The instrument, fitted into a neat case, weighs from
5 oz. to 9 oz.
254.—In using the Reflecting Level, it is held upon the
thumb at about arm's length, and adjusted by raising or
lowering the arm until the reflection of the pupil of the eye
seen in the mirror is exactly bisected by the line cut by the
mirror against the clear glass. The distant object seen in
front, that cuts this sight line and the image of the pupil of
the eye, will then be in true level position with the eye of the
observer, provided the air is still, so that the mirror is not deflected
from verticality. From the natural unsteadiness of the
hand there is some little difficulty of getting this level quite
free from oscillation. This may be obviated, or nearly so, by
clutching a picket or staff with the hand and suspending the
level from the thumb projected out for the purpose, or by
resting the hand against a tree or other firm support. Capt.
A. H. East, R.A., has suggested to the author a very capital
device which he employs for hand instruments. This is to
place the handle of a stick (or umbrella) in the waistcoat
pocket, to clutch the body of the stick with the hand which
holds the instrument, and to steady it with the other hand.
In this manner the two arms and the stick form a tripod of
surprising steadiness.
255.—Reflecting Level in Case.—In windy weather
much greater exactness may be secured by placing the
pendulous level, just described, in a tubular case, Fig. 90.
The case is made of double tubes, so that the aperture cut on
one side may by a half turn of the outer tube close and protect
the instrument when out of use. The transparent side of
the inner case is sometimes closed by thin glass tube of its
own internal diameter. It is much better if made with two
vertical sides glazed with parallel glass. When this form of
instrument is used, it may be, if required, made to fit on the
top of a light staff. The eye is then brought with much
greater certainty to the point of bisection on the edge of the
mirror, and much greater accuracy is thus attained in levelling
with it.
256.—Water Levels.—The antique form of level, composed
of two vials fixed on the ends of a tube and partly
filled with water, by which a level is sighted in looking over
the surface of the water, is still used to a limited extent in
rural districts on the Continent; but the spirit level in some
simple form is fast superseding it. The same principle of
level, but with long tube, has been found convenient for the
surveyor in measuring through close buildings, Fig. 91.
257.—Browne's Water Level[6] is found to be a convenient
instrument for levelling in close towns. It consists
of a pair of glass tubes of about 2 feet in length, placed in a
casing tube for protection. The casing tube is divided into
inches and parts, or the scale is a detached piece of painted
wood, or any rod or rule. A cock at the bottom admits the
water to flow to level in the pair of tubes, one of which is
shown, Fig. 92. There is a handle at the top which unscrews
to fill the level, and a small air cock. It is easily seen that
the water finds its level, and the difference of reading of the
two standards is the difference of level of the surfaces
upon which they are placed. By closing the cocks the
level is made portable. In this position it does not matter
how high the centre of the pipe is placed—for instance, in
crossing over a wall—as the water will still find its level when
the cocks are released by syphoning the water from the one
side or the other. It is a very convenient and exact level for
laying drain pipes in open weather, and for making foundations
for heavy machinery, etc., but of course it will not stand
frost.
Platelayers' levels and mechanics' levels generally are
deferred to consider with useful hand tools and apparatus employed
by surveyors in the final chapter.
CHAPTER V.
LEVELLING STAVES—CONSTRUCTION—VARIOUS READINGS
DISCUSSED—SOPWITH'S—FIELD'S—STRANGE'S—STANLEY'S
NEW—METRICAL—SIMPLE CONSTRUCTION MINING STAFF—PAPERED
LEVELLING STAFF—PRESERVATION—PACKING
PADS—STAFF PLATE—STAFF LEVEL—PRACTICE OF LEVELLING—INDEX
OF BUBBLE—LAMP—CURVATURE CORRECTIONS—STATION
PEGS—REFINEMENT OF LEVELLING—LEVELLING
BOOKS—INK BOTTLE, ETC.
258.—Levelling Staves.—Since great improvements
have been made in the telescopes used as part of all modern
surveyors' levels, particularly by increasing their light-receiving
capacity, all systems of vanes which were formerly made to be
seen distinctly at a distance have disappeared from use by
British surveyors; it is now found that the plain reading
of a divided staff can be taken by means of the telescope
at a sufficient distance from the observer for all practical
purposes. In this country one construction of staff is now
generally adopted; and the only variations that are made in
this are found occasionally in the readings. The construction
of the level staff in common use is that invented by the late
Thomas Sopwith,[7] called the telescopic staff, the face view of
which is shown Fig. 96. For ordinary open field work this is
made 14, 16, or 18 feet in its extended length; but generally,
except for levelling on mountainous land, the 14 feet is used.
This staff when closed is about the same length as the tripod,
5 feet 4 inches, and may be conveniently stowed away
under the seat of a railway carriage. Sopwith's staff, as it was
formerly made, consisted of two square parallel tubes and one
inner solid parallel slide. Made in this manner it was liable
to be rather shaky when extended, besides which it frequently
got jammed in the telescopic boxes if put away damp from
rain: this tended at first to limit its use. It is now usual to
make the boxes slightly conical, that is, diminished towards
the upper part, so that they are rigid when opened out
but are very free when closed, which quite remedies the
defects just mentioned.
259.—The ordinary construction of Sopwith's staff and
the best mode of manufacture is shown, with the joints
grooved together, in section Fig. 93. The outer tube or
case A, which in the 14-feet staff is 5 feet in length, is made
of mahogany 5/16 inch thick, the front being ¼ inch. The outer
dimensions of the section are 3-1/8 inches by 2 inches. The
second tube B is 5 feet 1 inch long, of outer dimensions 2-3/8
inches by 1¼ inches. The inner slide C is solid, 5 feet
2 inches long, 1¾ inches by ¾ inch. All the slides are sunk
on the face about 1/16 inch to prevent the divisions being
rubbed by exposure in sliding together. The slides have
each a brass shoe and cap. They are held when extended by
a spring catch, the detail of which is shown in Fig. 94, section
y to z of Fig. 93—S spring of T form screwed firmly to the
edges of the box. The catch is made at A over the edge of
the brass cap A′. The spring should be of very hard rolled
brass. It is well to have one or two brass bands round the
body of the outer casing to secure this as far as possible from
being split by accident.
260.—The most important consideration in the manufacture
is that the telescopic work should fit well, and that
the boxes should be glued up quite square and out of winding.
The boxes should, after the glue is quite set, be screwed with
brass screws at distances of about 6 inches apart, to secure
the joints which may afterwards in use be exposed to long-continued
rain. The fittings should be carefully made, so
that when the staff is extended there should be no shakiness
sufficient to cause serious vibration when it is used in windy
weather. The interior of the slides when finished should be
thoroughly oiled with raw linseed oil, and the outer surfaces
be well soaked in shellac dissolved in spirit, and then
French polished over this. The brass work should be well
lacquered.
261.—Semi-circular Staff.—This is another kind of
telescopic staff, with Sopwith sliding arrangement, which
possesses a certain merit, but is more expensive to make. It
is semi-cylindrical, the cylindrical part being made without any
joint. This is shown in the section Fig. 95. The general
dimensions of the face of the staff are the same as those
given for the Sopwith staff. This staff is a little stiffer, but
there is more risk of its not standing true. As in the union
of four pieces of wood in the square form, previously
described, the tendency of one piece to warp in a certain
direction is resisted by the other pieces; but in this cylindrical
form there is no such resistance, so that it is found that these
staves when exposed to wet are much more liable to become
warped and fixed in their slides. There is also more
difficulty in getting the conical form fairly accurate in the
working. One particular merit, when a pair of staves of
this kind is used, is that the two go together and form a
cylinder, which is a very compact form, but perhaps a little
more difficult to carry, owing to the tendency of a cylinder to
roll off the shoulder.
262.—What was originally considered as the defect of the
Sopwith staff, besides its shakiness, as it was first made, was
the diminished width of reading of the upper length, this
being only 1¼ inches wide. This caused for a long period
other forms of staves, which maintained the same width of
reading surface quite to the top, to be preferred by many.
This fault has been partly remedied by the author in making
the feet readings of the upper staff by dots, instead of the
narrow figures, which were very difficult to read. In other
respects the light and portable form of the Sopwith staff has
ensured its general use.
263.—The original form of reading designed by Sopwith
is still much more in use than any other. It is similar in
pattern to Fig. 96, shown in detail for 1 foot Fig. 99. The
dots at the end of the lines shown in the figure were
introduced by the author to render this staff more distinct
than when lines only are used, as in the ordinary pattern.
264.—Sopwith's pattern is sometimes printed on paper
for pasting on the staff, and in this manner the staff comes
out much cheaper than by drawing the readings in solid paint.
Paint, however, is strongly recommended, not only because
it wears much better and keeps cleaner, but that the painting
and varnishing add very much to the durability of the
staff, exposed as it must necessarily be to rainy weather;
further, the paper, however well it is fixed at first, is liable to
creep away from the edges of the staff, and leave a space
into which rain enters very freely by capillary attraction;
but it does not again freely evaporate, so that it rots the staff
and makes the paper reading after a time mouldy. It is,
nevertheless, convenient to take a set of first length papers if
a surveyor is going abroad, as from accidents—grazing by
carrying the staff with the tripod of the level, etc.—the first
length of surface is very liable to become too much injured
and effaced for fair reading. A description of fixing the
paper will be given further on.
265.—For Reading the Sopwith Staff, the foot readings are
taken from the tops of the red figures. The ·1 foot figures
are in black, and are all odd numbers, 1, 3, 5, 7, 9. These
read also from the top. The height of the figure is exactly
·1 foot, so that the bottom of each figure reads the lower even
number—thus the bottom of 3 reads 2, of 5 reads 4, of
7 reads 6, and of 9 reads 8. The 6 and 9 foot figures if made
alike, from effect of telescopic inversion, may cause error.
The author has for many years made the head of the 9 a
solid black block to avoid this.
266.—Various Readings.—A very large number of
surveyors design their own staff readings. This was formerly
very much the fashion, consequently a great number of
patterns come before the manufacturer. The author for about
twelve years kept a copy of what he considered the most
meritorious of these patterns, both for future reference and to
judge of their comparative merits. This was discontinued,
as it was found that the number of designs became a little
perplexing, and they were rather dangerous to show to a
customer, who often selected from its appearance a pattern
which proved afterwards unsatisfactory in use.
267.—Rogers Field's and Colonel Strange's Readings.—The
author made some experiments to obtain a clear staff,
readable beyond the ordinary range of staves with a 14-inch
level; but much more complete experiments were made with
the author's set of patterns by Mr. Rogers Field, C.E., whose
ingenuity is well known. This gentleman finally designed a
staff which in the author's opinion is still one of the best,
but it has not generally pleased the profession: this is illustrated,
Figs. 97, 100. The author has tried it at all distances:
at 20 chains he has found a reading of ·01 foot could be
taken approximately with a good 14-inch level with his point
index-stop level, Fig. 75. The late Colonel Strange made a
series of experiments with the author's patterns placed at 10 and
20 chains distance. He also had for these experiments one of
Mr. Rogers Field's staves. He arrived at the conclusion, for
distant reading particularly, that the black markings on all the
twenty staff patterns he had were excessively heavy, so that
the lightest and most open readings were the clearest. This
led him to design a staff, a part of which is shown in Fig. 101,
which has been since generally used on the great India survey.
This staff somewhat resembles the English ordnance pattern.
The fault found with these patterns is that they do not read
the ·01 foot, which is necessary for close reading in hilly
districts, otherwise they may be read very clearly at a distance
of 20 chains, where the Sopwith becomes a blur. We may
take it that the surveyor, if he be a fairly good draughtsman,
would subdivide the ·05 block to the ·01 foot; but it is
argued that his assistant, who might be a fair leveller, might
not. Another objection is that the reading is on one side and
is not cut through by the horizontal web, so that a white
margin can be seen in the telescope on both sides of the
vertical webs, between which it is most pleasant and exact
that the reading should be taken. This objection does not,
however, hold for the point reading, Fig. 75. Colonel
Strange's pattern has not been very generally accepted by
civil engineers. The author tried to meet the matter by
making the block ·05 foot, but so subdivided as to indicate
·01 foot. This has frequently been preferred to his dotted
Sopwith.
Fig. 102.—Details of Stanley staff; A bottom length, B middle,
C top with dot figures.
268.—The author designed another staff especially for
his point index. This is shown above, Fig. 102. It has
had a very fair popularity, being good both for distant and
near sighting. In this staff for the close figures 11, 12, 13, on
a 14-feet staff, which are with great difficulty distinguishable
at a distance, the author employs dots only as before mentioned—one
dot for the 11, two for the 12, and three for the 13, as
shown C for the 12 and 13 in the right-hand figure. It must
be remembered that a good clear staff is a great desideratum,
as it means less size, weight, and cost in the level necessary
to be used with it for equal exactness. A clear staff with a
14-inch level is quite equal to a complex misty one with
a 16-inch level, with the advantage of saving expense in the
purchase, and about 2 lbs. in the weight of the level to be
carried in work.
269.—Our space will not permit the discussion of the
various staff readings that have been designed, many of which
are, in the author's opinion, superior to the Sopwith; but
some variations are necessary occasionally for personal reasons.
Some surveyors, from imperfect colour vision perhaps, strongly
object to the red foot figure as being indistinct at a distance,
hence in many patterns a clear black figure is employed.
Some get confused with the number of equal lines of ·01 foot
in the Sopwith, what is sometimes termed Sopwith's ladder. In
this case these lines may be made unequal in different ways:
several patterns have this peculiarity. Some persons cannot get
over the inverted figure as seen in the telescope. In this case it
would be much better, perhaps, to read with an erecting eye-piece
to the level; but practically the manufacturer has to
invert the figures. Other less important variations are common.
270.—Metrical Staves.—These are in this country
generally made 14 feet, to keep the length the same as the
tripod. The most approved patterns are shown Figs. 103 and
103A. In using the metre pattern at short distances often a complete
metre cannot be taken in the field of view, so that there is
a little difficulty in being certain to what metre interspace the
subdivisions belong. To avoid this the author places a dot or
dots after the decimetre figures that follow the metre—one
dot for 1 metre, two dots for 2 metres, three dots for 3 metres.
Thus 1·4 metre reads ·4; 2·4 metre reads :4. The dots need
only be very small, as they are not required except for very
close readings, that is, within about 30 metres: at 40 metres
distance one complete metre comes into the ordinary
telescopic field.
271.—Feet and Inches Staff.—For building works,
drainage, and some other cases, the staff is divided into feet and
inches, and subdivided again into eighths or tenths of inches.
This is most convenient when the work has to be carried out
with 5 or 10 feet rods and the 2-feet rule. The intermediate
inches between the feet are better marked 3, 6, 9 only than
fully figured. For rough usage the author has made a solid
10-feet pine staff, well painted. This has a strong hinge in the
centre, and is kept stiff when open by a strong open hook. It
closes face to face in two parts, which keeps the face clean.
This is important for dock and drainage works, where the
staff holder's hands in many cases necessarily get dirty by
climbing; otherwise it bears much more rough usage than
the telescopic staff, and is much cheaper to make. Fig. 104.
272.—Mining Staves.—For levelling in mines, large
sewers, and other cases were there is no height for the
ordinary staff, the Sopwith staff is made in its closed form
commonly 2 feet 3 inches and 3 feet 3 inches only in length,
to open out respectively 5 feet and 8 feet, or in some few
instances even shorter than these dimensions. The mine
staff is in every way, except its length, similar to the ordinary
Sopwith, art. 259.
273.—Stanley's Portable Staff.—The writer has made
a portable staff in lengths of 18 inches, somewhat like a
French folding rule. It may be formed of three, four, five,
or six lengths, opening out respectively 4 feet 6 inches,
6 feet, 7 feet 6 inches, and 9 feet. The separate pieces are
flat boards, slightly sunk on the face to prevent the divisions
being scratched in opening and closing, but left solid at the
joint ends. The boards are attached together with a kind of
rivet at each joint. A strong spring at the end of each piece
with a catch and notch keeps the length opened or closed
with sufficient rigidity.[8] The entire length of the staff when
closed in 20½ inches. The same kind of staff forms a very
useful builder's or drainage staff, divided in this case in feet
and inches; and it is conveniently portable for carrying
abroad. Fig. 105—E shows back view, F front view, G
cross section, A longitudinal section. The holding springs are
shown at BB′B″.
274.—A portable mine staff designed by Mr. G. J. Jee,[9]
is said to be a useful staff for colliery work. It is constructed
in three lengths, sliding one into the other. The bottom length
of three feet is graduated in the ordinary way. The top of this
length has a band attached to it, painted to continue the
lower division of the staff upwards. The other end of the
band passes over a roller attached to the top division of the
staff. The roller contains a spring which keeps a constant
tension on the band. By extending the lengths of the staff
and clamping them, the staff may be lengthened out any
distance to 9 feet. The weight of the staff is 5 lbs.
275—Papering or Repapering a Sopwith Staff.—The
staff, if new, is painted with three coats of rather flat,
thin white-lead paint on the face, and left to season till the
paint is quite hard. It is then washed thoroughly with a
sponge dipped in stout, until this adheres without beading,
and is again left to dry. For repapering an old staff, this is
soaked with hot water in which there is some washing soda,
and rubbed until the old paper is brought off. After the
staff is in either of the states described above, it has to be
made warm and coated with one or two coats of size. The
size may be made of a piece of glue left in water for a
night, and then melted in a jam-pot placed in a saucepan
of water over a slow fire. When the staff is sized and dry,
if ordinary papers be used, it has to be divided carefully
into foot lengths, which are marked with a set square in
pencil across the face of the staff. The foot lengths may
be set off accurately from an engine-divided chain scale, or
by beam compasses. The papers, which are printed short,
are then pasted over, preferably with paste made of starch
with boiling water, but not afterwards boiled. As the lengths
of paper are pasted they are laid aside, pasted side upon
pasted side, to thoroughly absorb the paste for a few minutes,
the time varying according to the increased length required
above that of the original printed paper. While still wet, the
upper paper of the two is lifted up and cut with scissors, at
the same time fitting to the boundary lines. This wet cutting
ensures the paste being equally distributed quite up to
the edges. The foot length of pasted paper is then laid by
setting the upper edge exact to the upper foot line, and
gradually bringing the paper down from this by dabbing with
a clean cloth or straight hat-brush. If the paper does
not reach the foot mark when laid, it is again lifted, and a
little more pressure used in laying it the second time, which
will lengthen it out as required. Other lengths are laid in the
same manner. The skilled workman requires no lap to the
joins of the papers, but brings them up edge to edge; with
the amateur a lap of 1/8 inch is advisable.
To avoid the trouble of marking off and stretching each
foot, the author has introduced jointless levelling staff papers,
so that the entire length of each section may be put on in one
piece. These are of special paper, and it is only necessary to
paste the face of the staff well and smoothly, and lay the
paper unpasted down in position upon it.
After the papers are thoroughly dry they require two coats
of thin isinglass size, and then a coat or two of varnish. Paper
varnish can be bought; but in defect a varnish may be made
of Canada balsam dissolved in oil of turpentine. This should
be laid on with a flat bristle brush (varnish brush), and set in
a warm room to dry for a day or two.
276.—Preservation of the Levelling Staff in Use.—Where
two staves are used they may be placed face to face
for carrying, and be strapped together, and will take little harm
with moderate care. Where one only is used it is generally
strapped to the tripod. A strip of wood is sometimes used
to protect the face of the staff.
277.—For carrying the staff with the tripod, a convenient
plan is to have two pads formed of stout ox-hide butt, each
pierced with two slots near their ends at the exact distance
apart of the width of the staff, Fig. 106. The strap of calf
leather is passed from one slot round the staff into the other
slot, and then passed round the tripod and pulled up tightly
and buckled. The pad of course protects the front of the
staff from grazing by the friction of the tripod against it.
There is a certain amount of risk, under any circumstances,
of the cylindrical tripod pressing against the front of the staff
and splitting it. To avoid this the author has lately made
the pads with a mahogany bridge piece, so that the pressure
is distributed, coming upon the edges of the front where the
staff is strongest to resist it. This is shown, Fig. 107.
278.—For the entire protection of the staff a leather-bound
sailcloth case is very generally used. This may be
divided into two compartments for the staff and the tripod,
with pads between. The whole case has a neat appearance,
and forms a protection from slight bruises and dirt, either in
travelling or when set up in an office corner for future use.
279—Repairing Figures and Divisions.—Surveyors
going abroad will find it very convenient to have a few tubes of
artist's oil colours—white, black, and vermilion, with one or
two sable brushes to touch up any divisions or figures upon
the staves that have become accidentally injured or worn off by
friction. A tube of medium is also useful, which will cause
the colour to dry quickly and leave it bright. The tubes of
colour will keep any number of years if the caps are carefully
replaced. The brushes after use should be well washed with
soap and hot water, rubbing the soap in quite thickly till they
are quite clean, and then well rinsed before putting them by.
280.—Iron Triangle.—For use of the staff in the field,
particularly in open grass or moist lands, a triangular plate of
iron, as represented Fig. 108, is very useful. This is trodden
down firmly by the staff holder before he places the staff
upon it. In use it gives a certain base to turn the staff upon
from fore to back sight. It is very inexpensive.
281.—Staff Level.—This is a small circular level, shown
at Fig. 109, the upper surface of which is formed of a glass
worked slightly concave and fixed into a short cylindrical box.
The glass is hermetically sealed after being nearly filled with
spirit. The circular level is mounted on a plate with a dovetail
fitting which fits in a slot in the holding plate attached to the
back of the staff. In use the staff holder has to observe when
the bubble under the concave glass is in its centre. A very
little practice is required to hold the staff vertically by means
of this little contrivance, which only weighs, about 2 oz.
282.—Staff-holder.—This implement, shown Fig. 110,
striding a staff, is very generally used in Germany and other
parts of the Continent. The staff is sunk into one side of a
hardwood block. The block is turned at one end to form
a handle. A second similar handle is cut with a strong screw
and screwed into the end of the block. This screw handle
by turning brings up a following piece, shown inside next
the staff, which is covered with leather. When it is screwed
up, the staff may be held firmly by the handles only, without
the risk of the fingers coming in front. With this accessory
it is also held more easily and truly vertical. It is a comfort
in use in cold weather.
283.—Practice of Levelling with the Staff.—This
subject can be followed here only so far as to exemplify the
uses of the instruments and of accessories connected with such
instruments. For practical levelling we have the standard
original works of Simms, Ainsley, and others, with many
modern works.[10]
284.—For Holding the Staff, Mr. Holloway, in the work
referred to in the last note, gives instructions in such concise
form that they may be quoted with advantage. He says:—"I
generally enter into confidential chat with my staff holder,
in which I explain to him the vast importance of his duties,
i.e., I endeavour to make him a man of importance in his
way, and I never fail to get those duties properly performed.
My instructions to him are seven in number:—
"1. Draw out the slides of the staff, and be sure the
joints are properly locked. Draw out one length
only unless signalled to do otherwise.
"2. When the staff is once on a point never move it
unless signalled to do so.
"3. Examine the staff regularly before setting it down
to see that no dirt is sticking to the bottom of it.
"4. Always stand erect behind the staff, so that the
figures face the level.
"5. Do not let any part of the hand come before the
face of the staff.
"6. In no case put a downward pressure on the staff.
"7. If the grass be long, mossy, or spongy, tread
it down, so that the staff shall have a firm
footing—select a firm spot if the selection is
left to yourself."[11]
285.—The manner of setting up a level has been already
described in the previous chapter. The leveller generally
follows a definite track which he has previously arranged and
marked out on a map. The distances apart for placing the
staves or staff are measured by the chain, or by the subtense
system to be fully described hereafter. Where the levelling
is very important, as for canal work, topographical survey,
etc., wooden pegs are driven down at the measured stations
where the staff is to be placed from which the levels are to
be taken. A general rule followed, as far as practicable, for
starting is to select an easily recognised, permanent, solid
station for first placing of the staff—a mile-stone, large boulder,
or other solid object answers: a datum line is generally
assumed to be at a certain depth below this, to which all
levels are referred. From this station, if the ground be fairly
level, 5 chains is the ordinary advanced position where the
level is set up and the first staff reading taken. The level is
set up at the measured distance from the staff, which is
indicated by a mark left by the chainman.
286.—Occasionally in town surveys the height of the
level has to be taken. For this a small steel spring pocket
tape is used to take the height of the axis of the telescope,
Fig. 111. The tape may be adjusted by taking a piece off
the first end, and allowing for the width of the tape case, so
that by placing the ring of the tape upon the hook under
the instrument and bringing the case just to the ground, the
height of the axis of the telescope above the ground may be
read off at the point where the tape leaves its case.
287.—The Reading of the Staff.—The first position, which
is afterwards termed the back reading, is taken at a distance
behind the first forward position of the level. This is
recorded exactly as it appears in the telescope, the height
of the telescope being also noted in the levelling book, to be
described. Thus in Fig. 112, S the first staff; L the first
station for taking levels. The fore reading L to S′ reads to a
higher part of the staff S′; L′ next level station back sight.
L′S′ reads high on the staff S′; fore sight L′S″ reads low;
back sight L″S″ again low, following the contour; fore sight
L″S‴ low; thus giving data in the levelling book from
which the contour can be plotted from the datum line, which
is taken low to make all readings plus.
288.—The staff reading, as already described, is divided
into feet, with two places of decimals. The safest method of
taking this reading is to take the second decimal place first
and then record it, then the first decimal, and finally the foot.
In this manner no effort of memory is required, and the staff
being sighted three times assures the certainty of the reading.
The telescope should not be touched during the operation,
so that the reading in this manner is only a cautious transfer.
289.—If two staves are used on fairly level ground, the
second staff is now advanced 5 chains from the level to a
measured station, the staff holder here sighting the line
through the level to the back staff, and firmly treading down
the staff plate if the land is soft or grass, or otherwise requires
it, or an iron triangle is used. When time is given to hold
the staff vertically by means of the staff level, the reading is
taken in this position by the leveller as before, and this is
recorded in the levelling book. The level is now moved
forward 10 chains, that is, 5 chains ahead of the forward
staff. The staff is carefully turned half round without pressure
upon its standing place or plate to face the level as now
placed, in which position it is then read off by the level
as the back sight, the back staff now being moved 5 chains
forward of the level, and so on alternately staff and level until
the distance required to be levelled is completed, if there is
no obstruction which causes another method of procedure to
be adopted. A similar plan is pursued with a single staff;
but care has to be taken in securing the right line of march,
which will be by placing the staff in a sight line through the
level with a fixed landmark instead of the back staff mentioned.
290.—The equal back and fore sights as far as practicable
are insisted upon by all levellers, as by this means any inaccuracy
in the level, if the run of the bubble is kept constantly
true, is thereby compensated; but it is not always convenient,
and when it is not the accuracy of the work must depend
largely upon the qualities of the level. It is not necessary or
convenient at all times to take the back and fore sight in a
line—obstructions of woods, rivers, etc., may occur. In these
cases very often what is quite equivalent may be done by
taking equal angular back and fore sights from the apex of an
equilateral triangle thus:—Say an obstruction occurs for the
chain by a pond or wood, but that both points to which the
levels are to be taken are visible at some lateral position.
Levels may be taken from this place, and if the intermediate
point of distance is equal from both stations there will be no
instrumental error. Thus, suppose the direct level line east
(90°), and that the two stations can be seen and the staves
read at 150° and 210°; here, evidently, this is equivalent to a
direct back and fore sight, the right angle to the level course
being 180°—the one station is 150° = 180° - 30°, and the other
210° = 180° + 30°. If these equal angles can be even approximated
with a fairly good level the error will be small. In this
manner intermediate and extended points may often be
conveniently taken by previous arrangement with a good staff
holder. It is in this angular levelling that the greatest use of
the compass is found to give the angles, to make entries of
the work in the levelling book.
291.—In levelling hilly ground great loss of time would
sometimes be incurred from taking equal back and fore sights;
the best plan in this case is to make as much use as possible
of the length of the staff in use. It is in hilly districts only
that a staff longer than 14 feet is advantageous. With any
staff in descending a hill only 5 feet of the staff can be used
for the back sight, that is, a part of it equal to the height of the
level, and sometimes 4 feet or less if there is grass, brambles,
or other obstruction. Whereas for the foresight all the staff
upwards of the height of the level, that is, about 9 feet in a
14-feet staff, can be used with certainty. The distance of setting
up of the levels and staves must in this case entirely depend
upon the length of the staff and other conditions present.
292.—For near reading of the staff on sharp inclines,
reading to two places of decimals is not near enough, as errors
may accumulate rapidly. It is in such cases that a fully
divided staff is best. The divisions upon a near staff appear
in the telescope much magnified; and three places of decimals
may easily be taken by anyone used to reading a chain scale,
particularly if a point diaphragm be used. Through valleys the
level may be often checked at some point from hill to hill by
a back sight: the contour must nevertheless be followed for
the section. It is in these shorter unequal ranges and in distant
sights that accuracy in the level is demanded; and it becomes
interesting to know how nearly this may be depended upon
for such readings.
293.—As already mentioned, a sensitive 14-inch level of Y
construction, or a dumpy in perfect adjustment supported on
the tribrach system, will work with a level tube divided to read
5 seconds in divisions 1/20 inch apart. There will be a little personal
error in reading the bubble from difference of reflection,
according to the direction of the light from the two ends
of the bubble, as before discussed; but the bubble may be
assumed to be read within less than half a division, that is,
within 2½ seconds—say 2 seconds. A distinct staff may be
read with a good glass within ·1 foot at one mile. A second
of arc subtends ·025598 of a foot = approximately ·3 inch at
a mile distance. Therefore a back reading at this distance
can be taken within an inch or so of allowance for instrumental
errors. A reading taken in this way at a mile distance
would require a plus allowance for curvature of the earth of 8
inches, minus say 1 inch for refraction = 7 inches. From these
data we can get a fair check level for hilly ground, possibly
more accurate than by contour levelling for a distant station,
even if we allow double the probable error, say ·1 foot for
error of reading the staff at a mile distance.
294.—Lamp.—At heights between hills in wide valleys
check levels may be taken from five to ten miles very well
with a good 14-inch level in still clear weather in dark nights
by the use of an oil lamp. Coincident points above datum
being selected, the lamp is set upon the ground, or at a
measured height at a calculated point, or raised or lowered to
lantern signals, allowance being made for curvature and
refraction. The wide band of light is read very easily by
shifting the observer's position and raising or lowering his
tripod. The "Calder" lamp stove answers very well as a
lamp. It has a wick about 3½ inches wide, and by means
of a masked chimney may be made to present a clear white
line of light of 1 inch in depth, Fig. 113.
The heliostat is sometimes used for check levelling in
sunlight. This will be described further on with the theodolite.
295.—Curvature Corrections of the earth and of
Refraction to be made use of occasionally for check levelling.
The rule for finding curvature is "That the difference
between true and apparent level is equal to the square of the
distance between two places or stations in miles—divided by
the earth's mean diameter, 7916 miles"; consequently, by this
rule the correction is always proportional to the squares of the
distances. By proportioning the excesses of height to the
squares of the distances, we may obtain a curvature table for
corrections. This is, however, always in excess of the true
curvature by the refraction caused by the increase of density
of the air towards the earth's surface, which bends the visual
ray. The curvature of the earth may be corrected for refraction
one-fifth to one-sixth,[12] which varies according to the
atmospheric pressure.
296.—The following table, which takes curvature minus
refraction, will be found useful to have at hand: it may be
written out and pasted inside the lid of the level case:—
Table of Differences of Apparent and True Level for Distances in Chains.
Distances in Chains.
Curvature minus Refraction in Dec. Ft.
Distances in Chains.
Curvature minus Refraction in Dec. Ft.
1
·000089
14
·0175
2
·000358
17
·0258
3
·000804
20
·0357
4
·001435
22
·05
5
·002233
24
·06
6
·003216
26
·07
7
·00437
28
·08
8
·0057
30
·09
9
·0072
40
·14
10
·089
60
·31
11
·011
80
·56
Where great precision in levelling is required, as for
important trigonometrical surveys, many precautions are
required to be taken which would be quite superfluous, for
instance, in railway work. Thus much greater exactness
and freedom from personal error is secured by having
two levellers to go over the same ground simultaneously.
Errors by two persons in the same part of the track are
very unlikely to occur, and by comparing books every part
may be checked.
297.—Pegs.—Where the work is to be entirely pegged
for chain measurements, the pegs may be made of natural
sticks sawn off and pointed up with a bill hook. If they are
sawn from timber they are generally made about 9 inches
long and sawn to a point, the head being full 2 inches by
2 inches. Where great precision is required a cast-brass or
iron nail is driven into the head after the peg itself is driven
down. This is used to turn the staff upon, Fig. 114. A the
peg shown with a nail in its head, 1/8 size. B nail about full
size.
Fig. 114.—A, staff pegs of sawn timber, 1/8 scale; B, nail, full size.
298.—It is considered a precaution with an ordinary level
to mark one leg of the tripod and always place this in the
same position to the staff. Thus, if the marked leg is placed
to the forward staff at first, it is put at the next station backward
to the back staff. This corrects any general error from
defective work in the instrument and want of adjustment;
and if the staves are placed at equal stations any instrumental
defect whatever, to act cumulatively upon a distant station, is
then prevented, as this principle produces an alternate plus
and minus error.
299.—Differences of true level have been found between
working southward towards the sun from working northward
from it, which are caused by the expansion of the
instrument and bubble tube upon the side heated by his
rays. These matters of higher refinement may be followed
in some of our best works on levelling. Most excellent
instructions in this matter will be found in the appendix
of A Manual of Surveying for India,[13] in a paper by
Colonel J. T. Walker, R.E., F.R.S., etc., of the great
Trigonometrical Survey of India, wherein levels have been
carried across from ocean to ocean for over 1500 miles of
land surface.
300.—Levelling Books which record the levels as they
are taken are considerably varied in form, much influenced,
no doubt, by the method pursued by the civil engineer for
the execution of his work. The illustration, Fig. 115, shows
the most general forms, but there are many others.
301.—Entries are very generally made in levelling books
in black lead. Faber's artists' pencils, which require no
cutting, are very generally used, No. 2 being black and
moderately hard. It is very convenient to carry a small file
for sharpening the lead frequently. In the author's surveyor's
knife, described further on, a file forms one of the blades.
302.—Where it is desirable to make the original levelling
book readings permanent for reference or otherwise, they are
very commonly written in ink, Morrell's registration ink being
very generally used, or the author's drawing ink answers;
this being permanent is not liable to corrode the pen, nor
permit the writing to be effaced in any degree by moisture.
Fig. 115.—Specimens of levelling books, 1/3 scale.
Ordinary Level Book with columns for No., Back Sight, Intermediate, Rise, Fall,
Reduced Level, Distance, Remarks.
303.—The Ink Bottle mostly used is that known as the
excise bottle. This is of a smooth, oval form, covered with
black leather, with a tab and buttonhole to hang upon a button
of the coat, Fig. 116. One of the numerous fountain pens is
now generally used instead of the bottle described.
DIVISION OF THE CIRCLE AND METHODS EMPLOYED IN TAKING
ANGLES—DIVIDING ENGINE—SURFACES FOR GRADUATION—VERNIER—VARIOUS
SECTIONS—READING MICROSCOPES—SHADES—MICROMETERS—CLAMP
AND TANGENT MOTIONS—OF
LIMBS—OF AXES—USE AND WEAR—DIFFERENCE OF
HYPOTENUSE AND BASE.
304.—Division of the Circle.—Sexagesimal Division.—All
true surveying instruments depend, as their special function,
upon taking the direction, or angular position, of surrounding
objects or definite parts of the surface of the earth from
positions which are at first accurately measured or ascertained.
The instruments required for such work must possess an
accurately divided circle or arc, with means of subdividing the
visible divisions of this to greater closeness than any possible
method of drawing lines simply would permit. The lines
upon the circle in general practice in Great Britain are divided
into degrees, which are subdivided to 30, 20, 10, or 5 minutes,
according to the size of the instrument, and arranged for
further subdivisions by means of a vernier into minutes or 30,
20, or 10 seconds of arc. Upon large circles, say of 10 and
12 inches diameter, and with modern 5, 6, and 8 inch
diameters, angular displacements in the direction of the
telescope are ultimately read off with a microscope by means
of a screw with divided head, termed a micrometer, placed
tangentially to the divided circle; or by a series of lines
placed at equal distances apart in front of an eye-piece or
within a microscope; but in the ordinary portable instruments,
or those that a surveyor can personally carry about the
country, the ultimate subdivisions of the circle are still
generally made by a vernier scale only, which will presently
be described, although the smaller modern micrometer reading
instruments are slowly but surely coming into favour for all
high class work.
305.—Centesimal Division.—Ten to fifteen years ago on
the Continent generally, and in America occasionally, the
division of the circle into 400-grades and ½-grades, and the
subdivision of these decimally to centigrades, appeared to be
coming more and more into use, particularly with the more
extended use of the tacheometer. Under this system it will
be seen that the right angle subtends 100 grades. This
division, with its centesimal parts, was found to blend
conveniently with logarithmetical calculation and to permit
the free use of the slide rule with great saving of time over
ordinary calculation, but it is now very little used.
The decimal division of the ordinary degree of 90 to the
quadrant greatly facilitates the calculation compared with
what is necessary with the sexagesimal division into minutes
and seconds, and the reading of the verniers is much simpler
and less liable to errors; moreover, the mental conversion of
the sexagesimal division into decimals of the same degrees is
much simpler than the conversion into the centesimal degrees
of 100 to the quadrant.
306.—Dividing Engine.—This important tool is used
for cutting the graduations on all surveying instruments. If
possible a position should be secured for it on a ground floor
at a mile or more distance from any railway, and at a good
distance from roads upon which there is heavy traffic, as small
vibrations are sufficient to cause unpleasant working and some
error in the division of large instruments. For very accurate
work some makers divide at night for the sake of stillness.
The principles of construction of this machine, as at present
in general use, were invented by Jesse Ramsden, of which an
account was printed by the Board of Longitude in 1777.
Refinements of detail have been added to the invention, and
the steady action of steam or electric power has been applied
in place of the foot, but otherwise the machine remains
practically the same. Therefore a brief description of this
machine as originally invented will be sufficient for the
purposes of this work, which is not intended to fully describe
the tools used in the manufacture of instruments.
307.—Ramsden's Engine consists of a circular brass surface
plate, made generally of 36 inches diameter. This plate is
supported from below upon a hollow vertical axis, which
moves in an adjustable collar placed at its upper end and in
a conical point or pivot at its base. The pivot rests in a cup
of oil and supports the weight of the plate and axis, so that
this part rotates with little friction. The outer edge of the
surface plate is cut with 2160 teeth or threads, into which an
endless or tangent screw works, so that the plate can be revolved
any desired quantity by means of the screw. Six turns
of the tangent screw moves the plate 1°. The head of the
tangent screw is divided as a micrometer into 60 parts; therefore
the movement of one of the divisions of this head revolves
the plate 10″ of an arc. A ratchet wheel of 60 teeth is
attached to the tangent screw, and so arranged that by
reciprocating motion applied to a rack which works into it
the circle can be advanced any multiple of 10″. Motion is
given to the tangent screw by a catgut over a pulley worked
by the foot. The work is centred and clamped down upon
the surface plate. While the divisions are being cut this surface
plate remains for the time quite stationary.
308.—The dividing knife is attached to a swinging frame
having a reciprocating motion. The forward extent of its
swing is regulated by a detent wheel with teeth of varied
heights, which, as they are brought by the mechanism consecutively
forward, stop the knife at a definite position; so
that the cuts upon the circle—technically the limb—are regulated
for lengths to represent 10 degrees, 5 degrees, degrees
and parts. In the use of this dividing machine the divider
who worked it had alternately to press his foot upon a treadle
and then pull a cord attached to the dividing knife frame.
These motions are now performed by self-acting mechanism.
For full particulars and details of the dividing engine see
Troughton's Memoir, Phil. Trans., 1809: Memoirs of the
Royal Astronomical Soc., vol. v. p. 325; vol. viii. p. 141;
vol. ix. pp. 17 and 35. For various plans that have been
tried see Holtzapffel's Turning and Mechanical Manipulation,
pp. 651–955.
309.—The Material upon which the limb or circle of an
instrument is divided is almost uniformly of silver, except for
mining survey instruments, which need a very strong cut.
Silver being dense and of extremely fine crystallisation, or
grain, as it is technically termed, bears a uniform smooth cut
with sharp outline. Occasionally circles or arcs are divided
on platinum, certainly the best metal, as it keeps constantly
clean; but it is expensive. The verniers are then made either
of this metal or of gold. The silver of the circle, when this
metal is employed, is rolled down from a surfaced cast plate
of about ·25 inch in thickness to about ·045 inch, by means
of which it becomes uniformly dense and fine grained. In all
cases possible, that is, upon all flat internal surfaces, the
silver is placed in an undercut groove and planished down
to fill the groove without any other fixing being necessary.
This plan of insertion is employed for all vertical circles—the
horizontal circle of Everest's theodolite, limbs of sextants,
box sextants, etc. In Fig. 117 the silver is shown at A,
in the section to which it is drawn by a plate after it is
cut in slips. It is shown placed in its groove B ready for
planishing down. By this method certainty of dense surface
is obtained for the future division.
310.—Upon bevelled edges and outer surfaces the rolled
silver is planished to form, and then soldered to the metal
of the part of the instrument to be divided. The surface, after
being made as dense as possible by planishing or otherwise
is turned to form and stoned to surface ready for the
dividing knife.
311.—Graduating.—The object aimed at by the skilful
divider is to obtain as deep a sharp-edged cut as possible,
which shall be at the same time as fine as it can be read
clearly by the microscope with which it is to be used.
This matter is most important to the possessor of the
instrument afterwards for use, as in the atmosphere the silver
soon forms an oxide and a sulphuret upon its surface which
has to be cleaned off; and at every cleaning a portion of the
silver is necessarily removed, so that in old or badly divided
instruments the divisions become dull or lost from this reason.
312.—After the instrument is divided it is engraved with
figures and stoned off with fine blue-stone, and finally finished
with willow or pearwood charcoal, which has just sufficient
cut in it to leave a hard edge to the division lines.
313.—It may be useful to the surveyor, far from aid of the
optician, to know that divisions on silver which are much
oxidised may be brought up to sharp lines by the use of a
piece of fine-grained charcoal, sharpened by a clean file to a
chisel point. This should be frequently dipped in water, and
rubbed lightly with the flat of its end surface, Fig. 118,
keeping the motion of the hand in the direction of the
circumference of the circle. The piece of charcoal before
being used should be first tried upon a piece of plain, smooth
metal—an old coin which is worn smooth will do—to see
that it is not scratchy. No kind of polishing powder should
in any case be used for cleaning limbs or verniers, as this is
sure to rub down the edges of the cuts and thereby ruin the
divisions of the instrument.
314.—It must be understood that the above directions
are not intended for the ordinary cleaning of the circle for an
instrument in general use, as such would be injurious to it.
In the ordinary daily use of the circle, if it is not in any case
touched by the hand, and is kept carefully brushed with a
large, soft camel-hair brush when taken from the case, and
the same when returned to it, it will keep a long time in an
excellent state. If the circle is slightly tarnished, this tarnish
may be removed by a piece of quite clean wash leather; but
the brush is always the safest if sufficient. If the vernier
gets grubby against the circle, a piece of clean thin writing-paper
may be passed between these parts, which will clear
out any dirt or grit there may be between sufficiently.
315.—The Vernier Reading Index.—This is one of
the most important inventions ever applied to instruments
of precision for measuring upon the circumference of the circle.
It was invented or brought into practical use by Pierre Vernier,
a native of Ornans, near Besançon, in Burgundy. The first
publication of the invention appears in a pamphlet published
in Brussels in 1631, Construction, Usage, et Proprietes du
Quadrant Nouveau de Mathematique. This invention was
possibly foreshadowed, as it is mentioned by Cristopher Clavius
in his Opera Mathematica, 1612, vol. ii. p. 5, and vol. iii.
p. 10; but he did not propose to attach it permanently to
read into an arc, that is, to place it in its practical form.
316.—The value of the vernier as a means of reading
small quantities depends upon the fact that the eye cannot
separate lines, drawn at equal distance apart, of above a
certain degree of closeness, there being a point for all vision
where such lines appear to mix with the ground upon which
they are drawn and form a tint; therefore, an index reading
into such close lines would be, unless under extreme magnification,
most indefinite; whereas the eye can see a single
separate line clearly and detect any break in it. The vernier
for reading subdivisions depends upon the functions of the
eye having power to detect any break in an otherwise straight
line, so that a line that appears without a break may be taken
as the index of reading from among others that appear broken
or separated. It is found in practice that a line as fine as it
can be clearly seen will appear broken in its continuity with
another equally fine line, if at the meeting the rectilinear
displacement is as much as ·25 to ·2 part of the width of
the line. It therefore follows that we may read closer by displacement
of parts of a single line than by any possible series
of lines that can be drawn in spaces apart upon a surface; so
that if we can arrange lines in such a manner that they open
out or separate into distinct lines to admit of this principle,
we obtain the full value of the unbroken single line reading,
and this is the principal aim of the vernier.
317.—On the same principle that we can find the straight
or most direct line of a series of lines to take as our index,
we can also estimate the amount of the displacement of our
selected line, if this does not read perfectly straight from the
vernier division to the circle division. This small difference
is detected in practice by many experienced surveyors, so that
a vernier reading nominally to minutes only is recorded
n′ + 15″, 30″ or 45″, that is to 15″. There is no doubt that
this will be approximate, but it may be much nearer than the
even minutes, say to the 30″ on a 5-inch, or the 15″ on a
6-inch sharply divided circle.
318.—The Vernier Scale, as employed by Vernier, was
divided to read minutes upon a circle or limb divided to
half degrees, by taking thirty-one divisions of the scale and
dividing these in thirty equal parts for a separate scale to
read against it. This plan is now termed an inverse reading,
the reading being the reverse to the direction of that of the
arc. In modern practice the vernier to read minutes is
divided to the length of 29 half degrees, and this length is
subdivided into thirty equal parts: consequently, where the
vernier and scale are placed edge to edge or reading to reading,
every division of the vernier advances consecutively on the
scale one-thirtieth of the half degree, that is = 1′ of arc on
the scale divided to half degrees. In the above diagram,
Fig. 119 represents the scale and vernier at the position from
which the description is taken, wherein the vernier is shown
to cover 29 half degrees or 14° 30′, and this length is divided
into thirty parts. The consecutive advance of the vernier on
the scale is shown + 1′ for each half degree. In this position
of the vernier, or at a similar position in relation to any other
half degree of the circle the arrow placed at the zero of the
vernier reads direct into the degree or half degree, so that
this reading must be n° or n° 30′ at any equivalent position in
relation to any line on the limb.
319.—In Fig. 120 the arrow upon the vernier scale is
shown reading at a position beyond 23°, which we then know
must be 23° n′. Now, if we look along the vernier, the lines
of this and the scale appear coincident at the twelfth division
of the vernier; consequently, the n′ is 12′, and the reading is
altogether 23° 12′.
320.—Learning the reading of the vernier is very similar
to that of the clock, wherein a child at first gets confused by
the difference of value of the minute hand and the hour
hand. In the case of the vernier we have only to get clearly
in our minds that the degree reading and the vernier reading
are quite distinct processes, in which the vernier reads minutes
only, and this by coincidence of lines only, and that it has
nothing to do with degrees, which are indicated by the arrow
only. The arrow may be assumed to be placed on the vernier
scale to save an unnecessary line of division; but this practically
might just as well be placed quite outside of it, as it has
nothing whatever to do with the vernier reading.
321.—It is important to make this matter of reading the
vernier clear; therefore in Fig. 121 the index arrow and vernier
are shown reading past a half degree. At this position
the arrow reads 23·30 on the limb + the vernier, or 23° 30′ + n′
of the vernier reading. We find the coincident line of the
vernier with the limb is at 17, therefore the reading is 23°
30′ + 17′ or 23° 47′.
322.—The principle of the vernier, upon which it takes
its reading from the coincidence of lines, as just stated, points
out that the figuring of values of points of coincidence may
be varied at discretion, and the zero index may be in
any convenient position. The above described is the common
reading to the theodolite and many other instruments.
In mining dials and some other instruments the zero is placed
in the centre. We may, for example, take a central reading
with a vernier reading to 3′, wherein the circle being divided
into degrees; the vernier is then, necessarily, in the direct
method, divided into twenty divisions (20 × 3 = 60) which
correspond with nineteen degree marks of the circle. With
a central reading the vernier in this case is figured 30, 45,
0, 15, 30. This is rather a simple reading, as the zero to
which an arrow is attached gives the true bearing, and it
is readily seen to which degree it refers.
In Fig. 122 the 45 of the vernier is coincident with a line
of the limb, this must, therefore be 45′; and as the index
arrow is past 44°, it is 44° 45′. If the vernier had read the
division next past the 45, the division being to 3′, this reading
would have been 44° + 45′ + 3′ = 44° 48′. The same principles
may be applied to any subdivision. Circles are
commonly divided by the vernier in various ways to give
readings from 5′ to 5″.
Theodolites reading to 30 seconds are usually divided
degrees and thirds of degrees on the circle and minutes
and halves on the vernier, as illustrated (Fig. 123), the
reading in this case being 153 degrees 40 minutes on the
circle and 8 minutes 30 seconds on the vernier, giving a
total reading of 153° 48′ 30″.
A 20 second reading usually has divisions of 20 minutes
on the circles and these are subdivided into minutes and thirds
by means of the vernier.
28 degrees 40 minutes on the circle and 12 minutes 20
seconds on the vernier, giving a total of 28° 52′ 20″.
A 10 second reading is designed in the same manner
as the above, but each division of the circle is 10 minutes
instead of 20 minutes, with minutes and sixths on the vernier.
Fig. 125 is an illustration of this, showing a reading of 7°
16′ 30″.
323.—For Centesimal Division the vernier to read minutes
is generally divided 50 into 49 for the half grades, for small
circles 4 inches to 5 inches. For larger circles, 6 inches to 8
inches, verniers are cut 25 to 24. The circle is then divided
to ·25. Where there is space for five divisions to the grade,
·20, the third decimal place, may be estimated or read exactly
to ·005 by a vernier 40 to 39, or more closely if desired by a
micrometer, to be described presently.
Figs. 126, 127.—Sections of scales and vernier for circular readings.
324.—Surfaces of Limb and Vernier.—To get a perfect
reading of a vernier the scale and vernier should be
brought into contact upon a plane. This, for many reasons,
is impossible in a great number of cases upon an instrument,
from the conditions of its construction, convenience of vision,
and in some cases for want of means of ensuring durability of
the edges which work together. Therefore verniers and scales
are more commonly constructed upon the methods shown in
section Figs. 126, 127, where VV are verniers, LL limbs.
The plan shown in section Fig. 128 gives a nice reading on a
new instrument; but the part of the edge not covered by the
vernier is open to accident, or if nearly covered by a part of
the instrument, open to the introduction of gritty dust, which
wears the meeting line open, and thereby causes loss of edge
to edge reading. Fig. 129 shows a section we find on some
French instruments. This plan was introduced by the late
Colonel A. Strange for the section of the limb reading of theodolites
for India, but it was found in practice awkward to use
upon this instrument, as it required unpleasant stooping to
read it. It is, nevertheless, one of the best permanent vernier
readings, as the division remains constant under the amount
of wear occasioned by the sliding of the vernier upon its
circle.
325.—With the reading planes shown in section Fig. 126
we require great care to bring the eye, whether open or through
the microscope, directly radial with the centre of the circle at
the line into which the vernier cuts. If we read the line in
the slightest degree one-sided it is quite possible to make a
difference of a minute on a 5-inch or 6-inch circle. This is
the section of the general reading plane of theodolites, where,
from the necessary height of the telescope, the limb has to be
placed much lower than the eye. With this section the circle
comes fairly square to a comfortable position for reading. It
will be noticed that there is a slight lap shown to the vernier
over the limb at a, Fig. 126, which is always found in new
instruments of this section. It gives an allowance for wear
between the vernier and the limb caused by the fretting of the
metals together, as also by the intrusion of grit, which is
always present in instruments used in the open air. The lap
should not be great, and it should be nearly equal along the
edge of the vernier, although it is a difficult matter for the
maker to get it perfectly so.
Fig. 127 is a section of the reading planes common to
sextants and parts of many instruments. This plan requires
the same care to obtain a truly perpendicular reading to
the division as that described above for Fig. 126.
326.—In the very best of work there is at all times a
certain amount of error, both between the divisions themselves,
and in the place of the axis in relation to the centre of
the divided circle, and of the position of the vernier in
relation to both these. It therefore becomes necessary,
where exactness is required, to place at least two verniers
to read opposite sides of the circle. These bisect every
reading through the axis of the instrument, and detect very
small errors in the work, as well as personal errors of the
observer, of which the mean reading of the minutes or
seconds only may be taken and used for correction to mean
position. Where very great precision is aimed at, three or
even five verniers are sometimes placed round the circle, and
the mean reading is taken of the small differences in minutes
or seconds, after calculation for correction, to find the direct
position of the axis of the telescope required for the record of
the observation.
327.—Reading Microscope.—The microscope usual
for reading the vernier is either a simple plano-convex lens
of short focus or a Ramsden eye-piece of the kind described
for observing lines on the diaphragm of a telescope, art. 82.
Frequently the microscope, technically called the reader, is
made of a compound form, sometimes with a diagonal prism
or mirror. It is uniformly mounted in such a manner that it
may move concentrically to the divided circle into which it
reads. In English instruments it is placed normal to the
surface of the vernier, so that following its curvature it may
read opposite any line upon it. In French instruments the
reader is frequently placed obliquely, so as to look along the
line of the limb into that of the vernier, which is said to be
advantageous in certain lights.
328.—In theodolites for reading the horizontal circle, the
reader is sometimes mounted to slide in an undercut groove
near the circumference of the limb to follow its curvature.
This motion is not pleasant; it is better in this and all cases
of vernier reading, if possible, to mount the reader on frame-work
proceeding directly from and moving upon the axis.
Where it is practicable, it is much better to have two readers
where there are two verniers, and in all cases to have one to
each vernier, than to shift one reader about after the instrument
is placed in position, which is liable to disturb it. With
opposite readers mounted on a pair of arms formed of one
piece of metal, where these bisect the circle working through
its axis, by the setting of one reader truly normal to the
coincident division of the vernier the opposite reader will be
set also; so that this does not only save time, but the instrument
need not be touched for reading the second vernier.
The same principle should be applied to any greater number
than two verniers as nearly as it may be practical.
329.—Instruments that have to be packed in cases for
conveyance should always have readers removable from
the instrument, with proper fittings in the case provided
for them, or they should be hinged to turn up to a secure
position, the latter being a more expensive but a much better
way. It is better also, if possible, to remove the light frame
with the reader if this does not turn up, so that it cannot be
injured in replacing the instrument in its case.
330.—Fig. 130 shows a good rigid form of reader for an
oblique plane of division:—V vernier, L limb. This reader
is placed on an arm radial from the centre of the instrument,
more generally in pair with an opposite reader. The connection
with the arm is commonly made for portability with a
dovetail slide fitting to the reader, sprung by a saw-cut down
it to ensure constant contact after wear, as shown in section
Fig. 132; N arm of reader, O fitting to arm. The better
form is shown in Fig. 131. In this the arm is jointed, so that
the reader out of use is turned up into the central part of the
instrument. This plan admits of adjustment of the reader for
reflection of light from the division, or for reading down the
lines if preferred. The magnifying power of either of these
microscopes is generally two to three diameters. The adjustment
of the glasses should be such as will produce a flat field
(Ramsden's principle, p. 41), so that several divisions of the
vernier and limb may be read sharply when it is in focus,
although the central division only is taken for the reading.
Fig. 132.—Section of movable arm fitting to reader.
331.—Surface Reflection to Reader.—In reading
with the microscope the silver surface, from its brightness in
certain lights, gives unpleasant reflections which render the
reading difficult. In practice the hand or a piece of white paper
is used to shade the open vernier in such cases. In large instruments
a piece of ground glass is fixed in a frame over the
vernier, which throws a soft light, producing the effect of a
dead surface upon the silver, or the light is reflected from
a cardboard or ivory surface. Fig. 133 shows a common form
of microscope for reading a vertical circle, by which the light
is reflected from a white surface surrounding the field-glass
end of the reader.
332.—Shades for Vernier.—It is very general on the
Continent to place the divided reading of the circle and its
vernier on a plane perpendicular to the axis, Fig. 128, and to
place the reader at a fixed angle for down-the-line reading, the
object-glass of the reader being constructed to focus parallel
rays. In this way the division of the circle is followed into
its vernier or vice versa. In this case the silver may be shaded
by ground glass, which gives a soft, pleasant reading in most
lights. The general arrangement is shown, Fig. 134; L limb,
V vernier, S shade of ground glass, M reader. Objection is
made to glass shades by civil engineers as being too delicate
and liable to fracture, with risk of the particles of glass getting
into the working parts of the instrument. To obviate this the
author has made the shade of a piece of thin horn or transparent
ivory, which appears to answer very well and to save
this risk.
Fig. 134.—Oblique reading microscope with shade, French plan.
333.—For ordinary instruments with no provision for
shading, a piece of transparent horn about 2¼ inches by
1¼ inches may be carried in the waistcoat pocket, and will be
found a great comfort if held over the vernier when the lines
appear glary, or the horn may be placed in a pocket frame
with the case containing reflector for bubble reading, Fig. 52.
In large theodolites, used for geodetic surveys, the object-glass
of the micrometer microscope is sometimes surrounded by a
thin belt of turned ivory. This throws a very soft light upon
the divisions.
334.—Micrometer Microscope, for Reading Subdivisions.—Where
more exact reading is required than is
possible with the vernier, as in the case of the reading of
circles 10 inches or more to seconds, a micrometrical
microscope is employed, which gives means of measuring
the distance from line to line of the division upon the limb
by the displacement of a web, point, or line moved by a
fine screw with a divided head.
The great demand of late years for reducing the size
and increasing the accuracy of theodolites has induced the
highest class makers to introduce micrometer reading instruments
of six, five, and even four-inch circles, and their accuracy
is far greater than is possible with any instrument of the
same size that reads by verniers. Of course the workmanship
in these instruments has to be of a higher order, and the
reviser estimates the accuracy of the micrometer through magnification
and the necessary refined workmanship to be at least
four times as great as the vernier reading, with the advantage
that the micrometer is much more certain and easier to read.
335.—The construction of the reading micrometer as
originally designed by Troughton has not been materially
modified in those in general use. Certain refinements have
been introduced for astronomical work: these are sometimes
expensive and often cumbersome, so that they need not be
considered in relation to surveying instruments.
336.—In all cases where micrometers are used, the structure
of the framework of the instrument which carries them
should be made extremely rigid, as very minute deflections
or vibrations render the reading to seconds of arc impossible.
The number of micrometers applied to a circle is generally
2, 3, or 5.
337.—If a circle is to be read by micrometers, the vernier
is generally dispensed with. The circle is usually divided to
read in 5′. The first approximate reading used to be taken
by a single index line with the aid of the ordinary reader,
Fig. 130. From the index line the degrees or minutes
were taken to the last 5′ line indicated. Since the introduction
of high-class engraving machinery the figuring is
made at each degree and is clearly read in the microscope,
so that the index reader is unnecessary. This engraving
is quite a nice piece of work, as to figure from 0
to 360 means nearly a thousand figures, and on a 5-inch
circle these have to be less than 1/100th of an inch high. Only
the highest class makers are able to do this work. When
a microscope is adjusted to one line it should be observed
that all the other microscopes upon the same circle should
also read exactly to a line that should be true from microscope
to microscope to the arc they subtend between each other.
Fig. 135.—Side elevation of Troughton's micrometer.
338.—The Micrometer, as it is now technically termed
to include the whole piece of apparatus, is a compound
microscope consisting of three lenses, with measuring apparatus
at the mutual foci of the field-glass and of the two
lenses which form the eye-piece. The field-glass, which is
placed nearest the divided arc, is generally an achromatic
microscopic lens of an inch or more in focus. The eye-piece
is of the Ramsden form, Fig. 16. By the construction of the
compound microscopic arrangement the eye of the observer
may be placed at any convenient distance from the limb, and
any desired magnification may be obtained to assure micrometric
nicety of measurement. The engravings represent the
micrometer, Fig. 135 in side elevation, Fig. 136 longitudinal
section, and Fig. 137 the micrometrical slide, which is shown
partly in section for demonstration in all the figures; a the
micrometer, q microscope body tube. This has a male screw
outside at b′, upon which there are two collars dd′ with capstan
heads. These collars hold the microscope upon the
reading frame b at any required distance from the limb to
secure proper focal adjustment. g objective tube. This
screws into the body tube and permits adjustment of the
objective to the division of the limb and the micrometer index
web by the milled head s. This tube has a locking nut i
to secure it from after movement when it is once properly
adjusted. h an achromatic object glass of half an inch or
over in focus. e the casing that receives the eye-piece which
screws into the outer plate of the micrometer. f the eye-piece,
generally made about one inch long. This slides by friction in
its cell to produce distinct vision of the spider lines in the
micrometer.
339.—The micrometer frame, Fig. 137, a has a fixed scale
or comb, with five or more points or teeth formed upon it, and
a movable sliding frame, upon which a spider web or webs are
inserted and cemented in finely engraved lines to form an
index, brought as nearly as possible to the mutual focal plane
of the object-glass and the eye-piece. The index web frame
has a fine screw of about a hundred threads to the inch tapped
into it. The micrometer screw, divided drum, and milled
head are now generally constructed as shown in Fig. 137.
Two springs press upon the index frame and the outer frame,
and thus keep the drum up to its collar. The drum r is
divided upon its edge into sixty equal parts, to read seconds
of arc generally to a single line index. The screw is moved
by the milled head beyond the drum, so that the divided surface
of the drum need not be touched.
340.—The portion of the arc measured being generally 5′,
the distance of it, as it appears at the magnified image of the
arc at the position of the index of the micrometer, is made to
correspond with five turns of the micrometer screw, the head
of which divides each turn into 60. By this means the 5′ is
divided into 300, that is, to single seconds, and by approximation
of the interspaces on the micrometer head, as far as the
reading is concerned, to fractions of a second. The fixed
scale, or comb, as it is termed, is commonly placed in the
focus of the eye-piece with five webs upon it, fixed to agree
with five turns of the screw or a rack with points at the bottom.
These webs or rack divide the 5′ of arc in minutes, and
indicate the number of revolutions of the screw, as shown
by the displacement of its index line. A pair of lines
or webs are commonly placed in modern instruments at
1′ part, to ensure certainty of reading by the mean of two
observations.
341.—The magnitude of 5′ of arc depends necessarily
upon the radius of the divided circle; therefore the microscope
of the micrometer has to be made to suit the division it
is required to subdivide—that is, using the same micrometer, the
smaller the circle the higher the magnifying power is required
to be to take register by the same screw. Within a wide range
the micrometer is perfectly adjustable, to ensure exactness upon
this point, by varying the distance of the object-glass from the
limb, for which purpose the microscope is made adjustable by
the pair of screws dd′ which clamp it to its standard as already
mentioned. The principle of this adjustment is easily seen,
for if we place the object lens at a distance equal to its solar
focus from the limb, the image will emerge in parallel lines;
but as we cause it to recede from the limb, the image may
be brought to any position within the tube greater than the
solar focus of the objective of the microscope. The image is
therefore brought to a position where it may be picked up
conveniently by the eye-piece. In this manner we have only
to make the adjustment of the object-glass from the limb such
as the space of any pair of divisions of the limb may be
magnified up equal to the displacement of five turns of the
screw for seconds measurement.
342.—The two points where the divisions and their images
are situated are termed the conjugate foci of the lens, and the
magnifying power is proportional to these distances; thus, if
we call the distance of the object, that is the limb, from the
object lens f, and the distance of the focal plane of its image
within the tube F, the image will exceed that of the object in
the ratio of Ff, or F/f will represent the magnified image. By
this method it will be seen that the expression F/f will have
an increased value, if we either increase F or diminish f, which
we have to consider in the construction of the microscope to
bring it to the conditions under which it will adjust to bring
the micrometer screw exactly to its required reading.
Fig. 138.—Grubb's plan of securing micrometer screw.
343.—It is very general in instruments at the present time
to tap the micrometer screw directly into the micrometer frame,
and to make the drum and milled head a part of the screw.
In this case a very soft motion may be given to the screw by
dividing its nut longitudinally and bringing the parts together
with a certain amount of spring. Sir Howard Grubb, of Dublin,
has placed a spring ball fitting, as shown Fig. 138 at EE′,
over the screw upon his astronomical instruments, which gives
a very soft motion to the screw. These refinements are very
important, as it is not desirable that any undue pressure should
be put upon a delicate instrument which under all conditions
must be made rigid enough to resist it, and the greater the
pressure required to bring the instrument to bearing the
stronger it must be made.
344.—Stanley's Micrometer.—The author has made
an arrangement in which the screw has a long, double tubular
sliding stem, Fig. 139. The inner stem which carries the
milled head has a groove cut down it, into which a stud from
the inside of its covering tube slides. This arrangement permits
the milled head to be pressed inwards or outwards in turning it
without any pressure coming upon the micrometer greater than
the friction upon the sliding tube, and that of a weak spring
which keeps the stem nearly extended in its tube. A simple
Hook's joint H is formed at the head of the screw, so that no
part of the weight of the hand comes upon the screw. A
tubular guard-piece T prevents the milled head hanging down
too far when out of use. When the screw is used it is lifted
to about the centre of the guard tube. With this arrangement,
as no practical weight or pressure comes upon the micrometer
from handling it, the supporting frame-work may be made much
lighter than is necessary with any other form of micrometer.
345.—The author prefers to form the micrometer scale and
the index of fine lines engraved upon parallel worked glass for
surveying instruments. This avoids the risk of breaking webs,
and, what is much more important, he finds that with engraved
lines on glass he is able to bring the scale and index exactly
and permanently into the plane of mutual foci of the object-glass
and eye-piece by placing the lines upon the same faces
of glass, thus avoiding the great difficulty of focussing to guess-work
of an intermediate position between two sets of webs at
different distances.
The strip of glass A is fixed by a clamp and two screws to
the side of the micrometer box. The slip B is ground and
polished to fit A. B is carried by the micrometer frame F,
which holds it in a clamp by two screws. A spring, not shown,
presses B against A, so that any displacement of the micrometer
lines may be made by the milled head. The lines upon
A are adjusted to the position of the circle they are intended
to read at exactly 5′ or other quantity.
For the smaller instruments which will be much more frequently
used by the surveyor a simpler form of reading is used,
and as the reviser is convinced that in future this form of reading
will gradually replace the vernier for all high-class work, a full
description of this very simple reading is here given. The
reviser is confident, after many years of practice for the most
accurate form of index, that a point certainly stands first, a pair
of webs or lines on glass, between which the division is seen,
second; and a single web or line on glass placed over the
division, third. The comb mentioned in art. 339 is done
away with, and one revolution of the micrometer screw made
to carry the index over one division of the limb. For clearness
the engravings show only a 10″ reading; for a 5″ reading
the divisions on the limb are to 5′ instead of 10′, and the
micrometer head is divided and figured accordingly.
Fig. 140 shows at C a portion of the theodolite circle as
seen through the micrometer microscope. P is the movable
pointer, M the micrometer head, and I the index or reading
line.
To use the micrometer the first steps are to carefully focus
the pointer P by means of the eye-piece until it appears clear
and perfectly sharp, and set the reflector at the bottom of the
microscope so that it reflects sufficient light to illuminate the
divisions on the circle. Then, by turning the micrometer
head M, set the pointer P to the centre of its travel, so that
it covers the V cut in the bottom of the slide, and leave the
0 of the micrometer head exactly opposite the index line I.
Now proceed in the same manner with the other microscope.
After setting the microscopes as described above, lightly clamp
the lower clamp screw of the instrument and release the upper
one. Now revolve the upper part of the theodolite until
360 degrees on the circle appears exactly under the pointer of
one of the microscopes. The other will then be pointing to
180 degrees, and the instrument is set ready for measuring the
first angle.
We will presume now that a bearing has been taken by
the telescope and it is required to read the angle, and that on
inspection of the micrometer it is seen to be in the position
illustrated at Fig. 141, viz., between 227 and 228 degrees.
Now as the degree is subdivided into 6 parts, each of these
subdivisions must represent 10 minutes of arc, therefore the
pointer is situate between 227° 30′ and 227° 40′. It is now
necessary to measure exactly the distance of the pointer from
the division 227° 30′, which is done in the following manner,
by means of the micrometer head M.
This micrometer head is so constructed that one complete
revolution of it causes the pointer to exactly travel over the
space of one division on the circle.
The head itself is divided into 10 primary parts, which
indicate single minutes, and these are subdivided into 6 parts
of 10 seconds each, therefore in order to measure the exact
position of the pointer in Fig. 141 it is only necessary to turn
the head M until the pointer is exactly over the previous
division of the circle (as shown in Fig. 142) and read the
distance on the micrometer head M. In this case the head
has been turned through six main divisions of 1 minute = 6
minutes and two subdivisions of 10 seconds = 20 seconds,
giving a total reading of 6′ 20″, this, added to the circle
reading of 227° 30′, gives 227° 36′ 20″, which is the correct
reading of the angle.
It will be seen that this method is very much simpler and
a great deal more accurate than any form of vernier reading,
and also that its greater accuracy permits the use of smaller
instruments. Thus a 5-inch micrometer reading theodolite is
more accurate than a 6-inch one with verniers.
Six-inch micrometer theodolites are usually divided to read
to 5 seconds of arc. The method of reading is the same as
described above, but in this case the circle is divided to spaces
of 5 minutes each and the micrometer head to 5 main divisions
of 1 minute, each of these having 12 subdivisions of 5 seconds,
which it is possible to again subdivide by estimation and so
measure angles to 2½ seconds.
Another feature in favour of micrometer reading instruments
is the ease with which they can be adjusted. With
verniers, should they get out of adjustment through damage, the
instrument must be returned to a maker; with micrometers, if
through rough usage or accident, it is found that after bringing
the pointers to the centre of their V's and setting the micrometer
heads to 0 they are not exactly opposite one another
(180 degrees apart), then their setting has become disturbed
and must be readjusted in the following manner:—First bring
the V of one micrometer to the 360° on the circle, then see if
the V of the opposite micrometer is exactly at 180°, if not
this can be easily set to it by means of the small adjusting
screw which will be found at the left end of the micrometer
box, that is, the opposite end to the divided head. Having
examined the V's and adjusted them if necessary, the next
step is to set the pointers P exactly to 360° and 180° respectively,
in which position the divided heads should both read 0;
if they do not do so reset them as follows: Take a screw-driver
and slacken the small screw which is in the centre of the
divided head; this will free the divided rim so that it can be
turned without shifting the position of the pointer. Turn the
divided rims until they read exactly 0 at the index line and
retighten the screws. This completes the adjustment.
Fig. 143, 144.—Sections of clamp and tangent in two directions.
346.—Clamp and Tangent Adjustment.—The vernier
reading to the circle, when this was adjusted by the hand,
was scarcely practicable at nearly its full value until the
discovery of the clamp and tangent screw motion was made.
This useful invention is due to Helvetius, the celebrated
astronomer of Danzig (about 1650). By this mechanical
arrangement the circle or arc is left quite free to move about
its axis until the clamp is screwed down, which then fixes it
firmly. The fixing arrangement of the clamp is attached to a
solid part of the instrument, but is so constructed that when it
is clamped it may yet be moved without unclamping, in relation
to the fixed part of the instrument, by the tangent screw
which, as its name indicates, is placed in a direction tangential
to the circle or arc. This arrangement may take many forms
in detail, two of which, the most general and especially
adapted to surveying instruments, will be described.
Fig. 145.—Elevation and part section of clamp and tangent.
347.—The above illustrations, Figs. 143, 144, represent a
clamp and tangent motion in two sections at right angles to
each other. This form is common to vertical circles and arcs
generally, of a theodolite, arc of sextant, circles upon some
mining-dials, protractors, and many other instruments. Fig.
145 is partly a front elevation of the same, but with part of
the clamp screw A cut off. The stem of the tangent screw is
shown in section at E. In all the figures L is the limb of the
circle or arc. This has a groove at its under side at G, into
which a fillet of the clamping piece C is inserted to make the
clamp slide freely about the periphery of the circle when the
clamping screw A is loose. A spring is sometimes inserted to
open the clamp between the sliding piece K and the clamp C.
FF, Figs. 143, 144 is the tangent nut to E. This nut is sawn
down and has a cross screw to keep sufficient tightness to
prevent loss of time, and yet to allow the tangent screw to
work pleasantly at the same time that it holds the circle and
vernier quite dead to the position to which it is adjusted by
the screw. The tangent nut F has to move to the direction
horizontal to the plane of the tangent screw; therefore it has
an axis vertical to the plane of the clamp. This is shown at
K. The axis is held down firmly by a nut and a washer fitted
with a square hole, to prevent the nut unscrewing. The tangent
screw has a collar fitting or shank at the tangent boss B, which
is turned down from the full-sized metal of the screw. The
fellow collar on the outer side of the boss is formed by the
shank of the milled head of the tangent screw D. The hole
through the milled head is made square, so that it can be
adjusted up to the boss without risk of after unscrewing by
friction by the screw E. This is tightened up by means of a
screw-driver applied at E. The boss B has a vertical axis N,
similar to the tangent nut, and is attached to a solid part of
the instrument by the washer and nut shown at 0.
348.—The above construction is solid and good, and will
bear considerable wear; but there is a little delicacy of touch
required to adjust the collars to the boss and to give pleasant
tightness to the screw; a better plan is to dispense with the
split in the tangent nut and the inner collar turned on the
tangent screw, and place a spiral spring over the tangent
screw which follows the adjustment, or in some cases a long
bow spring may be conveniently used in place of the spiral.
These plans answer very well: one of them will be presently
described for axis clamping. In place of the groove at G the
clamp is sometimes constructed to move on an arm direct from
the axis of the circle. This is on the average a pleasanter
motion, but in complex instruments it would often interfere
with the motion of other necessary parts.
349.—Axis Clamp and Tangent.—This is generally
used to bring the horizontal axis of an instrument to bearing,
and is made independent of the circle and vernier. The
ordinary form, which is very effective when properly constructed,
is shown Fig. 146. This form is used for clamping
the vertical axis of a theodolite, mining-dial, Y-level, and some
other instruments. The clamp C surrounds the axis as a
collar, from which two lugs in the same casting are projected
at a. These are brought tight upon the outer axis socket B by
means of the screw W, which has a wing-nut head to give
good purchase. In the construction of this form of clamp the
collar should be fitted and ground to its bearings with the lug
in the solid, and the cut at a be sawn through afterwards.
350.—The tangent screw adjustment is shown at T, moved
by the milled head M, the boss E being fixed to the instrument.
This part of the arrangement is just the same as that
described above for a vernier tangent. Objection has sometimes
been made to this form of clamp, that it tends to become
weak after a time from the constant clamping and releasing,
which causes loss of elasticity in the metal. When this
occurs it is no doubt due to the metal of the clamp not being
good gun-metal; or, if brass, not thoroughly pressed or
hammered before the piece is made up. A plan, in not uncommon
use in Germany, of avoiding this supposed source
of weakness is to bring up a tumbling piece direct on the
axis by a screw. This is shown in Fig 147, screw W;
tumbling piece A. This produces a direct clamp upon the
axis socket B′. The clamp ring CC′ is made loose on its
socket.
351.—In practice it is found impossible to clamp the
axis of a theodolite without disturbing the centre more or
less. In some experiments the author made he found the
direct or tumbling piece clamp Fig. 147, although it holds
firmly, disturbs the centre much more than the clasping clamp
Fig. 146. Therefore when the former is used the clamp
should be upon a strong flange. This increases weight, and
it can scarcely be so well for a portable instrument. In all
cases, in the construction of the instrument, clamps should be
fitted and screwed down before the centre is ground and
finished. This ensures the centre being made correct in its
clamped position, in which it will afterwards be used.
Fig. 147.—Clamp and tangent to vertical axis, German plan—Hunäus.
The arrangement Fig. 147 shows also a spring S falling
upon a stud at E, fixed upon a part of the instrument upon
which it acts as a fulcrum. The spring should be of hard
rolled German silver. In this case the tangent screw needs
no split or other adjustment to make it tight, as all loss of
time is taken up by the spring.[14] The plan is found practically
to answer fairly; but unless this is very carefully made there
is a want of solidity in the movement which a well-fitted,
direct-acting tangent screw possesses.
352.—The French generally in all their superior instruments
clamp upon a flange carried out from the lower rim of
the socket, with the screw placed longitudinally to the axis.
When this plan is very carefully carried out, so that the
clamping has neither tendency to raise or lower the socket-piece,
it is no doubt very good. In large instruments, where
weight is no object and the flange may be made large, it is
certainly the best plan. In such cases the clamp may be
released as a free fitting to prevent the possibility of strain.
Fig. 148 shows the French plan attached to a tribrach: S
socket, F flange, C clamping screw, T tangent screw. The
tangent in this arrangement acts against a spiral spring contained
in a tube A, which gives a very steady motion to the
instrument.
353.—Some particulars of the care required in the manufacture
of the tangent screw were given, art. 22. The test for
the equality of this screw, which is important when it moves a
vernier, is to loosen its clamp and to see whether it works
equally, firmly, and smoothly at all parts when it is turned
down from end to end. The test for its straightness is to
screw down the clamp, then to notice any little mark on the
milled head of the tangent screw, or make a slight mark upon
it, and to place this mark uppermost, and then to take a
reading with the vernier, then to turn the milled head a quarter
turn and take another reading, and again another quarter, and
so on consecutively. By comparing the rates of reading of
the vernier at the quarter turns, if we find these equal the
screw is straight. A little allowance is necessary for imperfect
work. If the work is very bad at some quarter turns there
will be an advance at the opposite quarter of nearly double the
proper mean quantity.
354.—For Testing and Adjusting the Fitting of
the Tangent Screw.—The clamp should be tightened
down and the ball B, Fig. 144, held tightly between the thumb
and forefinger; then, by using a gentle reciprocating motion in
the direction of the tangent just sufficient to move the circle, if
there is any looseness in the screw or the ball fitting B it will
be felt as a jar, or technically, a slight loss of time. If this be
in the ball B it can be taken up by the screw E at its end. If
it be in the screw it can be taken up by the cross clamp screw.
If it be in neither of these, it may be in one or both of the
axes N and K. In this last case it will need refitting. It
appears a somewhat simpler test with a theodolite to lightly
press the telescope on one side of the eye-piece and take a
reading of the vernier, and then to press the other side and
again take a reading. This, possibly, indicates loss of time in
the clamp and tangent if there is found any difference in these
readings; but this would not be with any certainty, as the fault
might be in some other part of the instrument. It, nevertheless,
is a simple plan to test the whole instrument, including
the clamp and tangent, although this does not localise any
defect there may be in any special part of it.
355.—Use and Wear of the Clamp.—The common
fault of a novice when he commences to use an instrument is
that he applies too much violence to all clamping parts. Thus
we find the lower parallel plate of an instrument soon becomes
deeply indented, and the clamp of the tangent screw often
strained, or its screw worn loose by extreme clamping. The
best rule to avoid this with a clamp is to make a personal
test of how little force is required to produce sufficient hold
for the action of the tangent screw, and when this is found
out to try to clamp only slightly in excess of this. A novice
scarcely recognises the power of a screw. It is, perhaps, a
fault of some makers of giving much too large heads to clamp
screws which to a certain extent permits this overstraining from
clamping. In discussing this matter with a scientific civil
engineer upon an instrument which had been very much
strained, to which small clamping screw heads were suggested,
this gentleman replied that he looked to the optician to
"supply instruments, not brains," and made the user responsible;
but, really, a young surveyor is generally so intent on
the object of his work that he cannot consider the mechanical
details of his instrument, to which his attention possibly has
never been properly directed; so that there is a policy in
cutting off possibility of injury to the instrument where this
can be conveniently done.
356.—Use and Wear of the Tangent Screw.—Seeing that
the axis of an instrument is quite free to the extent of the loss
of time on the tangent screw which holds it, and that this
freedom, by any slight touch of the telescope, may cause a
difference of reading—in some cases of several minutes of arc—it
becomes important to observe that the tangent screw is in
good order. This matter considered at its full value, we may
wonder, perhaps, what kind of work may have been done with
the tangent screw loose and worn down in its central part, as
we find it in many old instruments sent for repair. A great
amount of the common defects we find in worn tangent screws
might have been prevented by using certain precautions; and
even the much-worn tangent screws would sometimes go on
fairly by a different method of use from that to which they
have evidently been submitted. The wear of a tangent screw
is due principally to the fact that this screw is necessarily
oiled to make it work freely, and that the oiled part being
exposed to dust, this dust attaches itself and works into the
thread with the oil so as to cut both the screw and the nut.
Precaution is necessary that this should be obviated as far
as possible. One precaution may be taken, that when the
screw is oiled, say once in three months, the parts outside the
nut should be cleaned off quite dry with a few strands of thread.
The oil left in the nut, if the screw has been turned through it,
will be quite sufficient to lubricate the screw. Another better
precaution is to use only one part of the screw for a period,
say one month. The screw may be divided mentally into
three parts—near part, middle part, and end part. If one part
only be used for a period, and the vernier be set in using the
instrument so that not more than about 1° of motion is required
of the screw, no grit can be carried far into the centre of the
nut; and if the precaution of cleaning the screw with thread be
taken every time the instrument is returned to its case after a
day's work, the screw being left at about the same place on
the screw and nut, it will keep true with little wear. When
another part of the screw is taken into use, this part should
be first cleaned with thread and then oiled with watch oil,
after which the former position of the nut should be cleaned
quite dry with thread. Treated in this manner a tangent
screw will last, in constant wear, for ten years or so, keeping
in fairly good order. Where a spring is used to take up loss
of time there is less risk, and the only precaution necessary
is to be sure the spring continues to act properly. There is
generally, however, a little more wear with a spring than with
a free thread.
357.—If the instrument be not touched after the tangent
is set, and there is no wind to cause vibration, the instrument
will read correctly although the tangent may be out of order.
But after the adjustment by the tangent screw, which may cause
a disturbance, it is always necessary to set the microscope to
the vernier. This is one important reason why the microscope
should move as softly as possible, and that it is advisable to
centre it upon the axis. Where any doubt of the quality of the
tangent exists, the telescope should be reobserved for verification
of its position after reading, which is also undoubtedly the
safest in all cases.
358.—Some contrivances have been applied to tangent
screws to prevent wear from dust, and also to take up the
nut after wear. A very good plan, common in American
instruments, is to insert the end part of the screw beyond the
nut in a closed tube. This entirely prevents dust from resting
on this part; and if the precaution be taken to clean the
exposed part of the screw after use it is very effective for
preservation. This plan the author has combined with a
spring arrangement, which appears to render it very safe from
loss of time and much wear. This arrangement is, however,
a little expensive to make, therefore can only be applied to
high-class instruments. Fig. 149, C nut, through which tangent
screw passes; B tangent boss, A milled-head, H covering tube
to the point of the screw, GG′EE′ pair of telescopic tubes
which cover the screw. A German silver or platinum spring
works inside these tubes, keeping a constant separating pressure
between C and B to take up any loss of time in the screw.
Fig. 149.—Protected tangent screw with helical spring.
359—Free Tangent Screw.—There is always a risk of
a tangent screw of any fixed kind producing a certain amount of
strain upon the instrument, therefore, where practicable, it
should be made free. The illustration, Fig. 150, shows the
form of free tangent the author now applies to many instruments.
The centre stud is clamped to the lower part of the
instrument by the screw shown in dotted lines. To the left
hand a piston containing a spiral spring carries a pressing-rod
against which the screw to the right hand works.
360.—Loss of Time by Wear of the nut is variously
taken up when no spring is used. One plan was shown of splitting
it up. A plan common in Germany is to make the nut in
two pieces, which are brought up by two screws. This is a very
effective plan. The author has found a tumbling piece arrangement
also effective. Fig. 151, S section of tangent screw,
T tumbling piece moved by the adjusting screw, shown above,
for wear of the tangent screw. This adjusting screw A should
be tapped tight without oil, and put together dry to prevent its
receding by pressure.
Fig. 151.—Tumbling piece adjustment for wear of tangent screw.
361.—Hypotenuse and Base.—Other trigonometrical
values besides the division of the circle into equal parts are occasionally
placed on instruments for special purposes. The most
common of these is the scale of difference of hypotenuse and
base, which is generally placed upon the back of the vertical
arc of a theodolite and upon some dials and clinometers.
The division for this purpose is generally done by hand. The
scale gives a percentage difference for certain angles. Thus
when used with chain measurement, it gives the number of
links of the chain to be deducted per chain of 100 links for
the inclination of land that the theodolite or other instrument
indicates in following the surface contour.
362.—A Horizontal Scale of Tangents was placed
upon the surveying theodolites by Ramsden. This was divided
upon a scale carried by the vernier plate, which read to the
zero line (0°) of the limb. It is found in practice more
accurate to take the tangent to any curve from a scale of
tangents, as, for instance, that in Molesworth's pocket-book,
and set this off upon the limb by means of the vernier.
363.—Gradient Scale.—Civil engineers engaged on railway
work occasionally have a scale of gradients upon the back of
the vertical arc 1 to 100, 150, 200, etc. These are better read
from the circle with vernier from a table of gradient arcs.
CHAPTER VII.
THEODOLITES—CONSTRUCTIVE DETAILS OF 5-INCH AND 6-INCH
TRANSITS—SPECIAL ADDITIONAL PARTS—PLUMMETS WITH
SCREW ADJUSTMENTS OF IMPROVED FORM—STRIDING LEVEL—LAMP—ADJUSTMENT
OF AXIS OVER A POINT—SOLAR
ATTACHMENT—PHOTOGRAPHIC ATTACHMENT.
364.—The Theodolite is the most perfect instrument for
measuring both horizontal and vertical angles by the aid of a
telescope and graduated circles. For the purpose of surveying,
the theodolite is mostly employed to take a system of triangles
upon the horizontal plane of the surface of the land, and of
objects at any position in which they may be placed. When
altitude angles are taken separately these are generally applied
to give corrections to chain or other actual measurements upon
the surface by calculation of the difference of hypotenuse and
base.
365.—The theodolite in all its essential features, as
differentiated from sighted compasses for taking angles, mentioned
by Digges,[15] was the invention of Jonathan Sisson, a
celebrated mathematical instrument maker of the beginning
of the 18th century.[16] Great improvements were afterwards
made in this instrument by Ramsden, who brought it up
nearly to its modern efficiency by the introduction of the transit
principle.[17] Later improvements in portable instruments consist
in the application of the transit principle to the telescope,
which was formerly applied to astronomical and the larger
geodetic instruments only. Other improvements have been
made more recently in constructive details.
366.—Theodolites were commonly made of two distinct
types, which were originally distinguished as plain theodolites
and transit theodolites. In the plain theodolite the telescope
moves through an arc of about 45° upwards or downwards
from the horizontal plane, but very few of these are now made
compared with the number of transit theodolites in which the
telescope may take a complete revolution upon its horizontal
axis, so that a back and fore sight may be taken by a half
revolution. This difference of construction entails a difference
in the manner of mounting the telescope to correct its adjustments.
In the transit the accuracy of centring and reading
is easily discovered by taking a back and fore sight at a
distance as equivalent to an arc of 180°, which may be read
on any part of the limb by transitting the telescope, wherein
the correspondence of this arc to the reading of the limb to
right and left hands will detect error. With the plain theodolite
the equivalent method of examination is effected by
placing the telescope in Y's, as previously discussed for the
Y-level, and turning it end for end on its bearings, a process
liable to disturb the direction of the telescope unless special
care be taken. In the following description of the details
of construction of a theodolite it will be convenient to take
the transit form of instrument, as this is more comprehensive,
the original pattern being selected, as this may be
constructed with the limited amount of tools generally found
in a surveying instrument workshop.
367.—The size of a theodolite is fixed technically by the
diameter of the line of division upon the horizontal circle. A
5-inch or 6-inch theodolite is the largest size that may be
carried comfortably in a single case; and no great advantage
is gained by having an instrument beyond this size if the work
is that of the ordinary surveyor on town and county surveys.
The verniers of 4- and 5-inch instruments read sharply to
single minutes of arc, which is as nearly as can be plotted
with any degree of certainty with an ordinary protractor
reading by vernier also to minutes only; 6-inch instruments
read to 30 but generally to 20 seconds. Occasionally 4-inch
theodolites are selected for lightness at a sacrifice of capability
and of distinct and exact reading. The following table gives
the average weight of the transit theodolite illustrated on the
last page:—
Instrument.
Case.
Overcase.
Tripod.
4-inch
Transit.
11
lbs.
8
lbs.
4
lbs.
8
lbs.
5-inch
"
13½
"
9
"
5
"
9
"
6-inch
"
19
"
10
"
6
"
11
"
8-inch
"
36
"
20
"
10
"
18
"
If with lamp extra about ¾ lb. If with striding level extra about ¾ lb.
It will be seen that the 5-inch instrument of this class with
cases and tripod, say altogether 36 lbs., is really of quite as
much weight as a fairly strong man can carry through a
hard day's work. The 5-inch instrument is therefore
becoming more and more popular with practical civil
engineers, and its performance, if of good modern work,
is quite equal to the 6-inch of less than half a century
ago.
368.—By giving a description in detail of a transit theodolite,
the general principles of a great number of other
instruments, particularly those of larger dimensions, will be
included, except for certain details that the specialities of
the particular instruments demand. The most convenient
plan to follow in this description will be to take the
structure of a 6-inch transit theodolite of common construction,
as it is built up from its base, piece by piece, according
to the rule of ordinary structure; where more modern
theodolites vary mostly from this is in having many parts
shaped out of the solid, which are screwed together in the
form illustrated.
369.—The Tripod Stand of a theodolite of 6 inches and
under is generally made identical with that of a level, a
common form being that described for a dumpy, art. 216.
The arrangement of one turn-up leg, as shown Fig. 63, is
very advantageous for the theodolite if it is to be used on
mountainous or even very hilly ground. For instruments exceeding
6 inches a framed stand, which will be described further on,
is better. Some makers use a framed stand for a 6-inch instrument.
The rigidity of the stand ought to be quite equal to that
of the work in the theodolite, or a little in excess, and when
this is attained it is sufficient. Where the stands of theodolites
so often fail is from the defective construction of the tripod
head, not at all from deficiency of timber in the tripod itself;
and overloading this, in adding weight without attention to
scientific construction, is worse than useless.
370.—In the following description of the transit theodolite
the parallel plate setting-up arrangement is taken, as this is
at the present time (1914) still in use in this country and in
America. There is nevertheless great probability that it will
not long continue to be so, as year by year the tribrach system,
described art. 233, for levels is coming more forward, both for
levels and theodolites. This tribrach system the author holds
to be much more scientific, and when thoroughly understood,
more simple and expeditious to work with. It is also to be
recommended, as there is no possible risk of strain upon the
general work of the instrument, nor risk of error from distortion
of the vertical axis from strain in setting it up to adjustment.
A constructive drawing of a common transit theodolite with
parallel plates is shown Fig. 153, of which the following is a
detailed description.
Fig. 153.—6-inch transit theodolite—back view, with sections.
371.—The Lower Parallel Plate N.—This has a large
boss-piece taken up from its central part, which forms a dome of
a hollow globular section, technically termed the socket, shown
at X. In the interior of the lower part N a coarse female
screw is cut, of about fourteen threads to the inch, which is
used to attach the instrument to its tripod.
372.—The Upper Parallel Plate is constructed as a flange
from a solid boss L. This piece is generally made in gun-metal
of a form as solid as possible, to resist the straining
action of the parallel plate screws. The boss is prolonged
downwards by a stem-piece, upon the lowest part of which a
ball collar of globular section is firmly screwed. The screw is
turned by means of two opposite holes, into which a powerful
forked screw-driver is inserted, until it is jambed up too tightly
against its shoulder to ever become loose by the ordinary use
of the instrument. The ball collar fits into the socket carried
up from the lower parallel plate. The whole of this globular
arrangement is termed the ball and socket. The boss L of the
upper parallel plate, with its stem, has a hollow conical hole
through its axis, into which the body-piece, to be described, fits
accurately. Upon its outer upper part an inset collar is formed
which acts as a guide to the clamp K. At the outer edge
of the parallel plate M′ four vertical, conical holes are made,
which take socket-pieces, which are tapped as nuts to the
parallel plate screws M. These socket-pieces are jambed into
their holes tight home to their shoulders. The socket-pieces
are made separate, both to give a greater length of female
screws than the thickness of the plates, and that they may be
easily restored at any time if worn loose in the threads by the
action of the plate screws.
373.—The Parallel Plate Screws.—One in elevation is
shown at M, with its point dotted, and one in section at M′.
The four parallel plate screws are in opposite pairs, placed
exactly at right angles to each other in a line passing through
the vertical axis of the instrument. These are made of gun-metal
about 3/8 inch in diameter, with a deep thread of about
thirty-two to the inch. They require cutting on a nice steady
screw-cutting lathe. The lower points of the screws are slightly
domed, sufficiently only for the amount of rocking they have
to take, so as to impress the lower parallel plate as little as
possible. The milled heads M are placed between the parallel
plates, not above, as previously described for levels. There
being a constant strain upon these screws in use and by
intrusion of grit from flying dust they soon become worn.
After wear the threads may be recut deeper, and new socket-pieces
fitted to the upper parallel plate. To prevent wear
the upper parts of these screws are sometimes encased in tubes—a
plan very generally adopted in America. At the foot of
one of the parallel plate screws a stay-piece is fixed to the lower
parallel plate, which forms a kind of ring round the screw.
This prevents the parallel plates from shifting upon the axis
at the ball and socket. The parallel plate screws should be
without any shake or what is technically termed loss of time.
They should move firmly but softly. They should support
the instrument against the ball and socket upon which the
whole rocks to position by their aid, but not be screwed down
too tightly, as this has a tendency to disturb the axis of the
instrument however solidly it may be made. Makers often
have instruments in their hands for repairs in which the
parallel plate screws have been deeply indented into the lower
parallel plate, with the centre of the instrument permanently
strained more or less.
374.—The Body-piece.—The only outward part seen in
elevation of this is shown at T: it is shown in section T′.
This piece carries the limb of the instrument SS′ by a
centred collar to which it is attached by screws. About
the centre of the body-piece an inset collar is formed to take
the clamp KK which bites upon it. The lower outer part of
the body-piece forms a conical fitting in the boss of the upper
parallel plate L. The interior is a hollow conical axis. The
body-piece is generally made of hard gun-metal. The greatest
possible care is required in its manufacture, art. 21. The
interior and exterior should be perfectly concentric at every
part. Much of the value of the instrument depends upon the
perfection of the work in this piece.
375.—Axis Collar Clamp K has been already described,
art. 349, and is illustrated in Fig. 146, which is taken from
a theodolite, so that only specialities in relation to the instrument
Fig. 153 need be noted. This clamp surrounds the
body-piece and clamps it by means of the screw K shown on
the left hand. The clamp is connected with the upper parallel
plate through the tangent screw, the head of which is shown
at P, so that when the screw K is tightened the parts L and T
are fixed together, except that a slow motion can be given to
these parts by the tangent screw P. By this clamp and
tangent arrangement the whole of the upper part of the instrument
is rendered free to revolve, to bring the instrument to
bearing when the clamp is loosened, the final adjustment being
secured after clamping by the tangent screw. It is this part
of the instrument which is used after setting it up to bring the
magnetic needle true to magnetic north, or otherwise to direct
the telescope to any established distant mark, object, or star that
may be fixed for the zero or other index point of the horizontal
circle, to which all readings from its position are referred.
376.—The Central Vertical Axis is shown only in half
section at Z. This is made uniformly of bell-metal, in the
form of a truncated cone, extending from the horizontal circle
plate S to the interior of the socket N. Its fitting surfaces
are at the two ends of the cone, extending about half an
inch, the central part being chambered back. At the upper
part a pin-piece centres the vernier plate, to which it is attached
by a wide collar with three or four screws. A square shoulder
rests with weight only just sufficient to support the instrument
upon the body-piece. This part has to be so adjusted that
the axis perfectly fits and yet moves freely. A square-hole
collar and screw are fixed on the lower end of the axis, just to
touch the socket of the body-piece, so as to secure the axis in
its position when the instrument is lifted. An eye or a hook
is fixed into the screw at the lower end to take the cord of
the plummet used for fixing the instrument over a definite
point on the ground. This is not shown in the engraving.
377.—The axis of an ordinary theodolite is made the
weakest part. It is generally considered in the trade right for
it to be so, as in case of accident no other part of the vertical
axis system is likely to be deranged; and this is the easiest
part to replace, being, as it were, independent of other fittings.
Whether this should be taken cum grano salis is a question;
at any rate with the axis weak it is not policy to load the upper
part of the instrument with metal—which in places at least, is
generally made ten times as strong as the axis—when the
instrument has to be carried about by a person over his
shoulder. Some suggestions will be made on this point
hereafter.
378.—The Horizontal or Lower Plate or Limb.—Sometimes
the whole of the piece SS′ is termed the limb,
but more generally this word is applied to the divided part
only. This plate is of brass, and is attached to the body-piece
by screws. The outer rim, which is somewhat triangular
section, is undercut upon the inner side of its lower surface to
support the clamp-piece, the outer edge being turned to a fillet
to take the clamp which is rebated to fit it. The upper surface
of the rim, or the limb proper, is turned to the frustum
of a cone of about 45°. This part is covered with silver,
which is beaten out to the conical form and soldered down
upon it, and afterwards turned to true form. The dividing has
been discussed in the last chapter.
The 6-inch instrument is generally divided to 20′, but
sometimes to 30′, and the vernier reads to 20″ or 30″. The
figuring is from 0 to 360, right to left, taken facing the
instrument.
379.—The Vernier Plate is shown in section under P′.
The vernier from which it is named is shown at VV′, Fig. 155.
The vernier plate is carried from the central axis and forms
the foundation for all the superstructure. The upper
and lower plates are left very free where they are brought
together, the verniers being generally sprung down just to
gently touch the limb. The vernier surface is let down
some distance into its plate for protection. The reading of
the vernier has been discussed in the last chapter.
380.—It may be particularly noted, as already stated,
that the central axis and the body-piece are attached
to the vernier and horizontal plates by screws. This plan
might strike one as being unsound: it is not really so, the
reason for this construction being that these axes are, or should
be, of bell-metal, and that this metal being very hard and
brittle it would not be so easily worked, or so serviceable as
brass for the limb and vernier plate, neither would there be
means of correcting errors which generally occur both in the
workmanship and in the dividing of this delicate part. The
adjustment for fixing the limb and vernier plate, technically
called centring, in particular requires considerable technical
skill. It is generally performed by the divider, who is a
specially intelligent artisan. In the author's improved theodolite,
to be described further on, the axis is in one casting
with the standard; but in this case the construction is
different, the axis being made larger and the whole body being
in a special gun-metal which approaches bell-metal in
hardness.
381.—The vernier plate carries the ball nut of the tangent
screw, shown at Fig. 153J. The general arrangement may
be seen by the section, but is more fully described art. 347.
One thing is important in this screw, viz., that it should
range without strain quite parallel with the plates, so as not to
give the slightest tendency to elevate or depress the edge upon
which it is placed during motion in any part of its thread.
The clamp is sometimes placed between the plates.
382.—The Compass-box.—The general construction of
this is shown, Fig. 155, W. In the transit theodolite it is
fixed firmly by screws to the vernier plate and is made to
form a steadying piece to the A-frames C′ C″ which support
the upper part of the instrument. For this purpose the compass-box
is made as a solid casting in brass, which is much
stiffened by the raised step which forms the divided circle.
Four solid lugs in the same casting project from the rim of
the compass, and form stiffening pieces between the lower
parts of the A-frames; these are secured to the lugs by four
screws, one of which is shown, Fig. 153, at a. The lug screws
hold the whole superstructure together quite independently of
the vernier plate, to which it is afterwards firmly fixed. The
compass needle is lifted by means of a milled head, just
inside one of the standards, not shown. For a general description
of the compass-box see art. 138. The vernier plate
carries two or more verniers. The verniers are read by a pair
of microscopes, Fig. 155 MM′ placed one on each end of a
radial arm N having its axis of motion upon a large collar
of the vertical axis. By this plan, when one microscope is set
to read by the coincidence of lines upon one of the verniers,
the other microscope on the other arm or arms will be set also
in like position over the other vernier or verniers.
Fig. 154.—Vertical circle with clipping arm of transit theodolite.
The verniers are adjusted ready for reading when the
telescope is accurately directed upon any object of which it
is desired to ascertain the angular position in relation to magnetic
north, or a definite object. The vernier plate also carries
a spirit level at O, Fig. 153, which is adjustable by a pair of
capstan-headed screws.
Fig. 155.—Cross section of the upper part of a transit theodolite.
383.—The Standards or A-Frames, shown C′ C″ Fig.
155, are solid castings in brass of about 7 inches in height.
They are set up upon the vernier plate, to which they are
attached by four stout screws, as also by cross screws to the
compass as stated. This renders the superstructure of the
transit as firm as may be in a built-up construction. Upon
the front of one of the standards a spirit level, Figs. 153, 155,
I, is placed adjustable by two capstan screws. This level,
and one shown Fig. 153 at 0 on the vernier plate are used
entirely in setting up the instrument; and being placed at
right angles to each other, are a means of making the vernier
plate quite level. Upon the inside of each of the standards,
at about 2 inches from the vernier plate, a clip-piece, Figs.
154, 155, P is secured by two screws. This takes the
clipping screws, Fig. 154 HH′ to be described. At the
top of the standards two V's are formed, upon which the transit
axis rests. One of these is cut out of the solid casting. The
other as shown in half section Fig. 155 c is formed as a parallel
sliding piece with the V at the top placed in a vertical slot
formed in the standard. This sliding piece has a screwed
stem continued from its lower surface that passes through a
vertical hole at the top of the A-frame, which is formed here
as a cross-piece. Upon the screw two capstan nuts are placed,
one on each side of the cross-piece, Fig. 155 xx′; these permit the
adjustment of this in height so as to get the transit axis perfectly
horizontal when the vertical axis is perfectly perpendicular to
the horizon. The sliding piece is covered by plates back and
front to render it firm in its position. The transit axis in
practice is adjusted with a striding level which will be described
presently.
With the author's theodolites from 6 inches downwards the
old-fashioned adjustment to one upright for levelling the horizontal
axis has been dispensed with for many years, and is
only fitted if specially ordered, as it has been found to be a
frequent source of error. Long experience has proved beyond
doubt that the fewer adjustments there are, and the more parts
that can be fashioned from the solid metal correctly, the longer
will the instrument keep in adjustment. Should there ever
be any wear on either of the V's a few strokes with a piece of
very fine emery paper upon the opposite one will put it right in
half the time that it could be corrected with the old-fashioned
adjustable V, and no amount of vibration can alter it as with
the adjusting screws.
An axis cover cap bb′ is placed on the top of each standard.
The cap is screwed down at one end with a cut screw and
collar. The screw is used for adjustment to gentle pressure
on the axis. The second screw is a milled head EE′.
Under this screw the cap is slotted out to one side,
and turns on the cut screw as an axis to open the cap
without removing its milled-head screw, so that the telescope
can be lifted out to turn its face to the opposite side of the
instrument. In the under side of the centre of the cap a cell
is bored out, into which a small cork is fitted, which produces,
when the cap is clamped down, a soft elastic pressure on
the axis.
384.—The Transit Axis which supports the telescope
rests at its ends upon two trunnions, Figs. 154, 155AA′,
technically called pivots, in the V's of the standards already
described. The pivots are turned as true as possible, and
afterwards ground to exactly equal size in a collar, so that
they may be reversed end for end in their bearings without
changing the linear direction of the transit axis, except by the
little difference of pressure that one end of the axis imposes
by the weight of the vertical circle and its attachments being
eccentric. In larger instruments this difference of weight is
counterbalanced, as shown in dotted lines at p, Fig. 155.
The centre of the transit axis is formed into a collar e of about
1¼ inches in width, which exactly fits the outer tube of the
telescope, and to which it is fixed with soft solder. The collar
is directly connected with and supports a flange f. Upon this
flange the vertical circle FF is fixed by three or four screws.
385.—In front of the vertical circle a flanged collar-piece
carries the vertical vernier frame VV′, Fig. 154, centred
upon it. The vernier frame is attached by three screws to the
clipping arm to be described, and in front of this the
vertical microscope arms are centred. These carry two
readers U, Fig. 155, exactly similar to those which read upon
the horizontal circle, and they are similarly centred, so that
by setting one, the other is set at exactly 180° from it. In
front of the centre of the microscope arms on the transit axis,
an axis collar-piece j is attached by three screws cut directly
into the axis. This collar and one at the other end of the
axis A′, turned out of the solid, are nicely fitted to the opening
between the standards to prevent lateral displacement of
the axis.
386.—The Clips.—The clipping arm, which is centred
on the transit axis and attached to the verniers, is shown
Fig. 154BB′B′. It is fitted to move freely on its axis at A,
so as to permit unrestrained motion of the telescope. A milled-head
clamping screw with clamp, Fig. 155, K, and the same
partly cut away to show the slot in which it works, are shown
at K′ Fig. 154. This is used to fix the verniers stationary on
the circle, except for the adjustment by the tangent screw G′,
which has its collar attached to the clipping arm, and its ball
nut attached to the clamp at D when using the telescope for
levelling. This clamp and tangent sets the vernier to zero on
the circle. It is also used in setting the telescope before angles
of altitude or depression can be measured. The clipping
screws HH′ are used to bring the principal bubble B,
Fig. 153, on the top of the telescope to the centre of its run
after the verniers have been brought to zero by means of the
clamp and tangent screws. The clipping screws hold the clips,
Fig. 155, P or P′ to the one standard or the other. The
whole of the vertical adjustment is exactly equivalent to that
already described for the horizontal motion, except that it is
placed in the vertical plane.
387.—The Vertical Circle, Figs. 154, 155, F is carried by
four arms from a central boss attached firmly by screws to
the transit axis. It is grooved at the edge to take the clamp-piece.
The silver is inlaid in this circle in the manner shown
Fig. 117. The vernier is read upon the circle on the plan
shown Fig. 127. The circle is divided generally to half
degrees or 20′, and is figured 0 to the horizontal with 90°
upwards and downwards. The zero lines are made directly
coincident with the optical axis of the telescope when it is
level. The vernier reads to half minutes or 20″, in either
direction, the rising arc above the level datum being considered
as plus, the falling arc as minus.
388.—On the outer edge of the circle or at the back a
scale of difference of hypotenuse and base reads to a line
on a fiducial edge upon a part of the clip BB′, Fig. 154,
at N. This scale is calculated for decimal quantities, and
gives the percentage number of links, feet, or metres to be
deducted from the chain measurements upon the ground line
to give the horizontal distance corresponding to the angle of
inclination at which the telescope is set for observation.
389.—The Telescope, Fig. 153, DD′ has been described
art. 94. Its general construction is also shown in partial
sections in the figure. Its body tube passes through the
transit axis in which it is soldered.
390.—The Principal Level Tube is generally mounted
on the telescope upon two stiff screws which rise from plates
attached to the telescope body by pairs of screws. Each
level screw has a pair of capstan nuts. The level is mounted
in a brass tube with stop-pieces at the ends, each of which
carries a tenon with a hole in its centre through which the
level screw passes to be clamped top and bottom by the
capstan nuts. These nuts give adjustment to the level, so
that the centre of its inner upper surface may be placed
parallel with the optical axis of the telescope.
Fig. 156.—Stanley's new model of 4-screw transit theodolite.
391.—Until 1898 the author was unwilling to attempt to
remodel the old form of transit theodolite, believing the
4-screw adjustment would soon become a method of the past,
but as a small demand continued from the Colonies and
United States for this form of instrument he felt bound to
make it of more solid construction to bring it somewhat up to
date. The illustration shown, Fig. 156, is of an instrument,
following in construction the transit theodolite already described
in many details, the marked exception being that the standards
are in one casting with the compass-box and axis, these being
entirely shaped out in the solid metal. The upper parallel
plate is of special design, being far stronger, yet lighter, and
gives a much longer bearing to the levelling screws. The
lower parallel plate is also shaped with three feet so that the
instrument may be set up without its stand when required.
It has also modern spring tangent adjustments with covered
screws. The limb is covered, and the readers are jointed
across the axis to turn up without separation. It has a
floating aluminium compass read by a microscope, so that the
instrument, except in the four-screw arrangement for setting up,
embraces many modern improvements formerly applied only
to special high-class theodolites. The improved construction
permits greater rigidity with fifteen per cent. less weight.
Of later years, however, the demand for four-screw levelling
instruments has been maintained, especially from Canada,
owing to the influence of the American school of teaching,
and in consequence all the author's improved theodolites
are fitted with either three- or four-screw levelling, whichever
is desired. It is a strange fact, however, that with
all the American makers, although they list all their ordinary
instruments with four-screw levelling, their refined ones, which
they term "precision" instruments, will be found with three-screw
levelling.
392.—Detached parts of a Theodolite.—The Plummet
supplied with the theodolite is made to hang from a hook under
the centre of the axis of the instrument, the cord, which is of
soft silk, being looped or knotted to hold in the hook. The
lower end of the plummet is brought to a point which, when
in use, falls directly under the vertical centre of the instrument
upon the surface of the ground. In Fig. 157 the screw and
plummet are shown detached. The cord C is attached to the
plummet by passing it through a hole in the milled-head screw
S at the top of the plummet, and by making a knot K in the
cord. Fig. 160 shows an ingenious ring plummet recently
invented and patented by Mr. W. H. Shortt, A.M. I.C.E. The
chief object was the production of a plumb bob whose plumbing
point should be situated at, or very close to, the centre of
oscillation in order that the position of the point might be
unaffected by oscillation of the bob itself, apart from any swing
which it might have about the point of suspension of the string.
A further object was to shape the bob so that a person holding
the string, or standing close to it when attached to an instrument
and looking down at the bob, should be able to see
readily the exact position of the plumbing point.
These objects have been attained by making the bob in
the form of a ring, so that the centre of oscillation which lies
in the centre of the ring can itself be used as the plumbing
point, since it can be readily seen and indicated by the
extremities of pointers projecting towards the centre from the
inside of the ring.
A great advantage of this bob is that when plumbing on
to a flat surface it does not fall over when lowered, but may
be allowed to actually lie on the surface while the position of
the point is being marked. Also it can best be steadied by
lowering into contact with the ground and raising again.
The plumbing pointers are largely protected from injury
when the bob is in use, and when not in use the suspension
string can be wound diametrically across the bob, in recesses
provided for the purpose, thus completely protecting the
points.
393.—The Loop.—It is somewhat difficult in the ordinary
way to adjust the plummet to the station mark on the ground
or on a peg. The cord is sometimes placed in an ivory runner
fixed to the top of the cord, Fig. 159. This gives friction on
the cord and permits extension and contraction of the loop for
adjustment. Where the plummet has to be suspended from the
instrument as well as from a hook inside the stand, which is
sometimes convenient, it is better to have the runner cut
out on one side. This permits easy change and it is just as
firm.
394.—Messrs. Gurley Bros. of Troy, N.Y., have a good
plan for shortening the plummet line. This is effected by
making a reel in the plummet, which is wound by a milled
head at the top of it, Fig. 158.
395.—Screw-drivers, Tommy Pins, etc.—A screw-driver
and a tommy pin, the last to turn the capstan heads, are
placed in the case with the theodolite. Two screw-drivers
with proper handles are better, as there are small and large
screws. A camel-hair brush to dust the instrument, a piece
of wash-leather, a little vaseline, and a small bottle of good
watch oil are also very useful. These little refinements are
generally kept out to keep down the price of the instrument.
396.—Additional Parts, and Variations in Theodolites.—Illuminated
Axis.—4, 5 and 6-inch transits sometimes,
and larger instruments always, have the transit axis
bored on one side through to the interior of the telescope, as
shown on Fig. 155. Through the hole a small pencil of light
is sent by a lamp l with a plano-convex lens front, to a lens
placed in the end of the axis. This, by a slight adjustment
of the lamp on its stand, focusses the light upon a small mirror
placed within the telescope, which reflects its rays to the diaphragm.
The lamp gives a faint light only sufficient to distinguish
the webs for night and underground observations.
The mirror is about 1/10 inch in diameter, and is generally
mounted upon a milled head screw tapped into the trunnion
band of the telescope m. The point of the screw is extended as
a thin stem into the axis of the telescope, where the mirror is
held by it. This arrangement permits the mirror, which is
generally made of silver, but is much better of platino-iridium,
to be removed for cleaning. The lamp is mounted upon a
wooden stand w carried upon a slide n or upon two brass pins
direct to the A-frame. The wood is employed in this case to
cut off conduction of heat to the near standard from the lamp
as much as possible to prevent disturbance of the axis from
expansion by heating. The stand may be removed when the
lamp is not required and placed in the case. In large theodolites
a pair of lamps are used, that the transverse axis may
not be heated more on one side than on the other.
397.—The Lamp, which is found so convenient for bringing
a star or distant light to read with the webs, becomes
difficult to use when the object is very faint, as the light
thrown into the telescope by the lamp takes off the effect of
blackness of the night sky or that of total darkness. This
becomes important in taking observations of small stars, as
for instance, the circumpolar stars of the southern hemisphere.
In some theodolites, made first for the Sydney Government,
the author placed a very small lamp to throw light upon the
face of the webs only, making these appear as light lines on
a black ground. The reflecting eye-piece, Fig. 20, will be
found to answer very well, and this is a simple, inexpensive
contrivance. Any amount of illumination desired may be
thrown on the front of the diaphragm, according to the distance
at which the light is held from the eye-piece: generally
a very faint light only is required.
398.—The author has illuminated the webs front and back
by means of a very small (one-quarter candle power) incandescent
lamp, which is charged by a portable battery, or a
secondary battery where a dynamo is at hand for charging it,
and for countries where these cannot be renewed or where the
extremes of temperature are too great for their use, he has
devised a small hand dynamo for generating the current and a
rheostat for controlling the power of the lamp, so that resistance
may be employed to reduce the light to the faintest
possible glimmer.
The electric lamp is far superior to the old oil lamp and
safe to use in gaseous mines; it is far cleaner, does not give
out a tithe of the heat, and may be removed from its socket
and used in the hand for reading the verniers in a bad light.
All the author's modern instruments that are required with illuminated
axis are now fitted with electric lamps.
399.—A Trough or Long Compass, used in place of
Circular Compass.—A long compass, Fig. 32, p. 74, is often
applied to a theodolite, either upon the top of the telescope,
or more generally and conveniently for reading under the
limb. In this last case the trough needle is a separate piece,
which is only attached to the limb of the theodolite by means
of loop slides or bayonet fittings under the limb, when required
to take a bearing. The engraving Fig. 161 shows the
long compass with bayonet fittings. There are four slots, two
of which are shown SS′, which fit in under the heads of
round-headed, shouldered screws. The author has somewhat
modified this pattern recently by making it slide into grooves.
The trough needle is generally made 5 or 6 inches long,
and reads into a short scale of about 10° at each end. The
divisions are best placed upon sliding fittings, so that they
may be adjusted by four screws from the outside of the box—screws
shown AA′. This enables the needle to be adjusted
to its own axis, and also to the 0° reading of the horizontal
limb of the theodolite. A slide lift to the needle is shown
at L. When the same form of compass is used upon large
instruments a reader is placed at each end of the needle.
400.—Striding Level.—For the adjustment of the transverse
axis of a theodolite a very sensitive spirit level is used.
This is mounted upon a bed, which may be formed of brass
tubing, from the two ends of which adjustable legs descend,
the ends of which are forked, the hollows of the forks forming
V bearing surfaces. The V's rest upon the pivot of the axis.
By reversing the striding level on the pivots the transverse axis
of the telescope, or transit axis, can be readily adjusted truly
perpendicular to the vertical axis. In the construction of the
striding level, shown in detail in Fig. 162, the two striding
standards SS are carried down from the ends of the casing
tube B of the spirit level. These are adjustable: one, Fig. 164,
by raising or lowering the end of the level tube by the capstan
screws CC′, and the other, Fig. 163, by a lateral adjustment
of the capstan screws PP′ that act upon the stud S, which is
fixed upon an arm centred upon the axis of the tube. This
connection is shown by dotted lines. By these two motions
the standards are brought to perfect parallelism with each
other for their bearing surfaces and adjustment of the crown
of the bubble tube.
Fig. 165.—Wallis' shifting centre for theodolites.
401.—Adjustment of the Axis for Setting it up overa Point.—Every surveyor experiences an amount of difficulty
in getting the plummet to fall from the axis of the
instrument exactly over a point upon the ground, or a mark
upon a rock, or still more so upon a point in street paving in
a town, which is necessary for exact work. It is easily set
near the point, that is, within half an inch or so, by pressing
or shifting the legs; but the difficulty increases as the exact
point is approached, so that the setting has generally to be
left at a certain state of approximation. There are a great
number of schemes in use for moving the axis by adjustment
of the instrument the small quantity required, without disturbing
the legs of the tripod when they are firmly set down
nearly correct to position. One of these would no doubt
be generally applied to the theodolite, except for the reason
that every means yet devised adds to its weight, and also to
the expense of the instrument. A moderately simple plan,
which is especially adapted to the parallel plate adjustment, is
to make the lower flange of the theodolite, upon which it
stands when set down off its tripod, somewhat larger and
thinner. This flange, instead of being screwed directly down
upon the tripod head, is placed between two ring plates,
which are clamped together when the theodolite is set in
position. The large hole in the centre of the ring permits
movement of the lower plate of about 1 inch. Fig. 165 is an
arrangement of this kind by Mr. J. Wallis. This is made
entirely independent of the theodolite, and may be used or
not as required. I is a screw that corresponds with the head
of the tripod which takes the theodolite; T similar female
screw to take the tripod head when the shifting centre is used;
CC′ a box formed by screwing two tray-pieces firmly together;
S clamping flange; HH′ clamp screwed into the top
of box C. This has two handles by which the screw is moved
to clamp when the instrument is in position. The weight of
this additional part is about 3 lbs. The arrangement is particularly
adapted to parallel plate adjustments.
402.—In an American plan of a transit by Messrs.
Heller & Brightly, the flange is lifted by the parallel plate
screws, which tighten it at the same time.[18] Messrs.
Troughton & Simms have a plan of shifting the axis by
means of a pair of eccentric plates, which carry the instrument
in two directions nearly at right angles to each other.
By this arrangement an amount of leverage is secured which
produces an easier motion than that of shifting the weight of
the instrument on the plans mentioned above. The author's
schemes will be described as a part of his new theodolites a
few pages on.
403.—Stadia Webs or Lines used for taking subtense
angles by the telescope for measuring distances, which are
frequently applied to theodolites, will be fully described,
Chapter XII., in treating of subtense instruments generally.
404.—Solar Attachment to a Theodolite.—This appliance
is an adaptation to the theodolite of the solar compass of
W. A. Burt, of Michigan, which was made to replace the
magnetic compass in determining a true meridian, or north
and south line, by observation of the sun only. It was
brought into general use in the surveys of the United States
public lands. The solar compass consists mainly of three
arcs of circles by which the latitude of a place, the declination
of the sun, and the hour of the day can be set off. In the
solar attachment to the theodolite the latitude arc is found
unnecessary, as this is formed by the vertical arc of the
theodolite; therefore the hour and declination arcs need only
be described.
Fig. 166.—Burt's solar attachment to a theodolite.
405.—The Hour Circle, Fig. 166, H is fixed upon the
centre of the telescope upon a socket axis S, which is placed
perpendicularly to the optical axis and to the transverse axes
or pivots of the theodolite. This circle is divided to read five
minutes of time, and is figured I to XII twice, or I to XXIV,
the index being a fine line carried down on a plate from the
lower arm of the declination arc, which is fixed to the socket S.
The hour circle, when set to any reading, may be clamped to
this position by means of the milled head placed over the
socket M.
406.—The Declination Arc is of 5 inches radius, divided
to read on the same plane with a vernier V to single minutes
of arc. The vernier arm is fixed by a clamp at C, which
carries tangent adjustment T. At the back of the vernier
arm two spur-pieces are carried out directly from it, L and I.
These are blocks of metal about 1½ by 1¼ by ¼ inches, which
carry each a lens of a focus L to I, and a silver plate to be
presently described, upon which the sun's image is received in
one direction or the other.
407.—The Image Plate, Fig. 167, is marked with two
sets of lines intersecting each other at right angles. The lines
bb are termed hour lines, the lines ccequatorial lines; these
lines having reference respectively to the hour of the day and
the position of the sun in relation to the equator. The intervals
between the lines bb and cc are just sufficient to include the
circular image of the sun formed by the solar lens on the opposite
end of the vernier arm. The axes of the solar lenses and
corresponding image plates are placed parallel with each other,
and with the direction of the vernier arm. Below the lower
line c three other lines are cut at 5 minutes apart. These are
useful for making allowance for refraction. The following
description for the use of the instrument is partly extracted
from Messrs. Gurley's manual.
408.—When the instrument is made perfectly horizontal,
the equatorial lines and the opposite lenses being accurately
adjusted to each other by a previous operation, the sun's position
in the heavens with reference to the horizon will be defined
with precision. Suppose the observation to be made at the
time of one of the equinoxes; the arm R set at zero on the
declination arc V; and the polar axis is placed exactly parallel
to the axis of the earth. Then the motion of the arm R, if
revolved on the polar axis around the hour circle H, will
exactly correspond with the motion of the sun in the heavens
on the given day and at the place of observation; so that if
the sun's image be brought between the lines cc on the image
plate in the morning it will continue in the same position,
passing neither above nor below the lines as the arm is made to
revolve in following the motion of the sun about the earth.
409.—In the morning as the sun rises from the horizon, the
arm R will be in a position nearly at right angles to that shown
in the illustration, the lens being turned towards the sun and
the silver plate, on which his image is thrown, directly opposite.
As the sun ascends, the arm must be moved around, until when
he has reached the meridian, the graduated side of the declination
arc will indicate XII on the hour circle; and the arm R,
the declination arc V, and the latitude arc, that is the vertical
arc of the theodolite, will be in the same plane.
As the sun declines from the meridian the arm R must be
moved in the same direction, until at sunset its position will be
the exact reverse of that it occupied in the morning.
410.—Allowance for Declination.—Let us now suppose
the observation made when the sun has passed the equinoctial
point, and when his position is affected by declination. Then,
by referring to the Nautical Almanac and setting off on the arc
his declination for the given day and hour, we are still able to
determine his position with the same certainty as if he remained
on the equator.
When the sun's declination is south, that is, from the
22nd of September to the 20th of March in each year, the
arc R is turned towards the plates of the instrument in
the opposite position to that shown in the engraving, using
the solar lens at I, with the silver plate opposite at L.
The remainder of the year the arc is turned from the
plates, and the lens at L and plates at I are employed in the
position shown in the figure.
411.—When the solar compass is accurately adjusted and
its plates made perfectly horizontal, the latitudes of the place
and the declination of the sun for the given day and hour being
also set off on their respective arcs, the image of the sun cannot
be brought between the equatorial lines until the polar axis is
placed in the plane of the meridian of the place, or in a position
parallel to the axis of the earth. The slightest deviation from
this position will cause the image to pass above or below the
lines and thus discover the error.
412.—We thus, from the position of the sun in the solar
system, obtain a certain direction absolutely unchangeable
from which to run our lines and measure the horizontal
angles required.
The transit theodolite will, without the solar compass, perform
the same functions; but by means of this instrument the
calculation for position is much more simple.
413.—Photographic Apparatus in Connection with
the Theodolite.—The application of photographic apparatus
as an accessory to surveying instruments has been tried tentatively
for many years. A practical introduction to the subject
was first given by M. Laussedat in a paper published in the
Comptes Rendus de l'Academie des Sciences, 1859. The subject
has since been well studied by many writers, and is written up
extensively by Dr. E. Deville, LL.D., Surveyor-General of
Canada, in a work entitled Photographic Surveying, published in
Ottawa, to which we must refer the reader for full discussion of
the subject. In England, Mr. J. Bridges Lee has invented a
very suitable camera in which a negative glass photograph of
4½ × 3½ inches is taken, with an axis line from the shadow of
a hair permanently photographed coincident with the axis
to the telescope as it appears to view. At the same time
degrees and subdivisions are taken on the photograph to
right and left of the axial line. The edge of the magnetic
circle is also photographed upon the plate, indicating
clearly the bearing of the station taken by the axis line.
The whole of these operations are performed at once in
a perfect manner.
414.—Mr. J. Bridges Lee's photo-theodolite was made in
excellent workmanship by Messrs. Troughton & Simms. The
inventor has published a paper on the subject, to be had of the
Society of Engineers, Westminster.
Fig. 168.—Light camera upon the telescope of a theodolite.
At the present time a camera is very commonly taken by a
civil engineer for prospecting in new countries,—a convenient
form of this will be discussed at nearly the end of this work—but
it is not generally held that photography will ever offer a
means of expeditious surveying, except possibly in very mountainous
countries where the necessary stations for observation
become difficult of approach and of clear definition. The
objections to the more general adoption of photography are,
otherwise, that the processes are in degree tedious, and require
special skill in manipulation, and that the apparatus is heavy
and expensive with sensitive glass plates for use with it.
415.—There are many cases, no doubt, where a photograph
would be valuable for the exact definition of a station. To
meet this case the author has made a small light camera, shown
Fig. 168, giving photographs 2 × 2 inches only, with axis line
from shadow of a point. The camera to be placed when
required upon the telescope of a theodolite for special cases.
He has lately used his patent slide for this camera that carries
films which will be further described at the end of this work.
The films are unbreakable, and remain sensitive many years if
kept dry. The weight of this camera with its double slides
and 100 films is about 1 lb. There is ample room for it in the
ordinary theodolite case.
CHAPTER VIII.
SPECIALITIES IN MODERN AND IMPROVED FORMS OF TRANSIT
THEODOLITES FOR SURVEYING—RAILWAY WORK—EXPLORING.
416.—The description given in the last chapter of a 6-inch
transit theodolite gives all particulars of the original Old
English form, which in a general way comprises the constructive
principles of all others. When we consider modern
instruments the details are found to vary greatly, but most
particularly in the direction of uniting in solid castings many
parts that may be shaped out by machinery in a manner
impossible by hand-work, which avoids the instability of the
work being screwed together in many pieces, and makes it at
the same time lighter, more rigid, and less liable to jar out
of adjustment. This direction of construction is also followed
in the best modern work on the Continent and in America.
It would extend this work beyond convenient limits to offer
details of the wide variations employed in practice, but as the
author has made this subject a life study, and has embraced,
modified, and endeavoured to improve this class of work in all
its details, freely adopting any improvement he has observed, his
own instruments will represent largely his present ideas of the
best forms, with the economy of having engravings for illustration
to hand. Transit theodolites of portable form will be considered
here, leaving larger stationary instruments to another
chapter.
417.—New Model Transit Theodolite.—In this
instrument the principles of construction are the same as in
the ordinary transit theodolite fully described in the last
chapter, but the distribution of materials and details are very
different. The general arrangement of a 5-inch instrument
is shown in Fig. 169. One important difference, as before
mentioned, is that the work is not built up so much in separate
castings and pieces as is usual, but every possible casting is
shaped out of the solid to the finished form. The vertical
axis is of nearly the same construction as the ordinary transit,
except that the central axis is about double as strong, being of
once and a half the ordinary diameter. It is made in one
casting with the upper framework. The vernier plate is
formed of thin hard hammered gun-metal, which is screwed
upon the axis. This plate has not in this construction to
support the superstructure as in an ordinary theodolite, but
has only to hold the two axis bubbles, which are thereby
brought distinctly in view, and the clamp and tangent motion,
which is also placed conveniently for use upon this upper
plate, in a position where there is less risk of accident than
when it is placed upon the outer edge of the limb.
418.—The Readers to the horizontal limb are jointed to
turn up against the standards and adjust for reflection, as
shown Fig. 131. In this manner the readers do not need
detachment to place the instrument in its case.
Fig. 170.—Section of standards of new model theodolite.
419.—The Central Axis and the standards are made
in one casting in hard gun-metal. The standards are of
light cylindrical and ribbed section. This construction,
although of only about one-half the weight of the A-frame
arrangement with its attachments, described in the last chapter,
was found upon testing to have more than double the rigidity
in resisting deflection, with perfect certainty of avoiding the
accidental occurrence of imperfect fitting of parts, or of screws
jarring loose, Fig. 170. The making of the vertical axis and
the standards in one piece was in a certain sense an experiment.
It has been found in practice of many years now to
give much greater resistance to all ordinary strains and jars, and
ensure the instrument keeping in order and adjustment when
jolted by carrying over the shoulder, just as the same principle
acts in the dumpy level; but at the same time, in cases of violent
accident, such as the fall of the instrument from a height, it
renders repairs somewhat more expensive, as this entire part
might have to be reinstated instead of the axis only, the axis of
the theodolite being generally made very weak that it may go
first, often indeed with a slight jar. Many details are the same
as the transit theodolite before described, adopting what is
thought to be the soundest principle in all cases.
420.—The Compass-box in this instrument is attached
under the limb. It is of the trough form shown Fig. 32,
page 74. The magnetic north is set to zero. The tribrach is
of the form described for levels, illustrated Figs. 72 and 73,
p. 128.
421.—The weights of transit theodolites of this construction
are about
6-inch
in gun metal
14
lbs.,
aluminium,
8
lbs.
5-inch
"
11
"
"
6
"
4-inch
"
7¾
"
"
4½
"
This pattern embodies all the essential features of a
thoroughly reliable and convenient instrument for all-round
general surveying. It has no unnecessary elaborations and is
a strong, light and compact instrument suitable for continuous
hard wear. It has fewer pieces than any other design and is
packed in its case complete in one piece ready to screw upon
its stand upon being taken out of its case.
Fig. 171.—Stanley's simple sliding stage for tribrach theodolite.
422.—The author has devised a special arrangement for
displacement of axis for this theodolite, which does not interfere
with its valuable quality of standing the tribrach on a wall
or flat surface, Fig. 171. In this scheme the arms of the
tribrach are slightly elevated by the foot screws. A flange is
formed on the top of the head with a leading tube through it
to the upper surface of the lower tribrach plate; upon this tube
an upper flange is screwed, so that the plate comes between
the two flanges, where it may be fixed by means of rotation of
the flange by a thumb-piece. The engraving shows the
arrangement with the axis displaced to its extreme point,
about ¾ of an inch from the centre.
A somewhat similar arrangement is made for four-screw
levelling instruments shown on page 250 at Fig. 172, but in this
the sliding motion is fixed to position by the action of the
levelling screws. It is sometimes preferred to have the sliding
adjustment upon the tripod head instead of upon the instrument,
and in some cases for getting a greater range of movement,
on both, and for this purpose the reviser has designed
the two tripods shown at Figs. 173 and 174, the former
being of the round solid pattern, and the latter having
adjustable sliding legs. A somewhat similar arrangement is
made for a sliding head to a framed tripod as shown below,
Fig. 175.
Fig. 175.—Stanley's framed stand with sliding head.
423.—Improved Transit with Adjustable Axis.—This
instrument, Fig. 176, in general, resembles that last described,
except that it has a larger telescope and it is mounted
on a sliding stage with screw adjustments, which is particularly
described below. It is frequently provided with a tacheometrical
eye-piece for giving horizontal distances by subtense
taken on the incline, which will be described in Chapter XII.
Fig. 176.—Stanley's patent new model theodolite, with mechanical stage.
424.—The Mechanical Tribrach Stage.—This important
addition to the theodolite above described permits exact
adjustment over a station. The upper plate of the tribrach
with the movable stage is shown in Fig. 177. A dovetail
slide is fitted upon the base of the stage adjustable for wear
by a slip-piece with two screws at the narrow part. The slide
is adjusted to position in the direction of its dovetail fitting
by a large milled screw so as to move the whole instrument
above it for centring in this direction. An upper slide acting
in the same manner, with dovetail fitting pieces at sides moves
for an equal distance for centring transverse to the lower
slide by a milled head. This gives the same kind of motion
of displacement that we have in the slide rest of a lathe
or the mechanical stage of a microscope, except that in
this case we have a kind of three-point bearing surface. The
motion given to the screws permits the perfect adjustment of
the theodolite over a point on the ground corresponding with
the suspended plummet, after the instrument is set up to
nearly its true position by movement of the tripod legs.
The range of motion is from ¾ to 1 inch, a quantity quite
sufficient for final adjustment, but which does not materially
affect the equilibrium of the instrument upon its rigid tripod,
as it has in this case a broad solid base even in the extreme
positions of the slide.
This movement being above the levelling screws, the
adjustment of the instrument for level is not affected by its
use, as in the case of all sliding arrangements below the
levelling screws. Suitable means are provided for taking up
any wear that might occur in the slides.
425.—The above stage is supported upon three foot
screws, the female fittings being specially long to give plenty
of bearing surface to prevent wear; they are sawn down on
one side so that they spring lightly upon the screws, and are
provided with cross capstan screws for tightening up when
necessary. This plan gives the screw about ¾ inch of thread,
and permits adjustment for comfortable movement and for
wear without any risk of shakiness. The screw in larger
instruments of this class has a cap to exclude dust. The foot
of the screw has a ball which rests in a slotted tube before
described, Fig. 71, p. 127.
426.—This theodolite with mechanical stage is generally
fitted with illuminated axis for tunnel work, art. 383. The
lamp is not shown in the illustration.
The weights of this make of theodolite are about
6-inch
in gun-metal
18¾
lbs.,
aluminium
10
lbs.
5-inch
"
13¾
"
"
7½
"
4-inch
"
9½
"
"
4½
"
427.—8-inch Transit Theodolite.—For ordinary surveying
the smaller instruments are sufficient. For opening
a survey in new countries the 8-inch instrument, Fig. 178, or
a larger one, is generally used for the superior triangulation,
particularly for observations at night of distant lights when
greater light-grasping power is demanded of the telescope.
The larger circle gives a more exact reading of the limb, which
is generally divided to read clearly to ten seconds of arc, and
by estimation sufficiently near to obtain five seconds reading
very approximately with the verniers. When instruments
exceed 8-inches, the reading is by means of microscopes, the
application of which will be described further on.
428.—The 8-inch transit illustrated is of the author's
model. It is in general structure similar to the 6-inch just
described, except in certain specialities. The instrument does
not clamp upon the vertical circle, but a similar circle is provided
upon the opposite side of the axis. This answers two
purposes, it balances the pressure upon the pivots and obviates
disturbance of the division by the clamp. The principal
bubble is supported upon the vernier frame, as special exactness
is not required for the instrument to be used as a level.
The base support is upon the Everest tribrach system, which
will be described in the next chapter. A long compass is
shown, but a telescopic compass is sometimes used. The
instrument is shown with an axis-lamp and diagonal eye-piece
for star observation.
429.—The vertical axis of this instrument is sometimes
pierced for a look-down telescope to sight its vertical position
on the ground to the centre of a peg. This will be described
with geodetic instruments in the next chapter. It is an expensive
refinement, seldom necessary, as the axis with plummet
may easily be brought within the tenth of an inch.
Theodolites of eight inches and over are uniformly packed
in two cases. The lower part is packed in a case by itself, the
upper parts connected with the vertical circle and all the
accessories, eye-piece, plummet, etc., forming the contents
of another case, each part being sufficient for one man to
carry without the tripod. The weight of the entire instrument
is 29½ lbs.
430—Quick-setting Theodolites.—The demand for
instruments with quick-setting arrangements has greatly increased
of late years. They save a great deal of time in setting
up, and also save wear of the levelling screws, as the instrument
may be instantly set nearly level by its means, so that
less than half a turn of the levelling screws will bring it to true
level. An ordinary transit is shown Fig. 179, fitted with
a similar arrangement to that described art. 240, p. 132.
431.—Railway Theodolite.—There are objections made
to the transit theodolite by some civil engineers that it is a
large and heavy instrument, only to be accepted for its
perfect convenience over lighter forms. To meet this
objection the author has made a special transit theodolite,
Fig. 180, which is sufficient for railway work and general
surveying upon moderately level country. The transit principle
is conserved by balancing the telescope on its axis to permit it
to transit over the eye-end only. The vertical arc is omitted
as being unnecessary for railway work. The instrument
is constructed especially low and of great rigidity and
solidity, with light weight. The compass is of the trough
kind. The limb is covered for protection. It is extremely
portable. Weight of 4-inch, 7¼ lbs.; 5-inch, 9½ lbs.; 6-inch,
12¾ lbs. Being constructed for rough, hard wear and local
use it is not made in aluminium.
432.—For tunnelling underground railways the mining
theodolite described further on will be found the most valuable
for railway engineers.
433.—Mountain Transit Theodolite.—This instrument,
Fig. 181, is designed for geographical exploration, and
making sketch surveys. It embraces the transit principle for
the convenience of taking zenith stars. It is made in 3-inch
and 4-inch sizes. It has two verniers to the horizontal limb
reading to minutes, and a single vernier to the vertical circle.
It has been made by the author in aluminium alloy only, the
total weight being 2¼ lbs. for the 3-inch and 3½ lbs. for the
4-inch. The eye-piece reads direct or diagonally. It has clamp
and tangent adjustment to both circles, and a trough compass.
The tripod slides up to half length, each leg being adjustable to
fix to any length within the range of the slide to accommodate
it to the surface of inclined rocks.
434.—A Mountain Theodolite is a term applied to any
very small or light theodolite. These are generally made to
order, very frequently to a reduced model of a larger theodolite,
3 inches being a common size. The telescope is occasionally
placed upon the side of the horizontal axis to transit. Theodolites
of this class generally weigh much more than the above-described
instrument, a common weight being 5 to 7 lbs.
435.—Improved Solar Attachment.—The reviser's
improved solar attachment admits of a full vertical circle being
employed; it also has a clamp and tangent to the hour circle
and declination arc and quick acting clamp and fine adjustment
to the solar arm. An instrument so fitted is shown on p.
260, Fig. 182.
436.—Micrometer Reading Theodolites.—The favor
with which the smaller micrometer reading theodolites have
been received and the ever increasing demand for them owing
to their much greater accuracy has induced the reviser to
introduce a whole range of these instruments. In many cases
where greater accuracy is required for horizontal than for
vertical angles, the micrometers are only fitted to the horizontal
circle and the vertical circle has verniers as usual. A useful
instrument for general surveying without any unnecessary
elaboration is shown below at Fig. 183.
The 6-inch instrument reads to 5 seconds of arc on the
horizontal and to 10 seconds of arc on the vertical circle, and
the 5-inch instrument to 10 seconds of arc on the horizontal
and to 20 seconds of arc on the vertical circle.
A full micrometer reading instrument is shown at Fig. 184,
the 6-inch reading to 5 seconds of arc on both circles and the
5-inch reading to 10 seconds of arc on both circles.
Fig. 184.—Stanley's full micrometer transit theodolite.
A specially light form of micrometer reading transit
(Fig. 185) has recently been designed by the reviser which
has met with much favour. It has a 4½-inch horizontal
circle reading by micrometers to 20 seconds of arc which may
be approximately read by mental subdivision to 5 seconds,
and a 4-inch vertical circle reading by verniers to single
minutes. It is also made micrometer reading to 20 seconds
of arc to both circles. The compass is of circular form
reading by microscope to ¼-degrees, which may easily be
estimated to a third of this.
An example of a more refined micrometer transit is
shown at Fig. 186. This instrument was designed by
Dr. E. Deville, LL.D., Surveyor-General of Canada, and is
arranged for latitude determination by Talcott's System, and
general geodetic work.
It has a 6-inch horizontal circle reading by micrometers to
5 seconds of arc, and a 4-inch vertical circle reading by
vernier to 1 minute, with zenith spirit level graduated to
2 seconds of arc, detachable and interchangeable with a small
level for ordinary use. The telescope is 14 inches solar focus
with large object glass so that observations may be taken of
stars up to the sixth magnitude; it has a revolving micrometer
diaphragm and electric illumination to micrometers, to
diaphragm both front and back, and to zenith spirit level, it
has also a rheostat for regulating the amount of light, and
a dynamo generator for supplying the current.
The universal transit designed by the reviser is shown at
Fig. 187.
This is an 8-inch instrument, reading by micrometers on
both circles to 2 seconds of arc, and is fitted with all the
necessary arrangements for universal work.
A description of the larger geodetic instruments is given
in a subsequent chapter.
CHAPTER IX.
PLAIN THEODOLITES IN WHICH THE TRANSIT PRINCIPLE IS
NOT EMPLOYED—THE PLAIN THEODOLITE—IMPROVED
CONSTRUCTION—EVEREST'S—SIMPLE—ADJUSTMENTS AND
EXAMINATION OF THEODOLITES.
437.—The plain theodolite is of nearly its original form
as invented by Sisson. It still retains a limited popularity,
which is principally due to its portability, being of less bulk
and weight than the transit of equal diameter of circle. If we
consider the railway theodolite described in the last chapter as
a simple form of transit, this must be considered as an exception
with regard to the bulk and weight, not being greater
than that of the plain theodolite.
438.—The Plain Theodolite.—For the general description
we may follow that given in Chapter VII. for the 6-inch
transit for all parts of the instrument below the vernier plate,
and for the compass-box above this plate. The construction of
the instrument varies from the transit in having a half vertical
circle only, with a single vernier, and in the differences in
the arrangement of the fittings connected with the telescope.
A single microscope is generally used on the horizontal circle,
and this passes in a groove from one vernier to another,
instead of having two microscopes on arms jointed upon the
vertical axis, as in the better construction of transits before
described.
The standards or A-frames in the ordinary plain theodolite
are attached to the vernier plate, but not generally to
the compass-box. The pivots of the transverse axis, which
are made exactly equal in size, rest on coupled bearings on
the tops of the standards, which are in construction made
together, and therefore exactly alike. The transverse axis is
not adjustable, as in the transit theodolite previously described;
the standards have therefore to be adjusted to height in the
manufacture by filing, with the application of a special striding
level, until the transverse axis is brought permanently perpendicular
to the vertical axis.
439.—The vertical arc is fitted over the transverse axis;
that is constructed with a turned flange to which the arc is
firmly screwed. The arc is divided to 30′ and reads with a
vernier to minutes. The vernier is fixed directly to the vernier
plate, and reads generally with a microscope jointed on the
transverse axis, but sometimes with a loose magnifier for
economy. Divisions for difference of hypotenuse and base
are occasionally divided on the back of the arc. The vertical
arc has a clamp and tangent placed at the back, therefore this
cannot be shown in the engraving. Along the bar above the
vertical arc a stout plate is attached by screws. From this a
pair of Y's with clips and eye-pins, as described for the Y-level,
art. 192, supports the telescope.
The telescope is of the same construction as that described
for Y-levels, with turned collars. The diaphragm is cross-webbed.
For economy a simple cap is generally put to the
telescope instead of the better plan of a ray shade. The
principal level is fixed to collars fitted round the telescope, to
which are attached one slot-piece for lateral adjustment of the
level, and one screw-piece for linear adjustment by means of
two capstan nuts. The level is placed under the telescope for
compactness.
440.—The parts of the plain theodolite below the standards
are the same as those already described for the transit theodolite,
except that the vernier plate carries one level only at right
angles to that of the telescope. The telescope is therefore
set to zero by the vertical arc, and the two levels are then
used as the pair upon the vernier plate of the transit. The
means provided for the adjustment are the same as those of
the Y-level, but the Y's are adjusted firmly by the maker by
fitting them down upon the Y-plate in the manufacture.
441.—The plain theodolite, except where price is the first
consideration, appears to be going gradually out of use, being
superseded by the transit. It has had a long day since its first
conception by Sisson about 1730. For 4-inch and 5-inch
instruments the makers still find a small demand. The 6-inch
is rarely enquired for. The plain theodolite cannot compete
with the transit for perfect utility, but it holds the merit of less
weight and of greater portability. The weights of the three
sizes in general use are as follows:—
Weights of Plain Theodolites.
Instrument.
Case.
Outer Case.
Tripod.
4-inch
7
lbs.
7½
lbs.
3½
lbs.
8
lbs.
5-inch
11
"
8½
"
4
"
9
"
6-inch
17
"
10
"
5
"
11
"
Very light 3-inch and 4-inch plain theodolites of from 5 lbs.
to 7 lbs. complete are made occasionally for travellers.
442.—The author has recently modified the plain theodolite,
Fig. 189, for which there still remains a small demand
in the Colonies, by making the construction much more solid
by shaping the work out of single castings in gun-metal for
parts formerly screwed together in many pieces, which formerly
was necessarily arranged to permit facility of construction
by hand-work. There are also in the new instrument some
improvements made in detail. The limb dividing is covered
for protection. The readers are joined through the vertical axis
and are hinged to turn up. The compass has an aluminium
ring with a microscope which permits it to be read at a
convenient height and much more accurately. The tangent
screws are covered to exclude dust, and some other improved
details.
443.—Everest's Theodolite, Fig. 190, designed by
the late Sir George Everest, and used for details of the
great trigonometrical survey of India, is built up very much
upon a well-known common French model. In service in
India it has proved an excellent instrument. The horizontal
circle or limb of this instrument consists of a single plate,
upon which the silver is inlaid flat upon the surface, upon the
plan shown, Fig. 128. In place of the ordinary vernier plate
three arms are extended from the central axis, which carry each
a vernier at its end, reading to a fiducial edge, Fig. 127, p. 186.
The verniers trisect the circle, and are marked A, B, and C.
A fourth arm, proceeding from the same relative position of
the centre as the arms of the vernier, carries a clamp and
tangent which is similarly constructed to that of the ordinary
theodolite described. The instrument has also an under
clamp and tangent for setting the telescope to bearing, or
for repeating, as in the ordinary theodolite.
444.—The horizontal axis carries the telescope in a cylindrical
fitting as in the transit theodolite, terminating in two
pivots which are set to permanent position as in the plain theodolite.
The pivots rest in bearings upon short standards
carried out from the centre upon a flat horizontal bar to which
a spirit level is attached for adjustment of the pivots to
horizontality. Vertical angles are read off upon two arcs
which have a horizontal axis as their centre attached to the
telescope, so as to move with it in the vertical plane, with
clamp and tangent adjustment. An index, upon the same
centre carries two verniers and has a spirit level attached to it.
The verniers are read by a pair of microscopes. Upon the
upper side of the telescope a trough needle is placed.
445.—This instrument has been used in military surveys
by the Royal Engineers. The objections that civil engineers
have made to Everest's theodolite are that the working
parts are made very open, so that the wet and dust intrude;
further it lacks the general convenience of the transit
principle, which is necessary for astronomical observations.
The tripod is sometimes made of the ordinary solid section,
art. 216; but for India, where carrying labour is cheap, a heavy
framed stand is used, which is special, as follows:—
446.—Everest's Tribrach.—The upper part of the engraving,
Fig. 191, shows this tribrach that supports the upper
part of the instrument directly upon its vertical axis. The
three arms of the tribrach carry each a milled-headed adjusting
screw, the nut of which is formed in the arm. The arm is
sawn up to admit of adjustment, that the milled head may turn
softly but without any shake. The lower points of the milled-headed
screws, technically feet, fall into V-grooves in the head
of the tripod. The V's are not shown in the engraving. Above
the upper surface of the tripod head, a thin, three-armed plate
of metal, termed the locking plate, is centred upon the hollow
axis of the head, so that it will move laterally. The locking
plate has a hole and slot at the end of each of its arms, the
holes of which admit the toes of the feet of the tribrach into
the V-grooves formed in the head of the tripod. The locking
plate when moved laterally locks all the toes in at once, so
that the instrument is secured by this means to a certain degree
from accident. This locking plate has commonly a milled-headed
screw clamp which fixes it in its locked position.
The head of this screw is under the tripod head, and consequently
cannot be shown in the engraving. It is a defect of
this locking plate that the screws, unless they fall perfectly in
the V-grooves have a tendency to ride. To avoid this the
author has for many years made the ball feet fall upon a plain
surface, being at the same time held in their places by a
slotted plate which fits over the neck of the balls. This plan,
which is not shown in the engraving, is now adopted by other
makers. The author uses also his patent tribrach sometimes
on this instrument.
447.—The Framed Tripod of Sir Geo. Everest's design
is made of straight-grained mahogany, each leg being formed
of two side-pieces, with one or two cross-pieces. The engraving,
Fig. 191, shows the head of a tripod of this construction. The
side-pieces are spliced together at the lower ends, where they
form a rather obtuse point, which is shod with a gun-metal
shoe. The upper ends of the side-pieces carry strap plates
that receive a bolt which holds them firmly by means of
winged nuts to the tripod head. The legs can be detached
after use and the tripod head be placed in the case with the
instrument in a packing provided for it. Some modification
of this form of tripod is generally used for all large field instruments.
The author's improved Everest theodolite is shown
at Fig. 192.
448.—Simple Theodolite.—The plain theodolite being
of the cheapest construction may be stripped of its superior
functions, which are used for testing its adjustments, and be
made into a simple angle measurer for laying out or plotting
small parcels of ground, small estates in building ground, local
sewage, gas and water works, and many other cases of small
surveys, for which purpose it will be found sufficient, with a
saving of about half the cost of a perfect theodolite. The
instrument shown above, Fig. 193, was designed by the author
to meet the above cases. In this instrument there is no
vertical arc. The telescope has a socket axis carried upon a
single standard. The axis cannot be seen in the figure from
interference of the telescope placed in front of it. The telescope
is arranged to be fixed in a level position by means of
the loose pin being pressed in a pair of holes. It may then
be used as a level by means of the spirit level shown on the
vernier plate. The horizontal circle is divided to read with a
single vernier to 3′ of arc by means of a hand magnifier which
is placed in the case with the instrument. There are internal
and external axes, each provided with clamp and tangent
motions to the horizontal circle, as with the plain theodolite.
It is supported on a tribrach, the legs of which are upon the
plan, art. 249.
If it be made with two verniers and divided upon silver
it becomes a useful light instrument for filling in details of
superior triangulation. Weight, about 4¾ lbs.
449.—Examination and Adjustment of the Theodolite.—The
description given of a transit theodolite, arts.
369 to 389, will show that this instrument is provided with
means of adjustment in every requisite direction. Larger
transit instruments possess the same means of adjustment,
but in some parts these have greater refinement. Plain theodolites
have the like methods, except in the case of the
transverse axis, which is adjusted once for all by the
maker. It will be necessary, therefore, to limit our space to a
discussion of the examination and adjustments of the transit
theodolite only, of which we have given a full description,
arts. 369 to 389, noting only where variations occur from
partial differences between this and others.
450.—A theodolite as it comes from a respectable maker
is usually carefully adjusted in all its parts. If it has travelled a
long journey it is, however, well for an experienced surveyor
to put it through its various adjustments. The corrections, if
any are required, will be generally very small, and these in all
probability will be of the same kind as will occur in the use of
the instrument and in the accidental conditions to which it
may be subjected during conveyance from place to place upon
a survey; therefore it is well to be familiar with them.
When a new instrument is received from the maker, it is
necessary to observe attentively the manner of its packing as
it lies in its case. It is well at first to lift the parts a few
times gently out of the case and replace them, so that this
may be done at any future time with certainty and without
any risk of strain upon the instrument, remembering always
that an instrument in conveyance is much more liable to be
thrown out of adjustment by carelessly replacing it in its case
than from its ordinary use, art. 42.
451.—For examination or adjustment of the theodolite the
tripod stand should be at first firmly fixed with legs extended to
an angle of about 70° to the ground, which should be solid and
hard. As the telescope has to be brought to the height of
the observer's eye, it is well to mention his stature in ordering
an instrument. The tripods that are made for tall men are
often awkward and unsteady if the legs are extended to bring
the telescope down to the height of a short person.
They may always be cut down and refinished by the maker.
When the tripod is set up the toes should be each separately
pressed down, so that future slips are impossible. This being
done the instrument is taken from its case and grasped firmly
by the body part under the horizontal circle, and placed on
the tripod at once, then screwed firmly but not too tightly
down upon its bearing surface. With a 6-inch transit theodolite
the upper part is sometimes detached and packed
separately in its case. Where this is so, after the body
part is fixed on the tripod, the cleats on the top of the
standards must be opened out, and the upper part of the
instrument, lifted by its telescope, be slowly lowered into its
bearings, being particular at the same time that the clips
under the telescope embrace their stay-piece on the standard.
The cleats must then be closed over the pivots. The instrument
being set up to position, all levels may be adjusted
to the centres of their runs, and every part clamped sufficiently
to make the instrument firm, but in no case using violence to
produce a strain in any part. The clamps or other fittings
are afterwards separately released as they are required for
examination or adjustment of the parts to which they
relate.
452.—Examination for Coincidence of Exterior and
Interior Vertical Axes.—The theodolite being set up solidly,
and all clamps fixed as above described, unclamp the
lower or exterior axis clamp and set the vernier plate levels
parallel with opposite pairs of parallel plate screws if the
instrument adjusts on the parallel plate system, art. 193, or
one level parallel with one pair of foot screws if it is made on
the tribrach system, art. 234. Now adjust both levels. Turn
the instrument half round (180°) and observe if the levels
keep the centres of their runs. If they do so they are in
adjustment to the exterior axis. If found imperfect, the
adjustment by the capstan heads of the levels is set, by
means of the tommy or pin which is provided in the instrument
case, for half the error as it appears by the bubble, the
other half being given by readjustment of the parallel plate or
tribrach screws. In these adjustments it is necessary to be
particular always to observe the bubbles after the hands have
left the instrument, not during the adjustment, which produces
strain upon the instrument. Now clamp the lower clamp and
note if this clamping has disturbed the levels. If the levels
are very sensitive it will do so in a slight degree, but the
disturbance should be very small if the clamp is perfect.
Now unclamp the vernier plate and note again if this clamp
disturbs the levels: this should also affect them very little.
Now observe the levels if they stand exactly as they did when
the exterior axis was unclamped at their present position, and
also at right angles to this. If they remain as before the axes
are truly concentric. If they do not, there is no remedy except
at the hands of the maker. The vertical axis to which the
above examination applies is considered the most important
part of the instrument, and the work should be thoroughly
well done; nevertheless, if the levels are very sensitive, which
they seldom are, such minute faults may be detected, that a
small allowance may be made for imperfection of work, and
the instrument still be considered a sound one. In the use of
the instrument it is always well, after the circle is set either by
the magnetic compass or by sighting a distant point for direction,
to clamp the lower clamp and readjust the levels to the
vernier plate. In this way the axis that will afterwards be used
for triangulation will be vertical, and small errors due to want
of coincidence of axes be eliminated.
453.—Examination of the Azimuthal Level.—This level,
which is placed over the telescope, being made of superior
sensitiveness to the vernier plate levels, is much more accurate
for adjusting the vertical axis, but much slower in operation
for testing. The verniers of the vertical circle should be
accurately set to zero, in which position the run of the bubble
should exactly agree with those on the vernier plate when
placed parallel with them in any direction, but this level
may also be considered by itself. Assuming the circle and
verniers correct, or otherwise, it may be reversed over the axis
by half turns in all positions over the parallel plate or tribrach
screws, and adjusted by the capstan heads half the error, as
before described, for the vernier plate levels.
454.—Examination of the Divisions and Centring.—The
vernier plate being unclamped, the verniers, if two,
should be brought approximately to 0° (360°) and 180°, and
then the plate be lightly clamped. The microscopes or readers
are then to be set truly radial with the zero reading of the
verniers, and the tangent screw adjusted to make one of the
readings, say the 360°, exact. The opposite reading, 180°, is
then carefully examined, and the error discovered, if any, is
due to the imperfection of centring, assuming the dividing
perfect. At this point it is well to record the amount of
difference. The same examination is then repeated with the
90° and 270°. In a properly centred and accurately divided
5-inch or 6-inch theodolite this difference will not amount to
more than 1′ error, in larger instruments proportionately less.
Owing to the difficulties at all times of reading the circle
correctly from difference of direction of light, and what is
termed personal error, it is well to entirely repeat this examination,
turning the instrument half round. It is also well to
repeat the examination at what are termed the half points, 45°,
235°, and 135°, 315°. This will sometimes detect the error
of centring, if there be any, in its true direction. The purpose
of the two verniers is to discover this error. In practice the
two readings are always taken, and the mean is considered
as the true reading. Where there are a greater number of
verniers exactly the same principle is followed, but the mean of
three or more readings is taken, which of course assures great
accuracy.
Examination of the telescope has been discussed arts. 107
to 115.
455.—Testing an Instrument for its Stability.—The
stability of an instrument will depend principally upon the
quality of the workmanship; but the same test will also
indicate, at any time, whether the instrument has been submitted
to sufficient wear to need the repair of the optician. For
this examination the eye-piece of the telescope requires to be
focussed against a piece of white paper held obliquely in front
of the object-glass so as to throw a soft white light into the
telescope. After the eye-piece is focussed, any distant point
may be taken for a sighting object upon which to direct the
telescope. This point should be focussed by the telescope so
that its image falls centrally upon the intersection of the webs.
The eye should then be shifted up and down or sideways
within the range of clear vision of the webs in the eye-piece
to ascertain that there is no parallax, that is, that the adjustments
of the eye-piece and the telescope are in true focus upon
the webs. This preliminary arrangement being made, which
will serve in future examination for other adjustments, all parts
of the instrument should be examined to see that the clamps
are firmly clamped. The object to be used as an index or
sighting point should be brought by the clamp and tangent
motions exactly upon the intersection of the webs as they
appear in the telescope, when the following examinations are
to be made.
456.—Tripod Head Examination.—The telescope being
sighted upon an index point, and all clamps screwed down
and the tripod firmly fixed on the ground, take the tripod head
of the theodolite in both hands and give it a twist of about a
pound pull in one direction; then examine the telescope to
see if the index point is displaced in the telescope. If it still
stands correct give a like twist in the opposite direction and
again examine the telescope. If it stands these opposite firm
twists retaining its position the stand is good and in good
order. If it does not, assuming good construction of stand,
the remedy may be found in tightening up all its screws; but
if its construction is bad it will not, even after this tightening,
keep in order. There is no doubt that more inaccurate
triangulation is caused by defective tripods than from any
other cause whatever. A perfect instrument is useless on a
bad tripod.
457.—General Examination of Fixed Parts.—The stand
being found good by the above process, the general fittings
of the instrument may be examined, after clamping all parts
and directing the telescope to a distant point, by taking a
quill pen by its root or pipe and pressing its feathered end
upon one side of the eye-piece of the telescope sufficiently
to bend the quill, and afterwards examining the telescope to
see that the webs are not displaced from the index point.
This may be done first to the right hand and then to the left.
If the webs still cut the same object it is clear that the whole
of the centres, fittings, clamps, and tangent screws of the horizontal
circle are correct. If any displacement be discovered,
the amount of difference between the right and left handed
twists will be the total error due to imperfection of work or
wear as the case may be. In exactly the same manner, but
by pressing the eye-piece upwards and downwards, the transit
axis and its fittings may be examined. If the instrument be
not generally sound enough to bear the above tests, other
critical adjustments become necessary. For the correction of
faults that may be included in the above operations, the parts
of the instrument must be separately examined.
458.—Examination of the Transit Axis.—The best
means of adjusting this axis in a theodolite is by a striding
level, art. 400. When this is not provided with the instrument,
and it is often omitted for economy, the axis is generally better
to be left as it is adjusted in this particular, by the maker. To
adjust the transit axis the vernier plate bubbles are set exactly
true by reversing angles of observation. The cleats are opened
and the striding level is mounted above the instrument resting
upon the pivots. The telescope is placed exactly over an
opposite pair of parallel plate screws, or parallel with two
screws if the base adjustment be on the tribrach principle.
The striding level is then carefully observed and reversed on
the pivots. If there be any difference in the run of the level
bubble the transit axis is adjusted by raising or lowering the
movable V on which one pivot rests by turning the capstan
nuts until it is quite correct, if the instrument has this old-fashioned
arrangement, or if not, by a few strokes of fine
emery paper upon the V which is higher. This adjustment
is almost superfluous, as the axis is generally set right at first,
and is not subject to change, especially if solid without an
adjustable V.
459.—For larger theodolites of 12 inches and over, the
transit axis is much better adjusted by means of an artificial
horizon, which will be described further on. By the use of
this instrument in the northern hemisphere the pole star is first
observed directly by the telescope, and then by its reflection
from the horizontal surface of clean mercury placed on the
ground at 12 feet or so from the instrument. If the star and
its reflection cut the webs equally in directing the telescope by
movement of its transit axis only from the one to the other,
this axis must be truly horizontal. If the vernier plate be then
turned a quarter of a revolution and the exterior axis a quarter
of a revolution, the telescope transitted and observation be
repeated, the verticality of the principal axis may be adjusted
with perfect certainty. The principal axis should be moved
one-eighth of a revolution all round and the bubble examined
at every position to assure perfect adjustment. With the
plain theodolite, Everest's and some others, the transverse axis
is fixed to position by the maker, therefore cannot be adjusted.
460.—Examination and Adjustment of Webs, Lines on
Glass, or Points.—The ordinary manner of webbing the
diaphragm of a theodolite was shown Fig. 23. Horizontal
angles are taken by the upper intersection of the diagonal
webs or lines. A single web is placed horizontally for
taking vertical angles: it is necessary that this should be
nearly true. When the theodolite has its axis vertical, as
shown by the vernier plate bubbles being in the centre of
their runs, if one end of the horizontal web or line be set to
cut a small distant object by sight in the telescope, the same
object should keep on the web while the tangent screw of
horizontal circle is moved a distance sufficient to traverse it,
the hand being always taken from the screw while the observation
is made. If it does not do so, the collimating screws
should be lightly tapped with the back of a penknife in the
direction to set it right. These screws have a slot in the body
of the telescope, under the loose covering plate, sufficient to
permit of this small adjustment.
461.—Adjustment of the Telescope to Vertical Collimation.—The
eye-piece is first focussed as before against a piece
of white paper held obliquely in front of the object-glass until
the webs are sharply seen. The axis of the telescope is then
examined for vertical collimation error. The method of doing
this has been already described for a telescope placed in Y's,
as it is in the Y-level, and the plain theodolite, art. 200. The
only difference with the transit theodolite is that instead of
turning the instrument in its Y's, the telescope is transitted, as
it is termed, over on the transverse axis exactly half a revolution,
or 180° as seen by the vernier reading; and the horizontal
circle is moved also half a revolution, so that the telescope
points again on the same distant point which is used for an
object. If the webs or lines still cut the same point or small
object, they are in vertical collimation, or truly in the optical
axis of the telescope, as regards the vertical direction which
this adjustment is intended to secure, presuming the circle has
been correctly divided and centred and the verniers accurately
set. If the webs or lines do not cut the same point, half the
error is corrected by the top and bottom collimating screws near
the eye-piece. This process is repeated until it is exact, being particular
to observe, as before mentioned, that there is no parallax.
This adjustment cannot be made with the plain theodolite; but
the zero of altitude may be examined on both sides of the arc.
For the transit theodolite, adjustment by means of a
collimator, art. 229, is much more convenient and exact, as
lateral and vertical errors in the position of the webs can be
detected in one operation. When a Y-level is at hand, this
may be used as a collimator if it is first set to solar focus.
462.—Examination for Perpendicularity of Transit Axis
and Telescope.—The whole of the lower part of the instrument
retaining its position with all clamps firm, open the cleats
upon the top of the standards so as to release the transit axis.
Now release one of the clip screws and gently lift the upper
part of the instrument out of its bearings. Turn the telescope
the reverse way upwards, which will be in this case bubble
downwards. Release the clamp and turn the clips to the
reverse position of the telescope, and reverse the position of
the pivots in their bearings. If the telescope be now directed
to the same point as before, and the webs still fall upon it,
the telescope adjustment is at right angles to the transit
axis.
463.—Examination of the Magnetic Needle.—If the
needle be placed in a circular box, as shown in the engraving,
Fig. 30, it admits of no adjustment. If it is placed in a trough,
Fig. 161, it admits of adjustment generally by lateral screws
to a portion of its division. If the needle is used for a survey,
it is set to the zero of the horizontal circle by clamping the
vernier plate and bringing the northern vernier to zero, then
releasing the exterior axis and bringing the needle by the
motion of the lower tangent screw to the zero of its circle.
The corrections of the needle for giving true north have been
discussed, art. 132. It is difficult to read an ordinary edge-bar
needle correctly, it is also difficult to mount it perfectly true.
It may be read at both ends, and if the 0° and 180° points
cut the line fairly it is considered correct; if not, the mean of
the difference may be taken. In some instruments a microscope
is mounted over the needle point that the needle may be
adjusted to a web; but British surveyors seldom feel confident
of surveys by the magnet, and for triangulation generally prefer
to employ a certain number of distant fixed points, the bearings
of which are at first as accurately ascertained as possible,
for referring objects, rather than to refer frequently to the
magnet. When the needle is out of use it should always
remain lifted off its centre. When the instrument is put
by for a long period it is better to place it in a vertical
position and free the needle, so that it rests in the
magnetic meridian, in order to preserve its magnetism as
much as possible.
464—Use of the Theodolite.—In setting up a theodolite,
place the tripod nearly over the position in which it is
to be used. This is frequently the socket hole formed in the
earth by the removal of a ranging pole or picket, to be described
Chapter XVII. Then, after it is set up, suspend the plummet
from the hook, which will be found inside the head of the
tripod. If the ground be solid and level, then by shifting the
toes of the tripod slightly, and firmly pressing them down one
by one, the centre of the plummet may be brought easily within
about ·25 of an inch of its true position. The theodolite is then
placed on its tripod, observing that the telescope is in a position
easy to be used. The centre of the picket-hole, when this is
used for a station, is generally taken by guess-work, which is
considered near enough. It may be taken with a little more refinement
by placing, in the same hole, a short false picket of nine
inches or so in length, but of the same diameter as the ordinary
picket, the top of which is cut off smooth and polished, and
has lines sawn across its centre inlaid with ebony, described
in Chapter XVII. The false picket is carried about with the
theodolite. With Everest's and many other forms of theodolites
the hook is fixed under the axis of the instrument.
In this case it is usual to set the theodolite before adjusting
it to the station, as there is no separate hook to the tripod,
which also occurs with all framed stands.
465.—Where there is no hook to the tripod an excellent
plan is to have a false centre, which may be a piece of turned
wood with a hole through it, to fix on the top of the tripod
head. The plummet cord adjusts through the hole. This
false centre is also convenient where the axis adjusts to
position by a mechanical stage. Fig, 194 shows a false
centre formed of a piece of ivory with two slots to permit the
cord to loop over and yet hang centrally.
466.—It may be observed that if the tripod be set up out
of level, which it must necessarily be in many cases, the hook,
if attached to the stand and following its inclination, will not
hold the cord at a truly vertical position to the axis. Surveyors
commonly allow a little for this inclination. It is much
more accurate to have the cord suspended directly from the
axis of the instrument when it is constructed to admit this.
Then if a false centre be used the plummet should be
suspended a second time from the axis hook. With the kind
of runner shown in the figure this need take little time, as
it is instantly detached and replaced.
467.—After the tripod is fixed with the theodolite upon it,
the readers are set to exact focus. The horizontal circle is
then brought to zero by the vernier plate clamp and tangent,
and the compass brought to magnetic north, if all angles are
taken in reference to this as a check, by means of the lower
clamp and tangent. The vernier plate clamp is then released.
The eye-piece is correctly focussed upon the webs, lines or
points against the northern sky, or upon a piece of white
paper held obliquely if this is preferred. The telescope is then
ready to be directed towards a picket or other station mark to
be observed, and set correctly to focus this, after which the
eye is moved to the right and left, to the extent of clear vision
in the eye-piece, to see that the object appears to remain fixed
upon the intersection of the upper V of the webs, or does not
dance, as it is sometimes termed. The observation, if of a
picket, should be taken as near the ground as possible, as it
may not be set quite upright. If the telescope is directed to
objects where the sun's rays would enter it, the ray shade
should be pulled out sufficiently to quite shield the object-glass.
The initial reading to be recorded is always taken on
the face of the instrument, in which position the upper tangent
screw is always on the right-hand side. When the observation
is clear and satisfactory, it is recorded in the field-book. If
the sight lines taken are to be measured by the chain, the
amount of inclination is taken by the vertical circle reading to
the top of the picket if this is the 6-feet ordinary length, or to
a marked band if this is longer. The inclination may be
taken exactly to angle by vernier, or roughly by scale of
difference of hypotenuse and base if this is engraved on
the vertical circle, or by both of these—the one as a check
upon the other. It is common to take the upper inclination
as a plus (+) and the lower as a minus (-). Inclination
observation is recorded at the same time as the horizontal
position. Other observations of the various positions or
pickets are taken in a similar manner at the same time.
When a stadia or tacheometrical diaphragm is used the
angle is recorded and the stadia reads the distance. It
is thought well when the theodolite is in position to take
as many exact observations as possible in all directions of
intended stations. It is also convenient to take a number
of observations, which from the circumstances present may be
inexact, such for instance as the angles subtended by trees,
gates, rough buildings, or even sometimes the corners of
fields, as from such observations these objects may be placed
nearly enough for ordinary plotting by the angles they subtend
from this and another station upon the plan. In any case
they form a check to positions if taken with pickets afterwards
more definitely. These may be marked in the field-book
inx. for inexact.
468.—Field Book.—This book is generally made 8
inches by 4 inches, covered with red leather, with elastic
closing band and sheath for pencil, as an ordinary pocket-book.
It contains about 100 pages of good stout writing-paper.
Two lines are ruled in red ink, ¾ inch apart,
vertically down the centre of each page. The column between
the lines is used for distances measured by the direct
chain line at which hedges are crossed, stations, offsets, or
other measurements are taken. In the right and left columns
observations are made of objects desirable to be recorded or
triangulated.
469.—For superior triangulation, definite and prominent
fixed objects are taken at as great distances as possible, so as
to include the details of measured triangles within a superior
triangle. A church steeple, for instance, is a favourite
sighting object. This cannot, however, generally be made, a
station for future triangulation unless a scaffold is built up
around it. Generally the most convenient method on fairly level
ground, if the survey is large, is to have an ordinary scaffold
pole, 20 feet or so in length, carefully straightened by a village
carpenter with a stretched chalk line and then painted white.
This may be squared at the end and fixed vertically in a
socket formed of crossed boards to a depth of about 3 feet in
the ground, with long crossing tail pieces rammed firmly with
the soil to keep it steady. When this is used for a triangulating
station, the pole is taken out of its socket and its exact
position is centred for placing the theodolite. Flags are
sometimes used to indicate stations: their defect is that the
wind may blow them from or to the observer and thus render
them invisible. Other methods will be found in practical
works on surveying. This subject will also be reconsidered
in Chapter XVII.
470.—Elimination of Instrumental Errors during Triangulation—Changing
Face.—It is generally advised to
change face with the theodolite after angles are taken in
the ordinary way, that is, to take first the initial angles
reading from the face vernier with the tangent screw on
the right hand, and then to take the same angles with the
back vernier, the telescope being transitted. This, of course
gives a reading on a different part of the circle and corrects
the error of position of the vernier, or centring, in the
following manner:—In Fig. 195 let a be zero (360°), the
reading of the face vernier. Let the opposite reading (180°)
be at a′. Suppose at 180° on the left-hand side of the
instrument the 180° reads at b, then observe by the telescope
an object that cuts this reading, or place a picket to do so.
Change face; then the same arc will come to c, and the
telescope must traverse cb to come to the first direction.
The instrumental error is half bc, which bisected in a′ gives
180° exactly. The same principle of repetition with changed
face may be made an any part of the circle, and the mean
will be the correct reading.
471.—Repeating Angles.—This is performed by taking all
parts of the circle for reading a given angle, so that errors of
division and centring of the instrument are eliminated. The
process is as follows:—Take the angular positions of two
objects in azimuth, commencing with the zero of the horizontal
circle, say the two objects subtend from the centre of the
instrument 36° 10′; then turning the telescope back from its
advanced position at 36° 10′ by releasing the lower or axis
clamp, we may bring the first reading to the original zero
position. Now clamp the lower clamp and release the vernier
plate clamp and take again a forward reading. If this reads
36° 10′ + 36° 10′ = 72° 20′, the circle and centring appear so
far correct; but it will probably read 72° 21′, and the corrected
reading would be the mean 36° 10′ 30″. If we continue this
system round in ten pairs of readings the whole circle will be
embraced, then the mean of the sum of the minutes divided
by the number of pairs of observations will give the true
reading of the minutes. By taking the readings of two opposite
verniers separately, the circle would be encompassed by five
readings. This plan is followed in all important triangulations
where the work is submitted to calculation. Such
refinement is scarcely necessary for direct plotting with the
protractor.
472.—It may be observed that if the horizontal circle is
placed with its zero constantly to magnetic north—not
necessarily for taking angles in reference to this—that the
same part of the circle will always be used in the same
direction; so that the sum of errors of the whole circle must
necessarily tend to tie, even if the division is to a certain
degree imperfect, provided also that the protractor used in
plotting is also kept in one direction. This plan has otherwise
no inconvenience, as any arc or angle may be taken by
the difference of the circle reading in any position in which it
may happen to fall. This does not mean that it is advisable
to survey above ground by the needle—it is quite otherwise.
It is best to have some distinct, sharply defined object to
which all angles are referred, and therefore called a referring
object, as the general index. The magnetic bearing need
only be the initial position of the horizontal circle of the
instrument.
473.—With larger, what are termed geodetic instruments,
to be described in the next chapter, constructive errors are
not permissible; but these instruments are observed under
altogether different conditions, which are suitable to the
precision demanded. A large theodolite is generally fixed
upon solid rock, or masonry with good foundation, or upon
a very firm solid framed stand, and is protected from wind,
sun and rain. Where it is necessary on level ground to
elevate the instrument for more extensive view, a proper
structure is built, in which the theodolite is isolated from
the outer walls or enclosure carrying the stage upon which
the observer works, so that no vibration or deflection of
this, caused by the wind or the weight of the body, affects the
instrument. Under such conditions angles are read on
various points of the circle by micrometer microscopes so as
to obtain a sufficient number of means, that personal and
instrumental errors may be reduced to a minimum.
CHAPTER X.
LARGE THEODOLITES USED ONLY FOR GEODETIC SURVEYS—STANLEY'S
10- AND 12-INCH—14-INCH ALTAZIMUTH—COLONEL
STRANGE'S 36-INCH THEODOLITE.
474.—Large theodolites employed upon geodetic surveys.
Where the complete survey of a country has to be made,
a system of large triangles is formed over the country from
convenient positions which are naturally or artificially
elevated so as to obtain distant views with the telescope.
These triangles are correctly measured by angles subtended
from a very carefully measured base or bases set out upon
approximately level planes, which are generally of a mile or
more in length. Where measurements are derived from
such bases by constant intersection of angular positions
extended therefrom to large triangles or other polygons, it
becomes important that the theodolite employed should
measure such angles with great accuracy. In this case the
vernier reading does not possess sufficient refinement, and the
divisions representing the degrees have to be magnified to
appear wider apart, so that they can be more finely subdivided
for the reading to be taken by means of a micrometer microscope
capable of subdividing the divisions made upon the
instrument even to single seconds of arc. The theodolites
used for the superior triangulation of Great Britain were
Ramsden's 36-inch and 18-inch, which, although constructed
in the last century, remain excellent instruments.
475.—The construction of large theodolites is varied very
considerably according to the conditions present in the country
to be surveyed. This subject if carried into detail would
extend much beyond the intended limits of this work. This
chapter will therefore be limited to the description of a 10- or
12-inch instrument, and to two historical instruments which
have been used successfully for geodetic work.
476.—10- or 12-inch Theodolite.—These instruments
approach the limit in size of portability for movable stations
in triangulation. The illustration, Fig. 196, is of the author's
latest 10-inch model, the patterns of which were made for a
theodolite with vernier readings to be used for the construction
of a spiral tunnel through the Andes, now completed. The object
in its construction was to obtain great rigidity with moderate
weight. To this end the gun-metal of which it is made is
shaped out from castings as comprehensive in unity of parts as
possible. It has a framed mahogany stand (not shown) which
is braced in every way and provided with a very rigid head. In
general construction of the instrument illustrated it has a
mechanical sliding stage and an extra powerful clamp and
tangent arrangement for the lower limb, the adjusting screws
being all covered to exclude dust. The circles are divided to
5 minutes, and are read by micrometers to single seconds of
arc. Two vertical arcs are used, the second one carrying the
clamp and tangent arrangements, which also serves to balance
the trunnion. The 10-inch instrument carries a 16-inch telescope
with 2-inch object-glass, and the 12-inch instrument an
18-inch telescope with 2-1/8-inch object-glass. The tangent
screws all act against springs to avoid loss of time.
477.—14-inch Theodolite.—For this description a
modern instrument is taken which Colonel A. R. Clark
selected for illustration in his excellent article on Geodesy
in the ninth edition of the Encyclopædia Britannica, to the
publishers of which the author is indebted for the illustration,
Fig. 197. The instrument is a combination of a transit theodolite
with special arrangements as an altazimuth instrument
with fixed base, one side of the vertical circle being divided to
place the zero in a direction coincident with the polar axis.
The construction as a simple fixed transit theodolite for support
upon a pedestal in stone wherein the axis remains permanent for
a principal geodetic station, and therefore requires only a single
setting to bring it to true north and south for zero, renders
change of position of horizontal limb unnecessary for a permanent
station. For this the instrument is well adapted, and will
be discussed here. The telescope is of 18 inches focus, with
2 inches clear object-glass. The axis pivots are of hard steel:
one is perforated for illumination by a lamp. The vertical
circle is placed almost directly upon the side of the telescope,
and the tangent arm on the opposite side is of nearly equal
weight, so that there is no counterbalance necessary. There are
three Ramsden eye-pieces giving powers of 17, 35, and 54, and
one diagonal eye-piece. A level is attached inside the standard,
divided to read 10″ of arc: this has cemented ends, art. 177, and
is enclosed in an outer tube for protection. Two other exactly
similar levels are attached to the exterior axis of the instrument.
The circle is divided to 5′ of arc and reads by two micrometer
microscopes to single seconds. The vertical axis of the instrument
is of steel. It is placed with the apex of the cone upwards,
and terminates on a triangular spring with three adjusting
screws by which any portion of the weight of the upper part
of the instrument can be relieved from the axis, so that the
whole instrument moves quite freely. The horizontal circle
reads with three micrometer microscopes on the upper circle
to single seconds. Originally the light was thrown down on
the divisions by three ivory cones placed over the fronts of
the microscopes, as shown in the illustration; but these have
been changed in the present instrument for concave swivelled
reflectors, which may be set to any angle convenient to throw
sufficient light upon the circle. The microscopes are supported
from the body of the instrument upon hollow conical arms upon
the same excellent plan originally used by Ramsden. The
microscopes have adjustments in three directions, so as to
bring them exactly into place for trisection of the horizontal
circle. The clamp and tangent motion is placed directly
upon the divided circle, and has adjustments to secure
freedom from strain; but this is not perfect—it is perhaps
the worst feature in the instrument, some modification of
the plan shown, Fig. 196, being much better for large
instruments.
The whole instrument is mounted on a tribrach frame,
which is adapted to stand upon a portable table or upon
masonry. The screws have lateral adjustment to prevent loss
of time by wear.
478.—It is a common custom with this class of instrument
to make the axes of hard steel. This plan is no
doubt very satisfactory as it leaves the optician's hands,
but the author very much prefers good hard bell-metal.
When he saw the above described instrument at Southampton,
there was quite sufficient evidence of rust on the
pivots to destroy all perfection of centring, and this could
scarcely have occurred with bell-metal. Of course the brittleness
of bell-metal would be objectionable where the instrument
might be subjected to severe jar in carriage from place to place;
but the author has obviated this by a plan he would strongly
recommend for general adoption—of having the axis of good
gun-metal, and to silver-solder a ring of bell-metal thereon
where the fitting surfaces occur. If the gun-metal is pure it
will bear the average reliable strain of hardened steel, which
in hardening and tempering is not with certainty always free
from flaws; and the average wear of pure bell-metal is perhaps
quite as good as steel.
479.—36-inch Theodolite, Fig. 198, was designed by
the late Colonel A. Strange and constructed by Messrs.
Troughton & Simms for the Great Trigonometrical Survey of
India. It is probably the most complete and perfect theodolite
ever constructed. The leading characteristics of this
important instrument only will be given. It has a horizontal
circle 36 inches diameter, and a vertical circle 24 inches
diameter. The telescope has a focal length of 36 inches:
the aperture of the object-glass is 3·25 inches.
Fig. 198.—36-inch theodolite—Great Indian Survey. From a photograph.
480.—The Stand has three massive mahogany legs AA
braced together with horizontal and oblique wrought-iron
bars B. Each leg is divided vertically, and contains a long,
gun-metal, square-threaded screw C which is made to rotate
by means of a worm-wheel and endless screw worked by a
winch handle D, and capable of being firmly clamped after
adjustment at points about 15 inches apart E. The upper
ends of these screws are conical, and fit into three inverted
radial grooves formed in the lower side of a cast-iron circle or
table, which is thus supported by the three screws without
being attached to them, and is therefore free to accommodate
itself to expansional changes without restraint. The upper
surface of the cast-iron circle is turned flat and true to receive
the tribrach of the instrument. The three screws F which
pass through the side of this circle are intended to adjust the
centre of the instrument over the station mark. A lever G
also passes through the side of the circle and actuates three
rollers, which, when in action, support the greater part of the
weight of the instrument, and so enables the horizontal zero to
be set without difficulty. As the instrument weighs over
400 lbs., it will be seen that some such arrangement is
absolutely necessary to enable it to be moved on the cast-iron
circle. When the correct position has been obtained,
the lever is thrown out of action, and the instrument remains
immovably seated upon its circular frame.
481.—The Foot Screws are tapped through the ends of
the tribrach arms in the usual way, but have a range of motion
not exceeding 1/10 inch. This range may appear small, but is
really much more than is required, as the upper surface of
the cast-iron circle can be levelled by the long screws in the
mahogany legs before the instrument is placed on it, so that
not more than about 1/100 inch of motion is required. The
foot screws do not rest directly on the cast-iron circle,
but on the extremities of an intermediate three-armed plate,
securely bolted to the centre of the instrument, the distance
between the tribrach and the plate being about 1/10 inch. The
object of this arrangement is to obviate the disturbance of
level and azimuth which arises from clamping foot screws of
the ordinary construction after adjustment, as well as that due
to looseness of the foot screws in the tribrach arms. The
arms of the spring plate, being of considerable width, have
great horizontal rigidity, but being comparatively thin are
easily bent vertically. The outer ends of the arms rest on
the cast-iron circle or stand; the foot screws pass through the
tribrach arms, but not through the spring arms. It is evident
therefore that when the foot screw is turned inwards with the
screwing motion, the solid end of the tribrach will be raised
and the slit between the two arms widened; but since the end
of the screw does not rest on the stand, but on an intermediate
arm, which is actually a portion of the tribrach itself, it is clear
that if a lateral pressure be applied to the tribrach no motion
will be caused thereby, however loose the screw may be, so
long as the pressure is less than the lateral rigidity of the intermediate
arm. The lateral pressure caused by turning the
instrument in azimuth when taking observations is greatly
within this limit. This plan is perfectly successful, but it is
only available where a moderate range of vertical movement is
needed. In the present instance, as the cast-iron ring or stand
on which the instrument is supported is always first made
practically level, the vertical range of the foot screws need
not be more than a small fraction of an inch. Another point
with regard to the foot screws is their delicacy and certainty
of action. This is attained by applying to them a clamp and
tangent screw arrangement H very similar in principle to that
sometimes applied to circles. Although the foot screws themselves
are rather coarse, having only about eight threads to the
inch, the arrangement is such that one entire revolution of the
slow motion tangent screw alters the level only about one second
of arc. Hence the foot screws in this instrument, though
coarse and strong enough to bear great weight are probably
for the first time made in keeping, in point of refinement, with
its most delicate parts.
482.—The Horizontal Circles.—The inner or working
circle is 36 inches in diameter. It is very finely divided on
silver to 5 minutes, and is read by five equidistant micrometer
microscopes to tenths of a second of arc. It is fixed at the
centre to the tribrach, but everywhere else is perfectly free.
The outer or guard circle consists of a second horizontal circle
exterior to and concentric with the inner circle. There is a
space of about 1/10 inch all round between the two circles, and
the upper plane of the outer circle stands about the same
quantity above that of the inner or principal circle. The
guard circle is supported by radii of its own, quite independent
of those of the inner circle. This circle has several functions.
It protects the working circle from accidental injury; it helps
to distribute changes of temperature uniformly over the circumference
of the working circle; it receives the clamp and tangent
screw, leaving the working circle absolutely free from contact
at all times; and it bears a strongly-cut set of divisions, more
visible to the naked eye than those of the working circle, which
are exceedingly fine, and therefore would be inconvenient for
setting the instrument approximately in azimuth.
483.—The Horizontal Tangent Screws.—It will be seen
at II′ that there are two clamps and two tangent screws
to the horizontal circle. It is necessary to have both, on
account of the large size of the circle. In use, of course,
they are not both used at the same time. In the present
position of the instrument the clamp and tangent screw on
the left-hand side of the illustration would be employed; but
on reversing the telescope this clamp would be released and
the one on the opposite side made use of. It is necessary
with this, as with smaller instruments, to avoid loss of motion
in the tangent screws. Many methods have been employed
to obviate this loss of motion, but while they are suitable to
small instruments they are not so effective with large ones,
such as that under consideration. The plan adopted in
this case is that known as the divided nut principle. The
block into which the tangent screw is tapped is divided transversely
and the two halves are forced asunder, and therefore
act against the contrary sides of the screw threads by four
internal spiral springs. The tension of these springs is
necessarily constant, and therefore not subject to the disturbance
and slow recovery of elastic force unavoidable in an
external spring. Means are supplied for regulating the tension
of the four springs, which must be a little in excess of the
force necessary to move the revolving mass, without taking
the parts to pieces.
484.—The Vertical Axis is a truncated cone of steel with
its base downwards. It is about 6·5 inches high and 3·3
inches and 2 inches in diameter at the base and summit
respectively, the flange being about 4·5 inches in diameter
and constructed on the isolated principle. The vertical axis
socket and the five horizontal microscopic arms are cast in
one piece of aluminium bronze, the elliptical table carrying
the telescope supports being bolted to the central boss in
which the socket of the vertical axis is formed. The vertical
axis and the elliptical table are both perforated in the centre
so as to allow of a look-down telescope being employed in
adjusting the instrument accurately over the station mark.
485.—The Telescope is furnished with two separate eye-ends,
carrying respectively a vertical and a horizontal parallel
wire micrometer J. It is also supplied with both bright and
dark field illumination, the latter being employed when faint
stars are observed. The vertical circle K is divided on silver
similar to the horizontal circle, and is read by two opposite
micrometer microscopes when the instrument is used for
terrestrial work: but when required for astronomical purposes
four micrometers can be used, and they can be shifted to any
part of the circle on which they are clamped. In the illustration
the four micrometers are shown in position. The two
rods or handles seen parallel with the telescope at LL′ are
attached to the middle of the transit axis where the telescope
passes through it, and are intended to raise or depress the
telescope without touching it by hand. These rods are also
used for carrying adjustable counterpoises, the instrument
being so balanced in every part that the equipoise is as nearly
perfect as practicable through any diametrical section of the
vertical axis.
486.—The Spirit Levels, both horizontal M and vertical
N, are very delicate. They are constructed so that the
divisions on their scales represent as nearly as possible one
second of arc. The scales are divided to twenty per inch.
The glass bubble tubes are mounted on V bearings, and are
kept in position by light springs in such a manner that they
are free to adapt themselves to changes of temperature with
perfect freedom. They are also enclosed in external cylindrical
glass covers to protect them from sudden changes of
temperature. The arrangements for adjusting the levels are
such as to obviate strains without risk of shake, and to ensure
delicacy of action.
487.—The Five Micrometer Microscopes O for reading
the horizontal circle are carried by the same number of
equidistant radial arms branching from the central boss
which carries the whole of the instrument above the horizontal
circles. These micrometers are made on Robinson's principle,
Fig. 199, that is, with a short bow spring S having a central
nut tapped through it to keep the tension between the bearing
of the micrometer screw on the end of the outer box and the
slide which carries the webs constant with whatever part of
the screw may be in use. The radial arms each carry a vertical
socket which is bored out cylindrically to receive the microscope.
These sockets are slotted vertically, and have three clamping
screws at the side to hold the microscopes firmly in position
when they are once adjusted. The two webs in these micrometers
are placed parallel to one another, and at such a
distance apart that when in proper adjustment they are a trifle
wider apart than the width of one line on the circle, as shown
in Fig. 200. The micrometer heads are divided into sixty parts,
and the whole is arranged so that in practice ten revolutions
of the micrometer screw traverse the webs over ten minutes
of arc or two divisions on the circle. Each division therefore
on the micrometer head represents one second of arc; and
as the divisions are clearly cut on silver and about one-tenth
of an inch apart, there is no difficulty in reading to
the tenth of a second, which, on a circle of 36 inches in
diameter, is equal to the ·00000872 of an inch, or the three-thousandth
part of one division of the circle; this, as
before stated, is equal to five minutes of arc, or the ·02616
of an inch. The illumination of the microscopes, or rather
of the divisions of the circle, is a most important matter.
When such exact measures are to be taken it is effected
by means of perforated silver reflectors attached to the
micrometer arms and mounted quite independently of the
micrometers themselves. The axis of each reflector coincides
with the axis of its microscope. All the reflectors have
both vertical and horizontal movements, and are therefore
readily adjustable to the best position for securing effective
illumination under the varying conditions in which the instrument
may be employed.
488.—Relieving Apparatus.—It will be readily understood
that the moving parts of so large an instrument must
necessarily be very heavy. In this case the telescope, vertical
circle, pillars, elliptical table, horizontal micrometer arms, and
vertical axis socket weigh nearly 300 lbs. It would of course
be impossible to take horizontal angles with so much friction
on the flange of the vertical axis as this weight would produce,
hence the necessity for some form of relieving apparatus.
That employed in this case is a system of forty spiral springs,
each of a definite length, which when adjusted support
about 6·25 lbs. The spiral springs are mounted on a flat ring
in two circles with projecting pins to keep them in position.
The upper ends of the springs support a steel ring with a
circular groove on its upper surface, between which and a
corresponding groove in the outer part of the vertical axis
socket three equidistant, nearly frictionless steel rollers run;
so that by this means about 250 lbs. weight is taken off the
flange of the vertical axis, the remaining weight being sufficient
to allow of the instrument moving with the necessary freedom,
and at the same time giving all the stability requisite for
accurate levelling.
489.—Miner's Circumferentor.—In the original form
of theodolite, as it was at first designed by Digges, open
sights took the place of the telescope. The sights in this
case were extended on arms. The compass-box, afterwards
added, was placed over the axis and made as free from
obstruction as possible, so that the needle, upon which
general surveying formerly depended, could be read correctly
by placing the eye vertically to the plane of the horizontal
circle of division against which the needle read. After the
introduction of the telescope to the theodolite this old form of
instrument took the general designation of the circumferentor;
and subsequently, being best adapted to underground surveying,
it became, with some slight alterations, the miner's
dial.
490.—Upon this original circumferentor improvements
have been made in the various mining dials we possess, in all
of which the large open compass is still preserved. This
prominence of the compass does not indicate that the modern
scientific mining engineer has any desire to depend upon it
for taking horizontal angles, but that in close and tortuous
workings it provides the nearest and often the only possible
means of taking angles having regard to the extreme difficulties
of observation of any kind. Where workings are open and
fairly plane the telescope and circle with vernier reading
can be used, so that at the present time the better instruments
possess the means also of taking observations of
angular direction by vernier reading. Several other very
important factors specialize mining from ordinary surveying
instruments, which may be stated as follows:—1. That
there shall be means of shortening the tripod for work in
strata of small depth. 2. That the instrument shall be low
and compact in itself, that the head of the surveyor may be
placed above it if possible, even in shallow workings. 3. That
great extent of adjustment of the compass-box to horizontality
shall be given in the fittings of the instrument, on account of
the difficulty of extending the legs at all times for tripod
adjustment and from the extreme inclination of the floor of
the working in some cases. 4. That it is desirable in mining
survey instruments that the telescope, if there is one, shall
take sights at all angles upon the surface of the earth in the
locality in which the instrument is used, as also about a
vertical position, so as to be able to sight lines from the top
to the bottom of the shaft, or vice versa, to set off angles in
the same azimuth as those taken at the surface by direction of
stretched wires or otherwise. This last contrivance will also
give the means of sighting a perfectly vertical point beneath
the centre of the instrument placed at the top of the shaft, to
make a concurrent station below during ventilation, when the
plummet would be disturbed. The devices by which these
various requirements have been met more or less perfectly
will go far to explain the specialities of construction found in
mining surveying instruments, which will now be described,
commencing with the oldest and most simple specialised
form upon which improvements have been made in many
directions.
491.—Plain Miner's Dial.—The original simple form
of specialized miner's dial is shown in Fig. 201. It consists
of a compass, divided to single degrees, read by a
finely pointed edge-bar needle mounted on a jewelled cap.
The needle has a sliding rider placed upon it, art. 130, so that
it may be carefully balanced to horizontality in any locality in
which it is used. The divided compass is raised on a step,
and the upper surface of the needle is made to be quite level
with the division when the compass is horizontal. In erecting
the instrument with the needle correctly balanced, the compass
may therefore be brought to horizontality by the coincidence
of the upper surface of the needle with the plane of the divisions,
without the necessity of having spirit levels.
492.—The compass-box is extended in one meridian,
north to south, by strong arms that carry a pair of sights
hinged to turn down to the surface of the cover for
portability. The compass-box and arms together are termed
the limb. The limb of the instrument is mounted upon a ball
and socket joint to be described. The socket is slotted down
on one side to permit the limb to be turned to a vertical
position. In this position the level shown on the front of the
instrument is used for levelling by means of the sights: this
level is not, however, put on all plain dials.
493.—The cover of the compass-box, Fig. 202, is fixed on
the box to a given position by a stud and slot. It has an arc
divided upon its outer surface, which is centred from a small
hole placed near the outer edge. A line from the centre of
the hole to the zero of the arc is made perpendicular to the
central indices of the sights. A piece of silk or a horse-hair
carrying a small plummet is fixed to hang from the hole. By
this means when the limb is turned down in the slot of the
socket and the silk or hair stretched by the plummet to permit
it to hang in front of the arc, it will then cut the divisions,
and thus form a reading index to the arc, giving thereby
approximately the vertical angle at which the sights are
set to degrees.
494.—The instrument is mounted on a simple jointed
tripod to be described. It will be seen by the above description
that this instrument is cheaply made, and is not
designed for very exact work. It is now giving way for more
exact instruments, but it forms the groundwork on which
mining survey instruments are most generally constructed.
The height of this dial with sights erect is 11 inches; weight,
6 lbs. Some of the separate parts above enumerated, which
are common to many other forms of mining instruments, will
now be more particularly described.
495.—Sights, one of which is shown separately, Fig. 203,
are common to mining instruments. They are constructed
essentially in two parts, technically termed the slit and the
window. The slitA is a narrow parallel cut made through the
metal upon the inner surface of the sight, which is turned
towards the centre of the instrument. The thickness of the
metal is hollowed away on the outer side which comes next
the eye, so as to present a thin edge only for the sighting
slit, as shown in section at A′. In some instruments the
slit is formed of two thin plates fixed to the sight by
screws in slots, which render it adjustable both to width
and position; this is the better way if machinery be not
used for cutting the slit. The windowB is an oblong
opening, across which a hair wire or a thin plate placed edgewise
is fixed in line with the slit. The hair or wire is laid in
a deeply engraved line, so that it is in the same plane as the
centre of the slit. The ends of the hair are held firmly by
drawing them through small holes and fixing them therein by
means of dry, conical, pinewood pins pressed tightly in the
holes. When a thin plate is used edgewise, this is soft-soldered
into the top and bottom of the window. In the pair
of sights the window of one sight is placed at the lower
position and the slit in the upper. In the fellow sight the
positions of these parts are reversed, the observation being
always taken from the slit through the window. The duplication
of parts in each sight permits it to be used in either
direction.
496.—In the use of the Sight the point or object to
be observed from the slit should appear to be bisected
by the hair in the window at the same time that it appears
to the eye to stand in the centre of the slit. For this reason
it is not necessary that the slit should be very narrow. It is
generally more comfortable to take the sight with the eye at
the distance of 10 to 12 inches in front of the slit to obtain
clear vision of it. In this case if it be made too narrow it
shuts out the field of view.
497.—It is not quite certain that the old slit and window
is the best form. Many mining engineers prefer a pair of
equal slits, one of which replaces a window. In this case,
instead of the wire covering the object sighted in the use of
the instrument, the object is made to appear in the centre of
the forward sight slit. In this construction the sight apertures
are made much narrower so that they do not cover too
much of the field of view. Excellent work is done with this
open form of sight, and its construction is much more solid
than that of having loose hairs.
498.—Universal Sight, termed technically hole and cross
sight, consists of a small hole C′, Fig. 203, on the inner side
of one sight that is hollowed away on the outer side which
comes next the eye, so as to present a thin edge of the hole
only. The fellow sight C has a hair cross placed centrally in
a circular window. This is of occasional use for sighting
angles approximately in altitude and horizon simultaneously;
but the cross occupies so much of the sight space that observation
with it cannot be depended upon.
499.—Ball and Socket Joint.—This is shown in elevation
Fig. 201 at F, and in section Fig. 204 F, D. It is one of
the oldest forms of adjustment, and is common to many dials.
When the clamping screw G is released the ball is free in its
socket F to move about its centre, to the extent of the opening
at the top of the socket, in any direction. A plugE, which
really forms the lower half of the socket, is screwed into the
part F′ at the lower part of what is technically called the
socket-piece. The plug is turned upwards by its screws so as to
tighten the ball by means of a tangent screw G which works
in a rack thread cut in a part of the circumference of the plug,
thus forming a screw and cross screw, which, as the construction
indicates, clamps the ball with great rigidity. There are
several other ball and socket arrangements; these will be
discussed in describing the special instruments to which they
are affixed. The only objection to this form is that it elevates
the dial very much more than others.
500.—The Tripod Stand of an Ordinary Miner's Dial.—The
upper part is shown in Fig. 205. This form of
tripod is common to many dials. The legs are made about
1¼ inches in diameter. The heads of the legs are fitted
directly without brasswork between the book-platesA, to
which they are held by cross screws or bolts which form the
joint on which the legs move for extension. Unless the head
be worked out of the solid, the book-pieces are screwed to a
plate that carries a male plug centre to which the dial is fixed
by a milled-headed screw shown at Fig. 201 L. The plug is
grooved at the position of the point of the screw so
as to permit rotation of the instrument when the screw
is slightly released. This tripod head remains permanently
fixed to the legs. Each leg is jointed to part in its centre by
unscrewing, to present when disjointed a metal point to hold
the surface of the ground, to form a short stand. The usual
height of the full tripod legs is 5 feet; the upper part only
2 feet 6 inches. The usual form of joint is shown in detail
in section Fig. 205. C the male screw, which is fitted to the
woodwork by a socket and cross pinned to it. This piece has a
point at its lower end. D the socket-piece is screwed over
the point to extend the leg when the tripod is required of full
length. The woodwork of this lower piece has a conical metal
point to bite the ground when it is set up in use. Occasionally
for close work shorter legs are provided, or the legs are jointed
in three parts. In the common dial shown, the legs are left
exposed when out of use; with superior instruments they are
packed in a deal case that protects the socket fitting to which
the instrument is attached. Another much better form of
tripod will be discussed further on with the instrument to which
it is attached.
501.—Examination and Adjustment of the Plain Miner's
Dial.—The tripod should be first set up to full length
and each length separately twisted to right and left to see
that its socket fittings are good and free from shakiness.
The legs should each be separately pressed in and out at
its centre to see that the screws clamp the parts firmly and
are free from shakiness. The instrument should then be set
up and its socket fitting be felt to see that it is free from
shake, and also be turned round to see that it moves freely.
The ball fitting should be clamped and its rigidity be tested
by fair pressure on the two ends of the limb separately. The
sights should be examined to see that they are quite linear
with hair and slit. The compass-box should be levelled by
the coincidence of the upper surface of the needle with the
plane of the division, and be reversed in every direction by
turning the compass-box, the reading being observed with the
N. point of the needle at N. E. W. S. to see that it bisects
the graduation by angles 180° apart. The compass-box being
level, the sights should be ranged with an external object at a
distance—a plumb-line is best—a piece of string suspending
a stone answers—to see that they are vertical, and that they
cut the same line with the position of the sights changed fore
to back. If the sights are coincident, but do not range with
the plumb-line, the needle is out of balance, and this may
be corrected by shifting the rider.
502.—Henderson's Dial.—This is an improvement
upon an old form of circumferentor,[19] in which four sights are
centred in opposite pairs so as to revolve about the vertical
axis, so that one pair of sights may take any angle to the other
pair. In Mr. J. Henderson's dial the improvement consists
in making the compass larger, the needle being made to read
by a vernier placed upon one end to 3′ of arc. Mr. Henderson
prefers plain slit sights instead of slit and window sights, as
before stated, which avoids the accidental derangement of
the horse-hair.[20] The instrument combines some of the parts
of Lean's dial, to be next described. Illustration of this
instrument is given in Mr. B. H. Brough's Mine Surveying.
503.—Lean's Dial.—The inventor of this instrument
was Mr. Joel Lean, a Cornish mine manager, who was well
known at the end of the 18th century for his important improvements
in mining apparatus. This dial is still popular in
Cornwall and other mineral districts. In general construction
the sights and limb on which they are mounted are the same
as in the plain dial just described, art. 491. The legs are also
the same—other parts are additional or modified. In the
engraving, Fig. 206, the sights and vertical arc with its telescope
are shown mounted together on the limb. This is done
to show the relative position of these parts: they could not in
practice be used simultaneously upon the instrument. They
are separately attached to the limb by the same pair of milled
headed screws. As a general rule the telescopic arrangement,
which will be described further on, is used above ground and
the sight arrangement below. The details of construction are
as follows:—
504.—The Tripod—of the mining circumferentor, in common
with many other forms of dial, has the legs fitted directly
between book-pieces, which are fixed to the lower parallel plate,
as shown Fig. 206, thus dispensing with the separate tripod
head, common to levels and theodolites. Otherwise the
parallel plates are similar to those described for levels and
theodolites, art. 193, and are used in the same manner. The
upper parallel plate in this dial carries the male axis, which fits
into a socket attached below the centre of the limb in the
manner just described for plain dial. The tripod stand,
with its parallel plates attached, is generally packed in a pinewood
case when out of use. The reason for attaching the legs
directly to the lower parallel plate instead of having a tripod
head is that it saves the extra elevation of the instrument by
the depth of one screw fitting. At the same time it must be
observed that it exposes the axis to the air by separating the
instrument at this part when it is put by, which renders the
axis difficult to be kept lubricated and in smooth working
order. On the Continent and in America it is general to
detach the legs only, on a plan shown, Fig. 85, p. 140. This
keeps the axis attached, and is probably the better plan,
although it may be found a little more troublesome to erect
the instrument.
Fig. 207.—Section of compass-box and axis of Lean's dial.
505.—Revolving Compass forms a part of Lean's dial and
many other dials. It is shown in section Fig. 207. As the
axis is constructed in this instrument, the socket-piece A is
ground to fit the male axis S, and at the same time it is
shouldered to fit the surface of the parallel plate T to prevent
excess of friction on the axis fitting, so that it may move easily to
set the needle to magnetic north of the compass-box if desired.
The socket-piece is attached to the compass-box through a
collar. The compass has a step D which is divided to degrees
on its inner edge to read to the point of the needle, and
similarly to degrees on its outer edge to read with a vernier
scale, shown D to 3′. The vernier is set off on each side
of the zero line in ten divisions, which are figured 30, 45,
0, 15, 30, art 322, p. 184. The upper surface of the needle
is made level with the upper surface of the step. The bottom
plate of the compass-box is divided to 10°: in some difficult
positions in the use of the instrument this last is the only
reading that can be sighted. The compass-box, which carries
the vernier B, is fixed centrally on the arm plate. The arm
plate is centred upon a step fitting between the compass
and the socket-piece, so that it carries the whole
superstructure of the instrument around the compass, its
relative position being read by the vernier. The edge of the
compass plate is formed into a toothed wheel, as shown in
section in the figure on the right-hand side, into which a
small wheel or pinion R is fixed in a box upon the arm plate
that works by means of a large milled-head screw P. By
means of this milled head the instrument may be rotated
about the compass, so that the line of division on the
compass step reading into the vernier performs the functions
of the horizontal limb of a theodolite. In this manner
angles may be taken by means of the vernier, quite irrespective
of the reading of the needle. When the compass is set
to the zero of the vernier at north (360°) it may be fixed in
this position by means of a pin fitting in opposite holes to the
arm plate and bottom plate of the compass, not shown; and
when thus fixed the needle only is used as in the plain dial.
Between the collar-piece C and the socket-piece A a wedge-shaped
lift raises the needle off its centre by pressing in a
slide shown at L.
506.—The Vertical Arc is erected upon the limb as
close as possible to the compass-box, so as to leave
room for a level to be placed between the seatings of the
arc and sights. The axis of this arc is a simple hinge
joint, brought down nearly to the surface of the cover
which protects the glass of the compass-box: this is done to
keep the instrument as low down as possible. The telescope,
which is of the same kind as that used for the theodolite,
traverses the arc tangentially, permitting it to be adjusted for
reading the arc by its vernier by means of a clamp and
tangent motion at any position. The arc is divided on one
side into degrees, and reads by the vernier to 3′ in the same
manner as the horizontal circle. On the opposite side it is
divided with a percentage scale of difference of hypotenuse
and base which reads to an index line. A spirit level is
placed under the telescope, in line with its axis, to which it is
adjustable by means of capstan-headed screws. The telescope
when fixed is placed just sufficiently above the arc to permit
it to be brought to a vertical position at 90°, or a degree or
two over this, with the full aperture of the object-glass beyond
the extreme edge of the horizontal circle. By this construction
a bearing may be taken of any object upon the surface
from the top of a shaft, and a line may be sighted to the
bottom of the shaft in exact azimuth with this without
changing the horizontal adjustment of the instrument. In
the same manner, if the vertical axis be perfectly adjusted by
the level on the vernier plate, the telescope at 90° + n will
indicate a perfect vertical to the station of the instrument
above, the + n being the allowance to be made for the eccentricity
of the telescope, provided the collimation is perfect.
If this is not perfect, the vertical may still be taken accurately
by means of three observations taken from equal division of
the entire horizontal circle, say at 360°, 120° and 240°.
507.—It will be noticed that the vernier to the compass
circle comes directly under the vertical arc, therefore it can
only be read obliquely when this arc is mounted: with open
sights the vernier can be read directly. This is a defect in
this instrument, as the vernier is mostly required for exact
work when the telescope is used.
508.—Lean's dial possesses the qualities 1 and 4, pointed
out in art. 490 as important to dials; in 4 the power of
setting the telescope to the vertical with great facility being
the most important. This quality has kept the dial a favourite
with many mining engineers in mineral districts for many
years. Otherwise for general work the compass is most
inconveniently obstructed by the arc above it, and the
instrument, although, of course, of less height than the
theodolite, some of the functions of which it performs indifferently,
is too high to be used in shallow workings. The
height of a 5-inch Lean's dial to the central apex of the
telescope is 9½ inches; to the top of the sights placed in a
level position, 8 inches; weight of instrument only, 6½ lbs.
The 6-inch instrument is about 1 inch higher, and weighs
1 lb. more.
509.—A number of variations have been made in
Lean's dial; but none that the author is aware of has
proved successful. In an instrument of this class, designed
by Mr. J. Whitelaw,[21] the vertical arc is brought
down to the compass-box by placing pivots on each side of
the box after the manner of Hedley's dial, to be next
described. This lowers the instrument about an inch, and
is an improvement; but this is effected at the expense of
placing a striding bar across the compass box, which is a great
impediment to the clear sighting of the compass.
Messrs. Newton & Son have made the telescope to detach
from the arc of Lean's dial to be placed directly upon the
limb. In this way they claim for it that it combines a
miner's dial and dumpy level. The arrangement appears to
the author to make the instrument top heavy as a dial, and to
give too little power for a good level, added to which it costs
about the same as the two separate instruments of equal
quality. Of course any telescopic dial may be used as a level
by clamping it at zero. Practical surveyors generally object
to compound instruments that entail many loose pieces.
These were a fashion in the middle of the nineteenth
century.
510.—Examination of Lean's Dial.—As regards the
stand, sights and parallel plates, particulars have been
given upon the plain dial just described. The revolving
compass should be turned round by the milled head P, Fig.
207, of the pinion wheel R to see that the compass-box
revolves steadily at all points without disturbance of the
needle. It may also be particularly observed that the needle
does not oscillate at any part of the circle, to be sure that the
compass-box is quite free from iron. The vernier should be
examined at four opposite positions of the needle to see that
the needle is truly centred and is in accord with the vernier.
The lifter should be tried to see that it lowers the needle
gently on the centre, and that it holds the needle firm off the
centre. The telescope should be set up and directed to an
object, and all parts of the instrument clamped and the needle
observed. The telescope should then be detached and the
sights set up, to see that they range fairly with the telescope.
If they do not do so the difference should be noted and
treated as a constant in any case of change from telescope to
sights on the same survey. The difference ought to be very
small, otherwise the instrument should be returned to the
maker.
511.—The Adjustment of Lean's Dial is the same as that
of the plain theodolite, so far as this can be carried out;
but generally the adjustment is depended upon as it leaves
the manufacturer. For the general use of this and other
dials some notes will be made further on, but as regards
vertical position and the taking of azimuth angles, for which
this dial is specially adapted, notes may be made here.
512.—To set a line in Azimuth with one taken above
Ground.—This is necessary where there is local attraction to
the needle below, or there is a suspicion of this, so that the
needle cannot be depended upon with certainty. The
instrument is placed on staging over the pit and a vertical is
taken to its centre either by the means briefly discussed art.
506 by the instrument, or by suspending a plummet, a ball,
or a bullet from the centre of the instrument by a thread and
burning the thread when the ball is free from vibration. The
ball is allowed to fall upon a smooth horizontal surface formed
of earth or otherwise, in which it makes a dent which will be
vertical to the axis of the instrument if the ball has not been
deflected by ventilation currents. Two lights, as distant as
possible to be seen to range in line with the dent, are
placed at the bottom of the pit. The lights, if thought
desirable, may range north and south with the needle; but in
whatever direction this may be set the correct azimuth of this
may be taken by cutting them by the webs of the nearly
vertical telescope of the dial; and this azimuth may be
correctly set out on the surface by a pole or other station
mark, or its true direction by a pair of these, one on each side
of the pit's mouth, the second station mark being set out
after a shift of the horizontal vernier exactly 180° on the
circle. A straight-edged flooring board painted white may be
made to cut the line from light to light, which is more
definite for bearing than the lights themselves.
513.—Hedley's Dial, the invention of John Hedley,
H.M. Inspector of Mines, in 1850, has now become the most
popular form of miner's dial, modified, however, from its
original form in various ways. The peculiar feature of this
form of dial is that the sights move upon a framework centred
upon a horizontal axis, so that they may by a rocking motion
take horizontal angles within a wide azimuth without obstruction
to the sight of the compass.
514.—For consideration of the general features of Hedley's
dial, the tripod and the ball and socket are the same as that
described for the plain dial; but the socket is not cut down
on one side to change the position of the axis, as the compass-box
in this instrument is required to be kept uniformly level.
The general appearance is shown Fig. 208. For districts in
which the working strata are fairly level, parallel plates are put
to this instrument in place of the ball and socket joint. The
compass-box revolves, as that described for Lean's dial;
but it is more general in this instrument to have a clamp and
tangent motion, as in a theodolite, than the rack and pinion
motion. Two levels for setting the compass horizontal
are sunk into the plate of the compass-dial low enough to
miss the edge-bar needle. The step of the compass is divided
into degrees and the plate of the dial to 10°. The vernier,
which is placed on the opposite side of the box to the vertical
arc, reads to 3′, as described for Lean's dial.
515.—The Rocking Centre forms the peculiar feature of
Hedley's dial. From opposite points of the under side of the
compass two pivots are projected. These are set perpendicular
to the vertical axis, which is placed above the ball and
socket. The pivots are placed central with the vernier and
in line with E. to W. of the compass when this is set to zero
(360°). The pivots form the axes of a stout ring—rocking
ring—which surrounds the compass-box, with space sufficient
to clear it when the ring is rocked about its axis. The ring
has two extended arms which carry sights as shown. These
turn down upon the compass-box when out of use. One of
the pivots is prolonged for about ¾ inch beyond the outer circumference
of the ring. The prolongation is made generally
of triangular section. This forms a fitting to the vertical arc,
which is attached by a milled-headed screw when required, the
arc being an encumbrance when this dial is used for making
horizontal plans only.
516.—The Vertical Arc, with its index arm, forms a
separate piece. The arm is centred upon the arc with a
ground fitting, which is retained in its position by a collar
fixed with three screws. The arm-piece forms the axis,
through the centre of which a triangular hole is made to
fit the triangular prolongation of the pivot, so that the index
arm remains fixed, and the arc moves with the rocking ring,
to which it is held by a pair of dowels. The arc is divided
into degrees on the outer edge of its surface, and a scale of
difference of hypotenuse and base upon its inner edge. The
graduations read to a single index line upon a fiducial
edge carried down from an opening in the index arm.
Hedley's dial can be locked by a pin, which is attached
to the under side of the compass-box, so as to work by the
compass only. The ring can also be locked level with the
compass by a sling latch-piece so as to convert it into a
plain dial.
517.—The great merit of Hedley's dial is that the rocking
centre permits a greater range of open sighting than any other;
and the instrument is very low, permitting its use in
shallow workings. Further, that it is a very strong instrument
to resist accidents, and is very portable. The height of a
6-inch Hedley's dial above the tripod head, in a level position,
is 9 inches to the top of the sights. Weight of instrument,
7 to 10 lbs.
518.—In the author's simple dial, Fig. 209, which is of
a modern form, the ball is clamped by a capping-piece over
it moved to clamp by two stout pins. This form gives a
little less height and still holds the dial firmly. The horizontal
axis moves rather stiffly, so that no clamp to the arc
is required. It is a very cheap form of dial, but substantially
made. It answers for a small mine survey.
519.—There have been many variations made and proposed
for Hedley's dial. Mr. Casartelli, of Manchester, places
the arc over the centre of the compass-box.[22] This plan is
intended to make the rocking centre firm; but the arc interferes
a little both with the sights and the view of the compass
box. Messrs. Davis and Son connect wheel-work with the
arc, so as to magnify the scale of motion. Other less important
variations in Hedley's dial are common.
520.—Examination and Adjustment of Hedley's Dial.—The
general examination of the stand and of such parts
of the instrument as correspond with Lean's dial is the same
as just given. The rocking ring should be lifted and pressed
down at each end alternately to see that there is no loss of time
on the axis. The arc should be examined in like manner.
The dial should be set up in front of a plumbed line to see
that its sights range properly when the instrument is set level
by its bubbles. A point should be observed, say through
the hole and cross webs at the top of the sight; and with
this point kept in view the rocking ring should be moved
upwards or downwards so that the point traverses the plumb-line
to the extent of the rocking motion. If it does not do
so, possibly the transverse level in the plate of the compass-box
may be adjusted to make it do so; but in this adjustment it
must be particularly observed that the balance of the needle
remains so that it still reads the graduation with its upper
edge, and that the sights traverse the same plumb-line when
turned about, as it is possible to set the level right with one
pair of sights and throw other parts out. There are no simple
means of adjustment provided, so that if the instrument is not
accurate it should be returned to the maker for correction.
521.—Improvement in Hedley's Dial, by Addition
of Telescope.—Surface work being generally performed with
the theodolite, surveying with open sights following this
cannot be effected with sufficient accuracy; therefore there
becomes a necessity for the use of the telescope, which was
first placed on this instrument by the author at the suggestion
of Mr. W. Preece, C.E. In mines, also, although sights
present often the only possible means of directing angular
positions in cramped and tortuous workings, on the other
hand, better work can very often be done and the telescope
be conveniently used. Under these conditions, this addition
forms an important improvement in the instrument, to be at
hand to apply when desired. The telescope of this instrument
detaches exactly as with Lean's dial, but the sights are
made with an angle piece, so as to extend them to a distance
of about 12 inches apart for sighting. Fig. 211 is of one
cranked sight. The instrument illustrated Fig. 210 has
parallel plates, art. 193, p. 99, suitable for fairly level
workings. A ball and socket joint is sometimes fitted to this
instrument in place of these.
522.—The Telescope is placed on Y's, and is of exactly
the same form as that described for a plain theodolite. The
Y's in this instrument offer a great convenience for reversing
the telescope for back sights in range when the vertical axis is
fixed. The level under the telescope is sufficiently good to
convert this instrument into a level for drainage, etc., when
the rocking ring is locked with the compass. Its examination
and adjustment are the same as those last given, except for the
telescope, which is the same in all particulars as that of a
5-inch plain theodolite.
523.—Improved Miner's Dial.—The illustration given,
Fig. 212, is of the form of dial introduced by the author, a
part of the arrangement only being of his own design. The
telescope with Y supports is the same as that just described,
and the sights, not shown, are cranked in the same manner as
shown Fig. 211. The horizontal circle, instead of being
in the interior of the box, is placed on the exterior rim,
and reads with two verniers—not for correction, but for
convenience of reading in different positions. The compass
is divided upon the upper surface of the step to degrees, and
in the same manner on the interior cylindrical surface of the
step. This last often permits the compass to be read in a
close working when the upper surface could not either be
lighted or sighted. This plan was used on old circumferentors.[23]
The plane of the compass is divided to 10° as
usual. The compass adjusts by clamp and tangent motion.
The axis of the instrument is supported upon a ball and socket
arrangement designed by the author for roughly bringing the
compass to level, and a parallel plate adjustment for final
setting. The ball is fixed by clamping a pair of plates together
by a thumb-screw. Each plate is hollowed in the
centre to hold nearly half the ball. When fixed, the instrument
is found to be very rigid.
524.—A plan of clamping designed by the author to
meet the conditions of the tribrach system of adjustment of
equal rigidity to that above described, is shown in elevation,
Fig. 213 B. In this the upper half of the socket is screwed
down outside the lower half socket by means of three projecting
handle pins. This is a somewhat neater arrangement
than that shown in Fig. 212. Either of the above-described
ball arrangements elevate the instrument, and are better
omitted for close working if there is a special adjustment in
the tripod attached to the instrument, as that to be described
presently, which will be found sufficient in most cases. The
height of the instrument from the tripod is about 6½ inches;
weight, 11 lbs. for both parallel plate and tribrach adjustments.
525.—Adjustable Tripod for Dials.—The author's improved
form of tripod is adjustable to all heights between
30 inches and 57 inches, Figs. 213, 214. Each leg is formed
of two stiff bars of mahogany, shown in detail, Fig. 214 G of
section, about 1¼ inches by 5/8 inch, and a third bar or leg G′
of about 1¼ inches square, which slides between the other
two. The sliding surfaces are grooved and tongued together
in V grooves in the solid. Two strap-pieces of brass SS′
are fixed near the ends of the bars. One of these S′ is
firmly soldered to a boss-piece that takes a thumb-screw,
which has quite sufficient power to hold the leg G′ firmly at
any position of extension. It is a rigid stand, which may
leave the tripod head nearly vertical upon any inclination of
the floor surface.
Fig. 213.—The author's adjustable ball joint and socket tribrach stand.
526.—Hedley's Dials, with Pastorelli's and Hoffmann's
Ball Arrangements.—By either of these arrangements
the ball and socket is brought down close into the
parallel plate adjustment so that the dial is of less total
height. Hoffmann's is now becoming the most popular
system, as practice has shown it to be the most perfect
for mining survey. By either of these arrangements the
ball and socket is clamped by the same screws that bring the
instrument to final position. In Pastorelli's arrangement[24] the
socket is drawn down upon the ball by the adjusting screws.
In Hoffmann's[25] the ball is pressed up into the socket, which
is the exact mechanical equivalent. When the screws are
lightly clamped the ball can be moved with moderate force,
or even quite loosely by careful adjustment; and in either
case, when the ball is once set, care must be taken to keep
pressure constantly upon it during the final adjustment by the
screws. The general arrangements are shown in two Figs.
215, 216, which are taken from the drawings of the respective
patents. In Fig. 215, va, the axis of the instrument terminates
in a ball e which works in a cup f. The axis has also a portion
of a ball of greater radius b concentric with the lower ball e.
The upper parallel plate d is cupped over this ball. When
the parallel plate is moderately free on b, the axis va may be
set to any angle within the range of the central opening of d;
and as the friction upon bd is greater than that upon fe, the
axis moves by the adjustment of the parallel plate screws aa.
In Fig. 216 the action is precisely the same, except that the
pressure is upwards instead of downwards. In Fig. 215 there
are springs s under the parallel plate screw heads to keep contact
when the screws are loosened. In Fig. 216 the spring
is a plate under the screws s, the action being the same in
both cases.
Fig. 215.—Pastorelli's ball and socket adjustment.
527.—Some objections have been made to this class of
arrangement, over the simpler one of clamping the ball independently
and then adjusting by the screws, as being more
complex. On the other hand this compound arrangement has
the merit in underground instruments of being lower and more
compact, which is very important. The author has somewhat
modified the arrangements of Hoffmann's head, as shown in
the engraving on next page, to render it still more compact
for mining instruments.
Fig. 217.—Improved Hedley's dial, mounted on Hoffmann's head.
528.—In Fig. 217 an improved Hedley's dial is mounted
upon an improved form of Hoffmann's head. The whole
arrangement is very compact, rigid, and rapid in action.
The height of this dial is 9½ inches; the weight 8 lbs. for
a 6-inch instrument, in aluminium 5 lbs.
529.—Hedley's Dial with Cranked Rocking Centre.—One
defect of the Hedley's dial, which in certain cases makes
Lean's preferred, is that with the rocking ring the sights cannot
be brought vertical for looking up or down a shaft. The
author has devised a means of getting over this difficulty by
making the ring of cradle form, thus throwing the bearing surfaces
to sufficient height to cause the ring, when the arc is
raised to about 90°, to fall under the compass-box and its
adjustments, Fig. 218. This dial presents possibly the greatest
refinements of the Hedley principle at the time of its patent,
No. 9134, 1898. Since this date the reviser has introduced
a few further refinements as illustrated at Fig. 219.
This instrument has tribrach levelling with quick-setting
spherical lower plate, a sliding tribrach for centring over any
desired spot, and full clamp and tangent motions to both horizontal
centres. The dividing is upon silver on a 6-inch covered
limb reading by two verniers to single minutes, folding sights
interchangeable with telescope Y's, and this dial may be used
upon any staging without its stand. The somewhat peculiar
shape of the cranked rocking ring is necessitated by the
movement of the sliding tribrach, which it has to clear in all
positions for reading vertical sights.
530.—Accessories Common to Hedley's Dials are
a vertical reflector and a diaphragm illuminator.
Reflecting Cap.—One of the disadvantages of Hedley's
dials over Lean's was pointed out to be the impossibility of
vertical sight where the two last described dials are not used.
Some years ago the author devised a plan of obtaining this
vertical sight by reflection by means of a reflecting cap,
Fig. 220, placed over the end of the telescope. The cap is
formed of a tube which fits the outer surface of the object end
of the telescope. This is prolonged sufficiently to lock it by
a dowel in correct position against revolution when the points
that are used for index in the diaphragm of the telescope are
vertical. The tube is cut in two and hinged to turn up,
as shown in two positions H and H′. When turned up it
leaves the tube open for direct vision. A reflector R is placed
in the cap, and there is an opening below it equal to the full
aperture of the telescope. It is easy to see that by this means
a pair of lights or a line may be sighted up or down a shaft,
and the azimuth of its direction be reflected to follow a line
by slightly rocking the telescope upon its pivots. This may be
done, however, with more refinement if there is a clamp and
tangent motion to the vertical arc, which is placed only on
first-class instruments.
531.—Illumination of the Diaphragm for observing the
webs or a point, may be conveniently effected underground
by employing a conical ring reflector in front of the object-glass.
The aperture through the cone leaves the field of the
object-glass nearly free, as it is only necessary that the cone
should project in front of this for a very small distance. This
reflector is placed over the object end of the telescope when
it is required, just the same as the ray shade. The vertical
reflector, Fig. 220, goes on the same fitting. The reflector
Fig. 221 R may be made of silver or platinum. A light
placed anywhere opposite this, and perpendicular to the axis
of the telescope will throw sufficient light to show the webs or
point. Sometimes a simple, plain mirror placed on an arm
bent over to the centre of the front of the object glass, in
which the mirror stands at 45° to the axis, is used; but this
plan is not so good as that shown Fig. 221, as the light has to
be brought to face the mirror quite perpendicular to the axis
of the telescope, and this process is frequently difficult to
accomplish underground.
Fig. 221.—Conical reflector to illuminate axis of telescope.
532.—Continental Forms of Miner's Dials.—On
the Continent generally sights have been abandoned for
miner's dials. The telescopes are usually of short form,
with large object-glass and wide field of view. The
telescope is generally placed eccentrically, which permits the
instrument to be made of very low form. There is a certain
amount of disadvantage in the eccentricity of the telescope, as
angles cannot be taken direct from the centre of the instrument
but this is compensated for in the plotting by making
each station a small circle equal to the amount of the eccentricity
of the instrument to scale, and setting off angles
tangentially to this, which may be done with a little more
trouble than that of plotting the angle from a point.
533.—French Miner's Compasses.—Fig. 222 shows
the simpler form of this instrument. The needle is open and
quite free from obstruction. The telescope is centred about
level with the compass-box. The vertical axis has clamp and
tangent adjustment. The transverse axis is set entirely by
hand as with the plain dial. The instrument is set up level
by its tribrach adjustment. The height with 5-inch needle in
a level position, without tripod head, is about 5 inches;
weight about 11 lbs. without the tripod table. The extremely
squat form of the instrument permits its use in very close
workings, with a short tripod, if the workings are fairly level.
It is used also as a cheap form of surface surveying instrument,
consequently it is not generally very carefully made.
As a good instrument of the class it cannot compete with
that to be next described.
534.—It will be seen by Fig. 222 that the instrument has
no direct connection with its stand or tripod. This is general
with all French and German instruments, even with
theodolites and surveying levels, it being the rule that the top
of the tripod should form a kind of table upon which the
instrument is set up. The table is almost uniformly made of
wood, and is somewhat bulky and clumsy in construction,
therefore not very well adapted to mining surveying, particularly
in wet mines. Neither is the tribrach system of
adjustment, unless it is supplemented by some form of ball
and socket arrangement, or with adjustable stand. This
subject will be further discussed in the description of superior
instruments presently.
535.—Miner's Transit Instrument.—This is the
théodolite souterrain of the French, and is of a construction
very general throughout the Continent—Fig. 223. The
compass is placed clearly in view. The vertical axis has a
clamp and tangent motion to bring the compass to exact
bearing if desired, or to permit surveying with the compass
only. The axis has also a clamp and tangent screw to the
exterior divided circle, which reads with two verniers. The
telescope is placed on the side of the instrument, and has
clamp and tangent motions to read the vertical circle which
the vernier traverses in transit. All the divisions are made
strong to be read clearly by lamp-light, either to 1′ or 3′ by
the vernier, as desired. A second level is generally placed on
some part of this instrument at right angles to the one shown.
The instrument is balanced by a counterpoise weight to keep
its vertical axis in equilibrium. The height of an instrument
with 5-inch needle is about 6¼ inches; the weight without
the tripod table is about 14 lbs. The tripod table is constructed
in various ways by different makers.
536.—The value of the transit principle applied to mining
instruments, for taking back and fore sights for hanging lines
in undulating strata, by simply turning the telescope over on
its axis, cannot be overrated for exact work such as the telescope
alone can perform. Further, with this construction the
inclination and difference of hypotenuse and base for correction
of the chain measurements may be taken. But it is
important in the use of this instrument to observe the side
upon which the telescope is situated at the time of observation,
right or left. For this a column should be placed in the field-book.
As a rule fore sights are taken with the telescope left;
back sights with the telescope right, remembering that in
plotting all angles are taken eccentrically from the axis of the
instrument, that is, tangential to a small circle which represents
the eccentricity of the telescope according to the scale used in
plotting.
537.—The Tripod Table of a superior class of Continental
instruments, whether this is used for surface or mining surveying,
is usually made with some form of adjustment to bring
the upper surface approximately level before setting up the
instrument. In this case the table is made a combination
of wood and metal; and the only difference between mine
and surface tables is that in the former case there is a jointed
arrangement for shortening the legs, but not in the latter.
The table surface for superior work is generally adjusted to
approximate level either by a ball and socket joint or by a
pair of knee joints placed at right angles to each other, with
clamps to hold it firmly when adjusted. Radial V-grooves are
commonly made for the points of the tribrach, and a hole is
sometimes made in the centre of the table for suspending a
plummet from the axis of the instrument. There are many
forms of tripod table in use, a modified form of one of which
in metal will be described further on in the chapter on plane
tables. There are certain merits in this table arrangement over
connective stands, as the table is convenient to set up fairly
level, and the instrument need not be exposed until the operation
is complete. On the other hand there is more risk of
upsetting and injuring the instrument by accident when loosely
placed on the table. There are, however, schemes more or less
complicated to prevent this, as by a screw fixed in the tripod
head acting against a spring which draws the instrument constantly
down when attached, and other contrivances, none of
which is perhaps equal in simplicity to Everest's arrangement
for the tribrach, Fig. 191, p. 273, on this particular
point.
538.—Improved Mining Survey Transit.—The
author has modified the form of instrument last illustrated,
retaining the general principles. In Fig. 224 the compass is
made larger and reads in the inside of the step as well as upon
the surface, which is the only way in many cases that it can
be read in a close working. The reading of the horizontal
circle is placed nearly vertical, so that it may be seen clearly
when the instrument is near the roof of the mine. The vertical
circle is made smaller than the horizontal, as this circle,
as a rule, is of less importance, and it can generally be read
more exactly from its convenient position. The arrangement
also permits greater freedom for the use of the tribrach. The
telescope is made with a much larger object-glass than is
usual, to take a wide field of view; therefore it forms a
good level.
539.—Two pairs of sights are placed upon the telescope,
either for roughly sighting an object or station, or to be used
in difficult positions. These are made on a new principle,
shown Fig. 226. The sights are placed in two windows, each
of which is formed of a needle point of platino-iridium. In
sighting, the points are brought over each other, the distant
lamp or object appearing between them. A sharp point gives
much clearer definition than a hair, as it subtends of itself no
angle to the axis of the eye. ab represent the pair of sights,
c as they appear superimposed. This instrument is very conveniently
fitted with subtense points in the telescope, by which
distances may be taken with the author's staff, Fig. 105, p. 158,
without actual measurement, for the particulars of which see
next chapter. The subtense points are arranged to measure
the staff either vertically or horizontally. As a rule it will be
found with this instrument better to take rough positions first
with the points, and afterwards by the telescope. The instrument
cannot be recommended universally for underground
surveying, but it is valuable under certain conditions in close
strata. Its height is 6 inches and weight 13 lbs.
Fig. 225 is an ordinary tripod, like that used with a level.
This is preferred by many mining engineers as being firmer
than any jointed arrangement, and is sufficient for working in
a seam of fairly equal thickness. The legs vary from 9 inches
to the full height, 5 feet 4 inches. An ordinary set of three
tripods would be 1 foot 6 inches, 3 feet 6 inches, and 5 feet
4 inches.
540.—Mining Theodolite.—This theodolite is of
the most convenient form for underground railways, Fig.
227. The telescope transits on its axis to be brought to
a vertical position. The vertical axis is pierced so that about
10° of angle may read below the vertical most conveniently
by means of a diagonal eye-piece. The centre is supported
upon a sliding fitting so that it may be displaced about 1¼ inches
about the centre of the tripod and be clamped to its position.
The horizontal axis is pierced to permit the diaphragm to be
illuminated by a lamp. The tripod stand is fitted with sliding
legs, if it is to be used for mine survey, to adjust for irregularity
of surface of the ground and for low workings. The form of
the instrument is very compact, rigid, and portable.
541—Prismatic Mining Survey Compass.—This
arrangement is designed by the author for very close
workings. The entire depth of the instrument being only
4 inches, any reading may be taken from one point of view
simultaneously with the observation. The 5-inch compass,
Fig. 228, has a floating ring divided to half degrees, and
the reading of this is reflected through a prism so that it
appears directly under the fore sight, to be seen at the same
time. The prism has a slight magnifying power, so that by
estimation a bearing may be easily taken to ¼ degree or nearer.
The principle of the compass is described art. 148, the prism
art. 55; but in this case the prism is raised and has a second
lens under it, so that it forms a kind of prismatic Ramsden
eye-piece. This elevation of the prism permits sighting under
a certain amount of downward inclination, regulated by the
height of the prism and the length of the back sight, as well
as the upward inclination which is common to the use of
prismatic compasses. The most important feature in this
compass is the mode of lighting, which is effected by means
of a large prism, Fig. 229 R, placed under the compass-box in
a square tube, and a small movable lamp to throw light into
it, Fig. 228 L. The floating ring, Fig. 229 C, is made of
celluloid, quite transparent, so that the divisions upon it are
clearly read through the small window in the cover of the
compass-box. The fore sight W is jointed in two folds jj,
so that it extends the distance of sights to about 10 inches
apart in use, and yet folds away closely to the compass for
portability when out of use. On the near sight a cut is
made transversely to the slit. A second similar cut on the
fore sight is made level with this to take levels roughly. About
20° are set off on each side of the cut on the fore sight, so
that angles of altitude may be approximately taken—although
the instrument is not well adapted to this. Two levels set at
right angles to each other, to be used in setting up the instrument,
are fixed under the compass-box. Weight of instrument,
4¼ lbs. without the tripod stand.
542.—Hanging Compass.—A very general method of
underground surveying in mineral districts upon the Continent
is by means of the hanging compass; this instrument is therefore
generally found in catalogues of surveying instruments in
France, Germany, and Italy. The original hanging compass
was invented by Balthasar Rössler about 1660.[26] It appears
to the author to be a valuable instrument for surveying in
tortuous mineral veins where sighting is difficult. The measuring
line upon which it is used is either a hempen or copper
cord or a chain. The compass is hung upon the cord or
chain, which may be stretched to any point out of sight, and
the compass will then indicate the bearing of the line. In
Germany two instruments are used simultaneously—the hanging
compass for taking the bearing, and a clinometer, composed
of a light brass semicircle graduated to degrees, with a small
plummet for taking the inclination.
543.—Hanging Dial.—Fig. 230 represents a modification
of the hanging compass designed by the author,
by which inclination may be taken simultaneously with
bearing, if the dial can be suspended near the centre of
the line or chain where the catenary curve is parallel with
its points of support.
544.—In the construction of the instrument a circle of
brass about 6 inches diameter, ½ inch wide, and 1/8 inch thick,
has two arms extended to 12 inches at the upper part, on the
end of each of which a hook is formed for hanging the instrument
upon a cord or chain. Upon the lower part of the
circle a fork-piece, with a bearing clipping the circle, is attached
by two screws. The fork-piece is constructed to support two
axes concentric to the vertical circle, in which the compass-box
is suspended much above its centre of gravity, so that it
falls by its own weight in use to a level position. Upon the
edge of the compass-box an index is brought up nearly to the
interior surface of the vertical circle, which reads into graduations
upon this circle into degrees and half degrees.
545.—A Light Hanging Clinometer, Fig. 231, shows
the kind that is used in Germany, of 5 inches diameter,
graduated to degrees, made of thin brass. It is packed in the
case with the hanging compass, described art. 542. The ends
of the semicircle are formed into hooks for hanging on the
line. The plummet has a horse-hair line, which cuts the
degrees. The clinometer may be used only when the hanging
dial Fig. 230 cannot be suspended near the centre of the line,
in which case this light semicircle will cause less deflection of
the line, and give the inclination approximately. For further
details of the use of the hanging compass the reader is referred
to Mr. B. H. Brough's admirable work on Mine Surveying.
546.—Semi-circumferentor.—This simple instrument
can scarcely be enumerated with mining surveying instruments,
as it is much more used for surface work; but being
of the class of circumferentors to which miners' instruments
generally belong, this is the most convenient place for its
description. It has very general use on the Continent. Its
construction is very simple, Fig. 232. It is supported on a
ball and socket joint. The socket is formed in two pieces,
which are clamped together to hold the ball by a winged-headed
screw. One pair of sights is mounted upon the
extreme ends of lugs upon the limb. The limb is divided to
half degrees. When the ball is loosely clamped the fixed
pair of sights may be adjusted to cut any desired object. A
second pair of sights is jointed upon an axis to move
centrally between the first pair. These are made shorter to
pass within the first pair to any angle around the arc, except
the small angles with which the sights themselves interfere
when they are superimposed. The movable sights carry
verniers to read on the limb to 2′. There is a small compass
attached to the limb. As a cheap instrument for taking
angles approximately it is very useful, particularly for workmen
employed in carrying out work from drawings plotted
from a survey by a better instrument. The weight of the
instrument with 6-inch circle is about 2 lbs.; height above
tripod, 7 inches.
547.—The tripod of this instrument is made of wood.
The head is shown Fig. 233. The legs are simply extensions
of the upper parts, which are shown attached with bolts.
The point of each leg has a steel shoe to prevent it slipping
in use. The head is turned to a cone, which fits into the
socket-piece of the instrument and permits it to be rotated
with moderate friction. The head is made of triangular
section that the legs may be clamped firmly to it. When
used for underground work a separate set of short legs is
provided, which attach to the head by the same bolts.
548.—Lighting Underground.—The old underground
station, formed of a lighted candle or lamp, is not now considered
good in practice where surface land is exactly defined
by boundaries held by legal clauses and rights. The system
of underground surveying now very generally followed is that
first recommended by Mr. Thomas Baker, C.E., and afterwards
fully developed by Mr. H. Mackworth,[27] by which a
station taken for angular directions is formed by the position
of the centre of a tripod. For this system three tripods are
provided for each instrument, with head adjustment complete.
These tripods are made in such a manner that the instrument
can be placed on any one of them in a level position. Two
lamps are provided, the flame of either of which will take the
position of the vertical axis of the instrument when the lamp
is placed upon the tripod formerly occupied by it. It is
easily seen that by this system fore and back sights or angular
positions can be extended with all the accuracy that the
uniformity of the flame of the lamp will permit.
549.—Mining Survey Lamp.—The author constructed
this lamp from an idea given to him by Mr. Geo. Kilgour,
C.E., Fig. 234. It is somewhat different from the ordinary
form. Its accuracy does not depend upon the regularity of
the flame. A vertical axis is formed under the lamp, which
is made to the same fitting on which the mining survey
instrument is placed. The lamp is placed entirely eccentric
to the vertical axis in such a manner that a vertical line
formed by a wire upon its face may stand central and linear
with the axis. A cross line is also placed at the same height
above the tripod head as the centre of the axis of the telescope
or cross sight. By this means, although the lamp throws its
light broadly in one direction only, the cross is a perfectly
defined object, easily picked up and brought to exact bearing
in the instrument when placed upon another tripod. In converting
this lamp from a fore to a back sight it has simply to
be turned half round on its axis, which is done without any
displacement of the relative position of the cross in vertical or
horizontal directions. Where this lamp is required in mines
liable to fire-damp, it is made on the safety principle of the
Davy lamp.
Electricity has been applied to lamps for surveying. This
plan has been found successful where a secondary battery is
used that can be charged by a dynamo upon or in the mine,
or with some of the modern dry batteries.
550.—Mining Targets.—The three tripod system has
been much improved by the introduction of accurate targets
made specially for the instrument used, and interchangeable
with the instrument on either stand. The reviser has
designed several forms of these. They are generally used
with a mining theodolite for high-class mine surveying,
and the lower part is similar to the lower part of the
theodolite they are used with. Instead of a horizontal
circle, they simply support a plate carrying cross levels, and a
pillar carried up to bring the target level with the optical
centre of the telescope of the theodolite; this part is made to
fit the outer centre of the lower part into which it is held by a
special clamp. The theodolite is made with a double outer
vertical centre, and this is held to the lower part similarly
clamped, so that the theodolite and targets all lift out of their
centres and interchange with each other. A complete mining
set of this description is shown at Fig. 235. This forms
a very complete mining outfit. It consists of a highest-class
tacheometer with quick setting spherical lower plate,
mechanical centring stage, auxiliary top and side telescope,
illuminated axis, striding level, also two targets with quick
setting spherical lower plates, mechanical stages, cross levels,
and swivelled sighting crosses. All three are made with
lift-out centres, which are interchangeable, and all have
base plates permitting their use on any staging or fixing
without their stands. The targets are sometimes made
to hold candles instead of the swivelled cross, and sometimes
with plain steel points only.
The auxiliary telescope is the special form designed by
Mr. Dunbar Scott, and it embraces all the advantages and
eliminates all the disadvantages of all other types.
The particular feature is its interchangeability with top or
side positions, and the means provided to ensure perfect
adjustment with the minimum of trouble, thus forming a
mining transit which will perform with exactness all the complex
functions in mine surveying and requiring no correction
for eccentricity.
The auxiliary telescope is provided with a centre that may
be screwed to the threaded extension of either the transverse
axis or the vertical pillars of the main telescope. In either
position it is clamped firmly and ranged quickly into alignment
with the main telescope by two opposing screws. The
diaphragm of the auxiliary telescope has one web only, so
placed that it is vertical when on the top and horizontal when
at the side.
The observation of steep horizontal angles is made only
with the auxiliary on top, and of precipitous vertical angles
with the auxiliary on the side. A counterpoise is provided,
which exactly balances the auxiliary, so that there is no strain
upon the instrument.
For vertical sighting it is also most useful and accurate, as
by transferring the lines of both positions of auxiliary two
lines are transferred down a shaft, at right angles to each other,
which, if produced, will intersect each other exactly under the
centre of the instrument, and no allowance or calculation
whatever has to be made to ascertain the centre.
The whole attachment adds very little to the weight, the
greater part being of aluminium, and it is packed separately in
the case so as not to interfere in any way with the instrument
when not in use.
In Fig. 235 the auxiliary telescope is shown at top; Fig.
236 shows it attached at the side.
551.—Pocket Instruments.—A very light pocket instrument
has been designed by Mr. D. W. Brunton, which
will be found useful; he terms it a pocket mine transit, but of
course it has nothing to do with a transit. It is designed for
roughly taking horizontal and vertical angles, and answers the
purpose of a prismatic compass, clinometer and Abney level,
and is very portable, made in aluminium, and weighing only
8 oz. It is shown at Fig. 237.
The cover is provided on its inside with a mirror, and this
acts as a back sight; it is opened out to an angle which reflects
the fore sight, and the object sighted and the reading of the
needle is then taken. It is necessary to hold the instrument
firmly against the body and see that it is level sideways by
placing the spirit level across the box and bringing the bubble
to the centre of its run, while any turning movement should
be made by turning the body from the hips. For vertical
sighting the fore sight is used as the back sight, and the
mirror in the lid moved to reflect the bubble, the back sight
being formed by the hole in the mirror seen at the bottom of
the centre line, the clinometer bubble is then moved till the
air bell is seen in the centre of its run and the vernier reading
taken.
552.—Dip Compass.—This consists of a magnetic
needle suspended between centres so as to move readily in a
vertical plane, and is shown at Fig. 238. When in use the
ring is held in the hand and the compass-box by its own
weight takes a vertical position; it must then be held in the
plane of the meridian. In this position the needle when unaffected
by the attraction of iron assumes a horizontal position.
When brought over any mass of magnetic iron ore it dips, and
thus detects the presence of such ore with certainty.
If held in a horizontal position it serves as an ordinary
pocket compass and thus indicates the magnetic meridian in
the plane of which it should be held when used to ascertain dip.
CHAPTER XII.
INSTRUMENTS TO MEASURE SUBTENSE OR TANGENTIAL
ANGLES TO ASCERTAIN DISTANCES—HISTORICAL NOTES OF
THE METHOD—PRINCIPLES INVOLVED—STADIUM MEASUREMENT,
DIRECT AND BY THE ORDINARY TELESCOPE—CORRECTIONS
FOR REFRACTION OF THE OBJECT-GLASS—STANLEY'S
SUBTENSE DIAPHRAGM—ANALLATIC TELESCOPE
OF PORRO—TACHEOMETERS—STADIUM—FIELD-BOOK—OMNIMETER
AND ITS FIELD-BOOK—BAKEWELL's SUBTENSE
ARRANGEMENT.
553.—Direct Subtense Measurement of Distances,
by an Instrument, depends upon our powers of measuring the
image of a distant staff or stadium, or the divisions marked
thereon as they appear at the focus of the telescope. If the
stadium is placed at right angles to the direction of one of
two sight lines which subtend a given angle, the number of
units divided upon the stadium cut by these lines will be
proportional to units of length of base or cotangent for a
constant focus of the telescope; so that if we can measure at
a fixed angle the number of equal units of measurement of a
stadium correctly, we can obtain its exact distance; and
whether this method is more or less exact than chain
measurement will depend entirely upon the perfection with
which either of these operations may be practically
performed.
554.—The Origin of the Invention of Subtense Surveying
was thought to be due to Wm. Green, an optician
of Great Moulton Street, London, who was awarded a
premium for its invention by the Society of Arts in 1778.
He published a pamphlet giving a description of his method
in 1778.[28] This subject he pressed upon the notice of professional
men at the time, and his method has continued
in use in this country ever since. His refracting telescope,
which alone has remained in use, formed part of the
theodolite. A micrometer was placed in the focus of the
eye-piece of the telescope, which revolved a quarter turn in
its axis to read angles vertically or horizontally. He constructed
his micrometer with lines fixed at a given distance
apart, and by a second method with the lines adjustable. For
this adjustment a fine line was ruled upon one side of two
pieces of glass. The ruled sides were placed face to face, so
as to be at the same focus. One of the lines was adjustable
by a micrometer screw. His staff was 20 links in length by
4 inches in width, divided decimally into 1000. His description
of the manner of using his instrument will give a general
idea of working the others which have been derived from
it—tacheometers, omnimeters, etc.—and this is worthy of
note, as the invention, though generally attributed to him,
was not his:—
555.—"To find the contents of a field with either of the
instruments described, let the telescope be placed so that the
observer may see all its angles from his station. If near the
centre of the field the better. The person who carries the
scale (staff) is to go all round the field, stopping at every
angle, and to place the scale at right angles to the axis of the
telescope (passing) from corner to corner (from right to left
if required) with the help of a signal by the observer. After
the distances all round the field are taken (by measurement of
the image of the micrometer) and all the angles included betwixt
them, with the theodolite, plot it out in the usual manner, e.g.,
with a nonius protractor. Describe a circle, and on this
circle set off all the angles from the centre through each point
upon the circumference. Set off the length of every line by a
scale of equal parts. These points will give the limits of the
field, which may be laid out in trapeziums, triangles, etc., and
measured from the same scale of equal parts. The surveyor
will comprehend how easily the contents of the field are found
by trigonometrical calculation, since by this method there are
two sides and one included angle given.
"The common method of measuring with the chain,
besides the inaccuracies to which it is liable, does only give
the length of the surface of the ground between two objects,
and therefore not its proper distance, unless the surface be
straight and no object to hinder its being measured from one
end to the other. How often this is practicable I leave to
the consideration of those who are most accustomed to
measure lines, and doubt not that upon the whole they will
find the telescope method has besides ease, accuracy, and
universality, necessity itself to recommend it."
He points out the utility of the system for levelling, as
"both distance and inclination may be taken at the same
time." He finds by experiment that the accuracy of the
method exceeds that which he could reasonably expect by
calculations deduced from theory, by several circumstances
in its favour being inseparable from it.
"The observer's station is the centre of circle whose
radius is the distance required, which is obtained by measuring
the length, that is, the tangent or subtense, of the small
arcs whose limits are defined by viewing their image in the
focus of a telescope between two points there placed, and
moving them up and down until they appear to touch the
very extremities of said limits exactly. The manner of seeing
is natural and by practice will become habitual, and therefore
continually approach nearer to perfection.
"Thus may any surveyor in less than two hours take all
the dimensions of an irregular polygon necessary for obtaining
its area, if it be as much as 80 or 100 acres and limited by
twenty or thirty unequal sides."
Green points out that if the subtense angle is taken
horizontally, atmospheric refraction error is eliminated. He
proposes to use both reflecting and refracting telescopes.
With the reflector he possibly obtained accurate results, but
with the refracting telescope he does not appear to have
recognised a constant correction which is necessary and
important.
It has since been found that in 1778 the Danish Academy
of Sciences awarded a prize to G. F. Brander for a similar
device, which he had applied to his plane-table, six years
before. Its real discoverer was James Watt, who used it in
1771 for measuring distances in the surveys for the Tarbert
and Crinan Canals. In James Patrick Muirhead's Life of
James Watt, he gives a statement by Watt himself that he
constructed his instrument in 1770 and showed it to Smeaton
in 1772.
556.—Subtense Instruments, as that originally made
by Green, are of some form of theodolite, the telescopes of
which are constructed to measure either the angle subtended
by the chord of a small arc or the tangent of the same. For
convenience the tangent is more generally taken upon a graduated
stadium or staff, which is erected for measurement
perpendicularly to the horizon, the principle of which is
shown in the following scheme:—
Fig. 239.—Diagram of tangential angle measurement.
Let AC, Fig. 239, be a horizontal line; BC a stadium
set up vertically. Then if the angle BAC and the height
BC are known, the distance of AC can be easily calculated.
For any intermediate distance between A and C a vertical will
be in length proportional to this distance. Let de be at one-third
the distance from A; then the line de will be one-third
the length of BC. If we divide BC into three parts and
place the stadium at fg two-thirds the distance from A, the
angle dAe given by an instrument subtending a fixed angle
will cut the staff at the second division, equal to two thirds
the staff, which demonstrates the principle of all tacheometers,
Cleps, etc.
If the tangent be made a constant equal to the
length of the stadium BC, and this stadium be placed at
another position, say de or fg; then the angle subtended by
its entire length will vary in a manner that can only be estimated
by trigonometrical calculation.
In case of reading two distant marks on the stadium only
for the subtense, the single central web of the telescope
being directed first to one and then to the other of these
webs, the distance is calculated as follows:—
Given the tangent BC and the angle BAC, required
the distance AC. Let the angle BAC be represented
by D; then—
CA
= cotan D, or CA = CB × cotan D.
CB
Reducing by logarithms, we have—
log CA = log CB + L cotan D - 10.
For example, make CB 14 feet, and the angle D 2° 45′
50″, thus:—
log CB
= 1·146128
L cotan D - 10
= 1·316265
log CA
= 2·462393,
or CA = 290 feet.
The above gives the principles followed with instruments of
the theodolite class simply; but arrangements are made in
omnimeters and similar instruments to read the tangent
directly and determine the height CB in equal parts, so that
observation of the heights BC gives rectangular co-ordinates
and thus saves reduction from degrees of arc.
In practice the staff or stadium is made of the greatest
length convenient for portability. With a telescopic staff, 14
or 16 feet is commonly used. If a unit tangent be not
employed, the foot is divided into 100 parts, each of which
parts, with the tacheometer, represents 1 foot of the base,
and the whole staff 1400 or 1600 feet. The ordinary
Sopwith staff, art. 263, answers the purpose, but art. 268
better.
557.—Measuring Distances by the Ordinary Telescope by
Measurement of its Focal Image.—When we apply a refracting
telescope to measure a subtense angle by webs fixed in
the diaphragm, vision is not direct as in the scheme Fig.
239, but subject to bending caused by the refractive quality
of the lens, art. 58, the telescopic focus varying with the
distance from the staff. Thus with a 12-inch telescope there
will be a difference of about ·25 inch in the focus, whether
the staff is held at 50 or 500 links from the telescope; and
this difference of focus is equal to a difference of base or
cotangent between the points A and C in the last figure,
so that these distances do not remain proportional to the
fixed unit of the tangent or stadium. It is important to go
carefully into this subject of the use of subtense webs in
the ordinary telescope, as the necessary correction does
not appear to have been recognised by English writers
on instruments, and no doubt this is the principal reason
that subtense measurement has not been more practised in
this country.
558.—At the commencement of the last century,
Riechenbach, a Bavarian engineer, pointed out a method still
in use on the Continent. The author is indebted to the
kindness of Lord Rayleigh for the following demonstration
of Riechenbach's formula:—
Let Fig. 240 AB = s, ab = i, OA = d, Ob = r. O is the
optical centre of the object-glass; ab a pair of webs at variable
distance r from O according to telescopic focus; f focus for
parallel rays. Then by similar triangles s/d = i/r or d = rs/i, r
is found by optical laws to vary in the proportion of
1/r + 1/d = 1/f. We may therefore eliminate the variable r by
substituting its value r = fd/(d - f), by which we find d = sf/i + f,
which gives the true correction; and the distance from
the axis of the instrument will be d = sf/i + f + c where c is the
constant distance of the object-glass from the axis of the
instrument. It is usual to place the vertical axis of a
theodolite central between the object-glass and the diaphragm
at solar focus, so that the constant c becomes f/2.
It is seen that sf/i represents the direct subtense, whereas
the refraction, which is a constant, gives f and the position
of the object-glass f/2. Riechenbach's formula being true for
parallel rays is evidently also true for any subtense with refraction
for the staff at any distance. We may therefore adopt a
plus constant of 1½f, which added to the apparent subtense is
found to produce no error. Thus with a telescope of 1 foot
solar focus, and using the decimal system of notation, as
before mentioned, if a stadium or distinct scale be placed at
301½ feet distance from the centre of the instrument, and the
webs or points of the diaphragm be adjusted to read 3 feet =
300 divisions, every subtense may afterwards be taken as
number of divisions read + 1½ feet for distance in feet. If the
subtense is to be taken in links or metres the dividing of
the stadium will be to these measures, but the constant
remains the same 1½ feet always.
559.—When the line of sight is inclined from the horizon
and the stadium is held erect—a convenient method commonly
followed upon the Continent—the reading becomes in
excess of the true reading, in the ratio of the cosine of the
angle of the stadium, represented by a line tangent to the
sight-line subtended to the foot of the stadium, as shown in
the following diagram.
Fig. 241.—Diagram of vertical stadium on an incline.
560.—The Subtense-diaphragm of the author, Fig.
242, forms the eye-piece of a theodolite. It has movable
indices which are separated according to a scale formed by
calculation upon the data of the above formulæ. By this,
distances may be taken in the horizontal plane for land of any
inclination without after calculation. This result is obtained
by observing the angle of inclination upwards or downwards
on the theodolite and setting the micrometer to this angle
before reading the subtense distance. The reading is taken
by points which are arranged to measure the subtense 1 to 100,
so that the ordinary Sopwith staff may be used. The diaphragm
at zero appears as an ordinary subtense-diaphragm. It may
be observed that this diaphragm may be used as a good check,
as distances may be taken over any irregularities of intervening
incline and give the true base for the entire distance.
561.—If the mean contour distance is required from station
to station, this may be taken directly by subtense from the
staff-reading held at right angles to the axis of the telescope.
The means of doing this, devised by the author, is to place
a sight director of a special form upon the side of the staff,
Fig. 243. This small piece of apparatus is shown attached to
the staff. It consists of a small telescope three inches long
attached at right angles to the staff by means of a dovetail
slide fitting when in use as shown. The staff-holder sights
the tacheometer through the short telescope, which can only be
seen to appear therein by moving the staff until it is approximately
at right angles to the direction of the tacheometer.
562.—The Anallatic Telescope.—In this telescope
the focus is constant, and consequently the tangential measurements
indicated by the numerical qualities subtended by a
constant angle are directly proportional to the base, so that
there is no constant to be added. The invention of this
instrument and its modern application to subtense measurement
was due to Professor J. Porro, of Milan, who put it to
practical test in 1823,[29] in an instrument termed a tacheometer.
The telescope will be best understood by the
following details:—
The object-glass O, Fig. 244, is made of a focus that falls
well in front of the axis of the instrument CC′, so that the
rays cross before falling upon the anallatic lens A, the optical
arrangement being such that if the rays fell direct without any
refraction they would reach the axis and subtend angles therefrom
inversely proportional to the distance of the stadium.
The object-glass and anallatic lens are of the same focus, so
that the rays after crossing from equal refraction may emerge
parallel in the space A to M. The stop at S and at the axis
CC′ cuts off eccentric rays that would otherwise give internal
reflections from the telescope tube. The eye-piece, represented
by MF, may be made to pick up the image of the stadium in
front of it upon an ordinary webbed diaphragm or upon ruled
glass. The diaphragm webs are fixed, or the glass surface
engraved with three or five horizontal lines and one vertical.
The outer horizontal lines are used generally as the subtense
lines, and the central line for levelling and taking altitudes.
The vertical line is used for triangulating on the surface of the
ground.
563.—There is an adjustment made by sliding tubes to
bring the object-glass and anallatic lens within mutual focus
to ensure the parallelism of the emergent rays and to adjust
magnification. This is commonly effected by means of a
rack and pinion, moved by a separate key kept in the instrument
case, but which should not be touched after the
instrument is once adjusted by the maker, except in the case
of accident. It is much better made without this rack adjustment
and permanently fixed by the maker, as if it has the
adjustment it is likely to be tampered with and thus defeat its
object. The eye-piece adjusts to distance from the object-glass
in the ordinary manner of the surveying telescope—by
rack and pinion.
564.—The eye-piece of the anallatic telescope is generally
made of much higher power than those ordinarily employed
for levels and theodolites—25 to 30 diameters is usual.
Where a diaphragm is used the subtense lines are commonly
placed on a slip of glass in two or three sets, so that greater
magnitude of image may be taken for objects at distances of
from 2 to 7 chains with the 14-feet staff, or that the staff may
be read at greater distances than 14 chains. This series of lines
is distinguished as 50, 100, and 200, Figs. 245, 246 and 247;
so that with this as great a distance as 28 chains with a 14-feet
staff may be estimated, but this is beyond the safe power of
the instrument. The intermediate line, as shown Fig. 220, is
valuable in all cases for levelling. The advantage of the increased
power of the eye-piece is more than neutralized by
the loss of light.
Figs. 245, 246, 247.—Subtense lines ruled on glass.
Fig. 248.—Adjustable point diaphragm with stadia points.
565.—While many civil engineers are satisfied with a single
percentage pair of subtense lines the author much prefers using
the point system, arts. 237 to 239. In this case the diaphragm,
as made by the author, possesses two systems of adjustment;
that shown Fig. 248 at a for the single point for altitudes, and
the pair of points separated by the spring ss for subtense
angles. These points adjust by separate screws top and bottom
with a milled-headed key f. The two verticals are fixed permanently.
These points are all made of platino-iridium,
which possesses the hardness and elasticity of spring steel,
and is at the same time, as far as is known, perfectly non-corrosive.
In case of any light dust or moisture resting upon
the points, it is perfectly safe to brush them lightly with a soft
camel-hair brush to clean them. Where the 200 factor is
required, a mean may be taken of two observations above and
below the central point. Where 50 is required, the vertical
points may be adjusted to this.
566.—In adjusting the lines, webs, or points to a given
subtense, the anallatic lens may be moved to give more or
less angular displacement or magnification of the image.
Greater accuracy is obtainable when the staff is held normal
to the line of sight instead of vertical. If the staff be
held incorrectly in the inclined position at great angles of
elevation or depression, the resulting error is very much
smaller than in the case of an equal variation of the staff from
the true vertical position. When adjustment is made upon a
distant stadium at small angles of elevation or depression, the
subtense of the small arc will vary so little from a tangent
to one of its radii that the one or other may be taken
without sensible error. The plan originally proposed by
Green of placing a sight tube through the stadium at right
angles to its face, as a means of keeping it in the chord of the
arc, is as good as any other, but is more cumbersome
than that described art. 561. If the vertical stadium be
preferred, this may be set up by the small level, Fig. 109,
p. 163.
567.—It is well to note that with the anallatic telescope
the stadium must not be so near that the rays from
the object-glass do not cross in front of the anallatic lens
or the subtense will appear much increased, so that there
is a fixed nearness at which this form of telescope can
be used, say 50 feet. For this reason engineers generally
prefer an ordinary telescope, making use of the addition of a
constant. The author also prefers the plain telescope, as
being more correct according to his experiments where the
constant is correctly allowed. There are many advantages in
the use of a plain open telescope instead of the anallatic
telescope for tacheometers, among them the following may be
mentioned. More light reaches the eye because there are
fewer lenses; there is no intermediate lens requiring adjustment
and which becomes dirty and bedewed and is inaccessible
for cleaning, and for the same dimensions of the
telescope greater power can be obtained. A larger telescope
and of higher power is of great advantage in subtense
measurement, but the full advantage is not obtained in the
anallatic telescope. The idea which appears to be still common
that an ordinary open telescope will not give accurate results
at all distances by means of stadia readings, plus the distance of
the anterior principal focus of the object-glass from the axis of
the instrument, is entirely erroneous. When a staff is held at
any distance in front of the object-glass of an open telescope,
an inverted image of the staff is formed at the conjugate focus
which subtends an angle at the corresponding nodal point of
the lens, equal to that subtended by the staff at the other
nodal point. If a diaphragm with two stadia points or webs
be placed at this conjugate focus the ratio i/f′ = the ratio l/D;
where i is the space between the stadia points, l the height on
the staff which these points appear to intercept when viewed
through the eye-piece accurately focussed on them, D the
distance of the staff from the object-glass, and f′ the distance
of the diaphragm from the object-glass. Now in this equation
i is a fixed space, l is the observed height on the staff, and
both f′ and D are variables, of which it is desired to find the
value of D. From the laws of optics it is also known that
1/f′ + 1/D = 1/F where F is the principal focal length of the lens.
Therefore f′ = FD/(D - F) for all values of D. Substituting this
value of f′ in equation (1) we get i × (D - F)/FD = l/D; and
multiplying both sides by D, i × (D - F)/F = l. ∴ D - F = (F/i)l and
D = (F/i)l + F which is true for all distances. But this
distance is measured from the object-glass, and the distance S
required by the surveyor is that from the axis of the instrument,
and it is therefore necessary to add that of the object-glass
from the axis d. ∴ S = D + d = (F/i)l + F + d, and
F + d is the constant of the instrument = c. ∴ S = (F/i)l + c.
When the range is greater than that at which the divisions
of an ordinary levelling staff can be clearly read with the
stadia points, target stadia rods or targets fixed to a levelling
staff are used. It is usual to use plain targets fixed with their
centre lines at exactly 10 or 20 feet apart or other convenient
distance, and the angle subtended by these is measured by a
micrometer diaphragm. The reviser, in conjunction with
Mr. C. W. Scott, B.A.I., A.M.I.C.E., has designed a micrometer
diaphragm which has been proved to give very accurate
results. It is made to revolve, so that either horizontal or
vertical stadia rods may be measured, and it is fitted with fine
fixed platino-iridium points, which are much more satisfactory
than webs or lines engraved on glass. These are fixed
on one side of the diaphragm, two each 1/200 part of the principal
focal length of the object-glass above and below the axial
point. On the other side of the diaphragm is a movable
point which can be traversed over the fixed points by a micrometer
screw, every complete turn of which moves the point
over a distance equal to 1/1000th of the principal focal distance
and the head of the micrometer being divided into 100 parts,
it reads to the one hundred-thousandth part of the same;
while a small star-wheel records the number of complete revolutions,
five of which cover the space between any two of the
fixed points. In using this micrometer with say a 10-foot
target, let the lower target cross-bar be clamped to the level
staff at 2 feet, and the upper target cross-bar at 12 feet.
Direct the axial point to the centre between the targets at 7
feet and read the angle, then bring the nearest fixed point
to the top or bottom mark by means of the tangent screw, and
bring the micrometer point to the other mark by the micrometer
screw. The micrometer reading is the reading on the
divided head plus the hundredths indicated on the star-wheel
plus 500 for each included complete space between the fixed
points. See whether the micrometer reads up or down, and
set the fixed point to the lower or upper mark on target
accordingly. To obtain the distance from the axis of instrument,
divide 100,000, multiplied by the length of the target
by the micrometer reading, and add the constant of the
instrument S = 100,000l/x + c where x is the micrometer
reading, and l the length of the target. The tacheometer
which the author has lately made has a plain open telescope,
but this is of the same size as that used upon the Porro
system, and consequently it gives much more light and better
definition.
568.—Tacheometers consist essentially of any form of
theodolite that is provided with means for reading distances
by its telescope. Stadia work is simply another name for
tacheometry, which is derived from the Greek tacheos (quickly),
and metreo (I measure), and signifies the art of measuring
rapidly. The graduation of the arcs and circles of these
instruments is sometimes made upon the centesimal system,
the circle reading 400 grades, which are subdivided to half
grades to read with the vernier or micrometer to centigrade
minutes of ·01 grade. The centesimal system facilitates
calculation, and permits a free use of a logarithmic slide rule of
a special kind. In France, where working with this system at one
time became more general, we have very complete centesimal
trigonometrical tables adapted to the tacheometer published in
stereotype,[30] but it has not gained favour, and very few instruments
are now so divided. A compromise which has found
a certain amount of favour is the decimal division of the
ordinary degree of 90 to the quadrant; this greatly facilitates
the calculation compared with what is necessary with the
sexagesimal division into minutes and seconds and the reading
of the verniers is much simpler and less liable to errors.
Moreover, the mental conversion of the sexagesimal division
into decimals of the same degree is much simpler than the
conversion into the centesimal degree of 100 to the quadrant.
Any instrument divided sexagesimally can be converted by
simply changing the vernier if the divisions on the limb are
degrees or half degrees. The theodolite, Fig. 169, the author
made specially for a tacheometer. Any theodolite may be
converted into a tacheometer by fitting it with a subtense
diaphragm. A modern tacheometer should be a high-class
theodolite in which every possible refinement is included.
569.—The tacheometer, although manufactured for
many years for export, has been very little used in this
country. The instrument to be described, shown Fig. 249,
is the author's latest pattern. It is made with sexagesimal
division or ingrades, to read by the verniers to 20″ or to
centigrade minutes. The telescope is of much larger and of
higher power than that of the ordinary theodolite. For a 6-inch
instrument the telescope is of 11 inches focus, with an object-glass
of 1¾ inches aperture. The eye-pieces are of the Ramsden
form of powers 18 and 25. The points in the diaphragm
are set to cut 100 divisions of the stadium at 100 units + constant
of the measurement intended to be taken, links, feet, or
metres. This precludes distant measures, say of over 15
chains, where a 16-feet stadium is used, but they are made
adjustable so that they may be set, if desired, for any other
subtense, although this is not recommended. It is doubtful
whether the subtense method can be considered as reliable at
a distance of over 1500 links; or at any rate we must assume
that much greater accuracy can be obtained by dividing
distances greater than this into two by an intermediate station
for observation, independently of the additional convenience of
having the staff-holder within easy distance of communication.
570.—Where points are not used in the diaphragm or
where lines are preferred, these may be divided upon glass
in fine lines as Fig. 246; or spider webs may be used, but
these are more difficult to set exact for stadia.
571.—Stadium.—Any accurate levelling staff will answer
for the stadium, but the ordinary Sopwith, Fig. 99, is slightly
confusing. A more open reading is generally recommended—that
shown Fig. 102, p. 155, which the author designed
for the purpose, answers perfectly. It is better to read the
stadium low, as there is less vibration; but it is not often
possible or at any time advisable to read it from the bottom—1
foot up is generally most convenient. Readings are taken
and recorded of each subtense web, or point, separately, and
the difference of reading subtracted for the subtense of tangent.
With a point diaphragm for taking the subtense angle a fair
certainty of accuracy of measurement of distance within ·002
may be assured, which is much nearer than can be attained
by average chaining, taking six times the labour.
572.—The General System of Working the Tacheometer,
with sufficient detail for practice, would take too much of our
limited space to be given here. We now have several good
works published in Great Britain, in addition to the able
paper by Mr. Brough before mentioned, such as The Tacheometer:
Its Theory and Practice, by Mr. Neil Kennedy;
Surveying, by Whitelaw; Aid to Survey Practice, by L. D'A.
Jackson, &c. There is a small work published in New York
giving some details.[31] There are complete works in French,
Italian, German, and Spanish. In French, Leves de Plans
a la Stadia, by M. J. Moinot, engineer to the Paris, Lyons,
and Mediterranean Railway, gives very complete instructions
for all conditions of country, upon surveys which he has
personally carried into practice with this instrument.
There are several tacheometers made upon the Continent,
of more complicated forms than those herein described, but
they do not produce better work.
573.—Field-books for the tacheometer are ruled in
various ways in columns, which vary in number in different
books from twelve to twenty. The French generally have fourteen
columns, giving the number of the station, time, heights
of line of collimation above point levelled, numbers of points
selected, horizontal and vertical angles observed, reading of
subtense webs and their differences, height of staff by reading
central web, and columns for calculations and remarks;
most English forms are more simple.
574.—A convenient protractor in which the equivalent of
surface reading is taken from a scale upon its lower part
directed from the centre of the protractor is here shown.
575.—The Omnimeter is one of the class of instruments
in which the tangent to a radius proceeding direct from the
axis of the telescope is represented by the stadium made of
constant length, the subtense angle varying with the distance.
The omnimeter is the invention of Chas. A. C. Eckhold, a
German engineer, described in the provisional British patent[32]
as "a person living in Alexandria." The instrument as
originally devised consisted of a kind of theodolite to which
the subtense tangential system was added as an entirely separate
part. The important part of the provisional specification shows
that the principle of the invention consists in the use of two
sights to the instrument, one a telescope to sight the object,
and the other a powerful compound microscope to read
divisions upon a tangential scale. The telescope and microscope
are firmly united together in parallel position with their
axes exactly crossing the transverse axis of the theodolite, so as
to move together through the same angle by the motion of the
telescope in traversing the azimuth. A delicate level is placed
upon the telescope, and when the bubble is in the centre of
its run the scale is truly at right angles to the axis of the
microscope. The scale in the early instruments stood vertically
at the extreme edge of the instrument in a position
lateral to the object-glass of the telescope. It was finely
divided to millimetres, and read the intervals of the divisions
by means of a micrometer screw with a vernier.
Fig. 251.—Details of omnimeter, showing section of microscope and scale.
576.—With the instrument as originally constructed, it
was found that the delicate scale, protruding vertically to the
extreme edge of the instrument, was very liable to injury
unless supported by heavy metal work, which rendered the
instrument cumbersome. A great improvement was made
in this instrument, which brought it to its modern form, by
placing the tangent scale in a horizontal position, where it
could be firmly fixed upon the vernier plate as shown Fig. 251
S, and reading the scale by means of a reflecting prism P in the
eye-piece of the microscope. In this improved instrument, as
the microscope and telescope are still united on one axis so
that they move at equal angles to each other, it is clearly
indifferent whether the scale be placed vertically or horizontally,
provided it is placed truly at right angles to the microscope
when the axis of the telescope is horizontal. The scale, which
is 4 inches long, is placed in a sliding fitting to adjust longitudinally
to its position by means of a micrometer screw. In
the English instrument the scale is divided into 100 parts for
calculation. The divisions are subdivided by shorter lines,
making the actual division 200. The micrometer screw has
50 threads to the inch, and moves over one of the divisions
of the scale only. The micrometer head is divided into 100,
numbered at the tens; a vernier placed against the head subdivides
each of these divisions into 5, making the total
micrometer 500 for one complete revolution. The total
division of the 4-inch scale therefore becomes: 200 (divisions
of scale) × 500 (micrometer) = 100,000 in 4 inches. The
scale is placed centrally to the instrument, so that when the
telescope is level the microscope is vertical, and reads 50,000
when in perfect adjustment.
577.—The general appearance of the instrument resembles
the transit theodolite, already described art. 368, in every way
except for the addition of the microscope and scale, shown in
perspective in Fig. 250. The details of construction of the
microscopic apparatus may be followed in Fig. 251. T telescope
with sensitive level B mounted upon it; R body of
microscope connected solidly upon the same axis as the
telescope, shown in half section. The eye-piece is placed at
right angles to the microscope and telescope, and reads through
the reflection of a prism P to the face of the instrument. The
details of the eye-piece are shown in section Fig. 252. The
tangential scale is shown in section Fig. 251 S with the micrometer
with edge reading vernier at M. The compass of the
instrument C is of the trough form, and placed on the
opposite side to the level to be used after transitting the telescope
from the position in which it is shown in the figure.
The axis of the connected telescope and microscope is
exactly 6 inches above the surface of the tangential scale S.
Fig. 253.—Omnimeter webs; a telescope, b microscope.
578.—The telescope diaphragm is generally webbed with
one horizontal and two vertical webs, Fig. 253 a, the altitude
reading being taken from the top of the horizontal web, and
the horizontal angular position from the centre of the interval
between the vertical webs. The microscope diaphragm b
has two horizontal webs, and reads from the centre of the
interval, which is judged by the eye. Observed in this manner,
there is no error due to covering angle subtended by the webs
themselves. The most exact reading is obtained with a fine
point.
579.—Reading of the Tangent Scale.—As the micrometer
divides half a principal division into 500, the complete figured
divisions are therefore divided into 1000. This is done for
the sake of decimal notation. In reading it is only necessary
to observe that the shorter or half division is 500, which must
be added to the micrometer reading when it is past this
division; as for instance 65½ reading is 65,500, and say the
micrometer reads 234 past this, the reading is then clearly
65,500 + 234 = 65,734, just as before described for reading
half degrees with the vernier.
580.—Value of the Scale taken in Rectangular Coordinates.—The
radius from the transverse axis of the telescope
to the tangent surface of the scale is exactly 6 inches. The
scale is 4 inches divided into 100,000 parts, as it is read with
the aid of the micrometer and vernier. The radius therefore
in terms of the scale would be at 6 to 4, that is 150,000. By
this we see that the divisions of the scale by the angle subtended
give tangents, the value of each division of which is the
reciprocal of this on 150,000 of the radius or base to any unit
we may select. If we make the unit 1 foot, then one division
represented by a unit of change of position of the vernier
reading, and consequently of equal angular change in the
direction of the axis of the telescope, would give a tangent of
1 foot upon a stadium placed at 150,000 feet distance. If
the stadium were made 10 feet, as is usual, the same angular
magnitude would be traversed in ten times this distance, or
over 280 miles, making the value of the units of the vernier
1,500,000. This will give a general idea of the delicacy of
the instrument so far as constructive principles are concerned,
and not its performance.
581.—The Stadium is marked off in a number of feet,
links, or metres, according to the unit taken for measurement
of the surface of the land. The English stadium is generally
formed of a 14-feet levelling staff, with the surface painted
with a ground of plain white. At 10 feet apart two black
bands about 2 inches wide are painted in, leaving in the centre
of each band a clear white line of about one-tenth of an inch
in width. These white lines are carefully set to 10-feet standard
centre to centre. But a better plan is to have two equilateral
triangles painted, with their apices meeting to the centre. An
intermediate 5-feet line is drawn in black, which is found convenient
for near measurements, to avoid too great angular
displacement of the telescope. When the measurement is in
chains, 15 links or 20 links may be taken for the distance of
the lines apart to give the tangent. For metre measurement
3 metres are commonly taken for the stadium division. These
are in each case subdivided. The lowest stadium reading
should be 1 foot at least from the ground to avoid grass and
other obstructions.
582.—Field-book.—The field-book as shown above, Fig.
254, was recommended by the inventor.
583.—Mode of Operating with the Omnimeter.—Carefully
set the instrument up at its station in perfect adjustment
as a theodolite, noting the departure point upon the scale
reading through the microscope. Place the stadium in a
vertical position at the point to which measurements are
required. Direct the telescope so that the horizontal web
cuts the upper line of the stadium, and lightly clamp it. Now
read the microscope and record the reading as observed in the
field-book. Unclamp the telescope and take the reading of
the lower point of the staff and record this. Record the
bearing of the instrument on the horizontal circle as with a
theodolite.
584.—To Determine the Horizontal Distance in Feet.—Divide
the constant radius of 1,500,000 given before by the
difference of the two readings of the stadium mark, which are
10 feet apart. For example:—
First reading
of scale
67,500,
micrometer
235 =
67,735
Second
"
64,000,
"
450 =
64,450
Difference
3,285;
then
1,500,0003285
= 456·6 feet distance.
The process is somewhat simplified by logarithms, as we
have only the log. of the difference to subtract from the
constant, the 1,500,000 mantissa of which is 1,760,913.
Thus—
log. 1,500,000
6·1760913
log. 3,285,000
3·5165354
2·6595559
= 456·6 feet.
585.—To Determine Horizontal Distance in Chains the
stadium should be marked as just described for feet, but
at 20 links distance from line to line. Then the radius
150,000 × 20 gives 3,000,000. Taking for example, readings
as before with difference of 3285 we have—
3,000,0003285
= 913·2, or 9 chains 13·2 links distance.
To Determine Horizontal Distance in Metres, the stadium
is divided to 4 metres. Then radius 150,000 × 4 = 600,000.
Taking, for example, difference of reading as before 3285 then
600,0003285
= 182·64 metres.
586.—Levelling—Taking Altitudes.—To take the elevation
of the staff above the level of the instrument, subtract
the reading of the scale, when the axis of the telescope is level,
from the lower reading of the staff on the scale, and divide
by the distance difference, as found by the method discussed
before, then multiply this by 10 feet. Thus taking the lower
reading as before 64,450 and the constant for the level position
of the instrument, say 50,010, we then have—
Lower
reading
64,450
Level
"
50,010
Difference
14,440
then
14,4403285
× 10 = 43·96 feet nearly.
The heights, in relation to the position of the instrument, are
positive or negative according as the scale readings are greater
or less than the constant level reading or departure point.
587.—Work of the Omnimeter.—The perfection of the
principles of the omnimeter would lead anyone to infer that
work might be done with it of the highest degree of accuracy.
The testimony of the greatest authorities show by comparison
that it is unable to compete in this respect with the best made
tacheometers. A large number of these instruments are
employed in India. Colonel Laughton reports upon it—"It
has been found to give very accurate heights of buildings, etc.,
also to be wonderfully accurate when used as a levelling
instrument; but it is not so accurate for measuring distances
over 600 feet, and even at this distance the error sometimes
amounts to as much as 1 foot. It is recommended as admirably
adapted for city surveys and traversing, also in hilly and
jungly countries, and for railway and similar purposes."[33]
588.—Wherein the instrument fails to give exact results is
no doubt in the difficulty of its manipulation. For taking two
readings, which are necessary for every operation in distance,
the instrument has necessarily to be set twice, the hand being
placed upon the micrometer for the second observation while
the attention is upon the sighting of the telescope; and even
when the readings are taken by the telescope, the microscope
has to be separately adjusted to read the micrometer scale.
In the repetition of these processes it is almost impossible
to avoid some slight disturbance of centre by pressure. In
distant readings atmospheric changes giving difference of
refraction occur quickly, so that there is more risk of error
from two separate observations than if the observations of
the subtense webs are taken simultaneously, as with the
tacheometer. Further, any defect in workmanship or wear
tells seriously against the readings of the instrument. Its
advantages are theoretically that a wide angle is subtended by
the stadium with the omnimeter in short distances which
must be in every way an advantage. Further, since the early
general use of the omnimeter, the tacheometer has been
greatly improved, particularly in providing it with a larger and
better object-glass so as to obtain greater field of view, that
fairly near stations may be taken with it that were formerly
only possible of reading with the omnimeter. The manufacture
of omnimeters is now very limited; the subject is only
retained in this edition because there are still some hundreds
of these instruments in use.
589.—Improvement in the Omnimeter.—One improvement
in this instrument by Mr. W. N. Bakewell, M.Inst.C.E.,
consists in turning the body of the microscope to a right
angle at the position of the transverse axis of the omnimeter,
and placing a reflecting prism at the angle. By this means
the eye-pieces of the telescope and the microscope are brought
side by side, greatly facilitating the joint readings. A second
improvement is in making the scale 1,000,000 instead of
150,000, which much facilitates calculation, but it is doubtful
if these improvements will stay the declining popularity of the
omnimeter.
Fig. 255.—Bakewell's tangential arrangement to a theodolite.
590.—Bakewell's Tangential Arrangementto a
Theodolite for Measuring Distances.—This arrangement,
which gives the distances by direct reading without calculation,
was devised by Mr. W. N. Bakewell to extend the power of an
ordinary 6-inch transit theodolite fitted with subtense webs.
The observations are made on marks at 3 feet and 13 feet on
an ordinary Sopwith staff—a 10-feet base, as is usual with the
omnimeter. Any other base may be used if the distances
registered are proportionally altered, or the scale may be
divided to suit. It was first applied by the author to a
theodolite that had been in good service, without the necessity
of making any structural alterations in the instrument.[34] The
measuring apparatus consists of a tangent screw impinging
upon a radial plane, with micrometer and vernier. The details
will be readily comprehended from the engraving, Fig. 255,
and the following full description.
591.—The transverse axis of a theodolite, upon the
opposite side of the telescope to that upon which the vertical
arc is fixed, is turned down to a cylindrical surface true with
the pivots. A collar A, which fits the cylindrical surface, is
slit up on one side to enable it to be clamped firmly to any
position of the axis by a clamping screw B. The collar is
connected in the same gun-metal casting with the radial arm
C that terminates at T in a plane, which is made truly radial
with the transverse axis of the telescope. This radial arm C
has a long German-silver spring S at the opposite side to the
radial plane, which keeps it up firmly in contact with the
point of the micrometer screw. A screw is cut on the drum
of the micrometer D; on the spiral the scale of distances is
engraved; and readings are taken from a line on the index I
which slides on the bar E. The scale being one of reciprocals
the divisions are at unequal distances, so a vernier cannot be
used; consequently at long ranges where the divisions are
close, the subdivisions must be estimated. Where this is too
rough a method, resort must be had to calculation. The
outer end of the drum D is divided into 200, and reads by
vernier V carried by the arm E in 5 or thousandths of a
revolution. The micrometer screw has twenty-five threads to
an inch, and the radius of the arm C is 4 inches. One complete
revolution of the screw is one-hundredth of the radius,
and using a base of 10 the radius factor is 1000 × 100 × 10 or
1,000,000; consequently Barlow's or any other table of reciprocals
can be used, and the distances obtained, by inspection
with comparatively little labour. This additional part has not
range sufficient for altitudes, being available for about 2 degrees
only. The distance may be taken as a subtense or small
tangential angle at a radius which, with the azimuthal angle
taken by the vertical arc of the theodolite, will give altitude by
its sine and horizontal distance by its cosine in the usual
manner. The principle is that of the omnimeter, and it
possesses the same objection for perfect performance, that the
theodolite has to be handled twice for the two observations
necessary.
592.—The Gradienter Screw.—This is no doubt a
simplified copy of Bakewell's tangential arrangement and is
shown at Fig. 256.
It is a micrometer screw fitted to a tangent arm, which
can be clamped to the trunnion of telescope when the latter is
in any position.
The screw is cut of a value that causes the web of the telescope
to move 50/100 of a foot at 100 feet distance for each
revolution, and the head of the screw is divided into 50 parts,
consequently each division upon the head represents a movement
of the cross web of the telescope of 1/100 of a foot upon
a scale placed at 100 feet distance. The scale on the arm
over the gradienter screw indicates the number of complete
revolutions of the head, therefore, if the screw be revolved
two whole revolutions the two divisions covered on this scale
indicate 50/100 × 2 = 1 foot to the 100 feet.
To establish any grade with this screw.—Set the gradienter
head to zero, then level the telescope and clamp the gradienter
arm. Suppose grade required be 1·75. Turn the
gradienter head through three whole revolutions, which will
equal 150, then go on turning through 25 of the divisions
on the head and the total movement will be 1·75, the required
grade.
For Measuring Distance.—First with a staff for moderate
distances. Any space on the staff covered by two complete
revolutions of head is 1/100th part of distance, thus, if the
difference between the two readings be 3·475 feet the staff is
distant 347·5 feet.
Second Method.—For long distances with any rod of
known length, such as a 20-foot stadia rod. Send out a man
with the rod which he holds vertical at place to be measured.
Then measure its length with the gradienter screw; say it takes
2 revolutions and 45 divisions over, thus 2 revolutions = 100
and 45 extra divisions = 145. Then—
20·00 feet1·45
× 100 = 1379·3 feet.
Another instance.—Suppose the man at a distance has no
stadia rod. He simply holds up any stick, say a walking stick.
Measure this in telescope. Say it subtends 1 revolution and
28 divisions. This = 78. When your man comes in with
the stick, measure its length. Say it was 3·25 feet. Then—
3·25 feet0·78
× 100 = 416·6 feet.
The above illustrations are for readings taken approximately
level. If there be much elevation or depression the
angle must be read and the difference of hypo and base
calculated and the stadia rod or staff must be inclined so that
its face is at right angles to the line of sight from telescope.
This can be done by the rod man inclining the staff or rod
until the shortest reading is given if a staff be used, or the
longest measurement is recorded by the gradienter screw head
if a stadia rod be used. It is better in this case to have the
staff fitted with a director (see art. 561), so that the person
holding the staff may sight into the telescope of the instrument,
thus ensuring the staff being exactly at right angles to
the line of sight.
No constant should be added with either this, Bakewell's,
or omnimeter measurements, as the angles are taken from the
centre of the instrument. This gradienter screw has the same
fault as mentioned for the two foregoing, viz., that all readings
are taken by two movements of the instrument.
CHAPTER XIII.
INSTRUMENTS CONSTRUCTED ESPECIALLY FOR OFFERING FACILITY
OF TAKING INCLINES—INCLINOMETER—THEODOLITE—GRADIOMETER—CLINOMETERS—ABNEY'S,
TROUGHTON'S, DE
LISLE'S, STANLEY'S, BARKER'S, BURNIER'S, WATKINS'—CLINOMETER
SIGHTS—RULE CLINOMETERS—ROAD TRACER.
Certain instruments are constructed specially with the
object of taking inclines, where this is the predominant work
to be performed with them. They form an important branch
of surveying instruments, and for their special kind of work
present many time-saving capabilities.
593.—Lister's Inclinometer Theodolite.[35]—This instrument
is the invention of Mr. James Lister, C.E. It was
originally designed to set out upon the surface of land the
widths of slopes or batters by pegs, as required in the execution
of railway, canal, and other earth works. In general
construction it resembles a theodolite as before described,
arts. 370 to 391, with the addition of an extra vertical axis to
the telescope piercing the horizontal axis at right angles, Fig.
257. In this construction the telescope upon the horizontal
axis can be set by the vertical supplementary axis to any
inclination, so that if the vertical axis be set to the slope of a
railway cutting, any number of points or pegs may be set out
continuously with the same setting by direct observation
through the telescope across any irregularity or inclination of
the land surface. In this operation an immense amount of
labour is saved over the ordinary system of pegging by calculation
with the aid of a theodolite, where each peg requires a
separate setting of the instrument. When the inclinometer
theodolite is used for surveying purposes, the telescope is
fixed by a spring catch which places it firmly true to the
reading of the ordinary vertical arc.
The instrument is also fitted with a mechanical device for
repeating the tangential angles when operating on curves, which
obviates the necessity of reading them on the horizontal arc,
thus facilitating the work. This will be referred to in the
following explanation of the manipulation of the instrument as
the "angle repeater."
The main difference between the method of taking cross
sections by the level and by the inclinometer theodolite is in
substituting inclined bases for horizontal ones, which will be
clearly understood by reference to the following diagrams,
which illustrate somewhat extreme surface inclination.
Fig. 258 shows the levelling method and Fig. 259 the
method by the inclinometer theodolite. In the first it will
be seen that each section requires to be taken singly with
repeated changes in the position of the instrument at each
section, involving numerous readings on the staff, booking,
and reduction of the levels for changes only. Also the
sectional measurements require to be taken in short horizontal
lengths with the plumbing of the end of the tape at each
length. By the inclinometer method this unnecessary labour
is avoided, there being no changes in the position of the
instrument, as from one setting a series of sections may be
taken on either side of it. There is no reduction of levels,
and the sectional measurements are taken on the surface to
which the base line is always approximately parallel.
The saving of labour is even more marked in the setting
out of slope pegs than in the taking of cross sections, for in
addition to the transference of level from the centre pegs to
the outcrop of the slope several approximate calculations have
to be made before the exact position of the slope peg can be
found, while by using the inclinometer theodolite it is only
necessary to put in normal slope pegs at intervals of a quarter
of a mile, or at such distances apart that a ranging rod may be
seen from one point to the other, and by setting up the instrument
at each alternate peg, or at half mile intervals, the whole
of the intermediate pegs for a quarter of a mile on each side
of it can be "boned" as simply as ranging a straight line, the
telescope being inclined to, and revolving in the plane of the
slope. In this manner as much work may be done in a few
hours as will take a week with the levelling method, and this
without the slightest physical or mental strain to the operator.
594.—Explanation of the Method of Operating with the
Inclinometer Theodolite.—For setting out a centre line of railway,
etc., and putting in level pegs the instrument may be used as
an ordinary theodolite, or even as a level, and the work performed
in the usual manner. It may also be used as a level
when setting out the normal slope pegs on slightly inclined
ground surfaces, but when the inclination is considerable it
may be used in a special manner with advantage as hereinafter
explained.
595.—To take Cross Sections when the Line is Straight.—It
is unnecessary to explain the use of the instrument
when the ground surface is comparatively level, so as to
require no change in position and resetting of the instrument,
it being obvious that in this case it may be used simply as
a level with advantage; but when the surface is inclined in
the direction of the centre, and also at a right angle thereto
in the direction of the section lines, the method of procedure
is as follows:—
Assuming that it is desired to take a series of 15 sections
(and this is within the limit of the number that can be taken
from one setting of the instrument), set up the inclinometer,
preferably over the centre peg of the series, in such a position
that the two front legs of the tripod stand across the centre
line, and the back leg (which has a distinguishing mark) rests
upon the centre line. Set the lower limb of the tribrach stand
upon which the instrument is supported to a level condition
in its lateral direction by manipulating the back leg, and at
the same time observing the bubble on the stand. This will
enable the instrument to be subsequently tilted to a certain
extent in a perfectly vertical position. Clamp the horizontal
arc to zero and direct the telescope to the centre line. Clamp
the lower limb and bring the arc round to an angle of 90°.
The vertical arc is now at right angles to the centre line and
parallel with the section lines. Now release the telescope
from the vertical arc and turn it again on the centre line, and
by working the back adjusting of the instrument (or in case of
necessity manipulating the back leg) tilt the instrument until
the cross web of the telescope is elevated to a short distance
above the seventh or most distant peg of the sections, or site
of the first section to be taken. Now tilt the vertical arc until
the cross web assumes a position parallel to the general inclination
of the ground surface laterally. Clamp the arc to this
inclination and note the angle thereon, for this will be the
angle of the inclined base from which the whole of the sections
will be taken and subsequently plotted.
Commencing at the seventh peg at this side of the instrument,
the sections may now be taken consecutively to the
seventh peg on the other side by taking readings on a level
staff held in an inclined position at a right angle to the cross
web or base, as shown in Fig. 259, and oscillated that the
lowest reading may be taken. A reading must be taken on
the centre peg at each section to establish the height of the
base above the peg. The base may be raised or lowered at
any section, or part of a section, to meet any excessive elevation
or depression of the ground surface which might prevent
the staff being read, but a separate reading on the centre peg
at each variation of the base must be taken, thus:—Fig. 260.
The bases being parallel the angle of inclination remains
the same. The tilting of the instrument produces a variation
in the angle of the vertical arc, but this is only to such an
infinitesimal extent that unless the tilt be excessive it may be
disregarded. The correction, however, may be simply made
after the instrument has been adjusted for any operation by
ascertaining or simply noting approximately the angle of the
tilt, and setting off this angle on the horizontal arc towards the
tangent line, thus varying the chord or base line to this extent,
or it may be found by referring to a table of natural sines, etc.,
and multiplying the cosine of the angle of the tilt by the tangent
of the vertical arc angle, the result being the tangent of the
corrected angle, thus:—if the angle of the tilt be 10°, and the
vertical arc angle 25°—Referring to tables, cosine 10° = ·98481,
tangent 25° = ·46631. ·46631 × ·98481 = ·45924 = tangent
24° 40′, the corrected angle making a variation of 20′.
596.—To take Cross Sections when the Line is on a
Curve.—This operation is similar to that explained above
for taking cross sections when the line is straight, except that
being on a curve a variation of the tangential angle must be
made at each peg or section. As this is performed mechanically
by a single movement of the angle repeater and no
reading of the angle is required, the work is just as readily
performed. To more clearly elucidate the method, we will
take a case in point and assume that the number of sections
to be taken is 15 and that the radius of the curve is 50 chains,
which the accompanying diagram illustrates.
Diagram (Fig. 261) showing the adjustment of the instrument
for taking sections on curves and the variation of the
tangential angles for each section.
Fig. 261. If the centre pegs be taken as slope pegs, the diagram applies to illustrate
the setting out of half widths.
Having set up the instrument at A, Fig. 261, over the
centre peg of the series in the manner before described,
ascertain the tangential angle for the first chain of the curve
by dividing the constant, 1719, by the radius of the curve in
chains, which gives the angle in minutes or 1719 ÷ 50 = 34′ 24″,
and set the angle repeater to give a movement of double
this angle or 1° 8′ 48″, ready for application at each change of
section.
Set the horizontal arc to the tangential angle for the
seventh peg from the instrument at which the first section has
to be taken, or 34′ 24″ × 7 = 4° 0′ 48″, and direct the
telescope to the peg. Zero is now on the chord line AD,
which is parallel to the tangent at the seventh peg, and at an
angle of 8° 1′ 36″, from the tangent line AB, which divided
by 7 gives the variation of the tangential angle at each section,
or 1° 8′ 48″, to which the angle repeater has been set.
Release the horizontal arc and bring it round to an angle of
90° from zero, and the vertical arc will be at a right angle to
the line A D and parallel with the section line at the seventh
peg. Release the telescope from the arc and turn it at right
angles thereto in the direction of the zero line AD. Now,
by working the back adjusting screw of the tribrach, tilt the
instrument until the cross web comes somewhat above the
seventh centre peg, then tilt the vertical arc until the cross
web is parallel with the lateral inclination of the ground
surface. Clamp the arc and note the angle thereon to determine
the inclination of the base to plot the sections from,
and the instrument is then in adjustment for taking the first
section at the seventh peg in the manner already described,
being careful that the lateral bubble on the instrument is in a
perfectly level condition. To take the second section at the
sixth peg, one movement of the angle repeater must be made
and the lateral bubble adjusted, which operation must be
repeated for every succeeding section.
The movement of the angle repeater brings the vertical
arc parallel to the section line at each peg, and the adjustment
of the bubble maintains the angle of the inclined base
uniform throughout.
When the sections are all taken on this side of the
instrument, the telescope is turned to the other side and the
operation continued until the whole fifteen are completed.
From the above detailed description it may be thought
that the adjustment of the instrument for the operation is
somewhat complicated, but in practice it is not so. After the
first experience and the method is understood, it is only a
matter of two or three minutes, and once in position the
sections may be taken as rapidly as on level ground, and the
saving of labour is practically the same as in taking sections
when the line is straight.
597.—To set out Half Widths or Slope Pegs when the
Line is straight.—In commencing this operation it is
necessary in the first instance to set out two or more half
widths, according to the length of the cutting or embankment.
These may be a quarter of a mile apart, or so far as a ranging
rod may be clearly seen from one point to the other. The
pegs put in at these points act as normals from which to
"bone" or range in all intermediate pegs by sight simply,
without further recourse to levelling measurement or calculation.
If the ground surface be comparatively flat, these
normals may be put in in the usual way by using the instrument
as a level, but if the surface is much inclined and the
slope deep, a simpler method may be adopted, which will be
hereafter explained.
Assuming that the normals have been put in, set up the
instrument at any intermediate peg in such a position that the
telescope when set to the angle of the slope shall line with
the top of the peg, as per sketch, Fig. 262. Then release
the telescope from the vertical arc and direct it to one or
other of the nearest normals, adjusting the cross web to cut
the top of the peg by turning the instrument on its axis.
Clamp in this position and the telescope will revolve in the
plane of the slope, and any point on the intermediate surface
intersected by the cross web is the outcrop of the slope and
the position of the peg. When all the pegs on the one side of
the instrument are put in, turn the telescope to the other side
to cut the next normal and proceed in the same manner.
When all the pegs have been put in for this half mile
distance, the instrument may be moved to the next half mile
normal and the operation repeated, until the whole cutting or
embankment is completed, the last normal point being in all
cases the formation width at the ends.
In speaking of half-mile distances we are assuming the
most favourable conditions of surface and application of the
method, but in practice where the surface is undulating the
positions of the normals should be at the most elevated points
from which a considerable range of sight may be obtained.
In fixing the points for the slope pegs, a rod should be
held in an inclined position and be brought to line exactly
with the cross web of the telescope, the pegs should then be
driven level with the ground surface where the foot of the rod
has rested.
598.—To set out Slope Pegs when the Line is on a
Curve.—The operation is similar to that described above,
except as explained for taking cross sections on a curve. A
variation of the tangential angle must be made for each peg,
and if the centre peg shown on the diagram accompanying
that explanation be taken as one of the slope pegs, it will also
serve the purpose of illustrating the present one, and a brief
recapitulation of the manipulation of the instrument to bring it
into adjustment for the operation is all that will be required.
The normal slope pegs having been set out and the
instrument set up at an intermediate one, as before explained,
instead of directing the telescope in the first instance to intersect
one of the next normals, set the angle repeater to double
the tangential angle for the first chain in the curve, and the
horizontal arc to the tangential angle for the distance in chains
that the normal is from the instrument. Then turn the
telescope to cut the normal peg and clamp the lower limb.
Now bring the horizontal arc round to an angle of 90° from
zero and clamp. Release the telescope from the vertical arc
and turn it at a right angle thereto in the direction of the zero
line AD, and by working the back adjusting screw tilt the
instrument until the cross web cuts the normal peg again.
Adjust the lateral bubble on the instrument to a level condition
and it is in adjustment for the operation.
To put in the first peg from the normal, make one movement
of the angle repeater and adjust the bubble. To put in
the second one, make another movement of the repeater and
adjust the bubble, and so on until the whole is completed.
It will thus be seen that by a simple mechanical operation a
vast amount of work can be done in an incredibly short space
of time as compared with the levelling method, and that with
little or no effort on the part of the operator.
599.—Alternative method of setting out the Normal
Pegs.—Let the diagram, Fig. 263, represent the section of a
cutting at the point opposite which the normal has to be set
out, when the section depth may be assumed to be 16 feet, the
formation width 30 feet, and the slope 1½ to 1, or at an inclination
of 56° 18′. The distance bc for a 1½ to 1 slope is one-third
the formation width, or 10 feet. The data required for the
operation is the distance ad from the centre peg to the plane
of the slope, which is found by multiplying ac by the natural
sine of the slope angle 56° 18′, thus: 26 × ·831 = 21·60 feet.
The operation when the line is straight is to set up the
instrument at a centre peg some distance away from the
normal in the manner previously described, viz., with the
front legs set across the centre line, the back leg on the
centre line, and the bubble on the tribrach set level before
adjusting the instrument, which manipulation produces a
perfectly vertical tilt.
After adjustment, set the horizontal arc to zero and direct
the telescope to the centre line, clamp the lower limb, set the
vertical arc to the angle of the slope, and bring the horizontal
arc round to an angle of 90°, or a right angle to the centre
line. Liberate the telescope and direct it again to the centre
line, and by working the back adjusting screw tilt the instrument
until the cross web intersects the top of the centre peg
at the normal. The telescope will now revolve in the line ag
parallel with the plane of the slope and at a distance of 21·60
feet from it. Therefore any point on the surface in the line
of the slope where 21·60 can be read on the staff is the
outcrop of the slope and the position of the peg.
In this example, when the required reading is higher than
the ordinary staff, lower the tilt and take an intermediate
reading, as at f in the diagram, Fig. 263, which may read,
say, 12·00, when the required reading on the peg will be
reduced to 9·60.
In setting out normals on a curve by this method the only
difference in the operation to that above described is that
instead of in the first instance clamping the instrument with
zero on the centre line, it must be clamped with zero on the
chord line, i.e., at double the tangential angle for the distance
the instrument is from the peg, as before explained in detail
for operations on curves.
By this method two normals may be set out at least 20
chains apart from one setting of the instrument, or several
slope pegs may be set out in like manner, which under certain
contingent difficulties of ground surface is an advantage of
considerable importance.
In this connection there is also an alternative method of
putting in the slope pegs after the normals have been set
out, which, under certain conditions, may be employed with
advantage.
Instead of setting up the instrument at the back of the
normal with the telescope set to line with the plane of the
slope, and to range the pegs in by means of a rod or staff held
at the inclination of the slope, as before described, it may be
set up in any position in the line of slope where a reading can
be taken on the peg, as at a on the sketch (Fig. 264), and at
the point read, as at b, a disc should be clamped to the staff,
as this can be much more clearly seen than the staff graduations
when sighting long distances. The staff should then be
transferred to the next normal and held on the peg. If the
telescope be now turned in this direction and the cross web
adjusted to cut the disc, any point on the intermediate surface
where the disc can be intersected is the outcrop of the slope
and position of the slope peg.
It is necessary to observe in the setting out of slope pegs
that when there is a change of gradient the operation must
cease, but if the point where this occurs be made the position
of a normal the operation may be proceeded with, if the
instrument be set up at this point.
600.—To set out Slope Pegs on both sides of the Line
simultaneously without moving the Instrument from the Centre
Line.—Conditions. Single Line. (ab) Formation 15 feet.
(cd) Depth of cutting 14 feet. Slope 1 to 1.
The point e, Fig. 265, is the extension of the slope lines to
cut the centre line, and its depths below formation for 1 to 1
slope is half the formation width, or 7′ 6″.
Operation.—The instrument being set over a centre peg
with the telescope at the slope angle, turn the telescope to any
other peg and adjust the cross web to line therewith (on line c f).
Take the section depth cd (14 feet), to which add de (7′ 6″) =
21′ 6″. This multiplied by ·707, the natural sine of the slope
angle (45°) will give the distance from the axis of the instrument
to the slope line, thus: 21·50 × ·707 = 15·20 feet, and
the point on the surface at g where 15·20 can be read on the
staff is the position of the slope peg. This is similar to that
described in the last paragraph, but if the telescope be now
changed to the angle of the slope on the other side of the line
ch, the peg i is instantly found by the same reading (15·20).
601.—The Use of the Inclinometer in Mining.—A lode
having been discovered, it is required to mark out on the
ground the general line of the outcrop. Hitherto the method
employed has been to find the strike and drift of the lode and
to level and survey the surrounding country and plot on a
contour plan. Lines parallel to the strike and spaced according
to the trigonometrically calculated bases are ruled in.
The points of intersection of the contour line with that of the
parallel line to the strike of the same height above datum will
be a point of outcrop. The bearings of these points are read,
and their distances scaled from the plan, the theodolite is then
taken to the field, and the points found are marked out on the
ground. This entails a considerable amount of labour and
careful work both in the field and office, and then only points
at intervals are obtained and not a continuous line.
The inclinometer, having an adjustable axis at right angles
to the horizontal, enables the line of sight to be made to revolve
in any plane. If at the spot where the lode has been discovered
the instrument be set up in line with the strike, and
the movable axis adjusted to the angle of dip, it is evident the
line of sight lies wholly in that plane, and a continuous line of
outcrop may be pegged out on a flat or undulating country,
which can be produced to any length required by taking the
instrument to a fresh station. This feature of the instrument
is equally, if not more, important than its use for rapidly
pegging out railway slopes.
602.—The Gradiometer.—This instrument, while performing
all the duties of a first-class level, is designed also for
taking vertical inclines at small fixed angles for railways,
drainage works, steep incline levelling, etc., etc., and also
telemetrical readings up to great distances.
In general construction, as regards telescope, stand, etc.,
it resembles a level, and when set at zero is equal in every
way to one of the best, with the additional advantage that it
may be used for rapid work without the trouble of setting up
by the levelling screws, as the telescope may be levelled at
any sight by means of the gradienter drum milled head. The
gradiometric arrangement is effected by the telescope being
mounted in trunnions, one pair being adjusted vertically; the
amount of elevation or depression is indicated by a drum
carrying an open extended scale graduated to read rise or fall,
from 1 in 12 to 1 in 1,200, which may be conveniently and
distinctly read without the use of a vernier.
The additional parts do not increase the bulk of the case
and add very little to the weight.
By its use a great saving of work is effected. For instance,
for a town drainage in which it is desired to work out an
inclination, say the levels indicate a fall of 10 feet between
the extreme points: if the line the drainage is intended to
take be measured, however angular or zigzag it may be, and the
length of that line be divided by the amount of fall, this will
give the gradient; say the line of streets measures 5,000 feet,
this, divided by 10 feet, gives a gradient of 1 foot in 500.
Therefore if the drum be set to that proportion, all the pipes
may be laid directly without further setting. The gradients
for any railway may be instantly found by merely turning the
drum until the telescope sights, up or down the incline to be
measured, a reading on the staff equal to the height of the
instrument, and taking the reading of the drum at the position
of the indicator.
For levelling steep inclines it also saves a great number of
settings up, as, instead of levelling for, say every 14 feet rise
or fall, the gradient of the total distance can be taken and
also the distance measured by stadia reading, when the
incline is not too great for taking one reading with telescope
level, or by gradient reading when this cannot be done, and
by adding the staff reading to the distance divided by the
gradient, and deducting the height of the instrument the
difference of level can at once be ascertained.
Example: Sighting a staff at a gradient which falls conveniently
upon it, say 1 in 35 and this reads 8·7 feet. Distance
measured, as explained later, say 735 feet, then 735/35 = 21 feet +
8·7 feet = 29·7 feet; deduct the height of instrument, say 4·9
feet, difference of level 24·8 feet.
For measuring long distances beyond the range of the
stadia lines or points in the diaphragm, or for measuring
distance on inclines, the gradiometer will also be found very
useful, as by taking the difference of any two suitable gradients,
the base distance is given without calculation for difference of
hypo and base.
If the gradient be not very steep or below the height of the
staff, the simplest method is to sight the staff with the telescope
level and take the staff reading; say this is 12·45 feet, then
set the gradient drum to 1 in 100 and again take the staff
reading and, say this is 4·30 feet, the difference between these
readings = 8·15 feet. Strike out the decimal point which
multiplies it by 100 and we have the base distance 815 feet.
For shorter distances a larger base upon the staff may be
taken, thus giving greater accuracy; for instance, if the gradient
drum after taking the level reading be set to 1 in 50 and
the resulting difference divided by 2, any error in taking exact
readings is reduced by one half, or 1 in 33-1/3 and divide
difference by 3; or 1 in 25 and divide difference by 4: or 1
in 20 and divide difference by 5, etc. Any error of reading
would be reduced by one third, one fourth, one fifth, etc.
The difference of readings obtained by either of the
following two gradients will also give base measurement
without any calculation whatever: 100 and 50 | 63-2/3 and
40 | 60 and 37½ | 50 and 33-1/3 | 33-1/3 and 25 | 25 and 20 | 20
and 16-2/3 | 12½ and 11-1/9 | 11-1/9 and 10.
Example: Suppose the top of staff is below level altogether,
turn the drum until the top of staff is sighted in the telescope;
say the gradient of this is 27½ go on turning until gradient 25
is indicated and take the staff reading; say this is 12·75, then
move the drum until gradient 20 is indicated and take the
staff reading: suppose this to be 3·40, then
12·75
- 3·40
= 9·35
Omit the decimal point and the measurement reads 935
feet, which is the horizontal distance. The two most suitable
gradients would of course be used according to the position.
Distances may be set out with equal facility with the
gradiometer by the subtense method, by working out a subtense
suitable for the distance. This is easily done by dividing
the distance required by any two numbers having a difference
of the required subtense, the result being two gradients, which,
when worked with, will give that subtense at the required
distance.
Example: If the distance required to be set out be 650 feet,
a suitable size for an object to be plainly visible at this distance
would be 10 feet. Then take as divisors two numbers
having a difference of 10, say 10 and 20.
650 ÷ 10 = 65
650 ÷ 20 = 32½
These two gradients will give a subtense of 10 feet at a
distance of 650 feet, and all that is necessary is to send a man
out in the required direction with a 10-feet rod (preferably
having ends,
thus ,
for long distances, to facilitate
distinct reading), and signal him to move farther off, or nearer
until the length of the rod, held vertically, is exactly covered
by the movement of the telescope caused by revolving the
drum between gradients 65 and 32½.
It is always preferable to make the subtense as large as
possible, as the larger it is the more accurate the result will be.
All distances set out by this method are base distances, no
matter what the difference of level may be, and such figures
for divisors should be used as give the gradients below 100.
Gradients between 12 and 65 are the best and quickest
to work with, and with care more accurate results are obtained
than with chaining.
Thus, at one time, a distance may be set out or measured,
the difference of level taken, and also the gradient ascertained,
and the drum can instantly be set to zero and all ordinary
levelling operations continued.
If preferred the gradient drum can be divided to percentage
gradients ·001 to 8 instead of ordinary gradients 1
in 12 to 1 in 1,200.
603.—Gradioplane.—This is a new instrument, specially
designed by the reviser for very accurate underground surveying,
such as is required for large sewage work or water works,
long tunnels, or any work requiring a very rigid and accurate
instrument, with a very powerful telescope for measuring all
horizontal and small vertical angles.
The horizontal circle is 6 inches diameter, and reads by
two verniers to 20 seconds of arc, or it is fitted with micrometer
microscopes reading to five seconds of arc if desired.
In the former case it carries a floating bevelled aluminium
ring compass divided to ¼ degrees, reading by microscope, and
in the latter a long trough compass.
Vertical angles are measured by a very accurate form of
gradiometer screw carrying a drum with open extended scale
in exactly the same manner as the foregoing instrument, and
the remarks regarding that and its working apply equally to
this instrument. The telescope, which is 14 inches long and
carries a 1¾ inch object glass is so mounted that it will revolve
in the plane of any inclination set by the gradiometer drum, and
is provided with a locking arrangement for fixing it absolutely
true for fore or back sight, and it carries a long sensitive spirit
bubble to enable it to be used as a most accurate level and
for rapid levelling; this may instantly be set level by the drum
at any sight without troubling to level the instrument. The
diaphragm is fitted for subtense measurements.
A further refinement is fitted to the telescope when
desired, by which any grade may be instantly divided into
any desired number of parts; this is effected by means of a
horizontal circle fitted to the stage under the telescope, which
is read by a vernier attached to the telescope. This circle is
divided from 0 when the telescope is fixed at zero round each
way to 90 degrees into 100 parts, the vernier divided to read
100ths or 10ths of each division. It will be seen that when
the telescope is in line with the gradient drum, that is at zero,
it will be raised or depressed to whatever grade is indicated
upon the drum, and is then capable of being revolved 180
degrees for taking a back sight, when it sights the opposite
grade to that which it does when at zero. When it has
revolved 90 degrees only the telescope becomes level at any
grade, and therefore at any position it is set between zero and
90 degrees it sights a part of that grade; supposing the telescope
at zero is set by the gradienter drum at 1 = 1,000 then
by revolving the telescope from that to level, it passes over
100 parts of that grade, each of which may be subdivided by
the vernier to 100 parts again, consequently 100 × 100 × 1,000
which equals 1 in 10,000,000 or any desired number of
10,000,000ths may be readily set by means of the clamp and
tangent fitted to the telescope, or if the grade be set by the
gradient drum to 1 = 100 then 100 × 100 × 100 equals 1 in
1,000,000, or any other grade which is set by the gradient
drum may, with equal ease, be divided by 10,000 or any
other proportion that the horizontal circle vernier may be
divided to give.
A sliding lower plate is provided for accurately centring
the instrument, the levelling screws are adjustable for wear,
and the tribrach is fitted with quick-setting spherical joint.
This instrument will also be found of great utility in mining
work, to mark out the general line of the outcrop when a lode
has been discovered. This, by the ordinary method, entails a
considerable amount of labour and careful work both in the
field and office, and then only points at intervals are obtained,
not a continuous line. With this instrument the line of sight
may be made to revolve in any plane, so that if it be set up in
line with the strike at the spot where the lode has been discovered
and the gradient drum adjusted to the angle of dip, it
is evident that the line of sight will be wholly in that plane, and
a continuous line of outcrop may be pegged out on a flat or
undulating country and can be produced to any length required
by taking the instrument to a fresh station.
The above illustration, Fig. 268, shows the gradioplane
fitted with a horizontal circle to the telescope for subdividing the
grades of the gradienter drum, and when thus fitted forms the
most exact instrument for setting out or ascertaining gradients
that has been devised.
604.—Abney's Clinometer.—This very popular little
instrument, the invention of Captain Abney, Fig. 269, embraces
the same form of sighted level with reflector as that
shown in section, Fig. 87, p. 142, but the level instead of
being fixed in line with the tube is placed above it upon an
axis which forms the centre of a divided arc. The axis with
the bubble is turned to any angle by means of a light milled-edged
wheel placed in front of the arc. It carries an index
which reads on the arc the angular position of the level to the
centre of the instrument by a vernier to 10′. There is also a
scale placed upon the arc giving gradients from 1 in 1 to 1 in 10.
As the bubble of the level in its course passes the centre over
the axis its reflection is made to become coincident with the
sight line through the tube only when it is quite level. Therefore
whatever the inclination of the tube, the bubble may be
brought level by turning the milled head until it appears
centrally in the sight axis of the tube, and the angle at which
this occurs can be clearly read afterwards upon the arc.
The size of the instrument in its case is 5 by 2½ by 1½
inches; weight, 8 oz.
605.—Troughton's Abney's Clinometer.—In the
Troughton form, Fig. 270, the arc is toothed, and it is
moved by a pinion similar to the movement of the box
sextant, so that the bubble moves slowly in relation to the
motion of the fingers when adjusting. The arc is read by
a single index line instead of by a vernier.
606.—Telescopic Hand Clinometer.—The author
has recently added a telescope to the Abney form of clinometer,
as shown Fig. 271. The arc is moved by rack and
pinion and reads by a vernier to single minutes, therefore good
reading within one minute of arc may be made with it.
Captain East, R.E., suggested a mode of steadying the instrument
for observation which appears to answer admirably for
hand observation. He puts the hook-end of his walking-stick
into his waistcoat pocket and clutches a part of the
stick by his right hand at the height of his eye. Then
holding the instrument in his right hand supported by the
stick it is kept quite steady for observation.
607.—De Lisle's Reflecting Clinometer.—There
have been several arrangements made for converting the
Burel level, Fig. 89, into a clinometer; that devised by
General A. De Lisle, R.E., with modifications by Colonel
Bell and Mr. Alfred Cooke, as represented in Fig. 272, is the
most popular. In this a heavy arc is constructed upon the
lower part of the instrument. This is jointed upon a vertical
axis at C so that it may be revolved to bring the mass of the
arc either forward or backward, to take inclines upwards or
downwards, or to rest at an intermediate position to make the
instrument flat and portable in its case, it takes the position
shown in the figure. The arc has a stiff centre axis with a
radial bar, the edge of which forms the index. A sliding
weight is placed on the radial bar, which is sufficiently heavy
when at its greatest extension to exactly counterbalance
the weight of the arc in a horizontal position and to make
the mirror quite vertical. In this position it forms a simple
Burel level. A set of graduations are made upon the arc,
which are numbered 1 to 50 to 1 to 1. The radial bar
index set to one of these numbers gives the amount of inclination
that will result from the coincidence of the reflection of
the centre of the pupil of the eye cutting the object to be
observed. The length of this instrument is about 6 inches;
its weight about 10 oz.
608.—Prismatic Clinometer.—This instrument was
originally devised by the author about 1860. The form of the
instrument, Fig. 273, is that of a prismatic compass, art. 155.
A similar metal or card and talc dial to that of the prismatic
is used, but this is centred upon a transverse axis which is
pointed at the ends to fit into hollow centres. This card is
weighted on one side, so that when the sights are in a truly
horizontal position the prism will show the zero of the card
cutting the sight line. If the instrument be inclined upwards
or downwards, the degrees of elevation or depression will be
indicated by the card retaining its pendulous position. This
is a very convenient instrument for use with the box sextant,
and as it is only of about half an inch in thickness, and of
the same diameter, it will pack conveniently in the case with
that instrument—weight, 8 oz.
In Using this Form of Clinometer the prism is raised
or lowered in its sliding fitting until the divisions of the card
are sharply defined. Then in looking over the edge of the
prism through the slot above it, the hair in the window of the
back sight will appear to cut the divisions of the card; and the
object seen in the distance, in front of the hair to which the
instrument is directed, will appear coincident with the number
of degrees of inclination indicated by the card.
This clinometer is sometimes fitted upon a prismatic
compass, so that inclines may be read by the same prism and
sight arrangement. This is, however, done more neatly by
the arrangement next described, if the instrument is intended
to be used with the prismatic compass only, and is not wanted
separately for use with the chain.
609.—Barker's Combined Prismatic Compass and
Clinometer,[36] Fig. 274.—The prismatic compass of this
arrangement is that of Hutchison's form, art. 155. The clinometer
is of the same kind as that just described, but this,
instead of being a separate part of the instrument capable of
detachment, remains permanent. To effect this arrangement
the clinometer card is mounted over the compass card on a
pin axis instead of centres. A part of the clinometer card is
cut away so as to permit the compass card to be read beneath.
This cut-away part is held by a stop to a position out of the
field of the prism when the instrument is to be used as a
prismatic compass. When the stop is released and the instrument
is held with its face vertical, the pendulous clinometer
card comes into view, and cuts by its reading through the
prism the sight line, as before described for the prismatic
clinometer. The prism is focussed to the upper or lower dial
by a long, sliding fitting. It is used as the instrument last
described.
Fig. 275.—Continental form of clinometer (Burnier).
610.—Continental Form of Clinometer.—Hand
clinometers on the Continent are generally made on Captain
Burnier's plan, Fig. 275, which was explained for the prismatic
compass, art. 156. Indeed this instrument is more
generally combined with the prismatic compass. The graduation
is set up on a plated ring vertical to the plane of the
swing of a pendulum, shown in section Fig. 276. The
reading index is a hair which is read on the graduation by
means of a cylindrical lens, B, when this is brought coincident
with the sights D′W′ as described for Burnier's compass.
When the clinometer and compass are combined the vertical
rims stand opposite to each other, AC. A lifter, Fig. 275, L, is
provided to take the working parts out of bearing, and a stop
S′ to prevent oscillation. The illustrations show the combined
instrument: B cylindrical lens reading the drums; A
clinometer; C compass; DD′ fore sight; WW′ windows,
both of which fold down on the top of the instrument.
611.—Major Watkins' Clinometer.[37]—The vertical
plane of division is adopted, as in that of Captain Burnier, but
the reading, instead of being taken on the exterior of the ring
by a magnifier, which entails a projection, is placed on its
interior. This reading is magnified by a concave reflector,
shown Fig. 277 at R, which reads to a line on a slip of
ivory placed just beside the eye-hole E shown in the
engraving. The pendulum is stopped by a pin, upon which
it springs when the box is rotated vertically to prevent wear
when out of use. There is much less work in making this
instrument than Burnier's, and the round form is more
portable. The only point on which it does not bear comparison
is in that the concave mirror represents a uniform
distance sight which makes the reading indistinct to persons
of weak sight, whereas Burnier's admits of adjustment by
placing the instrument nearer to or further from the eye, the
cylindrical lens being made large to admit of this form of
adjustment. This instrument could be improved by the
mirror being made adjustable. Weight, 6 oz.
612.—Clinometer Sights.—A clinometer sight is often
attached to a light pocket compass, as shown Fig. 278 at the
upper part of the engraving, consisting of a pin hole and hair
cross. This, used in the manner shown by the position of
the eye in the engraving, can only be made to take sight
inclines by another person reading the pendulum index,
which marks the inclination in the degrees to which the compass
is divided. This portable pocket instrument is, however,
useful in other ways. Standing face to the instrument it
will measure inclines directly very fairly by looking over the
top edge and bringing this to the visual rate of inclination
at which the pendulum index can be read in front view.
Geologists commonly use it in this way to take the dip of
strata. It can also be used by putting it on or against
any inclined surface. The case is generally gilt or nickel
plated, and is about 2 inches diameter, and the instrument
weighs about 3 oz.
613.—Rule Form Clinometer.—This is made in the
form of a stout 12-inch, one-fold boxwood rule, Fig. 279.
It is much used by civil engineers as a working tool, and
intended to be applied directly to an inclined surface, either
placed on a straight-edge or otherwise, generally to take the
inclination of earth work. It may be placed upon a picket
laid upon the ground to take natural slope. When used in
this manner the lower surface is placed on the straight-edge
or picket, and the rule is slowly opened until the bubble in
the level in the upper limb becomes central. The arc of the
head joint will then indicate the inclination. It may be used
in another way: the lower limb may be set level on the
dumpy level compass or on any flat plane, and the inclination
may be sighted through the pin-hole and cross-hair sights
shown at the ends of the upper part of the instrument. Its
size is 6¾ by 1¾ by ½ inches; weight 9 oz. There are several
varieties of this instrument.
614.—The Road Tracer is a balanced clinometer much
used by natives in India and China for road making, Fig.
280. It consists of a pendulum, supported upon a stand
that carries a sighted tube which indicates the level of the
ground when the weight is carried in the axis of suspension.
The weight is adjustable to a scale by a screw. The scales
read inclines, by displacement of the weight, up and down in
percentages or gradients, to which it may be divided.
This instrument has been improved by Mr. C. V. Bellamy,
M.I.C.E., M.I.M.E., F.G.S., &c., Director of Public Works,
Lagos, West Africa, a civil engineer who has had great
experience in the colonies, and it will be found much more
accurate, less liable to get out of order and far more convenient
to use than the old forms. It is shown at Fig. 281.
The chief feature of this pattern lies in the adoption of
the arc of a circle instead of a straight scale, and a pendulum
weight actuated by a rack and pinion in place of the screw
and sliding weight. This admits of greater nicety in the
divisions and allows a stronger and lighter construction.
The sighting tube is provided with reversible sliding
shutters, so that back readings may be taken without unclamping
the instrument or altering the vernier or index. A powerful
clamp is provided for locking at any desired grade.
A recent further improvement by Mr. Bellamy has been
made by making this instrument in a form to give readings in
degrees of arc as well as in gradients. Fig. 282.
INSTRUMENTS OF REFLECTION—OCTANT OR QUADRANT—REFLECTING
CIRCLE—SEXTANT—PRINCIPLE—PARALLAX—CONSTRUCTION—EXAMINATION—ADJUSTMENT—ARTIFICIAL
HORIZON—SOUNDING SEXTANT—BOX SEXTANT—SUPPLEMENTARY
ARC—IMPROVEMENTS UPON THIS—OPTICAL
SQUARE—OPTICAL CROSS—APOMECOMETER.
615.—The Octant or Quadrant measures angles
within 90° by an arc of 45°. This instrument is generally
termed an octant on the Continent from the space of the
divisions; a quadrant by English-speaking races, from the
extent of angles it takes. The idea of bringing the reflection
of an object from a mirror in line with the direct sight line
from another object, to measure the angle at the position of
the observer subtended by the two objects, was originally
proposed and worked out in a manner by Hooke,[38] and also
by Newton.[39] Newton's invention was the more simple and
important. This was communicated to Dr. Halley, then
Astronomer Royal, but it was left unpublished until after his
death, when it was found in Newton's own handwriting among
Dr. Halley's papers.
Newton employed two mirrors to obtain the reflection of
an object placed at any angle of less than 90° to the axis of
the telescope or sight tube, to throw an image directly through
the tube. One of these mirrors was placed at an angle of 45°
to the axis of the telescope and covered half its field aperture,
so that a direct image of an object could be received by the
eye from the open uncovered part of the telescope at the
same time as the reflected image of another object from the
mirror. The second mirror was placed so as to throw its
reflection into the mirror on the end of the telescope without
giving any obstruction to the open aperture. This side
mirror was fixed with the centre of its plane over the axis of a
movable arm which read upon an arc the amount of its
angular displacement to 90°. The mirrors were so arranged
that their faces should be parallel to each other when the
movable arm was placed at the zero of the arc. The graduation
of the arc was of double the closeness of the ordinary
arc reading, so that the angular positions of the two mirrors in
relation to each other was indicated according to the following
law:—
That the angle between two reflections in the same plane is
equal to twice the inclination of the reflecting surfaces to each
other.
616.—Hadley's Quadrant.—In Newton's quadrant the
arc was brought most inconveniently in front of the face.
By Hadley's arrangement the telescope or sight line is brought
in a direction about parallel with the chord of the arc,
producing the very convenient form of instrument now in use.
This instrument was exhibited at the Royal Society, 13th
May, 1731.[40] It was tried experimentally by the Astronomer
Royal, August, 1732, in a yacht excursion, when readings
were taken satisfactorily within a minute of arc.[41] It afterwards
came into general use.
The quadrant was at first held to be sufficient for
measuring the sun's altitude for obtaining latitude, but
Hadley, as early as 1731, saw the advantage of extending the
arc so as to be able to observe the opposite horizon if the
direct one was obscured. It was also found that measuring the
moon's angular distance from a star beyond 90° was serviceable
in determining longitude. He therefore proposed by a
duplicate system of reflections to extend the arc by what is
termed a back sight to 220°. The means he suggested, which
were commonly carried out in instruments of the period,
were found to be too complicated for practice.[42] In the
meantime the construction of these instruments, originally
framed of a combination of wood, ivory, and metal, was much
improved by making the frame entirely of metal. There
were also great improvements made in the optical parts, by
which the arc of 90° was extended. In 1757 Captain
Campbell had an instrument constructed of metal of 60° of
arc which therefore read to 120°. This instrument, with
details of improvement, principally by Ramsden,[43] became the
modern sextant.
617.—Reflecting Circle.—As soon as the success of
the sextant was assured there appeared to be a general desire
to complete the circle by reflections, many inventors thinking
this would possess great advantages over the arc of 120°, and
we find therefore no lack of inventions to this end, even by
eminent men. Reflecting circles, as they are termed, that were
of sufficient merit to come into limited use, were designed by
Mayer, 1770; Borda, 1787; Mendoza, 1801; Hassler, 1824;
Fayrer, 1830. Troughton's circle of about this period was no
doubt the best instrument of the class.[44] We have also
meritorious reflecting circles by Pistor and Martins, and by
Amici.[45] Although these instruments were used at sea to a
limited extent, particularly on foreign ships, they were also
used on land, where indeed they were more manageable. As
no further reference to these reflecting circles will be given,
anyone interested in the matter may refer to the books
mentioned in the notes, where very full particulars of their
structure are given. It was felt necessary to mention the
subject here, as the same ideas are constantly cropping up as
assumed advantages where previous experience is forgotten.
Reflecting instruments at sea are tedious to use when the
angle to be taken exceeds that taken in by the eye without
movement of the whole body. On land, when the angle
exceeds 120°, a theodolite is better; but supplementary
angles may be taken with the sextant conveniently on land,
where the portability of the instrument is of great consideration.
This will be again brought forward in discussing box
sextants with supplementary arc.
618.—The Sextant, of the invention of which some
particulars have just been given, is only used as a surveying
instrument for the exploration of new countries, for which
employment—it may be used with or without a tripod or
stand—it is found to be a most convenient, light, and
portable instrument for the traveller for ascertaining longitude,
latitude, and time with the aid only of an artificial horizon.
Triangulation may also be taken with it of terrestrial objects,
even for the complete circle, by repetitions from station to
station in angles within 120°. The same principles which
are followed in the construction of the nautical sextant are
followed also in the manufacture of two modified forms of this
sextant which are used for surveying only, the sounding
sextant and the box sextant. As the nautical sextant is most
open to observation of its parts it will be more convenient to
discuss the construction and general arrangements of this
instrument first.
619.—Optical Arrangements of the Sextant.—Newton
in the description of his instrument placed the mirrors
parallel to each other, that is, to zero of the arc, in his
illustration for the demonstration of the principle. In this
position he showed that the direction of the reflected ray is
coincident with the direct ray entering the eye from the same
object or star. This scheme the author has generally found
the clearest for illustrating the principle to persons not well
acquainted with optics, there being some difficulty in explaining
the law just given, art. 615, from a more complicated
scheme.
Fig. 283.—Reflection in direct line from two plain mirrors.
620.—If two mirrors be placed with their faces parallel
to each other in such a manner that a ray of light may
continue after two reflections from them, the ray will continue
its path parallel in its direction to its incidence upon the first
mirror.
Let MM′, Fig. 283, be two mirrors placed with their
faces opposite and parallel to each other. Let the incident
ray IM fall on the mirror M whose normal is a. Then, as
the angles of incidence and reflection are equal, art. 54, it will
be reflected at equal and opposite angle to the normal to M′.
Let the normal of M′ be a′. Then again, the incident line
MM′ will be reflected at equal angles to the normal to D′,
that is, as shown by the diagram, it will continue parallel with
the incident ray and in such a position that an object at P
would appear to the eye, placed at D′, as though it were at
P′ in the direct line of sight.
621.—Parallax.—It will be seen by the figure that the
point P does not appear to the eye at D′ in its true position
but at P′ therefore with the mirrors MM′ quite parallel, the
points P and P′ appear coincident, and would read as one
point with the index of the sextant set at zero, that is, at the
position when the mirrors are parallel to each other; whereas
the points P and P′ really subtend a small angle if direct
lines be drawn from them to D′. It is therefore clear that
the angle read by coincident reflection and direct or, as it is
sometimes called, visual image is less than the true angle at
about the position shown. This difference is called the error
of parallax. When the object is distant this error is immeasurably
small. The parallax error varies proportionately
to the distance of the mirrors apart and with their angular
position. If the mirrors are in such an angular position that
the rays proceeding from an object impinging upon the centre
of the first mirror would, if continued, reach the eye, there
would be no error of parallax. This occurs in the nautical
sextant at about 60°, and the parallax error increases on
either side of this point.
622.—In the practice of surveying this small error is
neglected. When the box sextant is used the mirrors are
placed at a very small distance apart, and the parallax error
therefore is extremely small even for near objects. Where
two objects are to be triangulated, the one near and the other
distant, the parallax error is much decreased or eliminated by
taking the near object by direct vision, and the distant object
by reflection. In this case, if the near object be towards the
right hand, the sextant must be used in an inverted position.
If the two objects be both near, a distant object may be
sighted in the direction of one of them for the reflected
image.
623.—It is readily seen that if the parallelism of the
glasses shown in the figure be disturbed, say by a change in
the relative angular position of M′ so that the planes M and
M′ continued to subtend an angle to each other, then the
normal of M′ must also be changed in direction equal to
this; but the ray MM′ remaining constant, as there is no
movement of M, this ray will therefore be displaced in its
reflection from M′ an amount equal to the angle of incidence
on M′ from its normal, plus the angle of reflection from the
opposite side of the normal, that is, to double the amount of
angular change of the position of the mirror or of its normal,
which is the same thing. The sextant therefore reads, by
change of position of one of its mirrors, half the angle of
reflection upon its arc; and to make it read to the angular
value of its reflection the divisions on the arc are made
twice as close, that is, half degrees are made to read as
degrees. This will be better explained by the following
scheme.—
Fig. 284.—Principles of reflection of the sextant.
624.—The above scheme, Fig. 284, is taken from Captain
Magnaghi's admirable work before mentioned, which gives a
very clear geometrical demonstration of the value of angular
positions in compound reflection. A ray of light SR directed
to a plane mirror R is reflected therefrom to a plane mirror
R′, following a plane of reflection perpendicular to the
intersection of the two mirrors. The direction R′T of the
ray reflected by the second mirror falls into the same plane of
reflection, and makes with the direction SA of the incident
ray an angle double that which is comprised between the
two mirrors.
The two planes of reflection SAB and ABT unite in
one because they both contain the line AB and the normal
BP to the mirror R′.
In prolonging the normals of the mirrors to their point of
intersection P we find that—
BTS = BAS - ABT;
but as ½ BAS - ½ ABT = BPA = BDA,
therefore BTS = 2 BDA.
625.—The mirrors being placed in the position shown in
the figure, if we look through a telescope whose visual axis is
placed in the line ET, with its objective to the mirror R′,
we see in the centre of the field of view the image of the
object S reflected consecutively by the mirrors R and R′.
We also see in the telescope whether the mirror R′ is only
a certain height above the plane of reflection, so as to permit
half of the object-glass to receive the rays coming from the
point E situated in the prolongation of the line TB, also the
image of E which is necessarily coincident with that of S,
because the rays by which each image is formed enter the
telescope in the same direction BT. Therefore when the
images of the two objects E and S appear superimposed or
coincident in the middle of the field of view, we have an
index given that the mirrors form an angle with each
other which is half that which is made at the point T from
the same objects, and when one is known the other is
easily deduced.
626.—Nautical Sextant.—The ordinary construction
of this instrument, Fig. 285, consists of a cast gun-metal
frame, forming approximately in outline a segment of a
circular disc AA″ including within its extreme radii
about 155°.
627.—The Limb G, which is made only about 1/12 inch in
thickness, has generally a face of about ¾ inch in width, which
is inlaid with silver or platinum, as Fig. 127, p. 186, to take
the graduation to about 140°. The limb is stiffened by a
deep, thin rib about ½ inch wide, supported by a corner
hollow. The exterior radial arms and interspace framing, Fig.
285 MM, which vary very much in design according to the
taste of the maker, is made generally of about 1/14 of an inch in
width upon the face of the bars, with a depth of 3/8 inch. This
arrangement of the bars placed edgewise gives great stiffness
to the surface of the arc with little weight. A handle L, made
generally of ebony, is supported on two standards or brace-piecesN, which are carried off to about 2 inches from the back
of the frame to hold the handle parallel with the face. The
handle has sometimes a hole bushed through it with metal, to
support the sextant upon a corresponding pin forming part of
a stand or tripod when the instrument is used for taking
observations on land. Three feet are placed at the corners of
the frame of the sextant, one shown at Q, to support it conveniently
on a table to take the reading of an observation just
made.
628.—At the centre of the arc a female axis of about
1½ inches in depth E is attached by three screws to the frame
perpendicular to the plane of graduation. This carries the
male axis, which centres the vernier on the vernier arm M.
The axis is covered by a protecting tube which forms one of
the three feet upon which the instrument rests when laid
down. The vernier arm is made of gun-metal of about 1/16 inch
in thickness and from 1 inch diminishing to ¾ inch in width.
This is stiffened by a light rib on its upper side.
629.—The Vernier V reads upon an 8-inch sextant, that
is, one of eight inches radius, to 10″, the graduations being to
20′ and the vernier taking 120 divisions. A description of the
vernier reading was given, art. 318. The vernier falls upon
the arc on the plan shown Fig. 127, p. 186. It is clamped
near to position by the milled-headed screw H, and is adjusted
by the tangent I. A magnifier J is placed on a jointed sling-piece
K which traverses the vernier. This is sometimes
provided with a ground glass shade to dull the silver for
reading. The sling-piece moves the magnifier opposite to
any division of the vernier.
630.—Over the axis of the vernier arm a large, oblong
mirror, termed the index glass, A, is fixed with its face in a
plane cutting the centre of the axis. The index glass is placed
with its longest sides approximately in line with the vernier
arm. This mirror is placed in a metal tray and is sometimes
made adjustable by three screws; but it is better fixed by the
maker by screwing the flange-piece, which forms one end of
the tray, hard down. The index glass moves with the index
arm and gives the first reflection of sun, moon, or star which
falls thence upon the horizon glass B.
631.—The Horizon Glass B is placed upon a spur-piece
formed in the same casting as the frame. This glass,
which is worked perfectly parallel, has the lower half of its
surface next the frame silvered. The silver is cut to a sharp
line against the plain part. The horizon glass placed in its
metal tray has adjustments given to it by means of capstan-headed
screws in a manner that will be presently described.
632.—The Telescope screws into a ring fitted at R, which
stands upon a bar erect from near the edge of the frame. The
female screw by which the telescope is held is formed of two
rings which adjust for the amount and direction of separation,
so that the telescope may be directed coincident with the
horizon glass. The bar or standard supports the ring
fitting and is made of either square or triangular section, fitted
accurately in a deep socket fitting, in which it slides to raise
or lower the ring by means of a milled-headed screw placed
on the end of the bar. This permits adjustment only sufficient
to bring the axis of the telescope opposite the line of division
between the plain and silvered parts of the horizon glass.
633.—Four Circular Shades, carried in square frames
fitted with dark bluish-grey glasses, are jointed to the frame at
C. These have nib-pieces at the upper corners, so that one
or more of the shades may be turned up at a time by the
finger-nail to intercept any surplus amount of light from a
luminous body reflected from the index-glass; or the whole of
the shades may be turned up when observation is made of the
mid-day sun. Three other similar shades, but placed in
circular frames are fixed at D, which hinge over and back, to
be thrown in or out of interception, and are used to subdue
the light from the horizon if required.
634.—The Telescopes used as a part of the sextant are
generally two in number. One for direct vision is a short tube
of about 3 inches in length, focussing at about 4 inches. The
optical arrangement is the same as that of an opera glass, consisting
of an achromatic object-glass of about 4 inches focus
and a concave eye-glass of about 2 inches negative focus,
Fig. 14. The second telescope is about 7 inches to 8 inches
in length. This has two Huygenian eye-pieces, which have
each a wired diaphragm at the mutual focus of the eye-piece
and the object-glass. One of these has two fine wires placed
parallel for use in adjusting the telescope, and the other has
two pairs of crossed wires to indicate the centre of the field
of view. There is also a plain pin-hole sight provided for open
vision.
635.—The Case in which the instrument is packed is
generally made of well-seasoned mahogany, dovetailed together
at its corners. The fittings are made to put the instrument
back in its case as it was last used within a wide range. A
tommy-pin for adjustments and a hand magnifier are supplied
with the instrument. The case is generally French polished
inside as well as out to prevent absorption of moisture from
sea air.
636.—Manufacture and Examination of the Nautical
Sextant.—Besides the general good work that this instrument
demands, the important points to be observed are, that
the glasses should be of hard crown glass worked perfectly
parallel from face to face; they should also be well polished.
These observations apply to both the reflecting glasses and
the shades. The silvering of the mirror should be protected
with a good coating of copal varnish. The mirrors should be
held by three points only, and be quite free from strain. The
upper of the three points should detach, so as to be able to
remove the glass at any time for resilvering. The axis should be
fitted with all the care necessary for a theodolite, and be placed
truly central to the arc. The extremity of the vernier arm
when free of its clamp should traverse the arc at equal distance
from its face and move with very light friction. The extreme
lines of the vernier should cut equal divisions all along the
arc 0° to 140°, observations being taken particularly at both
ends and in the centre of the arc. The vernier should lie flat
on the limb from end to end of the arc. The standard or
stem-piece for elevating the telescope should move upwards
and downwards stiffly but equally by the motion of its milled-headed
screw. The division lines of the limb and vernier
should be cut fine but very deep: they should be cut on the
dividing engine from the axis of the sextant to ensure true
centring of the arc, and not as in the usual plan of having the
axis adjusted to the divisions.
Fig. 286.—Section of axis and index glass of sextant.
637.—Axis.—This is the most important part of the
instrument, and requires the greatest care in construction.
Fig. 286 represents this to a scale half size. a the axis,
made of hard gun-metal, has a collar by which it is attached
to the index arm. The axis is ground and burnished carefully
into S the socket-piece, which is fitted into the frame and
held down by three screws. At the end of the socket there
is a collar-piece B attached upon an angular or tight conical
fitting by the screw D, which prevents the axis rising out of
its socket. The axis is covered by a cap L which protects it
from injury, and this at the same time forms a leg to the
instrument as before mentioned. The index glass I is
mounted in a tray T shown in section. There are two points
of contact at the lower part of the back of this glass, formed
by pins, and one point of adjustment pressing against the clip
G by a spring C in front, acting contra to a screw at the
back E, which adjusts only a small distance to bring the index
glass to perpendicularity. The flange-piece F is adjusted in
the manufacture so as to leave very small separate adjusting
to the index glass necessary.
638.—Section of the Limb and Clamp and Tangent.—The
general arrangement is shown in Fig. 287. M arms of
the frame; J section of the limb; C clamp attached to the
tangent N for clamp and tangent motion, described art. 346;
O milled head to clamp; N milled head to tangent. The
vernier is shown at V, reading through an opening on
the face of the index arm P. The rib to stiffen this arm is
shown at R.
639.—The Adjustment Arrangement of the Horizon
Glass.—This most important adjustment is constructed in
various ways. The plan now generally thought to be the
best is for the maker to fix the horizon glass frame firmly in
its true position perfectly perpendicular to the surface of
the frame, and to allow a small amount of adjustment to the
glass only. A convenient plan of doing this is shown in the
vertical section full size in Fig. 288. The frame FF is made
in one casting, which has its base collar firmly fixed to the
frame of the sextant. Fig. 289 is a cross section A to B.
H the horizon glass is held upon its face by three points, one
of which is shown at L, which is placed in the centre of the
top. The lower front points are the exterior corners of a
plate which is cut away between. This plate is held by the
screw G. The screw G forms a kind of hinge which,
together with the elasticity of the plate, gives a slight
pressure directing the glass hard upon the points of the
screws J and Q. The screw J resists this pressure lightly
and permits adjustment of the horizon glass H to angular
position in relation to the plane of the index glass to a small
extent, by means of a pin placed in the capstan head J.
The perpendicular position of the horizon glass, H, is
secured by slight adjustment of the capstan head K, which
moves against a spring L in the vertical centre of the top of
H. This piece, with screw and spring, is attached to the
horizon glass frame FF′ by the screw M, so that it may be
easily removed to replace or resilver the glass. The silver on
the glass is cut to a sharp line at about the point H with a
razor.
640.—Testing the Parallelism of the Surfaces of the
Glasses.—The best method is to firmly fix a telescope
provided with webbed or pointed index diaphragm so that
the webs or points cut a distant, sharply defined object, or its
edge only, quite clearly. If the glass to be tested be now
placed in four directions agreeing with its four sides in front
of the object-glass of the telescope, and it is worked
perfectly parallel, and is free from striæ, the distant object
will not appear to be displaced by its presence in the slightest
degree at any position. If the glass be not mounted and is
quite square, should there be any very small error, the
thickest or thinnest edge should be placed towards the frame;
but in this case only a very small error is permissible. The
coloured glasses require the same test as the white ones.
Where the parallel glass to be tested is small, the object-glass
of the telescope may be covered by a paper cap, with
a small hole only left through its centre, sufficient to take
the glass.
641.—The glasses, when fixed in the sextant, may be
examined for parallelism approximately by setting them end
up singly to the sun, with the sextant set at an angle that
the direct and reflected images of the sun's limb appear just
to touch, the eye-piece of the telescope being constantly
covered by the sun-glass. If there be a want of parallelism,
the image will be disturbed. One reason that the telescopic
plan first proposed is better to be followed in the construction
of the instrument, is that the telescope is fixed
and that there is no indistinctness from unavoidable motion
of the body, such as occurs when the sextant is held in
the hand.
642.—The Quality of the Surfaces of the Glasses may
be examined, both for flatness and brightness and for equality
of density, by holding them so that the reflected image of a
straight body, as for instance a stretched thin string placed at
a distance, may be observed by reflection in glancing over the
surfaces with the eye nearly parallel with its plane. If the
glass be imperfect the image that reaches the eye will appear
to be wavy. If the reflection appear misty, this is generally
due to want of parallelism of the glass; but this mode of
observation is altogether somewhat technical and difficult to
attain without skill.
643.—To Silver the Index or Horizon Glass with
Mercury.—Clean the glass thoroughly by boiling it in water
containing an alkali (potash or soda), and then polish it off
with whiting and water, using a clean piece of old linen or
perfectly clean wash-leather. Do not touch the surface with
the fingers. Take a piece of clean tin-foil freshly opened from
the roll and cut out a piece slightly larger than the glass to be
silvered. Lay this upon a smooth pad—an old leather book-cover
answers. Place a single drop of clean mercury about the
size of an ordinary shot upon the tin-foil and rub this gently
over the surface until it is entirely silvered. Now pour very
gently sufficient mercury upon the foil till the surface appears
to be flooded. Take a sharply cut straight-edge formed of
stiff writing-paper, and draw this over the surface of the mercury
to clear it. Take a slip of clean smooth writing-paper very
little wider than the foil and of about one and a half times its
length: spring the paper to a slight curve and place one part
of it over the silvered foil so that when it springs open it will
cover it and exclude the air from the surface. Now give the
glass a final polish and lay it upon the paper over the foil.
Hold the glass down with slight pressure with the left hand,
and slowly and steadily draw out the slip of paper in the linear
direction of the surface of the glass with the right hand. This
will take out the air between the foil and the glass, so as to
bring the mercury in contact and leave a perfect mirror. It
must now be set aside with the glass turned face downwards
in an inclined position, so that the surplus mercury may drain
off from the foil. Small slips of foil should be put at its lower
edge, which, by their attraction for the mercury, will accelerate
the draining. The mirror should not be touched after setting
it up to drain for twelve hours at least, after which the surplus
foil may be trimmed off. After another thirty hours or more it
may have any varnish or other protection applied to the back
of the silver.
644.—Where instruments are taken abroad mercury silvering
may become spotted, so that a small store of mercury and
tin-foil should be taken out with the sextant for resilvering.
But it should be particularly observed that the mercury should
never be placed in the same case with the instrument, as the
smallest particle, if it touch the frame, will eat into the brass
and destroy its strength. Sealing-wax dissolved in spirit
answers for a varnish at the back of the foil fairly well
after resilvering if proper varnish be not at hand. It is
advisable before attempting to silver a sextant mirror to
practise on a few slips of ordinary glass in order to get into the
way of doing it. In modern practice base silver is deposited,
and no mercury is used, but the process requires special skill.
645.—Adjustment of the Index Glass.—Hold the sextant
clamped to about 60° in a horizontal position with the index
glass near the eye. Look nearly along the plane of the
glass in such a manner as to be able to see one part of
the plane of the arc by direct vision, and another part by
reflection of it at the same time. If the direct view and the
reflected join in one line, and the arc appears as the continuity
of a single plane, the index glass is perpendicular to
the plane of the sextant. If this be not the case it can be
adjusted by turning the set screw placed at the back of its
upper centre, Fig. 286E, very gently.
646.—Adjustment of the Horizon Glass to Perpendicularity.—Place
the vernier at zero. Hold the plane of the
sextant parallel to the horizon and observe if the image of the
horizon seen by reflection at the edge of the silver line
coincides exactly with the image received directly through the
plain part of the glass. If it does so the horizon glass is perpendicular
to the plane of the instrument, that is, assuming
the index glass is also perpendicular. In this adjustment it is
well to rock the plane of the instrument say 20°, to see that
the horizon is cut as a clear line about its horizontal position
for this amount of angle. If the mirror be not perpendicular
adjust gently by the single screw at the top of the horizon
glass frame. If the horizon be not water, the sharp outline
of any distinct distant object will answer, or a piece of fine
string placed at a distance and stretched straight.
647.—Adjustment for Index.—This is the adjustment for
parallelism of the two mirrors at the zero of the arc. The
sextant is clamped at zero as before: the arc of the instrument
is turned in a vertical position and the horizon again observed.
If this appears to cut a clear line through the plain glass and the
mirror there is no index error, and the planes of the glasses
are truly parallel to each other in this position. If the line
is not continuous adjust gently by the lower screw, Fig.
288, at G.
648.—Adjustment of the Horizon Glass by the Sun.—This
is a better adjustment than that given above, except
that it introduces any error that may be due to the imperfection
of the shades; and it is more difficult particularly
for the first approximate adjustment. Arrange the telescope
and shades so that a clear outline of the sun's limb may be
observed without distressing the eye. Place the vernier at zero.
Observe the sun, which will be most conveniently sighted at
about 40° elevation, first with the plane of the frame vertical,
and then horizontally perpendicular to this. If the sun
presents a round disc in both these positions the sextant is in
adjustment. If in the vertical position there appears to be a
small notch at top and bottom of the sun's limb, the glass is
not perpendicular to the plane of the instrument, and this
requires adjustment by the screw at Fig. 288K. If notches
appear at the sides of the limb when it is held horizontally
there is an index error, which may be adjusted at G if it be
small.
649.—Index Error after Adjustment Allowance.—The
limb of the sextant is graduated 5° beyond the zero position
when the glasses are parallel to each other. This is called
the arc of excess. The vernier is also divided three lines
beyond its zero position, which is marked by an arrow. These
extra divisions are placed on the instrument for correcting the
index error by measurement of the angle subtended by the
diameter of the sun's disc alternately on one side and the
other of the zero line, in which observations, if the two
readings agree, the sextant must be in perfect adjustment;
when they do not agree half the error may be adjusted by the
horizon glass. The same observations may also be made
with a bright star by setting the index alternately on one and
the other side of zero. When the sun is used the reflected
and direct images are brought together, so that the two suns
that appear in the instrument just touch limb to limb, first
upon direct reading and then upon the arc of excess. When
the division is adjusted very nearly, any small error, plus or
minus, may be allowed as a constant for all readings. In
observations of the sun care should be taken that the eye is
protected, both by the sun-glass cover to the telescope and by
sufficient use of the shades.
650.—Adjustment of the Telescope to Set its Axis Parallel
to the Plane of the Sextant.—In fixing up the instrument
after manufacture, the ring standard which carries the telescope
is set at a measured distance from the plane of the
frame, so that the centre of the ring coincides with the height
of the silver line cut on the horizon glass. This is necessarily
a primary adjustment. For final adjustment the long, inverting
telescope is screwed home in the ring, and the eye-piece
which has two parallel wires across its diaphragm placed in it.
The telescope is brought to focus on any distant object, the
eye-piece being turned at the same time to bring the wires
parallel with the face of the instrument. Two objects are
taken subtending an angle of 90° or over,—as the sun and
moon, or the moon and a bright star,—and the index is
moved so as to bring the objects, say the limbs of sun and
moon, in contact with the wire nearest to the sextant, and fixed
there. Then by changing the position of the instrument a
little, the images are made to appear upon the wire furthest
from the sextant. If the limbs of the sun and moon still
remain in exact contact as they appeared before, the axis of
the telescope is truly adjusted. If the limbs of the two
objects appear to separate at the wire furthest from the
sextant, the ring-adjusting screw furthest must be loosened a
very little and the screw nearest the sextant tightened the
same amount. If the reverse, and the images appear to
overlap, adjust in the reverse direction. By repeating this
operation a few times the contact will appear to be the same
at both wires, and the axis of the telescope will be in collimation,
that is parallel with the plane of the instrument. After
the telescope is truly adjusted it may be raised or lowered a
little to make the reflected and direct images appear equally
clear.
651.—Final Examination of the Sextant.—It will be
readily seen that an instrument, although correct in theory
but depending upon perfection of workmanship in centring,
division, surface and parallelism of glasses, and also in its
adjustments, can scarcely be brought to perfection. The
errors generally increase from the zero point, where adjustments
are possible, and are greatest at 140°. In the ordinary
commercial sextant of the dealers the errors of centring alone
are commonly 3 minutes to 5 minutes, with like errors in
other parts. It is therefore better, where the sextant has to be
absolutely relied upon, to subject it to actual trial. The zero
point can be readily fixed by rules already given; besides this
the meridian altitude of several bright stars subtending angles
of about 30°, 60°, 90°, and 120° should be measured either
from a clear horizon or from a mercury artificial horizon, to
be described presently, for angles under 60°, and the errors
plus or minus tabulated. The data for the meridian altitudes
of certain stars upon any night may be taken from the
Nautical Almanac, which will require correction for the
latitude and longitude of the observer. This subject is too
complicated to be entered upon in detail here. At the present
time the National Physical Laboratory undertakes the examination
of sextants for a moderate fee. This is effected by
means of fixed collimators, art. 229. For angles distributed
over the arc the parallax error is eliminated by placing
the collimators in pairs. The N.P.L. certificate may now
be had with good instruments when purchased. It may be
noted that an originally well-made instrument retains its
qualities for all time, the wear of such instruments being
inappreciable.
652.—To Use the Sextant the right foot should be
placed nearly 2 feet in advance of the left and directed at
right angles to it. In this position the body is firm. The
instrument is supported by the right hand, the elbow being
brought down firmly upon the body. The clamp screw first
and then the tangent screw are moved by the thumb and
finger of the left hand. Some practice is required to make a
steady observation. To bring two objects into apparent
juxtaposition, methods of observation for terrestrial objects
will be reconsidered in discussing the box sextant further on.
As regards celestial observations reference should be made to
works on practical astronomy, as the subject would take too
much space to be entered upon here. The whole subject,
with many refinements of correction of parallax, etc., which
fall beyond the limits of practical surveying with the sextant,
is ably discussed in Chauvenet's Spherical and Practical
Astronomy.
653.—Artificial Horizon.—For ascertaining the latitude
of a place from the observation of a celestial body by
means of a sextant, it is necessary to have some means of
estimating the position of the horizon. A method of doing
this, originally proposed by the elder George Adams, optician,
1748,[46] was to float a parallel disc of glass upon a basin of
mercury, and to receive the reflected image of a star from the
mercury by the sextant simultaneously with its direct image.
The angle then given by the reading of the arc is double the
angle at which the true horizon is placed relatively at the
same time. This idea, carried out in a practical form in an
instrument henceforth called the artificial horizon[47] is due to
Wm. Jones, a well-known optician at the end of the 18th and
beginning of the last centuries, who arranged convenient
means of making the instrument portable, and to keep the
mercury from disturbance of the air by covering it with a
glass roof. The form of artificial horizon that he invented has
been in common use ever since. He also invented another
simpler form, which was that of taking the reflection from a
piece of silvered, or of black, glass. The performance of
the artificial horizon depends in any case entirely upon
means of obtaining a reflection from a perfectly horizontal
surface.
654.—Theory of the Artificial Horizon.—A ray M′ Fig.
290, from a luminous body, at infinite distance will have its
image reflected from a level reflecting surface SS′ at an angle
equal and opposite to the incident ray, the angles M′AS
and EAS′ being equal. Let E be the place of the eye or
the sextant: this will receive a ray from the same distant body
in direction ME, which is sensibly parallel with M′A. The
angle MEA being double the angle of incidence M′AS,
the half of this angle will therefore produce the horizontal
line EH at the height of the observer's eye if the plane of
reflection SS′ be level. Therefore if we take half this angle
MEA as it appears in the sextant, it will give an angular
position of the object in relation to the horizon at the height
of the eye, or be tangential to the surface of the earth. If
M′AS be 30°, the angle AEM will be 60°, showing the
elevation of object half this or 30°. The sextant takes 120°
with certainty; therefore 60° will be the limit of meridian
altitude the artificial horizon will measure.
655.—Artificial Horizon in Black Glass.—This
instrument is the most portable, packing in a close pocket
case. It is made of both circular and square form in
plan. Fig. 291 is the Admiralty pattern. The black glass
should have a truly plane surface. It is fixed over a brass
tray by being floated on plaster of Paris to avoid strain. A
light rim of brass is screwed down over the glass to keep it in
position. There are three adjusting screws AA′A″. It is
adjusted to level by a loose level tube ground on its under
face P. The level tube shown in detail Fig. 51, p. 94, is
placed on the surface lineally with the two screws, Fig. 291
AA′, and afterwards at a right angle to its first position with one
end of the tube towards A″. It is finally tested by traversing
at the position shown in the Fig. 291, and at right angles to
this direction. There is a great risk of getting a strain on the
glass in fixing it in its frame. The author therefore prefers
the circular form that leaves the glass quite free except at its
fixings at three equidistant points only. In this kind of
artificial horizon there is only one surface of glass to be worked
true; therefore, there is perhaps less risk of error on this
account than in other forms. On the other hand the mercury
presents a more perfectly level plane. The circular artificial
horizons are commonly made 3¼ inches diameter; weight,
¾ lb.; the oblong, Fig. 291, 4 inches by 3 inches; weight 2 lbs.
656.—Artificial Horizon of Mercury, Fig. 292. This
instrument consists of an oblong tray of about 6 inches by 3
inches by ¾ inch in depth made of wrought iron. It is covered
by a roof with two sloping sides at about 45° to the plane.
The sides of the roof are glazed with worked parallel glass
fixed by screws at three points. The mercury when out of
use is contained in an iron screw-stoppered bottle, Fig. 293.
It is poured into the open tray for use, and the tray is
afterwards covered by the roof to prevent currents of air
disturbing the level of the surface. After use the mercury is
poured back into the bottle from the corner of the tray.
It should be particularly observed that it is perfectly drained,
as any free particles in the case in which all parts of the instrument
are packed would be certain to attack the roof, which is
made of brass and simply varnished. The instrument is
packed in a mahogany case, size 7½ inches by 6 inches by
5 inches; weight, with 1 lb. of mercury, about 4¾ lbs.
657.—The Bottle, Fig. 293, is made of cast iron. It has
a screwed plug stopper with a leather collar and a covering
cap with a small hole through its apex. To pour out the
mercury the cap and stopper are unscrewed, the plug is taken
away, and the cover is screwed on again. The mercury then
issues from the small hole in the cap. To return the mercury
the cap is reversed and screwed upon the bottle. It then
forms a funnel. The tray has a covered corner at which there
is a small hole. This permits the mercury to be poured into
the funnel without splashing. Both plug and cap are then
screwed down firmly, and the bottle is placed in a secure
fitting in the case.
658.—Captain George's Artificial Horizon,[48] Fig.
294. This is a great improvement on that last described.
The instrument being made entirely of iron there is no risk of
getting it injured by escape of the mercury. It is also much
more portable and convenient. Two chambers E and M are
connected together by a tube through a stem-piece in which
there is a strong iron cock at a. The chamber E is cored
out and form a bottle into which about 1 lb. of mercury is
introduced by removing a screwed stopper at B. The chamber
M is an open tray with a cover formed of a piece of parallel
glass placed in an iron rim which screws down upon it. A
milled-headed screw at C forms an air plug. The cock moves
very stiffly by the leverage given by a tommy-pin, shown a′,
which is inserted in the hole at a. The chamber E is slightly
elevated to cause the mercury to flow from it to M, the cock
being turned on at the same time and the air screw C released
a little. By the same arrangement, M being raised, the
mercury flows back into the bottle for storage.
659.—For Using this Artificial Horizon, when the mercury
is poured out in the tray M, it is levelled by the three
screws AA′A″ so that it covers the bottom of the tray and
presents a clear, level surface. A separate disc of parallel
glass, which fits the tray M very loosely, is provided with the
instrument. This floats on the surface of the mercury and
keeps it quite still, even when the covering glass is removed.
This arrangement is useful also in case of an accident to either
of the glass covers. The disc is kept when out of use in a
soft leather bag which fits in the tray M. This artificial
horizon is generally carried in a solid leather case with sling
to go over the shoulder. Its weight complete is about 4½ lbs.;
size, 9½ inches by 4 inches by 1½ inches. The surface of
mercury is a circle of 3 inches diameter.
660.—Improved Captain George's Artificial
Horizon.—Mr. S. A. Ionides, C.E., has devised an improved
form of the foregoing instrument shown at Fig. 295.
In this the container is formed beneath the horizon box
with a plug tap fitted in the thickness of metal between the
two; this form makes the whole much lighter and less than
half the size of the usual Captain George's pattern.
661.—In Using the Artificial Horizon with the Sextant
it is generally placed on the ground at such a distance in front
of the observer that he can conveniently see the required reflection
of the star or sun, the observer moving about until the
reflection is obtained. This is a tedious process and requires
some practice. It is much more easily effected if the sextant
be mounted on a tripod or other stand. When a stand is used
it has generally a universal joint, so as to be able to take surface
angles also from the fixed position. When the altitude
of objects on the earth is taken, the observation requires
reduction for refraction, which becomes an important factor,
although this is variable with atmospheric conditions; but
upon the whole it always tends to make the object appear
higher than it really is. Commonly one-seventh of curvature
is used as an approximate correction. For solar and
stellar refraction, works on astronomy should be consulted.
The index error of the sextant is corrected before refraction,
when the natural horizon is employed. When the artificial
horizon is used the index error is allowed before taking its half
as a single measure. The artificial horizon is used also with
the theodolite. It forms the most perfect means of adjusting
the transverse axis by taking an observation of the pole star with
the telescope, first directly and then by its reflection from the
artificial horizon. If the images cut the centre of the webs in
the two positions by the movement of the transverse axis only
from the one to the other, this axis is proved perfectly level.
662.—Various schemes for obtaining the horizon by some
system of levelling apparatus attached to the sextant have
been devised, none of which are very practical, as they all
depend upon a pendulum or a gravitation surface of a
liquid or a gyroscope, and are all unstable as hand
instruments. There have been numerous patents taken out
with this object from that of Winter (1760) downwards,
which anyone interested in the subject may consult.[49] The
matter is mentioned here as the recurrence of the idea
appears to be frequent.
663.—The Sounding Sextant.—This instrument is
used for coast surveys. Angles are taken with it of objects,
buoys, etc., from the land and also from a boat on the
water for such objects or for others upon land. It is
constructed upon the same principle as the ordinary
nautical sextant; but as it is to be used as an all-day
working instrument, and not for a few diurnal observations
only, it is made much more solid, and its optical
parts take a more extended field of view. The graduation
is also stronger, such precision of reading only being
required as may afterwards be plotted on a chart. This
instrument is shown in perspective, Fig. 296. The index
glass is large—about 2¼ inches by 1¼ inches. This is
secured on all sides by a firm rim to the tray in which
the glass is held at three points. The adjustment of the
index glass is left under control, as it may occasionally
be necessary to remove it from effects of spray upon and
about it. The horizon glass is made about 1½ inches
in width and ¾ inch in depth. This is entirely enclosed
in a tray, the whole surface being a mirror without any
plane part to the glass as with the ordinary sextant, so
that it is entirely protected by the metal. By this
arrangement the eye receives the direct ray from the
object immediately before it, and the reflected ray from
an object whose angular position is desired to be taken
with it: but these images do not come exactly into
contact, as the narrow frame interposes. It is, however,
sufficiently near for terrestrial observations. The adjustment
of the horizon glass to the perpendicular of the
plane of the arc is the same as that shown in detail for
the box sextant further on. The adjustment of the
horizon glass to the index is by a stiff arm extended
from the sole-plate projected into a loose opening,
where it is held firmly by two opposing capstan-headed
screws, as before described. The arc of the sextant
is of 6 inches radius, graduated upon silver to 20′, and
reading by the vernier to single minutes only by the
microscope. The clamp and tangent are the same
as those described for the nautical sextant. The frame
is straight braced. The telescope has a wide field, with
achromatic object-glass of 4½ inches focus, the clear
aperture being 1-1/8 inches. The supporting ring of the
telescope has no rising stem or collimating adjustment,
but is solidly fixed in its true position by the maker.
The ring carries a plain disc pin-hole sight, which takes
the place of the telescope for near observations. The
instrument in use is held in the hand by a firm oblong
handle. The instrument rests, if required for reading,
upon three legs as the ordinary sextant. Its weight is
about 2¾ lbs., or when packed in its case, 5 lbs. Its
examination and adjustment are of the same kind as those
just described for the nautical sextant.
664.—Box Sextant.—This very neat and portable
instrument was invented by the late William Jones.[50] It is
used for taking angles within 120° upon the surface of the
land to within a single minute of arc. It has become
deservedly popular with British surveyors as a land surveying
instrument, and is equally so as a military one.
It is the same in principle as the nautical sextant already
described, but it possesses the great merit—as a surveying
instrument constantly in hand—that all its glasses and delicate
parts are securely protected from accidental injury by being
covered; whereas the nautical sextant, made for one or two
diurnal observations only, has all these parts exposed. And
it is not only that all parts are protected when the instrument
is in use, but they are all doubly protected by the covering
box when carried about out of use; so that it is found that a
well-made box sextant set originally in perfect adjustment will
retain this adjustment in average use for very many years.
The author has seen an instrument twenty years in use still
in perfect adjustment. The box which covers the instrument
out of use forms also a most convenient handle or support for
it when in use by attaching it in a reversed position underneath,
as it appears in Fig. 297. This attachment is made
either by a screw cut entirely round the body of the instrument,
or, what is much better, by a bayonet fitting, for the
reason that large screws of this description are liable to cross
thread. The general description of the outer parts is as
follows:—
Fig. 297.—Perspective view of the box sextant ready for use.
665.—C a covering box which inverts from the position
shown in the figure and covers the instrument. This has a
diameter of 3 inches and a depth of 1½ inches. B box containing
the optical and moving parts of the sextant. A axis of
index glass. This axis also carries a toothed segment fixed
close under the front of the box, by which both the index
glass and index are moved by means of a pinion to be
described. The index carries a vernier divided into 30,
which reads into the arc to single minutes; the arc is divided
to half degrees on silver. The magnifier is centred by a
swivel hinge joint over the axis, so as to permit it to be
brought to focus upon the arc at any position. This magnifier
is held down on the front of the box when out of use by a nib
catch at a position of about 80° of the arc. O a milled head,
the axis of which carries a pinion which works into the
segment above described under the index glass. The pinion
is about 1 to 9 of the segment, so that the index traverses the
arc of 60° (reading 120°) by one-and-a-half turns. This gives
a conveniently slow motion to the index glass, and enables
this sextant, if it be well made, to be set rapidly with great
precision. S two nibs, part of two levers for putting the
shades in or out of action.
666.—In the closed form of sextant the shades block the
reflecting position between the index and the horizon glass.
For surface surveying they have therefore to be opened out,
through an opening closed by a slide shutter which moves by
a stud in a slot on the under side. The shades consist
of one green and one dense red glass which must be worked
parallel, as before described for the nautical sextant. These
are used for taking altitudes of the sun, for adjustments only.
667.—The Key K is a milled head which screws out, and
carries a watch-key pipe at the end of its stem by which
adjustments may be made from three square-headed screws
fitting its pipe, two of which are close to b, the axis
of the horizon glass. These adjust perpendicularly to the
plane of the arc. One screw at a adjusts the parallelism of
the index and horizon glasses when the index is at zero.
668.—The Telescope is achromatic, with draw tube for
focussing. It magnifies about 2½ diameters. It has a
concave eye-glass, and therefore gives an erect image, Fig. 14.
A sun-glass E screws over the eye-glass when it is required
for sun observations. The telescope is attached to the
sextant by means of a crank-piece upon the telescope which
is fixed by the mill-headed screw T′ and two steady pins.
The crank-piece screws in reverse position upon the telescope
for portability before putting it by in its case.
669.—By some makers the telescope is made to slide into
the body of the sextant and thus become quite portable.
This plan is a very neat one, but it requires care to see that
the shades do not interfere before it is put by. The weight of
the entire sextant with its solid leather case is about 18 oz.
only. For close work the telescope is not generally used. A
sliding shutter pierced with a small hole covers the telescope
opening into the sextant, which is used as a sight hole.
670.—The Interior or Optical and Mechanical part of
the Sextant is shown Fig. 298. I index glass, fixed over the
toothed segment on the same axis. The pinion is shown
working into the segment moved by the milled head O of
Fig. 297 on the face of the sextant. Fig. 298: horizon glass,
cut by ED, adjusts to the vertical by screws CC′, which
have square fittings on the face of the instrument, shown
Figs. 299 and 300 full size. The differential adjustment
between horizon and index glasses is made by a screw with
a square fitting at P. This adjustment acts by screwing against
a helical spring, shown at Q. The reflected rays enter by a
wide window in the side of the box, Fig. 298 d, the direct
rays by a small window f. The path of a ray is shown by
fine lines from R to E, for the positions in which the index and
horizon glasses are placed. The pin-hole opposite which the
eye is placed is shown white. S shades with their axis are
shown cut off, to prevent confusion of other parts. They are
simply round discs of parallel glass on arms which rise from
the back of the face by pressure of the nibs at S.
671.—The Construction of the Box Sextant may be fairly
inferred from inspection of the engravings. The face-plate is
made of a casing in brass 1/8 inch thick, which should be well
hammered to harden and stiffen it. The axis, which has a
wide collar, is fitted into a hole in the plate, first by turning
it as exactly as possible, and then by burnishing it in by
friction, the hole being broached slightly conical with a
D-broach. The careful fitting of the axis is an important part.
The horizon glass frame, Fig. 300, is held down by a central
screw which fits tightly both in its fore hole and thread. The
flange of the tray F is cut to an angle on its under side to
permit adjusting to verticality by rocking over this angle, by
tightening and loosening the adjusting screws cc′ which protrude
in square heads to the face of the instrument. The
horizon glass, H, which is half silvered, is fixed in a tray-piece
which has two narrow fillets turned to the face of the glass,
and a spring-piece at the back brought up by a screw a. This
glass is entirely open at its unsilvered part. The toothed
segment should be cut upon its own axis, and although fitted
to the pinion without any looseness, it should not press the
index axis. The silver is inlaid in the arc on the plan shown
Fig. 127. The vernier is soldered closely on the index and
should read down to a fine clean edge.
672.—Examination of the Box Sextant.—The glasses
should be cleanly silvered, with a sharp, clear cut between the
silver and the clear glass of the horizon glass. The pinion
should move softly and equally in causing the index arm to
traverse the arc. If the pinion be moved in little jerks backwards
and forwards there should be no shake, but the index
should follow every slight motion. The magnifier rising joint
should move rather stiffer than the traversing joint, so that the
focus is not changed by traversing across the arc. The
magnifier should have about 1 inch or less focus, and should
stand square to the plane of the sextant when in focus. The
graduation should be deep and fine, and the vernier should
read 30 = 29 at the two ends and the centre of the arc. If
there be a small excess or defect of vernier to arc, this should
be noted and allowed for, either at the time of reading or as
an index error. The sliding fittings of the pin-hole sight,
shades, and under shutter should move firmly but not stiffly.
The telescope should fit without shake. The covering box
should fit well in both positions of cover or hand-hold.
673.—Adjustment.—The box sextant is best adjusted by
the sun upon the plan described art. 648. The adjusting
screws, as already stated, are moved by the key, which unscrews
from the face of the sextant, Fig. 297K. The adjustment is
made permanently by the maker, except only that of the
horizon glass, which is at the command of the user. The
adjustment to perpendicularity of face is made by the two
screws upon the face near b; adjustment to zero of arc by the
screw at the side a. In defect of appearance of the sun, the
sextant may be adjusted to any clear, sharp line, as that of a
stretched piece of twine, for perpendicularity of plane, and to
any object of clear outline sufficiently distant, say at half a
mile, to avoid error of parallax for index zero, art. 621.
674.—Use of the Box Sextant.—The sextant has its
under shutter opened by pressing the stud attached over in its
slot. The nibs of the shade levers, Fig. 297S, are then
raised and the shades depressed. The cover is then screwed,
or slid on if it fixes with bayonet notches, upon the under side
of the sextant to form the hand-hold. The pin-hole sight is
pressed over for use if not already in its position, unless it be
intended to use the telescope. The box sextant is held in
the left hand, with the right-hand thumb and forefinger
constantly holding the milled head, and turning this so as to
bring the two objects, of which it is desired to obtain the
angular position, from the observer, exactly in apparent juxtaposition,
the one over the other. In turning the milled head
it is better to let all the other fingers of the right hand clutch
and steady the instrument. To take angles objects should
be observed that cut sharp, erect outlines, as buildings, posts,
trees, etc., if possible. In open country it is necessary to use
pickets, to be described further on. With pickets the reflected
image of the upper half of one picket should form a continuous
outline with the direct image of the lower half of the other
picket in the eye, so that the pair of pickets appear as one.
Where an angle greater than 120° is required an intermediate
picket is set up, and angles taken to the right and left of this
are added together.
675.—It must always be remembered that the sextant
takes angular positions actually, whereas plans are made in
azimuthal angles. There are some not very satisfactory
means of approximate correction for this, for which books on
surveying may be consulted; but altogether the sextant is not
very useful for taking angles for plans on other than fairly
level ground, wherein it has proved a most valuable and
sufficiently exact instrument. Where ground is undulatory
fairly good work may be done with it by taking stations for
exterior triangles at equal heights on the hillsides, as
ascertained by a hand level or clinometer to be described, or
sometimes from hilltop to hilltop where these are of fairly
equal heights. For sketch plans of very hilly or mountainous
districts the prismatic compass, art. 148, is better, as this
gives, although with less precision than the sextant, its angles
in azimuth.
Fig. 301.—Interior construction of box sextant with supplementary arc.
676.—Box Sextant with Supplementary Arc.—This
sextant is preferred by many because of its more extended use.
It is complete as an ordinary sextant for angles up to 120°;
but if it be thought desirable to extend the angles to 220°—by
a single observation this may be done. The ordinary arrangement
of the box sextant just described is left intact and forms
the upper part of the instrument. This arrangement, as in
the box sextant, is attached entirely to the face or arc plate,
the only difference being that the index glass is made of less
depth. For the supplementary arc arrangement a mirror is
fixed upon the lower or sole plate exactly under the position
of the index glass. This mirror is termed the supplementary
index glass. The position of the face of the index glass is at
right angles to the face of the ordinary index glass when the
index is at zero. The arrangement of glasses is shown
Fig. 301: MM′ index glasses. The supplementary angle is
read through a separate pin-hole sight which is placed at
about 90° from the pin-hole sight of the proper sextant and a
little lower down on the rim. The arc of this sextant reads
in the ordinary manner, left to right, to an inner circle of
figures for angles from 0° to 130°. The supplementary arc
reads by the same vernier, and is figured in the same manner
at the tens; but it reads into an outer circle of figures which
progress in the reverse direction, that is, right to left. The
readings of the supplementary arc are from 90° to 220°, so
that for a certain range, that is, for angles from 90° to 130°,
these may be taken either by direct arc or by supplementary
arc. The supplementary angle is taken by means of the
coincident images of two reflections, one from the index glass
and one from the supplementary index glass, and not by one
direct and one reflected image as in the sextant proper.
Figs. 302, 303.—Diagram of supplementary arc sextant.
677.—Theory of Supplementary Angles to the Sextant.—For
the measurement of these angles we have to consider
direct reflections only of two reflecting planes placed one
above the other nearly in contact, so that the images projected
from both planes may reach the eye superimposed. Let
Fig. 302 II′ be the surface of a mirror (index glass) which is
movable to any angle in relation to the face of the mirror SS′
(supplementary index). For demonstration of the principle
these mirrors are shown in this diagram at 90° to each other;
therefore coincident reflections will be at 90° + 90° = 180°.
Let the lines FC and BC form a right line (180°); F fore
sight and B back sight. An object at F would be reflected
from the mirror II′ to the eye at E, the angles FCI and
ECI′ being equal. Another object at B reflected from the
face of the mirror SS′ would also reach the eye at E,
the angles BCS′ and ECS′ being equal. And as the
angles FCI and BCI′ are equal in crossing a right line,
the line FCB must be also a right line (180°) which is
indicated by the angle of coincidence of the two reflections to
E. The positions of the reflections are shown as angular
measurements upon the graduated arc.
678.—In Fig. 303 let SS′ remain as before, angle BCE
will remain as shown in both figures. Move the index glass
from the position II′ of Fig. 302 to the position JJ′ of
Fig. 303, so that after this movement the eye at E would
receive the image of an object at a new position F′ as reflected
from the mirror JJ′, F′CJ and ECJ′ being equal. In
this process, as the reflector JJ′ in the angle ICJ would
have moved half the angle JCF, the record of this movement
upon the index, which moves with JJ′, is at the same
time double the true angular difference, as with the sextant
proper fully described, the graduations being in both cases
the same pro ratâ. The increase of angle is taken supplementary
to the angle given by the first reflection, by addition
to this angle in a direction right to left from the right line of
the former sight EC; consequently this increase is read
backward on the sextant, that is, right to left, and is indicated
by the outer line of numerals.
679.—Manufacture.—The general structure of this instrument
is nearly the same as the ordinary box sextant, except
the parts just referred to. The supplementary index glass is
an ordinary mirror similar to the index glass but of only
¼ inch in depth: it is mounted in the same way. Its
adjustments are similar to the horizon glass in kind, but there
are no exterior screws, this glass being permanently fixed by
the maker. Opposite the supplementary index glass a wide
window is cut through the rim of the case near the sole plate
to take sight of the object at angles exceeding 120°, so that in
this sextant two large windows are cut out opposite to each
other. The diameter of this sextant is 3 inches; the exterior
depth about 1-5/8 inches, that is, 1/8 inch deeper than the
ordinary box sextant. It weighs about 20 oz. It is carried in
a solid leather case with strap to pass over the shoulder.
680.—Examination and Adjustment.—Examination will
be nearly the same as for the common box sextant. The most
important point is that the readings taken within both arcs
should be alike, assuming, which is necessary, that the part
comprising the sextant proper is perfectly adjusted. Thus
there is a 90° on both direct and reverse arcs. The 90° may
be measured by any pair of objects on the direct arc, and afterwards
compared by shifting the index to the 90°, on the
supplementary arc. If no object be found at 90°, then 95° 30′
or any other quantity may be compared. It is also well to
compare readings at or about 120° on both arcs. The 90° and
120° fall in the same position in the reading, and this checks
any error in either. If the adjustment be not fairly perfect, the
instrument should be returned to the maker. Indeed, this
sextant would be better without any external means of
adjustment, leaving these to be made by the optician in such
a permanent form that they will not be liable to change. It
is, as the plain box sextant, exceptionally protected from
accident.
681.—In using this instrument the arc up to 120° is taken
exactly as with the plain box sextant. Beyond 120° the
sextant is shifted to take sight through the supplementary pin-hole,
being particular to observe that the pinion is now turned
the reverse way to increase the angle, and that the vernier reads
for the supplementary arc right to left. It is in this reversing,
if not carefully performed, that a little difficulty is experienced
in using this instrument.
682.—Box Sextant, with Continuous Arc to 240°.—This
instrument is an improvement by the author upon
one originally designed by Mr. W. Franklin. The reading
is taken continuously from the same sight-hole and by
the same arc, and in a direct manner without any reversal for
part of the arc. This sextant reads with certainty to 240°.
683.—In the construction of this sextant there are two
horizon glasses superimposed one above the other and crossing
each other, with faces which are adjustable for perpendicularity
at an angle of 120°. The horizon glass is divided top from
bottom by a clear band cut through it, as in the old form of
back-sight nautical sextants. One of the wide glasses reflects
into the upper, and the other into the lower mirror of
the horizon glass. The pin-hole sight or the telescope is placed
in the same position as in the plain box sextant described.
The horizon glass is fixed and both the index mirrors adjust
to angular positions, or one index glass only and the horizon
glass is adjusted, this arrangement being optional. The arc
is graduated as the plain box sextant, but it reads with two
rows of figures from 0° to 120°, and from 120° to 240°, the
0° of the under line being under 120° of the upper. When
the arc is set to zero the index glasses are in such a position
that the direct vision and the reflection as seen in the upper
mirror of the horizon glass are coincident for direct images, as
at the zero of the plain sextant, but at this point the lower
mirror of the horizon glass reflects to the eye an object at 120°.
When the index is moved forward the angles continue onward,
reflected from both glasses, so that the upper reads on 10°,
20°, 30°, etc., whereas the lower read 130°, 140°, 150°, etc.;
so that if the objects desired to be triangulated are under 120°
the coincidence is seen in the upper mirror, and if over this in
the lower, the great distance of 120° apart of the angles preventing
the risk of accidentally taking the one for the other.
In the compact form of a box sextant this instrument embraces
the uses of the ordinary reflecting circle of double the diameter,
due to the entire circle graduation; and the range is sufficient,
as beyond 240° the head materially interferes with observation.
The size and weight of the instrument are generally but little
over that of the plain box sextant. The adjustments are made
permanently by the maker. The use of this instrument is
fully inferred from the description given. The construction is
shown in Fig. 304, E place of the eye with direct ray through
the horizon glass H to O. The index glass I is that of the
ordinary sextant, shown by dotted lines, throwing the image of
an object at P to the upper horizon glass and thence to the
eye at E. B is the fixed supplementary glass with its surface
at 60° to the lower horizon glass at A. The sight lines from
an object at Q are reflected from B to A and thence to E.
A spring arrangement shown SS with a milled head underneath
permits the lower glass A to be drawn down to convert
the instrument into a simple box sextant.
Fig. 304.—Stanley's continuous arc box sextant.
Fig. 305.—Section of supplementary horizon arrangement.
684.—Details of Spring Arrangement to the supplementary
horizon glass are shown in Fig. 305 full size in
section. The springs SS in Fig. 304 and S Fig. 305 form
two points of support to the horizon glass, the silvered face
of which is shown at A. A third point of contact is near D,
placed in the centre of the end of the supporting plate for the
horizon glass. When the screw R, which is placed in a loose
fitting, is released, the springs bring the supporting plate tight
up to D and hold the horizon glass firmly in an elevated
position. When the screw R is tightened it brings this glass
down. The horizon glass is adjusted over a rocking centre by
the screws CC′. A screw and collar b prevent the loss of the
screw R. By this arrangement the horizon glass is brought
in or out of the field of view, in order to use the supplementary
arc or for leaving it as a plain sextant.
685.—Open Surveying Sextants, similar to nautical
sextants but generally smaller and of stronger construction,
preceded the box sextant, and are still used to a limited extent
upon the Continent, particularly with some form of supplementary
arc, or arrangement to produce a large part of the reflecting
circle. These forms are also occasionally revived by the
opticians of our own country. The reason of this is easily
seen. To the optician who lives in a town, moves on a level
surface, and has comfortably warm hands, even in the winter,
to hold and move the separate parts of an instrument, the
open sextant appears the most perfect, as he can get at every
part of it easily to clean and adjust. The surveyor takes
another view of the subject. He is exposed in the open
country to all weathers and all difficulties of movement over
the land; therefore that form of instrument which is best
protected and least liable to injury by a fall will be sure to be
popular with him. It is upon these conditions the box
sextant of some form is generally preferred.
A handy form of portable surveying sextant has been
devised by the author and is shown at Fig. 306.
The arc is of 4 inches radius and is divided on silver to
read 20″, is complete with shades and telescope and packs
into a case 7 × 6 × 2½ inches.
686.—Optical Square.—This extremely handy little
instrument is invaluable for taking offsets in chaining for any
irregularity or obliquity to the right line in the boundaries of
fields, hedgerows, fences, streams, etc., giving as it does
instantly at sight a right angle to any object that may be
sighted on either hand. The instrument is optically constructed
exactly as a box sextant; but the glasses are fixed
with their faces permanently at the angle of 45° to each other,
by which means the reflection of 90° is truly given on
principles fully discussed at the commencement of this
chapter. This instrument being made very small, that is,
2 inches or less in diameter, it is found most convenient for
manipulation to place the adjustments to the larger glass, that
is, the index glass. The horizon glass, Fig. 307, h is therefore
fixed firmly, like the index glass of the box sextant, by two screws
to the sole plate. The index glass i is held and adjusted in
exactly the same manner as the horizon glass of the box
sextant, as shown in detail, Figs. 299, 300, the only difference
being that the frame which holds the glass is made of the
entire height. The rim of the case of the optical square is
formed of a short length, 3/8 inch to 5/8 inch, of a pair of
telescope tubes which slide easily together. One of these is
attached to the sole plate and the other to the cover, so that
at first they close together as a box and lid. All the openings
required for sight, as Fig. 307 at Q for horizon sight, o for
index sight, and e for pin-hole or eye sight, are cut through
the two tubes.
687.—The inner case is cut in the plane of some part of
the circumference of the instrument from a pin-hole into
a bayonet notch, made with a horizontal slot for the two
cases to revolve upon each other upon a pin, sufficiently to
close and open the sight holes. This plan secures the instrument
from any intrusion of dust when it is closed and out of
use. An adjusting key is placed in the case, held by a tube
or stud at the position k. The weight of the entire instrument
is about 4 oz. if of ordinary make; but smaller ones are made
in German-silver or silver, 1¼ inches diameter, 3/8 inch thick,
weighing under 2 oz. These latter are very convenient for
the waistcoat pocket, and are equally as exact as the larger
instruments. Fig. 309 shows the general outward appearance
of the optical square.
688.—Examination and Adjustment of the Optical
Square.—Place two pickets in an open space at a distance
apart, the further the better. Range an intermediate short
picket in right line with these or the top of a stake the height
of the eye, or what is better still, if at hand, the top of a tripod
stand. Place the optical square over the intermediate station
or tripod. Place another picket, which we will distinguish
as the 90° picket, at a distance, and make this appear in the
optical square coincident by reflection with the direct sight
of one of the pickets in the right line from our station. Turn
the optical square right over on its place, and looking in the
opposite direction take a sight at the other right line picket
and observe the 90° picket. If this still appears coincident
with the direct line in reflection the optical square is in perfect
adjustment. If it does not appear so, half the difference must
be adjusted by means of the key taken from the interior of the
case and placed on the square at k, Fig. 307, and this
observation repeated until the 90° is correct.
689.—In Using the Optical Square it is customary to walk
along the chain line at about the desired position for taking
an offset, looking by direct vision through the plain part of the
horizon glass h at a fore sight object until the required object
is sighted by reflection at right angles to this, where it appears
by coincidence of image with the fore sight. The heel of the
forward foot in stepping indicates fairly the vertical position of
the optical square; but some surveyors prefer the use of a
drop arrow to fix the point. The offset is then chained in
the line.
690.—Double Optical Square.—This instrument is
exactly what its title indicates, that is two optical squares, the
one placed exactly over the other, the one reflecting to the
right hand and the other to the left. A simpler name, however,
would be an optical cross. This arrangement of reflectors
greatly extends it use. First, as regards the 90°, this need
not depend in any way upon the position of the observer, as
two objects may be observed, one to the right and one to the
left, to appear to cut the direct forward line of sight, and therefore
to cut the base line at the exact position of the instrument
at right angles to it. Secondly, an intermediate station
can be found in direct line between any two points, as the
90° + 90° forms this line.
691.—The arrangement of the optical part of the instrument
is shown Fig. 308. The two index glasses CD are fixed
at equal angles to the direct line of sight EO. The two
horizon glasses AB are superimposed with the interval of a
small space, 1/16 inch, between them. The horizon glasses
are each separately adjusted so that their reflecting planes
are respectively 45° to the index glass from which they receive
the reflections. The diameter of the instrument as usually
made is about 2¼ inches; its depth 7/8 inch. The weight is
about 9 oz. It is generally carried in a light, solid leather,
sling case. Total weight with instrument, 12 oz.
692.—Examination and Adjustment of the Double Optical
Square.—1. Place the instrument, as already described for the
optical square, at a station intermediate between two pickets.
Examine the right angles, first looking towards one picket and
then towards the other from the same position, as with the
optical square, turning it over for this examination. 2. Turn
the instrument half round and examine it this way also by
turning it over again in like manner. Adjust either horizon
glass if required. 3. Now take the position for the eye of the
former 90° and see whether the extreme pickets appear in true
position by the exact coincidence of their images at 180°.
4. Do this again, facing the opposite way and turning the
instrument half round. If the extreme pickets still range in
line from the central station the adjustment is perfect. If they
do not do so half the error must be corrected by returning to
the first and second adjustments to find out between which
pair of mirrors it lies. For this adjustment the instrument is
much better to be placed upon the top of a tripod, as the
position of the axis should remain fixed after turning it over or
changing the direction of the instrument. It is only from
severe accident that the maker's adjustment will be disturbed.
693.—Apomecometer.—This little instrument, the
invention of Mr. R. C. Millar, is intended to measure the
height of buildings, trees, etc., by measuring the distance from
the vertical upon the surface of the ground. It performs one
of the functions of the box sextant in the same manner as the
optical square, that is, to measure a single angle by reflection.
The angle measured is 45°, consequently by measuring a
space upon level ground up to a vertical, the vertical will be
known, this being equal to the horizontal. Of course this will
always be approximate, as the ground will seldom be truly
level; but by taking a position, even on an incline, as nearly
as possible level with the object, a very fair estimate may be
made. Horizontal distances may be measured in the same
manner from a perpendicular to any line.
694.—The instrument is constructed in exactly the same
manner as the optical square just described as regards its
mirrors and its adjustments, but the faces of the mirrors are
fixed at the angle of 22° 30′, so as to give a reflection of 45°,
upon principles fully discussed. In Fig. 310, A is the index
glass, B the horizon glass, E the pin-hole sight. There is a
window opposite the index glass, and one behind the
horizon glass, each sufficient to take in a wide field of
view at about 45° and in the direct line E to H. These
windows close by rotation of the casing of the box, which is
made as the optical square. When closed the instrument is
dust-tight and may be carried in the waistcoat pocket loose,
or in a light snap leather case. Its size is 1¼ inches diameter,
3/8 inch in thickness, weight 2 oz. in German silver.
695.—The Use of the Apomecometer.—To measure the
altitude of a building the open side nearest level is selected,
and a station for observation is taken which is at a distance
thought to be approximate to the height. The instrument is
held edgewise with the pin-hole sight to the eye, and the
reflection of a point of the building about level with the eye is
observed by direct vision through the instrument. At the
same time there will appear a reflection of the summit of the
building. If we now walk backwards or forwards, as the case
demands, keeping sight of a level object, as for instance in
Fig. 311 the plinth of a building, then at a certain point the
summit of the building will appear by coincident reflection.
The height of the object will be the same as the distance
plus the height of the observer's eye. This distance may be
measured on the ground, or if a rough estimate is sufficient
it may be stepped, the principle of which is shown by Fig. 310
in the line OH, being equal to FH. If a part of an object
is required to be measured such part may be taken on the
horizontal plane, as for instance the height of the figure in
Fig. 311, by ab being = ed, as the base ab can easily be
measured. An approximate may be found by dropping a
small pebble at a and at b and then measuring the distance
apart of these pebbles.
696.—The distance of an inaccessible object may be
measured, as for instance a buoy at sea, by measuring in any
straight line double the distance and taking equal angles thereto
by the apomecometer on any direct line. An approximate
idea may be formed by walking over measuring points. As
for instance, b being a buoy at sea, Fig. 312, walk from e, at
which a walking-stick may be set up, towards an object o.
At E the buoy and object o will appear to be coincident.
Then drop a stone or make a mark directly under the
instrument. Walk on till beyond E′ and turn to face e. Now
in returning, the buoy and the object e will appear coincident
at E′. The distance EE′ is double that of the intermediate
a to b.
GRAPHIC SURVEYING INSTRUMENTS AND APPLIANCES CONNECTED
THEREWITH—PLANE TABLES—ALIDADES—TELESCOPIC
ARRANGEMENTS—SUBTENSE MEASUREMENTS—VARIOUS
DEVICES FOR HOLDING THE PAPER—CONTINUOUS
PAPERS—ADJUSTMENT OF TRIPOD HEADS—METHOD
OF USING—EDGEWORTH'S STADIOMETER—SKETCHING
PROTRACTOR—SKETCHING CASE—CAMERA
LUCIDA, ETC.
697.—Plane Tables.—These instruments have been
used for filling in the greater number of topographical surveys
in all countries. They possess the merit that any intelligent,
untrained person can be readily brought to comprehend their
manipulation in the work to be performed, as angles of
position of objects are taken directly by drawing lines pointing
to them from a point upon a sheet of paper stretched upon a
table. In new countries natural objects without very marked
outline are conveniently defined for position. The objection
to this method, from a point of view of the practical surveyor,
is that the work which can be done with equal facility in a
comfortable office from the field-book is with this instrument
performed in the open air, under risk of rain, dust, and other
atmospheric discomforts affecting both the person and the
material on which he works. But for countries where the
climate can be depended upon, the facility with which surveyors
with little experience can map details for filling in superior
triangulations made with the theodolite, its use has gained
much favour. Natives can be easily taught to use it, and the
check on their work through the previous triangulation is
perfect. The subject of plane tables will in these pages be
considered only in its general aspect, with the examples of a
few good instruments, referring the reader who cares to follow
the subject further to an excellent paper by Mr. J. Pierce, Jun.,
read before the Institute of Civil Engineers, February, 1888.[51]
698.—The Plane Table in its simplest form consists of a
small drawing-board mounted upon a firm tripod stand, and is
shown at Fig. 313.
A rule termed an alidade, with sights placed at its ends,
gives the direction of any object from a given point on the sheet
of paper stretched upon the table, to which a fine line is drawn
by an HH pencil to point the direction. The alidade sometimes
carries a trough compass fixed upon it, but this is generally
a separate instrument which is placed against its fiducial or
ruling edge to give a magnetic north to south line, to which
all other lines are assumed to take angular direction. A loose
spirit level is also provided, by means of which the board may
be set level by shifting the legs of the tripod.
699.—Plane Table with Telescope.—Where greater
refinement of observation is required than is possible with
sights, a telescope is mounted on the alidade, which moves in
the vertical plane upon an axis, so that it may be directed in
a linear direction with the fiducial edge of the rule to any
point in azimuth. The telescope sometimes carries a level, so
that the table may be set level by means of the alidade.
700.—A class of plane table which meets all necessary
refinement for ordinary filling in of field work is shown in the
illustration, Fig. 314. This nearly resembles those made by
the author for filling in details of the great trigonometrical
survey of India. The drawing surface of this table consists of
a loose panel which stretches the sheet of paper by pressing it
into its frame, where it is afterwards held by a pair of ledges
which fit at their ends into long slots. The panel of the board,
shown in detail Fig. 316, is mounted upon a firmly braced
tripod stand. The head of the tripod stand, shown Fig. 315,
is secured to the board with a central screw (not shown)
which permits the board to be set in any direction, it being the
rule that the edge W should always take a north to south
direction. Three screws sss at the corners of the triangular
head can be raised or lowered by milled heads from the under
side. These screws permit about 15° of adjustment to the
table without any unsteadiness, as the centre screw clamps
it finally hard down upon them when all adjustments
are made. A small trough form of magnetic compass a is
placed upon the rule to strike the magnetic north to south line,
to which all angles are referred in transposing the work of the
plane table. The diaphragm of the telescope is provided with
a platino-iridium point fixed vertically at the mutual focus of
the object-glass and the eye-piece. A pair of points to subtend
an angle to measure a staff for distance, Fig. 319, is a convenient
addition.
701.—The Telescopic Arrangement of the alidade is varied
in different countries. In some cases it is placed near to
one end, which is perhaps better than in the centre of the rule,
as it is more easily read. In the modern French military
alidade a prismatic eye-piece is used, so that observation is
made by looking directly down upon the eye-piece of the
telescope. In the Prussian alidade adjustment is made to the
standard of the telescope so as to bring the horizontal axis
upon which it moves level, that the telescope may move in
azimuth, however irregular or uneven the surface of the paper
on the board may be. This is necessary for any great degree
of refinement in the plane table, as the surface of a piece of
wood upon which the paper is stretched will be almost certain
to warp if exposed to all weathers, and this, added to the small
width of the alidade, can scarcely retain the axis in exact
horizontality, placed as it is high above the surface of the table.
Some plane tables made by the author for General Robinson
for Indian service were of papier-maché to remedy the defect
of warping, but even this material warps upon exposure.
Plane tables have been made in Germany of metal and of
glass, but in this case the weight is a great objection. The
author has found surfaced slate very good, but it has the same
objection of too much weight for a portable instrument.
702.—Lateral Adjustment to the Alidade.—The author's
plan of obtaining this is to increase the practical width of the
rule by giving it an extended point of support on one side so
as to set the telescope in azimuth. For this construction the
telescope is mounted upon a plate with an arm extending
outwards upon the back of the rule. This has a milled-headed
screw placed at the near extremity of the arm. The screw is
inserted in a deep bush for wear; this attachment is shown in
section Fig. 318. The adjusting screw A′ has a collar fixed
upon its point which is centred upon a tight screw tapped into
the milled head. This collar, as it does not turn with the
milled head, does not abrade the surface of the paper by
contact with it. A small cross level B is put upon the arm
between the milled head and the standard of the telescope.
The under side of the rule is cut away or placed obliquely to
the surface, so that it bears on the outer ruling edge only.
The milled-headed screw being at its normal position and the
table level, less than half a turn one way or the other will
bring the small cross bubble to its centre in a few seconds for
any average irregularity of the surface of the table, and by this
means cause the telescope to move correctly in azimuth.
703.—The Telescope Arranged for Subtense Measurements.—Where
a stadium, art. 556, is to be used for estimating
distances from station to station, when an ordinary telescope
is used, the author places two platino-iridium points vertically
from top and bottom of the diaphragm, and adjusts these by a
screw until a subtense angle upon the stadium of 1 foot cuts
the point at a distance of 100 feet, or according to the
measurements to which the land is taken. In this case it is
necessary to have an altitude arc to the telescope, as shown
upon the alidade in Fig. 317. This has a degree scale
reading by vernier to about 3 minutes.
704.—Various Devices for Fixing the paper on the
Surface of the Table have been made. Many prefer simply
pinning it with drawing pins on a quite plain pinewood
surface. In this case the table is better slightly sunk round
the edges with a rabbet of the depth of the thickness
of the head of the pin, so that the alidade may rest
firmly even over the pin heads. The French plane tables
have very generally rollers at each end of the table, upon
which a long slip of paper is rolled, sufficient for twelve or
more stations. The rollers for small tables are made of brass
tube about 5/8 inch in diameter. They commonly move with
a turn-key which is inserted in a square fitting in the end of
the roller. The rollers keep the paper tight by means of
ratchet wheels and spring pawls at their ends. This
plan is very convenient for topographical work, as for instance
a river may be followed from station to station right down its
course and appear on a single slip, its bearing being indicated
by the compass north line. Fig. 320 shows the manner in
which the author has made this plane table.
705.—Adjustment of the Plane Table.—There are a great
many devices for this. Mr. Pierce, in the admirable paper
already mentioned, gives illustrations of the different plans.
Some of these have all the complication of the adjustment of
the stage of a theodolite, and one has superadded to this a
slide-rest motion. These things of course are necessary if
the field work is made to take the place of finished office
work. One general feature of plane table tripods is some
means of adjustment of the table to uneven ground, when the
tripod-head cannot be brought nearly level. Gurley's plane
table adjustment is perhaps the simplest of any of these
devices, and appears to the author to be as good as any other.
Fig. 321, D the table top; A a ball fitting turned inside and
out, and attached firmly to the table top; C a socket fixed
firmly in the head of the tripod; B a bolt with globular
head fitting the interior of A, and carried through the head to
a winged nut which clamps it firmly. A spring is placed to
act against the winged nut, so that when this is slightly
loosened the ball fitting A may move between B and C with
moderate firmness when the table is being set to an angle.
To meet all conditions the revisor has designed a high-class
plane table shown at Fig. 322. This has a ball and socket rough
levelling arrangement and parallel screws for fine levelling,
circular motion to table with clamp and tangent, spring rollers
for taking any length of paper and instantly clamping it,
alidade with extra powerful telescope with vertical circle
divided on silver reading by two verniers to minutes with
clamp and tangent motion, cross levels, diagonal scale, and
adjustment for setting telescope to revolve in vertical plane,
circular compass with cross levels and plumbing bar. The
board is generally made 30″ × 24″. The telescope is stadia
reading and is made with long sensitive bubble mounted upon
it or upon the verniers if preferred as shown at Fig. 323.
Fig. 323.—Stanley's high-class alidade with bubble on verniers.
706.—Method of Using the Plane Table.—The table is
first set and levelled up at a commanding position to observe
the extent of country it is intended to plot from observation
from a single station. Let Fig. 324 1 be the first station for
plotting the enclosure abcdef. Draw lines by the alidade
pointing to these angles represented by the letters from a
point near 1. Set up a picket or stadium at the station 2
where it is intended that the plane table shall next be set up,
and draw the line 1 2 distinctly on the paper. Measure the
line 1 2 either by its subtense on the stadium or by direct
chain measurement, and plot this from station 1 on the paper
according to the scale to be worked to in making the plan.
On removing the table set up a picket or distinct land mark
vertical with the position of station 1 occupied on the paper.
Move the table to station 2 at the measured distance and set the
direction of the board by means of the alidade so that the
line 2 1 cuts the picket left at station 1. Now draw lines
from station 2 to all the points abcde, cutting the former
lines as represented by dotted lines in the figure, and the
intersections of these lines will give the true positions of
abcde, according to the scale selected for the base 1 2, and
these may be tied up to represent the boundaries, as shown on
the plane table 2. It will be readily seen that the line 1 2
represents a bearing in azimuth; so that if the edge of the
table be set, say truly N. to S., in both positions the line on the
paper 1 2 will agree in both these positions of the table; but
the check by the alidade of this line is valuable to save risk of
error.
707.—Where an extent of land is to be surveyed by the
plane table, longitudinal bands of a mile or so in width are
taken. Where the roller plane table with continuous paper,
Fig. 320, is used, the forward points of observation are lined
in and the backward ones simply tied up, being certain by
observations written in pencil upon the paper that identical
objects are tied up from the positions of both stations. Where
an object cannot be seen from both stations its position may
be indicated by the stadium from a single bearing, or it may
possibly be tied up from a further advanced station.
708.—Edgeworth's Stadiometer.[52]—The general
construction of this instrument is given in the inventor's
specification of patent, from which the engraving, Fig. 325 is
taken. The vernier plate of an ordinary theodolite is extended
to a plate of about 10 inches in diameter. This is adjusted
to level by means of parallel plate screws. The plate or plane
table is divided on its edge ¼°. The part representing the
limb of a theodolite is carried out from its axis by two arms
only: upon these the standards RR of the telescope are
mounted. These standards leave a striding space near the
plate, into which any scale S of equal parts with a zero centre
is introduced, which is intended to be used for the plotting,
the striding space being so arranged that the fiducial edge of
the scale shall pass exactly over the axis of the instrument.
The standards unite in the same casting to form the horizontal
axis bearing of the telescope. This axis permits the telescope
to move in azimuth. The telescope carries a vertical arc
divided to degrees, also a scale of centesimal differences of
hypotenuse and base, with the ordinary clamp and tangent
adjustment of a theodolite. It is also fitted with a level above
it which is used in setting up the instrument. Stadia webs are
placed in the diaphragm and are made adjustable to subtend
upon the stadium a percentage of arc agreeing with the unit to
which the land is measured. The inventor does not appear to
have known the optical error of the system proposed for
measuring distance, art. 558. Neither does this appear to
have been recognised by others writing upon the instrument,
who have generally followed the late J. F. Heather's
description.[53]
709.—To Use Edgeworth's Stadiometer.—After it is set up,
a circular disc of paper of about an inch less diameter than the
table is held down upon it by four spring clips. The telescope
is directed consecutively from object to object, the positions of
which it is desired to take. It is clamped by the screw below
the plate during the observation. The stadium is placed
against the object and the distance taken by the subtense of
the webs in the diaphragm, which may be exact if a constant
be added after proper adjustment, art. 558. If the stadium be
above or below the horizontal plane it is inclined by means of
a sight-hole through it, as originally proposed by Green, so
that the subtense is equal under all conditions. The horizontal
distance is taken by the difference of hypotenuse and base, as
shown on the vertical arc, so that the record of a complete
observation appears for calculation as—
stadium reading + constant - altitude correction.
This distance is at once set off from the centre of the instrument
by the scale on a line drawn upon the disc of paper, and
observations are written against the line. In making a number
of observations from one station two or more discs of paper
may be employed to save confusion of lines and interference
of descriptions. These papers are separately used in plotting
as protractors by pricking holes through the stations defined
in the field from the centre of the disc which represents the
station of observation.
710.—The Sandhurst Protractor, Fig. 326, is a military
protractor adapted especially for topographical delineation,
which is commonly used with the plane table. It is
different from many instruments of its kind in having only
useful matter upon it. It is made of boxwood, upon which
the protractor is cut, and has also one scale of 6 inches to a
mile in yards, at the lower edge, the tens of which are carried
across to make parallels of 90° in the manner of an ordinary
military protractor. Over the back of the protractor is a scale
which gives a standard for shading slopes of land upon topographical
maps, Fig. 327, from 2° to 35°, also lines for contour
shades. A small plummet, the cord of which is passed through
a hole in the centre, from which the degrees are protracted,
is supplied with the instrument. When the protractor is held
up, degrees downwards, the cord of the plummet will pass over
the degrees and indicate the angle at which it is held. By
looking over the edge the angle of inclination of the land may
be taken directly, as with a clinometer, or by looking along the
edge by a second person reading the plummet the angles of
altitude may be taken more exactly.
711.—Military Sketching Board.—This sketching
board, Fig. 328, the invention of Mr. Graham F. Hodgson, will
be found a very great improvement upon the old pattern boards.
It is designed to meet the requirements of military and other
officers not conversant with the higher branches of surveying,
and it will also be found of great use to surveyors, explorers,
and other travellers.
It consists of a mahogany board revolving on a circular
metal plate attached to a handle held in the operator's left
hand.
Mounted on the metal plate is a compass, which is visible
through a glass plate flush with the face of the board and the
tracing paper or cloth on which the map is made; the paper
being stretched tightly over the board by means of rollers.
A magnetic north line is drawn on the paper over the
centre of the compass. The operator invariably has his board
in its relatively correct position by always keeping the magnetic
north line immediately over the top of and aligned with
the compass needle when his sights are taken.
The sights are taken by means of an alidade moving along
a slotted bar, which itself slides along a bar fixed at the side
of the board.
The object aimed at is sighted in a mirror attached to the
end of the alidade and aligned with a point at its other end,
and the alidade is clamped into position by a thumb-screw on
the slotted bar.
The advantages of this instrument are many and will only
be fully realised when it is in practical use. No backsights
are necessary. Sights can be taken with one hand.
The operator is always in a comfortable position and the
object aimed at is always immediately in front of him. The
alidade remains in position by means of the clamp screw along
the ray drawn till the object sighted at is reached and the
distance known, which is merely marked off by means of the
scale on the alidade. It is invaluable when sketching rivers
from launches or canoes when backsights are often impossible.
It is light and portable, being easily carried slung over the
shoulder in a canvas case.
712.—The method of using is simple and ensures a great
degree of accuracy with a minimum amount of time and
trouble:—
(1) The tracing cloth is first fixed by means of the rollers
over the board. (2) A magnetic north line is then ruled across
the paper and passing immediately over the centre of the compass
visible under the paper. (3) The operator then, holding
the board by the handle underneath, proceeds to make his
map and first brings the magnetic north line immediately over
the top of and aligned with the compass needle. (4) He then
from some point, marked as his starting point on the paper,
proceeds to take sights to any objects he may wish to delineate
on his map. These sights are taken by means of the alidade
fixed above the board. The sighting rule is pushed along a
slotted bar, which itself slides along a bar at the edge of a
board until the edge of the alidade is against the starting point
and is sighted on the object aimed at. The object is sighted
in a small mirror fixed at the end of the alidade and aligned
with the point at its other end. The alidade is then clamped
into position with the thumb-screw on the slotted bar and the
operator draws his ray corresponding with the direction of the
object aimed at. The distance is then marked off on the
scale on the alidade. (5) When the operator moves to the
next station no back-sight is necessary. He at once puts the
board into its relative correct position by merely revolving it
until the magnetic north line is again lying over the top of
and aligned with the compass needle and he then proceeds to
take all necessary sights at that station.
713.—Cavalry Sketching Case.—This forms a very
convenient exploring sketching board, permitting sketches to
be made on horseback while en route. The pattern shown in
Fig. 329 is that of Captain W. Vernier. It consists of a small
board 9¼ inches by 7½ inches, at two sides of which there are
small rollers to hold paper 7 inches wide and from 3 feet to
6 feet in length, according to its thickness. Two stout indiarubber
bands, which hold a small straight-edge to scale in any
position on the paper with sufficient firmness to be able to draw
a line against it, are passed over the board. A small compass
on one side of the board indicates direction. After one sketch
is made, a new part of the paper is rolled forward.
714.—Camera Lucida—Optical Compass.—In new
countries where landmarks are not clear a sketch of the general
aspect of the country will make the points of triangulation
more clear. Where the plane table is not used these sketches
may be made with accuracy as to positions by the use of the
photograph camera, the camera lucida, or points of observation
may be taken in correct bearing by the optical compasses.
These latter instruments are described in the author's Treatise
on Drawing Instruments, seventh edition.
CHAPTER XVI.
INSTRUMENTS FOR MEASURING LAND AND CIVIL WORKS
DIRECTLY—CHAINS—VARIOUS TELLERS—STANDARD CHAINS—ARROWS—DROP
ARROW—VICE FOR ADJUSTING CHAIN—CAINK'S
RULE FOR INCLINES—STEEL BANDS—WIRE LAND
MEASURES—COMPENSATION SYSTEMS—LINEN TAPES—OFFSET
RODS—PINE STANDARD RODS—RODS WITH IRON
CORE—BEAM COMPASS RODS—COINCIDENT MEASUREMENTS—COMPENSATED
RODS—BASE LINE APPARATUS—COAST SURVEY
LINES—PERAMBULATOR—PEDOMETER—PASSOMETER—SOUNDING
CHAINS—SOUNDING LINES—TELEMETERS—HAND
RODS—RULES.
715.—The Instruments Generally Employed for Measuring
Land are chains, steel bands, and tapes. Where roads are
roughly measured, pedometers are commonly used. Where
very exact measurements are required, rods have been used.
Rough approximate measurements are obtained by stepping,
with the use of the passometer to count the steps.
716.—Land Chains.—Although these are made in
many qualities the forms vary very little. They are too well
known to need much description. In the British Isles and
some of our colonies the chain of 100 links, equal to 66 feet,
the invention of Edmund Gunter about 1620, is generally
used, 10 square chains (100,000 square links) giving the
statute acre, presenting a decimal system of measurement
much in advance of any other at the present time. The
best land chains are made of steel, which is afterwards
hardened and tempered to spring temper, in the process
of which the surface is burnt off with asphalt varnish in
order to produce a covering to resist the rusting effects
of moisture. Steel chains are made light and strong. The
light chain, of No. 12 Birmingham wire gauge, weighs
under 5 lbs. The strong chain, of No. 8 B.W.G., weighs
about 12 lbs. A light chain of 50 links, of weight under
3 lbs., is sometimes used with the complete chain of 100
links for taking offsets.
All the best chains, whether of steel or iron, are made with
long links formed by turning up the ends of a length of wire.
Three small oval links are placed between each pair of long
links. These three interval links are found to cause the chain
to kink less than when only two are used. Each oval link is
sawn through at the meeting line, which is brought up on one
flat side of the oval in bending it from the wire. The saw-cut
forms the point of adjustment. The small link is
afterwards re-sawn and closed to shorten it, or forced open to
lengthen it. There are generally four swivels in the length
of the chain, two of which are at the handles: these
prevent the chain from becoming twisted in turning the
handles over in use. A swivel is shown Fig. 331 at S. Iron
chains are sometimes galvanized to prevent rust. This
process, however, makes the chain much more brittle, and
cannot be recommended. It may be noted that all link
chains lengthen with use.
717.—Tellers are small pieces of brass suspended to the
chain by a spare link placed at every ten links. They divide
the chain decimally from either end equally. Proceeding
from one end of the chain the tellers read 10, 20, 30, 40, 50,
and the other end they read by subtraction from the
complete chain: 100 - 10 = 90, 100 - 20 = 80, 100 - 30 = 70,
and 100 - 40 = 60. Fig. 331 shows detached pieces of chain with
value of the tellers figured under. S inserted swivel. The
50 teller shows the link attachment. A shows the position
at which the arrow or other mark is placed to commence or
finish the chain measurement, the handle being included in
the first link. These tellers are liable to catch and get
dragged off in chaining. When this chain is used abroad, or
far from home, it is well to have an extra set of tellers to
repair losses.
718.—Inserted Tellers.—This form of teller is preferred by
many, Fig. 332. It is much less liable to get dragged off,
but it is not considered quite so distinct, and it is a little
liable to get clogged with grass and weeds.
719.—The author's design for inserted tellers is shown
Fig. 333. These are perhaps quite as distinct as the last.
The holes in wet weather fill up with mud and the surfaces
keep bright, so that they remain very readable. There is
much less drag, and the chain therefore wears longer.
720.—Feet Chains are usually made 100 feet, more
rarely 50 feet. They are generally made in foot lengths, but
sometimes for flexibility are preferred in 6-inch lengths. They
are commonly made of No. 8 B.W.G. steel or iron. The
weight of 50 feet is 6 lbs.; 100 feet, 11 lbs. If made of light
steel, No. 12 B.W.G., the 100 feet weighs 6 lbs.
721.—Mining Chains used in mineral districts are made
generally 10 fathoms, or 60 feet, 6-inch links counted off
by tellers in fathoms. They are made entirely of brass.
The weight is about the same in brass as steel—No. 8
B.W.G., 9 lbs. Occasionally they are made extra strong,
No. 7 B.W.G.; weight 12 lbs. In coal mines Gunter's chains
are generally used.
722.—Metre Chains are made 20 or 25 metres long.
They are marked with tellers at every two metres with a plain
ring at the metre. The tellers are generally of the inserted
kind, Fig. 332. In taking measurements the sign of the
teller is doubled: thus the ordinary 1 or 10 is counted 2
metres; the 2, 4, and so on. 20-metre chains in light steel,
No. 12 B.W.G., weigh 4½ lbs.; strong, in No. 8 B.W.G.,
9 lbs. 25-metre, light, 6 lbs.; strong, 11 lbs.
A land chain is generally secured for carrying by a
leather strap with a buckle. Occasionally it is carried in a
sailcloth bag with a strap over the shoulder.
723.—Standard Chains.—These are of the same form as
the ordinary steel chain, but all the links are hard soldered
after being adjusted link by link. They are not intended to be
used for regular chaining, except it be for laying down rough
base lines. Their special employment is to test chains, or to
set out with two pegs on a straight piece of ground a standard
length or station where the common chains in use may be
tested daily. A standard chain is commonly enclosed in a box
with a lock to prevent its accidental use for an ordinary chain.
724.—Arrows.—These are sometimes called pins. Ten
form a set. They are shown with the chain in Fig. 330,
and are commonly made of the same wire as the chain—No.
8 B.W.G. They are much better made one gauge
stouter (equal to about 1/7 inch), and preferably of hardened
steel than of iron. The common length is 15 inches.
Where heath, stubble, or woodlands prevail 18-inch are
better for use, and in some exceptional cases even 2-feet are
very convenient. Surveyors going to new countries are recommended
to take the longer arrows as well as those supplied
with the chain. It is common either to tie a short length of
scarlet webbing upon each ring of the arrow or to sew a piece
of red flannel or bunting upon it to find it easily in long grass.
Arrows are sometimes carried in a quiver with a strap over the
shoulder, Fig. 334, which leaves the hands of the fore chainman
free to remove obstructions where they occur.
725.—Drop Arrow, Fig. 335. Where ground is very
hilly it is common to roughly level the chain by holding the
lower position shoulder high, either by guess work or by using
any kind of rough hand level or clinometer to ascertain this.
The arrow is then dropped, and the point, held at first lightly
in the ground, is pressed hard down or another arrow supplanted
for it. The chain in this case is used in odd multiples of links
as they occur, of which record is taken separately at each
station. In going downhill a drop arrow answers very well.
In going uphill a plummet to the last arrow is better. Some
use the drop arrow as a plummet, carrying for this purpose
in the pocket a piece of fine whipcord, with a bent hook tied
to one end, to be used when required.
726.—Examination and Adjustment of Chains.—Respectable
makers send out chains tested to within half of one of the
small links of standard, that is, within a quarter of an inch;
but in use this error may increase either by the bending of the
long links of the chain, when it becomes shorter, or in the
more general case of friction from wear and from strain, by
which it becomes longer. In London, standards are fixed
upon the pavement in Trafalgar Square and at the Guildhall.
These standards are also fixed at many municipal town halls.
Surveyors very commonly lay down a standard on the pavement,
or by pegs on a level gravel path. Where a peg is used
it should be driven home nearly to the surface. It should if
possible be made of a piece of heart of oak 12 inches long and
about 2½ inches square. The standard length, which may be
set off by a standard chain or new steel tape, should be from
a saw-cut across the centre of one peg to a similar cut on the
other. It is well also to have the centre space (50 links)
indicated by a smaller peg.
727.—The Chain to be Adjusted should be first examined
and its long links set straight by means of a hammer on a flat,
hard stone or anvil, after which the error will be, if it has been
much used, that it is too long. It should be then laid in direct
line on the standard just described, and stretched lightly with a
pull of about 7 lbs., and then left to rest. Assuming it too long,
the centre of the chain should be observed to ascertain which
half is of the greater length, then short links should be taken
out at distributed distances, if more than one be required, by
twisting the link open in a vice, and opening and closing
another link to restore the chain.
Fig. 336.—Stanley's vice for adjusting and repairing land chains.
728.—Chain Vice.—The links of steel chains can seldom
be twisted open without breaking, and broken links cannot be
restored by steel links. Iron links answer, but they are very
stiff to twist open. Generally it will be found best for professional
men to repair the chain with spare brass links. These
wear very well. Where a smith is near with his vice and a
light hammer the links are readily opened. It often occurs in
open districts and abroad that no smith's shop is to be found.
To meet these cases the author has constructed a special vice,
as shown Fig. 336. This vice is let into a piece of hard wood—an
old oak post answers admirably. In stone districts it is
perhaps better to let it into a stone and fix it by pouring hot
lead round it. The part B is used for an anvil for straightening
the links. The vice V holds the link edgewise very firmly by
bringing up the slide J by means of the screw S. The link
may then be knocked open by the pane end of a light hammer.
The link is closed again in the same manner. If the vice be
left out of doors the screw should be well greased and the
whole covered with a leaden cover. The weight of the vice
is about 6 lbs. It is made of cast iron with chilled face, or
the jaws are faced with steel.
729.—Opening and Closing the Chain for Use.—The chain
is most readily unfolded by taking the two handles in the hand
and walking away from it as it lies on the ground. It is most
convenient to place it about 45°, and half a chain length from
the first station, each chainman taking a handle and moving
to his position. The only danger in undoing a chain is from
two chainmen taking one handle each and walking in opposite
directions, in which case, if there happens to form a kink, the
opposite movement of the two men will probably stretch or
break the chain. In closing the chain it is taken by the middle
links and folded up two links at a time till the handles are
reached. If the links be placed consecutively in position
round the axis formed by the first links, it may be folded up
very compactly in a twisted form ready for the strap, by
which it is carried, to be passed round it.
730.—Chaining is performed by two chainmen, termed the
leader and follower. The follower, having pressed a stake
into the ground for a starting point, then places the centre of
the outside of the handle of the chain against it. The leader
takes ten arrows in his right hand and one handle of the
chain in his left, and walks directly towards a point which is
to be the termination of the measurement, stopping at nearly
the length of the chain, examining the chain to see that it
is straight. He then places an arrow lightly outside the
centre of his handle. The follower looks over this arrow to
the distant station to see whether it is in direct line. If it
be not so, he waves his right or left hand once, twice, or
thrice for 1, 2, or 3 inches for movement to right or left.
The follower picks up the arrows consecutively as left by the
leader, and when he has the ten, 10 chains have been
measured, which is then recorded in the field-book, or earlier
than the ten if a shorter distance or object completes the
measurement. It is most important to observe that if an
arrow be taken for the first station, the follower having ten
counts nine only for the first ten. To prevent accident it is
therefore safer to start from a stake or other landmark, not one
of the arrows. Some surveyors advise eleven arrows. If
eleven be used, one should be distinctly marked from the
rest so as never to be counted. This may be done by
omitting the red webbing tie, or using a green tie for the
odd arrow. The French always make the drop arrow the
eleventh arrow, which is never counted in direct chaining.
731.—Caink's Rule for correcting inclines in chaining
is the invention of Mr. Thos. Caink, C.E., of Malvern,
Fig. 337. It is made four-fold, each fold being one link.
The link is divided decimally along the inside of the rule.
On the outer edge of the rule there is a scale marked degrees,
a part of which is subdivided where the scale is open to read
closer, that is, to 20 or 30 minutes. These degree divisions,
which read up to 16° on one side of the rule, indicate the
space from the end of the rule to be allowed in addition for
the same degrees of inclination of the land up to 4 links of
measurement. On the opposite side of the rule the inclination
scale is carried from 16° to 22° 10′. For these higher
numbers the length of the rule is first set off, and then plus
such part of the rule as is indicated by the position marked
upon it of the required number of degrees.
732.—To Use Caink's Rule.—The follower has a clinometer
of one of the kinds shown, Figs. 260 or 264. He
notes at starting the position upon the face or body of the
leader that corresponds with the height of his own eye. He
takes the inclination of the land to this point of the leader's
body while he is standing upright at one end of the chain and
the leader standing at the other, noting the number of degrees
shown by the clinometer. He then places the rule in the
direction of the chain, with the number of degrees indicated,
in front of the arrow, and moves the handle of the chain to
this position. For the sake of verification, if he has a second
arrow he may place it in the new position, which gives the true
allowance. In either case the leader moves the chain forward
by the amount required and places his arrow ready to continue
the work. By this method it is seen that there is no after
calculation or separate record necessary for undulating land,
but the true horizontal position is given correctly at each
chain measured. The same form of rule is made for feet
and metres.
733.—In mountainous countries the eight links of the
rule is insufficient allowance for common inclinations. Such
countries are measured much more accurately by some system
of subtense measurement, for which see Chapter XII.; but
where a small piece of sudden steep inclination occurs half a
chain may be taken, and the number of degrees indicated
upon the rule be doubled, so that the full rule, instead of
taking 22° only, will take 44°.
734.—Steel Bands for measuring, termed steel band
chains, are made in various forms in this country, and sold
by nearly all opticians. They are much lighter than chains
of equal strength, and are made of standard length. They
are also lighter to use, being smooth and without any projection.
On the other hand the reading is less distinct than
with the chain, and they need more careful usage in chaining.
They also require oiling before being put by. From the
thinness of the metal they are altogether more delicate and
less durable than the chains for hard wear; but it is thought
by many to be a compensation that they are always of true
length.
735.—The bands commonly used for land measuring are
made 3/8, ½, 5/8, and ¾ inch wide, of Nos. 26 and 24 B.W.G. in
thickness, respectively. The chain is divided into links by a
small stud riveted through the centre of two small washers, a
large stud being placed at the fives and an oval plate held by
two rivets at the tens, which are numerically indicated in plain
engraved figures, as shown in detail, Fig. 341 b, or perforated
with holes indicating the number of tens. These band
chains are made in links, feet, metres, or to any foreign
measure to order, and of any length corresponding with land
chains. Weights, approximately—100 feet: ¾ inch, 7 lbs.;
5/8 inch, 4¾ lbs.; ½ inch, 4 lbs. 100 links: ¾ inch, 4¾ lbs.;
5/8 inch, 2¾ lbs.; ½ inch, 2¼ lbs. 20 metres: ¾ inch, 5 lbs.;
5/8 inch, 4 lbs.
736.—Steel band measures are also made with divisions
throughout, etched upon them with acid in such a manner
that the divisions and figures stand in relief up to the original
surface, whereas the new surface, which is etched back to
form the ground, appears dull. The brightness of the figures
and divisions on the dull ground makes them easily read.
These bands are divided into links, feet and inches, metres
and decimeters, or closer quantities either on one or both
sides of the band as required. With the etched band there is
perhaps a little risk of weak places from over-etching, although
these bands are most carefully made, but perhaps this is not
greater than in the inserted stud band, where weak places are
necessarily caused by the loss of width at the points where the
holes are made for the studs, wherein moisture hides after use
in damp weather.
737.—The steel bands have handles the same as a land
chain. They are wound upon a steel cross, Fig. 340. They
are commonly placed in a wind-up case similar to that of an
ordinary measuring tape, but in steel, provision being made
that one of the pair of handles may be secured about the
position of the axis of the tape for winding it up. In Fig. 338
the axis is made very large, so that the handle may be pressed
in from an opening in one side of it. The newest idea is
to cut a slit in one side of the plate up to the centre, as
shown, Fig. 339. In this case the handle and band are put
in from the side, so that the axis is no larger than is necessary
to take the handle. A strap is placed on the side of the case
for holding it. This is shown cut off to admit sight of the
handle.
738.—The French make the handle generally T-shaped
and hollow in the cross part, which renders it very light and
perhaps less cramping to hold. The arrows are very commonly
held by loops to the cross on which the band is wound.
This general arrangement is very portable and convenient to
carry; it is shown Fig. 342.
739.—Wire Land Measures.—Where long open
stretches of new country are to be measured, it is common to
employ a steel wire chain, of 5 chains or of 500 feet in length,
fitted with a pair of strong cross handles only.
740.—The author has made many chains of 500 links;
in Fig. 344 a part of one is shown full size. This band,
as we may term it, is wound upon a reel in an iron case,
Fig. 343. A spring brake is placed at the position A, which
holds the reel and prevents the band from springing out into
loose hoops when it is run out. The 50 and 100 links are
indicated by short lengths of brass tube placed over the
band—single at the 50 links, but numerically indicated by
number of bands as 2, 3, and 4 chains. In Fig. 344
a 50 and a 300 links are shown; weight, 3½ lbs. This flat,
narrow, steel band chain was unknown until introduced
to the notice of the profession in the first edition, 1890. It
is now in very general use, and lengths may be had from
stock of 2, 3, 4, or 5 chains, or 200, 300, or 400 feet wound
upon a steel cross.
741.—Richmond's Tension Handle.—Various devices
have been employed for giving equal tension to chains and
bands to ensure equality of measurements. Salter's spring
balance has been very commonly used attached to one handle
of the chain to give a uniform pull, say of 15 lbs. This
appears to answer very well. Mr. Richmond, surveyor, of
Sydney, has devised a very simple plan for tension of light
bands, which, being lighter and attached, is much more
convenient than Salter's balance. This is shown Fig. 345.
The band passes through a fitting in the centre of the
handle, and a spiral spring is fixed to this and the band at
a short distance along it. By pulling the handle a given
tension can be applied, which is shown by the mark it
reaches towards the end of the band. This is adjusted to
standard length, and a small notch is placed in the centre of the
end, from which a plummet may be suspended if necessary.[54]
The engraving is of a slightly modified form by the author,
in which a thin tubular cap covers the free end of the band to
save this exposed part from accidents.
Fig. 346.—Copper case thermometer for suspending to a band chain.
742.—Chain and Band Thermometer.—Where very
great accuracy of chain or band measurement is aimed at,
temperature is taken to allow for expansion of the metal. A
thin plain glass thermometer of the clinical form is the most
sensitive of any. This is carried in a wooden pull-off case
lined with indiarubber. When it is used it is placed upon the
ground by the side of the chain. The delicacy of the clinical
form of thermometer is often objected to by the practical surveyor,
hence there are several other forms with boxwood and
ivory scales. These are not very satisfactory, as the boxwood
and ivory retain the heat of the body, from being carried in
the pocket, for a long time after exposure. The author has
enclosed the clinical form of thermometer in a copper case
with open face, Fig. 346. The copper being a good conductor
of heat, this is very sensitive to the temperature of the air.
Two turn-down hooks are placed at the ends of the tube to
suspend it on the band. The thermometer stem has two indiarubber
caps, so that it will bear dropping on grass. It is
contained in the same form of pull-off case as the clinical.
743.—The coefficient of expansion for steel between 32°
and 212° Fahr. is about ·000012, which is less than ·01 inch
per degree per chain. Temperature corrections can therefore
be recognised only upon very exact work, appreciable only
when long bands of the Marchant type, lately described, of
from 5 chains to 10 chains in length are used.
744.—Mr. Littlejohn has patented an adjustable handle
for temperature. This is divided for allowance for the 100-feet
or other band for every degree Fahr. or centigrade. Fig. 347.
The handle is set to the temperature as it changes during the
day. It offers, perhaps, the highest refinement in ordinary
land measurements.
745.—Repairing Sleeve for Steel Bands.—The
reviser has patented a sleeve which will be found useful, as by
its use a broken band can be immediately and permanently
repaired in the field without the use of tools. They are made
to fit all sized bands, but it is necessary that the correct sized
sleeve should be used. One of these sleeves is shown attached
to a band at Fig. 348.
In order to effect a repair it is merely necessary to clean
the broken ends of the band, and insert them into the sleeve,
then hold a lighted match under it until the soldering material
is melted, when the repair is completed.
The central hole in the sleeve is to enable the user to see
when the broken ends are in contact, and the other two are to
indicate when the soldering material is melted, which takes
place when it either bubbles up in or runs away from these
holes.
746.—Linen Tapes.—This most useful implement,
Fig. 349, is one of the most unsatisfactory measures the trader
and user has to do with. It consists, as is well known, of a
tape oiled, painted, and varnished, which is rolled up in a
leather case when out of use. When the weather is moist it
shrinks, and when dry it expands. If it be too heavily painted
it becomes brittle and rotten; if it be lightly painted it remains
more flexible, but is more affected by moisture. A good tape
bears very well a stretching force of 7 lbs. to 14 lbs., but if strained
over this it is permanently stretched. There is no plan known
to the author by which these defects can be remedied.
Numerous attempts have been made—often valueless or
worse—some, although popular, mere claptraps, such as
the insertion of wire. The best tapes for strength and
permanency are made entirely of green, hand-made, unbleached
flax. The tape is said to come from Holland to
this country. These are at first oiled with a drying oil
(boiled linseed oil), and when seasoned for a month or so,
painted once or twice with white lead colour—not too thickly.
The printing is more permanent if done in oil; but the tape
is somewhat more flexible if the figures are stencilled in
Indian ink and the whole afterwards thinly varnished over
with copal varnish. The great secret for preserving the tape
is to use it very carefully and only in fine weather. In wet
weather for taking offsets a light steel 50-link chain is quite as
convenient as the tape, and safer.
Tapes are divided into links, feet and inches, metres, and
all measures as required. A decimal yard is commonly
placed on tapes for measuring earth work. For use with the
chain a 66-feet tape is usually employed, but many think a
33-feet better, using the chain for dimensions above this. For
measuring buildings, 50-feet or 100-feet tapes subdivided to
inches are employed.
747.—Steel Tapes.—Thin steel tapes, 3/8, ½, and 5/8 inch
wide are in very extensive use. They are more accurate and
more costly than linen tapes, but less flexible and less durable.
Where dimensions are important they should always be used
for short measurements. In all cases it is advisable for a
surveyor to keep a steel tape for examination of the lengths of
linen tapes in use. They are made to all the measurements
of linen tapes.
748.—Pocket Steel Tapes 6 feet to 12 feet, Fig. 350, are
used more generally by mechanical engineers. These tapes,
which are very light, are held open by a catch, and closed by
a spring.
749.—Offset Rods are generally made 10 links long,
either in one piece or jointed in the centre with a bayonet
joint. They are about 1-1/8 inches in diameter, diminishing
towards the top to 7/8 inch, and made either of yellow pine or
ash. A hook is commonly put at the top, Fig. 351, which
takes the handle of a chain to draw it through a hedge or
other obstruction. The author's plan of making this is shown
at H. The lower end of the offset is shod with a steel
or wrought iron socket point, so that it may be set up in the
ground and used if required as a picket. Bands are painted
alternately black and white at every link. Square or flat rods
are occasionally used for the same purpose, but they are not
generally so convenient.
The offset is Used in the manner of an ordinary rule
to take rectangular short measurements from the chain as it
lies upon the ground, commonly in order to obtain the contour
of irregular outlines.
750.—Measurement by Rods has become less
general than formerly, from the greater accuracy of Konstat
or Invar steel tapes, by which practically correct base lines
may be laid down. For geodetic works requiring the greatest
accuracy the bases have been laid with rods of various forms.
These rods will be briefly described. It is only in the
construction of iron bridges, roofs, etc., that rods are at
present generally employed in the work of the civil engineer.
751.—Pine Standard Rods, made of straight-grained
pinewood seasoned five or six years and then well soaked
in linseed oil, make good standard rods. The ordinary
length in use is 10 feet by 1¾ inches square. If the rod be
used for butt measurement the ends are tipped with gun-metal
in which a turned steel stud is hard-soldered. The stud is
afterwards ground to true face in a lathe, and left of standard
length at 60° Fahrenheit (15·5 centigrade), Fig. 352. A disc
of brass 1 inch diameter is inlaid at every foot for 5 feet from
one end of the rod, with a line at the true foot. These rods, after
the work upon them is finished, are lightly French polished to
keep them clean and to prevent the effects of moisture. The
effect of temperature upon deal was found by Roy to be about
the same as upon glass—·0000085, average of total length per
degree centigrade, which is about three-fourths that of iron.
752.—Where butt rods are used for continuous measurement,
it is necessary that they be brought very carefully
together. In base line measurement three or four are used,
but for metal work or masonry two 10-feet only are generally
employed. It is necessary that the rods should lie upon a
straight surface or be supported in a straight line. In bringing
them together, a piece of indiarubber 1/8 inch or so in thickness
temporarily placed at one end will prevent any palpable disturbance
of the percussion if the fixed rod be well weighted.
One 5-feet more fully divided butt rod is very commonly
supplied with a pair of 10-feet rods for supplemental measurement.
753.—Angle-piece.—A solid angle-piece with two
planes at right angles is very convenient for use with butt rods
to give means of scribing the true length down to a surface,
Fig. 353 S.
754.—Butt Rods with Iron Core.—Where rods are
to be used for preparing iron work it is better to have an
iron core through the rod, that may expand and contract with
the metal on which they are used. The rods that the author
has designed for this purpose are made out of a length of
seasoned pine 2¼ inches square, sawn down and turned cut
sides outwards to prevent warping. A 10-feet length of iron
steam tube about ½ inch diameter is painted several times and
then bound round with paper soaked in paraffin. This is placed
in a pair of meeting grooves, as shown in section Fig. 355.
The two pine flitches are cross-tongued together and glued
up with the inserted tube between them. The tube has a
turned steel cap placed over each end, Fig. 354, and this is
ground in a lathe to true standard at the temperature of 60°
Fahr. A steel pin is placed through the centre of the rod to
indicate 5 feet. The finished size of the rods is 2 inches
square.
The author has made these rods in sets, consisting of two
10-feet and one 5-feet packed together with an angle-piece,
Fig. 353 S, in a deal case.
755.—The 5-feet Rule is of steel, ¾ inch by ¼ inch, inlaid
in a piece of dry pine, altogether of only half the thickness of
the rods, so that it stands the correct height for central butt
measurement, Fig. 356. The rule is divided into feet and
inches, with one foot to eighths. A centigrade thermometer is
placed in one of the rods to indicate the prevailing temperature,
and a small piece of scale showing amount to be allowed in 10
feet per degree centigrade for temperature above or below
15·5° centigrade is engraved upon the thermometer scale.
The coefficient for the expansion of wrought iron is given by
Lord Kelvin as ·000019 mean per degree centigrade.
Where a long length is laid down for a base line or other
purpose, it is better to take the thermometer reading at each
measurement and defer correction to the completion of the
work; the temperature errors may then be added together as
a total, and the space allowance may become a measurable
quantity. For example, say ten 10-feet lengths give by these
united centigrade degrees, plus and minus, shown at separate
readings + 167°, and that the standard of the rods is true at
15·5°. Then 167 - (10 × 15·5) = + 12° per foot total allowance,
that is, 12° × 10 feet × ·000019 = ·0228 feet or ·2736 inches
to be added. In measuring iron of course no correction has
to be made.
756.—Beam Compass Measurements are occasionally preferred
for iron work. In this case the beam is moved from
centre punch mark to mark along a surface by the beam
producing a scratch for the forward position in which to place
the punch mark. Rods of pine are commonly employed.
Figs. 357, 358 will sufficiently illustrate the instruments.
757.—The Method of Coincidence in measurements
by rods has often been applied to measurement of base lines.
The plan consists in allowing one rod, or a lighter continuous
part of it, to pass the other rod, so that a line cut to
standard on one rod may be read into one on the other.
The best plan to do this is to have a scale fixed along the face
of one rod near its end, as shown Fig. 359, and to have an
extension from the other end of the second rod to pass
alongside this scale, so that two lines may be brought into
coincidence. The rod B has a fixed scale b placed on top of
it at one end. The rod A has a scale protruding from it.
This scale may be jointed with a good ground joint at J for
portability. The rods are laid lightly together, and any final
adjustment is given by light taps with a small hammer or
mallet upon one or the other side of the stud P until exact
coincidence of the lines shown at b is brought about. This
tapping operation appears a rather rough process, but
practically it is very exact.
758.—Compensated Rods.—The plan used by Bessel
for the measurement of a base upon the shores of the Baltic
in 1836 is looked upon as a model of the most perfect work
of its kind. The rods were composed of two bars of iron
having surfaces accurately planed, with a similar bar of zinc
placed between them. The bars were laid one on the other,
but not in contact, the surfaces being kept apart by glass
plates, upon which they could slide with little friction. The
linear expansion of zinc per degree centigrade is about
·0000292 (Fizeau); that of iron much less than half this—about
·0000119 (Thomson). The bars are attached to each
other in such a way that the expansion of the zinc may act in
the opposite direction to the expansion of the iron. The
form followed for the construction is shown in Fig. 360 where
II′ are the iron bars, Z zinc. The length of the zinc required
for compensation between the junctions is found in the
equation—
(S + Z)(0000119) - Z(0000292) = 0,
S being the total length of the standard rod in feet, and Z the
length of zinc in feet required for compensation. This plan
is that adopted for the compensation of pendulums. For the
verification of a rod it may also be made to form the rod of a
pendulum, by which temperature expansion and contraction
upon the system will be clearly indicated by difference of time
rate in the change of temperature during night and day. This
test becomes important where great precision is aimed at, as
the expansion in metals varies according to their purity and
state. The standard lines in rods made upon this model are
placed upon small inserted discs of platinum placed near the
ends, which are read by microscopes in coincidence upon a
pair of rods.
759.—Colby Compensated Rods, the invention of
Major-General T. F. Colby, who was for twenty-seven years
superintendent of the Ordnance Survey, upon which these
rods were used. Each rod is composed of one rod of iron
and one of brass, which are so arranged in pairs that the
difference of expansion of these metals shall act to diminish
the amount of entire expansion at the points measured, a
quantity equal to its increase by temperature, in a manner to
be described.
The Rods are each made 10 feet 1·5 inches long, 5 inches
broad, and 1·5 inches deep. Fig. 362 i is a side elevation of
one rod, Fig. 363 ib plan of iron and brass rods, Fig. 365 ib
perspective view. By this it will be seen that the rods are
placed edgewise. The distance apart is 1·125 inches. They
are supported in the middle upon rollers, Fig. 362 F. They
are firmly fixed together at their centres by transverse steel
cylinders, Fig. 363 RR′ 1·5 inches diameter, each rod being
left free to expand or contract from the neutral central point
independently of the other. The neutral point is formed of a
T-piece E, Fig. 363, fixed firmly on the bottom of the box bx.
At the extremity, and at right angles to each of these bars, is a
flat steel tongue, Figs. 364, 365 A, 6·2 inches long, 1·1 inches
broad, and 0·25 inch thick, which projects 3·25 inches from
the side of the iron bar i. The tongue A is jointed by double
conical pivots at f and f′, which form axes perpendicular to
the surface of the tongue, allowing it to be inclined to slightly
different angles to the direction of the bars according to the
expansion or contraction the system experiences by heat. The
pivots are 0·5 inch diameter, and are placed at 2·3 inches from
the end of the tongue next the brass bar. On the tongue at
P, flush with its upper surface, a small stud of platinum is
inserted, upon which a small dot is struck to form the point of
standard measurement.
Colby Compensated Measuring Rods.
Fig. 361.—End of rod mounted with microscopes, trestles and ground plate.
The bars are placed in strong wooden boxes, to the bottoms
of which are fixed the plates that hold the brass rollers
upon which the bars are supported, Fig. 362 F, and the
central stay E mentioned before prevents any displacement
of the bars when the rods are held by the rollers RR′. To
protect the tongue A, which projects beyond the boxes, there
is a special covering nozzle having a hole and cover over the
dot. A level is placed on one of the bars, which is seen
through a window in the lid of the box. At the ends of the
box plates are fixed for supporting the tripod of the double
compensated microscope, Fig. 361 D, employed to observe
the standard points of one pair of rods brought by adjustment
to true position MM′. A pair of sight vanes which shut
down are placed on the ends of the box for setting the rods
approximately in line.
Colby Compensated Measuring Rods.
Fig. 362.—Side elevation of point of support of rod.
Fig. 363.—Side elevation of centre, with section of box bx.
Two Rigid Tripod Stands Fig. 361 S are used to each
of the rods placed under the rollers Fig. 362 F upon which
the bars are supported in the box. The tripods carry a
universal slide-rest by which the rod may be adjusted to
position both in horizontal and vertical planes Fig. 361 A.
Six rods were used for the Ordnance Survey at one time,
and were designated by the letters A B C D E F. The
weight of each rod complete with microscopes in its case
is 136 lbs.
Compensated Microscopes.—The compound microscopes,
Fig. 361 MM′, used with the Colby apparatus form a complete
separate instrument, consisting of two microscopes placed
parallel to each other and united together for reading the rods
when they are brought with their standard points the distance
apart that separates the axes of the two microscopes. In the
intermediate space between the two microscopes, and parallel
with them, a telescope T is fixed on the same piece of apparatus,
with adjustment for reading a point on the ground G perpendicular
to the measuring rod. The microscopes are held
apart by two bars of brass and iron 7 inches long, 0·5 inch
broad, and 0·375 inch thick, which are placed at 2·5 inches
apart and secured with the telescope, which forms the fixed
centre, by collars to the bodies of the microscopes. The
difference of expansion of the iron and brass maintains the
separation of the microscopes at their foci at one distance
with every change of temperature of the air. The object-glasses
are of 2 inches focus. The microscopes are brought
to adjustment and bearing by levelling on a tribrach whose
base is fixed firmly to one of the rod cases, and by lateral
adjusting screws. Special microscopes are used with each of
the six rods of the Colby apparatus, and are distinguished
by the letters M N O P Q R S. The weight of each compound
microscope is 5 lbs. Very full particulars of the Colby
apparatus with engravings of all parts, are given in "The
Ordnance Survey Account of the Measurement of the Lough
Foyle Base."
In measuring a base line a piece of nearly level land
is selected, and the rods are supported upon the trestles or
tripod stands at about 3 feet from the ground. The heights
of the upper surfaces of the tripods are ranged by a theodolite
or level for all intermediate points between the two ends of
the line. Generally twelve trestles are employed with these
rods, which are fixed firmly to the ground at every station by
legs well rammed in, Fig. 361 HH′. The cases containing the
rods, or the rods themselves, are made sufficiently strong to be
supported upon two points only without serious deflection.
The Colby system of measurement of base lines varied
in detail has been employed by nearly all the nations of Europe
and in America.
760.—Modern Base-line Apparatus.—The introduction
of "Konstat" steel (highest grade Invar) tapes and wires
has revolutionised the method of measuring base lines. These
tapes offer a means which is far superior to anything obtained
by measuring bars, because they combine the advantages of
great length and simplicity of working, with more precision
than the shorter laboratory standards, providing that suitable
apparatus is used in applying them to their work. Base lines
may now be rapidly measured with long "Konstat" steel tapes
so that much longer lines are laid down than was formerly
the practice when measured with bars, with the result that
any errors that may be introduced do not affect the ultimate
expansion so much owing to the greater length of the base.
The coefficient of expansion of "Konstat" steel is under
·0000005 per degree Fahrenheit, so that provided accurate
means of suspending the tape and reading it and transferring
the readings to a plate properly let in the ground are used,
we have a most exact and rapid method for this important
work.
The tapes are usually 100 feet or 30 metres long, but
300 feet or 100 metres are often used. The tapes are a few feet
longer than these measurements, so that the rings are well clear
of the reading lines. A silk cord is attached to these rings
and passes over the end suspension supports, one of which is
shown at Fig. 366. These are made with two steel bars
rigidly mounted on two tripods; upon the bars a sliding
carriage is mounted carrying a pulley running on ball bearings
with a vertical motion for final adjustment of the tape for height.
A weight is attached to the other end of the silk cord to give
the same tension as that under which the tape was divided.
Fig. 366.—One of the two end supports of the band, showing tension weight,
with cord running over the ball-bearing pulley.
To prevent catenery light intermediate stands, as shown at
B Fig. 367, are used at about every ten feet; these have a
rising cross piece with guides which are adjustable for height
and sideways to support the tape in perfect alignment.
Having the tape properly suspended the reading instruments,
C Fig. 367, are placed in position at either end. These are
mounted on rigid-framed stands and provided with levelling
screws, cross levels, transverse screw motions and movement
in azimuth, with clamp and tangent motions and aligning
telescopes. A powerful microscope is rigidly fixed over a
little table over which the tape passes and reads its division
with great exactness, coincidence with the division being made
by the traversing screw. By the side of the reading microscope,
and in exact collimation with it, a plumbing telescope
is rigidly fixed, and this sights down to a transferring apparatus,
D Fig. 367, which is over the plate let into the ground.
Fig. 367.—Two reading and plumbing instruments, C, C; transferring
instrument, D; and one of the adjustable intermediate supports, B.
The transferring apparatus is a spring centre punch rigidly
mounted truly vertical on a supporting plate having transverse
motions, cross levels and levelling screws. The top of the
centre punch has a small platinum disc let in a recess, and
upon this disc very fine cross lines are marked. This
apparatus is placed on the ground over whatever has been let
in to receive the mark, it is then levelled and the cross lines
upon the punch top brought by means of the transverse
motion screws exactly to coincide with the spider web of the
plumbing telescope, and in this position the centre punch is
lightly struck with a mallet which marks the plate let in the
ground in the exact position of the centre of the cross lines at
its top, so that if now the transferring apparatus be removed
the cross webs of the plumbing telescope would cut the dot
marked in the plate by the centre punch. This method is
far more exact than any hanging plumb-bob, as even if they
are screened to prevent swinging very few hang with the point
perfectly true. In laying down a base line No. 1 reading and
plumbing instrument is set up and levelled over the starting
end block, which is usually of hard stone or granite set on
a firm foundation, with a copper plate let in its top about
the centre, the line having been previously set out with
a theodolite, and the intermediate stations being roughly
measured with an ordinary steel tape. At each intermediate
station or length of Konstat tape used a teak post is driven
into the ground and a zinc plate screwed upon its top;
the other end block is similar to the starting one. The
Konstat tape is now mounted between the end suspension
supports, one being outside the starting end block and the
other outside the first teak post which has been put in for the
first length. No. 2 reading and plumbing instrument is set
up over this post, and No. 1 and No. 2 are aligned upon each
other by their aligning telescopes, and the Konstat tape
adjusted over the little tables under the microscope of each;
the intermediate stands are then put in and adjusted for height
to prevent catenery, and the guide pieces are brought up to
the tape on either side and clamped to prevent side deflection
by wind. The tape being properly suspended it can be easily
moved with the fingers lengthways, as it is suspended at either
end by silk cords over ball-bearing pulleys. It is brought in
position with its starting end division somewhere under the
microscope of No. 1 reading apparatus, and the microscope
is then brought into exact coincidence by the traversing
screws. The transferring apparatus is put on the granite
block with the centre punch in the field of view of the
plumbing telescope and then levelled; the cross lines in the
top of the centre punch are then brought to exactly coincide
with the plumbing telescope webs by the transverse motion of
the transferring apparatus, the centre punch is struck and the
mark thus made in the copper plate has a line engraved
through it. The transferring apparatus is then removed to the
position under No. 2 reading and plumbing apparatus. No. 2
microscope is made to coincide with the end division on the
Konstat tape by its traversing screws, the centre punch of
transferring apparatus, brought by its traversing screws to
coincide with the webs of the plumbing telescope and struck,
marks the first section. No. 1 reading and plumbing
apparatus is then transferred to the next post, No. 2 remaining
over the first section post, the first end suspension stand is
transferred outside No. 2 post and the tape mounted between
as before, the traversing motion of No. 2 reading apparatus
must not be touched, but the end division of the tape brought
to coincide with its microscope web by shifting lengthways.
No. 1 microscope at the further end is adjusted to coincide
by its traversing screws and the transferring apparatus as
before, and so on until the entire length is measured, the last
centre punch mark on the copper plate let in the further
end block or stone having a line engraved through it.
A few 1-100th of an inch divisions, or 1-10ths of a
millimetre, are divided on either side of one end division of
the Konstat tape so that any allowance for expansion or
contraction may be made under the microscope at the
time, but with Konstat tapes this is very small indeed.
With fairly level ground any slight differences of level can
be allowed for in setting up the stands, so that the tape
remains level; if the difference is too great for this the
difference of hypo and base must be calculated. Thermometers
are used, generally one suspended on the tape at
each end.
761.—Perambulator.—A very ancient instrument,
described by Vitruvius as being among the effects of the
Emperor Commodus; it was used by hand, or attached to a
carriage to measure distances. The instrument is at present
used as formerly for measuring roads. Upon pavements and
asphalt roads it measures accurately, where by reason of traffic
it is sometimes a difficult or very slow process to use the
chain. The plan of manufacture is varied considerably. The
author makes the felloe of the wheel in segments of well-seasoned
mahogany in two rings, Fig. 368. These are rivetted
together from side to side in such a manner that the grain
of the wood is crossed as much as possible to prevent lateral
warping. The tyre, which is 6 feet in circumference, is made
of hard rolled brass 1 inch by ¼ inch thick. The spokes are
light steel tubes covered with brass tube, and screwed
into a brass hub. The axle of the wheel is placed in a steel
fork which is formed by screwing, by means of a winged nut,
two bars of about 18 by 1½ by 3/8 inches upon a boss formed at
the end of the steel stem of the turned wood handle. Made
in this manner the handle may be easily detached and placed
flatwise upon the wheel, so that the whole may be packed in a
square deal case of moderate dimensions for transport.
The Registering Part of the Instrument, Figs. 369, 370.
The axle is protruded through the fork on the left-hand
side, and thence through the registering box supporting
one of its ends. The other end of the box is supported by a
stud which fits into the side of the fork. The axle in the part
contained within the box is cut into a screw, Fig. 370 S, of
about sixteen threads to the inch. The screw works in the
edges of a pair of discs R, placed one upon the other upon
the same axis; these are cut on their edges with teeth to form
worm wheels in which the screw upon the axis of the wheel
works. The upper disc has 110 teeth. This therefore moves
one revolution by 110 turns of the wheel. It is divided into
110 divisions at its circumference, but is figured 20 yards to
220 yards or 1 furlong, so that each division represents 2
yards, corresponding with the circumference of the wheel, Fig.
369 O. The divisions are read by a point attached to the side
of the box shown at the top of the figure. Single yards are
shown by the intermediate position of the pointer between the
divisions, but single feet may very well be estimated approximately.
The lower disc is cut with 111 teeth. The ratio 110
to 111 gives a differential displacement of one tooth only after
110 revolutions of the wheel, or of 220 yards traverse. The
two discs take, therefore, by revolution over the surface 220 ×
110 = 24,200 yards or 13·5 miles before they return to the
same relative position as at starting. This is, therefore, the
space this perambulator will traverse without resetting. To
enable the lower disc to be read the upper disc is cut away
for half the interior circumference of its circle. A part of the
upper disc is formed into a point, to read direct from the centre
into divisions on the lower disc, in furlongs up to 13½ miles.
The Measuring Box is covered with glass for protection.
The box can be taken off by removal of the milled-headed
screw at any time to set it back to zero, but in practice
it is often found more convenient to spin the wheel round to
zero or an even mile of the outer circle, and record differences
of reading, if this can be done in the distance within the
record of 13 miles of the lower disc. The screw and axis,
which are of hard steel, should be occasionally oiled with
watch oil to keep the perambulator in good working order.
762.—The reviser has designed a light form of perambulator
on the bicycle wheel principle. It is shown at Fig. 371,
and is very light and portable. The rim of the wheel is of
gun-metal and is usually made two yards in circumference.
It is fitted with a counter which denotes two yards to every
revolution, and the distance is given in number of yards only.
The handle is detachable from the fork for packing, and the
whole is contained in a light pine case. The wheel is also
made two metres and ten links in circumference.
763.—Pedometer.—Used for roughly ascertaining distances
passed over in walking. This ingenious instrument
was the invention of William Payne in 1831 (patent No. 6078).
It is the size of an ordinary watch, and has a similar face;
but between the figures, which indicate miles 1 to 12, there
are four divisions only, to indicate quarter miles. The pedometer
is slung up by a loop, Fig. 371, H fixed upon the
handle, which in use is passed over the edge of the waistcoat
pocket so as to keep the instrument in an approximately
vertical position.
764.—The Registering Apparatus consists of a pendulum,
Fig. 372, P placed horizontally by being supported by a
delicate spring L to its highest position, where it rests against
a stud. The action of the pendulum is caused by its following
the motion of the body in stepping, until stopped by the foot
reaching the ground, when the momentum attained by the
pendulum carries it from its upper position of rest where it is
sprung against the stop to its lower free position, where it
is stopped by a screwed adjustable stud S, shown under it.
The axis of the pendulum is free upon the axis of the ratchet
wheel R. When the pendulum falls, a fine spring, fixed to
its upper surface, drops its end into the teeth of the ratchet,
moving over two or three teeth, which are held against retrograde
motion by the spring pawl D. When the pendulum
rises, the ratchet is moved forward the number of teeth that
the spring at first slipped over. The ratchet is connected
with a pair of geared wheels, not shown, the axis of the second
of which forms the axis of the hand. In this manner each
oscillation of the pendulum is communicated to the index
hand. The ratchet is made with extremely fine teeth, so that
by adjustment of the screw stud S a greater or less number of
these teeth may be taken by one beat of the pendulum, and
thus the mileage rate may be adjusted approximately to the
step. This is done, however, very imperfectly, as the variation
of the average steps of men amounts to one or two inches,
and the difference from the number of teeth taken will scarcely
indicate less than three inches in the step.
765.—Passometer.—This instrument was originally
invented by the author as an improvement upon the pedometer
(1868). The instrument, Fig. 373, is not intended to
indicate miles or any distance, it simply counts the number
of steps taken. The action is just the same as the pedometer,
but the ratchet teeth are larger and less liable to miss a tooth,
as it is made to take one tooth only at a single step. The dial
arrangement is entirely changed. The steps are numerically
indicated by a separate hand which reads into the graduations
up to 50 steps upon a small dial. Each revolution of the
small hand reads through gearing one division of the central
hand, which moves over the complete circumference of the
dial, reading up to 25,000 steps. This is the extent of
indication. It is necessary in continuation beyond 25,000
steps to take a record of progression per 25,000 where a
greater distance is required to be measured.
766.—The average step may be estimated perhaps within
1 or 2 per cent. by training in walking several miles steadily,
counting the steps, always remembering that we take shorter
steps uphill and when we are tired. But the mean step of
the individual under all the different circumstances is the only
rule that can be followed.
767.—Sounding Chains used for coast surveys are
generally made of iron, but sometimes of brass. They are
usually made of 10 fathoms entire length. The links are
1 inch, and the feet are indicated by tellers. The form of
teller designed by the author is shown in Fig. 374 for the 3.
A leaden weight, similar to that shown Fig. 375, is used upon
the end of the chain—of 28 lbs., for ordinary coast work, or
heavier if there are strong currents. The chain is contained
in a strong wooden box.
A very elaborate apparatus with steel wire line has
been made for deep-sea sounding by Lord Kelvin and
others; but this subject is beyond the province of the
present work.
768.—Sounding Lines, used for survey of shallow
coasts and harbours, are made of water-laid line of fine green
hemp, about ¾ inch circumference, Fig. 375. White tapes
are inserted as tellers at every foot, and red tapes at every
fathom. 3 to 6 fathoms are the ordinary lengths employed.
If the water is shallow the fathoms are easily counted, but if
thought necessary knots may be tied to indicate the number
of fathoms on the red tellers. The weight is about 7 lbs.
for 50 feet line, about 15 lbs. for 100 feet. The under side
of the weight is commonly recessed to take tallow when it is
desired to bring up a specimen of the bottom, if this is loose
sand or mud.
769.—Coast Survey Lines.—For surveying distances,
from point to point of soundings along a coast, lines of fine
copper wire rope marked with tellers at 50 and 100 feet are
commonly used. The line is generally allowed to rest on the
bottom of shallow water, and is floated up by means of
attached corks in deep water. It is usually laid and
picked up by means of a reel fixed at the stern of the surveying
boat. The lengths of line used vary from 1000 to
5000 feet.
770.—Telemeters.—These scarcely enter within the
practical limits of surveying instruments, but as several
attempts have been made to introduce their use it is
necessary to mention them. The general attempt has been to
measure a great distance, 1000 feet or more, by means of the
angles subtended from the ends of a short base to a distant
point. This base in the telemeter of Piazzi Smyth is 60
inches; Colonel Clarke, 72 inches; Otto Struve, 73·5 inches;
and Adie, 36 inches. The angles are usually taken upon
the principle of the sextant by coincidence of image. Very
much greater success has been attained recently by Messrs.
Barr and Stroud by means of their range-finder of 54 inches
base. The author, as far as his information reaches, is
assured that no instrument of the class is satisfactory for
surveying purposes. Further, the subject is one to which he
has devoted some study, and designed two telemeters.[55] One
of these appeared to him for a time satisfactory within certain
limits. The base in this instrument was 50 feet, formed of a
fine pianoforte wire stretched between two observing telescopes,
the tension of the wire directing the one telescope to a right
angle, and the other telescope to an arc which read either
degrees and minutes or absolute distances in the eye-piece
to the direction in which the telescope was pointed. In first
trials this instrument was found fairly satisfactory; but
subsequently in windy weather the deflection of the wire
rendered the action of a pair of instruments quite unreliable.
There are some instruments, as Colonel Gautier's
telemeter used in the French army, which depend upon
combined reflectors placed normally at 15° to 45°, as in the
apomecometer, art. 693, but with a tangent screw to give a
small motion of displacement to one mirror which reads on
a scale of calculated distances to angle from a certain base
measured between two stations of observation. A very similar
instrument, invented by Labez, has one reflector only at 45°.
These instruments may be useful for measuring approximate
distances for range in the army, but can scarcely rank as
surveying instruments, the box sextant, art. 664, being in every
way a superior telemeter for the purpose when a measured base
can be fixed and well-known trigonometrical calculation used.
771.—The simplest and best telemeter for surveying purposes
is the subtense telescope, and all good, up-to-date
surveying instruments have their telescopes so fitted, but for
those who do not carry an instrument with a telescope the
reviser has designed a small subtense telemeter, Fig. 376, which
consists of a small telescope fitted with subtense points,
and mounted in a collar which has vertical and horizontal
motions and a centre socket to fit a Jacob's staff. The stadia
is set to read 1 in 100. The telescope has rack and pinion
focussing and may be revolved in its socket so that the stadia
rod may be read held either horizontally or vertically. It is
packed in a leather holster case, and a four-fold 10-feet spring-pointed
stadia rod is supplied with it divided into feet, tenths,
and hundredths.
772.—Hand Rods, although used more generally by
building surveyors, are extremely useful also to the civil
engineer and land surveyor for town work among buildings
and in mines. They are made 5 feet in length, less generally
10 feet. The 5-feet are made of single blades of lancewood
or of two jointed to fold. The 10-feet are always jointed
and made much stouter than the 5-feet. The 5-feet are
generally sold in pairs.
Fig. 377.—Ordinary 5-feet jointed rods—plan and section of joint.
773.—Ordinary 5-feet Rods are divided to every
3 inches, with feet only stamped with numbers, as shown
Fig. 377. Where the rod is jointed the best form of folding
joint is shown in the figure in section and plan. The spring S
is sunk into the face of the rod at the joint on one side, and
springs into a groove (housing) in the other side so as to lock
the joint when it is either open or closed. The most useful
dimension for the rod is 1 inch by 1/6 inch. Rods are nearly
always made of lancewood, but they are preferred dyed black
for neatness by many surveyors. A pair of rods is usually
carried in a cowhide case. They are also often carried
in the stem of a walking-stick hollowed out for the purpose.
The rod or rods in this case are made much lighter, generally
½ inch by 1/8 inch for a pair of rods, or 7/16 inch by 7/32 inch
for a single rod. The single rod is to be preferred in this case
for its extra strength.
774.—Fully Divided Rods.—The author has made rods
for many years divided to single inches. These measure from
both ends—one end direct as Fig. 378 and the other end
reversed by turning the rod over as Fig. 379. By this plan
the rod gives direct measurement in feet, inches, and parts
from either end, and the division is always placed outwards
against the work, so that measures may be taken from either
end by turning the rod over sideways, without turning it end
for end.
775.—Connecting Link for Rods, which weighs only
1 oz. and may be carried loose in the pocket, is often found
convenient for measuring heights, as it permits the ends of a
pair of rods to be brought together, Fig. 380. By this means
the arm will raise the rods about 7 feet, and with 10 feet, the
height of the pair of 5-feet rods, this will make 17 feet of
measurement. When the 10-feet is set against a wall, its
height, if 20 or 30 feet, may be guessed very approximately by
standing at a distance from it.
776.—Slip Jointed Rod.—This form is less general, but
it is a very convenient form of rod. The jointing is effected
by two loops which are fixed to the centre end of one part of
the rod in such a manner that the other part may slide through
the loops. When the rod is extended to 5 feet there is a stop
which prevents further extension, and a spring to keep it at
this exact position, Fig. 381. The outside of the rod is
divided into feet and inches. The inside is divided so that
any addition to the half rod, produced by extending it;
may give the measurement from end to end of the rod
at this position, thus:—The half rod being 2 feet 7 inches
closed, if the loose side be drawn out 19 inches the rod from
end to end will be 4 feet 2 inches, which will be indicated by
the division and figuring inside the rod. This is very convenient
for measuring openings such as doorways or passages.
777.—Brace-piece.—A 10-feet rod is sometimes made
with a brace-piece, which folds up inside the rod. This brace-piece
is jointed to fix both half rods to 90° when it is desirable
to use the rod as a square.
778.—Civil Engineer's Rule is made fourfold in both
boxwood and ivory, Fig. 382. The most convenient size is
1 inch wide. Some of the profession prefer them narrow for
lightness—¾ inch; and some wide for strength—1¼ inches.
This rule is generally well made, with German-silver joints
and outside joint-plates. The divisions placed on the rule
outside are inches in eighths and tenths; the inside, the
ordinary architects' scales, 1/8, ¼, ½, 1, and four chain scales, 20,
30, 40, and 50. A 10 is got by halving the 20; 60, by
doubling the 30. A protractor reading to 5° is divided on
the head. With silver joints and in fine ivory this rule is
often made a presentation instrument.
CHAPTER XVII.
STATIONS OF OBSERVATION—PICKETS—FALSE PICKET—PERMANENT
STATIONS—REFERRING OBJECT—HELIOTROPE—HELIOSTAT—HELIOGRAPH—SIGNALLING—MORSE
ALPHABET—NIGHT
LIGHTS—OIL LANTERNS—MAGNESIUM LIGHT.
779.—Stations of Observation vary materially according
to the extent of the survey and its purpose. For geodetic
works stations are raised at great expense, often in masonry or
solid woodwork. For ordinary local or civil surveys the stations
are commonly formed of single poles set up vertically, which
vary in dimensions according to the extent of survey and the
difficulties which may be encountered by various obstructions
to direct visions by woods, lakes, marshes, etc. The
apparatus that may be useful in the work of the civil engineer
in ordinary practice will only be considered here.
780.—Pickets or Ranging Poles, Fig. 383, as the
name indicates, are used for ranging a direct line through a
district, either by a series of poles sighted from one to the
other or by being placed in position convenient for triangulating
by the theodolite where the country is open, or free from many
buildings, trees, or other convenient landmarks.
781.—The picket (Fr. piquet) is a straight, slightly tapering
pole shod with wrought iron or steel. It is generally made of
about 1-1/8 inches diameter, and is painted in alternate feet red
and white with an enamel paint that will not soil the hands or
take dirt from them. The shoes should be made with strap-pieces,
so that the picket, which is generally made of yellow
pine for lightness, should not be liable to break off at the shoe
in use. Fig. 381 represents the lower part of a picket as
made by the author: B black, W white, R red. It is usual
to have six pickets at least out in use with a theodolite in
open country.
782.—False Picket.—For the placing of a picket it is
usual to clear the sod with a small spade where possible, so as
to suspend the plummet from the theodolite into the hole
made by the picket to triangulate from its position. In
marshy lands and under many conditions this is not easily
done. It will generally be found more expeditious to carry
about one of the author's false pickets, to place directly in the
hole from which the picket is removed, which saves the
trouble of removing the grass. This is shown in Fig. 384.
It consists of a wooden peg, upon the top of which a cross is
sawn to represent the axis. This cross is filled in with a veneer
of ebony, and the whole is polished over to keep it clean.
It will be readily seen that any picket accidentally broken will
make a false picket. In setting up the theodolite over it
the plummet is brought to verticality with the centre of the
cross. In moving the false picket the original one is easily
replaced, if required, in the same position for continuing the
work.
783.—Spur-shod Picket.—Much stouter poles than
may readily be pressed in by hand, as for instance, of 2 inches
diameter, may be driven into the ground by having a spur
or cross-bar of steel, about 7 inches long and about 3/8
inch diameter, placed through the pole, say at 1 foot distance
from the point, a form which is much used on the Continent.
This picket may be jerked down for a certain distance by
pressure of the foot on each side, and then jerked home to
the ground by standing upon it, to make a 10-feet or 12-feet
pole stand sufficiently rigid for temporary work, Fig. 385.
784.—Permanent Stations are commonly constructed
upon hilltops or other commanding positions. A very general
way is to set up a long pole of fir or other wood at command,
from 10 to 20 feet in height, according to the circumstances.
Occasionally it is desirable to remove the pole and place the
theodolite centrally over its vertical position. A very good
way to do this is to have a slightly tapered wooden socket,
Fig. 386 S, constructed of stout boards, say 1½ inches
thick, made into a hollow square with a cross of boards,
WWWW fixed to it. The socket is placed in a hole dug
out entirely below the ground, and is rammed in and fixed as
an ordinary gate post. The pole P is squared at the end to
fit the tapered socket up to shoulders which are formed by
leaving the other part of the pole round. The socket for a
15-feet pole should be 18 inches deep; for a 20-feet one,
2 feet deep. Where these poles are properly prepared they
may be jointed together in two or more parts for portability.
Bunting flags, red and white, about 18 inches by 9 inches,
may be fixed at the tops of the poles. In fixing the socket the
pole should be erected in it to be able to keep it constantly
vertical during the ramming. A plummet suspended at arm's
length, at a distance from the pole in two positions at about
right angles to each other from the centre of the pole, will
provide a means of keeping it erect during the fixing of
its socket. The socket hole, upon lifting the pole out, forms
the centre for erecting the theodolite over its position.
785.—Referring Object.—It is desirable that all
arcs taken by the theodolite from an important station
should contain one point in common, for which the best
defined object to be found at a distance may be selected.
Colonel Clark, of the Ordnance Survey, recommends as a
referring object two rectangular plates of metal placed with
their edges parallel to each other in the vertical plane, at
such a distance apart that the light of the sky seen through
the opening appears as a vertical line of about 10″ in width.
The best distance for this object is from 1 mile to 2 miles.
Two pieces of board, fixed a small distance apart by ledges
screwed thereon, answer the same purpose. The description
fully conveys the method without illustration.
Stations Visible at Great Distances are formed by means
of reflection of the sun's rays or by artificial light.
786.—Heliotrope, or heliostat as it is sometimes called,
may be any form of mirror to throw the sun's ray in a constant
direction or to a distant station at a time of day fixed for
making observation. The instrument is uniformly constructed
with a small glass mirror having a plane surface. The angle
of divergence of the extreme rays in the reflection is the same
as that subtended by the sun's diameter at the position of the
mirror, that is, of about 32 minutes of arc. This divergence
is sufficient to render the reflector visible at a great distance.
The plan upon which the author has constructed this instrument
is shown in Fig. 387. It consists of a reflector M
formed of a plain glass mirror of about 5 or 6 inches in
diameter, placed in a metal tray. The mirror is centred vertically
upon an axis to which a worm wheel B is attached upon
one side that works into a tangent screw which is moved by
a milled head so as to place the mirror at any angle to the
horizon. The mirror and its vertical adjustment just described
are carried by a fork which is erected from the base board of
the instrument upon a socket joint which permits the mirror
to be turned about. Upon the lower part of the fork above
its socket another worm wheel is constructed centrally to the
axis. This works into a tangent screw attached by fittings to
the base board. The tangent screw has a long shank leading
to a milled head A. By means of the milled heads the mirror
may be set to any position, so as to throw the reflection of the
sun in any required forward direction. A small hole is cut
through the silver in the centre of the mirror to sight the
position to which the sun's reflection is directed.
787.—The Base Board is of ¾ inch mahogany about
20 inches by 10 inches, and is supported upon a very firm
tripod stand, like that described for a plane table, art. 700.
At one end of the board a sighting screen of mahogany,
10 inches by 10 inches and ¾ inch thick, is hinged, so as to
be held erect by means of a stay bar E. In the centre of
the screen an opening is turned out 3½ inches diameter, and
a frame-piece of half circle only is placed over this. The
frame piece is grooved out at the back so as to hold discs,
shown abc in the figure.
788.—The Discs abc, are of thin brass and have
openings respectively ¼, ¾, and 1½ inches wide, so as to
reduce the width of the line of light which appears through
them when the reflection of the sun is thrown from the back.
These have each a fine wire stretched across them to indicate
the centre. A fourth disc, not shown, has a double cross of
wires to indicate the centre only.
789.—To Pack the Instrument, the screen is turned down
the index frame, falling into the opening F; the mirror with
its fork is lifted out and secured to the surface of the base
board by buttons; and the whole apparatus is put in a pine
case. Its weight without tripod stand is 8 lbs.
790.—To Use the Heliotrope, the station on which the
sun's light is to be thrown is sighted by looking through the
small hole in the centre of the mirror, and adjusting the base
board until the station appears in the centre space of the disc
opening. The mirror is then turned towards the sun by
means of the milled heads until its image, reflected upon the
back of the screen, appears central with one of the discs
which is intended to be used. All parts of the stand and
fittings being made quite firm, the attendant moves the milled
heads, as required, to follow the apparent motion of the sun,
at intervals of five minutes or less. It must be observed that
the centre of the slit in the disc represents the station visible
to the observer. This point must therefore be plumbed to
the station point in setting up the instrument. A part of the
screen at P is cut away to admit of the suspension of a
plummet.
791.—The heliotrope was much used in India for the
great trigonometrical survey. Colonel H. Thuillier states
from experiment that "A heliotrope of 9 inches diameter
answers for 90 to 100 miles. For nearer distances it is much
too bright to be observed through a telescope, and the light
must be diminished in the following proportion. For distances
of 2 or 3 miles (the usual distance of a referring mark) an
aperture of 0·25 of an inch will answer, and for longer
distances about 0·1 of an inch of aperture per mile of
distance will suffice, viz., an inch for 10 miles, 2 inches
for 20 miles, and so on, provided always the apparatus
is carefully adjusted and the man who works is alert
and skilful."[56]
Practically the discs here described will give all the
variation required. In less favoured climates than India
more opacity will be found in the atmosphere, and larger
apertures required than those just stated.
Signalling with the Heliotrope.—A thin wooden bat D is
moved over and off the outside front of the open disc
aperture, following the rule of Morse signals, which will be
presently described for the heliograph.
792.—Heliostat.—Is a smaller instrument than the
heliotrope, in which the mirror or mirrors are moved by
clockwork, so as to keep the sun's reflection in a uniform
direction throughout the day. This instrument is delicate and
not generally well adapted to field work.
793.—Heliograph.—This instrument is the invention
of Sir H. C. Mance,[57] since improved by Major Macgregor,
Colonel Bonham, and others. It is used for a military
signalling apparatus, but it is also employed, on account
of its portability in place of the heliotrope for surveying,
where great precision by limiting the area of light reflection
is not required. The construction of the instrument
is shown in Fig. 388. B is the back of a plain circular
mirror of 5 inches diameter, supported upon pivots on a
fork frame J, the lower part of which forms a socket.
The socket is furnished with a thumb-screw to secure the
mirror and its frame when placed upon a cone projecting
from the apparatus connected with the base plate formed on
the top of the tripod head. The cone is erected upon a
disc or wheel cut at its edge in teeth and centred upon
the axis of the tripod head. The wheel is revolved by
means of a pinion connected with a milled head A which
moves the mirror and the entire apparatus above in horizontal
revolution.
794.—The Sighting Arm L is attached to a collar fitting
projected from the tripod head. This may be fixed in any
horizontal direction by means of the tangent clamping screw
C. The arm L has a supplementary extension by the piece
Sj, which is jointed at the position of these letters and also by
a socket fitting into the arm. The termination of the extension
is a sighting point I formed of a thin blade of metal.
The arm and its fittings permit the sighting point I to be set
in any direction or elevation to follow the inclination of the
land.
795.—The Sighting Vane is a piece of white metal
upon which there is placed a black dot termed the sighting
spot. A small circle, about 1/5 inch diameter, is left unsilvered
in the centre of the mirror, which does not reflect the sun's
rays. It therefore causes a small disc of shadow in the
centre of the reflection of the mirror, termed the shadow
spot. The shadow spot is made to appear upon the sighting
spot when the instrument is adjusted to throw the sun's image
upon a distant station.
796.—The Supplementary Mirror M is similar to that
already described, centred also on pivots and placed in a forked
frame. This is mounted on a cone S′ which fits into a socket
at S, when the extension arm J is removed. This mirror is
intended to receive the image of the sun when placed towards
the back of the pointing of the instrument to throw the sun's
image from the mirror M to B, to signal by double reflection,
when the sun is at a forward angle to the distant station.
The coincidence of reflection is taken with this mirror by the
reflection of a piece of paper pasted on its centre of the same
form as the index I.
797.—Telegraphing Apparatus, called technically flashing
apparatus. This consists of a rod R hinged to the top
of the mirror at its upper end and also to a lever which
forms a Morse key at the lower end. The rod is formed of a
screw of about half its length, which passes into a female screw
tube so as to shorten or lengthen it as required to direct the
reflection of the sun's rays by turning the milled head above
R, which forms a part of the tube. The Morse key is hinged
at J to the stem of the instrument, and is kept up to a fixed
stop by means of a spring P extended by an arm from the
stem of the instrument, so that pressure upon the disc F
moves the key down to its stop P, and also tilts the
mirror to throw its reflection off the observing station
during the pressure. The flashing described by the jar
of its action is liable to displace the mirrors. The use
of the bat, shown at Fig. 387 D, is more certain for
signalling words.
798.—The Tripod of the Heliograph TT′T″ consists of
three circular mahogany legs 1-1/8 inches in diameter and about
4 feet 9 inches long. The legs are capped with sockets
carrying collar-pieces which are attached to the tenon-pieces
of the head. The head forms a box for the revolving apparatus
and remains attached to it when the mirror apparatus
and arm are removed. The tripod head is protected when
out of use by a leather cap attached by a strap to one of
the legs. The weight of the tripod is 6 lbs. In fixing the
tripod for use it should have the legs extended nearly
60°, and the toes should be firmly pressed into the
ground. At windy stations it is well to dig holes and
sink the toes, or to have a heavy stone suspended under the
centre of the head.
799.—The Case for the Heliograph is made of solid
leather, with separate divisions for mirrors, arm, and sight. A
spare mirror is sometimes packed in the same case that
the instrument may not be made useless by accidental
breakage. A strap is provided with the case to go
over the shoulder. The instrument weighs 5 lbs.
complete in its case. Great care should be taken to
observe the arrangement and position of the parts of the
instrument before taking it from its case, as it is always
packed closely.
800.—To use the Heliograph with a Single Mirror.—In
this case the reflection is direct. The instrument is
approximately directed by looking through the mirror from
behind, moving the arm L and the sight I to cut
the distant station, and then clamping the screw C. After
this is done the exact position is found by placing the head
nearly in front of the mirror, with the back to the distant
station with which it is intended to communicate. Then to
adjust the mirror, if required, and move the eye until the
distant station appears reflected in the exact centre of the
mirror. After this, without moving the head, finally to adjust
the sight vane I until the reflection of the sighting spot is
brought exactly in line with the centre of the mirror and
appears reflected upon the image of the distant station. The
sighting spot is then in direct line between the distant
station and the centre of the mirror, in whatever
direction or inclination the mirror may be afterwards
placed to reflect the sun's image. Care should be taken
not to disturb the stand nor arm in future movements of
the mirror.
801.—To Adjust the Mirror, stand behind the instrument
and adjust the vertical screw R and the horizontal pinion
A until the black spot, as it appears on the mirror from the
reflection of the hole through it, is seen upon the centre
of the point of the sight vane surrounded by a ring of
bright reflection from the silvered surface of the mirror.
The distant station will then receive the reflection, which
must afterwards be kept constantly upon it by gently
moving the screw R and pinion A, following the apparent
path of the sun.
802.—To Use the Heliograph with Two Mirrors, which
is necessary when the sun is shining towards the distant station
and its image can only be projected by double reflection, the
second mirror is placed upon the end of the arm in the socket S.
This has a white paper vane cemented upon it, as shown at
M. The mirror B is placed roughly facing the sun. The
mirror M is turned towards the distant station upon which it
is intended to direct the rays, being careful at the same time
to observe that the two mirrors do not intercept each other's
rays. Now from the back of the mirror M we look into the
mirror B, moving the head until the centres of the two mirrors
appear in a line with the eye. Then without moving the head,
adjust the direction and inclination of M until the reflection
of the distant station appears in the centres of the mirrors.
Now clamp the mirror M in this position, from which it must
not be moved so long as it is required to keep the same
station in communication.
To keep the reflection following the sun a position is
taken at the back of the mirror B, and this mirror is
worked as before described, when it is used singly, by
the milled heads, only that in the present case the paper vane
M takes the place of the metal vane I.
803.—Telegraphing by the Heliograph.—The communication
is made by the alternate pressure and release of the
Morse key F, each pressure throwing the reflected image of
the sun off the observing station. The Morse alphabet,
which is universally used, consists of rapid touches represented
by dots, and pressures of at least four times the time
of a touch represented by dashes. The following arrangement
forms the alphabet:—
A
· –
N
– ·
B
–···
O
– – –
C
–·–·
P
·– –·
D
–··
Q
– –·–
E
·
R
·–·
F
··–·
S
···
G
– –·
T
–
H
····
U
··–
I
··
V
···–
J
·– – –
W
·– –
K
–·–
X
–··–
L
·–··
Y
–·– –
M
– –
Z
– –··
The time between the words is double that of a dash. Many
other signs are commonly used for figures, etc., for which the
reader may consult The Manual of Instructions in Army
Signalling. The same system is used for signalling by flags;
and by stopping off light of lamps this system is most valuable
for the surveyor in new countries for information of forward
ground and other matters.
804.—Lights for Observations by Night.—Under
many conditions an observation of a distant station may be
much more conveniently and accurately taken at night by
observation of a luminous object of limited area. For this
purpose the arc light, lime light, blue signal light and others
have been employed. For the civil engineer where
regular stations are not erected, as with geodetic work, oil
lights or the burning of magnesium ribbon are the most
convenient.
805.—Oil Lanterns.—In the great trigonometrical
survey of India large reverberatory lamps were used, which
were furnished with Argand burners with circular wicks about
2 inches in diameter. The back arc of rays was reflected by
a parabolic reflector 12 inches in diameter and 4·9 inches in
depth. The lamp was enclosed in a strong box with a plate-glass
face 12 inches in diameter, with apertures to admit
sufficient air and chimney to carry off fumes. The box was
constructed to form a packing case for conveyance of the
apparatus.[58]
806.—The oil lantern which will be found most convenient
for the civil engineer will be one of the same form
of construction as the bull's-eye lantern, but much larger—6
inches square is a good size. This may be made to go on the
same tripod as the heliograph, and will take its place for
signalling by night, or telegraphing by the Morse signals
by the hand or bat shown Fig. 387, D. A 6-inch
bull's-eye lamp with treble wick may be seen well in
clear weather 5 miles to 10 miles off. A railway signalman's
hand lamp forms a very good signal, or even an
ordinary 4-inch bull's-eye is very useful in working over new
countries.
807.—Magnesium.—The intense light given by burning
ribbon magnesium, and the extreme lightness in weight of
this material, render it of especial value for night signalling.
Magnesium ribbon is now sold at a very low price (about
two shillings per oz.), and 1 oz. will give a continuous intense
light, visible at 30 miles, for over an hour, whereas for a night
signal arranged to be given at a stated time, fifteen minutes is
amply sufficient for a single observation. Great difficulty is
often found in lighting magnesium ribbon when this is
slightly oxidized from exposure to air. The best method is
to employ the flame of a portable spirit lamp, made
for the purpose. Under any condition the burning ribbon
should be shaded from wind. A common plan is to
hang a straight slip of ribbon from the centre of a tripod
which can be readily shaded by a pocket handkerchief.
Where expense is not the object to be considered, lamps
may be had for burning the wire. Tin cases are
made for soldering up and storing the ribbon in for use
abroad.
CHAPTER XVIII.
MEASUREMENT OF ALTITUDES BY DIFFERENCES OF ATMOSPHERIC
PRESSURE—HISTORICAL NOTE—MERCURIAL
BAROMETER—CONSTRUCTION—OPERATION—ANEROID
BAROMETER—CONSTRUCTION—VARIOUS IMPROVEMENTS—HYPSOMETER.
808.—Historical Note.—The observation that the atmosphere
decreases in density with increase of height is due to
Alhazen the Saracen, about a.d. 1000. By this he explains
that a ray of light entering the atmosphere obliquely follows
a curvilinear path, bending towards the denser strata, that is
concave towards the earth. He showed that a body will
receive difference of pressure in a rare and a dense atmosphere,
and calculated that the height of the atmosphere to its
final attenuation would be from his data nearly 58½ miles. The
practical instruments that have been devised for measuring
altitudes, by the differences of pressure due to the weight
of superincumbent atmosphere are the barometer, the
aneroid, and the hypsometer. The barometer was invented
by Torricelli about the year 1640. Its principle was demonstrated
and first applied to altitude measurement by Pascal in
1647. The aneroid barometer was suggested by Conti in
1798, and said to be devised as a practical instrument by
Vidie in 1808. The hypsometer or boiling-point thermometer,
which depends for its boiling temperature upon the pressure
of the atmosphere above the liquid which surrounds it, was
suggested by Fahrenheit in 1724, experimented with by de Luc
in 1772, and brought to its present practical form by Regnault
about 1840. At the present time the aneroid is almost
exclusively used by the civil engineer, as this instrument when
made with great care is sufficiently reliable, more portable,
and not so delicate in use as the others. So that it is only
when very great precision is desired, or when the one instrument
is used as a check upon the other, that the mercurial
barometer, or the hypsometer, or both are now employed.
At the same time it must be understood that the aneroid
barometer scale is in a certain degree arbitrary, as the
divisions at best are only made up from a certain number of
points taken from observations of the mercurial barometer
placed simultaneously with the aneroid under an air pump,
and therefore its errors comprise those of the particular
mercurial barometer with which it is compared, and those due
to the difficulties of the comparison, and of making subdivision
afterwards in the same relative proportion, by copying to the
scale of the aneroid.
809.—The Mercurial Barometer.—The principle of
the barometer is generally understood. If a glass tube,
closed at one end, 33 inches long, say of ¼ inch or over
in bore, be filled brimful of mercury and the point of the
forefinger be firmly pressed on the surface of the mercury,
the tube may be inverted without the admission of air. If the
covered end of the tube be now plunged into a basin of
mercury and the finger slowly withdrawn from under the tube
beneath the surface of the mercury, the latter will sink in
the tube to about 30 inches above the surface of that in the
basin—that is, if the experiment be performed at about the
sea level. The empty space in what now becomes the top of
the tube is termed a Torricellian vacuum.
810.—In removing the pressure of the atmosphere from
its surface in the tube, which in the above experiment produces
the barometer, the pressure of the atmosphere then
falls only upon the exposed surface of the mercury in the
basin, or what is technically termed the cistern. This pressure
is equal per area, according to hydrostatic laws, to the upper
surface area of any equal column of mercury that the barometer
may contain. Therefore the weight of the column of mercury
in the tube, if cylindrical, above the surface of that in the
cistern, is the same as that of a column of air of equal size
reaching upwards to the full height of the atmosphere. In fact
the one exactly balances the other, and it is by the difference
of the weight or quantity of air above the barometer per
area of bearing surface that it is possible to ascertain the
altitude of its position by means of the height of mercury in
the tube, after proper allowance is made for sudden changes
of conditions of the atmosphere itself from time to time, capillary
attraction of the tube, temperature, etc.
811.—The mean height of the barometrical column in
Great Britain, at sea level at the temperature of 32° Fahr., is
about 29·95 ins. A cubic inch of mercury at this temperature
weighs 0·48967 lbs. Therefore
29·95 × 0·48967 = 14·66 lbs.
gives the mean pressure of the atmosphere on each square
inch of surface of the earth in this latitude. Nearer the
tropics the pressure is greater, near the poles less. It can
be shown that as the heights ascended by the barometer
increase in arithmetical progression, the pressure upon the
mercury diminishes in geometrical progression.
812.—Mountain Barometer.—The barometer used
for measuring altitudes, to which the above term has been
applied, is now made only upon Fortin's plan, in which the
bottom of the cistern wherein the glass tube is plunged is
made of fine, close-grained leather, the best for the purpose
being a stout kid. The pores of the leather must be sufficiently
fine not to admit of the escape of the mercury, and yet
at the same time sufficiently soft and pliable to transmit the
exterior pressure of the air. Fortin's construction permits the
cistern to be closed entirely secure from leakage of the mercury,
in whatever position the barometer may be placed. The
closing is effected by means of an adjusting screw, Fig. 390F,
which by its pressure decreases the capacity of the cistern and
forces the mercury up the tube, or adjusts it to a given
height, so that the scale of the barometer may be read correctly
from a given point X placed within the cistern. To
prevent injury to the tube the adjusting screw is made of a
length just sufficient to force the mercury to fill it, so that
when it is closed home there is no jar or percussion of the
mercury in carrying the barometer. The details of the mountain
barometer may be best followed by the illustrations.
813.—The Glass Tube is made of mild flint glass
thoroughly annealed and sufficiently stout to resist all the
strain and percussion that may occur with fair usage. One
end of the tube is slowly sealed by the blow-pipe, so that the
closed end may be as strong as the other parts.
814.—Mercury—Filling the Barometer Tube.—The mercury
of commerce is generally impure, and it contains
occluded air. For standard and mountain barometers the
mercury should be distilled in an iron apparatus, at just its
boiling heat, leaving about one-sixth of the mercury in the
still. The tube, which should be perfectly clean, is left
about 12 inches too long for the barometer. It is charged
with clean mercury for about 36 inches in height. It is
then boiled in a special circular charcoal stove, in the centre
of which there is a vertical iron tube of 2 inches diameter.
The barometer tube is introduced from the bottom of the
stove, to heat about 4 inches of the top of the mercury
only. The tube remains in this position till the mercury
boils. It is then elevated for another 4 inches and again
brought to boiling point, and so on until the end of the
tube is reached. Under this process the air and some
impurities rise to the surface of the mercury, and the tube is
considered to be properly boiled. The end of the tube is
then cut off to its proper length and inserted in the cistern,
in which there is left sufficient clean mercury to complete
the barometer.
815.—The lower part of the barometer tube, after it is
filled, is attached to a thin boxwood socket of about an inch
in depth by means of hot thin glue. The socket piece is
afterwards bound over with sewing silk, which is again covered
with glue, and is finally varnished so as to form an elastic,
secure fitting upon the glass. The socket-piece is secured to
a wide boxwood collar, Fig. 390, D. Upon the under side of
the collar an ivory gauge peg X is inserted, which forms the
index point for reading the surface of the mercury in the
cistern upon the Fortin principle.
816.—The Cistern.—The glass sighting tube, Fig. 390
H, of the cistern, through which the mercury and gauge point
X are visible, is made about 1½ inches long and from 1 inch
to 1½ inches internal diameter, the glass being 1/8 inch to 1/5 inch
in thickness, ground square at its ends. The upper end of
the glass fits upon the boxwood collar D, with the interval of
an indiarubber band to make the fitting air-tight. The lower
end of the glass tube fits upon the boxwood collar I, with an
interval of a turned leather collar. The boxwood collar prolonged
forms the lower part of the cistern. This has a second
boxwood collar screwed upon it, to which the leather bag E
is attached by silk and glue. A stout leather capping plug is
glued upon the lower end of the bag, upon which the boxwood
cap of the adjusting screw F presses for adjustment of the
mercury, or to close the tube.
817.—The Cistern Casing, which is of brass, consists of
upper and lower collar pieces, Fig. 390 AA′ and BB′, and
their attachments. The upper collar is fixed to the casing
tube of the barometer. In the inside of this collar a leather
washer is placed, which comes above the boxwood collar on
the glass tube D and makes soft contact between these parts.
The lower collar has been partly described with the cistern.
This has a brass tube E screwed upon it, covering the
bag and lower part of the plug of the cistern. The lower
closed end of the covering tube is formed into a nut for
the adjusting screw F placed in the axis of the tube.
There are four bolts or screws GG′ which bring the two
collars of the cistern casing towards each other, support the
lower part of this casing, and produce a pressure between the
boxwood collar on the barometer tube and the top of the glass
sighting tube with the intervening rubber collar, so that the
mercury at this point is secured.
818.—The Stem, or Barometer Casing Tube, is made of
brass, about ¾ inch diameter. This has a slot, of about ¼ inch
in width, down two concentrically opposite sides, from near
the top of the tube downwards for about 20 inches. The
tube is graduated along one open edge next the slot in inches
and tenths, these being again subdivided to twentieths, and
figured to read from 13 inches to 32 inches of mercury, as
shown in detail for the upper part in Fig. 391. The same
space is divided into centimetres and millimetres if metrical
measure be used. Within the outer tube an inner tube of
about 12 inches in length fits telescopically to move with a
soft smooth motion. This inner tube carries one vernier at
top and one at bottom, Fig. 389, rr′. The top vernier, shown
Fig. 391, is placed above a slot in this tube which corresponds
with the outer tube, so that the level of the mercury can be
seen below the top vernier-piece at S. The verniers are
divided into 50, so that, reading into the 20, they give reading
50 × 20, or 1000 to the inch. The inner tube carries a rack
about 11 inches long, which moves by a pinion fixed upon a
cock-piece, Fig. 389 m, on the outer tube in the same manner
as before described for telescope racking, art. 96. Two stay-pieces
placed over the outer tube hold the slots firmly at an equal
opening. A ring is placed at the head of the barometer to
suspend it in a room, to be used, if required, as an ordinary
meteorological barometer, as shown at the top of Fig.
391.
819.—Mounting of the Barometer.—The barometer is
mounted upon a tripod formed of three light tubes with steel
points, as shown Fig. 389. These screw into a collar which
is packed in the cap of the leather case. The collar has two
opposite screws that screw into a second collar, which is
also held by two opposite points at right angles to the first.
The points of the screws form axes in the manner of a
Hook's joint, permitting the barometer to take a vertical
position by the superior gravity of its cistern and lower
parts.
820.—The Thermometer, shown at Fig. 389 t, has its bulb
brought as nearly as possible into contact with the glass tube
enclosed in the casing tube. It is commonly divided with
both centigrade and Fahrenheit scales. Correct observation
of the thermometer is necessary to be made with every observation
of the barometer, as the specific gravity of the mercury,
and consequently the height of the column, depend partly
upon this for its correct determination.
821.—The Packing Case, Fig. 392, is made of solid leather
lined with thick felt to fit the barometer. The legs are
placed in packings outside the case. In packing for carriage
the screw of the cistern is turned nearly home, leaving
only sufficient space for any probable expansion of the
mercury from increase of temperature. The barometer should
always be carried in an inverted position, as this precludes
the possibility of air getting into it, and even tends to
exclude, by the jarring motion of carrying, any air that may
have accidentally become occluded. A strap is attached to
the case for holding it over the shoulder.
822.—Reading the Barometer.—It will be observed that
the mercury against the sides of the tube presents an upward
curved appearance, due to the resistance of the glass to
perfect contact, and the cohesion of the mercury in what is
termed capillary action. This beading, as it is termed, varies
according to whether the mercury is rising or falling. It
is always necessary before taking an observation to raise
the mercury, by turning the screw F, until its surface just
touches the peg X, to make observations uniform. The
reading is taken by slowly lowering the index-piece by means
of the milled screw until light is just excluded between the
fore and back index surfaces, as shown Fig. 391 at S, at the
highest point of the surface of the mercury. The inches,
tenths, and half-tenths (·05) are read on the scale, and the
thousandths on the vernier. Thus, suppose the scale reads
26·45 and the vernier 25 = 25 thousandths, the reading
will be—
26·45
·025
26·475
For altitude the upper and lower stations are taken, and the
difference subtracted for difference of barometrical scale.
823.—Difference in Altitude in feet taken from Barometrical
Inches.—Complete barometrical tables for this comparison
will be found in Molesworth's and other pocket-books in use
by all engineers. It is therefore unnecessary to occupy
our space with them. A very approximate rule may be given,
which was proposed by Mr. R. Strachan in the Meteorological
Magazine, as follows:—
"Read the barometer to the nearest hundredth of an
inch; subtract the upper reading from the lower, leaving out
the decimal point; and then multiply the difference by 9, which
gives the elevation in feet. Thus:—
Lower
station
29·25
inches
Upper
"
28·02
"
123
9
Elevation
1107
feet."
824.—Capillarity.—For meteorological observations a
quantity must be added to the reading equal to the resistance
of the tube in capillary action to the rise of the mercury.
This is greater in an unboiled tube than in one in which the
mercury is boiled. For altitude measurements with a single
barometer, or by two barometers with equal tubes, it may be
neglected, as it will be equal in all parts of the tube. Where
two barometers of different bores are used, the following
table gives the correction:—
Correction of Capillarity to be Added to the Reading.
Diameter of Tube in Inches
·6
·55
·5
·45
·4
·35
·3
·25
·2
Unboiled
Tube,
Inches
·004
·005
·007
·01
·014
·02
·025
·04
·059
Boiled
"
"
·002
·003
·004
·005
·007
·01
·013
·02
·029
825.—Temperature Correction.—As the mercury increases
in temperature it becomes specifically lighter, therefore rises
higher in the tube under equal atmospheric pressure. The
temperature is indicated by the thermometer, shown at Fig.
389t. The expansion of mercury for 1° Fahr. is 0·000101;
but the brass tube also expands 0·0000104, and it is the
difference between the two expansions that we require, the
mercury expanding about 7·15 more than the brass. If we
subtract from the reading ·00014 of the observed altitude for
every degree of Fahrenheit above 32°, the correction will be
practically very near. Thus for a single reading—thermometer,
52° Fahr.; barometer, 30 inches
-(52 - 32) × 30 × ·00014 = ·084,
making the true reading 30 - ·084 = 29·916 inches at 32°
Fahr.
Tables for correction without any calculation will be found
in Molesworth's and other pocket-books.
826.—Gravity Correction.—The force of gravity decreases
as we ascend to a higher level in proportion to the square of
the distance from the centre of the earth. It follows that the
force of gravity as we ascend at the equator diminishes at a
less rapid rate than at the poles. Its amount is always
small—on an average it may be taken at about 0·001 inch of
mercury per 400 feet of ascent.
Time.—Humboldt discovered that the barometer varied
within the tropics at different hours of the day. This has also
been found to be general to some extent in all countries,
depending upon many conditions. It is only important for
consideration of altitude measurements, that it is advisable if
possible to take the upper and lower stations simultaneously
by a pair of barometers for exact determination of altitude.
827.—Aneroid Barometer.—The first introduction of
this instrument into England was by Pierre Armand, le Comte
de Fontainmareau.[59] This instrument consisted of a vacuum
chamber as its prime mover. The chamber was made a flat
cylindrical box, with its upper surface of thin metal, with corrugations
covering its surface in concentric rings. The chamber
was filled with a number of spiral springs which resisted the
pressure of air, to prevent the collapsing of the corrugated
surface when the chamber was exhausted, and so placed the
surface in equilibrium with the pressure it received from the
atmosphere. The movements under various pressures were
multiplied by gear work and levers so as to make a small
movement of the corrugated surface evident in the extent of
motion of an index hand reading upon a dial.
The aneroid practically in its present form was devised
by Lucien Vidie from 1848 to 1862.[60] In this instrument
the vacuum chamber, which is a thin, flat, circular box, is
corrugated equally on both sides, so as to obtain double area
of active surface under atmospheric pressure to that of the
older form. The chamber has its surfaces drawn apart by an
exterior spring, the point of communication or tension being
placed at the centre of its corrugated sides only.
Fig. 394.—Perspective view of the interior of an aneroid.
828.—The construction of this aneroid is shown in Fig.
394, which is of a 4½-inch instrument, aneroids made for
surveying being of two sizes, 3 inches and 4½ inches. A is a
solid plate of metal 1/8 inch in thickness, termed the base
plate; B the vacuum chamber, circularly corrugated on both
sides, made of thin, hard-rolled German silver containing a
large percentage of nickel.
829.—An axis is projected from the lower side of the
chamber, of about 1/5 inch diameter. This is tapped with a
screw and screwed firmly down into the base plate with
a counternut. On the upper side of the vacuum chamber
the axis is projected upwards to receive the tension of a
strong, very flexible spring D above it, to be described. A
bridge-piece EE of steel of strong section strides over the
vacuum chamber. This piece has a stout arm-piece projecting
from it towards A, which is secured to the base plate
by a screw that is left open to a hole indicated near A through
the outer case of the instrument, by means of which the
bridge-piece can be rocked so as to produce more or less
tension of the spring D upon the vacuum chamber for final
adjustment. The bridge-piece has two points of rigid support
in right line, which form a primary—adjusted when the
instrument is made—of the spring contra to the pull of the
vacuum chamber. The main spring D is made of fine thin
steel, carefully tempered, as broad as the chamber. This
spring is constructed so that by its elasticity it may have
sensitive movement under the pull of 10 lbs. to 15 lbs.
per inch of active surface of the vacuum chamber. It is
upon the perfection of this spring as much as upon the construction
of the vacuum chamber that the sensitiveness of the
instrument depends. The upper axis of the vacuum chamber
is secured by a cross cotter pin C which gives an exact point
of resistance and yet secures flexibility of the spring at the
junction. This cotter pin is placed in the centre of the three
points of support of the bridge-piece EE. A lever arm G
is fixed to the main spring D upon a stout plate of metal
which is in direct connection with the point of tension of the
vacuum chamber. It is the small movement of this lever
arm (about ·01 inch at the chamber) that gives motion to the
indicating apparatus. The lever moves a cranked arm on the
axis HK, which communicates through the axis to a second
cranked arm placed at right angles to the first I. This pulls a
chain Q attached to the arm J. The chain is wound round a
small drum fixed upon the axis which carries the hand near R.
The drum keeps the hand in one direction contra to the pull
of the chain by a hair spring R which is just sufficient to overcome
the friction of the axis of the hand F. The hand and
drum and their fixings are carried by the plate M, which is a
light piece of brass projected from a stiff standard fixed from
the base plate K. The compound lever apparatus described
moves the point of the hand about five hundred times the
amount of movement over the first fulcrum of the lever at the
chamber.
830.—Compensation for Temperature.—This is a somewhat
difficult matter, which is generally brought about by
several modifications of parts. Some ordinary aneroids will
move upwards about 1/10 inch of mercury by a rise of temperature
of 8° centigrade only. This is caused principally by the
increase of temperature softening the spring to render it less
rigid, and the softening of the vacuum chamber to render it
more flexible or sensitive to atmospheric pressure. Some
little difference is also caused by the unequal relative expansion
of the lever, arms, spring, and chain, these parts being
of steel and brass. Compensation can be made in the lever
arm G by making this curved and of two unequally expansive
metals, as zinc and steel, so that the curvature increases with
increase of temperature and the lever shortens. Compensation
can also be partially made by making the base plate in
two metals—iron and brass—so as to press the standards
fixed through the two metals nearer or further apart with
temperature changes. But the whole subject is too technical
to be entered upon in our limited space, as it depends so
much upon the construction of the instrument, which is
modified in various ways by different makers in order to
effect this correction.
831.—Dial and Hand.—From the delicacy of the structure
of the aneroid it becomes evident that no two instruments can
be made to exactly the same rate of movement; therefore
each instrument has to be separately graduated when it is
intended to measure altitudes with it exactly. However
close or open the scale may be, it becomes closer as greater
altitudes are ascended, the density of the atmosphere as a
gaseous fluid decreasing in geometrical progression as the
altitude increases in arithmetical progression. From this
we can understand that a vernier to the index hand can
only read approximately, although it will act fairly well at
a certain point of the scale. The best and possibly only
correct method of dividing the scale is to put at first a false
scale to the instrument, and to read this scale by the index
hand with a microscope under an air-pump, compared at every
half-inch of height of the column of the mercury by the gauge
attached to the pump. When this is carefully done, a zero
point is taken of the position of the index hand at the atmospheric
pressure at the time, as indicated on the false scale.
The proper scale, as it appears upon the dial, is divided from
the position of the readings of the false scale, the two scales
being superimposed upon a special dividing machine. The
dial is afterwards figured and finished.
832.—The ordinary method of reading the aneroid is to
let the index point read over the divisions. The author
devised a plan, which he has used for many years, of fixing
a small plate of aluminium upon the point of the hand, level
with the scale, which is raised on a step to read it upon its
inside edge, to a fine line on the aluminium. By this means
error of parallax in reading is entirely avoided. The author
also places an adjustable magnifier to move over the index for
reading. This last improvement is now followed by other
makers. A pointer also revolves with the outer rim to show
the last reading before ascent or descent.
Instruments made with care in the points just indicated
must necessarily become expensive. Where the aneroid is to
be used as a weather glass, or even as a travelling companion
to judge of approximate heights in climbing mountains, such
care is not needed, and the instrument may be produced very
cheaply of useful quality. On the other hand, where precision
is required, a delicately made aneroid will indicate a movement
of 3 feet or less in raising or depressing, when holding the
instrument horizontally in the hand and giving a light tap on
the glass with the finger-nail before reading, so as to put all
motive parts in equilibrium.
833.—The Altitude Scale is generally placed near the
periphery of the dial; it is the all-important part to the
surveyor. This scale is usually set out from a mean
of atmospheric pressure at sea level, taken from Sir George
B. Airy's tables, which give the extreme pressure of 31
inches barometric pressure for zero at sea level. With
this pressure altitudes are taken at intervals according to the
indices tested under the air-pump, and the intermediate
divisions are graduated to scale. These index points are
shown in the table below for a few points:—
Table of Altitude with Barometrical Scale.
Height in Feet.
Barometer in Inches.
Height in Feet.
Barometer in Inches.
0
31
6000
24·875
250
30·717
7000
23·979
500
30·436
8000
23·125
750
30·159
9000
22·282
1000
29·883
10,000
21·479
1500
29·340
11,000
20·706
2000
28·807
12,000
19·959
2500
28·283
13,000
19·236
3000
27·769
14,000
18·535
4000
26·769
15,000
17·853
5000
25·804
It may be generally observed that the more open the scale
the less altitude can be obtained by a single revolution of the
hand; therefore the more points can be taken per 1000 feet.
Thus, with an altitude barometer reading to 3000 feet, readings
can be pointed in construction at every 250 feet; with one of
6000 feet, at every 500 feet; and over this at every 1000 feet.
834.—Movable Altitude Scale.—In this the altitude scale
revolves so as to be able to set it at zero for ascending
from any point. As the barometrical scale diminishes, it is
necessarily inaccurate, and cannot therefore be used upon a
surveying aneroid; but the plan is pleasant for approximate
measurements for amusement in making ascents. It is only
mentioned here for the reason that the inaccuracy of the
movable scale is not always recognised.
835.—Adjustment of the Aneroid.—There is a screw at
the back of every aneroid somewhere under the point A,
Fig. 394, by means of which an aneroid may be brought to
the reading of a mercurial barometer at the position the
mercury may be read. Where a good instrument has been
set by the maker to a standard barometer, it is not wise to
alter it frequently if it keeps in good working order for
altitude measurements without being again set by a standard.
On the other hand, however well the aneroid may have been
made it works gradually to a slight change, caused by the
smooth wearing of parts in action. It is well to have an
aneroid, after one or two years' wear, cleaned and adjusted
by the maker. It will then, if a good instrument, work well
for many years.
836.—Directions for Measuring Altitudes.—Turn the
outer rim of the instrument until the index carried thereby
reads to the same point as the index hand. Raise the
magnifier until the reading comes into sharp focus. Hold
the instrument as nearly horizontal as possible, and tap the
case lightly with the thumb-nail two or three times, so as to
overcome any slight friction of its mechanism. This places
the action of the works in equilibrium. Write down the observation
as it now reads in the pocket-book, taking thousands
from the right hand (large figures), hundreds from the right
hand (small figures), tens from the lines to the left of this,
and units from observation of the position of the index line in
the space between the last and the next line. Say this observation
reads 2465. Whether we ascend or descend, the instrument
acts similarly. We will now presume we ascend to the
height we require to ascertain, and take a second reading, 1945;
the difference between these numbers, 2465 - 1945 = 520 feet,
is the number of feet ascent. It is necessary, where exact
measurement is required, to take the reverse reading, as the
atmospheric pressure may have changed. We now descend,
taking the last observation, 1945, and find the reading at the
first position 2463 instead of 2465, that is 2 difference, which
proves that the atmospheric pressure has decreased. If we
take half this difference = 1 and correct the first deduction,
520 - 1 = 519 will give us the correct measurement, subject
only in this instance to the irregular possible fall of atmospheric
pressure, which will not in many instances, if the times
of observation have been nearly equal, be a quantity worthy
of consideration. It is not necessary to make any correction
for the height of the observer in positions above ground, as
the instrument must be placed at a uniform distance from the
eye to obtain the reading. In mines it will frequently be
necessary to measure the heights from the ground at which
the observation is made.
837.—Various Improvements in the Aneroid.—It is
uncertain whether any great internal improvements have been
made in this instrument, except by Vidie, at various times.
Many attempts have been made to increase the length of scale
to obtain more open reading. These attempts have all been
in the direction of increasing the difference of space between
the fulcra of the levers or by additional gearwork, producing
thereby a greater multiplication of the small unit of displacement
of the axis of the vacuum chamber beyond the normal
× 500, which is already great. The multiplication has been
taken up to × 2000 or more. This increases the difficulty of
manufacture and certainty of permanent action. Many of these
plans were tried by Vidie and abandoned. A plan of Vidie's[61]
of giving the hand three or four revolutions, and to register this
upon a spiral scale upon the dial, also by counting on a second
dial the number of revolutions, has been repeated with slight
variation by E. T. Loseby in 1860[62] and by Major Watkin
later. Vidie's plan of drawing back the hand to read the
spiral has been modified also by Major Watkin in a manner
which may be a little less frictional.[63]
838.—Watkin's Extended Scale Aneroid.—This
instrument is shown at Fig. 395, and has a very extended reading,
consisting of three complete circles, in place of the usual
single scale, with a hand or pointer sufficiently long to extend
across them all. In order to show clearly which circle of scales
should be read there is an indicator attached to the movement
of the instrument which causes a series of figures (I., II., III.,
corresponding with the three circles) to be exhibited through an
aperture in the dial. For instance, when the instrument is in its
normal state the hand will point to the first or outer circle, and
the figure I. will appear and remain in the aperture until the
barometer falls to 27·8, where the break takes place in the
circle, as will be seen in the illustration. The hand then
takes up the reading on the second circle (where the break
appears at 27·8) and figure II. replaces figure I. in the aperture,
remaining there until the barometer falls to 25, when the reading
is transferred to the third circle, and figure III. appears in
the aperture.
839.—Watkin's New Patent Mountain Aneroid
Barometer.—This instrument, of which both a front and
back view is shown above at Figs. 396 and 397, is the
invention of Colonel H. S. Watkin. The special feature is
that it can be put in or out of action as required, and
when out of action is impervious to the influence of variations
in atmospheric pressure. This relieves the strain on
the mechanism of the aneroid, as it is only put into action
when a reading is required. The lower portion of the vacuum-box
instead of being a fixture (as is the case with ordinary
instruments) is allowed to rise, which is effected by attaching
to the lower portion of the vacuum box a screw arrangement
actuated by a fly nut on the outside of the case. Under
ordinary conditions this screw is released, and the vacuum-box
put out of strain. When a reading is required, the fly
nut is screwed up as far as it will go, thus bringing the instrument
into the normal condition in which it was graduated.
It has an aluminium case for lightness, is made in two
sizes (3 inch and 4½ inch), and has a sling leather case.
These plans are again on their trial. It is the author's
opinion on the subject, knowing the delicacy and skill shown
in Vidie's work, that little improvement is likely to be
obtained by magnification of the small motion of the vacuum
chamber by mechanical means, which must necessarily be by
a process both delicate and highly frictional. Attempts, he
thinks, may otherwise be successfully made in the magnification
of the small motion of the hand in a frictionless manner by
optical means to obtain clearer definition.
840.—An improvement was made in the aneroid in one
direction by the late Thomas Cooke[64] by replacing the chain
by a thin gold band upon, and leading from, the drum. This
obviated the small difference of rate of displacement due to
separate jointed links as they leave the tangent of the drum.
It is said, however, to cause a little springiness at this point,
where it should be very dead, which somewhat minimises
the improvement; so that it has not been very generally
adopted.
841.—Bourdon's Aneroid, invented by C. Bourdon in
1849.[65] The motor of this instrument consists of a flat,
oval tube bent into a circular form. This tube opens to
greater and lesser curvature by difference of external pressure
upon it. The small motion given at one free end of the tube
is multiplied up by gearwork. This instrument is found to act
most delicately as a steam gauge; but experience has shown
that it is not so sensitive or durable for indicating atmospheric
pressure as the vacuum-chamber aneroid last described.
842.—Hypsometer, or Boiling-point Thermometer.—That
water or any other liquid boils at a certain temperature,
according to the amount of atmospheric pressure
surrounding it, is easily observed by placing a cup of boiling
hot water under the receiver of an air-pump. At first the
surface will remain still, but as the pressure of the air is
pumped off it may be made to boil time after time until it arrives
at a low temperature. The temperature at which the water boils
as the air is rarified may be easily followed by observation of
a thermometer immersed in the cup of water; and at the
same time, if a barometer be placed in connection with the
receiver it will indicate the pressure, from which the scale of
differences may be practically made. For the civil engineer
this instrument, accompanied by the aneroid, is in every way
superior to the mountain barometer, which must necessarily
have a three-feet tube, as the hypsometer is much lighter,
more portable, and less liable to injury, and perhaps, from the
uncertainty of keeping a pure vacuum in the barometer, safer
as a means of observation.
Fig. 398.—Hypsometer, or boiling point thermometer.
843.—The modern form of instrument is shown in Fig. 398.
The boiler shown immediately over the lamp is filled
about half full of rain water by lifting off its covering
tube C. The covering tube has a smaller tube, about 3 inches
long and ½ inch diameter leading upwards from it, through
which the thermometer bulb is passed into the boiler. This
tube is covered by the jacket J, formed of four telescopic
tubes that are extended, as shown in the figure, for use,
but which close up quite compactly when the instrument is
put in its case. The upper drawer of the jacket tube is about
¾ inch diameter, so that the tube enclosing it passes over the
leading tube when the apparatus is closed. The lamp, which
is filled with pure spirit, draws out from the bottom of the
outer casing O. It carries a wick holder with screw cap, and
this again has a covering cap to secure the spirit perfectly
when the instrument is carried about. The inner casing A is
perforated with holes to admit air at the level of the body of
the lamp. When the lamp is lighted and complete for use it
is placed vertically in its outer case O, which is jointed in two
parts and perforated by large holes surrounding it top and
bottom: the bottom holes are covered with wire gauze. By
this arrangement the flame is not seriously disturbed by wind
or rain.
844.—The Thermometer, upon which the action of the
instrument depends, has a stout stem about 6 inches long and
¼ inch diameter, with a very fine, flat, oval bore about ·01 inch
wide and not much over ·005 inch in thickness. The stem
is divided very openly for about 25° below 100° centigrade,
each degree being subdivided into 10, below 212° if Fahrenheit
scale be used, with each degree divided into 5. The divisions
are filled in with lamp-black, and the stem is backed with
white enamel to give clear reading. The thermometer T when
in use is surrounded by a vulcanized indiarubber collar I which
slips over its stem to adjust it to position in the boiler tube as
shown.
In placing the thermometer in its jacket, it is important to
hold it erect to be sure it passes into the leading tube from
the boiler, as there is generally just room for it to catch by the
side of this tube, where if it were pressed down it would break
the bulb. When the thermometer is out of use the rubber
collar is removed, and the thermometer is placed in a tubular
metal case which is lined with indiarubber tubing, so that no
jar can injure it.
The whole apparatus when closed is carried in a solid
leather case, which contains divisions for the separate parts of
the apparatus, and a strap for passing over the shoulder for
carrying it. Fig. 399 shows the general form of case.
845.—Use of the Hypsometer.—Saussure calculated,
from data of his ascents of Swiss mountains, that the temperature
of boiling water decreased 1° centigrade for every
978·5 feet of ascent, where the mean temperature of the
atmosphere was estimated at 0° centigrade, or freezing point.
If the temperature of the surrounding atmosphere be taken as
5·5° centigrade, the ascent per degree of that scale is 1000 feet.
This becomes, therefore, the most convenient data to calculate
from, allowing 3·9 feet per 1000 per degree centigrade for
temperature above or below 5·5° centigrade at any two stations
of observation, of which the difference of level is required.
Thus:—If at the first station the temperature of air be 15·6
centigrade, the boiling point 95·5° centigrade; second station
temperature of air 14·1° centigrade, boiling point 94·2° centigrade,
the barometrical pressure of the lower station being
taken as a constant, or referred to the aneroid for correction;
then 15·6° - 5·5° = (9·1) (3·9) = 29·2 + dif. 95·5 - 94·2 = (1·3)
(1000) = 1329·2 - dif. external temperature (15·6 - 14·1) (3·9°)
= 1323·4 difference of level in feet.
Sometimes the thermometer is divided to Fahrenheit
degrees, subdivided into 5 to read by interspace and line to
·1° F. This may be changed to centigrade for use of the
above formula by taking 32° F. lower than the reading and
multiplying by 5/9. Thus—
60° Fahr. = 5/9 (60 - 32) = 15·55° centigrade.
The calculation proposed by Lefroy is, however, simpler for
Fahrenheit scale. To allow for diminution of boiling temperature,
with height from 212°, with barometer at 30 inches, take
511 feet of altitude for the first degree and add 2 feet for each
succeeding degree. Thus, taking height of first station = h
corrected for 212° Fahr., 30 inches barometer, remembering
decrease of barometrical pressure acts the same as increase of
height. Then—
211°
boil point
h + 511 feet.
210°
"
h + 511 + 513 = h + 1024 feet.
209°
"
h + 511 + 513 + 515 = h + 1539 feet.
CHAPTER XIX. — INDEX — FOOTNOTES:
MISCELLANEOUS SURVEYORS' AND ENGINEERS' INSTRUMENTS,
APPLIANCES, AND ACCESSORIES—CROSS STAFF—MECHANICS'
LEVELS AND CLINOMETERS—BONING RODS—FOOTNER'S
RAILWAY GAUGE—GIRTH STRAP FOR TIMBER MEASUREMENT—GIRTH
TAPES—TIMBER MARKER—SLASHING KNIFE—BILL-HOOK—RECONNOITRING
GLASS—TELESCOPE—SUN
SPECTACLES—WHISTLES—PIONEER TOOLS—SKETCH BLOCK
BOOK—CAMERA—GEOLOGICAL TOOLS—WEALEMEFNA—OPISOMETER—BOUCHER'S
CALCULATOR—SLIDE RULES—FULLER'S
CALCULATOR—ENGINEERS' POCKET BOOKS—CHRONOMETER—OUTFITS.
846.—Cross Staff.—Those of Tycho Brahé and of
Gunter were very elaborate affairs, consisting of a pair of
notched cross-bars sliding on a divided rod which gave directions
to form any angle in a quadrant from the eye by sliding
the bars further from or nearer to it. The surveying cross
staff, after better instruments were invented to take angles,
became a cross at right angles, sawn upon a disc of wood and
supported upon a staff which was pressed into the ground.
This was used by looking along the saw cuts to take offsets to
the chain, and for setting out buildings. The fixed cross-head
was much improved by making it a cross of metal with turned-up
ends, down the centre of which vertical saw cuts were
made at right angles, Fig. 400. This, in the author's opinion,
is still the best form.
847.—Cylindrical heads superseded the open cross-head.
The modern instrument in use is the French form, Fig. 401,
which is made of octagon brass tube. This is cut with alternate
sight slit and opposite window, with vertical hair on each
of four rectangular sides of the octagon. On the other four
sides there are plain slits subtending 45° to those first mentioned.
The octagon tube is mounted upon a socket-piece
which fits upon a conical pointed staff. The defect of this
cross-head is the closeness of the slits, due to the small diameter
of the tube, which renders the direction given for
sighting uncertain.
848.—Adjustable Cross Staff Head.—The cross
staff head is sometimes made cylindrical, in two parts, Fig.
402. The upper part is centred upon the lower so that the
upper series of sights move to any angle in relation to the
lower. In this construction a wheel is cut about the axis of
the upper part, which works into a pinion in the lower part, so
that the upper part may be revolved horizontally by it. The
meeting planes of the two cylinders are divided, the lower into
degrees and the upper with a vernier. The vernier is almost
an unnecessary refinement, as the sighting distance from slit to
hair is only about three inches, and no very great exactness can
be obtained in the sighting. This instrument has commonly a
magnetic compass upon the upper surface. It is about as
expensive as the semi-circumferenter, shown Fig. 232, p. 347,
and very inferior to that instrument owing to the extreme
closeness of the sights. Its use is obvious.
Many of the following articles, briefly described, may be
beyond the direct province of this work; but the utility of
these implements for completing the equipment of a surveyor
or engineer for special work it is hoped will be sufficient
apology for their introduction. The subject can scarcely be
treated except in a desultory manner.
849.—Mechanics' Levels.—In crowded Eastern cities,
in levelling through close passages, in many cases the surveyor
has to resort to mechanical levelling to carry his levels through.
Mechanics' levels are too well known to need much description.
The ordinary good kinds are made from 6 inches to 18
inches long, generally of rosewood, as this wood is very hard
and stands well. They have a brass plate at the top, and
tips of the same metal at the base. The illustration, Fig. 403,
is of a 12-inch level. The level tube, which is of blown glass,
is fixed in plaster of Paris, and the upper plate screwed down
over it.
850.—The Author's Hand Level is shown Fig. 404—12
inch. This is made of a casting either of iron or brass.
The level tube is ground to curvature and is somewhat superior
to the ordinary run of this class of work. The level tube
is fitted with ball socket at one end and stiff spring fitting
at the other, which is adjustable, so that the tube may be
easily replaced if broken.
These levels are commonly fixed upon a stout fir straight-edge
of about 5 feet to 10 feet in length by the lugs at the ends.
The level is taken by blockings upon the ground. Corrections
of error, both in level and straight-edge, may be made for any
considerable distance by reversing the forward and backward
position of the level with its straight-edge alternately.
851.—Square Level—Circular Level.—Fig. 405
represents a very useful class of level for setting up some
instrument stands, plane tables, etc., in which a pair of level
tubes are placed at right angles to each other. It is generally
made very small—1½ inches square only. A circular level,
the upper surface of which is formed of a worked concave
glass, was lately very popular, and is still used to a small extent.
As the spirit cannot be hermetically sealed in, it evaporates,
and this level soon fails. Mr. J. J. Hicks has taken out a
patent for a hermetically sealed circular level, described p. 96,
which appears to answer very well.
852.—Incline Level.—For laying railway rails and
drainage works the bubble is frequently made adjustable by
the tube in which it is contained being hinged at one end and
fitted in slides to rise with a screw at the other end, as shown
Fig. 406. A scale of percentage of inclination S is commonly
divided upon the adjustable end. The tube is raised or
lowered by the key A, which is removed after setting and
cannot be tampered with.
853.—Sighted Levels.—A mechanic's level is commonly
made with a hole longitudinally through it of about ½ inch
diameter, closed at one end, except a small hole of 1/30 inch or
so, and a cross upon a piece of glass at the other end. This
plan permits a sight to be taken through it which gives an
approximate level. Occasionally the same form of sight as that
described is hinged on the top surface at each end of the
level. The author has found a better plan of sighting to be
given by a pair of sights placed on a centre upon the ends of
the level to turn up when required for use, as shown Fig. 408,
P S one of the pair of points. This, when turned up,
shoulders on the stop-piece A B. The stop-piece is made of
sufficient thickness to admit the point in the hole near B for
protection when it is folded away out of use. The section of
the level, as shown by the end view D, is the same as that of
the level, Fig. 404. Very fair accuracy may be obtained by
making these sights appear coincident upon a distant staff or
rod.
854.—Boning-Rods, Fig. 409. These are very
commonly employed with mechanics' levels. They are made
somewhat like a stout T-square of 3 feet to 4 feet in length,
about 3 inches in width, and ¾ inch in thickness both of the
stem and head. They are at first placed at a distance apart,
9 or 10 feet, and a straight-edge of this length is laid from one
to the other, upon which the mounted level is afterwards
placed, the boning-rod being tapped down in the ground till
the bubble is in the centre of its run. A third boning-rod is
then placed at the same distance as the first pair, and the
straight-edge with the level upon it is reversed end for end.
This, if the work be fairly down, leaves the two outer boning-rods
level, however imperfect the straight-edge and level may
be, if the run of the bubble be taken correctly. By removing
the central boning-rod from the outer pair of rods, levels may
be continued by sighting over them, or boning forward as it is
termed. On the Continent boning-rods are commonly fixed
by driving a separate standard into the ground, which has a
pair of brass slings by its side to hold the rod, Fig. 410. This
is a much neater plan than that in common use of blocking
the rod up with stones. Boning-rods are also sometimes used
conveniently with a proper surveying level, from the tops of
water-pipes, etc.
855.—Railway Gauge, combining level and clinometer.
This high-class gauge, Fig. 411, is the invention of Mr. H.
Footner, C.E., late of the London and North-Western Railway.
It is formed of a bar of Spanish mahogany neatly shaped. The
end fittings are of steel. The gauging part is formed of two turn-up
steel flap-pieces with back stops. A spirit level is sunk in
the end fitting, shown in the figure towards the left hand.
The clinometer is formed by a gun-metal pin of ½ inch in
diameter; 9 inches long. This slides perpendicularly in a
spring fitting sufficiently stiff to support the gauge, and is
made to fall on the centre of the rail. The pin is divided
into inches and eighths. When it is out of use it slides up
the end of the gauge and leaves the whole instrument smooth
and portable to carry open or go into a leather case. Its use
is implied.
856.—Timber Girth Strap.—The direction for removal
and estimate of the value of timber often falls into the hands
of the surveyor. The height of standing timber may be taken
by a long rod, or a pair united by a link, art. 775, or by the
apomecometer, art. 693. The girth is most conveniently taken
by a leather girth strap, of which there are various patterns: but
that illustrated below, Fig. 412, is perhaps the most popular form.
This strap is made of two straps of bullock's hide 1 inch wide,
thinned down to about 1/8 inch in thickness; the two pieces
are stitched together to make it 12 feet to 14 feet long. The
strap is divided by lines into inches, but figured in units at
every 4 inches = single inches of quarter-girth. The figures and
lines are stamped. A brass weight, shown at one end of the
strap, is thrown by the strap with a swing round the standing
tree, and encompasses it in a second of time. The weight is
caught by the hand and the strap brought up to it to read the
quarter-girth. The quarter-girth gives roughly the equal sides of
a square; as, for instance if a quarter-girth reads 10, the size
of the tree is 10 × 10 = 100 inches, or 8·4 cubic foot-inches
per foot run.
Some surveyors prefer a hook instead of a weight, as being
more convenient to measure close timber. This is shown
Fig. 413. The hook is stuck into the bark and the tree is
girthed by walking round until the hook is met.
857.—Girth Tapes, similar to measuring tapes, Fig. 349,
p. 506, are occasionally used, but these are more convenient
for felled timber. Tapes for the purpose are made from
¾ inch to 1 inch wide, and 6, 12, and 24 feet long. They
have the ordinary feet and inches on one side and quarter-girths
on the other.
It is customary to allow 1 or 1½ inches, and sometimes
more for bark, according to the species of tree and the custom
of the country.
858.—Marking off Timber.—For this a special tool
with a gouge point, Fig. 414, and strong buck-horn handle,
termed a timber-marker, is used for standing timber intended
to be felled. The contents of the tree are sometimes marked
with the marker upon it if for sale, good bark allowance being
made in cases of difficulty of extraction from the forest, etc.
A plain knife is usually put with the marker, which is useful
as a food knife.
859.—The author makes a very small, neat surveyor's
knife, with marker, for the waistcoat pocket, Fig. 415, which
combines—M tree marker (small); S screw-driver for small
screws of instruments; P tommy-pin for turning capstan heads;
F file for sharpening lead of pencil, when this is used for the
field-book; and ER two penknife blades. The knife is similar
to the author's architect's knife, which is well known. The
tree marker is not strong enough for constant work.
860.—Slashing Knife—Bill-Hook—Axe.—In new
countries where sight way has to be obtained for the survey
through forests and jungles, one or more of the tools illustrated
next is most valuable as a part of the surveyor's equipment.
The slashing knife, Fig. 416, which is over a yard long, wielded
by a strong man will remove light brushwood very quickly.
Where the wood is close and of larger growth the bill-hook,
Fig. 417, is better; and with thickset timber the axe becomes
necessary. The well-known Canadian axe is found to be the
best.
861.—Hedging Gloves—Iron Hooks for Climbing Trees.—For
clearing land to avoid spines hedging gloves are generally
used; these are made of soft horse-hide, and although pliable
resist thorns to a great extent. Clutch hooks are also very
convenient to climb trees, to look forward for the easiest
direction for sight way.
862.—Rods for Measuring Standing Timber.—These
are generally made 25 feet long, jointed in 5 feet lengths,
similar to a fishing rod, but much stiffer. The rod is set by
the side of a tree to be measured and observed from a distance
where the first breech cuts its length.
863.—Reconnoitring Glass.—At present it is customary
to use a binocular field-glass in preference to a
telescope. The telescope gives greater penetration from its
higher power; the field-glass is preferred for its wider field of
view. The field-glass the author has supplied to the Indian
Government has neutral-tint glasses centred on the eye-pieces
to take off the glare when looking towards the sun, Fig. 418.
These have also hinge joints between the pair of bodies, which
permit adjustment of distance of centres to the distance of the
eyes. The object-glass should be 1¾ inches, not over this.
Where a telescope is used, the 30-inch—the original, not the
present—India military telescope is to be recommended,
Fig. 419. This is portable, has a sling case and a good
2-inch object glass. For lightness, aluminium bodies are
preferred by many for both field-glasses and telescopes; at
present the price of this metal is very low, so that it is
probable it may become in a short time general for the
purpose.
864.—Prism Binoculars.—These will be found a great
improvement on the old form of field-glasses, as owing to the
optical arrangement a high power is obtained combined with
a larger field of view and good illumination. Fig. 420 shows
the most modern form with all refinements; hinged body,
central focussing and separate focussing to suit each eye. It
has a very compact and strong body, and the size magnifying
8 diameters or about 64 times weighs only 13 ozs.
865.—Dome Spectacles—Bogles.—Spectacles of
neutral tint are most comfortable for general wear in sunny or
snowy countries. The dome or globular form is generally preferred.
Where there is hot dust gauze sides are to be preferred.
There is a very cheap form with gauze sides, which holds on
the head by an elastic band, termed bogles. These are rather
hot to the face, and the band after a time becomes sticky.
The spectacle form is much better. The glasses are made in
various shades to choice: some very dark or even black, the
latter being made for viewing and tending arc lights.
866.—Whistles made very powerful are much used in
exploring abroad to bring the party together, and for signalling
generally by sound, using the Morse signals, art. 803.
867.—Pioneers' Tools.—A small set of these is often
very useful to the surveyor in new forest countries. The
common set consists of a claw-hammer, wood-chisel, stone-chisel,
pincers, screw-driver, gimlet, and brad-awl. The leather
case is 8 by 4 by 2½ inches; it weighs 1¾ lbs. with strap. This
may be supplemented by a small American saw, cutting
both edges, about 20 inches long, and the axe previously
described, with a few pounds of wire nails. The tools serve
for marking trees or rocks, erecting signals, temporary
covers, etc.
868.—Sketch Block Book—Pocket Book.—In reconnoitring
no better information can be given of a track
than forward sketches from commanding station to station.
Sketch books about 7 inches by 5 inches are generally found
sufficient. The drawing-paper should be thin, and the pocket
large enough to contain all the separate sheets as they are
taken off by the penknife after completion from the block.
The sketches may be made with pencil, or a fine fountain
pen; or if the surveyor be a colourist a light box of moist
colours and a water bottle will often leave pleasing sketches
as reminiscences. Pocket-books with section lines to 1/8 inch
or 1/10 inch scale are sometimes used to give approximate plans
to scale of buildings, etc., where required, as well as the
ordinary field-book record.
869.—Camera.—Recently the camera has been much
used for reconnoitring. These are now made very light and
portable to take ¼ plate or 3 × 3 inch films, either on rollers
or in separate films.
870.—Cement Testers are made in various manners,
generally to test the cohesion of the cement as a homogeneous
hard body. Mr. Mann's cement tester, Fig. 421, goes on
another principle—it tests the adhesion of the cement to
stone, which appears to the author to be its most important
function; it is always hard enough.
871.—Watson's Improved Vicat Needle is a most
refined and accurate instrument for determining the time taken
by cement in setting. The cement is placed in the circular
container shown in the illustration, and the weighted needle is
lowered into it by means of the handle at the top. The
depth of penetration is shown in millimetres on the divided
arc.
872.—Geological Tools.—Acid-bottle—Blow-pipe—Touch-stone.—Where
countries are prospected for railways
it often becomes important to examine the rocks, both to
detect the softer rocks for cutting and to find limestone suitable
for mortar. A geological hammer, weight about 2 lbs.
to 3 lbs., is the ordinary tool. This, with a chisel and sailcloth
bag with strap, is all the necessary appliance. In searching
for limestone a small bottle of sulphuric acid sewn up in
a leather case is useful. A dipper is blown on the stopper of
the bottle, and a single drop of acid will detect limestone by
the bubble of froth it produces. Where minerals are to be
examined, a small blow-pipe apparatus is necessary. This
should be accompanied by a book of instructions. Where
the surveyor has not been trained to use the blow-pipe, one
with constant blast should be employed. For examination
for precious metals a touch-stone and two-acid bottle—sulphuric
and nitric—for silver and gold, are useful. The
metal is merely rubbed on the stone and the acid applied.
If the metal is base the acid removes it from the surface of
the stone. If precious it removes other matter and leaves it
visible.
873.—Wealemefna—Opisometer.—The wealemefna is
a very neat form of space runner invented by Mr. E. R. Morris,
which is found a very convenient instrument for measuring
distances on maps in prospecting. It is very small and light,
and may be, if desired, attached to the watch-chain. It gives
distances run over in inches and eighths, to be afterwards
calculated to the scale of the map, Fig. 423. The opisometer
for the same purpose, Fig. 424, is formed of a spur wheel at
the end of an ivory handle running upon a screw. This
instrument gives measurement by reversing its run upon the
scale of the map.
874.—Boucher Calculator, the invention of M. Alex.
E. M. Boucher, engineer, of Paris.[66] This is one of the most
convenient pocket calculators that a civil engineer can desire,
being only of the size of an ordinary watch. The instrument
was formerly made in France for this country in a very slovenly
manner. It is now made in London by the author, of sound
work and accurate centring, Fig. 425. It has face back and
front. The front one, which is shown in the illustration,
carries logarithmic scales of sines, numbers and square roots,
and is made to revolve by turning the milled head placed
under the handle, as the winder of a keyless watch. The
back dial, which is fixed and does not revolve, has upon it
a scale of equal parts giving the decimal parts of logarithms,
and a logarithmic scale of cube roots. There are three index
hands, one fixed on the side of the case over the front dial,
as shown in Fig. 425, and one on each end of the central
axis made to revolve simultaneously over the back and front
dials by means of the milled head at the side of the case.
Any operation involving multiplication, division, proportion,
powers or roots can be performed approximately with great
rapidity by the aid of this calculator, and it is practically as
simple to use as an ordinary slide rule, as will be seen from
the following explanation of its use:—
Multiplication, using the second circle of divisions from
the outside of the front dial:—Bring the first factor under the
fixed index, set the movable index to 1, then bring the second
factor under the movable index, and the product will be found
under the fixed index.
Division is performed on the same scale as follows:—Bring
the dividend under the fixed index, set the movable index to
the divisor, then bring 1 to the movable index, and the quotient
will be found under the fixed index.
For proportion the second circle is also used:—Set the
first factor under the fixed index and set the movable index
to the second one, then the proportionate equivalent of any
number brought under the former will be found at the movable
index.
Square roots, using the same scale:—Bring the number
under either of the indices, and the square root will be found
upon one of the two inner circles of the same dial.
Cube root:—In this case it is necessary to first bring the
1 on the front dial under the fixed index, then set the movable
index to the number, and the cube root will be found on
one of the inner circles of the back or fixed dial.
To use the trigonometrical dial:—Bring the needle of
this dial over the angle of which the sine or tangent is
required, and read upon the other dial (indicated by the
needle) the natural trigonometrical line upon the inner circle,
or its logarithm upon the outer circle.
The book of instructions supplied with the instruments,
written by Professor George Fuller, C.E., for the author, gives
all directions for working and also gauge points from which
calculations are made as with the slide rule.
875.—In reduction of factors of a calculation collectively
Boucher's calculator may take more than one turn or less than
unity. The author has added a central index to record the
number of turns. This is said to be of great value for the
perfection of the instrument, Fig. 426.
876.—Slide Rules, of which there are great varieties,
are of too complex a nature to discuss, except very briefly, in
our limited space, particularly as general descriptions have
been often given. The ordinary logarithmical scales of
Gunter (1619), known as Gunter's lines, are placed upon most
slide rules. The arithmetical lines are lettered A, B, C, D,
and E. A and B are alike: these are technically termed
double radius log. lines. They are used for all processes of
multiplication and division. C and D are also alike and are
termed single radius log. lines. They are used together for
ordinary multiplication and division, and in conjunction with
A and B scales for squares and square roots. The E
line, not originally a Gunter's line, but found early in the
century on several rules, is termed a triple radius log. line.
The numbers of the divisions on this line are the cubes of the
numbers of the corresponding divisions of the D line, with
which it generally works. All these lines work reciprocally
together, performing the most complex calculations by simply
setting them to numbers or gauge points of which given
solutions are required, as for instance, the first four lines in
combination give answers to such questions as:—To divide
by a number two numbers multiplied together, one of which
is squared; to divide the product of two numbers by the
square of a third number, etc., each of which calculations is
performed at a single setting. By inversion of the slide A to
C the reciprocal of a given number is found, also the mean
proportional between two numbers, the fourth term is inverse
proportion, etc. Trigonometrical calculations are performed
by the lines of sines, tangents, etc. Instructions are to be
found in the books supplied with the rules, and as a
part of many works. Among the most complete books
may be mentioned "The Slide Rule," by R. G. Blaine,
M.E., and "The Slide Rule," by Chas. N. Pickworth.
These both contain very full information on the subject.
877.—The Slide Rules in most general use are A. Nestler's
and A. W. Faber's. Both these well-known firms make a
very complete series, applicable to a great variety of technical
calculations.
878.—The reviser has recently completed from the designs
of the author an entirely automatic dividing engine for these
rules, which is the only one in existence.
A great number of slide rules are made for special
purposes only: some of these are very useful to the civil
engineer.
879.—Hudson's Slide Rules give strength of shafts, beams,
and girders; pump duty; and computation of horse-power in
engines.
880.—Honeysett's Hydraulic Slide Rule gives discharge of
water from channels and pipes of different forms and
inclinations.
881.—Tacheometrical Slide Rules with scale of sine2 and
sine × cos. for calculating the horizontal equivalents and vertical
heights from tacheometrical observations. These are made
either for use with instruments divided sexagesimally to 360°
or centesimally to 400.
882.—Sheppard's Slide Rule has duodecimal lines, double
reading, for squaring and cubing timber.
883.—Young's Slide Rule is designed for squaring and
valuing timber simultaneously, which operations it performs
in a very expeditious manner.
884.—Essex's Slide Rule is the best for calculating the
rates of velocity and discharge from sewers, water mains,
channels, and culverts of different forms, as it works with all
formulæ.
885.—The Slide Rule of Prof. Geo. Fuller, C.E.,
Fig. 427, presents perhaps the highest present refinement of
this class of rules, capable of greatly facilitating the numerous
arithmetical calculations of the civil engineer. Its range is
greater than most calculating machines, and besides the operations
of multiplication and division, squaring and cubing,
results requiring the reciprocals, powers, roots, or logarithms
of numbers can be quickly and easily worked out by its use.
The rule consists of an outer cylinder that can be moved
up or down, and turned round upon the cylindrical axis which
is held by the handle. Upon the outer cylinder a single spiral,
logarithmical scale is continued from end to end, the total
length of which makes the scale 500 inches long. This is
graduated into 7250 divisions. One index is fixed to the
handle. A second index is attached to the inner tube blocked
out by a flange to read upon any part of the scale; so that
altogether there are three tubes which work together telescopically,
by means of which the indices may be set to any
position on the graduated cylinder. Stops are placed so that
the indices may be brought to zero. By these means, the
indices being set to any of the gauge points, the logarithmical
scale, moving by itself, will maintain the same proportion for
any numbers. In this rule a single log. radius is repeated by
coincidence of indices, so that its scale of divisions, 41 feet
8 inches long, if compared with an ordinary double radius
slide rule, becomes equal to a slide rule of 83 feet 4 inches
long. The ordinary 12-inch slide rule has about 80 divisions
to each radius, so that it is easily seen how much more exact
quantities may be brought out with a rule of 7250 divisions.
It is a most valuable rule for calculations for the tacheometer.
Copious tables of gauge points for civil engineers are printed
upon the central tube, which is supplemented by a book
of instructions. The value of this rule has been much
extended by scales to facilitate subtense calculations, by
Mr. W. N. Bakewell, C.E., in the "Fuller-Bakewell" slide
rule.
An additional improvement, as shown at Fig. 428, has
now been effected in these instruments by adapting the case
to support the rule when in use, thus overcoming the objection
of being always obliged to hold it in the hand.
The use of Professor Fuller's rule is, however, confined to
arithmetical computations. The numerical solution of formulæ
comprising trigonometrical functions can only be performed
by extracting, with considerable loss of time, the values of
these functions from a book of tables. To do so requires a
certain effort of mind with its consequent risk of mistakes.
This limitation has restricted its use in a considerable body of
calculations, such, for example, as in the computation of the
co-ordinates of surveys from the lengths and bearings of their
lines, a method of plotting which is very largely used by land
surveyors at present; in astronomical computations; in civil
and mechanical engineering, etc.; the use of logarithms being
preferred on the score of speed, although the degree of accuracy
attained with Professor Fuller's rule is amply sufficient in the
large majority of cases.
886.—The Co-ordinate Spiral Slide Rule has been
designed to meet these requirements by Mr. H. O. Barnard,
A.C.H., F.R.A.S., etc., Superintendent of Trigonometrical
Surveys, Ceylon, Fig. 429. Like Professor Fuller's rule, upon
which it is an improvement, it enables the user to perform
with speed and accuracy arithmetical computations involving
multiplication, division, proportion, continuous fractions,
powers, roots, and logarithms; but in addition, the natural
and logarithmic values of trigonometrical functions of any angle
can be determined by inspection with the same accuracy as in
numerical computation, while the products, quotients, etc., of
these functions, by lengths or numbers, integral or fractional, are
obtained with equal ease, rapidity and precision. The scope
of its operations will be gathered from the examples which are
given to illustrate its use in the instructions supplied with the
rule.
Although the co-ordinate spiral rule, as all varieties of
slide rules, is based primarily upon the theory of logarithms,
a knowledge of that theory is by no means essential to its
practical use.
887.—Thacher's Slide Rule.—Fig. 430. This contains
a shorter scale than Professor Fuller's, and the system is
not quite so simple. Full printed instructions are given in the
book supplied by the inventor, Mr. Edwin Thacher, of Pittsburg,
U.S.A., or of the author, who is his agent for this country.
The original divisions of this rule were made by the author.
The scale is manufactured in the United States. There
appears to be found some difficulty in its construction to keep
the scales to true length and get them to exact position.
888.—Pocket Sets of Chain Scales.—These are
made 3, 4, 5, and 6 inch. Three of 6 inch form the ordinary
set. The chain scales, if three only, are 10, 20, 30, 40, 50,
and 60; if six they generally contain the same scales with
feet equal to the links. An extra scale with the ordnance or
other scale of the country is found also useful for measuring
from maps or plans. Some civil engineers prefer the pocket
scales made wide with quite square ends, to be used as offsets
or for sketching. These scales are generally made in ivory
and placed in a light morocco or Russia leather case. The
numbers of divisions of the scales should be stamped on the
ends to prevent the wrong scale being drawn from the case.
889.—Anemometers are used by mining engineers for
testing the ventilation of mines. The original and best known
form is that of Biram, Fig. 431. This instrument is held in
any current of air, and the velocity of the current is registered
by the motion of oblique fans, by means of ordinary decimal
gearwork on five dials giving feet and multiples by 10. Lowne's
anemometer, with the author's improvements, Fig. 432, is of
similar principles of construction, but it is arranged in portable
form to go in a pocket case. Another well-known form of anemometer
is built upon the same principle, but of cubical form.
It is customary to take the velocity of the current for one minute
by a watch, there being a detent provided in most instruments
to start and stop the motion of the hands upon the dials.
890.—Books of Tables and Formulæ.—Few British
Surveyors are without Molesworth's pocket-book. This contains
all the useful tables and notes of reference valuable to the
civil engineer in his ordinary work—weight, 5 ozs. Many
pocket-books have been written on the same plan. Hurst's
pocket-book contains all matters of reference for the town
surveyor among buildings. Trautwine's Civil Engineer's
Pocket-book (American) is the most complete, but it is of
double the weight of the Molesworth. Spon's Engineers'
Tables for the Waistcoat Pocket—weight, little over ½ oz.—is
a very useful little book. Of Traverse Tables both
Gurden's and Boileau's are comprehensive and reliable.
There are several pocket-books of Curve Tables, those of
Cutler & Edge, Beazeley, and Kennedy & Hackwood being
perhaps in the most general use.
891.—Technical Books—Ordnance Maps are published
on special districts and subjects which are often relative
to the country or the special conditions of work abroad and at
home for minerals, etc. It is very useful to possess such of
these as may be required, and the note is only made here as a
reminder.
892.—Sling Case for Drawings.—The most convenient
method of carrying maps or drawings for public works
in execution is to have a solid leather case similar to a
telescope case. This is best if made with the cap or lid of
the same length as the body: it can then be drawn out any
distance according to the length of the rolled drawing. If
thought more convenient, and the map or drawings are heavy,
a strap may be added to pass over the shoulder, Fig. 433.
893.—Chronometer.—This may be any form of watch
with compensated escapement. At present the prices run high
for this class of work; but from the simplicity and moderate
certainty of compensation it does not appear that this should
be necessary for the production of a fair working instrument
useful for the surveyor in new countries to check his longitude.
Where a good chronometer is used it is better to keep it
to Greenwich time without alteration. If there is a gaining or
losing rate this will most probably remain constant in equal
times, so that corrections may be made pro ratâ for all observations
until a check can be taken with certainty when arriving
at a town which possesses an observatory. The quality of a
chronometer is fully ascertained by having a certificate from
one of our observatories, that of Kew being the most popular.
894.—Chronograph.—For the observation of stars in
transit for the purpose of taking longitude, a dead-stop watch
or chronograph is most useful. This can now be had in
combination with an otherwise fair going watch at a very
moderate price.
895.—Outfit of a Surveyor for Work in a New
Country.—The ordinary items of strong, dust-coloured
woollen clothing, good boots, saddle, firearms, etc., do not
come within the province of this work. The instruments
he will require will depend partly upon the nature of the
country and the kind of work to be done. If for prospecting
only, light instruments are commonly selected—the sextant,
or box sextant with glass artificial horizon, good pocket
chronometer, telescope, aneroid barometer, prismatic compass,
and clinometer. If a general survey is to be made, the first
instrument of importance is the theodolite, the 4 or 5-inch
being the most usual. With this, pickets, land chain and
arrows, a steel tape for testing, and a linen tape. If for survey
in mineral districts, a good mining-dial is required, with all
accessories of chains, etc. If for railway work, a 5-inch
theodolite, a good level, staves, pickets, clinometer, and
prismatic compass. In all cases, field-books, drawing instruments,
supply of paper, drawing boards, squares, parallel rule,
pencils, Indian ink, colours, stencil plates, and other articles
for office use, of which the established optician or trader will
give full information from his experience, or general reference
may be taken from any complete catalogue of such
instruments.
Shows you in detail how to install
electric wires. Read the contents.
Contents of chapters: 1, Introduction; 2, Planning
the wiring; 3, Completing the installation; 4, Installing
the lights; 5, Other methods of wiring; 6, Materials and
notes; 7, Conduit and protected wiring, armored cables,
pipe conduits, latest condulet fittings and concentric
wiring; 8, Digest of 1916 edition of the National Code,
Underwriters rules and notes. 128 pages, 45 illustrations
and 9 plates, 12 mo, cloth.
Price 55 cents—Postpaid
LEARN TO DO THINGS
Model Library Series
OF COPYRIGHTED BOOKS
1. The Study of Electricity for Beginners.
2. Dry Batteries, How to Make them.
3. Electrical Circuits and Diagrams, Part 1.
* 4. Electric Bells, Annunciators and Alarms.
5. Modern Primary Batteries.
6. Experimenting with Induction Coils.
* 7. Electric Gas Igniting Apparatus.
* 8. Small Accumulators, How to Make and Use.
9. Model Steam Engine Design.
* 10. Practical Electrics.
11. Inventions, How to Protect and Sell them.
12. Woodwork Joints, How to Make and Use.
* 13. The Fireman's Guide to the Care of Boilers.
* 14. The Slide Valve Simply Explained.
* 15. The Magneto Telephone.
* 16. The Corliss Engine and Its Management.
* 17. Making Wireless Outfits.
18. Wireless Telephone Construction.
* 19. The Wimshurst Machine, How to Make It.
20. Simple Experiments in Static Electricity.
21. Small Electrical Measuring Instruments.
22. Electrical Circuits and Diagrams, Part 2.
* 23. Induction Coils, How to Make Them.
24. Model Vaudeville Theatres.
* 25. Alternating Currents, Simply Explained.
* 26. How to Build a 20 foot Bi-plane Glider.
* 27. A B C of the Steam Engine.
* 28. Simple Soldering, Hard and Soft.
* 29. Telegraphy for Beginners.
30. Low Voltage Lighting with Storage Batteries.
33. House Wiring for Electric Light.
* 34. Magnets and Magnetism.
* 36. Small Windmills and How to Make Them.
* 31. Gas Engine Management.
37. Collin's Wireless Plans, Part 1.
38. Collin's Wireless Plans, Part 2.
In paper covers Price 25c each Postpaid.
* These books can also be had in cloth binding
at 55c each postpaid
[10]A Treatise of the Principles and Practice of Levelling, by F. W.
Simms, 1842; A Treatise on Land Surveying, by John Ainsley, revised
by William Galbraith, 1849. Quite modern works—Aid to Survey
Practice, L. D'A. Jackson, Crosby Lockwood, 1910; On Levelling and
its General Application, by Thomas Holloway, Spon, 1887; revised 1914.
[12] Deschanel's Natural Philosophy, by Prof. Everett, p. 1018, 1876.
[13]A Manual of Surveying for India, by Colonel H. L. Thuillier,
C.S.I., F.R.S., etc., and Lieutenant-Colonel R. Smith. Thacker,
Calcutta, 1875. (Now out of print).
[14] The illustration is taken from Die geometrischen Instrumente, Dr.
G. Chr. K. Hunäus. Hanover, 1864.
[51]Proc. Inst. Civil Engineers, vol. xciii. part iii. paper No. 2308.
See also Military Surveying in the Field, by Major The Hon. M. G.
Talbot, Prof.; Papers Royal Engineers, vol. xiv. p. 25.
[52] Patent No. 1202, D. R. Edgeworth, April 1866.
[53] Heather's Surveying Instruments, 1870, p. 85.
[54]The Surveyor, vol. ii. No. 5. Sydney, Nov. 1889.

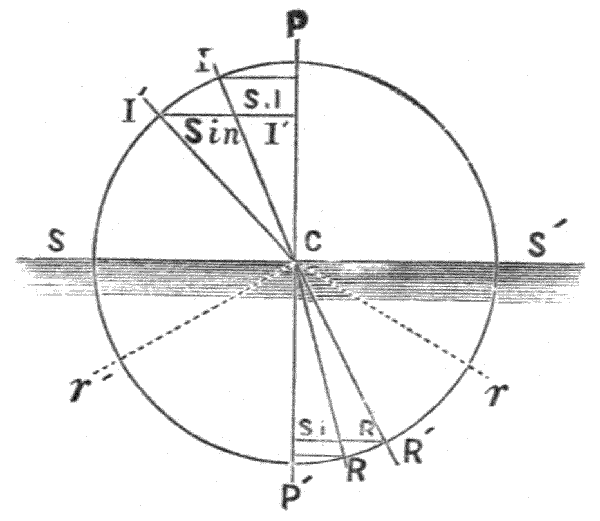
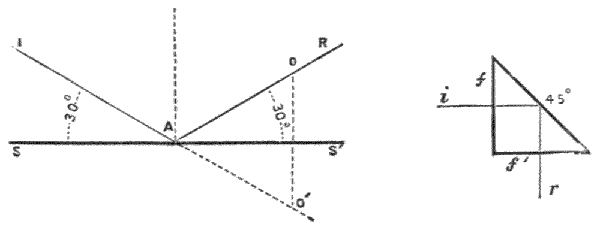
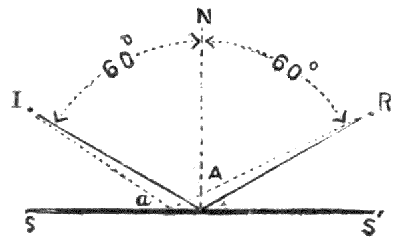
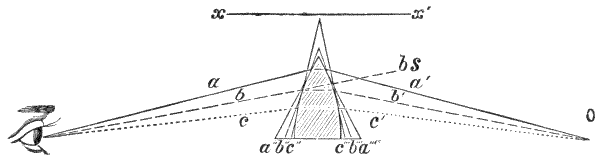
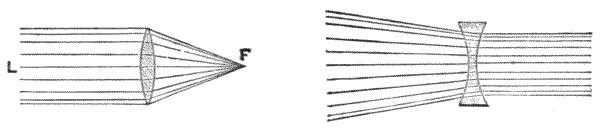
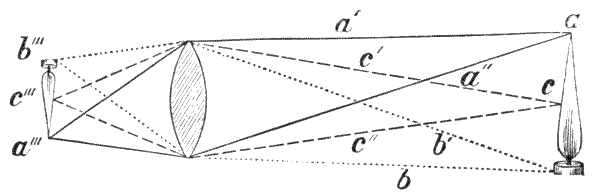
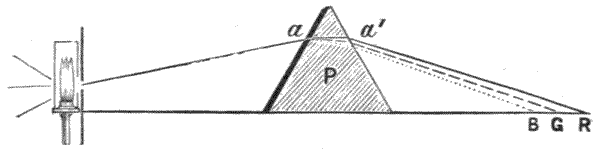
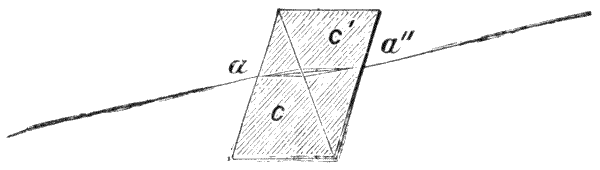
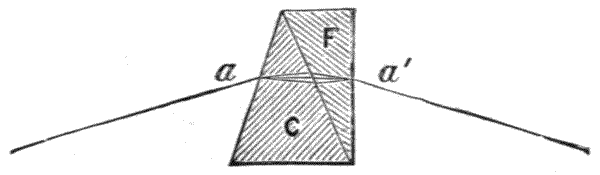
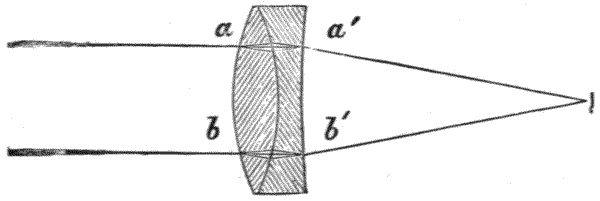

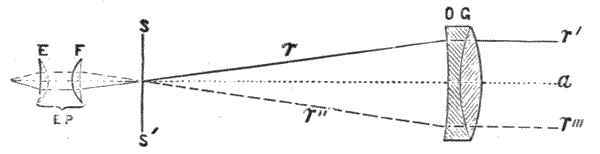
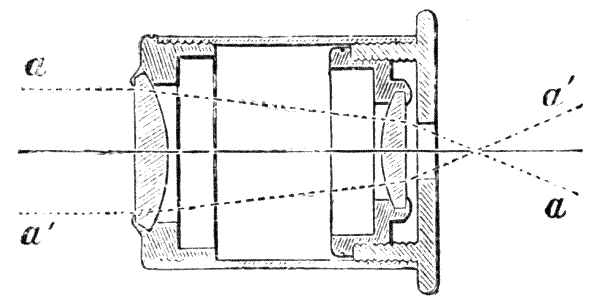
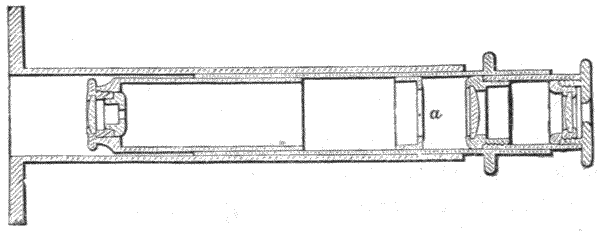

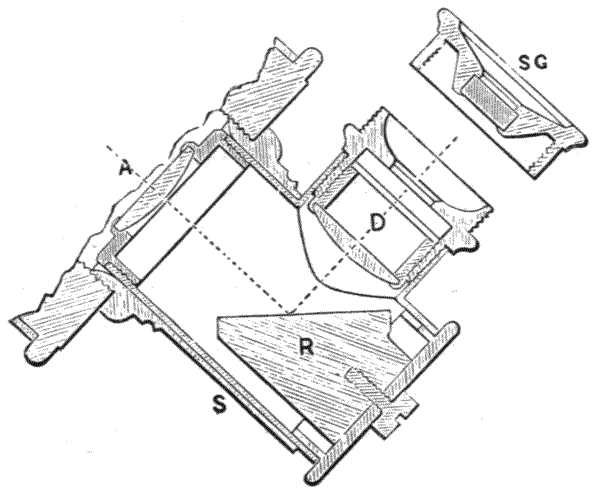
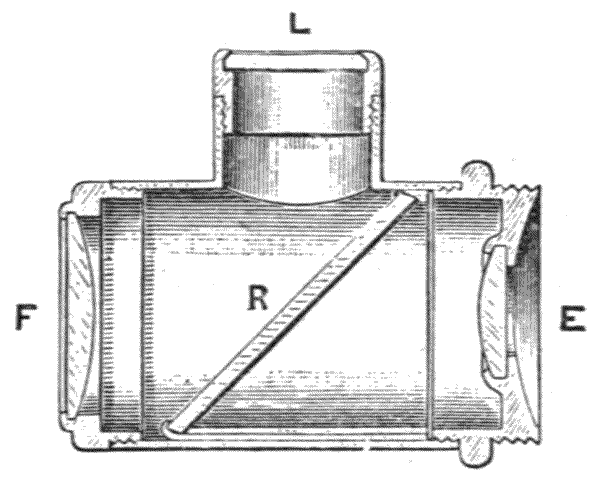
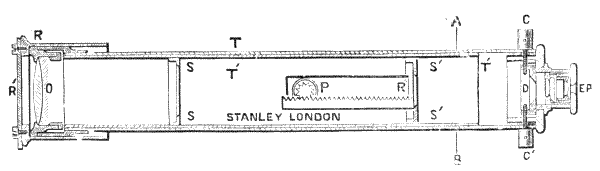
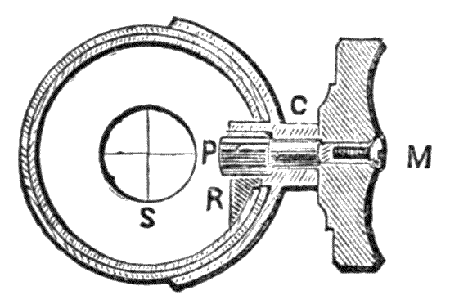
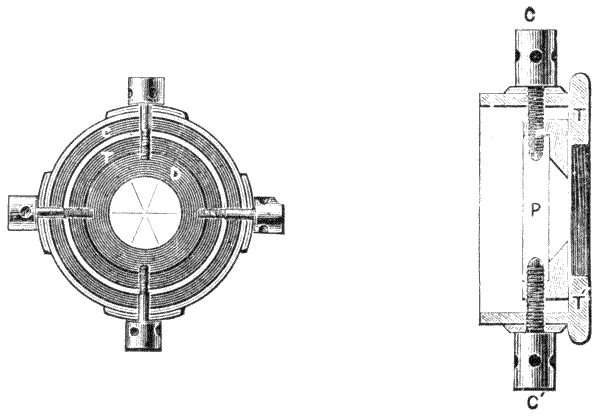
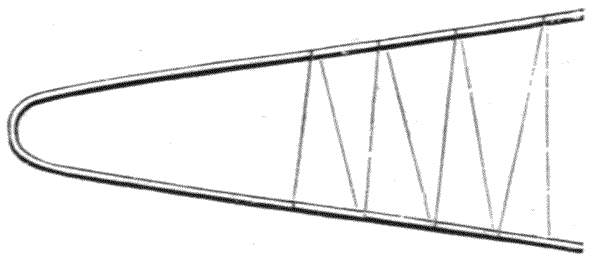


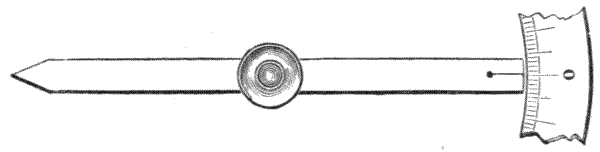
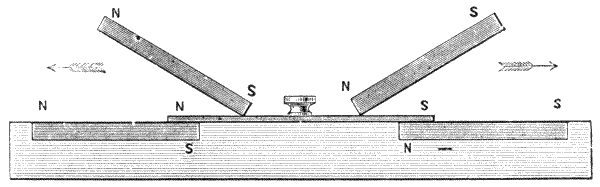

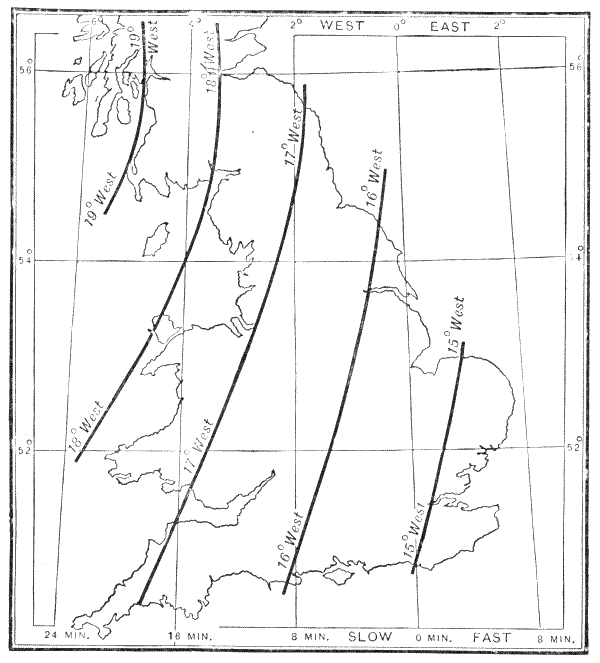
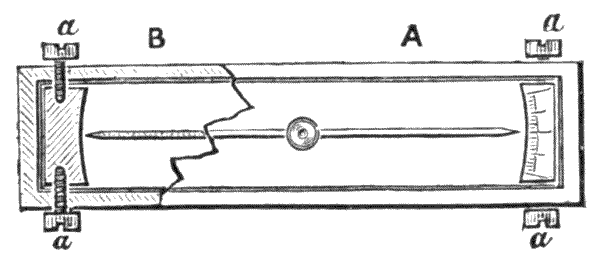
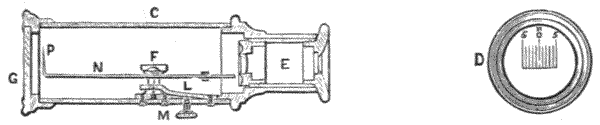
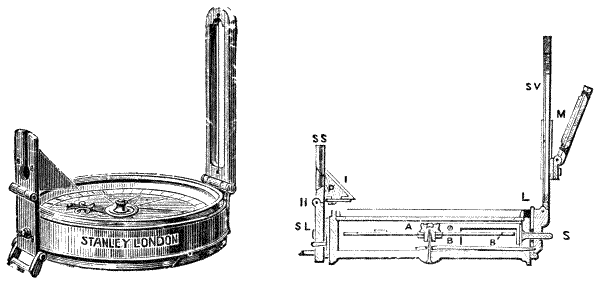
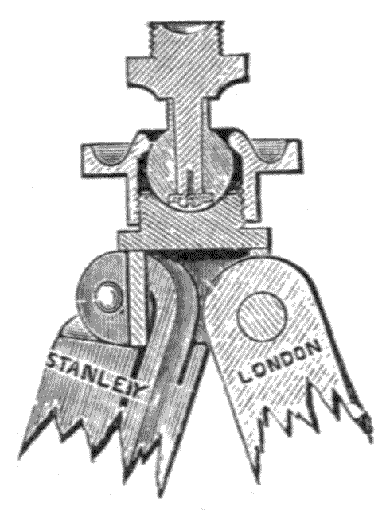
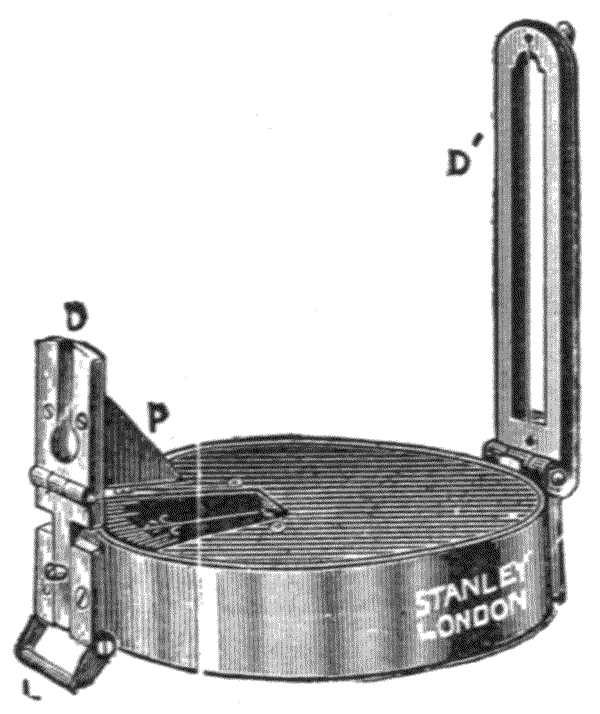
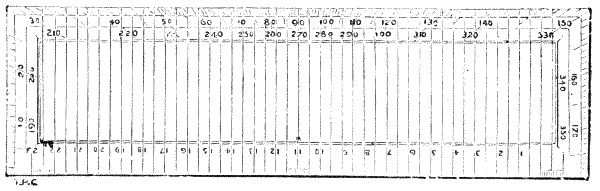
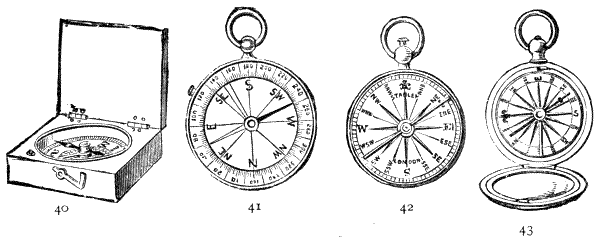
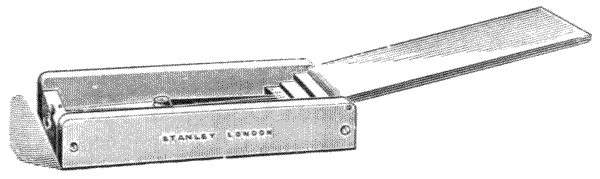
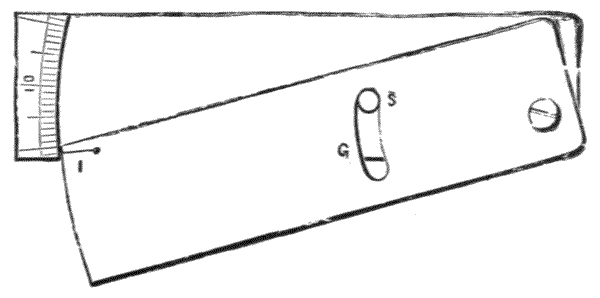
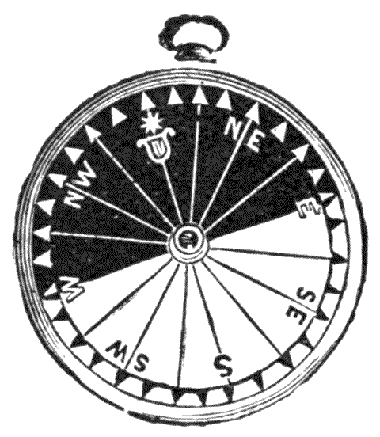

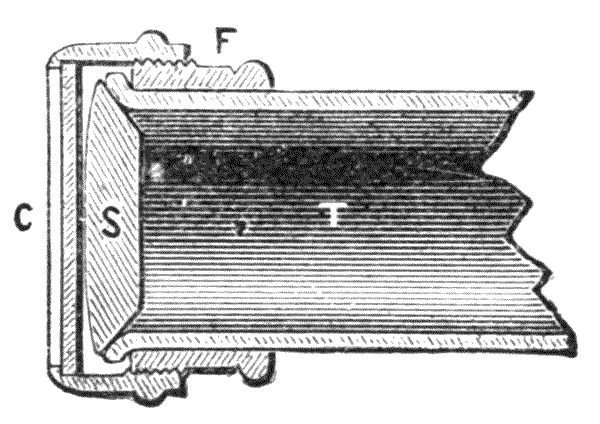

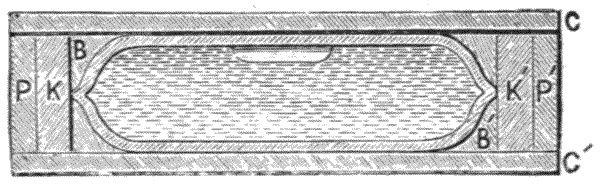

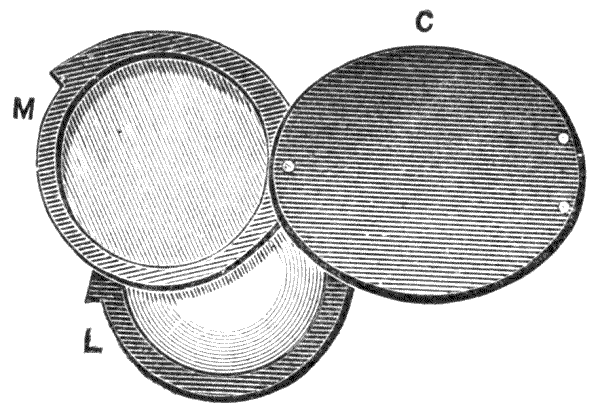
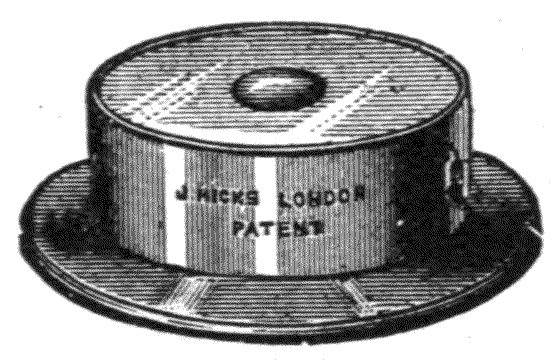
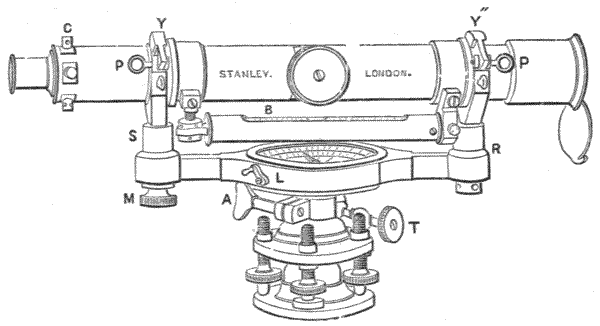
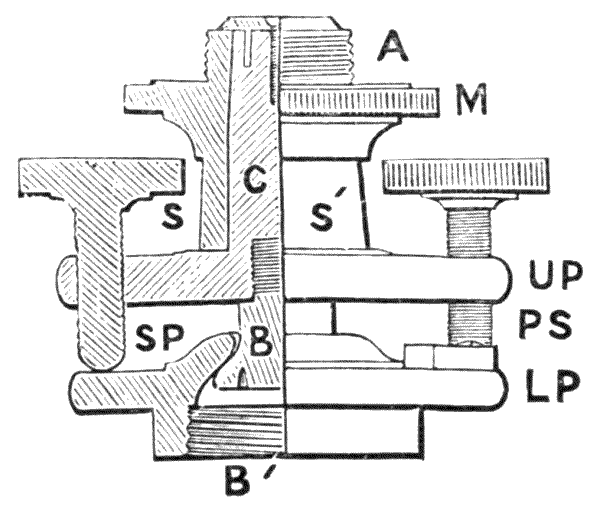
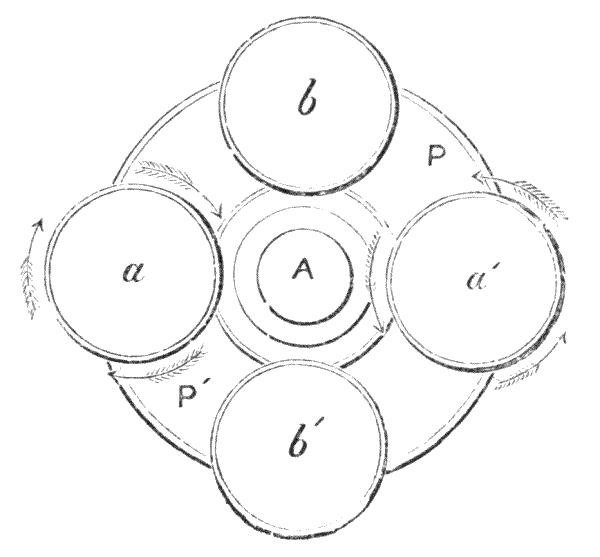
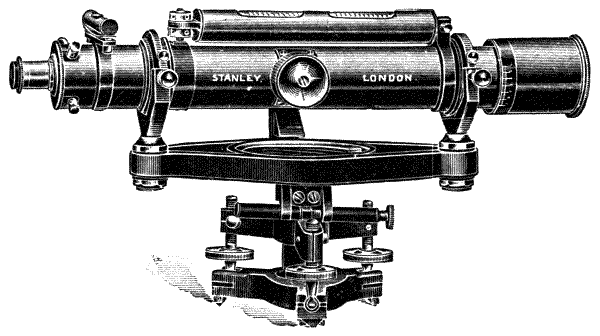
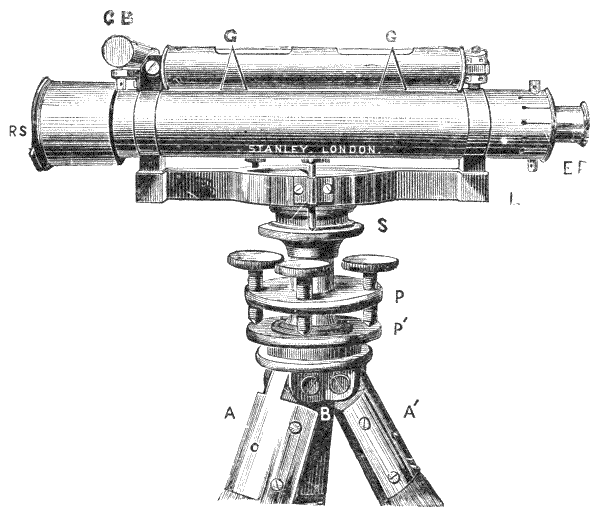
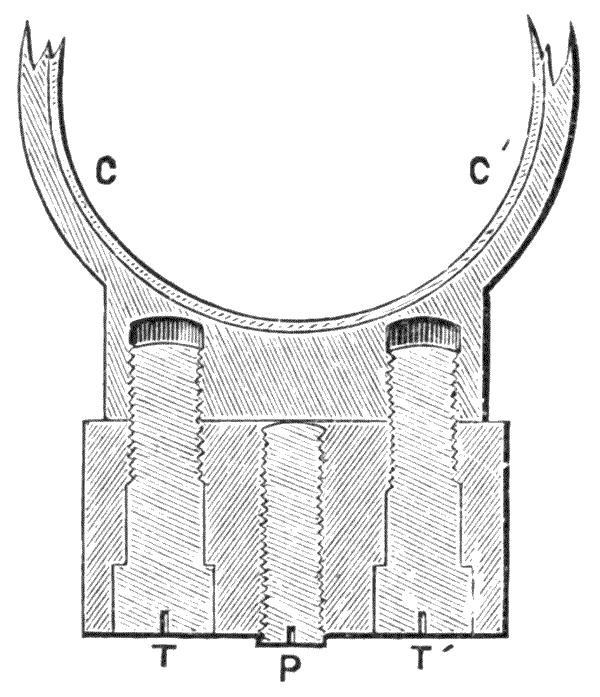
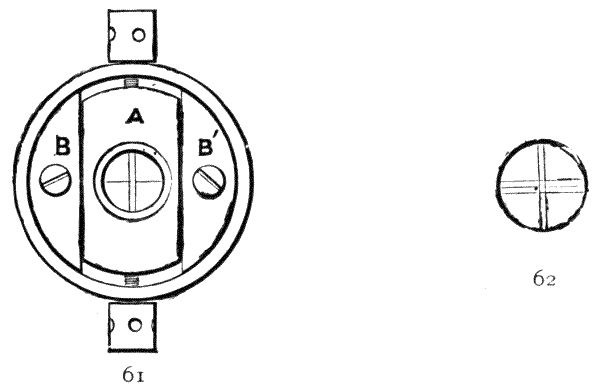
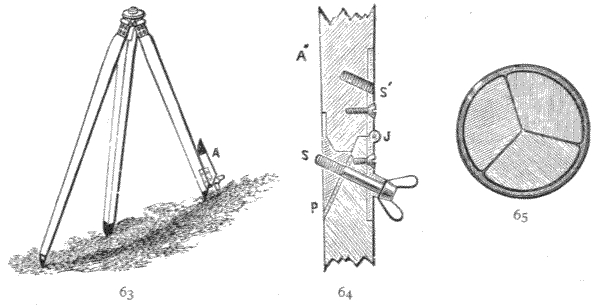
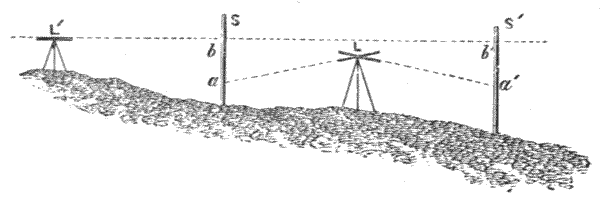
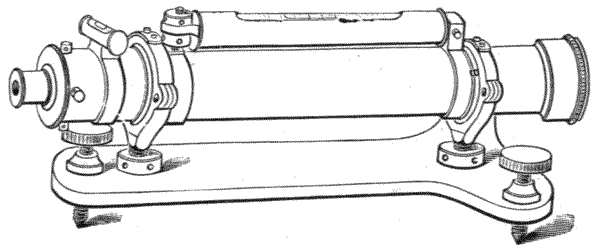

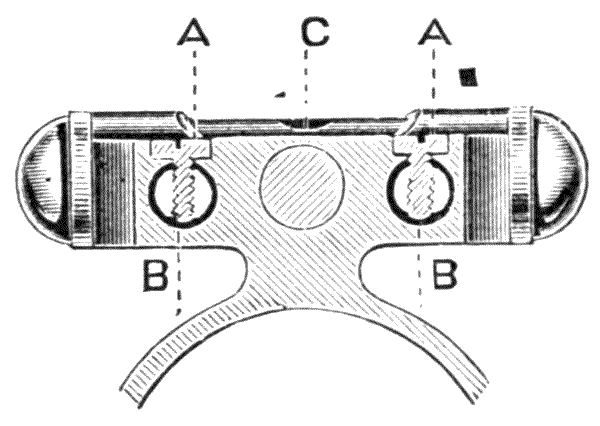
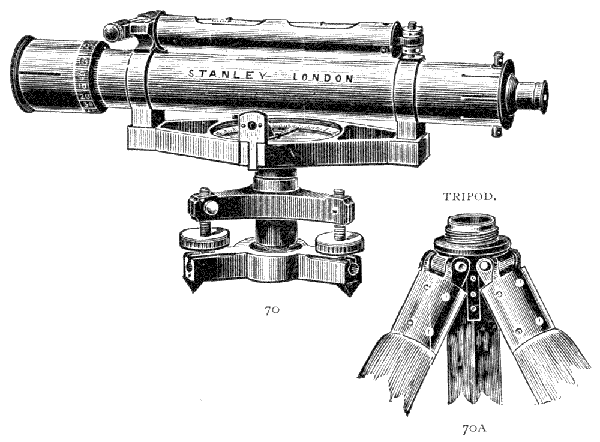
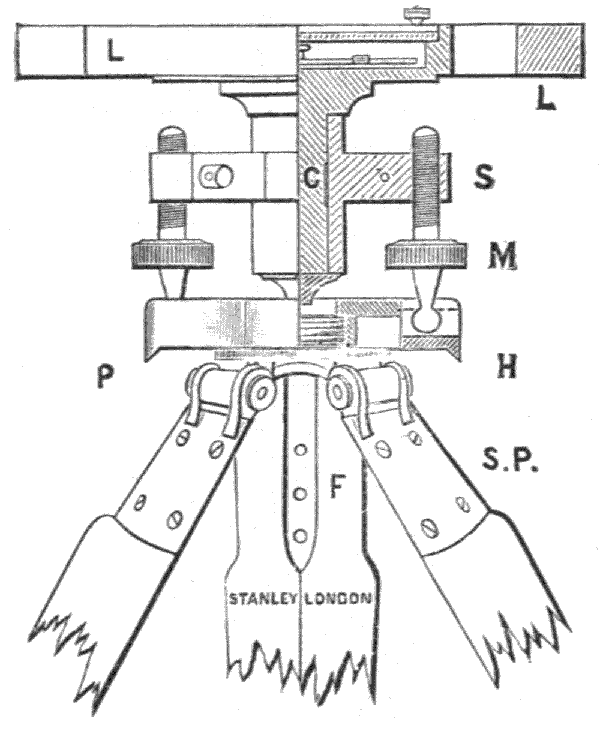
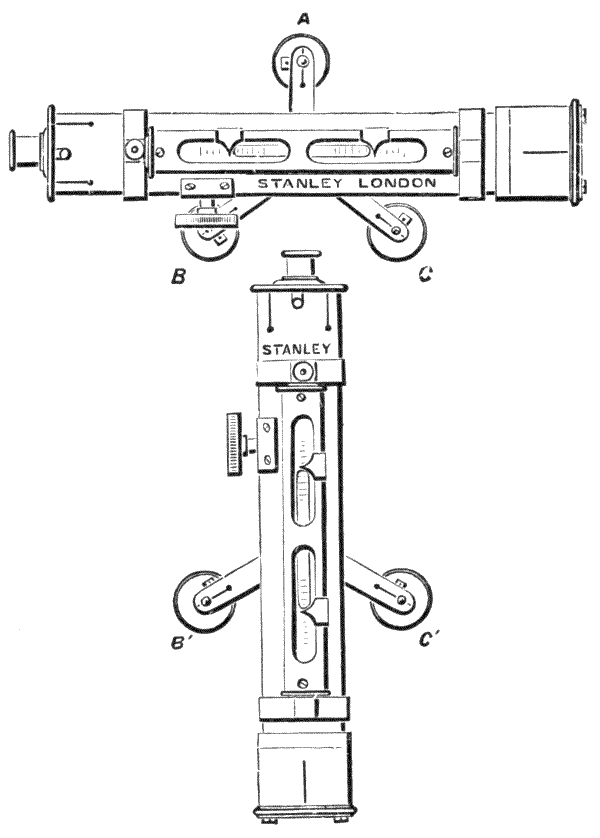
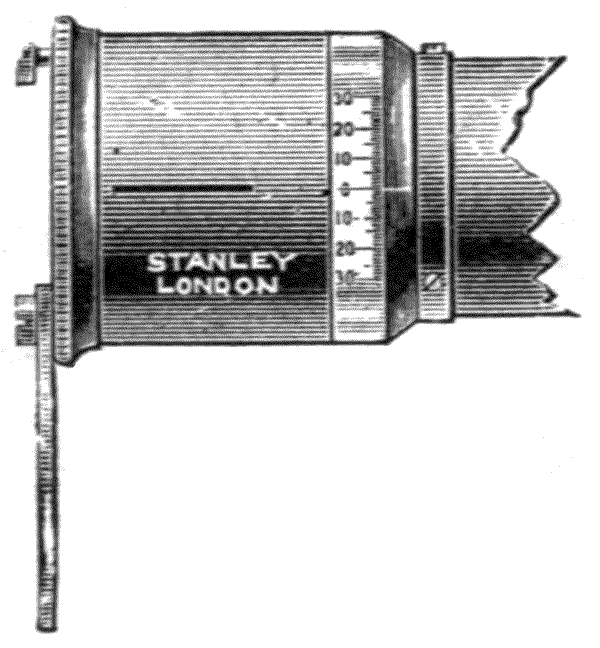
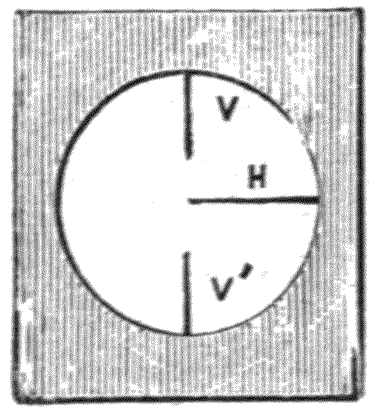
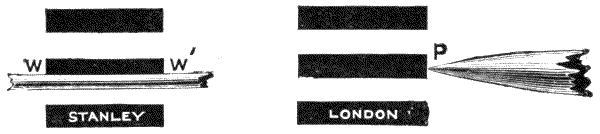
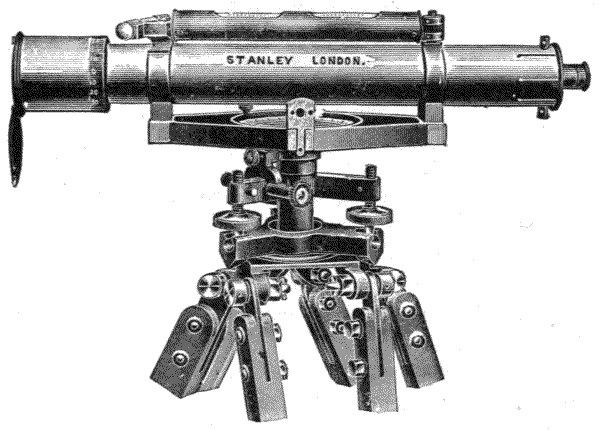
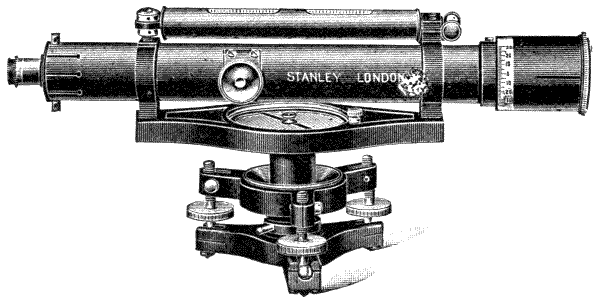
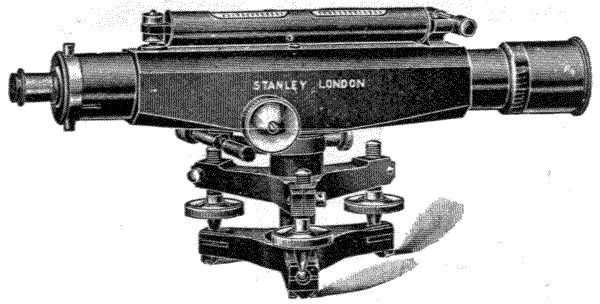

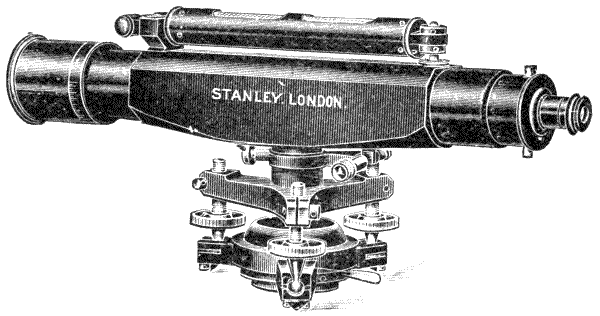
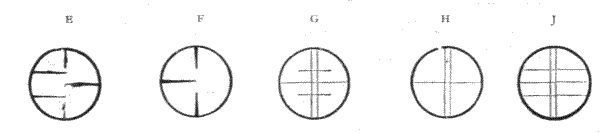
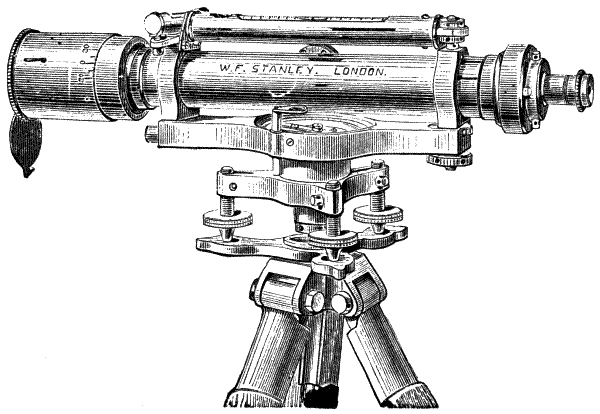
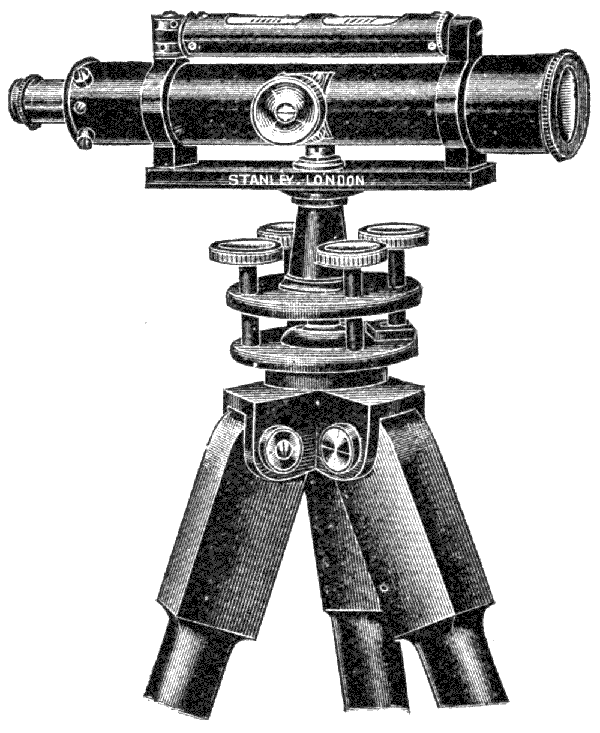
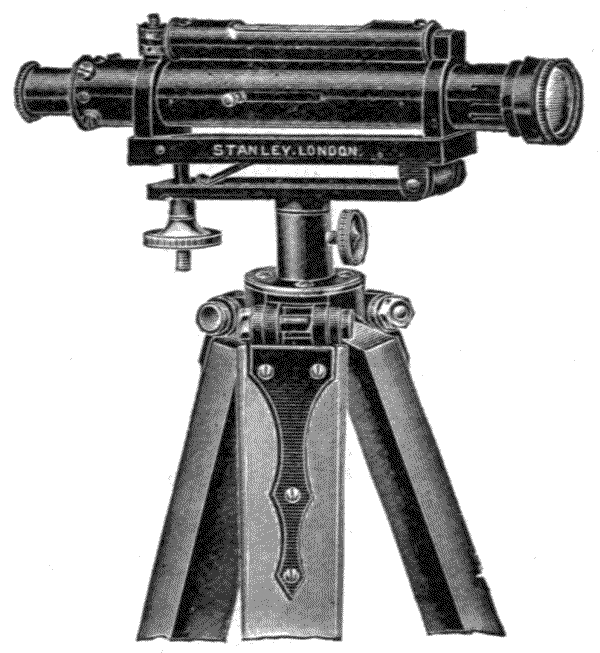
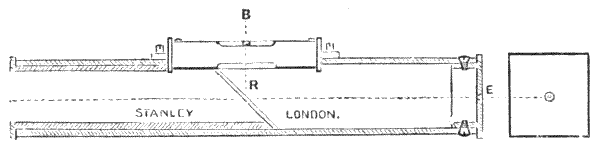
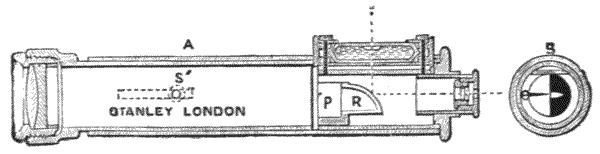
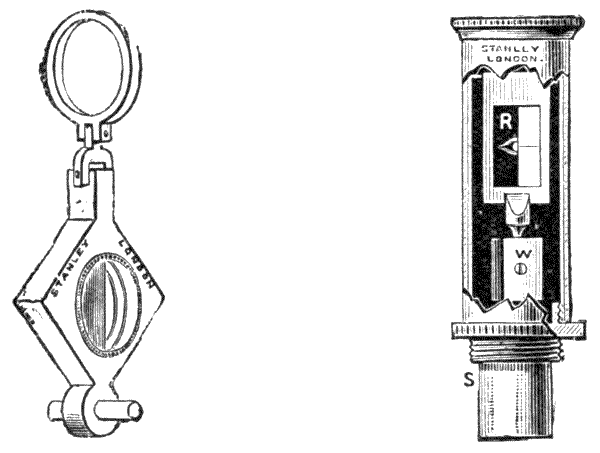
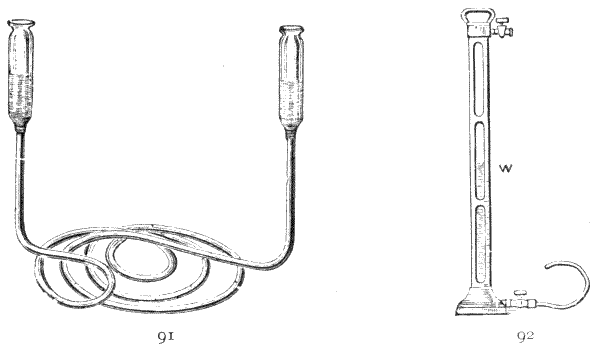
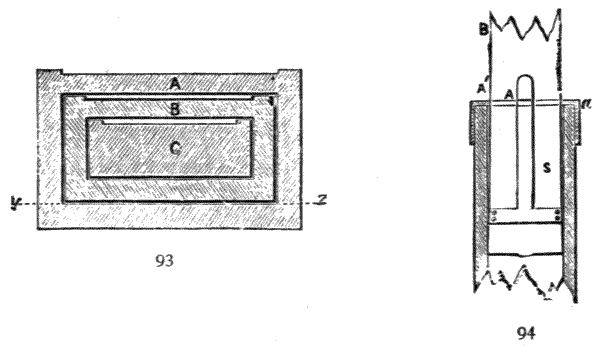
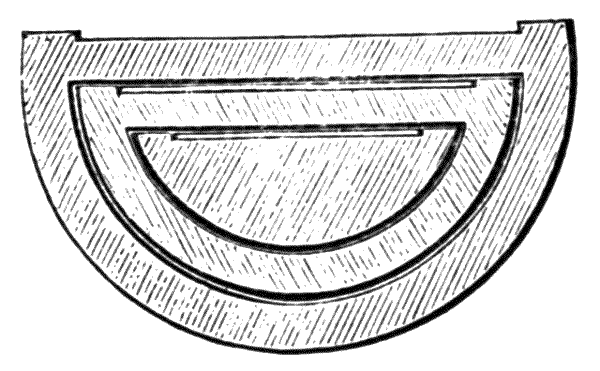
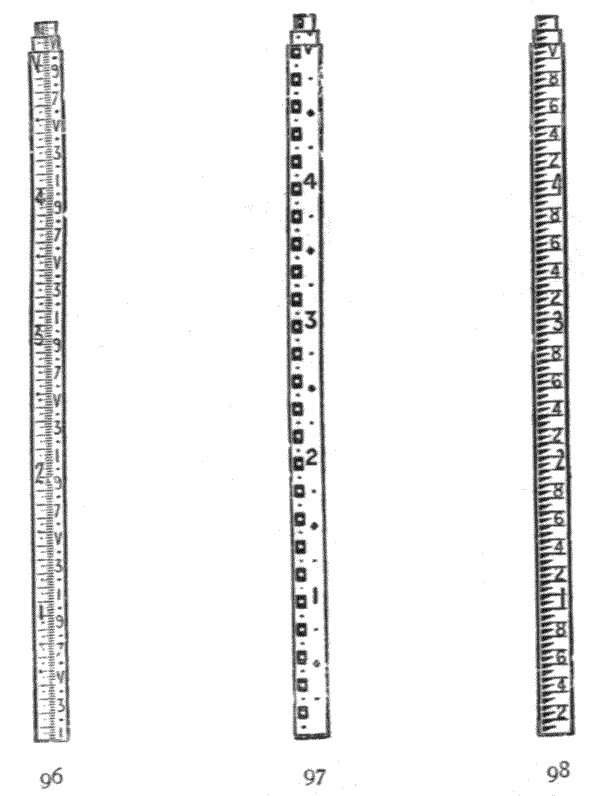
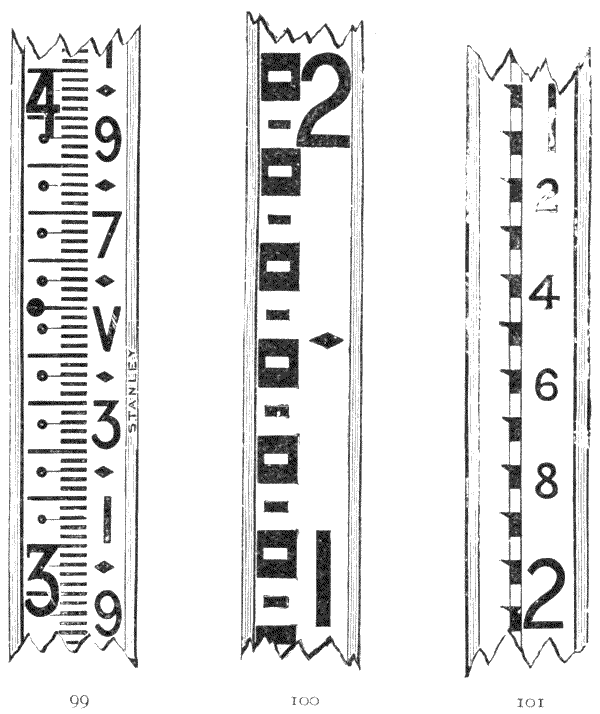
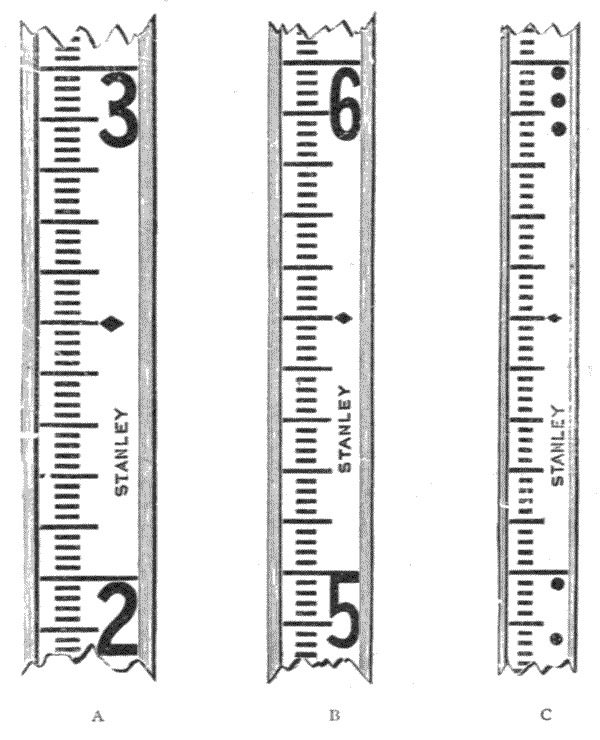
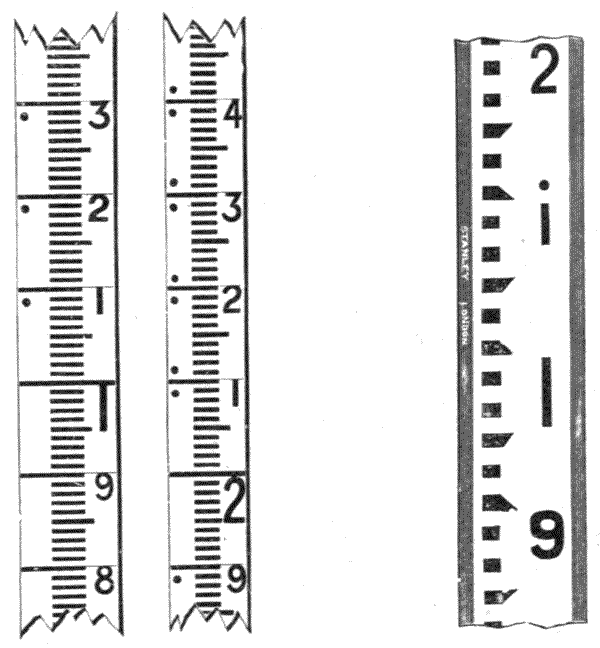
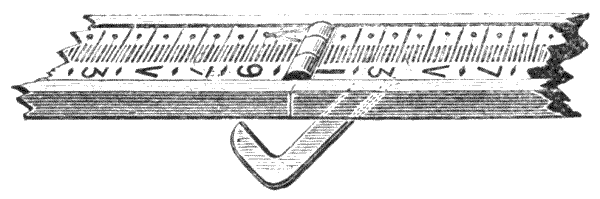
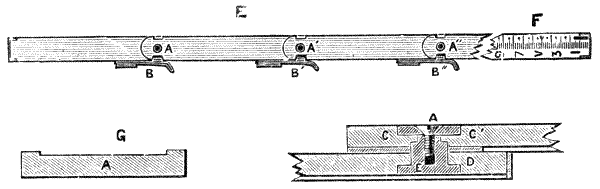
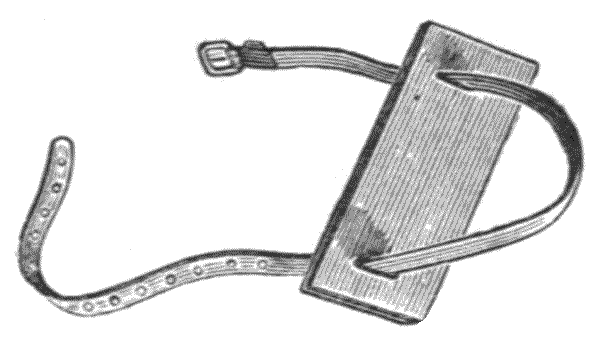
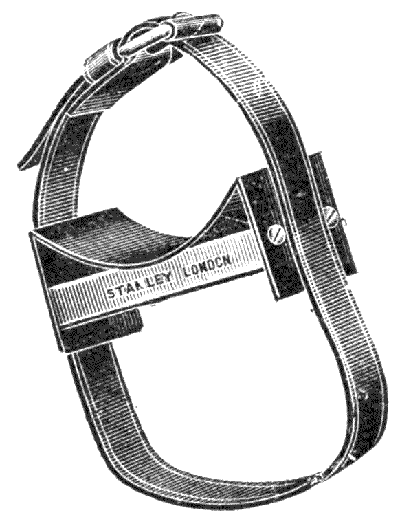
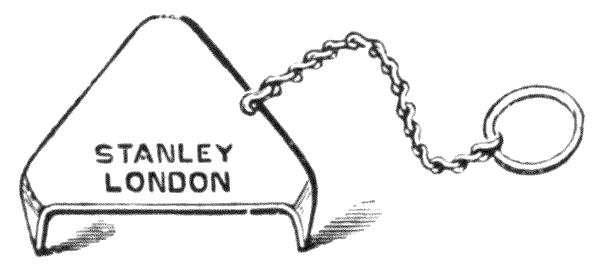
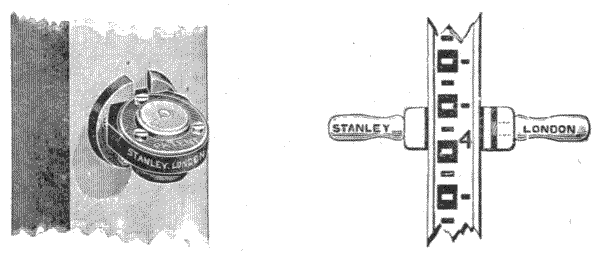

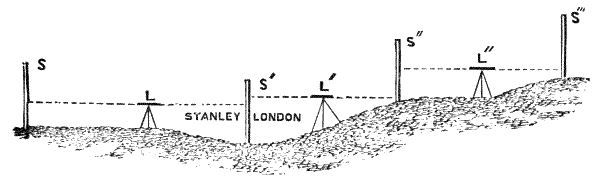
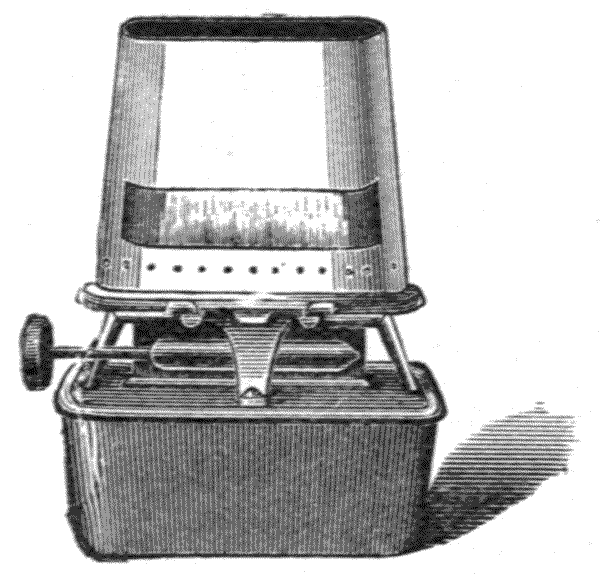
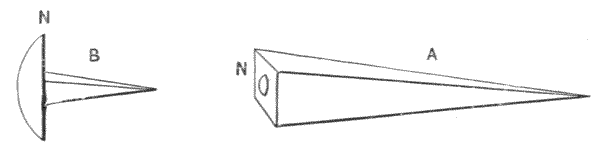
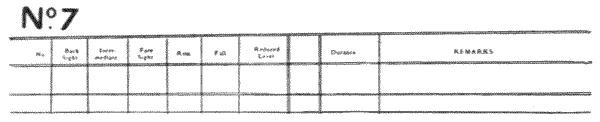
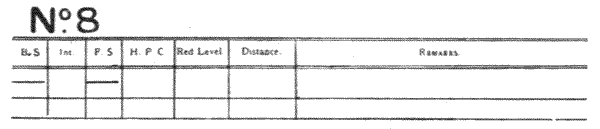

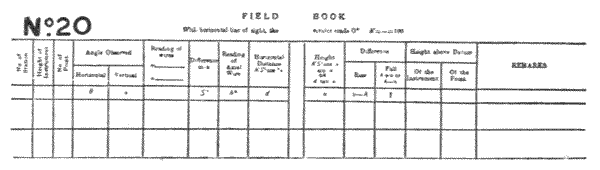
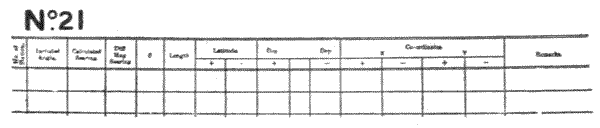
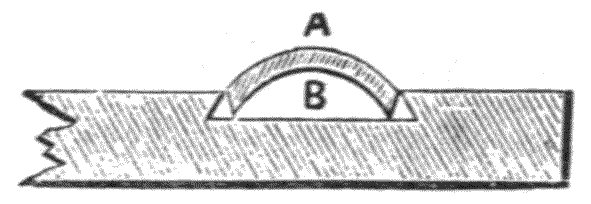
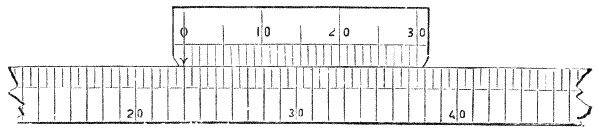
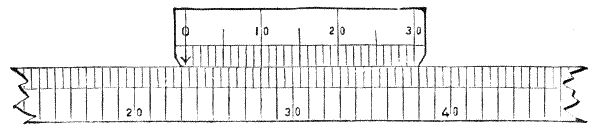
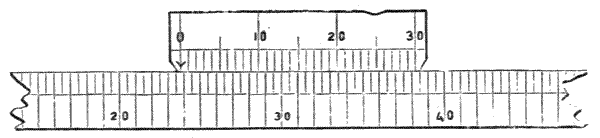
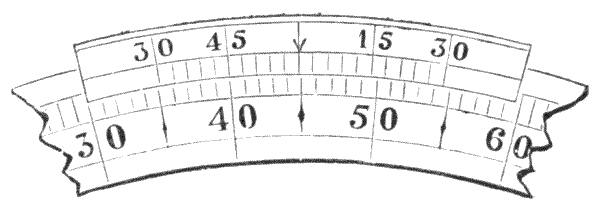



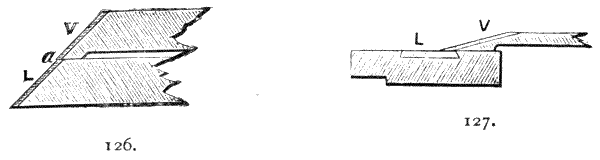
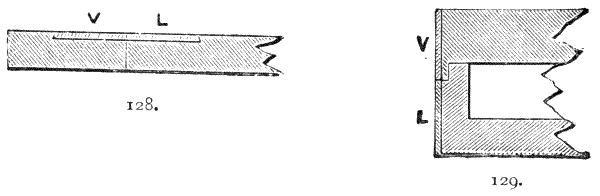
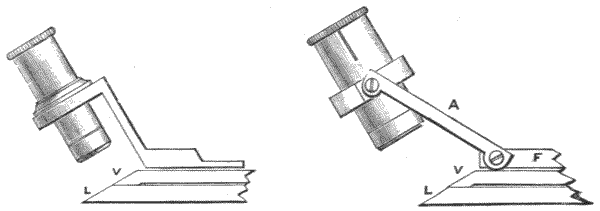
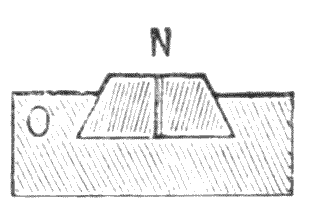
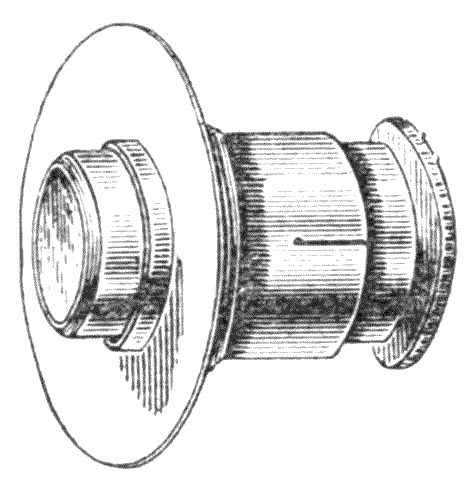
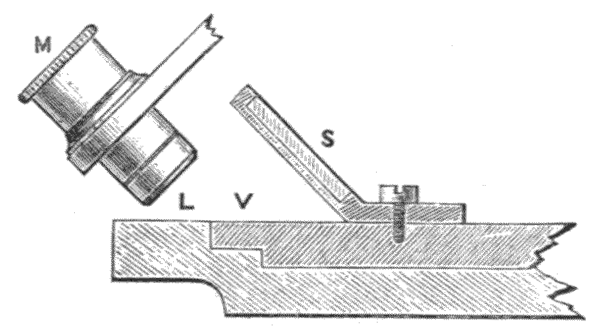
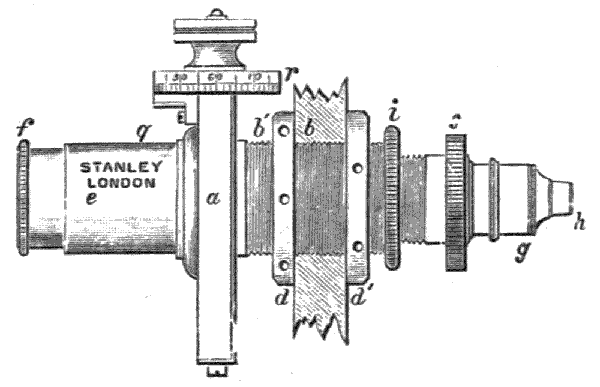
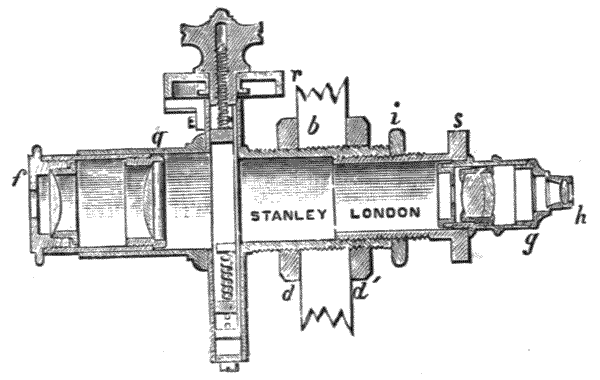
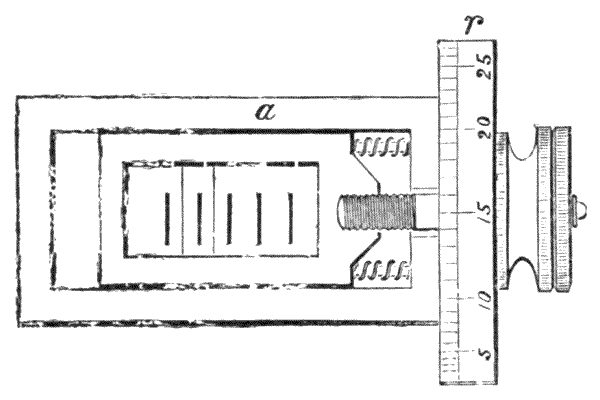
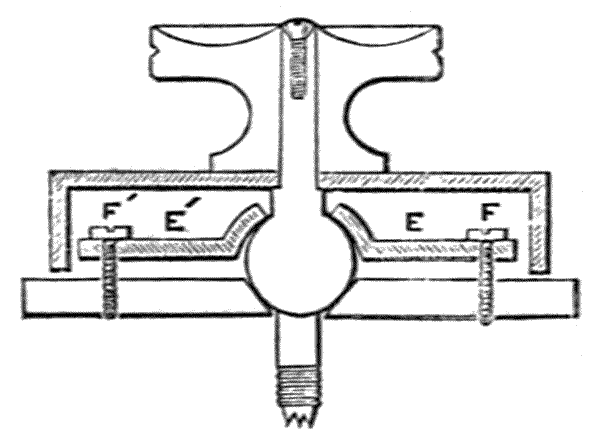
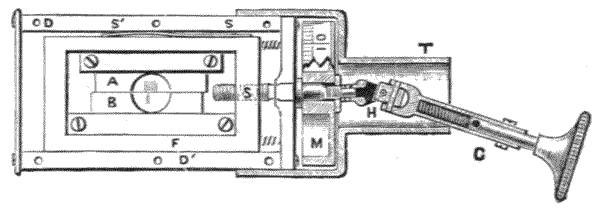
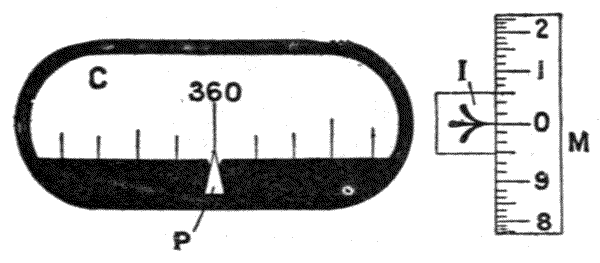
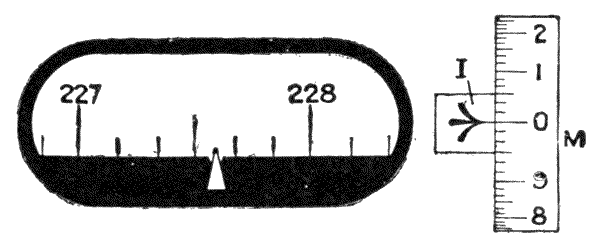
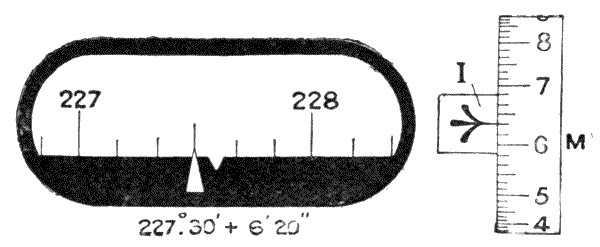
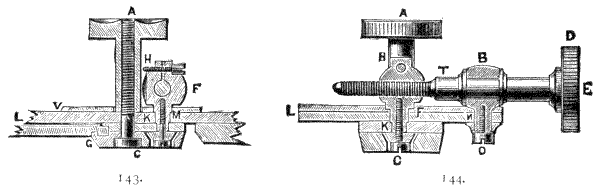
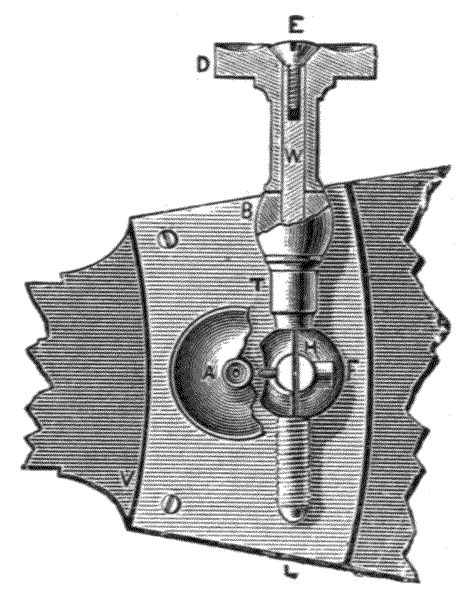
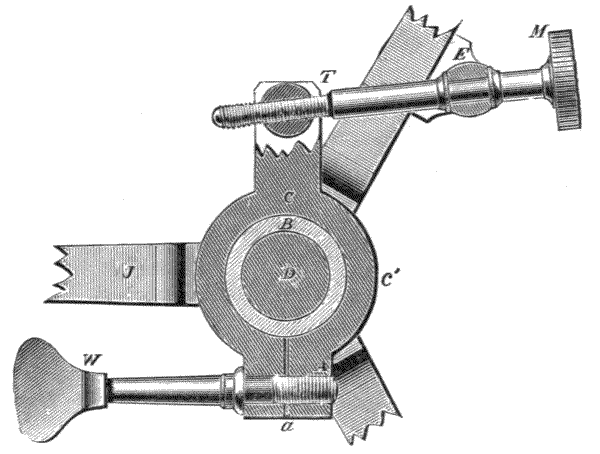
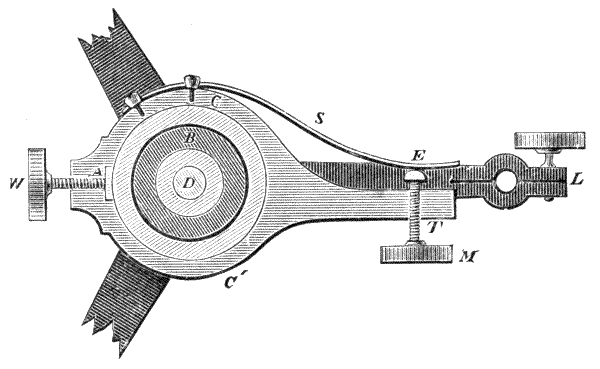
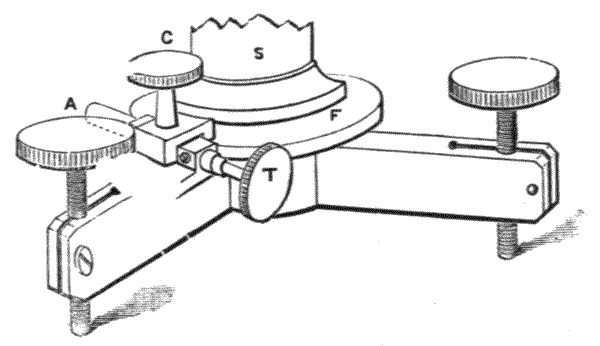
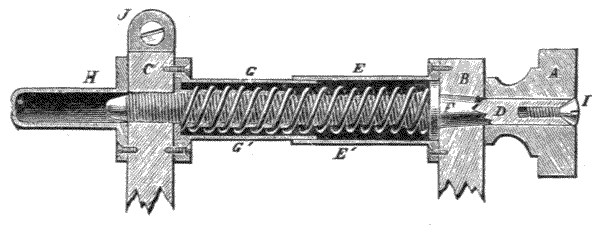
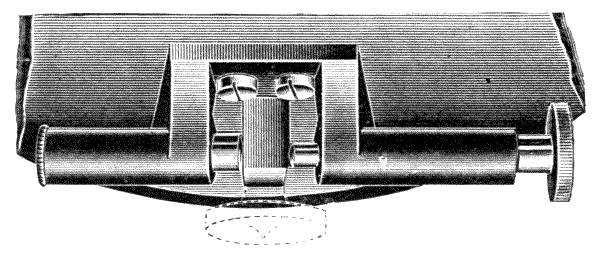
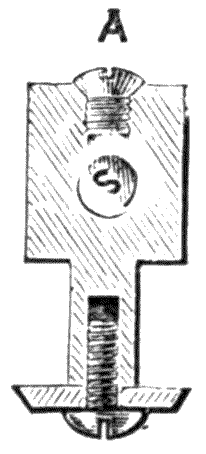
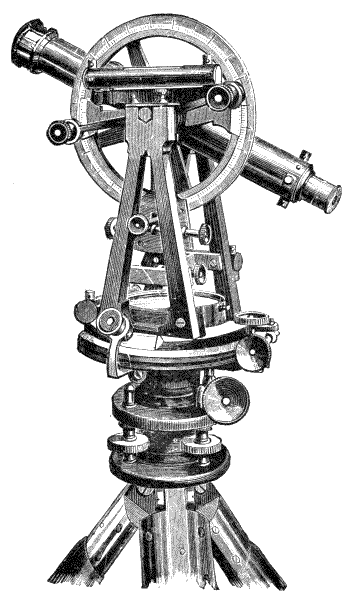
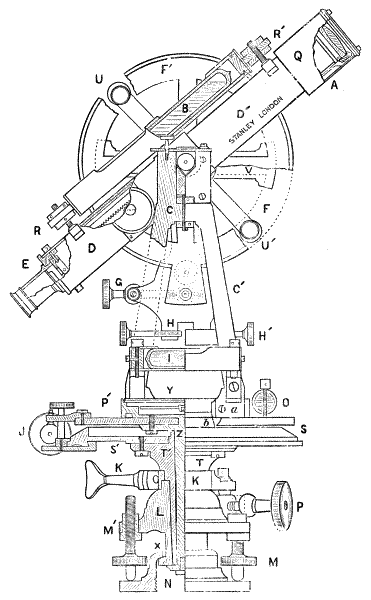
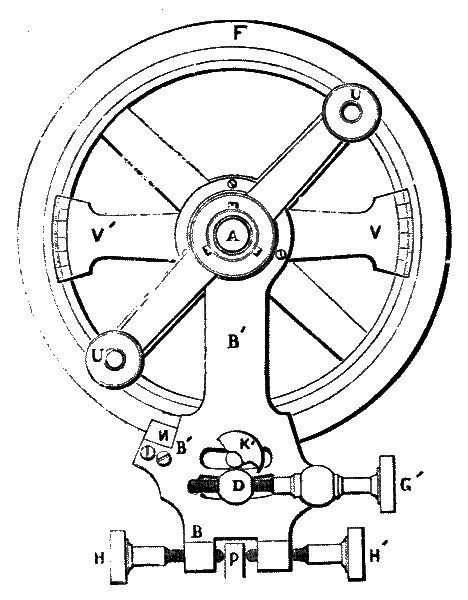
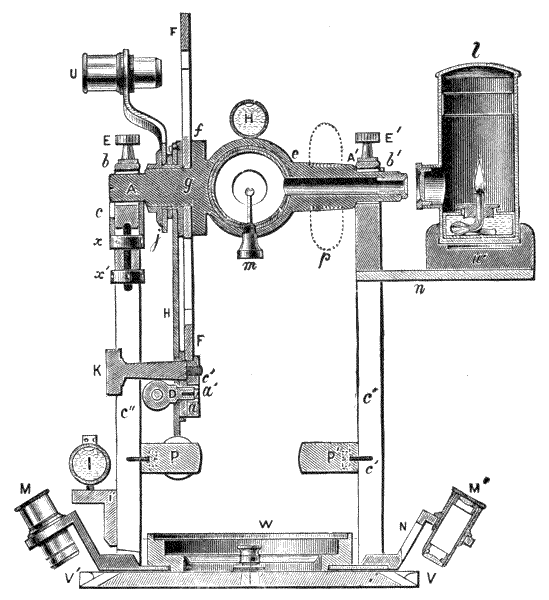
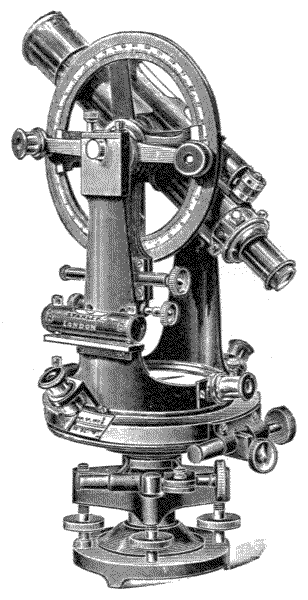
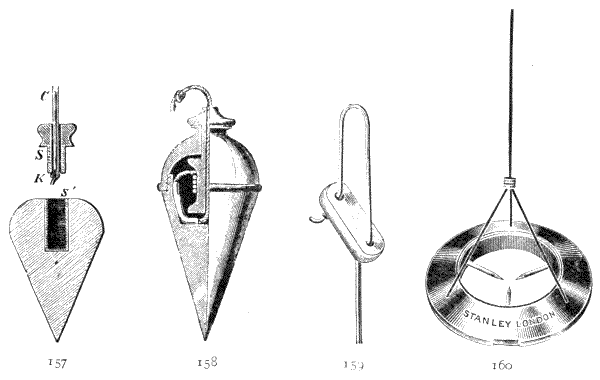
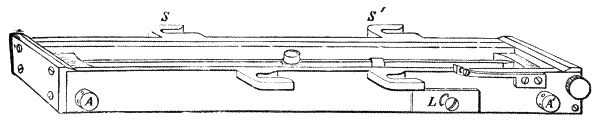
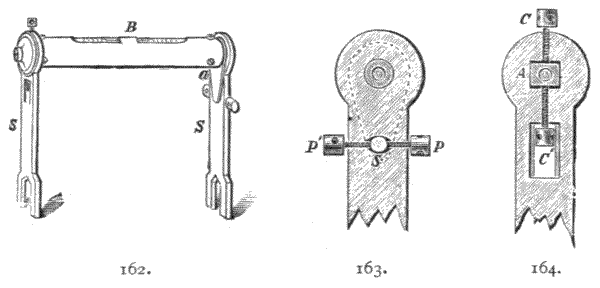
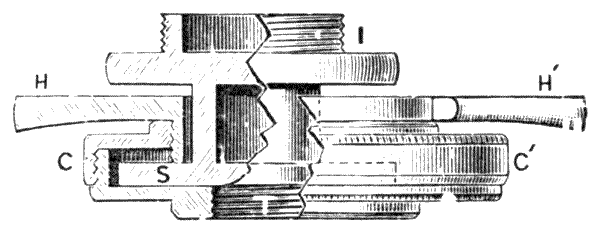
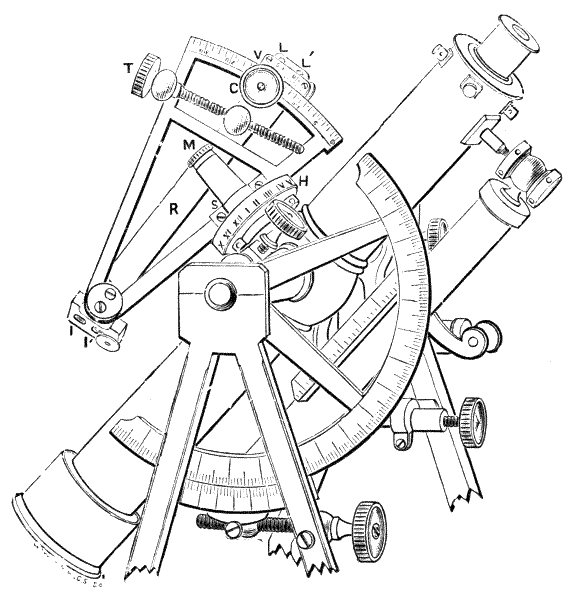
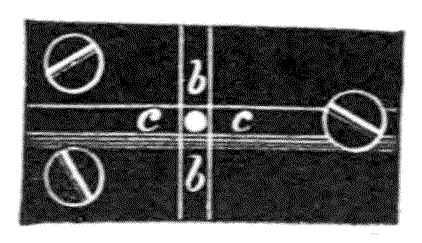
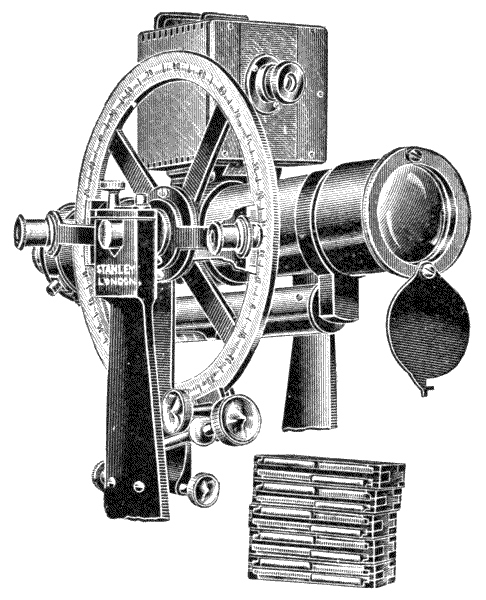
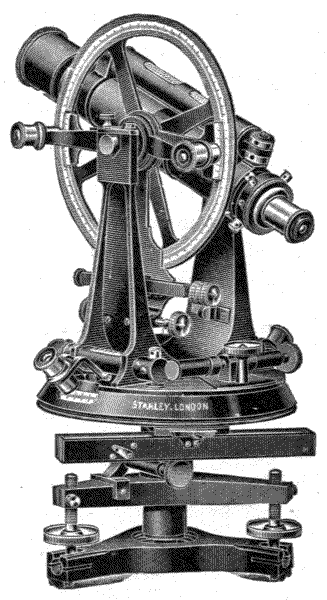
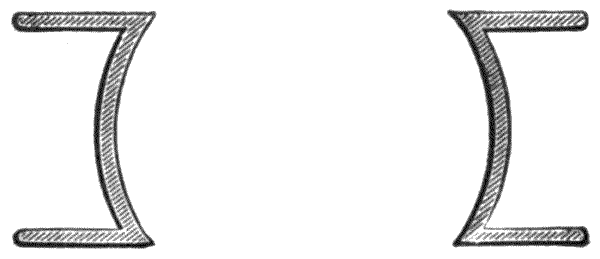
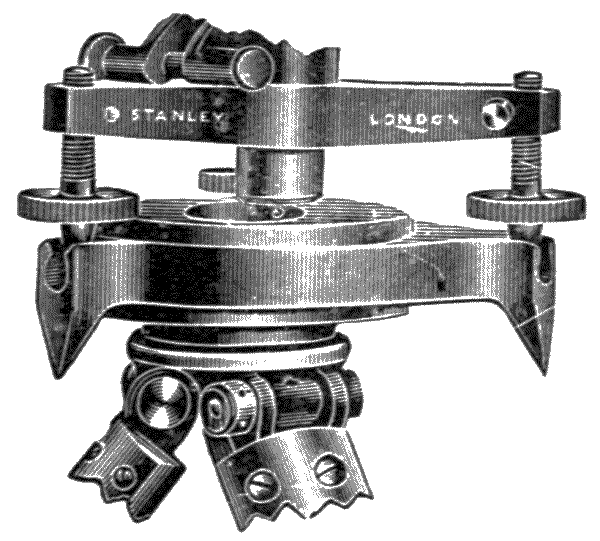
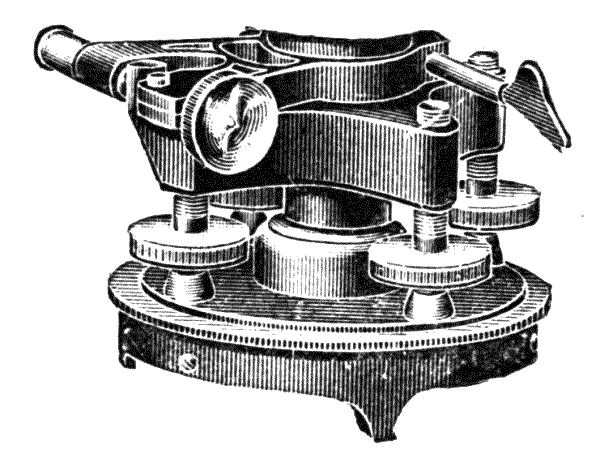
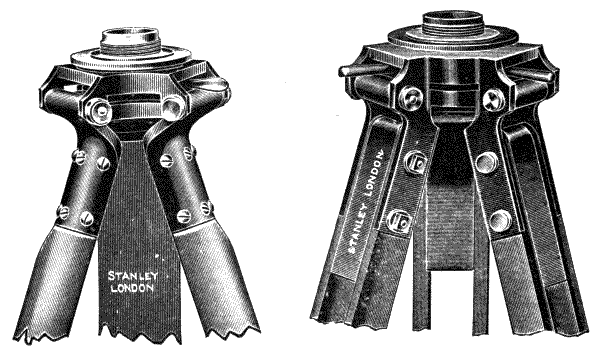
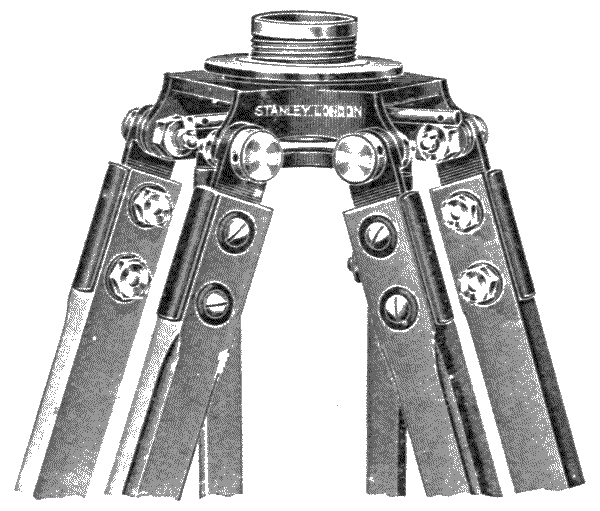
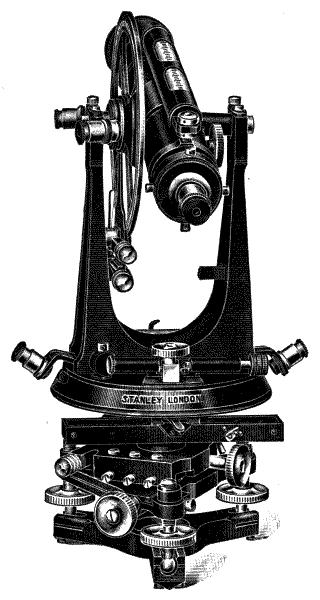
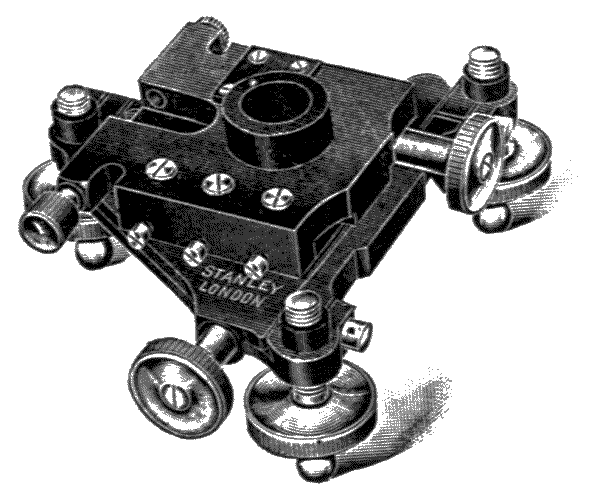
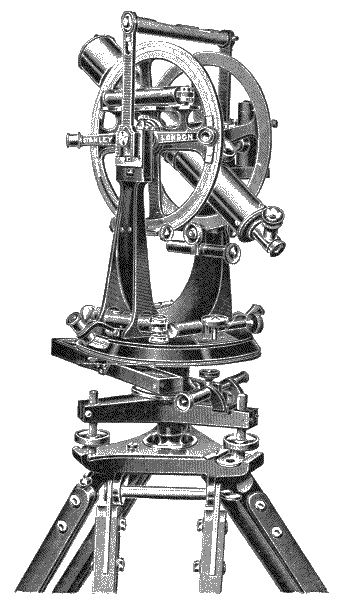
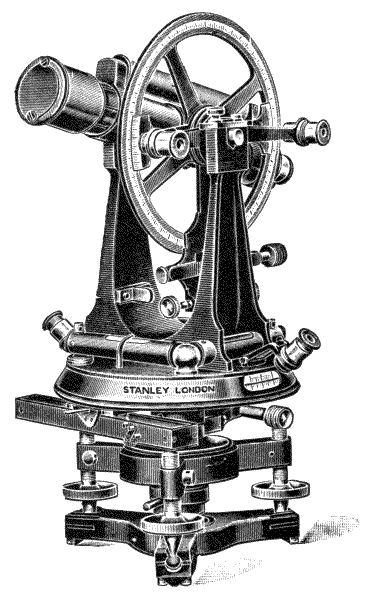
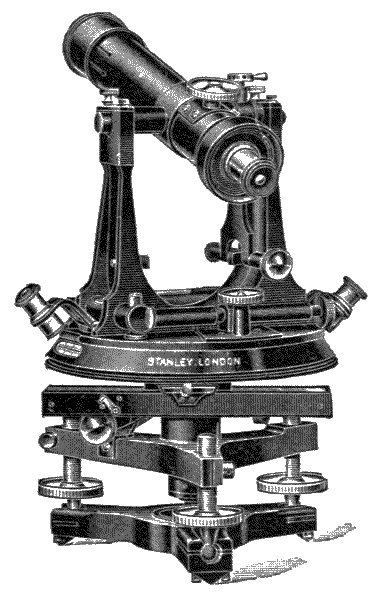
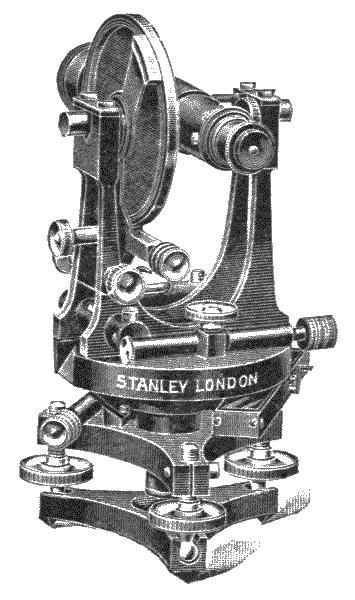
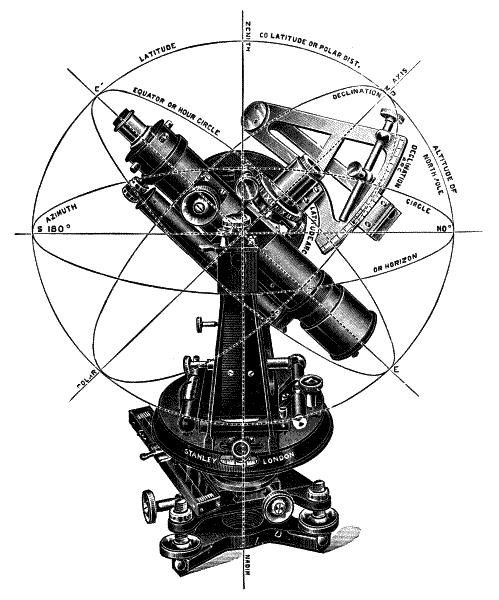
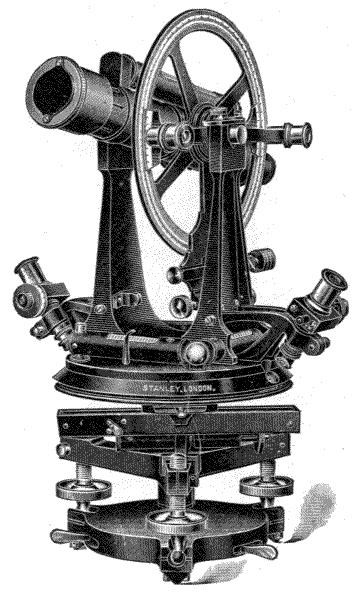
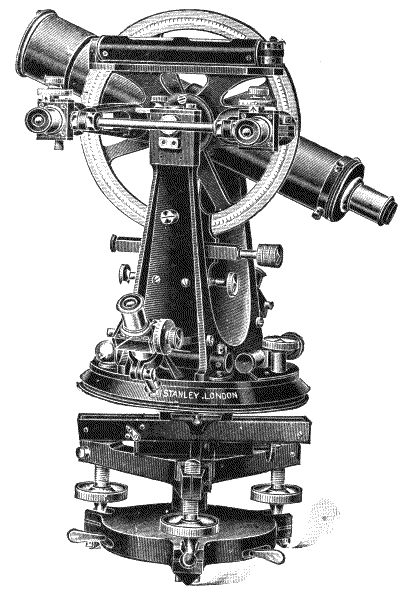
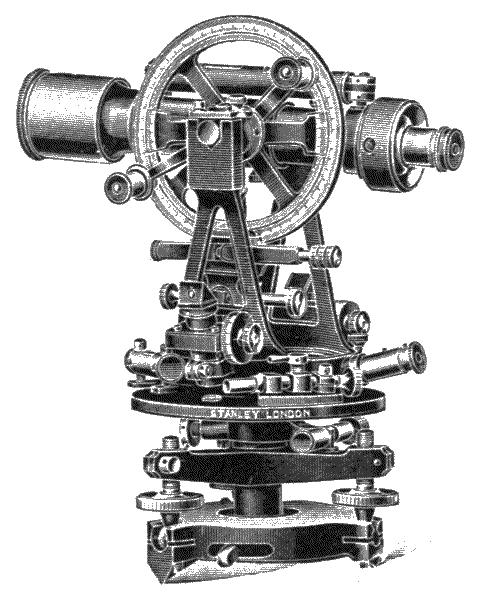
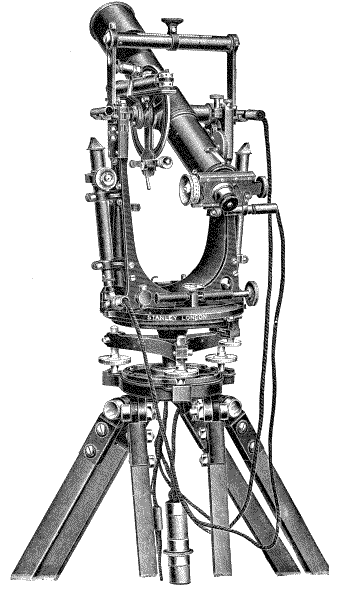
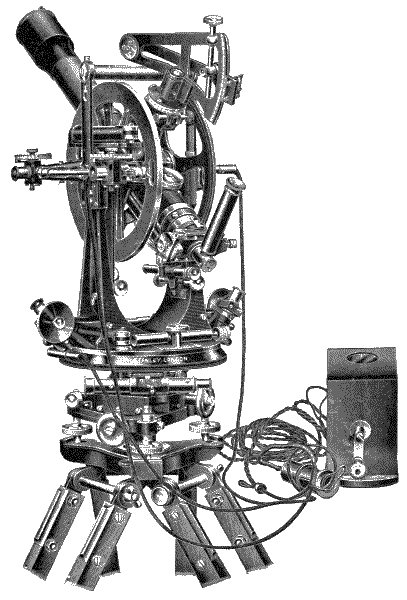
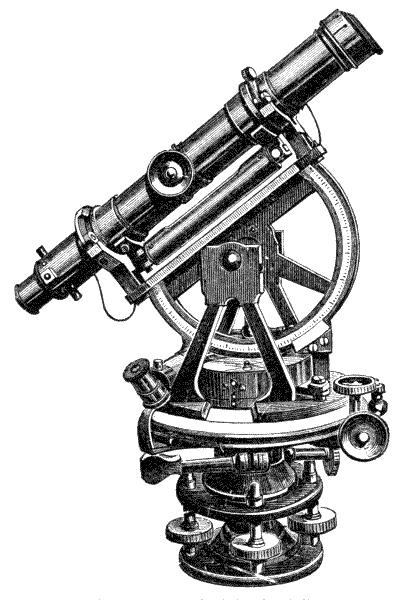
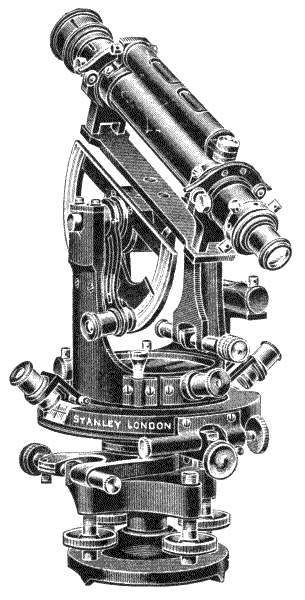
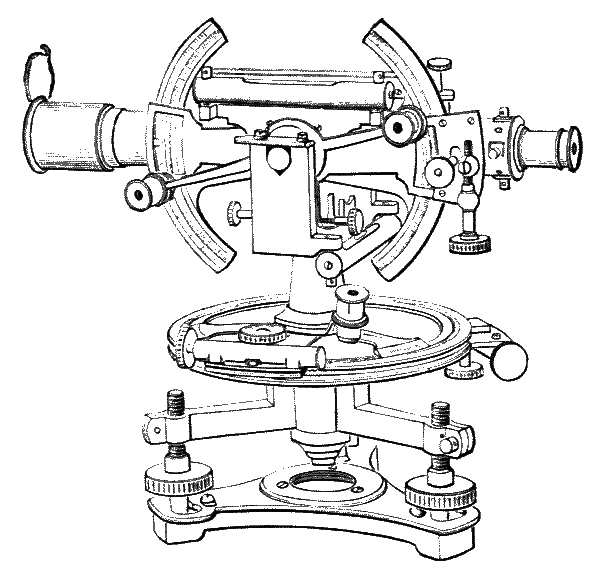
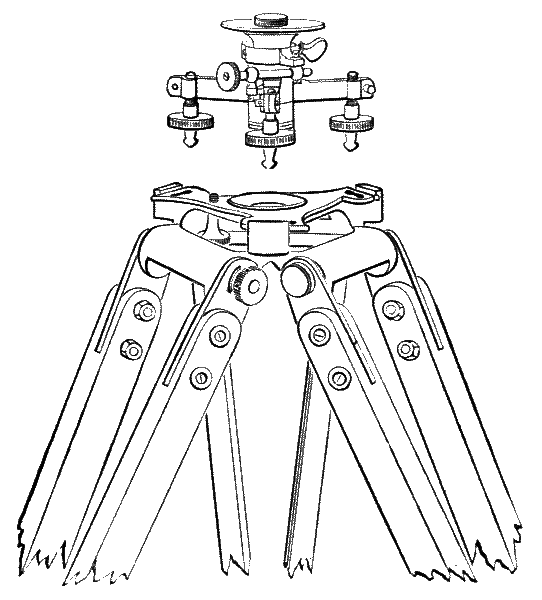
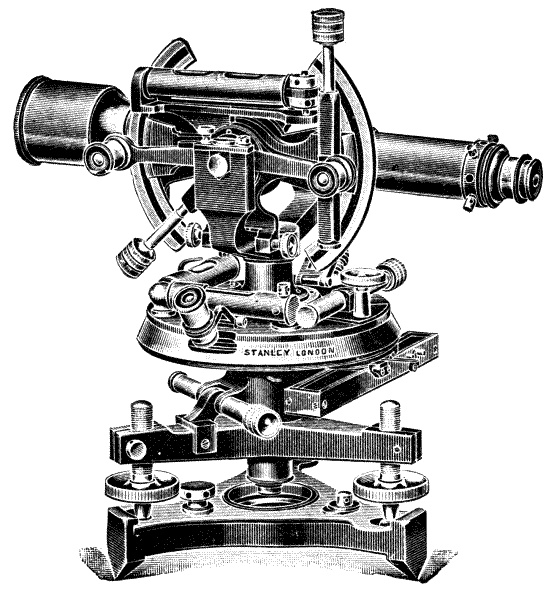
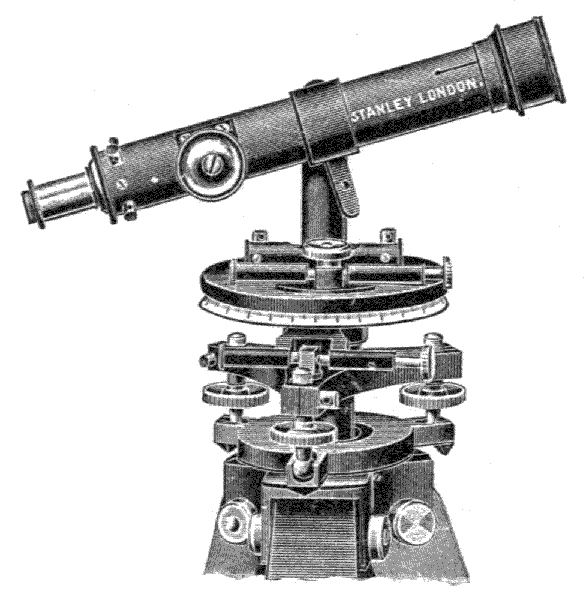
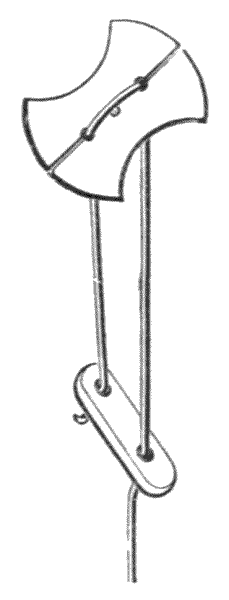
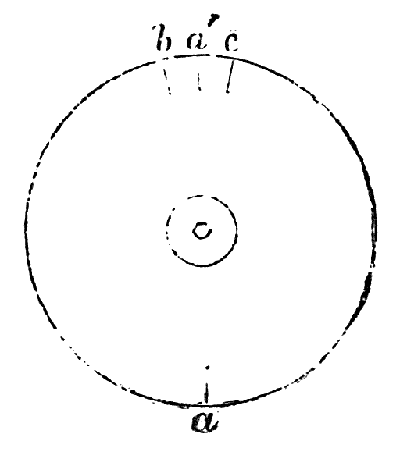
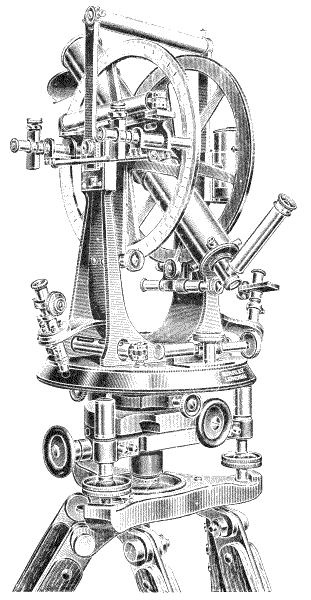
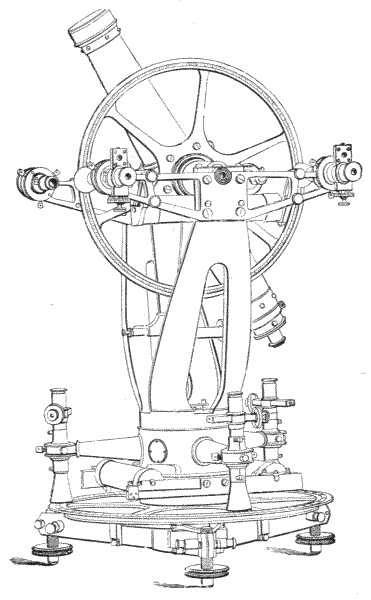
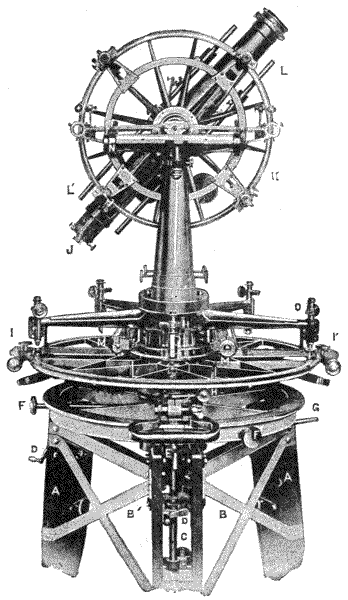
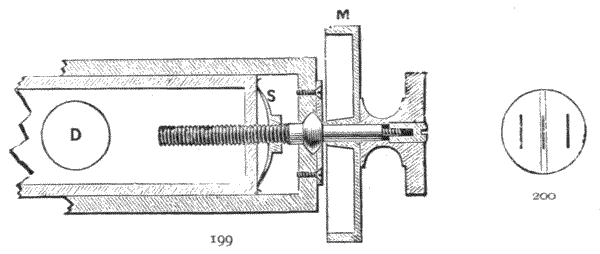
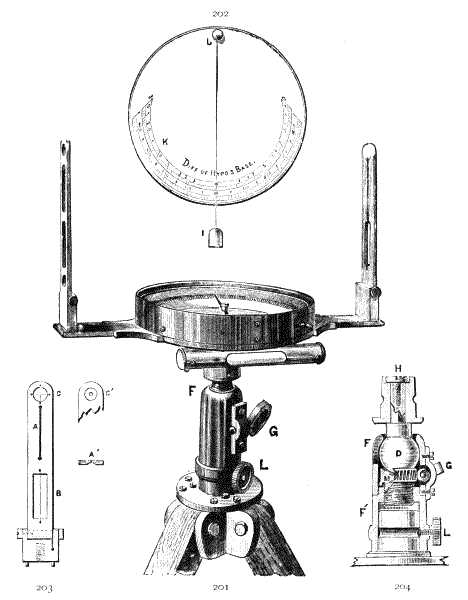
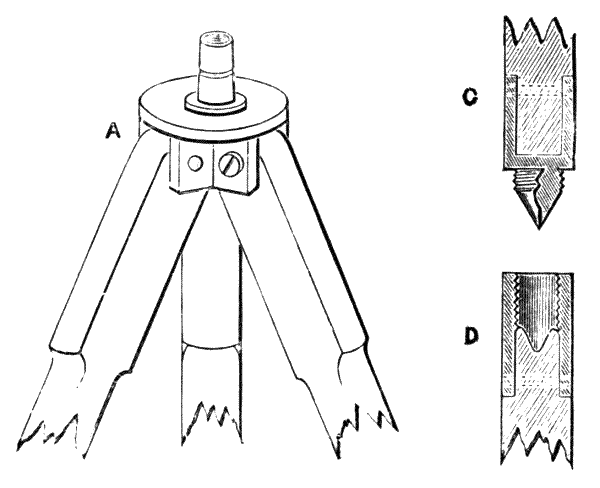
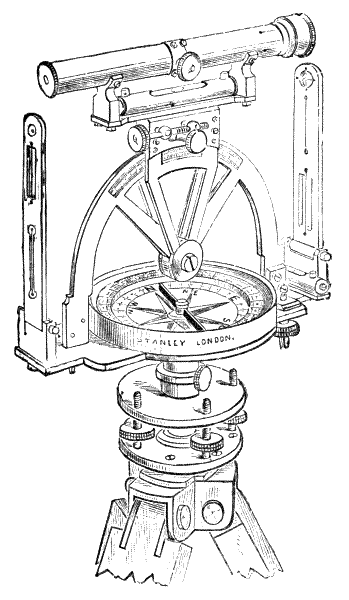
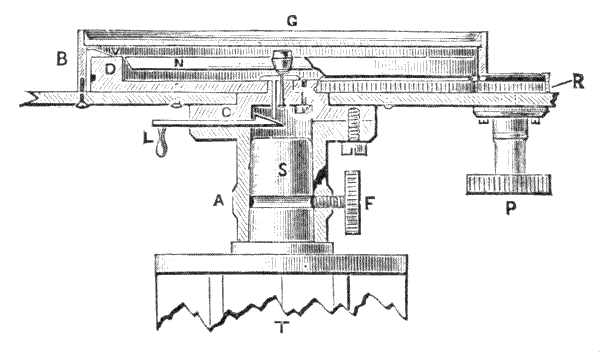
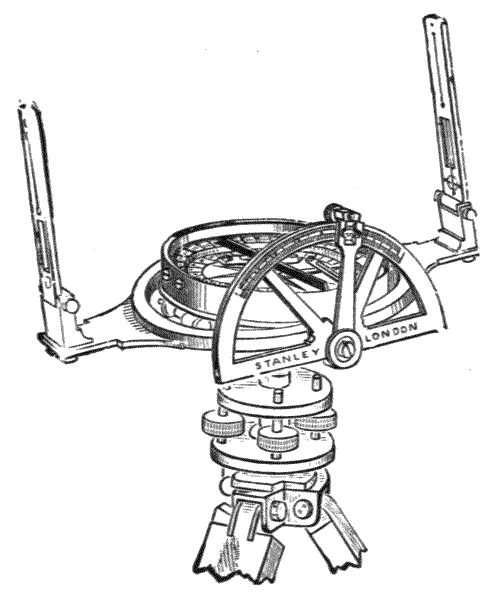
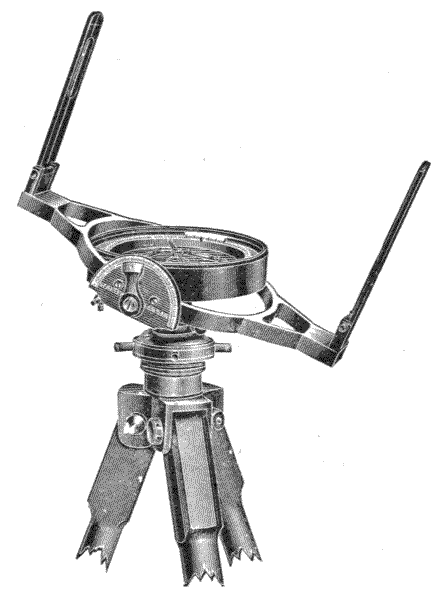
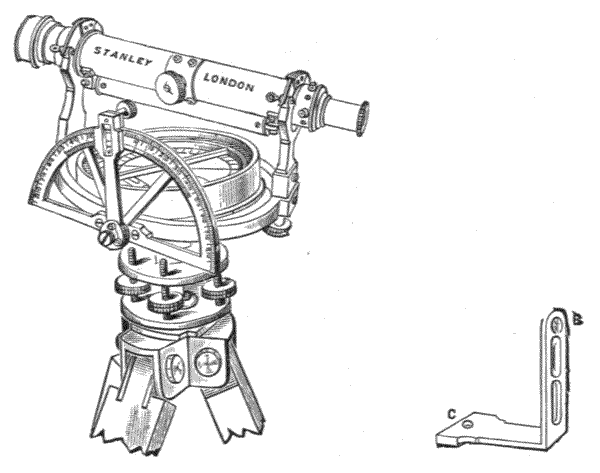
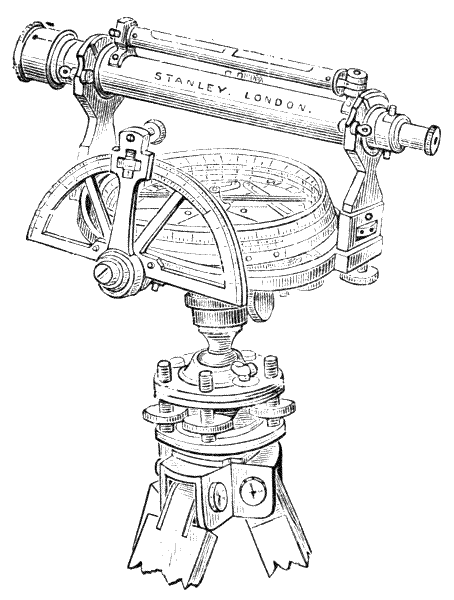
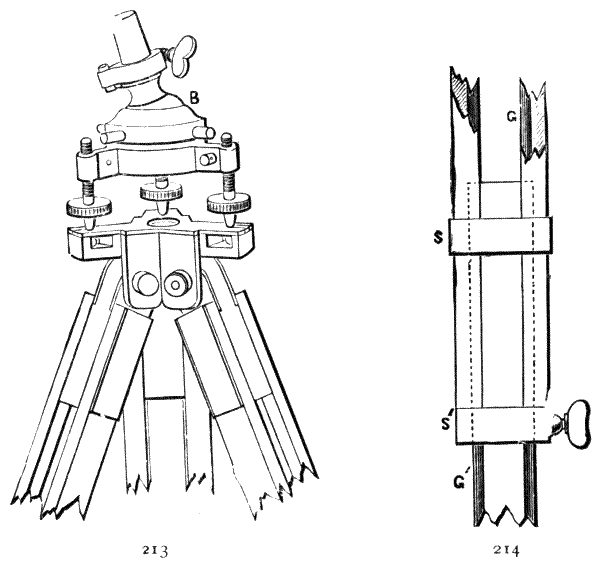
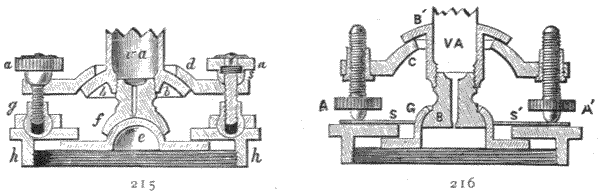
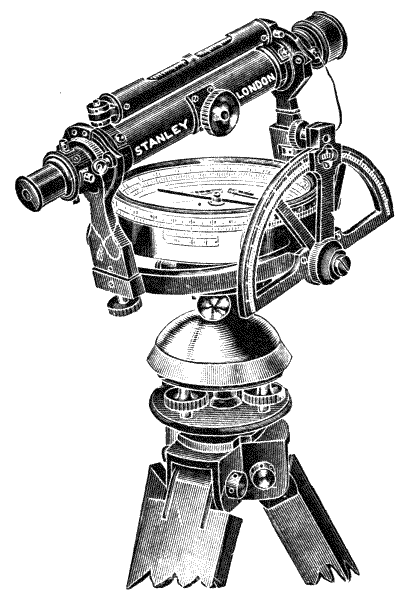
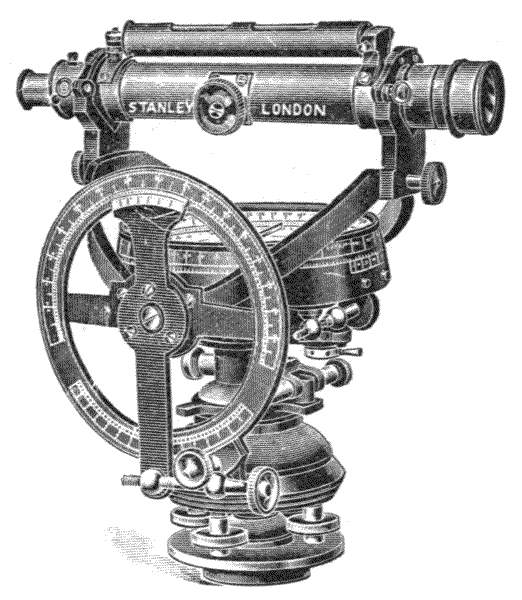
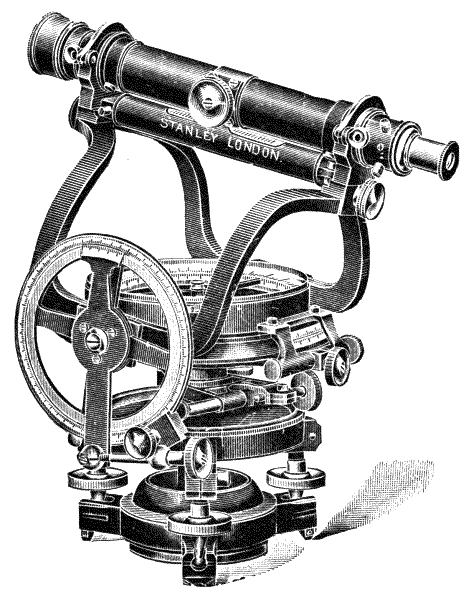
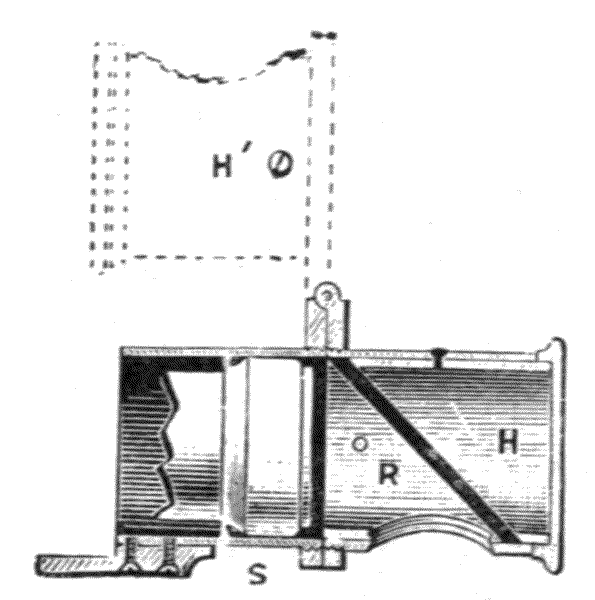
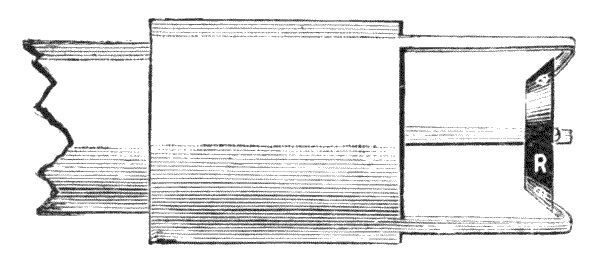
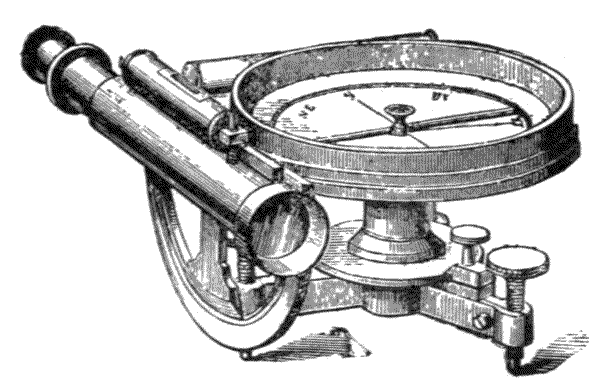
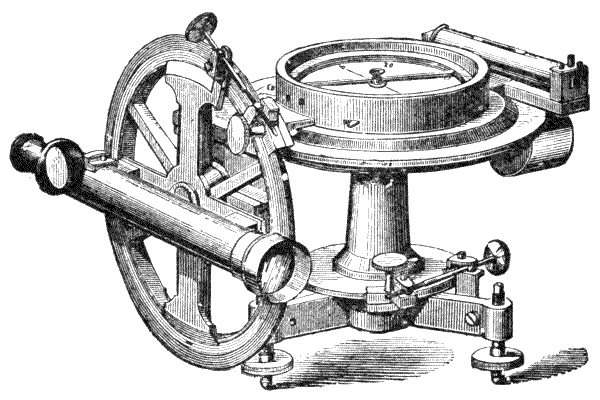
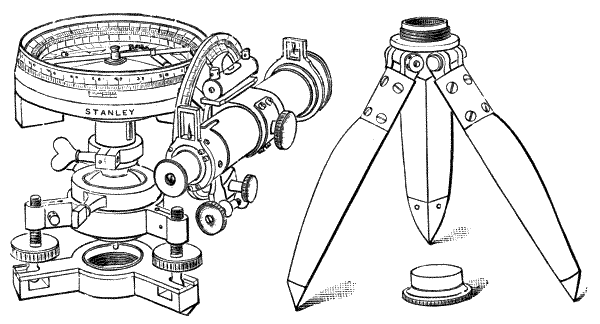
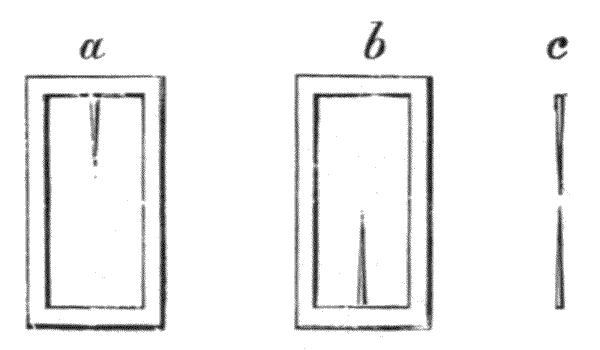
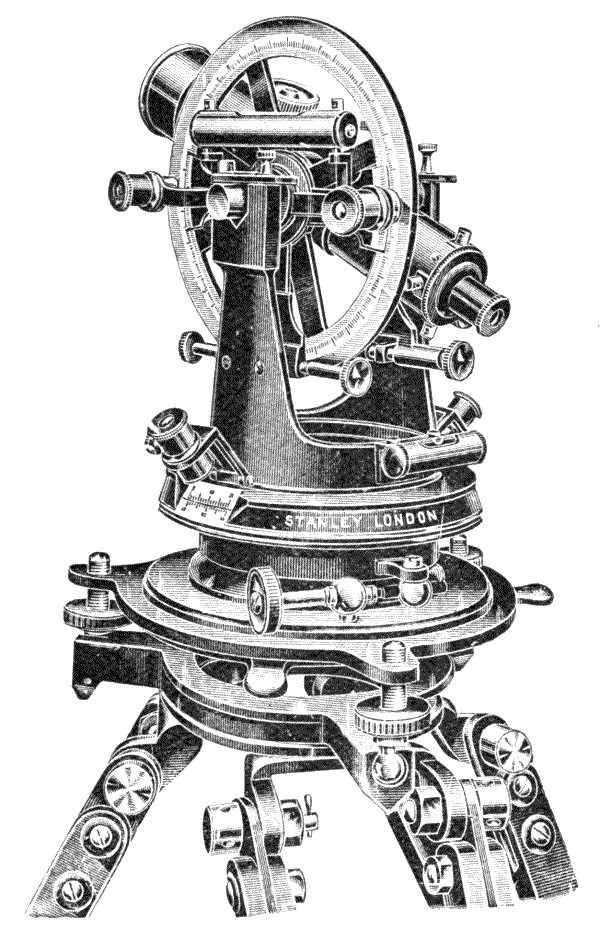
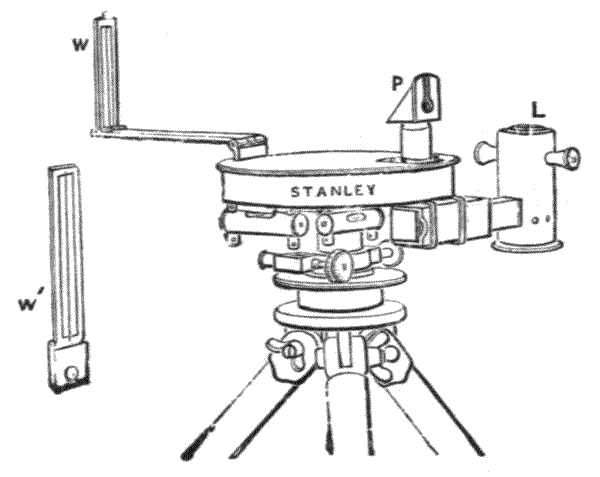
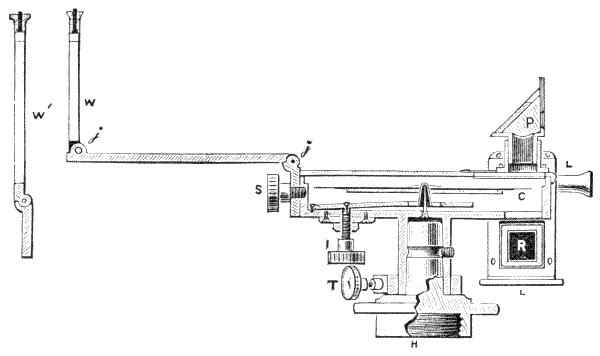
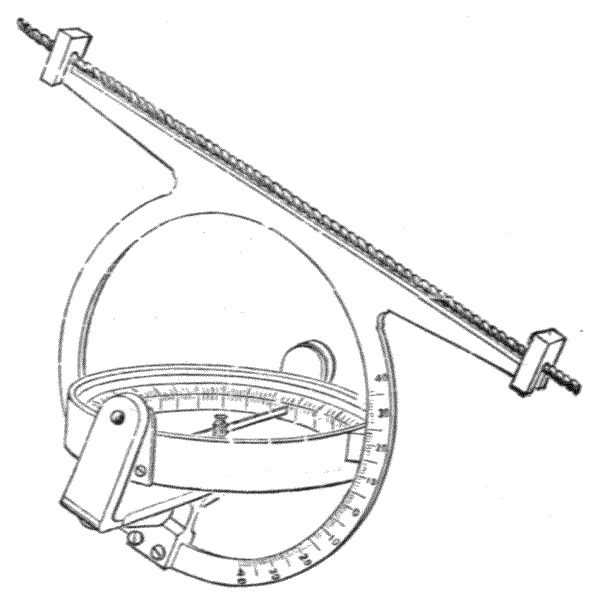
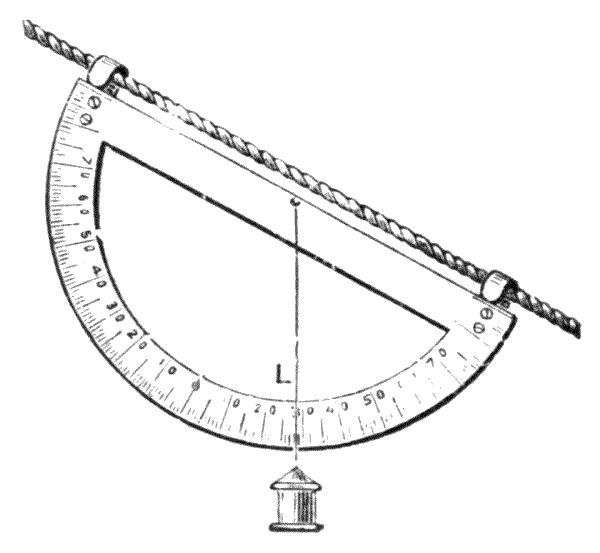

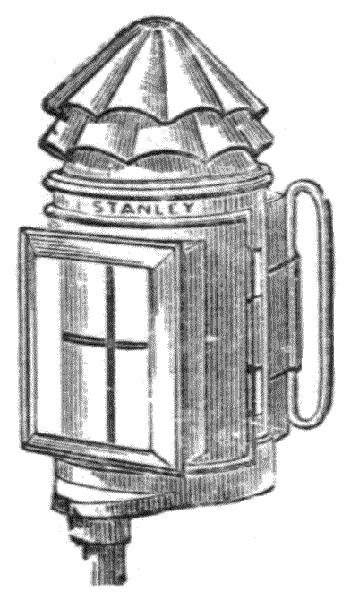
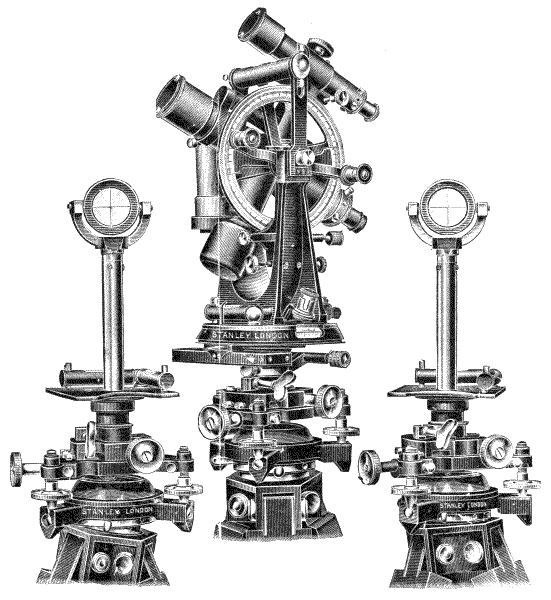
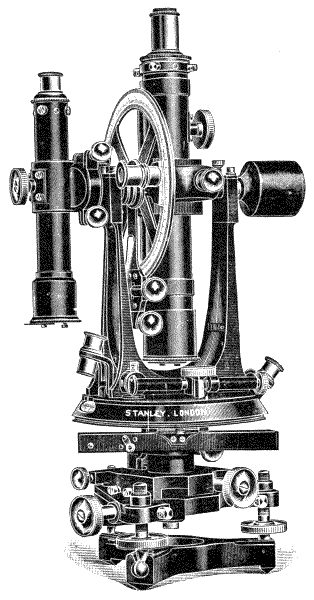
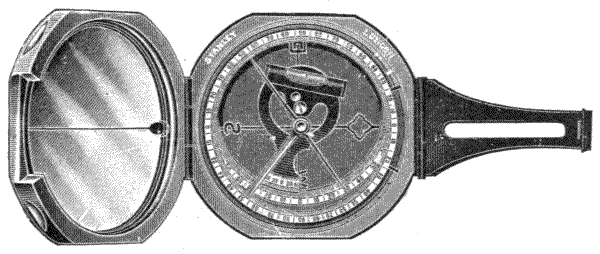
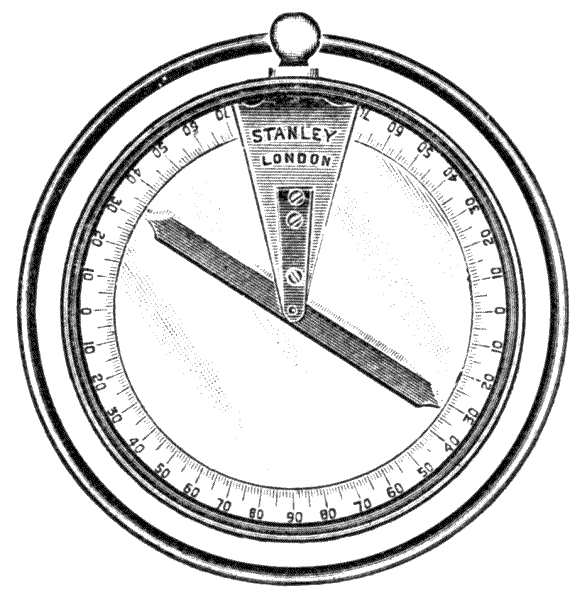
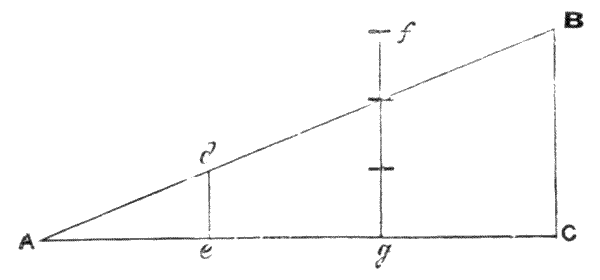

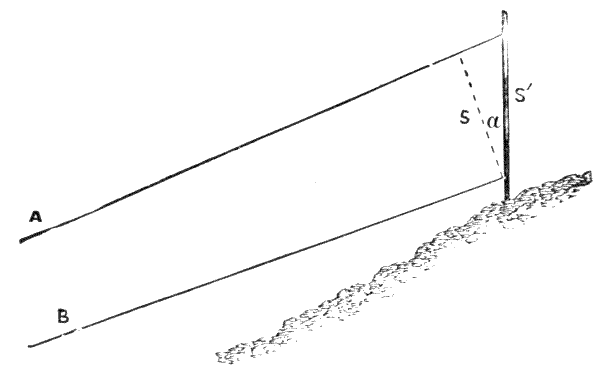
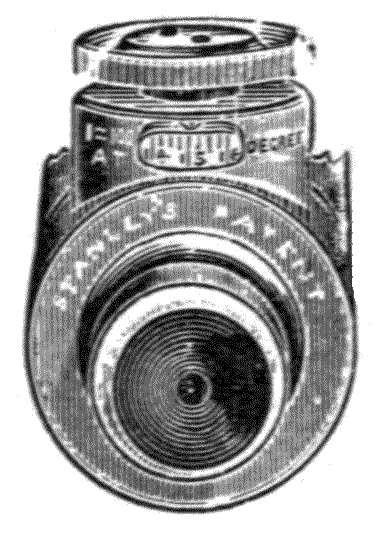
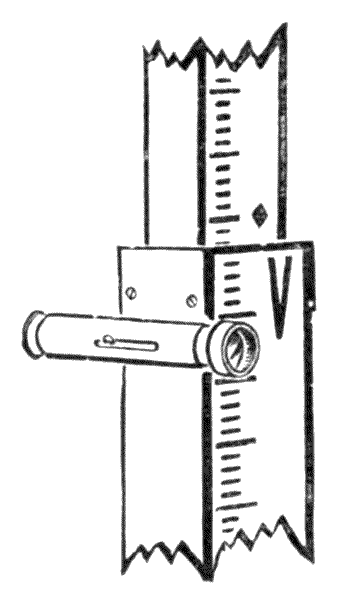
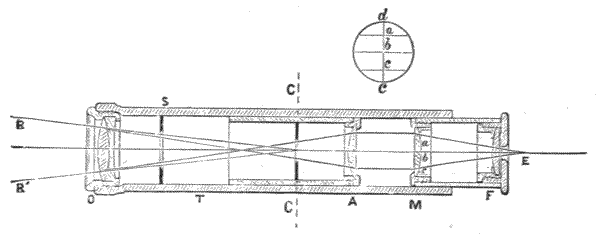
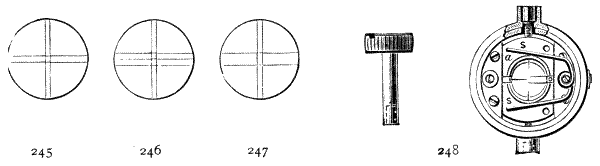
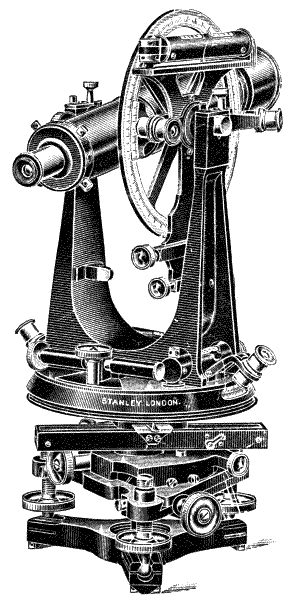
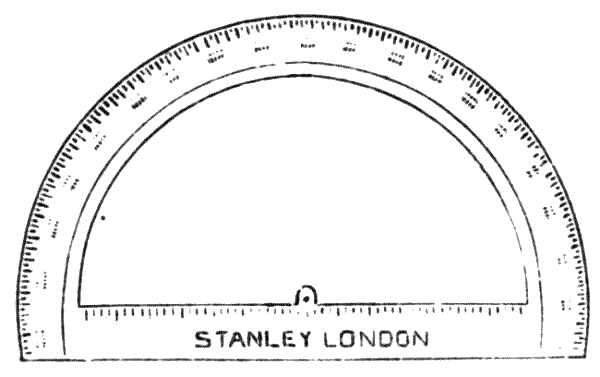
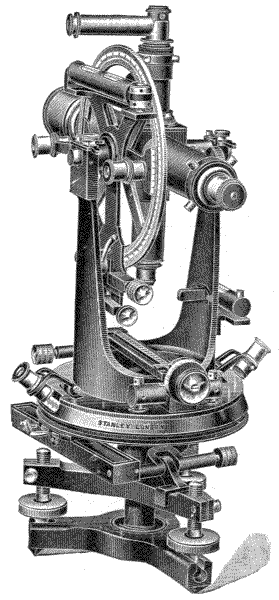
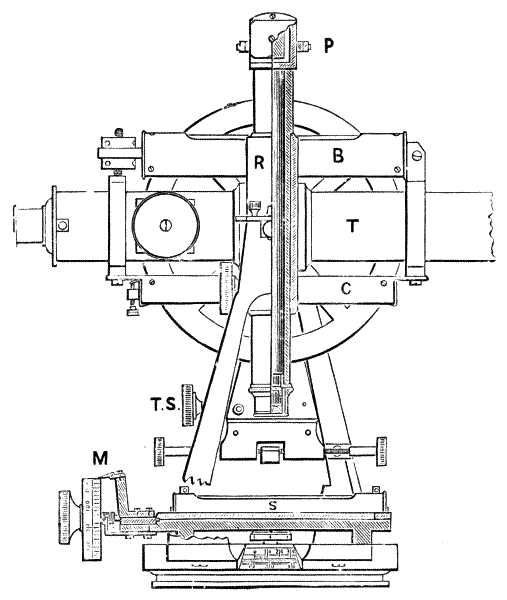
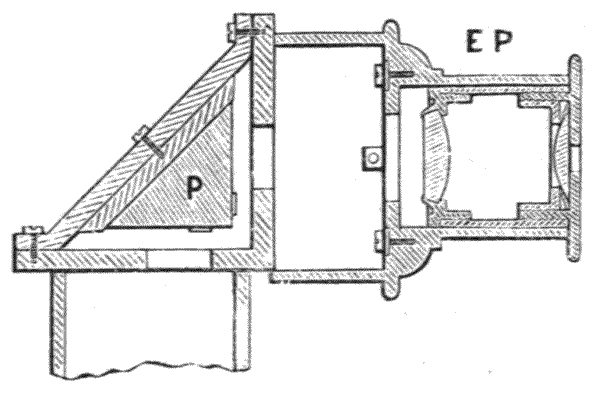
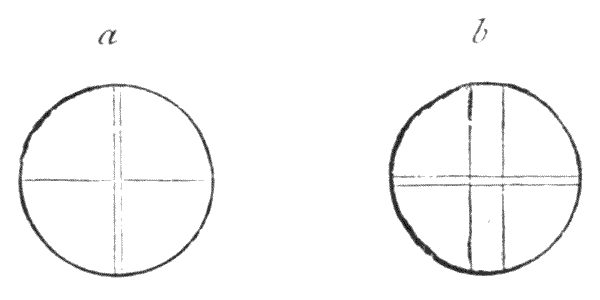
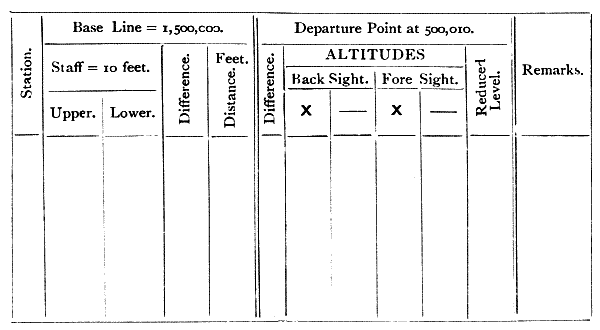
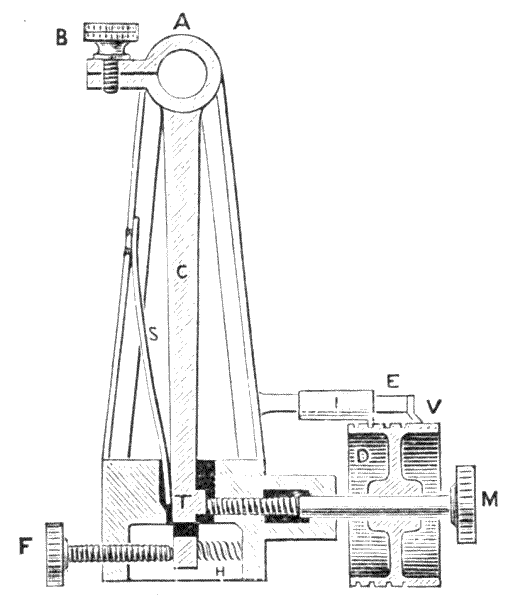
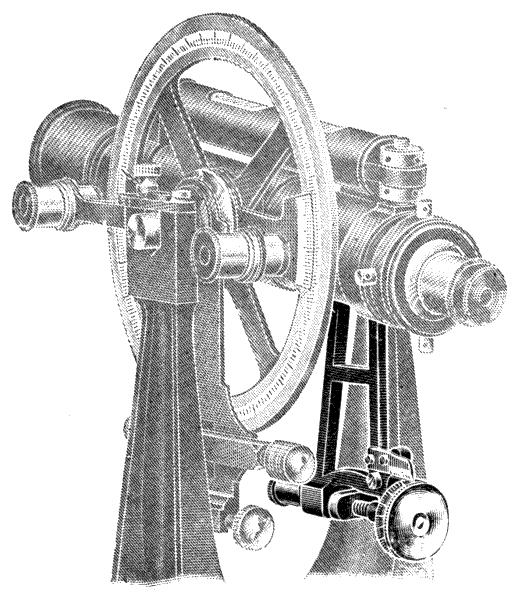
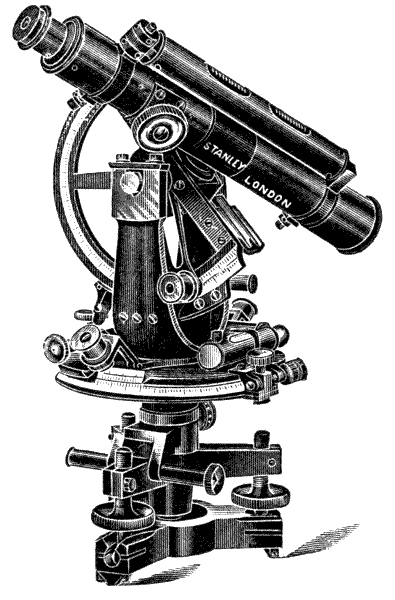
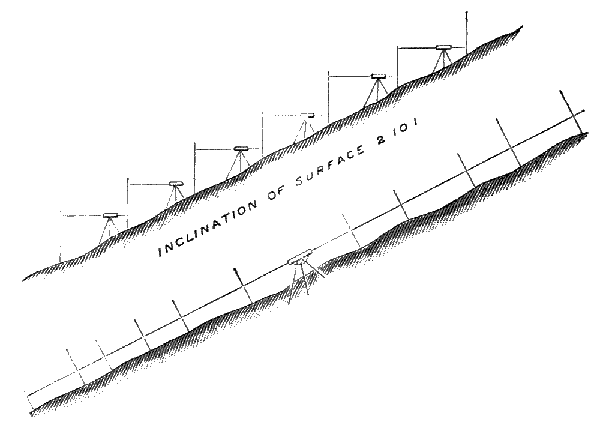
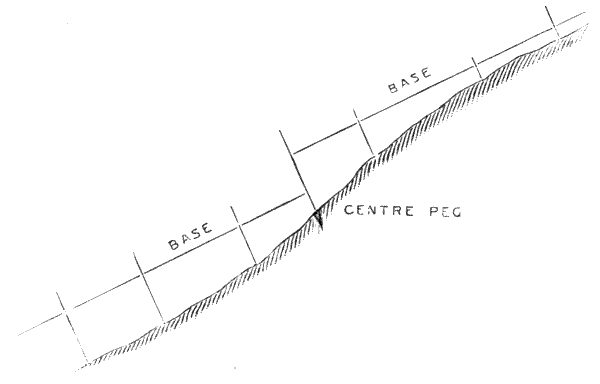
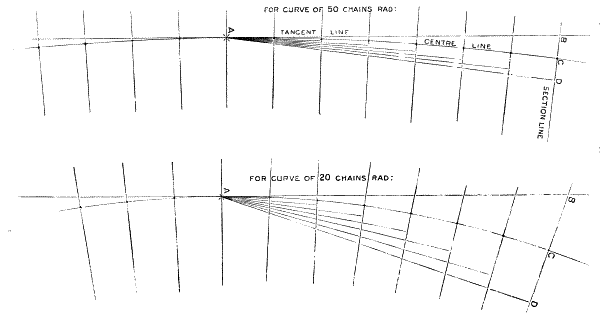
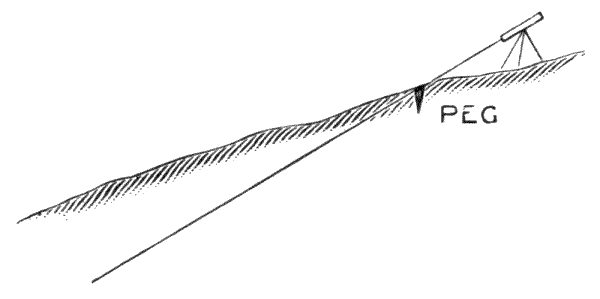
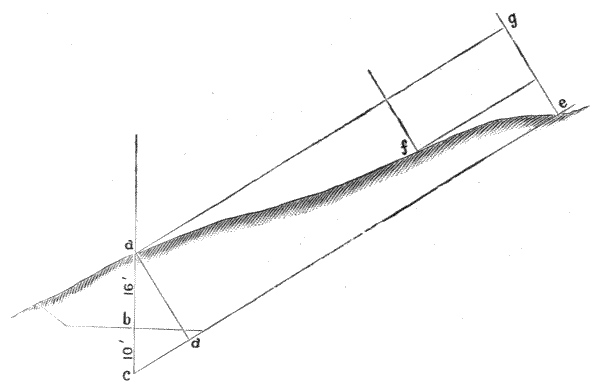
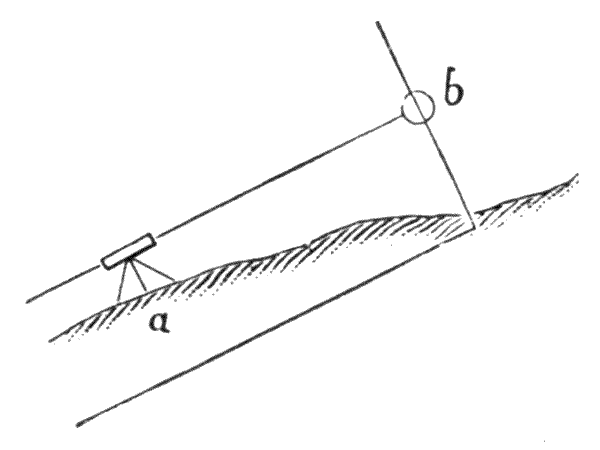
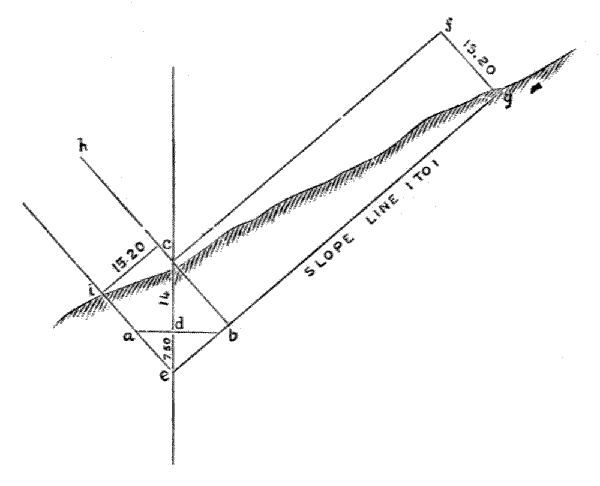
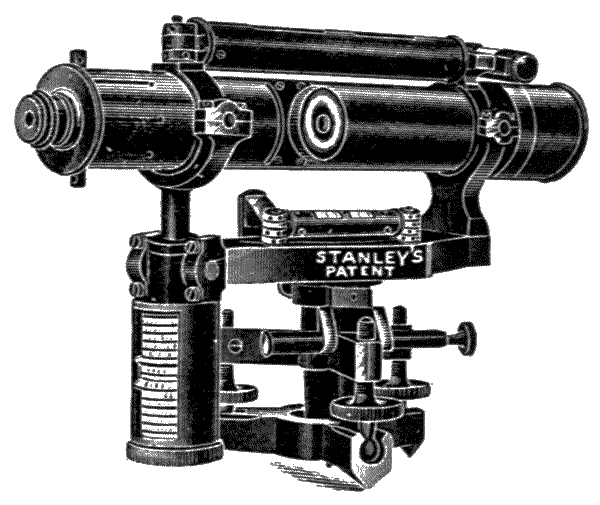
 ends,
thus
 ,
for long distances, to facilitate
distinct reading), and signal him to move farther off, or nearer
until the length of the rod, held vertically, is exactly covered
by the movement of the telescope caused by revolving the
drum between gradients 65 and 32½.