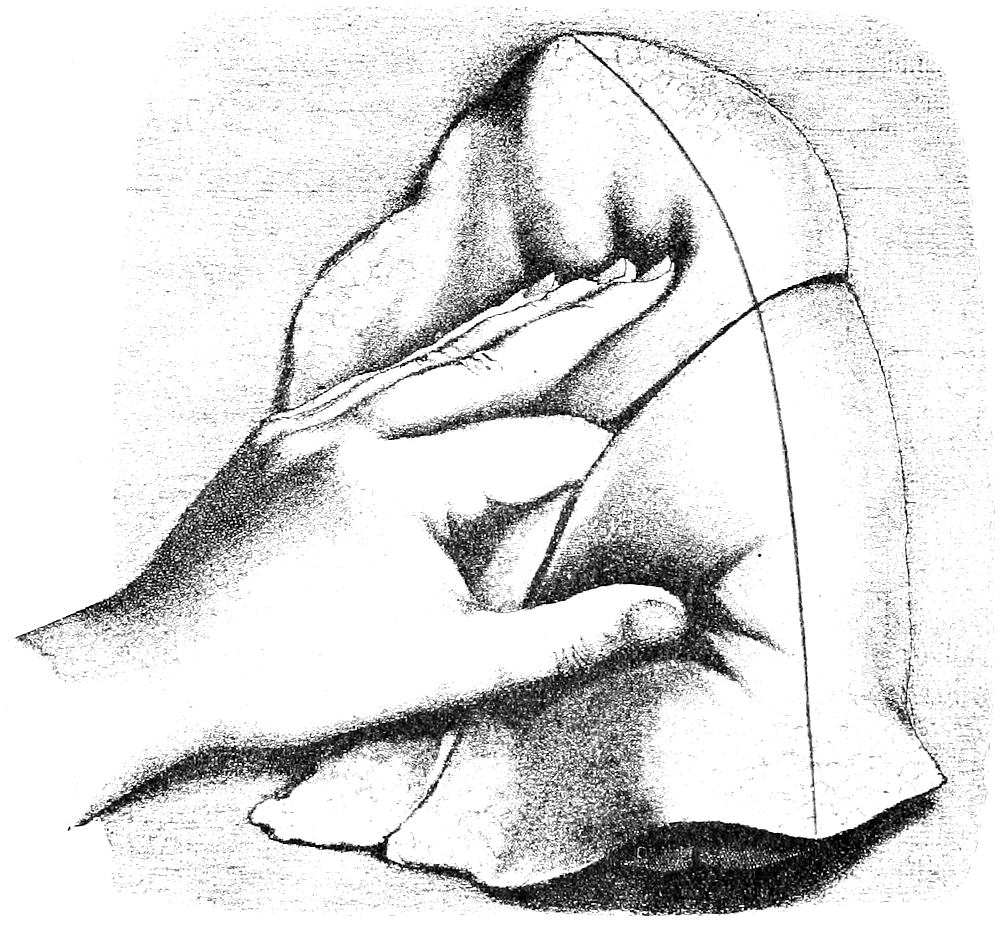
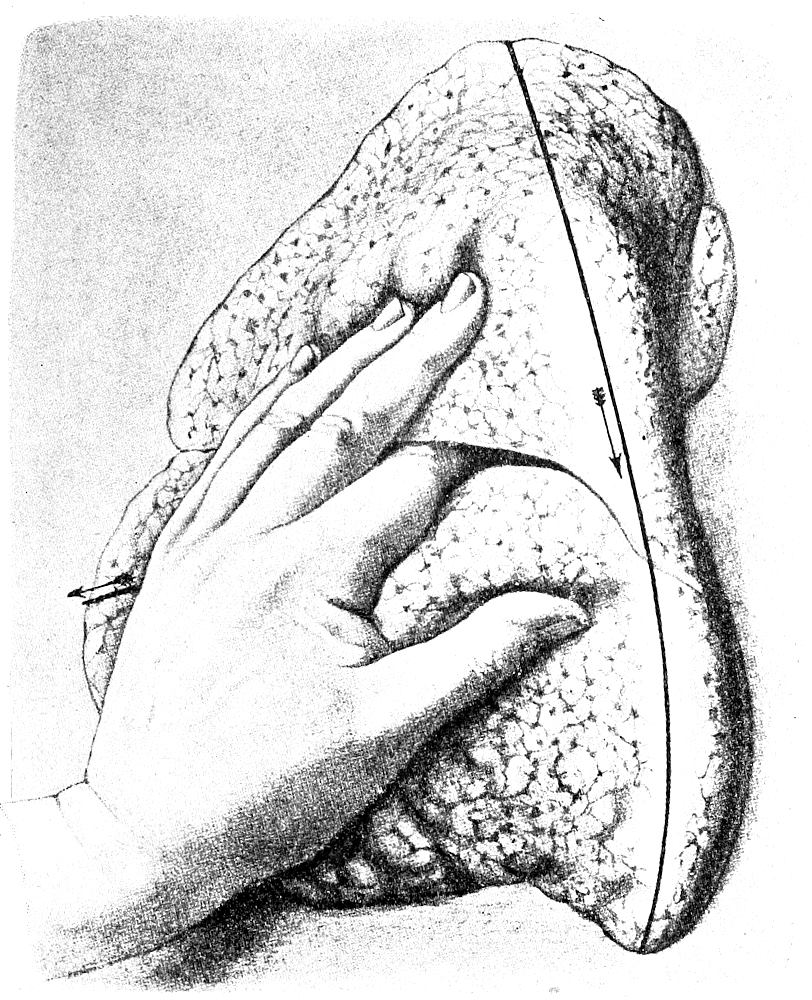
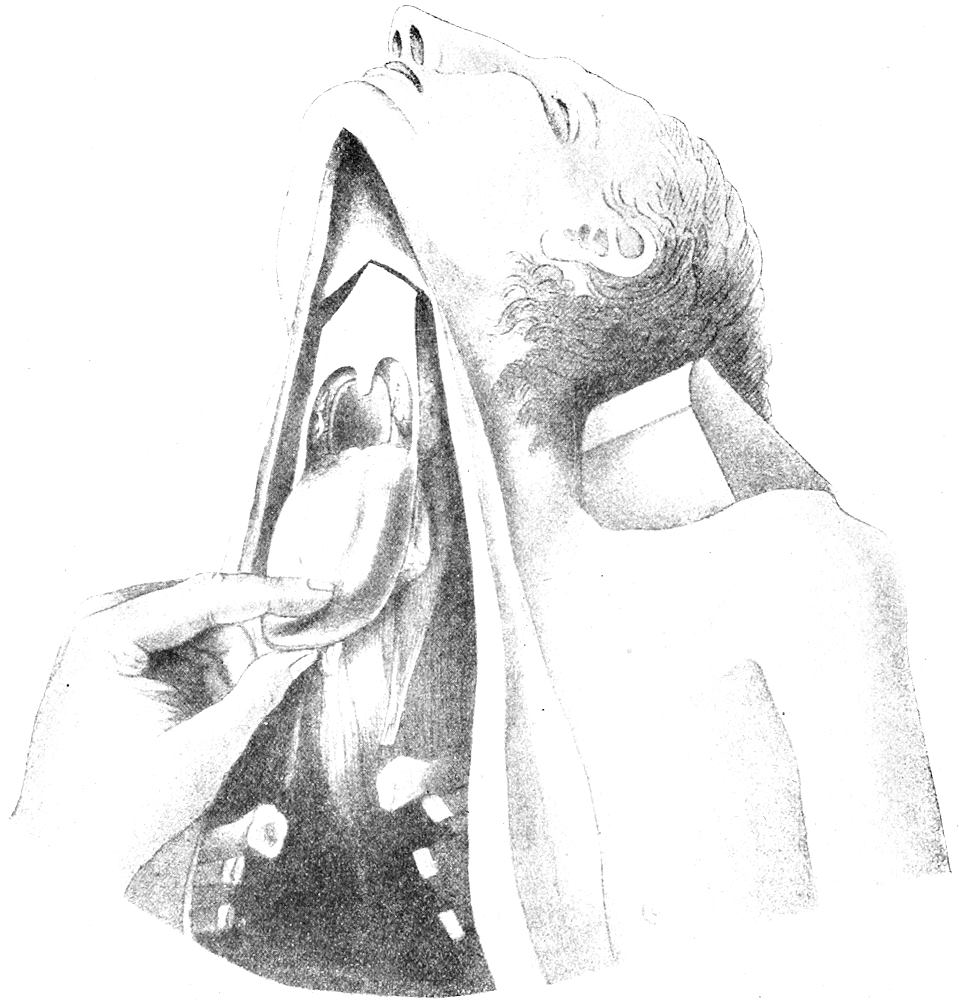
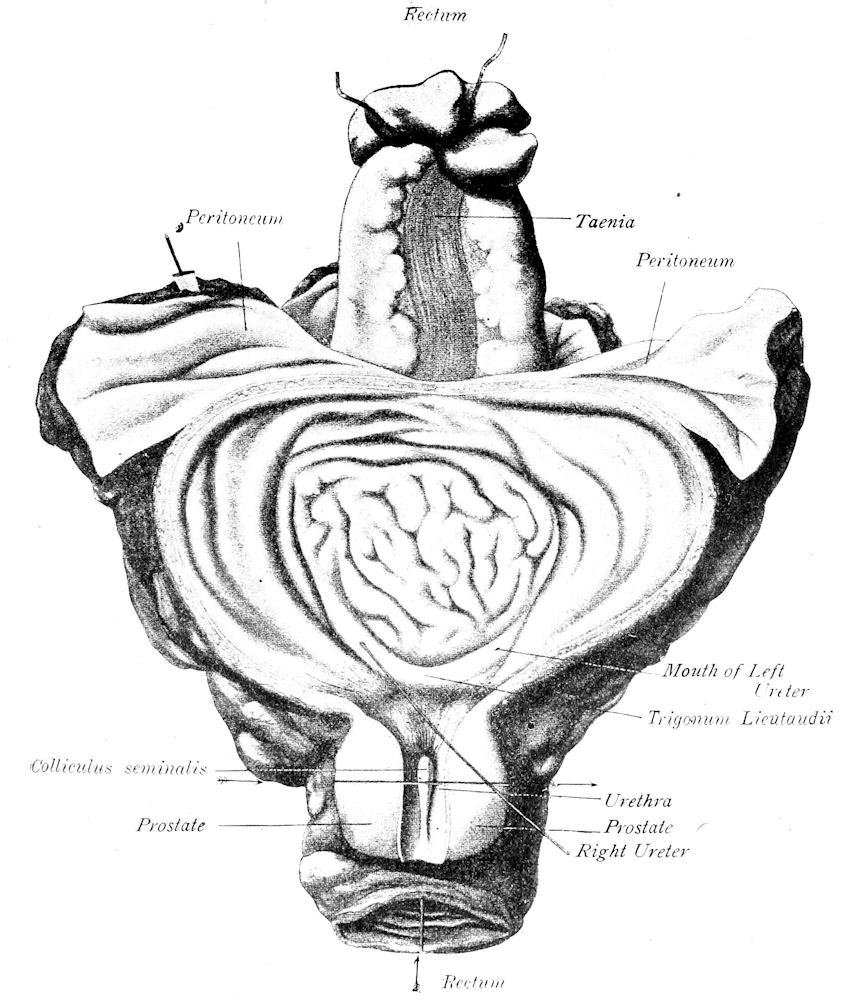
ALDRED SCOTT WARTHIN, Ph.D., M. D. Professor of Pathology and Director of the Pathologic Laboratories
IN THE
UNIVERSITY OF MICHIGAN,
ANN ARBOR
SECOND EDITION Rewritten and Enlarged
Mortui Vivos Docent
310 PAGES AND 55 FIGURES
ANN ARBOR
GEORGE WAHR, Publisher
1911
Copyright 1897, by George Wahr
Copyright 1911, by George Wahr
ERRATA.
Page 155.—Thickness of gall-bladder wall 1-2 mm. instead of 1-2 cm.
Page 240.—Langhans’ for Langhan’s.
Page 264.—v. Kossa instead of Kossa.
Page 295.—v. Kölliker instead of Kölliker.
HERRN PROFESSOR ALEXANDER KOLISKO
Zur Erinnerung
an die ertragreichen, im Sektions-saale des
Wiener allgemeinen Krankenhauses
zugebrachten Sommertage
der Jahre
1893, 1894, 1895
gewidmet.
PREFACE TO THE SECOND EDITION.
The first edition of this book, in spite of numerous typographic
errors beyond the control of the writer, was very soon exhausted.
An apology is due the many, to whom, during the last ten years, a
new edition has been repeatedly promised. The writer’s only excuse
for the failure to fulfill these promises has been the pressure of other
work that has prevented such fulfillment. In the final accomplishment
of these promises the book has been practically rewritten and
more than doubled in size.
The autopsy method given in the main text is a composite one,
made up from the Rokitansky, Virchow, Chiari and Nauwerck
methods, according to the judgment of the writer as to what was
the best in these, and put together with modifications and additions
arising out of his own experience. The aim has been to offer a
method by which an autopsy can be performed with the greatest
speed and ease, and at the same time with the greatest completeness,
the various steps of the operation following in logical order
in such a way that nothing can be lost or destroyed, and thereby
revealing a complete picture of the pathologic conditions present.
A choice of methods is offered whenever the aims of the examination
may be so varied as to make variations in method advantageous.
The general order of the autopsy is the same as that given in the
Protocol Blank-book, the present book being designed as a guide
and reference-book for that. The points to be noted in the examination
of each region are given in connection with the method of
examination of that region, and represent the condensed special
pathology of the latter. This should be of great service to the
beginner in autopsy work, as affording a concise but complete guide
to the most important conditions of each region. A textbook on
Special Pathology should be used as a reference book in connection
with these condensed statements of special pathology.
The technical methods for microscopic examination given in
Part II have been brought up to date, and all recent methods of
value included. Original methods have been given in preference to
modifications; the latter, when of value, are also mentioned. As a
rule that method has been chosen which in the light of the writer’s
laboratory experience has yielded uniformly the best results. An
effort has been made to reduce the number of methods to the lowest
number as representing the best and most indispensable ones.
During the fourteen years of laboratory experience since the publication
of the first edition there has been plenty of time for changes
in points-of-view concerning laboratory methods. Then an ardent
exponent of celloidin-imbedding as a routine method, the writer has
now practically discarded it in favor of paraffin-imbedding and the
celloidin-sheet made by the dextrin-sugar or molasses method.
This combination method is so superior in every way to ordinary
celloidin-imbedding that the latter becomes obsolete except for a
limited number of conditions. A number of personal modifications
of various methods will also be found in this part of the book;
indeed, it is intended to be an expression of individual opinion concerning
laboratory methods.
The writer’s views concerning the value of teaching by
unknowns,—that is, giving the student preparations or case-material
for his own analysis and independent working-out to a diagnosis—are
stronger now than they were when the preface to the first edition
was written. Experiments with other methods of teaching
have always brought me back to this as yielding by far the best
results. It accomplishes two things—it not only teaches a knowledge
of pathology, but it develops objectivity and the faculties of
diagnosis, and accomplishes these with more marked success than
any other method of teaching pathology.
Aldred Scott Warthin, Ph.D., M.D.
Ann Arbor, Michigan, May, 1911.
PREFACE TO THE FIRST EDITION.
Pathologic Histology deals with departures from the normal in
the various tissues of the body, which, occurring as the sequelæ of
disease-processes, or standing in the closest causal relationship to
the clinical symptoms and physical signs, constitute the foundation
of all diagnostic conclusions, and of all rational therapeutic treatment.
Without a definite knowledge of these abnormal changes, of
their various forms, of the manner in which they arise and progress,
no physician can deal intelligently with disease. The knowledge
of the natural history of disease, based upon a knowledge of the
normal body, makes the wise and successful practitioner; and to
such, the autopsy, the microtome and the microscope must ever
stand as constant aids in the satisfying of his intellectual curiosity.
It is, therefore, essential that the student in his undergraduate
work should be so trained that, in addition to a broad conception of
General Pathology, he may acquire also such a technical knowledge
as to fit him to carry on his investigations after leaving the laboratory.
Not only in everyday practice in certain lines is a knowledge
of this technique necessary for diagnostic purposes, but the
true physician should so hold himself toward every problem of diagnosis
which presents itself to him, that with every opportunity, he
will, through excision, curettage or autopsy, make use of his technical
skill to further his knowledge of disease, and to aid his
science toward a solution of its great problems.
It is for these reasons, that in my laboratory courses in pathologic
histology, I wish to give each student a practical working
knowledge of the technique of pathologic investigations. That the
student become an expert as the result of such undergraduate
courses is neither possible nor desirable; it is only hoped that he
may be placed in a position to cope intelligently with the questions
awaiting him in the field of practice.
For the guidance of the student toward this end, I have compiled
this little book of laboratory methods, endeavoring to make
it as practical as possible, but yet thorough and complete. The
methods given are taken from the original papers, or from the compilations
of Friedländer and von Kahlden, but are modified in many
instances according to the writer’s own experience. The autopsy
methods are, in the main, those used by Kolisko of Vienna; but
methods of Virchow, Chiari, Nauwerck, and others, are also given.
It is from the study of the material itself, and not from the
textbook alone, that the student can obtain a proper knowledge of
pathologic changes. The most comprehensive textbook can give
no adequate idea of the infinite variety of these changes; there is
no absolute type, but an endless variety of appearances more or less
closely related. Only from a contemplation of this variety is it
possible for the student to build up a point-of-view, and to arrive
at an independent and unbiased conclusion.
The student who seeks in a preparation only the appearances
described in a textbook is not studying in a scientific way. He will
constantly accept the author, instead of using his own impressions
for the basis of deductions, guided by the experience of others.
With an unbiased mind the student should take each specimen for
that alone, which it, itself, presents; and upon this he should build
his conclusions. He should seek in the textbook the things he
finds in the material; not seek in the latter the things he reads in
the former. Thus may he escape superficiality, avoid errors and
hasty judgments, and build up for himself a sure foundation of
knowledge. For these reasons the students in my laboratory course,
having been thoroughly prepared for such work by the study of
normal tissues in the histologic laboratory, are given the pathologic
material as unknowns, which under careful guidance, they are
enabled to work out for themselves to a satisfactory conclusion.
The student is further aided in the fixing of his impressions,
and in their expression, by means of the drawings and written
descriptions which he is required to make of the preparations. In
this way the faculties of observation and expression receive a training
that is not otherwise possible. It is true that such a course of
instruction is difficult for the student whose previous training has
been deficient in the cultivation of these most important faculties;
for this reason it is the more necessary that he should now apply
himself to work in the scientific method.
That this method of teaching takes much more of the instructor’s
time is true; that it takes too much time cannot be granted
when measured according to the results obtained. The frequent
objection of the student that he cannot draw only emphasizes the
necessity of that student’s receiving the necessary training to enable
him to reproduce his visual impressions.
A greater difficulty lies with the teacher. Not only must he
select his preparations with wisdom, so that in the necessarily limited
time of the course, the student may receive the greatest benefit;
but he must be tactful and patient in leading the student to work
for himself. It is easy to give a demonstration and then tell the
student to work; it is very much more difficult and nerve-consuming
to make the student see and demonstrate for himself. The
relation of the microscopic preparation to the gross anatomy must
be shown, and, when possible, demonstrated by macroscopic preparations;
further, the relation to the clinical symptoms and physical
signs must be made clear, so that the student receive not a narrow
conception of pathologic histology as something in itself separate
and complete, but as a foundation-stone to the broadest conception
of diagnosis, whereby the real unity of his studies will be revealed.
Moreover, the teacher must be fully awake to individual differences
and needs, and carefully shape his teaching influence upon each
student accordingly. The problem of the individual equation
becomes especially difficult in a course of this kind.
The laboratory course in histologic pathology, in the University
of Michigan, follows the general order given in the second part
of this book, beginning with the diseases of the blood and the circulation,
and finishing with the special pathology of the most important
organs. A preparatory training in general technique is first
given. About one hundred and seventy-five prepared specimens,
each illustrating some especial pathologic point, are given to the
class as unknowns for diagnosis. In addition each student is required
to prepare about fifty slides from fresh material, performing
for himself all of the necessary technical manipulations, according
to the methods given in this manual. To further the work in this
course, and to meet the needs of advanced students and of practitioners,
this book is primarily intended.
Aldred S. Warthin, Ph.D., M.D.
Ann Arbor, January, 1897.
CONTENTS
PART I.
THE SOURCES OF PATHOLOGIC MATERIAL AND THE
METHODS OF OBTAINING IT FOR EXAMINATION.
SOURCES OF PATHOLOGIC MATERIAL
AND METHODS OF OBTAINING
IT FOR EXAMINATION.
The chief sources of pathologic material are the autopsy, surgical
operation, diagnostic excision and curetting, the spontaneous
discharge of diseased tissue, and the experimental production of
pathologic conditions in animals. To these sources may be added
the blood and other body-fluids, as well as pathologic fluids,
exudates, effusions, cyst-contents, etc., particularly the cellular
elements found in the sediment of such fluids.
That an accurate pathologic diagnosis be secured, the material
must first be properly obtained, its gross characteristics carefully
noted, the portion to be examined microscopically chosen with discrimination,
and, finally, the microscopic examination itself carried
out along the various lines indicated. All of these procedures
require the knowledge of a certain amount of technique, and the
general principles of such technique should be familiar to every
student of medicine. While it is not possible that every medical
graduate can enter into the active practice of his profession as an
expert pathologist, yet the possession of the technical knowledge
necessary to perform an autopsy properly and to select with discrimination
the tissue for microscopic examination gives to a physician
a distinct practical advantage. This advantage becomes the
greater if to the possession of this knowledge there be added also a
practical working knowledge of the technique necessary for the
microscopic examination and diagnosis. Not that this knowledge
should be so extensive as to cover the great field of special methods;
all that is really essential is a knowledge of the general principles
of laboratory examinations; and a very large proportion of
practical work can be successfully carried out if the physician possesses
this foundation knowledge. In the first days of practice a
young physician so equipped often finds that his laboratory training
comes to be his chief source of income and opens the way to a successful
professional career. It constitutes a professional asset
which the older practitioner usually does not possess.
CHAPTER I. THE AUTOPSY: GENERAL CONSIDERATIONS.
1. AUTOPSY (Postmortem examination, necropsy, necroscopy,
obduction, mortopsy, section; Latin, sectio cadaveris, sectio
anatomica, autopsia cadaverica, sectio, obductio; French, autopsie
cadaverique, nécropsie; German, Leichenschau, Section, Obduction)
is the term preferably applied to the examination of the dead
body, conducted for the purpose of ascertaining the cause of death,
for the study of the pathologic conditions present with reference
to their nature and cause, or for the obtaining of anthropologic,
anatomic or surgical data. When carried out primarily with the
view of obtaining evidence of legal importance, as in the case of a
suspected crime, accidental death, the identification of a body, in
damage suits for injuries received, malpractice, insurance, etc.,
the autopsy is usually styled medicolegal, or the German term
obduction is not infrequently applied. The terms prosector and
obducent, although used originally in a medicolegal sense, are now
generally applied to the person performing the autopsy whether
medicolegal or not.
2. IMPORTANCE OF THE AUTOPSY. The opportunity
of performing an autopsy should be regarded by the physician and
student as a very great privilege. Even to the prosector with an
experience of several thousand autopsies to his credit, each new
examination of a dead body becomes a new revelation and extends
still farther his intellectual horizon. To the student and physician
in practice each autopsy may, if performed in the proper spirit,
become in itself an educational factor of the greatest value. In no
other scientific procedure is there such a demand made upon the
faculties of observation, judgment and interpretation, and in no
other is there such intimate correlation between methods of technique
and the higher intellectual processes. It is unnecessary to
add that the ability to perform an autopsy in the proper manner
presupposes a foundation of accurate anatomic and pathologic
knowledge as well as a capacity for careful work.
Primarily, the aim of the autopsy is to ascertain the cause of
death and to acquire knowledge of the changes produced in the
tissues and organs by the disease-process. If for no other purpose
than that of extending our knowledge of disease, the autopsy
becomes the most valuable factor in furthering the development
of medical science. We have but entered into the broad, rich fields
of pathology; at any time new facts may be discovered or observations
of the most far-reaching nature made. From year to year
the statistics of the most common diseases must be revised in the
light of new conceptions of disease. Through the autopsy there
lies within the reach of every practitioner the opportunity of contributing
something worth while to the general sum of medical
knowledge. There is not a pathologic condition in the medical
category that does not call out for illumination upon some point
or other. The phenomena of malignant tumors, the earliest stages
of the so-called chronic affections, as well as the majority of the
infectious diseases, require further autopsy observations for their
elucidation. The autopsy establishment of the diagnosis is also
of the greatest importance in giving value to vital statistics. Until
we have a more universal confirmation of the clinical diagnosis by
the pathologic our vital statistics must of necessity be imperfect.
To the practitioner the autopsy offers further a most valuable
control of subjectivity and a guide to methods of diagnosis and
treatment. Without such a control no one is so likely to get into
a dangerous rut as the practicing physician. The disclosures of
the autopsy will enable him to correct faulty methods, and should
effectually check any tendency to superficial diagnosis. Particularly
is this the case with regard to such diagnostic methods as palpation,
percussion and auscultation. Postmortem percussion offers
a most valuable means of acquiring precision in this important
branch of physical diagnosis. The percussion boundaries may be
marked upon the body by pencil, or long pins may be inserted, so
that when the body is opened the exact relation of the percussion
area to the organ in question may be noted. In the case of palpable
tumors the results of palpation before the body is opened should be
carefully controlled by the findings when the actual conditions are
exposed. Even when the cause of death seems obvious it is worth
while to perform an autopsy at every opportunity offered, both for
the sake of controlling technical methods and for the pictures of
disease revealed. More accurate knowledge of the nature of the
processes of disease can be obtained through one autopsy than
through months of textbook reading. To the surgeon the opportunity
of examining cases dying after surgical operation should be
a source of great satisfaction. The review of anatomic relationships
offered by the autopsy is in itself worth while, and in the case of
healthy individuals killed by accident the survey of the normal
appearances of the organs and tissues offers an opportunity for
study too valuable to be neglected. Further, it is justifiable to practice
upon the cadaver any surgical operation that does not disfigure
it. Removal of the spleen, transplantation of thyroid tissue into the
spleen, decapsulation of the kidney, transplantation of ovarian tissue,
gastric and intestinal operations, anastomosis of blood-vessels,
operations upon the uterus and cervix, prostate, vas deferens, thyroid,
nose, ear, etc., and many other surgical procedures may be
practiced with profit upon a cadaver during the course of an autopsy.
The feasibility of a new operative method or the improvement of an
old one may thus be demonstrated.
In the case of medicolegal autopsies the ends of justice as well
as the life, liberty or reputation of some individual may depend upon
the results of the postmortem examination. In all cases to which
there is any suspicion attached, or in which the cause or manner
of death is doubtful an autopsy should be legally required, but unfortunately
this is not yet done in this country. Physicians individually
should endeavor to create in the public mind a more healthy
attitude toward the autopsy and an appreciation of its usefulness.
As to his own share in the advantages derived from it, it is safe to
say that no physician can perform an autopsy properly without having
his experience widened, his knowledge of disease increased, his
diagnostic faculties sharpened and his tendency to subjectivity controlled.
Last, but far from being the least, should be his gain in
honesty and humility.
3. LEGAL ASPECTS OF THE AUTOPSY. The individual
cannot dispose of his dead body without the consent of his nearest
heirs, except in those States (New York) providing by statute that
a person may direct the disposition of his cadaver. The legal rights
to the corpse are vested first in the husband or wife of the deceased;
if none, then first in the father, then in the mother; after the parents,
in the brothers or sisters; after them in the next of kin, according
to the course of common law; and then to the remotest degree
according to the law of descent of personal property. An autopsy
performed with the consent of the relative having the body in custody
cannot be questioned, if it is properly performed. In the case
of members of societies requiring autopsies the membership cards
or certificates should be endorsed by the nearest heir.
A physician who performs an autopsy without the consent of
the person having the custody of the deceased does so at his own
risk, except in those cases in which the autopsy is in accordance
with legal statutes. In the majority of the States there are statutes
providing that the Coroner or Board of Health shall order an
autopsy whenever a person is found dead and the cause of his death
is not apparent, and cannot be ascertained from the evidence given,
or from a superficial examination of the body. In such cases no
permit from the relatives is necessary, and an autopsy performed
under the direction of law is never subject to legal punishment, if
it has been performed according to approved methods. Nevertheless,
even in these cases it is a better policy to secure the consent
of the custodian of the body, when this is possible.
When consent to an autopsy is withheld and the physician feels
that such an examination is necessary, he should turn the case over
to the Coroner or Board of Health, and act under such direction.
Conflicting decisions, however, have been made in different States.
The Supreme Court of Indiana (1909) held that a Coroner cannot order
an autopsy unless there was a reasonable supposition that death
had occurred from violence or casualty. A suit brought by an Indiana
physician to recover fee for an autopsy held on the order and under
the direction of a Coroner was set aside on the ground that there
was not the slightest suspicion of death from casualty or violence.
Such a decision is too narrow and not framed in accordance with
the actual needs of the times in so far as the protection or enlightenment
of the community is concerned. Under such a decision a Coroner
or Board of Health could not in safety order an autopsy in the
case of a death in which the diagnosis had not been established clinically,
when no suspicion of violence or casualty exists, although
the establishment of the diagnosis through an autopsy might be of
the greatest importance to the family or community.
On the other hand the Court of Appeals in Kentucky (1906)
affirmed judgment for the defendant in a suit for damages brought
against a physician for performing an unauthorized autopsy to secure a
burial permit, the court holding that, if the autopsy was made in
good faith for the purpose of ascertaining the cause of death in
order that a burial certificate might be granted, and if the autopsy
was made decently with due regard to the sex of the deceased and
without unnecessary incisions or mutilations, there could be no
grounds for damages. This is a reasonable and just decision and
laws framed upon it should be passed in all the States. Autopsies
performed under such conditions, however, should always be conducted
in the presence of several witnesses competent to testify as
to the methods used.
In several States legal authority is given to the Board of Health
to order an autopsy whenever the health interests of the people
demand such an investigation. Autopsies performed under such
orders against the desire of the relatives should always be carried
out with extreme care and in the presence of proper witnesses.
State and charitable hospitals cannot be made liable for autopsy
performed by Coroner or Board of Health, when the consent of the
relatives is withheld. It is high time that all charitable institutions
in this country should require an autopsy from all patients dying
within their walls. The cards of admission should contain a clause
to this effect, and such cards should be counter-signed by the nearest
relatives.
Inasmuch as some life-insurance policies contain clauses requiring
the presence of a representative of the company at the autopsy
or a forfeiture of the claims, it is best to ascertain if such policies
exist in any given case, and to notify the company. The Supreme
Court of Missouri has decided that an autopsy made in ignorance
of such an insurance clause is no bar to recovery if the company be
notified in time for a re-examination of the body.
Supreme Court decisions also hold that consent for an autopsy
implies removal of organs and tissues for microscopic study, when
such is necessary to fulfill the object of the autopsy.
One of the great needs of this country is a uniform autopsy law
and the establishment of a proper medicolegal autopsy code, as in
Germany. As conditions exist at the present, crimes may be easily
concealed, the safety of the community endangered by failures in
diagnosis of communicable affections, and our morbidity and mortality
statistics become a shame and reproach to the nation. The
majority of our medicolegal autopsies are made by ignorant and
imperfectly trained coroners and coroners’ physicians, mostly political
appointees of inferior material. We need in our medical schools
a greater amount of attention paid to the teaching of autopsy-technique
and gross pathology. The community must also be educated
to a realization of the value of autopsies. It is the duty of every
physician and layman to work diligently for the improvement of
existing conditions. Had the ideas of a former Governor of the
State of Michigan been realized there would have been compulsory
autopsies upon the bodies of every person dying within the State,
and far-reaching results would have been attained. The economic
importance of tuberculosis and the venereal diseases would have
been made clear, the profession and laity alike educated, and the
progress of preventive medicine tremendously aided.
4. PERMISSION FOR AUTOPSY. It is a desirable and
certainly a wise precaution to obtain a written permit for the
autopsy from the next of kin or from the legal representative of
the body, in case the examination has not been ordered by law.
Some of the legal decisions quoted above offer sufficient grounds
for this precaution. The following form is in use in the University
of Michigan Hospital.
No........ Ann Arbor, Michigan..................., 19..
Professor of Pathology........................ University of Michigan.
Permission has been given by........................., who bears
the relationship of..................to........................, to hold
a postmortem upon the remains of..........................., with the
understanding that the object of such postmortem is to ascertain the
cause of death, and that you are to use such means as you deem best to
make a thorough examination for the proper attainment of the object
desired, excepting that...............................................
...............................Superintendent.
There can be no doubt that the public in general is beginning
to appreciate the usefulness of autopsies, as it is much easier to
obtain them now than it was ten years ago. The proper display of
tact and a reasonable exposition of the object of the examination
will practically always meet the objections urged on sentimental
grounds. Aside from these the chief objection usually met with is
the fear of mutilation of the body. Emphatic assurance may be
given in this respect, not only as to the entire absence of any disfigurement
resulting from the examination, but also as to the marked
improvement in the general appearance and condition of the cadaver
as the result of the autopsy.
While it is obviously difficult to give any specific rules as to
the method to be pursued in seeking permission for an autopsy,
there are certain arguments that can be used to advantage. Natural
curiosity, the general good to humanity, the control of diagnostic
and therapeutic methods, new knowledge to be gained, the question
of inherited or infectious conditions, the strengthening of insurance
claims, etc., are some of the lines that may be followed in working
for an autopsy. Satisfaction is always expressed when definite light
is thrown upon the hereditary or infectious nature of the condition.
Religious scruples may often be overcome by an appeal to the
pastor or priest.
In a certain number of cases the matter is hopeless from the
beginning, but in the majority the autopsy may be secured by the
exercise of proper tact and patience. The laity should be educated
to ask for the autopsy; and even at the present time laymen often
show a greater willingness in this direction than some members of
the profession. That physicians and undertakers who discourage
or oppose autopsies should be avoided is a principle that should be
instilled into the minds of the public at large. Undertakers soon
come to recognize the aid given them by the autopsy in the matter
of embalming and preserving the body, and the prosecutor should
always show his readiness to allow the undertaker to profit by his
operations, and to render him such definite help as may be within
his power.
As a last resort the offer of a small amount of financial aid in
the burial expenses will secure sometimes a permission otherwise
refused. In extreme cases the physician may decline to sign the
death certificate, or the Coroner may be called in, or the case turned
over to the Board of Health. Under suspicious circumstances such
procedures are necessary, but threats to resort to these expedients
should not be made without good reasons.
With the request for the autopsy should be included the right
to take such portions of organs or tissues as is necessary for a
microscopic examination and for the complete diagnosis. It is, of
course, never necessary and certainly unwise in the majority of
cases to make any definite statements as to what or how much shall
be taken away or left. No specimens should be taken if this is
absolutely forbidden; and, while a half autopsy is better than none,
the importance of the microscopic examination should be urged, if
necessary, as strongly as the performance of the autopsy. The use
of a written permission, such as is given above, obviates the necessity
of making a special request for material and avoids the complications
that such a request often brings about. Moreover, the legal
decision above quoted grants the right to microscopic examination
as included in the permit for the autopsy when such an examination
is necessary to complete the aims of the autopsy.
5. AUTOPSY INSTRUMENTS. An autopsy can be properly
performed with very few instruments; indeed, a knife and a
saw, with a needle to close up the body, would suffice for the majority
of cases. But there are very great advantages in the use of certain
instruments adapted especially to autopsy needs, and these the
physician should gradually acquire for his work. It is not advisable
to purchase the so-called “postmortem sets” sold by the dealers, but
far better to start with two or three of the most necessary
instruments and gradually add to these. Surgical
instruments as they become discarded can often
be made to do good service in the autopsy outfit. In
private practice the fewer instruments one can get
along with the better, as there is much less trouble
in carrying them about and in taking care of them,
and it is better to make the performance of the
autopsy as inconspicuous as possible. In teaching
institutions and in hospitals the number and variety
of instruments that can be utilized in autopsy work
are limited only by the financial means at disposal,
but even under the most favorable conditions in this
respect it is better to simplify as much as possible.
The list given below will meet all
requirements.
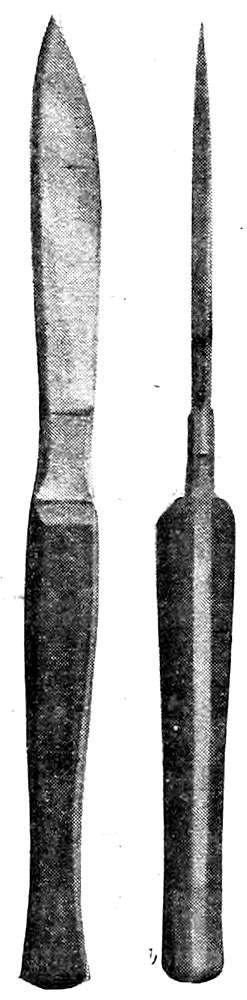
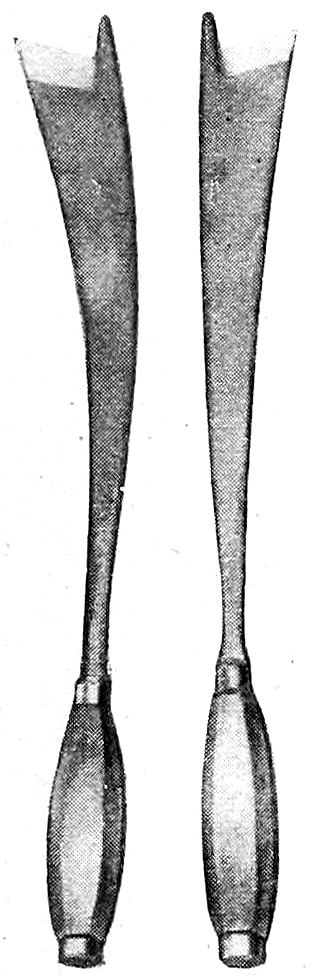
Fig. 1—Large
Section, or
Cartilage Knives
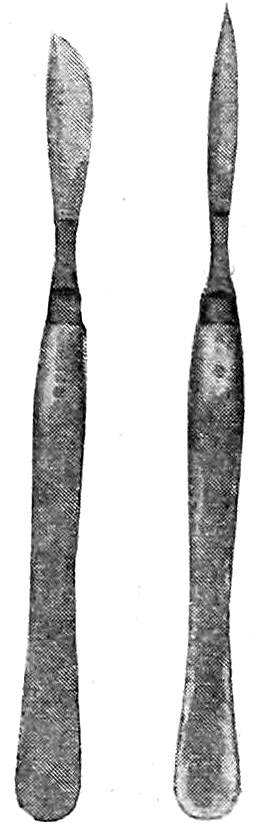
Fig. 2—Scalpels
Knives. The large section- or cartilage-knife
is the most important cutting
instrument used in autopsy work.
It is a strong, heavy knife 20-22 cms.
long, with handle and blade of about equal length.
The blade has a heavy back, a bluntly rounded
rather than a sharp point (more blunt than appears
in the illustration), and bellies at its anterior third,
narrowing toward the handle. In its widest part the
blade should measure about 1¾ cms. The handle is
heavy, 1½ cms. broad, and a little over 1 cm. in
thickness toward the blade, gradually diminishing to
about ¾ cm. at the posterior third, then increasing
to 1 cm. toward the end. This variation in thickness
gives a gentle curve to the handle that is of great importance
in adapting the latter to the form of the closed hand, so that the
knife becomes practically a cutting extension of the fore-arm. With
this knife all the chief incisions are made, and it is rarely out of the
hands of the operator during the autopsy. The handle or blade may
be made shorter or longer according to preference, but the other
features of the instrument are most important.
Scalpel. (See Fig. 2.) A number of dissecting scalpels of varying
sizes are needed for finer dissections. They should have a metal
handle, and are preferably of one-piece construction.
Long Section- or Brain-Knife. In place of the broad thin brain-knife
usually advised, an amputation-knife can be used to much better
advantage in the section of the brain and in making
the chief incisions in the large organs. It should have
a sharp point rather than a blunt one.
Fig. 3—Long
Section Knife
Myelotome. This is used only for the purpose of
cutting the spinal cord squarely across in the removal
of the brain. It has a slender steel stalk with wooden
handle, and a short, thin, narrow blade set obliquely at
the end of the stalk. This instrument is not
absolutely necessary, as the cord may be
satisfactorily cut with the point of the long
section knife.
Fig. 4—Myelotome
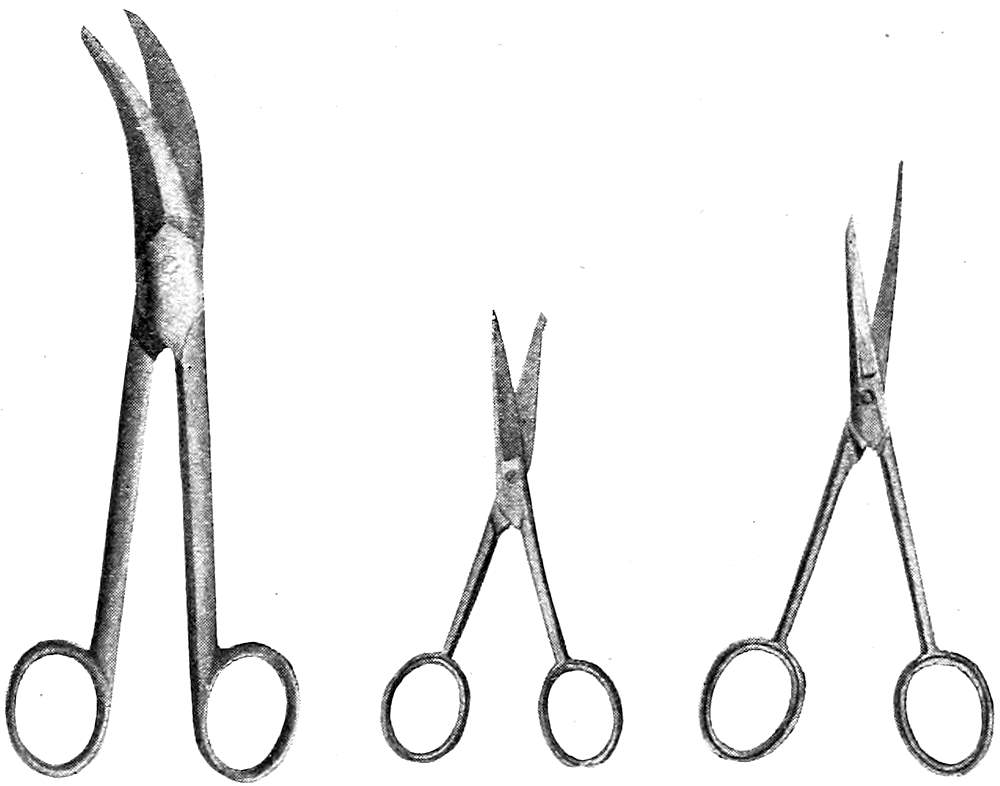
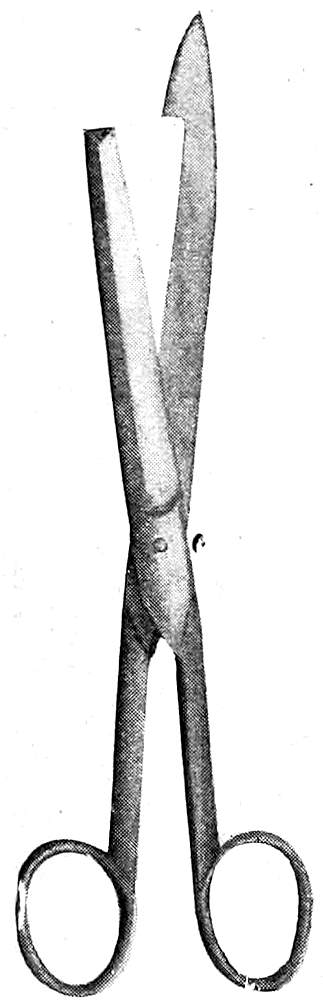
Scissors. (See Fig. 5.) A number of
these are of service: one large and strong
pair with long handles and short stout
blades, another large pair curved or bent
with the longer blade blunt- or probe-pointed,
a small pair with a narrow, probe-pointed
blade for opening small vessels or
ducts.
Enterotome. (See Fig. 6.) For opening
the intestine the enterotome or intestinal
scissors are used. These consist of one
long probe-pointed blade bluntly rounded at its end,
and a shorter blade with straight end fitting into the
longer blade. Neither blade should be sharp-pointed.
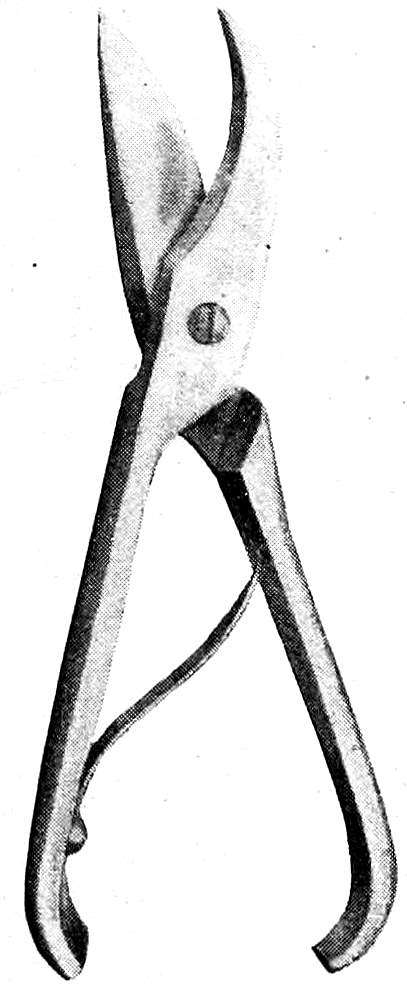
Costotome. (See Fig. 7.) The cartilage-shears
have two short, thick blades, the upper one with a broad
belly, the lower one curved. Between the strong
handles a spring is placed, and the construction should be such
that when the blades are closed the ends of the handles do not
touch. The form in which the handles meet and are secured with
a catch is a dangerous autopsy instrument because of the severe
pinching that the operator’s hand is sure sooner or later to receive.
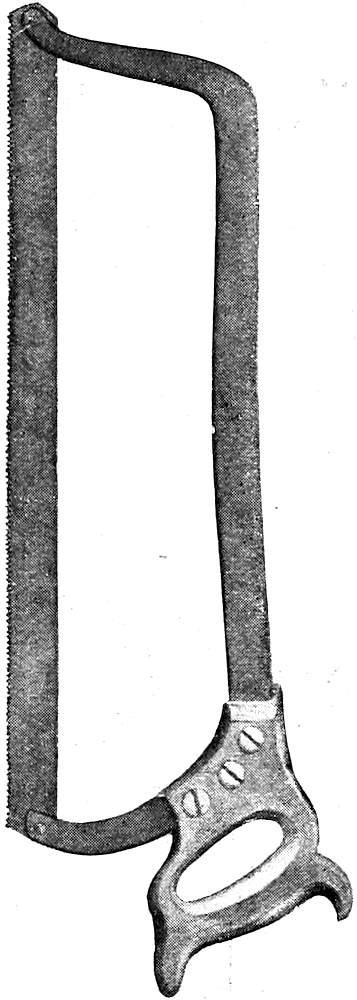
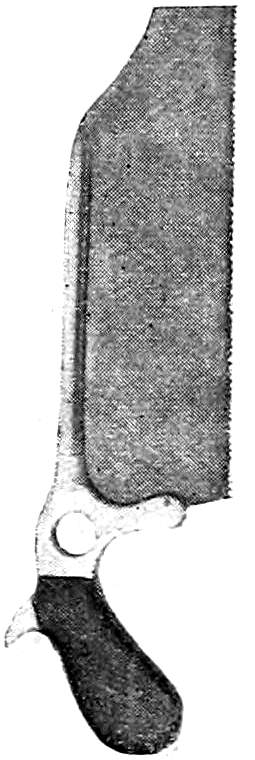
Saws. (See Figs. 8, 9, 10.) A small hand-saw (bone-saw) is
necessary for opening the skull, and the same saw may be used to
open the spinal canal. It is sometimes made with a rounded point
(“fox-tail” saw). For sawing vertically through the base of the
skull when exposing the nasal tract a larger butcher’s saw with a
high frame may be used. For sawing the angles of the skull-cap
Hey’s saw may be of service but is not essential. A metacarpal
saw may be used for opening small bones or the long bones of an
infant. Band saws are sometimes used in opening up the nasal tract.
Fig. 5—Autopsy Scissors of Various Types
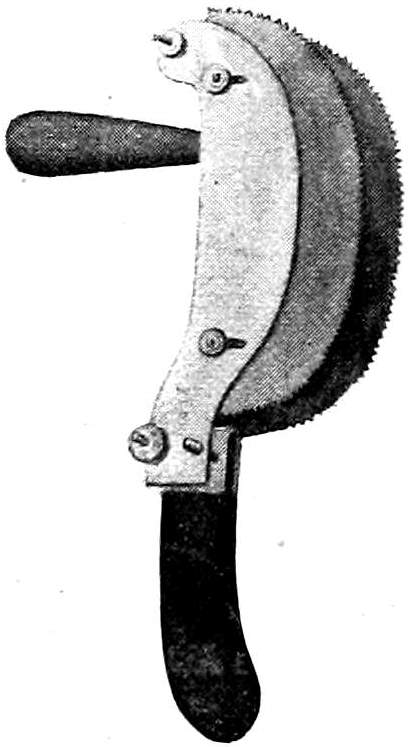
Rhachiotome. (See Fig. 11.) This instrument consists of two
curved saw blades placed parallel to each other in such a way that
the distance between them can be regulated by screws. There are
two handles, a horizontal one for the right hand, and an upright
one for the left hand attached to the fixed saw blade. It is used in
opening the spinal canal.
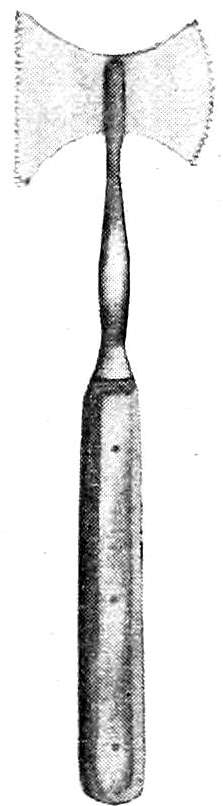
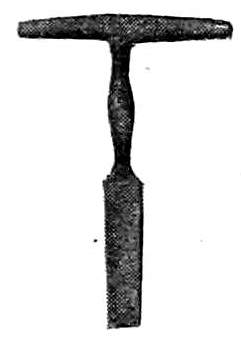
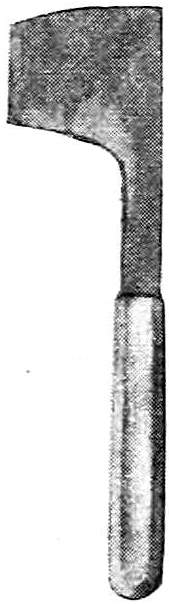
Chisels. (See Figs. 12, 13, 14.) A very convenient autopsy
instrument is the T-chisel or skull-opener, used for springing off the
skull-cap and in detaching the periosteum. Side- and guarded-chisels
may be used for the same purpose. The hatchet-chisel may
also be used on the skull or spinal column. Straight and curved
bone-chisels are also necessary for the examination of the bones
and bone-marrow.
Brunetti Chisels. (See Fig. 15.) These are of great service in
opening the spinal canal, but require some practice for their proper
use. When used with skill they are preferable to the rhachiotome.
The chisels are rights and lefts, and have a long, heavy,
curved blade, broadening toward the cutting end, which has
on its right or left side a small blunt projection that is introduced
into the spinal canal after the removal of a
portion of one of the vertebræ. This projection
serves as a director and lever, while the cutting
edge of the chisel is driven through the lateral portions
of the bony covering of the canal by means
of blows from a wooden mallet received upon the
heavy handles.
Fig. 6—Enterotome
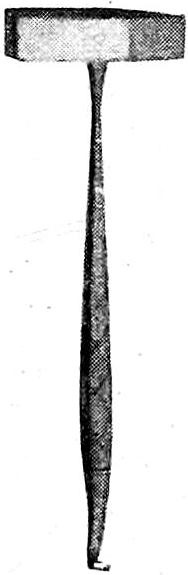
Hammer. (See Fig. 16.) The steel hammer
of the amputation- or bone-sets is often of great
service in autopsy work.
The hook at the end of the
handle may be used to lift
up the skull-cap after the
sawing is completed.
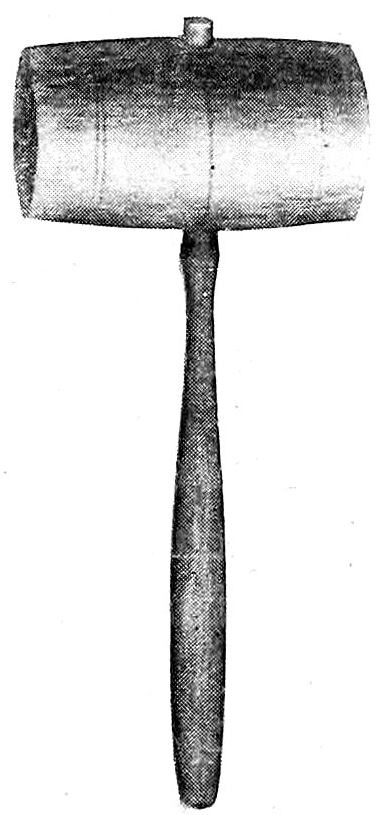
Mallet. (See Fig. 17.)
A wooden mallet is necessary
for the use of the Brunetti
chisels. It may be loaded with lead or
the end may be covered with felt to deaden
the sound of the blows.
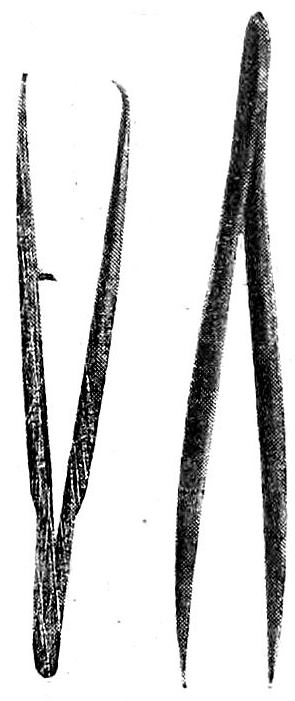
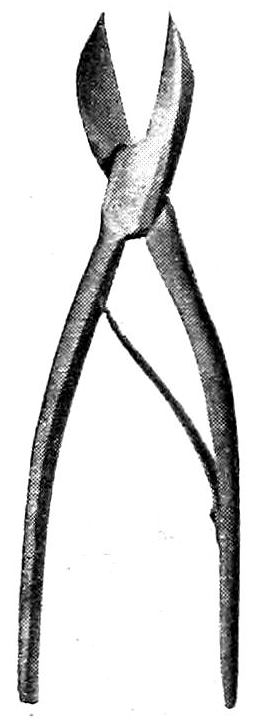
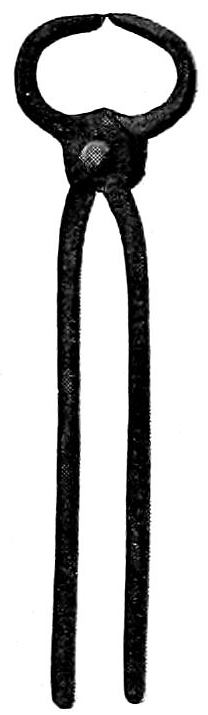
Forceps. (See Figs. 18, 19, 20.) Dissecting
forceps of various types are useful in the
finer dissections. Cover-glass
forceps should be at
hand for use in the taking
of smears. A pair of
strong bone-forceps may
be of occasional service
in cutting ribs or small
bones. When the spinal
canal is opened by means
of the Brunetti chisels or rhachiotome the
loosened fragments of the vertebræ should be
jerked off by means of lion-forceps, or a strong
pair of ordinary nippers may be used for the
same purpose.
Fig. 7—Costotome
Fig. 8—Large Autopsy Saw
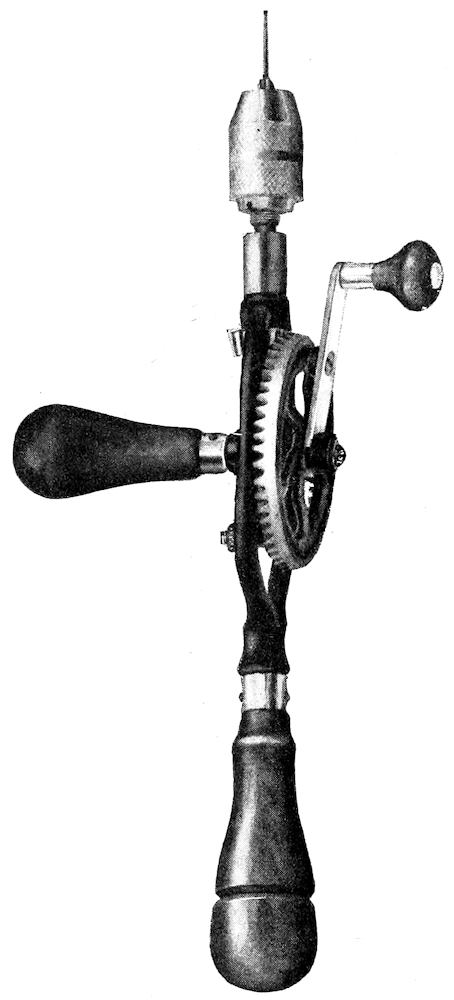
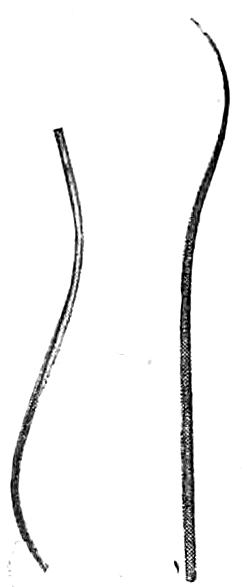
Miscellaneous Instruments. (See Figs. 21,
22, 23, 24, 25.) Probes of various sizes, grooved and curved
directors, retractors, catheters, both metal and flexible, injection-syringe,
blow-pipe with valve, trocar, cannulas, hand-drill
for wiring bones, an iron-vise, etc., all find a place of usefulness in
autopsy technique. In institution work
motor band-saws, trephining or dental engines,
drills, etc., may greatly facilitate the
progress of autopsies when the daily number
of these is great and when special
examinations of the ear or nose
are required. The needles for
sewing up the incisions should
be large, strong and slightly
curved. A strong linen thread
should be used for
stitching and for ligatures.
Fig. 9—Small
Autopsy Saw
Fig. 10—Hey’s
Saw
Fig. 11—Luer’s
Rhachiotome
Fig. 12
T-Chisel or
Skull-Opener
Fig. 13
Hatchet-Chisel
Fig. 14
Straight Bone-Chisel
Besides the instruments
mentioned above
there should be brass or nickel measuring sticks,
one 10 cms. long and one 30 cms. long, a flexible
metal measuring tape, graduated glass vessels
for measuring fluids, graduated glass cones for orifices, etc.
Suitable scales should also be provided. Rounded or triangular
wooden blocks are needed to elevate portions of
the body. For the display of gross specimens as
they are removed from the body, agate dishes or
wooden trays that have been infiltrated
with paraffin should be at
hand. The necessary outfit for the
taking of material for bacteriologic
examinations should always be present.
Likewise cover-glasses and
slides for smears, and reagents for
the examination and preservation of
tissue should be at hand. Sponges,
pails, towels, tow or excelsior for
filling up the body-cavities, disinfectants, etc., must be
supplied.
The autopsy outfit may be extended indefinitely to
suit the requirements of the conditions or the ideas of the pathologist.
In actual practice, however, the physician may confine his
requirements to the limits of a cartilage knife, dissecting scalpel,
forceps, one small probe-pointed pair of scissors, enterotome, saw,
T-chisel, needles, thread, sponge and specimen bottles. Five or six
dollars would cover the initial expense, and the set may be gradually
increased. It would seem unnecessary to decry the use of
surgical instruments for the autopsy. Once an instrument is used
in an autopsy it should be left in the autopsy set.
Fig. 15—Brunetti
Chisels
Fig. 16—Steel
Hammer
Fig. 17—Wooden
Mallet
Fig. 18—Forceps
CARE OF INSTRUMENTS. The cutting instruments
should always be kept sharp and bright.
Care should be taken that when the knives are sharpened
the blunt points and rounded
bellies are not ground off. After use
the knives should be cleaned, disinfected
and wiped dry. A tight galvanized
iron box containing wire
trays and a bottom pan for holding
formalin is very practical in institution
work. In private practice the
knives after cleaning and disinfection
may be kept in a holder made of
Canton flannel or chamois skin having
pockets fitted to the instruments;
the whole may be rolled up into a small
and compact bundle.
6. PREPARATION FOR THE AUTOPSY. Permission
having been obtained, the autopsy should be performed without
delay. It is very important that the examination should
be carried out before the body has become cold, if any
thorough microscopic study of the tissues
is to be made. Changes in the finer structure
of cells and nuclei quickly take place,
and certain tissues, such as parts of the
nervous system, the medullary portion of
the adrenals, the pancreas, mucosa of
gastro-intestinal tract, etc., within an hour
or so after death are usually no longer fit
for microscopic study. In all cases, therefore,
it is best to make the autopsy as soon
as possible after death, that is, as soon as positive
signs of death appear. In the majority of cases this
takes place within an hour, and the most favorable time for the performance
of the autopsy falls within one to three hours after death.
Under certain circumstances it may be necessary to make the examination
sooner, but for various reasons the operation is very repugnant
when performed within the first half-hour after death. For
ordinary purposes an autopsy performed
within twelve to twenty-four hours is usually
satisfactory. Occasionally it becomes necessary
for medicolegal purposes to examine
a body some days, weeks, or even months
after death and burial.
Fig. 19
Bone-Forceps
Fig. 20
Bone-Nippers
Fig. 21
Probe
Fig. 22
Blow-Pipe
The body should not be frozen if microscopic
studies are to be made. When the
autopsy is delayed cold storage just
above the freezing point produces
less change in the gross pathologic
picture, as well as in the finer structure.
No embalming fluids, injections,
punctures, etc., should be allowed, and undertakers should
be instructed not to do these things until after the question
of autopsy has been decided and the operation completed.
If the use of an embalming fluid becomes necessary,
formalin, not stronger than a ten per cent solution,
should be advised, as it does not damage the tissues and
hinders but little the operations of the autopsy. Strong
solutions, as found in the usual embalming fluids, render
the tissues stiff and hard and cause color changes,
while the strong vapors are very unpleasant to the
obducent. The use of arsenical embalming fluids
or preparations should be wholly discountenanced.
When it is desired to study the mucosa of
the stomach or intestine, it may be fixed soon after
death by the introduction of a fixing fluid into
the stomach or intestine by means of a tube and
pump. Finally, instructions should be given that the body
shall not be dressed for burial until after the autopsy.
The necessity of making special preparations for an
autopsy depends upon its performance in a regularly appointed
autopsy room or under the conditions of private
practice. In the former case the autopsy room should be constructed
to meet the demands of the work. In teaching hospitals
it should be a large, well-lighted and properly-ventilated room with
proper facilities for teaching-staff and students, and should be so
connected with the hospital wards that the conveyal of bodies may
be protected from observation. In the same building there should
be the pathological laboratory, library and museum, a waiting-room,
and under some conditions a chapel for funeral services. The
autopsy room itself should have a grooved concrete
floor sloping to a central drain, the furniture
should be of simple construction, and so
built that the entire room may be washed with a
hose. The seats should be arranged in an
amphitheatre facing the northern side of the
building, which should be constructed practically
wholly of glass, the lower sashes containing
ground glass or prisms. The northern half
of the roof should likewise be of
glass.
Fig. 23—Hand Bone-Drill
In the pit, in the field of strongest
illumination, should be placed
the autopsy table. This should be
strongly built, of marble, slate, soapstone, artificial
stone, copper, zinc, etc., about seven feet
long, thirty inches wide, and thirty to thirty-six
inches high. A high table is much preferable to
a low one. It should have a top with grooves
slanting toward a central perforated plate fixed
in the central hollow standard in such a way
that the top may be freely revolved. In the
standard there should be a drain and ventilating
shaft connected with a fan revolving outward.
The drain from the table as well as the others
from the laboratory should empty into a large
catch-basin where the contents may be sterilized
before passing into the main sewer. Above the
table a combination gas and electric light with hot and cold water-pipes
should be arranged. A sheet of blue glass of the proper tint
may be used in connection with the illuminating apparatus to give
daylight effects.
Extra tables, weighing and measuring apparatus, sinks, lavatories,
bacteriologic outfit, sterilizer, instrument-case, etc., may be
supplied as needed. In the case of delayed permission, or when the
law requires that the bodies be kept a certain length of time before
the autopsy, it becomes necessary to provide a proper cold-storage
apparatus. The local conditions will suggest the most convenient
and appropriate construction. In routine autopsy service well-trained
assistants and attendants become a necessary
factor in the satisfactory performance of the work.
In private practice the autopsy is usually made in
a private dwelling or, more rarely, in an undertaker’s
shop. Under such conditions much depends upon the
ability of the operator to make the best of things. In
place of a proper table, the cadaver must be examined
upon the bed, undertaker’s body-rest or
shutter, in or upon the coffin, on the coffin
lid, box, door, shutter, table or board. It is
always advisable to move the body from the
bed when anything else can be found upon
which it can be placed. The support should be put in
front of the window giving the best light and the
cadaver placed upon this with its left side toward the
window. Care should, of course, be always taken that
the operation cannot be witnessed from without. A
piece of oil-cloth or several layers of newspapers should
be placed upon the floor beneath and around the support.
When it is necessary to make the autopsy on the
bed or in the coffin an abundant supply of old newspapers
tucked under and around the cadaver will
usually prevent the escape of blood or fluids.
An abundance of cold water should be provided,
also a slop-pail, several basins, towels, old cloths,
sponges, etc. Before the operation is begun the instruments
and utensils, specimen bottles, needle and thread,
etc., should be arranged. A stick of wood may serve as
a head-rest. Material for filling up the body and restoring
its form should be secured, according to the need
for such. Hay, bran, tow, excelsior, old cloths, paper,
etc., may be used for this purpose.
Fig. 24
Autopsy Needles
Fig. 25—Brass
Measuring-Stick
When all is ready for the operation members of the
family or of the laity should be tactfully gotten out of the room. It
is always well to ask members of the family if they desire to be
present, but this invitation should be given in the expectation that
it will not be accepted. The effect of an autopsy upon the minds of
the laity is not always a pleasant one, and harm is sometimes done
through the misinterpretation of necessary procedures and the
resulting gossip. In private practice it is worth while, as a matter
of courtesy, to invite several of one’s colleagues to witness or take
part in the autopsy. An ideal way would be to have one of these
perform the operation in expectation of future reciprocation. In
the interests of objective observation a clinician should never perform
the autopsies of his own cases, but should turn them over to a
trained pathologist or to a colleague. The operator is usually in a
better position to know what to do than the onlookers, and while
the suggestions of the latter are usually futile they may be endured
for the occasional great help derived from them.
As far as the obducent himself is concerned he may prepare
himself simply by removing his coat and rolling up his sleeves, or
he may wear an autopsy coat or apron. While an autopsy can
without doubt be best performed with hands bared, the danger to
the operator is sufficiently great to lead him to sacrifice the undoubtedly
greater technical skill thus gained, to his own safety, by
the use of some protective. Rubber gloves of a medium weight,
reaching half way to the elbows, are a great protection when carefully
cleaned, sterilized and cared for. The sleeves of the coat may
overlap the gloves and be fastened to these by an elastic band.
When gloves are not used the hands may be covered with carbolized
vaseline, or a six per cent solution of guttapercha in benzin. Cuts,
abrasions, hang-nails, etc., must be protected by surgeon’s-plaster,
collodion, finger-cots, etc. When these are used it may be necessary
to remove them during the course of the autopsy, as they are easily
torn or become loose. Frequent washing in flowing water lessens
the danger of infection. Blood and other fluids from the body
should never be allowed to dry upon the skin or upon anything used
in connection with the autopsy.
Gloves should be thoroughly washed and scrubbed; and, when
clean, washed in four per cent formaldehyde and dried before they
are removed from the hands. They should be then dusted inside
and out with talcum powder and put away dry. When they are
again used they should be tested for holes by filling them with
water. After having been used several times they easily tear. If
the autopsy has been performed with unprotected hands, thorough
disinfection of these, particularly of the finger-nails, should be
carried out. Unpleasant odors may be removed from the hands by
the use of mustard, dilute tincture of benzoin, turpentine, etc., and
then washing with tincture of green soap. Rubbing with cornmeal
is very effective in removing discolorations of the skin, particularly
the blood-stains fixed by formaldehyde that occur so often
in the course of autopsies on bodies injected by the undertaker.
Postmortem infections should receive prompt surgical attention,
as the smallest one is dangerous and may develop in a few
hours to such an extent as to cause the most alarming constitutional
symptoms. In a way all autopsy work, like surgical operations,
offers a risk to the operator. This is particularly great in all
cases of pyogenic infection, tuberculosis, blastomycosis, syphilis and
the acute specific infectious diseases. Any of these infections may
be received through the unbroken skin by way of a hair-follicle;
but previous cuts, abrasions, hang-nails, etc., form a frequent avenue
of entrance for the infecting agent, as well as punctures,
scratches and cuts received during the autopsy from instruments,
spicules of bone, needles, etc. It is particularly dangerous to allow
blood, pus or exudates from the peritoneal or thoracic cavity to
enter a glove through a hole. A finger or hand so bathed is very
likely to develop hair-follicle infections. All wounds received during
the autopsy should be allowed to bleed freely, and then should
be thoroughly washed in sterile water, alcohol and ether and an
antiseptic.
Tuberculous warts are very common on the hands of prosectors
having a large autopsy service and not using gloves. A generalized
tuberculosis may follow. These warts are easily removed by repeated
painting with fuming nitric acid, just sufficient to keep the
skin yellow. If this treatment fails such warts should be excised.
Syphilis has been reported only a few times as due to postmortem
infection; but observations tend to show that the spirochætes may
remain virulent for several hours (7-24) after death.
7.AUTOPSY TECHNIQUE.The object of the autopsy is
to examine thoroughly, in as short a time as possible, and in the
easiest and most convenient method, all of the organs and tissues
of the body, with reference to the occurrence of disease-changes, in
such a way that nothing will be overlooked or obscured. The preservation
of relationships becomes, therefore, a very important matter;
and nothing should be done to disturb these until a complete
pathologic picture has been obtained. All unnecessary handling
and cutting must be avoided. No hasty or ill-advised cuts should
be made. Careful deliberation is often necessary as to the proper
course to be pursued in order to obtain the proper result. Each
autopsy is a law unto itself in this regard. New complications constantly
arise and must be studied before the right way of revealing
the solution of the pathologic problem is found. Above all things
nothing should be destroyed until its relationships have been fully
determined. False steps taken in an autopsy cannot be retraced,
and the complete investigation and the successful attainment of a
diagnosis may be made impossible by improper methods of technique.
As in all other technical matters there is a best way of carrying
out the different steps of the autopsy; and as this best way
must be altered to suit the conditions as they arise, it follows that
there is both a science and art of autopsy-making. Some general
rules can be laid down that apply consistently to all autopsies, but
strict adherence to one method is impossible in all cases. As in
everything else the prosector should be master of his technique and
not let it master him.
When everything is ready for the autopsy the operator should
take his place at the right side of the cadaver, unless he happens to
be left-handed, when it may be more convenient for him to stand at
the cadaver’s left. This position at the cadaver’s side he does not
leave, except when opening the cranium, when he stands behind the
head. When the spinal cord is removed posteriorly he still remains
on the same side of the table, although the cadaver, having been
turned over, presents its left side toward him. The instruments
arranged in proper order should be on a tray close at his right hand,
either on a neighboring table or placed on the autopsy table. As
they are used they should be washed and returned to their proper
place and not allowed to lie on the body or table.
The cutting technique employed in the autopsy is, as a rule,
quite different from that employed in surgical operations or in dissection.
For the large incisions the cartilage-knife is used. It
should be held in the palm of the hand so that when the arm is extended
the knife-blade becomes an extension of the axis of the arm,
and used with a free arm-movement, fingers and hand being firmly
fixed to the knife-handle. Long, sweeping cuts, adequate in pressure,
and giving smooth and even incisions, are made by moving
chiefly from the shoulder, with secondary movement from the elbow.
The knife-blade should not be pressed or pushed into the tissues, but
should be drawn through them rather quickly, cutting as it is
drawn. The greater the force used, the more swift the drawing-motion
should be. All cuts should be clean; if made in the wrong
place they will do less damage than ragged, uneven incisions. The
toe of the cartilage knife is used for the beginning and end of
long incisions and for cutting in hollow or depressed surfaces. For
flat surfaces the belly of the knife is employed. The heel of the
blade can be used for cutting cartilages. The incisions made in the
body should be directed away from the operator, especial care being
taken to avoid injuring his left hand or the hands or arms of anyone
assisting in the operation. When the knife is held as directed there
is not much danger of a slip except at the end of the incision when,
the resistance being overcome, the knife goes through with a rush.
To avoid this, pressure should always be slackened toward the end
of the incision. The main incisions in the organs should be made
with the brain-knife or short amputation knife, by a long, sweeping
cut made from heel to toe of the knife-blade and beginning at the
part of the organ farthest from the operator, drawing the blade
through the organ toward the operator. For finer dissections the
smaller scalpels are to be employed, and in such cases the dissection-technique
of fixed arm and free finger movement must be used. In
many places within the body the cutting-edge of the knife should
be directed outward rather than inward so that underlying structures
may not be injured. Often the fingers of the left hand are
used in such cases to take the place of a grooved director. The
application of these and other points of technique will be elucidated
in the chapters following, whenever it is of advantage to use some
especial method. In general nothing should be done to disturb relationships
until these have been noted, and cuts should be made into
organs in such a way that they may be reconstructed in their original
shape and condition.
Order and cleanliness should characterize the autopsy. Abundance
of water should be at hand, and after every incision the knife
should be dipped into a vessel of water standing on the autopsy
table. Practically all cuts should be made with a clean wet knife;
only in the case of the chief-incisions of the large organs is it of
advantage to cut with a clean dry knife, when it is desirable to
obtain a judgment of the moistness or dryness of the cut surface.
Never cut with a dirty knife, as the cut-surface may be obscured.
A gentle scraping with the knife-blade often gives a more distinct
picture of the cut surface. The water-stream should not be used
too freely upon cut surfaces; it should be employed only when
there is so much blood or fluid that the surfaces are obscured, or
when it is desired to float up certain tissues or parts of organs. A
better picture of the cut-surface can sometimes be obtained by blotting
it with absorbent paper free from lint. Organs and tissues
removed from the cadaver should not be allowed to dry. Nor should
they be left in water. Both conditions will quickly ruin material in so
far as its after-use for microscopic study is concerned. They
should be kept covered with moist cloth or paper. As the organs
are removed from the body they may be quickly dipped into water
and quickly rinsed, but beyond this the use of water is not advisable.
Blood and fluids within the cavities of the body should be
quickly removed as soon as their character is determined. Stomach
and intestinal fluids in particular should not be allowed to escape
within the body-cavities. They should not be washed out, but removed
by the aid of beakers and sponges. Drops of blood or other
fluids upon the surface of the cadaver should be removed before they
become dry. All respect should be paid to the dead body. The
face and hair should be covered after they have been examined; and
great care should be taken to prevent any accidental cuts on the
surface; and the entire field of operation as well as the autopsy-table
must be kept clean. In private practice the external genitals should
be kept covered except for their examination. An abundance of
large sponges and a gently-flowing stream of water under low pressure
permit a clean and orderly autopsy. The use of a hose with
water under high pressure is dangerous because of the accidental
spattering that is sure to occur. Blood and fluids from a dead body
should not be spattered about because of the great danger of spreading
infection. When accidents do happen prompt cleaning up and
disinfection should be carried out. Particularly in private practice
is it of the greatest importance that no blood-stains be left behind.
The time required for an autopsy varies with the conditions of
the individual case. A complete and well-performed autopsy under
ordinary circumstances requires at least one hour, usually an hour
and a half. It is true that all the organs can be removed from the
body in a much shorter time, but the removal and inspection require
at least the time given above, if properly done. Some cases present
great difficulties and may require 4-12 hours for a satisfactory and
complete examination. For a medicolegal examination 2-3 hours is
usually necessary. No prosector should make more than two autopsies
in one day, and, if he is making them every day, one daily is
quite sufficient. The intellectual and nervous energy required for a
good autopsy is so great that it is impossible for anyone to do justice
to a large number made in quick succession. In many German
laboratories this fact is recognized and the autopsies are assigned
proportionately to members of the pathologic staff.
At the close of the autopsy the cadaver must be thoroughly
cleaned and restored, as far as possible, to its natural appearance.
Directions for the restoration and closure of the autopsied body will
be given in a later chapter.
CHAPTER II. THE ORDER OF THE AUTOPSY.
ORDER OF THE AUTOPSY. In so complicated a piece
of work as the complete autopsy it is absolutely necessary that a
definite order of procedure be followed at every autopsy, altered
when necessary to suit the requirements of individual cases. In
medicolegal examinations a definite autopsy order should be prescribed
by law. For the average case, in fact for nearly every
autopsy, I believe the following order, as given in my protocol
book, to be the best one. It is based upon topographic and anatomic
relationships, preservation of blood-content, ease and convenience
of method, etc. As the protocol should follow this order, it is given
here in full.
Autopsy-Protocol No.
1. Name: 2. Sex:3. Age:
4. Nationality: 5. Status:6. Occupation:
7. Day and Hour of Death: 8. Time of Autopsy:
Clinical Diagnosis:
Pathologic Diagnosis:
Prosector:
A. External Examination. General.
9. Build:
27. Muscles:
10. General Nutrition:
28. Rigor Mortis:
11. Head:
29. Panniculus:
12. Facies:
30. Oedema:
13. Eyes:
31. Body Heat:
14. Neck:
32. Hypostasis:
15. Thorax:
33. Putrefaction:
16. Abdomen:
34. Orifices:
17. Back:
Mouth:
18. Anomalies:
Nose:
19. Deformities:
Ears:
20. Signs of Trauma:
Genital:
21. Surgical Wounds:
Anus:
22. Scars:
35. Postmortem
23. Skin:
Percussion:
24. Hair:
25. Teeth:
26. Mucous Membranes:
B. Internal Examination.
I. SPINAL CORD.
1. Dorsal Incision:
4. Inner Meninges:
2. Vertebrae:
5. Cord:
3. Dura:
6. Inner Surface of
Vertebrae:
II. HEAD.
1. Scalp:
13. Ventricles:
2. Periosteum:
Left Lateral:
3. Skull-Cap:
Right Lateral:
Third:
4. Dura:
Fourth:
5. Longitudinal Sinus:
6. Meningeal Vessels:
14. Chorioid Plexus:
15. Pineal Gland:
16. Cerebral Ganglia:
17. Peduncles:
7. Basal Vessels:
8. Inner Meninges, Left:
18. Cerebellum:
9. Inner Meninges, Right:
19. Pons:
20. Medulla:
21. Hypophysis:
10. Cerebrum:
22. Basal Sinuses:
11. Right Hemisphere:
23. Basal Dura:
12. Left Hemisphere:
24. Cranial Nerves:
25. Base of Skull:
III. THORAX AND ABDOMEN. (Main Incision.)
1. Panniculus:
6. Position of Diaphragm:
2. Musculature:
7. Mammæ:
3. Abdominal Cavity:
8. Costal Cartilages:
4. Omentum:
9. Sternum:
5. Position of Abdominal Organs:
IV. THORAX.
1. Thoracic Cavity:
11. Left Lung:
2. Position of Thoracic Organs:
12. Right Lung:
3. Anterior Mediastinum:
13. Bronchi:
4. Thymus:
14. Bronchial Glands:
5. Pericardium:
6. Heart:
15. Pulmonary Vessels:
7. Right Heart:
16. Great Vessels of Thorax:
8. Left Heart:
17. Thoracic Portion of Oesophagus:
9. Cardiac Orifices and Valves:
18. Thoracic Duct:
10. Coronary Vessels:
19. Thoracic Vertebræ.
V. MOUTH AND NECK.
1. Mouth:
9. Thyroid:
2. Tongue:
10. Parathyroids:
3. Pharynx:
11. Cervical Lymphnodes:
4. Tonsils:
12. Parotid:
5. Nose:
13. Submaxillary Gland:
6. Larynx:
14. Cervical Vessels and Nerves:
7. Trachea:
15. Deep Muscles of Neck:
8. Cervical Portion of Oesophagus:
VI. ABDOMEN.
1. Peritoneum:
15. Left Adrenal:
2. Spleen:
16. Left Kidney and Ureter:
3. Large Intestine:
17. Right Adrenal:
4. Appendix:
18. Right Kidney and Ureter:
5. Small Intestine:
19. Abdominal Aorta:
6. Duodenum:
20. Iliacs:
7. Bile Passages:
21. Ascending Vena Cava:
8. Stomach:
22. Lymph Vessels:
9. Pancreas:
23. Retroperitoneal
10. Liver:
Lymphnodes:
11. Gall Bladder:
24. Hemolymph Nodes:
12. Portal Vein:
25. Sympathetic:
13. Mesentery:
26. Psoas Muscles:
14. Mesenteric Lymphnodes:
27. Vertebræ:
VII. MALE PELVIS.
1. Penis:
6. Prostate:
2. Scrotum:
7. Seminal Vesicles:
3. Testis:
8. Seminal Duct:
4. Epididymis:
9. Urethra:
5. Rectum:
10. Bladder:
VIII. FEMALE PELVIS
1. Rectum:
9. Tubes
2. Vulva:
3. Urethra:
10. Ovaries:
4. Bladder:
5. Vagina:
11. Blood and Lymph
6. Uterus:
Vessels of Uterus:
7. Cervix:
8. Body:
12. Ligaments of Uterus:
IX. SPECIAL REGIONAL EXAMINATION.
1. Bones:
6. Peripheral Nerves:
2. Marrow:
7. Sympathetic:
3. Joints:
8. Organs of Special Sense:
Eye:
4. Lymph Glands:
Ear:
Nose:
5. Peripheral Blood Vessels:
X. MICROSCOPIC AND BACTERIOLOGIC FINDINGS.
XI. SUMMARY OF CASE.
The organs may be inspected and opened in the body without
removing them; but when weights and measures are desired they
should be removed and sectioned on the table. When the spinal
cord is removed posteriorly it should be done at the beginning of
the autopsy, for the sake of convenience and cleanliness. If the
thorax and abdomen are examined first there is a loss of solidity and
resistance, making the posterior opening of the spinal canal more
difficult. The head may be opened while the cadaver is face downward
and the brain removed with cord attached. If the cord is examined
anteriorly this should be done at the close of the autopsy after
the thorax and abdomen are completely cleaned out. The head
should be opened before the heart and great vessels are cut in order
to avoid bleeding the sinuses and pial veins. It should be kept elevated
until the heart has been examined to avoid bleeding the latter
through the jugulars. The abdomen is opened before the thorax so
that the position of the abdominal organs and the height of the diaphragm
can be correctly noted. A complete survey of the peritoneal
cavity should be made at once before the appearances are changed
through the loss of blood or other fluids, or through drying or
handling. The size of the liver should be estimated before the heart
is cut out, inasmuch as the loss of blood through the cut inferior
vena cava may reduce its size as much as one-half. The pleural cavities
should be examined before its vessels are cut, as the escape of
blood may alter the appearances of the pleuræ. The heart is opened
before the lungs are removed, so that its blood-content may be
judged. The section of the neck organs is conveniently carried out
according to anatomic relationships, beginning with the tongue. In
the abdomen the spleen is removed first because it is the most easily
gotten out of the way. The intestines up to the duodenum may be
taken next, or the adrenals and kidneys, followed then by the gastro-intestinal
tract, pancreas and liver. When necessary the kidneys
may be removed in connection with the pelvic organs. In the case
of extensive growth of neoplasms, marked inflammatory processes,
adhesions, malformations, anomalies, etc., the order must be changed
to meet in the best way the demands of the situation. Such changes
in the order must always be mentioned in the protocol. It is a great
mistake to begin the autopsy with a local examination of a supposed
fatal lesion, except in the cases of wounds, particularly in medicolegal
cases, in which a most careful and minute description of the
wound is necessary.
Some writers (Letulle, Heller, et al.) advocate the removal of
neck, thoracic, abdominal and pelvic organs en masse and their
examination outside of the body. Except in rare cases in the adult,
and more frequently in the child, this method does not present any
special advantages aside from the preparation of museum specimens.
It may be convenient to follow it when a very short time is
allowed for the autopsy, just sufficient to remove the organs so that
they can be examined later. When this method is followed the order
should be:
1. Organs should be turned over without twisting, so that their
posterior aspect is uppermost. Then the examination in the following
order: right and left azygos veins; thoracic duct; removal of adrenals;
opening of ureters; removal of kidneys; opening of aorta, inferior vena
cava, portal vein and branches, and common duct; examination of pancreas;
removal of aorta as far as arch; opening of œsophagus; examination
of mouth, pharynx, palate, tonsils, tongue and sublingual glands,
epiglottis, larynx, trachea and large bronchi; roots of lungs, prevertebral
lymphnodes, and the pneumogastric nerves.
2. Organs are then turned over again without twisting, and examined
from anterior surface as follows: removal and examination of
thymus and thyroid; opening of superior vena cava, termination of
thoracic duct and right lymph-trunk; opening of pericardium, examination
of cardiac plexus, opening of arch of aorta; section and examination
of pulmonary arteries and veins and hilum of lung; examination and
removal of heart and lungs; examination of diaphragm, liver, gall-bladder
and bile-ducts; external examination and separation of spleen,
stomach, pancreas and duodenum; removal of œsophagus, stomach, pancreas
and duodenum; external examination, dissection and removal of
intestine to the rectum; examination of peritoneum, mesentery and
omentum; separation and examination of kidneys, ureters, bladder and
urethra; separation and examination of genital organs (in male, prostate,
seminal vesicles, vasa deferentia and testes; in the female, oviducts,
broad ligaments, ovaries, vulva, vagina and uterus).
For the ordinary clinical autopsy this method is more inconvenient
and time-consuming, and offers not a single advantage over
the order advocated above. I use it only in young children and in
adult cases of generalized carcinomatosis, sarcomatosis, pulmonary
embolism, congenital cardiac lesion, tuberculosis, aortic aneurism
with tracheal or bronchial erosion and a few other rare generalized
conditions. For all other cases I advise that the first mentioned order
be followed, varying it as occasion demands. The autopsy should be
individualized. Departures from the routine order will take place
chiefly in the thoracic and abdominal cavities. It is often more convenient
to remove the kidneys before taking out the intestines, to examine
the liver before the spleen, or to make other similar variations in
the order. The order of examination of the larger divisions of the
body (head, thorax, abdomen and pelvis) should always be followed
strictly; but the neck and thoracic organs, or the thoracic organs
alone, may be removed en masse and examined outside of the body,
and the same procedure may be carried out in the case of the abdominal
or pelvic organs whenever advisable. Removal en masse with
examination on the table is especially indicated in the case of the
neck and thoracic organs in aortic aneurism, pulmonary embolism,
congenital cardiac lesions, mediastinal neoplasms, generalized carcinoma
or sarcoma of thoracic organs, etc. The same procedure is
indicated in the case of the abdominal organs in generalized carcinomatosis
or sarcomatosis, inflammation and tuberculosis of the
abdominal organs or peritoneum, aneurism of the abdominal aorta,
pseudomyxoma peritonei, etc.
In my judgment it is extremely bad practice to examine first
that part of the body which the clinician believes to be chiefly
affected. Still worse is it to limit the autopsy to such a regional
examination. Imperfect and subjective conclusions will be avoided
if the regular order is followed and each organ examined objectively.
In all cases a complete autopsy should be made if permission
can be obtained, and the permit for an autopsy should be regarded
as one for a complete examination unless definite exceptions have
been made. The examination of any organ or part should never be
neglected. Many prosectors habitually omit the section of the neck-organs,
intestines and genital tract when there is nothing to attract
especially their attention to these parts. The examination of the
spinal cord, orbits, nasal tract, ears, joints and bones may be omitted
in the ordinary autopsy in the absence of especial considerations
directing attention thereto; all other parts should be systematically
examined. The pathologist must always maintain an unprejudiced
state of mind toward the clinical diagnosis—rather a doubting mind
than a disposition to accept the suggestions of the clinical opinions.
The best cure for subjectivity is the complete performance of the
autopsy in regular routine order, and the dictation of the protocol
at the autopsy table during the operation.
CHAPTER III. THE PROTOCOL.
THE PROTOCOL. Autopsy findings should be recorded in
the form of complete, concise notes, following the order of the
autopsy. Such a protocol should consist of descriptive statements
of the pathologic changes found, as well as of all negative conditions.
It must be a guarantee that all organs have been examined
and that nothing has been overlooked. Herein lies the great value
of the use of a protocol blank book with printed autopsy forms.
When such are used and both positive and negative pathologic findings
are recorded during the progress of the autopsy the chances of
omission are reduced to a minimum.
The protocol must be purely objective and exact. All appearances
should be so carefully described that from the protocol itself
a diagnosis may be formulated. Conclusions and diagnoses have
no place in the protocol until the final summing up. It is better to
describe the appearance of organs than to class them as “normal”
or “negative,” “nothing notable,” etc. The only excuse for the
employment of such phrases is a lack of time for the dictation of a
proper protocol, but the scientific value of the autopsy is thereby
impaired. As the complete description of the normal appearances
would require too much time and lessen that available for the pathologic
examination, the prosector should describe briefly the chief
characteristics of the normal organ, any variation in any one of
these characteristics being sufficient evidence that the organ had
suffered pathologic change. The description of the normal organ,
however, usually offers the greatest difficulty to the beginner, and
so much time may be spent upon this that the pathologic changes
are slighted. However, the relatively small number of points constituting
the criterion for the normal organ may be learned by experience
and by the study of autopsy-protocols made by experts. The
latter study is also necessary for the acquisition of the extensive
protocol terminology that has been developed. A knowledge of
this terminology lightens greatly the difficulties of the protocol;
but its misuse leads to confusion and incorrect interpretations.
It is not a good plan to write up the protocol after the autopsy
has been finished. It should be dictated during the progress of the
autopsy. Only in this way can an accurate and purely objective
description be obtained. The use of simple, terse English and the
proper employment of autopsy terminology are also chief factors in
the production of a good protocol.
The importance of following a definitely-outlined routine of procedure
is very evident in the case of protocol-making. The general
order of the autopsy should be followed strictly in the protocol; and
all deviations from the usual method noted and described. Aside
from this general order, each organ or part as it is examined should
be systematically described according to the following scheme:
1. Location and relation to other parts.
2. Size and weight.
3. Shape. (Contour, lobes, edges, borders, character of surface, etc.)
4. Color.
5. Consistence.
6. Odor.
7. Cut surface.
8. Blood-content.
9. Histologic features in detail. (Capsule, surface, parenchyma, stroma, vessels, etc.)
10. General and localized pathologic conditions.
For the hollow viscera and body-cavities the following points
should be systematically noted in addition:
1. Size and shape of cavity.
2. Free gas or air?
3. Fluid or solid contents? (Amount, odor, color, cloudiness, consistency, precipitation or separation on standing, presence of blood, fibrin, pus, parasites, etc.)
4. Condition of wall of cavity (serosa or mucosa).
1. Location and Relation. The organs and parts should be
located according to the landmarks of regional anatomy. Brain-lesions
may be charted upon the printed outline sheets of the different
parts of the brain. Similar outline sheets may also be used for
other parts of the body.
2. Size and Weight. The exact weights and measurements
should be given in the metric terms. Organs should be weighed and
measured after the removal of other tissue in which they may be
imbedded (fatty capsule of kidney, etc.) or to which they are
attached (diaphragm from liver, blood-vessels from heart, etc.).
The volume of the organ may be estimated by putting it into a graduated
vessel containing water and noting the amount of displacement.
In the absence of facilities or the time necessary to take
weights and measurements an approximate estimate of size and bulk
may be given by comparisons with well-known objects, such as
peas, mustard-seed, pepper-corns, walnuts, apple, hen’s egg, etc., but
such terms are only relative and not accurate, and their use should
be avoided as much as possible. That the weight and measurements
of any given organ fall within normal limits cannot be taken as evidence
that the organ is normal. The judgment as to the size and
weight of the organ must always be controlled by a consideration
of the pathologic conditions present as to the exact factor in the
increase or the loss of size or weight.
3. Shape. The organs should be removed with the least possible
disturbance of shape. If it is not possible to do this, the shape
of the organ should be noted as it lies within the body. A knowledge
of the normal form of the organs must serve as the basis for
judgment. Comparison of pathologic alterations in form with the
shape of some familiar object is permissible (horse-shoe, hour-glass,
shagreen, cauliflower, mushroom, coral, polypoid, hog-backed,
etc.) Borders, contours, edges, external surfaces, etc., are rounded,
sharp, flatter, thinner, saccular, lobulated, smooth, wrinkled, folded,
villous, polypoid, granular, nodular, fissured, etc. All possible anomalies
of form exist from the very slightest deviations up to the
most marked distortions.
4. Color. The color of an organ or part should be noted as
soon as possible after its removal from the body, or, better, as soon
as the cadaver is opened, since oxidation, evaporation, loss of blood,
and contact with water quickly cause color-changes. Venous blood
may quickly become bright red, notably in the spleen and cerebral
veins and sinuses. It is not to be supposed that, even when the
cadaver is opened within a very short time after death, the color is
that of the living body. Certain color-changes always take place as
soon as death occurs, but it is necessary to create a color-standard
for the different organs as seen under the conditions of the ordinary
autopsy. Injections of formalin and other undertaker’s fluids
destroy all color, and should not be permitted before the autopsy.
Freezing likewise changes the color of many of the organs.
The judgment of the color of the tissues and organs of the
human body is extremely difficult because of the fact that only
rarely is a pure simple color seen. Ordinarily a combination of
colors is present, and the analysis of these is often not easy. If the
organ is held before the eyes at a distance of about a yard an impression
of a single color-unity may be obtained, but when brought
nearer to the eyes the surface presents a variegated, mottled,
speckled or streaked effect of many colors, sometimes running the
entire range of the spectrum. The colors most frequently seen in
the body are yellow, red and brown in all possible combinations and
shades. Blue, gray, slate, black, green and purple are also common
in combination with these three or with one another. The analysis
of the color is concerned, first with the color proper of the parenchyma,
secondly with the color of the blood and the blood-content,
thirdly with the color of some pathologic substance contained in the
tissue, as blood- or bile-pigment, carbon, melanin, etc. In describing
color-combinations use the predominant color last; as, for example,
a reddish-yellow-brown means that the predominant color is
brown with more yellow in it than red. Innumerable combinations
of these three colors exist (light brown, chocolate, yellowish-brown,
brownish yellow, brownish red, etc.). The macroscopic color will
not be apparent in microscopic preparations except when due to
a true pigment.
The term discolored is applied to dirty, cloudy colors, particularly
gray or greenish, as in gangrene. Spotted, mottled, streaked,
variegated, etc., have the same application in the autopsy-protocol
that they have elsewhere. The judgment of the color of an organ
should be made twice: as seen through the capsule or external covering,
and again on the cut surface of the organ. In the latter case
the transparency, translucency or opacity of the surface should be
noted with the color. Normally translucent structures become opaque
as the result of inflammatory thickening, parenchymatous degenerations,
leukocyte infiltrations, tubercles, postmortem digestion, etc.
An increase in translucence may be due to œdema, hydropic degeneration,
amyloid, mucoid and colloid degenerations, liquefaction
necrosis, anæmia, atrophy, loss of pigment, etc. (translucent, transparent,
jelly-like, colloid, mucoid, lardaceous, sago, bacon, ham-fat,
pearly, etc.).
5. Consistence. This is best estimated by placing the four
fingers of the right hand beneath the edge of the organ as it lies on
the board or in the body and lifting it slightly upward and inward
toward the main mass of the organ. This should be done in several
places, so that an idea of the general consistence of the organ is
obtained. Hollow organs must be tested before and after opening,
in the latter case, to get an idea of the consistence of the wall.
Organs with capsules should be tested through the uncut capsule
and also on the cut surface. After the general consistence has been
determined an examination of the entire organ by thumb and fingers
should be made to determine localized areas of different consistence
(soft: abscess, cyst, œdema, areas of degeneration, etc.; hard: amyloid,
tubercles, tumors, chronic passive congestion, fibroid indurations,
pneumonic areas, etc.). The size and location of such areas
should be carefully noted. The presence of fluctuation, loss of elasticity,
pitting on pressure, friability, hardness, etc., should be described
in ordinary terms, although a comparison with familiar
objects often gives a more definite impression than the simple use
of adjectives describing the condition (consistence of leather, dough,
mush, pea-soup, putty, wood, jelly, stone, iron, etc.). The relaxation
or softness of an organ is often judged by its flattening on the board,
or by its hanging down over the index-finger when this is placed
beneath its middle and the organ raised, or by the jelly-like tremors
of the organ when the dish containing it is agitated.
An increased friability is noted in diseased bones, muscles,
pneumonic lungs, organs showing acute congestion, etc. An increase
or a loss in elasticity is to be noted chiefly in the large
blood-vessels, lungs, skin, etc. In describing a condition of loss of
normal firmness the German School makes frequent use of the termination
malacia (softening) in such words as myomalacia, osteomalacia,
gastromalacia, myelomalacia, encephalomalacia, etc. When
such softening is the result of postmortem autolysis or digestion, as
is so often the case in the stomach (postmortem perforations), thymus,
pancreas, adrenals, brain, etc., the term postmortem softening
is more frequently used in this country. Soft tumors are described
as medullary, encephaloid, etc. In all judgments as to consistence
the normal differences between the organs must be considered, as
well as the length of time between death and the autopsy, the cause
and manner of death, undertaker’s manipulations, temperature,
moisture, rigor mortis, putrefaction, etc.
6. Odor. But little attention is paid in the average autopsy
to the odors of the body, and very little has been written about their
importance. This is probably due to the fact that the average individual
more or less consciously or unconsciously suppresses the
sense of smell. Yet a keen sense of odors and an ability to analyze
them are of the very greatest importance in autopsy work. Certain
infections, and other diseases as well, have peculiar and distinctive
odors (small-pox, measles, colon-bacillus infections, pulmonary gangrene,
diabetes, uræmia, acute yellow atrophy, leukaemia, etc.). The
odor of many drugs and poisons may also be distinguished in the
tissues, gastro-intestinal tract or body-cavities (alcohol, ammonia,
amyl nitrite, aromatic and ethereal oils, assafétida, carbolic acid,
chloral, chloroform, creosote, ether, hydrocyanic acid, iodoform,
musk, nicotine, nitrobenzol, phenacetin, phosphorus, etc.) Many
foods may be recognized in the stomach by the odor (onions, garlic,
cabbage, turnips, pineapple, oranges, apples, peaches, vinegar,
grape-juice, caraway and anise seeds, celery, sage, cardamom, and
many others). In describing odors we should compare them with
natural odors or class them as sweet, sweetish, sour, bitter, pungent,
sharp, heavy, yeasty, pus-like, fruity, etc.
7. Cut Surface. The cut surface of the organs and tissues
should be examined immediately after the organ is sectioned. During
the examination the organ should be moved in different planes
so that the light may fall upon the surface in various angles. Color-changes,
differences in reflection and refraction, minute inequalities
of the surface, etc., are often brought out in this way when otherwise
they might be overlooked. During the examination the surface
may be gently scraped over by the blade of the large section-knife
held at an angle of 45° to the surface. The character and
amount of the blood and fluid exuding from the surfaces and vessels
should be noted; after this has been done the cut surface may
be gently washed with water and examined with regard to histologic
and pathologic details. During the inspection pressure may
be made upon the organs to determine still further the blood- and
fluid-content. The color, moisture or dryness, consistence, reflection
or “shine” (dry-shining, moist-shining, fatty shine, pearly
shine, etc.), cloudiness, translucency, transparency or opacity
of the cut surface must also be considered. Normal organs
are never perfectly dry, although they vary greatly in the amount
of moisture shown on the surface. They have, therefore, always a
certain degree of reflecting power. Different parts of the cut surface
of the same organ should be compared as to color, moisture and
dryness. (Areas of suppuration, congestion, œdema, inflammation,
recent hemorrhage, hydropic degeneration, liquefaction necrosis, etc.,
are more moist than normal; old thrombi, fibrinous exudates, old
hemorrhages, simple, coagulation, caseous and Zenker’s necrosis,
dry gangrene, anæmic and hemorrhagic infarctions, amyloid, concretions
of cholesterin, bile-pigment, lime-salts, urates, etc., contents
of dermoid cysts and cholesteatomata, etc., are dry.) The cut surface
must be described also as to its even or uneven character, finely
or coarsely granular, shagreened, rough, nodular, elevated or
depressed portions, fissures, folds, umbilication.
The cut surface of neoplasms is examined especially by scraping
it with a dry knife held at an angle of 45°. The cells thus
obtained constitute the tissue-juice (“cancer- or sarcoma-milk”). Soft
medullary neoplasms yield an abundance of such cell-scrapings,
hard tumors but little. The cells thus obtained may be treated
according to the various methods given on Page 219, and then examined
microscopically. The cut-surface of the soft parenchymatous
organs (bone-marrow, spleen, thymus, lymphnodes, liver, pancreas
and kidneys) also yields material for examination by this method.
8. Blood-Content. The blood-content of the organs should be
estimated both before and after they are sectioned. This estimation
should be based upon the color of the organ, condition of the blood-vessels,
amount of blood exuded from the cut surface, number of
bleeding-points (anæmia, hyperæmia, stasis). Capillary, arterial
and venous hyperæmia should be differentiated when possible. Only
rarely are evidences of arterial congestion seen in the cadaver. It
is also necessary to observe the occurrence, location and extent of
hypostasis and to differentiate antemortem and postmortem (lungs,
brain, intestines, etc.). The association with œdema and inflammation,
particularly in the lungs (hypostatic pneumonia) speaks for
antemortem hypostasis. A red color in parts possessing no blood-vessels
(heart-valves, endocardium, intima of aorta, cartilage, etc.)
indicates an imbibition of diffused hæmoglobin (hæmatin-imbibition).
Changes in the color of the blood (carbon monoxide, hydrocyanic
acid, and hydrogen sulphide poisoning, all poisons producing
methæmoglobinæmia, icterus, leukæmia, etc.) should be described
and recorded; likewise all hemorrhages, extravasations, etc.
9. Histologic Features. After the general points given above
have been considered the histologic features of the organ should
be taken up in routine. For example, in the case of the spleen, the
capsule, trabeculæ, pulp, stroma, follicles and vessels should be
examined; in the liver, the capsule, trabeculæ, liver-acini, blood-vessels
and bile-ducts; in the kidneys, capsules, cortical surface,
cortex, labyrinths and medullary rays, glomeruli, columns of Bertini,
medullary pyramids, vessels, pelvis and beginning of ureter.
When the organs are thus systematically examined there is but
little chance that anything visible to the naked eye has been overlooked.
10. Pathologic Lesions. Anomalies, defects, erosions, ulcers,
evidences of trauma, inflammations, abscesses, tubercles, gummata,
neoplasms, parasites, and all forms of pathologic changes, local
or general, must be accurately located and described. The changes
peculiar to certain diseases and infections must always be borne
in mind during the examination of any organ in which such conditions
are likely to be found. The relationship of lesions in different
parts of the body must be recognized. Localized lesions must be
described according to position, size, form, color, consistence, etc.
Their nature must be recognized, their relation to other or to pre-existing
conditions determined, the stage of the process estimated,
and the part played in the causation of death ascertained.
In the examination of the body-cavities and hollow organs, as
well as pathologic hollow structures, the first thing to note is the
escape of gas or air under pressure. Occasionally it is best to open
the organ under water to note the escape of bubbles. The odor of
the gas, inflammability, etc., are to be noted. The fluid or solid
contents (blood, bile, urine, féces, mucus, pus, exudates and transudates,
altered secretions, food-remains, concretions, foreign bodies,
parasites, etc.) are described as to their amount, color, consistence,
odor, reaction, chemical nature, precipitate, presence of cellular elements,
etc. The size of the cavity, monolocular or multilocular, the
character of its lining (transparency, translucency, cloudiness or
opacity, color, “shine,” moisture, smoothness, roughness, villous or
polypoid, consistence, thickening, swelling, elevations, atrophy,
incrustations or deposits on the lining, etc.) are to be considered.
In the case of cystic tumors (adenocystomata, dermoid cysts, cholesteatomata,
etc.) especial attention should be paid to the character
of the cyst-contents (mucoid, glairy, colloid, jelly-like, pea-soup-like,
pultaceous, mushy, doughy, caseous, pearly, laminated, flaky,
powdery, etc.).
CHAPTER IV. THE EXTERNAL EXAMINATION.
THE BEGINNING OF THE AUTOPSY. The autopsy begins
with the examination of the exterior of the body. The cadaver
should be completely stripped of clothing and examined as a whole,
then as to its separate parts. Time is saved and omissions prevented
if a definite order is followed in the external examination, such as
follows here.
1. Identification of the Body. In ordinary cases the name of
the deceased will be given upon the autopsy-permit, and this will
serve as sufficient identification. In large autopsy-services, when
several cadavers may be brought in at the same time, each one
should be properly tagged so that no mistake is possible. It is necessary
in medicolegal cases to make a more formal identification by
having the cadaver positively identified by persons having knowledge
of the individual during life, or by those who first saw the body,
or who took it in charge. In such cases when identification is impossible
at the time of autopsy the protocol should give in full details
the place, time, and conditions of discovery of the body, with an
accurate description of its external characteristics, clothing, articles
found on the body, surroundings, etc. Bertillon measurements and
finger-markings may be taken; dental work should be carefully
described; false teeth and hair, eyeglasses, etc., should be preserved,
and the most careful attention should be paid to bodily anomalies
or peculiarities, birth-marks, tattoo, etc. Photographs, casts, Roentgengrams,
etc., may be taken. Powder-marks, blood-stains, as well
as those of semen and other discharges, should be described and, if
necessary, preserved. Legal names, as well as aliases, should be
recorded and attested in all cases of legal significance. In fact, the
only proper way to conduct any autopsy is with the assumption
that the results will have legal value; and such an assumption is
the best safeguard against important omissions.
2. Sex. This should always be mentioned in the protocol. In
the case of pseudohermaphrodism the determination of the real sex
may be difficult and may eventually be decided by microscopic
studies. Likewise in bodies that have been burned or mutilated the
question of sex becomes a matter of anatomic and histologic study.
The character of the bones, pelvis, remains of sexual organs, etc.,
are used as criteria to decide the question. In cases of burning, the
uterus in the female and the prostate in the male may often be recognized
microscopically when the head and extremities are burned
off and only a charred mass of flesh and bone remains.
3. Age. When the true age is not known the apparent age
must be estimated by considering the general appearance of the
body, development, bones, epiphyses, sutures, blood-vessels, skin,
hair, teeth, sexual organs, etc. Roentgengrams of the epiphyses,
hands and feet may be made. The presence of an arcus senilis
should be noted. Arteriosclerosis of the temporal and radial arteries
may be determined by inspection and palpation. The determination
of the age of the new-born will be considered in a later chapter.
4. Nationality. When not definitely known this may be estimated
by such criteria as color of skin, finger-nails, character of
hair, facies (cheek-bones, jaw, forehead, cephalic index, facial angle,
eyes, etc.), hands, feet, general build, etc. For ethnologic and
anthropologic data the body may be described according to the
primitive type it represents (Australioid, negroid, mongoloid, xanthochroic,
melanchroic, Iberian, dolichocephalic, etc., according to
the different classifications).
5. Status. Unmarried, married, widow, widower, divorced,
legal status, citizen of what country, state, county or town, etc.
6. Occupation. As this often throws light upon the pathologic
condition present in the body, the trade or occupation should
be ascertained and stated in the protocol. When no direct information
is available a judgment concerning it may be made on the
basis of certain conditions, occupation or industrial diseases found
in the body (anthracosis, argyrosis, siderosis, silicosis, chalicosis,
lead-poisoning, chronic phosphorus poisoning, nitrobenzol and other
forms of poisoning, localized muscle-hypertrophy or atrophy, callus,
etc.).
7, 8. Time of Death and Time of Autopsy. The day and hour
of death and the time of autopsy should be noted. When the time
of death is not known with certainty it can only approximately be
estimated by the condition of the body with respect to such postmortem
changes as rigor mortis, algor mortis, hypostasis, diffusion-spots,
decomposition, etc. From no one of these signs of death can
an absolute statement be made as to the time of death; so great a
variation may occur with any one or with all of these so-called
positive signs of death that only very relative estimates can be given.
Between the actual time of death and the appearance of positive
signs of this event there exists a variable period in which death
announces its appearance by negative signs only; the cessation of
the vital functions, respiration, circulation and nervous excitability.
These functions may, however, be reduced to so low a degree of
strength that their existence cannot be made out by the usual
methods, and a condition of apparent death or “suspended animation”
may be present. Such a condition is most frequently seen in
cases of cholera, hysteria, catalepsy, hypnosis, excessive fatigue,
prolonged exposure to cold or to high temperatures, concussion,
severe hemorrhage, action of certain poisons, electrical currents and
lightning stroke, strangulation, asphyxia, suffocation, drowning, etc.
The condition of apparent death may last hours or even days, but
as a rule it is one of very short duration. Granting the existence
of such a possibility of apparent death before absolute signs of death
appear, it follows that in all autopsies made very soon after death
has occurred, the prosector must bear such a possibility in mind,
and satisfy himself beyond all doubt of the actual occurrence of
death before beginning the autopsy.
Tests for the Determination of the Occurrence of Death. Loss
of reflexes or response to stimuli are early signs. Mirror, flame or
feather held before the mouth and nose, or vessel containing fluid
placed on epigastrium show absence of respiration. Opening of artery,
temporal or radial; if death has occurred vessel will be empty.
Tests with blood-pressure apparatus are negative in dead body.
Electrical tests and Roentgengrams of heart and lungs show no
movement in these organs. Subcutaneous injection of ammonia;
no congestion or vesicle formed in the dead body. Subcutaneous
injection of fluorescin (Icard’s test): in the living body a greenish
color soon appears in skin, mucous membranes and conjunctivæ;
but not in the dead body. Heat applied to the skin causes no reddening
in the dead body, and, if a vesicle forms, the fluid contained
in it has no albumin and the underlying skin is dry and glazed and
not red. The application of caustics produces no eschar in the dead
body. A steel needle inserted into the living tissues becomes quickly
tarnished; in the dead body oxidation will not take place after many
hours. Glazing of the eyes (if these are open) takes place very
quickly after death; the eye-ball collapses ordinarily, but may remain
prominent in death from hanging, suffocation, apoplexy, etc. The
eye loses its elasticity; the pupils can be made oval by compressing
the globe (Ripault’s test). The patch of dark discoloration on the
part of the sclerotics exposed to evaporation is known as Larcher’s
sign. The hands held against a strong light lose the pink tinge
between the fingers, and the soles and palms become yellow. A
tight ligature about a finger or limb causes no reddening (Magnus’s
test). Relaxation of the sphincters occurs soon after death. It
should be borne in mind in this connection that the discharge of gas
and féces is not uncommon after death, that a fetus may be expelled
by the increase of intra-abdominal pressure due to rigor mortis and
gas-formation, that a discharge of semen or prostatic fluid almost
always occurs in the adult male, that electric contractility may last
several hours after death, that muscles may twitch during this
period, and that atropine will dilate the pupils for some time postmortem.
9. Build. The body should be measured by stretching in a
straight line a metal tape-measure from the vertex to the centre of
the external arch of the instep, the foot being held at a right angle
to the surface of the table. Giantism or dwarfism, partial or complete,
asymmetrical development, etc., should be noted and the type
determined (rachitic, cretinoid, congenital and acquired deformities
of bones may cause dwarfism; giantism may be congenital or due to
disease of the hypophysis as in acromegaly). In all cases of abnormal
development of the skeleton the possibility of diseased conditions
of the hypophysis, thyroid, thymus, adrenals and sexual glands
must be borne in mind. In a general way the build of the body may
be described as large, heavy, strong, medium, small, delicate, etc.
Racial, sex and age differences should be noted. Roentgen-ray
examination may here also be made use of in the determination of
stages of skeletal development. Approximate estimates of the general
build may be made when only part of the body is preserved.
Such rules as nineteen times the length of the middle finger equals
the approximate height, four times the length of the femur equals
the height, the distance from the tip of the olecranon to the tip of
the middle finger is five-nineteenths of the height, etc., are obviously
very uncertain.
10. General Nutrition. The body should be weighed. Nutrition
good, medium, poor, emaciated, etc. Condition of skin, muscles,
panniculus, etc. Differentiate loss in fat from loss in muscle. Distinguish
physiologic fat from pathologic (lipomatosis, etc.).
11. Head. The size and shape of the head should be noted,
and any peculiarity or pathologic condition described (microcephalic,
macrocephalic, dolichocephalic, brachycephalic, etc.).
12. Facies. Aside from individual and racial characteristics
the face of the cadaver may show varying expressions (Hippocratic
facies, hepatic facies, expression of peace, pain, horror, distortion,
etc.). Note all anomalies and pathologic conditions (leontiasis
ossea, leonine expression of leprosy, hare-lip, etc.).
13. Eyes. Closed or open, shape, size, color, deep-set, changes
due to death, condition and size of pupils, arcus senilis, color of conjunctivæ
and sclerotics, eye-lids. The pupils are usually dilated at
death, but after a short time they contract, usually unequally, and
remain so for several days. Note particularly all anomalies and
pathologic conditions (corneal scars, coloboma, cataract, strabismus,
etc.).
14. Neck. Short and thick, long and narrow, thin or fat,
smooth or wrinkled, scars, enlargements, marks of rope, fingers,
string, evidences of strangulation, hemorrhages, abrasions, etc.,
other forms of trauma, cysts, enlarged glands, condition of thyroid,
etc.
15. Thorax. Shape, length, breadth and depth, angle of Louis,
epigastric angle, symmetry of sides, prominence or depressions,
pigeon-breast, shoemaker’s or funnel breast, rachitic rosary, character
of ribs and interspaces, mammæ, degree of hairiness, eroding
tumors or aneurisms, etc.
16. Abdomen. Depressed, scaphoid or elevated, distended,
tympanitic, presence of fluctuation, symmetry, results of palpation
(neoplasms), character of abdominal wall (tightly stretched or lax,
wrinkled), presence of linea fusca or lineæ albicantes (pregnancy,
ascites, tumor). The existence of enteroptosis or gastroptosis can
often be told by inspection of the abdomen.
17. Back. General build and contour, bedsores, etc. Spine
should be carefully examined (anterior, posterior or lateral curvatures,
evidences of trauma, etc.).
18. Anomalies. Malformations and anomalies of any region
should be thoroughly examined and carefully described. The most
common ones found in adults are hare-lip, cleft palate, branchial
cysts, bifid sternum, accessory ribs, malformations of fingers and
toes, hypertrophy of great toe, hypospadias, cryptorchidism, pseudohermaphrodism,
congenital dislocations, particularly of hip, lumbosacral
meningoceles and dermoid cysts, microcephalus, club-foot
and hernia, its variety, location, size and condition. Under anomalies
may be considered the stigmata of degeneracy and the homo
delinquens type. These should also be mentioned in the identification
of the cadaver.
19. Deformities. Location, degree, character, probable cause,
etc. Most commonly caused by tuberculosis, rachitis, gonorrhœa,
syphilis, osteitis deformans, trauma, burns, osteomalacia, tabes,
muscular atrophies, gout, rheumatism, tumors, aneurism, diseases of
the lung causing asymmetry of the thorax, acromegaly, etc. Most
common forms are Pott’s disease, spondylitis, ankylosis, spinal curvature,
contractions and retractions of parts, bow-leg, knock-knee,
changes in the pelvis, dwarfism, shortening of extremities, exostosis,
drumstick or clubbed fingers, flat foot, loss of bones, amputations,
occupation deformities, swelling of joints, tophi, Charcot’s
joint, hygroma, ganglion, etc.
20. Signs of Trauma. Location, size, character and condition
of wound (bruises, bloody suffusions, hæmatoma, erosion, denudation,
lacerations, punctures, crushing, blister, fractures, dislocations,
bullet-wounds, marks of hanging, strangulation (abrasions in the
neck caused by hanging show minute hemorrhages in and about
their edges, particularly in the upper border; section of the neck
shows small hemorrhages in the cervical tissues), or drowning,
burns, action of corrosives (brown spots on lips), effects of electric
currents, etc. In the case of powder-markings note number, direction,
burning, singeing of hairs, etc.) In medicolegal cases the
description of traumatic lesions should be especially minute and
complete. An effort should be made to distinguish postmortem
from antemortem wounds. Recent wounds have clean cut walls
and edges covered with blood; old wounds show reaction, vascularization,
granulations, adhesion of edges of wound, or of exudate.
Postmortem wounds are usually free from blood unless large veins
are ruptured. Loss of the epidermis before or after death causes in
the cadaver yellowish or brown, firm, leather-like spots.
21. Surgical Wounds. Location, size, nature of operation,
state of wound, character of surgical dressings, drainage, etc., discharge
from wound as blood, pus, féces, urine, etc., odor of wound,
age as shown by stage of repair, evidence of infection, etc. Hypodermic
marks, saline injections, blisters, venesection, cupping, exploratory
punctures, recent vaccination marks, etc., should be noted.
22. Scars. Location, size, character, recent or old, pigmented
or pale, rough or smooth, contractures, keloids, traumatic or surgical,
nature of injury or surgical operation, hypodermic scars, vaccination,
acne, cupping, small-pox, chicken-pox, shingles, “electric
belt,” croton oil, burns, etc.
23. Skin. Color (racial differences), brown, gray or black
pigmentations in Addison’s disease, pellagra, syphilis, vitiligo,
xanthoma, chloasma, pigmented nodes or nævi, argyria, arsenical
poisoning, pernicious anæmia, xeroderma pigmentosum, chronic
jaundice, vagabond’s skin, tan, following blisters, plasters, cupping,
use of croton oil, Roentgen irradiation, effects of violet rays, melanotic
tumors, pregnancy, etc.; bronzing in Addison’s and chronic
icterus; lemon yellow in chlorosis and pernicious anæmia; yellow
to dark green in icterus; grayish-brown in potassium chlorate poisoning;
bluish-red (cyanotic) in cardiac insufficiency; yellowish-bluish-red
(“Herz-farbe”) in cases of complete loss of compensation;
cherry-red or rose-red in carbon-monoxide or hydrocyanic
acid poisoning, rarely as the result of an erythema, although
this condition usually disappears after death; dirty sallow to grayish
or greenish in tumor cachexia and poisoning with H2S; white after
severe hemorrhage, cachexia of chronic Bright’s disease, leucoderma,
vitiligo, albinism, leprosy, etc.; red, yellow, green or brown
in hemorrhages according to their age. Eruptions should be classified
and described as to location, abundance, stage, etc. (macules,
papules, wheals, desquamation, scales, blebs, bullæ, pustule, tubercles,
ulcers, abscess, phlegmon, herpes, crusting, granuloma, etc.).
With the exception of chicken-pox and small-pox the eruptions
of the acute exanthemata disappear after death, as do all erythematous
rashes except in rare instances. Emphysema of the skin should
be differentiated from œdema. The most common lesions of the
skin are acne, eczema and syphilis. Tuberculosis (lupus) is not
uncommon; anthrax, favus, rhinoscleroma, actinomycosis and blastomycosis
and Aleppo or Delhi boil are more rarely seen. Tinea
versicolor and tricophyton (barber’s itch and the various forms of
ringworm) are the most common parasitic affections. In the Southern
states ground-itch due to the hook-worm is the most common.
Leprosy should be considered in connection with individuals coming
from Norway, Sweden and Finland and other leper-foci. The
most common tumors of the skin are all the various forms of
hæmangioma and lymphangioma (freckles, moth patches, naevi,
moles, warts, birth-marks), fibroma, lipoma and squamous-celled carcinoma
(horny and basal-celled types). The latter is the most common
form of malignant tumor. Sarcoma of the skin is more rare;
the melanotic sarcoma, arising usually in a pigmented mole, is the
most common form. Next to this is the round-cell sarcoma or
lymphosarcoma (mycosis fungoides, leukaemic and aleukaemic
lymphocytoma, etc.). Spindle-cell sarcoma, angiosarcoma, endothelioma
and other forms are less common. Sebaceous cysts (wen,
atheroma, steatoma) are very common. Less frequent are molluscum
contagiosum, xanthoma (endothelioma lipomatodes), myoma, myxoma,
chondroma and osteoma. Adenoma sebaceum and sudoriparum
are rare. Other conditions of the skin to be noted are cleanliness,
elasticity, general nutrition, moisture, presence of scales,
atrophy, hyperplasia (ichthyosis, horny warts, cutaneous horns, the
various forms of elephantiasis), scleroderma, keloid, xeroderma pigmentosum,
albinism, leucoderma, vitiligo, myxœdema, seborrhœa,
alopecia, erysipelas, dermatomyositis, psoriasis, impetigo, rhinophyma,
herpes, miliaria, sudamina, symmetrical gangrene, trophic
changes, “goose-flesh,” hemorrhages, scars, tattoo-marks, etc. The
various forms of skin-diseases should be described and recorded
whenever present.
The presence of petechiæ or ecchymoses in the skin (purpura)
is characteristic of all the forms of essential purpura (simplex, peliosis
rheumatica, hæmorrhagica, senilis, morbus maculosis Werlhofii,
scurvy, Möller-Barlow disease, etc.); such skin hemorrhages occur
also as the result of trauma, congenital hæmophilia, in the course of
many infections (small-pox, plague, typhus, yellow fever, endocarditis,
measles, scarlet fever, septicæmia, pyæmia, rheumatism,
meningitis, typhoid fever), in many intoxications (snake-bite,
icterus, nephritis, iodine, bromine, phosphorus, chloroform, etc.),
also in severe anæmia, pernicious anæmia, leukæmia, sarcoma, carcinoma,
acute yellow atrophy of the liver, hysteria, vicarious menstruation,
reflex hemorrhages, stigmatization, etc. The number,
size, color and location of all cutaneous hemorrhages should be
recorded.
24. Hair. Color, abundance, distribution, character, quality,
condition, length, pathologic conditions (alopecia areati, senilis,
præsenilis, pityrodes, syphilitica and symptomatica, trichorrhexis
nodosa, hypertrichosis, parasites, etc.). In prolonged fevers and
wasting diseases the diameter of the hair is diminished. Symptomatic
alopecia occurs after syphilis, typhoid fever, scarlet fever,
measles, erysipelas, anæmia, Roentgen irradiation, etc. The length,
color and quality of the hair as well as amount and distribution vary
in different races. Hypertrichosis is often associated with degeneracy,
criminal tendency, epilepsy, idiocy and certain forms of
insanity. An apparent growth of hair after death may be caused by
retraction of the tissues; an actual postmortem growth is not conceded
by the majority of authorities in spite of the numerous tales
to that effect. Loss or absence of pigment is seen in albinism,
leukotrichia due to infection, Graves’ disease, exposure, burns, nervous
affections, fright, worry, etc. The presence on or about the body
of hairs not belonging to the cadaver is a point of great importance
in medicolegal cases and one that should be thoroughly investigated
as to their source. Human hair can be identified microscopically,
and it is possible to recognize different specimens according
to their variation in color, length, quality, etc.
The nails should be considered in connection with skin and
hair, with reference to the following points: presence or absence,
hypertrophy, atrophy, color, condition, length, development,
onychia, hyperonychia, paronchyia, onychogryphosis, longitudinal
and transverse ridges, fissures and cracks, opacity, brittleness, etc.
26. Mucous Membranes. Color, deposits or incrustations,
eruptions, erosions, herpes, mucous patches, rhagades, ulcers, fissures,
moisture, trauma, effects of corrosives, burns, pigmentation,
as in Addison’s disease, leukoplakia, hairy tongue, hemorrhages,
tumors, etc.
27. Muscles. Musculature and condition of muscles (slight,
athletic, well developed, poor, flabby, soft, etc.), anomalies, etc.
28. Rigor Mortis. Postmortem rigidity is one of the absolute
signs of death. It begins usually 1-2 hours after death, the involuntary
muscles and heart showing it first. Externally it shows first
in the muscles of lower jaw and neck, extends downward, involving
the lower extremities last and disappearing in the same order.
Its appearance, however, is subject to the greatest variation, and
the presence or absence of rigor mortis cannot be used as a criterion
for the estimation of the length of time the body has been dead.
Instantaneous rigor has been reported in suicides and in people
killed in battle. Intense excitement, great muscular exertion, etc.,
favor its rapid appearance. It also comes on very quickly after
death from rabies, tetanus, strychnine poisoning, cholera and a
number of other conditions. It sometimes is delayed or absent
after heat-stroke; chronic alcoholism also delays its appearance.
Usually the contraction lasts 24-48 hours, but under certain conditions
may persist for several days. It is prolonged in muscular individuals,
after death by suffocation, rabies, strychnine poisoning,
etc. The stiffening of the muscles may be broken by application of
heat or the use of force (removal of clothes from the body); when
once broken it rarely returns. In a case of death from rabies seen
by the writer the rigor was so strong that it required the united
efforts of two men to straighten the limbs, and before the close of
the autopsy the rigor had returned as strong as in the beginning.
Rigidity due to undertaker’s injections and freezing must not be
mistaken for rigor mortis. The possibility of rigidity due to ankylosis
must also be borne in mind.
29. Panniculus. The subcutaneous panniculus is estimated by
pinching up a fold of skin between the thumb and fingers of the
right hand and the thickness determined. The amount is described
as panniculus abundant, moderate, absent, etc. Estimates should
be made of panniculus of upper extremities, thorax, abdomen, back
and lower extremities. Pathologic conditions, such as general obesity,
adiposis dolorosa, multiple lipomata, elephantiasis lipomatosa,
fatty collar, etc., should be described in full.
30. Oedema. At the same time that the panniculus is being
examined, the presence or absence of œdema (pitting on pressure)
should be noted in the same regions. When present it may be
described as slight, moderate, marked, extreme, localized, universal,
etc. Emphysema of the subcutaneous tissue is shown by the presence
of elastic swellings of the skin, not pitting on pressure, but
giving a crepitation when palpated.
31. Body Heat. The absence or presence of the body heat is
of great importance in giving some idea as to the relative length of
time the body has been dead. The nose, ears and extremities first
become cool, the liver region retaining the heat longest. The rate
of cooling depends upon the external temperature and the conditions
of the body. Nude bodies, cadavers exposed to water and
cold, and bodies that have suffered severe hemorrhages lose their
heat more rapidly. Under ordinary conditions the rectal temperature
is the same as that of the surroundings in about forty hours.
During the formation of the rigor there may be a slight increase
in the temperature of the cadaver. An increase above the normal
temperature has also been noted in the dead body immediately
after death from tetanus, cholera, small-pox, peritonitis, electric currents,
suffocation, gangrene, etc.
32. Hypostasis. After death the blood passes into the veins
and very soon through gravity collects in the greatly distended veins
of the lowest portions of the body, except where these are pressed
upon by the weight of the body. Such a settling of the blood begins
usually within 1-2 hours after death, but may take place even before
death (hypostatic congestion) in cases of long-standing recumbent
position, cardiac lesions with failure of compensation, wasting diseases,
acute infections, death from suffocation, etc. Postmortem
lividity should be described as to its extent, location and color. In
anæmia the color is pale purplish red, in congestion dark purple, in
cyanosis the color may be dark bluish red and the fingers, toes, ears,
etc., retain the cyanotic appearance for some hours after death; in
potassium-chlorate poisoning the color is chocolate, in hydrogen-sulphide
poisoning grayish green, in poisoning with hydrocyanic
acid or carbon monoxide it is rose or cherry red. Fresh hypostatic
patches can be made pale by pressure and when cut they will bleed
freely. Hemorrhages cannot be pressed out nor will hemorrhagic
areas bleed as freely as hypostatic patches. In all medicolegal
cases care should be taken to differentiate bruises and ecchymoses
from hypostatic patches, as in the popular mind the latter are often
regarded as evidences of trauma or violence. The location of the
hypostasis is of importance in showing the position of the body
after death; if the anterior portion of the body is hypostatic the
cadaver must have been lying upon its face for some time after
death; suspension of the body for some time after death by hanging
causes a hypostasis of the lower extremities. Of the internal organs
the brain, lungs, stomach and coils of intestine chiefly show hypostasis.
Antemortem hypostasis of the lungs is distinguished from
postmortem by its deeper color, firmer consistence, more marked
œdema and microscopic signs of beginning inflammation (hypostatic
pneumonia). Cadaveric lividity reaches its maximum in
24-48 hours, and after this time diffusion gradually occurs. In connection
with the examination of hypostatic areas the condition of
the superficial vessels as to size, distention, etc., should always be
noted.
33. Putrefaction. The first signs of putrefaction are seen in
the transformation of the hypostatic areas into diffusion spots and
stripes following the course of the larger veins. The color is at first
a dirty red or brownish-red, but soon becomes gray or green as a
result of the action of hydrogen sulphide diffusing from the intestines.
Diffusion spots cannot be made pale by pressure, nor do they
bleed when cut. The greenish coloration begins first over the abdomen
and lower intercostal spaces, and this gradually spreads over
the body, showing first in the hypostatic areas and along the veins.
The abdomen then becomes distended; gas may form in the subcutaneous
tissues so that the skin becomes swollen, crackles on
pressure and gives off gas-bubbles when cut. The epidermis becomes
loosened in spots, forming blebs containing a dirty-brown
exudate, while the tissues become soft and are easily torn. The odor
of putrefaction is evident. Decomposition sets in more quickly in
infants, in fat and plethoric individuals, and after death from snake-bite,
active syphilis, plague, sepsis, heat-stroke, suffocation, acute
infectious fevers, icterus, gangrene, diabetes, etc.; it is delayed by
hydrocyanic acid and other poisons. When putrefactive bacteria are
present in the body, decomposition may begin immediately after
death.
34. Orifices of the Body. The mouth, nose, ears, anus, urethra
and vagina are to be examined with special regard to their condition
and contents (open, closed, gaping, torn, bleeding, discharge of pus,
blood, mucus, féces, stomach contents, semen, urine, foreign substances,
parasites, ear-wax, etc.). In cases of suspected rape an
especial examination of the orifice of the vagina or anus is indicated.
35. Percussion and Palpation. The external examination may
be closed by the percussion of the heart, lung, spleen, liver and
stomach boundaries, and by the palpation of the abdomen. The
fine opportunity for control of technique, judgment as to sound, size,
consistence, shape, etc., should not be lost. Rigor mortis of the
abdominal muscles can be removed by kneading the muscles or by
the application of hot cloths.
CHAPTER V. THE EXAMINATION OF THE SPINAL CORD.
1. METHODS OF EXAMINATION. The spinal cord may
be opened anteriorly or posteriorly. The choice of method is largely
a matter of convenience or of individual skill in using certain instruments,
such as the Brunetti chisels. The method of opening posteriorly
is more commonly used in this country, as it requires less
skill. It necessitates, however, an additional long skin incision that
must be tightly stitched together to prevent leakage of blood and
fluids after the restoration of the body. For this reason it is not
as clean a method as the anterior opening, which requires only the
one main skin-incision. In private practice the latter method is
often advisable, as by it an examination of the cord can often be
secured when the relatives would not consent to its removal posteriorly,
on the ground of undue mutilation of the body. The anterior
examination also permits a better inspection and an easier
removal of the spinal ganglia and nerves.
Examination of Cord Posteriorly. For the opening of the spinal
cord posteriorly the cartilage-knife, bone-forceps, bone-nippers and
rhachiotome are necessary; in place of the latter the single saw,
double chisel, Brunetti chisels or single chisel may be employed.
The posterior examination of the cord should take place at the
beginning of the autopsy, after the external inspection of the
cadaver, before the thorax and abdomen are examined. The removal
of the sternum gives a loss of resistance to the manipulations upon
the back of the cadaver, and the turning-over of the body after it
has been opened anteriorly is usually an unpleasant procedure
because of the dripping of blood and other fluids. When it is found
necessary to examine the cord posteriorly after the opening of
thorax and abdomen it is better to fill these cavities with tow or
excelsior, replace the sternum and sew up the anterior skin-incision
before turning the body over.
The cadaver is placed face downwards, with medium-sized
blocks beneath the cervical and lumbar regions, the arms being
folded underneath the body. With the cartilage-knife an incision is
then made through the skin and subcutaneous tissues in the median
line, over the spinous processes, beginning above at the occipital
prominence and ending at the lower border of the sacrum. The
skin and subcutaneous tissues are then dissected back by bold slashing
strokes for a distance of a hand’s breadth on both sides of the
spine, thus laying bare the muscles of the neck and back. The muscles
may be stripped back with the skin, but the heavy flaps thus
formed are very likely to fall back and cover the seat of operation.
Chain retractors may be used to hold the skin flaps back, particularly
in the case of a very fat individual, but usually the separate
stripping of the skin and muscles is sufficient. To remove the muscles
the cartilage knife is set close against the spinous processes of
the uppermost vertebræ and a deep cut made on each side of the
spine throughout its entire length, severing the vertebral attachments
of all muscles and tendons. About four finger-breadths outside
of these cuts there should now be made from above downwards
on both sides another deep cut through the muscles parallel with
the first two incisions. The bundles of tendons and muscles between
these parallel cuts on both sides of the spine are then separated from
the bones as cleanly as possible, beginning either above or at the
sacral end, severing the muscle-mass at the end at which the separation
begins, but leaving it attached at the other end, where it is
laid over the side of the body out of the way, and replaced after the
examination of the cord is completed; or the two bundles of muscle
may be cut off at both ends and disposed of without further trouble.
Portions of tissue clinging to the vertebræ should then be scraped
or cut away with the chisel or knife.
When the vertebræ are bared the next step is the removal by
saw, bone-forceps or chisel of the posterior bony wall of the spinal
canal in such a manner as to expose the cord and permit of its
removal without causing any damage to it, either from the instruments
or from fragments of broken bone. A single-bladed saw with
curved ends may be used to saw through the laminæ on both sides
of the spinous processes; or even the small bone-saw (Fig. 9) may
be used for this purpose. The blade of the saw should be held
obliquely against the spinous processes with the sawing edge
directed outward so as to cut the laminæ close to the medial borders
of the ascending and descending transverse processes. The sawing
is complete when the spinous processes become movable. The
straight-edged chisel may be used to cut any adhesions left after
sawing, and the bone-forceps may be used to cut the atlas and axis.
When the laminæ have been cut through on both sides of the spinal
column for its entire length, including the sacrum, the posterior ligament
between the atlas and occiput is cut with the cartilage
knife; and the strip of bone and ligaments loosened by sawing is
torn off from above downward by grasping it in the upper cervical
region with a pair of bone-nippers and jerking it off forcibly downward
toward the sacrum, thus exposing the spinal canal. It may
be taken off in the opposite direction by cutting the ligament
between the last lumbar vertebra and the sacrum and stripping
upward.
The use of the single saw is not advised, however, as it is too
time-consuming. The laminæ on both sides of the spinous processes
may be cut at the same time by the use of Luer’s rhachiotome (Fig.
11). The blades are separated according to the size of the vertebral
arches and are set so as to include the spinous processes and cut the
outer border of the laminæ close to the transverse processes in such
a manner as not to injure the cord. Since the spinal canal is broader
in the cervical and lumbar regions than in the dorsal, the distance
between the saw-blades must be regulated accordingly. The dorsal
portion is first sawed. The sawing should be in long cuts without
too great pressure, the instrument being steadied by placing the
left hand on the upright bar. As soon as the spinous processes
become movable on slight pressure the sawing should be stopped.
Should the blades become caught in the saw-cuts great care should
be taken to avoid injuring the cord while releasing them. The
straight-edged chisel may be inserted into the cuts and any parts
still adherent may be carefully sprung apart. This is necessary particularly
in the upper cervical region. The entire posterior wall of
the canal may be loosened in this way, the sacrum being also sawed,
when it is desired to open this part of the canal. When all the spinous
processes are movable the attachments either above or below
are cut with the cartilage-knife, and the spinous processes and
laminæ torn off by the bone-nippers in one piece, either toward the
head or sacrum as is the more convenient.
The laminæ may be cut by a chisel instead of a saw. The
straight-edged or curved single chisel, the “tomahawk” chisel, or the
double-bladed chisel of Esquirol may be employed. The latter
instrument has adjustable chisel-blades that can be set to include
the spinous processes. These blades are very strong and short, and
have convex cutting edges. The use of a wooden mallet (Fig. 17)
is to be preferred to that of the steel hammer in driving chisels of
any type. The straight, curved and tomahawk chisels are held with
their cutting edges directed slightly outwards. The Amussat rhachiotome
is a chisel-knife with a curved metallic handle, the cutting
edge running along the length of the chisel. When set at an angle
of 45° to the laminæ it is driven through them by means of blows
from a wooden mallet delivered upon the chisel-back over the cutting
edge. The Brunetti chisels are shown in Fig. 15. In using
these to open the spinal cord posteriorly, a block should be placed
beneath the abdomen so as to raise the lumbar vertebræ above the
level of the dorsal. The intervertebral ligaments of the last lumbar
vertebræ are then cut through with the belly of the cartilage-knife
held at right angles to the spine. The laminæ and spinous process
of the last lumbar vertebra are then cut out with the straight-edged
chisel or bone-forceps, exposing the canal. The right and left Brunetti
chisels are then alternately used, beginning usually with the
“left” chisel, the blunt probe-point being introduced into the canal,
while firm pressure downward is made upon the handle, while at
the same time the cutting edge is driven through the outer borders
of the vertebral arches by blows from a wooden mallet delivered
upon the head of the handle. Great care must be taken to keep the
cut at the same level throughout. It is better, however, to cut too
high rather than too low. In the latter case the cord may be
injured, while in the former the bone may later be easily trimmed
off sufficiently without causing any damage. The arches of three
to four or even more vertebrae may be cut without removing the
chisel. The same thing is then done on the other side, using the
“right” chisel. The loosened portion of bone and ligaments is then
cut or torn off with the bone-forceps or nippers. The cut bone
should not be touched with the hands because of the danger of
injury and subsequent infection from the sharp spicules and splinters
of bone. As the canal is opened the block under the body is
pushed towards the head, the object being always to cut down hill
and not upward. When the cervical region is reached the head of
the cadaver should be firmly held by an assistant so as to give sufficient
resistance to the blows of the mallet. The skilful use of the
Brunetti chisels is difficult to acquire and a great deal of practice is
necessary, but when once the knack is obtained the spinal canal can
be opened in this way more quickly than by any other method. In
private practice the noise made by the hammer upon the head of
the handles of the chisels is unpleasant, and should be avoided by
the use of felt or something else on the head of the chisel or mallet
to deaden the sound.
Another easy and convenient way of opening the spinal canal
posteriorly is the cutting of the laminæ by means of special bone-forceps
designed for this purpose. The cutting-edges may engage
the laminæ from without or the lower blade may be introduced
into the canal as a blunt probe, while the upper blade cuts down
upon it through the side of the arch. Such bone-forceps should be
very strong and have long handles to give sufficient purchase, as a
good deal of force is necessary to cut through the laminæ.
With a good instrument the canal can be opened in this way in
about 10-15 minutes. It requires much less skill than is needed
for good and quick work with the Brunetti chisels, and for that reason
is recommended, as is also the use of Luer’s rhachiotome, for
the general practitioner.
In the case of marked curvatures of the spine it may be impossible
to use either rhachiotome or Brunetti chisels. The straight
single chisel and small saw can be used on the concave and convex
sides of the curvature respectively. In children and young adults
the canal can be easily opened with the bone-forceps.
After the removal of the posterior wall of the spinal canal the
peridural adipose tissue and the dural sac are exposed in the canal.
The cord may now be removed with dural sac intact, and when the
cord is soft this should be done, but in so doing the spinal fluid is
likely to be lost; and, as it is very important to obtain a knowledge
of the amount and character of this fluid, care should be taken to
preserve it. With the block placed under the cervical region to
keep the cervical and dorsal vertebræ higher than the lumbar the
dural sac may be opened in the median line from above downward.
The cervical dura is grasped with a pair of forceps and lifted so
that a cut can be made in it with the small bent, probe-pointed
shears. The blunt probe-point is then introduced into the subdural
space and the dura cut in the median line downward toward the
sacrum. With care the arachnoideal sac with its fluid may be preserved
intact. What fluid there is in the subdural space will collect
in the lumbar region and may be secured while the lumbar dura is
cut. The fluid in the subarachnoideal space will likewise collect in
the lower portion of the cord, and it is best at this stage of the operation
to introduce a sterile pipette through the delicate arachnoid
and draw up the fluid, preserving it for bacteriologic and microscopic
examination.
The thirty pairs of spinal nerves are now cut from above downward,
beginning on the right side. The cut edge of the dura or
a dural fold, if the dura is left uncut, is seized with the dissecting
forceps and pulled over to the left, so that as much of the nerve can
be secured as possible. A long, narrow, sharp-pointed scalpel is
inserted, outside of the dura, into the intervertebral foramina, as
far as possible, and the nerves are cut while traction is made upon
the dura to the opposite side. The same procedure is then carried
out upon the left side. When all of the spinal nerves are cut, the
scalpel is introduced in the spinal canal upward, as near to the
foramen magnum as possible, and the cord and dura are cut transversely.
The cord should be held by the dura; direct pressure with
forceps or fingers upon the soft substance of the cord should never
be made. If the forceps cannot be used to hold the dura with
advantage, then the cord enclosed in the dural sac may be gently
but firmly held in the palm of the left hand and lifted and drawn
downward towards the sacrum with the greatest care. As the
cord is removed the fibrous attachments between the dura and the
longitudinal fascia of the anterior wall of the canal are cut with the
small scalpel by means of oblique cuts upon the bodies of the vertebræ.
Any fragments of bone impeding the removal of the cord
should be trimmed off with the bone-forceps. The forcing of the
cord through a tight aperture in the open canal may ruin that portion
of the cord. In some cases it may be better to sever the dura
and cord at the sacral end, below the cauda equina, and remove it
toward the head, using the same method of holding the dura, and
cutting the spinal nerves and peridural tissue. When this is done
the importance of saving the spinal fluid should be borne in mind.
Some prosectors prefer to sever the dura and cord above before
cutting the spinal nerves, and to cut these and the epidural fascia
while removing the cord. An experienced operator may save time
in this way, but there is greater danger of injuring the cord. The
cord may also be removed by severing the spinal nerves and vessels
inside of the opened dura and lifting the cord out of the dura, but
it is more likely to be damaged by this method. When the brain
has been removed before the cord the dural attachments as high as
the foramen magnum should be severed and the cord removed up
to the point where it was severed from the brain. If it is desired to
remove the cord attached to the brain, the cord is first loosened
throughout its length from below up to the foramen. It is then
carefully protected while the skull is opened; and after the brain-connections
have been severed it is drawn up through the foramen
as the brain is lifted out of the skull. After its removal from the
body the cord is stretched out upon table or board and the dura
opened in the median line both anteriorly and posteriorly, if the
latter cut was not made before its removal from the body. If it is
desired to make sections of both cord and dura for microscopic
study the dura may be left uncut or attached to the cord after it
has been opened in the median line. It then helps to hold the
pieces of cord together after the latter has been cut. Otherwise the
dura may be removed from the cord by cutting the nerve-roots and
denticulate ligaments on both sides. The cord is now examined
by making transverse cuts through it with a clean knife which is
dipped into clean water before each cut. The cord is allowed to
hang over the index-finger of the left hand while the knife is drawn
across it, severing it down to the underlying pin which is left uncut
to hold the pieces together. The cuts are usually begun in the
cervical region and are made at the level of the spinal nerves. When
the dura is left attached to the cord it may be laid back and the
cord cut within it, or if it has not been opened, the cuts may be
made through it and the cord at the same time, if a very sharp knife
is used. Areas of softening should not be cut, but should be preserved
intact for examination after fixation and hardening. If the
segments of cord are left attached to the dura or pin the cord and
membranes may be fixed and hardened en masse so as to permit
future orientation.
Examination of Cord Anteriorly. After the complete examination
of the neck, thoracic and abdominal organs the spinal column
is divested of all remaining tissues, including the psoas muscles.
A block is then placed beneath the lumbar vertebræ. With
the belly of the cartilage-knife held transversely across the spinal
axis the intervertebral disks on both sides of the next-to-the-last
lumbar vertebra are cut down to the level of the canal. If the lumbar
vertebræ are sufficiently elevated by the block placed beneath
the abdomen, the cutting of the disks allows the neighboring vertebræ
to spring away, so that the body of the vertebra thus separated
can be cut out by the bone-forceps or chisel. The spinal canal is
thereby exposed; so that the Brunetti chisels may now be used in
cutting the pedicles and stripping off the vertebral bodies. As this
stripping progresses upward the block is moved toward the head
so that the cutting is always down hill. The chisels are driven
through the pedicles of five or six vertebræ at a time; the handle
is forced down until the long chisel-blade is nearly parallel with the
vertebræ. At the same time the cutting-edge must be sent forward
at a uniform level, just high enough to expose the canal. If the cut
is too high the chisel will enter the body of the vertebra, if too low
the probe-point will be pushed into the cord. When the cervical
vertebræ are being cut the head of the cadaver must be steadied by
an assistant. As the sections of vertebræ are loosened the intervertebral
disks are cut with the cartilage-knife and the pieces of
bone pulled away with the bone-nippers. When the canal is fully
exposed the examination of the dura and the removal of cord and
dura proceed as when the canal is opened posteriorly. The straight
chisel and the bone-forceps are also used to open the spinal canal
anteriorly, but the Brunetti chisels are especially recommended for
this operation.
Examination of Spinal Ganglia. While these may be examined
when the canal is opened posteriorly, they can be exposed
with less danger of damage in the anterior examination. To expose
them in the posterior examination they must either be drawn forcibly
through the intervertebral foramina, or the articular processes
must be cut away with the chisel.
When it is desired to remove a part of the spinal column for
preservation as a specimen, the intervertebral cartilages and the
cord above and below the portion to be removed are cut through
with the knife, and the ribs severed with a chisel, while the adherent
soft parts are cut away. The saw or chisel is then used to complete
the disarticulation if necessary and the loosened portion is removed.
The entire spine may be removed, if desired; and may be bisected
with a band-saw. A stick of wood may be put in the place of the
spine and covered with plaster-of-Paris.
After the cord and dura have been removed the inner surface
of the canal should be examined. The character of the cut surface
of the vertebral bodies is also noted, and the bones examined for
pathologic conditions.
2. POINTS TO BE NOTED IN THE EXAMINATION OF
THE SPINAL COLUMN.
1. Dorsal Incision. Note color of skin as it is cut, number of
bleeding points, moisture, bedsores, amount and character of panniculus,
color and blood-content of muscles, hemorrhages, purulent
and tuberculous processes (usually infiltrations from diseased vertebræ)
trichina in spinal muscles, etc.
2. Vertebrae. Necrosis from bedsores, surfaces smooth or
rough, purulent and tuberculous processes (most common anteriorly),
exostoses, curvatures, fractures, dislocations, erosions, malformations
(spina bifida and supernumerary vertebræ most common),
neoplasms (secondary carcinoma, primary sarcoma, myeloma
and chloroma most common), actinomycosis, syphilis, rachitis, etc.
3. Dura. Note epidural tissue first, then dura, its thickness,
color, translucency, blood-content, intradural pressure, character of
inner surface (normally it is grayish-white, smooth and shining).
defects, bone-formation, organizing blood-clots, hæmatoma, gumma,
neoplasm, etc. Most common pathologic conditions are chronic
pachymeningitis, syphilis, tuberculosis, traumatic lesions and secondary
carcinoma. Primary tumors (sarcoma) and parasites
(echinococcus and cysticercus) are rare. Teratomata occur in
sacral and coccygeal regions. A diffuse formation of adipose tissue
is common, as is also the development of bony plates in the dura
in old chronic pachymeningitis (usually syphilitic). Note character
and amount of contents of subdural space (blood, pus, serous
exudate, etc.).
4. Inner Meninges. Normally gray, transparent, delicate. Note
intrameningeal pressure, contents of subarachnoid space, color,
thickness and translucency of arachnoid and pia, blood-vessels,
presence of blood, pus, fibrinous exudates, localized thickenings,
calcification, etc. Most common pathologic conditions are acute
and chronic leptomeningitis, results of trauma, hemorrhage, syphilis,
tuberculosis, cerebrospinal meningitis, leprous meningitis, etc.
Bony plates (osteomata) are found in the arachnoid of the majority
of people over forty-five years of age. In small number and size
they have no pathologic significance; they are often large and very
numerous in old cases of syphilitic leptomeningitis, sometimes
encasing the cord. Primary tumors (fibroma, myxoma and sarcoma)
are rare. Teratoid tumors (lipoma, myolipoma, neuroma)
are occasionally found in the lumbosacral region, often associated
with spina bifida. Secondary carcinoma and sarcoma, and metastases
of the so-called glioma of the eye are also rarely found.
5. Cord. Size and form. Average length about 45 cms.;
weight, 30 grms.; weight of cord to that of brain, 1:48.
Anteroposterior diameter of cervical cord
0.9 cm.
Anteroposterior diameter of dorsal cord
0.8 cm.
Anteroposterior diameter of lumbar cord
0.9 cm.
Transverse diameter of cervical cord
1.4 cm.
Transverse diameter of dorsal cord
1.0 cm.
Transverse diameter of lumbar cord
1.2 cm.
Adhesions to inner meninges, consistence (should be uniform;
changes in form and consistence are often the results of postmortem
changes), color (gray-white, as seen through the pia), translucency
(sclerotic areas in the white matter are firmer, depressed
and gray or brownish-gray in color, and more translucent when present
in the gray matter), moisture, color and blood-content of cut surface,
relation of white and gray matter, symmetry of parts, size of
central canal, presence of cavities, areas of softening (soft, yellowish-white,
loss of structure), hemorrhages, congestion, anæmia,
œdema, gumma, tubercle, tumors, parasites, etc. The normal consistence
of the lower portion of the cord is usually somewhat firmer
than that of the upper part. The “butterfly-figure” should stand
out distinctly on the freshly-cut surface; the outlines between the
white and gray matters should be sharp, and the gray matter
should be grayish-red in color. Normally the white matter tends
to rise above the gray. Inasmuch as the cord is often injured accidentally
during its removal it is important to distinguish such artefacts
from pathologic softenings. This can be easily done by taking
a small portion of the doubtful area and examining in the fresh
state under the microscope. In true softening numbers of “fat-granule”
cells and also capillary walls showing fat-degeneration
are seen.
The pathologic lesions of the cord easily recognized by the
naked-eye are areas of sclerosis or gray degeneration, yellow degeneration,
hemorrhage, anæmia, œdema, congestion, tabes dorsalis,
amyotrophic lateral sclerosis, acute poliomyelitis, syringomyelia,
ascending and descending degenerations, glioma, gumma, tubercle,
certain malformations, neoplasms and parasites. Other important
pathologic conditions are: Malformations (myelocele, hydrorrhachis
interna, diastematomyelia, etc.), atrophy, myelitis, sclerosis,
effects of trauma, syphilis and intoxications, infections, tuberculosis,
etc. Primary tumors are: Glioma, gliosarcoma, gliomyxoma,
sarcoma (spindle-cell, myxo-, angiosarcoma, etc.), neuroepithelioma,
neuroma, diffuse gliosis, etc. All are rare with the exception
of the gliomata. Metastatic carcinoma and sarcoma are relatively
rare. Cysticercus and echinococcus are rare.
The thickness, color, consistence and translucence of the spinal
ganglia should be noted. Atrophic nerves are smaller, more gray
and more translucent.
6. Inner Surface of Vertebrae. The remains of the epidural
tissue and the inner surface of the spinal canal should also be carefully
examined, noting the consistence of the vertebræ, the character
of the ligaments, fascia, periosteum, etc. The anterior wall of
the canal should be smooth, the color of the vertebræ grayish-red,
that of the intervertebral disks grayish-white. Caries, tuberculosis
and syphilis lead to roughening of the bony wall of the canal.
CHAPTER VI. THE EXAMINATION OF THE HEAD.
I. METHODS OF EXAMINATION.
1. Removal of Skull-Cap. For the section of the head the
cadaver is placed upon its back with its head near the end of the
table. The head may be elevated by a block placed beneath the
neck, or it may be elevated and at the same time firmly held in
position by the use of a special head-rest, different varieties of
which are offered by instrument-makers. It is better to use the
simple block of wood and to control the position of the head with
the hands during the operation. The prosector takes his position
behind the head of the table. The hair of the cadaver is then
arranged in such a manner as to be out of the way, and protected
by towels so that it will not become matted with blood and bone-dust.
When the hair is short it is parted in a line extending from
just behind the ears across the vertex. The shape of the head and
the degree of baldness will determine the exact position of the primary
incision through the scalp; sometimes it must be made farther
back than the line connecting the ears in order that the incision
may be concealed. In the great majority of cases it will be made
as follows: The head is steadied with the operator’s left hand, and
turned as far to the right as possible. The point of the cartilage-knife
is then inserted into the scalp, just within the hair-line, behind
the left ear, and with the belly of the knife the scalp is cut through
to the periosteum, in the line of the hair-part, over the vertex, and
as the head is turned to the left, down to the hair-line behind the
right ear, the knife, as it approaches the end of the incision being
raised so as to make the point finish the cut. This scalp-incision
should be made with a strong and quick drawing movement, but
the knife should not be pressed so firmly against the bone as to
cut through the periosteum, else hemorrhages, collections of pus.
etc., may escape before they are seen.
The scalp is next loosened anteriorly by means of the hands,
using the tip of the cartilage-knife occasionally to nick the fascia
and thus facilitate the working forward of the anterior flap until it
has been loosened as far as the supraorbital ridges anteriorly and
down to the level of the beginning and ending of the incision made
across the vertex. When sufficiently loosened the anterior scalp-flap
is turned over the face, and stretched over the chin, where it
will remain, out of the way, and with both face and hair protected.
The posterior flap of the scalp is then worked back to the same
level at the sides and to the lower border of the occipital protuberance
posteriorly. It is then turned under between the back of the
neck and the wooden block. In stripping the scalp the greatest care
should be taken not to cut or tear off the periosteum. Scars, tumors,
adhesions, traumatic lesions, etc., in the scalp should be carefully
worked out and described as the flaps are loosened. The convex
margin of the fascia of the temporal muscles is now cut with the
point of the cartilage-knife and the muscles are stripped down on
both sides to the level of the folded-over scalp-flaps, where they are
either left hanging down out of the way or are cut off and laid
aside. If they cannot be easily stripped down, they may be scraped
off with the chisel. Some prosectors remove them at the same time
with the scalp, but this is usually not well done. The skull now
should be bare, except for the periosteum, down to the level of a
line passing just above the upper margin of the orbits anteriorly,
at the sides just above the aural opening, and posteriorly just below
the occipital protuberance.
The periosteum is next removed over the entire cranial surface
by means of the chisel, bone-scraper or dull knife. In medicolegal
cases particularly it is of the greatest importance that the periosteum
be removed in this way and the surface of the skull-cap carefully
examined. In ordinary cases the periosteum is often left
attached to the skull-cap when the external examination shows no
pathologic conditions to be present.
After the examination of the periosteum and external surface
of the cranium the skull-cap is removed by sawing in such a way
that a space large enough for the convenient and safe removal of
the brain is afforded. This may be done in several ways. A circular
incision may be made through the skull around its entire
circumference just above the level of the folded-over flaps of scalp.
The left hand should be protected by a folded towel. The head is
held firmly in the left hand and turned slightly toward the left.
The saw-cut is then begun anteriorly about ½ cm. above the supraorbital
margins, and continued around to the right, while the head
is turned more and more to the left. The ear should be held down
out of the way by an assistant. The saw-cut is continued then at
the same level to the posterior median line just below the level of
the occipital protuberance. The saw is then removed and the head
turned as far as possible to the right; the saw-cut is then continued
around the left side from the posterior median line until the beginning
of the cut in front is reached and the circular incision is complete.
Fig. 26.—Author’s method of removing skull-cap.
Another method of sawing the skull-cap is to saw in two
planes, forming an angle just behind and below the ear (angular
method). The anterior cut is made above the hair-line of the forehead
and carried down at the sides to meet just below and behind
the ear the posterior semicircular cut made at this level. A modification
of this method is to make the anterior and posterior cuts
join at a sharper angle in front of the ears. Both of these methods
have for their object the prevention of disfigurement of the forehead.
When the circular method is used a depression or ridge is
often seen in the forehead, after the restoration of the body, due
to the slipping of the skull-cap after it has been replaced. Such an
accident may happen even when the bones are wired together,
unless great care has been taken in wiring.
A more satisfactory way of opening the skull, and one that
makes slipping of the skull-cap after restoration practically impossible,
is the method used by the writer, and illustrated in Fig. 26.
The scalp-incision and the folding back of the flaps are carried out
as described above. The right half of the anterior flap of the scalp
is then taken in the left hand and used to control the position of
the head, the latter being turned to the left as far as possible. An
oblique saw-cut is then made on the right side in a line extending
from the posterior margin of the site of the posterior fontanel, over
the right parietal eminence toward the right mastoid prominence.
The sawing begins on the greatest convexity and is continued upward
a slight distance beyond the median line, and downward far
enough to cross the level of the connecting horizontal cut to be made
later at a level just above the aural canal. The left half of the posterior
scalp-flap is now taken into the left hand and used to steady
the head while it is turned over to the right as far as possible. A
similar oblique cut is then made on the left side, crossing the one
made on the right, in the median line, behind the site of the posterior
fontanel, and extending down across the left parietal eminence in
the direction of the left mastoid prominence. While the head is still
held by the left half of the posterior scalp-flap a horizontal saw-cut
is begun on the left side, just above the aural canal, intersecting the
oblique cut posteriorly and continued around to the front at a level
just above the supraorbital ridges. When the frontal region is
reached the head is steadied by holding the left half of the anterior
portion of the scalp-flap. When the horizontal cut reaches the right
temple the right half of the anterior flap is taken in the hand, and the
head turned to the left while the cut is carried around the right temporal
region to intersect the right oblique cut. When the skull-cap
is removed there is formed an interlocking joint (Fig. 27) which
under ordinary conditions holds the restored skull-cap firmly without
wiring and without the formation of a ridge or crease on the
brow, since the bone cannot slip. It is best, however, in the event
of the shipment of a cadaver by rail to wire the bones to prevent
any forcible dislodgement.
Fig. 27.—Skull-cap after removal, showing posterior interlocking joint.
Whatever method is used the greatest care should be taken to
saw the skull-cap without injuring the brain. The difference in
thickness of different portions of the cranium must be borne in
mind. Sight, sound and “the feel” are taken as guides. The outer
and inner tables, the diploë, and the dura have an entirely different
resistance and give a different sound. The saw-dust of the outer
table is white, that of the diploë red, that of the inner table white.
As soon as the saw strikes the dura a peculiar “rustling” or “scraping”
sound is heard, and this should be taken as the warning to
stop sawing. On curved surfaces it is best to begin sawing on the
greatest convexity and to continue until the saw is through and
then to extend the cut from this point. The sawing should be done
lightly and quickly, without too strong pressure. Set the saw carefully
at first, to avoid slipping. The small bone-saw is usually used
for this operation; saws attached to electric or dental engines are
sometimes employed. Care should be taken to bring the beginning
and ending of the saw-cut into the same plane; and the oblique cuts
should be symmetrical.
As soon as the sawing is completed, no matter what method is
used, the T-chisel or skull-opener (Fig. 12) is used to spring off
the skull-cap. The chisel-blade is inserted into the saw-cut in the
right frontal region, and turned sideways with a quick, powerful
movement of the right hand. Any portions of the inner table not
completely sawed through (usually in the region of the petrous
portion of the temporal) are thus broken, and the dura is loosened
sufficiently from the inner table to allow the prosector to introduce
the fingers of the right hand beneath the skull-cap in the frontal
region and to hold down the dura while the fingers of the left hand
inserted into the frontal saw-cut pull the skull-cap backward with
a powerful tug, completely separating it from the dura, unless the
dura is adherent throughout, as is the case in very young children,
old people, and in certain pathologic conditions. In the latter case
it may be necessary to cut the dura along the line of the horizontal
saw-cut and to remove it with the skull-cap, cutting the falx as the
skull-cap is lifted. In young children the dura must always be
removed with the skull-cap. In the case of pathologic adhesions
an attempt should be made first to separate them from the lamina
vitrea by cutting them with a knife or chisel-blade inserted through
the saw-cut. As the adhesions are severed the skull-cap is lifted
gradually backward. Too much force should not be used in jerking
off the skull-cap, else the brain may be damaged. Whenever
possible the dura should be left intact, as a better judgment is
thereby obtained of the intradural pressure, and there is less danger
of losing the contents of the subdural space.
Some prosectors use hammer and chisel to remove the skull-cap.
This is a bad method, particularly so in the case of medicolegal
autopsies, as artificial fractures of the skull may thus be produced.
It is safest never to use a hammer in the opening of the
skull.
The skull-cap is examined as soon as taken off. If the periosteum
was not previously removed it is now scraped off, and the
skull-cap examined against the light. After its complete examination
the operator proceeds to the removal of the brain.
2. Removal of the Brain. The convexity of the dura is first
examined. The narrow-bladed brain-knife or long section
knife (Fig. 3) is now taken in hand, and with the cutting edge
directed upward the point of the blade is inserted into the anterior
end of the superior longitudinal sinus and the sinus cut open as far
posteriorly as the opening in the cranial vault will admit. Its walls
and contents are then examined. With cutting edge outward the
point of the brain-knife is then inserted through the dura just to
the left of the anterior end of the falx and the dura cut around to
the left at the level of the horizontal saw-cut. The knife is then
inserted through the dura just to the right of the falx and the dura
cut in the same way on the right side. The two halves of the dura
are now loosened from the convexity of the brain by breaking the
blood-vessels connecting the dura with the inner meninges. The
index-finger is swept over the convexities and along the sides of
the longitudinal sinus, tearing the pial veins. Pathologic adhesions
should be carefully worked out. The finger is then used to raise
the falx anteriorly so that the point of the brain-knife can be introduced
beneath it to cut it upward and forward. The dura is then carefully
examined and turned back over the brain and allowed to hang
down over the occiput. The inner meninges over the exposed portion
of the brain are now examined; and the brain is then removed
as follows: The four fingers of the left hand are placed beneath the
frontal lobes, lifting these sufficiently for the prosector to be able
to cut the I, II, III, IV and VI cranial nerves, the carotids and
pedicle of the hypophysis down to the tentorium cerebelli. The
tentorium is then cut with the tip of the brain-knife, which is held
perpendicularly, by a gentle up-and-down sawing motion, from left
to right along the superior border of the petrous bones. The V,
VII, VIII, IX, X, XI and XII cranial nerves are then cut as closely
as possible to their exits. As they are cut the brain is lifted gradually
more and more, and supported by the left hand. When all the
connections have been cut except the cord and vertebral arteries
these are severed by the myelotome (Fig. 4), or by the brain-knife,
the point of which is put down through the foramen magnum as far
as possible, and the cord and vertebral arteries severed by a transverse
cut made from left to right as nearly horizontal as possible.
The knife is now laid aside and the first two fingers of the right hand
put beneath the two cerebellar lobes so that the medulla and portions
of cervical cord fall between these fingers, which are then used
to lift them upward and backward. The freed brain is now rolled
over backward out of the cranial cavity upside down onto the palm
of the left hand, and is then placed upon a board, tray or dish ready
for examination. If the cord has already been removed, any portion
remaining is taken out with the brain. In case the cord has been
freed and is to be removed with the brain it is only necessary to cut
the vertebral arteries and then to lift up the brain, drawing the cord
up through the foramen magnum.
3. Section of the Brain. (Modified Virchow Method.) The
brain as it is taken from the cranium is placed upside down, with
occipital lobes toward the prosector. The basal meninges and
blood-vessels are then carefully examined. The hemispheres and
convolutions are separated and the arachnoid torn by the tip of
the index-finger or the handle of a scalpel; and the branches of the
cerebral vessels to their deepest ramifications are thus exposed,
giving a complete picture of the circle of Willis and all of its
branches to the point where they enter the brain-substance. The
larger vessels are opened by transverse or longitudinal cuts and
their walls and contents noted. The brain is then turned over, and
the meninges examined over the entire convexity. The pia and
arachnoid are then removed together over the entire convex and
median surfaces of the hemispheres. If the blood-vessels between
the convolutions are seized with the forceps the meninges can be
easily stripped off, the fingers aiding the forceps, using great care
not to tear the brain substance. The meninges are removed about
half-way down the outer sides of the hemispheres and are there
left intact so as to hold the pieces of brain together after it has
been cut, and so permit orientation. The cortical surface is then
examined; if bloody, it should be washed with a weak stream of
water.
Fig. 28.—Method of examination of brain. Opening of left ventricle. Line
showing direction of cuts. (After Nauwerck.)
The hemispheres are now separated until the corpus callosum
comes into view. The left hemisphere is then held by the left hand,
with the thumb on the median surface and the fingers on the outer
and under sides, so that the hemisphere is turned outward and yet
raised slightly at the same time, thus stretching the corpus callosum
over the cavity of the left lateral ventricle. The point of
the narrow brain-knife (Fig. 3) with cutting edge upward is then
introduced with great care through the corpus callosum about
midway between the genu and splenium and close to the gyrus
cinguli (gyr. forn., Fig. 28). The corpus callosum at this point is
about 2 to 3 mm. thick and it is gently nicked with the point of the
knife until an opening is made into the cavity of the ventricle. The
knife-point must not be allowed to slip through to damage the basal
ganglia beneath. Into the small opening thus made the brain-knife,
held nearly horizontal, with cutting edge upward, is introduced
and the corpus callosum cut forward until the anterior horn
of the ventricle is reached. The point of the knife is then passed
into the horn and the knife-handle raised and turned over forward,
cutting slightly outward through the frontal lobe to its apex and
disclosing the anterior horn. The knife is then reversed, held horizontally,
with cutting edge upward, and the corpus callosum cut
posteriorly from the beginning of the first cut, until the posterior
horn is reached, when the point of the knife is inserted into the horn
and the knife turned over toward the operator, cutting backward
and somewhat outward through the occipital lobe to its apex and
opening up the posterior horn. (See Fig. 28.) By this method the
lateral ventricle is opened first at the highest point of its cavity,
and the fluid contents collect in the anterior and posterior horns so
that the amount and character can be easily noted.
Fig. 29.—Section of brain. Ventricles opened. Lines show direction of large
longitudinal incisions through brain-substance. (After Nauwerck.)
The left hemisphere is now turned still more to the left, and
with the brain-knife a broad, smooth cut is made through it downward
and outward at an angle of 45°, reaching nearly to the cortical
surface, in a line connecting the cut through the frontal lobe with
that through the occipital and passing along the outer borders of the
corpus striatum. The left hemisphere is thus separated in the form
of a prism-shaped mass having a convex under surface. (See Fig.
29.) The severed hemisphere falls back by the force of its own
weight and the flat cut-surface of the cerebrum is then bisected by a
cut made at right angles to it, from before backward, and extending
nearly to the cortical surface. (See Fig. 29.) In the case of both
of these large incisions of the hemisphere the severed parts are left
connected by a small portion of cortical tissue and the pia. The
knife should be perfectly dry and clean while making these cuts,
and the cut surfaces should not be touched with the fingers or knife-blade,
or wet with water, until they have been carefully inspected.
Other straight parallel cuts may be made through the brain substance
toward the cortex, the severed portions being left connected
by the pia so as to permit future orientation.
The right lateral ventricle is now opened. The four fingers of
the left hand are placed outside and beneath the right hemisphere
with the thumb on the median surface, gently raising the hemisphere
toward the left, taking care to see that the corpus callosum
is not pulled over to the right of the median line. The knife is held
in the right hand beneath the left one. The right ventricle is then
opened in the same way as the left, beginning in the middle of the
corpus callosum near to the gyrus cinguli, and opening first the
anterior horn and then the posterior. The operation is somewhat
more difficult on the right side than it is on the left, owing to the
lack of tension in the cut corpus callosum, so that greater care must
be taken to avoid injuring the floor of the ventricle. After the
opening of the ventricle the right hemisphere is cut by long parallel
incisions made in the same way as on the left side. (See Fig. 29.)
Some prosectors in opening the right ventricle prefer to turn the board
around so that the frontal lobe points to the operator. The right hemisphere
is then held in the left hand and the right ventricle opened just as if it were
the left ventricle, except that the posterior horn is opened before the anterior.
The method given above can be just as easily learned, and time is saved by not
turning the board around twice, as is necessary in the latter case.
After the right ventricle has been opened the corpus callosum
and fornix are raised by the thumb and index-finger of the left
hand, putting the septum pellucidum on the stretch. The narrow
brain-knife is then introduced through the interventricular foramen
from the right, its blade flat, with cutting edge directed forward and
upward, and the fornix and the corpus callosum are cut anteriorly,
exposing the cavity of the septum pellucidum. To expose the third
ventricle, the corpus callosum, septum pellucidum and fornix are
then lifted up and laid back from the velum chorioides. The tela
chorioidea is then, with the chorioid plexus of the third ventricle,
pulled backward from over the pineal body and the corpora quadrigemina,
care being taken not to tear away the pineal body. The
veins entering the tela from the great ganglia are cut with the point
of the knife. The right descending posterior pillar or crus of the
fornix is then lifted with the thumb and index-finger of the left
hand, the brain-knife on the flat side with cutting edge to the right
is introduced beneath it, and the crus is cut toward the right. The
corpus callosum, fornix and tela are then turned over to the
left (see Fig. 29), fully exposing the pineal body and the corpora
quadrigemina.
The cerebellum and medulla are now supported by the index-finger
of the left hand placed beneath the latter; while the brain-knife
is held nearly horizontally in the right, and a deep sagittal cut
is made into the vermis exactly in the median line so as to make
a small opening into the fourth ventricle. The point of the knife
with cutting edge upward is then introduced into this opening and
the incision through the vermis increased anteriorly and posteriorly
until the two cerebellar hemispheres fall apart and the fourth ventricle
is wholly opened. The point of the knife, with cutting edge
upward may then be introduced into the posterior opening of the
aqueduct and the latter opened to the third ventricle, the pineal
body being removed before the cut through the roof of the aqueduct
is made. In the Virchow method the corpora quadrigemina and the
vermiform portion of the cerebellum are sectioned in the median
line by a cut opening up both aqueduct and the fourth ventricle.
Other prosectors open the aqueduct from the third ventricle toward
the fourth. The left cerebellar hemisphere is now cut through in
the line of the middle branch of the arbor vitæ, exposing the dentate
nucleus. Each half of the hemisphere is again bisected by a cut
made at right angles to the surfaces exposed by the first cut. The
right cerebellar hemisphere is then similarly sectioned.
The section of the brain now shows all of the ventricles and
their relations, as well as the condition of a large part of cerebral
and cerebellar brain-substance. (See Fig. 29.) All cut portions are
connected with each other and it is possible to fix the entire brain
as it now stands and later find no difficulty in topographic orientation.
There still remains, however, the demonstration of the conditions
in the basal ganglia, pons, medulla, etc. These structures
are best shown by transverse cuts made across the entire brain as
it lies after the opening of the ventricles. The hemispheres may be
cut singly, but it is better to cut both of them at the same time,
using a dry blade and drawing the knife from left to right, making
identical cuts on the two sides, that the histologic features may be
compared. The transverse cuts may be made in the same region
as recommended in the method of Pitres (see below), or they may
be made closer together. As the cuts are made the sections are separated
from each other by the knife-blade and the cut surfaces
examined. After the cerebrum has been cut transversely in this
way the peduncles, pons, medulla and cervical cord are elevated on
the index-finger of the left hand and also sectioned transversely and
the cut surfaces examined. If the index-finger be placed beneath
the medulla parallel with its long axis, and medulla and pons raised
up the cerebellar lobes fall to the side out of the way. All transverse
cuts are made from left to right and so deep that only a small
portion of brain-tissue, or the basal meninges hold the parts
together for future orientation. The brain is now completely sectioned,
with all parts preserved and capable of being restored to
their normal relations. The parts may be re-assembled and the
entire brain put into the fixing fluid, when it is desirable to save the
entire organ for microscopic study.
Other Methods of Opening Brain. For the demonstration of large
localized pathologic conditions the brain may be opened by a very simple method
of transverse or sagittal incisions extending entirely through the organ. The
broad-bladed brain-knife should be used and the blade should be wet. The cuts
should be made symmetrically on the two sides and with due reference to anatomic
landmarks. They may be made either from the convexity or from the
basal side.
The method of Pitres (see Fig. 30) is also employed for the same purpose.
After the inspection of the meninges and basal vessels and opening of
lateral ventricles, the brain is divided into three parts, consisting of the two
hemispheres and one part made up of the cerebellum, pons and medulla. The
anterior ends of the cerebral peduncles are cut transversely in front of the
corpora quadrigemina, and the hemispheres are then separated by a sagittal
median incision through the corpus callosum, septum pellucidum, commissure
of third ventricle, substantia perforata posterior, tuber cinereum and infundibulum,
the optic chiasm and neighboring optic tract having first been removed.
The hemispheres are then cut as follows: The hemisphere is laid upon its
median surface with the occipital lobe toward the operator. The four fingers
of the left hand are then put into the central fissure and six parallel transverse
cuts (see Fig. 30) are made through the hemisphere with a dry brain-knife, as
follows:
1. Sectio praefrontalis, through the frontal lobe about 5 cm. in front of
and parallel to the central fissure, exposing the cortex and medulla of the three
frontal convolutions, gyrus orbitalis, and the convolutions of the median surface
of the frontal lobe.
2. Sectio pediculo-frontalis, through the “foot” of the frontal convolutions,
exposing the three frontal convolutions, anterior end of the island of Reil, gyrus
orbitalis, corpus callosum, head of caudate nucleus, anterior portion of lentiform
nucleus and lenticular striated portion of the internal capsule.
3. Sectio frontalis, through the anterior central convolution, showing the
anterior central convolution, island of Reil, the temporal convolutions, corpus
callosum, tail of caudate nucleus, the optic thalamus, middle portion of lentiform
nucleus, the anterior portion of the lenticular part of the internal capsule,
the external capsule and claustrum.
4. Sectio parietalis, through the posterior central convolution, showing
the same, the island of Reil, temporal convolutions, corpus callosum, tail of
caudate nucleus, posterior end of optic thalamus and lentiform nucleus, posterior
end of the lenticular-optic part of internal capsule, the external capsule and the
claustrum.
5. Sectio pediculo-parietalis, through the foot of the parietal convolution,
3 cm. posterior to the fissure of Rolando, showing superior and inferior parietal
lobules, temporal convolutions, corpus callosum, extreme posterior portion of
optic thalamus and tail of caudate nucleus.
6. Sectio occipitalis, about 1 cm. in front of the parieto-occipital sulcus,
showing cortex and medulla of occipital lobe.
After the third cut the fingers of the left hand are taken out of the central
fissure. The sections of brain as they are cut are left lying in their order with
the posterior face of the cut upward. The same incisions are then made in
the other hemisphere and the two series of sections compared. The cerebellum,
pons and medulla are then examined as described above.
Section of Brain in Skull. When the skull-cap is removed by a circular
saw-cut the brain may be cut through with the saw at the same time; or, after
the skull-cap and dura have been removed, the upper portion of the hemispheres
may be sliced off by a horizontal cut made at the level of the saw-cut. The
portions removed are examined further by sagittal cuts. The lateral ventricles
are then examined in the skull, and the remaining portion of the brain either
cut transversely in situ or removed and sectioned outside of the cranium. This
method is mentioned to be condemned.
For special neuropathologic studies a number of methods have been advised,
the main purpose of which has been to preserve intact parts of the brain having
definite anatomic relationships so that lesions may be studied by means of serial
sections of the entire system involved. The methods of Déjerine and Meynert
are employed for this purpose.
Method of Déjerine. After a careful examination of the cortical surface
for the presence of lesions, and of the inferior surfaces of the crura for secondary
degenerations, the pons is cut horizontally in a plane parallel with the
inferior surface of the hemispheres and passing just above the great root of the
trifacial. The brain is thus divided into two portions, one consisting of the two
peduncles and superior portion of the pons, the other containing the remaining
portion of the pons, the cerebellum and the medulla. The cut surfaces of the
pons are examined for evidences of degeneration in the pyramidal tracts, and
the hemispheres are separated after it has been determined in which one the
lesion is located. If the lesion is found to be central the degenerations of
importance will be found in the tracts of the internal capsule and in the region
of the tegmentum. The hemispheres are then opened by horizontal incisions
passing through the superior third of the optic thalamus. If the lesion is cortical
the hemispheres are divided into three segments by two transverse vertical
incisions, one passing just posterior to the splenium of the corpus callosum, the
other just anterior to the knee. The posterior segment consists of the occipital
lobe and part of the parietal; the central one contains the regions adjacent to
the fissure of Rolando, the middle portion of the temporal convolutions, the
basal ganglia, the cerebral peduncle and corresponding portion of the pons; the
anterior segment consists of the forepart of the frontal lobe. The segments are
then fixed and hardened and cut on a brain-microtome. The anterior and posterior
segments are sectioned vertically transversely, the central segment is cut
horizontally. By this method cortical lesions may be accurately located, and
the entire course of degenerating fibres followed out.
Method of Meynert. This method aims to separate all portions of the brain
possessing differences of internal structure that may be taken as indicating difference
in significance, and to compare them by weight. The natural furrows
or fissures are used as incision-lines, and three series of dissections are made,
the first of which, here given, is the separation of the brain into three parts, the
brain-mantle, brain-stem and cerebellum. The brain, with pia still intact, is
placed base upward, with cerebellum toward operator. The arachnoid covering
the fissure of Sylvius is cut or torn, and the island exposed. The three furrows
bounding it must be plainly seen. The pia between the optic tract and uncus, as
well as that in the middle portion of the transverse fissure between corpora
quadrigemina and corpus callosum, is cut, and the under surface of the
splenium of the corpus callosum is freed from membranous adhesions to the
corpora quadrigemina and the pineal body. When the medulla with pons and
cerebellum is now elevated the transverse fissure gapes open, and permits a
free look into the lateral ventricles.
The brain-mantle on both sides is now separated from the brain-stem at
the basal portion of its frontal end. The knife, held nearly horizontal, is introduced
into the fissure between the posterior border of the orbital convolutions
and the anterior border of the lamina perforata anterior; and a cut is made
slightly downward, not quite parallel with the orbital surface, about 3 cm. anteriorly
in the medulla of the orbital convolutions, around the under surface of
the head of the corpus striatum. The temporal ends of the brain-mantle are
then cut through, the knife moving externally between the temporal lobe and
the island, inside between the descending horn of the lateral ventricle and the
optic tract. As soon as the inner cut has been extended beyond the outer corpus
geniculatum on both sides, the knife is turned downward at right angles, in a
curving stroke, to cut through the junction of the occipital lobes with the stem,
internally along the portion of the corpus striatum adjacent to the optic thalamus,
externally between the junction of the first temporal convolution with the
operculum on one side, and the posterior end of the island on the other. When
this has been done on both sides the blade of the knife is turned forward in a
semicircular stroke. The posterior end of the brain-stem is gradually lifted up
out of the mantle by elevating the cerebellum and medulla oblongata. The
upper peduncle of the arch of the brain-mantle along the upper border of the
island and the outer border of the corpus striatum is severed from the stem as
far as the anterior end of the upper border of the island, which bends downward
into the anterior border. The peduncle of the fornix with the pedicle of
the septum and the lamina of the knee of the corpus callosum are severed close
above the anterior commissure, and the knife following the anterior border of
the island is carried downward from the head of the corpus striatum. The
remaining connections between the frontal lobes and stem are put on a moderate
stretch and the incision is completed by bringing the knife back into the
first cut made from the opposite direction parallel with the orbital surface over
the upper surface of the stem. The three arms of the cerebellum are then severed
and the brain-stem, consisting of the island of Reil, the basal ganglia,
crura, pons, medulla and cerebellum, is completely freed and lifted out of the
mantle.
A combination of the Meynert and Virchow methods is used by many.
The lateral ventricles are opened and an incision made along the fornix into
the descending horn. The stem-ganglia are then cut out and brain-mantle and
stem separated. The hemispheres are then cut by frontal sections made from
the anterior end as far as the central convolutions. From the central convolutions
backward horizontal sections are then made; the series of sections are
numbered in order and fixed and hardened for microscopic examination.
It is evident that the section of the brain can be modified to meet the
individual requirements, according to the nature, location and extent of the
lesion and the character of the study to be made of the latter. The brain may
be fixed and hardened either before or after sectioning.
Fig. 31.—Base of cranium, after removal of brain. (After Nauwerck.)
4. Examination of Base of Cranium. After the section of the
brain the prosector returns to the head and examines the basal
sinuses (see Fig. 31) by cutting them open with the point of the
brain-knife or by using small shears and forceps. When cut open
the walls of the sinuses should be laid back for inspection. Ordinarily
the sinus transversus, sinus petrosus superior, sinus petrosus
inferior, sinus cavernosus and the sinus sigmoideus are opened. The
last-named is given especial attention because of the frequency of
thrombosis and its involvement from carious conditions of the
neighboring portions of the temporal bone. In purulent mastoid
inflammation the infection often reaches the meninges by this route.
The carotids and the exits of the cranial nerves (see Fig. 31) are
then examined. The hypophysis (see Fig. 31) is then removed by
making semicircular cuts through the overlying dura mater around
the gland and then lifting it out of the sella. This is best accomplished
by means of the small scalpel and forceps. It is sometimes
necessary to chisel away the overhanging bony parts in order to
remove the hypophysis without damaging it. When removed it
may be sectioned by a sagittal cut made either to the left or right
of the pedicle.
Fig. 32.—Incisions for examination of orbit, ear and nose. x y marks line of
incision for exposing nasal tract according to method of Harke.
The basal dura is next removed by means of forceps and knife,
chisel or dura-forceps. The bones are then carefully examined for
fractures, caries, etc. Particularly in cases of middle-ear disease,
meningitis, etc., should the dura be removed from the temporal bone
and the latter carefully examined.
5. Examination of the Orbit. When the eye-ball cannot be
enucleated anteriorly the orbit may be opened by removing its roof
with small bone-chisel and hammer according to the lines of incision
given in Fig. 32. The dura is, of course, first removed. The bony
plate covering the orbit is thin and easily splintered, so that the
chisel should be very carefully used. The pieces of bone should
be removed with the forceps. The optic foramen and the superior
orbital fissure may be opened at the same time. After the
removal of the roof of the orbit the orbital fat and muscles are
dissected away until the optic nerve and eye-ball are exposed. The
sclera is then seized with the forceps and the eye-ball pulled back
and cut quickly around its equator with sharp shears or scalpel.
The head should be held so that the eye looks downward, so that
when cut the vitreous humor falls out, leaving the retina well
spread out over the posterior half of the bulb. If the retina is
thrown into folds it may be straightened by blowing into it or filling
it with water. After the retina has been examined it may be
washed off from the chorioid, leaving it attached around the papilla.
The pigment-layer remains attached to the chorioid, and when the
latter is examined for the presence of tubercles it should be removed.
When removed for microscopic studies the eye should be placed at
once in a suitable fixing fluid.
Fig. 33.—Tympanic cavity after removal of tegmen. an, mastoid antrum; ha,
hammer-anvil articulation; s, tendon of musc. tens. tymp.; t. musc.
tens. tymp.; g, genu of facial nerve; a, auditory nerve; f, facial
nerve; n, nerv. petros. superfic. major. (After Politzer.)
6. Examination of the Ear. The dura is removed from over
the temporal bone and the tegmen tympani cut off with chisel and
hammer as indicated in Fig. 32, 1, 2, 3, 4, 5, thus exposing the
tympanic cavity as shown in Fig. 33. When the tegmen tympani
is very hard and compact the hammer and chisel are used to remove
that portion of the tegmen lying laterally to the eminence formed
by the upper semicircular canals. As the ear-ossicles lie immediately
beneath the roof of the tympanic cavity care should be taken
not to injure them with the chisel, and this can be best accomplished
by beginning to chisel so far posteriorly that the tegmen of the
mastoid antrum is first cut away, and from this opening the cut is
extended carefully until the tegmen tympani is removed. When
the tegmen of the tympanic cavity is very thin and porcelain-like,
as is often the case, it may be most quickly and expediently
removed by means of the pointed bone-forceps. A complete view
of the tympanic cavity is obtained by removing the coverings of
the mastoid antrum posteriorly and the bony canal anteriorly after
first drawing out the musc. tensor tymp. from the canal. The
mastoid process may be opened with the saw or with chisel and
hammer. The labyrinth may be exposed by cutting anteriorly with
the chisel held horizontally in such a way as to spring off the upper
half of the bony labyrinth, exposing the vestibule and cochlea. The
superior and posterior semicircular canals come off, and from their
open spaces the membranous semicircular canals can be lifted out
with the forceps and then examined in water.
The external auditory canal may be opened and the outer surface
of the ear-drum examined by carrying the anterior flap of the
scalp downward and forward until the entrance into the bony canal
is reached. The external ear is then cut off close to the bone, using
slight pressure so as to avoid tearing out the lining of the canal
or injuring the tympanum. The anterior bony wall of the canal,
and a part of the lower, are then carefully chiseled away until the
membrane is exposed. Any bony projections on the thicker upper
or lower wall of the canal may be trimmed off to give an unobstructed
view. When pathologic changes are present upon any part
of the wall of the canal the latter should be opened from the other
side so as to expose the condition fully.
For the removal of the auditory apparatus and its examination
outside of the body a number of methods are advised. The temporal
bone may be resected by extending the scalp-incision half-way
down the neck along the anterior edge of the trapezius. The
anterior flap with the external ear is carried forward as far as the
middle of the zygoma and below to the angle of the lower jaw. The
posterior flap is carried backward to the middle of the occipital
bone. All soft parts are cut as closely to the bone as possible. A
saw-cut is now made across the posterior cranial fossa, beginning
just behind the mastoid process and extending to the median line
of the clivus half-way between the anterior border of the foramen
magnum and the sella turcica. The sinus sigmoideus is thus included
in the part to be removed. A second saw-cut is then made across
the middle cranial fossa, in a line nearly parallel with the transverse
diameter of the skull, cutting the middle of the zygomatic arch, the
anterior portion of the squama, the great wing of the sphenoid and
the pterygoid process, to the tuberculum sellæ. The median ends of
the two saw-cuts are then united by a chisel-cut in the median line
of the sella and clivus. All bony connections remaining are then
cut with the chisel. The soft parts are then cut, beginning with
those attached to the mastoid process; the loosened bone is then
raised and pulled anteriorly so that the posterior capsule of the
maxillary joint can be cut and the jaw-bone disarticulated. All
remaining soft parts of neck and nasopharynx are now cut and the
temporal bone with the complete ear-apparatus and neighboring
portion of nasopharynx is removed. When both temporal bones are
removed the saw-cuts should not be carried to the median line, but
should stop at the borders of clivus and sella, and then united on
each side by sagittal chisel-cuts made along these borders, leaving
the clivus and sella as a firm connecting bridge between anterior and
posterior portions of the skull. The resected bone may now be examined
by means of a saw-cut made perpendicularly through the apex
of the eminence of the superior semicircular canals and parallel with
the crista of the petrous bone. The tegmen should be removed
before the saw-cut is made and the covering of the tympanic cavity
and the outer wall of the external auditory canal also removed. The
tendon of the tensor tympani is cut and the anvil-stapes articulation
severed so that the saw-blade passes between the drum, hammer and
anvil on one side and the head of the stapes on the other without
damaging or displacing the ossicles. This can be accomplished by
pushing outward the drum with hammer and anvil so that the saw-blade
can pass between the anvil and the head of the stapes. The
bone should be held in a vise and a fret-saw used. On one side of
the cut will be seen the drum, hammer, anvil and anterior portion
of the mastoid cells; on the other the stapes, wall of the labyrinth
and posterior half of the mastoid cells. The Eustachian tube may
be easily worked out from the tympanic cavity or from the pharyngeal
opening.
A sagittal section of the middle ear may be made, giving pictures
as shown in Figs. 34, 35. The temporal bone is resected as
above, the tegmen tympani removed and the bony covering of the
Eustachian tube removed with hammer and chisel until the tube is
exposed from its pharyngeal opening to the isthmus. The temporal
bone is then divided into an outer and an inner half by cutting the
roof of the tube with fine straight scissors from the pharyngeal
mouth to the bony portion and then cutting the membranous floor of
the canal likewise. The bony canal, the floor of the tympanic cavity
and the mastoid process are then cut sagittally with a fine fret-saw,
passing between the lower annular segment of the sulcus tympani
and the inner wall of the tympanic cavity. By altering the direction
of the saw-cut the Eustachian tube may be removed in connection
with either outer or inner portion of the temporal bone.
Fig. 34.—Sagittal section through left middle ear, outer half. an, mastoid antrum;
n, niche of the hammer-anvil body; op, mouth of Eustachian tube;
te, Eustachian tube; it, isthmus of tube; mt, tympanum; ww, mastoid
cells. (After Politzer.)
Fig. 35.—Sagittal section of left middle ear, inner half. op, mouth of Eustachian
tube; te, Eustachian tube; tp, musc. tensor tymp.; p, promontory;
st, stapes; sp, musc. staped; f, facial nerve; an, mastoid antrum;
ww, mastoid cells; ot, ost. tymp. tubæ; u, lower wall of tympanic
cavity. (After Politzer.)
Other methods of examining the ear are shown in Fig. 32. The tympanic
cavity and labyrinth may be removed intact by cutting with a chisel having a
cutting edge 3 cm. broad, in the lines 1, 2, 3, 4, 5, as shown in Fig. 32. The
cut 1 is made with the chisel held nearly horizontal and parallel with the base
of the skull. Cuts 2, 3, 4 and 5 are made vertically. Great care must be taken
not to splinter the bone. A small chisel can be used to connect the ends of
the cuts. Soft parts are cut away with the chisel. An elevator is then introduced
into cuts 1 and 2 and the part lifted out by cutting the remaining soft
parts and the articulation of the lower jaw. The portion removed contains the
inner section of the external auditory canal, tympanic cavity, ear-drum, a portion
of the mastoid cells, the entire labyrinth, auditory and facial nerves.
Politzer’s method of removing the auditory apparatus in connection with
the nasopharynx and the Eustachian tubes is also shown in Fig. 32 by the lines
a, b, c, d, e. Two drill-holes are made in the floor of the anterior fossa at a,
1 cm. to the right and to the left of the crista galli, extending vertically through
the nasal cavity to the under surface of the hard palate. A fine key-hole saw
is then introduced through the right drill-hole, and the base of the skull is
then sawed in the lines ab, bc, cd and de as indicated in Fig. 32. Symmetrical
cuts are then made on the left side following the same lines and the two drill-holes
connected by a transverse saw-cut. Any remaining bony connections are
then cut with a wide chisel. In order to cut the bony bridges in the region
of the nasopharynx it may be necessary anteriorly to use the Hey-saw through
the mouth-cavity as well as from the cranial side. To facilitate the removal
of the loosened portion two parallel saw-cuts are made in the occipital bone
3 cm. to the left and right of the median line, extending nearly to the posterior
edge of the foramen magnum and connected below by a slightly rounded cut as
shown in Fig. 32. A long-armed chisel can now be used conveniently through
the opening thus made, for horizontal manipulations upon the base of the skull,
while the loosened portion of the base is lifted with the bone forceps or
nippers set in the posterior saw-cut e and the sella turcica. As the bone is
raised the posterior and lateral pharyngeal walls are cut with the cartilage-knife,
the posterior wall of the capsule of the maxillary articulation on both
sides severed, the jaw disarticulated, and all muscular and membranous connections
cut, until the preparation is completely freed. The auditory apparatus
and the Eustachian tubes can now be examined by any one of the methods
given above.
7. Examination of Nose and Neighboring Cavities. Of all the
methods advised for the examination of the nasal cavities the
method of Harke (Fig. 32) is the easiest and gives the best views
of the nasal tract. After the brain has been removed the scalp incision
is carried downward to the middle of the neck on both sides,
following the anterior edge of the trapezius, as for the removal of
the temporal bone. The anterior flap is then carried forward as far
as the bridge of the nose and the edges of the orbits, and the flap
pulled down over the face. The posterior flap is carried back as far
as the upper cervical vertebræ, removing the muscles with the scalp.
The head of the cadaver is now raised and firmly held by an assistant
or clamped in a head-holder; and with the large meat-saw the
occipital bone is sawed through in the median line, cutting first the
squama and then the clivus. The saw is then set anteriorly into the
frontal bone, to the left or right of the septum, in order not to injure
the septum narium. (Fig. 32.) The sawing then proceeds through
the sella turcica, body of the sphenoid, ethmoid and frontal bones
until the base of the skull is divided into halves. The cartilage-knife
is then introduced through the foramen magnum and the basal ligaments
cut. The right and left sides of the skull posteriorly are then
taken in the two hands and with a quick, powerful tug forced outward
until the nasal bones, hard palate and alveolar processes break
apart. The two halves of the base of the skull then open like a book,
turning on an axis, running through the inferior maxillary articulation
and the occipito-atloid ligaments. If there is too great resistance
in the region of the foramen magnum, the anterior and posterior
arches of the atlas may be cut with a chisel. The sphenoidal
sinus, septum narium, frontal sinus and the nasal cavity on one side
of the septum with the nasopharynx are thus exposed, and their
walls and contents may now be examined. Material for bacteriologic
examination should be secured before further cutting is done.
The septum may then be removed with forceps and scissors, the
nasal cavity on the other side examined, the nasopharynx inspected,
and the antrums opened with small bone-forceps. After the examination
is complete the halves of the base are brought together and
fastened with copper wire anteriorly and posteriorly, taking care
that the anterior wire will not be visible through the skin of the
forehead.
8. Examination of Face. When the anterior flap of the scalp
is carried down to the edge of the orbits and half-way across the
lower jaw as advised above for the removal of the temporal bone, the
parotid region may be examined. The upper and lower maxillary
bones are best examined after the removal of the neck-organs. A
transverse incision is made in the skin of the neck low enough to
be concealed by the clothing, and connecting with the longitudinal
scalp-incisions. The facial flap is then dissected upward with great
care as far as the infraorbital edges, exposing the maxillary bones,
from which the soft parts must be so carefully removed that restoration
of the face can be made. For the examination of the anterior
nasal-cavities the upper lip must be separated from the bones.
II. POINTS TO BE NOTED IN SECTION OF HEAD.
1. Scalp. Note wounds, hemorrhages, inflammations, scars,
parasites, neoplasms, number and location of bleeding-points on
section, color of different portions, adhesions to periosteum or
cranial bones, etc. Most common pathologic conditions are wounds,
hemorrhages, wens, lipoma, squamous-celled carcinoma, syphilis,
tuberculosis, favus, pediculi, tricophytia, angioma and round- and
spindle-celled sarcomata. The temporal muscles should be examined
for hemorrhages, œdema, purulent inflammations and trichinæ.
The postmortem hypostasis of the back of the head should not be
regarded as pathologic.
2. Periosteum. Subperiosteal hemorrhages, purulent infiltrations,
adhesions, indurations, chronic inflammation with new-formation
of bone, and neoplasms are the most common pathologic conditions.
3. Skull-Cap. The measurements (circumference, 49-65 cms.;
long. diam., 18 cms.; trans. diam., 13-15 cms.), form, asymmetry,
character of surface (normally smooth and moist), color of cranial
bones, character of sutures and fontanels (easily traced?), supernumerary
sutures and bones, consistence (softened in craniotabes,
purulent inflammations, syphilis, neoplasm), new-formations of
bone, perforations (syphilis, neoplasms, Pacchionian granulations,
purulent inflammation), elevations, depressions, fractures, areas of
erosion or absorption, thickenings of external surface (crater-like
due to organized cephalhæmatoma, chronic periostitis, neoplasm or
gumma), radiating scars or indurations (syphilis), red, soft, spongy
thickenings (rachitis). The temporal and frontal regions are most
frequently the seat of syphilitic (corona veneris) and rachitic
changes (frontal and temporal bosses, square forehead, etc.) Note
ease or difficulty in sawing, relation of external table, diploë and
inner table, measure thickest and thinnest portions, character and
amount of diploë, weight of skull-cap (heavy in sclerosis, light in
atrophy), dural adhesions, examine by transmitted light (color,
blood-content, presence of pus in diploë may be shown by greenish
or yellow color), smooth or rough inner table, erosions (rough,
more or less reddened), grooves of meningeal vessels, Pacchionian
erosions, hyperostosis, exostosis, osteoma, osteophytes (not uncommon
in pregnant women, also in hydrocephalus, acromegaly),
atrophy (old age, craniotabes, hydrocephalus), sclerosis (syphilis).
In marked cachexias (cancer of stomach) the inner table often
shows a high degree of erosion and atrophy.
4. Dura. Collections of pus may be found between skull-cap
and dura in purulent inflammations of scalp or diploë. Rupture of
middle meningeal artery or its branches, with or without fracture
of the skull, gives rise to hemorrhagic extravasations in same location.
Old hemorrhages may be partly organized. In young infants
the dura is adherent to the skull-cap and cannot be separated. In
youth and adult life it is adherent only along the longitudinal sinus
and about the blood-vessels; in old age it becomes more adherent.
Extent, location and strength of adhesions should be noted. The
normal dura should be grayish-red, smooth, symmetrically stretched,
so that a small fold only can be taken up by the fingers in the
frontal region, and just translucent enough to show the outlines
of the convolutions and the pial vessels. An increased tension is
caused by exudates, tumor, abscess, hydrocephalus, hemorrhage,
congestion, œdema, etc. Diminished tension occurs in atrophy of
the brain, especially marked in the frontal region, where the dura
may be wrinkled and loose. Perforations of the dura by Pacchionian
bodies are very common along the longitudinal sinus in late life,
and should not be regarded as pathologic. Small osteomata are not
uncommon in the same place and in the falx; they may be very
numerous in acromegaly, late syphilis and cachectic conditions.
Changes in the color of the surface of the dura may be due to
hemorrhage, purulent or syphilitic inflammation, old thickenings,
etc. Thickenings are more easily seen from the inside surface of
the dura; they appear as hard, tendon-like, opaque areas. The normal
inner surface is smooth, grayish and moist-shining. In pachymeningitis
it may be dry, dull, roughened, and covered with blood,
pus or fibrin. The most frequent pathologic condition on the inside
of the dura is the organizing or encapsulated hemorrhage (pachymeningitis
hæmorrhagica chronica, hæmatoma duræ), so common
in chronic alcoholics. Miliary tubercles of the dura are common in
meningeal tuberculosis. A gummatous pachymeningitis is not
infrequent in late syphilis. Pachymeningitis fibrosa is also common
in old syphilitics. Actinomycosis occurs in connection with actinomycotic
encephalitis. The primary tumors of the dura are fibroma,
osteoma, fibro-endothelial tumors (psammoma) and angiosarcoma,
etc. Secondary carcinoma or sarcoma is rare.
5. Longitudinal Sinus. Character of walls and contents.
Thrombosis, with purulent or gangrenous inflammation, is the
most important condition. Note mouths of superior cerebral veins.
6. Meningeal Vessels. Note grooves, rupture, thrombosis,
hemorrhage, infection, amount of blood, symmetry of distribution,
etc. Traumatic rupture of middle meningeal is the most important
condition.
7. Basal Vessels. Anomalies in size and distribution, thickness
and character of vessel-walls (sclerosis, atheroma, aneurism,
calcification). Thrombosis, embolism, aneurism, sclerosis, atheroma,
calcification, obliterative endarteritis due to syphilis, are the
most common conditions. The changes in the middle cerebral
arteries are of especial importance in cases of apoplexy, softening,
etc.
8. Inner Meninges. The arachnoid, subarachnoid space and
pia are usually considered together. The arachnoid bridges over
the sulci, the pia dipping down following the brain substance. The
contents of the subarachnoideal space are best seen, therefore,
between the convolutions. The inner meninges are gray, delicate
and transparent; the pial veins show plainly, the arteries are empty
and lie deeper, while the more superficial veins are uniformly filled
with blood. Sclerotic arteries run more superficially and are more
prominent. The removal of the skull-cap often gives rise to the
presence of air-bubbles in the pial vessels, and this should not be
mistaken for any pathologic condition. Hypostasis likewise should
not be regarded as a pathologic condition. Normally the membranes
are moist; in increased intracranial pressure (tumors, hydrocephalus,
hemorrhages) they are dry and dull. Inflammation is
shown by a loss of transparency of the membrane and by the presence
of exudate in the subarachnoideal space. Old thickenings are
white and opaque. The amount of fluid in the subarachnoideal space
may be so great as to cause the arachnoid to bulge out over the
sulci. Note character of exudate (purulent, fibrinous, serous or hemorrhagic).
In purulent meningitis greenish-yellow or yellowish-white
collections of thin pus are found in the meshes of the arachnoid;
in fibrinous inflammation the exudate is grayish or milky
white. The normal fluid (cerebrospinal) of the subarachnoideal
space is clear and small in amount. It is increased in œdema and
congestion, as well as in serous inflammations. In inflammatory
conditions the membranes are dull and cloudy and the fluid more
or less turbid. Pathologic adhesions may exist between dura and
inner meninges, and between the latter and the brain-substance. In
the latter case the meninges do not strip easily, but pull off portions
of the cortex. Over tumors, gummata, areas of softening,
the meninges may be so adherent that they cannot be separated
from each other. In old syphilitics, alcoholics, cachexias of old
age, etc., the pia may be thickened, white and opaque (leptomeningitis
chronica fibrosa). Aneurisms of the pia vessels are of great
importance in cases of meningeal hemorrhage. They may be very
small (size of pea) and often are found only after very careful
search. Atheroma, infective emboli, etc., are also causes of meningeal
hemorrhage. Meningeal tubercles are very common and
often hard to recognize. They are usually best seen over the basal
meninges. Often they can be demonstrated by stripping off the
meninges and floating the membrane in mercuric chloride or formalin
fixing-fluids. After a few minutes’ fixation the tubercles appear
as minute grayish or opaque points, the membrane often appearing
as if sprinkled with fine sand or powder. The Pacchionian bodies
of the arachnoid must not be mistaken for tubercles. They are
grayish in color, and most abundant along the longitudinal sinus.
The meninges over the two hemispheres should be compared as to
transparency, thickness, blood-content, amount of fluid in arachnoideal
space, etc.
The most important pathologic conditions of the inner meninges
are anæmia, hyperæmia, stasis (asphyxia), œdema, hemorrhages
(stasis, anthrax, aneurism, atheroma, infective emboli),
serous, purulent and fibrinous inflammation (pyogenic cocci, bacillus
pneumoniæ, pneumococcus, bac. coli, diplococcus intracellularis),
chronic leptomeningitis (syphilis, alcoholism, toxæmia, etc.),
tuberculosis, syphilis (gummatous meningitis), blastomycosis,
actinomycosis and neoplasms. The last named are not common.
Cholesteatoma, hæmangioma, lymphangioma, endothelioma,
fibroma, osteoma and lipoma represent the benign tumors found
here. Primary sarcoma is the most common tumor, usually angiosarcoma,
perithelioma, cylindroma, round-cell-, spindle-cell- or
myxosarcoma. Secondary sarcoma and carcinoma occur. Animal
parasites are cysticercus and echinococcus.
8. Cerebrum. Weight of brain as a whole 1,200-1,400 grms.
(15-50th year). Cerebrum averages 1,039 grms. in the female, 1,155
grms. in the male. A weight of 1,100 grms. may be taken as the
minimum normal, and 1,700 grms. as the maximum for the brain as
a whole. The relation of the brain-weight to that of the body is
2-100. In old age there is a loss of weight. Sagittal diameter 15-17
cm., transverse 14, vertical 12.5 cm.
Examine the convexity, comparing hemispheres, noting convolutions
and sulci (size, number, symmetry, etc.) Atrophy of the
gyri is shown by increased width of sulci and the narrower, sharper
gyral apex. With increased intracerebral pressure the gyri are flattened
and broader, and the sulci smaller. Note color and consistence
of cortex, adhesions with pia, areas of fluctuation, induration, depressions,
yellow softening, recent and old hemorrhages, effects of
trauma, tumors, tubercles, gummata, etc. Examine median surfaces,
note arching of corpus callosum. On section of the brain
note color (pale in anæmia, red in capillary hyperæmia; hemorrhages,
areas of softening, tumors, tubercles, gummata, sclerotic
areas, abscesses, etc., all show color variation from the normal gray
or white); consistence (soft in degeneration and abscess, hard in
sclerosis), moisture (normally is moist-shining; moisture increased
in œdema, inflammation, abscesses, soft tumors, recent degenerations;
dry in old caseous tubercles and gummata, and in anæmia),
blood-content (number of bleeding-points, distinguish from punctate
hemorrhages), character of cut surface (normally smooth,
sclerotic areas, abscesses and areas of softening are uneven and
depressed, hard tumors and sclerotic blood-vessels are elevated
above the surface). The absolute and relative size of cortex and
medulla, and the distinctness of the boundary between them, should
be noted.
Hemorrhages may occur in any part of the brain, and may be
large or small. Rupture into a ventricle is always fatal. The large
hemorrhages are due to rupture of a diseased artery; small punctate
hemorrhages throughout cortex are usually embolic (fatty
embolism). Old hemorrhages are brownish in color (pigment).
Areas of softening are usually the result of embolism, thrombosis
or sclerosis. They are usually yellow, yellowish-white or brownish-yellow
or red.
9. Ventricles. Contain about a teaspoonful of clear fluid.
This may become purulent, cloudy, hemorrhagic, fibrinous. Note
size of ventricles and horns. (Fluid increased and ventricles dilated
in hydrocephalus.) Character of ependyma normally gray-red,
delicate; may be pale or red, indurated, thickened, roughened
(chronic ependymitis), hemorrhagic, etc. Compare floors of lateral
ventricles as to symmetry (corpus striatum large in hemorrhages),
color, etc. Adhesions are found most frequently in posterior horns.
A fine granulation of the ependyma is caused by miliary tubercles.
Large solitary tubercles may be found in the ventricles. Do not
mistake postmortem softening of ependyma for pathologic changes.
In the third ventricle note the presence of any abnormal contents,
character of wall, symmetry of corpora quadrigemina, etc. Look
for same changes in fourth ventricle as in lateral. Lining is gray-white
and delicate; floor should be gray-white, firm, and show
anatomic structures. Gray sclerotic areas are often present in
floor. Solitary tubercles, tumors (glioma, neuroepithelioma, gliosarcoma,
sarcoma), dermoids and cysticercus-cysts may be found
here. Examine aqueduct of Sylvius for abnormal contents.
10. Chorioid Plexus. The tela chorioidea is normally delicate
and translucent. Note color (red, pale, cloudy), swelling, purulent
infiltration, condition of blood-vessels, tubercles, etc. Psammoma,
sarcoma, papillary epithelioma, carcinoma, fibroma, angioma,
cholesteatoma, cysticercus and echinococcus may be found in the
tela and plexus. Cysts due to œdema are very common, also aneurismal
dilatations of the vessels. In cases of hydrocephalus the
veins of Galen should be examined for thrombi or compression from
without. In acute hydrocephalus the plexus is deep red; hyperæmic,
its vessels distended with blood.
11. Pineal Gland. The most common pathologic findings are:
psammoma, adenoma, teratoma, sarcoma, formation of cysts
(hydrops cysticus glandulæ pinealis), hypertrophy, abscess (purulent
meningitis), metastatic tumors. In all cases of giantism especial
attention should be paid to the pineal gland as well as to the
hypophysis.
14. Cerebellum. Cerebellar cortex is 2 mm. thick, grayish-red
in color. Note irregularities in thickness, color, consistence,
blood-content, moisture. Compare hemispheres. White substance
should be shining and moist. Abscesses, tubercles (solitary or conglomerate),
gummata and neoplasms are the most common pathologic
conditions.
15. Pons. Consistence firm normally. Note blood-content,
relation of white and gray stripes, hemorrhage, degenerations, cysts,
neoplasms, etc.
16. Medulla. Color grayish-white, consistence firm. Note
blood-content, hemorrhages, degenerations and cysts (syringomyelia).
17. Hypophysis. Cysts are common, also calcareous concretions.
Adenomatous hyperplasia is the most common tumor (acromegaly,
obesity). Carcinoma, sarcoma, lipoma and teratoma are
rare. Gumma and tubercle occasionally occur; even when the gland
is wholly destroyed, acromegaly does not result. Epithelial tumors
of the infundibulum may occur in association with hypoplasia of
the genitals. In diseases of the thyroid the condition of the
hypophysis should be especially considered.
18. Basal Sinuses. Note contents (marantic and infective
thrombi), especially in middle-ear disease and meningitis. Distinguish
postmortem clots from thrombi, the former being dark-red,
soft and moist, and are not adherent to the walls. The walls
of the sinus should be gray, delicate, and shining.
19. Basal Dura. Note same conditions as in dura covering
convexity.
20. Cranial Nerves. Examine and trace to exits. Note
atrophy, degenerations, compression, indurations, thickenings, neoplasms
(neuroma), etc.
21. Base of Skull. After the removal of the basal dura the
bones of the base should be smooth and gray-yellowish-red in color.
Look for fractures, caries, roughened areas, exostoses, collections
of pus, hemorrhage, neoplasms, etc.
The most important pathologic conditions of the brain are
congenital defects or malformations (hydrocephalus, microcephalus,
etc.), anæmia, hyperæmia, œdema, hemorrhage (traumatic, spontaneous,
capillary, apoplexy), embolism, thrombosis, arteriosclerosis,
aneurism, anæmic infarction, encephalomalacia (white, yellow and
red softening), pigmented scars, atrophy, secondary degeneration,
encephalitis, (non-purulent, purulent, hemorrhagic, syphilitic,
metastatic, chronic), sclerosis (diffuse, disseminated, focal, hypertrophic),
tuberculosis, syphilis, actinomycosis, blastomycosis,
rabies, primary neoplasms (glioma, neuroglioma ganglionare, angiosarcoma,
spindle-cell sarcoma, polymorphous-cell sarcoma, perithelioma,
endothelioma, angioma, myxoma, fibroma, osteoma, teratoma,
lipoma), primary epithelial tumors of ventricles, pineal gland
and hypophysis (adenoma, cholesteatoma, papillary epithelioma,
carcinoma), metastatic tumors (all forms of carcinoma and sarcoma,
malignant chorio-epithelioma), cysts, parasites (cysticercus,
echinococcus) and traumatic lesions (commotio cerebri,
contusio cerebri, hemorrhage, red softening, puncture and
shot-wounds, infected wounds, traumatic abscess). Especial examination
of the brain should be made in all cases of acromegaly, epilepsy,
cretinism, congenital idiocy, degeneracy, criminal tendency,
insanity, chorea, caisson disease, locomotor ataxia, paralysis agitans,
syringomyelia, spastic paralysis, infantile paralysis, hereditary
ataxia, rabies, all forms of paralysis, motor or sensory disturbances
and neuritis.
3. POINTS TO BE NOTED IN EXAMINATION OF EYE.
The fat-tissue in the orbits should be yellowish-white; from it
the red muscles and the white nerves should be easily distinguishable.
On section of the eye-ball the vitreous normally is clear and
the retina uniformly grayish-black and smooth. The most common
and important conditions to be looked for are phlegmonous inflammations,
purulent panophthalmitis, orbital hemorrhage, thrombosis
of ophthalmic vein and sinus cavernosus leading to pachy- and leptomeningitis,
neoplasms of orbit, wall of orbit, eye-ball or lachrymal
gland (melanosarcoma, glioma, gliosarcoma, neuroepithelioma,
various forms of sarcoma, angioma, lipoma, adenoma, carcinoma),
affections of individual muscles (myositis, atrophy), atrophy of
optic nerve, choked disk, retinitis, choroiditis, iritis, glaucoma, etc.
4. POINTS TO BE NOTED IN EXAMINATION OF EAR.
Note condition of scalp (hyperæmia, œdema, hemorrhage)
about ear, condition of external canal (dry, moist, character of contents),
condition of periosteum, particularly over the mastoid process
(normally grayish-red), condition of bone after removal of
periosteum (normally smooth). Inflammatory œdema, purulent
infiltrations in the soft parts, collections of pus beneath the periosteum,
roughness of bone beneath elevated periosteum, presence of
pus or blood in external auditory canal, perforations of drum, etc.,
should be noted. Normally the drum should be grayish-white and
shining. Note contents of middle ear, Eustachian tube, condition of
ossicles, mastoid cells and bone. Lining of middle ear should be
grayish-red and smooth; the cut edges of bone should be uniformly
grayish-red. When infiltrated with pus they are brown or greenish.
The mucous membrane is deep-red or greenish in purulent
inflammation; yellow, creamy pus, often of very offensive odor,
may be found in middle ear, Eustachian tube or external canal.
Note character of perforations; old ones have smooth and thickened
edges. The most important pathologic conditions are: otitis media
purulenta, inflammation of mastoid cells, caries of mastoid process,
sinus-thrombosis (leading to meningitis or pyæmia), otitis media
tuberculosa, granulomatous polypi, cholesteatoma, sclerosis, congenital
anomalies, foreign bodies, parasites, neoplasms (chiefly of
external ear).
5. POINTS TO BE NOTED IN EXAMINATION OF NOSE.
The normal mucosa of the nasal tract is light grayish-red.
Note character of contents of the cavities (mucus, blood, pus, dry
clots or scabs), congestion, hemorrhage, erosions, ulcerations, diphtheritic
membrane, diffuse or localized thickenings of the mucosa
(polypi), adenoids, exostoses, caries, foreign bodies, parasites (maggots)
and neoplasms (sarcoma, fibroma, carcinoma). The most
important conditions are acute and chronic catarrhal inflammations,
ozæna, croupous or diphtheritic inflammations, syphilis,
atrophy or hyperplasia of the mucosa, polypi, and more rarely tuberculosis.
Syphilis causes inflammations and gummatous infiltrations
of the mucosa, gummatous periostitis, foul-smelling necrosis of the
bony portions (ozæna syphilitica). Dense hard fibromata developing
from base of skull may fill up the nasopharynx or erode the
cranial base and press upon the brain. Softer sarcomatous growths
may arise from the hypophysis, or from the lymphoid tissue of the
mucosa. Squamous-celled carcinoma is not infrequently primary
in the antrum and thence invades the nose. Primary malignant
tumors of nasal tract not common. Leprosy, glanders, blastomycosis,
and rhinoscleroma are more rarely seen.
CHAPTER VII. MAIN INCISION: THORAX AND ABDOMEN.
I. METHOD OF OPENING TRUNK.
1. The Main Incision. After the examination of the cranium
has been completed, the skull-cap is replaced and the anterior flap
of the scalp drawn up over it, to hold it in place until the close of
the autopsy. The head is then wrapped in a towel to protect the
face and hair.
The prosector then stands at the right side of the cadaver (if
left-handed, on the left side), the body being brought as near as
possible to the edge of the table. The cartilage-knife is then held
in the palm of the right hand and with it an incision is made
through the skin in the median line of the body, extending from
just below the thyroid cartilage to the base of the penis in the male,
and to the anterior commissure in the female, passing to the left of
the umbilicus. If pathologic conditions (hernia, surgical wound,
tumor, etc.) are present in the median line the main-incision should
deviate to right or left as expedient. The incision in the suprasternal
notch is made with the point of the knife, the thumb and
fingers of the left hand being used to put the skin of the neck on a
stretch. Over the sternum the knife is held horizontally and the
tissues cut to the bone. As soon as the epigastrium is reached less
force is used, and the cut should not be deeper than through the skin
and subcutaneous tissue over the abdominal portion of the incision.
At the end of the incision the knife is raised, vertically and the cut
finished with the point of the knife. The incision is then carefully
deepened in the epigastrium, just below the ensiform, until a small
opening is made through the peritoneum into the abdominal cavity.
To determine the presence of gas within the peritoneal cavity the
peritoneum should first be nicked with the point of the knife to
make a very small opening through which the escape of any free
gas within the cavity can be easily noted. When bacteriologic
examinations of the peritoneal fluid are to be made, the incision
should be extended down to the peritoneum, which should then be
seared, and the fluid secured by means of a sterile pipette forced
through the seared portion. If it is more expedient to secure the
fluid through an incision, the opening should be made with a sterilized
knife and the fingers should not be put into the cavity, but
are used to lift up the abdominal wall at the sides of the incision.
In cutting through the peritoneum great care should be taken not
to injure the stomach or intestines, which, often greatly distended,
are pressed tightly against the peritoneum. If the opening is made
just below the ensiform the knife, should it slip through unexpectedly,
usually strikes the liver without causing any damage.
Fig. 36.—The main incision completed. Lines show incisions through costal
cartilages, and for disarticulation of sternoclavicular joints. (After
Nauwerck.) The incision in the neck is begun higher than is usual
in this country.
The abdominal incision is now extended downward to the
pubis. The first and second fingers of the left hand are introduced
into the peritoneal cavity and used as directors to lift up the abdominal
wall and to keep the intestines from the knife, the latter cutting
between them in the line of the first incision through the skin and
subcutaneous fascia. When the main incision is complete the knife
is introduced into the abdominal cavity with cutting edge directed
outward and the abdominal muscles are divided on either side just
above the pubis by cuts extending outward to the skin. (See Fig.
36.) Care should be taken not to cut the latter. These transverse
cuts made from the peritoneal surface permit the opening of the
peritoneal cavity to the necessary extent, so that transverse incisions
through the skin are not necessary.
The main incision is carried to the left of the umbilicus and then back to
the median line, in order not to injure the umbilical vessels, the ligamentum
teres of the liver, or a concealed hernia or persistent omphalomesenteric duct.
In the case of the new-born the incision to the left of the umbilicus is extended
to the pubis in an oblique line diverging from the median line. After the examination
of the umbilical vessels through the main incision a second diverging
cut is made from just above the umbilicus, passing to its right, across the umbilical
vessels and hepatic ligament down to the pubis, forming a triangular flap
including the umbilicus, urachus and umbilical arteries.
The abdominal flaps are now held back and a thorough inspection
of the cavity made, noting particularly the position of the
abdominal organs, contents of cavity, condition of peritoneum and
appendix, occurrence of perforations, etc. The position of the diaphragm
is then determined on both sides, by passing the right hand
up under the ribs to the highest part of the dome of the diaphragm
and then pressing outward against the chest-wall so that the height
can be estimated by rib or interspace.
The skin and muscles are now stripped from the thoracic wall
on both sides of the median incision, beginning first on the right.
(See Fig. 36.) The right flap of the abdominal wall is taken in the
left hand just above the umbilicus and turned over the right lower
border of the ribs, and pulled forcibly upward and outward to the
right, putting the peritoneum, the ligamentum teres of the liver and
abdominal muscles upon a stretch over the edge of the ribs. These
are then cut by the cartilage-knife in an incision extending from
the median line along the edge of the ribs deep down into the flank.
The loosened flap of skin and muscle is then pulled over to the right
with the left hand, while the right hand holds the cartilage-knife,
with its cutting edge turned obliquely to the surface of the ribs,
and makes long, sweeping cuts from above downward, severing the
thoracic muscles and fascia as closely as possible to the costal
cartilages and ribs. The skin and muscles are thus stripped off from
below upward until the right side is laid bare as far back as the
anterior axillary line and to the middle of the clavicle above. (See
Fig. 36.)
In stripping the muscles from the ribs it is necessary only to do it sufficiently
to show the costal cartilages and their articulations with the ribs. Too
clean dissecting is not necessary. On the other hand, careless slashing cuts
should be avoided, as they might cut through into the pleural cavity.
The right mammary gland is next examined. The index-finger
of the left hand is put upon the nipple, the skin-flap turned over,
and an incision made from the inner surface, extending through the
gland to the nipple. Parallel incisions may then be made. The axillary
glands may be examined by carrying the skin and muscle flap
farther down into the axilla. The thoracic wall is then laid bare on
the left side, in exactly the same way as on the right, except that
the right hand works underneath the left, as the latter pulls the flap
over to the left. When the left side is stripped, the left mamma is
examined in the same way as the right.
The thorax is now opened, beginning with the right second
costal cartilage. This is cut with the belly of the cartilage-knife
about ½-1 cm. from the costal articulation so as to leave as much
of the cartilage attached to the sternum as possible. (See Fig. 36.)
The cut is made with a rocking motion so that the knife-blade will
strike upon the next lower cartilage instead of going through into
the thoracic cavity. The cartilages and intercostal muscles are cut
in this manner in succession down to the tenth, the cut flaring outward
below with the outward curve of the costal articulations. The
cartilages forming the lower edge of the ribs are left uncut at this
time. When the first opening into the pleural cavity is made attention
should always be paid to the possible escape of gas or air (pneumothorax).
When pneumothorax is suspected the opening may be
made through a little pocket of water formed by holding up the
skin-flap and filling the hollow with water. A similar incision is
then made through the cartilages on the left side from the second
to the tenth. The lower right edge of the ribs is now lifted with
the right hand, and the cartilage-knife, held on the flat, with cutting
edge toward the abdomen, is put through the opening of the
incision through the cartilage and through the diaphragm, and the
last cartilages cut by a stroke made outward and slightly upward
to avoid injuring the abdominal organs. The last cartilages on the
left side are then cut by putting the blade of the cartilage-knife,
held on the flat with cutting edge outward, through the diaphragm
from the abdominal side, into the incision through the cartilages,
and cutting through the lower edge of the ribs in the same manner
as on the right.
The lower part of the sternum and cartilages is then lifted in
the left hand and the diaphragm trimmed off closely beneath it.
Still lifting the sternum the tissues of the anterior mediastinum are
cut close to its under surface, care being taken not to cut the pericardial
sac. The sternum is thus freed up to the cartilage of the
first ribs and the sternoclavicular attachments. With the sternum
lifted as high as it is possible to do so without breaking it the cartilages
of the first ribs are now cut with the blade of the cartilage-knife
turned outward to avoid cutting the large vessels and flooding
the part with blood from the distended veins. This is possible
since the cartilages of the first ribs extend farther outward than
those of the second ribs. (See Fig. 36.)
After the first costal cartilages have been cut on both sides, the
sternum is lifted nearly perpendicularly and twisted slightly toward
the right so that the capsule of the left sternoclavicular articulation
can be put upon a stretch. The latter is then opened from below
until the joint is exposed. With the sternum still pulled firmly
upward and toward the right the left sternoclavicular articulation
is completely severed, the left sternocleidomastoid and other muscles
and fascia attached to the sternum are cut from left to right;
and the sternum, twisted over to the right, is disarticulated in the
same manner from the right clavicle, and the right sternocleidomastoid
cut. The freed sternum is now examined. It may be cut
through in the median line with the saw, or cuts made into it with
knife or chisel.
Fig. 37.—Method of disarticulating sternoclavicular articulation and cutting
cartilage of first rib from above. (After Nauwerck.)
Ossification of the cartilages of the ribs is very common in late middle
life and old age, more rarely in younger persons. The first cartilages, particularly
the left one, and the lower ones usually show it in the most marked
degree. It may be impossible to cut them with a knife, and the hand-saw must
be used. Ankylosis of the sternoclavicular articulation is also not rare, and it is
sometimes necessary to saw through the clavicles. The sternoclavicular articulation
and the cartilage of first rib may also be opened from above downward
with a long, narrow-bladed scalpel, the incision following the articular surfaces.
Many prosectors prefer this method. (See Fig. 37.) The location of the joint
and the direction of the incision may be ascertained by moving the arm and
shoulder of the cadaver. The sternocleidomastoids may be cut when the skin-flaps
are stripped off. In case bacteriologic examination is to be made of the
contents of the pleural cavity the incisions into the cavity should be made with
a sterilized knife, or the material for culture may be obtained by means of a
pipette introduced through a seared interspace.
2. POINTS TO BE NOTED IN THE MAIN INCISION.
1. Panniculus. Note thickness at different points in the incision,
color (straw-color, rosy or almost white in early life, orange or
reddish-yellow in atrophy or old age, brown in severe anæmias),
moisture (œdema, serous or purulent inflammation, transfusion; the
latter should not be mistaken for pathologic œdema), dryness in
atrophy, long-continued fevers, cachexias, etc., number of bleeding
points (passive congestion, hypostasis), hemorrhages (recent, old,
pigmented).
2. Musculature. The muscles of the neck, thorax and abdomen
are examined with reference to the following points: size
(atrophy, hypertrophy), color (normally bright brownish-red, may
be paler than normal, deep brown, yellow or grayish), consistence
(pale muscle usually tears easily, brownish muscle usually tears less
easily), moisture (moist in œdema, inflammation, and as a result of
transfusion; dry in anæmias, severe diarrhœas, long-continued
fevers), translucency (increased in Zenker’s necrosis, fatty infiltration,
fatty degeneration, atrophy, anæmia; diminished in cloudy
swelling and simple necrosis), blood-content (anæmia, hyperæmia),
hemorrhages (trauma, surgical, hypodermic injections, toxic, infective,
hæmatoma of abdominal rectus in typhoid fever), inflammation
(acute, chronic, focal, diffuse, primary, secondary, abscess,
fibroid, etc.), bony formations (myositis ossificans), parasites
(trichina the most common, especially frequent in muscles of neck
and in the intercostals and diaphragm, small whitish, oval bodies
looking and feeling like grains of sand; echinococcus and cysticercus
are more rare), neoplasms (not common, the spindle-cell fibrosarcoma
or “recurrent fibroid” of abdominal wall the most frequent
form). Zenker’s necrosis (hyaline, waxy or “fish-flesh” degeneration)
is of frequent occurrence in the abdominal muscles in typhoid
and other severe fevers and intoxications. Anomalies of sternal
and pectoral muscles are not rare.
3. Abdominal Cavity. Watch carefully for the escape of gas
when the first cut through the peritoneum is made. A lighted
match may be held over the opening, or the skin incision may be
filled with water and the peritoneum opened through the water,
noting the escape of bubbles. The odor (sour, sweetish, yeasty,
fécal, putrid, etc.) should be noted. Abnormal contents of the peritoneal
cavity are to be measured and described as to color (amber,
greenish-yellow, color of bile, red, bloody, brown, gray, creamy,
milky, opalescent, etc.), consistence (thin, clear, watery, serous,
pea-soup-like, gruel-like, creamy, jelly-like, colloid, semi-solid, etc.),
odor (fécal or foul, due usually to the presence of the colon bacillus;
acid or yeasty in perforation of stomach; fruity in diabetes,
acute hemorrhagic pancreatitis; odor of ether, chloroform, alcohol,
etc.), contents (blood, bile, féces, stomach-contents [distinguish
perforations due to postmortem digestion], fibrin, fat, chyle, pus,
foreign-bodies, mucin or pseudomucin, parasites) and reaction
(acid, alkaline). Non-inflammatory ascites occurs in portal stasis,
hepatic cirrhosis, thrombosis or compression of portal or splenic
veins, chronic passive congestion, chronic valvular lesions with
incompensation, nephritis, severe anæmia, obstruction or rupture
of thoracic duct, etc. The fluid of transudates is usually
clear, odorless, alkaline, low specific gravity (below 1.016), small
albumin- and fibrin-content, few flocculi, and relatively small
number of white cells. Inflammatory exudates are turbid, often
foul-smelling, usually acid, specific gravity over 1.016, high
albumin-, fibrin- and urea-content, numerous thick flocculi and
numerous cells. In early peritoneal tuberculosis the fluid may be
clear and resemble that of a transudate. Milky and opalescent
fluids are found in diabetes, lipæmia, new-growths of the peritoneum,
obstruction or rupture of thoracic duct or receptaculum.
Hemorrhagic exudates may be traumatic (rupture of spleen, liver,
intestines, extra-uterine pregnancy, etc.), inflammatory (severe
acute peritonitis), or due to new-growths or tuberculosis of the
peritoneum, extreme portal stasis, perforation of gastric or typhoid
ulcers, severe intoxications, chronic icterus, etc. Red effusions may
be due to diffused hæmoglobin. In such cases there is no settling
of the color, and coagulation may not occur. When red cells are
present settling takes place on standing. Rupture of gall-bladder
or bile-ducts may lead to presence of free bile in the peritoneal cavity.
Postmortem diffusion of bile through the gall-bladder wall
should not be mistaken for a pathologic condition. In normal conditions
there is just enough fluid in the peritoneal fluid to make the
surfaces moist, and about a teaspoonful in all may be collected
from the flanks and pelvis. The amount may be greatly increased
just before death in all cases of slowly progressive cardiac weakness.
Note character of peritoneum (normally moist-shining, grayish,
translucent, cloudy, dry, lustreless, thickened, hyaline (“iced” or
“Zuckerguss”) in chronic inflammation.)
4. Omentum. Note position of lower border, amount of fat, condition
of blood-vessels, dry or moist-shining surface, adhesions (to
appendix, cæcum, oviducts), indurations, contractions (edges rolled
up), character of lymphnodes, cysts, tubercles, secondary tumors,
snared-off tumors from ovary or uterus (parasitic cysts, fibroids),
encysted foreign bodies, etc., exudates on surface, fat-necrosis,
accessory spleens, encysted parasites, hernia, etc. Most common
pathologic conditions are inflammation (secondary to appendicitis,
salpingitis, etc.), metastic carcinoma and tuberculosis.
5. Position of Abdominal Organs. Note situs viscerum inversus,
gastro-enteroptosis, displacements due to spinal curvatures and
deformities, and hernia, anomalies or malformations, locate organs
by usual landmarks (edge of ribs, ensiform, umbilicus, etc.), position
of lower and left borders of liver, gall-bladder, spleen, pylorus
and fundus of stomach, appendix, colon, etc. Malposition of transverse
colon especially common. Note volvulus, ileus, invaginations,
etc. Examine stomach and intestines carefully for perforations.
Differentiate postmortem perforations and those due to pathologic
conditions. (Edges of postmortem perforations soft, slimy, without
evidences of disease.) The appendix should also be carefully examined
at this time. Note also peritoneal surface (color, thickness,
translucency, tubercles, adhesions), color and blood-content of all
abdominal organs before acted upon by exposure to air. In the
female examine pelvic organs. Do not mistake postmortem perforations
of stomach or intestine, postmortem imbibition and diffusion
of bile in region of gall-bladder, postmortem contraction of
intestines, dilatations of lymphatics with lymph or chyle, agonal
transudates, accessory spleens, etc., for pathologic conditions.
6. Position of Diaphragm. Normally fourth rib or interspace
on right, fifth rib on left, higher in the young, lower in old age.
Raised in conditions of increased abdominal pressure (pregnancy,
ascites, enlargement of liver or spleen, subdiaphragmatic abscess,
dilatation of stomach, urinary or gall-bladder, tumors of any abdominal
or pelvic organ, especially ovarian cysts, etc.), low in increase
of intrathoracic pressure (pleuritic effusions, pneumothorax, pericardial
effusion, hypertrophy of heart, tumors, aneurism, etc.).
7. Mammae. Condition varies according to age, pregnancy,
lactation, etc. In resting glands the structure is lobulated, connective-tissue
white with yellow fat between; in the white connective-tissue
are small grayish-red nodules of gland-tissue (“breast-grains”).
During lactation the fat disappears entirely or to a large
extent, the entire organ consisting of a more homogeneous grayish-white
glandular tissue, distinctly granular on section, and resembling
the section of a salivary gland. Note size of ducts, presence
of secretion (colostrum or milk) on pressure, congestion, œdema,
abscess, fistula, caseous tubercles or gummata, cysts (milk, “soap,”
“butter,” senile, new growths), neoplasms, atrophy, hypoplasia,
hypertrophy, accessory nipples, parasites (echinococcus). The most
common tumors are adenofibromata and carcinomata. Tuberculosis
is not rare. In the male breast hypertrophy has been noted in association
with malignant chorio-epithelioma of the testis; and in
the female with pseudopregnancy and tumors of the genital tract.
Adenofibroma, gumma and tuberculosis are the most common conditions
of the mammæ in males.
8. Costal Cartilages. Note color (ochronosis), degree of ossification,
anomalies, separations, fractures, caries, tuberculosis, alteration
in shape (pigeon-breast, emphysema, Pott’s Disease, erosions
of tumors or aneurisms, rickets, etc.). The costochondral edges are
thickened as a result of rachitis (rachitic rosary). In old age the
costal cartilages may undergo the so-called “asbestos-like” degeneration,
becoming yellowish- or grayish-brown, streaked with shining
whitish granules, with calcification or ossification and new-formation
of blood-vessels. Degeneration cysts (senile) are not
infrequent, and the cartilages sometimes appear as if soaked with
oil, soft and translucent. Fibroid or calcified areas may be present.
Spaces and clefts within the cartilage may be filled with new-formed
bone-marrow.
9. Sternum. Note shape (pigeon-breast, “shoemaker’s,”
rounded, scaphoid, bifid, anomalies of ensiform, etc.), fractures (in
marked osteoporosis the bones may break during removal), erosions
(aneurisms, tumors), tuberculous and syphilitic caries, gummata,
perforations, etc. Under surface of sternum should be smooth,
shining, translucent and grayish. In chloroma the under surface
may present a uniform greenish layer ½-1 cm. thick. Bone-marrow
of sternum is normally red and lymphoid in character; may be
green in chloroma, pyoid in leukæmia, hyperplastic in severe
anæmias. Sclerosis and osteoporosis of sternal bones are not rare.
In the former condition the marrow may be entirely absent; in the
latter hyperplastic.
CHAPTER VIII. THE EXAMINATION OF THE THORAX.
I. METHODS OF EXAMINATION.
1. Thoracic Cavity. As soon as the sternum is removed the
anterior mediastinum and the pleural cavities are examined, noting
first the position and relation of the thoracic organs, quantity and
character of mediastinal fat, the contents of the pleural cavities,
pleuritic adhesions, etc. Pleuritic exudates should be removed
before they have become mixed with blood from the cut vessels or
heart; and the pleural surfaces should be examined before their
appearance has been changed by exposure to the air or to fluids.
Pleuritic adhesions should be broken or cut, beginning with the
left side and then on the right, and the entire surface of both lungs
wholly freed.
2. Thymus. The thymus is then examined by means of transverse
cuts; or, when large, is dissected from below upward, turned
up onto the neck, and removed later in connection with the neck
organs. When no traces of thymic tissue are visible to the naked
eye the thymic fat should always be cut transversely and examined
for the presence of small lymphoid nodules. In the case of
hypertrophic thymus the question of pressure upon the trachea
becomes of very great importance, and, to settle this, the trachea
should be opened above the sternum before the thymus is removed;
or the thymus may be taken out in connection with the trachea
and both sectioned horizontally at the same time. In cases of
sudden death, in which the thymus may be an etiologic factor,
it is safest to examine the trachea from above the sternum before
the thorax is opened, or to fix the whole body (infant’s or child’s)
in formalin and then to remove thymus with trachea, and examine
by means of transverse sections.
The heart is examined before the lungs chiefly for two reasons: Its blood-content
can be more accurately determined, and the blood caught in the pericardial
sac, so that when the pulmonary vessels are cut in the removal of the
lungs there is no gush of blood into the pleural cavity.
3. Pericardial Sac. This is next examined with respect to the
degree of intrapericardial tension. Its anterior wall is then picked
up at about its middle by the thumb and index finger of left hand,
and the point of the long section-knife, with cutting edge outward,
is pushed through the pericardium and a small slit made into the
sac. The escape of gas or air should be noted at this time. A
sterile pipette may now be introduced and the fluid contents of the
sac secured for bacteriologic examination; or before the pericardial
sac is opened the pericardium may be seared with a hot iron and
a sterile pipette pushed through it into the cavity. The longitudinal
incision through the pericardium is now extended upward
to its attachment to the great vessels, and through the opening
thus made the character and amount of the pericardial fluid are
determined. The incision is then extended to the left at its lower
end by cutting the sac-wall toward the apex of the heart. Through
the three-cornered incision thus made the heart is lifted out of the
sac and the surfaces of the parietal and visceral layers of the pericardium
examined. Localized adhesions of the pericardium may
be cut or torn, extensive or complete adhesions may be separated
when this is possible; if this cannot be done, the pericardial layers
are cut with the heart wall.
4. Section of the Heart. The heart may be examined either
in the body or outside. The choice of several methods may be
taken, and the one most convenient and easy of performance is
advised, rather than a method based upon such considerations as
the direction of the blood-current in the normal body. The chief
essential is to expose completely the interior of the heart with the
least possible disturbance of anatomic relationships, and to accomplish
this in the simplest and easiest way. Such a method must
leave the heart in such shape that it can be reconstructed for histologic
study or utilized as a museum specimen. This can be accomplished
by a modified Rokitansky method, as follows:
The heart is first carefully inspected as it lies in the pericardial
sac. The apex is then lifted in the left hand and the posterior
wall inspected. The heart is then drawn up over the right edge
of the ribs, so that the left border of the heart presents uppermost
as the line of greatest convexity. The point of the narrow brain-knife
(amputation-knife), with cutting edge upward, is then
inserted through the wall of the left ventricle at the apex, just to
the left of the septum, and the knife pushed into the cavity until
the point can be forced through the ventricular wall just below
(ventricular side) the left auriculoventricular ring, and the ventricle-wall
is then cut upward (as the heart is held) to the apex, in
the line of greatest convexity, exposing the cavity of the left ventricle.
The knife is laid aside and the ventricle is explored with
the fingers of the right hand and the size of the mitral opening estimated.
Before the fingers are introduced through the valvular
openings the flaps should be carefully examined to see that no
vegetations, thrombi, etc., are in danger of being loosened by them.
With the opening of the heart-chambers the blood, if fluid, may
pour out into the pericardial sac and flood the pleural cavity if not
prevented by sponging or by removing it by means of a beaker.
The knife is then introduced on the flat through the mitral opening
into the left auricle in a line continuing the first incision with
the junction of the left pulmonary veins. (See Fig. 38.) The
knife is then turned with cutting-edge upward, the point thrust
through the upper left pulmonary vein or between the left pulmonary
veins, and the auricular wall is cut upward (downward anatomically)
to meet the first incision below the mitral ring. The
incision should pass between the mitral segments. The left auricle,
mitral ring and flaps and the greater portion of the left ventricle
are thus exposed and should be inspected.
Fig. 38.—Section of left ventricle and auricle, when heart is examined in the
body. (After Nauwerck.)
The heart is then taken in the left hand and held by the anterior
flap of the left ventricle, with the fingers inside the ventricle
and the thumb on the outer surface of the anterior wall of the left
ventricle, and lifted up vertically out of the pericardium. The
brain-knife held perpendicularly, with cutting-edge to the right, is
pushed through the right ventricular wall just to the right of the
septum, carried across the cavity of the ventricle, to engage again
in the ventricular wall in the line of greatest convexity, just below
(anatomically) the right auriculoventricular ring, and the wall is
then cut upward to the apex. The right ventricular cavity is thus
opened, the fingers are introduced to explore the tricuspid ring,
and the cavity and contents are inspected. The knife, held flat, is
then carefully introduced through the tricuspid opening into the
right auricle, the cutting edge outward, and its point thrust through
the wall of the auricle midway between the superior and inferior
venæ cavæ, and the auricular wall and tricuspid ring are cut upward
toward the apex to meet the first incision into the right ventricle.
If sufficient care is taken the incision will fall between the anterior
and posterior cusps. Right auricle, tricuspid flaps and ring, and
the right ventricle are thus exposed for inspection.
The heart is then drawn downward and allowed to lie flat in
the pericardial sac, and the pulmonary artery is then explored with
the fingers of the right hand. While the anterior wall of the right
ventricle is held by the thumb and index-finger of the left hand the
knife is then introduced, on the flat, along the right side of the
septum, into the pulmonary artery; the edge is turned upward and
the point pushed through the wall of the artery, about 3 cm.
beyond the ring, and a cut made toward the apex through the
anterior wall of the artery, pulmonary ring and anterior wall of
right ventricle, just to the right of the septum. The pulmonary
artery, ring, pulmonary flaps, and right side of auricular and ventricular
septum are now inspected. In cutting the pulmonary ring
care should be taken to make the incision between the two anterior
cusps.
With the heart still lying flat in the pericardial sac, the aortic
opening is explored by the index-finger of the right hand and the
size of the ring estimated. The knife is then introduced on the
flat, into the left ventricle, along the left side of the septum,
through the aortic opening and as far as possible into the aorta. It
is then turned, with the cutting edge upward, and the point pushed
through the anterior wall of the aorta. The heart is then drawn
downward and slightly raised by the left hand, holding it at the
apex by the two flaps of the right ventricle. The knife is then
drawn from above downward toward the apex, cutting in succession
the anterior wall of the aorta, across the pulmonary artery,
through the aortic ring, and the anterior wall of the left ventricle,
just to the left side of the septum. By dissecting away the pulmonary
artery from the aorta the incision through the former may be
avoided. (See Fig. 41.) When desired this cut may be brought down
through the septum instead, but if the bundle of His is to be studied
in serial sections the cutting of the septum should be avoided. The
enterotome or long straight shears may be used for all the incisions
except the first ones made into the ventricles. For these the knife
is necessary. The incision through the aortic ring usually cuts the
anterior segment, but by making the cut more to the right the
incision will pass between the anterior and the right posterior flaps.
Before the valvular orifices are cut it is often expedient to test
the adequacy of the valves by means of water or air. The hydrostatic
test is employed to the best advantage in the case of the pulmonary
and aortic valves, either by pouring water into the vessels,
or by immersing the heart in water and then lifting it up quickly.
In the case of the auriculoventricular valves the air-test is carried
out by inserting the nozzle of a bellows through an opening made
in the ventricular wall and noting the effect of blowing and suction.
Graduated cones or balls may be used for more accurate measurement
of the orifices, or they may be measured after they have
been cut.
If sufficient care is exercised in cutting the valvular rings the
incision can be carried between the flaps without injury to the latter.
This is often desirable in cases of valvular lesion, endocarditis,
etc. In such cases the valvular rings may be left uncut,
the line of incision being broken by the auriculoventricular ring,
when the mitral and tricuspid valves are concerned. The pulmonary
and aortic rings may also be left uncut; the incisions are
stopped at the rings, and then begun again in the vessel-walls
beyond the valves.
When bacteriologic examinations of the heart-contents are to
be made the wall of the auricles or right ventricles can be seared
with a cautery and a pipette introduced through the seared area;
or the heart can be opened with a sterile knife, care being taken not
to introduce the fingers into the opening or to permit the entrance
of water.
Excellent preparations for the museum or for demonstration
purposes can be made by distending the heart with alcohol or
formalin. Blood and blood-clots should first be washed out. When
fixed the heart may be sectioned in various planes, leaving the segments
attached by the epicardium posteriorly, or openings may be
cut in the walls. A very good picture of hypertrophy and dilatation
is obtained by making a transverse cut through the ventricles
midway between apex and base. Alterations in the form and position
of the ventricular septum are best seen by this method.
After the opening of the heart and the inspection of the orifices,
valves and auricular and ventricular septa, the coronary vessels
should be examined by transverse cuts, or opened by fine probe-pointed
scissors, beginning at their origin in the aorta. The auricular
septum should be carefully examined for possible defects.
While this is being done the wall should not be put on the stretch,
but should be lax. The auricular appendages should be cut open
from the auricles and examined for thrombi, which are of not infrequent
occurrence in them. The mouths of the coronary veins and
the veins of Thebesius should be examined also. The cardiac muscle
is examined by parallel, vertical or horizontal incisions. The papillary
muscles should be cut longitudinally from apex to base. The
cardiac plexus and the ganglion of Wrisberg should be examined
before the heart is removed.
When the heart is in a state of rigor mortis the contraction
should be made to pass away by kneading or by the application of
heat, before the organ is opened, or before any measurements are
taken. After the heart has been opened it may be removed for
weighing.
The heart may be removed first and then opened outside of
the body. The organ is grasped in the left hand and lifted vertically
and upward toward the head as far as possible, putting all of the
attachments on the stretch. The vessels are then cut from below
upward, first the inferior vena cava, then the pulmonary veins, the
superior vena cava, pulmonary artery and lastly the aorta. (See
Fig. 39.) The vessels should be cut as closely as possible to their
exits through the pericardium, and care must be taken to get out
the auricles entire.
Fig. 39.—Removal of Heart. Dark line shows incision through vessels. (After
Nauwerck.)
After removal from the body the heart is placed upon the board
with its anterior surface up, and the apex toward the operator. It
may then be opened by the same method given above, by inserting
the point of the brain-knife into the left ventricle just to the left
of the septum, and cutting first the wall of the left ventricle along
its left border as far as the mitral ring, exploring the mitral orifice,
and then cutting it and the auricular wall into the upper left pulmonary
vein with the long shears. The right ventricle, right
auricle, pulmonary artery and finally the aorta are opened in succession,
using the enterotome for all cuts except the first opening
of the ventricle. The first incisions into the ventricles can be made
very conveniently by holding the heart vertically with apex up,
and the ventricle to be opened toward the prosector. The brain-knife
is held vertically and its point inserted into the ventricle, just
to the right or left of the septum, according to the ventricle to be
opened, then carried across the cavity and pushed through the ventricular
wall below the auriculoventricular ring, and the wall is
then cut toward the apex. The remaining incisions are most easily
made with the enterotome when the heart is held flat on the board
with its anterior surface up. When the heart is opened outside of
the body the Virchow method of opening in the direction of the
blood-stream may also be used. (See below.)
Under certain conditions other methods must be employed for
the examination of the heart. In cases of suspected aneurism, pulmonary
embolism, patent ductus arteriosus, etc., the thoracic
organs should be removed en masse and dissected on the table.
They may be removed in connection with the neck-organs or alone.
In the latter case the trachea is cut transversely above the sternum,
the fingers of the left hand introduced into the trachea, and, while
traction downward is being made with force, the œsophagus and
cervical vessels are cut transversely, the trachea and vessels
stripped down to the level of the clavicle, and the subclavian vessels
cut on both sides. The thoracic organs are then stripped from the
vertebræ down to the diaphragm and cut off just above the latter.
The pulmonary artery may be examined in situ before the
heart is opened by thrusting a sharp-pointed scalpel through the
wall of the artery just beyond the valves and cutting upward to the
branches going to the right and left lungs. This incision may be
extended downward through the pulmonary valve and the anterior
wall of the right ventricle, and the right side of the heart first
exposed.
Virchow Method. The heart is rotated toward the left side of the
cadaver so as to bring the venæ cavæ into view, and is held by the index-finger
and thumb of left hand. An incision is then made in the wall of the right
auricle, beginning midway between the two cavæ and extending downward as
far as the right auriculoventricular ring, in the direction of the right ventricular
ridge. The tricuspid is examined from above. The tricuspid ring
may be left uncut and an incision made in the ventricle-wall, beginning just
below the valve and extending downward along the right ventricular ridge to
the septum, or the incision may be carried down in the same line passing
through the tricuspid ring. The long narrow-bladed knife or the enterotome
is introduced into the right ventricle and an incision made from the middle
of the first incision, just above the insertion of the anterior papillary muscle,
through the pulmonary orifice into the pulmonary artery, passing between the
two anterior leaflets of the pulmonary valve. The heart is now drawn up on
the right edge of the ribs so that the left ventricular border presents uppermost.
The left auricle is then opened by an incision beginning in, or just below, the
lowermost pulmonary vein and extended in the direction of the left ventricular
ridge as far as the auriculoventricular ring. Beginning just below the ring
an incision is made through the entire length of the left ventricular ridge as
far as the apex and to the septum, which lies usually beyond the apex. A
second incision is then made in the left ventricle from the apex, extending
through the anterior ventricular wall close to the septum, parallel to the
descending branch of the anterior coronary artery and about 1 cm. from it,
and passing through the aortic opening between the anterior and the right
posterior cusps. This is the more easily accomplished if the pulmonary artery
has been dissected away from the aorta, so that the incision can be carried well
over to the right. (See Fig. 41.) As the chambers of the heart are opened the
contents should be inspected, clots removed, and the valvular orifices examined
from the upper side. The coronary arteries are then opened with the fine
probe-pointed scissors. When the heart has been removed from the body it
may be opened on the board by following the method as given above. The
heart is held very conveniently for the Virchow incisions by putting the four
fingers of the left hand beneath it and the thumb on the anterior surface; complete
pronation puts the heart in the position for opening the right side; complete
supination gives the position for opening the left side.
Fig. 40.—Section of right auricle and ventricle, according to Nauwerck.
Fig. 41.—Incision for opening of aortic ring; same for all methods described in
text. (After Nauwerck.)
Nauwerck Method. By this method the left auricle, left ventricle, right
auricle and right ventricle are opened in succession. The heart is seized in the
left hand, and without rotation is drawn upon the right edge of the ribs. Beginning
in the upper left pulmonary vein or between the veins an incision is made
through the wall of the auricle to the sulcus circularis, avoiding any injury
to the coronary vessels. Beginning below the mitral ring an incision is carried
along the left ventricular ridge to the apex. The left auricle and ventricle are
then cleared of blood and the mitral opening examined. The heart is then put
back into its natural position; the left thumb is placed in the apex of the left
ventricle and the four fingers passed over the right border of the heart to its
posterior surface, rotating the heart to the left until the right auricle is brought
uppermost. (See Fig. 40.) Then an incision is made through the wall of the
right auricle, beginning midway between the superior and inferior venæ cavæ
and extending to the tricuspid ring, then begun again 1 cm. below, is carried
along the right border of the heart, or slightly anterior to it, as far as the
septum. (See Fig. 40.) The contents of right auricle and ventricle and the
tricuspid valves are now inspected. The heart is then removed from the body
by lifting it up vertically as far as possible and cutting the vessels from below
upward as close as possible to their exits through the pericardial sac. The
hydrostatic test is then applied to the aortic and pulmonary valves by pouring
water into these vessels, or by immersing the heart an water and then lifting it
out. The heart is then laid flat on the board with apex toward the operator.
The enterotome is introduced into the right ventricle and through the pulmonary
orifice and an incision made through the anterior wall of the right ventricle,
beginning just above the anterior papillary muscle at about the middle height
of the ventricle, and cutting through the pulmonary conus and pulmonary
valve well to the left, close to the septum, following the narrow
ridge of fat at the base of the artery so as to pass between the left anterior
and posterior segments. The heart is then rotated on its vertical axis so that
the right auricle is turned toward the prosector, and the tricuspid ring is
opened with the intestinal shears. The auricular appendage is then cut open
from the auricular incision. The heart is then held in its former position and
an incision is made in the anterior wall of the left ventricle just to the left of
the septum, from the apex through the aortic ring and the left wall of the
aorta, while the pulmonary artery is pulled to the right. (See Fig. 41.) Care
must be taken not to damage the right border of the base of the mitral; the
cut should pass half way between the pulmonary orifice and the left auricular
appendage, cutting the left aortic flap. If it is desired to save the cusps the
pulmonary artery may be dissected from the aorta and the incision carried
between the right posterior and the anterior valve-flaps. The heart is again
rotated toward the right and the mitral ring is cut with the enterotome, which
is introduced from the left auricle into the left ventricle. The left auricular
appendage is then cut open. The heart-wall is then examined by means of
parallel vertical or horizontal incisions. The papillary muscles are cut longitudinally
from apex to base. The coronary vessels and their branches are then
examined, partly from the aorta and partly from the incisions through the muscle.
Prausnitz Method. The heart is removed and held in the palm of the
left hand and two vertical incisions are made on either side of the septum,
parallel with it, and extending from base to apex. Two other incisions are
then made from base to apex on the outer borders of the ventricles, connecting
at the apex with the first incisions. The ventricles are opened by the triangular
flaps of the anterior wall thus formed, these flaps being attached at the base of
the heart. The contents of the cavities are examined and removed; the valvular
orifices and flaps are examined, and the pulmonary and aortic rings are
cut through with the shears by extending the two incisions made on each side
of the septum, taking care to pass between the cusps.
The heart can also be opened with the long shears alone. The openings
of the two cavæ in the right auricle are connected by an incision. The auricular
appendage is opened by a second cut. The shears are then put through the
tricuspid ring, and this with the right ventricle is cut, the incision following
the right ventricular border. The pulmonary orifice is then opened by a cut
made along the right side of the septum. The left heart is opened through
the pulmonary veins, cutting first the auricle-wall, then the mitral ring and
ventricular wall to the apex. An incision is then made along the left side of
the septum, through the aortic orifice into the aorta.
5. Section of the Lungs. The general inspection of the pleural
cavities and pleural surfaces is made as soon as the thoracic cavity
is opened, as indicated above. If a pneumothorax is present the
pleural cavity on the affected side is filled with water, the neck
organs are exposed and a tube inserted into the trachea. When
air is forced through this bubbles will escape from the perforation
and the opening can be easily located. When extensive or complete
pleural adhesions are present, so that they cannot be separated,
it becomes necessary to remove the costal pleura in connection
with the visceral layer. This is accomplished by loosening
the costal pleura and subpleural fascia at the cut edge of the ribs
with the blade of the knife, until the fingers and, finally the hand,
can be worked in between the costal pleura and the chest-wall,
gradually separating the two until the entire lung is freed with
both layers of pleura adherent. Firm adhesions at the apex may
have to be cut with the knife. Similar adhesions with the pericardium
or diaphragm may make it necessary to cut out the adherent
portion with scissors or knife and remove it in connection with the
lung. When the pleural adhesions are very firm upon the right
side the prosector may find it most convenient to stand at the left
side of the cadaver and from this position separate the right costal
pleura from the chest wall. An assistant may be of great service
in pulling the thoracic wall outward. The edge of the ribs or cartilages
may be covered with a towel or the skin may be drawn
over it to protect the hands. In extreme cases it may be necessary
to saw the ribs and remove them in connection with the lungs.
Sometimes the adhesions may be separated more easily if the
neck-organs are first removed down to the clavicle, and then, in
connection with the lungs, are removed en masse, by means of
powerful tugs, from above downward. The apical and posterior
adhesions may be torn fairly easily in this way when ordinary
manipulations in the thoracic cavity have no effect upon them.
When the pleural surfaces are free the left lung is lifted out
of the cavity onto the right edge of the chest-wall, pulling it forcibly
over to the right so that its posterior surface becomes uppermost.
In this position the lung may be sectioned by one or more
main incisions made with the long section-knife, cutting the organ
from apex to base, down upon the ribs in the direction of the main
bronchi and vessels. After the examination of the cut surfaces the
organ may be returned to the cavity. It is better, however, to
remove the lung, and section it outside the body. This is done by
cutting the mediastinal pleura, pulmonary vessels and main
bronchus with the cartilage-knife, while the lung is held upon the
right edge of the thoracic opening, holding the knife so that its
blade strikes the edge of the costal cartilages.
Fig. 42.—Section of left lung. (After Nauwerck.)
The lung, when free, is placed upon the board with its hilus
downward and base toward the prosector. (See Fig. 42.) It is
then held in the left hand, as shown in the illustration, the thumb
holding the lower lobe, the index-finger between the lobes with its
tip upon the main bronchus, the other fingers holding the upper
lobe. With the long section-knife held slightly obliquely toward
the anterior edge the main-incision is now made in one sweeping
cut from apex to base, along the line of greatest convexity, down
upon the main-bronchus and its chief branches and the large vessels.
Care should be taken not to cut off the bronchi of the two
lobes from the main bronchus. Incisions parallel to the main one
may be made, if desired. Usually it suffices to go carefully over
the remaining part of the lung, feeling it carefully for airless solid
areas; if such are present they may be sectioned separately. The
bronchi are then opened from the cut surface by means of the
probe-pointed scissors, cutting as near to the pleura as possible.
The sound or director may be used with advantage in opening
up cavities from the bronchi. The position of the lung should be
so changed that the bronchi always extend away from the prosector
in a straight line. The portion of the lung containing the uncut
bronchus should be left hanging over the left hand to put it on
the stretch, thereby facilitating greatly the opening of the bronchus.
The pulmonary vessels are opened with fine probe-pointed scissors
from the cut surface. The bronchial lymphglands are then sectioned
with the knife.
Fig. 43.—Section of right lung. (After Nauwerck.)
The right lung is then lifted up out of the thorax onto the right
side of the thoracic opening, and is either sectioned in this position,
or the mediastinal pleura, pulmonary vessels and bronchus are cut
from below upward with the knife, its edge being directed against
the ribs. When freed the lung is placed on the board, root downward
and apex toward the prosector. (See Fig. 43.) The index-finger
is put between the upper and lower lobes, the thumb holds
the upper lobe, the other fingers are spread out over the surface
of the lower lobe. The main-incision is then made in a sweeping
cut, from base to apex, along the line of greatest convexity, the
knife-blade being held slightly obliquely toward the anterior border
(see Fig. 43), cutting down upon the main bronchus and its
first division. Other parallel cuts may be made. The middle lobe
is then sectioned by a sagittal incision on its anterior surface,
directed toward its anterior border. The bronchi, pulmonary vessels
and bronchial lymphnodes are then opened as in the case
of the left lung.
Bacteriologic examinations may be made from smears or cultures
made from the cut surfaces; or, to avoid contamination, the
surface may be seared with a hot iron and the material obtained
by means of a sterile pipette pushed through the seared surface
into the lung-tissue.
The lungs may also be removed by drawing them downward and outward,
away from the root, while the bronchi and pulmonary vessels are cut, the knife
being directed against the vertebræ, care being taken to avoid cutting the aorta
and œsophagus. The lungs are then lifted up toward the middle line, while
the mediastinal pleuræ are cut. The section of the lungs may be carried out,
if so desired, from the root, the main bronchus and then all of the branches
as far as the pleuræ being opened up by means of the probe-pointed scissors.
Other incisions may be made if desired.
As mentioned above, it is sometimes more convenient to remove the
thoracic organs en masse, either alone, or in association with the neck organs.
When this is done the dissection follows the method of Letulle (see above), or
the organs may be separated and sectioned according to the methods just given.
The section of the heart usually precedes that of the lungs, in order that
the blood-content of the former may be more correctly estimated. Under certain
conditions it may be more convenient or expedient to section the lungs first,
beginning with the left one.
When the neck-organs are not removed the section of the
thorax closes with the examination of the aorta, oesophagus,
thoracic duct and thoracic vertebrae. The blood-vessels and
œsophagus are opened with the curved scissors, from above downward,
the contents noted, and the walls examined. The thoracic
duct is best dissected out from the right side, by cutting along the
right side of the aorta and turning the latter over to the left. The
duct is more easily recognized at its lower end. It may be inflated
with the blow-pipe, or opened with a probe and fine probe-pointed
scissors. Sometimes the duct can be most easily found by removing
the left lung and then turning the right lung over into the left
pleural cavity. The posterior mediastinal tissues are put on a
stretch, so that the duct can be recognized through the pleura.
For the examination of the left subclavian vein the left clavicle
should be removed.
II. POINTS TO BE NOTED IN THE EXAMINATION OF
THE THORAX.
1. Thoracic Cavity. Presence of gas or air (pneumothorax,
infections with colon bacillus, gas-forming bacillus, proteus, etc.),
relative degree of pressure, odor, etc. Measure contents of each
pleural sac; note character of fluid (clear, turbid, bloody, chyliform,
chylous, purulent, fibrino-purulent). Normally the pleuræ are
moist-shining, smooth, grayish, transparent; only a few drops of
fluid found in the cavities. In cases of slowly progressive cardiac
insufficiency large amounts of clear fluid may collect in the cavities
just before death. Non-inflammatory collections of fluid also occur
in general œdema. In these conditions the pleuræ are not cloudy or
dull, while in the case of inflammation the pleural surfaces are dry,
cloudy, dull-shining, injected, rough or covered with fibrinous or
purulent exudate. Examine pleural surfaces particularly for evidences
of inflammation, recent and old tuberculosis, primary and
secondary neoplasms (carcinoma).
2. Position of Thoracic Organs. Locate anterior borders of
lungs, apex and borders of heart. The normal lung collapses after
the removal of the sternum. How much of the pericardial sac is
left uncovered by the lungs?
3. Anterior Mediastinum. Note character of connective-tissue,
amount and color of fat-tissue, number and size of lymphnodes,
occurrence of œdema or emphysema. An artificial œdema
may be caused by the injection of large quantities of salt solution
in the pectoral region just before death. An artificial emphysema
may be produced by the removal of the sternum. The condition
of the large veins in the upper portion of the mediastinum should
be noted before the heart is removed. Are they lax, moderately
full, or distended? Secondary tumors, hemorrhages, abscesses,
œdema and emphysema are the most common pathologic conditions.
4. Thymus. The writer believes that the weights usually
given for the thymus in the new-born are too high, and that 7-10
grms. represents the usual normal weight. A gland weighing 20
grms. or more must be regarded as enlarged. The organ reaches
its fullest development at the end of the second year. Atrophy
begins then, developing slowly up to the age of puberty, after that
more rapidly. In adults the thymus normally consists of a mass
of adipose tissue containing lymphoid nodules, in some of which
corpuscles of Hassall persist to old age. Postmortem softening
should not be mistaken for abscesses. The most important pathologic
change is hypertrophy. Pressure of the enlarged gland upon
the trachea, nerves or great vessels may cause thymic stridor,
asthma, or thymic death (“lymphatic constitution”). Enlargement
of the thymus may occur in “status lymphaticus,” exophthalmic
goitre, cretinism, myxœdema, Addison’s disease, acromegaly,
myasthenia gravis, epilepsy, scorbutus, rachitis, tonsillar hyperplasia,
adenoids, congenital syphilis, Hodgkin’s disease, leukæmia,
anencephaly, anæmia, acute infections, or it may exist as an independent
affection. Oedema, congestion, inflammation, tuberculosis,
neoplasms, etc., may also cause an enlargement. Absence
of the thymus has been observed. Primary and secondary forms of
atrophy in association with marasmus occur in children. Note relation
of size of thymus to condition of child; atrophy of the organ is
usually coincident with marasmus. Inflammation, tuberculosis,
cysts, primary and secondary neoplasms, gummata, etc., are not
common.
5. Pericardium. Note tension of sac, fluctuation, adhesions,
thickness, character of inner surface, contents (amount, color, odor,
presence of fibrin, blood or pus, gas). Normally there are about
5-10 c. c. of clear yellow fluid in the sac. Both peri- and epicardium
normally are moist-shining, smooth, grayish and transparent.
Large amounts of clear watery fluid may collect in the pericardial
sac in slow death in cases of chronic valvular lesions, chronic
nephritis, bronchitis and emphysema, but the surface of the peri- and
epicardium remains smooth and shining. In inflammatory
increase of the pericardial fluid the serous surfaces are dull, cloudy
or dry, and may be covered with a layer of fibrin, the fluid is more
or less cloudy and contains flakes or strings of fibrin, or may be
purulent. The fibrinous exudate may be very extensive and from
the movement of the heart be drawn out into bands, threads or
villus-like prominences (cor hirsutum or villosum). Pericarditis
is common in acute rheumatism, septicæmia, pyæmia, puerperal
fever, osteomyelitis, pneumonia, and as a terminal infection in
cardiac and renal disease. Tuberculosis is one of the most common
causes of purulent, fibrinous and hemorrhagic pericarditis, particularly
of the cor villosum. Examine surfaces for tubercles. The
presence of blood in the pericardial exudate points usually to tuberculosis
or malignant neoplasm, but in small amount may be found
in various infections and intoxications. The age of the pericarditis
may be judged by the amount of organization of the exudate,
adhesions, thickenings, etc. “Milk spots,” “soldier’s spots,” “tendinous
patches” or “friction scleroses” represent hyaline thickenings
of the pericardium due to old pericarditis. Total synechia or
atresia of the cavity may occur. As the result of calcification of an
old pericarditic exudate the heart may be surrounded by a calcareous
sheath (“stony heart,” “petrified heart”). Hæmopericardium
results from the rupture of the heart, aorta, pulmonary artery
or coronary vessel. Petechiæ of the peri- and epicardium are found
in pyæmia, septicæmia, hæmophilia, scurvy, severe anæmia, leukæmia,
chronic nephritis, and death from suffocation and various
intoxications. Pneumopericardium may be due to perforating
wounds, or to perforations from lungs, stomach or œsophagus, or
to infections with gas-forming bacilli. Malformations are rare
(diverticula, ectopia). Tuberculosis is usually secondary. Gummata
are rare. Actinomycosis is usually secondary to actinomycosis
of the neck or lungs. Primary neoplasms are rare. Secondary
carcinoma and sarcoma (especially lymphosarcoma) are more frequent.
Cysticercus, trichina and echinococcus are rare.
6. Heart. Note more carefully its position, whether displaced
to right or left, location of apex, borders, etc. Relative size compared
to cadaver’s right fist, which is usually a little smaller than
the heart. Weight and measurements:—(The heart should be
weighed after it has been opened, and its cavities freed from blood
and clots.)
Average weight in adult male, about 300-350 grm.
Average weight in adult female, about 250 grm.
Normal limits, 200-350 grm.
Weight of heart to body-weight in adult male, 1:169; in the
female, 1:162.
Circumference at base of ventricles 25.8 cm., length of ventricles
8-9 cm., breadth 8.5-10.5 cm., thickness 3-3.6 cm.; minimal
measurements are for the female. Auricles are 5-6 cm. in length.
Compare ventricles as to size.
Note form (long, cylindrical, pyramidal, broad, short, round,
etc.) In hypertrophy of the left ventricle the heart is longer and
more cylindrical; in hypertrophy of the right it is broader and
more rounded. Normally the apex is formed by the left ventricle,
the sulcus longitudinalis running to the apex and nearly dividing
the heart into halves. In hypertrophy of the right ventricle the
apex is formed by this ventricle, the sulcus longitudinalis passing
to the left of the apex; in hypertrophy of the left ventricle the
longitudinal sulcus runs to the right of the apex. What part of
the heart lies anteriorly? (Normally a large part of the right
ventricle.)
The consistence of the organ, particularly that of the ventricles,
should be noted (firm, flabby, soft, etc.). Condition of the
heart-chambers (empty, contracted, dilated, full). Rigor mortis
should be removed by kneading or by the application of heat. The
amount of subepicardial fat, its color, translucency, occurrence of
serous atrophy, œdema, subepicardial hemorrhage, etc., are to be
noted. In marasmus a serous or mucoid degeneration of the subepicardial
fat is not uncommon. The subepicardial fat increases
with age, and is normally most abundant along the grooves and
blood-vessels, particularly the auriculoventricular grooves and on
the right ventricle. Normally the color of the heart-muscle of the
ventricles should be seen through the epicardium. The fat is
increased in obesity, chronic alcoholism, chronic anæmia, tuberculosis,
etc. When the fat-infiltration is so marked that the muscle
cannot be seen the condition is known as adipositas or obesitas
cordis, or in extreme cases as lipoma cordis capsulare.
7. Right Heart. Note amount of blood contained in right
chambers (over-distended in death from asphyxiation, pneumonia,
etc.), also its consistence (thick, thin, watery), color (light, dark,
red, yellowish, chocolate, purplish), blood-clots (size, color, cruor,
lardaceous clots, chicken-fat clots, pus-like clots, consistence,
moisture), presence of free fat, gas or air, diffusion of hæmoglobin,
presence of bile-pigment in blood. Note also amount and character
of blood in venæ cavæ. The size of auricular and ventricular cavities
should be estimated, noting condition of trabeculæ and papillary
muscles (atrophic, flattened, hypertrophic, fatty, fibroid, calcification).
The musculature of the ventricular walls is examined
as to its thickness (normally the right ventricle wall is 4-5 mm.
thick). Postmortem contraction should not be mistaken for hypertrophy.
The color of the heart-muscle normally is pinkish in
infants, flesh-red in adults, and brownish-red in old age and in
atrophy following compensatory hypertrophy (brown atrophy).
Under normal conditions the muscle is translucent. In cloudy
swelling the heart-muscle appears cloudy and opaque as if cooked.
Fatty degeneration appears as yellowish, opaque patches or streaks
(“tiger-heart”), particularly in the papillary muscles and trabeculæ.
In severe intoxications the process may be diffuse, and the entire
musculature appear cream-colored or yellowish and opaque. The
consistence may be firm, flabby, soft, putty-like; localized areas
may be caseous. Infarcted areas are soft when fresh (myomalacia
cordis). The consistence is increased in atrophy, fibroid heart,
chronic interstitial myocarditis, syphilis, etc. Cloudy swelling and
fatty degeneration make the heart muscle softer and more friable.
In postmortem decomposition the heart as a whole becomes soft.
Normally the endocardium should be gray, delicate, thin and transparent.
The chordæ tendinæ are long, narrow and delicate. Note
thickenings of endocardium and chordæ tendinæ, presence of
thrombi (dry, brick-red, yellowish or gray, firmer than clots and
adherent to the endocardium, often show simple softening, which
should not be mistaken for pus; may be parietal, polypoid, valvular
or free). The endocardium may be stained diffusely yellow
(bile) or brown (methæmoglobin). Creamy or yellowish opacities
of the intima are due to fatty degeneration.
8. Left Heart. Note same things in left side of heart as on
right. In cardiac paralysis left ventricle is filled with blood if
rigor mortis has not set in. Left ventricle wall is 10-15 mm. thick
normally; may become 30 mm. thick in hypertrophy. Papillary
muscles and trabeculæ may be markedly hypertrophic, but in the
greatly dilated heart (aortic insufficiency) may be much flattened.
The septum of the ventricles may share in the hypertrophy of
either ventricle and when hypertrophic bulges into the cavity of
the unaffected side. Examine wall of left ventricle, particularly
near the apex, for infarcts, fibroid patches, aneurismal dilatation,
rupture, fatty degeneration, thrombi, etc. Look particularly for
pathologic conditions involving the atrioventricular bundle.
9. Orifices and Valves. Orifices should measure as follows:—Tricuspid
(12-12.7 cm.), mitral (10.4-10.9 cm.), pulmonary (8.9-9.2
cm.), aorta (7.7-8 cm.). Rough measurements may be taken with
the fingers, tricuspid admitting three, mitral two, pulmonary one
and a half, aorta thumb. The orifices may be measured by graduated
cones, or in the ordinary way after the heart is sectioned.
Normally the edges of the valve-flaps should be delicate, smooth
and thin. Examine for vegetations, thrombi, induration, thickening,
contractions, ulcerations, tears, perforations, defects, calcification,
atheroma, valvular aneurism, etc. Note thickening, contraction,
adhesion, shortening, etc., of the chordæ tendinæ. When
the tendons are long, narrow and thread-like, and without adhesions,
the probabilities are that a lesion of the mitral orifice was
not present.
10. Coronary Vessels. Walls should be uniformly delicate
and thin, and the intima should be delicate, gray and transparent.
Note contents of arteries and veins. Examine arteries especially
for thrombi, emboli, arteriosclerosis, atheroma, calcification, obliteration
of lumen, thickening of wall, loss of elasticity, opacity of
intima and increased tortuosity of course.
The most important pathologic conditions of the heart are:—endocarditis
(ulcerosa, maligna, verrucosa, simplex, chronica
fibrosa, sclerosing), valvular insufficiency and stenosis, hypertrophy,
dilatation, atrophy, fatty infiltration, fatty degeneration,
cloudy swelling, anæmic infarction, calcification, acute and chronic
myocarditis, abscess, fibroid heart, cardiac aneurism, rupture,
thrombosis, embolism, malformations (septum defects, patent ductus
arteriosus, stenosis or atresia of orifices), tuberculosis (not rare,
in association with tuberculous pericarditis, or general miliary
tuberculosis), syphilis (gumma not common, localized or diffuse
interstitial myocarditis the most common manifestation), actinomycosis,
cysticercus, echinococcus, trichina and neoplasms (primary
rare, in part congenital, fibroma, lipoma, angioma, myxoma,
rhabdomyoma; secondary sarcoma less rare than secondary carcinoma,
most common forms are melanotic sarcoma and lymphosarcoma).
11. Left Lung. Weighs 350-500 grm. Size (voluminous, collapsed,
compare lobes); form (edges rounded, sharp, nodular, saccular
or cystic, contractions, depressions, emphysematous enlargements);
pleura (examine again more closely. Circumscribed dull-shining
or cloudy areas point to some pathologic condition of the
lung beneath. Look for evidences of healed tuberculosis, particularly
in the pleura of the apices. Secondary carcinoma of the
pleura is very common. Primary tumors are rare; endothelioma
and sarcoma are the most common forms. Small circumscribed
areas of pigmentation usually represent old tubercles); color
(depends upon degree of anthracosis, blood-content and condition
of pleura, areas showing especial color should be examined closely;
most common colors are pinkish-gray normally, grayish, slaty,
black, red, brown, dark-red to black); size of air-cells (normally can
be seen with naked eye, best seen at apex and borders, about size of
pin-points, when larger than the head of a pin they are emphysematous);
lobules can also be seen with naked eye, usually polygonal in
shape, 2-3 mm. in diameter; consistence (estimate by going over
entire lung, pressing the lung-substance between thumb and fingers;
air-containing lung is soft, elastic and crepitates; airless areas
are hard, firm and do not crepitate).
On the cut surface the following points should be noted:
Blood-content (anæmia, hyperæmia, hypostatic congestion), color
of cut-surface, air-content, exudate (serous, purulent), consistence
(hard, soft, elastic, caseous, brittle, crumbling), character of surface
(smooth, granular, nodular, cavities). Cavities should be described
according to their position, size, shape, contents and character of
their walls.
12. Right Lung. Weight 420-620 grms. Note size, form,
color, surface, size of air-cells, lobules, consistence, blood-content,
air-content, exudate, consistence and character of cut-surface, as
in case of left lung.
Evidences of healed tuberculosis are found in practically all adult
lungs in the form of localized thickenings or puckering of the pleura,
especially at the apices, hyaline or anthracotic nodules, encapsulated,
caseous or calcified tubercles. Old scars and indurations are
firm, hard and usually black in color. Caseous areas are smooth, dry,
white or grayish, and opaque. Very young tubercles are elevated,
grayish and translucent. Atelectatic areas are depressed and bluish-red
in color. Areas of hepatization are red or gray, elevated, granular,
crumbling, moist in early stage, dry in caseous hepatization.
In bronchopneumonia the areas of hepatization are usually sharply
circumscribed. Metastatic abscesses lie usually beneath the pleura,
are usually multiple and distributed over both lungs. Bronchopneumonic
areas are usually found in the dependent portions, particularly
in right lung. An abundance of foamy, watery fluid on
the cut-surface indicates œdema; when very bloody there is usually
a marked stasis or beginning hepatization present. In atelectasis
and fibrinous hepatization the exudate from the surface is not
foamy. Emphysematous areas are white or grayish-white and are
most frequently found along the borders. Large air-spaces are
often found along the interlobular septa (interstitial emphysema),
particularly in children following trauma, croup, whooping-cough,
etc. In chronic passive congestion the lung is firmer than normal,
deep-red or brownish in color. Hemorrhagic infarcts lie usually
beneath the pleura, are wedge-shaped, with base toward pleura,
firm, smooth on section, or granular, and when fresh are nearly
black; older ones are lighter and brownish. Cavities in the lung
occur in tuberculosis, embolic and primary abscesses, actinomycosis,
gangrene, bronchiectasis, primary and secondary tumors, etc.
Gangrenous areas have diffuse borders, are gray or greenish in
color, with central softened areas, with ragged borders and stinking
smell. In bronchiectatic cavities the smooth mucosa of the
bronchus passes directly into the wall of the cavity. Primary carcinomata
of the lungs appear as cavities having a white medullary
wall, or as medullary strands running along the bronchi. Tuberculous
cavities have caseous walls, are more or less encapsulated,
and usually show younger tubercles in the neighborhood of the
wall. Antemortem hypostasis is usually darker and firmer than
postmortem, and is usually associated with inflammation (hypostatic
pneumonia).
The most important pathologic conditions of the lungs are:—Anomalies
(anomalous lobes common, infradiaphragmatic accessory
lungs, agenesia, congenital bronchiectasis), atelectasis (fœtal,
compression, obstruction, paralytic, etc.), emphysema (acute,
chronic, vicarious, senile, atrophic, hypertrophic, interstitial, gangrenous),
hyperæmia, stasis, brown induration, hypostasis, œdema
(universal, stasis, hypostatic, atelectatic, acute, chronic, terminal),
hemorrhage, hemorrhagic infarction, thrombosis, embolism, fatty
embolism, pneumonia (croupous, atypical, bronchopneumonia, acute
and chronic interstitial), abscess, gangrene, tuberculosis (acute
miliary, caseous pneumonia, peribronchial, tuberculous bronchopneumonia,
indurative, fibroid, phthisis pulmonum), syphilis (gumma,
white pneumonia), actinomycosis, neoplasms (primary adenoma,
lipoma, papilloma, chondroma, osteoma, sarcoma, carcinoma and
teratoma are rare; metastatic sarcoma and carcinoma are common;
malignant chorio-epithelioma is not infrequent), parasites (echinococcus,
cysticercus, hook-worm embryos, pentastomum and distomum
pulmonale).
13. Bronchi. Note size, contents, thickness of wall, color and
thickness of mucosa. Normally the bronchi are empty, and the
mucosa grayish-red. In pulmonary œdema they contain clear,
foamy fluid; in bronchitis they may contain a mucous, mucopurulent,
purulent, fibrinous, hemorrhagic or putrid exudate. In acute
bronchitis the mucosa is red; in chronic bronchitis the mucosa may
be red or brownish, and thickened or folded. Material from the
stomach may enter the bronchi postmortem and cause a postmortem
digestion of the mucosa or wall.
The most important pathologic conditions of the bronchi are:—Inflammation
(acute and chronic catarrhal bronchitis, fibrinous,
putrid, atrophic, obliterans), bronchial asthma, tuberculosis, syphilis,
stenosis, bronchiectasis, perforation (aneurisms, abscess, carcinoma,
tubercles, etc.), bronchial calculi, foreign bodies, neoplasms
(adenoma, papilloma, carcinoma, chondroma, osteoma), parasites
(cysticercus, echinococcus, hook-worm embryos, distomum pulmonale,
pentastomum).
14. Bronchial Glands. Note size, pigmentation (gray, dark-gray,
black), consistence, character of cut-surface, caseation, fibroid
induration, calcification, œdema, congestion, abscess, neoplasm.
Tuberculosis and secondary neoplasms are the most common conditions.
Lymphosarcoma is the most frequent primary tumor.
15. Pulmonary Vessels. Character of walls and contents.
Normally the intima is smooth, grayish-white and translucent.
Fatty degeneration of the intima is not rare (acute infections and
intoxications); atheroma and aneurismal dilatation are infrequent.
Occasionally parietal thrombi and thickening of the wall due to
organization of a thrombus are seen. The pulmonary arteries are
normally empty or contain soft cruor or agonal white clots. These
are not adherent to the wall, do not fill the lumen and are soft and
moist. Emboli fill the lumen as if forced into it (at the branchings
of the artery they form “rider’s” emboli); they are more dry and
brick-red, brownish or grayish in color. Occasionally they may be
unrolled into long fibrinous strands. Older emboli may show more
or less organization and adherence to the vessel-wall. In air-embolism
the pulmonary arteries contain a mixture of blood and
air looking like a stiff-beaten white of egg of red color. Large
emboli of liver-tissue or liver-cells may be found in the pulmonary
arteries after traumatic rupture of the liver. Fat-emboli of the
smaller arteries can be recognized by the naked-eye. Thrombosis
of both pulmonary arteries and veins is very common in chronic
valvular lesions, pneumonia, terminal infections, burns of the skin,
poisoning with hemolytic agents, etc.
16. Great Vessels of Thorax. Note size of lumen, condition
of walls, particularly of intima, and the contents. Circumference
of thoracic aorta 4.5-6.0 cm., thickness of wall 1.5-2 mm. Test
elasticity of wall by stretching; note if it retracts and becomes
shorter than the œsophagus, which was cut at the same level. Note
consistence of wall (stiff and hard in sclerosis and calcification).
Normally the intima of the aorta is smooth, grayish-white and
semitranslucent; the wall is elastic. Fatty degeneration, sclerosis,
atheroma and aneurismal dilatations are the most common pathologic
findings. Fatty degeneration shows itself in yellowish spots
or streaks, more opaque and slightly elevated. Sclerotic areas are
hard, white and tendon-like. Atheromatous “plaques” and “ulcers”
are white or yellowish, elevated, rough, scaly, with loss of substance,
often more or less calcified. Thrombi are frequently formed
upon such atheromatous patches. Hemorrhage into the intima
may occur (aneurysma dissecans). Radiating or linear sclerotic
folds and depressions in the intima, with or without dilatation of
the lumen, usually result from syphilis (mesaortitis). A dirty
brownish discoloration of the intima is due to an imbibition of diffuse
hæmoglobin, usually postmortem. In chronic icterus the
intima may be bile-stained. Thrombosis of the aorta is not common.
Congenital or acquired stenosis at the isthmus is rare.
Tuberculosis of the aorta-wall is also very rare.
17. Thoracic Portion of Oesophagus. Note size (stenosis,
dilatation, diverticulum), contents (food, stomach-contents, blood,
pus, foreign-body), thickness of wall, color of mucosa (normally
grayish-white), neoplasms (carcinoma), perforations, erosions
(aneurism, abscess, neoplasm), inflammation. Anomalies, tuberculosis,
syphilis, actinomycosis and neoplasms (with the exception
of carcinoma) are rare. The most common location of carcinoma
is toward the cardia. Thrush is the most common parasite.
Varices of the œsophageal veins are common, and from these fatal
hemorrhages may occur. In the thoracic portion they are usually
the result of collateral distention to offset a portal stasis (hepatic
cirrhosis, Banti’s disease, thrombosis of splenic or portal veins).
The passage of stomach-contents through the cardia into the
œsophagus may cause a postmortem softening or perforation of the
œsophageal wall.
18. Thoracic Duct. Note size, contents and character of wall.
Tuberculosis, malignant neoplasms, obstruction, rupture and purulent
inflammations are the most important pathologic conditions.
In miliary tuberculosis the thoracic duct may be the primary focus
or the avenue by which the bacilli enter the blood. The duct also
plays an important part in the dissemination of malignant tumors
and infections from the abdominal cavity and pelvis. Chylothorax
and chylopericardium are usually caused by the blocking of the
thoracic duct by malignant neoplasms (lymphosarcoma, carcinoma),
or by rupture of the duct.
19. Thoracic Vertebrae. Note surfaces of vertebræ (normally
smooth), curvatures, softening, erosions, exostoses, neoplasms,
fractures, dislocations. Tuberculosis, curvatures and malignant
tumors (secondary carcinoma, primary sarcoma, myeloma, chloroma)
are the most common conditions. Aneurismal erosions are
not rare.
CHAPTER IX. EXAMINATION OF THE MOUTH AND NECK.
I. METHODS OF EXAMINATION.
1. Removal of the Neck-Organs. The block is left beneath
the neck, and the chin pulled upward by an assistant, so as to put
the skin of the neck on a tight stretch. If the main-incision cannot
be extended to the symphysis of the chin, the cartilage- or
long section-knife is run up beneath the skin in the median line to
the point of the chin, and, with the blade held nearly flat, the skin
is loosened from the tissues of the neck, first on the left side, then
on the right, as far back as the mastoid processes and the spinal column
and to the ends of the clavicles. Great care should be taken
not to cut through the skin. The long section-knife, with blade flat,
is then pushed through the floor of the mouth, to the left of the
median line, taking care not to damage the tongue, and with the
blade of the knife closely hugging the inner border of the lower
jaw, the floor of the mouth is cut through as far as the angle of
the jaw. The knife is then turned with its cutting edge toward
the right and a similar cut made through the floor of the mouth as
far as the right angle of the jaw. The knife must be held at right
angles to the floor of the mouth to avoid cutting the tongue. When
the mouth is open the course of the knife can be seen, but usually
the mouth is tightly closed in rigor mortis. When cutting the
floor of the mouth it is better to make short sawing movements
with the knife than to attempt to cut it with one sweeping cut.
Instead of cutting from the median line the knife may be inserted
at the right or left angle of the jaw and the cut extended upward
to the chin and thence toward the other angle. (See Fig. 42.)
Fig. 44.—Removal of neck-organs, when skin-incision is carried to the chin.
The same cuts through the soft palate are made, when the knife is
pushed up beneath the loosened skin of the neck. (After Nauwerck.)
As soon as the floor of the mouth is opened and the tongue
loosened from the lower jaw the left hand is introduced beneath
the skin, through the incision, into the mouth, and the tongue
seized by thumb and middle finger, and drawn forcibly downward,
while the other fingers are used to lift up the skin from the knife.
The long section-knife, with cutting edge turned toward the left,
is then introduced in the median line, along the left hand, until its
point reaches the hard palate, taking care to work the point back
slowly until it reaches the border between soft and hard palate.
This must be done by feeling rather than by sight. The block
under the neck is then pushed up under the head and the chin
thrown forward so that the point of the knife is directed at right
angles against the cervical vertebræ. The soft palate is then cut
to the left, while the tongue is pulled firmly downward and toward
the right, putting the uvular arch on a stretch so that the knife
passes around the left tonsil. The knife is then turned and the
same cut made on the right, severing the right faucial pillar and
tonsil, while the tongue is pulled downward and to the left. The
point of the knife is then pushed back to the pharyngeal wall and
the latter is cut from right to left by a strong, firm stroke directed
at right angles to the surface of the upper cervical vertebræ. The
cut through the pharyngeal mucosa should be at the level of the
boundary between the laryngeal and nasal portions, at about the
height of the axis. While this cut is being made firm traction
should be kept up on the tongue, pulling it downward, and alternately
to the left and right. The loose retropharyngeal and retroœsophageal
fascia tears easily and the mouth organs can now be
pulled so far downward that first transverse and then oblique cuts
through this fascia can now be made upon the vertebræ, severing the
vagi, carotids and jugulars, and working from above downward, until
the mouth and neck organs can be lifted up through the skin-incision
and the entire mass of the neck-organs separated from the spinal
column as far as the clavicles. Pulling the mass toward the right,
the left subclavian vessels and fascia are severed by a cut directed
downward and outward beneath the clavicle. Traction is then
made toward the left and the right subclavians cut beneath the
clavicle. If the thoracic organs have been removed the œsophagus
and aorta may now be stripped down to the diaphragm and there
cut off, or the neck-organs may be cut off at the level of the bifurcation
of the bronchi.
The organs, having been removed, are placed on the board,
œsophagus upward, and the tip of tongue toward the prosector.
The tongue is then cut in the median line and the cut surfaces
examined. Transverse cuts may be made when indicated. The
uvula is then lifted up and examined; and the tonsils and palate
next examined, the former by means of longitudinal incisions. The
intestinal shears are now introduced through the fauces into the
œsophagus and the left pillar cut between the uvula and the tonsil.
The posterior wall of the pharynx and that of the oesophagus for
its entire length is then cut in the median line, and these structures
examined. After the examination of the larynx from above, the
long blade of the intestinal shears is introduced into the larynx
and trachea, and these are cut in the posterior median line into
the right bronchus. The œsophagus is pulled to the left (prosector’s
right) out of the way. The left bronchus is opened by a special
incision to avoid cutting aorta and œsophagus. The larynx is now
lifted up and held in both hands with the thumbs on the horns of
the thyroid cartilage, and the fingers outside, and the larynx opened
by forcibly bending back or breaking the cartilage, so that the
entire interior of the larynx can be examined without touching the
mucosa.
The neck-organs are now turned over, with the aorta toward
the prosector and the tongue pointing away. The right and left
lobes of the thyroid are opened by oblique cuts running from above
downward and inward, and the isthmus is cut sagittally. The parathyroids
must be dissected out behind and below the thyroid, along
the course of the terminal branches of the inferior thyroid artery.
The parotid, submaxillary and sublingual glands and the cervical
lymphnodes are opened by longitudinal cuts. The aorta, carotids,
jugulars and their branches are opened with the curved or probe-pointed
scissors. The vagus, superior and inferior laryngeal nerves
and the cervical sympathetic ganglia are to be examined when the
case requires it. The examination of the neck-organs then closes
with the inspection of the muscles of the neck and the cervical
vertebrae.
If permission cannot be obtained for the complete removal of the mouth-organs,
the neck-organs may be removed by cutting them transversely against
the vertebræ between the hyoid bone and thyroid cartilage and then stripping
them from the vertebræ and removing them as in the method given above. The
skin-incision in such cases need not be carried higher than the collar-line, the
skin of the neck being loosened by a subcutaneous dissection.
When permission is withheld for the removal of the neck-organs they may
be examined in situ, by freeing the skin of the neck by a subcutaneous dissection,
cutting the lobes and isthmus of the thyroid in place and then opening the
trachea and larynx by an anterior median incision. The salivary glands, parathyroids,
cervical lymphnodes, vessels and nerves can all be examined by this
method without removing the organs as a whole.
In cases of aortic aneurism, corrosive poisoning, carcinoma of œsophagus,
trachea or bronchi, it is best to remove the neck-organs in connection with the
thoracic, removing first the neck-organs down to the clavicles and then stripping
all down to the diaphragm, where they may be cut off and examined outside
of the body. In cases of poisoning it is often necessary to remove the œsophagus
in connection with the stomach. The mass of neck- and thoracic organs are
removed as far as the diaphragm and then allowed to lie over the edge of the
thorax or are turned down over the abdomen so that the œsophagus is upward
and the tongue toward the prosector. The œsophagus and aorta are then separated
from the other organs and left in the thorax to be examined later in
connection with the abdominal organs.
If the thoracic duct was not examined when the thoracic organs were, it
may be examined after the section of the neck-organs is finished, but it is more
easily found after the method given above by turning the right lung over into
the left side of the thorax and then looking for it in the neighborhood of the
diaphragm, on the right side behind the aorta and between it and the azygos
vein. It runs upward toward the left to the body of the last cervical vertebra,
then over the left subclavian artery downward to the left innominate vein.
II. POINTS TO BE NOTED IN EXAMINATION OF THE
MOUTH- AND NECK-ORGANS.
1. Mouth. Contents (blood, mucus, stomach-contents, foreign-bodies,
etc.), color of mucosa (normally grayish-red), vesicles
(aphthæ), cheilitis, gingivitis, various forms of stomatitis, noma,
scorbutus, Ludwig’s angina, ulcers (syphilis, carcinoma, decubital,
tuberculosis), hyperkeratosis, macrocheilia, thrush, scars, wounds,
action of corrosives, lead-line, neoplasms, etc. Note pillars of fauces,
size, shape and condition of uvula. If the teeth have not been
inspected during the general examination they should receive attention
at this time. Note malformations, anomalies, neoplasms
(adamantoma, odontoma, dental osteoma, various forms of cysts,
epulis, giant-cell sarcoma, papilloma, fibroma, etc.)
2. Tongue. Mucosa normally is moist and grayish-red. Note
discolorations, coatings, crusts, scabs, exudates, various forms of
stomatitis, “geographical tongue,” glossitis, abscess, fissures, ulcers
(syphilis, carcinoma, decubital), chancre, wounds, action of corrosives,
scars (epilepsy, syphilis), tuberculosis, neoplasms (carcinoma,
lymphangioma, hæmangioma, papilloma, leukæmic lymphocytoma,
adenoma, thyroid adenoma [struma baseos linguæ], and
rarely sarcoma, congenital fibroma, lipoma, myxoma, chondroma,
osteoma and dermoid cysts), thrush, actinomycosis, leprosy,
trichinæ, cysts (lymphangiectatic), hyperkeratosis, leukoplakia,
“black hairy tongue,” macroglossia, partial or total hypertrophy.
All forms of syphilitic lesions may be found upon the tongue
(chancre, condyloma, plaques, papules, fissures, rhagades, ulcers,
gumma, etc.) “Smooth atrophy” of the base of the tongue is
regarded by various authors as pathognomonic of tertiary or congenital
syphilis. Cysticercus and echinococcus are very rare.
3. Pharynx. Normal mucosa is smooth and gray-red. Note
contents, color and character of mucosa, atrophy, congestion,
œdema, exudations (mucous, purulent, croupous, diphtheritic,
thrush), ulcers, scars, hyperplasia of lymph-follicles, adenoids,
various forms of acute and chronic pharyngitis, retropharyngeal
abscess, syphilis, tuberculosis, neoplasms (nasal polypi, lymphosarcoma,
leukæmic lymphocytoma, aleukæmic lymphocytoma, carcinoma,
retropharyngeal dermoids, lipoma, cysts, fibroma, chondroma,
etc.), glanders, leprosy, actinomycosis, rhinoscleroma, cysticercus
and echinococcus.
4. Tonsils. Size (how far do they project?), smooth or showing
depressions, color (normally uniformly gray-red), atrophy,
hypertrophy, hyperkeratosis, various forms of inflammation (acute
and chronic tonsillitis, diphtheria, angina superficialis, lacunaris,
follicularis, pseudomembranosa, purulenta and phlegmonosa, tonsillar
ulcers, cysts and abscess), syphilis, tuberculosis, actinomycosis,
thrush, concretions, neoplasms (carcinoma, primary is rare, secondary
from primary in tongue or larynx more common; lymphosarcoma
or lymphocytoma, either aleukæmic or leukæmic, is the most
common neoplasm of the tonsil, other forms of sarcoma and connective-tissue
tumors are rare), cysticercus and echinococcus are
rare.
5. Nose. If the brain is not removed and the nasal tract not
examined by the method of Harke, as much of the nose as possible
should be inspected, and the various conditions noted, as described
in Chapter VI.
6. Oesophagus. Contents, size (dilatation, stenosis, diverticula),
color and character of mucosa (normally smooth, transparent,
pale, grayish-white, often hypostatic on posterior surface),
inflammation, swelling of mucosa, leukoplakia, œdema, erosions,
ulcers, action of corrosive poisons, perforation, foreign bodies,
varices (cirrhosis, splenic anæmia), hemorrhage, aneurismal erosion,
infective granulomata (tuberculosis, syphilis and actinomycosis
are all rare), neoplasms (benign are rare, sarcoma rare; carcinoma
most common usually at the lower or middle third), parasites
(thrush the most important infection). Postmortem softening of
the œsophagus from the regurgitation of stomach-contents must
not be mistaken for pathologic conditions. Oesophagomalacia is of
the rarest occurrence during life.
7, 8. Larynx and Trachea. Nature of contents, character and
position of epiglottis and plicæ aryepiglotticæ (the latter should
be thin; greatly thickened in inflammation and œdema), mucosa
(normally gray-red and smooth); vocal cords (position and relations
as viewed from above; should be thin and tendon-like; mucosa
thickened in inflammation and œdema; may be atrophic), œdema,
inflammation, diphtheritic membranes, ulcers, syphilis, tuberculosis,
leprosy, glanders, actinomycosis, rhinoscleroma, neoplasm, foreign-bodies,
etc. An extreme œdema of the glottis may disappear after
death, and its occurrence be shown only by the wrinkled appearance
of the mucous membrane. Anomalies are rare, the most common
being a laryngocele. In typhoid fever erosions and ulcers are
not rare in the larynx. In small-pox ulcers, diphtheritic inflammations
and hemorrhages may occur. The most common tumor is the
fibroma or fibro-epithelioma (papilloma), occurring particularly in
children and singers (“children’s nodule,” “singer’s nodule”).
Angioma, myoma, lipoma and chondroma are rare. Thyroid adenoma,
the so-called “amyloid-tumor” and adenoma of the mucous
glands are rare. Sarcoma is also rare. Lymphosarcoma and leukæmic
infiltrations are not common. Primary carcinoma is more
frequent than sarcoma, but is relatively rare. It occurs most frequently
in men, arising on the true vocal cords, and is squamous-celled.
In trichinosis the laryngeal muscles usually show an early
and abundant invasion. The most important pathologic conditions
of the trachea are anomalies (diverticula, fistula, tracheocele),
inflammation (catarrhal, membranous, pseudomembranous), tuberculosis,
syphilis, secondary erosions, ulcers and perforations
(tumors of thyroid, cancer of œsophagus, tuberculosis and suppurating
lymphnodes, aneurisms), stenosis, compression from enlarged
thyroid, thymus or lymphnodes, dilatation, tracheotomy, intubation,
and neoplasms (relatively rare). The cartilages of both
trachea and larynx should be examined for inflammation, pigmentation,
etc.
9. Thyroid.Weight is 30-60 grms. The dimensions of the
lateral lobes are: Length 5-7 cm., breadth 3-4 cm., thickness 1.5-2.5
cm. They should be symmetrical. Note variation in form, character
of cut-surface (normally glassy, granular and yellowish-pink).
The colloid is transparent, yellow or brown in color, and rises above
the cut-surface. Cysts of varying size are very common, likewise
encapsulated adenomata. A firm, yellowish, moderately enlarged
thyroid is often seen in cases of pulmonary tuberculosis. Increase
of the stroma with hyaline change and calcification is common.
The most important pathologic conditions of the thyroid are:
goitre (struma diffusa, nodosa, maligna, benigna, parenchymatosa,
hyperplastica, adenomatosa, colloides, gelatinosa, cystica, vasculosa,
fibrosa, hæmorrhagica, calculosa, ossea, amyloides, inflammatoria,
etc.), inflammation (thyreoditis simplex, purulenta,
abscess), neoplasms (carcinoma the most common form of malignant
tumor, sarcoma not rare, adenoma and cystadenoma very common,
combinations of sarcoma and carcinoma have been observed;
other forms rare), granulomata (tubercles and gummata are rare),
parasites (echinococcus). Especial examination should be made of
the thyroid in cretinism, myxœdema, all forms of cachexia of
unknown etiology, infantilism, lymphatic constitution, unexplained
death, rachitis, chondrodystrophia, acromegaly, giantism, idiocy,
etc. In marked constitutional disturbances conditions of athyreosis,
thyreoplasia and hyperplasia of the thyroid may play an etiologic
rôle. Accessory thyroids are not uncommon in the neck, in the
supraclavicular fossæ and behind the sternum. They usually show
the structure of fœtal adenomata, but may become cystic or undergo
carcinomatous change.
10. Parathyroids. These organs are usually four in number,
sometimes more, sometimes only one or two. They are usually
paired, and are found near the inner posterior borders of the lobes
of the thyroid, near the two terminal branches of the inferior thyroid
artery. They vary in size from 3-15 mm. in length, 3-4 mm.
broad, by 1-2 mm. in thickness. They are normally brown in color,
and soft in consistence. It is often difficult to distinguish them from
the hæmolymph nodes that are common in this region. The parathyroids
should be examined in all cases of tetany, paralysis agitans,
acromegaly, epilepsy, infantile atrophy, myotonia and obscure
cachexias. Conditions of supposed hypoparathyreosis have been
reported. Hypertrophy of the parathyroids has been observed in
acromegaly. Adenoma has been described by several writers.
Cysts, fatty degeneration, fatty infiltration, colloid degeneration,
cloudy swelling and tuberculosis have been reported as occurring.
11. Cervical Lymphnodes. Note number, size, color, consistence,
character of cut-surface, etc. The most important pathologic
conditions are: tuberculosis, secondary carcinoma, Hodgkin’s disease,
lymphosarcoma (leukæmic and aleukæmic), various forms of
inflammation, dermoid and epidermoid cysts, cystic lymphangioma
(congenital cystic tumor of the neck), branchiogenic carcinoma,
and hyperplasia in syphilis, rachitis and status lymphaticus. In
acute inflammation the lymphnodes are red and soft; in chronic
inflammation they are usually grayish-white and firm.
12. Salivary Glands. The parotid, submaxillary and other salivary
glands are examined as to size, color, consistence and character
of cut-surface. The most important conditions are: parotitis
(epidemic and secondary), chronic inflammation, calculi, cystic dilatation
of ducts [ranula], Ludwig’s angina, salivary fistula, granulomata
(tuberculosis, syphilis and actinomycosis), neoplasms (most
common forms are the mixed tumors containing cartilage, fibrous
connective-tissue and myxomatous tissue and cords or rows of cells
regarded by some observers as endothelial, by others as epithelial;
other less common tumors are adenoma, fibroma, carcinoma and
sarcoma). Symmetrical enlargement of the salivary and lachrymal
glands occurs as the result of aleukæmic or leukæmic lymphocytoma
(“Mikulicz’s disease”).
13. Cervical Vessels and Nerves. Examine the arteries and
veins, noting contents, thickness and character of walls, size of
lumen, changes in the intima, sclerosis, atheroma, calcification,
thrombosis, embolism, etc. In death from strangulation or
hanging the intima of the carotids may be torn. The aorta
is usually examined after the section of the neck-organs. Note
size of lumen. In the adult it usually admits the index-finger
or thumb. The circumference of the thoracic aorta is
4.5-6 cm.; that of the abdominal aorta is 3.5-4.5 cm. Note its
elasticity, contents, thickness of wall, changes in intima, etc. Fatty
degeneration of the intima, sclerosis, atheromatous plaques and
ulcers, calcification and thrombosis are the most common conditions.
Syphilis is a very common cause of mesaortitis, shown by
linear or radiating depressions of the intima. The carotid gland
(paraganglion intercaroticum) at or near the division of the carotids
should be noted. It is about the size of a rice-grain, oval, vascular
and of firm consistence, resembling very much the superior cervical
ganglion. Alveolar tumors apparently primary in this gland have
been observed by a number of writers. Its epithelial nature is
denied by some observers who class it with the sympathetic system.
The nerves and ganglia should be examined and any change from
the normal noted, such as atrophy, effects of pressure, involvement
in scar-tissue, hæmorrhage, inflammatory processes, neoplasms, etc.
14. Deep Muscles of Neck. Note same conditions in these
muscles as mentioned above for abdominal and thoracic muscles.
Retropharyngeal abscesses and hemorrhages resulting from fractures
and luxations of the vertebræ are the most common conditions.
15. Cervical Vertebrae. Anterior surface should be smooth.
Fractures, luxations and tuberculosis are the most common conditions.
In caries of the vertebral bodies the surfaces become rough
and sharp. In luxations irregular prominences and deviations are
found. The prominent portion usually shows sharp edges.
CHAPTER X. THE EXAMINATION OF THE ABDOMEN.
I. METHODS OF EXAMINATION.
The preliminary general inspection of the peritoneal cavity was
made after the main incision. (See Chapter VII.) After the examination
of the neck and thoracic organs has been completed, the
abdominal organs are removed and examined separately. The
method to be followed must be varied to meet the conditions. In
the case of extensive carcinomatosis, general peritonitis, peritoneal
tuberculosis, pseudomyxoma peritonei, etc., when adhesions are
numerous and the abdominal organs matted together, the examination
becomes very difficult, and it may be necessary to remove the
abdominal organs en masse and dissect them on the table. If the
œsophagus and aorta have not been removed from the thorax they
are stripped down to the diaphragm, which is cut on both sides, so
that aorta, œsophagus and the abdominal organs en masse can be
stripped down to the brim of the pelvis and there cut off to be
examined outside the body.
For the ordinary autopsy the following order of examination
of the abdominal organs is recommended: The spleen is first examined.
It is lifted up from beneath the left under-surface of the
diaphragm by tearing or stretching the ligamentum phrenico-lienale
and the gastrosplenic omentum. In the case of wandering spleen
the technique of removal must be modified to suit the conditions.
When the spleen is very soft great care must be taken not to tear
or rupture it. When adhesions to the diaphragm are present these
must be torn or cut. The spleen is then laid upon the left edge of
the ribs. In this position it may be sectioned by an incision made
from upper to lower pole, and then, after it has been examined, it is
allowed to slip back into the abdominal cavity, when its removal
from the body is not desired. If it is to be removed and examined
outside of the body, its ligaments and vessels are cut with the knife
directed against the edge of the ribs, taking care not to cut the
stomach or tail of the pancreas. It is then weighed and measured,
and examined by means of a chief incision through its convex surface,
from upper to lower pole, and reaching to the hilus. Parallel
sagittal or transverse cuts may be made as desired. The cut surface
is then thoroughly examined. Bacteriologic examinations should
be made when indicated, before the organ is sectioned. A portion
of the capsule is seared and the pipette introduced through the
seared area.
The intestines are examined next. They may be opened inside
the body without separating them from the mesentery, but the
best method by far is to remove and open them outside of the body.
The middle portion of the transverse colon is lifted up by the left
hand and the ligamentum gastrocolicum and the mesocolon transversum
cut close to the intestine, toward the left, separating the
left half of the transverse colon, then the splenic flexure and the
descending colon and the sigmoid flexure to the rectum. After
the splenic flexure has been separated the descending colon can
usually be stripped down to the sigmoid by the hands without using
the knife. When the sigmoid has been freed from its mesocolon
two ligatures are put around the upper portion of the rectum, about
an inch apart, and the intestine is then cut between the ligatures.
The freed portion of the large intestine is then carried over into
the right side of the abdomen and as much of the lower portion as
is possible is put into a pan or tray resting upon the cadaver’s right
thigh. The right half of the transverse colon, the hepatic flexure
and the ascending colon are now freed down to the beginning of
the ileum, care being taken not to cut off the appendix when loosening
the cæcum. The entire large intestine is then gathered into the
tray resting on the cadaver’s thighs, and the intestine is pulled down
firmly by the left hand in a line corresponding to the main axis of
the right thigh. The coils of small intestine are left in their natural
position. The ileum is then severed from the mesentery as follows:
The intestine is pulled by the left hand straight down in the middle
line of the right thigh, putting the mesentery on a stretch. The
long section-knife is used by the right hand to cut the mesentery
close to the intestine in a manner resembling the use of the bow in
violin-playing. The blade of the knife is held slightly obliquely
against the mesenteric insertion of the intestine, and as the left
hand pulls up the coils of intestine against the knife, the latter in
the bowing or sawing movement severs the mesentery from the
intestine as close to its insertion as is possible without cutting the
intestine. The freed portions of intestine are caught in the tray
resting on the thighs, and the left hand grasps in succession new
portions of the small intestine and pulls them against the knife
until the entire intestine is freed up to the duodenum and the root
of the mesentery. A double ligature is put around the jejunum and
the intestine severed between the ligatures, and the freed jejunum,
ileum and large intestine are now removed in the tray for examination.
The severing of the intestine from the mesentery in this
manner can be carried out very quickly after a little practice. Care
must be taken to cut the mesentery as close as possible to the intestine
without nicking the latter. If too much mesentery is left on
the intestine it cannot be laid out straight and its opening is made
more difficult. If the coils of the small intestine are left in their
natural position, and if the ileum when it is first taken up by the
left hand is not twisted, the coils will unroll before the knife without
any difficulty. Some prosectors begin with the jejunum, ligating
it at the point where it comes out from beneath the mesentery,
cutting it between the ligatures and separating it from the mesentery
downward until the entire intestine as far as the rectum has
been freed. The latter is ligatured and the freed portions removed.
When the saving of time is of great importance the large intestine
may be freed as described above, a ligature put around the upper
end of the jejunum, and the mesentery severed at its root, so that
the entire mass of small intestine with its mesentery is removed
for further separation from the mesentery outside of the body.
When peritoneal adhesions that cannot be easily torn are present it
may be necessary to remove the intestines with mesentery attached.
After the removal of the intestines from the body they are
opened by the intestinal shears, beginning either with the jejunum
or the large intestine, the cut being made in the line of the mesenteric
attachment. As the intestine is opened careful attention
should be paid to the contents of each portion. It is very poor
technique to dilate the intestine with water or to run water through
it before it is opened. There is danger of washing away parasites,
blood, etc. When the intestine is distended the opening is easy,
but when collapsed it can be more easily opened if an assistant
straightens it out and holds it on the stretch in advance of the
enterotome. It may be opened on the table, in the tray, or in a pail.
The latter method is a clean and convenient one. As the intestine is
opened it is passed on the flat beneath the handle of the pail as it
rests on the rim, so that the intestinal contents are scraped off into
the pail and the clean mucosa examined as it is pulled from the pail
into a basin or tray. The ileocæcal valve should be carefully examined
from above before it is cut through. The appendix may be
opened from the intestine by the small probe-pointed shears, the cut
being made on the side opposite the mesenteric attachment. Transverse
sections can be made, if desired. When the intestines are
opened within the body, the enterotome is introduced into an opening
made in the ileum just above the ileocæcal valve and the intestine
is cut upward to the duodenum, along its mesenteric attachment,
the coils being drawn upon the probe-pointed blade of the
enterotome with the left hand. After the small intestine is opened
the enterotome is introduced through the ileocæcal opening and the
large intestine cut in the anterior tænia as far as the rectum. The
opening of the intestine within the body should be left until all the
other abdominal organs have been examined, because of the disagreeable
mess made by the escape of the intestinal contents into
the cavity.
The duodenum is opened next. The curved scissors, or the
enterotome, is introduced into its lower end through an opening
made above the ligature, and the inferior and descending portions
of the duodenum are cut in the middle line of the anterior wall.
The superior portion is then cut up to the pylorus, the cut passing
through the inferior wall of this portion, the enterotome being held
in the axis of the canal and pylorus, while the duodenum is pulled
over to the right by the left hand. Before the pylorus is cut it
should be explored, as to its width or constriction, by the index-finger
of the left hand. The duodenum may also be opened first
in the lower part of the descending portion. The root of the mesentery
is pushed over to the left and a fold of the anterior wall is
picked up by the thumb and index-finger of left hand and cut with
the shears, so that when let free by the left hand there is formed a
longitudinal incision in the duodenal wall large enough to admit
the long blade of the enterotome. The duodenum is then cut up to
the pylorus as described above. The inferior part of the duodenum
is then opened from the point where the first incision is begun. The
duodenum may also be opened downward, beginning at the pylorus,
a small transverse cut being first made in the stomach wall just
above the pylorus and the stomach opened along the greater curvature
as far as the cardia. The enterotome is then placed through
the pylorus and the duodenum cut in the median line of its anterior
wall throughout its entire length. When the duodenum is opened,
the papilla, the ductus choledochus and the ductus Wirsungianus are
to be carefully examined. The papilla can usually be easily found
by stretching the duodenal mucosa transversely over the head of
the pancreas. It lies below the middle of the head of the pancreas,
and about four finger-breadths below the pylorus. Pressure should
be made upon the gall-bladder to force bile through the duct and
papilla, and thus demonstrate their patency. When this cannot be
done a sound should be introduced, and the common duct opened
into the hepatic and cystic ducts. If the duodenal mucosa just
below the papilla be stretched forcibly downward the duct can
usually be opened by the small scissors without the aid of a grooved
director. The duct of Wirsung may be explored with the sound
from the papilla to the left of the common duct, or from its separate
opening when the two ducts do not open in common. Both the
bile-duct and the duct of Wirsung may be opened in the opposite
direction, from the liver and pancreas respectively.
The stomach is opened from the pylorus after the size of the
latter has been ascertained. The anterior wall may be cut midway
between the greater and lesser curvatures, or the cut may follow
the greater curvature, extending through the cardia into the œsophagus.
As the stomach is opened its contents are inspected and
removed. They should not be allowed to escape into the abdominal
cavity. When the organs are removed en masse the stomach may
be opened from the cardiac end. The organ may also be opened by
an incision through its posterior wall or along its lesser curvature,
as occasion may demand. If it is desired to save the pyloric ring
the incision may stop above or below it and begin again on the
other side. The stomach, with the lower portion of the œsophagus
and the superior portion of the duodenum, may be separated from
their attachments and examined outside of the body.
The pancreas is examined by turning the stomach toward the
thoracic cavity, cutting or tearing the gastrocolic omentum, and
cutting the exposed organ by a longitudinal incision through head,
body and tail, or by means of parallel transverse incisions made
through the different parts of the organ. The ducts of Wirsung
and Santorini should be explored. It must be freed from the duodenum
before it is weighed. The pancreas may be removed in connection
with stomach, duodenum and liver and examined outside
of the body. This is advisable in all cases of perforation of the
stomach, ulcer, carcinoma and surgical anastomoses, carcinoma of
pancreas, acute pancreatitis, obstruction of common duct, duodenal
ulcer, etc.
The liver may be examined in the body without removal. The
left hand is put between the diaphragm and the convex surface of
the right lobe of the organ, and the liver raised up out of the cavity.
With the long section-knife a main incision is made deep into the
organ, from left to right, about a hand’s-breadth above the lower
border. Parallel incisions to the main incision may be made. After
the examination of the cut surface the organ is dropped back into
the abdomen. When the liver is to be weighed and measured it is
removed from the body by cutting first the ligamentum hepatoduodenale,
examining, as they are cut, the common duct, hepatic artery
and the portal vein. The left lobe of the liver is then taken in the
left hand and raised as high as possible. The left triangular ligament,
the left half of the coronary ligament, the suspensory ligament,
the right half of the coronary ligament and the right triangular
ligament are cut from left to right. The inferior vena cava
is cut at the same time. In the case of adhesions between liver and
diaphragm these must be cut or the diaphragm itself removed in
connection with the liver. In such a case the diaphragm must be
trimmed off before the liver is weighed. The liver may also be
removed in the opposite direction, raising up the right lobe and
severing all connections as far as the median line of the spinal column.
The right lobe is then pulled upon the right edge of the
thorax-wall, and the connections with the left lobe are severed. In
separating the under surface of the right lobe care must be taken
not to damage the right adrenal. The liver is then weighed and
measured, and placed upon the board with the right lobe toward
the prosector. A long, deep cut is then made by drawing the long-section-knife
across the left and right lobes, extending the cut
through to the porta. Additional cuts may be made parallel to this
chief-incision. When occasion demands a number of sagittal incisions
may be made instead. As mentioned above, it is often best to
remove the liver with stomach, pancreas and duodenum and examine
on the table.
The gall-bladder is opened from its fundus with the fine probe-pointed
shears; its contents are caught in a vessel and examined.
The cystic, hepatic and common ducts may be explored from the
gall-bladder, if they have not been from the intestine. The gall-bladder
may be dissected from the liver and removed in connection
with the duodenum.
The portal vein is opened into its radicles; the examination of
the splenic vein is of especial importance. The portal lymphnodes
are examined at this time.
The mesentery and the mesenteric lymphnodes are now examined.
The former may be cut off at its root and examined outside
of the body. The lymphnodes may be opened by longitudinal or
transverse incisions.
The left adrenal and kidney are now examined. If the pancreas
and stomach have not been removed from the body they are
turned over toward the thoracic cavity, so as to expose completely
the left adrenal. The movability of the kidney is then tested.
Beginning above the adrenal an incision is made through the
peritoneum and underlying tissue, curving outward around the
kidney and downward to its lower pole, taking care not to
bring the incision too far around the lower pole of the organ for
fear of cutting the ureter. The knife is then laid aside, and the
adrenal and kidney are pulled upward toward the median line until
they are entirely free save for the blood-vessels and ureter. The
loose tissue about the fatty capsule of the kidney is usually easily
separated. The blood-vessels are then cut from above downward
against the spinal column, the ureter being left uncut. Holding the
kidney in the two hands, it is pulled downward toward the pelvis,
stripping the ureter free as far as the pelvic brim. At this level the
ureter may be cut, or, if it is desired to remove the kidneys in
connection with the pelvic organs, the ureter is left uncut and the
kidney laid over the pubis until the pelvic organs are removed.
When the kidney and adrenal are removed they are placed upon
the board and the adrenal separated. The latter organ is then
examined by means of parallel transverse incisions, or by an incision
in its longest axis in the middle of its flat surface. When the
adrenal is left in the body it may be examined by means of the
same incisions. The fatty capsule is then stripped from the kidney
and the organ weighed and measured. It is then held in the palm
of the left hand with the ureter between the middle fingers, the
convex border up, the thumb placed on one flat surface, the fingers
on the other, holding the organ tightly. The kidney is then opened
by means of a long incision made with the long section-knife, beginning
at the upper pole, drawing the knife through the convexity, to
the lower pole, and extending the cut through the organ to the
pelvis. As the knife approaches the hilus the grasp of the left hand
upon the organ is loosened and pressure upon the knife lessened so
as not to cut through the hilus. The edges of the fibrous capsule
are then caught by the fingers or forceps and the capsule stripped
from the cortical surfaces. The external surface and the cut surfaces
are then examined. When indicated other incisions into the
kidney substance may be made. The ureter is sounded from the
pelvis, and opened with the fine probe-pointed shears. The renal
artery and vein may be examined now, or better when the kidney
is being removed.
The right adrenal and kidney are removed in the same way, by
making a curved incision around the outer border of the organs,
pulling them up toward the median line and cutting the blood-vessels
from above downward against the spine, and then stripping
the ureter downward to the pelvis. After removal the adrenal is
separated from the kidney and examined as directed above for the
left adrenal. The kidney and ureter are then examined in the same
way as on the left. When it is desired to remove the right kidney
with the pelvic organs the same procedure is carried out as advised
above in the case of the left one. In the removal of the right
adrenal care should be taken not to injure the vena cava. In the
case of displacement of either kidney the incisions for the removal
of the organ must be altered to suit the case.
When the kidneys are removed before the examination of the intestines
and liver, the removal of the left adrenal and kidney usually follows the examination
of the spleen. The small intestines are pulled over to the right; the
peritoneum is incised over the left kidney between the descending colon and the
spinal column so that the right hand can be worked beneath the peritoneum up
above the adrenal and kidney, freeing them, and lifting them toward the median
line. The vessels are then cut as directed above, and the ureter stripped down
to the pelvis. On the right side the cæcum and ascending colon are raised and
a cut made through the peritoneum at the brim of the pelvis. The cæcum,
ascending colon and peritoneum are now stripped upward with the left hand
until the right hand can be passed up above the right adrenal to loosen it and
the kidney toward the median line. When this is accomplished the adrenal and
kidney are held in the left hand, while the right cuts the blood-vessels from
above downward against the spine, sparing the ureter, which with the two
organs is stripped downward to the pelvic brim. The close proximity of the
right adrenal to the under surface of the liver makes the removal in this way
much more difficult than when the liver is removed first. Usually, when the
method of removing the kidney after the spleen is adopted, the adrenal is left
in the body until after the removal of the liver.
So many variations in the order of section of the abdominal organs are
given by different writers that it is impossible to escape the conclusion that the
best order is the one best adapted to the individual case. A very common order
is spleen, left adrenal and kidney, right adrenal and kidney, duodenum, stomach,
pancreas, liver, intestines, pelvic organs and genitalia. Beneke advises the
removal of spleen, then the removal of the entire intestines, stomach and pancreas,
in connection with the gall-bladder, which is stripped from the liver and
removed in connection with common duct and duodenum, the whole mass
removed from the body and examined outside. Other prosectors begin with the
liver, then the spleen, urinary bladder and kidneys and genital organs, the
gastro-intestinal tract being left to the last. It may then be opened inside the
body without inconvenience resulting from the escape of its contents into the
peritoneal cavity. After surgical operations when permission for autopsy is
refused, the abdominal, and also the thoracic organs, may be removed through
the laparotomy wound.
After the examination of the abdominal viscera is completed the
abdominal aorta is opened in the median line of its anterior wall and
followed into its branches, the iliacs and hypogastrics. When
occasion demands it may be stripped from the spine and opened outside
of the body. The inferior vena cava is also opened throughout
its length and followed into its branches. The abdominal portion
of the thoracic duct should receive attention before the aorta is
removed. The receptaculum chyli is found by lifting up the right
edge of the aorta at the level of the second or third lumbar vertebra
and dissecting out the duct up to its thoracic portion. It may then
be opened by the fine probe-pointed shears. The retroperitoneal
lymphnodes and haemolymphnodes are examined in situ, or removed
with the blood-vessels and examined outside of the body. The
sympathetic ganglia, particularly the suprarenal and the cœliac
plexuses, and the splanchnic nerves are to be examined, especially in
cases of Addison’s disease. The section of the abdomen closes with
the examination of the ileopsoas muscles and diaphragm by means
of longitudinal or transverse incisions, and the inspection of the
vertebrae. Pathologic conditions in the latter are examined according
to indications.
II. POINTS TO BE NOTED IN THE EXAMINATION OF
THE ABDOMEN.
1. Peritoneum. Normally the peritoneum is moist-shining,
grayish and translucent. It is cloudy, dry, lustreless, injected,
swollen or covered with exudate in acute inflammation; thickened,
hyaline (“iced” or “Zuckerguss”) in chronic inflammation. Note
degree, character and location of adhesions. The most common
pathologic conditions are inflammation, tuberculosis, secondary carcinoma
and pseudomyxoma peritonei. Lymphomata are found in
cases of typhoid fever and in leukæmia. Primary neoplasms
(lymphangioma, endothelioma, carcinoma, lymphosarcoma, angiosarcoma,
etc.) are rare. Ovarian cysts of the structure of cystadenoma
may give rise to implantation-metastases over the peritoneum.
The parasites are echinoccocus and cysticercus.
2. Spleen. Weight 150-250 grms., length 12 cm.; breadth 8
cm., thickness 3 cm. Varies greatly in size and weight. Describe
shape, character of borders, number of notches, etc. Accessory
spleens are common in the gastrosplenic omentum. Capsule
should be delicate, smooth, shining and transparent. Note tension
of capsule (loose, wrinkled, tense), adhesions, hyaline thickenings,
exudates or neoplasms. Color of spleen through capsule is bluish-red.
Fresh anæmic infarcts appear as yellowish or reddish-yellow
areas surrounded by a darker red zone. Cicatricial depressions on
the surface of the spleen are usually the result of healed infarcts.
Consistence of spleen normally is that of muscle. In acute hyperplasias
and congestions the spleen is softer and more friable (acute
infections, typhoid fever). In chronic hyperplasias and congestions,
atrophy, amyloid degeneration, etc., the consistence is firmer than
normal, even to that of a wooden hardness in advanced amyloid disease.
(Apply iodin test.) The large, firm spleen is characteristic of
leukæmia, splenic anæmia, syphilis and chronic malaria. On section
note the pulp, follicles and trabeculæ. In the normal spleen the cut
surface is dark red or bluish-red, smooth, and the trabeculæ and
follicles easily seen. In acute hyperplasias the pulp swells up
over, the trabeculæ as a thick red or grayish-red gruel-like
substance. In chronic hyperplasias the pulp is atrophic, grayish-red,
and firm. In subacute hyperplasias the cut-surface often
presents a shagreened appearance. The color of the cut-surface
is blood-red in typhoid fever, grayish-red in septicæmias, chocolate-brown
in potassium-chlorate poisoning and hemosiderosis due
to other causes. In amyloid spleen the amyloid portions are
glassy; when confined to the follicles the latter look like grains of
boiled sago. The follicles are about the size of medium pin-heads,
grayish in color, not elevated and cannot be scraped out with the
knife. They are more numerous and larger in young individuals than
in adults. Note size and number, degenerations, etc. The trabeculæ
appear as fine gray lines, sharply outlined, increasing in size toward
the hilus and capsule. They are more distinct in atrophy and
chronic hyperplasias. In anthracosis of the spleen black granules
are seen in the pulp, particularly about the trabeculæ. Tubercles
appear as grayish-white, semitranslucent nodules, elevated above
the surface, and can be scraped out with the knife-point. When
caseation has begun their centres are opaque and yellowish. Gummata
are grayish-white, with opaque centers, and have a periphery
of vascular granulation-tissue or hyaline scar-tissue. The most
important pathologic conditions of the spleen are: acute and
chronic passive hyperæmia, embolic infarctions, abscess, acute and
chronic hyperplasias (typhoid, malaria, plague, pneumonia, septicæmia,
leukæmia, pseudoleukæmia, splenic anæmia, hepatic cirrhosis,
syphilis, Kala-azar, other forms of tropical splenomegaly, tuberculosis,
rachitis, idiopathic splenomegaly of the Gaucher type, etc.),
wandering spleen, absence of spleen, amyloid disease, atrophy, syphilis,
tuberculosis, actinomycosis, traumatic rupture, cysts (peritoneal),
neoplasms (primary are rare [angioma, angiosarcoma,
fibroma, chondroma, osteoma, lymphangioma, endothelioma]; secondary
sarcoma [chiefly lymphosarcoma and melanosarcoma] and
carcinoma are also infrequent; secondaries of malignant syncytioma
are more frequently found), parasites (echinococcus, cysticercus and
pentastomum).
3. Intestines. In the examination of the large intestine, appendix
(average length about 9 cms.), small intestine and duodenum
note the contents of the various portions with respect to amount,
color, odor, consistence, presence or absence of bile, food-remains,
parasites, foreign-bodies, blood, pus, concretions, etc. Note character
of wall, size of lumen, color (normally gray) and character of
mucosa, folds and villi, solitary follicles, Peyer’s patches, mouths of
bile-duct and pancreatic ducts, ileocæcal valve and opening into appendix.
Postmortem digestion of the mucosa, often leading to perforations,
postmortem hypostasis, imbibition of bile, pseudomelanosis,
and contractions of portions of the bowel must not be mistaken for
pathologic conditions. Redness of a portion of the intestine does
not in itself mean inflammation; the latter condition is shown by
excess of mucus, swelling of the mucosa, hyperplasia of the follicles,
hæmorrhage, etc. The contents of the small intestine are usually
gruel-like in consistence, thinner in the upper part, thicker toward
the ileocæcal valve. The hook-worm, ascaris lumbricoides and intestinal
trichina occur in the duodenum; tænia solium, saginata and the
bothriocephalus latus in the jejunum and ileum, tricocephalus dispar
in the cæcum, and oxyuris vermicularis in the large intestine and
rectum. Ulcers of the intestine may be due to typhoid fever, tuberculosis,
carcinoma, dysentery, embolism or thrombosis of mesentery
vessels, etc. Diphtheritic ulcers are caused by a variety of infections
and poisons. They are usually found in the large intestine,
but occasionally occur in the small intestine in cases of uræmia.
Typhoid ulcers usually have their longest diameter parallel with the
longitudinal axis of the intestine; tuberculous and carcinomatous
ulcers usually encircle the intestine, forming “ring ulcers;” diphtheritic
and dysenteric ulcers are irregular, involving the surfaces of
the folds. Solitary round or peptic ulcers occur in the duodenum
and jejunum. Decubital ulcers, associated with fécal concretions,
gall-stones or foreign-bodies are found in appendix and rectum most
commonly, more rarely in other portions of the intestines. Perforations
of the intestines may be traumatic, or due to infections
(typhoid, tuberculous, purulent, dysenteric, etc.), neoplasms
(carcinoma), embolic gangrene, ileus, fécal impaction, erosion
of calculus or foreign-body, parasites (round-worm?), over-distention,
etc.
The most important pathologic conditions of the intestines are:
anomalies (atresia, diverticulum, stenosis, dilatation, hernia), acute
and chronic passive congestion, hæmorrhage, stasis, embolism and
thrombosis, hæmorrhagic infarction, gangrene, traumatic injuries,
ileus, volvulus, strangulated hernia, enteritis (catarrhal, follicular,
hyperplastica, cystica, purulent, ulcerative, croupous, diphtheritic,
dysentery, cholera, typhoid, etc.), appendicitis (catarrhal, ulcerative,
perforative, obliterative), tuberculosis, syphilis (chiefly in
rectum, ulcers, stenosis and perforations), actinomycosis, anthrax,
intestinal sand, concretions, foreign-bodies, and neoplasms (primary
carcinoma the most important [adenocarcinoma, colloid, scirrhous,
medullary, etc.], most frequent in large intestine and rectum, secondary
carcinoma is rare; adenomatous polypi are common, particularly
in rectum; primary sarcomata [lymphosarcoma chiefly] are
much less common than carcinoma, secondary sarcoma more common
than primary [melanotic sarcoma, lymphosarcoma]. Benign
connective-tissue tumors [lipoma, fibroma and myoma] are relatively
rare. Primary carcinoma and sarcoma occur in the appendix,
as well as secondary carcinoma). Leukæmic infiltration is common
in leukæmia.
4. Bile-passages. Note patency, character of mouth, contents,
etc. The most important conditions are inflammation, gall-stones,
obstruction, stenosis, dilatation, perforation, carcinoma, and anomalies
(in the new-born). Round-worms may obtain entrance and
block the duct.
5. Stomach. On the external examination the size (dilatation,
contractions due to scirrhous carcinoma or scars), shape (hour-glass,
etc.), position, color of surface, consistence of wall, presence
of adhesions, etc., should be noted. When the stomach is opened
note presence of gas (odor), character of contents (fluid, gruel-like,
food-remains, curds, foreign bodies, mucus, pus, blood, parasites,
drugs, etc.), odor (yeasty, sour, acid, sweetish, foul, H2S, odor of
foods or drugs), reaction (acid or alkaline), color (yellow, greenish,
grayish, brown, black, bloody, etc.) Describe the character of
mucus on the mucosa (tough, glassy, difficult to remove in acute
catarrh; softer, grayish or grayish-red, often containing small black
blood-specks in chronic catarrh). Bile gives a yellow or greenish
color. The presence of blood may give to the stomach-contents the
appearance of “coffee-grounds;” in hæmorrhage by diapedesis the
contents may be brownish. Cloudy swelling of the glands is common
in sepsis, chronic anæmia and various poisonings. It affects
cells in deepest portion of glands, as shown by excising a bit of the
mucosa and examining microscopically. The brownish or black
discoloration of the mucosa associated with softening of the latter
(gastromalacia, postmortem digestion) must not be taken for a
pathologic condition. The mucosa becomes soft, cloudy or jelly-like
and strips easily from the whitish submucosa. Softening of
the entire wall leads to perforations that must not be mistaken for
pathologic ones. Their edges show no signs of disease. The normal
mucosa is grayish in color. In chronic passive congestion the
color may be dark red. Hypostatic congestion is common in the
large veins of the fundus. Hæmorrhages occur chiefly in the fundus
and along the greater curvature (caused by vomiting). In potassium
cyanide poisoning the mucosa is often rosy-red in color and
has a soapy feel. The normal mucosa is nearly smooth when the
folds caused by contraction are spread out. Localized hyperplasias
occur in chronic gastritis (etat mamelonné) and cannot be smoothed
out by stretching. Erosions (common in chronic passive congestion)
and ulcers (round or peptic, carcinomatous, due to corrosives,
very rarely to tuberculosis and syphilis) are to be carefully examined
and described. The different layers of the stomach wall are
to be examined with respect to their absolute and relative thickness.
Thickening of the submucosa may be caused by œdema, purulent
infiltration, increase of connective-tissue, carcinomatous or sarcomatous
infiltration. Hyperplasia of the muscular coat occurs chiefly
at the pylorus in cases of stenosis.
The most important conditions of the stomach are anomalies
(congenital stenosis of pylorus, situs inversus), acute and chronic
passive congestion (portal stasis), hæmorrhages, hæmorrhagic
erosions (portal stasis), gastritis (acute, chronic, catarrhal, purulent,
fibrinous, diphtheritic, phlegmonous, atrophic, hypertrophic),
tuberculosis (rare), syphilis (rare), anthrax, action of corrosive
poisons (acids, concentrated lye, carbolic acid, mercuric chloride,
silver nitrate, oxalic acid, potassium cyanide), round or peptic ulcer,
perforation, neoplasms (carcinoma the most common [adenocarcinoma,
medullary, scirrhous, colloid]; primary sarcoma rare [lymphosarcoma],
secondary are less rare; metastases of malignant syncytioma
may occur in the stomach wall; benign tumors are rarely
important. The most common are adenomatous polypi, fibroma,
myoma and fibromyoma), stenosis, dilatation, contraction, wounds,
concretions, foreign bodies and parasites (temporary as gordius,
round-worms occasionally enter, intestinal form of trichina).
6. Pancreas. Weight 60-100 grms.; measures 17-20 cm. long,
3-4.5 cm. broad, and 2.5-3 cm. thick. Color reddish-grayish-yellow;
consistence firm; lobules distinct. Postmortem change occurs
quickly. The most common pathologic conditions are: atrophy,
fatty infiltration, hyperæmia, hæmorrhage, inflammation (degenerative,
parenchymatous, hæmorrhagic, necrotic, gangrenous, purulent,
chronic fibroid or interstitial [inter- and intra-acinar], cirrhosis
of pancreas), tuberculosis (very rare), syphilis (gumma not common,
interstitial pancreatitis most common form), fat-necrosis,
cysts, congenital cystic pancreas, concretions in duct, hæmosiderosis,
neoplasms (primary carcinoma the most important [scirrhous,
medullary, adenocarcinoma]; primary sarcoma rare; secondary
melanotic sarcoma and lymphosarcoma occur, secondary carcinoma
less frequently; benign tumors rare, cystadenoma being
the most common), and parasites (echinococcus, round-worm in
duct). In fat-necrosis or acute pancreatitis the pancreatic ducts
should be examined for obstruction due to calculi or stenosis.
Areas of fat-necrosis appear as opaque, white, yellow or brown, firm
nodules. Accessory pancreatic tissue not rare in wall of intestine.
May occur more rarely in stomach-wall, omentum or abdominal
wall.
7. Liver. Weight 1,500 grms.; measures 22 cm. sagittally, 30
cm. transversely and 8 cm. thick. A dimension of over 30 cm. is
enlarged; when all dimensions are under 20 cm. the liver is smaller
than normal. Note size (enlarged in congestion, cloudy swelling,
fatty infiltrations, leukæmia, neoplasms; smaller in atrophy, acute
yellow atrophy, cirrhosis), changes of form (congenital furrows,
deep furrows with thickened capsule in syphilis, fine or coarse granulations
and contractions in cirrhosis, edge rounded in fatty and
amyloid liver, sharper in atrophy, capsule wrinkled in acute yellow
atrophy), capsule (normally smooth and transparent; thickened,
white, and opaque in chronic inflammation, the thickening being
usually most pronounced along the ligaments, blood- and lymph-vessels.
Small, hyaline nodules or patches may be scattered over
the capsule, or the entire capsule may be tendon-like [“iced” or
“Zuckerguss-leber”]. Adhesions with diaphragm, stomach, omentum,
spleen, intestine and abdominal wall may occur. Fibrinous
and purulent exudates may be found on the capsule, particularly
on the diaphragmatic surface; when encapsulated by adhesions they
form the so-called subdiaphragmatic abscess), consistence (increased
in fat-infiltration, cirrhosis, atrophy and amyloid; diminished in
acute parenchymatous degenerations, leukæmia, acute yellow
atrophy, acute congestion; fluctuation is present over abscesses,
echinococcus cysts and softened tumors), color (normally brown-red;
dark-brown in atrophy, dark red or bluish-red in passive congestion,
“nutmeg” appearance in chronic passive congestion, chocolate-brown
in hæmosiderosis, greenish in chronic icterus, yellow
in acute icterus, fatty liver, leukæmia and anæmia, grayish-white
or yellow in cloudy swelling and fatty degeneration; sharply circumscribed
dark bluish-red areas are caused by cavernous angiomata),
cut-surface (normally smooth and of uniform color, blood-content
abundant, before the age of puberty lobules are seen with
difficulty; in adults they are recognizable from their yellowish-brown
periphery and red central zones. They are about 1-2 mm.
long by 1-1.5 mm. broad. Note size of lobule, color of central,
intermediate and peripheral zones, distinctness of boundary
of lobules, elevation of lobules above surface. Lobules
are elevated in fatty infiltration and in cirrhosis, depressed in
atrophy. In acute yellow atrophy they cannot be made out. Fatty
infiltration begins usually in the peripheral portion of the lobules,
fatty degeneration in the central zone, amyloid in the intermediate
zone, hæmosiderin is found in the peripheral and hæmatoidin in the
central zone. In extreme fatty infiltration affecting the entire lobule
the outlines of the lobules cannot be made out. The normally shining
surface is dull, cloudy, appearing as if cooked in cloudy swelling
and fatty degeneration). Note amount of stroma; it is increased
in cirrhosis, so that the lobules may be entirely surrounded by connective-tissue,
or the connective tissue may invade the lobules.
Note also size and contents of hepatic and portal blood-vessels and
bile-ducts.
The most important pathologic conditions of the liver are acute
and chronic passive congestion, thrombosis of portal veins, atrophy
(simple and brown), fatty infiltration, cloudy swelling, fatty degeneration,
acute yellow or red atrophy, amyloid, phosphorus-liver,
abscess (metastatic, tropical, purulent cholangitis), cirrhosis
(Lænnec’s or atrophic, Hanot’s or hypertrophic, fatty, biliary, cardiac),
pericarditic pseudocirrhosis, tuberculosis, syphilis (very common:
gummata, interstitial hepatitis, cirrhosis, hepar lobatum),
actinomycosis, leukæmic infiltrations, glycogen infiltration (diabetes),
pigmentations (hæmosiderosis in pernicious anæmia, malaria,
hæmolytic poisons, etc., hæmatoidin in atrophy, bile-pigment in
icterus, anthracosis, argyrosis, malaria pigment, melanin), neoplasms
(most common tumor is the cavernous angioma, usually in
old people, rarely of clinical significance; primary carcinoma and
sarcoma rare; secondary very common [melanotic sarcoma, lymphosarcoma,
metastases from carcinoma of gall-bladder and duct, stomach,
pancreas and intestine, metastases of malignant syncytioma],
adenoma and cystadenoma are rare), cysts, congenital cystic liver,
parasites (echinococcus hydatidosus, granulosis and multilocularis,
cysticercus, distomum hepaticum, pentastomum denticulatum, coccidium
oviforme).
8. Gall-bladder. Note size (length 8-17 cm., diameter 3 cm.,
thickness of wall 1-2 mm.), amount and character of contents (clear
and watery in hydrops, seropurulent or purulent in inflammation,
excess of mucus in catarrhal inflammation), calculi, bile-sand,
thickening and indurations of wall, œdema, character of mucosa,
carcinoma (adenocarcinoma, squamous-celled). Note size, contents,
thickness of wall and character of mucosa of ducts.
9. Portal Vein. Note contents, character of wall, occurrence
of stenosis, thrombosis, pylephlebitis, thrombopylephlebitis, syphilitic
changes, calcification, pressure from without.
10. Mesentery. Amount of fat, color, condition of vessels,
blood-content, occurrence of œdema, inflammation, abscesses, hæmorrhages,
infarction, gangrene, fat-necrosis, aneurism, embolism,
thrombosis, cysts, parasites (bilharzia hæmatobia), tumor-infiltrations
and primary tumors (lipoma).
11. Mesenteric Glands. Size, appearance on section (rose-red
in acute inflammation, grayish-white in chronic), occurrence of
tubercles, secondary tumors, calcification, abscesses, pigmentation,
typhoid necrosis, primary lymphosarcoma, leukæmic hyperplasia,
Hodgkin’s, etc.
12. Adrenals. Weight 4-7.5 grms. measurements are 5-6 cm.
long, 2.5-3.5 cm. broad, 0.5-1 cm. thick. Normally the consistence is
firm; it is increased in amyloid degeneration, tuberculosis, syphilis,
fibroid induration and atrophy; diminished in hæmorrhage, soft
caseating tubercles, degenerating tumors. Postmortem autolysis
of the medulla takes place very quickly, the cortical portion remaining
as a hollow capsule. On section note the relations of the grayish-white
cortex (more yellow and opaque in adults from the
amount of fat contained in the cells), the intermediate brown zone
and the central grayish, translucent portion of the medulla. The
most important pathologic conditions are tuberculosis, syphilis,
atrophy, compensatory hypertrophy, hæmorrhage, infarction, thrombosis
of adrenal vessels, secondary tumors (melanotic sarcoma, carcinoma),
primary neoplasms (hypernephroma, accessory adrenals
typical and atypical, lipoma, glioma, neuroma, sarcoma), parasites
(echinococcus).
13. Kidneys. Right kidney weighs 110-145 grms., and measures
10-12 cm. long, 4.5-5.0 cm. broad, and 3-4.5 cm. thick. Left kidney
weighs 150-180 grms. and measures 12 cm. long, 5-6 cm. broad,
3-4.5 cm. thick. The left kidney is usually larger and heavier than the
right. Note position and movability of kidneys, thickness and color
of fatty capsule (increased in lipomatosis, atrophy of kidney), purulent
infiltrations and fibroid thickenings of the perirenal fat. Normally
the fibrous capsule is thin and translucent, easily stripped off,
the inner layer remaining attached around the blood-vessels passing
from capsule into cortex. The capsule is adherent in chronic inflammations
and over healed infarcts and localized inflammatory processes,
tubercles, tumor-nodules, etc. Note alterations in shape and
size (“horse-shoe kidney,” “hog-back,” round, fœtal lobulations, fissures;
enlarged in acute parenchymatous nephritis, pyelonephritis,
hydronephrosis, chronic passive congestion, etc.; diminished in
atrophy, chronic interstitial nephritis, etc.). Character of cortical
surface (normally smooth, grayish-brown in color; a fine or coarse,
regular or irregular granulation of the surface occurs in chronic
nephritis, the elevations corresponding to the preserved portions of
the parenchyma, the depressed portions to the areas of connective-tissue
increase; localized depressions or fissures may be caused by
old or recent scars of infarcts, abscesses, rupture, etc. Distinguish
fœtal furrows from pathologic depressions. Flat, puckered or radiating
scars point to syphilis. Elevations of the surface may be due
to fresh infarcts, tubercles, abscesses, neoplasms, etc. Accessory
adrenal tissue (resembles adipose tissue) and small papillary adenomata
are very common on the cortical surface. Retention- and
degeneration-cysts are also very common, particularly in the kidneys
of adults). In atrophic kidneys the glomeruli can be seen
through the cortical surface. Note condition of superficial vessels
(stellate veins). The color of the cortical surface depends essentially
upon the blood-content and the condition of the parenchyma.
In acute or chronic parenchymatous nephritis the color is whitish
or grayish-white. Localized fatty degeneration and cloudy swelling
cause pale, grayish-yellow, opaque spots or streaks. Hæmorrhages
appear as red or brown-red spots. In extreme passive congestion
the kidney may be a dark purplish-blue (cyanotic kidney). In
hæmorrhagic nephritis the surface may be covered with pin-point
or pin-head hæmorrhages. In pyæmia or acute ascending pyelonephritis
the surface may be dotted with gray or yellowish pin-head
abscesses. Metastatic abscesses are uniformly distributed; others
are arranged in groups. In miliary tuberculosis the surface may
contain numbers of grayish translucent miliary tubercles, with
opaque centers when caseation has taken place. They cannot be so
easily scraped out with the knife as the abscesses. Calcified glomeruli
may also appear as white spots. Proliferations of the interstitial
tissue cause large, red kidneys. Anæmic infarcts are yellow,
brick-red or rusty, with a deeper red zone about them. Pseudomelanosis
(usually postmortem) gives a gray-green color to the kidney.
In icterus the color may vary from brownish-yellow to deep bronze.
The consistence of the kidney is increased in chronic passive congestion,
atrophy, interstitial nephritis and amyloid degeneration;
decreased in acute degenerations and inflammations.
On section note color, blood-content and consistence of cut-surface,
relations of cortex and medulla. The cortex is normally
0.5-1.0 cm. broad (increased in acute degenerations and inflammations,
diminished in chronic inflammation and atrophy). Note
number, size and color of the glomeruli. They appear as red pin-head
points in congestion; in anæmia as small colorless granules; in
the normal kidney as small reddish points against the lighter
color of the labyrinths. In amyloid disease they are enlarged and
glassy. Calcified glomeruli are white and opaque. In venous congestion
the interlobular veins appear as bluish-red stripes; hæmorrhages
appear as red points in the glomeruli and convoluted tubules,
as red stripes in the collecting tubules. The blood-content is
increased in chronic passive congestion and chronic alcoholism. On
the cut-surface anæmic infarcts are usually wedge-shaped, with the
base toward the cortical surface. The color of the kidney-parenchyma
is usually gray; in fatty degeneration and cloudy swelling
it becomes yellow or grayish-yellow. The areas of greatest
degeneration appear as cloudy, opaque, yellowish points and stripes.
Slight degenerations are shown by slight cloudiness of the cortex.
The contrast between the grayish-white cortex and the dark-red
medulla is often very striking in severe parenchymatous nephritis.
In uric-acid infarction of the new-born ochre-yellow or vermilion-red
stripes or lines are seen in the medullary pyramids; white lines
indicate chalk-infarction; golden-yellow lines a bilirubin infarction.
In gout whitish deposits of urates occur in the kidney; they are
usually surrounded by scar-tissue. In purulent pyelonephritis yellow
stripes of pus surrounded by hæmorrhage occur in the pyramids.
Tuberculosis begins usually in the papillæ, destroying the pyramids
first and then the cortex, forming a multilocular sac lined with caseating
tissue. In hydronephrosis due to obstruction of the ureter the
kidney becomes converted into a multilocular sac without ulceration
or caseation of its papillæ. Note size of pelvis and calices, contents,
character of mucosa, concretions, etc. The normal mucosa is grayish-red
and delicate; it is rose-red in inflammation and often shows
petechiæ. In severe inflammations grayish-white sloughs encrusted
with urates are often found. Concretions of urates, phosphates or
oxalates may be present, often associated with decubital ulcers of
the mucosa. Tuberculous ulcers of the pelvic mucosa are common.
The ureters are straight and about 4 mm. thick. Note size, contents,
thickness of wall, changes in the mucosa, obstruction, dilatation,
concretions, etc.
The most important pathologic conditions of the kidneys are
anomalies (horse-shoe kidney, dystopia, double ureters, congenital
lobulation), floating kidney, congestion, anæmia, infarction, thrombosis
and embolism of renal vessels, atrophy (simple, arteriosclerotic),
hydronephrosis, nephrolithiasis, nephritis (parenchymatous,
hæmorrhagic, secondary contracted, primary contracted), rupture,
amyloid degeneration, abscess, pyelonephritis, tuberculosis,
syphilis, actinomycosis, uric-acid infarct, hæmatoidin- and hæmosiderin-infarct,
bilirubin-infarct, chalk-infarct, argyrosis, retention- and
degeneration-cysts, congenital cystic kidney, neoplasms (hypernephroma
and adenoma the most common; carcinoma infrequent,
sarcoma more common, particularly the congenital adenosarcoma
or rhabdomyosarcoma; fibroma, leiomyoma, lipoma and angioma
are relatively rare. Secondary carcinoma and sarcoma are common),
pyelitis, ureteritis (cystica, polyposa, diphtheritica, purulenta),
pyonephrosis, parasites (distomum hæmotobium, echinococcus,
filaria, cysticercus, pentastomum and dioctophyme renale).
14. Abdominal Aorta, Iliacs and Vena Cava. Note size of
lumen, thickness of wall, character of endothelium and contents.
Sclerosis, fatty degeneration of intima, atheroma, calcification,
aneurism, inflammation, thrombosis, stenosis, dilatation, compression,
and infiltrations with pus or neoplasm are the most important
conditions.
15. Lymphatic Vessels. Inflammation, obstruction, rupture,
tuberculosis and invasion by malignant neoplasms are the most
important conditions. (See also Thoracic Duct, Chapter VIII,
Page 130.)
16. Lymphnodes. The retroperitoneal lymphnodes and hæmolymph
nodes are described as to their number, size, color, consistence,
occurrence of hyperplasia, lymphadenitis, atrophy, congestion,
œdema, hæmorrhage, pigmentation, tuberculosis, metastatic tumors,
primary tumors (lymphosarcoma), leukæmic hyperplasias and
Hodgkin’s disease.
17. Sympathetic. The solar plexus, semilunar ganglia and
adrenal plexus should be examined, particularly in Addison’s disease,
for atrophy, degenerations, involvement in inflammatory processes,
hæmorrhages, tumor-infiltrations, etc.
18. Psoas Muscles and Diaphragm. Examine for purulent,
phlegmonous or gangrenous inflammations, tuberculosis, actinomycosis,
trichinosis, atrophy and scar-tissue. Pus from carious processes
in the thoracic and lumbar vertebræ burrows downward
along the psoas muscle.
19. Vertebrae. Fractures, dislocations, curvatures, deviations,
tuberculosis, caries, actinomycosis, etc.
CHAPTER XI. THE EXAMINATION OF THE PELVIC ORGANS.
I. METHODS OF EXAMINATION.
1. Male Pelvis. When the removal of the external genitals is
permitted the fundus of the bladder is taken in the left hand and
pulled toward the head of the cadaver while the anterior wall is
separated from the pubis. This can be done with the fingers of the
right hand or the point of the knife. The loose connective-tissue
is torn on both sides around the urethra and rectum until the hand
can be passed beneath the rectum, completely encircling it and the
prostate which must be freed as far as its anterior border. The
legs of the cadaver are then separated, and an incision is made with
the large section-knife, through the skin, beginning above at the
root of the penis, at the termination of the main incision, and following
the arch of the pubis around the external genitals down to
the left, passing around the anus to the coccyx. A similar incision
is then made on the right side of the external genitals to meet the
first incision behind the anus. The outer genitals are then held
in the left hand and pulled downward between the legs while they
are dissected from the pubis, cutting the suspensory ligament of
the penis, to the level of the posterior border of the symphysis.
The knife is then run through into the pelvis just beneath the
symphysis, and while traction is made upon the external genitals
toward the right, a sweeping cut is made downward to the left
along the pubic arch, severing the insertion of the cavernous portion
of the penis on that side. A similar cut is then made on the
right side. The penis thus freed is then pushed up beneath the
symphysis into the pelvis and the scrotum pulled up after it, putting
the perineum on the stretch and pulling up the anus so that
it can be seen. While the external genitals are forcibly pulled
upward in the pelvic cavity toward the head, the encircling incision
behind the anus is deepened, cutting the fat-tissue, connective-tissue,
and muscle around and behind the rectum, until the whole
mass of genital organs and rectum is so loosened that it strips up
easily to the brim of the pelvis, where any remaining attachments
of peritoneum or blood-vessels are severed and the entire mass
removed for examination on the board.
The mass is laid upon the board with rectum uppermost. The
latter is then opened from the anus, using the intestinal shears, and
scraping off the contents into a pail so as not to contaminate the
other tissues. The rectum is then separated from the base of the
bladder and prostate, guiding the incision along the outer muscular
layer of the rectum, and stripping off the latter until the seminal
vesicles are wholly exposed. These are then examined by means of
transverse cuts, or are opened longitudinally with the knife or fine
probe-pointed scissors. The prostate may also be sectioned from
its posterior surface, if it is desired to preserve the urethral side
intact. Cowper’s glands are also accessible from this incision. The
organs are then turned over, the penis put on a stretch and the
anterior wall of the urethra cut in the median line from the meatus
to the bladder. A pair of strong, medium-sized probe-pointed scissors
should be used. The incision is extended through the anterior
wall of the bladder. The mouth of the ureters, ejaculatory ducts
and ducts of Cowper’s glands are examined. If the prostate has
not been examined from the rectal side it may now be examined
by means of transverse incisions across the urethra and extending
entirely through the gland. The section of the genitalia is then
finished by the examination of the testicles. The latter are removed
by enlarging the inguinal canal on each side, slipping the testicles
up through them, and bisecting each gland so that the incision
falls through the head of the epididymis. The testicles may also be
examined by means of incisions made in the scrotum over the
glands, which are forced through the incisions and then bisected.
If the vasa deferentia are to be preserved they should be dissected
out before the semicircular cuts on each side of the external genitals
are made.
When the kidneys have been removed, and the ureters left
uncut, to be examined in connection with bladder and external
genitals, they are usually left lying on the thighs until the abdominal
examination is finished. They are then laid in the abdomen
until the pelvic organs have been separated up to the brim of the
pelvis. At this point care should be taken to see that the ureters
are not cut when the whole mass of pelvic organs, ureters and kidneys
is removed. When placed upon the board the ureters are laid
straight and the kidneys placed in their respective positions. The
ureters are sounded from the bladder and when desired opened
upward from the bladder to the kidneys. The section of the kidneys
may then proceed according to the directions given in the last
chapter.
Fig. 45.—Section of male pelvic organs. Arrows mark line of incisions through
prostate and rectum. (After Nauwerck.)
When the external genitals cannot be removed, the testicles
can be examined by enlarging the inguinal rings and canal, and
forcing each testicle up from below, through the ring. The gland
is then sectioned and, after examination, returned to the scrotum.
The anterior wall of the bladder is then separated from the pubis
and the tissues about rectum and prostate loosened until the hand
can completely encircle the rectum and prostate. These organs
and the bladder are then pulled up firmly toward the head
of the cadaver, and with the cartilage-knife hugging the pubic
bone the rectum is cut just above the internal sphincter, and
the urethra just anteriorly to the prostate. When it is desired to
get as much of the penis as possible, its attachments to the pubis
are cut from the pelvic side, and the body of the penis pulled up
into the pelvis, while the skin of the organ is loosened as far as the
glans. The body of the penis may be severed from the glans or the
glans may be freed from the prepuce and removed with the entire
organ, leaving only the skin to be used for the restoration of the
part. After the rectum and urethra are severed, the mass of pelvic
organs is stripped up to the brim of the pelvis and removed, as
given above. They are examined upon the board, opening first the
rectum, then the seminal vesicles, prostatic urethra, bladder and
prostate. The prostatic urethra and anterior bladder-wall are cut
with the small probe-pointed shears, while the prostate is cut
transversely with the long section-knife.
The bladder, prostate and seminal vesicles may be examined
in situ, or separated from the rectum and examined outside of the
body. The anterior wall of the bladder is freed from the pubis, and
the lateral connections of the prostate separated. The bladder is
then opened in its anterior wall by an incision from its fundus into
the prostatic portion of the urethra. The prostate is then cut transversely
at about its middle, the cut extending entirely through the
organ. The fore-finger of the left hand is then hooked underneath
the prostate, and the bladder stripped forcibly from the rectum,
upward toward the pelvic brim. The base of the bladder is thus
brought up into view, exposing the seminal vesicles, which are
examined by transverse incisions.
In the employment of any one of these methods, the urine, if
it is to be saved for examination, should first be drawn through a
catheter. This is also the cleanest way of emptying the bladder,
particularly when it is greatly distended. The employment of force
to squeeze the urine out of the bladder through the urethra is not
advisable when there is any disease of bladder or urethra present.
Fig. 46.—Section of female pelvic organs. Urinary bladder bisected and vagina
opened in anterior median line. Arrows show direction of incisions.
(After Nauwerck.)
2. Female Pelvis. The contents of the pelvis and the external
genitalia are removed from the female cadaver in the same way as
in the male. The anterior wall of the bladder is first freed from the
pubis and the tissues separated around and behind the rectum so
that the hand can be carried around the vagina and rectum. When
the external genitalia are to be removed with the internal organs,
an encircling incision is made on both sides of the external genitals,
beginning above at the termination of the main incision at the
beginning of the anterior commissure, and meeting behind the
anus. The external genitals are then dissected away from the arch
of the pubis until the knife can be passed up beneath the symphysis
and the attachments to the posterior border of the arch cut on both
sides, so that the vulva can be pulled up beneath the pelvic arch,
putting the perineum on the stretch. The posterior portion of the
encircling incision is then deepened until the entire mass of external
genitals and anus can be stripped up with the internal organs to
the brim of the pelvis, where they are held up perpendicularly and
any remaining attachments of peritoneum and blood-vessels cut,
care being taken to cut outside of the ovaries and tubes. The mass
thus removed is laid on the board with rectum uppermost and the
latter opened first. The organs are then turned over, and the
urethra and bladder opened in the anterior median line with the
probe-pointed shears. The vagina and uterus are then opened
in the anterior median line, bisecting the urethra and bladder.
A heavy pair of shears having one blunt-pointed blade
should be used. If it is desired to save the bladder and
urethra, they can be dissected over to the right, or the vaginal
wall can be cut on its left side. When the cervical canal will not
admit the scissors the uterus may be cut in the median line with a
knife. The horns may then be opened with the scissors. Additional
cuts may be made into the uterine wall as desired (tumors, placental
site, etc.). The tubes may be sounded from the abdominal
extremity and then opened for their entire length with the fine
probe-pointed shears, or they may be examined by means of transverse
cuts. The ovaries are held with their flat surfaces between
thumb and index-finger and then sectioned in the plane of greatest
dimension from the convex border to the hilus. The broad ligaments,
parametrium, parovarium and lymphnodes are examined by
means of cuts made parallel with the sides of the uterus.
When the external genitals cannot be removed, the vagina and
rectum, after they have been freed from the surrounding tissues,
are put on the stretch toward the head of the body and cut through
as close to the pubic outlet as possible. When this is carefully done
it is possible to secure the inner labia and the urethra intact. The
rectum is cut as close to the anus as possible. The organs are then
stripped up to the brim of the pelvis, then held up perpendicularly
while the remaining connections are severed. The organs thus
removed are examined on the board in the same manner as given
above. When the organs cannot be removed from the body, the
bladder and urethra are examined by an anterior median incision
after they have been freed from the symphysis. The uterus and
vagina are then cut with the knife in the anterior median line, either
through the bladder or after the latter has been dissected away.
The ovaries, tubes and broad ligaments are then examined as
directed above. The uterus and vagina may also be dissected from
the rectum and opened by a posterior median incision. This method
is used in medicolegal examinations.
To facilitate the removal of the genital organs in either sex a symphysiotomy
may be performed and the pubic arch pulled apart, or a portion of the
pubis may be cut out with the saw.
When permission to open the body by means of the usual main-incision
cannot be obtained, it is possible to remove the thoracic and abdominal organs
through the vagina or rectum. The cadaver is placed on its back, with buttocks
near the end of the table, the thighs separated as widely as possible and flexed
upon the body. In the male the scrotum is drawn up out of the way. A circular
perineal incision is then made, beginning anteriorly at the perineoscrotal junction
and extending around the anus. The arm may be introduced through this
opening after the removal of the rectum and the abdominal and thoracic organs
pulled downward and removed. In the female the uterus and vagina are
removed through the vaginal opening; the arm is then introduced and the
abdominal and thoracic organs removed.
II. POINTS TO BE NOTED IN THE EXAMINATION
OF THE PELVIS.
I. MALE PELVIS. 1. Penis. Size, anomalies, condition,
character of prepuce, evidence of circumcision, presence of smegma,
character of meatus, discharge, wounds, scars (on and back of
corona), evidence of syphilis, neoplasms, etc. Postmortem priapism
occurs particularly in leukæmia. It may be caused also by traumatic
or infective thrombosis and hæmorrhage, tumor-metastases,
inflammatory infiltrations, and in death from hanging. The most
important pathologic conditions of the penis are: inflammations
(balanitis, posthitis, cavernitis, gonorrhœa, etc.), gangrene, phimosis,
paraphimosis, præputial concretions, soft chancre, hard chancre,
secondary syphilides, traumatic lesions (fracture, hæmorrhage,
urine-infiltrations, etc.), anomalies (hypospadias, epispadias, etc.),
tuberculosis (rare), condylomata, elephantiasis, cornu cutaneum,
carcinoma, sarcoma (rare; melanotic sarcoma the most common
form), secondary carcinoma (primary in prostate), lipoma, angioma
and teratoma.
2. Scrotum. The most important pathologic conditions of the
scrotum are: œdema, inflammation, gangrene, trauma, burns, elephantiasis,
carcinoma, melanotic sarcoma, lipoma, fibroma, myofibroma,
lymphangioma and teratoma.
3. Testis and Epididymis. Testis and epididymis weigh 15-30
grms. Note size, form and consistence. Normal color of cut-surface
is grayish yellow; becomes brown in atrophy. Note character
of tunics (color, lustre, smoothness, consistence, etc.), and
contents of sacs (hydrocele, hæmatocele, empyema, etc.). The most
important conditions affecting the testes are: inflammation (orchitis,
epididymitis, vaginitis, abscess, hæmatogenous inflammations in
pyemia, mumps, scarlet fever, typhoid fever, variola, chronic fibroid
orchitis in syphilis, gonorrhœal epididymitis), tuberculosis, gonorrhœa,
syphilis, actinomycosis, leprosy, leukæmic infiltrations,
atrophy, compensatory hypertrophy, cryptorchidism, hydrocele,
varicocele, spermatocele, cysts, malignant teratomata (syncytioma,
cysts, cystocarcinoma, adenocarcinoma, adenoma, adenosarcoma,
cystosarcoma, rhabdomyosarcoma, chondroma, osteoma, myxoma,
etc.), carcinoma, sarcoma, lipoma, fibroma, etc., metastatic sarcoma
and carcinoma, dermoid cysts, benign teratoma, parasites (echinococcus
is rare). Tuberculosis is most common in the epididymis;
syphilis more frequently affects the body of the testis. Torsion of the
vas deferens may occur; atrophy of the testis may result. Twisting
or thrombosis of the spermatic vessels may cause gangrene of the
testicle.
4. Rectum. Note contents (amount, color, consistence, odor,
etc.), color and character of mucosa (normally grayish red or reddish
gray, smooth and translucent, solitary follicles just visible).
Normally the rectum should contain formed brownish féces; in
catarrh the contents are fluid and not formed, while the mucosa is
covered with a thick glassy mucus. In obstruction of the gall-ducts
the féces are gray (“clay-color”). In catarrhs and chronic passive
congestion the mucosa is red. Decubital ulcers are often green
from the imbibition of bile, and are surrounded by hæmorrhages.
They are circular or correspond in shape to the fécal mass pressing
upon them. Traumatic ulcers, hæmorrhages, diphtheritic inflammation,
follicular ulcers, foreign bodies, stricture, fécal impaction,
hæmorrhoids, fissures, fistulous tracts, tuberculosis, syphilis,
adenomatous polyps and carcinoma are the most common pathologic
conditions. The oxyuris vermicularis is the most common
animal parasite. Gonorrhœa of the rectum is not uncommon.
Stricture is most commonly caused by syphilis.
5. Prostate. Normal size is about that of a walnut or horse-chestnut.
Weighs 19-25 grm. Average dimensions are 2.7 cm. long,
4.0 cm. broad, 2.0 cm. thick. Note form, consistence, color of cut-surface
(smooth or granular), amount of secretion, corpora amylacea
(color brown to black), size of gland-spaces, cysts, abscesses,
tubercles, neoplasms. The most common pathologic conditions
are: hyperplasia (usually inflammatory, the result of old gonorrhœal
infection, less commonly due to chronic pyogenic infection),
neoplasms (carcinoma is relatively common, usually developed in a
prostate showing chronic inflammatory hyperplasia, adenoma,
myoma, fibroma, myofibroma), cysts, acute inflammation (usually
gonorrhœal), typhoid prostatitis, abscesses, tuberculosis, syphilis
(rare) and atrophy. Thrombosis and the formation of phleboliths
are very common in the prostatic veins; they are usually associated
with gonorrhœal infection. The inflammatory hyperplasia may
involve one or all three lobes of the prostate. In old men showing no
evidences of prostatic inflammation the prostate may be atrophic.
6. Seminal Vesicles and Duct. Should be symmetrical. Note
size, contents, character of wall, and appearance of lining membrane.
They measure 3-5 cm. long, 1-2 cm. broad and 0.7-1.5 cm.
thick. Gonorrhœal inflammations and tuberculosis are the most
common conditions. In old men the vesicles contain a brownish-yellow
mucoid substance. As a result of chronic inflammation the
walls of the vesicles are thickened, often hyaline; the lumen is
sometimes wholly obliterated. Calcification of the wall is not
uncommon. Concretions are found in the vesicles following obstruction.
Cystic dilatation may occur. Primary neoplasms (carcinoma
and sarcoma) are rare.
7. Urethra. Mucosa should be grayish-red, smooth, shining
and transparent. The most common and important pathologic condition
is gonorrhœa (acute, chronic, anterior, posterior, erosions,
ulcers, abscesses, perforation, stricture, periurethral abscess, cavernitis,
etc.). Non-gonorrhœal urethritis is rare (colon- and influenza-bacillus,
streptococcus, pneumococcus, etc.). Trauma (crushing,
laceration, perforation, urine-infiltration, hæmorrhage, periurethral
abscess, phlegmon, gangrene, stricture, urinary fistula,
etc.), soft chancre, hard chancre, secondary and tertiary syphilitic
lesions (gumma), tuberculosis (lupus), leprosy and neoplasms
(rare: adenoma, carcinoma, melanotic and round-cell sarcomata
[lymphosarcoma], fibroma, angioma) may occur. The most common
anomalies are hypospadias and epispadias.
8. Bladder.Size, degree of distention, amount and character
of contents, character and color of mucosa (normally gray-red,
smooth and transparent), muscle-coats (hypertrophic, atrophic).
The most common pathologic conditions are: anomalies (ectopia,
ecstrophia, vesica bipartita, vesica bilocularis, diverticula), congestion,
œdema, cystitis (acute and chronic catarrh, cystitis granulosa,
cystica, purulent, phlegmonous, diphtheritic, emphysematous,
interstitial, peri- and paracystitis, erosions, ulcers, gangrene, malakoplakia),
tuberculosis, dilatation, trauma (rupture, perforation,
fistula), neoplasms (papillary fibro-epithelioma, carcinoma, adenoma,
myxoma, myoma, rhabdomyoma, angioma cavernosum, sarcoma,
dermoids, secondary carcinoma [usually from prostate], and
sarcoma [melanotic sarcoma]), concretions (urates, uric acid, oxalates,
phosphates, carbonates, cystin and xanthin), and parasites
(filaria sanguinis, distomum hæmatobium, echinococcus, trichomonas,
ascaris and oxyuris).
II. FEMALE PELVIS.1. Rectum. Note same things as
given above for the examination of the rectum in the male. Gonorrhœa,
stricture due to syphilis and traumatic fistula (due to child-birth)
are more common in the female.
2. Vulva. The most important pathologic conditions are:
congestion, œdema, hæmorrhage, hæmatoma, trauma (laceration),
vulvitis (catarrhal, gonorrhœal, chronic, diphtheritic, gangrenous,
phlegmonous, ulcerative, abscess), erythema, eczema, herpes, acne,
furunculosis, pruritus, kraurosis vulvæ, leukoplakia, Bartholinitis,
retention-cysts, cysts of the glands of Bartholin, hydrocele muliebris,
syphilis (primary, secondary and tertiary lesions), tuberculosis
(lupus), elephantiasis, condylomata, neoplasms (lipoma, fibroma,
lymphangioma, papilloma, fibromyxoma, fibromyoma, chondroma,
neuroma, carcinoma [usually very malignant in type], sarcoma
[rare] and metastatic tumors [very rare]).
3. Urethra. Same conditions as noted above for the male.
Small polypoid granulomata (caruncles) are very common; usually
gonorrhœal in origin. Primary carcinoma is more common in the
male.
4. Bladder. Note same conditions as given above. Rectovesical
and vesicovaginal fistulas are not rare as the result of child-birth.
Secondary carcinoma is more common than in the male
(from uterus and cervix), primary carcinoma more rare. Ascaris
and oxyuris may enter bladder from vagina through a rectal fistula.
5. Vagina. Note size (about 5-8 cm. long), contents (foreign
bodies, pus, blood, etc.), color of membrane, condition of rugæ,
hymen, etc. The color of the mucosa varies from a delicate rosy
red to a bluish purple in the late stages of pregnancy. The most
important conditions are: colpitis (acute and chronic, catarrhal,
diphtheritic, gangrenous, emphysematous, granular, nodular,
adhæsiva, exfoliativa, vetularum, ulcerative; gonorrhœa the chief
cause; also caused by mercuric chloride and other poisons; occurs
also in cholera, typhoid fever, variola, scarlatina, diphtheria and
other infections), ulcers, abscesses, erosions, strictures, varices, prolapse,
atresia, trauma (lacerations, rupture, hæmatoma, fistula),
tuberculosis (rare), syphilis (primary less common than on
vulva, secondary lesions common, gumma rare), thrush, cysts
(retention, remains of Müllerian and Wolffian ducts, gas-cysts),
neoplasms (papillary fibro-epithelioma, fibroma, myxoma, myoma,
rhabdomyoma, rhabdomyosarcoma, myxosarcoma), carcinoma (primary
rare, secondary relatively common, particularly of malignant
chorio-epithelioma; primary ectopic chorio-epithelial tumors occur
in vagina also), and parasites (trichomonas vaginalis, oxyuris vermicularis).
Note particularly condition of hymen.
6. Uterus. The developed uterus weighs 33-41 grms. In
women who have not borne children the dimensions are 7-8 cm.
long, 4 cm. broad, 2.5 cm. thick; in women who have borne children
the dimensions are 8-9 cm. long, 5-6 cm. broad, and 3 cm. thick.
The dimensions of the postpartum uterus vary greatly, where normal
contraction has taken place the length is 8-9 cm., breadth 5-6.1
cm., thickness 3.2-3.6 cm., and weight 102-120 grms. Note size,
shape, character of peritoneal coat, consistence, character of cut-surface,
size and contents of cavity. Length of uterine cavity 5.2-5.7
cm. Note relations between body of uterus and cervix. In adults
the circumference of the body of the uterus is greater than that of
the cervix; before the age of puberty it is less than that of the neck.
In old age the entire organ contracts, but the body more than the
cervix, so that the organ again assumes an infantile form. The
external os in the virgin uterus is round or oval; in women who
have borne children it appears as a transverse cleft. The most common
conditions of the cervix are the so-called erosion and ectropion,
cystic glands (ovula Nabothi), cervical catarrh, hyperplasia, ulcers,
polypi, myofibroma and carcinoma. Note contents of cervical canal
(normally glassy, tough mucus; in catarrh becomes thin, cloudy
or purulent); length and shape of canal (elongations, dilatations,
stenosis, etc.). Color of mucosa should be grayish-red; the folds
should be distinct and symmetrical. Purulent and diphtheritic
inflammations, lacerations, polypi, cysts, fibromyoma, carcinoma
and tuberculosis are the most common conditions affecting the
cervical canal.
The uterine cavity is normally empty; during menstruation or
as the result of inflammation it may contain blood and bloody
mucus; and the mucosa may be deep-red. The normal mucosa is
gray-red and 0.5-1.0 mm. thick. In the puerperal uterus portions
of the placenta, fœtal membrane, purulent or bloody lochial discharges
are present. The placental site is shown by its uneven surface
and presence of blood-clots. Gangrenous and purulent areas
are greenish, gray, brownish-green, and black, with opaque and
ragged surface. Gas-bubbles may be present. The normal consistence
of the uterus is firm, diminished in the puerperal uterus,
increased in chronic metritis. The cut-surface is smooth in the
virgin uterus, rough in the uteri of women who have borne children
and in chronic metritis. The most common pathologic conditions
of the uterus are: abortion, hæmorrhage, apoplexia uteri,
hæmatometra, hydrometra, pyometra, rupture, perforation, traumatic
lesions, endometritis (acute, chronic, hæmorrhagic, interstitialis,
glandularis, hyperplastica, cystica, polyposa, adenomatosa,
infective, decidual, atrophic, etc.), foreign bodies, tuberculosis,
syphilis, actinomycosis, hyperplasia, metritis (acute, chronic,
hyperplastic, atrophic), perimetritis, parametritis, atrophy, neoplasms
(myoma and myofibroma the most common; adenoma,
adenomyoma, adenomatous polypi are very common; carcinoma
[adenocarcinoma, cystocarcinoma, medullary, papillary, colloid,
scirrhous, squamous-celled, malignant chorio-epithelioma] very
common; sarcoma less common but it is not rare [myosarcoma
the most common form; often represents a sarcomatous transformation
of a myofibroma]; metastatic carcinoma and sarcoma are
rare), and parasites (echinococcus).
7. Tubes. Note length, thickness, shape, character of peritoneum,
patency, fimbriated extremities (swelling, redness, exudate,
tubercles, hæmorrhage), contents, color and thickness of mucous
membrane, thickness and consistence of entire wall. Tubes should
be straight, not tortuous; in inflammation they are usually twisted,
tortuous or bent. Hæmatosalpinx is usually caused by a tubal gestation.
The most common pathologic conditions are: salpingitis
(usually gonorrhœal, acute, chronic, catarrhal, purulent, pyosalpinx,
hydrosalpinx, interstitial, perisalpingitis, tubo-ovarian abscesses
and cysts), tuberculosis, actinomycosis (rare), syphilis (very rare),
hæmatoma (ectopic gestation relatively frequent), neoplasms
(rare: adenomyoma, fibromyoma, fibroma, myosarcoma, sarcoma,
carcinoma, chorio-epithelioma and teratoma; secondary carcinoma
from uterus, ovary and intestine).
8. Ovaries. Note size, form, consistence, color, character of
cut-surface, number of Graafian follicles, corpus luteum, etc. Ovary
at puberty weighs about 10 grm., measures 4-5.2 cm. long, 2-2.7 cm.
broad, 1.0-1.1 cm. thick. The adult ovary weighs about 7 grm., and
measures 2-4 cm. long, 1.4-1.6 cm. broad, 0.7-0.9 cm. thick. A corpus
luteum is 1.0-2.0 cm. in diameter. Ovary is compared to an
almond in size and shape. In young individuals the surface is
grayish-white and smooth; with age the surface becomes more and
more irregular, the organ smaller and its consistence firmer. The
cut-surface in young individuals is normally very moist (this
should not be regarded as œdema). The most important conditions
are: inflammation (acute and chronic, hæmorrhagic, purulent, etc.,
oöphoritis, abscess), tuberculosis, cystic follicles, lutein-cysts, cystadenoma
(multilocular, monolocular, surface papilloma, simplex,
papillary), parovarian cysts, carcinoma, fibroma, sarcoma, dermoid
cysts, teratomata, malignant teratomata, embryoma, parasites
(echinococcus is very rare).
9. Uterine Ligaments, Vessels and Lymphatics. Peritoneum
over the broad ligament should be moist-shining, delicate and
transparent. Inflammatory processes are very common in the
parametrium, particularly in puerperal cases. The peritoneum is
cloudy, opaque, injected, or covered with fibrinous or purulent
exudate. Great numbers of small cysts containing clear fluid are
often found in the peritoneum of the broad ligament as the sequelæ
of inflammation. Note contents of blood-vessels (thrombi, concretions,
neoplasms), and character of walls. Parovarian cysts, myomata,
adenomyomata (round ligament), secondary carcinoma, chronic
inflammations, hæmatoma and tubercles are the most common
pathologic conditions.
CHAPTER XII. SPECIAL REGIONAL EXAMINATION.
I. METHODS OF EXAMINATION.
1. Bones and Bone-Marrow. The methods employed will
depend wholly upon the indications in any given case, the anatomic
relations and the aim of the examination. Anatomic knowledge
should be applied in the removal of any bone. In the case of the
extremities adequate incisions should be made in the skin extending
the entire length of the bone which is to be removed, and the
soft parts dissected from the bone before the latter is disarticulated
or cut out. When the bone is examined in situ it may be
opened with hammer and chisel or cut with a saw, either transversely
or longitudinally, so as to give the most instructive picture
of the condition present. The spinal column may be cut longitudinally.
The symphysis pubis is first cut through, a block of wood
is placed beneath the lumbar vertebræ, and the vertebral bodies are
sawed through in the median line, from below upward, moving the
block toward the head as the sawing proceeds. The cut-surfaces
of the vertebræ are then inspected. The pelvis may be removed
whole in connection with the lumbar vertebræ and the upper
halves of the femurs. The spinal column and the pelvis may also
be removed entire by sawing the ribs on each side of the spine,
cutting the occipito-atloid ligaments above, and disarticulating the
femurs or sawing them at their upper half or third and removing
them with the pelvis. Of the long bones the femur is the one most
frequently examined. An incision is made in the skin from the
groin in the direction of the large vessels extending to the middle
of the leg. The ligamentum patellæ is cut through and the skin
and muscles turned back at the knee until the joint is laid bare;
the capsule of the joint is opened and the femur disarticulated. The
skin and muscles are then separated from the upper part of the
femur, the hip-joint opened, and the femur disarticulated and
removed. When held in a vise it may be opened longitudinally
by sawing. Other bones are removed as indicated; the chief points
to be observed in their removal are the anatomic considerations
and the making of the incisions in such a way as to cause the least
possible disfigurement. For the examination of the bone-marrow
the tibia or femur, sternum, a rib and the body of one of the vertebræ
are usually opened by means of the saw or chisel.
2. Joints. The joints are opened for examination with attention
to the same considerations given above for the examination
of the bones. Approved surgical incisions may be used. If fistulous
openings into the joint are present these should not be cut until the
joint is open. When bacteriologic examinations are to be made
the joint should be opened with a sterile knife, or the capsule
seared and punctured with a sterile pipette through which the contents
of the joint-cavity are secured. The articular surfaces, epiphyses
and diaphyses should be examined by transverse or vertical
incisions.
3. Lymph-glands. The cervical, axillary and inguinal lymphnodes
can be secured for examination by carrying the skin-flaps of
the main-incision far enough back to make these regions accessible.
For the examination of other glands, such as the cubital, popliteal,
interscapular, posterior cervical, etc., the cadaver should be placed
in a convenient position, and the skin-incisions should be made so
as to expose sufficiently the part to be examined, without unnecessary
mutilation.
4. Peripheral Blood-vessels and Nerves. Skin-incisions are
made along the course of the vessels and nerves, and these are then
exposed by careful dissection. In the case of the upper extremity
the clavicle is removed when the entire course of the nerves and
vessels of the arm is to be exposed.
5. Sympathetic System. The cervical, thoracic and abdominal
sympathetic systems are examined either at the close of the examination
of each one of these regions or at the end of the autopsy.
Careful anatomic dissections are necessary for the demonstration of
the sympathetic ganglia and nerves.
6. Organs of Special Sense. These may be examined at the
close of the autopsy, according to the methods given above, if they
have not been examined at the close of the section of the brain.
II. POINTS TO BE NOTED IN SPECIAL REGIONAL
EXAMINATION.
1. Bones and Bone-marrow. Note size, form, color of surface,
consistence (diminished in necrosis, osteomalacia, rachitis, senile
osteoporosis, etc.; increased in sclerosis), fragility, fractures, separation
of epiphyses, fissures, dislocations, elevation or separation
of periosteum, periosteal defects, changes in periosteum (thickened,
indurated, and showing hard white elevations in chronic
inflammation; swollen and easily stripped from the bone in acute
inflammation; hæmorrhages and collections of pus beneath periosteum
cause separation of periosteum; in chronic inflammation the
periosteum may become more firmly adherent to the bone and contain
spongy, compact, cartilaginous or osteoid osteophytes that
vary in color according to the degree of calcification [bluish-red,
yellowish, dirty-white, shining-white]; the normal periosteum is
grayish-white in color; it is reddened in hyperæmia and hæmorrhage).
The surface of bones normally is smooth and grayish-yellow
in color; it becomes red with an increase in the number and
size of the medullary spaces, and paler, grayish-white or white in
necrosis; a dull, rough, uneven surface indicates lacunar absorption.
Note localized or general thickening (exostoses, hyperostosis). On
section note thickening of the bone (osteomyelitis ossificans), thinning
(osteoporosis, excentric atrophy), enlargement of medullary
spaces, obliteration of spaces by newly-formed bone (osteosclerosis;
bone becomes heavy and solid like ivory), and caries (pyogenic
infection, tuberculosis, syphilis, actinomycosis, neoplasm). Caries
occurs in both spongy and compact bone, but more often in the
former. The necrotic bone appears as soft, friable granules (molecular
necrosis) or sequestra, between which living bone or granulation-tissue
may be found. The necrotic granules feel like fine
grains of sand when the finger is rubbed over the cut-surface. The
color depends essentially upon the amount of granulation-tissue
present (gray, grayish-red or deep bluish-red). Purulent areas are
cloudy, opaque and yellowish. Tubercles appear as round, grayish,
semitranslucent areas, with opaque yellowish centers when calcification
has occurred. In young subjects the developing portions of
the bone (epiphyses, cartilages) should receive especial examination.
Note amount, color and consistence of bone-marrow. In the
young individual the marrow is red; after puberty the red marrow
gradually becomes restricted to the flat bones and the short spongy
bones, while in the long bones there develops a yellow, fatty marrow.
In old age the marrow of the long bones may become brownish,
transparent, myxomatous or soft like colloid, or contain large
cystoid spaces filled with a thin mucoid fluid or liquid fat. Red
lymphoid marrow is found in the long bones in severe anæmias;
it is grayish-red or deep red according to its blood-content. In
leukæmia the marrow may be red, violet, pink, grayish or grayish-yellow
(pyoid); in chloroma the marrow may be greenish. In
cachexias the marrow may become gelatinous as in old age. A
hyperæmic fatty marrow should not be mistaken for lymphoid
marrow; the fatty shine serves to distinguish the former. Cloudy
yellowish areas in the marrow point to purulent infiltration. Firm
sulphur-yellow masses are gummata.
The most important pathologic conditions of the bones are:
atrophy, osteomalacia, rachitis, fractures, dislocations, periostitis,
osteomyelitis, ostitis, acromegaly, necrosis, syphilis, tuberculosis,
actinomycosis, leprosy, exostosis, hyperostosis, hyperplasia, defects,
hypoplasia, dwarfism, giantism, neoplasms (primary sarcoma the
most common malignant tumor [periosteal, myelogenous, myeloma,
lymphosarcoma, chloroma, leukæmia]; secondary carcinoma [primary
in mamma, thyroid, prostate, adrenal] also relatively common;
osteoma, lipoma, exostosis cartilaginea, fibrosa and ossificans,
fibroma, myxoma, lipoma, angioma, chondroma, etc.), cysts, and
parasites (echinococcus, cysticercus).
2. Joints.Capsule (thickness, tension, defects, tears, perforations,
adhesions), cavity (contents [normally a few drops of light-yellow,
clear fluid, more in knee-joint than in other joints; may be
serous, purulent, hæmorrhagic or fibrinous], adhesions, granulation-tissue,
rice-bodies, free bodies, joint-mice, obliteration of cavity,
osseous, fibrinous or cartilaginous ankylosis, changes in internal
articular ligaments), synovial membrane (a delicate pale grayish,
smooth membrane; rough from exudate or formation of granulation-tissue;
red in hyperæmia or hæmorrhage. Note folds and villi; subserous
fat-tissue), articular surfaces (loss or increase of cartilage, separation
of cartilage, newly-formed bone, granulation-tissue, deposits
of lime-salts or urates, necrosis or purulent infiltration of the cartilage,
erosions, eburnations, defects or enlargement of ends of bones;
in degeneration and necrosis the bluish-white, transparent cartilage
becomes opaque, cloudy and yellowish). The most important pathologic
conditions of the joints are: arthritis (acute, chronic, serous,
purulent, gangrenous, primary, secondary, gonococcal, pneumococcal,
streptococcal, tuberculous, syphilitic, deformans, villosa, prolifera
cartilaginea, adhæsiva, ulcerosa, sicca, neuropathic), dislocations,
deformities, abnormal position, congenital anomalies,
chondritis, spondylitis, gout, necrosis, ankylosis, tuberculosis, syphilis,
free bodies, neoplasms (rare: angioma, sarcoma, chondroma,
lipoma; secondary more common from an extension of sarcoma of
neighboring structures; metastatic tumors rare), and parasites
(echinoccocus very rare).
3. Lymphnodes, Peripheral Vessels and Nerves, Sympathetic
and Organs of Special Sense. The pathologic conditions of these
structures have been given above.
CHAPTER XIII THE AUTOPSY OF THE NEW-BORN.
I. METHODS OF EXAMINATION.
The Section of the New-Born differs from that of the adult in
several particulars, as follows:—
a. Spinal Cord. The spinal canal may be opened with the
scissors alone, as the soft, bony structures of the spinal column are
easily cut.
b. Skull. The cranium is opened, after the removal of the
scalp, in the usual way, by cutting with the scissors into the posterior
angle of the anterior fontanel and then introducing the shears
into the longitudinal sinus, and cutting the latter posteriorly in the
line of the sagittal suture. The sinus is then opened anteriorly. The
sutures between the frontal and parietal bones, and between the
parietal and occipital bones, are now cut with the shears down to
the level of the greatest circumference of the cranium. The cranial
bones with the adherent dura are then pressed outward from the
brain, and are either held in this position or cut through with the
bone-shears so that sufficient room for the removal of the brain is
afforded. The anterior falx is then cut and the brain removed as
in the adult, using great care because of its very soft consistence.
When too soft to be removed the brain may be opened within the
skull; or a horizontal section may be made with the large, flat
brain knife at the level of greatest circumference. Some prosectors
freeze the brain before removal, or remove it while the cadaver is
immersed in a strong solution of brine.
c. Section of Thorax, Neck-organs and Abdomen. A small
block of wood is placed beneath the lumbar vertebræ, and the main-incision
reaching from thyroid cartilage to the pelvic crest is made,
the incision passing to the left of the umbilicus, and diverging outward
below it so as not to cut the left umbilical artery. The incision
is now extended through the abdominal wall into the peritoneal
cavity, the right half of the abdominal wall turned up so as to
expose the umbilical vein, which is cut loose from the abdominal
wall, so that a second diverging incision can be made through the
abdominal wall, beginning just above the umbilicus and passing
down to the right of the right umbilical artery, without cutting the
umbilical vein. There is left between the two diverging cuts a
triangular flap of abdominal wall (see Fig. 47) containing the
umbilicus, urachus and umbilical arteries, and connected with the
liver by the umbilical vein. The umbilical vessels are then probed
and examined by transverse sections; and the triangular flap of
abdominal wall turned down over the pubis. After the height
of the diaphragm has been noted the thorax is opened by cutting
the ribs outside of the costochondral articulations so as to give
more room. The thymus gland is then examined and removed.
The heart may be opened in the same way as in the adult, extending
the cut into the pulmonary artery up to the ductus arteriosus,
which is examined by the probe. The ductus arteriosus is easily
found by cutting the pulmonary artery in the middle of its anterior
wall. In the median line beyond the right and left branches of the
pulmonary artery is the opening of the duct, which can be probed
into the descending aorta. (See Fig. 48.) The heart may then be
removed, and the foramen ovale carefully examined.
Fig. 47.—Method of opening the abdomen in the new-born, with especial reference
to the examination of the umbilical vessels. Note triangular flap,
including umbilicus, urachus and umbilical arteries, and attached to
umbilical vein. (After Nauwerck.)
Fig. 48.—Section of pulmonary artery and pulmonary ring in the new-born,
showing openings of right and left pulmonary arteries and ductus
arteriosus (containing probe). (After Nauwerck.)
Fig. 49.—Method of demonstrating the Béclard center of ossification in the lower
epiphysis of the femur. (After Nauwerck.)
It is usually better to take out the neck and thoracic organs
en masse and examine on the table. This must always be done in
cases of suspected thymic death and when the question of the child
having been born alive or dead is to be settled. The position of the
diaphragm must be taken before the thorax is opened. The upper
air passages are then ligated. The thoracic cavity is then opened;
the pericardium and heart opened and examined. The larynx and
trachea are opened above the ligature, and the whole respiratory
tract with the ligature in position is removed from the thorax and
placed in a vessel of clean water. The air passages below the ligature
are then opened, and the lungs, after their floating power has
been tested, are cut beneath the water in order to see if air-bubbles
arise from the cut-surface or from the bronchioles. The lungs are
examined piece by piece for air-containing portions, noting their
floating power, crepitation, occurrence of bubbles, etc. In the case
of suspected thymic enlargement the trachea should be explored
from above for a stenosis, before the thorax is opened. If evidences
of pressure upon the trachea cannot be demonstrated in this
way the body of the child can be fixed in formalin and then opened.
The thymus and trachea are then examined by means of transverse
sections. The stomach should be ligated at both ends and then
removed, and opened under water. The presence of air points to
extra-uterine “swallowing” movements. This test is worthless if
decomposition has set in. When the thoracic organs are taken out
en masse the ductus arteriosus can be examined from the aorta.
The removal of neck, thoracic and abdominal organs en masse is
often of advantage in the examination of the infant cadaver, as the
organs can be much more easily examined on the table than in the
body. The neck organs are first removed after ligating trachea and
œsophagus, and with the thoracic organs are stripped down to the
diaphragm and then lifted up out of the body and laid over the left
side of the body. The diaphragm is then cut laterally and posteriorly.
The rectum is ligated and cut between ligatures. The crura
of the diaphragm, the cœliac vessels and root of mesentery are then
cut, and the viscera, including the kidneys, are stripped down to
the brim of the pelvis, where the peritoneum and blood-vessels
are cut.
The ear-test (the demonstration of the opening-up of the
Eustachian tube and middle ear by the establishment of respiration)
may be shown by the examination of the middle-ear from the
cranium. The ear-drum must be examined to see if it is intact.
The Béclard center of ossification in the lower epiphysis of the
femur is examined by opening the knee-joint, flexing the leg, and
then making parallel transverse cuts perpendicularly to the long
axis of the bone, until the greatest diameter of the center of ossification
is cut.
The eye-ball may be removed and examined for the pupillary
membrane. The eye is cut through a few millimetres back of the
cornea, the anterior segment is fixed in dilute chromic acid or alcohol
and then examined microscopically; or it can be examined in the
fresh state, the membrane being visible even to the naked eye.
Bacteriologic examinations should be made in the usual way,
the material being secured by sterile pipette, sterilized knife or platinum
loop, smears, etc. In the examination of a very fresh cadaver
the possibility of danger from infection with syphilis must always
be borne in mind.
II. POINTS TO BE NOTED IN THE SECTION OF THE
NEW-BORN.
Aside from establishing the cause of death, the autopsy of the
new-born has for its aim the determination of the age of the infant,
its viability and whether it was born living or dead. Special attention
must therefore be paid to all points that may be of value in
settling these questions.
The average length of a full-term new-born child is 50 cm. (42-58
cm.), boys being somewhat longer than girls; 58 cm. may be
taken as the maximal length, 48 cm. the minimal. Both length and
weight vary within wide limits. The length of the fetus in the first
five months of intra-uterine life corresponds approximately to the
square of the month. In the last five months the age of the fetus
equals approximately the length in centimetres divided by five.
Viability is usually regarded as beginning in the eighth month and
with a body-length of over 32 cm. The average weight of the full-term
new-born is 3,200 grms., for boys 3,310 grms., girls 3,230
grms.; maximum weight 5,500 grms., minimal 2,500. The weights
for the different months are: second month, 4 grms., third month
5-20 grms., fourth 120 grms., fifth 284 grms., sixth 434 grms., seventh
1,218 grms., eighth 1,549 grms., ninth 1,971 grms., tenth
2,334 grms.
Look for traces of vernix cascosa. The skin of the well-nourished,
full-term, new-born is smooth, not wrinkled, white or grayish-red
rather than red in color (a slight icteric tint is so common as to
be regarded as normal), and showing the fine lanugo hair only on
the shoulders. The hair of the scalp averages 2-3 cm. in length.
The finger-nails are firm, horny and extend beyond the finger-tips.
The subcutaneous panniculus should be abundant. The average
length of the umbilical cord is about 50 cm., and it is inserted about
the middle of the body or just below it. As a rule it is thrown off
on about the 5-6th day. The cartilages of the nose and ears are firm.
In male infants the testicles lie in the firm and wrinkled scrotum
(they begin to descend in the seventh month); in the female the
outer labia usually meet, but occasionally the inner ones are visible.
In the seventh and eighth months the clitoris rises above the greater
labia. A small amount of blood-stained discharge is often present
in the vagina of the new-born. From the mammæ of both male and
female new-born a whitish turbid fluid (“Hexenmilch”) can usually
be expressed. The great fontanel is 2-2.5 cm. broad, while the posterior
one is nearly closed. The pupillary membrane is absent after
the eighth month. The ductus arteriosus remains open 4-5 days
after birth; the foramen ovale is not completely closed until the second
or third month of extra-uterine life, although by the tenth day
the opening is nearly obliterated. The center of ossification in the
lower epiphysis of the femur should be present and measure 2-9 mm.
It is not present in the eighth month and in a large proportion of
cases begins to develop in the ninth month. Only rarely is it absent
in normal full-term infants. It appears in the bluish-white cartilage
as a lenticular mass of red or reddish-brown color in which the
blood-vessels can be easily seen. It may be absent in congenital
rachitis or syphilis, or in the latter disease it may show the characteristic
appearance of osteochondritis syphilitica.
The head should be examined for the presence of the “head-tumor”
or “caput succedaneum,” the œdematous swelling of the scalp
over the parietal eminences. Minute hæmorrhages may be present in
the tissues. The tumor usually grows smaller or disappears within
12-48 hours. In difficult labors a hœmatoma neonatorum may be
produced between the periosteum and bone, usually over the right
parietal eminence. It appears as a circumscribed tumor which may
increase after birth and persists for a long time. As the result of a
periostitis ossificans a wall of bone may be formed about the extravasate,
or it may be encapsulated with small bony plates. After the
absorption of the extravasate the newly-formed bone may persist
throughout life in the form of a “crater-like” or “coral island” elevated
circle of bone. Infection of the hæmatoma not infrequently
leads to the formation of a subperiosteal abscess, purulent infiltration
of the cranial bone and purulent meningitis. The cranium
should also be carefully examined for other evidences of conditions
due to the mechanism of birth, such as the general shape of the
head, condition of sutures, movability of the cranial bones, depressions,
over-lapping, etc., of the cranial bones. Wounds of the
scalp and face should be carefully noted. The circumference of the
cranium is 34.5 cm., sagittal diameter 10-13.5 cm., transverse 8-9.5
cm., diagonal 12-14 cm. The brain of the infant is normally rosy-red
in color, rather translucent, soft, almost jelly-like, and moist.
Tearing of the pial veins or meningeal arteries during delivery may
produce fatal meningeal hæmorrhages.
The weights of the internal organs are: brain 380 grms., thymus
7-10 grms., heart 20.6 grms., lungs 58 grms., spleen 11.1 grms.,
kidneys together 23.6 grms., testicle 0.8 grm., liver 118 grms. The
mature placenta weighs about 500 grms., and measures 15-20 cm. in
diameter, 3 cm. thick in the middle and 0.5-1 cm. thick at the edge.
In the examination of the abdomen the color and appearance
of the peritoneum, position of abdominal organs and height of diaphragm
should be noted. Before respiration is established the diaphragm
is at the fourth rib; after respiration is begun it is about
one rib lower on both sides, usually a little lower on the left side
than on the right. The condition of the umbilicus and umbilical
vessels is of great importance (umbilical hæmorrhage, infection,
insertion of cord, line of demarcation, etc.). Note contents, size of
lumen, thickness and character of walls, appearance and moistness of
intima. In umbilical infection the process spreads through the
sheaths of the umbilical arteries rather than of the vein. The
infected arteries contain yellowish-brown purulent thrombi; and
the tissues about them show œdema, hæmorrhages, purulent infiltration
or small abscesses. The perpendicular position of the stomach,
the relatively large size of appendix to that of kidney and spleen,
the lobulation of the kidneys, and the relatively large size of liver and
adrenals must be borne in mind and not be regarded as pathologic.
Examine adrenals especially for occurrence of hæemorrhage, infarction
and thrombosis. Look for accessory adrenals (“adrenals of
Marchand”) in broad ligament and along the spermatic cords.
Thrombi in the renal and spermatic vessels are not rare in the new-born.
Note occurrence and degree of uric-acid infarction of the kidneys
(formerly supposed to indicate that child was born alive).
Meconium is present in the large intestine of the child born at term;
when prematurely born it is found only in the small intestine. It
is greenish in color and contains cholesterin, crystals of calcium
sulphate, bile-pigment, desquamated epithelium and granular
detritus.
In the examination of the thorax especial attention should be
paid to the thymus, noting its size, color, consistence and evidences
of pressure upon underlying structures, particularly upon the
trachea. In death from suffocation small petechiæ are often found
in the thymus and in the serous membranes. The lungs rise up
over the edges of the pericardium and thymus when respiration has
occurred, and their color is a light rose. Areas of atelectasis are
bluish. The unexpanded lungs are brownish-red, firm in consistence
and distinctly lobulated. Air-containing lung floats in water and
crepitates, and gives off bubbles when cut beneath the water.
Attempts at artificial respiration may draw some air into the lungs.
Gas-bubbles may be produced by decomposition. In white pneumonia
the lung is pale, grayish-white and airless. The larynx,
trachea and bronchi are to be examined for presence of mucus,
amniotic fluid, meconium, foreign substances, etc. The ligated
stomach should also be tested as to its floating power, and should
be opened under water to determine the presence of air or gas.
The determination of the exact cause of death in the new-born
is often very difficult or impossible. In many cases no adequate
lesions can be found to explain the occurrence of sudden death in
the first days or weeks after birth. Among the more frequent
causes of such deaths are congenital syphilis, asphyxia neonatorum
(cardiac syphilis, presence of amniotic fluid, etc., in respiratory passages,
congenital cardiac lesions, injury to brain, meningeal or cerebral
hæmorrhage, congenital marasmus, intra-uterine infections,
umbilical infections, enlarged thymus, “overlying,” poisoning, congenital
hæmophilia, melaena neonatorum, etc.), adrenal hæmorrhage,
malformations of gastro-intestinal tract, absence of common
duct, nephritis, pneumonia, etc. The most important congenital
infections are syphilis, gonorrhœa, tuberculosis, variola, typhoid,
pyogenic infection, tetanus, measles, scarlatina, influenza, meningitis,
malaria, recurrent fever, pneumococcus, colon bacillus and
others, mostly very rare. Congenital leukæmia has been observed.
Numerous cases of congenital neoplasm have been reported (hæmangioma,
lymphangioma, fibroma, lipoma, neurofibroma, papilloma
of the larynx, adenoma, carcinoma [liver, kidneys, stomach, intestine],
cystic tumors of liver, pancreas, kidneys and ovary, rhabdomyoma
or rhabdomyosarcoma of kidney, heart, etc., adenosarcoma
of kidney, dermoid cysts and various forms of teratomata).
Congenital syphilis is so common and such an important condition
in the new-born that especial search should always be made
for evidence of its presence. Smears of all the organs should be
made in the cases examined soon after death, and either stained or
examined at once by the dark-field method for the presence of the
spirochæte. The most common anatomic manifestations of congenital
syphilis are pemphigus, macules, papules, or maceration of
the skin, white pneumonia, cardiac dilatation due to interstitial
myocarditis, interstitial hepatitis, splenic enlargement and osteochondritis
syphilitica. The long bones should always be examined
for the last-named condition; they should be removed and cut
longitudinally. In the boundary between epiphysis and diaphysis
the presence of a yellow, hard zone points to this condition. The
area of ossification is increased, irregular, and is separated from
the bone by the yellowish zone, which in its earliest stages is soft
and cellular, later sclerotic. The area of proliferating cartilage is
also increased and may contain medullary spaces, showing as red
lines. In rachitis the ossification-zone is wholly or partly wanting,
while the zone of proliferating cartilage is broader and rich in red
medullary spaces. In place of the ossification-zone there may be
present a layer of soft, grayish-white osteoid tissue containing
medullary spaces. No sharp line exists between the different zones.
CHAPTER XIV. THE MEDICOLEGAL AUTOPSY.
As has been stated above, every autopsy should be conducted
as if it were a medicolegal case, and autopsy-protocols should be
so complete and accurate that they may be accepted as evidence in
any case in which such testimony can be introduced. While the
ordinary autopsy may give satisfactory evidence as to the nature
of the pathologic processes found and the cause of death, the scope
of a medicolegal autopsy includes not only the cause and manner
of death, but also the identification of the body, the determination
of the commission of a crime, the manner in which the crime was
performed, its motive and the detection of the criminal. Under
such conditions the prosector must extend the field of his observations
and conclusions to meet the possibilities of the witness-stand.
The general technique of the medicolegal autopsy will vary
but little from that of the ordinary, and these variations will be
given here, as follows:—
The medicolegal autopsy should always be performed in the presence of
two witnesses, one of whom should be a physician competent to judge of the
methods employed in the autopsy. The autopsy findings should be dictated
during the progress of the autopsy, and at its close should be verified and
signed in the presence of the witnesses. No other spectators should be permitted
in the room. The examination should be made by daylight, and not
until positive signs of death appear. If the cadaver has been frozen it must
first be allowed to thaw out at room-temperature. The prosector should, if
possible, see and examine the body before it is removed from the place where
it is found, and he should carefully examine the surroundings, clothes and
external surface of the body for possible clues. All known information concerning
the circumstances of the case, the personal history of the deceased, the
occurrence of any injury, previous illness, etc., should be in the hands of the prosector.
Undertaker’s manipulations, such as the injection of embalming fluids,
puncture of intestines, aspiration of fluid-contents, etc., must not be permitted
before the autopsy.
Especial attention should be given to the identification of the body (measurements,
weight, build, shape of head, deformities or defects, color of hair and
eyes, teeth, dental work, thumb-markings, tattoo marks, birth-marks, scars,
evidences of previous diseases, occupation, clothing, etc.). In doubtful cases
the body should be photographed. Roentgen-ray pictures may also be made.
When only portions of a body are found the microscopic examination alone may
be able to throw light upon the case and give positive evidence as to the sex,
age, existence of certain physical characteristics, birth-marks, scars, disease,
etc. When no conclusions can be reached a minute description of the remains
should be placed in the protocol. The approximate time of death is to be
determined with greater care in the medicolegal case (temperature of body,
rigor mortis, putrefaction, dissolution, mummification, character of stomach-contents,
changes in eye-balls, etc.).
In the performance of the autopsy the greatest care should be taken to
avoid the production of artefacts. Hammer, chisel or wedge should not be
used; bones should be sawed through completely, particularly in the case of the
skull and spine. Especial care should be exercised in the removal of brain and
cord. Examine vertebræ in all cases when cause of death is unknown. The
main-incision may begin at the chin. The mouth and pharynx should be
examined for foreign-bodies before the mouth- and neck-organs are removed.
These should be taken out en masse. Particularly in young infants is the
examination of the larynx of great importance. Examine thoracic organs
in situ before removing them; then remove in connection with neck-organs and
examine on table. Ligate cardiac end of œsophagus to prevent escape of
stomach-contents. Cut œsophagus above ligature. Open pulmonary artery
before lungs are sectioned. Examine abdominal organs in situ before removing
them. Bullet- and stab-wounds should be accurately located, traced, measured
and course described. Recover missiles for use as evidence. The origin and
cause of hæmorrhage must be accurately determined. Remove genital organs
en masse after examination in situ. Examine particularly contents of vagina
and anus; make microscopic examination of same (semen, blood, foreign-bodies,
etc.). Do not put probe, knife or shears into cavity of uterus, but open
with a clean cut in the median posterior line. Examine ovaries for presence of
corpus luteum.
In cases of suspected poisoning especial attention should be paid to the
condition of the gastro-intestinal tract (position, distention, odor, consistence,
condition of blood-vessels, etc.). A ligature should be placed about the cardiac
end of the stomach and another around the duodenum below the mouth of the
common duct, and both organs removed. They should then be opened outside
the body and the contents examined (amount, consistence, color, composition,
reaction, odor), and the latter then placed in clean, sterilized glass or porcelain
jars, which are sealed and labeled. The mucosa of the organ is then carefully
examined and described, and the organ itself finally preserved in a sealed and
labeled jar. The small and large intestines and the œsophagus are similarly
ligatured, removed and examined, and with their contents are preserved for
chemic reaction by sealing them in separate sterilized jars properly labeled.
Blood from the heart and large veins should be saved for spectroscopic and
chemic examination. The contents of the urinary bladder likewise are saved
for chemic analysis. Finally, portions of the brain, liver, kidney, intestine,
spleen and other organs and tissues are preserved in separate vessels for chemic
and microscopic examination. When possible an expert chemist should be
present at the autopsy and receive the organs and contents directly from the
pathologist. Especial care must be taken that no contamination of the material
can occur. The manner of removal of the organs, the character and condition
of the instruments used, nature and condition of receptacles for material, manner
of sealing, use of preservatives, method of transportation to the chemist,
and other fine points of detail will all be threshed over in court in the endeavor
to discredit the testimony, and the pathologist and chemist must be thoroughly
prepared to meet all questions of this nature. In certain cases the presence of
a poison may be told by the finding of a granular or crystalline substance in
the stomach or intestines (arsenic-poisoning), by the color (green from aceto-arsenite
of copper, yellow from potassium chromate or iodin, purple from iodin,
red from bromin) or by the odor (bitter almonds, phosphorus, alcohol, chloroform,
laudanum, carbolic acid, lysol, garlic in arsenic poisoning). Excessive
acidity or alkalinity of the stomach contents is found in poisoning with acids,
alkalies or potassium cyanide. Portions of poisonous plants, mushrooms, match-heads,
etc., may be found in the stomach.
Certain pathologic conditions, as fatty degeneration of the liver, cloudy
swelling of the kidney, nephritis, malignant jaundice, acute yellow atrophy of
the liver, dysentery, and others may be caused by such poisons as phosphorus,
arsenic, mercuric chloride, potassium chlorate, chloroform, etc. When such
changes are found at autopsy the pathologist must always carefully differentiate
between disease and poisoning. He must decide as to the actual occurrence of
poisoning, the source and nature of the poison, how and when administered,
amount of poison, number of poisons, primary and secondary effects, attendant
circumstances, accidental, suicidal or criminal administration, motive, etc. Some
poisons produce no characteristic gross or microscopic changes in the organs or
tissues. In such cases no pathologic conditions sufficient to cause death may be
found, and when there is doubt a chemical examination should be made. Other
poisons produce more or less characteristic changes, either by their local action,
by selective action upon certain organs, by excretion, or by acting upon the
blood. The effects will vary according to the amount of the poison, its concentration,
length of action, condition of gastro-intestinal tract, rapidity of excretion,
etc. The most important and common poisons producing recognizable
autopsy conditions are as follows:—
Acids. In carbolic-acid poisoning there may be dry, brown, leathery spots
on the face about the lips; grayish-white eschars on mucosa of lips, mouth,
tongue, pharynx and œsophagus; œdema of the glottis and pharyngeal submucosa;
white or gray longitudinal eschars in stomach and duodenum; leathery
appearance of stomach wall; cloudy swelling of kidneys, odor of phenol in
urine, which is dark in color; general passive hyperæmia. In sulphuric-acid
poisoning there may be brown, leathery and dry eschars on lips and skin, grayish-white
to black eschars in mucosa of mouth, stomach and œsophagus; black,
dry and brittle clots in the blood-vessels; perforation of stomach; sloughing of
mucosa; parenchymatous nephritis. Hydrochloric acid has little or no action on
the skin; on mucous membranes the action is similar to that of sulphuric acid
except that the drying of the eschars and blood-clots is less marked. In nitric-acid
poisoning the eschars are yellowish; hæmatin is not separated and dissolved,
so that the brown black eschars seen in sulphuric- and hydrochloric-acid poisoning
are not formed. Oxalic acid causes a white or grayish escharotic condition
of the mouth, œsophagus and stomach; crystals of calcium oxalate may be found
in the blood-clots and in the kidney-tubules. Glacial acetic acid may produce a
grayish-white escharotic condition of the mucosa of the upper respiratory tract,
and pneumonia, when inhaled.
Alcohol. In concentrated solutions coagulates albumin and has a corrosive
action on mucous membranes. The ingestion of large amounts causes asphyxia,
gastro-enteritis, cloudy swelling of ganglion cells of brain, and parenchymatous
degeneration of kidney and liver. Lungs, liver, brain and stomach may give an
alcoholic odor. In chronic alcoholism there may be chronic atrophic or hypertrophic
gastritis, atrophic cirrhosis, sclerosis of arteries, miliary aneurisms of pial
vessels, fatty degeneration of heart and liver, and “hog-back kidney.”
Alkalies. Mucosa of mouth and œsophagus swollen and red, with desquamation
of epithelium; mucosa of stomach swollen, dark brown and ecchymotic,
with diphtheritic patches; croupous bronchitis may result from aspiration of
caustic soda or potash, and bronchopneumonia from inhalation of ammonia.
Stricture of the œsophagus, due to contraction of scar-tissue, may occur when
the patient survives the immediate effects of the poison.
Antimony. In acute cases the mucosa of mouth, œsophagus and stomach
is inflamed, with erosions and ulcerations; in chronic cases there is marked
emaciation.
Arsenic. Mucosa of stomach œdematous, hyperæmic and ecchymotic;
over the hæmorrhages there may be grayish-white sloughs or erosions. In these
there may be found granules or crystals of the poison. The glands of the
mucosa show cloudy swelling and fatty degeneration. Yellow sulphide of arsenic
may be seen on the gastric mucosa. The small intestine is filled with a rice-water-like
fluid, as in cholera, and the mucosa is congested, swollen and hæmorrhagic;
the lymphoid tissue may be swollen. There is slight icterus, cloudy
swelling of all organs and ecchymoses in pericardium and pleura. In chronic
poisoning with dilute solutions characteristic gastro-intestinal changes are wanting.
In cases of suspected arsenic poisoning it is important to take portions of
all organs and tissues for chemical examination.
Atropine. Death from asphyxia, resembles heat-exhaustion.
Chloral-hydrate. Hyperæmia of lungs, brain and cord. Examine urine.
Chloroform. Fatty degeneration of liver and heart. In delayed poisoning
the liver shows picture of acute yellow atrophy, with marked icterus,
widespread ecchymoses, cloudy swelling of kidneys and fatty degeneration of
heart. Lungs, brain and liver may or may not give odor of chloroform.
Ergot. Sclerosis and contraction of arteries; gangrene of endometrium;
in chronic cases sclerosis of the posterior columns of the cord.
Formalin. Corrosive action on mucosa of stomach; formic-acid in urine.
Hydrocyanic Acid and Potassium Cyanide. The mucosa of stomach is
deep red, swollen, softened and sometimes translucent; soapy to the touch; odor
of bitter almonds or ammonia; blood is fluid, dark or light cherry-red; red
hypostasis.
Illuminating-gas and Carbon-monoxide. Blood fluid and cherry-red;
cadaver life-like; pink hypostasis; carbon-monoxide-hæmoglobin in blood demonstrated
by spectroscope. In poisoning by coal-gas the changes are less marked
because of the greater amount of carbon dioxide present. Inhalation of smoke
is shown by black, sooty deposits upon the mucosa of the respiratory tract.
Lead. In acute cases severe gastro-enteritis; black fluid in intestines;
cloudy swelling of kidneys. In chronic cases arteriosclerosis, fatty degeneration
of muscles, liver, kidneys and spleen; cirrhosis; blue line on gums.
Mercury. Mucosæ congested, ecchymotic or showing grayish-white eschars;
diphtheritic inflammation of pharynx, colon and vagina; decalcification of bone;
cloudy swelling and calcification of kidney. In chronic cases ulcerative
stomatitis.
Nitrobenzol. Cadaver cyanosed; blood and muscles brown; mucosa of
stomach hyperæmic and ecchymotic; odor of bitter almonds; brownish methæmoglobin
in collecting tubules of kidney.
Opium and Morphine. No characteristic findings. Condition of pupils
not conclusive.
Phosphorus. In very acute cases there may be few changes; odor of
phosphorus; cloudy swelling of heart, liver, kidneys and gastric mucosa. In
subacute cases there is icterus, hæmorrhage, marked fatty degeneration of all
organs; in chronic poisoning there is universal fatty degeneration, and not
rarely a necrosis of the jaw-bone.
Potassium Chlorate. Hypostatic spots and blood are of chocolate color;
methæmoglobinæmia; hæmorrhagic nephritis.
Ptomaines. Gastro-enteritis, fatty degeneration; icterus, cloudy swelling
of kidneys.
Strychnine. Intense and persistent rigor mortis; blood fluid and dark
as in asphyxia. Urine should be saved for the frog-test.
Other causes of death requiring especial consideration in a
medicolegal examination are:—
Abortion. Determined by the finding of fœtal tissues, chorionic
villi, decidua, enlargement of uterus, formation of sinuses at
placental site, curetted surface, corpus luteum of pregnancy in
ovary, punctures or lacerations of uterus and cervix, effects of corrosive
fluids, infective endometritis, evidences of poisoning.
Asphyxia. Death due to lack of oxygen and excess of carbon
dioxide, produced by interference with respiration, choking, drowning,
hanging, paralysis of muscles of respiration, intoxication, etc.
When respiration is suddenly checked ecchymoses are usually
found in the pericardium, pleura, meninges, thymus, and rarely in
peritoneum. Lips, skin of face and neck, and finger-nails may be
deeply cyanotic; the blood is dark and fluid; passive congestion of
lung is usually present. In death caused by hanging or strangling
there may be fracture of the hyoid bone, thyroid cartilage or tracheal
rings, marks upon the skin, hæmorrhage, laceration of the intima
of the arteries, fracture or dislocation of the cervical vertebræ and
injury to the cord. In death from drowning the bronchi, lungs and
stomach may contain fluid, there is watery fluid in the pleural cavities,
maceration of skin, greater water-content in blood of right
heart than of left, with consequent raising of freezing point.
Infanticide. The points to be considered in determining the
age and viability of the child are given in Chapter XIII. The most
important causes of death in the new-born are also given in the
same chapter.
Electric Shock. Burns of skin, “lightning figures,” signs of
asphyxia, laceration of internal organs.
Burns and Scalds. Extent of burn more important than depth
of the burn; death usually ensues if one-third of the surface is
burned. Burns show scorching, singeing or marks of the hot object;
scalds usually show some action of the hot fluid on the skin or
mucous membranes. Demonstration of carbon-monoxide in blood
of internal organs proves the inhalation of carbon monoxide. When
exposed to intense heat the soft parts of the body show marked
shrinking.
Heat or Cold. No characteristic lesions in death from these
causes. Diagnosis must be made by exclusion and history of case.
Starvation. Marked disappearance of fat and atrophy of all
organs, stomach and small intestines empty, marked emaciation,
blood anæmic, concentrated when subject was deprived of water.
Violence. Wounds must be minutely described as to character,
degree of laceration, contusion, extravasation, damage to tissues,
direction of force, character of instrument, means and method
of infliction, path of projectile or stab-wound, etc. Postmortem
changes and injuries must be differentiated, as must be also antemortem
and postmortem lesions, primary and secondary effects of
the injury, effects of injury and pre-existing diseases. Intracranial
hæmorrhages must be carefully differentiated with respect to causation
by violence or disease. Effects of contrecoup must be borne
in mind. The presence of other marks of trauma, the exclusion of
disease, the location of the clot, the age of the clot, the age of the
patient, etc., are some of the factors to be considered. In young
people without alcoholic history or syphilis intracerebral hæmorrhages
without signs of violence are rare. When associated with
fractured skull they are usually regarded as due to the trauma.
CHAPTER XV. THE RESTORATION OF THE BODY.
When the autopsy is finished the body-cavities are cleansed
and then thoroughly dried. No blood, stomach- or intestinal-contents
should be left in the cadaver. All bleeding or dripping parts
should be tightly secured; the anus and vulva should be tightly
stitched, and the penis ligated. If necessary, the organs are then
cleansed and returned to the body, as nearly as possible to their
normal positions, although the brain, because of the difficulty of
getting it back into the skull-cap, is usually put into the thoracic
cavity. When several autopsies are done at the same time, care
should be taken not to mix the organs. The undertaker should
always be aided in his work; and, if he so desires, an embalming
powder or fluid may now be sprinkled or poured into the cavities.
The skull-cap must be securely fastened in its normal position,
so that no slipping can occur. If the body is not to be shipped
any distance the posterior interlocking joint will usually hold it
firmly in place if the scalp is drawn tightly together and closely
stitched. When the body is to be moved some distance, the skull-cap
must be more firmly fastened. This can be accomplished by
drilling holes at the sides of the saw-cut and fastening the skull-cap
to the cranium by means of copper wire, which must be tightly
twisted and pressed flat against the bone. When this is done in
the temporal region the wire is completely concealed by the temporal
muscles when these are drawn up with the scalp, or if these
have been cut away pads of cotton can be put in their place. The
cranial fossæ and the skull-cap may be filled with plaster-of-Paris;
while this is still soft a piece of wood may be pushed through into
the foramen magnum and allowed to project high enough above
the saw-cut to hold the skull-cap on, when it, filled with plaster, is
put in position. With the setting of the plaster the skull-cap is
firmly held. A little ingenuity will suffice to improvise various
other methods of securing the skull-cap, by the use of bandages,
metal pins, etc. After the employment of Harke’s method the
halves of the skull must be brought together and securely fastened
at the base or in the occipital region. After resection of the temporal
bone for the examination of the auditory apparatus the defect
must be filled in with cotton or other substance, and the lower jaw
and external ear restored to their normal positions. After examination
of the orbit and the removal of the posterior half of the
eye-ball a wad of red- or black-stained cotton should be used to
fill out the eye so that it will have the same degree of fullness that
the other eye has. When the eye is enucleated a glass-eye may be
substituted and the lids fastened together by fine stitches made on
the conjunctival side. If it is desired to save the skull-cap an artificial
skull-cap may be molded from a square piece of pulp-board
of the thickness of 0.5 cm. in the case of the adult, somewhat thinner
for children. The pasteboard is soaked in warm water for about
fifteen minutes, and is then molded over the skull-cap. It is then
cut parallel with the edges of the saw-cuts so that the edge of the
board will extend about 1 to 1.5 centimetres over the edges of the
skull-cap to overlap the bones below the saw-cut. The cranial
cavity is then filled with plaster or cotton. The pasteboard is
removed from the skull-cap before it becomes too dry for its lower
edge to be adapted easily to the lower border of the saw-cut.
Ridges or folds are trimmed off with the knife and the surface
made smooth. It is then adjusted and firmly fastened in position
by passing several turns of strong twine around the lower border
over-lapping the cranial bones. The temporal muscles and the
scalp-flaps are then drawn up and tightly stitched. A close base-ball
stitch should be used to fasten the scalp-flaps, and a black
thread should be used. If the scalp has been stretched so that it
is loose and baggy, a portion of it may be cut out, so that when
sewed together the flaps will fit tightly. The hair must be freed
from all bone-dust and blood-clots, washed if necessary, then dried,
and arranged in its former position in such a manner as to hide
the sutures.
The place of any bone that has been removed may be filled
by a piece of wood cut to the required proportions, and securely
fastened by wire or bolts, or plaster-of-Paris may be poured about
it and allowed to set. After removal of the spinal column or of
portions of it, there may be substituted a block of wood or an iron
pipe of suitable size, which may either be securely fastened above
and below by means of wire or bolts, or it may be held in place by
imbedding it in plaster-of-Paris. These expedients are not necessary
after the removal of the cord alone, but only when entire sections
of the spinal column are removed. When the cord is removed
posteriorly the skin-incision is tightly closed with a base-ball stitch,
and then covered with a strip of surgeon’s plaster or collodion to
prevent leakage of blood and serum after the body is turned over.
The thoracic and abdominal cavities are filled with dry bran,
saw-dust or finely-cut excelsior to fill out the normal contour, a
piece of old cloth or paper is laid over the whole, and the sternum
replaced. It is usually not necessary to fasten the latter, but if
desired the costal cartilages may be stitched together, or wired
when the needle cannot be pushed through the cartilage. When
the tongue and neck-organs have been removed, the lower jaw
must be held in position by fine stitches in the mucous membrane
of the lips to prevent the jaw from dropping and leaving the mouth
open. The contour of the neck may be restored by a pad of cotton.
The main-incision is then closed by a continuous base-ball
stitch, using a stout linen pack-thread and a rather large, slightly
curved needle. The first stitch begins in the middle-line about
1 cm. above the beginning of the main-incision, the needle being
introduced from below through the incision, and the thread secured
at its end by a knot. The stitches are then made about 5-7 mm.
apart, the needle each time being pushed through the skin from
the inside, so that it comes through the skin about 5 mm. on either
side of the incision, alternately to the left and right. The thread is
kept tightly pulled, and as perfect coaptation as possible is
secured. At the end of the incision the thread is secured by a
knot before it is cut. Collodion or surgeon’s plaster may then be
used to cover the entire incision. All other skin-incisions are sewed
up in the same manner. When the testes and the body of the penis
have been removed, it may be necessary under certain conditions
to restore the form of these parts before the main-incision is closed.
Cotton wads may be used for this purpose.
When all incisions are finally closed the cadaver is carefully
washed and all blood-stains and discolorations removed. When
formalin has been used as an injection-fluid blood spilled upon the
skin may produce a brownish stain that is removed with difficulty.
Corn-meal or hand-sapolio may be used to remove such stains.
After the cadaver has been thoroughly washed, it is dried, and can
then be turned over to the undertaker.
CHAPTER XVI. OTHER SOURCES OF PATHOLOGIC MATERIAL.
1. Autopsies on Animals. In the case of the small animals
used ordinarily for laboratory purposes, such as the mouse, rat,
guinea-pig, rabbit, cat and dog, the animal is put upon its back
and fastened to the autopsy-board either by small nails driven
through the extremities or by slip-knots of string or rope passed
over the latter. Autopsy board and holders designed especially for
the purpose can be obtained from makers of laboratory apparatus.
A main-incision is made in the anterior or median line from the
chin to the genitalia, and the skin stripped back from the thorax
on each side to expose the ribs. The thoracic cavity is then opened
by cutting the ribs with the bone-shears or bone-forceps, and the
sternum and cartilages are removed. The neck, thoracic and
abdominal organs may then be removed en masse and examined
outside the body, or the organs may be removed singly and examined
in succession, following in general the same methods of procedure
as in the autopsy on the human body, adapting the methods
given above to differences in anatomic structure and size. For the
opening of the skull and spinal canal the bone-forceps alone may
be used, or in the case of larger animals the saw may be needed.
Anatomic considerations should govern the method of opening the
skull. Directions for the performance of autopsies on inoculated
animals will be found in textbooks on bacteriology; and veterinary
methods of autopsies on the larger domestic animals are given in
textbooks on veterinary pathology. In all cases of autopsies on
animals full protocols should be kept, following the general order of
the autopsy, altered to suit the individual case.
2. Surgical Operation. A very large part of the material
obtained for pathologic examination is removed by the surgeon for
diagnostic purposes. The question of the surgical technique
employed may be left to the surgeon, but as far as the pathologic
aim is concerned certain principles should be followed, if the object
of the examination is to be secured. Unfortunately these principles
are not recognized by the great majority of practitioners, and pieces
of tissue to be examined are taken at haphazard from the surface
or from necrotic areas, to be run through by the pathologist, only
to find that no diagnosis is possible, either because the portion of
tissue removed did not extend deeply enough or is wholly necrotic.
Great care and judgment should be exercised in the choice of the
portions to be removed for diagnosis. The part removed must be
characteristic of the condition present. It is necessary not only to
ascertain the character of the pathologic change but also the nature
of the reaction in the surrounding tissue. A neoplasm may show
the histologic structure of an adenoma, but at its periphery may
be found infiltrating the neighboring tissues as an adenocarcinoma.
If the piece of tissue for examination is removed from the central
part or surface of the tumor, an incorrect diagnosis may be given.
This is especially true in the case of rectal and uterine polypi, papillomata
of the mouth and penis, horny warts, etc. The rule to be
followed in all cases is that the excised portion must be at the
boundary-line of the neoplasm or morbid process, and extending
across it so as to include both pathologic and surrounding normal
tissues. The cut must be deep enough to extend into living tissue,
and in the case of epithelial surfaces to go below the basement
membrane. It should be made at right angles to the surface.
Necrotic, softened, or degenerating portions should be avoided,
unless a portion of this is removed in addition for the purpose of
ascertaining the nature of the degenerative changes present. The
scraping away of superficial scabs, exudates, etc., should never be
practiced for purposes of diagnosis. Time is saved if a satisfactory
excision be made the first time, and to secure this the tissue must
be living, the cut must be deep enough, and the portion removed
must fully represent the nature of the condition present. When
organs are removed, as in the case of the appendix, uterus, tubes,
ovaries, mamma, etc., several portions of tissue representing different
structures of the organ should be secured for the examination.
Tumors and other pathologic specimens received from the surgeon
should be fully described as to size, form, weight, consistence,
color, relation to surrounding tissues (encapsulated, well-defined borders,
growth by infiltration or expansion, zone of inflammation,
etc.), character of cut-surface (color, moisture, translucency, smooth
or elevated, homogeneous, character of cell-scraping, evidences of
structure, etc.). Accompanying all pathologic material sent to the
pathologist should be concise and accurate notes giving the name,
sex, age, nationality, occupation and status of the patient, anything
in the individual or family history bearing upon the condition, the
source of the specimen, its exact location and relations, manner of
growth and character of operation. The pathologist should have
full data upon which to construct his diagnosis. A very common
idea among surgeons is that the specimen alone should be sufficient
for the pathologist, and that other data are not necessary for the
formation of his opinion. Many other considerations than the mere
histologic picture presented by a specimen enter into the formulation
of a pathologic diagnosis, if it is to bring to the aid of the surgeon
all that a pathologist’s knowledge and experience can give. This
is particularly true when the pathologist, as is usually the case, is
asked to give a prognosis. Both in hospital service and in private
surgical practice it is best to have printed history forms to be filled
out and to be sent to the pathologist with each specimen.
Another factor seriously interfering with the efficiency of the
pathologist’s work is the failure of the surgeon to see that the
material removed for diagnosis is properly taken care of before it
reaches the pathologist. Tissues removed for examination should
never be allowed to dry. They should not be exposed to the air,
but should either be placed at once in a fixing fluid or covered with
damp cloth. Curettings should be placed for a moment upon a pad
of gauze to remove the excess of blood, and the fragments of tissue
are then picked up and put into the fixing solution. When sent by
mail or express fresh tissues should be wrapped in damp cloth and
then in rubber cloth; or if the distance is great they should be put
into fixing fluids. A sufficient quantity of the latter should be used,
or decomposition may take place before the specimen reaches the
pathologist. All material for bacteriologic examination should be
removed under proper precautions, put into sterilized vessels, properly
sealed and sent to the pathologist under proper precautions.
PART II.
THE TREATMENT OF THE MATERIAL.
INTRODUCTION. The material obtained by autopsy, surgical
operation, curettage, excision, spontaneous discharge, animal
experimentation, etc., may be examined microscopically in the fresh
state, or prepared for microscopic examination by methods of fixation,
hardening and imbedding. The methods necessary for such
histologic studies of pathologic material are given in the following
pages, arranged as far as possible in their logical order. Only those
methods are given that, in the light of the writer’s experience, yield
the best results, from the standpoints of economy of time, labor,
and expense, and perfection of result. The number of histologic
methods contained in the literature is so great that it is out of the
question for the student or practical worker to try out all of them.
To give all of these methods would create confusion. I have
attempted to avoid this by giving in full detail only those which in
our laboratory experience have yielded the best results. So many
methods represent but slight variations of some original method,
and in the great majority of cases these variations add so little or
nothing of value to the original method that in such cases the latter
alone is given in full, with references only to the variations of the
method. The individual equation plays such a large part in the
judgment of laboratory methods that allowance has been made for
this when certain variations or alterations in original methods have
been strongly recommended by expert laboratory workers.
The purpose of the microscopic examination is the revealment
of pathologic changes too small to be recognized by the naked eye,
and the securing of a diagnosis that cannot be made macroscopically,
as well as the confirmation of diagnoses based upon the gross
appearances. Aside from these more immediate practical considerations,
the microscopic examination of tissues is concerned with
the solution of etiologic and pathologic problems, and the extension
of our knowledge of disease. The aim of pathologic technique is
the fixation of tissues for microscopic examination in such a manner
that all of the morphologic and chemical elements and constituents
of the tissue are perfectly preserved, so that with differential staining
methods they are all brought out with sufficient contrast to be
readily and correctly identified. In a certain number of methods
this ideal is attained, and to Weigert, more than to any other
worker in the field of pathologic technique, are we indebted for
such ideal methods.
The choice of methods will depend upon the source and nature
of the material, the object of the examination, the time-element and
the degree of responsibility involved. The cellular elements of all
pathologic fluids, secretions and excretions should be examined in
the fresh state as well as in fixed preparations. For the demonstration
of various chemical and morphologic features that are lost
or altered by processes of fixation and imbedding, and when a rapid
diagnosis is required, the examination of the material in its fresh
state or by the freezing method is indicated. When the freezing
method cannot be employed because of the changes in cells and
tissue produced by it, when very thin or serial sections are desired,
when a rapid diagnosis is not required, and when a very careful
and minute study is desired, with the application of various staining
methods, then the material should be fixed, hardened and
imbedded and cut upon a microtome. Whatever method is
chosen, it must be borne in mind, particularly in practical diagnostic
work, that the portions chosen for microscopic examination
must represent the characteristic anatomic structures of the tissue
or organ, that living tissue be included, that the pathologic condition
be represented both in its fully-developed state and at the transition-border
between it and the healthy tissue, and that when sections
are cut the block or tissue must be so oriented as to give the
most comprehensive view of the tissue and the pathologic process.
To accomplish this fully it is often necessary to make a number of
blocks representing different areas of the material, and to cut these
in different planes.
CHAPTER XVII. THE LABORATORY OUTFIT.
For practical diagnostic work or for pathologic research various
instruments and utensils are necessary, although the expense of fitting
up a working pathologic laboratory is not as great as it is often
thought to be. The most expensive item, as well as the most important,
is the microscope. This should be of the best make, and
should be carefully selected and tested before the final purchase.
As a rule the German makes, Zeiss, Leitz, and others, are to be preferred
to the American instruments, in spite of the higher cost due
to the duty imposed. I have found the German microscopes uniformly
good and standing the wear and tear of a teaching laboratory
much better than the American-made stands. I have never
seen a poor Zeiss or Leitz objective, but cannot say the same thing
of other makes. On the other hand, I have seen some American
objectives that were as good as any German ones, but there are
not many such. If one is going to buy an American microscope it
should be bought on the same principle that one would buy a violin
or a piano, wholly on its individual merits; and these can be ascertained
only by having the instrument carefully examined and tested
by an expert. Most laboratory workers will agree that the Zeiss
instruments are the best; they are also the most expensive. For all
practical purposes a Leitz stand costing ninety to one hundred dollars
is quite good enough. A medium-sized continental stand, with
rack and pinion and micrometer screw for coarse and fine adjustment,
a triple nose-piece with dust-protector, Abbé condenser, iris
diaphragm, plane and concave mirrors, three objectives (low, high
and 1/12 oil-immersion), and two eye-pieces, a low and a high, form
a complete outfit that answers all practical requirements. The new type
of stand with curved arm and large stage, permitting the
examination of all parts of a Petri dish or glass plate, and with the
mechanism of the fine adjustment protected from any strain when
the instrument is lifted by the arm is especially recommended. I
have also found the black-finish very practical. The entire outfit
need not be purchased at once; the stand with its accessories and a
low power may first be purchased, and the higher-power objectives
obtained later. One of the first luxuries is a movable adjustable
stage. A very good and relatively cheap one is made by the Spencer
Lens Co., of Buffalo. If a Zeiss stand is purchased the objectives
A, D, and 1/12 oil-immersion, and oculars 2 and 4 best meet the
requirements. Of the Zeiss apochromatic series, the objectives
16.0, 8.0, 4.0, and oil-immersion 2.0 mm., apert. 1.30, and oculars 4, 6
and 8 are most serviceable. The apochromatic objectives and the
compensation-oculars are expensive, and need not be used for ordinary
work, but are indispensable for photographic work. The Leitz
objectives, 3, 6, or 7, and 1/12 oil-immersion, with oculars 2 and 4,
and the equivalent objectives of the Spencer Lens Co. or Bausch
and Lomb will answer all ordinary needs. For the purpose of microscopic
measurements an ocular micrometer is necessary. This may
be obtained as a separate eye-piece, or as a round piece of glass with
measured divisions marked upon it that may be put into an ocular.
The value of the scale must be determined for every lens and tube-length
by estimating the number of its parts covering one part of a
stage-micrometer marked in hundredths of a millimetre.
Fig. 50.—A satisfactory outfit for the working laboratory. Continental stand,
medium-sized, with large stage, three objectives, etc.
An instrument of any one of the above-mentioned makes, carefully
selected and tested, should last its owner a life-time if proper
care is taken of it. It should receive the same careful attention
accorded a good violin or piano. It should be protected from dust,
action of chemicals, heat, sunlight, and rough usage. When carried
it should be supported in such a way that its weight is not thrown
upon the thread of the adjusting screws. The adjustment, draw-tube
and iris diaphragm should be carefully oiled at intervals, using
the least possible amount of the best microtome oil. It is not necessary
here to enter into the construction and theory of the microscope,
as this knowledge has usually been obtained before the pathologic
laboratory is reached. Experience has shown me, however,
that it is always necessary to remind students, even those experienced
for some time in the use of the microscope, of certain fundamental
principles in the adaptation of microscopic technique to
pathologic work. The following rules are of value:—
1. Use a low-power objective for all work except for the study
of bacteria, microparasites and finer cell-structures. The aim should
be to obtain as much of a bird’s-eye view of the “geography” of
the section as possible. Contrast plays a very important part in
pathologic diagnosis; and it is lost in high-power work, so far as
the relations of cells and tissue-elements and pathologic products
are concerned. The student almost invariably enters the pathologic
laboratory with a fixed “high-power habit,” and he is usually greatly
surprised to learn how much he misses with the high-power and
how much he can see with the low-power. A motto used many
years in my laboratory, “Low-power objective and high-power cortex,”
is of greater educational value than may appear at first sight.
A slide should be examined first with the naked-eye, as it is held
against a window or light; then it should be examined under the
low power. Rarely will it be necessary to use a high-power except
for the purposes mentioned above.
2. Weak eye-pieces should be used; strong ones darken the
field and tire the eyes. Only in the case of apochromatic lenses and
compensation oculars can the strong ones be used without darkening
the field too much.
3. In the use of higher powers see that the tube is drawn out
to the proper length, as indicated in the directions sent with the
instrument.
4. For pathologic work an Abbé condenser is essential. It
should be pushed up to its proper position beneath the stage, and
the plane mirror should be used with it, reflecting the light from a
cloud if possible. Daylight is always the best light. When this
cannot be obtained an incandescent or Welsbach lamp with ground-glass
globe can be used. The concave mirror should then be used.
The yellowish tint of artificial light may be avoided by the use of
a piece of blue glass placed beneath the condenser, or a vessel of
copper sulphate solution may be interposed. Especial lamps
designed to meet the requirements are offered by the trade.
5. The iris-diaphragm should be adjusted by the same hand
that moves the slide, usually the left one. With unstained preparations
the diaphragm should be nearly closed; when using the
oil-immersion it should be fully opened, as is also the case when
stained preparations are studied with the lower power. With
higher magnification the aperture is diminished somewhat, although
color-effects are best shown with open diaphragm. In the study of
pigments the diaphragm should be fully closed for a few moments
to see if the pigment shows any color by reflected light. It is then
examined by open diaphragm. In the study of sections the mirror
and diaphragm should be manipulated in various ways to bring out
all of the detail of the preparation, and should be adjusted to suit
each preparation.
6. Objectives must never be screwed down until they strike
the slide or stage. The higher-powers are frequently ruined in this
way. When running the objective down always examine from the
side to see that there is no danger of its striking the stage. In the
use of the oil-immersion place the drop of oil upon the slide or cover-glass,
and lower the objective by turning the coarse adjustment
until the oil spreads out between the lens and the glass; then focus
with the fine adjustment until a well-defined field is obtained. The
oil-immersion lens should not be allowed to stand many consecutive
hours in the oil. The oil should be cleaned from the lens by wiping
the latter with lens-paper or a soft cloth; if the lens is sticky the
paper or cloth may be moistened with benzol. The lens itself
should never be wet with benzol, xylol, alcohol or any cleaning-fluid,
because of the danger of softening the balsam in which the
lenses are imbedded.
7. Use the mechanical stage only for differential blood-counting,
or when the entire section is to be gone over carefully, or when
certain details are found with difficulty and it is desirable to mark
them for future reference. An immense amount of time is lost in
the use of the mechanical stage for ordinary work. By moving the
slide with the fingers of the left hand resting upon the stage an
entire section may be gone over in a few seconds without missing
any part of it; to accomplish the same thing with the mechanical
stage requires much more time.
It is an excellent plan for the student to purchase his microscope
when entering the medical school and to use his own instrument
throughout his course. It is the one instrument without
which no physician can afford to enter practice; and the student
who uses his own microscope before graduation will continue to use
it afterward. The microscope obtained, the remaining expenditure
necessary for the fitting-up of a practical working laboratory of
clinical and pathologic diagnosis need not be very great if one’s
financial condition does not warrant spending with a free hand. It
is possible with a little labor and ingenuity to make at home, or to
show the local tinsmith how to make, a large part of the necessary
apparatus, such as sterilizers, paraffin-ovens, drying ovens, thermo-regulators,
etc., at a slight cost. Students of mine have made these
things out of old tin cans and glass tubing; one student at a cost of
less than three dollars constructed a microtome on which practical
working sections could be cut. For the celloidin method no apparatus
except the microtome is necessary, as the process of imbedding
is carried on in bottles or dishes. These points are mentioned
to offset the prevalent idea that a large expenditure is a necessity
in installing a practical working laboratory.
In a large diagnostic laboratory, or in one intended for teaching
and investigation, there are numerous accessories necessary to
modern microscopic technique. For the observation of living objects
a warm stage is needed. The simple electrical apparatus devised
by Ross is the most convenient form, as it can be slipped on and off
the slide without changing the focus. It can be attached to any
electric light circuit and requires no attention.
For drawing from the microscope the improved form of the
camera lucida, or the latest model of the Edinger drawing-apparatus
are recommended. Both of these instruments have recently been
greatly improved. The Zeiss microphotographic apparatus is by far
the best for microphotographic work. For the polarization-microscope,
microspectroscope, and the complicated and expensive ultra-violet
and dark-field apparatus the worker is referred to the Zeiss
catalogues. A simple and practical dark-field method for the illumination
of bacteria, spirochætes and ultramicroscopic particles suspended
in fluids requires only a strong illumination and the use of a
Zeiss, Leitz, or Reichert dark-field condenser; or the very simple “India-ink”
method may be used for the demonstration of spirochætes.
(See Staining of Spirochætes.) Especial instruments for easily finding
a certain field are obtainable, and are of great convenience in
marking slides for photographic purposes.
Fig. 51.—A good practical microtome for paraffin and celloidin work. Well-adapted
to needs of students and beginners.
Next to the microscope the most important instrument in pathologic
work is the microtome. One that can be used for either celloidin
or paraffin work, and that can also be utilized as a freezing
microtome, should be selected in private work, when economy is
desired. The majority can be used for either paraffin or celloidin,
and one of the Becker models can be easily attached to the carbonic
acid holder for the cutting of frozen material. The Bardeen freezing
microtome is relatively inexpensive, very satisfactory, and can
be easily attached to the carbonic acid tanks. It can be recommended
for freezing work. The “slide” type, either that in which
the knife-holder is moved by the hand directly or by a crank turned
by the hand, is advised for ordinary diagnostic work. For students
and beginners the crank is of great advantage, as the knife is
securely held and cannot jump. The best microtomes are made by
Schanze of Leipzig, Jung of Heidelberg, Becker of Göttingen, the
Cambridge Scientific Co., the International Instrument Co., and the
Bausch & Lomb Co. For either celloidin or paraffin work the
medium or large Schanze slide-microtome or the Minot’s precision
microtome are recommended; for cutting serial sections in paraffin
the latest modification of the Minot automatic rotary microtome is
especially adapted. The best microtome knives are made by Walb
of Heidelberg. A long, heavy knife is to be preferred to a light one.
For the freezing microtome a knife of the type of the blade of a
carpenter’s plane set in a wooden handle should be used, Hones
and strops of the best quality are necessary.
Paraffin-ovens and drying-ovens of suitable size, and constructed
preferably of copper, are necessary for paraffin work. The
water-space about the oven should be sufficiently large, and the
temperature should be controlled by a thermo-regulator. Various
models are offered in the trade, but they can be made more cheaply
by the local tinsmith. The thermo-regulator can also be home-made
by anyone who has the necessary training in glass-blowing usually
given in courses in bacteriology.
Various instruments and utensils, such as razors, double-bladed knives,
forceps, spatulas, section-lifters, needles, scalpels, scissors, glass rods and tubing,
test-tubes, graduates, flasks, funnels, bottles, staining dishes, reagent bottles,
rubber tubing, water-bath, tripods, centrifuge, Bunsen burners, asbestos pads,
gauze, filter-papers, absorbent paper, labels, oil and wax colored pencils, slides,
cover-glasses, slide-boxes, camel’s-hair brushes, glass droppers, platinum wire,
etc., are required for the pathologic laboratory, and can be chosen to suit the
individual needs. The solid watch glasses make very good small staining dishes;
the enamelled trays and glass dishes used in photographic work are especially
adapted to the plate-method, particularly the size used for the 4 × 5 plate. Tea-strainers
or small sieves can be used for staining a large number of celloidin
sections; and there are different types of staining-dishes designed for the staining
of slide- and cover-glass preparations in number. Slides should be of the
best quality, colorless and with ground edges, and of medium thickness. Cover-glasses
should be square or oblong, round covers having but little use in pathology.
For ordinary work the No. 2 square, ¾ inch, is recommended; for work
with the higher-power dry objectives a thinner cover must be used. Slides and
covers may be cleaned by placing them in a solution of equal parts of one per
cent sulphuric and chromic acids and then rinsing in distilled water. A good
cleaning fluid is also made of one part acetic acid to three of 80 per cent alcohol.
To clean old mounts melt the balsam by heat or dissolve in turpentine, separate
slides and covers, boil in ten per cent lysol for half an hour, or for ten minutes
in the sulphuric-chromic-acid mixture, rinse thoroughly, dry with cloth having
no lint.
The laboratory should be supplied with running water, a sink large enough
for washing out specimens, numerous stop-cocks, and a drip-board. Distilled
water in abundance must be available. The laboratory-table should have an
alcohol- and xylol-proof finish, black on the whole being the most practical color.
A portion of the table should be covered with glass beneath which there is laid
a sheet of white paper.
CHAPTER XVIII. THE EXAMINATION OF FRESH MATERIAL.
I. METHODS OF EXAMINATION.
Pathologic material is examined in the fresh state when it is
desired to make a diagnosis in the shortest time possible, or when
the processes of fixation and hardening produce such alterations in
the morphology and chemic constitution of the cells that these
features can be recognized only in the unfixed, fresh state. So far
as the saving of time is concerned it is possible to take material
removed during an operation, examine it in the fresh state, and
return a diagnosis to the surgeon, while the patient is still on the
table under the influence of the anæsthetic. It is not possible to do
this with all tissues or with all pathologic conditions; but, when it
can be done, the advantages of such a rapid diagnosis, in the saving
of time, labor, expense and danger to the patient, are obvious. The
best idea of the cell is also gained by its study in a fresh condition.
Vital phenomena and certain morphologic features, as cilia, can be
observed only in fresh material. Many of the chemic constituents
of cells (glycogen, fat, mucin, pseudomucin, albumin-granules,
cholesterin, etc.) are either lost, or are so changed by processes of
fixation or hardening that they can no longer be recognized. The
majority of specific chemic tests can be made in fresh tissues only.
Moderate and slight degrees of fatty degeneration and cloudy swelling
are easily recognized in the fresh state; in fixed and hardened
preparations they may not be recognized at all. Particularly in the
case of the heart-muscle is it necessary to make an examination of
the fresh material when the diagnosis of these conditions is concerned.
Further, a greater or less degree of shrinking is caused by
many of the agents used in fixing and hardening, and this is avoided
by the examination of the fresh material. In the case of pathologic
fluids (sputum, urine, féces, etc.) an examination of the sediment
in the fresh state should always be made as a matter of routine.
The formed elements of these fluids are best determined by this
means. In the case of tissues, a diagnosis made by means of scrapings,
smears, teased bits of tissue, frozen sections, etc., should
always be controlled by the examination of fixed and hardened
material.
In the examination of fresh material the following methods are
employed: Sedimentation, smears, scraping, crushing, teasing, maceration,
sections, shaking or penciling, digestion, intravital staining, injection,
the warm stageand “cultivation.”
1. Sedimentation. The formed elements of pathologic fluids
(urine, sputum, pus, blood, exudates, transudates, cyst-contents,
etc.) are examined by collecting the sediment of such fluids from
the bottom of a sedimenting glass or bottle, by means of a capillary
pipette controlled by the finger. While the sediment is passing up
into the tube the pipette should be moved about the bottom of the
vessel so as to get some of the sediment from all parts. When the
fluid is rich in cellular elements sedimentation is not necessary; a
drop of the fluid is placed upon the slide; if too thick it is diluted
with physiologic salt-solution or serum. If poor in cellular elements
the fluid must be centrifugalized by means of a water- or electric-centrifuge;
and a drop of the sediment in the centrifuge tube is then
removed by the pipette and placed upon the slide, and covered with
a cover-glass. To facilitate the low-power examination of such sediments
parallel streaks upon the slide may be made across its entire
length, and examined without the use of cover-glasses. To apply
the various reagents mentioned below it becomes necessary to use
a cover-glass as directed.
2. Smears. A clean fresh cut is made into the organ or tissue,
and a clean slide or cover-glass is drawn across the surface. Without
permitting the smear to dry a drop of salt-solution or any
desired reagent is put upon it, and it is then examined. This method
is especially applicable to the study of the cells of the spleen, bone-marrow,
lymphnodes, etc. Permanent balsam-mounts may be made
of such smears by fixing with heat or alcohol and ether, staining,
drying and mounting.
3. Scraping. A fresh cut is made into the organ or tissue,
and the excess of blood absorbed by a pad of absorbent paper devoid
of lint. A clean scalpel held at an angle of 45° is then drawn with
some force back and forth over the cut-surface until its blade collects
a sufficient amount of “tissue-juice” made up of the cells of
the tissue. This is then put upon a slide, and covered with salt-solution
or any desired reagent, and is then examined. This method
is used especially for cellular infiltrations, soft tumors, and parenchymatous
organs (spleen, lymphnodes, bone-marrow, liver, etc.),
and for the inner wall of cysts (echinococcus-cysts, cysts lined with
ciliated epithelium).
4. Crushing. A small bit of the tissue is cut out with the
scissors or scalpel, and placed upon the slide. A cover-glass is then
placed upon it and pressed down so firmly that the bit of tissue is
spread out in a thin film or layer beneath the cover-glass. Reagents
are introduced beneath the cover-glass, as desired. (See below.)
This method is used in the examination of the lung, kidneys and
brain for fatty embolism, and of the brain and spinal-cord for “fat-granule”
cells, pigment, calcified ganglion-cells, Negri bodies, etc.
It is also frequently used in the bacteriologic examination of tissues
(crushing of tubercles, etc.).
5. Teasing. A small bit of the tissue is cut out and placed
upon the slide or in a staining-dish and covered with physiologic
salt-solution. It is then teased with fine needles until divided into
its ultimate elements. Hard tumors (mature connective-tissue
tumors, fibrosarcomata, etc.), muscle (examination for trichina),
nerve-trunks, etc., are best examined in this way.
6. Maceration. In the case of some tissues the ultimate histologic
elements are so firmly held together that they cannot be
separated without the aid of a macerating- or dissociation-fluid.
(See below.) Digestion is also used for the same end. The tissue
should be as fresh as possible and cut into small bits, which are
placed in the maceration-fluid in watch-glasses or staining-dishes
for twenty-four hours or longer. The macerated bits are then teased
until the finest elements are separated. In the case of very minute
elements the teasing may be carried on under a hand-lens or the
stereoscopic binocular microscope. During the process of maceration
all parts of the macerating tissue must be kept covered with
the macerating-fluid, or the uncovered portions will become
hardened.
7. Section-cutting. Sections of fresh tissue may be made with
the curved shears, simple razor, double-bladed razor and the freezing-microtome.
a.Curved Shears. The tissue is put upon a stretch, and from
the surface a thin, flat section is cut out with the scissors. With
care a fairly thin section may be obtained in this way. It may be
examined by pressing it upon a slide beneath a cover-glass, or it
may be treated as a frozen section.
b.Simple Razor. As a part of their required laboratory training
medical students should learn how to make working sections
with a simple razor. Such a technical knowledge is sure to be of
practical use at some time or other. With a little practice sections
sufficiently thin for ordinary diagnostic work can be cut. If the
piece of tissue is large it may be held in the hand; but when small
or soft it may be placed in a matrix of hardened liver, pith, potato,
apple, firm lard or butter, paraffin, etc., and cut at the same time
with the latter. Both blade and tissue should be wet with physiologic
salt-solution. The blade, which must be very sharp, should
be drawn through the tissue by a shoulder movement, with the
wrist-joint fixed. As the sections are cut they are floated off of the
razor-blade into physiologic salt-solution, and thence treated as
desired.
c.Double-bladed Knife. This consists of two parallel blades
arranged so that the space between them can be changed by means
of screws. For firm material the blades should be close together;
for soft material farther apart. The blades should be dipped into
physiologic salt-solution to fill up the space between the blades.
The instrument is then drawn through the tissue, and the section
between the blades floated out in salt-solution. Some workers use
this double-bladed knife to make a perpendicular cut into the tissue,
then turning it to either side to cut the lower edge of the section
and removing the blades with the section between them. Both the
single- and the double-bladed razors require practice for successful
section-cutting. Further, it must be borne in mind that sections
of fresh tissue obtained by these methods are unsuited for complicated
staining methods and can be used only for the simplest staining
processes. Nevertheless, in a fairly large proportion of pathologic
conditions it is possible to secure a diagnosis by these
methods.
d.Freezing Microtome. Much more satisfactory sections can
be obtained by freezing the fresh tissue and cutting it upon the
freezing microtome. Various types of these instruments are in the
market. The freezing is accomplished by the use of ether, ethyl-chloride
or fluid carbonic acid gas. The ether and ethyl-chloride
freezing-microtomes consist essentially of a metal plate or hollow
box on which the tissue rests and against the under-surface of
which a spray of ether or ethyl-chloride is forced by means of a
rubber bulb connected with a supply of the freezing agent in a bottle.
Such freezing attachments can be attached to any microtome,
but special instruments as Jung’s “student’s freezing microtome,”
Cathcart’s, Bausch and Lomb’s or Becker’s ether-freezing microtome
can be recommended for this purpose. (See Fig. 52.) The
tissue to be frozen must be of small size and not more than 3-4 mm.
thick. It is placed upon the freezing plate in a drop of water, white
of egg or thick gum-arabic, and pressed firmly against the plate.
The spray must not be too constant or strong, but should be given
with regular pauses of about a second to allow the ether to evaporate.
The tissue must be firmly frozen, but not so hard that it
crumbles. It is usually difficult to freeze the upper part of the
tissue hard enough to give good sections, and this half-frozen tissue
must be trimmed off with the knife until good sections are secured.
As the sections are cut they are removed from the knife-blade with
the finger and put into physiologic salt-solution that has been
recently boiled to drive off the air, so that, in thawing, there may
be no formation of air-bubbles in the tissue to cause artefacts. If
put into strong alcohol diffusion-currents may damage the tissue; a
succession of graded solutions should, therefore, be used if the sections
are to be fixed and hardened. The further treatment of frozen
sections is given below. The relative slowness of the method of
freezing, its greater cost, the necessity of the frequent replacement
of the rubber bulbs and tubing, and the greater amount of trouble
required by the use of ether or ethyl-chloride are disadvantages that
can be avoided by the use of the carbonic acid freezing microtome.
Where much work is done by the freezing method the use of the
latter is advised.
Fig. 52.—Type of freezing-microtome, for the use of ether or ethyl-chloride.
Cathcart model.
Fig. 54.—Bardeen freezing-microtome attached to carbonic-acid gas-cylinder.
The carbonic acid outfit consists of a microtome arranged so that
it can be connected with a cylinder of compressed carbonic acid gas,
as shown in the Aschoff-Becker or Bardeen models. (Figs 53 and
54.) The cylinders or drums containing a charge of 15-30 lbs. of the
liquid carbonic-acid are furnished by the trade at reasonable rates. It
is not necessary to buy the drums, as they are replaced by full ones
as needed. They are provided with valves and can be fastened in an
upright position or laid flat upon a table, in any way convenient
for the attachment to the microtome. Connection is made between
the valve of the cylinder and the object-holder of the microtome by
means of strong rubber tubing which should be securely wired at
both ends, or by a flexible metallic tube. The latter is preferable,
as the rubber-tubing often bursts, or is so stretched by the pressure
of the gas that it must be frequently replaced. Object-holders with
flexible metallic tube attachment for use in an ordinary microtome
are supplied by Bausch and Lomb and other firms. My personal
experience makes me prefer the Bardeen freezing microtome (see
Fig. 54) to all others. It is cheap and can be easily attached to the
valve of the gas-cylinder, which is fastened horizontally to the table-top,
as it has a screw-thread fitted to the uniform thread of the
drum-valve. The object-holder can be raised or lowered between
the glass-tracks on which the knife runs, so that sections of a definite
thickness can be obtained. The most satisfactory knife is that
of the type of a plane-bit set in a wooden handle. (See Fig. 55.) It
must be well honed and stropped. The tissue, which should not be
more than 5 mm. thick, is placed upon the object-holder in a drop of
water, albumin fixative, or saturated solution of gum-arabic, and
pressed firmly against the plate as the gas is turned on slowly and
evenly. Freezing is usually accomplished in one-half to one minute.
The best results are obtained by turning the gas on for about 15-20
seconds, then turning it off for several seconds; the tissue will
continue to freeze; if not hard enough the gas is turned on
again for 15 seconds and then turned off. If necessary this
may be repeated until the tissue is properly frozen. The interruption
of the gas-flow prevents over-freezing and thereby lessens
the amount of change in the cells. When sufficiently frozen the
gas is then turned off; the knife, with bevel-edge down, is held
in the right hand with its handle between the palm and the ball of
the thumb with the back of the hand uppermost; and the edge of the
knife set at an angle of 45° to the tracks, along which it is rapidly
pushed back and forth, shaving the sections from the frozen tissue
as the latter is pushed up above the level of the tracks by means
of the micrometer screw turned with the left hand. The screw
should have been adjusted at the proper height before freezing, so
that no time is lost in getting the object-holder up to the height for
cutting. By holding the elbow and fore-arm closely against the
body and pushing from the elbow with wrist-joint fixed the shaving
of sections can be accomplished very quickly, so that with one freezing
several hundred sections can be obtained. The microtome-screw
should not be turned by the left hand until the knife on its return has
cleared the tissue. A little practice in co-ordinating movements is
necessary for expert work. The sections should be allowed to
collect upon the knife-blade until a large number have been cut; they
are then swept off the blade by the finger into cold freshly-boiled physiologic
salt-solution. Sections of tissue that have been previously
fixed can be put into 60 per cent alcohol, where the sections will
unroll and straighten out perfectly flat. When the method of freezing
by alternately turning on and off the gas, as given above, is followed,
and the amount of freezing in the interval noted, there is
no danger of over-freezing, and the breaking and crumbling of sections,
with the production of marked artefacts, is avoided. When
over-freezing has occurred the block may be partly thawed out by
the finger. But over-freezing, as well as repeated freezing and thawing,
may cause so much damage to fresh tissue that a diagnosis cannot
be obtained from the frozen sections. After thawing out in the
physiologic salt-solution the sections of fresh tissue obtained by
freezing are treated according to the methods given in the next
section of this chapter.
Fig. 55.—Knife for Bardeen freezing-microtome.
It must be emphasized here that the process of freezing is an
active one, and alters the relation of cell-structures. With many
fresh tissues the changes resulting from the freezing are so great
that no diagnosis can be made. It seems necessary here to warn
against the routine employment of the rapid method of freezing
and staining fresh tissues in the diagnosis of material obtained by
surgical operation. It has become a fad with some surgeons to make
a pathologic diagnosis by the freezing method while the patient is
on the table. Consequently, as the result of diagnoses made by the
rapid freezing and staining method, many mistakes are made, even
by supposed experts in this line. Particularly in the diagnosis of
sarcoma is it easy to make mistakes because of the altered aspect of
the cells caused by freezing. Normal lymphnodes, tonsils and
inflammatory infiltrations may look like spindle-cell sarcoma in the
sections prepared by the rapid freezing and staining method; and
the exact nature of many other pathologic conditions cannot be
accurately determined from such sections. On the other hand, a
certain number of pathologic conditions can always be recognized
in sections obtained in this way, and this fact justifies the employment
of the method when properly controlled. In all cases in which
the pathologic condition is not clearly evident in sections obtained
by the rapid freezing and staining method no diagnosis should be
given. In such cases the tissue should be fixed and then cut upon
the freezing-microtome, or imbedded in celloidin or paraffin and
then cut. Even when the patient is upon the table the tissue
removed can be put into a 10 per cent formol solution for a few
minutes and then frozen directly in gum without washing out the
formalin. The longer the time that can be used for this short preliminary
fixation the better the sections will be and the less the
production of artefacts by the freezing. The process of fixation can
be hastened by warming the fixing-fluid. I advise this short fixation
before freezing in all cases of operative diagnostic work when
the diagnosis is wanted as soon as possible. For all other work
with the freezing microtome, when the question of time is not so
important, fixation with formol for 12-24 hours should be carried
out. This combination of formol-fixation and the freezing method
permits the early diagnosis of autopsy and operation material,
makes possible the demonstration of fat and other substances
altered or dissolved out by the imbedding methods, and is a convenient
way of selecting tissues, requiring more complicated staining
processes. (See also Page 239.) The further treatment of sections
of fresh tissue obtained by freezing will be found in the
second section of this chapter.
8. Penciling or Shaking. For the demonstration of the
stroma or reticulum either fresh or fixed sections may be placed
upon a slide in an abundance of fluid and gently penciled with a
fine, blunt camel’s hair brush until the fluid becomes cloudy. The
cloudy fluid is washed away and replaced by fresh as long as cells
are given off. The same results may be obtained by shaking the
sections in a test-tube until the cells are shaken out of the stroma.
The removal of the cells from the section is shown by its greater
transparency. One of the practical applications of these methods
in diagnostic work is the differentiation between alveolar round-cell
sarcomata and carcinomata.
9. Digestion. For the demonstration of stroma, parasites, etc.,
the tissues may be digested with gastric or pancreatic ferments until
the required elements are freed. A freshly prepared pepsin in 0.2
per cent HCl in the incubator for 3-5 hours will digest fibrin in
fresh clots. Sections of fixed tissues may be imbedded in paraffin,
cut, and digested on the slide with Grübler’s pancreatin according
to the method of Flint.
10. Intravital and Supravital Staining. Various methods have
been advised for the intravital staining of cell-granules. Intravenous
or intraperitoneal injections of methylene blue, alum carmine, neutral
red and other stains will produce intracellular granule-staining
in various organs of experimental animals. In the study of low
forms of animal life staining solutions may be injected, or the animal
or its parts may be examined in staining fluids. Human material
can be examined by this method immediately after being removed
from the body by operation or within 1-2 hours after death. (For
details of these methods see article on “Färbungen, intravitale,” Encyklopädie
der mikroskopischen Technik.)
11. Injection. Injections for the demonstration of blood-vessels,
lymphatics, ducts of glands, etc., are rarely used in pathologic
work. The organs to be injected must be fresh, warm from the
body, if possible. The vessels should be washed out by a freshly
filtered 8 per cent sodium nitrate or sodium sulphate solution, followed
by physiologic salt-solution. A cannula is introduced into a
main vessel, tightly secured, and then connected with a syringe or a
gravity injection-apparatus giving a constant pressure. The injection-mass
is then injected under a low pressure. In the case of injections
into lymphatic vessels the cannula should be introduced into the
largest lymphatics at the periphery of the blood-vessels where larger
lymph-vessels are more easily found. Injections are made with
either cold or warm solutions; the latter are preferable but require
that the organ to be injected be warmed by immersing it in water
at a temperature of 40°C. The injection fluid must be of the same
temperature. After the warm injection is given the organ is put
into ice-cold 10 per cent formol solution until fixed and then after-hardened,
imbedded and stained as desired. After the use of cold
injections the tissues are fixed in 10 per cent formol, alcohol, or any
other desired solution, and treated according to the end sought.
Nuclear and diffuse stains contrasting with the color of the injection
mass should be used. The process of injection requires great
care; the pressure must be carefully regulated to prevent extravasations,
and the injection-fluid must be free from air-bubbles. The
injection is continued until the organ appears diffusely stained.
Blood-vessels are fixed in their natural blood-injection by such
agents as formol and chromic acid, so that stains acting upon the
red blood cells cause the veins and capillaries to appear as if they
had been injected.
The following injection masses are advised:—
1. Cold Injection Mass (Beale’s Glycerin Carmine):—
Dissolve 0.3 grm. of carmine in a small quantity of water containing 5
drops of ammonia; add 15 cc. of glycerin and shake; add drop by drop 15 cc. of
glycerin containing 8-10 drops of glacial acetic acid. Then add further glycerin
15 cc., alcohol 8 cc., and water 24 cc.
2. Warm Injection Mass (Thiersch’s Berlin-blue Gelatin):—
(a) Dissolve 1 part of gelatin in 2 parts of water by allowing it to soak 24
hours, and then warming. Filter through flannel.
(b) Saturated water solution of ferrous sulphate.
(c) Saturated water solution of red ferricyanide of potassium.
(d) Saturated water solution of oxalic acid.
Make a solution (1) by adding 30 cc. of a to 12 cc. of b, and a solution
(2) by adding 24 cc. of c to 60 cc. of a; both mixtures to be made at a temperature
of 30°C. At same temperature add 24 cc. of d to solution 2, and then
solution 1, stirring constantly so that Berlin blue is precipitated. Heat on a
water-bath to 90°C.; filter through flannel.
3. Fischer’s Milk-Method. The vessels are flushed with 8 per cent
sodium nitrate or sulphate solution, and then injected with milk. When sufficiently
injected the tissue is hardened for 24 hours in a solution of water,
1,000 cc., formalin (40 per cent formaldehyde) 75 cc., and glacial acetic acid
15 cc. Freeze, cut and stain with Sudan III or Scharlach R.; the course of the
vessels is outlined by the fat-globules.
4. Silbermann’s method of injecting indigo-carmine, eosin or phlosin-red
into the circulating blood has been used for the demonstration of capillary
thrombi, the latter remaining free from the pigment.
12. Warm Stage. For the study of vital phenomena in the
living cell Ross’s electrical warmer is recommended. It can be
slipped on and off the slide without changing the focus, and is managed
without any difficulty. It keeps the centre of the slide at a
temperature of 37°C. Reagents can be applied as desired. Deetjen’s
agar may be used as a medium for the preservation of living
cells. (See Methods of Blood-Examination.) Various forms of
warm and moist chambers used in experimental embryological work
can also be utilized in experimental pathology.
13. Tissue-cultivation. The embryologic methods of growing
tissues in lymph and blood-plasma as developed by Harrison, Burrows
and Carrel have been applied in pathologic work to the experimental
study of repair and regeneration, grafting, transplantation
and tumor-transplantation. (For methods see Harrison, Journal
of Exper. Zoology, 1910; Burrows, Jour. of Amer. Med. Assoc.,
1910; Carrel, Jour. of Amer. Med. Assoc., 1910.)
II. REAGENTS USED IN THE EXAMINATION OF
FRESH TISSUES.
In the examination of fresh tissue it is often desirable to use certain
reagents for the purpose of making chemical tests or to bring
out some structures more prominently than others. To introduce
these reagents beneath the cover-glass in such a way as to get the
desired effect without disturbing given fields requires some practice
with a very simple technical method. The preparation is first examined
in salt-solution, and the cover-glass adjusted so that it has a
slight rim of fluid about its edge, but not enough to make it float.
The reagent to be applied is dropped with a glass-dropper at one
side of the cover-glass, while at the other the salt-solution is
removed slowly by a piece of absorbent paper. The changes produced
in the tissue-elements during the progress of the reagent can
be observed under low or high powers. Care must be taken to
change the fluids so slowly that isolated cells will not be washed
away.
1. Physiologic or Indifferent Fluids. Serous exudates, blood-serum, hydrocele
fluid, etc.; artificial serum made by a mixture of 9 parts physiologic salt-solution
with 1 part white of egg; or physiologic salt-solution (0.9 per cent for
warm-blooded animals, 0.6 per cent for cold-blooded).
2. Maceration Fluids. 33 per cent alcohol (24 hours); chromic acid
1:5000 (24 hours); potassium bichromate 0.1-0.2 per cent solution (2-4 days for
nervous tissue); 0.1 per cent osmic acid (12-24 hours); 33 per cent potassium
hydroxide (¼-1 hour, for muscle, tissue must be examined in the solution, as
the cells dissolve when water is added); Arnold’s iodine solution (10 parts of
a 10 per cent potassium iodide solution to which are added 5-10 drops of a
solution containing 5 grms. of iodine and 10 grms. of potassium iodide in 100 cc.
of water. Macerate one or more days. If solution becomes discolored add more
of the second solution); very dilute formol solutions (1 cc. to 500 cc. physiologic
salt-solution); Müller’s fluid (2-3 days, good for nervous tissue).
3. Glycerin. Used without diluting as a clearing agent, particularly when
pigment is present; and as a mounting medium for stained preparations that
cannot be put into alcohol.
4. Potassium Acetate. Saturated water solution for clearing and mounting
fresh preparations. Does not clear as strongly as glycerin, hence is better
adapted for the examination of fresh tissues.
5. Acetic Acid. 1-2-5 per cent solutions are usually employed. Clears
the protoplasm and causes the nucleus to shrink slightly and to stand out
more distinctly. It differentiates fatty and albuminous granules, dissolving
the latter; and is useful in the demonstration of elastic tissue fibres, sharply
outlining these against the connective-tissue which swells and becomes clear.
6. Acetic Acid Fuchsin. A few drops of fuchsin are added to a 2 per
cent solution of acetic acid. With this solution the nuclei are not only brought
out more sharply but they are stained red.
7. Lugol’s Solution. Dilute Lugol’s solution to a pale yellow color. It
brings out the contours of cell and nucleus, and has a specific reaction with
glycogen and amyloid, giving both a brown color. Since glycogen is dissolved
out in water-solutions tests for glycogen in fresh tissues should be made with
iodine-glycerin or iodine-gum (Lugol’s one part, gum arabic 100 parts). Smears
or cover-glass preparations may be placed in covered dishes containing a few
crystals of iodine.
8. Potassium and Sodium Hydroxides. In solutions of 1-3 per cent all
tissue-structures swell and dissolve or become unrecognizable except elastic
fibres, fat, pigment, amyloid, bacteria, yeasts and moulds. Used especially for
examination of skin-scrapings or pus for presence of blastomyces and various
forms of parasitic moulds (barber’s itch, ringworm, tinea, etc.). Solutions of
33 per cent clear the tissues but do not destroy the cells. Useful for maceration.
When diluted the cells are destroyed.
9. Mineral Acids. HCl or H2SO4 (3-5 per cent). Used to dissolve
areas of calcification. Calcium dissolves with liberation of CO2; the phosphates
dissolve without gas-formation, but with H2SO4 form crystals of calcium
sulphate. Sulphuric acid is also used as a test for cholesterin (red or violet coloration),
and with iodine as a test for amyloid.
10. Osmic Acid. In a 1 per cent solution this is used to test for the
presence of fat (oleates), the fat-droplets become black or brown.
11. Sudan III or Scharlach R. Alcoholic solutions of these dyes are
used for the demonstration of fat in fresh tissues. They stain fat orange to
scarlet. (For method see Staining of Fat.)
12. Alcohol and Ether. Used to dissolve fat-granules and to differentiate
between these and albuminous granules.
13. Stains. Fuchsin, methylene blue, methylene green in 1 per cent solutions
in physiologic salt-solution and acetic-acid-fuchsin are the best stains
used for the examination of fresh-tissues beneath the cover-glass. They are
drawn under the cover-glass according to the method given above.
For the rapid staining of sections of fresh tissue cut by freezing a section
is floated from the salt-solution onto a slide, which is then carefully lifted
from the salt-solution and the excess of the latter removed. Several drops of
methylene blue, carbol-thionin or carbol-kresyl-echt-violett are run upon the section
with the glass-dropper, and allowed to remain for 15-30 seconds. The stain is
then washed off with salt-solution, a cover-slip put on and the section examined
in the salt-solution. Thionin has been especially recommended (Wood, Strouse
and others) for the rapid staining of frozen sections; but I prefer to use carbol-kresyl-echt-violett
(kresyl-echt-violett 1 grm., 5 per cent aqueous solution of
phenol 80 cc., 95 per cent alcohol 20 cc.). This gives a very good differentiation
in the section examined in water, and the picture is clearer than with thionin;
the specific staining-reactions with mucin, amyloid, mast-cells, etc., are also
more marked than with the latter stain. Such sections are not as clear as
dehydrated and cleared sections and their possibilities of diagnosis are correspondingly
limited, even in the hands of an expert with sections of this kind.
To make permanent balsam-mounts of the frozen unfixed sections the latter
must be fixed in formol or alcohol, or by heat (hot water). The sections
may be placed in 4 per cent formol for several minutes, then into 80 per cent
alcohol, then stained, washed, dehydrated in absolute alcohol, cleared in carbol-xylol
and finally mounted in balsam. Hæmatoxylin and eosin may be used for the
staining. Fresh sections may also be fixed in hot water, stained in hæmatoxylin,
dehydrated in alcohol and cleared in xylol. To save time the sections may be
fixed on the slide for a few minutes in alcohol, care being taken to prevent
the sections from rolling up by dropping the alcohol onto the middle of the section
after it has been carefully flattened out on the slide. The section may
then be stained with hæmatoxylin, borax-carmine or other stains, dehydrated,
cleared and mounted in balsam. After fixing with alcohol on the slide the
section may be attached to the slide by blotting it with absorbent paper, then
covering section with absolute alcohol, draining this off after a few seconds and
then running over the section a thin solution of celloidin, which is allowed to
drain off, leaving a very thin film over the section and slide. The latter is
then immersed in water for a few seconds, and the celloidin-film on setting
holds the section to the slide, provided the celloidin has been of proper consistence.
The section can now be stained, washed, dehydrated, cleared in origanum
and mounted in balsam. When mounted the thin film of celloidin is
invisible (Wright’s method).
I have originated a much better method which is in use in my laboratory,
and can be applied to the staining of frozen sections of fresh tissues in large
numbers for class use. The sections are floated from the salt-solution on to a
warm solution of New Orleans baking molasses diluted ten times, or a dilute
sugar-dextrin solution, and thence are floated on to a clean glass plate and
arranged in rows. The plate is drained, and then without drying is immersed
in absolute alcohol for 15-30 seconds; it is then flooded with a thin celloidin,
drained, the celloidin film allowed to set, and the plate then put into warm
water, where the celloidin sheet floats off, carrying the sections, which can now
be cut out and treated as single celloidin sections, or the whole sheet can be
carried through the staining, dehydrating and clearing solutions to be cut up
into single sections before mounting.
CHAPTER XIX. THE PRESERVATION OF MACROSCOPIC PREPARATIONS.
For preserving gross objects for museum specimens alcohol or
formol may be employed. The former bleaches the tissues so that
ultimately they are almost destitute of color. Formol in a 5 per
cent solution gives better color-effects than alcohol, as the blood-containing
parts remain darker. The fluid also remains clear and
the tissues are firm. When alcohol is used the fluid must be frequently
changed, as it becomes turbid and yellowish, and the tissues
finally become soft and lose their form. The best methods of
preserving the natural color are found in the various modifications
of the Kaiserling method. The organs or tissues are placed first in
a formol solution until they are just hardened, the formol changing
the oxyhæmoglobin into acid hæmatin. They are then transferred
to alcohol to bring back the natural color, which is accomplished by
the change of the acid hæmatin to an alkali hæmatin, which has a
color very closely resembling that of oxyhæmoglobin, so that the
natural color is approximately reproduced. The method is carried
out as follows:—
Sol. I.—
Formalin
200
cc.
Water
1,000
cc.
Potassium nitrate
15
grms.
Potassium acetate
30
grms.
The tissues are left in this solution, in the dark, for one to several days,
being watched carefully to see that they are not over-hardened.
Sol. II.—80 per cent alcohol for 1-6 hours and then 95 per cent until the
color is fully restored (2-24 hours). Watch carefully and remove as soon as
best color effect is reached, and preserve in—
Sol. III.—
Glycerin
400
cc.
Water
2,000
cc.
Potassium acetate
200
grms.
The specimens must be kept in air-tight jars, and crystals of thymol added
to prevent growth of moulds. This is sometimes very difficult, and it becomes
necessary to change the discolored fluid for clear. I have found the rectangular
museum jars best adapted for the preservation of Kaiserling specimens. I use
a wooden top which fits over a thick piece of felt cut just the size of the jar,
which in turn fits over a piece of dental rubber cut to fit the jar. The jar is
placed upon a wooden bottom which has upright steel rods at the corners, that
pass through holes in the wooden top, and have a screw-thread so that they can
be fitted with screws, which when screwed down hold the wooden top, felt and
rubber sheeting tightly in place, making the jar air-tight, but giving a top easily
removable. Very beautiful specimens can be secured by the Kaiserling method,
and they can be kept for several years, but sooner or later the color-effect is lost.
Light, heat and exposure to the air cause a loss of color.
Some workers prefer the following in place of Sol. I:—
Hot water
2,000
cc.
Sodium sulphate
40
grms.
Magnesium sulphate
40
grms.
Sodium chloride
20
grms.
When salts are dissolved and solution cool add 200 cc. of formalin.
Melnikow-Raswedenkow Method:—
Sol. I.—
Water
100
parts
Formol
10
parts
Sodium acetate
3
parts
Potassium chlorate
0.5
part
Leave in this 1-2-3-4-5 days, according to size of specimen. Large organs
must have solution injected into vessels.
Sol. II.— 95 per cent alcohol, until color is restored.
Sol. III.—
Preserve in: Water
100
parts
Glycerin
60
parts
Potassium acetate
30
parts
Pick’s Method:—
Sol. I.—
Water
1,000
cc.
Formol
50
cc.
Carlsbad salts
50
grms.
Then transfer to 80 and 95 per cent alcohols, as for Kaiserling, and preserve
in water 9,000 cc., glycerin 5,400 cc., sodium acetate 2,700 grms.
Westenhoeffer’s method of preserving uric-acid: formol vapor 4-24 hours,
then 80-90 per cent alcohol containing mercuric oxide, and preserve in glycerin
to which some mercuric oxide covered by cotton or absorbent paper has been
added.
Claudius’s Method. The specimen is placed on a grating in a closed vessel
containing a concentrated solution of ammonium sulphate, an abundance of the
crystals being left on the bottom of the vessel. Carbonic acid or illuminating
gas is passed through the ammonium sulphate solution for 48-72 hours, and the
specimens are then preserved in the same solution. My experience with this
method has not been satisfactory.
Gelatin method of mounting Kaiserling preparations: Soak washed Gold
Label gelatin in distilled water for 12-24 hours. Take equal parts of water-logged
gelatin and glycerin and dissolve by heating in a double boiler, stirring,
for 15-20 minutes. Cool to 40°C. Then clarify with white of egg (well-whipped
whites of three eggs to half a gallon of jelly: stir well; steam for ½ hour) and
filter through cotton-wool. Add to jelly a few drops of a weak aqueous solution
of crystal violet to remove yellow color (Bruère and Kaufmann). To prevent
growth of bacteria a small percentage of formol or crystal of phenol may be
added. Kaiserling specimens are placed in glass dishes in the melted jelly, and
covered with it. When set the dishes containing the mounted specimens may be
covered with glass-plates and fastened to these by balsam or cement. I use a
deep Petri dish, filling it about two-thirds full with the jelly; over this I pour
melted paraffin of a very low melting point so as not to melt the jelly. When
the layer of soft paraffin is hard, a thick layer of paraffin of a 52° melting-point
is poured over it, and the dish filled even. When the hard paraffin is set, it is
varnished with shellac. Liquefaction of the gelatin by bacteria or enzymes constitutes
the great drawback to this method.
CHAPTER XX. THE FIXATION AND HARDENING OF TISSUES.
GENERAL CONSIDERATIONS. For the examination of
material that may be injured by freezing, or when very thin sections
are required for complicated staining procedures, it becomes
necessary to prepare the tissue by fixation and hardening, so that it
can be imbedded in some medium permitting the cutting on the
microtome of as thin sections as may be desired. Fixation is that
process by which the appearances of the tissue are preserved as they
were when it was taken for examination; hence in order to obtain
pictures resembling as closely as possible those of the living tissue
the material should be fixed immediately upon its removal from the
living body by operation, or as soon as possible after death when
obtained by autopsy. Fixing agents act by coagulating the cell
albumins, in this way “setting” or “fixing” the constituents of the
cell so that further change is stopped. Fixation, therefore, hardens
the cell, and all fixatives are also hardening agents. A practical
distinction between fixing and hardening is made, however, resting
upon the fact that not all fixatives harden the tissue so completely
that the proper consistence for the cutting of thin sections is
attained. To achieve this the tissue must be dehydrated. Alcohol
and acetone are the only reagents fixing and hardening perfectly
at the same time, as they remove the water from the tissue; for
all other fixing agents an after-hardening in alcohol is necessary.
In the case of such reagents the division of the process into a
primary fixation and a second hardening stage has been the cause of
the divergence in meaning of the two terms.
The best fixing agents are those that kill the cells at once, but
cause a slow coagulation with little or no shrinking. They must
penetrate and diffuse through the tissues rapidly so that the deepest
cells are quickly reached. Acid media, especially those containing
small percentages of acetic acid, are therefore better than
alkaline solutions. The tissue-elements, particularly the nuclei,
must be preserved as perfectly as possible so that they will not be
affected by further procedures of microscopic technique. The
chemic properties of physiologic and pathologic substances must
likewise be preserved. The preservation of karyokinetic figures is
a criterion of good fixation. In pathologic work it is also desirable
that the fixing agent should preserve the red blood cells, and permit
of the staining of bacteria in sections. Since fixing media are more
or less selective in their action, it follows that there is no one fixative
that gives equally good results in all cases. Especial fixing
reagents must be used for the demonstration of certain substances
(fat, etc.), or for the use of certain staining methods. Some stains
cannot be used at all after certain fixing agents have been employed.
For general use that fixing agent having the widest range of usefulness
should be employed; and for this reason fixing media composed
of several fixing agents are often employed in preference to
the use of a single one.
GENERAL RULES FOR FIXING AND HARDENING.
The tissue should be put into the fixing fluid as soon as possible
after its removal from the body. It must not be allowed to dry.
There should be an abundance of the fixing solution, 25-50 times
the volume of the object to be fixed. The tissue should never be
put into a dry vessel and the fixing fluid poured upon it; the vessel
should first be filled with the fixing solution and the tissue then
dropped into the latter. A slight agitation of the fluid will prevent
the sticking of the tissue to the bottom or sides of the vessel. The
size of the pieces must be adapted to the penetrating power of the
fixing reagent, but as a rule the pieces should not be more than
2-3 cms. in thickness, and for some reagents 0.5 cm. is as thick as
they can safely be. The reagents used should be changed when
they become cloudy or discolored. The used solution may be
filtered and used again, but some reagents can be used but once.
Alcohol may be saved for redistillation. In the case of some
reagents (mercuric chloride, chromic acid, osmic acid, etc.), the
time limits of the fixation should not be exceeded, as over-fixation
will ruin the staining-power of the tissues. Alcohol is practically
the only solution in which tissues may be left indefinitely, but even
with it there are certain limitations. As a general rule the time
required for fixation may be shortened by keeping the reagents at
incubator-temperature. As the different fixing reagents vary so
greatly as to their especial advantages and disadvantages these will
be considered separately. Only the best and most commonly used
methods are here included.
1. ACETONE. A water-free acetone is employed by placing pure dried
white copper sulphate in the bottom of the bottle or vessel in which the fixation-process
is carried on. Several layers of filter-paper are put over the copper
sulphate to keep the tissues from touching it, and the acetone is then poured
into the vessel. As soon as the copper-sulphate becomes blue it must be again
fused. It is only by this method of constant dehydration that acetone can be
employed to any advantage as a fixing agent; if fused copper sulphate is not
employed the amount of acetone necessary to fix well is so great that the method
becomes too troublesome and expensive to be recommended. But with the
simple copper-sulphate method of constant dehydration acetone becomes the
cheapest, most rapid and one of the best fixing reagents. The use of alcohol
is avoided, and the period of infiltration in xylol and in paraffin shortened. For
very quick work the entire process of fixation, hardening and dehydration may
be achieved by the use of acetone alone, small pieces of tissue being fixed ½-2
hours in acetone and then transferred directly to soft paraffin. For ordinary
work pieces of tissue 0.5 cm. thick are put into acetone over fused copper
sulphate for 20-60 minutes. A judgment of the degree of fixation can be
obtained by pressing the tissue lightly between the fingers; if it is of uniform
consistence, and does not give as if the inner portions were softer than the
surface, the fixation is complete. From the acetone the tissues may be brought
directly into xylol for 5-10 minutes, until they obtain a cloudy transparency,
thence into paraffin for 15-30 minutes and then blocked. The whole process of
fixation, imbedding, cutting and staining can be carried out in 30 minutes.
Acetone may be combined with formol, alcohol or any of the other fixing agents,
but when it is desired to use any one of these for some especial purpose it is
better to fix first with the desired reagent and then to use acetone for the dehydration-process
alone, instead of alcohol. We have found that formol-fixation
followed by acetone dehydration gives excellent results for general pathologic
work. Formol-acetone (acetone 100 cc., formol 10 cc.) may be found to have
advantages. The quick fixation in water-free acetone causes less contraction
than fixation with absolute alcohol; fixation with graded acetone-solutions
causes practically none.
Advantages. It is the cheapest and quickest method. It penetrates well
and causes little contraction of the tissues, shortens the time in xylol and
paraffin and makes more easy the cutting of dense fibrous structures. Cell-division
figures are as well preserved as by alcohol fixation, and the staining
of bacteria in the tissues can be carried out as well after acetone-fixation as
after alcohol. It preserves lecithin, hence can be used for the fixation of
nerve-tissues. When combined with formol (formol-acetone) the red blood-cells
are well-preserved and take a brilliant eosin stain.
Disadvantages. The disadvantages are practically the same as with alcohol
fixation but not so marked. Fat is dissolved, cell-division figures are not so well-preserved
as with mercuric chloride and Flemming’s solution, and the blood-cells
not so well preserved as with formol and mercuric chloride.
2. ALCOHOL. Absolute, 95-96 per cent alcohol, or graded alcohols
(70, 95 per cent. and absolute) may be used for fixation. For this purpose the
stronger alcohols are preferable, as the weaker solutions do not fix quickly
enough. On the whole the use of 95-96 per cent is to be advised. The pieces
of tissue must not be thick. Plenty of alcohol should be used and it should be
changed several times during the process of fixation, which for larger pieces
requires several days. For the last change absolute should be used. Very small
bits such as uterine curettings can be fixed in one hour, by using three changes
of absolute alcohol. Since alcohol both fixes and hardens it has been generally
used, but it is a relatively poor fixative. For after-hardening it is indispensable.
Absolute alcohol may be made from 96 per cent by the use of fused copper
sulphate. To test the strength of alcohol mix a few drops with pure water-free
xylol; if no sediment appears when viewed against a dark background the alcohol
is absolute or practically so. Many of the disadvantages of alcohol fixation
can be obviated by the use of formol-alcohol (95 per cent alcohol 100 cc.,
formalin 10 cc.).
Advantages. Cheapness, quickness, and ease of method. Can be used for
quick diagnostic work. Penetrates well, and can be used for large pieces of
tissue. Preserves glycogen, is especially good for the staining of bacteria in
sections, and the majority of stains work well with alcohol-fixation.
Disadvantages. Causes much shrinking and loss of finer details; preserves
cell-division figures not at all or poorly; destroys the red blood cells;
dissolves fat and other chemic products: does not permit of the use of certain
specific staining methods (nerve-tissues); causes excessive hardness of fibrous
and elastic tissues and makes cutting difficult.
3. CHROMIC ACID AND SALTS. Chromic acid is rarely used alone
in pathologic work, but is a constituent of Flemming’s solution (see below). Its
salts are employed in the form of:—
A. Müller’s Fluid (Potassium bichromate 25.0 grms., sodium sulphate
10.0 grms., water 1,000.0 cc.) This was formerly the favorite fixing solution,
but is now used chiefly for the eye and nervous tissues, either alone, or after
formol fixation, or mixed with formol. Large pieces may be used, even an entire
brain, but the process requires months or even a year for the best results. Even
small pieces take several weeks. The process may be hastened in the incubator.
The solution should be changed whenever it becomes cloudy. When fixation is
complete the fixed and hardened tissue may be cut directly on the freezing-microtome
or after-hardened and dehydrated in alcohol or acetone when it is
to be imbedded. The dehydration in alcohol should be carried out in the dark
and without previous washing of the tissue in the case of nervous tissue. Greenish
or brownish chrome precipitates appear if the dehydration takes place in the
light; but for ordinary material this precipitate can be avoided by washing the
fixed material in running water for 24 hours before transferring to alcohol.
Moulds grow luxuriantly in Müller’s fluid, but may be inhibited by the use of
pieces of camphor, thymol, etc.
Advantages. Cheap, penetrates well, causes little shrinking, permits special
nerve-stains, preserves red blood-cells, gives beautiful results with ordinary
stains, preserves fat.
Disadvantages. Slowness; does not preserve division-figures; does not
permit of staining for bacteria; does not give good results with many special
staining methods (fibrin, elastic tissue, reticulum, etc.).
B. Erlitzky’s Fluid (Potassium bichromate 25.0 grms., copper sulphate
5.0 grms., water 1,000.0 cc.). Used for fixation of nervous tissue. The formation
of pigment precipitates may lead to misinterpretation: the artefacts may
be removed by hot water or dilute acetic acid.
C. Orth’s Fluid (Müller’s fluid 100 cc., formol 10 cc. Make fresh before
using, as the mixture precipitates on standing.). Fix for 3-12 hours in the incubator,
or for 24-48 hours at room temperature. Wash in running water for
12-24 hours; cut on the freezing microtome, or after-harden in acetone or
alcohol and imbed.
Advantages. Combines the good features of Müller’s and formol fixations,
and obviates some of the disadvantages. It is a good general fixing solution.
3. FORMOL OR FORMALIN (40 per cent solution of formaldehyde
gas). Used in a ten per cent solution (water or physiologic salt solution nine
parts, formalin one part), often incorrectly called 4 per cent formol or formalin,
the mistake arising from the confusion with 4 per cent formaldehyde gas. For
nerve-tissues it is better to dilute the formol with physiologic salt-solution than
with water. Fix for 3-4-12 hours according to size of tissue. As it penetrates
well large pieces can be used. Wash in water before after-hardening in alcohol,
if tissue is to be employed for general work, otherwise it can be transferred
directly to the alcohol without washing. Tissues can be kept in formol for some
weeks, but after that time the staining-power is slowly affected, and the finer
structures suffer.
Advantages. Probably the best fixing reagent for general pathologic work.
It is cheap; easily made and kept in solutions of proper strength for fixing;
hardens while it fixes; does not require after-washing; penetrates well; causes
little shrinking; permits freezing directly from the fixing solution; preserves fat;
permits the use of after-hardening with bichromate solutions for especial
nerve-stains: preserves the red blood-cells: gives good results with nearly
all stains, and differentiates bile-pigment from hæmatoidin. It is the best
fixing reagent when tissues are to be sent some distance, as over-fixation
occurs only after several weeks or even months.
Disadvantages. Affects many people unpleasantly, causing coryza, eczema
of the hands and arms, and affections of the finger-nails, so that workers having
acquired this idiosyncrasy cannot expose themselves to formol vapor; it dissolves
glycogen and uric acid; does not fix cell-division figures as well as
mercuric chloride or Flemming’s solution; causes the precipitation of diffuse
hæmoglobin in the form of brown or black pigment-granules that may be taken
for melanin, malaria pigment or hæmosiderin; causes a pseudo-ochronosis of
cartilages; and, unless thoroughly washed from the tissues before after-hardening
in alcohol, it makes carmine-staining difficult or unsatisfactory and affects also
the specific staining-reactions for amyloid and mucin; it is not as good as alcohol
or mercuric-chloride when the sections are to be stained for bacteria. In spite
of these disadvantages it can be recommended as the best general fixing reagent.
For Orth’s fluid, formol-acetone and formol-alcohol see above.
4. FREEZING AND DRYING. The fresh tissue is frozen and dehydrated
in a vacuum over sulphuric acid, at a temperature of 20-30°C.; when
completely dried it is imbedded directly in paraffin. This method has been
especially recommended by Altmann on the ground that the tissues are simply
deprived of water without any change in volume.
5. HEAT. Physiologic salt-solution is heated to 80°C. Thin pieces of
tissue are placed in the hot water for two minutes, and then after-hardened in
alcohol. For larger pieces of œdematous tissues, cysts, etc., that cannot be cut
into thin pieces, the salt-solution should be brought to 100°C and the tissues
boiled for several minutes. This method is advised particularly for the coagulation
of albumin in cysts, œdematous tissues, for the study of renal casts, etc.
6. MERCURIC CHLORIDE. This is used most commonly in the
form of a concentrated water solution (mercuric chloride 7.5 grms., sodium
chloride 0.5 grm., glacial acetic acid 5 cc., water 100.0 cc.), or as Zenker’s solution
(mercuric chloride 5.0 grms., sodium sulphate 1.0 grm., potassium bichromate
2.5 grms., water 100 cc.; dissolve by heating, add 5 cc. glacial acetic acid just
before using. The use of a 5 per cent formol solution instead of acetic acid is
recommended). The pieces of tissue should not be thicker than 5 mm. Fix
6-24 hours, then wash 24 hours in running water, and after-harden in alcohol.
Should the sections show mercuric precipitates they should be treated with
Lugol’s solution for 30-60 minutes, then washed in a dilute solution of lithium
carbonate and thoroughly washed out in water and alcohol. Much better stains
can be obtained by this treatment of the sections with Lugol’s. The use of
iodine in the alcohol during the process of after-hardening is not advisable
because of the action of the iodine upon the albuminates of mercury. A 5 per
cent solution of sublamine in distilled water has recently been recommended by
Klingmüller and Veiel. Fix 1-3 hours, wash and after-harden in alcohol. Precipitates
are not formed, and good staining-results are obtained.
Advantages. The mercuric chloride solutions preserve well the red blood-cells,
mitotic figures and finer details of cell-structure, and permit the staining
of bacteria and animal parasites in the sections. Certain especial staining
methods (Mallory’s reticulum-stain, etc.) can be used only after mercuric
chloride fixation, while many others (Heidenhain’s iron-hæmatoxylin, Biondi-Heidenhain
triple stain, etc.) give best results after this fixation. For ordinary
work the saturated mercuric chloride solution is preferable to Zenker’s,
as the latter does not give good results with the commonly-used hæmatoxylin
stains.
Disadvantages. More troublesome and expensive; require thorough washing
and subsequent removal of precipitates, and affect (Zenker’s particularly)
certain stains.
7. OSMIC ACID. Osmic acid is used alone in a 1 per cent solution,
or in such combinations as Flemming’s solution (chromic acid 1 per cent. sol.
15 cc., 1 per cent osmic acid 4 cc., glacial acetic acid 1 cc.), Hermann’s solution
(same as Flemming’s, with 15 cc. of a 1 per cent platinic chloride substituted for
the chromic acid), Altmann’s solution (5 per cent potassium bichromate solution
50 cc., 2 per cent osmic acid solution 50 cc.), Marchi’s solution (Müller’s
fluid 2 parts, 1 per cent osmic acid solution 1 part), and that of Pianese (1
per cent sodium-chloroplatinate 15 cc., 2 per cent osmic acid 5 cc., ¼ per
cent chromic acid 5 cc., formic acid 1 drop). The pieces of tissue must
be very thin, as osmic acid penetrates very slightly. Fix 6-24 hours in the dark,
and wash thoroughly in running water, and after-harden in graded alcohols.
These solutions have but limited use in pathology, and are used chiefly for the
study of fat (oleates) and mitotic figures. Flemming’s and Hermann’s solutions
are the best for the study of mitotic figures, the latter bringing out
plasma details more clearly. Marchi’s fluid is used especially for the study
of nerve-degeneration, and Altmann’s for the demonstration of Altmann’s
granules. The method of Pianese is used for the demonstration of cell-inclusions.
The osmic-acid mixtures are all expensive, penetrate poorly,
cause precipitates, and affect greatly the staining-power of the tissues, so
that it becomes necessary to use certain stains (safranin, carbol fuchsin,
aniline gentian violet, etc.) as counterstains.
8. PICRIC ACID. A saturated water solution of picric acid is usually
employed. Fix 12-24 hours, and wash in alcohol, not water, and after-harden in
graded alcohols. Preserves mitotic figures, fine details of cell-structure, and is
very good for bone and calcified tissues, as it decalcifies and fixes at the
same time.
Numerous modifications and combinations of the above methods have been
proposed such as Flemming’s chrom-acetic solution, Rawitz’s chromic-picric-nitric
fluid, Rabl’s chrom-formic mixture, Burckhardt’s chrom-osmic-nitric solution,
Merkel’s fluid (chromic acid-platinic chloride), Carnoy’s mixture (glacial
acetic acid 1, absolute alcohol 6, chloroform 3), and many others. They have a
limited use in pathologic work.
In the judgment of a section as to its fixation the following
points may be of service: in alcohol fixation the red blood cells
are haemolyzed, and there is much shrinking; with formol fixation
the red cells stain copper-red with eosin; in mercuric chloride fixations
the red cells stain rose-red with eosin, and pigment precipitates
are present; in bichromate fixation the red cells preserve their
natural color, and fat cells show a brownish color; osmic-acid fixation
is shown by the black color of the oleates, and the failure of
the tissue to stain by ordinary stains.
CHAPTER XXI. DECALCIFICATION.
Bone and tissue containing deposits of lime must be decalcified
before they can be sectioned on the microtome. The decalcification
should be carried out after fixation and before the after-hardening
in alcohol. Some reagents may combine decalcification with fixation,
but this is satisfactory only when the amount of lime-salts
is relatively small. Fresh tissues should not be put into any of
the stronger acid decalcifying fluids, as they alter unfixed cells so
that the staining-power is lost and the fine histologic details
destroyed. The fixed tissue cut into small pieces is put into the
decalcifying reagent, which is used in large amount and must be
frequently changed. It is left in the decalcifying fluid until the
calcium salts are removed, as shown by tests with needle or
scalpel. The tissue must not be left in the fluid after decalcification
is attained, as the staining-power is affected by all decalcifying
reagents; it is therefore necessary to make frequent tests in order
to judge of the progress of the decalcifying process. After decalcification
the tissue should be washed in running water for 24 hours,
and then after-hardened in alcohol. Alkaline solutions may be used
to remove the acid before washing. Sections of decalcified tissue
always stain slowly, and it is advisable to remove any acid remaining
in the tissues by soaking the sections in a saturated water solution
of lithium carbonate before staining. Numerous formulæ for
decalcifying fluids have been recommended; a few of the best
methods only are given here.
1. Combined Fixation and Decalcification. Picric acid or Müller’s fluid
may be used for this purpose when the amount of lime-salts contained in the
tissues is very small. The process is slow.
2. Trichloracetic Acid. Fix tissues in 10% formalin and decalcify in
trichloracetic acid 90 cc., formol (40 per cent formaldehyde) 10 cc. Change
frequently. Decalcification is rapid, the tissue is but little changed and the
staining-power not affected.
3. Concentrated Sulphurous Acid. Fix in 10 per cent formol; decalcify
in concentrated sulphurous acid for 24 hours or longer if necessary. Wash thoroughly
in alkaline water. This is a very good and rapid method; the staining-power
is but little affected.
4. Haug’s Solution. (Pure nitric acid 3-9 cc., absolute alcohol 70 cc.,
sodium chloride 0.25 grm., water 30 cc.). For tissues fixed in mercuric chloride.
5. Phloroglucin. (Phloroglucin 1 grm., pure nitric acid 10 cc., distilled
water 50 cc.). The solution must be carefully dissolved over the flame in a
hood. Decalcification is rapid, and the tissue is protected from the acid by the
phloroglucin.
7. Schaffer’s Method. Imbed the fixed and hardened tissue in celloidin,
harden the celloidin preparation in 85 per cent alcohol, then place celloidin
block in a 3-5 per cent water solution of pure nitric acid and agitate in
Thoma’s water wheel, for 12 hours, or longer according to the size of the
piece. Transfer block to a 5 per cent solution of lithium carbonate or
sodium sulphate for 12-24 hours, changing solution several times, wash in
running water for 48 hours, dehydrate in graded alcohols up to 85 per
cent, and cut.
CHAPTER XXII. IMBEDDING.
The most perfect methods of fixation and hardening do not permit
the cutting of fine sections on a microtome without the freezing
of the tissue, or its infiltration and imbedding in some substance
which surrounds it with a protective coating, and preserves and
holds together its structural elements in their relative positions.
For the cutting of very thin sections, or for the preparation of serial
sections, it is absolutely necessary to employ the process of imbedding.
At the present time paraffin and celloidin are the two substances
in general use for this purpose. While each one of these
possesses certain advantages over the other, and we find consequently
one laboratory worker preferring celloidin and another
paraffin for general work, a long and varied experience makes me
believe that for a teaching laboratory and for diagnostic work when
much material is examined, the paraffin method answers all purposes
much better than the celloidin, and that the latter need be
employed only in very exceptional cases. Since paraffin sections
can be transferred into celloidin by the molasses- or dextrin-fixative
method, thus enabling the use of staining-methods that require
celloidin sections, very few advantages are left in the favor of
celloidin as an imbedding agent. The paraffin method requires a
more expensive outfit to start with in the form of a paraffin oven
and thermo-regulator, but otherwise the two methods cost about
the same. The paraffin method requires more careful attention
than the celloidin. As a rule thinner sections can be obtained in
paraffin than in celloidin, and for the preparation of serial sections
the paraffin method is the only method. Paraffin blocks can be
labeled and filed away, and kept indefinitely without any loss of
staining-power. With careful attention paid to the different steps
of the imbedding process practically everything that can be cut in
celloidin can be cut in paraffin. For very large pieces a slow imbedding
in celloidin is, however, preferred by most workers. Hard and
brittle tissues are as a rule more easily cut in celloidin. For the
staining of bacteria in sections paraffin imbedding is necessary.
Both methods should be learned and practiced with equal facility;
a working knowledge of both is essential in pathologic investigation
and diagnosis.
1. CELLOIDIN IMBEDDING. The granular form of Schering’s celloidin
is the best preparation to use, although good results can be obtained by
using a cheaper well-washed gun-cotton. In purchasing the latter care should
be taken to secure a sample that dissolves easily in alcohol and ether, and does
not give off yellow fumes when exposed to the light. Schering’s granular
celloidin keeps well, and forms on solution a firm, tough, transparent imbedding
mass, so that thin sections are obtainable without difficulty. When kept long in
stock celloidin becomes hard and dissolves more slowly. For use three solutions
are made, thick (10 per cent), thin (2 per cent), and medium (5 per cent).
The celloidin granules or shavings are put into a wide-mouthed bottle having a
tight stopper, and are covered with absolute alcohol and well shaken, and left
for 24 hours. An equal quantity of pure ether is then added, the mixture is
well stirred and allowed to stand for another 24 hours, when it is again stirred
and evenly mixed, and is then ready for use. When gun-cotton is used it is
torn into fine shreds and added to a mixture of equal parts of absolute alcohol
and pure ether and shaken until sufficient has been added to give the solution
the desired strength.
Slow Celloidin Method.
1. Absolute alcohol 24 hours.
2. Equal parts absolute alcohol and ether 24 hours.
3. Thin celloidin for 1-3 days.
4. Medium celloidin for 1-3 days.
5. Thick celloidin for 1-3 days.
6. Block.
The tissue is blocked by removing it from the thick celloidin on a section-lifter
and placing it on a block of vulcanized fiber or wood with enough of the
thick celloidin about it to form a good matrix. The preparation is then allowed
to evaporate in the air until the surface of the celloidin becomes firm (does
not stick to the finger). The block is then placed in 80 per cent alcohol or pure
chloroform until hard enough for cutting (1-24 hours). Cork should not be
used for blocking, nor should wood unless the tannin has been removed by
long treatment with alcohol-ether. The celloidin will adhere more firmly to
the fiber block if the latter is dry, and if there is a sufficient layer of celloidin
between the tissue and the block. The imbedded tissues may be preserved in 80
per cent alcohol for a long time, but gradually lose their staining power. They
may also be kept dry by coating them with melted paraffin. The blocks when
preserved in alcohol may be marked with an indelible pencil.
For imbedding large pieces of tissue in celloidin a glass dish may be filled
with thick celloidin and the infiltrated tissue placed in it with cutting surface
down. The celloidin is then allowed to evaporate slowly under a glass cover,
and fresh celloidin may be added as shrinkage occurs. When well-hardened
the celloidin is cut out of the dish and the block trimmed to the proper proportions,
and attached directly to the object-holder of the microtome or to a
block of wood by a few drops of thick celloidin, allowing it to dry for a minute
or so and then immersing in 80 per cent alcohol. The block may be cut on
the freezing microtome by soaking the hardened celloidin in water to remove
the alcohol (when block sinks), then coating it with saturated gum arabic
solution, and freezing.
Rapid Celloidin Method.
I have used the following method in my laboratory for a number of
years as a regular procedure in practical diagnostic work, and the results
have been uniformly good.
1. Fresh tissue cut thin, or uterine curettings, in absolute alcohol 1½
hours, three changes of fresh absolute during this time.
2. Alcohol-ether 1 hour.
3. Thin celloidin at incubator temperature 12 hours (over night).
4. Medium celloidin 1 hour.
5. Block from medium celloidin, evaporating celloidin by blowing, and
building up matrix by adding successive layers of celloidin.
6. 80 per cent alcohol 1-3 hours.
7. Cut.
The quick celloidin methods recommended in the literature (Kaufmann,
Stepanow, Scholz and others) require more time, and do not give better results.
Material received from operative clinics late in the afternoon can be sectioned
and stained usually by ten o’clock the next morning.
2. PARAFFIN IMBEDDING. A paraffin of a melting-point sufficiently
high enough to withstand summer heat is advisable; a 52°C. paraffin
answers for this latitude. The use of softer paraffins is not necessary. The
paraffin-oven should be regulated at a constant temperature of 54-55°C. Over-heating
of the tissue while in the oven must be carefully safeguarded, so that in
the management of a paraffin-oven the care of the thermo-regulator is the most
important thing.
Slow Paraffin Method.
1. Thorough dehydration in absolute alcohol 12-24 hours.
2. Aniline oil to remove alcohol, until tissue becomes transparent or sinks.
3. 1st. Xylol, ½ hour, to remove aniline oil.
4. 2nd. Xylol, 1-2 hours, until translucent.
5. 1st. Paraffin, 52°C. in oven, 1 hour, to remove xylol.
6. 2nd. Paraffin, 52°C. in oven, 1-12 hours.
7. Block.
The use of xylol-paraffin is not necessary. For blocking staining dishes,
watch-glasses, glass salt-cellars, paper-boxes, metal frames., etc., may be used.
A thin smear of tincture of green soap or glycerin is rubbed over the inside of
the imbedding box, and it is nearly filled with fresh melted paraffin. With warm
forceps the tissue is taken out of the bottle of second paraffin in the oven, and
arranged in the melted paraffin in the imbedding dish in the proper position for
cutting. Care must be taken that the melted paraffin is not hot enough to “burn”
the tissue, else its staining-power may be affected. The surface of the paraffin is
then cooled by blowing upon it, and as soon as a film appears upon the surface,
the dish is carefully immersed in cold water, so that the paraffin may set quickly.
When cool the paraffin-block should slip out of the dish and float to the surface.
It is then trimmed to the desired shape, leaving a good matrix of paraffin around
the tissue. The paraffin-block is then fastened to a wooden block or to the object-holder
of the microtome by means of melted paraffin (a hot knife is drawn
along the under-surface of the block and the latter immediately pressed upon
the wooden block or object-holder). Chloroform, cedar oil, benzene, carbon
bisulphide, etc., may be used instead of xylol, and each one possesses certain
advantages for certain purposes. Benzene is advisable for osmic-acid preparations.
Rapid Paraffin Method.
The above method can be greatly shortened for uterine curettings, thin
bits of tissue, etc., if the various steps are closely watched, and if the entire
process is carried on in the oven. The whole process may be carried out in 1-3
hours, a very great advantage over the quick celloidin method. A simpler and
cheaper method is that recommended by Heller, Henke and Brunk, as follows:—
Acetone Method.
1. Small bits of fresh tissue, or tissue fixed in formol, in water-free
acetone over copper sulphate for ½-1½ hours.
2. Transfer tissue directly to fluid paraffin in the oven for ½-1½ hours;
the acetone evaporates, and the tissue is infiltrated with paraffin; or
put into xylol 5-10 minutes, then in paraffin 15-20 minutes.
3. Block.
By this method the entire process of fixing, hardening, imbedding, cutting
and staining can be carried out in half an hour, and by it the freezing-microtome
can be dispensed with in a large part of quick diagnostic work.
Pyridin Method.
1. Fix in formol.
2. Dehydrate and clear in pyridin.
3. Paraffin.
This method requires a longer time than the acetone method, and is not
so good.
Combinations of celloidin and paraffin may be employed by imbedding first
in celloidin, transferring block to origanum oil, then xylol and finally paraffin.
Formol-agar has been recommended by Bolton and Harris for simultaneous
fixation and imbedding. It offers no especial advantages. Wright uses formol-gelatin
for imbedding tissues for sectioning on the freezing microtome. The
bits of tissue are placed in warm 20 per cent pure gelatin; this is allowed to set,
and the block placed in 10 per cent formol for 24 hours; it is then frozen and
cut. Soap-gelatin, glycerin-gelatin, gum-glycerin, etc., are now rarely used for
imbedding.
Note:—When a number of pieces of tissue are blocked at the same time,
either in celloidin or paraffin, they may be tagged with paper labels fastened to
the tissue with a drop of gum tragacanth or gum arabic. As the gum is not
soluble in any of the infiltrating and imbedding media the labels remain attached
until the block is ready for cutting.
CHAPTER XXIII. SECTION-CUTTING.
Fixed and hardened tissues may be sectioned on a microtome
without freezing or imbedding, or they may be cut on a freezing-microtome;
or, having been imbedded in either celloidin or paraffin,
they may be sectioned on any form of microtome suited to the purpose
desired. The choice of the microtome depends, therefore, upon
the character of the work. For ordinary purposes the small sliding
microtomes furnished with a crank are preferable, as they are more
easily kept in order and can be used for rapid cutting. For
serial paraffin sections the Minot automatic rotary microtome
is advised. Especial types of microtomes can be obtained for the
cutting of large sections, particularly for brain-sections. The
Bardeen freezing-microtome I have already recommended as the
most practical instrument for freezing work. In all cases it is
absolutely necessary that the instruments be in good order and
that they work with precision. The microtome knife must be
carefully honed and stropped. A heavy, rigid, biconcave knife-blade
should be used, and a good hone and strop are absolute
necessities. In honing, the knife is drawn from heel to toe with
cutting edge forward; while, in stropping, the motion is reversed,
the back of the knife being forward, and the motion from toe to
heel. The knife during the honing should be fitted in a knife-holder,
and the back of the blade protected from the hone by a knife-back.
The knife-blade must be kept free from grease and dirt, and nothing
must be permitted to touch its edge. When many sections are
cut at one sitting frequent stropping is necessary. When the cutting
is finished the knife should be removed from the microtome,
carefully cleaned and dried, and placed in its box. The slide and
other bearings of the microtome should be well-oiled with the best
microtome oil, and kept free from dust.
1. Cutting of Fixed Tissues Without Imbedding or Freezing.
It occasionally becomes necessary in pathologic work to cut tissues
directly upon the microtome without freezing or imbedding. This
can be done satisfactorily in the case of very firm substances, such
as amyloid liver and spleen, etc. The sectioning is done in the wet,
using 80 per cent alcohol, as in celloidin cutting. A large celloidin
knife should be used, and the blade should be flooded in alcohol. A
large piece of the tissue, or, better, several pieces, are clamped in
the object holder with only a small layer of tissue above the holder.
The knife-blade is placed at the least possible angle to the pieces
of tissue. To obtain sections of 15-20 microns in thickness the
object-holder is raised each time about 25-30 microns. The sections
will vary in thickness, some thin, others very thick.
2. Sectioning of Frozen Fixed Tissues. Tissues fixed in
formol, Müller’s fluid or Orth’s fluid may be frozen directly on the
freezing-microtome without previous washing. For other fixations
previous washing is necessary. Tissues in alcohol must have the
alcohol thoroughly washed out before freezing. Celloidin blocks
may also be cut by freezing after the removal of alcohol. The
fixed tissues cut to the proper size are placed on the object-holder
of the freezing-microtome in a drop of saturated gum-arabic and
the freezing carried out as directed above. (See Page 214.) As
the freezing causes little or no damage to fixed tissue, the frozen
sections may be transferred directly to alcohol, or floated out on
the dilute molasses or sugar-dextrin solution, and stained separately
or in sheets, according to the directions given in the next
chapter.
3. Sectioning of Celloidin Blocks. The celloidin blocks are
fastened in the object-holder of the microtome, and the knife-blade
(a longer and broader one than for paraffin-sectioning is advisable)
set nearly parallel with the longitudinal axis of the microtome, so
that the cutting-edge, striking the block at a very slight angle,
will be utilized for the greater part of its length in cutting entirely
across the surface of the block. Both object and knife-blade must
be kept constantly wet with 80 per cent alcohol; a broad camel’s-hair
brush or a drip-bottle can be used for this purpose. The sections,
as they are cut, are transferred from the knife to 80 per cent
alcohol by sweeping the finger or brush from above toward the edge
of the blade. Care must be taken not to strike the brush against
the edge of the blade, and this can be avoided by using the brush
always with a downward stroke. As the sections are cut they are
guided onto the knife-blade by means of a fine-pointed camel’s-hair
brush, if the sections show any tendency to curl. They should be
smoothed out at once on the knife, and then transferred to the dish
of 80 per cent alcohol. Sections 7-10µ thick are easily cut in celloidin,
if the process of imbedding has been carefully carried out.
To prepare serial-sections from celloidin blocks the sections as
they are cut must be arranged in their order on the knife-blade and
thence transferred in this order to a slide or glass-plate, to which
they are either fastened so that they cannot become loose during
the staining process, or they are fastened together by a film of
celloidin and stained in one piece. To fasten the celloidin sections
to the slide Mallory and Wright suggest the cutting of the block
in 95 per cent alcohol, and the arrangement of the sections in their
order on the knife, whence they are drawn on to a dry, clean and
numbered slide. Ether vapor from a half-full bottle of ether is then
poured over the slide, slowly, to flatten out the sections and fasten
down the frilled edges. The slides are then transferred to 80 per
cent alcohol to harden the celloidin, and they are kept in this solution
until ready for staining. Celloidin sections may also be
fastened to the slide by albumin glycerin (equal parts white of egg
and glycerin with a crystal of phenol or thymol). The celloidin
sections, as they are cut, may be transferred to a dry gelatinized
slide or plate (16 grms. gelatin in 300 cc. warm water), and are
then covered with a thin celloidin; the slide is then placed in water
at 50°C., the gelatin dissolves and the celloidin film floats off; the
latter is then stained as one section. Serial sections of celloidin-blocks
may also be arranged upon slides or plates covered with a
coating of the Schmorl-Obregia sugar-dextrin solution or diluted
New Orleans black molasses; the slide or plate is flooded with absolute
alcohol; drained; a thin celloidin is then poured over it; it is
immersed in warm water and the celloidin-sheet containing the sections
is liberated, and is then stained as a whole or cut into strips
as desired. The molasses method is the cheapest and simplest
method, and much to be preferred to the Weigert closet-paper
method, by which the sections are arranged upon a strip of moist
closet-paper which is either held upon the slide or kept upon a piece
of blotting-paper wet with 80 per cent alcohol. A slide or glass-plate
is covered with a thin layer of celloidin and the strip of paper
containing the sections is laid upon the celloidin surface, the sections
down, so that these stick to the slide as the paper is carefully
peeled off. The preparation is dried with filter-paper and a thin
layer of celloidin poured over the slide and sections. The celloidin
is then hardened in 80 per cent alcohol and the sections stained on
the slide; or the celloidin film is removed by immersion in warm
water, and then treated as one section. Celloidin films may be
marked with a brush dipped in a water solution of methylene-blue.
This should be done as soon as they are made. Langhans’ method
is advised for the remounting of serial sections from tissues stained in
bulk and imbedded in celloidin. The sections are cut in origanum-alcohol
(1 part absolute alcohol to 3 parts origanum oil) and placed
on a slide in a layer of origanum oil, blotted and mounted in balsam.
Should sections become milky in the oil, renew the latter until they
are cleared.
4. Sectioning of Paraffin Blocks. The paraffin block trimmed to
the proper proportions, leaving a rim of paraffin about 2-3 mm. wide
all about the tissue, is fastened to the wooden block by melting the
under side of the paraffin by drawing a hot knife across it, and
then immediately pressing the block upon the wood. The wooden
block is then clamped into the object-holder. If desired the paraffin
block can be fixed directly to the metal plate of the object-holder
in the same manner. The block is raised until the level of the edge
of the knife is reached. The knife is placed transversely or at a
slight angle, and the cutting done with a relatively small portion
of the edge. The paraffin block may be breathed upon to warm
slightly the upper layer when a hard paraffin is used, and the knife
is then drawn carefully through the block, guiding the section onto
the knife-blade by means of a fine-pointed camel’s-hair brush held
in the left hand. It is preferable, I think, to have a wider rim of
paraffin at one corner of the block and to place the block with that
corner at a slight angle to the knife, so that the edge of the blade
will first engage the block at that point. The tip of the camel’s-hair
brush moistened in water catches the corner of the section
as the knife begins to cut, and pushes it over onto the blade, thus
holding the section flat and preventing curling. When entirely cut
through, the section is removed from the knife by the brush, still
holding it at the corner first touched, or if necessary it is again
moistened and applied to the upper side of the section, lifting the
latter off the knife. The block is trimmed down to the proper level
by cutting thick sections first, then sections of the desired thickness
when the level of the entire block is reached. The sections
are then transferred, with their shiny side down, just as they come
off the knife, to a slide, sheet of paper, warm water, warm molasses
or sugar-dextrin solution, or 70 per cent alcohol, and treated further
according to the directions given in the next chapter. The presence
of ridges on the cut surface of the block is an indication that the
knife needs stropping. The knife must cut the paraffin, not scrape
it. Crumbling of the paraffin is the result of imperfect infiltration
during the imbedding process; water, alcohol, aniline oil or xylol
may be left in the tissue, the paraffin may contain oil, or the cooling
process may have been delayed. Curling of the sections can be prevented
by using a sharp knife and slightly warming the surface of
the block by breathing upon the block, use of a warm knife or
spatula, heat-focus, etc. For ordinary work paraffin sections 5-7µ
thick are easily obtained; for especial work 1-2µ sections may be
obtained by especial care in imbedding, using graded paraffins and
finally imbedding in a 56°C. paraffin. The pieces of tissue should
be small, and the sections may be cut with a knife wet with water
or alcohol. Serial paraffin sections are easily obtained; in fact,
paraffin imbedding is by far the best method for serial cutting. To
cut ribbons of sections upon the ordinary slide microtome the block
must be clamped into the object-holder so that the edge of the block
facing the knife, as well as the opposite side of the block, is parallel
with the knife-edge. The knife should be placed at right angles
to the microtome. If the paraffin has the right consistency the
edges of the sections as they are cut will adhere, and a ribbon of
serial sections will be pushed up over the knife. This ribbon can
be cut into pieces of the desired length and mounted according to
the directions given in the next chapter. The Minot automatic
rotary microtome is especially well adapted for the cutting of ribbon
sections. Failure of sections to adhere to each other is usually
the result of too hard consistence of the paraffin, and this can be
remedied by warming slightly, according to the method given
above. If the paraffin is too soft the sections fold together. The
block may be cooled in ice-water, or the sections may be cut with a
cooled knife. Paraffin knives so constructed that they may be
cooled by a stream of ice-water are supplied by dealers in microtomes.
The conditions essential for successful paraffin cutting are
perfect infiltration and imbedding, sharp clean knives and a certain
degree of skill in manipulation that can only be secured by practice.
CHAPTER XXIV. THE PREPARATION OF MOUNTED SECTIONS.
Sections of fresh material, unimbedded or imbedded tissues
must be treated by a series of processes before they are finally permanently
mounted and ready for use. These processes in general
are: preparation for staining, staining, differentiation, washing,
dehydration, clearing and mounting. The general procedure will
be modified to some extent by the character of the tissue, manner
of preparation (fixed or unfixed, imbedded or unimbedded, unstained
or stained), character of stain (affected by alcohol, xylol,
etc.), and the mounting agent (glycerin, balsam, damar, colophonium).
Two or more of these steps may be combined in one; the
same agent may differentiate, dehydrate and clear. Several stains
may be combined in one solution, or it may be necessary to use
them in succession. The very greatest variation is possible in
pathologic technique; in fact, practically every laboratory worker
modifies methods according to the light of his individual experience.
The really important thing is to be master of the method, and not
allow the method to control the situation. One of the greatest
attractions about laboratory work is the infinite possibility of variation
and improvement of methods and the invention of new ones.
I. PREPARATION FOR STAINING.
a. Frozen Sections of Fresh Tissue. Frozen sections of fresh tissues,
as well as those obtained by the single or double razor, may be stained by floating
the section on a slide, staining it directly (carbol-kresyl-echt-violett or
carbol-thionin), examining in the stain or washing, dehydrating, clearing and
mounting; or the section may be fixed to the slide with molasses or sugar-dextrin
solution, covered with a celloidin-film, and treated according to the
methods followed for paraffin or celloidin sections. Sections of fresh tissue
may be fixed in formol or alcohol, and then treated by the same methods as
celloidin sections. (See also Page 220.)
b. Sections of Unimbedded Tissues. These may be handled for staining
in the same way as paraffin, celloidin or fresh-tissue sections, either when sectioned
directly or after freezing. The sections may be stained directly, on the
slide, cover-slip, or in the staining solution, or they may be transferred into
celloidin sheets by the same methods employed in the preparation of paraffin
sections.
c. Celloidin Sections. These may be transferred from water or alcohol
directly to the stain. It is not necessary to remove the celloidin. If not stained
soon after cutting they should be preserved in 95 per cent alcohol. Celloidin
sections may be stained on the slide by simply blotting the section firmly on the
slide, without permitting it to become dry, and manipulating it carefully through
the various solutions; or the section may be fixed to the slide by the use of
95 per cent alcohol, ether-vapor and fixation in 80 per cent alcohol; or the section
may be fixed to the slide by the methods given above under the cutting
of serial sections of celloidin blocks. The most common method of preparation
of celloidin sections for staining is to transfer the sections from alcohol into
water to straighten them out, and then to transfer on the spatula into the stain.
For the treatment of serial celloidin sections see above.
d. Paraffin Sections. Paraffin sections may be stained directly without
removing the paraffin. This is especially advisable in the staining of tubercle-bacilli
and in other cases where the use of alcohol is to be avoided. For many
stains this method cannot be used. The sections as they are cut are floated directly
into the warm stain, on which they flatten out, and are then transferred to
the other solutions on the section-lifter, finally dried on the slide, in the incubator
or over the flame, cleared in xylol and mounted in balsam. Paraffin sections may
also be stained without removing the paraffin by being transferred directly from
the knife on to 80 per cent alcohol, stained, washed, dehydrated in absolute
alcohol or by drying, cleared and mounted. The section is transferred from
one solution to another on the slide or spatula. The paraffin is removed during
the clearing in xylol in both of these methods. The treatment with xylol
must be on the slide, else the section may go to pieces. The staining of the
section in the paraffin usually takes more time than staining after the paraffin
has been removed, but the process can be hastened by heating the stain.
Slide and Cover-slip Preparations. Paraffin sections may be affixed to a
slide smeared with a thin film of albumin-glycerin (equal parts of filtered beaten
white of egg and glycerin, with crystal of phenol or thymol, or 1 grm. of
sodium salicylate to 100 grms. of the mixture as a preservative). A drop
of fixative is placed upon a clean slide, and is rubbed over the slide in
a fine film with the back of the finger. The dry paraffin section with glossy
side down is placed upon the smeared slide, flattened with a brush and
then pressed firmly against the slide with the ball of the thumb. The albumin-fixative
is then coagulated in the incubator or over the flame; the paraffin
is melted over the flame without over-heating the section and the slide covered
at once with xylol to remove the paraffin. It is then put into 95 per
cent alcohol, thence into the stain; and after staining, the section is washed,
dehydrated, cleared and mounted. Cover-glass preparations of paraffin sections
are made by floating the sections with glossy side downward on warm
water (just below the melting-point of the paraffin) until they straighten out
and are perfectly flat. They are then floated on to cover-slips covered
with a thin film of albumin-glycerin, the albumin having previously been coagulated
by passing the smeared cover-slips through the flame quickly so that they
do not scorch or burn. The cover-slips with the adherent sections are then
placed in the incubator for 12 hours. The paraffin is then removed by xylol, the
xylol is washed out in 95 per cent alcohol, and the cover-slips are then carried
through the processes of staining, washing, dehydration, clearing and mounting.
The cover-slips must be handled with forceps and the section side should always
be uppermost. Slides covered with a film of albumin-glycerin may be used
instead of cover-slips. The albumin-glycerin film may be omitted, and the sections
with glossy side down floated in warm water on to clean covers or slides;
the water is drained off and the slides or covers are put in the incubator for 12
hours. Sections adhere fairly well by this method (capillary attraction method).
Bubbles are removed by careful heating. Serial ribbons of the size desired can
be floated and mounted on slides by the albumin-glycerin or the capillary attraction
method.
By far the best method of preparing paraffin sections for staining is the
molasses plate method, a modification, originating in my laboratory, of the
Schmorl-Obregia sugar-dextrin method. When many sections are to be stained
at once it is the most convenient method and gives uniform results. In the
preparation of sections for class-work it has no equal. It can be used also for
giving out unstained sections. When many sections must be stained in diagnostic
work the method saves much time and labor. Fifty sections can be
stained as easily as one. It combines all the advantages of the celloidin and
paraffin methods, as does the Schmorl-Obregia sugar-dextrin method, but is
much cheaper than the latter.
Schmorl advised the use of a sugar-dextrin solution (cane sugar solution
[1:1] 300 cc., 80 per cent alcohol 200 cc., yellow dextrin solution [1:1] 100 cc.)
to be run over a perfectly clean glass plate or slide until the entire surface is
covered with an even layer. The paraffin sections as they are cut are arranged
in order on the wet plate, and when the plate is full, it is heated sufficiently to
flatten and smooth the sections. The plate is then placed in an incubator for
3-12 hours to harden and dry. When dry it is immersed in xylol to take out
the paraffin, then treated with absolute alcohol for 10-15 minutes, the alcohol
drained off, and the plate covered with a thin layer of celloidin (celloidin
or photoxylin 10, absolute alcohol 100, ether 100). As soon as the celloidin sets
(1-2 minutes) the plate is immersed in warm water and the celloidin film containing
the sections is detached. It can now be carried through the staining,
washing, dehydrating and clearing solutions as one section, and in the clearing
solution cut into strips or single sections, as desired, for mounting. Huber and
Snow improved the method greatly by floating the paraffin sections directly on
to warm dilute sugar-dextrin (a 10 per cent solution of Schmorl’s stock-solution
will suffice), and plating the sections directly from the latter. This method of
using the dilute solution is less expensive, much cleaner, and saves time in drying
in the incubator. The results are in every way better than with the Schmorl
solution in full strength. The formation of bubbles and crystals is almost wholly
prevented, and less dust is caught on the plate. In my laboratory we have modified
the method still further by using a 10 per cent solution of New Orleans
black (or baking) molasses instead of the more expensive sugar-dextrin solution.
As the molasses costs but 20 cents a gallon, a gallon of the dilute solution costing
2 cents can be used indefinitely if fermentation be prevented by a crystal of
phenol or thymol. The paraffin sections are floated on to this dilute molasses
solution warmed sufficiently to smooth out the sections; 4 × 5 glass plates (old
negatives) thoroughly cleaned and kept in alcohol are immersed in the warm
molasses solution and the sections arranged on them as desired, lifting out of the
solution that part of the plate covered with sections as they are drawn upon it.
As soon as the plate is covered it is drained, and is then flooded with absolute
alcohol. After 1-2 minutes the alcohol is drained off and the plate flooded with
thin celloidin, which is allowed to set for a minute or so, and the plate then
immersed in warm water in which the celloidin film containing the paraffin sections
is detached. This film is then handled by catching it at the two corners of
one end with the fingers, or better still by a pair of forceps held in each hand.
The film is put first into xylol to remove the paraffin, then into 95 per cent
alcohol, then into water and thence into the staining solution. After staining
the film is washed, dehydrated and cleared, and in the clearing solution is cut
into strips or single sections by means of the wheel-shaped paper-cutter used by
paper-hangers. The pieces are then mounted. A dilute sugar-dextrin solution
can be used instead of the molasses-solution, but the latter is much cheaper
and does just as well. Aside from this advantage our method of transferring
the paraffin-sections into the celloidin film without first removing the paraffin
saves a great deal of time, as it is not necessary to wait for the plates to dry
in the incubator. The same method can be applied to the staining of single
paraffin sections on the slide. The conversion of the paraffin section into a
celloidin preparation without any loss of time for drying is so quickly and easily
carried out that I advise it above all others. The same method may also be
applied to the staining of fresh and fixed tissues cut on the freezing microtome
or sectioned without imbedding. The success of the plate-method will depend
largely upon the state of the glass-plates when put into the molasses solution.
They must be perfectly clean or the celloidin sheet will not separate well. It is
best to keep them in alcohol until they are needed. The celloidin must be of
the right consistency, the layer must be thin, and cover the entire plate uniformly.
It must not be allowed to harden too much before immersion in water
or it will be tough and will shrink. Handling of the celloidin-sheets with the
bare hands is not advisable because of the large number of epithelial cells adhering
to the celloidin. The sheets are easily changed from one solution to another
by catching them with forceps; the use of a glass-plate to transfer them is not
necessary. When it is desired to preserve sections for future staining the
celloidin sheet containing the paraffin-sections can be kept in 80 per cent
alcohol indefinitely.
Note:—If the glass-plate is numbered with a blue wax-pencil after the
paraffin sections are floated on, the marking will be transferred to the celloidin
sheet, and the latter will retain the marking through all solutions.
II. STAINING AND DIFFERENTIATION.
Staining is necessary to bring out clearly the constituent elements
of the tissues and their relations with each other, and
for the demonstration of histologic structures or chemical substances
that would otherwise be nearly or wholly invisible. The
technique of staining depends upon the fact that stains or dyes
possess certain affinities for the tissue-elements or for certain
simple or complex substances present in the tissues (microchemic
reactions). These affinities vary greatly with the dye.
Some dyes have an affinity only for single constituents of the tissue
(elective or specific stains); others have an especial affinity for the
nucleus (nuclear stains), others stain all the tissue-constituents diffusely
(diffuse or protoplasmic stains). There are but few pure
elective stains for single tissue-elements; the majority of stains
will stain more than one of the tissue elements, but may show an
especial affinity for certain ones. As a result of these variations in
the affinities of dyes for the constituents of the tissues it becomes
possible to manipulate the dyes or to combine them in such a way
that a specific differentiation of many tissue-elements is possible
through the use of different methods of staining. These methods
are based in part upon the use of different mordants, the employment
of several stains in combination or in succession, the mixture
of stains to form a new staining compound, the phenomenon of
metachromasia, the differentiation of certain tissue-elements by the
removal of the stain from the structures for which it possesses
a weaker affinity, and by the employment of different microchemic
reactions. The two most commonly employed methods are the
progressive, in which the stain is allowed to act until the affinities
of certain tissue-elements have been satisfied when the staining process
is interrupted; and the regressive, in which the tissue is over-stained,
and the dye withdrawn from the tissue-elements for which
it possesses the weakest affinities leaving the other elements
stained. This latter process is usually called “differentiation,” and
the chief substances used for such differentiating are dilute acid,
acid alcohol, acid stains, aniline oil, aniline-xylol and alcohol. Some
workers use the regressive method for such simple stains as hæmatoxylin,
overstaining, and then differentiating with acid alcohol
before counterstaining with eosin. The results obtained in this
way are much less satisfactory than is possible with the progressive
method.
Tissues may be stained in the body during life (intravital staining),
or immediately after removal from the body (supravital or
survival staining), either before or after sectioning. (See Page 217.)
Fixed tissues may be stained in bulk or in sections.
Staining Tissues in Bulk.
This method is not often used in pathologic work. The fixed and hardened
tissue is cut into small pieces, placed in the staining solution for several days,
washed thoroughly, dehydrated in alcohol, imbedded, cut, and mounted without
further staining. Alcoholic solutions penetrate best; hæmatoxylin, hæmalum,
carmine and alcoholic solutions of the aniline stains may be used. Metallic
impregnation (gold or silver salts) of fresh or fixed tissues is but little used in
pathology. (See Staining of Nervous System, and Spirochætes.)
Staining of Sections.
Celloidin sections are lifted from water or alcohol into the stain by the
needle or section-lifter. The use of the latter is advised, as by it the section
can be floated flat on to the staining solution. When many celloidin sections are
to be stained at once they can be stained in small tea-strainers and transferred in
these from one solution to another. Paraffin sections may be floated directly
on to the stain without removing the paraffin; or they may be stained on the
slide or cover-glass after removing the paraffin, the stain being dropped on to
the section, or the slide or cover-slip is immersed in the stain. Special staining-dishes
for the staining of paraffin sections on slides and covers can be obtained.
Paraffin sections transferred to celloidin sheets by the plate method can be put
into the staining-solution while on the glass-plate, or the films can be detached
and transferred from one solution to another by means of forceps. This is the
easier way, and it is not necessary to touch the films with the fingers.
General Rules for Staining.
1. The stain should be filtered just before being used, in order to remove
precipitates, moulds, etc. Unless they have been diluted most of them can be
used over and over again, hence after using they should be filtered back into the
stock bottle.
2. A liberal amount of stain should be used. Slides and cover-slips are
given enough stain to cover completely the section, when the staining is done on
the slide, or they may be immersed in staining-dishes. Plates and celloidin
sheets should be stained in large trays. Sections and celloidin films should be
flat without folds or wrinkles, and they should not touch one another when several
are stained at the same time. Transference of the section from water or
dilute alcoholic solutions to dilute or stronger alcohol respectively for a moment
and then back again will usually straighten out curled or wrinkled celloidin
sections.
3. Stain until the section is properly stained. Control this by removing it
from the staining-solution and examining it in water on a glass-slide without
a cover-slip, using the low-power. Sections will always appear more deeply-stained
when cleared than when examined in water, hence due allowance should
be made. Celloidin sheets can be examined on glass-plates. The time-limits
given in staining methods are only approximate; no absolute rules can be laid
down as to the length of time necessary to obtain a good stain. The methods
of fixation and hardening, age of the tissue, age of the stain, etc., affect the
staining power. Some stains lose their staining-power after a time; others
require a period of ripening before they yield the best results. As a rule staining
may be intensified or hastened by staining in the incubator or at a higher
temperature, by concentrating the stain, or by the use of such substances as
aniline oil. When differentiation is necessary the process should also be controlled
by frequent examination of the section, as above for staining. Usually
the section can be examined in the differentiating fluid.
III. WASHING.
Thorough washing after staining is necessary after nearly all stains. The
washing should usually be done by soaking the sections in several changes of
distilled water, although tap-water, alcohol, alum-water, and other solutions may
be used to intensify the staining effects. When this is done a final washing in
distilled water or alcohol is usually necessary. Differentiating fluids should
always be thoroughly removed from the section before mounting. Sections
should not be allowed to lie in wash-water that is colored by the stain; as soon
as the wash-water becomes colored it should be replaced by fresh. When sections
are left lying in the wash-water for some time the vessel containing them
should be covered to prevent the settling of dust on the sections, as it is practically
impossible to remove from the latter dust or other precipitates that may
become attached to them. Some stains give better results after long washing;
others are easily washed out if the sections are left standing in the wash-water.
The time-limits of washing will depend upon the character of the stain employed.
IV. DEHYDRATION.
Dehydration of the sections is usually produced by passing them through
two alcohols, 80 per cent and absolute, or 80 per cent and 95 per cent. For
certain clearing reagents (xylol) it is necessary to use absolute alcohol. When
carbol-xylol is used as a clearing reagent absolute alcohol is not necessary, and
95 per cent can be used instead for the second dehydrating solution. Usually a
minute in each alcohol is sufficient for the dehydration of single sections. If
dehydration with alcohol is not desirable because of its action on the stain it is
possible to dehydrate and clear in xylol by repeatedly blotting the section with
absorbent paper, covering the section several times with xylol and then blotting.
The section should never be allowed to become perfectly dry. Dehydration with
alcohol may also be avoided by staining paraffin sections without removing the
paraffin, drying in the incubator or over the flame, removing the paraffin in xylol,
and mounting. Imperfect dehydration is shown by the presence of white spots
or a milky cloud in the section when it is put into the clearing fluid.
V. CLEARING.
After dehydration, sections must be cleared in some solvent of balsam
before they can be mounted in the latter medium. When 95 per cent alcohol
has been used for the final dehydration the sections may be completely dehydrated
and cleared at the same time by the use of carbol-xylol (xylol, 3 parts;
melted crystals of carbolic acid, 1 part; add melted carbolic acid to the xylol to
prevent formation of crystals). The sections (on the slide or cover-slips, in
celloidin sections or films) are transferred from the alcohol, draining or blotting
off excess of the latter, into the carbol-xylol, and left until perfectly clear. This
can be most easily determined by viewing the sections against a dark background.
Carbol-xylol cannot be used for sections treated with aniline stains.
These are dehydrated in 95 per cent alcohol, and the final dehydration and clearing
accomplished by repeatedly placing xylol upon the slide and blotting it out
until the sections are transparent. Turpentine, chloroform, benzine, toluol, the
oils of bergamot, cloves, thyme, lavender, origanum cretici, and cedarwood,
aniline oil, and various mixtures of these oils are also used as clearing agents.
The majority of these will clear from 95 per cent alcohol, but not so readily as
carbol-xylol; they have individual disadvantages of taking out the eosin, affecting
aniline colors, dissolving celloidin, making sections brittle, slow action,
clinging odor, etc. Chloroform and benzine may be used for clearing osmic-acid
preparations; oil of turpentine is also good for clearing sections stained with
kresyl-echt-violett, and Wright’s blood-slain. With but few exceptions carbol-xylol
and xylol meet all requirements better than any other clearing reagents.
There is but one disadvantage in the case of carbol-xylol; some of the phenols
in the market cause a fading of eosin and hæmatoxylin stains. DeWitt has
shown that this fault can be corrected by redistillation, stopping the distillation
as soon as the temperature begins to rise above the constant boiling point of the
phenol; or the carbol-xylol that fades the stains can also be corrected by supersaturating
it with a mixture of sodium bicarbonate one part, and sodium-potassium
tartrate two parts. Sections kept in xylol or carbol-xylol should be protected
from dust and evaporation; it is not a good plan to keep them in these
solutions for more than 24 hours.
VI. MOUNTING.
Permanent mounts are made in glycerin, potassium acetate, lævulose, glycerin
gelatin, balsam, damar or colophonium. For celloidin and paraffin sections
a solution of Canada balsam in xylol is most commonly used for mounting.
Celloidin sections (celloidin films are best cut into strips and single sections
when in the carbol-xylol; the wheel-shaped paper-cutter used by paper-hangers
is the best instrument for this purpose) are lifted onto the slide from the clearing-fluid;
folds or wrinkles in the celloidin are straightened or removed by cutting
the celloidin at right angles to the section in order to relieve the tension,
and the section is then blotted firmly against the slide by means of a pad of
absorbent paper. The greatest care should be taken to prevent wrinkling, folding
or turning over of the edge of the section. As soon as the pad is removed
a drop of balsam is placed upon the section and the cover-glass put over
it. There should be just enough balsam used to fill the space between cover-slip
and slide, so that air-bubbles are not formed. The balsam must not be so
thin that the cover-glass will float about on the liquid, or so thick that it does
not spread well. In the latter case warming the slide may cause it to spread
more readily, but care must be taken not to injure the stain by over-heating.
Paraffin sections on the slide are similarly blotted and covered with balsam and
cover-glass; those on cover-slips are blotted between folds of absorbent paper
and immediately placed with section-side downward upon a drop of balsam that
has been put upon the slide.
Xylol-damar may be used in place of Canada balsam; it is cheaper and
colorless, but it tends to become cloudy. Colophonium is the cheapest of the
three and has but little color; it is highly recommended by many workers. In
a xylol-solution it may be used for aniline stains; a chloroform solution is advisable
for the mounting of osmic-acid preparations; while a solution in turpentine
and shellac is recommended for Weigert’s neuroglia method, Wright’s blood-stain,
and other special staining methods.
Glycerin, potassium acetate, laevulose and glycerin-gelatin are used for
the preservation of amyloid-, mucin- and fat-stains, as well as for other
preparations that do not permit the use of alcohol and xylol. Glycerin-gelatin
is probably the best medium for this purpose. It is made according
to Kaiser by soaking 7 grms. of gelatin for 2 hours in 42 cc. distilled water,
then adding 50 grms. glycerin and 1 grm. carbolic acid; the mixture is
warmed 10-15 minutes, stirring constantly, and filtered while hot. It is also
made by taking water, 200 cc.; gelatin, 20 grms.; powdered white shellac, 2
grms.; Farrant’s solution (gum arabic, glycerin, solutio acidi arsenicosi conc.,
aa. 30.0 grms.), dissolve by warming, and filter while warm. To mount in
this medium the section is placed on the slide, and blotted with absorbent
paper. A drop of warm glycerin-gelatin is then placed on it and the cover-slip
affixed. The drop spreads evenly beneath the cover-glass and becomes
solid as it cools. Mounts in glycerin, glycerin-gelatin, potassium acetate and
laevulose must be cemented around the borders of the cover-slip with
asphalt, wax, paraffin, gold size, etc., using a brush or glass rod for this
purpose.
VII. SUMMARY OF METHODS OF PREPARATION OF
CELLOIDIN SECTIONS.
1. Fixation of the tissues in alcohol, formol, etc. 2. Wash 24 hours, when necessary. 3. After-harden in 80 and 95 per cent alcohols for 1 to several days. 4. Complete dehydration in absolute alcohol for 24 hours. 5. Equal parts of pure ether and absolute alcohol, 24 hours. 6. Thin celloidin, 1-3 days. 7. Thick celloidin, 1-3 days. 8. Block. Harden block in 80 per cent alcohol. 9. Cut; keep sections in 80 per cent alcohol.
10. Stain; differentiate.
11. Wash thoroughly.
12. Dehydrate in 80 and 95 per cent alcohols.
13. Final dehydration and clearing in carbol-xylol.
14. Place on slide and blot with absorbent paper.
15. Mount in xylol-balsam or xylol-colophonium.
VIII. SUMMARY OF METHODS OF PREPARATION OF
PARAFFIN SECTIONS.
1. Fixation of the tissue in alcohol, formol, etc. 2. Wash 24 hours, when necessary. 3. After-harden in 80 and 95 per cent alcohol for 1 to several days. 4. Complete the dehydration in absolute alcohol for 24 hours. 5. Aniline-oil until tissue becomes transparent. 6. 1st. Xylol, ½ hour, to remove aniline oil. 7. 2nd. Xylol, 1-2 hours, until translucent. 8. 1st. Paraffin (52°C.), ½ hour in oven, to remove xylol. 9. 2nd. Paraffin (52°C.), 1-12 hours in oven, until infiltrated.
10. Imbed and block; cool quickly.
11. Cut sections; mount on slides or covers.
12. Remove paraffin in xylol.
13. Remove xylol in absolute alcohol.
14. 80 per cent alcohol, for a few minutes.
15. Stain; differentiate; wash.
16. Dehydrate in 80 and 95 per cent alcohols.
17. Clear in carbol-xylol.
18. Mount in Canada-balsam or colophonium.
IX. ARTEFACTS IN MOUNTED SECTIONS.
A mounted section, after passing through the various stages
indicated above, must of necessity present some appearances that
are the result of the technical methods employed. The number and
degree of such artefacts will depend upon the character of the
methods employed and the care exercised in their performance.
The trained observer ignores the presence of artefacts as having
nothing at all to do with the significance of the section itself; but
to the beginner in microscopic work they often appear to be the
most important thing in the preparation, and are given a pathologic
interpretation. How frequently do we see students, undergraduates
and postgraduates, take up a section and pick out a fold,
wrinkle, tear, staining-defect, precipitate, dirt, etc., as pathologic
features! It is necessary, therefore, for the student to acquaint himself
with the nature of artefacts so that he may ignore them and not
give them an incorrect interpretation. The most important artefacts
are as follows:—
1. Artefacts due to fixation (mercuric, chromic, osmic, etc., precipitates;
alterations in blood-pigment due to formol; loosening of cells from
basement membrane due to contraction [kidney tubules, etc.: loosened
endothelium in blood-vessels, particularly confusing to students]; destruction
of red blood cells, as in alcohol fixation; poor staining due to over-fixation).
2. Artefacts due to hardening (contraction, desquamation of cells,
etc.).
3. Artefacts due to imbedding and cutting (tears, holes, ragged edges,
irregular thickness, knife-streaks, compression of soft structures, dislocation
and tearing-out of firm tissues or material, wrinkles, folds, etc.).
4. Artefacts due to poor staining (uneven, spotted or streaked staining,
overstaining, understaining, poor differentiation, precipitates, insufficient
washing, fading, poor contrasts, defective staining due to presence of paraffin,
dextrin, etc., in section).
5. Artefacts due to poor mounting (imperfect dehydration and clearing,
cloudiness, milkiness or opacity of section; folds; wrinkles; turned-over
edges; tears in section caused by striking it with balsam-dropper or needle;
air-bubbles; lack of balsam).
6. Dirt and foreign-material (opaque and translucent dirt, above or
below section; coloring-matter in balsam; ink; pigment from pencil; cotton-,
silk, wool-, linen-, vegetable and paper-fibres, hairs, desquamated squamous
epithelium, portions of insects, etc.)
CHAPTER XXV. STAINS AND STAINING METHODS.—NUCLEAR AND PROTOPLASMIC STAINS.
THEORIES OF STAINING. The exact nature of the process
of staining has not yet been determined. Various theories
have been advanced, explaining the affinity of the tissues for certain
dyes, on the ground of a chemical, mechanical or chemicophysical
action. The chemical theory assumes the formation of an insoluble
compound through the chemical combination of tissue and stain;
the physical theory is based upon the assumption that the process
is purely physical or mechanical, while the chemicophysical theory
holds that it is neither purely physical nor purely chemical. The
process is not controlled by the molecular weights alone of the
substances concerned, but does depend upon the conditions controlling
the formation of solutions in general. Therefore, the theory
most widely accepted at the present time is the solution-theory,
which assumes that the staining-process is a solution of the dye in
the tissue, and that the stained tissue-element is a fixed solution
of the stain in its substance. This solution of the dye in the tissues
may be a direct action between the two (direct or substantive
stains); or it may be brought about only by the interaction of a
third substance (indirect or adjective stains). The third substance
is called a mordant, and the combination of the dye with the mordant
is known as a lake. The mordant may be added to the stain
or to the tissue, either before or at the time of staining. Many of
the fixing-fluids are mordants, particularly those containing
chromic acid or its salts. Alum, iron, and many of the metals are
the most commonly used mordants. In a general way acid mordants
are used for basic colors, and basic mordants with acid colors.
The stains most commonly used in pathologic work are:—
1. Natural Dyes:—Hæmatoxylin and Carmine.
2. Aniline Dyes:—a, Acid.—Eosin, erythrosin, acid fuchsin, orange G,
picric acid, sudan III, and scarlet R (Fett-ponceau).
In a general way it may be said that basic stains are nuclear stains,
and acid stains are protoplasmic. Neutral stains are usually diffuse stains;
when formed by the combination of acid and basic dyes they usually act
as selective stains for some especial tissue-element or cell-constituent.
Metachromasia, in its narrowest sense, is the term applied to that staining-phenomenon,
in which a single-chemical entity gives different colors to different
tissue-elements. In this sense iodine, in its action upon glycogen
and amyloid, is a true metachromatic substance. The majority of the
so-called metachromatic stains, however, do not possess true metachromasia,
since their metachromatic powers are dependent upon a mixture of two or
more dye-stuffs in the one compound. The most important stains of this
class are gentian violet, methyl violet, crystal violet, dahlia, thionin, toluidin-blue,
polychrome methylene blue, methylene azure, and kresyl-echt-violett. The
chief chromotropic substances are amyloid, mucin, mast-cell granules and cartilage.
Metachromatic reactions are at their best usually when examined in
water; they are affected by alcohol and usually destroyed by carbol-xylol.
Sections stained by metachromatic stains should be quickly dehydrated by
absolute alcohol and blotting, and cleared in xylol, when mounted in balsam.
I. NUCLEAR STAINS.
1. Haematoxylin (C16H14O6) is an ether extract of the wood of
Hæmatoxylon campechianum, a tree found in the West Indies and
Central America. In itself not a dye, it becomes one of the most
valuable when oxidized to hæmatein (C16H12O6), and combined with
alum, iron or other mordants to form a lake. It then stains nuclei
a deep violet-blue or black color that is practically permanent.
Mucin, lime-salts, bacteria, and colonies of actinomyces are also
stained varying shades of blue. If the staining process is prolonged
the entire tissue, as well as celloidin, becomes more or less heavily
stained blue. A pure nuclear stain is obtained by interrupting the
stain at the right time (examine in water); or if the sections are
over-stained they may be differentiated in acid alcohol (1 per cent
hydrochloric acid in 70 per cent alcohol). Hæmatoxylin stains well
after all fixing-solutions except osmic acid; some of its staining-formulæ
stain slowly after fixation in Zenker’s fluid. On the whole,
it is by far the best general nuclear stain for laboratory and diagnostic
work. It is employed in numerous staining formulæ, the
most useful of which are given here. These formulæ differ chiefly
in the time of staining, “ripening” of the stain (oxidation of
hæmatein), intensity of stain, necessity of differentiation, etc.
a. Böhmer’s Alum-haematoxylin.
Dissolve 5 grms. of hæmatoxylin crystals in 50 cc. of absolute alcohol;
add this drop by drop, while stirring, to 1,000 cc. of a 1 per cent solution of
potassium alum. Expose in open vessel to air and light for 1-2 weeks.
Filter before using.
b. Hansen’s Haematoxylin.
To 200 cc. of alum-hæmatoxylin solution brought to the boiling-point
add 2 cc. of a concentrated solution of potassium permanganate. Cool
quickly; filter when cold. Can be used at once without further ripening. It
tends to stain diffusely.
c. Delafield’s Haematoxylin.
To 400 cc. of a saturated solution of ammonia alum add a solution of
4 grms. of hæmatoxylin in 25 cc. of absolute alcohol. Expose mixture to
air and light for 3-4 days; filter; then add 100 cc. of glycerin and 100 cc. of
95 per cent alcohol, and filter. Expose to light until solution is dark enough,
then keep in tightly-stoppered bottle. It is a strong stain, and may be
diluted with distilled water when desired. The solution keeps well.
d. Ehrlich’s Acid-haematoxylin.
Dissolve 2 grms. of hæmatoxylin in 100 cc. of absolute alcohol. Add
this to a saturated solution of potassium alum in water 100 cc., glycerin
100 cc., and glacial acetic acid 10 cc. Allow mixture to stand for a week
exposed to air and light; then filter. Keep in well-stoppered brown bottles.
The solution stains best when it is six months old, and may be kept for
several years. It does not overstain, and on the whole is more useful than
Böhmer’s, Hansen’s or Delafield’s.
e. Mayer’s Haemalum.
Dissolve 1 grm. of hæmatein in 50 cc. of 90 per cent alcohol and warm.
Add this solution to a solution of 50 grms. of potassium alum in 1,000 cc.
of distilled water dissolved by heating. Mix warm, cool, and filter. With
hæmatein no ripening is required, and the solution can be used at once.
Hæmalum is a more precise nuclear stain, but stains more slowly than the
formulæ given above.
It may be prepared directly from hæmatoxylin crystals by dissolving
1 grm. of hæmatoxylin in boiling water; add water up to 1 litre, and cool.
Add 0.2 grm. sodium iodate and 50 grms. potassium alum, dissolving at room
temperature; 50 grms. chloral hydrate and 1 grm. citric acid may be added
to make solution keep better.
f. Mayer’s Acid-haemalum.
Add 2 cc. glacial acetic acid to 100 cc. of hæmalum solution. It stains
the nuclei more precisely than hæmalum.
g. Weigert’s Iron-haematoxylin.
Dissolve 1 grm. of hæmatoxylin in 100 cc. of 96 per cent alcohol. Allow
to ripen several days, but this solution should not be kept longer than six
months. Make a second solution of 4 cc. of liq. ferri. sesquichlor. (German
Pharmak. IV, sp. gr. 1,124), 1 cc. of concentrated hydrochloric acid and 100
cc. of water. Mix equal parts of each solution just before staining. The
mixture stains well for 5-8 days, so that a quantity of stain sufficient for
this time only should be made up. The two stock solutions are easily made
and keep well. The nuclei stain quickly and deeply, and differentiation and
long washing are unnecessary when hydrochloric acid is included in the
second solution, as given above. After-staining with eosin, picric acid or the
Van Gieson’s mixture gives better results with Wiegert’s iron-hæmatoxylin
than with any other hæmatoxylin.
Method of Staining with Haematoxylin.
1. Stain 1-15 minutes, controlling progress of stain by examination of
section in water, on slide, using low-power.
2. If sections are over-stained, differentiate in ½-1 per cent potassium-alum
or in acid alcohol.
3. Wash thoroughly in tap water, until a good blue is obtained.
Exposure to ammonia vapor or washing for a few seconds in lithium-carbonate
solution will hasten the development of the blue color. If these
reagents are used the section should afterwards be thoroughly washed
in water.
(Stain with a plasma stain, if contrast is desired.)
4. Dehydrate in 80 and 95 per cent alcohols.
5. Clear in carbol-xylol.
6. Mount in balsam.
Over-ripened hæmatoxylins may stain reddish or even brownish, and
too diffusely. In such cases the celloidin will be deeply stained. The addition
of alum-water to the stain may counteract the fault. Alum-hæmatoxylins
must always be filtered before using, as precipitates are constantly
formed as the result of oxidation.
2. Carmine. Carmine is the coloring matter of cochineal,
the dried bodies of the female coccus cacti, and is obtained chiefly
from Honduras. The coloring principle is carminic acid (C2H22O12).
When combined with alum, borax, lithium, etc., carmine gives a
good, permanent nuclear stain, varying from reddish violet to deep
scarlet. It is used chiefly in pathology to give a contrasting nuclear
stain to the various pigments, and when specific blue stains have
been used for fibrin, mucin, bacteria, elastic tissue, etc., or when a
blue injection-mass has been used. Alum-carmine is the most precise
nuclear stain. Differentiation with acid-alcohol is necessary
after staining with borax- or lithium-carmine. Lithium-carmine is
on the whole the best of the three for use as a contrast-color to
the various pigments.
a. Alum Carmine.
Carmine ½-1 grm., 1-5 per cent alum solution 100 cc.; boil 20 minutes;
cool; filter. Add crystal of thymol as preservative.
1. Stain 15 minutes to several hours.
2. Wash thoroughly in distilled water.
3. Dehydrate in 80 and 95 per cent alcohols; clear in carbol-xylol:
mount in balsam. Nuclei are a light reddish violet; the plasma is slightly
stained (muscle) or not at all.
b. Lithium Carmine.
2-5 grms. of carmine to 100 cc. of a cold saturated water solution of
lithium carbonate; filter.
1. Stain 1-3 minutes; transfer directly to acid alcohol (1 cc. of hydrochloric
acid to 100 cc. of 70 per cent alcohol) without putting section into
water; differentiate ¼-6 hours, until nuclei alone retain the color. Control
differentiation by examination on the slide in acid alcohol.
2. Wash thoroughly in water.
(Use plasma stain, as picric acid, if desired.)
3. Deyhdrate in 80 and 95 per cent alcohols; clear in carbol-xylol;
mount in balsam.
c. Borax Carmine.
Dissolve by boiling 0.5-0.75 grm. carmine and 1-2 grms. of borax in
100 cc. of water. To the hot solution add 5 cc. of a O.5 per cent acetic acid
until solution is deep red. After 24 hours filter and add crystal of thymol.
Stain and differentiate as with lithium-carmine, but leave the sections
somewhat longer in the stain (15 minutes).
3. Basic Aniline Stains. The basic aniline stains are used
as general stains for bacteria in sections, and at the same time
stain the nuclei. Methylene blue and fuchsin are employed especially
for this purpose. The metachromatic dyes (thionin, kresyl-echt-violett,
etc.) are also used as nuclear stains in combination
with their metachromatic reactions with mucin, amyloid, mast-cells,
etc. Methylene blue is used in the study of the blood-forming
organs, cell-inclusions, parasites in the tissues, etc. Safranin and
fuchsin are used for staining mitotic figures. (See Staining of
Mitoses.) Bismarck brown is employed sometimes in preparing
sections for microphotography. Methyl green is an intense chromatin
stain and is used in various combinations. Since these dyes
are not very permanent, and are easily washed out in dehydrating
and clearing fluids, as well as “running” in balsam mounts, they are
rarely employed as pure nuclear stains in pathologic work.
When the basic-aniline stains are used a saturated water or concentrated alcoholic
solution (1½-2 per cent in 40 per cent alcohol) may be employed as
stock-solution and diluted 1:5 or 1:10, as desired. The sections are stained 3-5
minutes, then differentiated in absolute alcohol, cleared in xylol, and
mounted in balsam. Methylene-blue is used by some workers as a nuclear
stain contrasted with eosin for tissues fixed in Zenker’s solution, giving better
effects with this fixation than the hæmatoxylins. Unna’s alkaline
methylene-blue formula is employed (methylene-blue 1 grm., carbonate of
potassium 1 grm., water 100 cc.). Dilute 1:10 or 1:5 for staining. Stain
10-15 minutes, wash quickly in water, differentiate in 95 per cent alcohol;
dehydrate in absolute, clear in xylol, mount in balsam. When celloidin sections
are used, 95 per cent alcohol may be used for dehydrating, blotting
on the slide with several changes of xylol.
The nucleolus has an affinity for the acid stains. With the modifications
of the Romanowsky methylene-blue-eosin methods the nucleolus stains
red, the nucleus blue.
II. DIFFUSE OR PLASMA STAINS.
The most commonly used diffuse stains are eosin, erythrosin,
acid fuchsin, orange G, and picric acid. They are practically never
used alone, but are employed as contrast-stains to the nuclear
stains. Eosin, orange G, acid fuchsin and picric acid may be used
as counterstains for hæmatoxylin; picric acid is used as the best
contrast to the carmines, while eosin and orange G are employed as
counterstains for methylene blue. The combination of hæmatoxylin
and eosin is by far the best general staining method for laboratory
and diagnostic work, except for tissues fixed in Zenker’s solution;
for these the combination of methylene blue and eosin is preferable.
Ammonia carmine is sometimes used as a diffuse stain for bone and
the central nervous system. The majority of the diffuse stains
wash out easily in water, alcohol and xylol, hence sections thus
stained should not be allowed to remain too long in these fluids.
a. Eosin. Two forms of eosin are obtainable, one soluble in water,
the other in alcohol. Saturated solutions of both kinds should be kept as stock
solutions and diluted as occasion demands. For use after hæmatoxylin a ½ per
cent solution is advisable; with Zenker’s fixation a more dilute solution may be
used, as tissues so fixed stain intensely in eosin. If used as a contrast-stain
to methylene-blue, eosin is used first in a 5 or 10 per cent solution, as the basic
nuclear stain takes out some of it. Some workers express a preference for
the aqueous solution of eosin, others for the alcoholic; the alcoholic solution
stains more uniformly and with less differentiation than the other. Eosin is
particularly good as a contrast-stain for tissues containing red blood cells when
fixed in formol, mercuric chloride or Zenker’s.
b. Orange G. Used in a 1 per cent water solution. Requires longer
time for staining than eosin.
c. Acid Fuchsin. A saturated water solution is kept in stock and
diluted as needed. Must be used in weaker solutions than eosin, as it more
quickly overstains, and cannot be washed out so well.
d. Picric Acid. Keep in stock either a saturated water or saturated
alcoholic solution, and dilute as needed. As it washes out more readily than
eosin, the staining solution should be stronger than for the latter, and the sections
somewhat over-stained to allow for some loss of stain. Picric acid gives
a brownish tint to nuclei stained with hæmatoxylin or carmine, and will take
out the stains completely, if allowed to act too long.
e. Ammonia Carmine. One grm. of carmine is dissolved, without
heating, in 50 cc. of distilled water and 5 cc. of strong ammonia water. The
fluid is then exposed in an open dish until the odor of ammonia is lost; it is
then filtered. When ready for use dilute by filtering 1-2 drops into 20 cc. of
distilled water.
III. COMBINED NUCLEAR AND DIFFUSE STAINS.
The diffuse or plasma stains may be combined with the nuclear
in one staining solution, or used in succession. The latter method
gives better results. The nuclei are stained first, the diffuse stain
being used after the washing-out following the use of the nuclear
stain, except in the methylene-blue and eosin method in which to
obtain the best results it is necessary to stain with the eosin first.
Nuclear hæmatoxylin may also be followed by a combination of
plasma stains, as in the Van Gieson’s mixture of picric acid and acid
fuchsin, Delépine’s mixture of rubin and orange, White’s erythrosin
and picric acid mixture, etc. In these mixtures the different affinities
of the plasma-stains give rise to differential or selective staining
effects.
a. Haematoxylin and Eosin.
1. Stain in any one of the hæmatoxylins.
2. Wash thoroughly.
3. Stain in dilute water or alcoholic eosin until section is bright rose-red.
4. Differentiate eosin-staining, as desired, by rapid or slow washing in
water.
5. Dehydrate quickly in 80 and 95 per cent alcohols.
6. Clear quickly in carbol-xylol. (If carbol-xylol takes out eosin too
rapidly add some of the dry eosin stain to it. Hæmatoxylin-stained
sections can be placed in such eosin-carbol-xylol and will take up
the eosin beautifully.)
7. Mount in balsam.
Hæmatoxylin and eosin can also be combined in one stain, but the results
are not as good as those obtained by successive staining.
b. Haematoxylin and Picric Acid.
1. Stain with Weigert’s iron-hæmatoxylin, or overstain with any other
hæmatoxylin.
2. Wash thoroughly.
3. Stain in saturated water solution of picric acid, diluted one-half, until
sections are a bright yellow. If left too long in the stain, the hæmatoxylin
will become brown or may be wholly lost.
4. Wash, dehydrate and clear quickly, as for eosin. (Dry picric acid
may be added to the carbol-xylol.)
5. Mount in balsam.
c. Haematoxylin and Acid Fuchsin.
Stain with hæmatoxylin, and after washing use a 1 per cent water solution
of acid fuchsin, until section is sufficiently red; wash; dehydrate; clear;
mount.
d. Haematoxylin and Orange G.
Stain with hæmatoxylin, and after washing use a 1 per cent water solution
of orange G, staining ¼-3 hours. Treat otherwise as for eosin-staining.
e. Carmine and Picric Acid.
Stain with borax- or lithium-carmine; differentiate in acid alcohol and
wash thoroughly. Then counterstain with picric acid, as for hæmatoxylin and
picric acid. Carmine and picric acid may also be combined in one stain, as
picro-carmine, but this is rarely used at the present.
f. Eosin and Methylene-blue.
(For tissues fixed in mercuric chloride or Zenker’s.)
1. Stain in a 5-10 per cent aqueous eosin for 20 minutes or longer, until
a deep eosin-stain is obtained.
2. Wash out excess of eosin in water.
3. Stain in Unna’s alkaline methylene-blue, diluted 1-4 or 5 with water,
10-15 minutes.
4. Wash in water.
5. Differentiate in 95 per cent alcohol, keeping the section in constant
motion to obtain a uniform decolorization. Control process under
microscope. Wolbach advises the use of a 0.75-1.5 per cent solution
of colophonium in methyl alcohol as a differentiating medium instead
of 95 per cent alcohol. For tissues fixed in formol or alcohol a 10
per cent solution should be used.
6. When the background is pink, dehydrate quickly with absolute alcohol,
or in 95 per cent by blotting on slide with xylol, until clear.
7. Clear in xylol.
8. Mount in balsam.
g. Van Gieson’s Method.
1. Stain in Weigert’s iron-hæmatoxylin, or overstain if any other hæmatoxylin
is used. (Weigert’s gives the best results, as it does not
decolorize so readily.)
2. Wash thoroughly.
3. Stain in Van Gieson’s mixture (acid fuchsin 1.5 grms., saturated water
solution of picric acid [0.6 per cent] 150 cc. This mixture keeps
well. Add 1 cc. of this stock solution to 10 cc. of saturated water
solution of picric acid. Stain in this for 10 seconds).
4. Wash quickly; dehydrate in alcohol; clear in xylol or carbol-xylol;
mount in balsam.
I have obtained the best results by making the Van Gieson’s mixture by
taking an ordinary small staining-dish nearly full of saturated water solution of
picric acid, and adding to this, drop by drop, sufficient saturated water solution
of acid fuchsin to make the solution just dark enough so that the finger cannot
be seen through the staining-dish. The hæmatoxylin-stained section is put
into this mixture for a few seconds, until it appears to become lighter. The
section is then washed in 95 per cent alcohol, dehydrated, cleared and mounted.
The Van Gieson method is extremely valuable in pathologic work, because
of its varied differential reactions. The nuclei are brown or black, protoplasm
is ochre-yellow, connective-tissue light red, voluntary and involuntary muscle
yellow, axis-cylinders red, connective-tissue hyalin deep rose-red, epithelial
hyalin yellow, orange or brownish, amyloid yellow or brownish pink, mucin
yellow or brownish, fibrin yellow or brown, necrotic areas yellow or brownish,
lime-salts brown to brownish blue or violet.
Combinations of rubin and orange (Delépine) and erythrosin and picric
acid (Powell White) are also advised as differential combination stains, but
are not so useful as Van Gieson’s. Other combination methods are to be found
in the various modifications of the Ehrlich triple stain.
CHAPTER XXVI. SPECIAL STAINING METHODS FOR DEMONSTRATION OF PATHOLOGIC CONDITIONS IN CELLS OR TISSUES.
I. AMYLOID. The best selective staining of amyloid is
obtained with relatively fresh tissues; long preservation in alcohol
or formol tends to weaken the reactions. Probably the best effects
are obtained by formol-fixation for 24 hours, and sectioning on the
freezing-microtome. Good results may be produced, however, after
any of the ordinary fixing and hardening methods by cutting the
sections on the freezing-microtome, without imbedding, or imbedding
in paraffin. The metachromatic reactions are not satisfactory
with celloidin sections. With hæmatoxylin and eosin the amyloid
substance stains a light red or bluish-pink; Van Gieson’s stains it
a yellow or brownish-pink color, giving it practically the same color
that it does epithelial hyalin. The different tissue-relations of the
two substances serve to distinguish them. The most important
specific amyloid stains are:—
1. Iodine.
1. Stain in Lugol’s solution 5-10 minutes.
2. Dehydrate in absolute alcohol 4 parts, tincture of iodine 1 part.
3. Clear and mount in origanum oil. Seal preparation with paraffin,
gold size or shellac.
The iodine reaction is also applied to fresh tissues by pouring Lugol’s
solution over a freshly cut surface, and is a good gross test for amyloid.
In both microscopic and macroscopic preparations iodine gives a mahogany
brown color to amyloid; other tissue is yellow. The iodine reaction may be
intensified by placing the sections in a 1 per cent sulphuric acid; the brown
color may be changed to blue, violet or green.
2. Methyl Violet.
1. Stain in 0.5 per cent methyl-violet solution ½ to several minutes.
Examine in water.
2. Wash in water.
3. Differentiate in 2 per cent acetic or dilute hydrochloric acid 1-2
minutes.
4. Wash thoroughly in water.
5. Mount in lævulose or glycerin-gelatin. Amyloid ruby red; tissue
blue-violet.
3. Gentian Violet.
Use same method as for methyl violet. The same color-effects are
produced.
4. Methyl Green.
Use methyl green in the same way as methyl violet. Amyloid sky-blue
or violet; tissue is green.
5. Iodine Green.
1. Stain for 24 hours in a ⅓ per cent water solution of iodine green.
2. Wash in water.
3. Mount in lævulose, glycerin or glycerin-gelatin. Amyloid red
violet; tissue green.
6. Birch-Hirschfeld’s Method.
1. Stain in a 2 per cent alcoholic solution of Bismarck brown for 5
minutes.
2. Wash in absolute alcohol.
3. Wash in water.
4. Stain in a 2 per cent water solution of methyl-violet (or a 20 per
cent gentian violet) for 5 minutes.
5. Differentiate in 1 per cent acetic acid until the non-amyloid parts
are brown.
6. Wash thoroughly in water.
7. Mount in lævulose, glycerin or glycerin-gelatin. Nuclei are brown;
amyloid ruby red.
7. Green’s Method.
To a few cc. of hæmalum in a watch-glass add a saturated solution of
methyl-violet, drop by drop, until the mixture shows a faint purple-red
tinge at the edge of the glass.
1. Stain sections 15-30 minutes.
2. Differentiate in acid alcohol until the purple begins to fade.
3. Wash thoroughly in water.
4. Mount in glycerin. (Sections may be blotted and dehydrated in
pure liquid paraffin; the latter is then removed by blotting with
xylol, and then mount in pure white vaseline.)
Nuclei are blue, amyloid ruby-red.
8. Kresyl-echt-violett (Morse’s Method).
Kresyl-echt-violett (R. extra) 1 grm., 5 per cent carbolic acid 80 cc.,
alcohol 20 cc. Mix, stirring well; filter. Solution keeps well, and can be
diluted as desired without precipitating.
1. Stain 1-5 minutes.
2. Wash thoroughly in distilled water, differentiating, if necessary.
3. Blot with filter paper.
4. Dehydrate in absolute alcohol as quickly as possible.
5. Clear in turpentine. Blot nearly dry before mounting.
6. Mount in balsam.
Formol, mercuric chloride and Zenker’s all give good results. Paraffin
imbedding, with staining of sections on the cover-glass (albumin-fixative
method), is the best method of staining for permanent mounts, although
good preparations can be obtained by the use of the freezing-microtome.
Carbol-xylol cannot be used for clearing. Nuclei are blue, protoplasm pale
blue, amyloid ruby-red.
As a specific reaction for amyloid and mucin this method has been
used in my laboratory for the last ten years in preference to any other. The
stains are permanent if not exposed to the action of light.
Thionin, toluidin-blue, polychrome-methylene-blue, and other metachromatic
dyes are also used to give similar reactions with amyloid, but
are not as satisfactory as the kresyl-echt-violett method. Amyloid may
also be stained with scarlet R or sudan III, according to the method of
Herxheimer, but the results are rarely satisfactory.
II. ATROPHY. Good pictures of atrophic tissues are obtained
with formol-Müller’s, mercuric chloride or Zenker’s fixation,
and staining with Van Gieson’s, to bring out the stroma which is
usually relatively or absolutely increased. In the case of pigment-atrophy
the sections should be very thin and stained with alum- or
lithium-carmine.
III. CALCIFICATION. Deposits of lime-salts appear in
fresh tissue as gritty, refractive areas that are bright and shining
by reflected light, and dark by transmitted. They are soluble in
acids, solution of the carbonate being accompanied by the formation
of bubbles of carbonic acid gas. Hæmalum and the alum-hæmatoxylins
show a specific reaction with the phosphates and
carbonates of lime, giving them a deep blue or reddish-violet stain.
Fresh calcification usually stains diffusely blue; older deposits are
deep-blue about the borders of the deposits, lighter or unstained in
the center of the mass. Tissues containing much calcium must be
decalcified before imbedding. If the process of decalcification is
not carried too far the specific staining reaction is not lost.
v. Kossa’s Silver Method for Calcium Phosphate.
1. Fix in alcohol or formol; imbed; cut.
2. Place section in 1-5 per cent silver nitrate solution, and expose to
daylight 5 minutes to 1 hour.
3. Wash in distilled water.
4. Transfer section to a 5 per cent solution of sodium hyposulphite, to
remove excess of silver nitrate.
5. Wash thoroughly in water.
6. Dehydrate in absolute alcohol.
7. Clear in xylol; mount in balsam.
Calcareous deposit black, as the result of the formation of phosphate
of silver and its reduction by the action of light. Alum carmine may be
used as a nuclear stain before the sections are treated with silver nitrate,
or safranin may be used after the sodium sulphite has been washed out.
IV. CELL GRANULES AND CELL INCLUSIONS. The
granules and cell-inclusions here included fall within the class of
special protoplasmic structures found particularly in neoplasms and
inflamed tissues, and which have been supposed to be parasites. For
the staining of other cell-granules see Blood and Blood-forming
organs.
1. Altmann’s Granules.
1. Fix small, thin pieces of fresh tissue in equal parts of 5 per cent
potassium bichromate and 2 per cent perosmic acid for 24 hours.
Wash in running water for several hours. After-harden in alcohol,
and imbed in paraffin. Cut very thin and mount on cover-glass;
remove paraffin.
2. Stain in aniline-water-acid-fuchsin (acid fuchsin 20 grms., aniline
water 100 cc.), warming until vapor is given off.
3. When cool remove the fuchsin with a mixture of 1 part saturated
alcoholic picric acid and 2 parts of water.
4. Renew the picric acid solution and warm on the paraffin oven for
30-60 seconds.
5. Dehydrate in alcohol; clear in xylol; mount in balsam.
1. Fix and harden in Müller’s; wash; after-harden in alcohol; imbed
in paraffin; mount on cover-glass.
2. Stain sections in a saturated solution of fuchsin in 2 per cent carbolic
acid 10 minutes or longer.
3. Wash in water.
4. Wash in absolute alcohol for 30 seconds.
5. Counterstain in iodine green (1 grm. in 100 cc. of a 2 per cent
carbolic acid) for 5 minutes.
6. Dehydrate quickly in absolute alcohol.
7. Clear in xylol; mount in balsam.
Nuclei are green; Russell’s fuchsin-bodies light-red; Altmann’s granules
light-red.
3. Pianese’s Method.
1. Fix in Pianese’s solution (see methods of fixation) 6 hours; wash
in running water for 12 hours; after-harden in graded alcohols;
imbed in paraffin; mount on cover-glass.
2. Stain 30 minutes in a staining mixture consisting of malachite green
0.5 grm., acid fuchsin 0.1 grm., Martius yellow 0.01 grm., distilled
water 150 cc., 96 per cent alcohol 50 cc.
3. Dehydrate in absolute alcohol; clear in xylol; balsam.
Nuclei are green; protoplasm reddish; cell-inclusions light-red.
4. Method for Staining “Plimmer’s Bodies.”
1. Fix in Hermann’s fluid for 12-24 hours. Imbed in paraffin. Mount
sections on cover or slide.
2. Transfer sections to hydrogen peroxide for 15-30 seconds.
3. Wash in water.
4. Transfer to a 4 per cent ferric alum solution for 2 hours.
5. Wash in water.
6. Stain in 0.5 per cent watery hæmatoxylin solution for 30 minutes.
Differentiate in the ferric alum solution until the nuclei are dark
and protoplasm colorless; control under the microscope.
7. Wash in water 3-6 hours.
8. Counterstain in 1 per cent solution of Ehrlich’s neutral red until
section is yellow-red.
Nuclei blue-black; cell-inclusions yellow- to copper-red.
V. CHOLESTERIN. Cholesterin is soluble in absolute alcohol,
xylol, ether and glacial acetic. It occurs in the tissues in characteristic
rhombic plates often showing a square notch in one corner.
In sections from which the cholesterin has been dissolved its
presence may be told by the appearance of “cholesterin-clefts” in
the tissue, or often in the protoplasm of large foreign-body giant-cells
(“cholesterin-giant-cells”). With concentrated sulphuric acid,
sections or material containing cholesterin become yellow and then
rose-pink. Lugol’s gives it a brown color which turns blue-violet
after the addition of sulphuric acid, and exhibits a play of colors,
blue, green, to red.
VI. CLOUDY SWELLING. This is best seen in the fresh
state in cells obtained by scraping or teasing, or by the examination
of frozen sections. Osmic acid, sudan III, scarlet R. ether, alcohol
and acetic acid may be used to differentiate from fatty degeneration.
The ordinary fixing and staining methods give good pictures,
except for slight degrees of the change. These are sometimes wholly
lost as the result of the contraction due to the fixation.
VII. COLLOID. (See Epithelial Hyalin.)
VIII. CORNIFICATION. Horn takes the plasma stains
(eosin, picric acid, etc.). Van Gieson’s makes a good differential
stain. With Gram’s method horn stains deep blue, and with the
Ehrlich-Biondi-Heidenhain method it stains red. After fixation in
Flemming’s it may be stained with safranin or gentian-violet. Keratohyalin
occurs as fine granules in the cells of the stratum granulosum.
They stain by hæmatoxylin, carmine and Gram’s method, or
may be demonstrated by means of special stains. Eleidin stains
with carmine and the fat-stains, but not with hæmatoxylin.
1. Buzzi’s Method of Staining Eleidin and Keratohyalin.
1. Harden, imbed, cut.
2. Stain in Congo red (2-3 drops of a 1 per cent water solution added
to small basin of water) for 2-3 minutes.
3. Wash thoroughly in water.
4. Stain in hæmatoxylin, and wash.
5. Dehydrate in absolute alcohol; xylol; balsam.
Keratohyalin blue, eleidin red.
2. Fick’s Method of Staining Keratohyalin and Keratin.
1. Harden in alcohol, imbed, cut.
2. Stain in saturated water solution of kresyl-echt-violett for 3-4
minutes.
3. Wash thoroughly in water.
4. Differentiate in 95 per cent alcohol until connective-tissue is colorless.
5. Dehydrate in absolute alcohol; xylol; balsam.
Keratohyalin red, keratin dark violet; nuclei blue-violet, plasma light
blue-violet.
IX. FAT. When alcohol has been used in the preparation of
the tissue, the fat-contents of the latter are dissolved out, and their
presence can alone be told by the presence of vacuoles. When
osmic acid is used as a fixing agent the oleates and oleic acid are
blackened. The tissue should then be washed in running water and
cut upon the freezing-microtome, or it may be imbedded in celloidin
or paraffin if this is done as quickly as possible to prevent the loss
of the fat. Chloroform or benzene should be used in place of xylol,
as the last-named dissolves out the fat. Safranin should be used
as a stain after fixation with any fluid containing osmic acid.
Frozen sections are to be mounted in glycerin-gelatin; when balsam
is used it should be warm melted Canada balsam without xylol.
Formol fixation preserves fat, and tissues so fixed may be cut on
the freezing-microtome and the sections stained with osmic acid,
sudan III or scharlach R, with nuclear counterstaining when
desired. For the demonstration of fat-embolism, fatty degeneration
or fatty infiltration the following methods are advised:—
1. Staining of Fat with Osmic Acid.
1. Fix in formol for 24 hours.
2. Wash; freeze; cut.
3. Place sections in 1 per cent osmic acid, Flemming’s or Marchi’s
fluid for 1-24 hours.
4. Wash in water, changing frequently.
5. 80 per cent alcohol ½-2 hours.
6. Wash in water.
7. Place section flat on slide; blot; add a drop of warmed glycerin-gelatin;
cover quickly. Ringing or sealing is not necessary.
Or, to mount section in balsam:—
After 6, counterstain with hæmatoxylin or safranin; wash again; dehydrate
quickly with absolute alcohol; clear in pure benzene; mount in pure
melted Canada balsam (containing no xylol).
2. Staining of Fat with Sudan III or Scharlach R.
Staining-solutions of these dyes may be made, as follows:—
a. Dissolve stain in 70-80 per cent boiling alcohol, keep in the incubator
over night, and use warm.
b. Make a solution of absolute alcohol 70 cc., 10 per cent caustic soda
solution 20 cc., water 100 cc. Saturate this with the stain, slightly
heating.
c. Make a mixture of 70 per cent alcohol 50 cc. and pure acetone 50
cc.; saturate this with the stain.
All solutions of these dyes should be filtered before using, and should
be kept covered to avoid evaporation and subsequent precipitation.
1. Formalin fixation 24 hours; cut on freezing-microtome.
2. Place sections in 70 per cent alcohol.
3. Stain in the simple solution 20-30 minutes; in the acetone or alkaline
alcoholic solutions 2-3 minutes.
4. Wash in 50-70 per cent alcohol, differentiating as needed.
5. Transfer to water; thence to slide; blot, and mount in glycerin
gelatin.
When a nuclear counterstain is desired, put the sections in water
after 4; then stain in hæmatoxylin; differentiate quickly in acid alcohol;
wash in water; place in weak ammonia or lithium-carbonate solution; wash
in water; transfer to slide; blot; mount in glycerin gelatin.
Sudan III and scarlet R stain the smallest particles of fat yellowish-red
to deep scarlet; scarlet R on the whole gives the best results. The
contrast with the blue nuclei when stained with hæmatoxylin gives beautiful
preparations.
3. Staining of Fat with Indophenol.
Stain sections with lithium-carmine; wash; then stain 20 minutes in a
saturated solution of indophenol in 70 per cent alcohol. Fat blue; nuclei red.
4. Staining of Fatty Acids and Soaps.
a. Benda’s Method. Fix in 10 per cent formol. Transfer tissue to
Weigert’s copper-fluorchrom mordant (neutral copper acetate 5 grms., fluorchrom
2.5 grms., water 100 cc.; boil and add 5 cc. of 36 per cent acetic acid) in the incubator
for 2-4 days. Cut on the freezing-microtome. Stain sections in sudan III
or scharlach R, and then in hæmatoxylin. Nuclei are blue, normal fat red,
necrosed fat green due to formation of fatty acid copper salt. Soaps give
the same reaction when converted into insoluble salts by fixing in formol
saturated with calcium salicylate. Through comparison of tissue hardened
in this way with another portion fixed in formol alone soaps and fatty acids
may be differentiated.
b. Smith’s Method. Stain in concentrated water solution of Nile blue
sulphate for 10 minutes. Fat stains red, nuclei dark blue, protoplasm light
blue, fatty acids dark-blue. Differentiate in 1 per cent acetic acid; wash in
water; mount in glycerin-gelatin.
X. FIBRIN. Fibrin stains with the acid aniline dyes, except
in areas of necrosis containing diffused chromatin, under which
conditions it stains deep blue with hæmatoxylin. In Van Gieson’s
mixture it stains yellow or brownish; in Mallory’s reticulum stain
it stains red, and with Mallory’s chloride of iron hæmatoxylin it is
grayish to dark blue. The best selective method by far is Weigert’s,
and it is the only really practical method giving a good
differentiation.
1. Weigert’s Fibrin Stain.
I have obtained the best results by making this stain as follows: 10 cc.
of aniline oil and 100 cc. of water are shaken together violently for several
minutes, and then filtered through a moist filter. The filtrate must contain
no drops of aniline. Add to the filtrate sufficient dry gentian-violet or methyl-violet
to produce a metallic shimmer on the surface of the solution after the dye
is dissolved by shaking. The solution will keep for several months.
Weigert advised the use of two stock solutions, I (absolute alcohol
33 cc., aniline oil 9 cc., methyl violet in excess) and II (saturated water
solution of methyl violet). These solutions will keep for years. When
ready to use stain take 3 cc. of Sol. I and 27 cc. of Sol. II. This staining
mixture will keep for about 2 weeks.
1. Fix in alcohol, formol, acetone, mercuric chloride or Müller’s.
Imbed in celloidin or paraffin; the latter preferably. Mount sections
on cover-glass with albumin fixative. Celloidin sections
must be fastened to slide by thin film of celloidin to prevent
shrinkage. Sections fixed in chromic mixtures (and sometimes after
formol fixation) must be oxidized in potassium permanganate and
then reduced in oxalic acid to give good results. (Transfer sections
to a 1 per cent solution of potassium permanganate to which 2
volumes of water have been added; oxidize for 10 minutes; then
wash in water, and reduce for several hours in a 5 per cent water
oxalic acid solution.)
2. Wash in water.
3. Stain in lithium carmine; differentiate in acid alcohol; wash thoroughly
in water.
4. Stain on the slide or cover-glass in the aniline-methyl-violet (or
gentian-violet) solution for 10 minutes. Wash off stain with
physiologic salt solution.
5. Blot section with absorbent paper.
6. Cover section with Lugol’s (300-2-1) or a 5 per cent watery potassium
iodide saturated with iodine. Leave on section for 1-5
minutes.
7. Blot off iodine.
8. Differentiate in aniline xylol (equal parts of xylol and aniline oil)
until the nuclei become red.
9. Wash in xylol, blotting with absorbent paper. Repeat until section
is transparent; then mount in balsam. All aniline oil must be
removed before using the balsam.
Nuclei are red; fibrin deep blue; bacteria, mucin, keratin and Altmann’s
granules also blue. The differentiation must be carefully controlled under
the microscope, and should be stopped before the finest threads of fibrin
begin to be decolorized.
XI. GLYCOGEN. Glycogen is soluble in water; and fixation
and hardening must be carried out with absolute alcohol to prevent
the solution of the glycogen. Tissue must be fixed immediately
after death, as glycogen is quickly broken up. Its reaction with
iodine is similar to that of amyloid, but it does not give the iodine-sulphuric-acid
reaction that the latter substance does.
1. Best’s Iodine Method.
1. Fix and harden in absolute alcohol; imbed in paraffin; cut.
2. Stain somewhat deeply with hæmatoxylin.
3. Wash in water.
4. Stain in iodine 1, potassium iodide 2, water 100.
5. Dehydrate in iodine 2, absolute alcohol 100.
6. Differentiate in origanum oil, 1-2 hours.
7. Wash thoroughly with xylol.
8. Arrange on slide and dry in air.
9. Mount in pure melted balsam (no xylol).
Nuclei are blue, glycogen brown.
2. Best’s Carmine Method for Glycogen.
1. Fix in absolute alcohol; imbed in celloidin; cut.
2. Stain in hæmatoxylin; differentiate in acid alcohol.
3. Wash in water.
4. Stain in filtered carmine mixture (carmine 1 grm., ammonium
chlorate 2 grms., lithium carbonate O.5 grm., water 50 cc.; bring
to boiling point, and when cool, add 20 cc. of strong liquid
ammonia. Keep in dark; can be used after 2-3 days and gives
good results up to 14 days) 2 parts, strong ammonia 3 parts,
methyl alcohol 6 parts. Make fresh each time it is used, as it
soon precipitates; do not filter; stain few sections at a time ¾-1
hour.
5. Differentiate 1-2 minutes in a mixture of absolute alcohol 4 parts,
methyl alcohol 2 parts, water 5 parts.
6. Wash in 80 per cent alcohol.
7. Dehydrate in absolute alcohol.
8. Clear in xylol; mount in balsam.
Glycogen is stained red; nuclei blue; dense connective-tissue, mast-cell
granules, protoplasm of gastric glands, etc., red; but these can all be
distinguished morphologically from glycogen. This is by far the best
method for the staining of glycogen.
XII. HYALIN. Epithelial hyalin (colloid) stains red or violet
with hæmatoxylin and eosin; it takes the other acid dyes and
stains to some degree with basic aniline stains. Van Gieson’s stains
it a yellow, orange or brownish-pink. Kresyl-echt-violett gives it
a deep indigo-blue color or a more green robin-egg blue. Connective-tissue
hyalin stains deep brilliant red with Van Gieson’s;
this is the best method for differentiating connective-tissue hyalin
from amyloid or epithelial hyalin. Russell’s method also stains
hyalin red.
XIII. HYDROPIC DEGENERATION. Fix by heat or formol-alcohol.
Imbed in celloidin; stain with hæmatoxylin and eosin.
XIV. HYPERTROPHY. Fix in Müller’s or mercuric chloride
for simple staining; for study of nuclei fix in Flemming’s and
stain with safranin.
XV. INFLAMMATION. The process of inflammation may
be studied to advantage in the mesentery, web or tongue of the
curarized living frog, by stretching these parts over a cork-ring
attached to a glass plate on which the animal rests. The exposed
tissues must be kept moist with physiologic salt solution. Heat,
chemicals or other irritants may be employed to produce the inflammatory
reaction. For the study of the inflammatory process in
sections the ordinary fixations may be employed, but for the study
of the nuclei, mitotic figures and cell-granulations fixation in Flemming’s,
Zenker’s, etc., is advised. Safranin, methylene blue and
eosin, the various stains used in the study of blood-cells, etc., may
be used.
1. Staining of Mast-cells.
a. Kresyl-echt-violett used as for amyloid or mucin is the best stain
for mast-cells. The cell-granules stain bright rose-red.
b. Ehrlich’s Dahlia Method.
1. Harden in absolute alcohol; imbed; cut.
2. Stain with saturated water solution of dahlia.
3. Wash in water.
4. Dehydrate in absolute alcohol.
5. Clear in xylol; mount in balsam.
c. Unna’s Method for Mast and Plasma Cells.
1. Harden in absolute alcohol; imbed; cut.
2. Stain in Unna’s polychrome methylene blue ¼-12 hours.
3. Wash in water.
4. Differentiate in Unna’s glycerin-ether mixture (Grübler) 15 seconds
to several minutes.
5. Wash carefully in water.
6. Dehydrate in absolute alcohol; clear in xylol; mount in balsam.
Mast cell granules are red; plasma cell granules blue.
d. Various modifications of the Romanowsky method stain mast- and
plasma-cells very well.
XVI. IODINE. For the demonstration of iodine in tissues
the following method has been advised by Justus. The experience
of other workers with it has not been satisfactory.
1. Harden in absolute alcohol; imbed in celloidin; cut.
2. Soak in water to remove alcohol.
3. Put section in wide-mouthed, stoppered bottle in freshly prepared
green chlorine-water for 1-2 minutes.
4. Transfer section on a glass needle to a vessel containing 500 cc.
water and 1 cc. of a 1 per cent solution of silver nitrate for 2-3
hours. The section is colored yellow-green, and a precipitate of
silver chloride appears.
5. Transfer section to a warm saturated solution of sodium chloride
until it becomes light.
6. Wash in distilled water.
7. Transfer to a concentrated solution of mercuric chloride.
8. Examine in pure glycerin.
Iodine should be red.
XVII. MITOTIC FIGURES. Various histologic methods
devised for the study of mitoses can be applied to the demonstration
of these in neoplasms, inflammation and regeneration. Flemming’s
solution or mercuric chloride fixation gives best results,
although formol, or even absolute alcohol, when used quickly and
carefully gives fair results if tissue is very fresh.
1. Flemming’s Solution and Safranin.
1. Fix small pieces of fresh tissue in Flemming’s, in the dark, for 24
hours; wash 24 hours; after-harden in graded alcohols; imbed
and cut.
2. Stain in 1 per cent water solution or saturated aniline water solution
of safranin, or 1 per cent water methyl violet for 12-24
hours, or carbol-fuchsin for one hour.
3. Differentiate quickly in a 0.5-0.0001 HCl in 70 per cent alcohol and then
in absolute alcohol until stain no longer comes away in clouds and
nuclei have right shade.
4. Clear in xylol; mount in balsam.
Fat is black; mitoses stand out sharply; tubercle-bacilli may be stained
black or red.
2. Fixation in mercuric-chloride may be followed by Ehrlich-Biondi-Heidenhain’s
stain (saturated aqueous orange 100 cc., saturated aqueous acid
fuchsin 20 cc., saturated aqueous methyl green 50 cc.) 12 grms. of Grübler’s prepared
stain dissolved in 100 cc. of distilled water, for stock solution. For staining
take 1 cc. of stock solution, water 30 cc., ½ per cent watery acid fuchsin 3
cc., and 2 per cent acetic 5-6 drops. Stain 2-24 hours; wash in 90 per cent alcohol;
dehydrate in absolute; clear in xylol; balsam.
Resting nuclei are bluish; mitoses and fragments of leukocyte nuclei
dark green; red blood cells orange red; protoplasm and connective-tissue
fuchsin red.
3. Benda’s Iron-Haematoxylin Method.
1. Fix in osmic acid, mercuric chloride or other fixative.
2. Stain sections by placing them in liq. ferri. sulfur. oxyd. (Germ.
Pharm.) diluted with double its volume of water, for 24 hours;
wash carefully in distilled water and then in tap water; stain in
1 per cent watery hæmatoxylin until section is black. Wash in
water. Differentiate in 10-30 per cent acetic acid, or in liq. ferri.
sulfur. oxyd. diluted with distilled water 1-20. A 10 per cent solution
of ferric sulphate may be used instead of the persulphate.
4. Heidenhain’s Iron-Haematoxylin.
1. Imbed in paraffin after fixation in mercuric chloride.
2. Immerse section in a 1.5 per cent solution of iron-alum sulphate
(violet-colored salt) or iron-ammonium sulphate for ½-3 hours.
3. Wash in water.
4. Stain in 0.5 per cent watery hæmatoxylin or hæmatein for 12-18 hours.
5. Wash in water.
6. Differentiate in the iron-alum or iron-ammonium solution until the
section becomes deep blue (control under microscope) and nuclear
structures stand out distinctly.
7. Wash in running water for 15 minutes.
8. Absolute alcohol; xylol; balsam.
Instead of the watery hæmatoxylin solution a mixture of hæmatoxylin
1 grm., alcohol 10 cc., and water 90 cc. may be used. Keep four weeks before
using. Stain 24-36 hours. For contrast staining a weak solution of Bordeaux
red may be used before the iron-alum and hæmatoxylin, staining 24 hours.
XVIII. MUCIN. Mucin stains a deep blue or reddish-violet
with an over-ripe hæmatoxylin. When counterstained with picric
acid very beautiful preparations can be obtained. Mucin also gives
a metachromatic reaction with kresyl-echt-violett, thionin, toluidin-blue
and polychrome methylene-blue, staining red with these stains.
Water or carbolic-acid solutions of these stains may be used; dehydrate
in absolute alcohol, clear in xylol, and mount in balsam. In
my opinion Morse’s Carbol-kresyl-echt-violett method as given
above for amyloid is the best of these metachromatic reactions.
Muchæmatein and mucicarmin give the most delicate reactions.
1. Mayer’s Muchaematein.
1. Absolute alcohol fixation is preferable.
2. Stain sections in Mayer’s solution (hæmatein O.2 grm. mixed with
a few drops of glycerin, O.1 grm. of aluminum chloride, 40 cc. of
glycerin, 60 cc. of water) for 5-10 minutes.
3. Wash in water.
4. Dehydrate in absolute alcohol; xylol; balsam.
Carmine may be used for counterstaining; mucin is blue. Should the
mucin swell in the stain replace water and glycerin with 100 cc. of 70 per
cent alcohol and 1-2 drops of nitric acid.
2. Mayer’s Mucicarmin.
Make staining solution by mixing 1 grm. carmine, O.5 grm. aluminum
chloride, 2 cc. water and 100 cc. of 50 per cent alcohol, heating over the
flame for 2-3 minutes until mixture darkens. Let stand 24 hours and filter.
The stock solution may be diluted 1-10. Stain 10 minutes. If it does not stain
well add 0.5-1 grm. of aluminum chloride. Mucin alone should be stained red.
Counterstain with hæmatoxylin.
XIX. MYELIN. This appears in the form of doubly refractive
granules, that stain with less intensity with the fat dyes, but may
be differentiated from fat in that it loses the power of reducing
osmic acid after being mordanted for eight days or more in
bichromate solutions, while fat does not.
XX. NECROSIS. Hæmatoxylin and eosin, and Van Gieson’s
give good pictures. Use Weigert’s fibrin stain for coagulation-necrosis,
and Benda’s method for the demonstration of fatty acids
for the staining of fat-necrosis. Recent necrotic areas stain diffusely
blue with hæmatoxylin; older areas may take the plasma
stains alone. Use various methods for the demonstration of micro-organisms
in the necrotic areas.
XXI. NEOPLASMS. Use hæmatoxylin and eosin, and Van
Gieson’s for ordinary diagnosis. To differentiate sarcoma and carcinoma
use Van Gieson’s, Mallory’s or other reticulum stains. For
the study of cell-inclusions use Altmann’s, Russell’s, Plimmer’s and
Pianese’s methods. Special fixation or Zenker’s is necessary.
Methylene-blue and eosin after Zenker’s give excellent pictures.
For the demonstration of mitoses the methods given above should
be employed.
XXII. PIGMENT. Use the carmines for contrasting melanin,
hæmofuscin, lipochromes, hæmatoidin, hæmosiderin, bilirubin and
all yellow, brown, blue, black, etc., extrinsic pigments. In tissue
fixed in mercuric chloride or formol bilirubin is green, and can thus
be differentiated from hæmatoidin. The lipochromes give weak fat-reactions,
and this is used to distinguish them from other yellow or
brown pigments. Alcohol fixation is the best for pigment study,
although the other fixing solutions may be used. Formol sometimes
produces pseudo-pigments by its action upon hæmoglobin.
The iron-reactions are obtained best in sections cut on the freezing-microtome,
although both paraffin and celloidin imbedding may be
used. In testing for iron glass needles should be used and all
traces of iron should be removed from staining-dishes, slides, etc.,
by treating with hydrochloric acid, distilled water and alcohol.
1. Potassium Ferrocyanid Test for Iron.
1. Stain sections in lithium carmine for several hours.
2. Differentiate in acid alcohol, stopping short of the desired complete
differentiation of the nuclei.
3. Wash in water.
4. Saturated solution of potassium ferrocyanid 1-3 hours.
5. Acid alcohol until iron-pigment becomes blue (½-12 hours). Complete
differentiation of nuclei.
6. Wash in water.
7. Dehydrate in absolute alcohol.
8. Clear in xylol; mount in balsam.
Hæmosiderin is blue (Berlin blue); nuclei are red. Lithium carmine
may be used after the iron-test, if desired.
2. Ammonium Sulphide Test for Iron.
1. Fix in alcohol; imbed; cut.
2. Treat sections with yellow ammonium sulphide for 5-60 minutes.
3. Wash quickly in water.
4. Dehydrate in absolute alcohol.
5. Clear in xylol; mount in balsam.
Stain with lithium carmine either before or after the reaction with
ammonium sulphide. Iron is grayish-black to black.
3. Combined or Masked Iron.
1. Treat tissues with Bunge’s fluid (95 per cent alcohol 95 cc., 25
per cent hydrochloric acid 10 cc.) for 1-2 hours at 50-60°C., until
inorganic iron is all removed.
2. Place tissues in acid alcohol (sulphuric acid 4 cc. in 100 cc. alcohol
95 per cent.)
5. Wash sections in acid alcohol, then pure alcohol, and finally in
distilled water.
6. Transfer to ammonium sulphide (5-60 minutes) or to potassium
ferrocyanid and O.5 HCl for 5 minutes.
7. Wash in water.
8. Counterstain in eosin or safranin; wash; dehydrate in absolute
alcohol; clear in cedar-oil; mount in benzene balsam. Keep
preparations in the dark.
4. Staining of Chromophilic Cells.
1. Fix in a chromic solution. In this the chromophilic cells become
yellow or brown.
2. Stain in polychrome methylene blue; the cells become grass-green
in color.
5. Tests for Silver, Lead and Mercury.
Use ammonium sulphide as for iron. Black sulphides are formed.
6. Test for Copper.
Treat with potassium ferrocyanid and hydrochloric acid; copper gives
a dark yellow-brown coloration.
XXIII. PSEUDOMUCIN. It is not precipitated by acetic
acid. It has a greater affinity for the diffuse stains than mucin, and
gives weaker metachromatic reactions.
XXIV. REGENERATION AND REPAIR. For the staining
of mitoses, cell granules and cell-inclusions see methods given
above. See also methods for staining of epithelium, reticulum,
neuroglia, etc.
XXV. URIC ACID AND PURIN BASES:—
1. Courmont and Andre’s Method.
1. Fix in absolute alcohol; imbed; cut.
2. Treat sections with 1/100 ammonia solution or very weak sodium
hyposulphite solution.
3. Transfer to 1/100 silver nitrate solution.
4. Wash.
5. Develop with a photographic developer.
6. Wash in water; stain with hæmalum and eosin; dehydrate; clear
in xylol; balsam.
Uric acid and xanthin or purin bases appear as black granules.
CHAPTER XXVII. THE STAINING OF PATHOGENIC MICRO-ORGANISMS IN TISSUES
Rapid fixation and hardening are requisites for the successful
staining of micro-organisms in sections. Alcohol, Zenker’s, mercuric
chloride and formol give best results; Müller’s because of its
slow action is not good, although formol-Müller’s may be used
because of the more rapid fixation with this fluid. In the case of
formalin-fixation staining with Weigert-Gram’s method may not
give good results unless the sections are oxidized in potassium permanganate
solution and then reduced in oxalic acid. (See Staining
of Fibrin.) Preservation of the tissue for a long time in alcohol
impairs the staining power of micro-organisms contained within it.
The tissue should be imbedded preferably in paraffin, as very thin
sections must be obtained. The freezing-microtome may be employed
and the thinnest sections selected for staining. Celloidin
stains very heavily with the aniline dyes and retains the color, so
that bacteria in celloidin sections do not stand out very distinctly.
On the whole paraffin sections, floated on slide or cover, and
fastened by albumin-fixative, give the best results, though for the
micro-organisms stained in carbol-fuchsin and decolorized in nitric
acid it is best to float the sections directly onto the warm stain
without removing the paraffin, and mount without the use of alcohol.
This method may be employed for all stains that are taken
out by alcohol. The stains used for film preparations are as a rule
applicable to sections. The basic aniline dyes, particularly methylene-blue,
fuchsin, methyl or gentian violet, kresyl-echt-violett,
thionin, and Bismarck brown, either in saturated alcoholic solutions
or dilutions of such, or in combination with alkalies, aniline oil or
phenol, are usually employed. The various modifications of the
Romanowsky method are very useful. The time required for staining
in sections is usually much longer than for films; but the staining
can often be accelerated or strengthened by warming over the
flame or in the incubator. Contrast staining of the nuclei with
lithium-carmine or Bismarck brown is advisable after the use of
staining methods in which the nuclei are decolorized. Xylol or
origanum oil should be used for clearing.
I. THE STAINING OF BACTERIA IN TISSUES.
According to their staining-reactions bacteria may be very conveniently
grouped in three classes: 1, Staining with Gram-Weigert’s
method; 2, Not staining with Gram-Weigert’s; 3, Staining with the
tubercle-bacillus method (acid-resisting).
1. BACTERIA STAINING BY THE GRAM-WEIGERT METHOD.
Weigert’s modification of Gram’s method, as given above for the staining
of fibrin, is the best for the staining of bacteria that stain by this
method. (See Fibrin, Chapter XXVI.) The differentiation with aniline-xylol
is slower and safer than with alcohol. Acetone-xylol (1:5) has been
recommended in place of aniline-xylol. Wolbach recommends the use of a 5-10
per cent colophonium-alcohol for differentiation. Contrast staining with watery
Bismarck brown, dilute carbol-fuchsin or eosin may be carried out if desired.
The aniline-xylol may be saturated with eosin and the section stained during
the differentiation. Carbol-gentian-violet may be used instead of aniline-gentian-violet;
it keeps much better than the latter.
Staining by Gram’s Method (Gram-positive).
Staphylococcus pyogenes aureus.
Staphylococcus pyogenes albus.
Staphylococcus pyogenes citreus.
Streptococcus pyogenes.
Micrococcus tetragenus.
Diplococcus pneumoniæ.
Bacillus aërogenes capsulatus.
Bacillus of diphtheria.
Bacillus of anthrax.
Bacillus of leprosy.
Bacillus of tetanus.
Bacillus of tuberculosis.
Bacillus of rhinoscleroma.
Bacillus of mouse septicæmia.
Bacillus of swine erysipelas.
Oïdium albicans.
Mycelium of actinomyces.
2. BACTERIA NOT STAINING BY GRAM’S METHOD.
For the bacteria belonging to this class Löffler’s methylene-blue, carbol
methylene-blue, a watery solution of methylene-blue or gentian-violet, Leishman’s
or Wright’s modification of Romanowsky’s methylene-blue eosin method
(see page 290), Unna’s alkaline methylene-blue solution preceded by eosin
after Zenker’s fixation (see page 260), aniline gentian-violet, Zieler’s method
and carbol fuchsin are most commonly used as stains. Wolbach advises the
use of a 5-10 per cent acetone-colophonium solution for the differentiation of
Gram-negative bacteria in tissue fixed in formol.
1. Löffler’s Methylene-blue.
1. Saturated alcoholic solution of methylene-blue 30 cc.; potassium
hydrate solution (1 in 10,000) 100 cc.
2. Stain 5 minutes to 24 hours.
3. Wash in water.
4. Differentiate in 1 per cent acetic acid, 10-30 seconds.
5. Wash in 90 per cent alcohol, 2-5 minutes; dehydrate in absolute
alcohol; clear in xylol; mount in balsam.
2. Gentian-violet.
1. Stain sections in a 2 per cent watery gentian-violet for 5-20 minutes.
2. Wash in water.
3. Decolorize in 70 per cent alcohol until stain ceases to come away.
4. Dehydrate in absolute alcohol; clear in xylol; balsam.
3. Zieler’s Method.
1. Fix in Orth’s solution, or any fixing solution except those containing
osmic acid; imbed in paraffin or celloidin.
2. Stain in Pranter’s solution (orcein D 0.1 grm., hydrochloric acid
2.0 cc., 70 per cent alcohol 100 cc.) for 8-24 hours.
3. Wash rapidly in 70 per cent alcohol.
4. Wash in water.
5. Stain in polychrome methylene-blue 10 minutes to several hours.
6. Wash in distilled water.
7. Differentiate in glycerin ether until no more clouds of color come
away and section is light blue.
8. Wash in distilled water.
9. 70 per cent alcohol for a few seconds; absolute 5-10 minutes; xylol;
balsam.
Protoplasm is gray-brown; bacteria dark-blue; background colorless.
Zieler’s method is especially good for the staining of the glanders, typhoid
and chancroid bacilli and the gonococcus.
For Unna’s methylene-blue eosin and the modifications of the Romanowsky
method see Pages 260 and 290 respectively. Pappenheim’s methyl-green-pyronin
method is also recommended for the staining in sections of
Gram-negative bacteria.
Not Staining by Gram’s (Gram-negative).
Gonococcus.
Micrococcus melitensis.
Meningococcus (in sections).
Bacillus of bubonic plague.
Bacillus of chancroid.
Bacillus coli communis.
Bacillus dysenteriæ.
Bacillus of epidemic conjunctivitis (Koch-Weeks).
Bacillus of influenza.
Bacillus mallei.
Bacillus pneumoniæ.
Bacillus proteus.
Bacillus of malignant œdema.
Bacillus pyocyaneus.
Bacillus of typhoid fever.
Bacillus of fowl cholera.
Bacillus of rabbit septicæmia.
Bacillus of swine plague.
Spirillum of Asiatic cholera.
Spirochæte pallida.
3. BACTERIA STAINING BY THE TUBERCLE-BACILLUS
METHOD. (ZIEHL-NEELSEN.)
1. Stain sections by floating thin paraffin sections directly on to warm
carbol-fuchsin (fuchsin 1 grm., absolute alcohol 10 cc., cryst.
carbolic acid, 5 grms., water 100 cc.) for 1-3 minutes.
2. Transfer on spatula to water, agitating so as to wash off excess of
stain.
3. Transfer section to 30 per cent nitric acid and water alternately,
until section has a pale lilac tint.
4. Wash in water.
5. Float on warm watery methylene-blue for 1 minute.
6. Wash in water.
7. Float section on slide; dry over flame or in oven; melt over flame,
and put section at once into xylol to remove paraffin.
8. Balsam.
Various staining-methods have been recommended for the
staining of the most important pathogenic bacteria in tissues. The
most useful of these methods are here given:—
a. Cocci.
1. Pyogenic Cocci. Stain by Gram-Weigert’s, contrast with Bismarck
brown or lithium-carmine.
2. Pneumococcus. Stains with ordinary water solutions, carbol-fuchsin
and Gram-Weigert’s. The staining of the capsule in sections is not
very satisfactory.
3. Gonococcus. Gram-negative. Stains in sections with Zieler’s
method, Löffler’s methylene-blue, or dilute carbol-fuchsin with differentiation in
alcohol.
4. Micrococcus Catarrhalis. Stains like the gonococcus.
5. Diplococcus Intracellularis Meningitidis. Smear preparations often
Gram-positive, in sections usually Gram-negative. Use same stains as for
gonococcus.
6. Micrococcus Tetragenus. Stain with Gram’s or watery solutions of
basic aniline dyes.
b. Bacilli.
1. Anthrax-bacillus. Stain with Gram-Weigert’s and contrast with
Bismarck brown or lithium-carmine. Stains also with strong watery gentian-violet
solution, with differentiation in strong alcohol.
2. Bacillus of Malignant Oedema. Gram-negative. Stain with watery
solution or gentian-violet.
3. Bacillus of Tetanus. Gram-positive. Stains with watery solutions
of basic aniline dyes.
4. Bacillus Aërogenes Capsulatus. Gram-positive. Stains with other
aniline stains.
5. Bacillus Pyocyaneus. Stains with Gram’s and other aniline dyes.
6. Bacillus of Influenza. Gram-negative. Fix tissue in alcohol. Stain
with dilute carbol-fuchsin and differentiate in dilute acetic acid.
7. Koch-Week’s Bacillus. Gram-negative.
8. Bacillus of Bubonic Plague. Gram-negative. Stain by Gaffky’s
method (Fix in alcohol or a mixture of glacial acetic acid 10.0, chloroform
30.0, and 96 per cent alcohol 60.0, imbed in paraffin, stain 2-3
hours in weak watery methylene-blue, dehydrate quickly in absolute
alcohol, xylol, balsam). It may also be stained by 24 hours in concentrated
solution of fuchsin in glycerin, rapid differentiation in weak
acetic; alcohol; xylol; balsam. Alcohol or mercuric chloride fixation
should be used, as formol fixation does not give good staining.
9. Typhoid Bacillus. Löffler’s methylene-blue or carbol-fuchsin, staining
24 hours, decolorizing in dilute acetic and washing rapidly in alcohol. Zieler’s
method may also be used. It is Gram-negative.
10. Paratyphoid Bacillus. Stains like the typhoid bacillus.
11. Colon Bacillus. Gram-negative. May be stained with Löffler’s
methylene-blue or carbol-fuchsin.
12. Diphtheria Bacillus. May be stained in sections of diphtheritic
membranes with Löffler’s methylene-blue, watery aniline stains, or with Gram’s
if the decolorization is not carried too far.
13. Bacillus of Chancroid. Gram-negative. Stain according to Unna’s
method:—
1. Fix in alcohol.
2. Stain 5-10 minutes in a mixture of a solution of methylene-blue
1 grm., potassium carbonate 1 grm., alcohol 20 cc., water 100 cc.,
and a solution of methylene-blue 1 grm., borax 1 grm., water
100 cc.
3. Place sections on slide; blot.
4. Decolorize in Unna’s glycerin-ether mixture.
5. Dry; dehydrate in alcohol.
6. Xylol; balsam.
14. Bacillus of Glanders. Gram-negative. Stain with Zieler’s method
or with Löffler’s methylene-blue, differentiating in weak acetic.
Noniewicz’s Method.
1. Stain with Löffler’s methylene-blue 2-5 minutes.
2. Wash in water.
3. Differentiate for about 5 seconds in a mixture of ½ per cent acetic
acid 75 cc., ½ per cent watery solution tropaeolin 25 cc.
4. Wash in water; dry by blotting; xylol; balsam.
Bacilli deep-blue; tissues light-blue.
15. Bacillus of Rhinoscleroma. Gram-positive. Fix in alcohol for
Wolkowitsch’s method:—
1. Stain in aniline gentian-violet 24-48 hours.
2. Wash in water.
3. Treat with Lugol’s 1-4 minutes.
4. Decolorize in absolute alcohol.
5. Remove more color by oil of cloves.
6. Xylol; balsam.
In tissues fixed in osmic acid and then stained in hæmatoxylin the
bacilli are dark blue with light blue capsules. The hyaline substance of rhinoscleroma
stains with basic stains.
16. Friedländer’s Bacillus. Gram-negative. Stains with ordinary aniline
dyes. For staining the capsules the following method is advised:—
1. Stain for 24 hours in the incubator in a mixture of a concentrated
alcoholic solution of gentian-violet 50 cc., glacial acetic acid
10 cc., and distilled water 100 cc.
2. Wash in a 1 per cent acetic acid solution.
3. Alcohol; xylol; balsam.
Bacilli deep-blue; capsules light-blue.
17. Tubercle-bacillus. Gram-positive. Stain in sections on warm
carbol-fuchsin without removing paraffin, as given above. Alcohol and mercuric
chloride fixation give best results. Aniline-gentian-violet may also be
used, staining with a warm solution for 15-30 minutes, and decolorizing in
20 per cent nitric acid followed by 70 per cent alcohol, counterstaining in Bismarck
brown, dehydrating in alcohol, clearing in xylol and mounting in balsam.
The Weigert-Gram method may be used for the demonstration of the branched
or streptothrix forms of the tubercle bacillus. For celloidin sections Mallory
and Wright advise the following:—
1. Stain rather lightly in alum-hæmatoxylin.
2. Wash in water.
3. Dehydrate in 95 per cent alcohol.
4. Attach sections to slide by ether-vapor method.
5. Stain in steaming carbol-fuchsin 2-5 minutes.
6. Wash in water.
7. Acid alcohol ½-1 minute.
8. Wash thoroughly in several changes of water to remove acid completely
and to bring back blue color to nuclei.
9. 95 per cent alcohol to remove fuchsin.
10. Aniline-oil, followed by xylol, blotting.
11. Xylol; balsam.
Celloidin is colorless, nuclei blue, tissue colorless, tubercle-bacilli red.
Orange G may be used as a diffuse stain.
18. Lepra Bacillus. Gram-positive. Stain paraffin sections on warm
carbol-fuchsin, as for the tubercle-bacillus. To differentiate from the tubercle-bacillus,
stain 6-7 minutes in a dilute alcoholic solution of fuchsin, and
decolorize in acid alcohol (nitric acid 1, alcohol 10). Lepra-bacilli stain;
tubercle-bacilli do not.
c. Trichomycetes.
1. Actinomyces. Alcohol and formol fixation are best. Good preparations
can be obtained with hæmatoxylin and eosin, Van Gieson’s or Weigert-Gram’s.
The special staining methods advised give no better results
than these simpler stains. Differential staining of clubs and mycelium may
be obtained by Mallory’s method:—
1. Stain lightly in alum-cochineal. (Powdered cochineal 6 grms., ammonia
alum 6 grms., water 100 cc. Boil half an hour, add water lost by evaporation,
filter, add crystals of thymol.)
2. Saturated watery eosin 10 minutes.
3. Wash in water.
4. Stain in aniline gentian-violet 2-5 minutes.
5. Wash in physiologic saline solution.
6. Transfer sections to Lugol’s for 1 minute.
7. Pass rapidly through water.
8. Dry thoroughly between folds of filter-paper.
9. Cover section with aniline-oil until clear.
10. Xylol; balsam.
Clubs pink; mycelium blue.
2. Nocardia, Cladothrix, Streptothrix and Leptothrix. Löffler’s methylene-blue
and carbol-fuchsin give good results. The Nocardiæ are acid-fast
with dilute acids. They give good preparations with Weigert’s fibrin stain
and lithium-carmine.
d. Vibrios.
1. Cholera Vibrios. Gram-negative. Sections may be stained with
fuchsin or methylene-blue.
e. Spirilla and Spirochætes.
1. Spirillum of Recurrent Fever. Stain in sections with Levaditi’s silver-method,
or with Nikiforoff’s method:—
1. Fix for 24 hours in equal parts of a 5 per cent water solution of
potassium bichromate and a saturated solution of mercuric
chloride in 0.6 per cent sodium chloride.
2. After-harden in graded alcohols in the incubator.
3. Imbed in paraffin.
4. Stain 24 hours in a mixture of alcoholic 1 per cent solution of
tropæolin 5 cc., concentrated watery methylene-blue solution
10 cc., caustic potash solution (1:1000) 2 drops.
5. Wash in water.
6. Dip several times in a mixture of equal parts of absolute alcohol
and ether.
7. Oil of bergamot; xylol; balsam.
The spirillum of African relapsing fever stains with the same stains as
the spirillum Obermeieri. The spirochætes of Vincent’s angina and fowl-spirillosis,
and the spirochæte refringens stain with watery aniline dyes and with
Giemsa’s stain; in section they are stained by the Levaditi method.
2. Spirochaeta Pallida (Treponema Pallidum). This organism is best
examined in the living condition by means of the dark-field illumination
(dark-field condenser). A very simple method of dark-field illumination
consists of the use of India ink. The suspected discharge or serum is placed
on a slide and an equal quantity of ink (Gunther’s or Higgin’s) added. The
serum and ink are rapidly mixed and spread over the slide to dry in a pale
brown smear. The oil for the immersion is placed directly on the smear.
The spirochætes appear as white spirals against a brownish-black field. The
best results are obtained with serum; the presence of mucus or fibrin interferes
with the clearness of the picture obtained.
Smears of serum from syphilitic lesions may be dried in the air and
fixed in absolute alcohol or equal parts of absolute alcohol and ether for
15-20 minutes. They may then be stained by Giemsa’s (old formula) stain
(azur II-eosin 3 grms., azur II 0.8 grm., glycerin [Merck’s chemically pure]
250 grms., methyl-alcohol [Kahlbaum I] 250 grms.). This solution can be
obtained from Grübler. Ten drops of the stain are mixed with 10 cc. of
distilled water immediately before the staining. The fixed preparation is
covered with the diluted staining fluid and warmed over the flame until a
slight steam arises. It is then allowed to cool for about 15 seconds, when
the stain is poured off and replaced by fresh, and the process repeated four
or five times, when the preparation is washed, dried and mounted in balsam.
Spirochætes are dark red. Slide or cover-glass and forceps must be absolutely
clean. Smears may also be fixed and stained by Wright’s blood-stain.
For the demonstration of the treponema in sections the method of
Levaditi gives the most satisfactory results:—
1. Fix thin pieces of tissue 24 hours or longer in 10 per cent formol.
(Formol-Müller’s and alcohol-fixation may also be used.)
2. 24 hours in 96 per cent alcohol.
3. Transfer to distilled water until tissue sinks.
4. Impregnation for 3 days in incubator, in a 1.5-3 per cent silver nitrate
solution.
5. Wash for a short time in water.
6. Reduce for 48 hours, in the dark, at room-temperature, in pyrogallic
acid 4 grms., 40 per cent formol 5 cc., distilled water 100 cc.
7. Wash in water. Cut on freezing-microtome, or imbed in celloidin
or paraffin. Toluidin-blue or safranin may be used as a contrast-stain.
The spirochætes are dark brown to black. Silver precipitates occur chiefly
in the outer portions of the tissue. The reticulum is brown; other parts of the
tissue are yellowish. Levaditi’s more recent modification of this method does
not give so good results as the original.
Schmorl’s Staining of Sections with Giemsa’s Stain.
1. Fix in 10 per cent formol. Cut very thin sections on freezing-microtome.
2. Place the sections in a staining dish containing a measured amount
of distilled water. To each cc. of water add one drop of Giemsa’s
stain. Use clean glass-needles to manipulate the sections. After
1 hour transfer sections to a fresh solution, in which they are
left 5-12-24 hours.
3. Wash quickly in a concentrated solution of potassium alum, then
quickly in water.
4. Mount in glycerin-gelatin; or dry on the slide until nearly perfectly
dry, then xylol, and balsam, or cedar oil. Alcohol must not be
used.
II. THE STAINING OF PATHOGENIC YEASTS AND MOULDS
IN SECTIONS.
1. Blastomycetes. The parasites of blastomycetic dermatitis can be
demonstrated unstained in pus treated with a weak sodium hydroxide. In
sections they are easily found after treatment with ordinary staining methods.
The various modifications of the Romanowsky method, or other
methylene-blue-eosin staining, give better staining of the parasite than can
be obtained by hæmatoxylin and eosin.
2. Oïdium Albicans. Staining with Weigert-Gram’s and lithium-carmine
gives beautiful preparations.
3. Moulds. These are best examined in the unstained condition, by
treating the material with equal parts of alcohol and ether, followed by a
3 per cent potassium hydroxide solution. The organisms and spores are
brought out distinctly. Löffler’s methylene-blue may be used for staining.
In the case of sections stain 1-2 hours and contrast with eosin. For the
examination of hairs or horny scales for fungi, Unna’s method may be used:—
1. Add glacial acetic acid to hair or epidermis; make cover-glass
preparations, drying by heat.
2. Ether and alcohol equal parts.
3. Stain in borax 1 grm., methylene-blue 1 grm., water 100 cc., ½-5
minutes.
4. Wash in water; dry; balsam.
If the horny elements are too deeply stained, decolorize in 1 per cent
acetic for 10 seconds, or in 1 per cent oxalic, citric, or arsenious acid for 1
minute.
III. THE STAINING OF ANIMAL PARASITES.
1. Amoeba Coli. Examine fresh material from fæces, abscesses or
cultures, in physiologic saline solution, on a warm stage. Stain under the
cover with methylene-blue and carmine. Make permanent mounts by removing
excess of stain and running in 50 per cent glycerin. In fixed preparations
the nuclei of the amoebæ do not stain with ordinary nuclear stains.
Mallory’s method may be used:—
1. Fix in alcohol.
2. Stain sections in a saturated aqueous solution of thionin 3-5 minutes.
3. Differentiate in a 2 per cent aqueous solution of oxalic acid for
½-1 minute.
4. Wash in water; dehydrate in absolute alcohol; clear in xylol;
mount in xylol-balsam.
Nuclei of the amœbæ and granules of the mast-cells are brownish-red;
nuclei of cells blue.
2. Trichomonas vaginalis and intestinalis; Cercomonas coli; Megastoma
entericum; Balantidium coli; Pyrosoma bigeminum; Trypanosoma;
Leishman-Donovan bodies, and allied forms are best stained with the modifications
of Romanowsky’s stain; the chromatin is red-violet (macro-nucleus
red, micro-nucleus black, flagellum red, protoplasm blue, basophilic
granules black). For staining in sections mercuric chloride or Zenker’s fixation
followed by staining with polychrome methylene-blue, Giemsa’s or the modifications
of the Romanowsky method may be employed.
3. Plasmodium Malariae. For films make medium smears (not too
thin); fix with equal parts of absolute alcohol and ether for ½-1 hour; or
fix and stain in the same solution (Leishman-Romanowsky, Wright’s stain,
etc.). For single staining methylene-blue, carbol-thionin, etc., may be
employed; for double staining eosin and methylene-blue. Ehrlich’s tri-acid,
or any of the eosin-methylene-blue combinations may be used (particularly
the Leishman-Romanowsky or Wright’s). With the Romanowsky methods
the body of malarial organism is stained blue, the chromatin varying shades
of lilac, red, purplish-red or almost black. When the blood contains but few
parasites 1 cc. may be drawn, mixed with 20 cc. of distilled water and centrifugated.
Smears are then made of the sediment. For the staining of the
plasmodium in imbedded tissues the following method is recommended by
Bignami. The tissue should be fixed in formol or mercuric chloride, preferably
a mixture of mercuric chloride 1 grm., sodium chloride 0.75 grm.,
acetic acid 0.75 grm., water 200 cc. Fix for 2 hours; after-harden in alcohol
and iodine-alcohol, changing the alcohol each day for seven days. Dehydrate
in absolute alcohol, and imbed in celloidin or paraffin. Stain in a saturated
watery solution of magenta or in a mixture of equal parts of saturated
alcoholic mixtures of magenta and orange G. Good results may,
however, be obtained with Löffler’s methylene-blue. Clear in xylol; mount
in balsam.
4. Coccidia and Sarcosporidia. The ordinary fixations give good
results. Imbed in paraffin or celloidin. Weigert’s iron-hæmatoxylin and
Van Gieson’s give as good pictures as any of the special methods advised.
5. Negri Bodies of Rabies. Examine in smears or make sections.
Take portions of gray brain-substance from the cortex in the region of the
fissure of Rolando (in the dog from around the crucial sulcus), from the
hippocampus, and from the cerebellum. Smear cover or slide by taking a
thin slice of the gray matter and compressing it between two slides, or
cover and slide, or by drawing the cover across the cut surface in order to get
some of the cells. Dry in the air; stain with watery methylene-blue; wash;
stain with watery acid fuchsin; wash in water; blot dry; mount in balsam.
Negri bodies fuchsin-red (about size of red blood cells); everything else
blue. When dried in the air and then fixed in methyl alcohol for 5 minutes
the smears may be stained by Giemsa’s method. For the demonstration of
the bodies in sections fix in Zenker’s, imbed in paraffin, and stain by the
eosin-methylene-blue method. The bodies take the eosin stain. Formol
fixation, freezing-microtome and Romanowsky stain give quick results.
Mann’s method for the staining of Negri bodies in sections is strongly recommended
by many workers. Fix material in mercuric chloride or Mann’s fluid
(1 grm. picric acid and 2 grms. tannin dissolved in 100 cc. concentrated water
solution of mercuric chloride) for 24 hours; wash thoroughly in running water;
imbed in paraffin. Stain in Mann’s mixture (1 per cent aqueous methyl-blue
[not methylene-blue] 35 parts, 1 per cent aqueous eosin 35 parts) for 24 hours;
wash in water; rinse in absolute alcohol; place in alkaline alcohol (absolute
alcohol 50 cc., 4 drops of a 1 per cent solution of sodium hydroxide) for 15-20
seconds until sections become reddish; wash quickly in alcohol; wash about
2 minutes in water until superfluous color is removed; place in weak acidulated
water (acetic acid) 1-2 minutes until sections are blue; quick dehydration in
alcohol; xylol; balsam. Cells are blue, nucleoli and blood-vessels red; Negri
bodies bright red. For quick diagnosis use acetone fixation and imbedding, stain
in Mann’s fluid 2-4 minutes, and proceed as in the Mann’s method. While
these bodies possess a great diagnostic importance for rabies, their exact nature
must still be regarded as unsettled; they are most probably not parasites.
6. Vaccine Bodies. Fix in Flemming’s, mercuric chloride or Zenker’s;
imbed in celloidin or paraffin. Stain with Heidenhain’s iron-hæmatoxylin
(bodies black) or Biondi-Heidenhain mixture (bodies blue, nuclei of leukocytes
and mitoses green, nuclei of epithelium and connective-tissue blue, protoplasm
and connective-tissue red). These bodies are probably not parasites, but
may be products of cell-degeneration.
7. Vermes. The heads, proglottides and ova are best examined in
the fresh state, in physiologic saline or glycerin. Acetic acid may be used
to bring out details. Berlin-blue or methylene-blue may be injected through
the genital pore for the demonstration of the excretory and genital organs.
Scolices and hooklets of echinococcus may be obtained by scraping the cyst-wall;
examine in glycerin. Permanent preparations of cestodes, nematodes
and trematodes may be made by fixing in mercuric chloride, formol or
Flemming’s, after-hardening in alcohol, staining in orange G, borax carmine,
alum hæmatoxylin, hæmatoxylin and eosin etc., mounting in glycerin
gelatin; or dehydrating, clearing in xylol and mounting in balsam. For sections
imbed in paraffin or celloidin. Trichinæ may be studied by teasing the
fresh muscle; by digesting with pepsin and hydrochloric acid and examining
the freed trichinæ on a warm stage; or by imbedding in paraffin or celloidin
and staining with hæmatoxylin and eosin. Permanent mounts of the
embryos of filaria may be made by fixing cover-glass preparations of blood
or chylous fluid by heat or mercuric chloride, and staining for a few seconds
with Löffler’s or a 2 per cent aqueous thionin.
CHAPTER XXVIII. THE STAINING OF SPECIAL ORGANS AND TISSUES.
I. BLOOD AND BLOOD-FORMING ORGANS.
The blood may be examined by means of films, stained or unstained,
or by sections, celloidin or paraffin.
A. FILMS. The blood may be obtained from the pulp of the
ring finger, from the skin over the knuckles, or from the posterior
aspect of the lobe of the ear. The place selected should be carefully
cleansed with water, soap and 1/1000 mercuric chloride solution,
and finally with alcohol and ether. A puncture is made with a
sterilized triangular needle or knife, or a stub-pen with one point
broken off. The last-named makes a most useful and inexpensive
instrument for this purpose. The puncture should be made by a
quick and deep stab, so that sufficient blood can be obtained from
one stab-wound. Pressure should not be employed to force blood
from the wound. Bleeding may be encouraged by letting the arm
hang down, or by applying pressure in the furrow of the terminal
joint of the finger. The first drop of blood should be wiped away
with a clean towel. When the second drop reaches the size of a
pin-head touch it with the under side of a perfectly clean cover-glass,
held by forceps, not by the fingers; place this cover-glass immediately
upon another clean cover, so that the blood will spread
out between the two covers in a thin film. The covers are then
separated by sliding them apart without pressing or squeezing;
place covers with film side upward, and dry in the air. The films
should not be touched with the hands; forceps alone should be used
to handle them. If the blood does not dry as quickly as it is spread
the film will be too thick. Films may be made upon slides in the
same way, or the drop of blood may be caught upon the edge of a
clean cover, slide or “spreader” and then drawn rapidly across a
slide. The dried film may be marked by scratching with a needle-point
the number and date on the film itself. Blood-films may be
fixed without drying by exposure to the vapor of formol or osmic
acid for several seconds and then dropping into absolute alcohol.
Formol alcohol, saturated mercuric chloride solution or Flemming’s
solution may also be used for the fixation of wet films, fixing for
5-10 minutes, and washing thoroughly after each of the last two
solutions. The dried film may be fixed by exposure to heat (110-115°C.)
for 5-10 minutes for Ehrlich’s triple stain, and for 2 hours for
the methylene-blue-eosin methods; 30-60 seconds at a temperature
of 120°C. may suffice; the film should be brought at once into the
required temperature. Heat-fixed films are improved by dipping
them for a few minutes in mercuric chloride solution and then
washing well before staining. Acetone-free methyl alcohol (1-2
minutes), absolute alcohol and ether in equal parts (½-12 hours),
formol-alcohol (1-2 minutes), alcoholic mercuric chloride (absolute
alcohol 25 cc., ether 25 cc., 5 drops of a 2 grms. mercuric chloride
solution in 10 cc. of absolute alcohol) for 2-5 minutes, and formol-vapor
are the chief solutions used for fixing the air-dried film. For
ordinary work methyl alcohol, formol alcohol, and the absolute-alcohol
and ether mixture give good results; heat fixation brings
out the granules well, and mercuric chloride is a good fixative for
the leukocytes. The combination of fixation and staining, as in
Leishman’s or Wright’s modification of the Romanowsky method,
is also recommended for general work.
For the staining of blood-films an almost endless variety of
staining-methods can be found in the literature. Many of these
represent slight deviations in the method of making the stain or in
its application, such deviations marking stages of improvement in
the development of the method. It is not necessary, therefore, to
give all of these methods, but to consider only the latest modifications
of value. In a general way blood-stains may be divided into
five classes:—
1. HAEMATOXYLIN AND EOSIN.
Fix in equal parts of absolute alcohol and ether for at least 30 minutes;
stain with hæmalum and eosin, or Ehrlich’s acid hæmatoxylin and eosin. By
adding O.5 grm. of eosin to the formula for Ehrlich’s acid hæmatoxylin a combination
stain can be made that is very good for blood-films fixed by heat or
absolute alcohol and ether. Stain 2-24 hours, wash, dry and mount in xylol
balsam.
2. EOSIN AND METHYLENE-BLUE.
Fix by formol (dried film over 40 per cent formol for 1 minute); absolute
alcohol for 1 minute; stain 5 minutes in a 1 per cent watery eosin; then without
removing eosin place in watery methylene-blue for 2 minutes; wash quickly; dry
in air; balsam.
3. MIXTURES OF EOSIN AND METHYLENE-BLUE.
The numerous mixtures of methylene-blue and eosin are not very stable,
can be kept for a few days only, and give varying results. Jenner improved
this method of staining greatly by collecting the precipitate formed by
the addition of eosin to methylene-blue, and dissolving it in pure methyl alcohol,
thus giving a solution that fixes and stains at the same time. The May-Grünwald
method is practically the same.
Jenner’s Method.
a. Water-soluble eosin, 1.25 grms. Distilled water, 100 cc.
b. Medicinal methylene-blue, 1 grm. Distilled water, 100 cc.
Mix equal parts of a and b in an open basin, stirring with a glass rod.
Let stand for 24 hours; filter; dry the residue at 50°C. Wash residue thoroughly
with distilled water and again dry thoroughly. Take 0.5 grm. of the
dried powder and dissolve in 100 cc. of pure methyl alcohol. Filter. Solution
keeps well.
1. Make blood-film. Dry in air. Do not fix.
2. Cover film with stain, keeping under watch-glass to prevent evaporation
Stain 2 minutes.
3. Wash in distilled water until the film has a pink color. Dry in
air. Mount in xylol-balsam.
Neutrophile granules are red, eosinophile rose red, basophile granules
violet, red blood cells and central portion of blood-platelets are terra-cotta,
leukocyte nuclei and granules in red blood cells are blue, protoplasm of
nuclei and outer portion of platelets light blue.
4. MODIFICATIONS OF THE ROMANOWSKY METHOD.
A large group of stains has resulted from various applications of the Romanowsky
idea of uniting equimolecular proportions of methylene-blue and
eosin, and the solution of the dyes so obtained in some suitable solvent. These
dyes consist of mixtures of methylene violet, methylene azure, eosinate of methylene
blue, etc., and can be obtained from Grübler and Co. under various names,
such as Azur-blau, Bleu Borrel, Giemsa’s stain, Leishman’s stain, etc. Hastings,
Leishman, Wright and others have combined the Romanowsky method with
that of Jenner by dissolving the new dyes obtained by their various modifications
in pure methyl alcohol, so as to form a solution that will fix and
stain at the same time. Hastings’ stain is a modification of Nocht’s stain;
Wright’s stain is a modification of the Leishman-Romanowsky method. The
revised directions given by Wright for making and using his stain are here given.
Wright’s method and the Giemsa stain possess all of the staining advantages
afforded by the variations of the Romanowsky method, and are alone given here.
The former is recommended for blood-work, the latter for the staining of
protozoa.
Wright’s Blood-stain.
To a 0.5 per cent aqueous solution of sodium bicarbonate add methylene-blue
(B.X or medicinal) in the proportion of 1 grm. of the dye to each
100 cc. of the solution. Heat the mixture in a steam sterilizer at 100°C. for
one full hour, counting the time after the sterilizer has become thoroughly
heated. The mixture should be placed in a flask of such size and shape that
the fluid will not be more than 6 cm. deep. After heating, allow the mixture
to cool, placing the flask in cold water if desired, and then filter it to
remove the precipitate. When cold the fluid should have a deep purple-red
color when viewed in a thin layer by transmitted yellowish artificial light.
It does not show this color while warm.
To each 100 cc. of the filtered mixture add 500 cc. of a 0.1 per cent
aqueous solution of yellow water-soluble eosin, and mix thoroughly. Collect
on a filter the abundant precipitate which immediately appears. When the
precipitate is dry, dissolve it in pure methyl alcohol (Merck’s) in the proportion
of 0.1 grm. to 60 cc. of the alcohol. To facilitate solution the precipitate
is to be rubbed up in a porcelain dish or mortar with a spatula or
pestle. This alcoholic solution is the staining solution. It should be kept
in a tightly-stoppered bottle. Should it become concentrated through evaporation
methyl alcohol in proper quantity should be added.
1. Cover film with a given quantity of staining fluid by means of a
medicine dropper.
2. After 1 minute add to the staining fluid on the film the same quantity
of distilled water by means of the medicine dropper, and
allow the mixture to remain for 2-3 minutes according to the
intensity of the stain desired. A longer period of staining may
produce a precipitate. Eosinophile granules show best after short
staining. The quantity of diluted stain on the preparation should
not be so great that some of it runs off.
3. Wash the preparation in water for 30 seconds or until the thinner
portions of the film become yellow or pink in color.
4. Dry, and mount in balsam.
Films more than a few hours old do not stain as well as fresh ones.
The red cells are orange or pink in color. Polychromatophilia and
punctate basophilia or granular degeneration are well shown. Nucleated
reds have deep-blue nuclei, and their cytoplasm is usually bluish. The
lymphocytes have dark purplish-blue nuclei and cytoplasm of a robin’s-egg
blue, in which a few dark-blue or purplish granules are sometimes present.
The nuclei of the polynuclear neutrophilic leukocytes are dark-blue or dark
lilac-colored, the granules reddish-lilac. The eosinophiles have blue or dark
lilac nuclei, a blue cytoplasm and eosin-red granules. The large mononuclear
leukocytes have a dark lilac or blue nucleus, cytoplasm pale blue or blue
with dark-lilac or deep purple granules. Mast-cells have purplish or dark-blue
nuclei, bluish protoplasm and coarse dark purple or black granules.
Myelocytes have dark blue or lilac nuclei, blue cytoplasm, and dark-lilac or
reddish-lilac granules. Blood platelets are blue with small violet or purplish
granules in their central portions. Malarial parasites have a blue body and
lilac or red chromatin. Spirochæte pallida is pale blue.
Giemsa’s Method.
a, One per cent water solution of azur-blau; b, one per cent watery
solution of eosin. For staining take 1 cc. of b, add 10 cc. of water, and then
1 cc. of the azur-blau solution. Stain 10 minutes to 1 hour.
Giemsa’s Old Method.
Azur II—Eosin
3.0
grm.
Azur II
0.8
grm.
Glycerin (Merck’s pure)
250.0
cc.
Methyl-alcohol (Kahlbaum I)
250.0
cc.
To 1 cc. of distilled water in a small, perfectly clean graduate add 1
drop of the stain, shaking very gently. Make very thin film; dry in air; fix 15-20
minutes in absolute alcohol. Cover preparation with a thin layer of the freshly
diluted stain for 10-15 minutes, renewing stain at end of 10 minutes. Wash in
a stream of water. Differentiate over-stained preparations in distilled water.
Dry with absorbent paper; mount in balsam. Stains the spirochæte pallida and
malarial organisms. The Giemsa solution may be obtained from Grübler. A
more intense staining can be obtained by adding to the water used for diluting
the stain 1-2 drops of a 0.1 per cent solution of potassium carbonate.
5. SPECIAL ELECTIVE STAINS FOR THE BLOOD.
1. Ehrlich’s Triple Stain.
Saturated watery solution of Orange G
120
cc.
Saturated watery solution of acid fuchsin
80
cc.
Saturated watery solution of methyl green
100
cc.
Glycerin
50
cc.
Distilled water
300
cc.
Absolute alcohol
180
cc.
Mix gradually; allow to stand for several months; do not shake or
filter. Remove stain with pipette. Fix by heat, or pure methyl alcohol for
5 minutes. Stain 5-10 minutes; wash thoroughly, dry and mount in balsam.
Neutrophile granules violet; eosinophile, a bright red; nuclei of the neutrophilic
and eosinophilic cells greenish-blue; nuclei of the lymphocytes deep-blue;
nuclei of the large mononuclears pale blue; those of red cells intense
blue; red cells copper red. The Aronson-Philipp modification is more variable
and less satisfactory.
Pappenheim’s Stain for Lymphocytes.
3-4 parts of polychrome methylene-blue or methyl green to 1-2 parts of
pyronin. Fix in absolute alcohol. Nuclei blue-green; protoplasm bright red.
Staining of Blood-platelets.
The blood-platelets may be examined in the fresh state by coating a
cover-slip with Deetjen’s agar-solution (boil 5 grms. agar-agar in 500 cc.
distilled water, filter hot, and to each 100 cc. of the filtrate add 0.6 grm.
sodium chloride, 6-8 cc. of a 10 per cent solution of sodium phosphate and
5 cc. of a 10 per cent solution of sodium diphosphate). Place drop of blood
on this coating and examine on warm stage. For permanent stained preparations
bleed into a fixing and staining fluid (equal parts alcohol and ether
and Romanowsky’s stain) or use Wright’s stain.
Bremer’s Diabetic Reaction.
Take a clean cover-glass, smear one-half with normal blood, the other
half with diabetic blood. Fix for 2 hours at 120°C., or in equal parts of
absolute alcohol and ether at 60°C. for 4 minutes. Stain in a 10 per cent
watery methylene-blue for 2 minutes, wash off the stain in water, and stain
for 10 seconds in a ⅛ per cent watery eosin. Wash, dry and mount in balsam.
In diabetic blood the red cells are green; in normal blood red. While
this reaction is constant in diabetic blood it also occurs in leukæmia, Hodgkin’s
disease, exophthalmic goitre and multiple neuritis. A 1 per cent solution
of Biebrich scarlet stains diabetic blood intensely, normal blood but
slightly. On the other hand, a 1 per cent methylene-blue and a 1 per cent
Congo red stain normal blood intensely and diabetic blood slightly.
Staining of Glycogen in Leukocytes.
To a solution of Lugol’s (100:3:1) add sufficient gum arabic to make a
syrupy mixture. Keep tightly corked. Place a drop of this solution upon
an air-dried film. After 1 minute dry with blotting paper. Examine with
oil immersion. A positive reaction is shown by the presence of a diffuse
brown or reddish-brown coloration or granules in the cell-body of the
polymorphonuclear leukocytes.
Staining of Fat in Blood.
Stain in solutions of scharlach R or sudan III in 70 per cent alcohol.
Staining of Blood-parasites.
The malarial parasites, trypanosomes, Leishman-Donovan bodies, sporidia,
piroplasma bigeminum, spirilla and spirochætes and the filaria may all be stained
with Wright’s or Giemsa’s modification of the Romanowsky method, or by
any of the modifications of this method. (See also Staining of Animal
Parasites.)
B. SECTIONS. The blood is allowed to drop directly into Flemming’s
solution and allowed to stand for 24 hours. It is then washed in water by
repeated decanting, or the coagulum may be placed in a bottle covered with
muslin, and then exposed to running water. It is after-hardened in alcohol
and imbedded in paraffin. Safranin should be used to stain the sections.
This method is especially good for the demonstration of mitoses in the
blood-cells.
Bone-marrow.
Prepare films and fix and stain, as for blood films. For sections, fix
the marrow in formol-Müller’s, mercuric chloride, Zenker’s, etc.; imbed in
paraffin; cut very thin sections; stain with Ehrlich’s triple stain or Wright’s
modification of Leishman’s stain. To distinguish the young forms of erythrocytes
and leukocytes Trambusi fixes in Flemming’s, stains the sections
in a 1 per cent thionin solution in aniline-water (4:100), differentiates in
acid-alcohol, and then brings the sections into a watery eosin and finally an
alcoholic eosin, and mounts in xylol-balsam.
Spleen and Lymphnodes.
Fresh material may be obtained by means of a trocar, and may be examined
in the fresh state, or films may be prepared, fixed and stained, as for blood-smears.
Sections of fixed tissues may be obtained by the use of the same fixing
and staining methods employed in the study of the blood or bone-marrow. For
the study of the reticulum Mallory’s reticulum stain or the digestion-method
may be used. In ordinary work formol-fixation followed by eosin-staining is of
great value in distinguishing hæmolymphnodes and lymphatic glands.
II. BONE.
For ordinary work decalcification is necessary except for those pathologic
conditions in which the lime-salts have been lost (see Chapter XXI).
Imbed in celloidin preferably. When decalcification has been carried out
place sections in an alkaline solution before staining, and stain for a longer
period than usual. Methylene-blue and eosin stain osteoblasts and osteoclasts
very well. Van Gieson’s is an especially useful stain for ordinary
work; osteoid tissue is red, calcified areas yellow. Sections of bone without
decalcification can be prepared by fixing, hardening and staining in bulk;
the bone is then sawn in the dried condition, and the sections ground down
to the required thickness. Schmorl’s methods for the preparation of bone-sections
have practically superseded all other staining methods.
Schmorl’s Thionin-picric-acid Method.
1. Fix in formol or formol-Müller’s preferably.
2. Decalcify in formol-nitric acid or Ebner’s alcoholic HCl acid solution.
3. Wash thoroughly in water. After-harden in increasing strengths of
alcohol; freeze or imbed in celloidin (not paraffin); cut.
4. Transfer sections to water for 10 minutes.
5. Stain sections, well spread out, for 5-10 minutes in a solution of
2 cc. of a saturated solution of thionin in 50 per cent alcohol and
10 cc. of water, to which 1-2 drops of ammonia are added.
6. Wash in water.
7. Stain ½-1 minute in hot saturated and cold filtered watery-solution
of picric acid.
8. Wash in water.
9. Differentiate in 70 per cent alcohol until the color ceases to come
away in blue-green clouds, 5-10 minutes or more.
10. Dehydrate in 96 per cent alcohol.
11. Clear in phenol xylol; xylol; balsam.
Lacunæ and canaliculi dark brown to black; bone cells red; ground
substance yellow or brownish yellow. Calcified areas take a darker yellow
than non-calcified. This method consists in an impregnation with a fine
precipitate rather than a staining. Should the precipitate be too heavy in
portions of the section it may be removed by thorough washing between
9 and 10.
Schmorl’s Thionin and Phosphotungstic or Phosphomolybdic Acid Method.
1. Fix thin pieces of fresh bone in formol, then in Müller’s for 6-8
weeks, or 3-4 weeks in the incubator. Fixation is best at 37°C.
2. Decalcify in Ebner’s hydrochloric acid solution. Wash thoroughly.
After-harden in alcohol. Imbed in celloidin or paraffin. Cut very
thin sections.
3. Water for 10 minutes.
4. Stain in the alkaline-thionin solution, as in previous method, for 3
minutes.
5. Wash in water.
6. With glass needles transfer sections to a saturated watery solution
of phosphotungstic or phosphomolybdic acid for a few seconds.
7. Wash 5-10 minutes, until section is sky-blue in color.
8. Fix the stain for 3-5 minutes in ammonia 1 part, water 10 parts.
9. Transfer directly to 90 per cent alcohol; change twice.
10. Dehydrate; clear in carbol-xylol; balsam.
If the ground-substance is too dark differentiate in acid alcohol before
dehydrating, and then wash thoroughly before beginning the dehydration.
Outlines of lacunæ and canaliculi are dark blue; ground-substance a
light or greenish blue; cellular elements a diffuse blue. Schmorl advises this
method for growing bone; in rickets the well-ossified areas alone stain well.
Both of the Schmorl methods can be used for the study of teeth as well.
Staining of Sharpey’s Fibres (v. Kölliker).
1. Harden, decalcify, imbed, cut.
2. Place section in strong acetic acid until it becomes transparent.
3. Stain in a saturated watery solution of indigo carmine for 15-16
seconds.
4. Wash in water; mount in glycerin.
Fibres red; ground-substance blue.
III. CARTILAGE.
Cartilage stains deeply with hæmatoxylin; with Weigert’s fibrin stain
it holds the blue; with thionin and polychrome methylene-blue stains for
mucin cartilage stains metachromatically red.
IV. CONNECTIVE TISSUES.
a.Connective-tissue Fibrils. The demonstration of connective-tissue
fibrillæ or reticulum is of great importance in the differential diagnosis of
sarcoma and carcinoma. Van Gieson’s method is the best stain for the
coarser fibrils, but does not bring out the finer reticulum as well as Mallory’s
aniline-blue method.
1. Mallory’s Reticulum Stain.
1. Fix in mercuric chloride or Zenker’s. After-harden in alcohol;
imbed in celloidin or paraffin; cut.
2. Stain in 1/10 aqueous acid fuchsin 5-10 minutes.
3. Transfer directly to the following solution and stain for 20 minutes
or longer:—
Aniline-blue, water-soluble (Grübler)
0.5
grm.
Orange G (Grübler)
2.0
grms.
1 per cent aqueous solution of phosphomolybdic acid
100
cc.
4. Wash and dehydrate in several changes of 95 per cent alcohol; dry
with absorbent paper.
5. Clear in xylol or origanum oil.
6. Mount in balsam.
Fibrils and reticulum of connective tissue, amyloid, mucin and connective-tissue
hyalin are blue; nuclei, protoplasm, fibroglia fibres, axis cylinders,
neuroglia fibres and fibrin are red; elastic fibres are pink or yellow;
red blood-cells and myelin-sheaths are yellow.
2. Mall’s Method for Reticulum.
1. Digest frozen sections of fresh tissue for 24 hours in a solution of
Parke, Davis and Co.’s pancreatin 5 grms., soda bicarbonate 10
grms., water 100 cc.
2. Wash carefully in water.
3. Place section in test-tube half-full of water and shake thoroughly
to remove cells.
4. Spread out on slide and allow to dry.
5. Allow a few drops of the following solution to dry on slide:—picric
acid 10 grms., absolute alcohol 33 cc., water 300 cc.
6. Stain for 30 minutes in the following mixture: acid fuchsin 10
grms., absolute alcohol 33 cc., water 66 cc.
7. Wash in the picric acid solution for a second.
8. Dehydrate in absolute alcohol; xylol; balsam.
3. Unna’s Method for Collagen.
1. Harden in absolute alcohol; imbed; cut.
2. Stain 5-15 minutes in polychrome methylene-blue.
3. Wash in water.
4. Differentiate in 1 per cent neutral orcein in absolute alcohol, 15 minutes.
5. Dehydrate in absolute alcohol.
6. Clear in xylol; mount in balsam.
Nuclei dark blue; protoplasm light blue; collagen dark red; plasma-cell
granules greenish-blue; mast-cell granules red.
4. Mallory’s Fibroglia Method.
1. Fix thin, small, fresh pieces of tissue in Zenker’s fluid; harden in
alcohol; imbed in celloidin or paraffin; cut.
2. Stain sections in 1 per cent aqueous acid fuchsin for 12 hours in
the cold, or 20-30 minutes at 50-56°C.
3. Wash in water for 5 seconds.
4. Differentiate in 0.25 per cent aqueous potassium permanganate solution
10-20 seconds.
5. Wash in water for 5 seconds.
6. Dehydrate in alcohol; clear in xylol or origanum; mount in balsam.
Fibroglia fibrils and cell-nuclei intensely red; contractile elements of
striped muscle, smooth muscle, neuroglia fibres, cuticular surfaces of epithelial
cells and fibrin are also red; connective-tissue fibres brownish-yellow
or colorless; elastic fibres, unless degenerated, bright yellow.
b.Elastic Fibres. Weigert’s method is so superior to the Unna
orcein-stain that it alone is given here. It is our best elective stain: gives
permanent preparations, and is in every way practical. The stain keeps well.
Weigert’s Method for Staining Elastic Fibres.
Preparation. Boil in a porcelain dish resorcin 4 grms., fuchsin (Grübler)
2 grms., and water 200 cc. After the mixture has boiled a few seconds
add 25 cc. of liquor-ferri sesquichlor., Pharm. Germ. III. Stir well and boil
for 5 minutes. When cool, filter. Carefully loosen the filter from the funnel,
transfer it to the same porcelain dish which still contains a small amount of
sediment, and add 200 cc. of 94 per cent alcohol. Boil and stir carefully.
Remove the filter-paper when all the sediment is dissolved. Cool, filter;
make up the filtrate to 200 cc. with 94 per cent alcohol, and to these 200 cc.
add 8 cc. of hydrochloric acid. Resorcin-fuchsin may be obtained from
Grübler, but the freshly-prepared stain gives better results.
1. Fix in any ordinary solution; imbed; cut.
2. Stain with lithium-carmine and differentiate in acid alcohol; wash
thoroughly.
3. Stain in the resorcin-fuchsin mixture for 20-60 minutes.
4. Wash rapidly in acid alcohol.
5. Dehydrate and differentiate in absolute alcohol until section is red.
6. Clear in xylol; balsam.
Nuclei are red; elastic fibres blue-black. Should the stain when old
give a diffuse staining differentiate for a longer time in acid alcohol.
c.Fat Tissue. Use same methods as advised for the demonstration
of fatty degeneration and infiltration (osmic acid, scharlach R, sudan III).
V. EAR.
Remove temporal bone; fix in formol-Müller’s; decalcify in trichloracetic
acid; wash; after-harden in alcohol; imbed in celloidin. For nerve-endings
use Golgi’s and methylene-blue methods.
VI. EYE.
Fix in Müller’s, formol-Müller’s, Zenker’s, formol, Flemming’s or
Marchi’s solution. Aid fixation by incisions into sclera. The eye should
not be left in formol for more than 3 days. Section as desired; imbed larger
pieces in celloidin, small ones in paraffin. Use alum-carmine, iron-hæmatoxylin,
Van Gieson’s, Weigert’s elastic stain, Levaditi’s silver-method,
Golgi’s nerve-stain, methylene-blue method, etc., according to the object of
the investigation.
VII. LIVER.
For the demonstration of the bile-capillaries Weigert’s neuroglia method
gives the best results. (See Page 300.) This method may be used with sections
cut on the freezing-microtome after fixation in formol. Such sections
are placed in a ½ per cent solution of chromic acid for 1 hour, transferred
to the neuroglia mordant for 5-6 hours, washed well with water, and then
treated as for the neuroglia method. Van Gieson’s method may also be used
for frozen sections of formol-fixed tissue. The walls of the capillaries show
as fuchsin-colored streaks.
VIII. MUSCLE.
Van Gieson’s is the best general stain for both striped and unstriped
muscle, as it differentiates the muscle perfectly from the connective-tissue.
Mallory’s reticulum stain may also be used for the same purpose. For the
study of myoglia fibrils the tissue must be fixed within a few minutes after
its removal from the living body. Autopsy material cannot be used. These
fibrils can be demonstrated by Mallory’s fibroglia stain, or by Mallory’s
phosphotungstic-acid hæmatoxylin stain for neuroglia. (See below.)
IX. NERVOUS SYSTEM.
It is impossible in a book on general pathologic technic to consider
all of the numerous staining methods that have been devised
for the study of the nervous system. I have attempted, therefore,
to pick out the best selective methods for the staining of the more
important nervous structures, so as to cover adequately the general
held of nervous pathology. Formol has now replaced Müller’s for
the preliminary fixation of nervous tissue, because of its quick
action, and because after its use chromic acid may be employed to
mordant the tissue, when it is desired to use certain staining methods
requiring such mordanting. Celloidin imbedding is preferable,
although paraffin may be used for general work. General stains,
such as hæmatoxylin and eosin, and Van Gieson’s are used for general
impressions.
1. METHODS FOR STAINING GANGLION CELLS.
A. Lenhossék’s Method.
1. Fix in equal parts of saturated watery picric acid and mercuric
chloride (Rabl’s mixture); after-harden in absolute alcohol; imbed
in paraffin; cut.
2. Stain in saturated watery solution of toluidin blue, or thionin blue, for
12 hours.
3. Wash rapidly in water.
4. Differentiate carefully in absolute alcohol, or in aniline-alcohol
(1-10).
5. Carbol xylol; xylol (quickly); balsam.
Nissl’s granules are blue. This method is easy, and the best for general
work.
B. Nissl’s Method.
1. Fix in 96 per cent alcohol for 2-5 days; mount tissue in gum arabic
on block; harden in 96 per cent alcohol; cut; place sections in
96 per cent alcohol.
2. Stain in methylene-blue soap mixture (methylene-blue B 3.75 grms.,
Venetian soap shavings 1.75 grms., water 1,000 cc. Shake well.
Keep 3 months before using. Shake and filter before using.),
warming, until bubbles arise.
3. Differentiate in aniline alcohol (aniline oil 10 parts, 96 per cent alcohol
90 parts) very rapidly.
4. Arrange section on slide; dry with blotting-paper; cover with
cajuput oil.
5. Blot; wash off oil with benzene.
6. Remove benzene; mount the wet section in xylol colophonium,
slightly warming; press on cover, and remove excess of colophonium.
Nuclei of ganglion cells light blue: granules dark blue. Toluidin blue,
thionin, dahlia, Bismarck brown or neutral red may be used instead of
methylene-blue, and often give better results.
2. METHODS FOR STAINING MYELIN SHEATHS.
A. Weigert’s Method.
1. Fix in formol 2-3 days.
2. Primary mordant (potassium bichromate 5 grms., fluorchrom 2.5
grms., water 100 cc.: boil and filter) 4-6 days.
3. Without washing after-harden in graded alcohols, in the dark.
4. Imbed in celloidin.
5. Secondary mordant (neutral copper acetate 5 grms., fluorchrom
2.5 grms., water 100 cc., boil and add 36 per cent acetic 5 cc.) for
1 day at 37°C.
6. Transfer to 70-80 per cent alcohol.
7. Cut.
8. Stain in Weigert’s iron-hæmatoxylin, 24 hours.
9. Wash in water, 30 minutes or longer.
10. Differentiate in borax-potassium ferricyanide (potassium ferricyanide
2.5 grms., borax 2 grms., water 100 cc.) until the gray
substance appears yellow to white. Control under microscope.
11. Wash thoroughly in water.
12. Dehydrate in absolute alcohol; clear in xylol; mount in balsam.
Myelinated fibres, blue-black, upon a colorless or light yellow background;
red blood cells may be blue-black. Weigert’s method is better than
any of the numerous modifications.
B. Orr’s Osmic-Acid Method.
1. Place fresh tissue from cerebral cortex or cord, not more than
⅛ inch in thickness, in 1 per cent acetic, 2 cc., and 2 per cent
osmic acid 8 cc., for 48 hours. If mixture is darkened at end of
24 hours, renew.
2. Transfer to 10 per cent formol for 3 days, in order to complete
reduction and hardening.
3. Imbed in celloidin or paraffin; cut.
4. Remove paraffin; alcohol; water; differentiate in ⅛-1/12 per cent
potassium permanganate.
5. Transfer to a 1 per cent oxalic acid solution, until sections become
yellowish-green.
6. Wash; dehydrate; xylol; balsam.
Nerves and fat black: tissue yellowish-green. A very reliable method.
3. STAINING OF AXIS CYLINDERS.
Stain with Van Gieson’s (red), Mallory’s aniline blue method (red),
lithium carmine (red), or
Williamson’s Modification of Bielschowsky’s Method.
1. Fix in Müller’s; imbed; cut.
2. Place sections in 10 cc. of tap water containing a few drops of
formalin, 5 minutes.
3. Wash in water.
4. Place in the following silver bath 5-10 minutes: 3 drops of liq.
ammoniæ (B.P.) are dropped into a test tube. Add 10 per cent
silver nitrate solution, drop by drop, until a brownish precipitate
is formed. Dissolve the latter by adding ammonia, drop by drop,
until the fluid is quite clear. Add tap water up to 10 cc.
5. Wash thoroughly in water.
6. Transfer to the dilute formol solution until sections become grayish-black
(1-3 minutes).
7. Place in the following solution for a few minutes: To 10 cc. of
water add 2 drops of 1 per cent watery solution of chloride of
gold, a few drops of saturated borax solution, and a few drops of
a 10 per cent solution of potassium carbonate.
8. Transfer to a 10 per cent aqueous solution of sodium hyposulphite
for a few minutes.
9. Wash in water; dehydrate in alcohol; clear in oil of cajuput; xylol;
balsam.
Axis-cylinders, intracellular fibrils and Golgi’s network are stained.
4. STAINING OF NEURO-FIBRILLAR STRUCTURES.
These are stained by Bielschowsky’s method, and by acid fuchsin after
fixation with osmic acid. The special methods (Apathy’s gold method,
Bethe’s molybdic method, the silver methods of Ramen y Cajal and Robertson)
have little practical application in pathologic work, and are used
chiefly in the study of normal histology.
5. THE STAINING OF NEUROGLIA.
A. Weigert’s Method.
1. Fix small pieces of fresh tissue in 10 per cent formol for 24 hours.
2. Mordant. 8 days at room temperature (4 days at 37°C.) in copper
acetate 5 grms., fluorchrom 2.5 grms., acetic acid 5 cc., water
100 cc.
Or, harden and mordant at the same time in 9 parts of the copper
mordant, and 1 part of commercial formol for 8 days, changing on the second
day, and once again later.
3. Wash in water: after-harden in alcohol; imbed in celloidin; cut.
4. Place sections in ⅓ per cent aqueous solution of potassium permanganate.
5. Wash in two changes of water.
6. Place in the following reducing mixture, 2-4 hours: Chromogen 5
grms., formic acid (sp. gr. 1.2) 5 cc., water 100 cc.; filter; to 90 cc.
add 10 cc. of 10 per cent sodium sulphite solution just before
using.
7. Wash twice in water.
8. Place sections in 5 per cent carefully filtered aqueous chromogen
solution 10-12 hours. (The glia fibres become darker, and a yellowish
contrast is obtained for the ganglion and ependymal cells
and thicker axis cylinders. Connective-tissue is stained red.)
9. Wash in water.
10. Place section on a slide freshly cleaned with alcohol; dry with
filter paper; stain in the following mixture for about 30 seconds:
Saturated solution of methyl violet in 70-80 per cent alcohol
100 cc., oxalic acid 5 per cent solution, 5 cc.
11. Remove excess of stain; dry with filter paper; cover slide with saturated
solution of iodine in 5 per cent potassium-iodide solution,
30 seconds.
12. Remove iodine solution; dry with filter paper; differentiate in a
mixture of equal parts aniline oil and xylol until no more heavy
clouds of stain are given off. Control under microscope.
13. Dry section with filter-paper; add xylol; blot; repeat three times.
14. Mount in balsam or turpentine colophonium.
Neuroglia fibres and nuclei, blue; connective-tissue, blue-violet; thicker
myelin sheaths, ganglion and ependymal cells, yellowish. This is the best
method, none of the modifications giving as good results. No method, however,
will stain every neuroglia-fibre.
B. Mallory’s Neuroglia Method.
1. Fix small pieces in 10 per cent formol, 4 days.
2. After-harden in saturated watery picric solution 4-8 days: or combine
1 and 2 by using formol 10 cc. with 90 cc. saturated picric
acid solution.
3. Place in a 5 per cent aqueous solution of ammonium bichromate,
4-7 days at 37°C., changing solution 011 second day; or 3-4 weeks
at room-temperature.
4. Without washing, harden in alcohol; imbed in celloidin or paraffin; cut.
5. Place sections in ¼ per cent aqueous solution of potassium permanganate,
15-30 minutes.
6. Wash in water.
7. Immerse in 5 per cent aqueous oxalic acid, 5-30 minutes.
8. Wash in several changes of water.
9. Stain in following solution, 1-several days: Hæmatoxylin 0.1 grm.,
10 per cent phosphotungstic acid 20 cc., hydrogen peroxide 0.2 cc.,
water 80 cc.
10. Wash rapidly in water.
11. Differentiate in freshly prepared 30 per cent alcoholic solution of
ferric chloride, 5-20 minutes.
12. Wash in water.
13. Dehydrate in 95 per cent and absolute alcohol or blot with xylol.
14. Clear in xylol; balsam.
When Zenker’s fixation is used, omit 2 and 3, and after cutting sections
treat with Lugol’s to remove mercury and then with 95 per cent alcohol to wash
out iodine; then wash in water and proceed with 5.
Neuroglia, nuclei and fibrin, dark-blue; all else is pale yellow or gray.
If the differentiation in 11 is omitted, the axis-cylinders and ganglion-cells
are rose-pink; the connective-tissues, dark red-pink.
6. COMBINED STAINING OF SEVERAL NERVOUS STRUCTURES.
Various methods of impregnation with silver, gold or lead are used in
histologic work, the Golgi methods and their modifications in particular.
They have but little application in pathologic work, and for that reason are
omitted here, as is also a consideration of Ehrlich’s vital methylene-blue
method and its modifications. Full details of these methods can be found
in laboratory textbooks on histology.
7. METHODS FOR THE DEMONSTRATION OF NERVE-DEGENERATION.
A. Marchi’s Method.
1. Harden small fresh pieces of tissue in Müller’s fluid for at least 8
days. Handle tissue very carefully to prevent mechanical injury.
The tissue may be placed first in formol, and then later transferred
to Müller’s fluid.
2. Place in freshly prepared Marchi’s fluid (Müller’s fluid 2 parts, 1
per cent osmic acid solution 1 part) for about 8 days in the incubator
at 37°C. The brain requires a longer time. When the
mixture loses the osmic acid smell renew it.
3. Wash in running water, 24 hours.
4. Harden in graded alcohols.
5. Imbed in celloidin; cut; dehydrate; clear; mount.
Degenerated nervous tissue (fat) is black: all else brownish gray.
Contrast stain in Van Gieson’s, lithium carmine, etc. This method is good
for the demonstration of early degenerations.
B. Donaggio’s Methods for Early Degeneration.
Method I—
1. Fix in Müller’s fluid or in 4 per cent potassium-bichromate solution.
The tissue may remain in the fluid for any length of time.
2. Transfer directly, without washing, to alcohol. Dehydrate; imbed
in celloidin; cut sections 20-30 microns. Place sections in distilled
water for a few seconds.
3. Transfer to the following mixture for 10-20 minutes: To 20 per
cent solution of ammoniated chloride of tin add an equal amount
of 1 per cent aqueous hæmatoxylin. Allow to stand for five days.
Keep in the dark, and in a cool place.
4. Wash rapidly in distilled water.
5. Differentiate in Pal’s solution (oxalic acid 0.5 grm., potassium sulphite
0.5 grm., water 100 cc.) until the normal fibres are entirely
decolorized.
6. Dehydrate; xylol; neutral balsam.
Degenerated fibres blue; normal, decolorized.
Method II—
1. Fix in Müller’s fluid: imbed as in Method I.
2. Place sections in 0.5-1 per cent aqueous hæmatoxylin solution, 10-20
minutes.
3. Transfer directly to a saturated aqueous solution of neutral acetate
of copper, 30 minutes. Renew copper solution once.
4. Decolorize as in Method I.
5. Wash rapidly in distilled water.
6. Dehydrate in graded alcohols; xylol; balsam.
Degenerated fibres black; normal fibres unstained, except for a narrow
circle at periphery.
Method III—
1. Fix and imbed as in Method I.
2. Stain in 0.5-1 per cent aqueous hæmaloxylin solution, 10-20 minutes.
3. Transfer directly to 10-20 per cent solution of perchloride of iron.
The section becomes black. After a few seconds they lose their
color. If washed in water, they regain their color.
4. Without washing, differentiate in acid alcohol (0.75 cc. HCl in 100
cc. alcohol).
5. Dehydrate in absolute alcohol; xylol; balsam.
Degenerated fibres appear as small black streaks or circular areas.
C. Staining of Fat-granule Cells.
Fix in Flemming’s or Marchi’s mixtures; or in formol, staining with
sudan III or scharlach R. The tissues may be examined also in the fresh
condition.
D. Old Degenerations.
Use Weigert’s myelin method to show absence of myelinated fibres.
Van Gieson’s method stains the neuroglia of degenerated areas a deep red;
it is very useful combined with Weigert’s myelin stain. Weigert’s neuroglia
stain may be used to demonstrate the relative parts played by neuroglia and
connective-tissue in the formation of sclerotic patches. When Weigert’s
iron-hæmatoxylin is used with Van Gieson’s the neuroglia remains unstained,
while the connective-tissue stains red. With other hæmatoxylins
the neuroglia cannot be sharply differentiated from connective-tissue when
stained with Van Gieson’s.
8. PERIPHERAL NERVES.
Use any of the above methods for the staining of myelin sheaths,
ganglion cells, axis cylinders, etc. Van Gieson’s is good for the demonstration
of connective-tissue increase. For the demonstration of peripheral
fibrils and nerve-endings consult textbooks on histology for Golgi methods,
Ehrlich’s vital methylene-blue method, and the modifications of May,
Drasch, and others.
Platner’s Method.
1. Harden in 25 per cent solution of liq. ferri sesquichlor., 1-5 days.
2. Wash in water, until the addition of KCNS to the water yields no
reaction.
3. Place in 75 per cent alcohol containing an excess of di-nitroresorcin,
2-30 days, according to the size of the piece of tissue.
4. Dehydrate in absolute alcohol.
5. Imbed; cut; dehydrate; clear; mount.
Axis cylinders, emerald green. A good method for the rapid demonstration
of pathological processes connected with the peripheral nerves.
9. CHROMAFFINIC TISSUES.
Wiesel’s Method.
1. Fix 1-4 days in 10 parts of a 5 per cent potassium bichromate solution,
20 parts of 10 per cent formol, 20 parts distilled water.
2. 1-2 days in 5 per cent potassium bichromate.
3. Wash thoroughly in running water, 24 hours; harden in graded alcohols;
imbed in paraffin.
4. Stain sections in a 1 per cent aqueous toluidin-blue or water-blue
solution.
5. 5 minutes in tap-water.
6. Stain 20 minutes in a 1 per cent watery safranin solution.
7. 96 per cent, and then absolute alcohol, until the blue color appears.
8. Xylol; balsam.
Chromaffinic cells green; other cells light blue, nuclei red.
X. SKIN.
Skin should be fixed in formol-Müller’s or formol, and should not be
left too long in alcohol or xylol. Imbed in celloidin preferably. For general use
the ordinary stains suffice; for the study of pigment stain with alum or lithium-carmine.
Use Weigert’s elastic-tissue stain for the demonstration of elastic
fibrils. The intercellular bridges may be demonstrated by Van Gieson’s
(remaining unstained), or by various special staining methods.
Herxheimer’s Method for Epithelial Fibrillae.
1. Harden; imbed; cut.
2. Stain in a saturated watery solution of kresyl-echt-violett.
3. Dehydrate in absolute alcohol; clear in clove oil; balsam.
CHAPTER XXIX. MICROSCOPIC EXAMINATIONS FOR MEDICOLEGAL PURPOSES.
1. BLOOD. Fresh spots should be scraped off and examined
in physiologic salt solution. Older spots are scraped off when possible,
or if the spots are on clothing or other fabrics, a piece of the
stained portion is cut out, and the scraping or piece of material is
placed on a slide in a macerating fluid (30 per cent caustic potash;
glycerin 3 parts and concentrated sulphuric acid 1 part; 15 per cent
tartaric acid; equal parts alcohol and ether; or Pacini’s fluid [mercuric
chloride 1 grm., sodium chloride 2.0 grm., glycerin 100 cc.,
water 300 cc.]). Even in very old clots or stains some red cells
may retain their characteristic form. The process of maceration
should be observed directly under the microscope, as the macerating
fluid gradually changes the cells after they become loosened.
Schmorl advises the following method:—
Moisten a small piece of the fabric in water and stain with
hæmatoxylin. Differentiate in acid alcohol, wash thoroughly in
water, stain with 1/1000 watery eosin solution, wash in water (3-6
hours), place in alcohol, and then again in water. Tease with great
care into fine threads on the slide, and examine the isolated fibres
in a drop of glycerin. The red corpuscles are easily recognized;
and the nuclei of the white cells or of the red cells of birds and
amphibia stand out distinctly. Permanent mounts may be made
by passing the specimen through alcohol, xylol, and mounting in
balsam. A portion of the stained fabric may be imbedded in celloidin,
sections cut, and stained with hæmatoxylin and eosin.
The red cells may be measured by the ocular micrometer. Those
of man are somewhat larger than those of other mammals, but the
difference in size is so slight that an absolute determination of the
source of the blood is not possible from the consideration of size
alone. Human corpuscles measure 0.0077 mm. in diameter; the
nearest in size are the corpuscles of the dog, rabbit, hog, cow,
horse, cat and sheep, in the order given, those of the sheep being
smaller. The measurements of a large number of corpuscles must
be taken if the question of size is to be considered. When red cells
cannot be found the stains must be tested for the presence of blood
pigment (Teichmann’s hæmin crystals). A small piece of the scraping
or stained fabric is placed upon a slide in glacial acetic acid;
the fluid is expressed; and a small crystal of sodium chloride or
sodium iodide is added to the fluid. Cover with cover-glass and
heat gently until bubbles are given off, and continue carefully until
the acetic acid has evaporated. The slower the evaporation the
larger the crystals will be. Examine with a ⅙ inch or No. 7
objective. The hæmin crystals are brown or claret-colored, of the
shape of rhombic plates single or superimposed. They are insoluble in
water, alcohol and ether; dissolve slowly in ammonia, dilute sulphuric
and nitric acids, and easily in caustic potash. The form of
the crystal and the color determines the diagnosis of the presence
of blood, but does not distinguish between human and animal blood.
Old stains should be treated with acetic acid 12-24 hours before
attempting to obtain the crystals. Contamination of the fabric with
fat interferes with the reaction; the fat should be removed first with
ether. If the suspected stain occurs on iron, steel, sand, clay or
coal, the crystals usually cannot be obtained. Decomposition may
also interfere with the reaction. In such cases a solution of the
stain in a saturated solution of borax should be made and submitted
to spectroscopic examination. The presence of blood-pigment on
any substance can be demonstrated by means of the spectroscope
or microspectroscope. Within recent years the biologic test for
blood and albumins has been turned to medicolegal uses, in the differential
diagnosis of human and animal blood or albumins. This
test rests upon the principle that in the serum of an animal treated
with human blood or albumin there are developed antibodies having
a strong specific hæmolytic or precipitating action upon human
blood or albumin.
2. Semen. Suspected seminal stains may be tested first by the
Florence sperm reaction. A portion of the material is mixed on the
slide with a drop of an iodine solution (1.65 iodine, 2.54 potassium
iodide, 30 water). Cover and examine with low power. The formation
of characteristic long rhombic, brown or violet crystals is evidence of
the presence of semen. The reaction is hindered by decomposition.
The spermatozoa may also be demonstrated in seminal stains by
soaking the fabric, carefully flattened out, in a watch-glass containing
dilute hydrochloric acid (1 drop to 40 cc. distilled water), for
5 minutes to 5 hours, according to the age of the stain. The fabric
is then removed and gently rubbed on a slide; the smear is covered
with a No. 1 cover-slip, and examined with the oil immersion or
the highest dry objectives. The smear may be stained by adding
neutral red solution to the macerating fluid, or by drying the smear
in the air, fixing in the flame, and staining with hæmatoxylin and
eosin, neutral carmine or fuchsin. The staining and macerating
solutions may be combined in one. The piece of fabric containing
the suspected seminal stain is soaked in a mixture of methyl green
1 grm., hydrochloric acid 15 drops, distilled water 350 cc., for 1-6
hours. It is then removed with the forceps and smeared on the
slide, examined in the moist state, or dried, fixed and mounted. The
head is stained an intense green.
3. Decidua and Foetal Tissues. Clots, curettings and discharges
may be examined in the fresh state by teasing; or the
material may be fixed in formol, formol-Müller’s or mercuric chloride.
The characteristic structures of the decidual cells, chorionic
villi and other fœtal tissues are easily recognized and the presence
of any one of these determines the occurrence of pregnancy, abortion
or child-birth.
4. Hair. The most important medicolegal question concerning
hair is the differential diagnosis between animal and human.
The following points must be considered:—
1. The cells of the outer layer (cuticle) of the hair are much
larger in the majority of animals than in man, and are much more
distinctly seen. The cuticle is much more dentate or serrate in the
hair of animals than in that of man.
2. The cortical layer in human hair is much thicker than in
animal hairs, as compared to the thickness of the medulla; in animal
hair the medulla is thicker than the cortical layer.
3. The cellular structure of the medullary substance is indistinct
in human hair; in animal hair it is very prominent. In human
hair the medulla is often absent, especially in certain portions of
the hair, while in animals it is rarely absent, and then only in
sharply localized portions. The hair should always be examined
throughout its entire length.
Hairs of the beard are usually thickest (0.14-0.15 mm. in diameter),
then follow in order of size the pubic hairs of the female, the
hairs of the eye-lids, male pubis, male head, and female head (0.06
mm. in diameter). There are, however, marked individual differences,
and the hair of infants is much finer than that of older children
and adults. The hairs of the new-born are pointed, as are also
the hairs of adults that are protected from cutting, rubbing, maceration,
etc. Cut hairs are at first blunt; later more rounded. Hairs
that have been torn out usually show a bulbous end with the
remains of the hair-follicle; fallen hairs have a closed, smooth,
atrophic root. When the question arises as to the definite individual
from whom certain hairs may have come a very careful comparison
of the given hairs with those of the individual concerned
must be carried out, as to color, size, thickness of different layers,
shape and size of the transverse section, etc. Paraffin imbedding
should be employed for this purpose.
CHAPTER XXX. THE STUDY OF MOUNTED PREPARATIONS.
1. Preparation. Analyze the method of preparation of the
specimen, noting-methods of fixation, hardening, imbedding, injection,
impregnation, staining, etc. Note the reaction of nucleus,
protoplasm, red blood-cells and connective-tissue to the stain. Look
for special staining reactions (hyalin. amyloid, mucin, etc.) and
metachromasia.
2. Histology. Look for histologic landmarks by which the
organ, or part of the body, from which the specimen is taken can
be recognized. If such landmarks cannot be found, analyze the section,
element by element, until its histologic features are fully noted
and recognized. Answer the question, “From what part of the
body does the tissue come?” Carry the differential diagnosis as
far as possible, with regard to sex, age, side of the body or organ
(for example, in the heart decide as to auricle or ventricle, left
ventricle or right, etc.).
3. Pathology. Study next the deviations from the normal.
Answer these questions: “Is the tissue normal?” “If not, in what
respects does it differ from the normal?” Study pathologic conditions
with the low power first, then use the high power for the
finer details. Consider the histologic features of the organ (capsule,
stroma, parenchyma, ducts, etc.) with respect to pathologic
changes.
4. Diagnosis. After the pathologic changes have been fully
studied, the diagnosis should be formulated. If the pathologic
changes found can be correlated as factors in some specific conditions
they should not be considered separately, but the specific condition
itself would constitute the diagnosis. When the pathologic
conditions have no definite relation to each other they should be
classified separately. If a section of kidney shows cloudy swelling,
congestion, œdema, small-celled infiltration, hæmorrhage and casts,
these different conditions would all be included in the diagnosis of
an acute parenchymatous degenerative nephritis. If the general
picture corresponds to that of tuberculosis, syphilis, neoplasm, etc.,
the various associated changes need not be considered alone, but
the broad and comprehensive diagnosis should be expressed in as
concise terms as possible.
Written descriptions of microscopic appearances should be so
full and clear that it is possible to make a diagnosis from the word-picture.
A full and adequate analysis of the preparation set forth
in concise and clear language is of more objective value than the
bare diagnosis. Reproductions by means of drawings are also of
great value in assisting the memory or in communicating the results
of the observation to others. A technique sufficient for ordinary
purposes may soon be obtained. Color work is usually easiest,
since the majority of sections are stained in color. The camera
lucida or Edinger’s drawing apparatus may be of great service in
the enlargement and placing of the various elements of the section;
with these instruments but little practice is necessary to produce
rapid and accurate representations. The close inspection of the
preparation during the drawing often reveals features that previously
had escaped attention. Many workers object to drawings
on the ground of subjectivity, but the same criticism applies
even more to word-descriptions. Especial attention must, however,
be paid to this danger, both in the case of drawings and word-descriptions.
In the case of scientific work the written description
is best backed up by photographs, rather than by drawings. Microphotography
has the very great advantage of being purely objective,
although dishonest photographs are possible. There are, however,
certain limitations to microphotography. Differential details are
lost in sections; all parts of the section cannot be fairly represented;
and focal and color limitations are great disadvantages. I believe,
however, that for pure scientific work word-descriptions should be
accompanied by objective microphotographs instead of drawings.
The microphotographic outfit of Zeiss has already been recommended
as the best. It is impossible to take up the subject of
microphotographic technique in this book. The reader is referred
to the chapter on “Microphotography” in Aschoff and Gaylord’s
Atlas, and to the works of Cresbie, Bagshaw, Kaiserling, Neuhauss,
and others. (See article on “Mikrophotographic” in the Enzyklopädie
der mikroscopischen Tecknik.)