| | Paragraph |
| Purpose | 14 |
| Before‐operation service | 15 |
| During‐operation service | 16 |
| At‐halt service | 17 |
| After‐operation and weekly service | 18 |
a. To insure mechanical efficiency it is necessary that the
vehicle be systematically inspected at intervals each day it is
operated and weekly, so that defects may be discovered and corrected
before they result in serious damage or failure. Certain scheduled
maintenance services will be performed at these designated intervals.
The services set forth in this section are those performed by driver or
crew before operation, during operation, at halt, after operation, and
weekly.
b. Driver preventive maintenance services are listed on the back
of “Driver’s Trip Ticket and Preventive Maintenance Service Record,”
W.D. Form No. 48, to cover vehicles of all types and models. Items
peculiar to specific vehicles, but not listed on W.D. Form No. 48, are
covered in manual procedures under the items to which they are related.
Certain items listed on the form that do not pertain to the vehicle
involved are eliminated from the procedures as written into the manual.
Every organization must thoroughly school each driver in performing the
maintenance procedures set forth in manuals, whether or not they are
listed specifically on W.D. Form No. 48.
c. The items listed on W.D. Form No. 48 that apply to this
vehicle are expanded in this manual to provide specific procedures for
accomplishment of the inspections and services. These services are
arranged to facilitate inspection and conserve the time of the driver,
and are not necessarily in the same numerical order as shown on W.D.
Form No. 48. The item numbers, however, are identical with those shown
on that form.
d. The general inspection of each item applies also to any
supporting member or connection, and generally includes a check to see
whether the item is in good condition, correctly assembled, secure, or
excessively worn.
(1) The inspection for “good condition” is usually an external visual
inspection to determine whether the unit is damaged beyond safe or
serviceable limits. The term “good condition” is explained further by
the following: not bent or twisted, not chafed or burned, not broken
or cracked, not bare or frayed, not dented or collapsed, not torn or
cut.
(2) The inspection of a unit to see that it is “correctly assembled”
is usually an external visual inspection to see whether it is in its
normal assembled position in the vehicle.
(3) The inspection of a unit to determine if it is “secure” is usually
an external visual examination, a hand‐feel, or a pry‐bar check for
looseness. Such an inspection should include any brackets, lock
washers, lock nuts, locking wires, or cotter pins used in assembly.
(4) “Excessively worn” will be understood to mean worn close to, or
beyond, serviceable limits, and likely to result in a failure if not
replaced before the next scheduled inspection.
e. Any defects or unsatisfactory operating characteristics
beyond the scope of first echelon to correct must be reported at the
earliest opportunity to the designated individual in authority.
a. This inspection schedule is designed primarily as a check to
see that the vehicle has not been tampered with, or sabotaged since the
After‐operation Service was performed. Various combat conditions may
have rendered the vehicle unsafe for operation and it is the duty of
the driver to determine whether or not the vehicle is in condition to
carry out any mission to which it is assigned. This operation will not
be entirely omitted, even in extreme tactical situations.
b. Procedures. Before‐operation Service consists of
inspecting items listed below according to the procedure described,
and correcting or reporting any deficiencies. Upon completion of
the service, results should be reported promptly to the designated
individual in authority.
(1) Item 1, Tampering and Damage. Look for any injury to
vehicle in general, its accessories or equipment, that may have been
caused by tampering, sabotage, collision, falling debris, or shell fire
since parking vehicle. Look for loosened or damaged accessories, loose
fuel or oil lines, or any disconnected linkage.
(2) Item 3, Fuel and Oil. Inspect tanks for fuel and oil
levels, add oil and fuel as necessary. Any appreciable change in levels
since performing After‐operation Service should be investigated and
reported to designated authority.
(3) Item 4, Accessories and Drives. Examine all accessories
such as carburetor, air cleaner, generator, and cut‐out relay for loose
connections, loose mountings, or leaks. Examine rear chain (final
drive) for free up‐and‐down movement (slack), midway between sprockets.
Total up‐and‐down movement must not be more than 1 inch, nor less than
½ inch. Inspect rear chain for adequate lubrication.
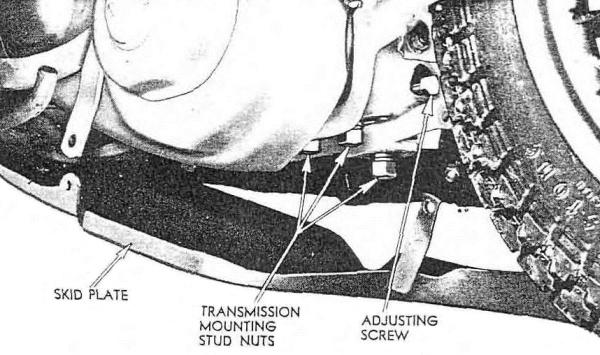
(4) Item 6, Leaks, General. Examine vehicle and ground under
vehicle for indications of fuel or oil leaks. Normally a few drops of
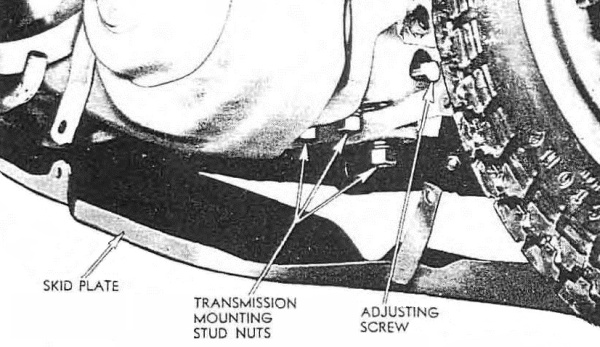
waste oil from chains may be expected to drop from skid plate.
(5) Item 11, Glass. Clean glass on instruments; clean and
adjust rear view mirror; inspect glass for breakage.
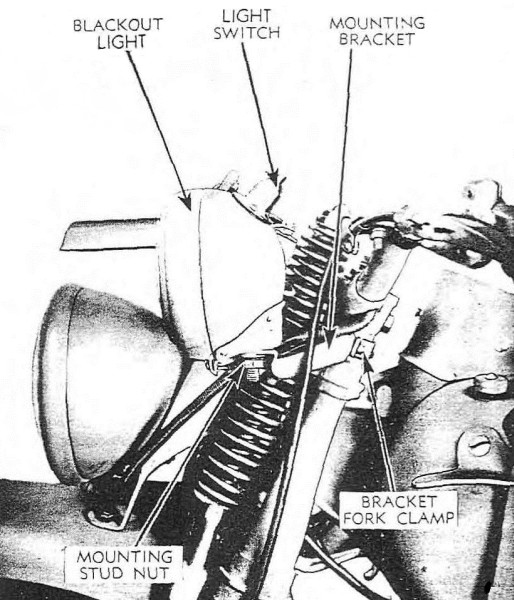
(6) Item 12, Lamps. If tactical situation permits, observe
whether blackout and service lights operate with switch in its
respective positions, and go out when switched off. Also see that
lights are secure, and that lenses are clean and not broken. Observe
whether both filaments of service headlight operate when dimmer switch
on left handle bar is moved to its respective positions.
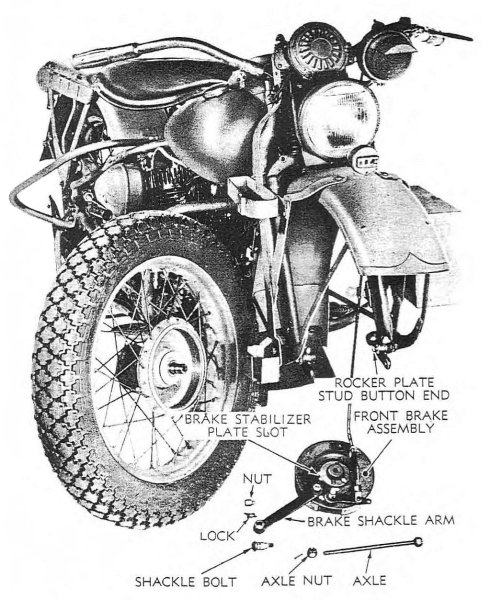
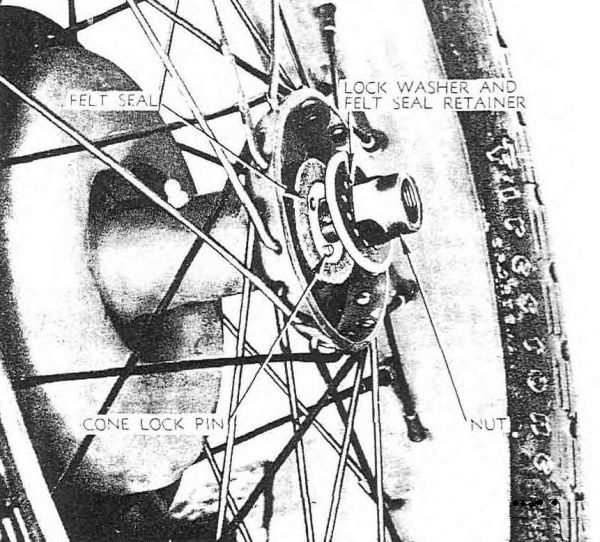
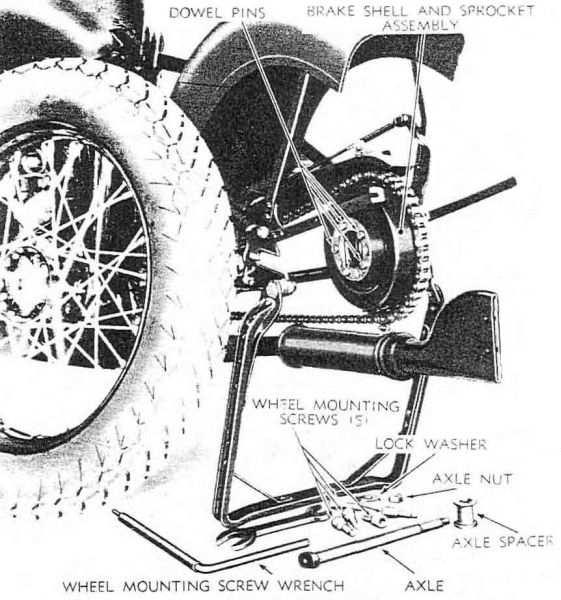
(7) Item 13, Wheels, Axle Nuts and Screws. Examine rear wheel
mounting socket screws, front and rear axle nuts, and front fork rocker
stud nuts for tightness. Observe rear chain adjusting screws for secure
locking. Inspect spokes for good condition and tightness.
(8) Item 14, Tires. Examine tires for cuts or imbedded objects
in treads or carcass. If time permits, check air pressure, which should
be 18 pounds front, and 20 pounds rear (tires cold). Inspect valve caps
for presence and secure mounting.
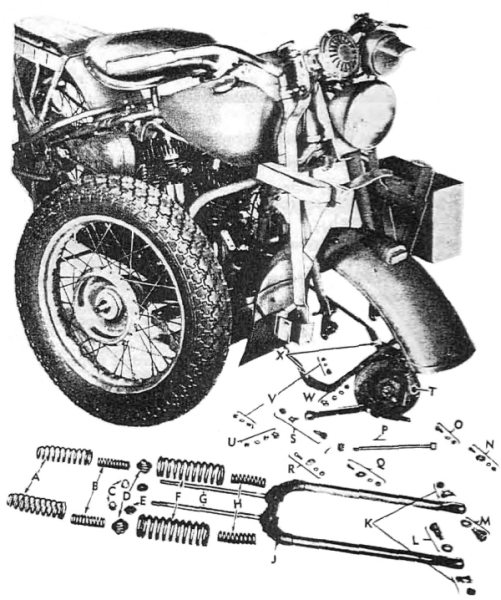
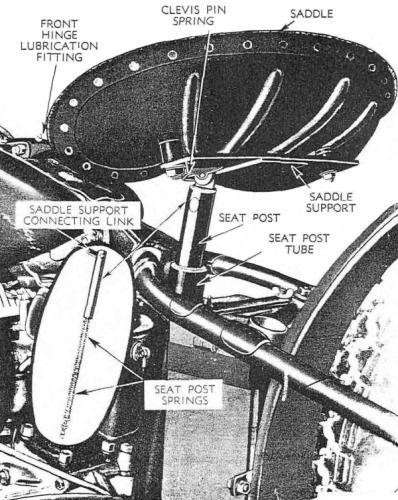
(9) Item 15, Springs and Suspension. Examine front fork
springs for secure mounting and good condition. Push down rear of
saddle to test for full action of saddle post spring.
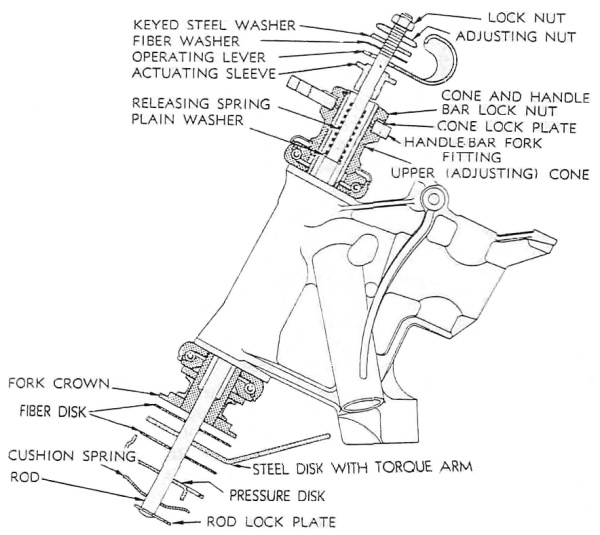
(10) Item 16, Steering and Handle Bar Controls. Test steering
head bearing adjustment by exerting strong upward pull at handle bar
grips, and observing whether or not there is any noticeable play in
bearing. Operate steering damper lever and observe that damper is
compressed before lever reaches right‐side position, and is fully
released with lever in left‐side position. Test handle bar grip
controls for full, free action; also test for complete opening and
closing of throttle, and full advance and retard of timer.
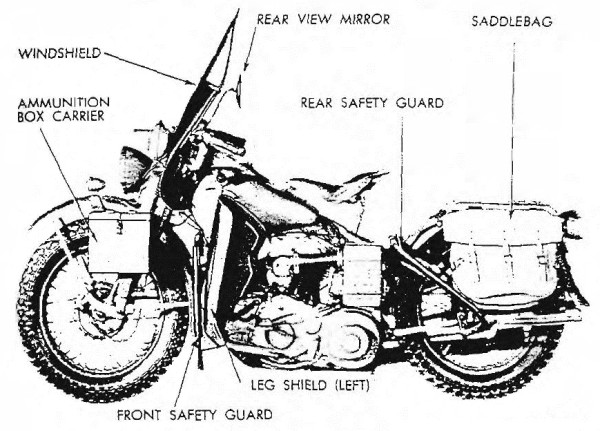
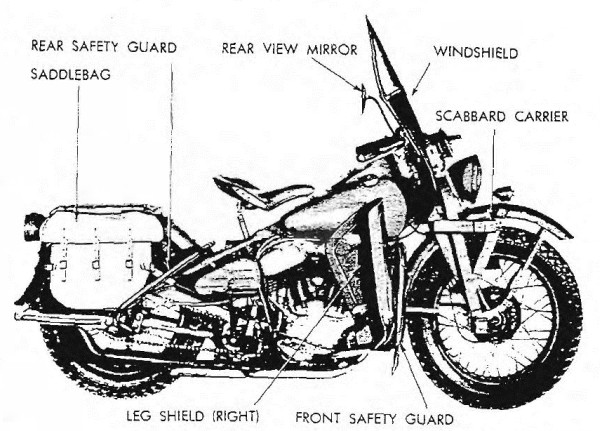
(11) Item 17, Fenders (Mudguards), Luggage Carrier, Safety Guards,
and Stands. Examine these items for good condition and secure
mounting.
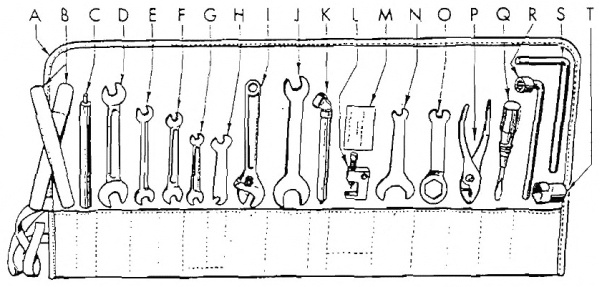
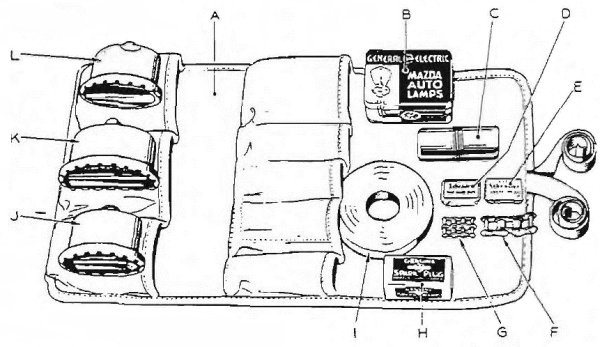
(12) Item 21, Tools and Equipment. Inspect tools and equipment
for presence, serviceability, and proper stowage. (See tool list in
par. 21.)
(13) Item 7, Engine Warm‐up. Start engine, noting any tendency
toward hard starting, or improper action of foot starter crank. Set
throttle to moderate idle speed. Listen for unusual noises. Watch
instrument indications and engine performance, such as misfiring.
CAUTION: Do not idle engine longer than 1 minute with vehicle
standing.
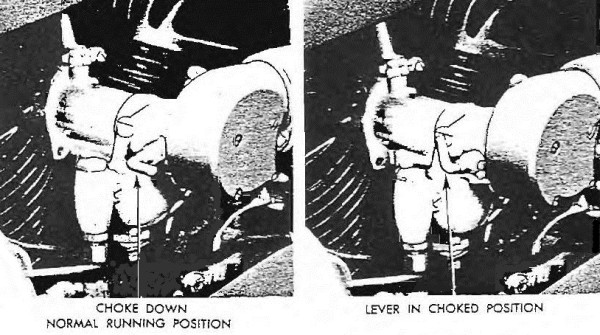
(14) Item 8, Choke. During idling of engine, reset choke as
required to prevent excessive choking and dilution of engine oil.
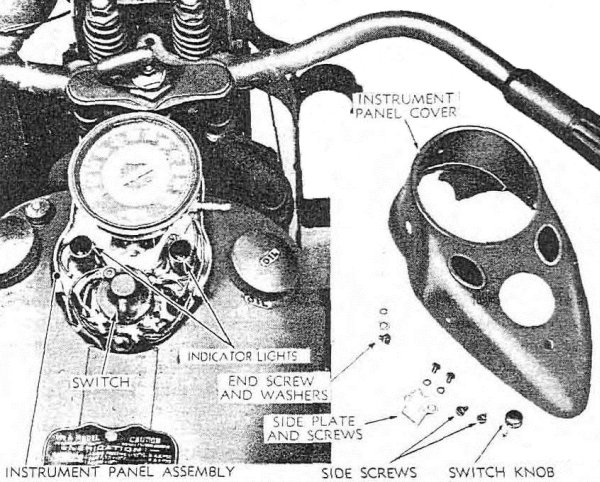
(15) Item 9, Instruments. When switch is turned on and engine
is idling at moderate speed both red light (indicating oil pressure)
and green light (indicating generator action) should be out. At lower
operating speeds generator‐indicating light may flicker. CAUTION: Do
not operate engine with red light on (no oil pressure).
(16) Item 10, Horn. Tactical situation permitting, test horn.
(17) Item 22, Engine Operation. Engine should idle smoothly.
Accelerate and decelerate, listening for any unusual noises that
may indicate compression or exhaust leaks, worn, damaged, loose, or
inadequately lubricated engine parts, or accessories. Note any unusual
smoke from exhaust.
(18) Item 23, Driver’s Permit, Accident Report Form No. 26, and
Vehicle Manual. These items must be present on vehicle and safely
stowed.
(19) Item 25, During‐operation Service. The During‐operation
Service should start immediately after vehicle is put in motion, in the
nature of a road test.
a. While vehicle is in motion, listen for any sounds such as
rattles, knocks, squeals, or hums that may indicate trouble. Be alert
to detect any odor of overheated components or units such as generator,
brakes, or clutch, fuel vapor from a leak in fuel system, exhaust gas,
or other signs of trouble. Any time the brakes are used, gears shifted,
or vehicle turned, consider this a test and notice any unsatisfactory
or unusual performance. Watch the instruments constantly. Notice
promptly any unusual instrument indication that may signify possible
trouble in system to which the instrument applies.
b. Procedures. During‐operation Service consists of
observing items listed below according to the procedures following each
item, and investigating any indications of serious trouble. Notice
minor deficiencies to be corrected or reported at earliest opportunity,
usually at next scheduled halt.
(1) Item 27, Foot and Hand Brakes. The foot brake should
operate smoothly and effectively, leaving reserve pedal travel of 1
inch. Normal free play before operation is 1 inch. Test hand brake
lever for free play, which should be ¼ of total handle travel. Test for
ease and smoothness of operation.
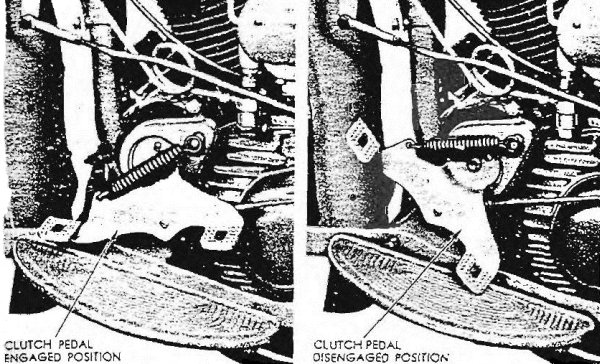
(2) Item 28, Clutch. Inspect clutch for disengagement at about
½ pedal travel. Clutch should not chatter, squeal, or slip.
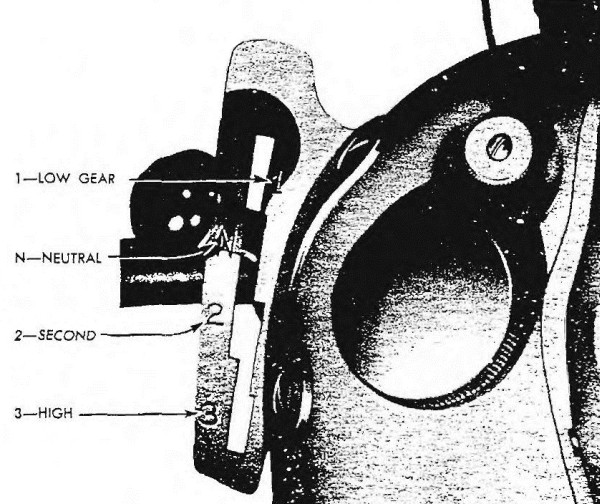
(3) Item 29, Transmission. Gears should shift smoothly,
operate quietly, and not jump out of mesh during operation. If
transmission jumps out of mesh in any gear, this indicates need of
shifter control adjustment.
(4) Item 31, Engine and Controls. Be alert for deficiency in
engine performance such as lack of usual power, misfiring, unusual
noise, stalling, indication of engine overheating, or unusual exhaust
smoke. Notice whether engine responds to controls satisfactorily,
whether controls appear to be in proper adjustment and are sufficiently
tight.
(5) Item 32, Instruments. Observe instruments for indication
of normal functioning of systems to which they apply.
(a) Speedometer and Odometer. Speedometer should indicate vehicle
speed without excessive noise or fluctuation. Odometer should record
trip and total mileage.
(b) Oil Pressure Signal Light. Red light should be off during
operation. If light goes on, stop vehicle and investigate for oil
pressure failure.
(c) Generator Signal Light. Green light should be off above 20
miles per hour. Battery discharge is indicated by green light being on.
(6) Item 33, Steering. Adjust steering damper to desired
steering friction. Observe vehicle steering for wander, shimmy, leading
to one side, or wheel hop.
(7) Item 34, Running Gear. Listen for any unusual noises from
wheels, axles, or suspension parts that might indicate looseness or
damage.
(8) Item 35, Chassis. Be alert for noises that might indicate
loose accessories, controls, attachments, or equipment.
a. At‐halt Service may be regarded as minimum maintenance
procedures and should be performed under all tactical conditions, even
though more extensive maintenance services must be slighted or omitted
altogether.
b. Procedures. At‐halt Service consists of investigating
any deficiencies noted during operation, inspecting items listed below
according to the procedures following the items, and correcting any
deficiencies found. Deficiencies not corrected should be reported
promptly to the designated individual in authority.
(1) Item 38, Fuel and Oil. Replenish fuel and oil as may be
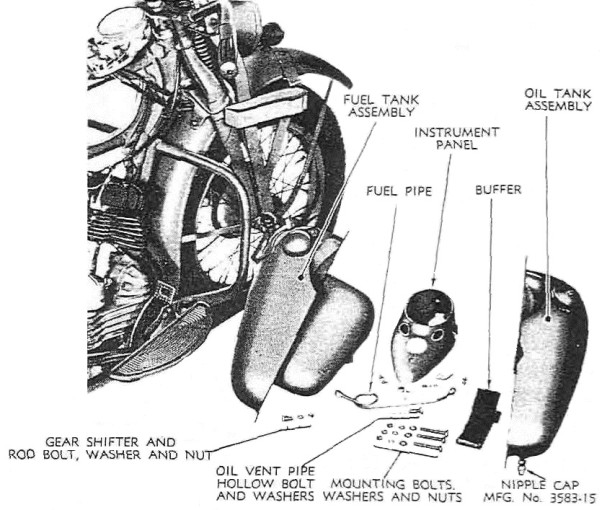
required to reach next refilling point. CAUTION: Left tank is for
fuel; right tank is for oil. Filler caps should not be interchanged, as
only fuel tank cap is vented.
(2) Item 39, Temperatures. Hand‐feel wheel hubs and brake
drums for overheating.
(3) Item 40, Vents. Make sure that crankcase breather outlet
and rear chain oil feed pipe are clear. Make sure grease drains in
front and rear brake side covers are open and clean.
(4) Item 42, Springs and Suspensions. Look for broken springs
in fork.
(5) Item 43, Steering. Investigate any difficulty developed
during riding.
(6) Item 44, Wheels and Mounting Screws. Inspect wheels for
broken, bent, or loose spokes. Also, look for loose axle nuts or rear
wheel mounting screws. Inspect wheel rims for good condition.
(7) Item 45, Tires. Examine tires for low pressure or damage.
Remove foreign matter from tire treads; inspect for cuts.
(8) Item 46, Leaks, General. Inspect vehicle for indication of
fuel, oil, or battery leaks.
(9) Item 47, Accessories and Chain. Examine accessories for
loose connections, loose mountings, or damage. Examine rear drive chain
for broken rollers, broken link side plates, and broken or missing
connecting link spring clips. Inspect chain for adequate lubrication.
(10) Item 48, Air Cleaner. Air cleaner must be secure,
with air passages in good condition and clean. When operating under
extremely dusty or sandy conditions, inspect air cleaner frequently and
service as required.
(11) Item 49, Fenders (Mudguards), Luggage Carrier, Safety Guards,
and Stands. Inspect these items for looseness or damage.
(12) Item 52, Appearance and Glass. Clean windshield, rear
view mirror, and light lenses; inspect for good condition, secure
attachment, and broken glass.
a. After‐operation Service is particularly important, because at
this time the driver inspects his vehicle to detect any deficiencies
that may have developed, and corrects those he is permitted to
handle. He should report promptly, to the designated individual in
authority, the results of his inspection. If this schedule is performed
thoroughly, the vehicle should be ready to roll again on a moment’s
notice. The Before‐operation Service, with a few exceptions, is
then necessary only to ascertain whether the vehicle is in the same
condition in which it was left upon completion of the After‐operation
Service. The After‐operation Service should never be entirely omitted,
even in extreme tactical situations, but may be reduced to the bare
fundamental services outlined for the At‐halt Service, if necessary.
b. Procedures. When performing the After‐operation
Service, the driver must remember and consider any irregularities
noticed during the day in the Before‐operation. During‐operation, and
At‐halt Services. The After‐operation Service consists of inspecting
and servicing the following items. Those items of the After‐operation
Services that are marked with an asterisk (*) require additional Weekly
services, the procedures for which are indicated in step (b) of each
applicable item.
(1) Item 54, Fuel and Oil. Fill fuel and oil tanks; fill oil
tank within 1 inch of top; be sure to put oil in right tank and fuel
in left tank; do not interchange caps. CAUTION: When operating under
extremely dusty conditions, drain engine oil tank and refill with fresh
oil as frequently as excessive contamination of the oil occurs.
(2) Item 55, Engine Operation. Test for satisfactory engine
idle without stalling. Accelerate and decelerate engine, noting any
tendency to miss or backfire, unusual noises, or vibration that may
indicate worn parts, loose mounting, incorrect fuel mixture, or
faulty ignition. Investigate any unsatisfactory engine operating
characteristics noted during operation. Learn to recognize noise caused
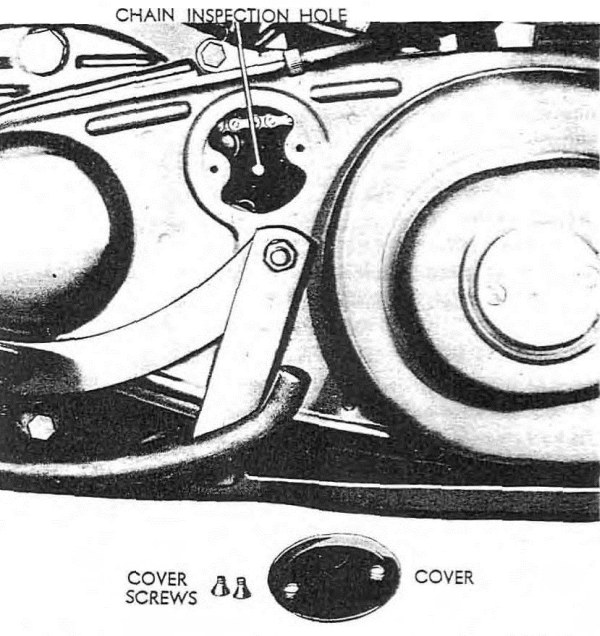
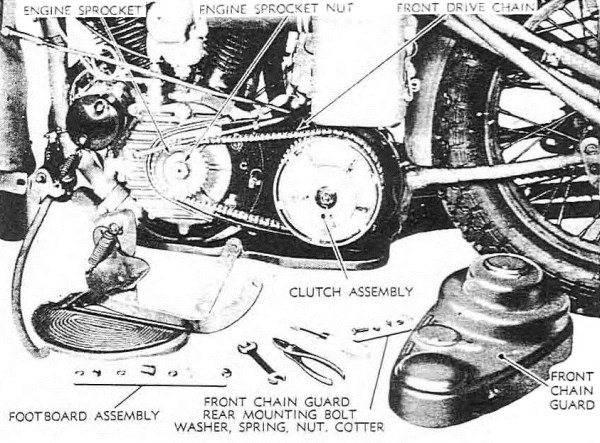
by loose primary (front) drive chain. Slack in excess of ½ inch total
up‐and‐down motion can cause excessive noise which sounds like engine
knock. Remove inspection cover for examination of chain.
(3) Item 57, Horn. If tactical situation permits, test horn.
(4) Item 59, Lights. If tactical situation permits, observe
whether blackout and service lights operate with switch in its
respective positions, and go out when switched off. Also see that
lights are secure, and lenses clean and not broken. Observe whether
both filaments of service headlight operate when dimmer switch on left
handle bar is moved to its respective positions.
(5) Item 56, Instruments. Before stopping engine, inspect
instruments to see that indicator lights are still out. Stop engine.
After 30 seconds, turn on switch to see that oil pressure and generator
signal lights turn on. CAUTION: Be sure to turn off ignition switch
after this test.
(6) Item 58, Glass. Clean rear view mirror, windshield,
instrument, and light glass. Examine for secure mounting and breakage.
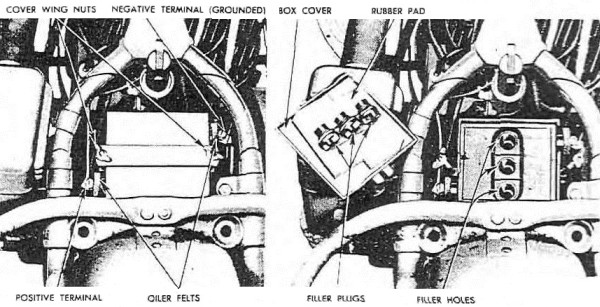
(7) Item 62, *Battery.
(a) Inspect battery carrier for good condition and secure mounting.
Inspect electrolyte level (should be 5⁄16 inch above plates). Inspect
for any signs of leakage of electrolyte indicating battery has been
overfilled, poorly sealed, or damaged. CAUTION: Do not add water
unless actually needed.
(b) Weekly. Clean dirt from top of battery, remove battery caps,
bring electrolyte level to 5⁄16 inch above plates, using clean,
drinkable water. Clean terminals or posts if corroded; be sure felt
washers are on terminals and properly oiled; tighten terminal bolts
cautiously, if loose. Clean and paint battery carrier if corroded.
(8) Item 63, *Accessories and Chain.
(a) Inspect carburetor, air cleaner, generator, and cut‐out relay
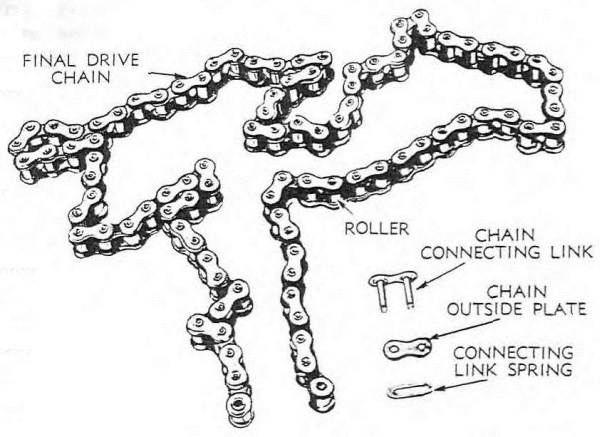
for loose connections, mountings, or damage. Examine rear drive chain
for broken rollers, broken link side plates, and broken or missing
connecting link spring clips. Examine rear chain (final drive) for free
up‐and‐down movement (slack) midway between sprockets; maximum total
allowable deflection is 1 inch, minimum, ½ inch.
(b) Weekly. Tighten any accessory connections found loose. Wipe
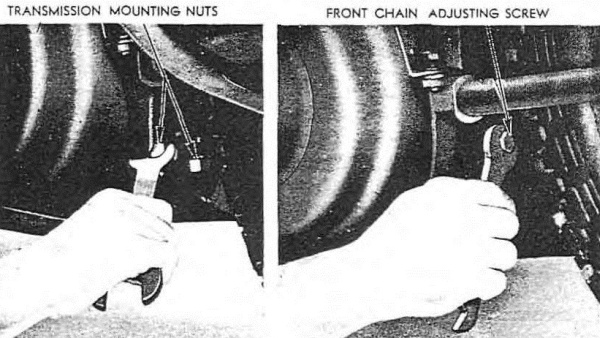
excess dirt from rear chain. Check front chain for adjustment, and
inspect for proper lubrication.
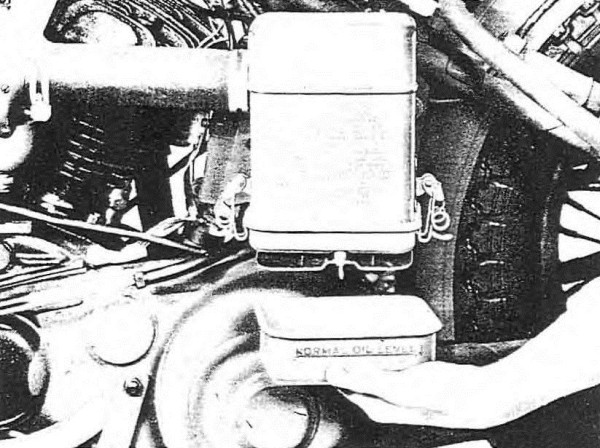
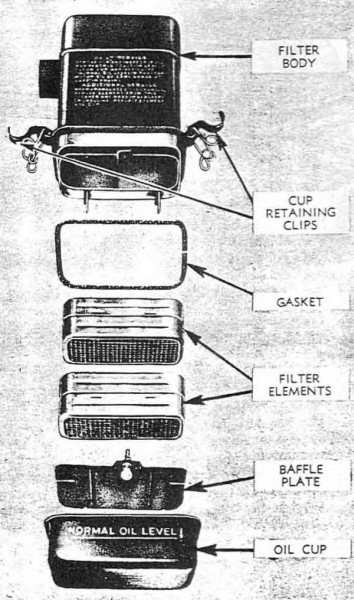
(9) Item 65, *Air Cleaner.
(a) Examine oil cup for excessive dirt and correct oil level. If air
cleaner is excessively dirty, clean elements in dry‐cleaning solvent,
refill cup with fresh oil. Dip elements in oil in oil cup, replacing
elements and attaching oil cup immediately. If gaskets are damaged,
replace. Under extremely dusty or sandy conditions it may be necessary
to clean and refill the air cleaner more than once daily. Inspect hose
for leaks.
(b) Weekly. Inspect air cleaner for proper oil level and
excessively dirty oil. Clean and service air cleaner, tighten mounting
and hose clamps. NOTE: Early‐type, round air cleaner does not have
removable filter elements. Complete cleaner must be removed to wash
element.
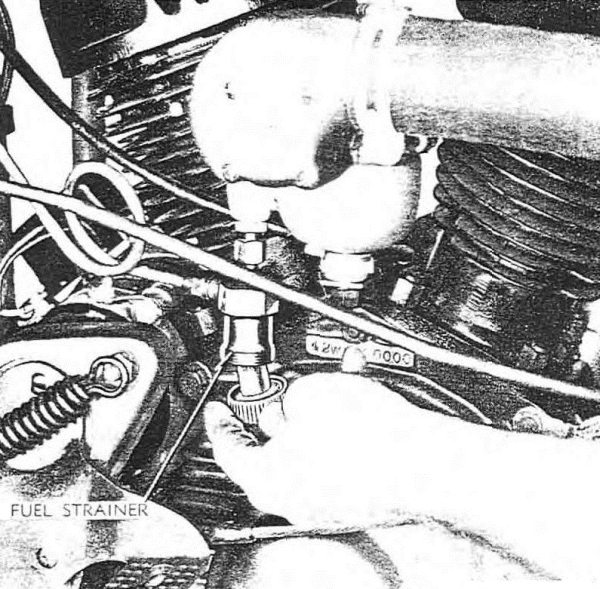
(10) Item 66, *Fuel Filter (Gasoline Strainer).
(a) Clean cap and screen of fuel filter.
(b) Weekly. Clean cap and screen of fuel filter, remove carburetor
bowl drain plug, and drain off water and dirt. Be sure to replace plug,
being careful to avoid cross threading.
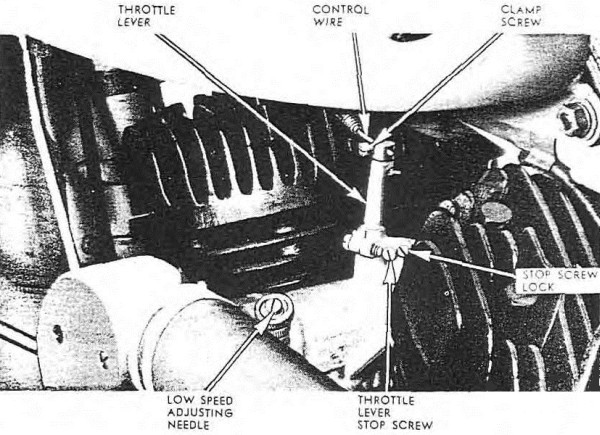
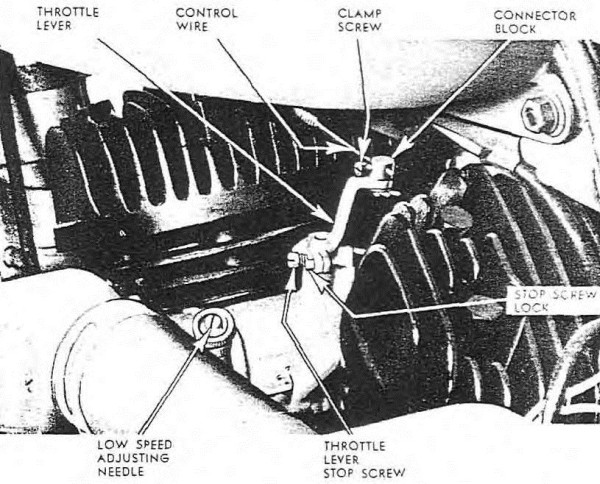
(11) Item 67, Engine Controls. Examine throttle and spark
controls for damage to wires or for disconnected linkage. Observe for
lack of lubrication.
(12) Item 68, *Tires.
(a) Remove foreign matter such as nails, glass, or stones from tire
treads. Inspect tires for abnormal tread wear, cuts, or bruises: also
for presence and tightness of valve caps. Inflate tires to 18 pounds
front, 20 pounds rear, with tires cool.
(b) Weekly. Replace badly worn or otherwise unserviceable tires.
(13) Item 69, *Springs and Suspension.
(a) Inspect front fork for broken or sagged springs, loose bolts,
studs, and nuts.
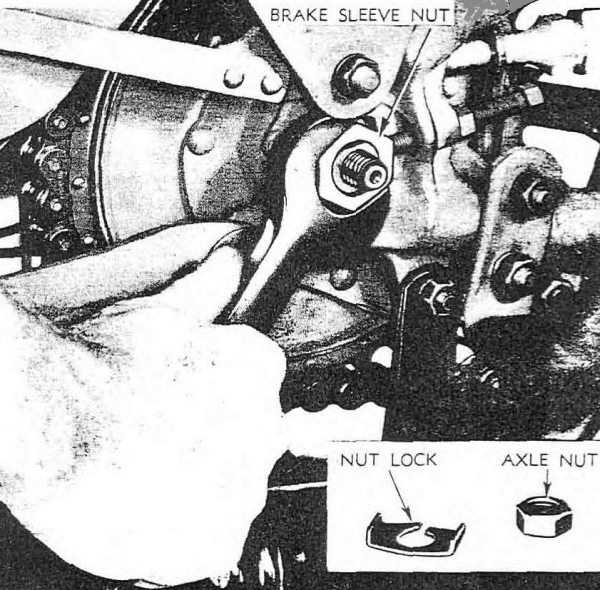
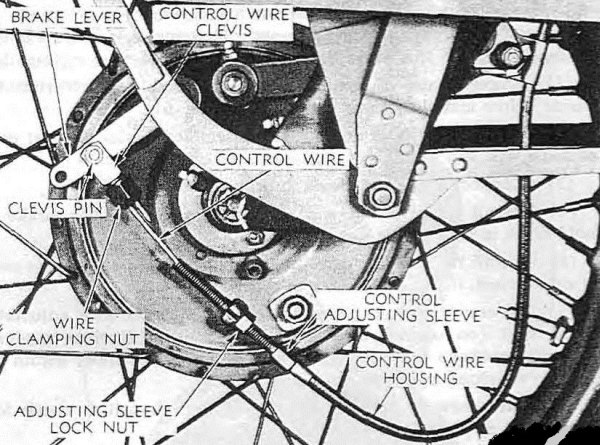
(b) Weekly. Tighten wheel axle nuts and rear brake sleeve nut. Also
tighten rear wheel mounting socket screws very securely.
(14) Item 70, Steering. Inspect steering head for proper
adjustment of bearings. Examine steering damper for correct adjustment.
(15) Item 72, *Vents.
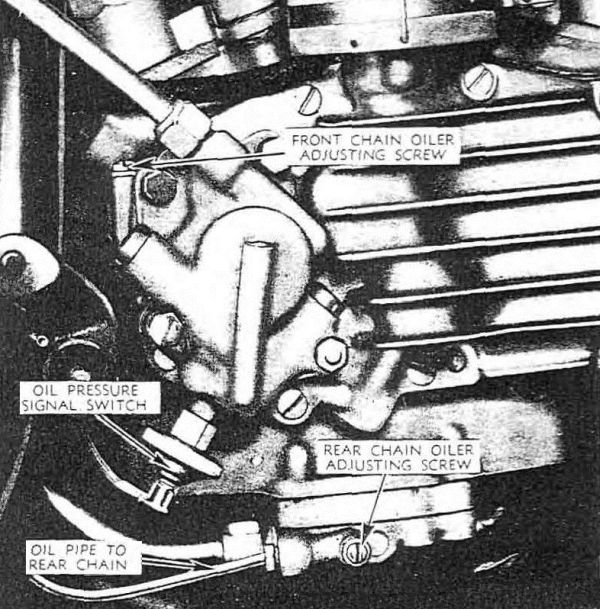
(a) Make sure that crankcase breather outlet and rear chain oil
supply pipe are clear. Make sure grease drains in front and rear brake
side covers are open and clean.
(b) Weekly. Clean crankcase breather outlet, rear chain oil supply
pipe, and grease drains in front and rear brake side covers.
(16) Item 73, Leaks, General. Look around mechanism and
beneath vehicle for indication of fuel, oil, and grease leaks. Examine
around brake drums for evidence of grease in drums or on linings.
Normally a few drops of oil may be expected to drip from skid plate.
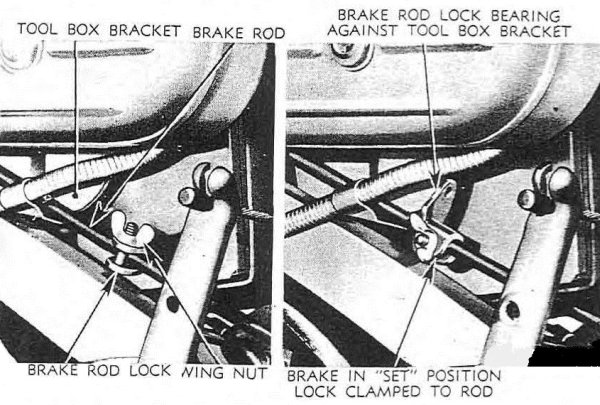
(17) Item 74, Gear Oil Levels. Inspect transmission oil level
with vehicle standing on rear stand (not jiffy stand); refill, if
required, to level of filler plug opening with engine oil. CAUTION: Do
not use gear oil.
(18) Item 76, Fenders (Mudguards), Luggage Carrier, Safety Guards,
and Stands. Examine these items for good condition and secure
mounting.
(19) Item 82, *Tighten.
(a) Inspect all frame and assembly nuts, bolts, and cap screws for
tightness.
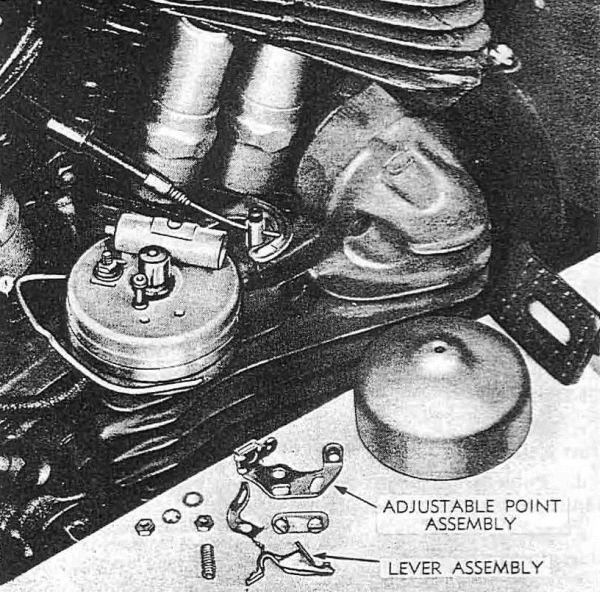
(b) Weekly. Tighten all vehicle assembly or mounting nuts. Driver
is cautioned not to tamper with or tighten screws or nuts about the
circuit breaker, as doing so may disturb ignition timing.
(20) Item 83, *Lubricate as Needed.
(a) Lubricate all parts where inspection reveals need for
lubrication: wipe all dirt from fittings before applying lubricant.
Report any missing fittings.
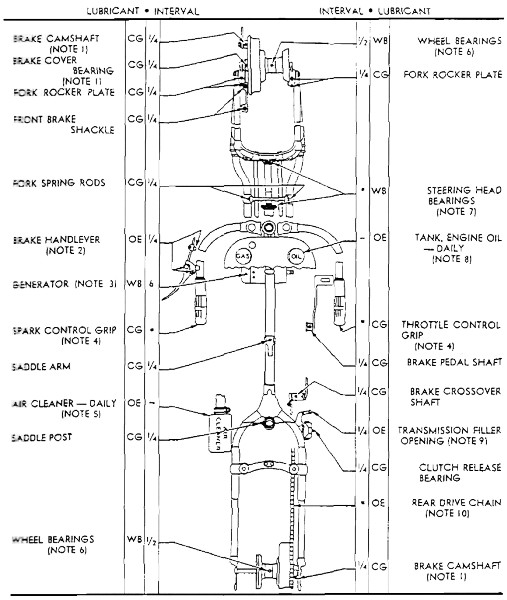
(b) Weekly. When vehicle has been driven a sufficient number
of miles so that it is due for a regularly scheduled lubrication,
lubricate according to Lubrication Guide in manual and current
lubrication directives. Refrain from overlubricating wheel bearings,
front brake side cover bushing, and front and rear brake operating
lever camshafts.
(21) Item 84, *Clean Engine and Vehicle.
(a) Clean dirt and trash from vehicle and remove excess grease.
(b) Weekly. Wash vehicle if possible. If not, wipe off thoroughly.
Do not rub lustreless paint enough to cause shine. If vehicle is washed
in a stream, care should be taken that water or dirt does not get
into bearings, breather valve, or brakes. CAUTION: It is extremely
important that high‐pressure streams or steam should not be directed
against wheel hubs, brakes, carburetor, air cleaner, or electrical
units.
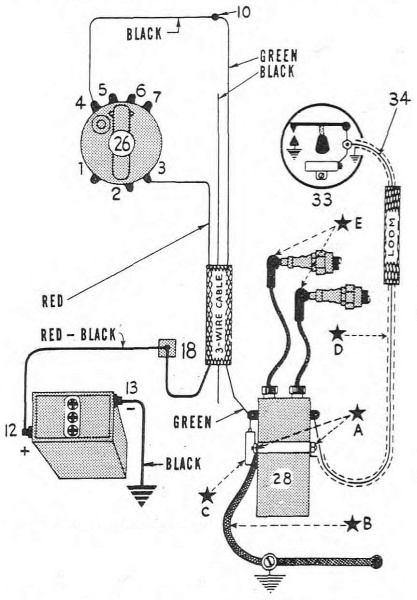
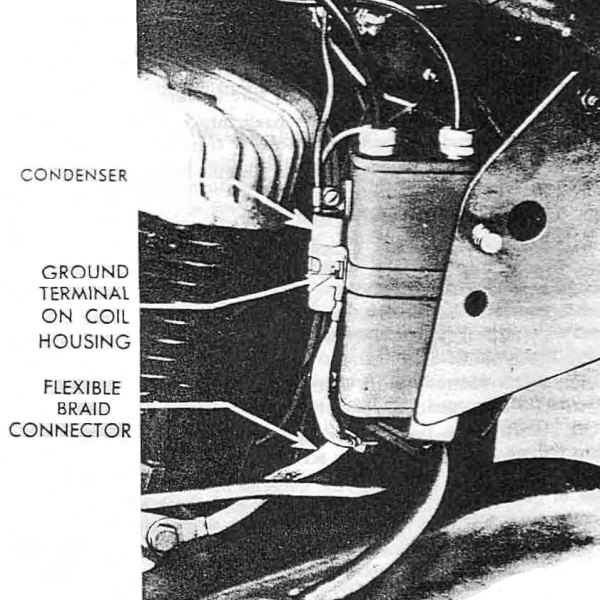
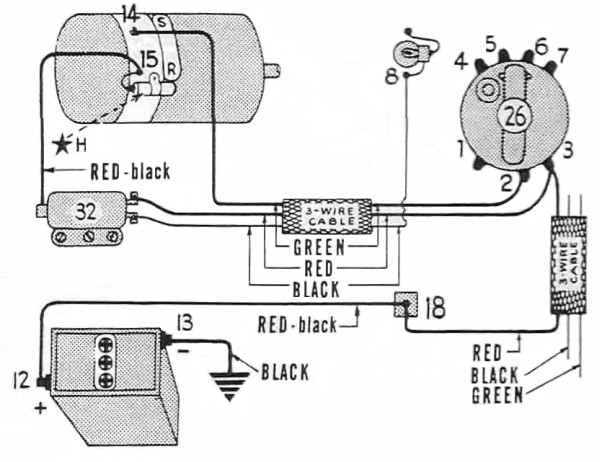
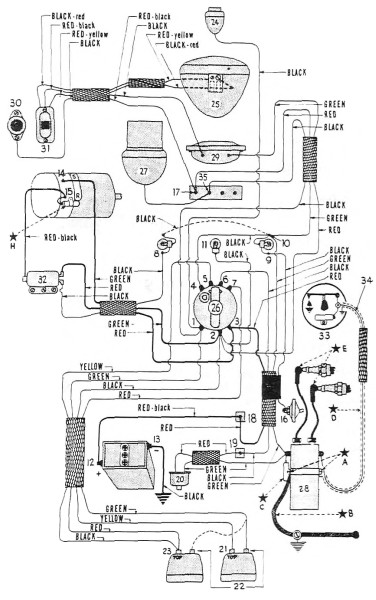
(12) Item 64, *Electrical Wiring.
(a) Inspect all ignition wiring to see that it is securely connected,
clean, and not damaged.
(b) Weekly. Inspect all wiring to see that it is securely connected
and supported, that insulation is not cracked or chafed, that loom,
shielding, and condensers are in good condition and securely attached.
Clean as required. Tighten any loose connections carefully. Radio
shielding or bonding defects, except cleaning or tightening, must be
referred to signal corps personnel.
(23) Item 85, *Tools and Equipment.
(a) See that all tools and equipment assigned to vehicle are present,
in good condition, and properly stowed.
(b) Weekly. Check tools and equipment assigned to vehicle with
vehicle stowage list (par. 21) to see that they are present. Inspect
tools for good condition and proper stowage. Report missing or
unserviceable items to designated authority.