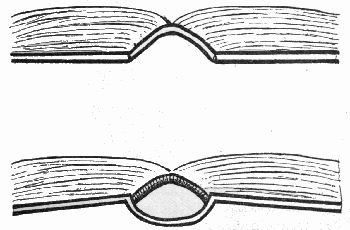
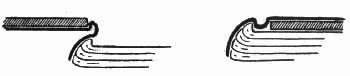
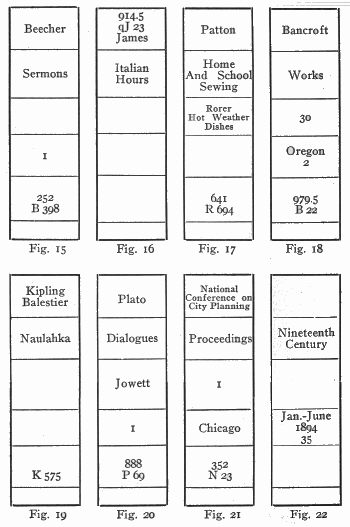
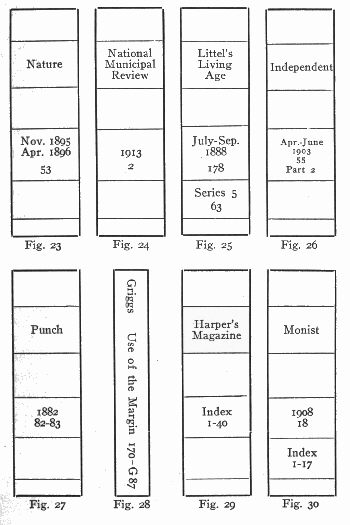
Practically all repairs to a book short of rebinding
should be made in the library, since the work requires
little space and no machinery, and the books may
speedily be replaced on the shelves for general use.
Large or medium sized libraries can well afford to
hire one or more girls as menders, while the small
library must utilize the spare time of regular assistants.
When books are sent to the binding department
they should be sorted into the following groups:
Books to be (a) rebound, (b) recased, (c) recovered,
(d) mended, (e) discarded; to have (f) new
sides, (g) new labels, (h) new book cards or pockets.
When menders are employed all except those in
the first group may be cared for in the library.
In sorting the books the question of whether to
rebind or repair at the library must be decided for
all books, except those in the discarded class and those
which need new records (tags, pockets, book cards,
etc.). The decision is not always an easy one to
make. The kind of library in question, whether
public, college, subscription, etc., will influence the
decision, as well as the actual condition of the book.
A few general rules about mending may help in
making decisions.
1. If the book has never been rebound and in all
probability must go to the bindery in a few months'
time, send to the bindery at once. Mending not only
adds nothing to the life of this book, but may easily
shorten it.
2. Mend books which have been rebound once
but which it would not pay to rebind again. Judicious
mending of such books may keep them in service for
a long time, but there comes a day when the use
gained does not pay for the time put upon them.
3. Mend books which have nearly outlived their
usefulness or which are to be withdrawn absolutely
when worn out. The question need be decided only
when the book is fairly clean, for if very soiled it
should be withdrawn at once.
4. Mend books which must be on the library
shelves, but which are seldom used.
5. Mend books printed on heavily loaded papers
which will not pay to rebind. There are, unfortunately,
many of them.
6. Mending cannot be done if the sewing is completely
broken, though it is sometimes possible to
insert signatures which are loose.
7. Books with broken corners must be rebound.
8. Recase books which have sewing intact and
covers in good condition, if they will be used comparatively
seldom.
9. Recover books which have worn covers but
firm sewing.
Adhesives
Paste. Home-made pastes are cheapest. While
there are various recipes for paste, either of the
following will give satisfaction:
| (1) |
| Wheat flour, | 8 oz. |
| Powdered alum, | 1/4 oz. |
| Glycerine, | 1-1/2 oz. |
| Oil wintergreen, | 1 dram. |
| Water, | 1-1/2 pts. |
Dissolve the alum in water and mix gradually
with the flour into a smooth, thin paste; cook in a
double boiler until smooth and clear; take from the
fire and add the glycerine and oil of wintergreen.
This quantity will make about one quart. If after
standing a day a watery fluid collects, stir it into
the paste. Keep this paste covered.
| (2) |
| 1/4 | pound of flour (1 cup). |
| 1 | teaspoonful of alum, dissolved. |
| 1 | generous fourth teaspoonful of oil of clove. |
| 4 | cups of boiling water. |
Mix the flour well with a little cold water, beating
until perfectly smooth. Add the alum dissolved in
a little cold water. Pour on two cups of the boiling
water, strain through a wire sieve. Add the remainder
of the boiling water and cook, stirring
constantly until partially clear. Add the oil of clove
and put into a clean, covered earthen jar. The paste
thickens as it cools. Take out small quantities for
use. The materials for this paste cost less than 2
cents for a hundred books.
To all pastes it is best to add a spoonful of carbolic
acid or formaldehyde to prevent spoiling. A small
quantity of corrosive sublimate will make paste
unattractive to bugs.
Although home-made pastes are cheapest, they
are a bother to make and the saving of expense over
commercial pastes is not worth while except in the
very small library. Besides paste in bulk which can
be obtained from the local binder there are many
kinds of commercial paste. Some may be bought
in powders; others, designed primarily for mounting
photographs, in glass jars; still others in cans
ready to use. The powders are cheap, keep indefinitely,
but when needed must be mixed with water,
and as a rule are not very satisfactory. Higgins'
and other photo-mounting pastes are expensive and
dry too quickly, but keep indefinitely. In the long
run the most satisfactory pastes are those in tin cans
with tight lids; these are ready to use, do not dry
up and the preservative which they contain keeps
them indefinitely. The Arabol Manufacturing Company,
100 William Street, New York, makes several
varieties. Their "Sphinx" paste, which gives excellent
satisfaction, can be bought in six one-gallon
can lots at 75 cents a gallon, f. o. b., and in larger
quantities at slightly reduced rates. Great care should
be used to avoid having the paste so thin that it
makes the paper stretch.
Although paste is a necessity in every library,
there is a tendency to use too much of it, and to
use it when it is not necessary. Ordinarily it will
injure the book less than other adhesives, but it
should be used sparingly on books that must be
rebound. When applied to the backs of loose signatures
they become brittle; then when the book goes
to the bindery a much larger amount must be cut
from the back than would otherwise be the case.
If paste is to be applied to part of the paper
only, the easiest way is to lay the paper on a board,
place another piece of paper over it, leaving exposed
the surface to which paste is to be applied. It can
be spread more evenly with the finger, faster with a
soft, long-handled brush. The larger libraries will
find a pasting-machine a great time-saver. Book
labels, book pockets, new end papers to freshen soiled
books—anything which needs to have the entire surface
covered—is pasted on the machine in one-tenth
the time required by hand.
Glue. For ordinary mending, glue should never
be used. (See Materials, p. 82.) Flexible glue, however,
is a necessity for recasing and recovering books.
It keeps indefinitely, can be used easily by those
who acquire the knack of using it, and it sticks everlastingly.
Mucilage. Mucilage has no real place in a
library. If paste is not the suitable material to use,
substitute flexible glue, never mucilage.
Cloth
Cheesecloth. This well-known cloth is used when
pressing down paper or book labels after they have
been pasted and applied, and for quickly cleaning
the hands of superfluous paste or glue. It should
be cut in pieces of convenient size and not used many
times before being discarded.
Jaconet. A thin, strong muslin will be needed for
guarding sections and occasionally for forming joints.
Jaconet is the best and may be obtained from a few
library binders.
Canton flannel. A medium grade of this cloth is
used for back-lining.
Book cloth. If recovering or re-siding is done
the library must have a supply of book cloths in the
shades preferred. For re-siding, any cloth in grade 1
(see page 75) is sufficiently good. For recovering
cloths in the grade which meets the requirements of
the Bureau of Standards are none too good. If much
recovering is done it is best to buy the cloth by the
piece.
Crepeline. This very thin cotton cloth, also called
mousseline, through which print is easily read, is
sometimes pasted over the entire surface of pages
which receive very hard usage, and which would
otherwise be literally thumbed to pieces long before
the rest of the book.
Specially prepared cloth. The Gaylord Bros., of
Syracuse, and the Multum in Parvo Binder Co., of
Philadelphia, manufacture hinges made of cloth.
While these are often useful they cannot be used under
any and all conditions, as one might be led to believe
from the claims of the manufacturers.
Papers
Onion skin. Onion skin is a very thin, tough
paper, used for mending torn pages, illustrations, etc.,
where print must show through. While it may be
obtained gummed on one side, very little is gained,
for it is nearly as easy to paste the ungummed onion
skin as to moisten the gummed. For tears which do
not run into the text; a thin, strong bond paper will
be satisfactory.
Kraft or manila paper. A 30x40 60-pound kraft
paper makes good end papers in recasing and recovering.
A 70-pound manila paper may be used instead
of kraft, if desired.
Red rope manila. This is a very strong, tough
fibred cardboard which may sometimes be used as
covers for books that it will scarcely pay to put
into stouter covers. It may be obtained in several
weights, the lighter weights being sufficiently strong
for library use.
Thread
Even if no resewing is done, thread is necessary
for making various repairs. The best are Hayes'
linen thread No. 25, and Barbour's No. 40.
Ammonia
This is necessary for breaking down surfaces of
highly glazed cloths so that labels will stick.
Shellac
After labels or the backs of books have been lettered
in white or black ink they should have a covering
of shellac. A supply of the best white shellac may
be obtained from the local paint dealer.
Occasional use is found for various other materials,
such as powdered pumice stone, sponge rubber, India
rubber erasers and art gum.
Folders
Several binder's bone folders, costing fifteen cents
each, should be kept in the binding department.
Knives
A long knife, broad at the point, thin-bladed but
dull, is needed for cutting paper after it is folded and
for various other uses. A sharp, pointed knife is
needed for removing books from the covers, or old
labels from the back.
Scissors
Long, thin-bladed, best quality.
Needles
Regular book-sewing needles.
Hammer
A broad-faced hammer may be required for beating
down the backs of sections, or the entire book
when it is difficult to replace it in its old cover.
Press
Books wet with paste or glue must be pressed. An
old-fashioned letter-press which screws down by hand
will answer all purposes in a small library. As they
are now out-of-date, second-hand ones can be purchased
for a small sum. There are one or two inexpensive
small presses which are not so heavy as the
letter-press, but which hold a larger number of books
and are fairly satisfactory. The most satisfactory press
is a stationary one which holds a number of books
and which will exert great pressure. On account of
lack of space and the cost it is inadvisable to use this
in a mending room, and makeshifts are generally
necessary.
Press-board
A few press-boards with projections which will fit
into the joints of books may be necessary. They may
be obtained from any dealer in binders' supplies.
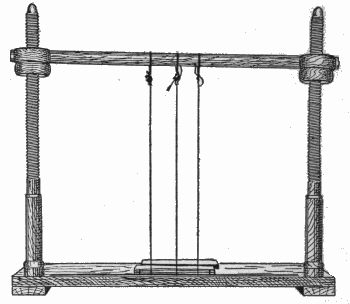
Sewing Bench
If any resewing is done a sewing bench is a necessity.
Ordinarily books needing resewing should be
sent to the bindery.
Glue-pot
A double-boiler glue-pot is a necessity if recovering
or recasing is to be done. It should be kept
clean.
Brushes
A long-handled, small-sized brush with soft
bristles will be used for pasting, while glue will require
a large, round brush such as is commonly used
in binderies.
Pasting Machine
A good pasting machine will cost about ten dollars,
but it is a great time saver. There are several on
the market. In the Wilmington Library the "Universal"
is used and gives satisfaction in all cases when
a machine can be used.
Cutting-Board
A small-sized cutting-board, such as is used by
photographers, is useful in the mending room as well
as in other parts of the library.
A part of the duty of the mending department is
to remove such dirt or stains as can readily be
removed without injury to the books.
Pages
Various materials may be used for cleaning books
which show soiled pages here and there, but which
are in the main fairly clean. A red rubber or a sponge
rubber is much better than an India rubber eraser.
The latter should never be used unless the paper is
excellent in quality. Bread crumbs rolled in a ball or
powdered pumice stone put on with a dry cloth will
often give good results. If the book is much soiled,
or has mud stains, it may be advisable to use ivory
soap and water with a few drops of ammonia, applied
with a piece of cheesecloth well wrung out.
If the paper is of good quality it may be washed
with Javelle water, a preparation used in French
laundries. This may be made by the following recipe:
To one pound of chloride of lime add four and a
half pints of water, and put in a jar with tight cover.
In a separate vessel, dissolve 20 oz. of ordinary washing
soda in four and a half pints of boiling water,
and immediately pour it into the first mixture. When
cold add enough water to make eleven pints in all.
Strain through muslin, settle, and pour off the clear
solution. After using it care must be taken to rinse
the paper thoroughly with water, as it tends to rot
paper.
In the cleaning of pages care should be taken not
to erase any marks made by the cataloging or
accession departments. Rubbing must be done slowly
and the pages held flat to prevent tearing. Rub from
the inside outward. All traces of pumice stone, rubber,
etc., should be carefully removed. If water and
soap have been used, it may be necessary to put a
pressing tin under the leaf, placing blotting paper on
each side.
Fox marks may be removed by immersing the
leaves in a weak solution of chlorine water and then
transferring to a hot bath of very weak hydrochloric
acid.
To remove creases from leaves accidentally folded,
place the leaves between moistened blotters enclosed
between dry blotters and press. This can be repeated
until the crease is entirely removed. Sometimes
creases may be ironed out with a hot iron.
Ink stains can be removed by any one of the
standard eradicators (oxalic acid followed by chloride
of lime). Stains from pad ink used for dating stamps
can be removed with benzine.
The edges of leaves on very soiled books may be
sandpapered. In this case the book should be held
very firm, if possible in a vise.
To Prevent Mildew or Mold
Occasionally books are accidentally soaked with
water. In many a fire more damage is done by water
than by fire. In such cases it may be a waste of
time and money to reclaim ordinary books which can
easily be replaced. It is a different matter when it
comes to rare books and especially to manuscripts
which cannot be replaced. Mr. J. I. Wyer, Jr., director
of the New York State Library, in his annual
report for 1911 describes as follows the method used
in that library after the disastrous fire of that year.
The first step was to remove all covers. Each volume was
then taken apart leaf by leaf, and each sheet was laid between
print paper for drying. After twenty-four hours every leaf
was again handled and placed between heavy blotting paper;
after twenty-four hours here, each leaf was again removed
to a second blotting paper. At all of these stages pressure
was applied to facilitate the drying and keep the documents
from wrinkling.... When each leaf had thus passed through
these three drying processes, those belonging to the same
volume were collected and carefully tied up in boxes or separate
packages to wait until all the manuscripts were thus
treated.... When all were dried, the manuscripts were arranged
in volumes.... The rarest pieces will in time be
mended, nearly all will be covered with crepeline, all will be
mounted on fresh paper and carefully bound into new
volumes.
Covers
Covers may be cleaned by the same materials as
those used on pages, but the best method is to wash
them with soap and water. For this reason the use of
a washable cloth for covers, such as keratol, durabline,
or fabrikoid, is an advantage. Miss Margaret Brown,
in her pamphlet on mending, Library handbook No.
6, advises the use of a wash as follows: "Two parts
good vinegar and one part water. Apply with a
clean cloth and rub hard until dirt is removed, then
place upright to dry. This should not be used on
leather."
Grease spots may be removed from both leather
and cloth by covering with a blotter and ironing with
a hot iron. The same method will partially remove
paint or varnish.
For a great variety of cleansing receipts see
Coutts and Stephen's "Manual of library bookbinding,"
Chapter X.
Covers that have warped must be dampened and
put under pressure.
Shellacking of covers has been advocated by some
librarians, but it is doubtful if it pays. It may be
used in the interests of cleanliness on books bound in
light colored cloth and on books in towns where the
atmosphere is very smoky. It is a process which
takes some time since two coats of shellac must be
applied, and it does not increase the wear of the cloth
to any great extent. As a regular part of preparing
the book for use it takes more time and material than
it is worth.
Sometimes a book becomes wonderfully rejuvenated
simply by having its cover and edges cleaned and
a new pocket pasted in the back.
It is very desirable that mending should not be
done by inexperienced assistants, for an uninstructed
beginner may do as much harm as good.
Torn Pages
Torn pages may be mended in any one of the
following ways:
1. If the tear does not affect the printing, cut a
strip of thin, tough bond paper one-half inch wide, a
little longer than the tear to be covered, put through
pasting-machine and cover the tear, trimming the
overhang even with the page.
2. If the page is torn into the text, and the book
is not valuable commercially, use ungummed onion
skin about one-half inch wide and apply as above. If
onion skin is not available a very thin, tough bond
paper will do very well. Use a thin coating of paste,
first putting a piece of white paper under the page
to absorb extra paste.
3. If torn in the text and it is desirable to make
as good a job as possible, use the following method:
Rub a very little paste on the torn edges, and place
them together. Then take a rather large piece of
ordinary tissue paper and rub it gently along the tear
so that the tissue paper will adhere to the torn edges.
Put under the press; when dry the superfluous tissue
paper should be torn off, taking care to pull always
toward the tear and from both sides at the same
time. The delicate fibre of the tissue paper acts as
an adhesive in such a way that it is almost impossible
to discern how the mending was done.
4. If the margin of the leaf of a valuable book is
torn in several places, take two sheets of paper the
size of the leaf, cut out from the middle of each a
piece a little larger than the letter-press of the book;
trim the torn leaf so that it remains somewhat larger
than the space cut out of the blank leaves; place it
between these two leaves and paste down, thus forming
new margins.
Books that have torn leaves mended may be put
into the press, but it is not strictly necessary. When
very much of this mending is done pressing is impossible
unless a standing press is at hand.
A few books such as Granger's Index and some
of the Poole's Index volumes should have the first
few pages entirely reinforced with cloth. The best
cloth for this purpose is crepeline, through which the
text can be easily read. When applying it put a thin
layer of paste on the leaf and then put on the cloth.
The book should then be pressed, first protecting
adjoining pages with paper.
Loose Leaves
Loose leaves may be inserted in several ways:
1. Lay a piece of white paper over the leaf,
allowing one-eighth of an inch of back margin of
the leaf to project. Paste this exposed surface and
attach it to the adjoining leaf in the book, pressing
down firmly. This can be done only when adjoining
leaves are firm.
2. Sometimes the leaf when inserted will extend
beyond the fore edge of the book. Trimming of
either back margin or fore edge is inadvisable. It is
possible to turn over about one-eighth of an inch of
back margin, using some kind of straight edge for
this purpose. Apply paste to turned over part and
press the fold well down into the book. This will
give more freedom to the leaf than if one-eighth of
an inch has been cut off and another eighth of an inch
pasted.
3. Fold strips of thin bond paper cut with the
grain, three-fourths of an inch in width, through the
center. Paste the outside. Attach the loose leaf to
one side and attach the other side to the adjoining
leaf in the book. It will be necessary to work quickly
because the paper strips when wet will cause a
wrinkling of the leaf. This method can be used only
if adjoining leaf is firm, but can never be employed
with overcasting.
4. If necessary to use as little paste as possible,
apply paste to a piece of common soft string by
drawing it over a board covered with paste. Then
draw the string through the book at the back. The
leaf may then be inserted.
Loose Signatures
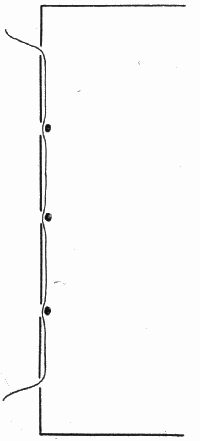
Ordinarily when one signature becomes loose
others speedily follow, and the book must be sent
to the bindery unless it is withdrawn absolutely.
Sometimes, however, one section will become loose
when the rest of the book is firm and solid, sometimes
also the use a book will receive does not
warrant binding. In such cases, if the book has
a loose back, open the section in the middle and place
it in its proper place in the book. Thread a darning-needle
with Hayes' No. 25 thread (or Barbour No.
40), pass the needle through the hole at top of the
section (the kettlestitch hole) in such a way as to
bring it out at the top of the book between the book
and the loose back. Draw thread through, allowing a
few inches to remain inside the section. Drop needle
through the loose back, insert it from the back
through the kettlestitch hole at tail of the book. The
thread can then be tied to the thread projecting at
the upper kettlestitch hole. This is a makeshift, but
may answer if the book is not to receive hard usage.
If the back of the signature is badly worn, mend it
by guarding with jaconet on the outside, or by pasting
a strip of bond paper down through the center of the
fold.
Tight Backs
For tight backs cut a guard of firm, thin cloth, such
as cambric or jaconet, about three-fourths of an inch
wide and as long as the book. Sew the section to
the middle of the guard, and paste the guard to the
book, one-half to each of the adjoining leaves. Press
this guard well back into the book. This can be
done only when the adjoining pages are securely held.
Loose Joints
It frequently happens that a book in the original
publisher's cover becomes loose at the joint, because
the super used as back-lining cannot stand the strain
put upon it. Ordinarily, a book defective in this
manner should be bound at once; but if it is deemed
best to attempt mending it, a strip of jaconet should
be cut 1-1/4 inches wide and the length of the book.
Paste one-half of this to the cover and the other to
the adjoining fly-leaf, thus transferring the strain
from the super to the fly-leaf. This method can also
be used to mend a break in the middle of a book, but
should never be used if the book must eventually be
rebound.
Another method of mending a loose joint is to
remove the book entirely from the cover, sew on new
end papers guarded with muslin, and cover the back
of the book with canton flannel which extends three-fourths
of an inch on each side. When dry, paste
the entire back of book and sides and put the book
back into the cover, pasting down the new end paper.
This is, in effect, recasing. (See page 184.)
Sometimes books which are loose at the joints and
have loose signatures may be mended by applying
paste with a long-handled paste brush to the backs of
the signatures. This must never be done if it is
possible that the book will need to be rebound later.
Fly-Leaves
To add new fly-leaves, cut paper suitable for this
purpose the same length as the old fly-leaves and
one-half inch wider. Fold over this one-half inch,
paste it on the outside and attach it to the old fly-leaf.
If necessary, this may be used as a new end
paper and pasted to the cover over the old end
paper. If used as an end paper, the book should be
pressed promptly to prevent it from warping.
Repair of Maps
All old or mutilated maps or charts must be flattened
out by placing the maps between large millboards
with heavy weights over them, before they
can be inserted in books. Repairs may be made with
onion skin paper or any other thin, tough paper, the
same as is done with torn leaves in books. If the
map is very old and valuable, it may be advisable to
use paper which resembles in a way the texture and
color of the map itself.
It is advisable to mount all maps on some kind
of cloth. It is best to have this done by a regular
binder, but it may be done in the library if there is
sufficient room.
If the map is to go on rollers, a piece of cotton
cloth is tacked to a large table, the top of the cloth
pasted, and the map placed on top, back down, all
wrinkles having been removed. Millboards or strawboards
are then placed on the map and weights placed
on top until it is dry. This may take some time, after
which it may be tacked to the rollers.
If it is a folding map or chart, it may be necessary
to cut the map into sections before mounting.
When mounted there will be one-eighth of an inch
space between sections, so that the map itself will not
be defaced through constant folding. The mounting
of such maps is a difficult task and should be done
only by an expert.
1. Remove book from the cover; cut out old
super from the back of the cover; thoroughly clean
the back of the book of super and glue without
injuring the backs of the signatures. Lift the lining-paper
from the back and front boards of the cover
and remove the old super. Scrape with a knife the
glue which does not come off with the super. If the
back of the book seems to be much thicker than the
fore edge, pound down with a backing-hammer.
2. Cut strips of muslin (or canton flannel) a
little shorter than the height of the book, wide enough
to cover the back and to extend over the boards 1-1/4
inches on each side.
3. Cut enough flexible glue to fill a double-boiler
glue pot half full when dissolved. When the water
comes to a boil the glue, which must be used hot to
get good results, will generally be ready to use. If it
is still too thick, add a little hot water to thin it.
4. Turn back the lining paper on front and back
covers, spread the glue on the inside of the back
of the cover and on the boards where the lining has
been turned back.
5. Put the strip of muslin in the place just glued;
then rub down the lining paper over the muslin.
6. Even up the book by tapping it on the table
so that no leaves will project at the top, bottom or
front.
7. Holding the book firmly in the hand, glue
the back.
8. Place the back on the muslin lining previously
glued to the back of the cover, care being taken to
see that the book is not put in upside down.
9. Fold over the cover and, taking the entire
book firmly in the left hand, with the right hand push
the book firmly back into the cover. This will prevent
it from becoming concave.
10. Crease the joints with a bone folder and rub
down the back.
11. When the book is dry, open it and, if necessary,
paste new papers over the inside covers. This
is necessary, because it is frequently impossible to
turn back the lining and remove the old super without
making an unsightly piece of work.
Rules for recovering can be used only when books
do not need to be resewed.
1. Remove cover from the main part of the book.
2. Remove with a dull knife the cloth from the
outside and inside of the cover until the two boards
are clean, being careful not to cut into the board itself.
It is not worth while to remove old paper sides or
end papers.
3. Remove superfluous glue, super, etc., from the
back. If the book has been overcast, and small strips
of leather have been placed over the back, paste the
ends of these strips of leather to the end papers.
Such a book will also have end papers guarded which
will remain as an integral part of the book.
4. If the book has not been overcast, it will be
necessary to add end papers. This can be done by
using two sheets which when folded once will be the
size of the leaves of the book. One of these should
be a 60-pound and the other an 80-pound manila
paper, both guarded entirely around the fold with
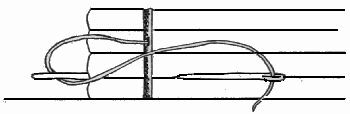
jaconet. Whipstitch the 60-pound fly-leaves to the
first and last sections of the book, then whipstitch the
80-pound, being careful to pass the needle back
through the first section. Paste one of the fly-leaves
and one of the end papers together.
If the book has been oversewed, cut the end papers
of 80-pound manila or 60-pound kraft paper the size
of the book and paste on the entire surface of the
fly leaves which are integral parts of the book. It
will not be necessary to guard these new end papers.
5. Trim the new fly leaves and end papers the
exact size of the book.
6. Mark the boards and book with corresponding
numbers so as to identify them.
7. Place boards on the book to within one-eighth
of an inch of the back and mark the distance from
the back.
8. Measure exactly the distance across the back
between marks just made on the end papers.
9. Select the proper cloth with which to cover
the book. Place the boards on the cloth, allowing the
width necessary for the back as measured in No. 8.
10. Mark around boards on cloth.
11. Cut cloth, allowing approximately an inch and
a quarter all around outside edge of the boards.
12. Glue the entire surface of the cloth.
13. Place boards on markings previously made,
pressing down firmly on the glued cloth.
14. Put stiff paper, previously cut to the proper
size, on the glued cloth between the boards, to prevent
the glue from sticking to the back of the book. This
should not be done if the book must have a tight back.
15. Turn in the corners as follows: Take the
exact corner of the cloth and turn it straight in over
the corner of the board. Next turn in the end and
then the side. Rub down well with a bone folder.
16. With bone folder, round the corners, and
crease the joints at the back.
17. Put the case so formed into a press for a few
minutes.
18. Cut a strip of thin, tough muslin or canton
flannel one-half inch shorter than the height of the
book and wide enough to extend an inch on each side
of the book.
19. Glue the back of the book and put on the
muslin or canton flannel.
20. Glue the entire surface of the completed case.
21. With the fore edge in the right hand, lay
book in its proper place on the right-hand cover,
draw up the left-hand cover and lay it on top. Open
the book, rub down the end papers well with bone
folder, and rub down the back; also crease the joints.
22. Put book in press over night.
23. Letter by hand either with black or white
ink as the case demands.
Many books which have been rebound with leather
backs come to the binding department with the cloth
sides badly frayed at the corners or edges. If the sewing
is good and the book is clean, it is worth while
to put on new sides.
1. Remove cloth sides and smooth off the inside
of the board with a dull knife.
2. Cut two pieces of cloth a little larger than the
sides.
3. Glue the inner surface of the cloth and place
on the book, turning in the corners as described in
15 on page 187.
4. Put book in the press.
5. After book is dry, paste a single end paper
over the inside of each cover.
In Chapter 6 will be found a discussion of the
advisability of purchasing books bound from the
sheets or in reinforced publisher's covers. While it
is advisable on the whole to have reinforcing done by
regular library binders, the work can be done in large
libraries that have proper equipment and labor. The
essential principles of reinforcing are the same in all
libraries that practice it, though they may differ as to
minor details. The following method has proved
satisfactory.
1. Remove the book from its cover, which is laid
aside for future use. If the call number is to be
gilded it will be easier to do it before the cover is
removed than after it is replaced.
2. Make end papers and fly-leaves of 60-pound
kraft paper or 80-pound manila, guarded with jaconet
on one side of the sheet. End papers should be
guarded on the inside of the fold.
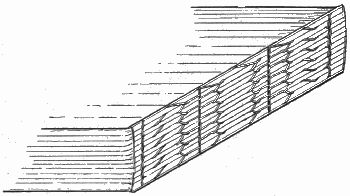
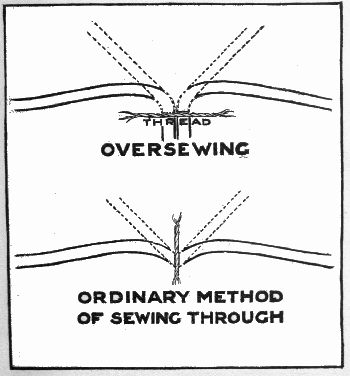
3. Oversew the fly-leaves to the first and last
sections of the book, being careful that stitches are
not over one-eighth of an inch deep.
4. Sew the end papers to the fly-leaves which
have just been oversewed, and paste fly-leaves and
end papers together.
5. Apply a thin coating of flexible glue to the
back of the book and put over it a piece of thin canton
flannel cut as long as the book and wide enough to
extend an inch on each side. This should be well
rubbed down.
6. Paste the canton flannel which projects on the
side to the end papers.
7. Glue one side of the book and place it on the
proper side of the cover. Glue the side remaining
uppermost and draw the cover up over it.
8. Rub both sides and back until sure that the
glue is well forced into them.
9. If desired, the book may be given a coat of
white shellac and one of varnish, after which it should
be wiped with a paraffine cloth.
1. Cut red rope manila cardboard the exact size
of the two covers plus the width of the back.
2. Remove the cover of magazine or pamphlet, if
possible keeping it in one piece.
3. Fit the red rope cover over the magazine,
creasing carefully at the joints with a folder so that
it will lie flat across the back as well as over the sides.
4. Glue the back of the magazine with flexible
glue and press it firmly into the improvised cover.
Rub down the back with a folder.
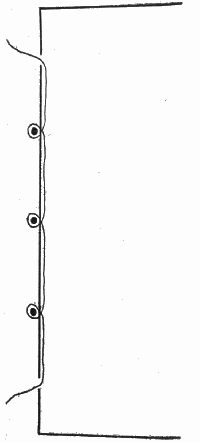
5. Thread a needle with stout linen thread and,
using it double, at the middle of the book put the
needle through from the inside to the outside. Leave
about two inches of thread projecting on the inside.
6. Put the needle through from the outside about
an inch from the head of the book. The needle must
come through in the same section where the thread is
projecting.
7. Carry the thread through to about the same
distance from the tail of the book and again put the
needle through from the inside to the outside.
8. Return the needle at the same place where
the first stitch was taken and tie to the thread left
projecting in such a way as to hold fast the long
thread through the center.
9. Paste the paper cover previously removed on
to the new cover.
This method can be used for all pamphlets one-half
inch or more thick; even for those two inches
thick, provided that the use they will receive is slight.
In the case of the thicker unbound books, it is necessary
to sew them in two or three places.
Few libraries can afford to have all call numbers
gilded. Therefore it is necessary either to letter
directly on the book, or to put call numbers in ink
on a white label which has first been placed on the
book. Much objection exists to these gummed labels,
because it is claimed that they come off very easily and
the work soon has to be done over again. Undoubtedly
this is true if the labels are not properly put on;
but if care be taken, there is no reason why the white
gummed labels should not last until it is necessary to
rebind a book, when of course the call number will
be gilded.
Two points must be remembered in applying labels.
1. They must be put on at an even distance from
the bottom of the book. Perhaps nothing else will
give a library such an unsightly appearance as uneven
labels—some at the top, some in the middle and some
at the bottom. The exact distance from the bottom
of the book is not one of great importance, but the
bottom of the label should not be less than 1-1/4 inches
from the bottom of the book, nor more than two
inches. Whatever distance is adopted, it will be necessary
to have a piece of cardboard which may be used
as a measure when applying the label.
2. Labels must be fastened so securely that they
will not come off. This seems sufficiently obvious, but
as a matter of fact many assistants who do this work
do not spend sufficient time to do it right.
The following directions should be followed:
a. If the book is new, it will be necessary to break
down the glazed surface of the cloth or leather
where the label is to be placed. To do this, use
ammonia diluted somewhat with water. Use a
brush about the width of the label and draw across
the back of the book at the proper place. After
having done ten or a dozen books, it is best to wipe
off the ammonia with a piece of cheesecloth which
brings with it the glaze.
b. Labels are not put on until books are dry.
Use labels made of extra heavy paper, so that they
will not turn dark when shellac is applied later. They
may be moistened on a wet sponge or on some one
of the numerous moisteners, or better still, they may
be dipped quickly in hot water with a pair of tweezers.
In using some labels it is not inadvisable to cover the
gummed surface with a thin coating of paste. As
soon as the label is pasted on the book straight and
in proper alignment, it should be pressed firmly down
with a piece of cheesecloth. This part of the operation
should not be hurried and considerable pressure
should be used until the label has firmly adhered.
c. When dry, letter with India ink and cover
label with a very thin coating of white shellac. Later,
when the first coating is thoroughly dry, cover with
a thicker coating of shellac. This should be done
quickly and neatly. If the line of shellac is uneven
the book has an unsightly appearance.
d. If books are thin, it is best to put labels on
lengthwise. If very thin, put labels on front covers,
near the back. If labels project over the back, trim
with scissors.
If books have been used or have already had
labels, the process is the same, except that no ammonia
need be used.
Old labels which have been shellaced are hard to
remove. The best way is to apply ammonia and water
to the label, allowing it to soak in. When thoroughly
moistened, remove with a dull knife. Removing dry
labels by scraping with a knife injures the back of the
book.
By Hand
It is sometimes feasible to letter with ink on the
back of a book instead of putting on a label which
holds the lettering. If the surface be glazed, it can
be broken down with diluted ammonia, or sometimes
merely a damp cloth will be sufficient.
So far as possible, letter with black India ink.
Carter's white ink is the best for lettering dark colored
cloths. It is sometimes difficult for a novice to
use white ink, but it can be handled satisfactorily if
one uses a stub pen which is kept perfectly clean and
is always wiped before being dipped in the ink. Shake
the bottle often and add water if ink is too thick.
Gold ink should never be used.
When lettering is dry, apply shellac as described
under Labeling.
With Type
Some of the larger libraries have found it economic
to have a binder's printing outfit for lettering
call numbers on all books, even when the
library does not bind books. Such an outfit may be
used of course for lettering author and title, but there
will be little occasion to do this except in connection
with a regular bindery. Call numbers, however, are
so much more legible and permanent when put on
with type that it should always be done whenever the
number of accessions is sufficiently large to warrant
the employment of some person to do the work. It
does not, however, need experienced finishers and, if
time permits, may be done by regular library assistants
after some instruction and practice. It will be
discovered, however, that lettering in gold on cloth is
more difficult than on leather. For the benefit of
those who wish to try it the following description is
given.
Tools. The tools necessary are a pallet to hold the
type; four fonts of brass type (lead, or type other
than brass should never be used); long-bladed knife
with straight edge for cutting gold leaf; cutting pad;
gas burner similar to the burners on cook stoves; and
a frame with wooden screws in which to hold the
book while it is being stamped.
Materials. The materials needed are the best
American gold leaf, cotton batting, sweet oil, some
specially prepared rubber for removing the excess gold
leaf, and glaire.
The tools or materials which are used exclusively
by binders can be obtained from any binders' supply
house. Glaire is easily made as follows:
Take whites of three eggs; add three teaspoonfuls
of vinegar and beat until it is a light froth. Let stand
a few hours and strain through a piece of muslin into
a bottle. If kept corked glaire will keep for some
time.
Process. 1. Place on finishing bench, backs up,
books on which call numbers are to be gilded.
2. With a small sponge, apply the glaire to the
part of the back which is to receive the call number,
taking care to draw the sponge evenly across the back,
leaving a straight line. If the application of glaire
makes that part of the book appear radically different
from the rest of the back, the glaire may be applied
to the entire back. It should not be allowed
to run over on the sides. Allow the glaire to dry
thoroughly.
3. With a long-bladed knife, transfer a sheet of
gold leaf to the cutting pad which must be thoroughly
protected by screens from all draughts. If the gold
leaf does not lie unwrinkled on the cutting pad
breathe on it lightly. With the knife, cut the leaf in
proper size for work to be done, being careful to
make the cuts clean, not ragged.
4. Arrange type in the pallet, beginning at the
right, and put type in the gas to heat.
5. Screw book, back up, firmly in the frame.
6. With cotton batting, apply sweet oil to the
part to be stamped, being careful to cover thoroughly
this surface with the oil. This is done to make the
gold stick.
7. Apply a piece of cotton, slightly oiled, to the
gold leaf which will instantly stick. It can then be
transferred to the book, where the sweet oil will hold
it securely.
8. Test the type for heat. A little practice will
soon teach the novice when the type is hot enough.
The object of heating the type is to make the gold
combine with the glaire in such a way as to cause the
gold to adhere. It is better to have the type too cold
rather than too hot. If it is too cold, the gold will
not stick and the work must be done over again; if
too hot, it burns the leather or cloth and the damage
is irremediable. For cloth work the type can be used
hotter than for leather.
9. Apply type to the book, pressing down firmly.
The pressure makes an indentation. If the materials
are of the right quality, the work carefully done and
the type of the right degree of heat, the gold will be
firmly embedded.
10. With the specially prepared rubber remove
the waste gold. When the rubber has absorbed all
the gold that it is capable of taking up, it may be sent
to a dealer who will refine it and give credit for the
gold which it contains. About one-third of the original
cost of the gold should be obtained from the sale
of the waste.
Whenever books are bound in light colored cloths
on which gold does not readily show use a black ink
specially made for this purpose. It is much easier to
use than gold, since the ink is evenly spread on a
smooth, hard surface and the type is used cold. No
glaire is necessary.