Festivals have always held an important place in
the life of home and community. The anniversary of
the day of birth, or of marriage, the day of graduation,
or of coming of age—what opportunities they
offer for strengthening the ties of kinship, for creating
hallowed associations that may often prove bulwarks
of safety in later days of temptation and sorrow!
Christmas, Easter, Thanksgiving, are now National
holidays with us, and our celebration of these
beautiful festivals is one more link in the chain which
binds us to all races and creeds; for the return of the sun
at the winter solstice, the renewal of life in the spring,
the ingathering of fruits in the autumn, have appealed
to all peoples as fitting occasions for the expression
of religious joy and for mutual congratulations upon
dangers past and the results of work accomplished.
In the joy of such occasions, we must not let them
degenerate into the mere mercenary exchange of material
gifts.
Christmas is preëminently the children's day,
when we annually remind ourselves of the divinity
inherent in all childhood, and desire to bring joy to
all children and goodwill to all peoples.
Easter means most to the adult who has experienced
sorrow and disappointment and has known
something of the anguish and awe and deepening of
life that comes with the message of Death. The
pleasure of the child in the hare and the Easter egg
must
not be allowed altogether to overbalance the
wondrous symbolism of the Easter lily.
The National holidays—Washington's Birthday,
Memorial Day, Independence Day, etc.—take us outside
the limits of the home and remind us that, as
we thank the men and women of the past for the
privileges of the present which we owe to their sacrifices
and aspirations, so we should realize our obligations
towards the future.
In celebrating these different festivals, let the
child bear his small part. We give a few ideas of
things which he may do or make. It is these early
impressions which are the lasting ones. The actual
service demanded of the child counts much in the formation
of character, though even more important is
the spirit which radiates at such times from the parents
and friends who celebrate or prepare to celebrate
these recurrent holidays. It is the "spirit which giveth
life," here, as everywhere.
The suggestions will be given in the order in
which the holidays come in the year. Where an article
is described in another part of the book, it will
not be repeated, but the page number will be given for
reference.
Place Cards at Table (White card, pressed four-leaf
clover, or paints)
1. Having found and pressed four-leaved clovers
in the days of summer, paste one lightly to each place
card as symbol of good-luck.
2. Copy a clover-leaf with paints and write on
card some appropriate quotation signifying good-will.
Decorated Note Paper
(Writing paper, leaf, paste
or paints)
Paste a real clover leaf (or paint one) on the
writing paper upon which you may be writing a New
Year's letter to your friend.
Calendar (12 oblong blotters, white or colored, ribbon
to match, 1 inch wide and about ¾ yards long,
tiny calendar pad, paste)
Take the calendar pad apart and paste the leaf for
each month upon one of the blotters. Then tie the
blotters together with the ribbon. This makes suitable
New Year's gift. (See also page 74.)
New Year's Bells (Red cardboard, scissors, paste,
ribbon)
Cut out a bell and paste a calendar pad on it.
Or cut 12 small bells and paste one leaf of calendar
pad on each, stringing all together with ribbon.
Good-Luck Pigs
With our German population the pig signifies
"good-luck," and at New Year's pigs, big and little,
made of various materials, are quite in order. A favorite
candy, made of sugar and bitter-almond, is
in the shape of a pig, and is used to present to friends
at this holiday time. Many suggestions already given
may be carried out with the pig idea in mind.
Midnight Watching
If friends stay up to watch the Old Year out,
any of the above-named articles may be made by the
children for souvenirs. A poem which may suitably
be read at this time is Tennyson's "Ring Out, Wild
Bells;" also, Longfellow's "The Poet's Calendar." A
timely
topic for discussion is the never-answered question:
When does the new century begin—with January
1, 1900, or 1901? Timothy Dwight, President of
Yale College, 1795-1817, wrote some clever verses
apropos of the subject when he helped usher in the
19th Century.
Save lace papers from candy and soap boxes and
they will prove useful when St. Valentine's Day comes
in making Valentines. With these papers and scissors,
paste, scrap pictures of flowers, doves, etc., the
children will spend happy hours in making these
dainty souvenirs. We give a few directions for making
some such.
Single Hearts (Red cardboard, lace paper, scrap pictures,
scissors, paste)
Cut a heart out of the cardboard and around the
edge paste a border of lace paper, fulling slightly and
attaching it to the under side of the heart. In the
centre of the upper side of the heart paste a pretty
scrap picture. This makes a simple but effective
Valentine.
Chain of Hearts (Red cardboard, scissors, scrap pictures,
paste, red ribbon)
Cut several hearts out of the cardboard, and, after
punching holes in the top and bottom of each one,
string them together, pasting a scrap picture on each
one if that added touch is desired.
Double Hearts (Red cardboard, scissors, paste, strip
of red paper)
Cut two hearts of different sizes. Then take a
narrow
strip of red paper measuring ¼ × 1 inch and
fold it into thirds. While still folded attach one end
of this paper to the centre of the upper side of the
large heart and the other end to the centre of the
lower side of the smaller heart. This unites the two,
one resting on top of the other, the paper acting
as a kind of spring to raise one above the other. Instead
of a small heart a scrap picture may be thus
attached on the larger heart.
In cutting out these hearts it may be necessary
first to cut a pattern out of newspaper, making several
trials before a satisfactory model is secured.
Lacy Valentine (Gold or silver paper, white tissue
paper, scrap pictures, paste)
Cut from a sheet of gold or silver paper a piece
measuring 5 × 7 inches. Fold this once through the
middle so as to make a book of 3½ × 5 inches. Cut a
piece from the tissue paper of 3½ × 5 inches. Fold
this two or three times and cut into it tiny perforations—oblongs,
diamonds, circles, hearts, etc. Then open
out and observe the lacey effect. Practice this until
something pretty and dainty is secured. Then upon
the centre of the book paste a scrap picture and attach
the tissue paper by its edges to the Valentine
in such a way that the picture shows a little between
the perforations. A narrow strip of stiff paper folded
in three, to give the effect of a spring as described
above, may be used at each corner. Inside of the
booklet paste other pictures as fancy dictates. Also
write therein some appropriate lines.
Spider-Web Design (Gold or silver paper, Bristol
board, scrap picture, paste, scissors)
Cut a circle of gold or silver paper, three or four
inches
in diameter. Fold once, making a semi-circle;
fold once more making a quarter-circle. Beginning
at the point of the folded paper, make a tiny cut from
one edge towards the other, but do not cut the point
entirely off. Turn the paper and make a second cut
parallel to the first about ⅛ inch away, the cut being
from the other edge of the paper. Turn again and
make a third cut. Each time the cuts grow in length
owing to the increasing width of the triangle or quarter-circle.
Continue thus until the circumference of
the folded circle is reached. Then open out and you
have a silver spider-web effect. Take a square or
circle somewhat larger than the web, and in its centre
paste a pretty bird, flower, or maiden. Then paste
the web upon this background, putting the paste along
the edges of the web, but leaving the centre free, so
that the child can raise it and peer through the slits
at the picture beneath.
Let city children send to country cousins scrap
pictures, colored papers, etc., and sample Valentines,
so that their friends may have the pleasure of making
and giving.
Valentine Dinner
Soup: Put into the clear soup the noodle hearts,
which may be purchased at a grocery store, or have
a vegetable soup, slicing the vegetables and cutting
them into little hearts with a knife.
Meat: Make chicken or beef croquettes, molding
them like hearts.
Vegetables: Slice the boiled carrots and potatoes
and cut into heart shapes.
Bread: Cut into hearts.
Salad:
Upon green lettuce leaves place hearts
cut from beets.
Dessert: Ice cream may be obtained in the
form of a Cupid or something similar, and cake may
be decorated with white icing having pink hearts outlined
upon it. The peppermint candies in the shape
of hearts, which have sentiments printed upon them,
may be passed either at the beginning or the end of
the meal. Cut in half, placing the halves in separate
dishes; then pass one dish to the girls and the other
to the boys, and by matching halves partners may be
found. Let the children, however, remain unconscious
of the distinction of sex as many years as possible.
In making preparations for the dinner let the
children help.
Place Cards for Dinner (Red paper, white cardboard,
scissors, pencil)
Cut a heart from the red paper. From the white,
cut an arrow, drawing it after a pattern found in
some book. Making two slits in the heart, run the
arrow through it. On the reverse side of the heart
write the name of the guest.
Decorations for Valentine Dinner (Red cardboard,
red ribbon)
Cut about two dozen hearts all of same size, or
graduated in size. String these upon the red ribbon
and suspend over the table.
Luncheon Card (1. Picture hatchet, cardboard, scissors,
paints; 2. Same—also white or reddish
brown paper)
1. Find
a picture of a hatchet and use it as a
model from which to cut one about two inches long.
Paint this in colors resembling the real hatchet, and
upon the reverse side write the name of the guest.
2. From a piece of white or reddish-brown paper
cut a one-inch square. Paint so as to resemble cherry
wood. Roll so that one edge overlaps the other a
trifle, simulating the trunk of a tree. As they overlap
cut a tiny slit through the two. Cut out a tiny cardboard
hatchet, paint as above, and insert in this slit
so that it holds the two edges together. Before fastening
in this way, an appropriate quotation may be
written inside, and the name of the guest on the outside.
It should stand up if rightly made.
Decorative Cherries (Paraffine, spool of wire, not too
fine, green cloth or paper, carmine oil paint, brush,
paste)
Purchase at the grocer's cakes of paraffine such
as is used for preserving purposes. Heat a cake in a
dish so that it is soft enough to model into balls the
size of a cherry. While still pliable make a slight
depression in its surface. Having previously rolled
the wire in the green tissue paper, and cut into inch
strips for stems, insert this into the cherry at the
depressed part of its surface. Cut out cherry leaves
of paper, or better dark green cloth, place a little paste
on these leaves at the back and arrange a stem on
each one. When the stem of the cherry is firmly fastened
in the fruit, paint the surface with carmine
oil paint. This gives a polished appearance to the
surface like the natural cherry.
The stems of the green leaves may be trimmed
about the stems of the cherries in twos or threes or
more, according to the number of cherries used.
Paper Chains
(Colored paper in sheets or cut into
strips, paste, small brushes or sticks)
The making of paper chains, in contrasting or
uniform colors, is a delightful pastime for children of
all ages. Very little children may easily learn to
make one loop at a time, and, with assistance, are soon
able to fasten several loops together.
Kindergarten Supply Stores furnish strips of
colored paper already cut, and put up in packages.
These strips measure 36 inches in length. It is very
easy, however, to cut strips from large sheets of paper,
and it is an excellent lesson in accurate cutting for
children over ten years of age.
These paper strips may measure one or two inches
in width and the entire length of the sheet. Cut the
long strips into short strips measuring four inches in
length. Holding the four inch strip in the left hand,
put a very little paste on the under surface of one
end of the strip. Overlap the pasted end of the strip
to its unpasted end, and hold firmly until fastened.
You now have one paper loop. Through this loop
is placed another four inch strip—the paste is added
in the same manner. Now you have two loops. Continue
doing this until you have the chain the required
length. These chains are very effective when used
in decorating.
For Washington's Birthday, red, white and blue
paper would be used for the chains.
Bonbonnieres (White tissue paper, red and blue aniline
dyes)
Very attractive bonbonnieres may be made by
cutting oblong shaped sheets of white tissue paper,
measuring 6 inches in length and 5 inches in width.
Fringe
the shorter edges of the paper, making fringe
1 inch deep.
Dissolve any good red and blue dyes in boiling
water, and place in separate dishes. Dip one fringed
end of tissue paper into the red dye for one second,
and dip the other fringed end into the blue dye.
Shake these ends gently in order to let the water
drip from them. When they are dry, place a large
sized candy in the centre of the paper, and gathering
up the fringed ends, twist them close to the candy,
thus forming a feathery effect in two colors. These
are very pretty when arranged on the table either in
quantity or singly.
Tents (White shelf paper, paste, match stick, red,
white and blue paper)
Groups of white tents, made of white shelf paper,
capped at the top with tiny American flags, may be
placed at short distances from the centre piece of a
luncheon or supper table with good effect.
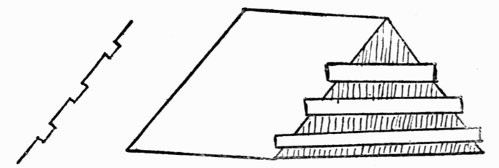
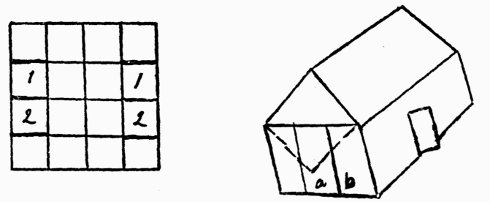
The large sheets of shelf paper may be bought
at any grocer's. Cut them into four-inch squares.
Place the paper before you on a flat surface, an edge
nearest you. Fold the front edge to the back edge of
square; crease the paper at the fold, open the paper and
fold the right edge to left edge of square; crease the
fold again. Open the paper and turn the square so that
a corner points towards you. Fold this front corner
to the back corner, so that the two points exactly
meet.
Crease on the fold, open the paper, and fold the
left corner to the right corner of the square. Crease
on the fold. Open the paper; before you you have
a square of paper, with eight folds across its surface,
a fold running front edge to back edge, from right
edge
to left edge, from right corner to left corner,
from left corner to right corner. Turn the square
of paper over so that all the folds on the surface of
the paper are on the upper side of the square. Place
the square with a corner toward you.
You will now see eight folds running from the
four edges and four corners to the centre of the
square. Crease with thumb and forefinger of right hand
the fold running from lower right edge to centre of
square. Place this right hand fold of square forward
so that it lies along the fold which extends from the
corner directly in front of you to the centre of the
square. Follow the same directions in folding the
crease that runs from the lower left edge to centre of
square. These two folds touch now on the fold that
runs from front corner to centre of square. You
will see a small triangle extending below the two folds
which thus meet in front of you. Fold this small
triangle back toward the centre, and underneath the
two folds that meet in front of you. One half of your
tent is folded. The same directions must be followed
in folding the other side of the square.
The two small triangles must be carefully folded
so that the tent will stand evenly when finished. You
will see when the front and back part of the tent is
finished that you have the right and left corners to
dispose of. Fold these corners underneath the tent,
so that when it is placed in an upright position it will
stand firmly. To make the tent stand well, crease the
edges that run from the four corners to top of tent,
thus making an exact pyramid. The use of a little
paste in securing the folds is of great assistance.
To represent the tent pole, a wooden match,
gilded, may be used. To this attach a tiny American
flag made of pliable red, white and blue paper.
Paper Lanterns
(Scissors, red, white and blue paper,
liquid gold paint, box of small candles, circular
box covers, baby ribbon—red, white and blue)
Lanterns made of red, white and blue paper,
each of one color only, ornamented with gold paint
and tied with the red, white and blue baby ribbon,
are extremely pretty for supper decorations. When
suspended from the chandelier above the centre of a
supper table, a lighted candle in each little lantern,
the effect is charming.
In view of entertainments where decorations are
called for, it would be well to lay aside all small circular
box covers that find their way into the household.
The small box covers that measure 2½ inches
in diameter may be taken as a standard size. These
box covers form the bottom of the lanterns.
Cut from the colored paper an oblong piece measuring
8 inches in length and 5 inches in width. Lay
the oblong piece of paper before you with its long
edges running right and left. Draw a pencil line the
length of the paper ¾ of an inch from the upper edge;
¾ of an inch from its lower edge draw another line
which will be parallel to the first.
From the upper pencil line to the lower pencil
line draw 15 lines ½ inch apart. These upright lines
will form 14 narrow oblongs. Use very sharp pointed
scissors, and cut away each alternate oblong. Paste
the two short edges of the oblong paper together,
one end overlapping the other. The body of the lantern
is now finished.
Let a little wax drip from a candle on the inside
of the circular box cover at its centre. When a
little bed of soft wax is formed, place an unlighted
candle on it in an upright position. Place a thick
coating of Spaulding's glue on the inner surface of
circular
rim of the box cover, and carefully fit the
body of the lantern into it.
When the paper lantern is securely fastened, gild
heavily the outside rim of the box cover and the upper
and lower circular bands which form top and bottom
borders of the lanterns. In the top circular band
punch four holes equal distances apart, through which
the ribbons are run.
Place Cards (White cards, water-color or oil paints,
brush)
Paint a picture of shamrock upon the card. It
may be copied from some picture, if not from the
real plant. If not possible to find a picture, our wild-wood-sorrel
(Oxalis acetosella) is supposed to be
the same as the shamrock and may be used for model.
Some authorities believe the white clover to be the
original shamrock.
Flags (Irish flag, green paint, gold paint, brush, scissors,
slender sticks)
If one Irish flag is bought the children may copy
it, painting a number, one for each guest, or for
decorating table. Glue flags to sticks.
Ribbon Flags (Green satin ribbon, one inch wide,
wooden toothpick)
Cut the ribbon into oblongs to make wee flags.
Glue to tiny flagsticks and put at places at dinner
table.
Shamrock Plants
The real shamrock is now brought over and may
be
purchased in March. A little plant makes an appropriate
souvenir. Or several weeks before the day,
children may plant shamrock seed in tiny pots for
use on the 17th.
Potato Race
A potato race is an appropriate game for St. Patrick's
Day. (See page 94.) Give cork doll for prize
to winner of race (page 81), as souvenir from Cork.
St. Patrick's Dinner
Have as many green vegetables and side dishes
as possible. Spinach will color the soup. Green vegetables
and salads are easy to obtain and ice cream
may be colored with pistache. Irish flags may be suspended
over the table.
Dinner Souvenir (Blotting paper, souvenir postcards,
green ribbon ½ inch wide)
Give each guest a blotter made thus: Buy souvenir
postcards with pictures of Killarney and other
Irish views. Cut the blotting paper into sheets of
same size as cards. Place together. Punch hole at
one end and tie together with ribbon.
Egg Shell Garden (See page 25)
Sponge Garden (Small, clean sponge, birdseed)
A few days before Easter, sprinkle the sponge
with birdseed. Keep damp and the seeds will sprout
and cover the sponge with growing blades of green.
Easter Eggs
(1. Diamond dyes, a dozen eggs. 2.
Small figured calico, lye, boiling water)
1. Boil the eggs hard and dye with the colors
according to directions on package, which may be
had at drugstore, price five cents.
2. Wind strips of the bright calico around the
eggs and boil in water strongly saturated with lye.
The lye extracts the color, which will be found printed
upon the eggs.
Place Cards for Easter Breakfast (1. White paper,
scissors, paints. 2. Plain white cards, paints)
1. If possible secure a real Easter lily for a model.
If this cannot be obtained, a picture of one will answer.
From the paper cut, freehand, if possible, the
shape of the lily and paint it lightly; just a little shading
and the golden center. Place the guest's name
upon the reverse side. It may be necessary to draw
the lily first before cutting, but the freehand cutting
is a good exercise.
2. Decorate a white card with the picture of a
lily, or a tulip, using water-color paints. Below the
flower write an appropriate flower motto.
Celluloid Place Cards (White celluloid, scissors, pencil)
Get from a dictionary or natural history a good
picture of a butterfly with open wings. Draw a pattern
from this and then outline a number of these on
the celluloid and cut out. These dainty, spirit-like butterflies
will make suitable place-cards, having the name
of guest on the reverse side.
Cut Easter lily of celluloid in same way.
Easter Chicken
(Yellow worsted, black beads, quill
toothpick, cardboard, wooden toothpicks, or picture-wire.)
Make a yellow ball as described on pages 96-7 for
the body of the chicken. A smaller ball makes the
head. Sew on the beads for the bright black eyes;
cut the quill into shape of a bill and sew into place.
Let wooden toothpicks form the legs; or, better still,
take picture-wire made of several strands. Wind some
of this around the body, letting the ends of the wire
extend about 1½ inches below the body; sew to the
body to keep in place. Then pick out the ends of
the wire a little to suggest toes and wind the legs
with worsted. Sew chicken to a card.
Easter Card (Parquetry circles used in kindergarten,
paste, gray card, scissors)
The little child may make an Easter card by
pasting upon a neutral-tinted card pictures of tulips
made of the kindergarten parquetry papers. Cut in
half either red or yellow circles. Place so that the
lower ends touch and the upper ones are a little
apart, suggesting a tulip. A strip of green paper will
represent the stem and an older child can cut leaves
of the green paper and paste on. Have a real tulip
from which to copy. Child may give this to Father
on Easter morning.
Toy Screen (See page 63)
Make dainty screen as described, and paste on
each panel a tiny Easter picture (Perry pictures may
be had by addressing firm in N. Y. City). Give to
Mother on Easter morning.
Church Window Transparency (See page 77)
We give no special suggestions for the celebration
of Memorial or Decoration Day. The ideas given
under the headings of the other patriotic holidays, as
Washington's Birthday and Fourth of July, may be
used also for this holiday, but it is not a day for mere
play.
If the parents plan to go to the cemetery let the
child accompany them and carry flowers, preferably
those of his own raising or plucking.
Reading
It would be well also on this day to read some
great piece of patriotic literature, either prose or
poetry, which will help the older children to realize
the great debt which we owe to the preservers of our
country, to whom we dedicate this day. Lincoln's
Gettysburg address should be read. Also Lowell's
"The Present Crisis." "Bugle Echoes," compiled by
Francis F. Browne, contains 150 poems of the Civil
War, both Northern and Southern.
Badge (Sheets of red, white, and blue paper, scissors,
paste)
A simple badge may be made for the children to
wear in this fashion:
1. Cut a circle ¾ inches in diameter out of the
red paper. Cut also from the red, white and blue
sheets strips of 2 × 5 inches. Paste the three strips
together at the upper end like ribbons, letting them
spread a little apart at the lower end. Paste the circle
at the upper end to finish off.
2. Another style may be made by placing the
three
colors so that one lies directly above the other.
In this case the blue is 5 inches long, the white four
inches, and the red three inches. Fasten to dress or
coat with a safety pin.
Firecrackers (Red paper, hemp string, paste)
Get large sheets of red paper to be found at
department stores or wholesale paper houses, measuring
about 35 inches in length and 26 inches in width.
From each one cut thirteen 2-inch strips, cutting the
length of the sheet. Fold each strip once across the
width of the strip, and cut through the center at the
fold. This gives twenty-six 2-inch strips of paper,
the width of the small sized firecrackers.
Hold a strip of paper between the thumb and
forefinger of the left hand. Moisten the thumb of
the right hand a very little, and roll the end of the
strip towards the left, as one does in rolling a paper
taper. Keep the strip rolled tightly until the other
end of the strip is reached. If the cracker seems too
loosely rolled unroll it a short distance, and gently
pull the strip into form again.
Place a little paste on the under side of the loose
end of the strip, and press the pasted end firmly on
the rolled surface of the cracker. Hold this until it
adheres to the surface of the cracker. Cut the hemp
string into three-inch pieces. Dip one end of the
string into the paste, then insert this pasted end into
one end of the cracker at the little opening which is
found at the very center. Hold this firmly for a moment,
or until the string is securely fastened.
Tie six or eight firecrackers into bunches with
red,
white and blue ribbons, and lay them over the
white surface of the luncheon or supper table.
Firecracker Card (See page 55)
Drums (Small wooden boxes, liquid gold paint,
Spaulding's glue, red, white and blue baby ribbon,
small sticks for drum sticks)
The market basket will, from time to time, furnish
the housekeeper with small circular boxes labeled:
Electro-Silicon Silver Polish. These wooden boxes,
measuring 8 inches in circumference and 12 inches
in height, make, when prettily ornamented, very attractive
drums.
Remove the cover of box, and place on its inner
rim a coating of Spaulding's glue. Place the cover
on the box again, and put aside until it is fastened.
Place the box on a sheet of stiff white paper, and
holding it firmly, draw a pencil line around its edge.
Now remove the box, and you will see that you have
outlined a circle. Using this circle as a model, draw
a second circle. Cut out these circles, following the
pencil very accurately. These two circles form the
two heads of the drum, and are to be pasted on the
top and the bottom of the box. Gild the circular surface
of the box. Cut strips of red or blue paper,
measuring 8½ inches in length and 1½ inches in
width. Brush the under surface of these strips with
paste, and place one strip at the top and one at the
bottom of the drum, ¾ of an inch above the rim of
the drum. These strips answer to the wooden bands
which hold the drum heads in place. Red, white and
blue baby ribbon may be carried from the upper to the
lower edges of the drum if desired to represent the
cords which hold the drum securely.
Little
wooden sticks, gilded and tied at the side
of the drum form the drumsticks.
The smaller Electro-Silicon boxes, measuring 2¾
inches in circumference and 1 ⅓ inches in height, may
be used in the same way.
Rosettes (Red, white and blue tissue paper, a strong
needle, white sewing silk, white library paste or
well-made flour paste)
Lay nine sheets of tissue paper one upon another,
alternating the colors, red, white and blue. Fold
these sheets together very smoothly once, thus making
18 smaller sheets if they were cut apart, but do
not cut. Lay a silver dollar or fifty-cent piece (depending
upon the size required) at the upper left-hand
corner of paper. Draw a pencil line around the
rim of the silver piece. Move the piece of money to
the right and draw another circle. Continue this
drawing circles until you have covered the surface of
the paper.
Thread a needle with the sewing silk, knot the
end of the thread and take several firm stitches
through the center of each circle in order to hold the
sheets of paper together. With sharp scissors cut
out each paper circle, and fringe by cutting, but not
too finely, from the edge to within ⅛ of an inch of
the center of the circle. Hold the knot on the under
side of the circle between the thumb and forefinger
of the left hand. Slightly moisten the forefinger of
the right hand and brush gently over the fringed
surface toward the center of the rosette. At the back
of each rosette put a bit of paste, then lay rosettes
on strips of paper one inch in width. Do not overlap
the rosettes, but arrange to allow the edges to touch.
These strips of rosettes may be used as festoons.
As
decorations for cakes or dishes of fruit they can
be used most effectively.
Shields for Luncheon Cards (Cardboard, red and
blue paper, baby ribbon—red, white and blue,
gold paint, water-color paints—red and blue)
Attractive luncheon or supper cards, suitable for
patriotic occasions, may be made in the form of
shields. Turn to the fourth page of Webster's Unabridged
Dictionary, and find the shield used as the
American Coat-of-Arms. This shield, enlarged to a
size measuring 2½ inches in length and 2½ inches
in width across the upper part, forms an excellent
model. If one does not draw habitually, use tracing
paper when tracing the pattern. If one uses watercolor
paints successfully, paint the deep blue band
across the upper part of the shield, and the twelve
red stripes running from the band to the lower edge
of the shield. For those who do not paint, dark red
and blue paper may be substituted very successfully.
A touch of gold paint on the edge of the shield adds
greatly to the effect.
Write each guest's name on a card measuring 2½
inches in length and 1½ inches in width. Attach a
card by means of red, white and blue ribbon to upper
corner of each shield.
Rockets (Red, white and blue paper, paste, gold paint,
slender wooden sticks)
Rockets are made in the same manner as firecrackers,
excepting that the paper strips are cut wider,
viz.: 3 or 4 inches in width, and more strips are required
to give the proper size. This may be left to
the maker's discretion.
When the rockets are rolled and pasted after the
manner
of the firecrackers, insert the sharp point of
a pencil into the center of one end of each roll, and
gently push out this center to the distance of two
inches. This will give the pointed end of the rocket.
These pointed ends may be gilded, as well as the slender
sticks which are inserted at the other ends.
The words "parade" and "procession" are associated
in the minds of most American children with
long lines of soldiers, and the small boy will play for
hours putting his tin soldiers in rank and file, or
marching with his comrades, with pans for drums.
In these later days, when the spirit of the Peace
Congress is in the air, it is well that the children
should become interested in struggles and battles of
a different and higher order and in the parades in
which long lines of honorable workers take part.
In this country all self-respecting people are
workers in one way or another, and though in the
course of progress of coöperative movements and combinations,
among many kinds of workers, there may
have been much of injustice, such movements have
also been accompanied by self-sacrifice, courage and
generosity of a high order. In time the good will
far out-weigh the evil. As Labor Day approaches, the
children, especially if the father expects to take part,
will be readily interested in the day and what it
should mean—the solving of the great problem of
the twentieth century. Meanwhile let the children
feel the beauty of Walt Whitman's lines:
"Ah little recks the laborer
How near his work is holding him to God,
The loving Laborer through space and time."
The Labor Day parade is a revival, or survival
in modern guise, of the mediæval processions of the
Guilds. Such a procession is charmingly represented
in Wagner's delightful opera, "Die Meistersinger,"
wherein, on a festival day, we see the bakers enter,
bearing the insignia of their trade, enormous pretzels
and other cakes. The cobblers march in with gigantic
boots and slippers suspended from tall poles; the
butchers carry hams and festoons of sausages, etc.
The child may imitate such a parade in his play.
In talking with the child, emphasize the obligation
to do good, true work and to take pride in such.
Let fidelity and trustworthiness be his watchwords.
Parade (Poles or broom handles, wrapping paper or
newspaper, scissors, tacks, rakes, spades, etc.,
flags and banners)
Let the children cut from the paper large outlines
of shoes, boots, hams, saws, try-squares, clocks,
watches, enormous pens, knives, forks, etc., and fasten
with pins or tacks to the poles. Then march to the
tune of some stirring air.
Some may be able to secure small garden rakes,
spades and toy brooms to carry. The American flag
and banners should also be carried.
Toy-Processions (Trade catalogues, toothpicks, paper
dolls, etc.)
Cut out paper dolls and let each one carry a tiny
toothpick upon which has been pasted a picture cut
from some catalogue. These catalogues will furnish
pictures
of shoes, carriages, saws, hammers, watches,
furniture, etc. Be sure that little American flags are
also carried. Dolls may be glued to spools for standards.
Place Cards for Dinner
1. (Bristol board, scissors, paints, brush)
Make place cards of Bristol board, which may
be cut into shape of shoes, watches, etc., and painted
accordingly. The name of guest may be placed on
reverse side. Or, on plain white card, paint a picture
emblematic of a trade and write upon it also some
quotation from a writer of democratic spirit.
2. (Tiny cast-iron rakes, spades and hatchets—1
cent each.)
As a souvenir, give each guest a tiny cast-iron
spade, rake and hatchet tied together with cord. Or,
for a joke, these may be placed by each plate instead of
knife, fork and spoon.
3. (Pen and ink or pencil, white card.)
Draw on a plain, white card a picture of an ant,
bee or beaver as emblematic of labor. Use for place
cards.
4. (Frances S. Osgood's poem, "Labor," white
cards, pen and ink.)
On each card write one stanza of this beautiful
poem, and after the close of the meal let each guest
in turn read the lines on his card. It would be well
for every child to commit this poem to memory. It
is long, but sings itself easily into the mind. The
word-pictures it calls up are exquisite and the learning
of it, little by little, would not be an unhappy task.
This is the festival which is given over to all
kinds of merry pranks and is dearly loved by the children.
It is an opportunity to teach them to discriminate
between the fun which is kindly and that which
is malicious and productive of needless pain.
Ducking for Apples and Nuts (Large pans or tubs,
apples, nuts, pennies)
Let the children, young and old, for once get
themselves wet, if necessary, in ducking for the nuts
and apples floating in the water. With a little suction
some of the children will be able to get pennies
from the bottom of the tub.
Fortune-Telling
1. With Needles. (Needles, pan of water)
Name a needle for yourself and one for a friend,
and put in the water, but not together. If they move
safely across, it betokens good luck. Two needles
meeting indicate life partnership.
2. With Toy Ships. (Pan of water, nut ships as
described on page 22 )
Name one little vessel for yourself and one for a
friend and set them afloat. If they come to port on
the other side all is well.
3. With Apple Rinds. (Apple, knife)
Pare an apple so that the skin comes off in one
long piece. Toss over the head upon the floor, and
the form it takes will give the initial letters of the name
of one's future mate.
4. With
Cake. (Cake, thimble, ring, penny, etc.)
Bake a cake, hiding in the dough a thimble, a
ring and a penny. When cut, the recipient of the ring
is fore-doomed to marriage; the one getting the thimble
will be a spinster; the one receiving the penny will
have the pleasures and responsibilities of wealth.
Apple-Biting Contest (Apple suspended from a
string)
1. The apple is set swinging and two people,
standing opposite each other, try as it passes to seize
and hold it in the mouth. They must not touch it with
the hands.
2. Tie an apple by its stem to the middle of a
string about a yard long. Then two people, each taking
one end of the string in the mouth, begin, at a
signal, to gather it as fast as possible into the mouth,
and so to reach the apple. This belongs to the one
reaching it first.
Refreshments
Apples, nuts, popcorn, cider, gingerbread and
doughnuts are suitable for lighter refreshments.
Baked beans and plain ice-cold rice pudding were
once eaten with decided relish at a New York City
Hallowe'en party, the city people evidently enjoying
the contrast between this feast and the usual caterer's
service. Serve fruit from a kettle suspended from
three cross-sticks, a la witch.
Decorations
Jack-o'-lanterns of pumpkins; strings of apples,
popcorn and cranberries, and toy brooms hung here
and there, as reminders of the witches who are said
to
be abroad, will add to the occasion. The pumpkins
should be cut to resemble skulls.
Reading
Have some one read "Tam O'Shanter's Mare"
(Burns); also some good ghost story. Thomas Kendrick
Bangs' "Ghosts Which I Have Met" contains
some good stories, all absurd. Choose a good reader
for this.
Place Cards
1. (White or tinted cards, Palmer Cox Brownies,
ink, pen)
The Brownies are delightfully funny little people
without a suggestion of anything coarse or evil. The
children love them. Let the older ones copy and cut
them out to use as invitation cards for the Hallowe'en
party or for place cards.
2. (See "Pricking," page 165.)
Since witches are always associated with the
pricking of pins, this is an appropriate occasion for
using the kindergarten pricking. Outline some of the
Brownies on tinted cards and prick as directed on
page 165.
3. (See Pumpkin Jack-o'-lantern cards, page
135.)
Place Cards (White paper or cardboard, brush and
paints or pen and ink)
1. Cut out a turkey, copying from some picture
if necessary. (Picture may be found in dictionary.)
If
skilful with brush or pen, indicate the feathers,
eye, etc.
2. Draw picture of a pumpkin. Cut it out. Paint
in deep orange tones with shadings of brown. Cut into
it eyes, nose and mouth, suggesting Jack-o'-lantern.
3. On white cards write stanzas from Whittier's
poem, "The Pumpkin Pie," and let each guest read
his stanza in turn.
4. Cut as many triangles as there are guests and
paint each to resemble a slice of pie. One side of
triangle should be curved.
5. Find a simple figure of a Puritan maiden and
draw in outline; then cut out and paint or draw in
black ink the important lines. Use as place card.
6. Make little walnut boats (see page 22), and
on each sail write name of guest.
7. Find picture of Mayflower and copy on white
card. On reverse side write a stanza of "The Breaking
Waves Dashed High." Let each guest read his
lines. (Or parts of "Hiawatha" about Mondamin
may be used.)
Table Souvenirs (Tiny cast-iron gardening tools, 1
cent each)
As described under Labor Day, these tiny penny
tools may be put at each place, the hatchet representing
the knife, the rake the fork, and the spade the
spoon. Attach name of guest to set.
Butter Modeling (Clay modeling tools, firm butter)
If any child has acquired a little skill in clay
modeling, let him try his hand at modeling out of
firm butter some form expressing a Thanksgiving
thought.
It may be a piece of fruit, or some animal.
Get clay modeling tools at art store.
Center Piece (Pumpkin, knife, fruits and vegetables)
Hollow out a pumpkin in such a way that a part
of the rind is left as a handle to the remaining part,
which serves as a basket. Into this basket put a
variety of fruits and vegetables, emblematic of the
bounties for which we are grateful.
Jack-o'-lantern (Pumpkin, knife, candle)
We doubt if any boy needs to be told how to cut
a face in a pumpkin. A sharp knife will soon make
the cuts for eyes, nose and mouth in the rind, the
seedy contents having been previously removed. A
hollow may be cut in the bottom of the interior to hold
the candle, which can be made still steadier by melting
a little from the bottom and letting it drip into this
hollow, forming a waxy bed into which the candle
may be inserted.
Candlesticks
See pages 24 and 64 for those made of apples
and of cardboard and colored papers.
Room Decorations
1. Corn Stalks. (Strong cord and needle, hammer
and tacks.)
Stack cornstalks in the corners of the rooms in
effective positions, two or three to a corner. Those
living in cities may find it well to secure these from
farmer friends some time before the holiday.
2. Unhusked Ears of Field Corn. (Strong cord.)
The corn husks must be turned back from the
ears and cut off from them without loosening the separate
leaves.
Then a number of these husks may be
strung upon a strong thread or string alternating
with the ears of corn. Hang along the upper part of
the wall as a frieze. The rich, warm tones of the
brown and yellow are very effective.
3. Cranberries and Brussels Sprouts. (String,
needle.)
Run upon a string half a dozen cranberries, then
a Brussels sprout; then more cranberries, etc., and
suspend this as a festoon along mantelshelf, in chandelier,
or over window.
4. Autumn Leaves. (See page 47.)
5. Autumn Boughs. (Oak boughs.)
Oak boughs, with the rich red and russet leaves
still upon them, are very handsome in the autumn.
The beautiful branches may be gathered by the young
people and hung in parts of the room where most
effective.
Place Cards
1. (Sheet black paper, Chinese white water-color
paint, brush.) Cut a stocking from the black paper
(obtainable at kindergarten supply store). With
the paint, paint in white toes and heels. On the reverse
side write some appropriate quotation and name
of guest. Stockings may be about four inches long.
2. (White paper, black ink or crayon.) Cut a
rough figure of a snowman out of white paper, put in
features with black ink or crayon, and write name on
reverse side.
3. (Water paper, water-colors, scissors, spray of
holly.) From real holly or a picture of same, paint a
spray
of green leaves and red berries. Cut out around
the edges and use as name card.
4. (Red cardboard, scissors, pen, ink.) Draw an
outline of a bell on cardboard and cut out. An appropriate
sentiment may be written upon one side and
name of guest upon the other.
Surprise Nuts (See page 23)
Snowflakes for Tree (See page 59)
Snowball (White cotton batting, snowflake crystals
from toy store, white cotton cloth, sewing thread,
mucilage)
Cut two circles of cotton cloth, stuff with the batting,
after sewing into shape of ball. Cover lightly
with snowflake crystals, first dipping ball lightly into
thin mucilage. Suspend from tree.
Candles (Paraffine or old candles, kettle, soft cotton
string, small box of sand, pencil)
Candles have sometimes been made in the kindergarten
in either of the following ways:
1. Heat a pound of paraffine (bought at grocer's),
or melt up some old candle ends in a kettle. Place in
front of the child a cigar box containing about a
quart of moist sand, smoothed level. Then with his
pencil let him press into the sand, making a deep, hollow
mold just the width of the pencil. Now let him
hold a short piece of string so that it hangs down into
this mold. An older person will then pour some of
the melted wax into the mold. It will cling to the
string, and in a moment or two will cool enough to be
drawn out, making a little candle that can be used for
the
Christmas tree, or put into a clay candlestick, also
made by the child. (See below.)
2. Put the kettle containing the melted wax before
the child and let him dip into it a piece of string about
four inches long. Then let him take it out in a moment
and lay it aside to cool. A very little wax will
cling to it. Meanwhile he dips in another string and
puts aside to cool. When cool he takes up the first
one and dips it in a second time, and a new coat of
wax adheres. He proceeds thus until the candles are
as large in diameter as desired (about ½ inch at base).
The candles may be put into clay candlesticks, also
made by the child.
Candlesticks (Clay, a tin or china candlestick to use
as model)
Let the child take a candlestick and copy in clay;
it should be of simple form, a mere cylinder, with
just enough of a base to make a firm standard.
Candlesticks (Cardboard, scissors)
Cut small squares of cardboard. The candles may
be made to stand temporarily upon these by melting
the lower ends of the candles and letting some of the
wax drip upon center of the cards, and then pressing
the candle down upon the melted wax. These may
be placed upon the table on Christmas morning.
Christmas Carols
Let the children learn some simple old carol, as
a secret, and Christmas morning have them sing it
softly and sweetly to awaken father. A full program
of songs suitable for this most beautiful of days
will be found in the little book, "The Children's Messiah,"
compiled by Mari Ruef Hofer, price 20 cents.
It
gives also the address of a firm publishing stereopticon
views for illustrating the program suggested.
Spider-Web Party (See page 104)
Arrange the twines of several colors as described
on page 104, and at the end place the gifts belonging
to each child.
Popcorn (Popcorn, popper, thread, needle)
Pop the corn and string into festoons with which
to decorate the tree.
Christmas Bells (Red cardboard, scissors, thread,
needle)
Make bells as described on page 109, only make
them of various sizes. String, and use to decorate
table or tree, or to festoon from the center of the
ceiling to the corners and sides of the room.
Kindergarten Lanterns (Red, gold, or silver paper,
scissors, thread, paste)
Take a kindergarten square of pretty paper or
make a square of some attractive wrapping paper.
Fold once into an oblong. Now cut a series of parallel
lines from the fold toward the edge, stopping each
about ½ inch from edge. Open and paste one end so
that it overlaps the other, the cuts running vertically.
This makes the lantern bulge out a little at the fold,
giving a Japanese lantern effect. Suspend by a thread
tied to the upper edge or paste a narrow strip of paper
on for a handle. Use as decoration for Christmas tree.
Paper Chains (See pages 56 and 115)
Reading
Read a part or the whole of Dickens' "Christmas
Carol," "The Chimes," or "The Cricket on the
Hearth;" or "Is There a Santa Claus," by Jacob Riis;
or "The Birds' Christmas Carol," by Kate Douglas
Wiggin. Longfellow's "Arsenal at Springfield" and
"A Christmas Hymn," by A. Domett, are also appropriate.