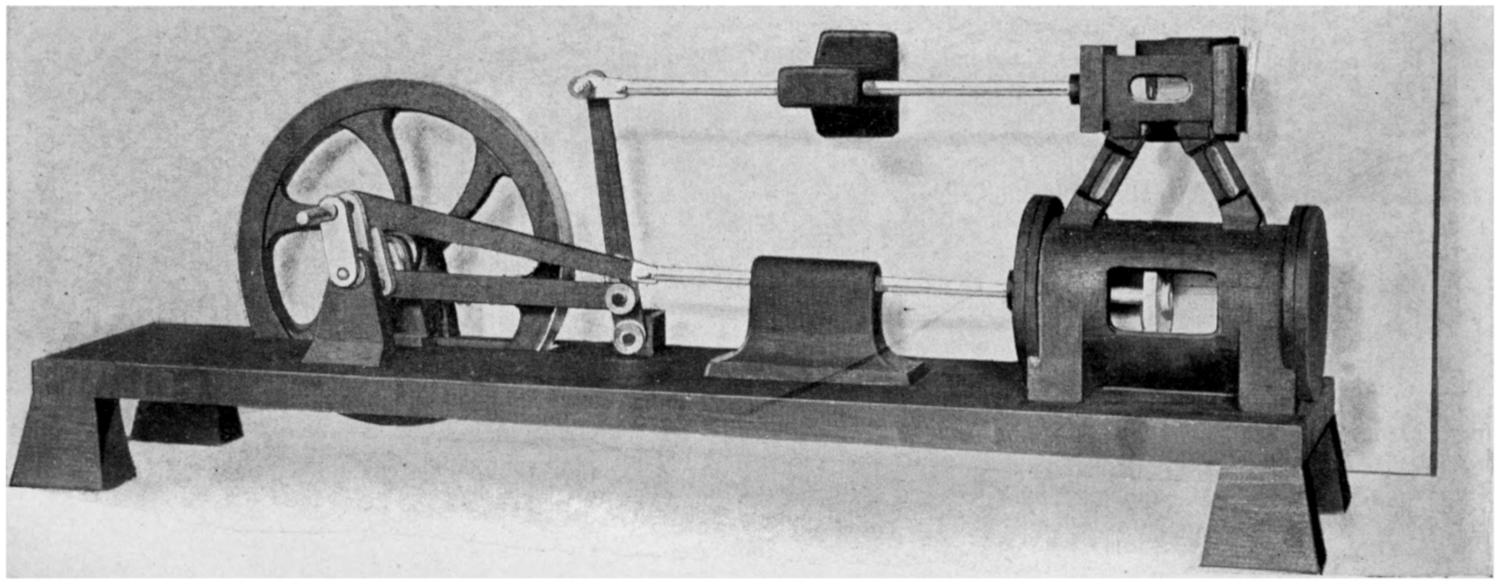
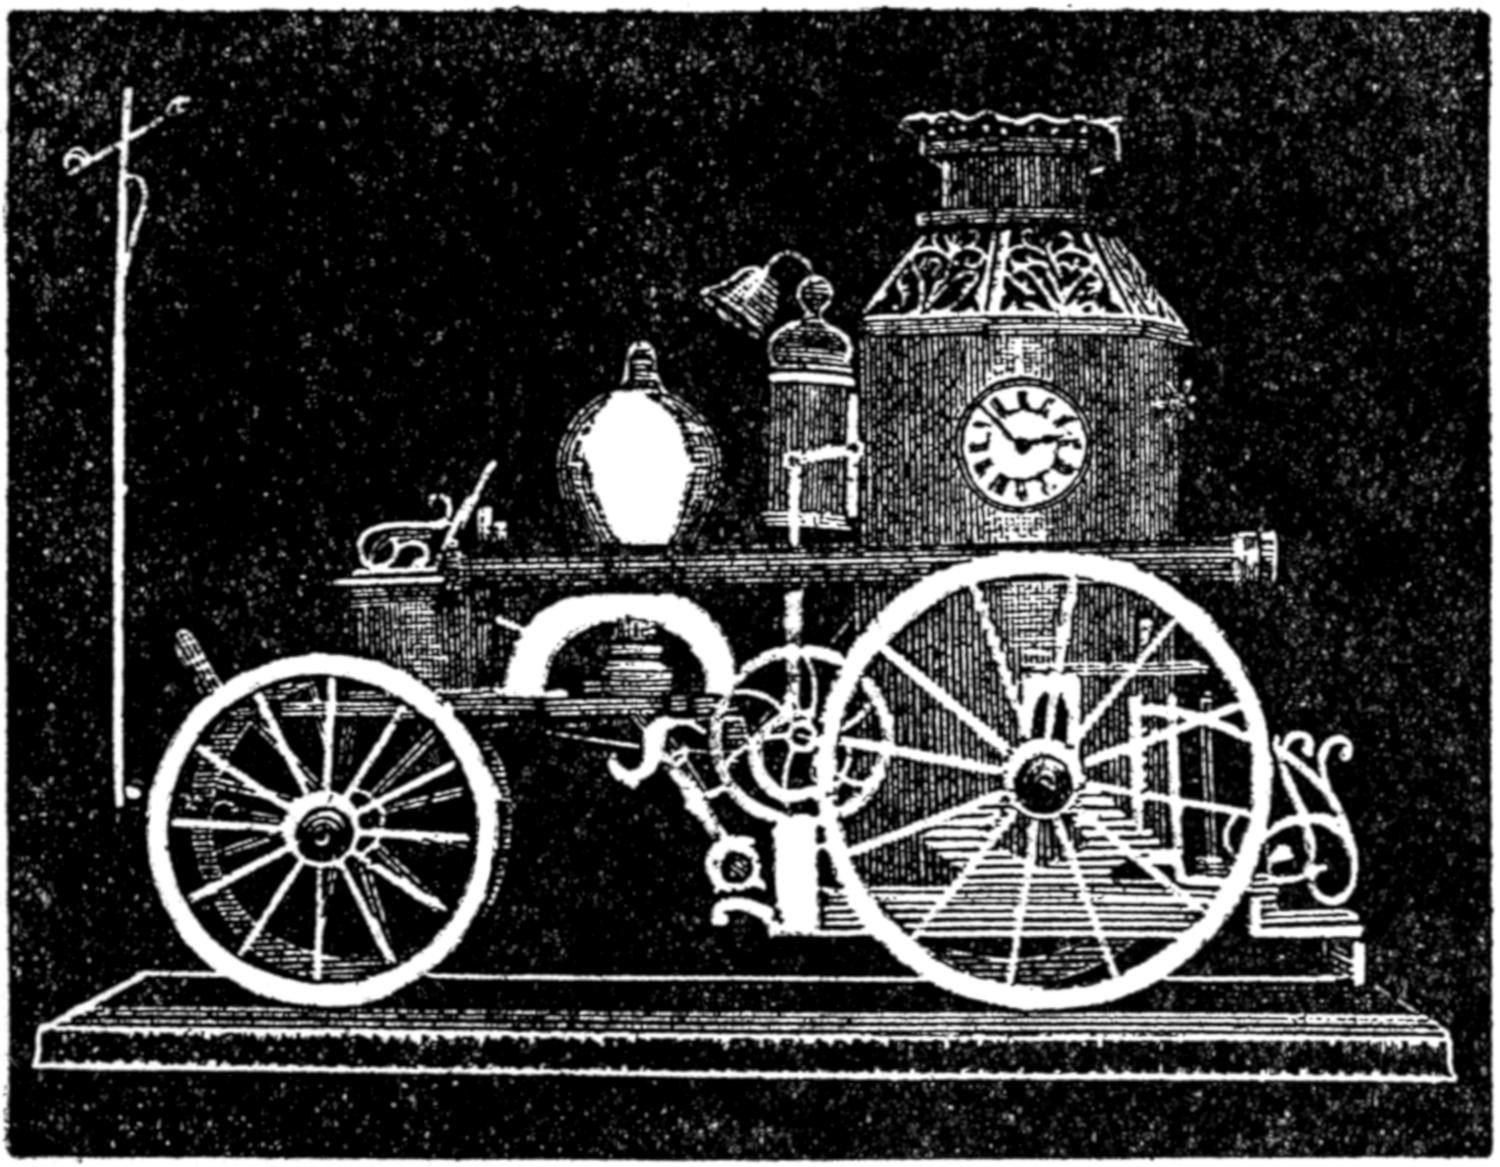
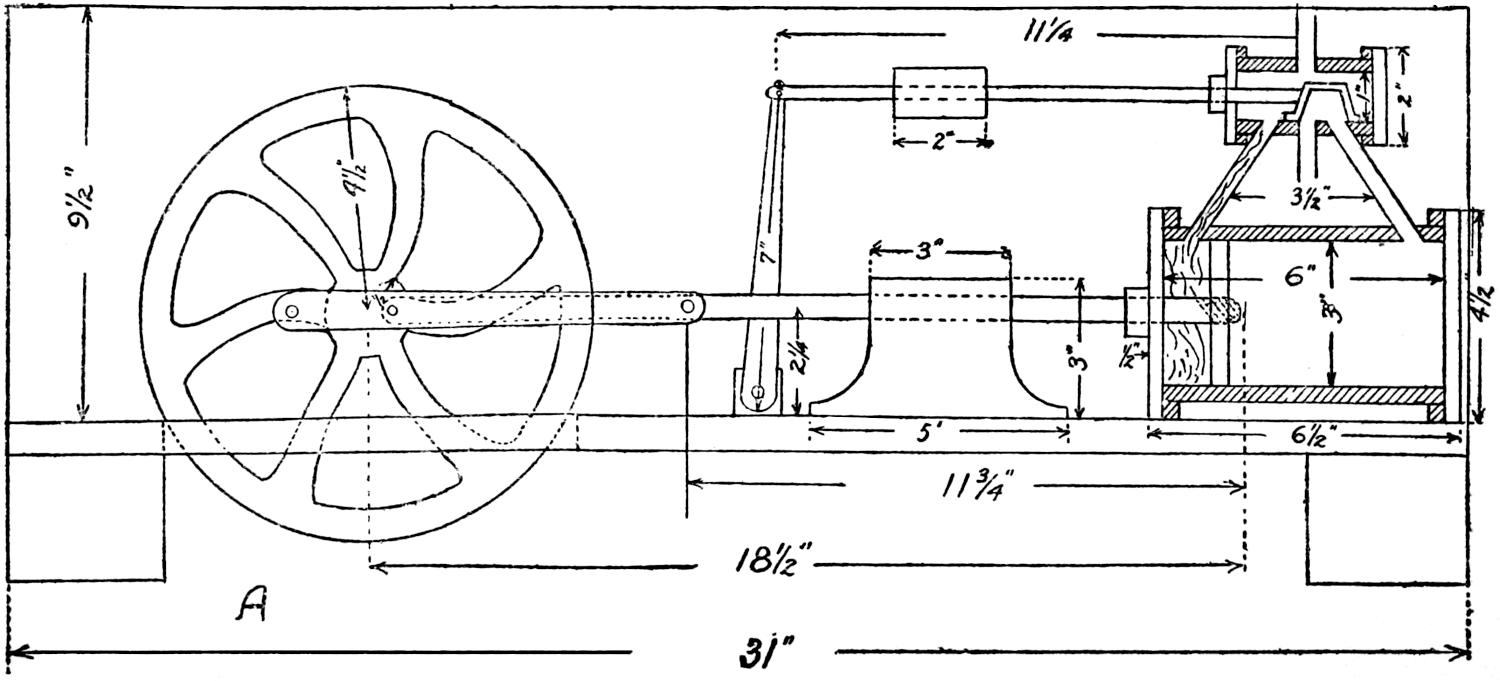
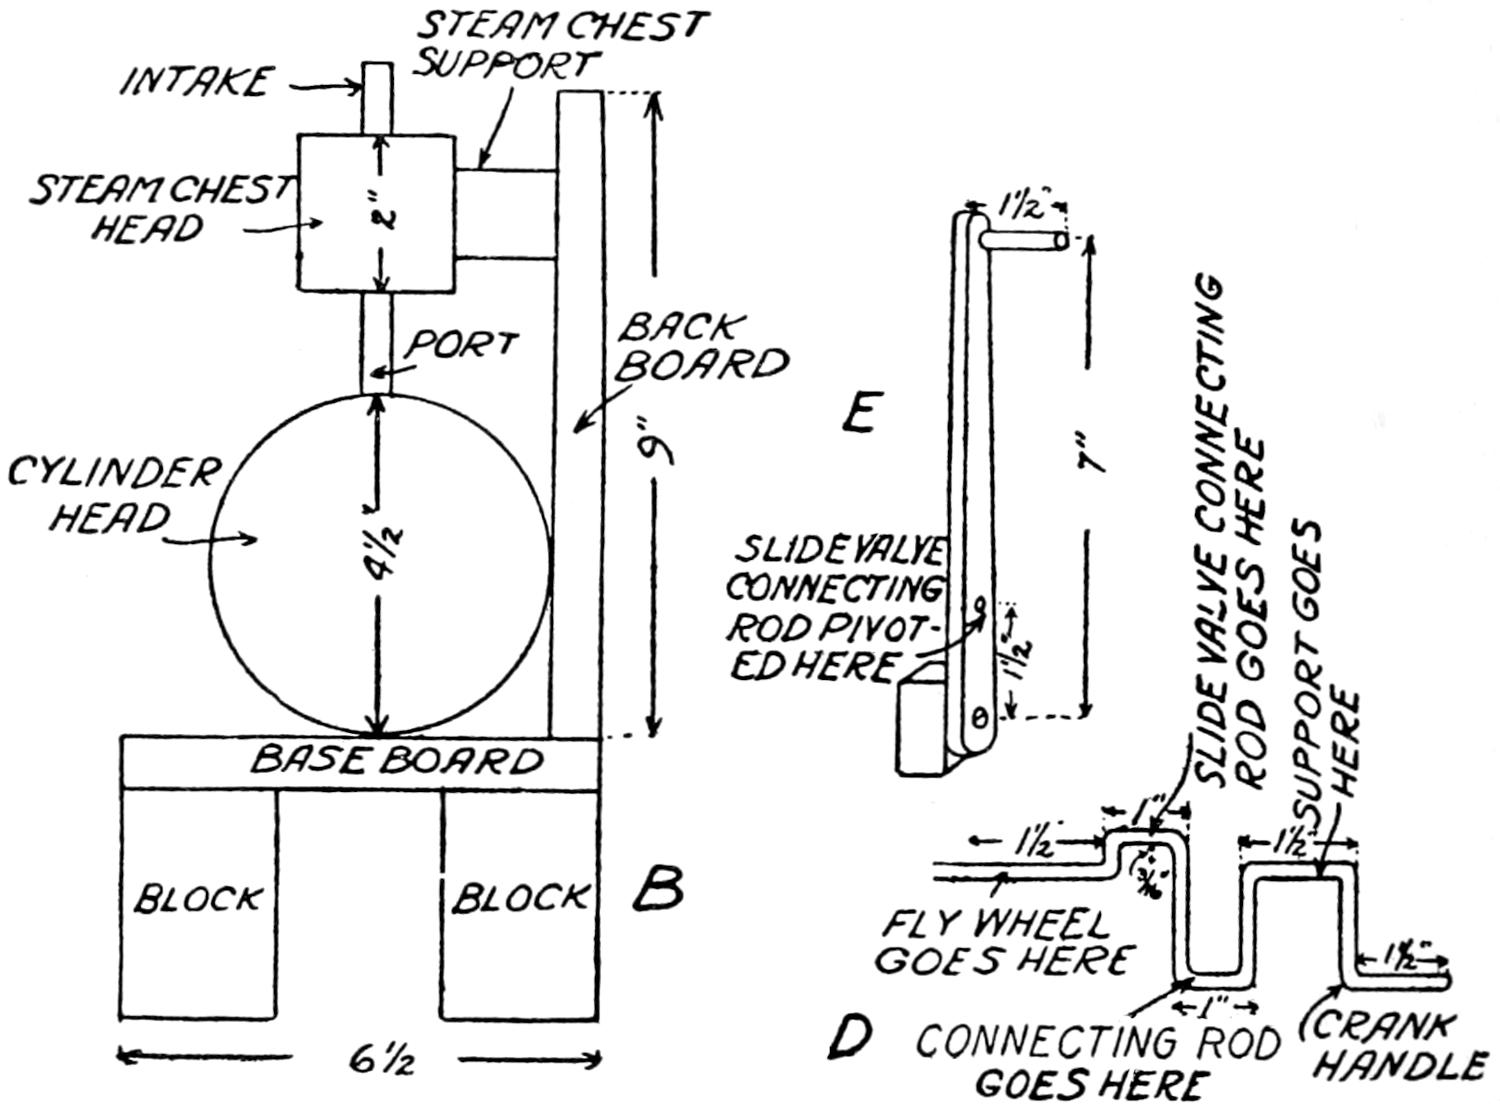
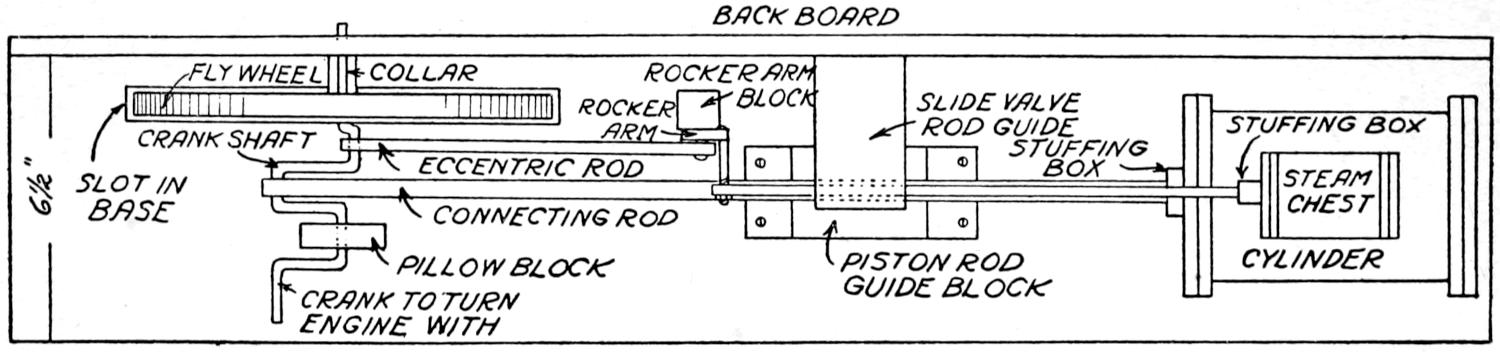
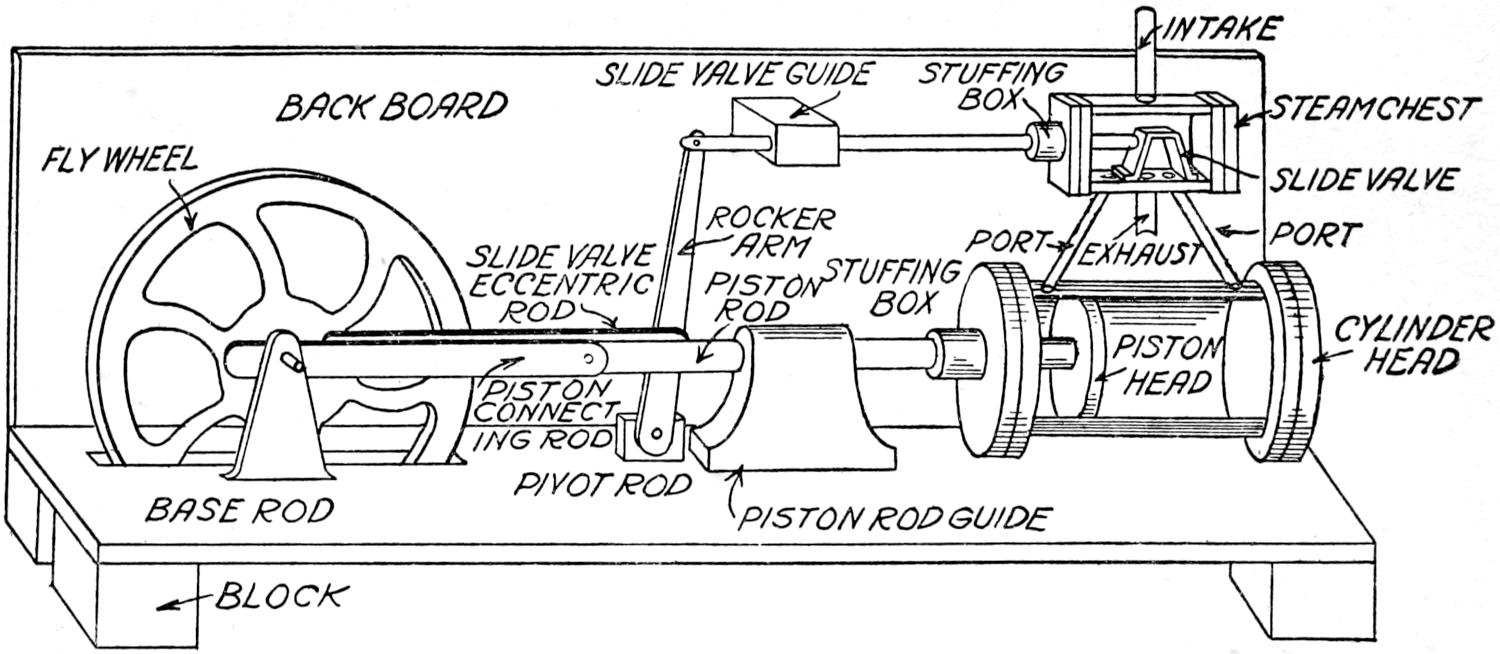
A MODEL ENGINE CONSTRUCTED FROM DIAGRAMS SHOWN IN THIS BOOK
HANDICRAFT
FOR BOYS
BY A. FREDERICK COLLINS
INVENTOR OF THE WIRELESS TELEPHONE Author of “Inventing for Boys,” “The
Boys’ Book of Submarines,” etc.
WITH 185 ILLUSTRATIONS AND DIAGRAMS
NEW YORK FREDERICK A. STOKES COMPANY PUBLISHERS
Copyright, 1918, by Frederick A. Stokes Company
All rights reserved
TO MY NEPHEW AND NIECE CLARENCE AND MAY ZEITLER
A WORD TO THE BOY
Your life, if you live it like the average boy, is
split up into four parts and these are (1) eating, (2)
sleeping, (3) working and (4) playing.
Now I haven’t a word to say about the first three
phases of your existence for you will attend pretty
well to the eating and sleeping ends, and your elders
will quite likely see to it that you get enough work to
do in and out of school.
But when it comes to playing I want to edge in, for
this is a very important and often a sadly neglected
part of your daily routine. There are three kinds of
playing, namely (a) where your mind only is engaged
as for instance at dominoes, checkers or chess, (b)
where your body is chiefly in action as in gymnastics
and outdoor games, and (c) where your mind and
body are doing something more or less constructive.
This book which I have written for you deals
with playing of the latter kind and while I don’t want
you to get so interested in any of the various arts and
crafts described to the extent of using all your spare
hours doing it, still it is a great mistake not to have
a hobby such as jig-sawing, printing, die-sinking or
the like. There is something tremendously fascinating
about visualizing things in your brain and then
fashioning them with your hands and you ought to
do it.
Different from other kinds of playing the by-products
of these arts and crafts last a long time after
your efforts have been spent upon them and it is a
source of great pleasure to look at them once in a while
and know that you made them with your own hands.
Not only is there the fun of planning and doing
the things I have described, but you will at the same
time pick up a lot of information and, what is of far
more value, your brain and eyes and hands will learn
to work together like a dynamo direct connected to
an engine, and then you can depend on them to serve
you well whenever the occasion may arise.
The Tools You Need — The Kinds of Tools — Some Hints on Using
Tools
How to Hold a Hammer — How to Use a Saw — How to Use a Plane — How to Use Chisels and
Gouges — How to Use a Brace and Bit — How to Use a Rule — How to Use a Marking Gauge — How to Use Hand Screws and Clamps —
How to Use a Nail Set — How to Use a Gimlet — How to Drive Nails and Screws — How to Make a Glue-Pot — How to Make Good
Glue and How to Use It
How to Sharpen Your Tools
About Sharpening Saws — About Sharpening Chisels and Plane Bits — About Sharpening Auger
Bits
How to Take Care of Your Tools — Removing Rust from Tools — To Etch
Your Name on Tools — Kinds of Wood to Use
Pine; Cedar; Mahogany; Oak; Birch; Walnut
How to Make Joints
Edge Joints — Corner Joints
About Working Drawings — Things for You to Make
How to Make a Work Bench — How to Make a Tool Chest
Scroll Sawing Outfits — A Cheap Scroll Sawing Outfit
How to Use the Scroll Saw
A Few Other Helpful
Things
A Hand Saw-Table — Files for Scroll Work — A Twist Drill Stock — A Pair of Pliers — A
Small Hammer — Scroll Saw Blades
How to Trace a Design on Wood — Designs for Scroll Sawing — Foot-Power
Scroll Saws
The Cricket Scroll Saw — The Lester Scroll saw — The Fleetwood Scroll Saw
How a Foot-Power Scroll Saw Works — How to Saw on a Foot-Power Scroll
Saw — Fancy Woods for Scroll Saw Outfits — Table of Scroll Saw Woods — Trimmings for Boxes, Etc.
Turning in Wood
Get a Lathe First
How a Lathe is Made
The Cheapest Lathe You Can Buy
Attachments for the Companion Lathe
Turning Tools for Wood — How to Turn Wood
The Art of Wood Carving
Your Set of Carving Tools — The Best Woods for Carving — Kinds of
Wood Carving
Chip Carving — Panel Carving — Carving in Solid Wood
Pyrography, or Wood Burning
The Necessary Tools
How to Make an Etching Tool — How to Make an Alcohol Lamp — A Better Outfit — About the
Designs — How to Burn in the Designs
Your Kit of Tools — The Various Kinds of Tools — Some Hints on Using
the Tools
About Sharpening Tools
Metals and Their
Uses
Iron Wrought Iron Steel Tin Zinc Lead Copper Aluminum
A Few Useful Alloys
Brass Type-Metal Pewter
How to Do Metal Work — First Sketch Your Ideas — Sheet Metal
Work
Cutting and Sawing — Making Seams and Joints
How to Solder Metals
Fluxes Solders
Bolts and Rivets — Bending Sheet Metal — Finishing Up Metals — Coloring
Metals
Bluing Steel — Bluing Brass — Giving Brass a Green Color — Giving Brass a Dull Look —
Frosting Brass Articles — Lacquering Brass and Copper — How to Make the Lacquer
IV.
VENETIAN IRON, REPOUSSÉ, PIERCED BRASS AND PEWTER WORK
The Tools You Must Have — The Materials You Need — What to Do
First
Making a Simple Design
How to Make a Toaster — How to Make an Egg Boiler — How to Make a
Venetian Plate Holder
A Dead Black Finish for Iron Work
Doing Repoussé Work
Tools Needed for Repoussé Work — How
toPrepare the Work — Tracing the Design —
Bossing the Work — How to Make a Flat Candlestick — How to Make a Photo Frame
Cleaning and Polishing Metal Work — Finishing, Coloring and Lacquering Metals
Pierced Metal Work
The Outfit to Do it With — How to Do the Work
Casting and Working Pewter
Something About Pewter — How to Make Pewter — About Working Pewter —
How to Cast Pewter — The Patterns Necessary — Making the Mold — Finishing the Ware
Talent versus Practice — Pictures for You to Draw — Simple Line
Sketches — Sketching Simple Outline Figures — The Proportions of the Human Figure — How to Draw Faces — Sketching Still
Life Objects — Drawing in Perspective
The Vanishing Point
How to Shade a Drawing
Working Drawings
Drawing Tools You Should Have — Simple Working Drawings
Making Plain Drawings — Isometric Perspective Drawings
Some Simple Aids to Drawing
How to Draw a Circle — How to Draw a Spiral — How to Draw an Ellipse —
How to Make and Use a Pantagraph — Howto Make
a Reflecting Drawing Board — How to Make Tracings — To Make Lasting Impressions — The Ancient and Honored Art of Cutting
Silhouettes — Transfer Pictures of Decalcomania
Kinds of Printing Presses — The Parts of a Self-Inking Press — How the
Press Works — Sizes and Prices of Presses — The Outfit You Need
Outfit for a 3 × 5 Press — Outfit for a 5 × 8 Press — Outfit for an 8 × 10 Press
About Type and Type Setting
Relative Number of Type Letters — Styles of
Type — The Parts of a Type — The Sizes of Type — Table of Type Sizes — Your Type Cases — Setting the Type
Making Ready — Printing the Job — How to Clean Type — About
Distributing Type — The Ink and Rollers — Printing in Colors — Printing in Gold — And Finally Your Stock Supply
The Art of Paper Making
What Paper Is — How to Make Paper
Making the Pulp — The Molds You Need — Laying the Paper
Sizing and Finishing
How to Bind Books
Making the Cover — Sewing the Book — Putting on the title
VIII.
RUBBER STAMPS, DIE SINKING, BURNING BRANDS AND STENCILS
Making the Mold — Vulcanizing the Rubber — Mounting the Rubber — How
to Use a Rubber Stamp
How to Make an Ink Pad
How to Make Rubber Stamp Ink — How to Make a Copygraph Pad — How to
Copy a Letter — How to Make Hectograph Inks
Die Sinking
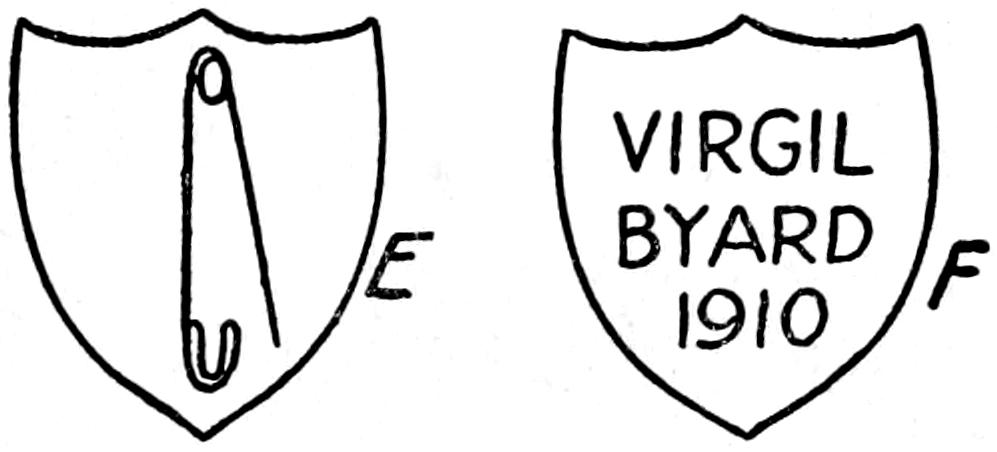
How to Make Badges, Name Plates, Etc. — How to Sink the Letters —
Finishing Up the Badge
Burning Brands
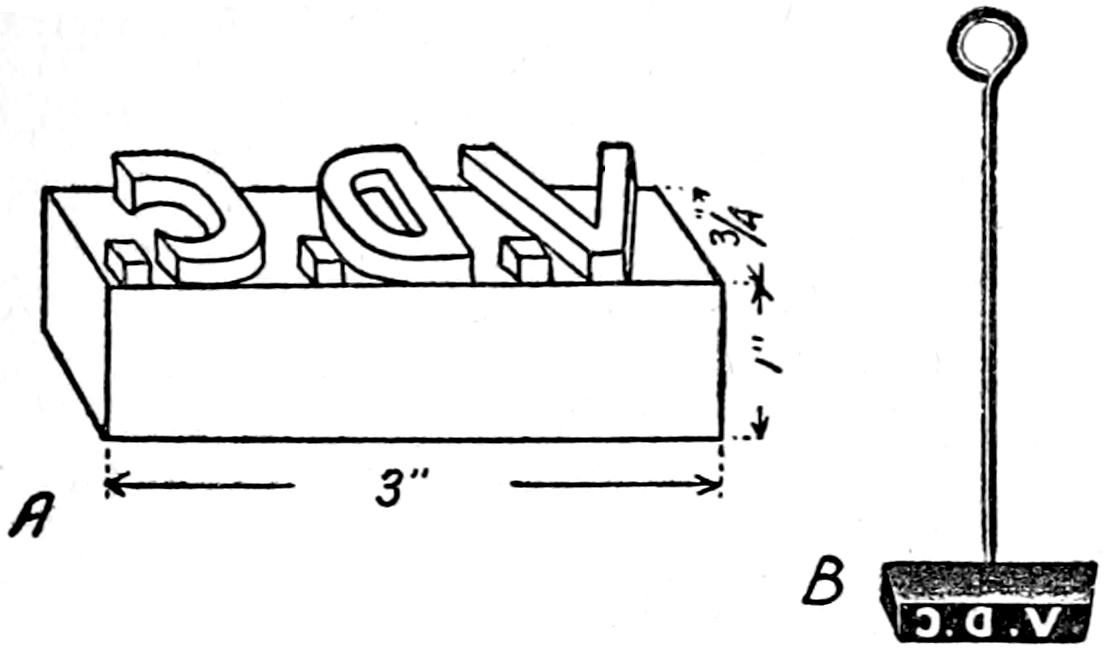
How to Make a Burning Brand
How to Use the Burning Brand
Stencils
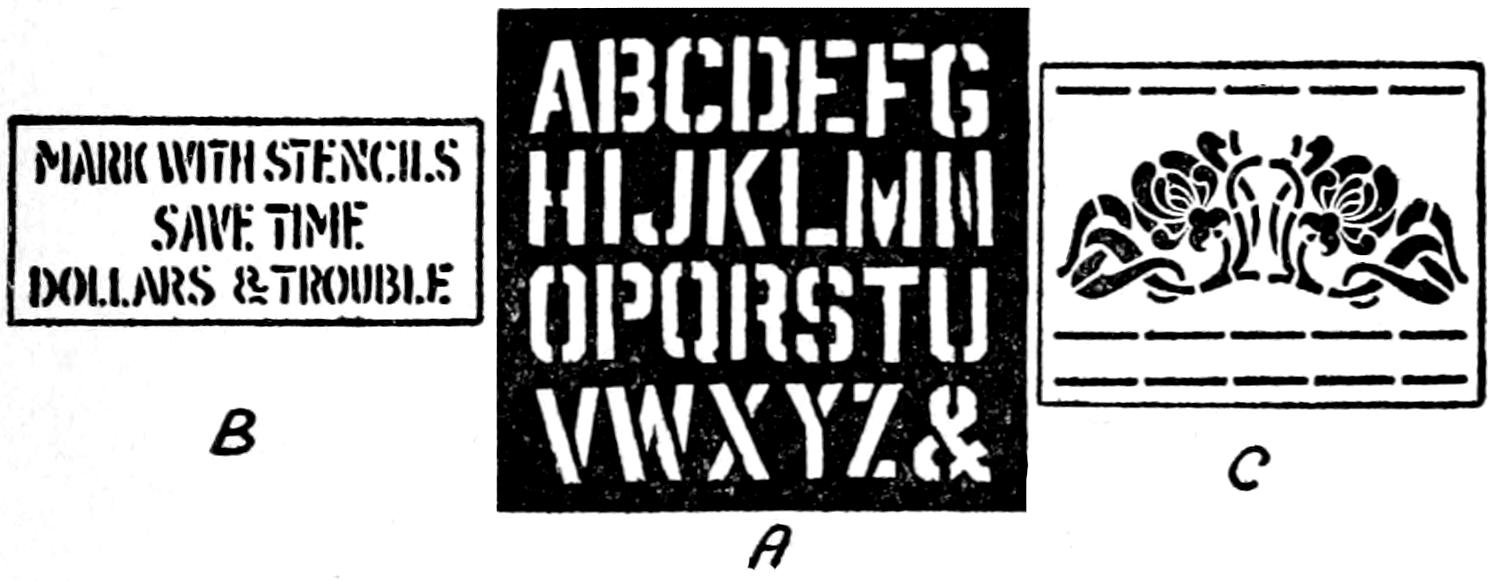
How to Cut Stencils
Cutting Paper Stencils — Cutting Brass Stencils —
How to Use Practical Stencils — How to Make Stencil Ink — How to Use
Decorative Stencils — Mixing Colors for Stenciling Borders
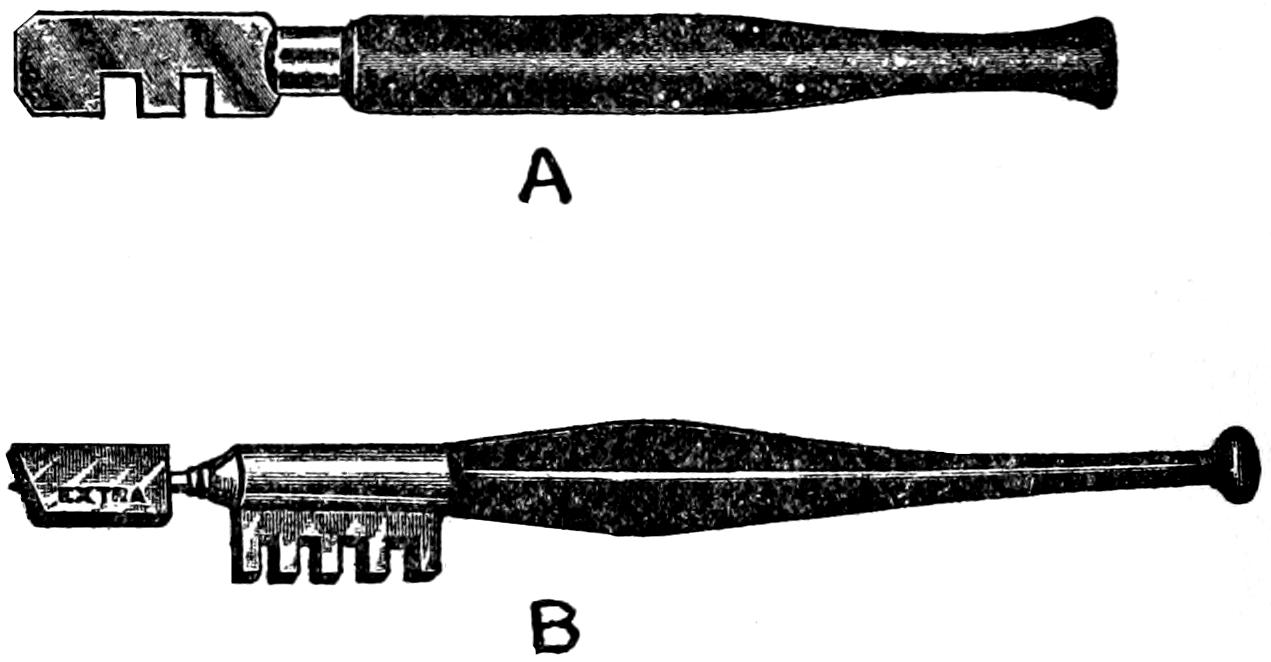
What Glass Is — How to Cut Glass — How to Use a Glass Cutter — How
to Finish off Glass Edges — How to Drill Holes in Glass — A Couple of Ways to Cut Glass Tubing — How to Cut Glass Disks —
How to Bend Glass Tubing
What a Bunsen Burner Is
How to Blow Glass — To Round the Ends of Tubes — To Border the
Ends of Tubes — To Seal One End of a Tube — To Make a Glass Nozzle — To Make a Hole in a Tube — To Join Two Tubes of the
Same Size — To Join a Tube to the Side of Another Tube — To Blow a Bulb on the End of a Tube
How to Make a Blowpipe — How to Blow a Bulb
How to Etch Glass
The Sand Blast Process — How to Make Ground Glass — The Acid Process
How to Make a Policeman’s Puzzle — How to Make an Automobile Truck —
How to Make a Swell Coaster — How to Make A Nifty Wheelbarrow — How to Make a High-Low Swing — How to Make a Stick Horse —
How to Make a Pony andCart — How to Make a
Life-Like Goose — How to Make a Dancing Sambo — How to Make a Wireless Pup
Thirty Minutes of Chemistry — The Mystic Glass of Milk — The Magic
Fountain — The Vicious Soap Bubbles — The UncannyWheel — Giving a Travelogue — An Electrical Soirée — Demonstrating Electricity Without
Apparatus
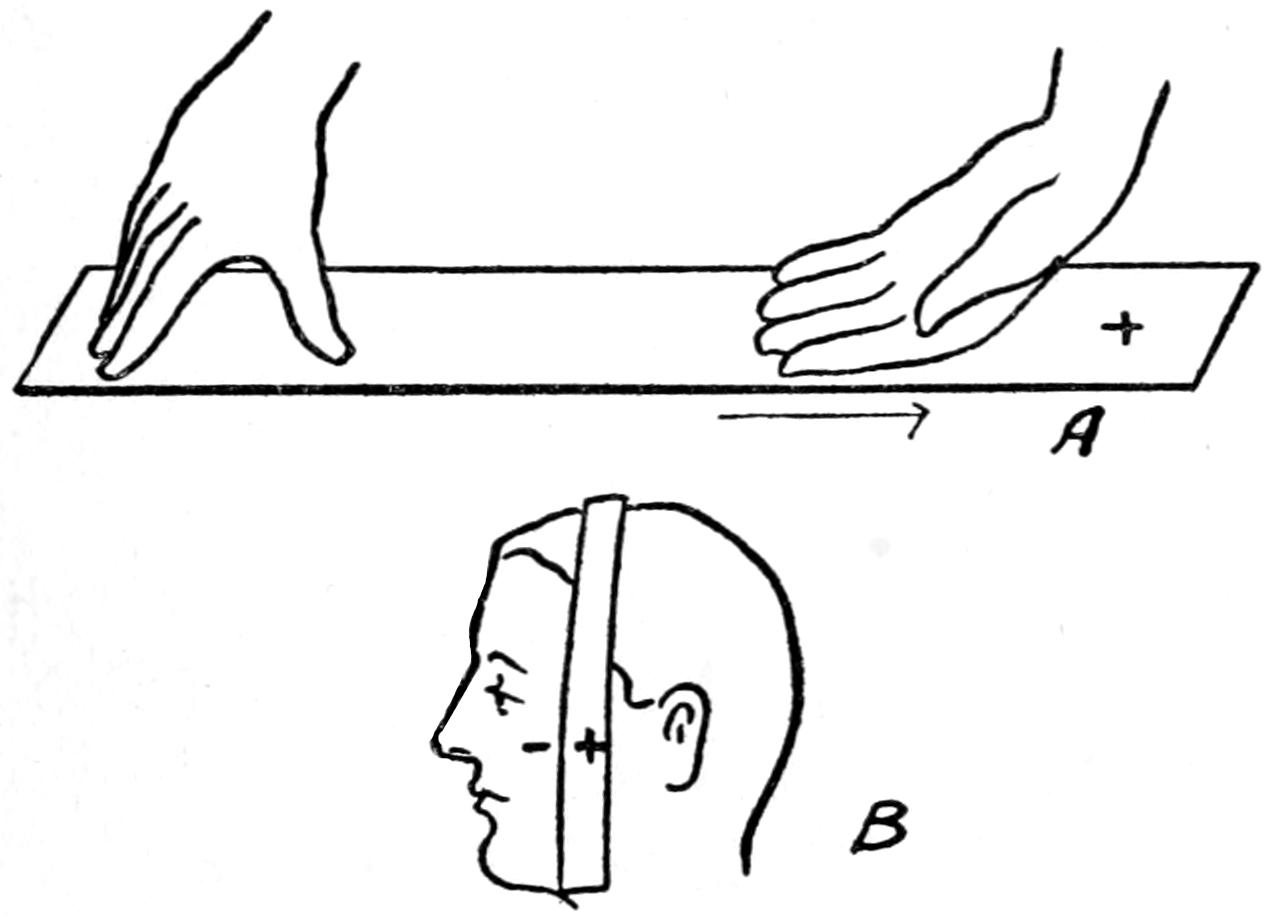
The Electrified Papers — How to Electrify a Person — How Like Repels Like
Making Experiments With Apparatus
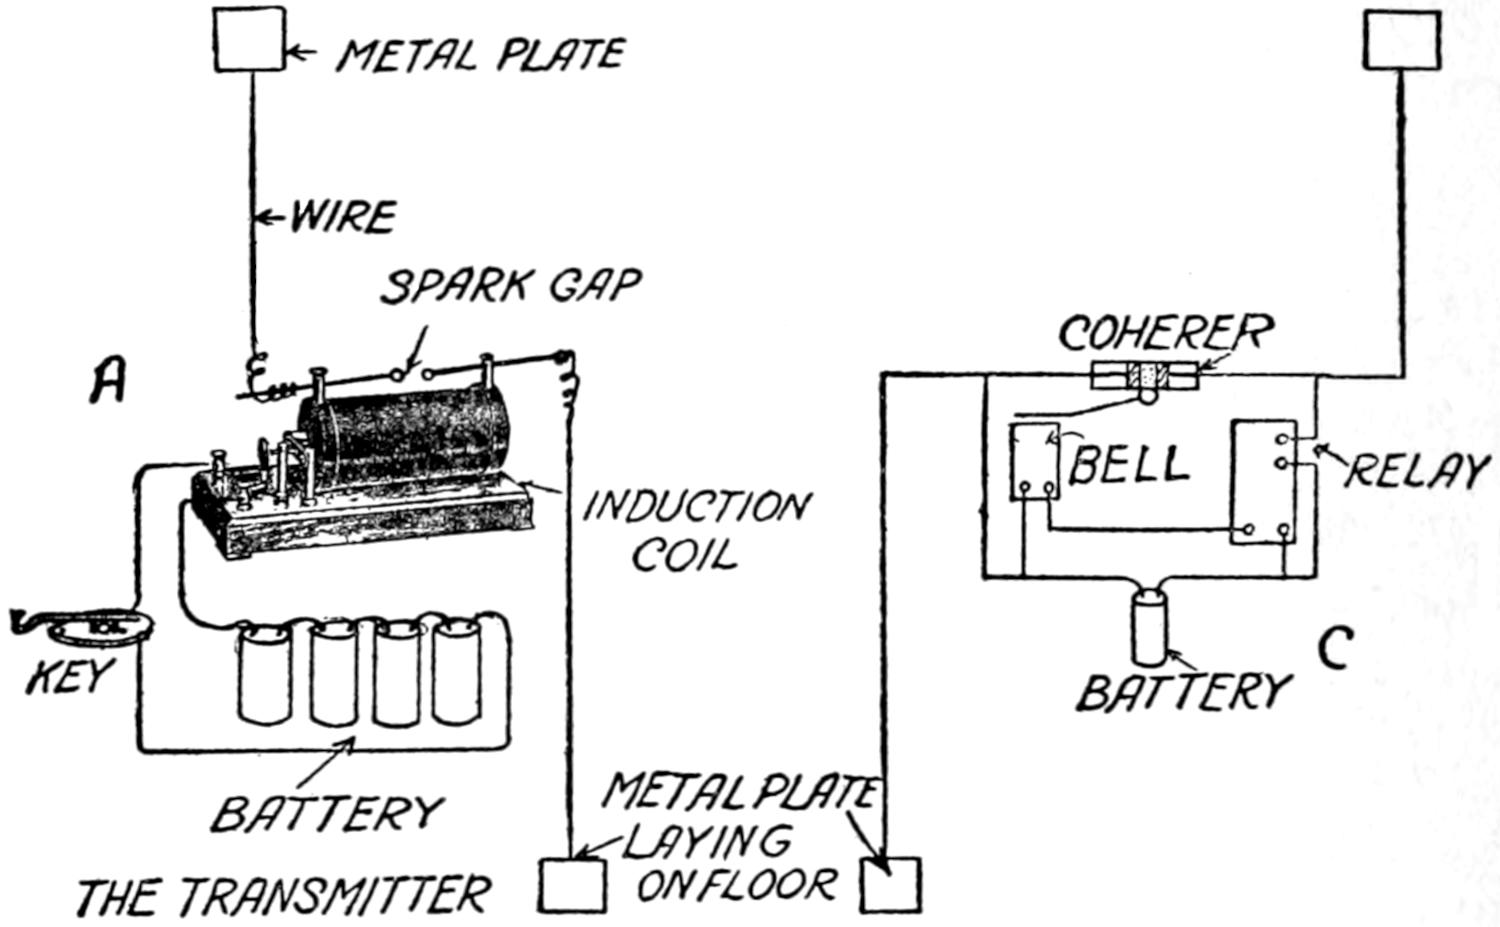
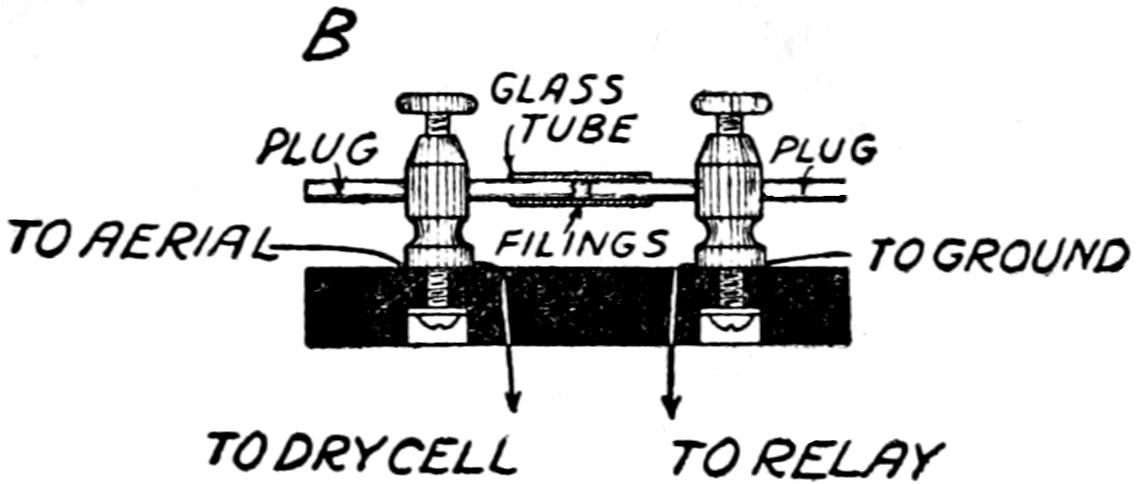
The Induction, or Spark Coil — Demonstrating Wireless Telegraphy
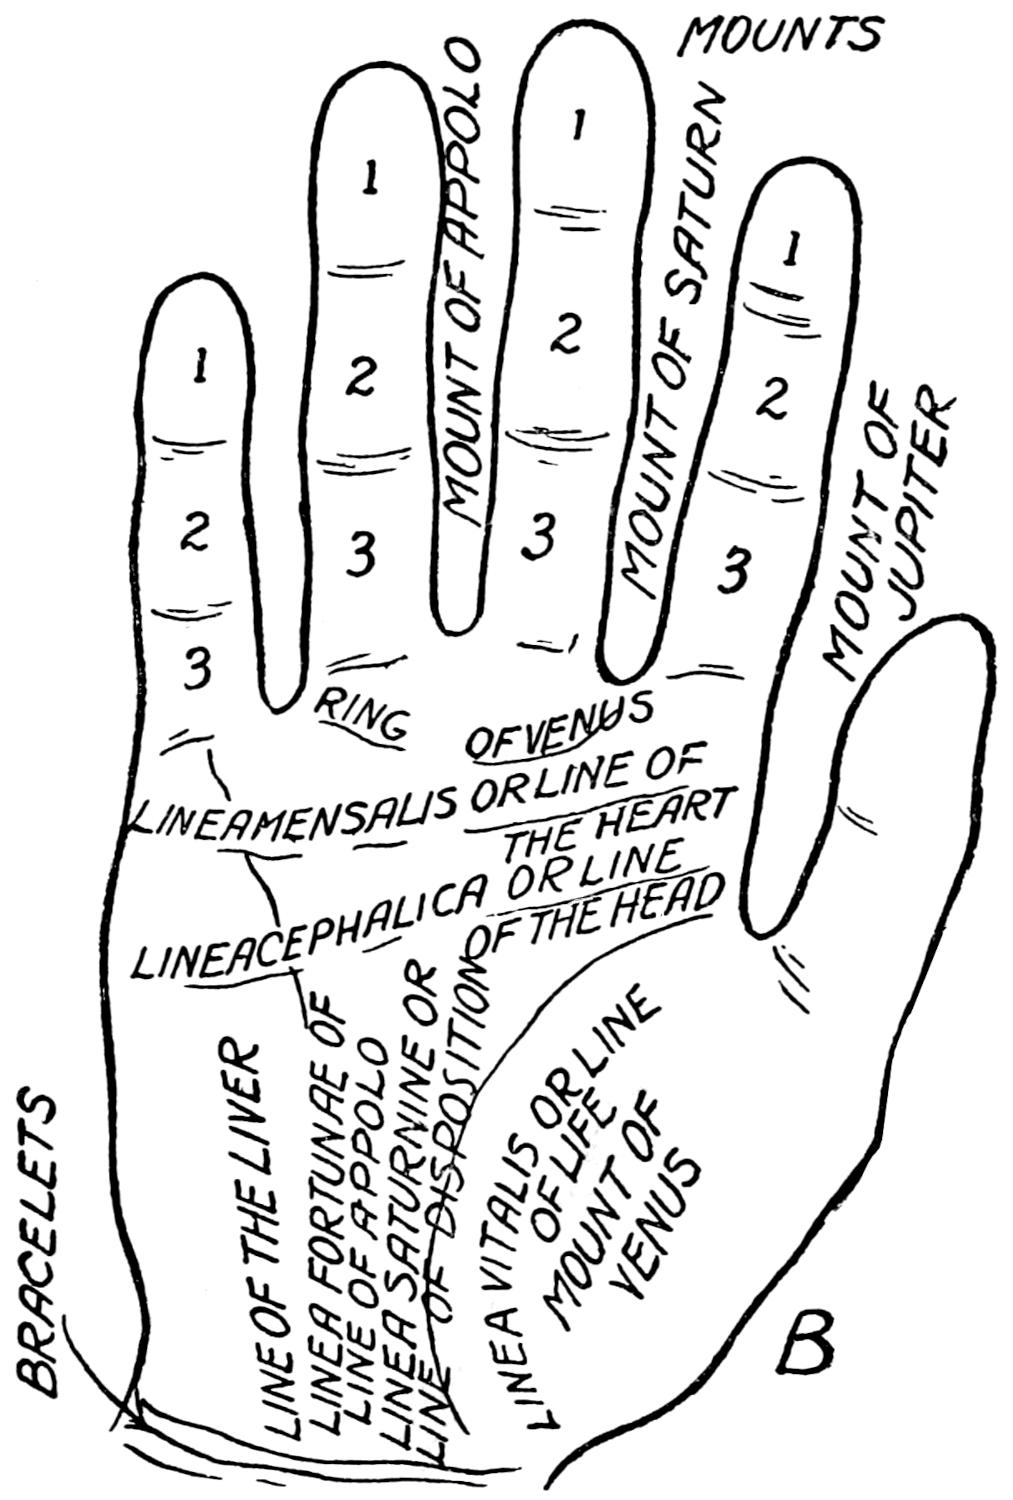
Reading Palms for Fun
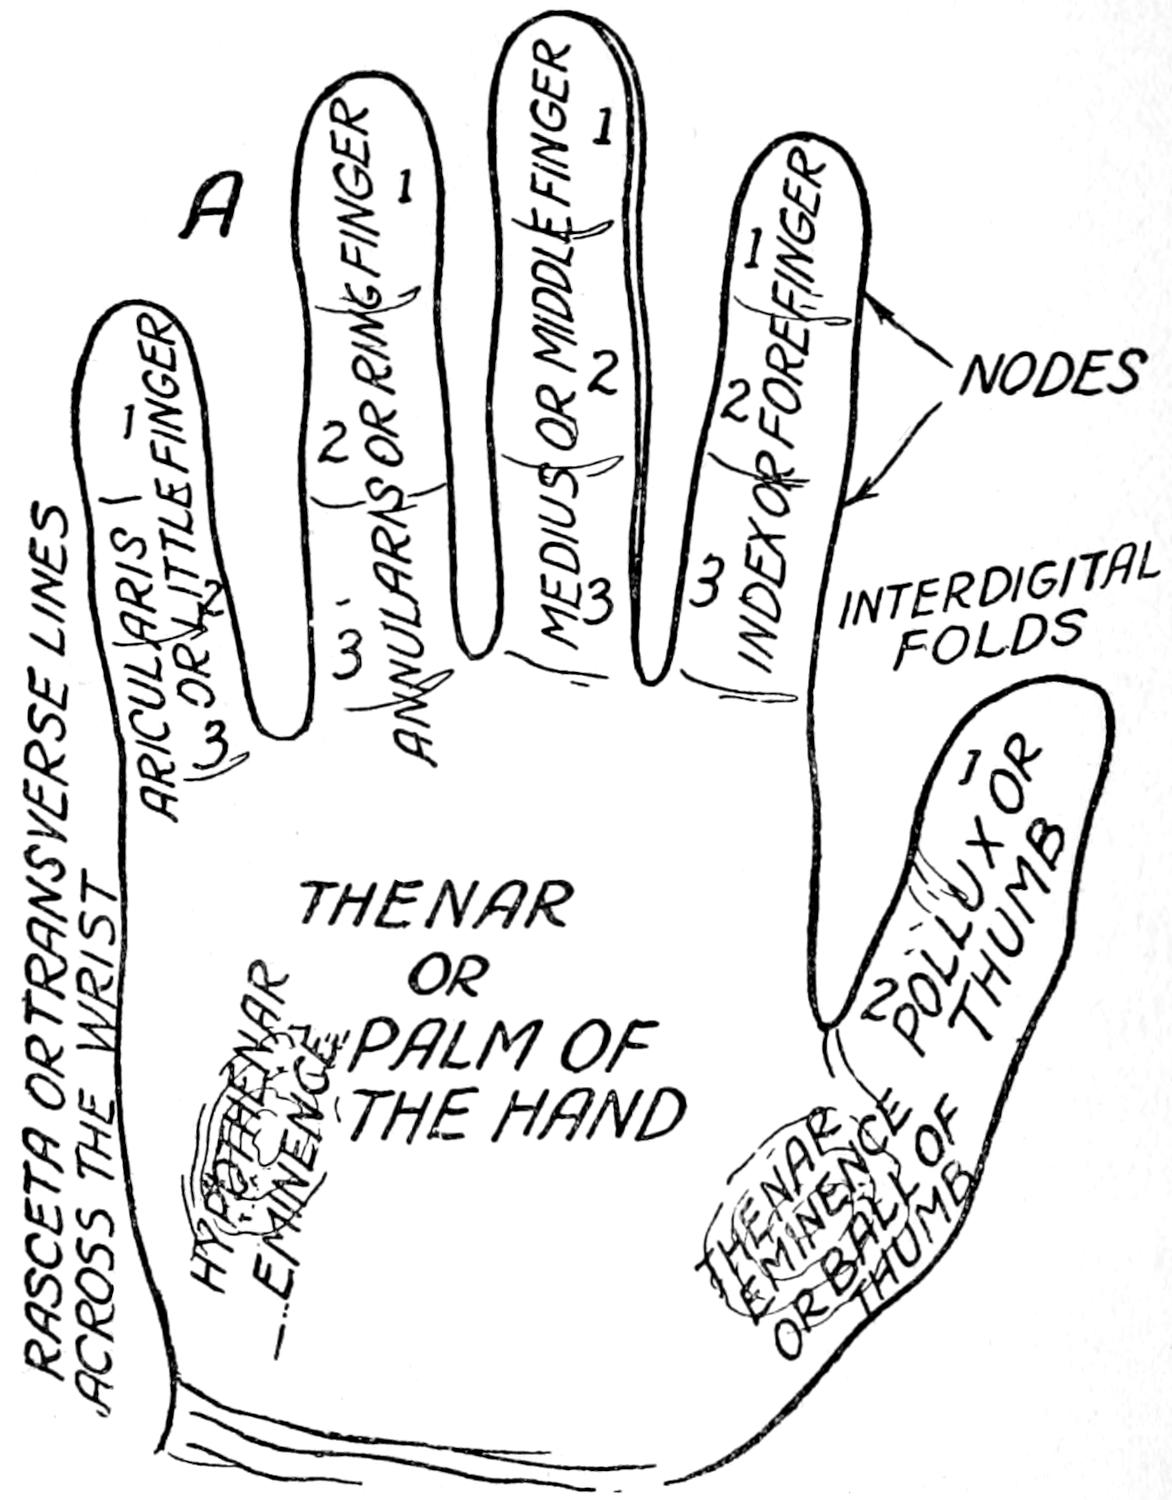
How to Read Palms
A Talk on the Steam Engine
Making the Model Engine
How the Engine Works
ILLUSTRATIONS
PAGE
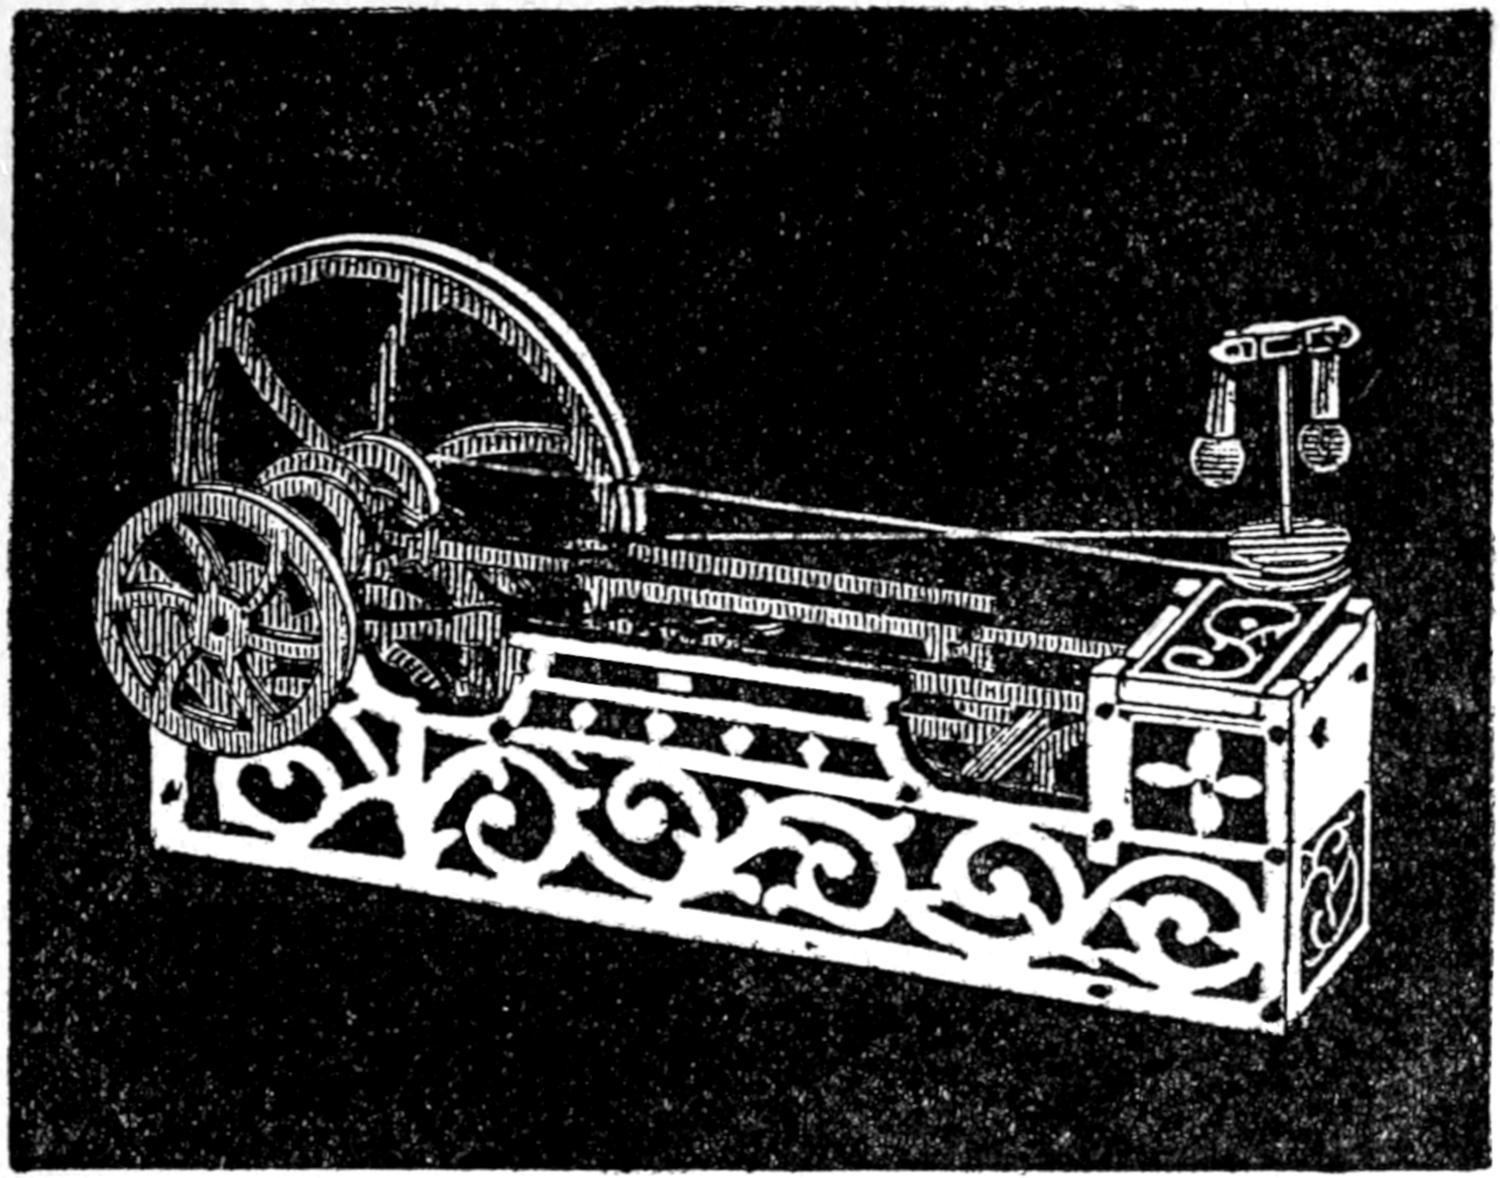
A Model Engine, Showing the Principal Working Parts
CHAPTER I CARPENTRY WORK AND CABINET MAKING — The Tools You Need. — The Kind of Tools. — Some Hints on Using Tools. — How to Hold a Hammer. — How to Use a Saw. — How to Use a Plane. — How to Use Chisels and Gouges. — How to Use a Brace and Bit. — How to Use a Rule. — How to Use a Marking Gauge. — How to Use Hand Screws or Clamps. — How to Use a Nail Set. — How to Use a Gimlet. — How to Drive Nails and Screws. — How to Make a Glue-Pot. — How to Make Good Glue and How to Use It. — How to Sharpen Your Tools. — About Sharpening Saws. — About Sharpening Chisels and Plane Bits. — About Sharpening Auger Bits. — How to Take Care of Your Tools. — Removing Rust from Tools. — To Etch Your Name on Tools. — Kinds of Wood to Use. — Pine. — Cedar. — Mahogany. — Oak. — Birch. — Walnut. — How to Make Joints. — Edge Joints. — Corner Joints. — About Working Drawings. — Things for You to Make. — How to Make a Work Bench. — How to Make a Tool Chest.
HANDICRAFT FOR BOYS
Did you ever think about what you’d do if you were
shipwrecked on a tropical island like Robinson Crusoe?
Well, if you had a good, strong pocket-knife with you
it wouldn’t be so terribly bad and in a few months’
time you’d have fashioned all the things you’d need to
furnish a three-room palmetto bungalow.
To be sure your furniture wouldn’t be very highly
finished but it would be awfully artistic and while in
a civilized community it might be looked upon as a
rare exhibit of savage workmanship, it would serve
you nobly and well in your island home.
But you don’t have to be marooned on a lonely isle
or limited to the use of a jack-knife to show your
prowess as a worker in wood. All you need to do
is to get some out of the way room where there is
plenty of light for a workshop and buy a few good
tools to work with and you’ll take as keen a pleasure
in making useful things with your own hands as
Robinson Crusoe did.
—It is a great mistake to go
out and buy a cheap chest of tools of whatever size
for while there is always a large number of tools in
it they are usually of a very poor quality.
If you can afford to buy a chest of good tools and
will get them of a regular tool supply house you can
then buy a chest of tools safely. Now to make any
ordinary piece of woodwork you don’t need many tools
but each one should be the very best, for therein half
the pleasure lies.
—The tools used for cabinet
making, as the finer kinds of joinery are called, are exactly
the same as those used for carpentry though they
are usually kept a little sharper and there should be a
few more of them.
All the tools you will need at first are shown in Figs.
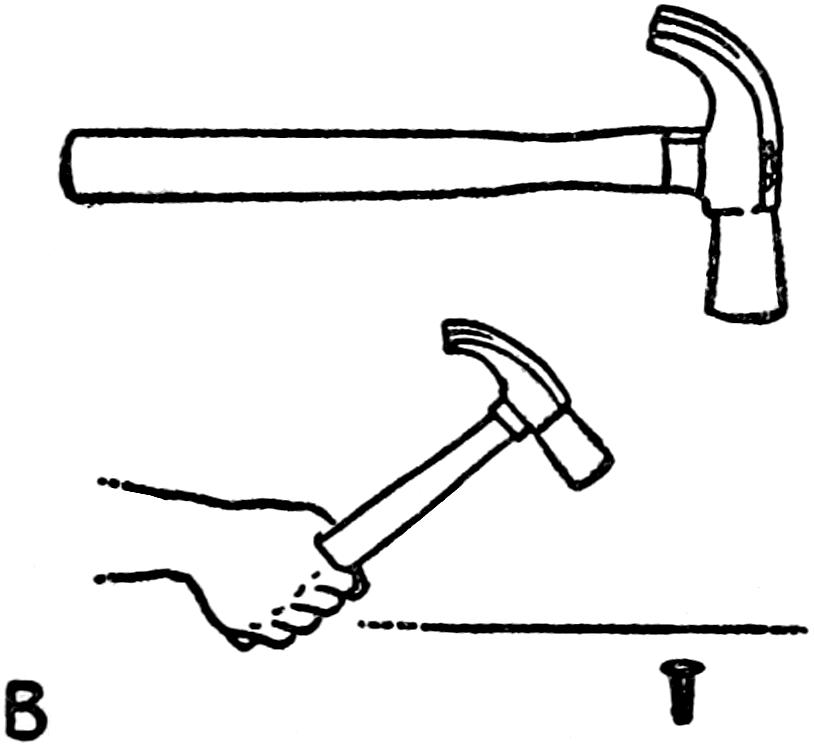
1 and 2 and these are (1) a cast-steel, adze-eye, bell-faced
hammer[1] weighing about 9 ounces, which is a
regular carpenter’s hammer. (2) A mallet, made of
hickory, with a 2¹⁄₂ inch face and try to get one in
which the handle goes clear through the head and is
wedged in.
(3) Four saws,[2] namely (a) a 16 inch crosscut saw—usually
called a handsaw—which is used for sawing
off boards across the grain, (b) a 20 inch rip-saw,
for sawing with the grain so that a board can be sawed
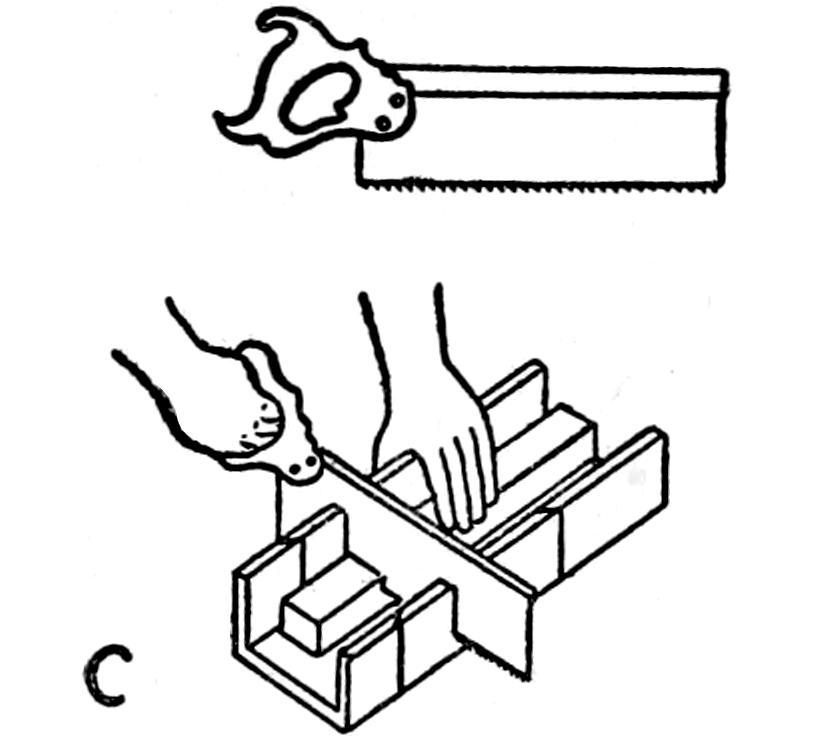
lengthwise, (c) a back saw or miter saw as it is sometimes
called; it is about 12 inches long and has about
20 teeth to the inch so that it makes a very fine and
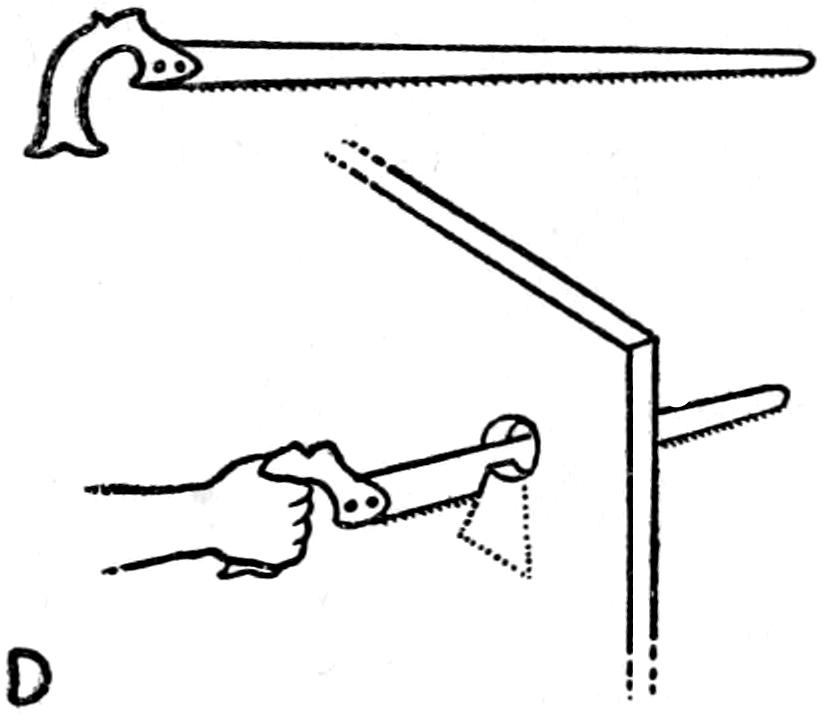
smooth cut. (d) A compass saw; it has a narrow,
tapering blade about 10 inches long and is used to cut
out holes in boards, and to cut disks, or wheels of
wood. The blade of a keyhole saw is thinner and
narrower than a compass saw and, hence, smaller holes
and shorter curves can be cut with it than with a compass
saw.
(4) A miter box (pronounced mi′-ter) is a little
trough of wood formed of a bottom with two sides
screwed to it but without a top or ends. The sides of
the box have saw-cuts in them, or kerfs as they are
called, at angles of 45 and 90 degrees so that strips of
wood, molding and the like can be sawed accurately
across, or mitered, to make a corner joint.
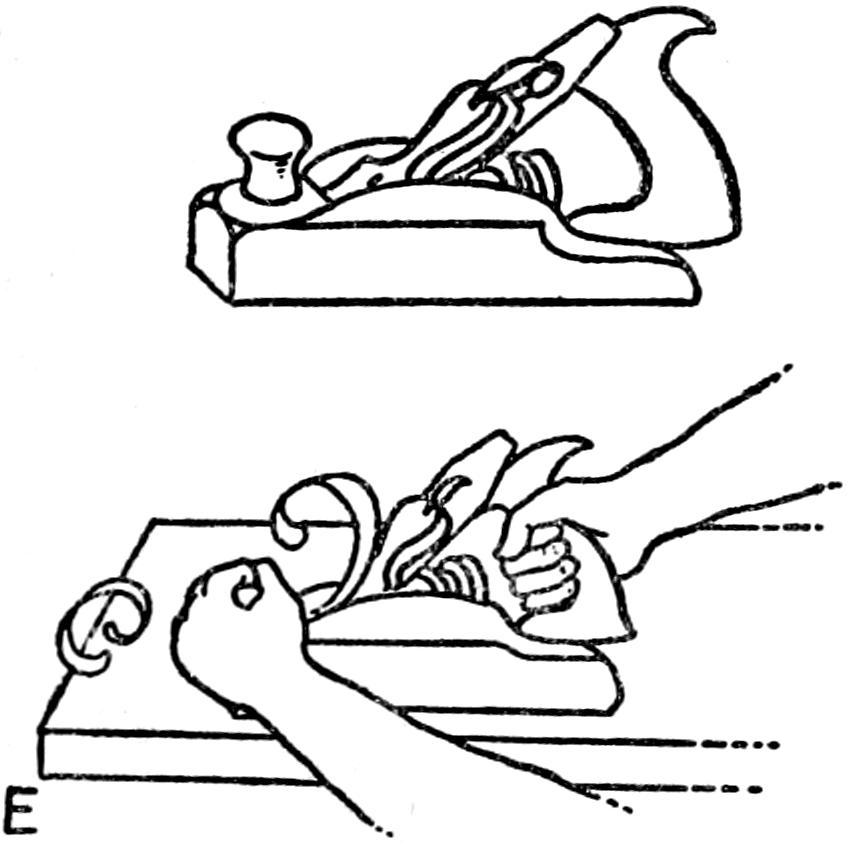
(5) Three planes[3] and these are (a) a block plane
for small light work; (b) a smoothing plane which is
a little longer and has a handle and is set fine, that is
the bit, or blade is finely adjusted for finishing work;
and (c) a jack-plane, which is a large plane used for
planing off rough surfaces.
(6) Three chisels,[4] or firmer chisels as they are
called. These are regular flat, bevel-edged carpenter’s
chisels and the blades should be ¹⁄₈, ¹⁄₄, and ¹⁄₂ inch
wide, respectively.
(7) Three gouges,[5] or firmer gouges, to give
them their full name. These gouges are simply
chisels with curved cutting edges so that a rounded
groove can be cut in a board. Get them with blades
having ¹⁄₄, ³⁄₈ and ¹⁄₂ inch regular sweep, as the curve
of the cutting edge is called.
(8) A brace and five auger bits.[6]
A brace and bit,
as you know, is a tool to bore holes in wood with.
You ought to have five bits and get them ¹⁄₄, ⁵⁄₁₆, ³⁄₈,
⁷⁄₁₆ and ¹⁄₂ an inch in diameter.
[6] When you buy auger bits get the genuine Russel Jennings.
(9) A maple or a boxwood rule; this should be a
regular, 2-foot, four fold carpenter’s rule. (10) A
marking gauge; the bar of the gauge is graduated in
16ths of an inch and the adjustable head of one good
enough to work with is fitted with a brass thumb screw.
(11) An iron bound try-square with a 6, or better,
a 9-inch blade. This is used not only to make measurements
with but to try whether a thing is square or
not, hence its name.
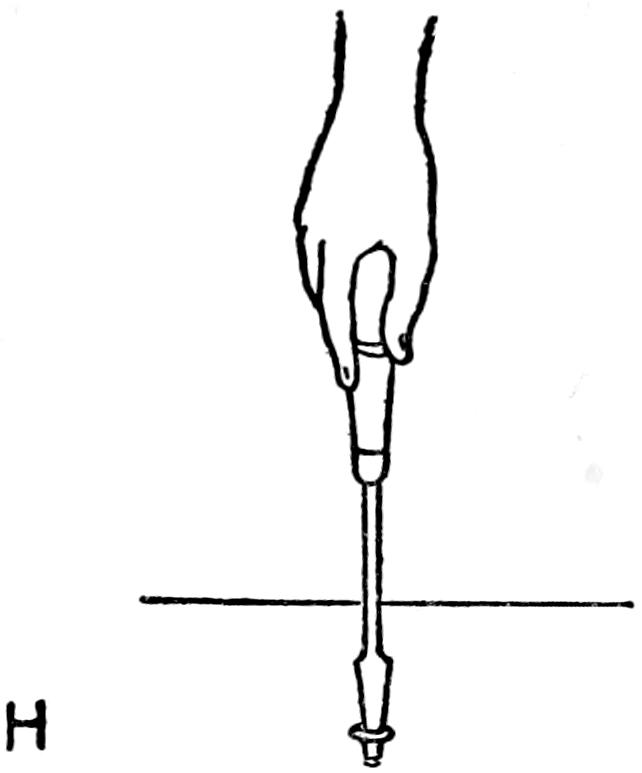
(12) Two screw drivers, one for small and the
other for large screws. (13) Two double cut gimlets,
one ¹⁄₈ and the other ³⁄₁₆ inch in diameter; these are useful
for making holes for starting screws and the like.
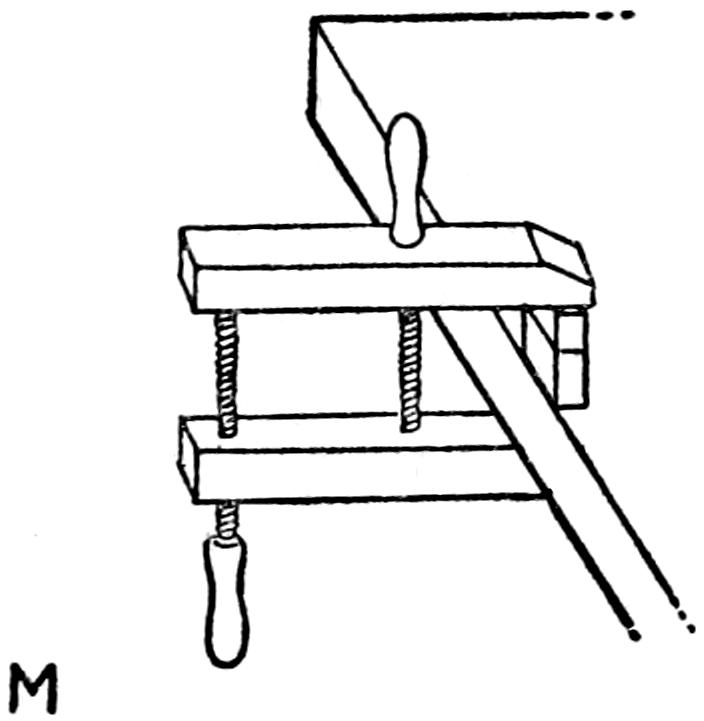
(14) Four hand screws, or clamps as they are more
often called; these are made of wood and are used to
clamp two or more pieces of wood together when they
are being bored or after they are glued. The jaws
should be about 7 inches long and they should open
at least 4 inches wide. They only cost a quarter
apiece.
(15) A nail set; this is a steel punch for driving the
head of a nail below the surface of the wood without
denting it.
(16) A Washita oil-stone is the right kind to
sharpen wood-working tools on; a stone ¹⁄₂ or ³⁄₄ inch
thick, 2 inches wide and 4 or 5 inches long will be
large enough and you should make a box with a cover
to keep it in and so protect it from the dust.
Fig. 2m. a clamp often comes in handy
(17) A sewing machine oil can filled with sewing
machine oil, or any other good, light lubricating oil,
is needed for sharpening your tools.
(18) A small can of Le Page’s liquid glue, or if you
want to make your own glue then get a glue-pot and
brush. You can buy a ¹⁄₂ pint can of liquid glue for a
quarter or less, or you can buy a cast iron, water-jacketed
glue pot which holds a pint for about 40
cents. Get a small round bristle brush for a glue
brush.
—Since I have used
tools ever since I was old enough to hold a hammer I
can easily tell you just how you should handle them
but to become a skilled workman you must be willing
to do the rest and that is to practice.
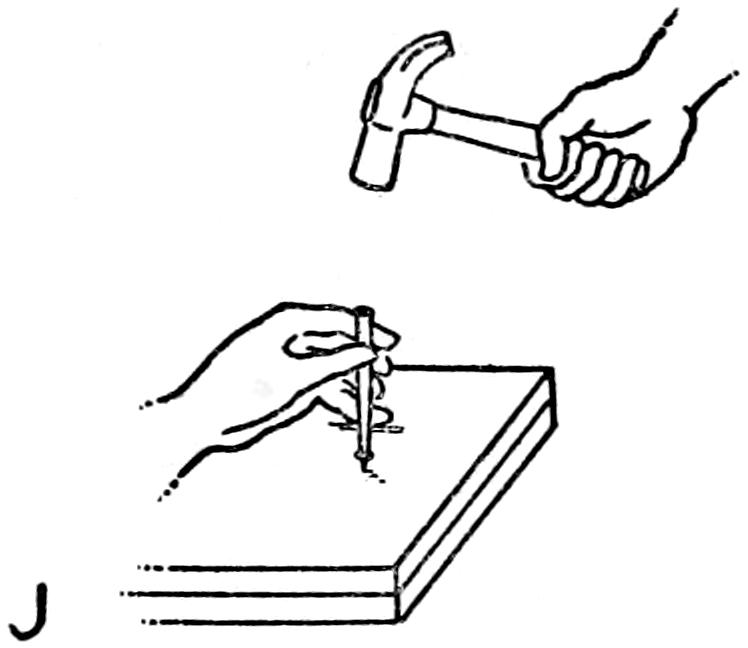
—When you use a hammer,
grasp the handle a couple of inches from the free
end and hold it so that it will swing freely and easily
in your hand and keep your hand and wrist above the
level of the nail or whatever it is you are pounding;
this takes the jar off of your arm and makes the work
of using it surer and less tiresome. Never use a hammer
on wood-work of any kind.
When you use a mallet as for driving chisels hold it
rather close to its head, and need I tell you never to
use a wooden mallet to drive nails with.
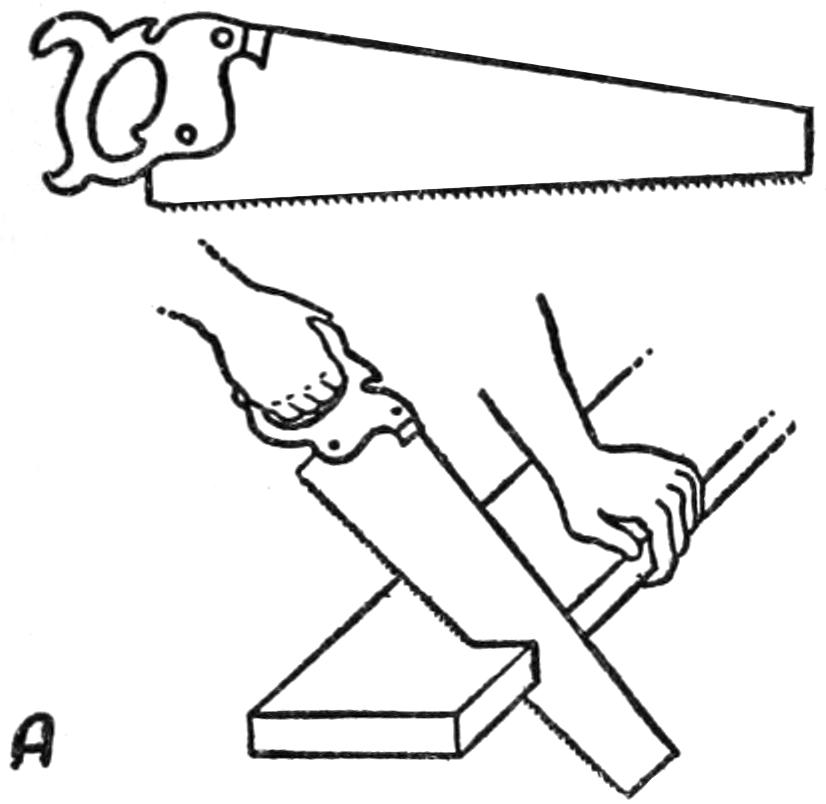
—Hold the wood to be sawed
with your left hand—I am taking it for granted that
you are righthanded; put all of the fingers of your
right hand through the hole in the handle of the saw
with your thumb on the other side and grip the handle
firmly.
To start the saw put it on the mark where you want
to saw the board and rest your thumb against the side
of it to guide and steady it. Stand so that your eye
will look down the back of the saw and don’t hold it
too straight but at an angle of 45 degrees, that is half
way between the horizontal and the vertical. Of
course this does not apply to a back saw or a keyhole
saw.
—Since a smooth plane has
no handle lay your right hand over the tail of it and
rest your left hand on the nose of it. Make short,
quick strokes, pressing down on the plane as it goes
forward and letting up on it a little as you draw it
back.
A jack-plane has a handle on it something like a
saw-handle and it is held like a saw with your right
hand. If there is no knob on the nose of it hold it
by laying your left hand across it. When using a
jack plane give it a long stroke with even pressure and
you will take off the same thickness of shaving all the
way along.
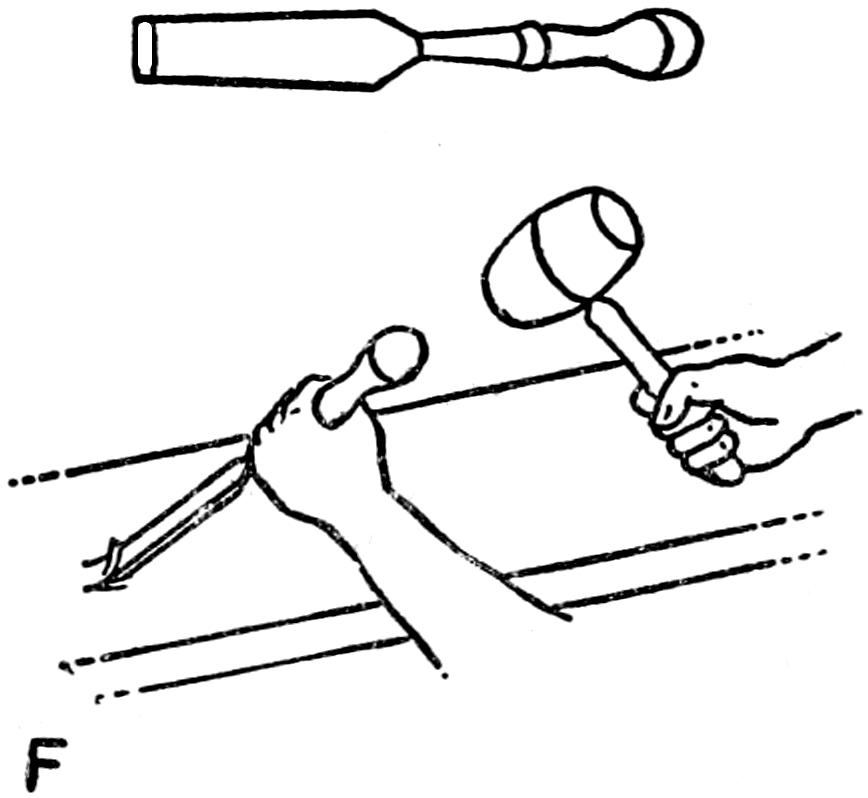
—To hold a chisel
properly when cutting a groove grip it a couple of
inches below the top of the handle with your left hand.
Hold it with the beveled edge down from you and at
a slight angle from the horizontal when making
grooves, and at a slight angle from the vertical when
cutting a mortise. Gouges are used in the same way
as chisels.
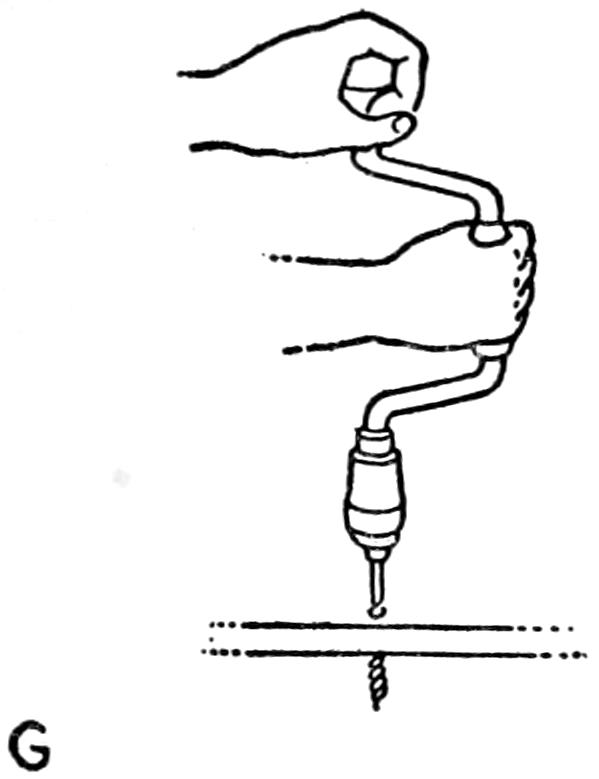
—Set the sharp
pointed end of the bit on the exact spot which is to
be the center of the hole you are to bore. Hold the
top handle of the brace with your left hand and the
crank handle with your right hand. Have the top of
the brace and the bit in a line with your eye and after
you start to bore sight the bit on both sides of the hole
you are boring to see that it is plumb—that is straight
up and down.
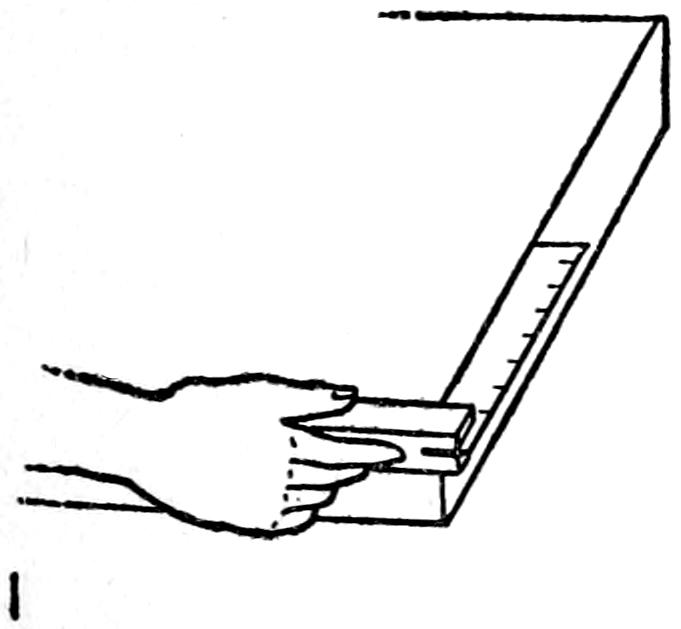
—A carpenter’s rule is two feet
long and divided into inches which are sub-divided
again into 8ths and 16ths of an inch. In making
measurements for joinery use the rule accurately or
you will have misfits.
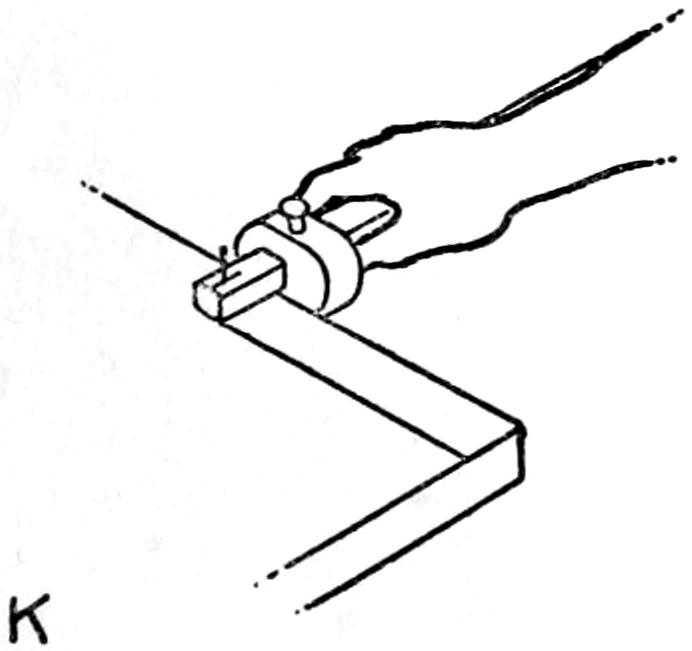
—This is a useful
device to mark off one or more parallel lines on a board
when one edge of it is straight.
The head slides on a wooden bar near one end of
which is a steel point. The bar is graduated, that is, it
is spaced off in inches and fractions of an inch like a
rule and this makes it easy to set the head at any
distance from the steel point.
When you have set the gauge hold the head against
the edge of the board you want to mark, press the
steel point against the surface and draw the gauge
along with both hands when the point will scratch a
line.
—Put the
pieces of wood that are to be held together between the
jaws of the clamp and screw each screw up a little at
a time so that the jaws are kept even, that is parallel.
—A finishing nail, that is, a
nail having a head only a shade larger than the shank,
is used for the finer kinds of woodwork. After you
have driven in a nail until its head is within, say, ¹⁄₈
inch of the surface put the small, hollow end of your
nail set on it, hold them together with your thumb
and forefinger and drive it in by hitting the nail set
with your hammer. After the head is sunk below the
surface of the wood fill in the hole with a wood filler[7]
when neither the nail nor the hole can be seen.
[7] To make a wood-filler, melt 1 ounce of white resin and 1
ounce of yellow wax in a pan and add enough ochre, which can
be had in any color, to give it the color of the wood you are
using. Stir it well and fill the dent while hot. This filler sticks
well to the wood and when dry is very hard.
—After you have started a
hole with a gimlet give it a complete turn and then half
a turn back each time, for by so doing it will be far less
liable to split the wood. Moisten the point of the
gimlet and it will go in easier.
—Put a little common
brown soap on the ends of nails and screws before
you drive them in and you will find that it greatly
lessens the friction.
—In these days of preparedness
it is easier to buy ready made glue than it
is to make it yourself; moreover it is just about as
cheap, nearly as good and certainly far less trouble.
If you insist on making your own glue though, you
must, first of all, have a glue-pot of the right kind to
make it in. As I have already mentioned a glue-pot is
made of two pots one inside the other. The outside
pot is half filled with water and the inside one contains
the glue.
You can improvise a glue-pot by using a tomato
can for the outside pot and a pepper or mustard can
for the inside pot. While it won’t look quite as shop-like
as the kind you buy it will work just as well.
—To
make good glue, put some small pieces of genuine
Peter Cooper or imported French Coignet glue into
the inside glue pot in enough water to cover it. The
outer pot is set on a fire and the water in it is brought
to a boil. Stir the glue until it is all melted, when it
should be about as thick as sewing machine oil. Skim
off the scum that forms when the glue is boiling.
In using home-made glue have it very hot, for the
hotter it is the stronger the joint it will make; further
put it on both surfaces of the wood to be glued
together very thinly as this also tends to make it stick
tighter.
—You must have
sharp tools if you expect to do a job like a carpenter
or a cabinet maker.
—This is done by filing
the teeth with a hand saw taper file and the saw must
be held in a saw-vise, that is a vise with long jaws
which keep the saw from vibrating.
When the saw is filed the teeth must be set, which
means that one tooth is bent one way a trifle and the
next one to it is bent the other way and this is done
with a tool called a saw set.
You ought to learn to file your own saws but it
would be just as well, or a little better, to let a man
who makes a business of filing saws do this job for
you at first. Keep your saws oiled when not in
use.
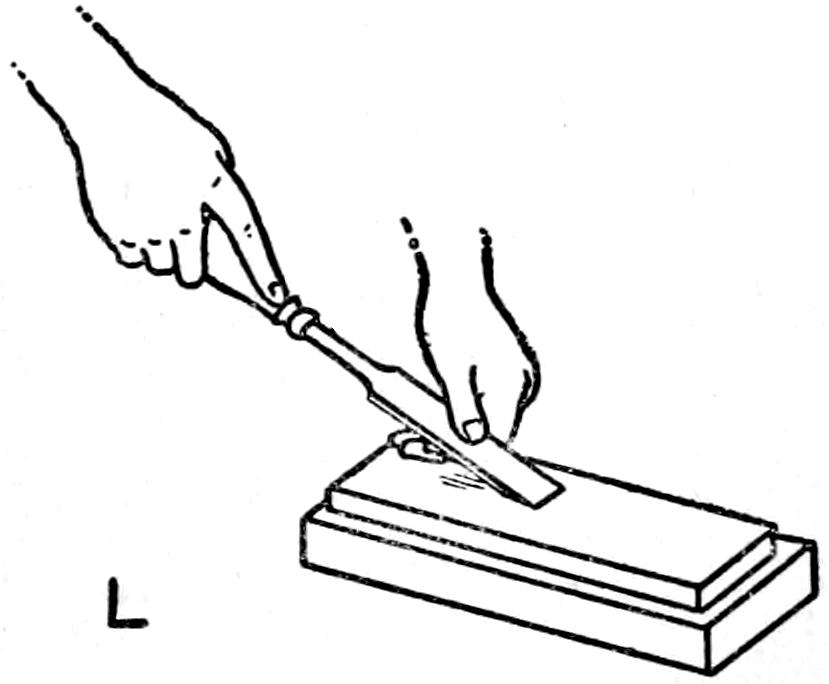
—To
sharpen a chisel or a plane bit put a few drops of oil
on your Washita oil stone; hold the beveled edge of the
tool on it and toward you, and see to it that it rests
flat on the stone or you will make it rounding and the
edge uneven.
When you get it at exactly the right angle grasp
it firmly with both hands and then move it on the
stone, forth and back, pressing down on it pretty hard
as it moves away from you, and easing up on it as you
draw it toward you.
When a chisel or a plane-bit gets a nick in it it
must be ground out on a grind stone; if you haven’t
one get a carpenter to do it for you, and when you get
it back hone it, that is, sharpen it on your oil stone as
before.
Get a Washita slip stone for the touching up gouges
and instead of rubbing the edge of the gouge on the
stone you rub the stone on the gouge. Never try to
grind a woodworking tool on an emery wheel.
—An ordinary
auger-bit seldom needs sharpening but when it does
the cutter of it must be sharpened on the inside. A
very fine file can be used for this purpose and then
hone it with a slip of an oil stone.
—If your workshop
is nice and dry you don’t need to put your tools
away in a chest or a cabinet after you get through using
them each time.
But if you use them only once in awhile it is a good
plan to wipe them off with a piece of cheese-cloth
moistened with oil and then lock them up where neither
the baby can get them nor the hired girl from across
the street can borrow them.
—Should any of your
tools show signs of rusting you can get the rust off
by rubbing some sweet oil on the rusted part; let it
stand a couple of days and then rub it with very finely
powdered unslacked lime.
—Clean the saw,
or whatever tool you want to etch your name on, with
a hot solution made by dissolving some sodium carbonate,
commonly called soda, in water and be careful
not to touch the cleaned surface with your fingers.
Next cover the cleaned surface with a thin layer of
melted wax or paraffin and when it is cold scratch
your name clear through it with a darning needle or
some other sharp pointed tool so that the steel is exposed
and the acid solution can act on it.
Put ¹⁄₂ an ounce of water into a glass stoppered
bottle and add ¹⁄₂ an ounce of nitric acid.[8] Shake the
solution well to mix it, dip a splint of wood into it and
touch the scratched in letters with it until the acid
covers the exposed parts of the steel.
[8] Nitric
acid is a poison and you must so label the bottle containing
it. Do not pour the water into the acid as it will splash
about. Be careful not to get it on your clothes, but if you
should, brush some ammonia over it as this will neutralize it
and stop its action.
Let the acid solution stay on for a half or an hour
and then wash it off with hot water, scrape off
the paraffin and you will find your name etched on the
steel exactly as you marked it.
—There are many kinds of
woods and each one has its special use in the arts and
crafts. For carpentry and cabinet making you will
probably not use more than half-a-dozen woods and
these are, (1) pine; (2) cedar; (3) mahogany; (4)
oak; (5) birch and (6) walnut.
—This is a good wood for making things in
general. There are two kinds of pine and these are
(a) white pine and (b) yellow pine.
White pine is very soft, light and straight grained
and it is a pleasure to use it even if it is only to sit on
a fence and whittle it with a pocket knife. (I wish I
could do it again.) You can make benches, boxes,
toys and a hundred and one other things out of it but
it is too soft for furniture and cabinet work.
Yellow, or Georgia pine has a fine yellow color,
and a beautiful grain and together they are very
showy. It is harder than white pine and while it can
be used where the latter cannot, it is not nearly as
easy to work.
—This fragrant wood belongs to the pine
family and it is nearly as soft as pine. There are two
kinds of cedar and these are (a) red cedar and (b)
white cedar.
Red cedar is the kind you want to get to make things
of; it has a pastel red color and a fragrant odor and
it is this latter property that makes it a good wood
for wardrobe chests, for moths do not like it. Next
to white pine it is about the easiest wood to work
and it is especially nice for making all small articles,
such as glove boxes, handkerchief boxes and the
like.
—Also and likewise there are two kinds
of mahogany and these are (a) Honduras mahogany
and (b) Spanish mahogany.
Honduras mahogany is the kind that cigar boxes are
made of and it is much softer and lighter in both
weight and color than Spanish mahogany. You can
make all manner of nice things of the better grades of
Honduras mahogany and, curiously enough, it stays
glued better than any other wood. It is nearly as
easy to work as pine and it takes a fine polish.
Spanish mahogany is like Honduras mahogany in
name only. It is a fine, close-grained dark-red-brown
or yellow-brown colored wood, takes a very high polish
and makes the finest kind of furniture.
—This is a strong, beautiful wood and is useful
in making all kinds of furniture the design of which
should be plain.
It is not an easy wood to work and tools when used
on it soon lose their cutting edges. But after you
have made a piece of furniture you can depend on it
that it will last to the end of time, nearly.
—This wood belongs to the oak family but
different from oak it is quite easy to work. It is light
in color, fine grained, so tough and elastic it cannot be
easily broken, and it takes a fine polish. For these
reasons it makes nice furniture and it is a very good
wood for turning.
It is from the bark of the birch that the Indians
made their canoes, but this is a story of the long ago
and we must stick to the present.
—This is a good old English wood; it is
the finest kind of wood that can be used for ornamental
furniture, gun stocks and wherever else a beautiful
color and a showy grain are wanted. It is easier
to work than oak and is a fine wood for carving.
—The word joint in woodworking
means the place where two or more pieces of
wood are fitted together, and hence the words joiner
and joinery in woodworking parlance.
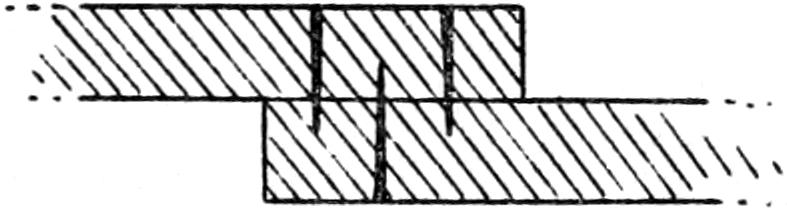
A· THE SQUARE OR BUTT JOINT
B· THE PLAIN LAP JOINT
C· THE BEVELED LAP JOINT
D· THE REBATED JOINT
E· THE TONGUE AND GROOVE JOINT
Fig. 3. how edge joints are made
There are two chief kinds of joints and these are,
(1) where two flat surfaces are fixed to each other,
and (2) where the edges of two boards meet to form
a corner. Though there are many ways to make both
kinds of joints I shall only tell you about half-a-dozen
which you will find the most useful for your needs.
—There are three easy ways to make
flat, or edge joints and these are (a) the square, or
butt joint; (b) the lap-joint and (c) the matched
joint, all of which are shown in Fig. 3.
In the square joint the edges of the boards are
simply butted together and nailed, screwed or glued.
This joint is very weak unless the abutting ends are
fastened to something else.
In the simplest form of lap-joint the edge of one
board is laid on top of the other board and these are
nailed or otherwise fastened together. A neater lap
joint is made by cutting away half of the edge of
each end of the boards so that when they are fitted and
fixed together the surfaces of the boards at the joints
are even and smooth.
A better joint than the lap-joint is made by planing
a tongue on the edge of one board and a groove in the
other. To do this easily, neatly and quickly you need
a rabbet plane and as this is quite a costly tool, you can
get along very well without it by using the lap-joints.
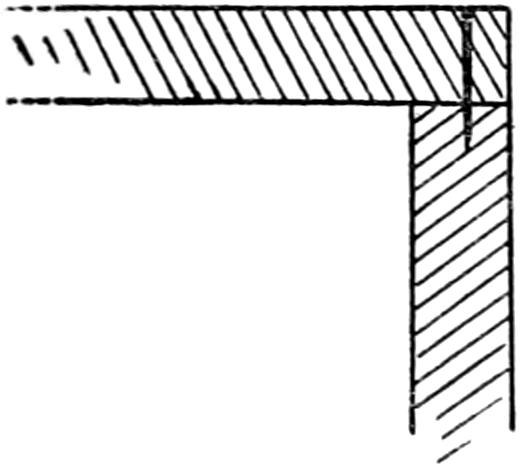
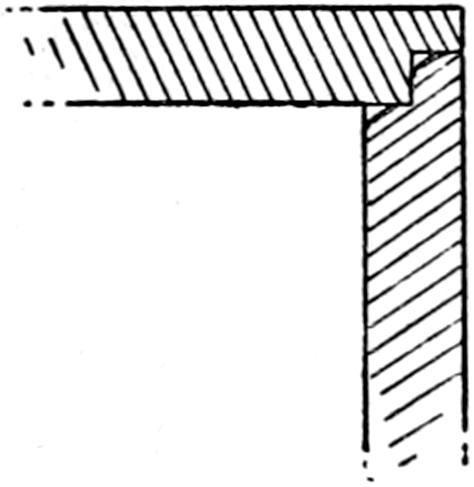
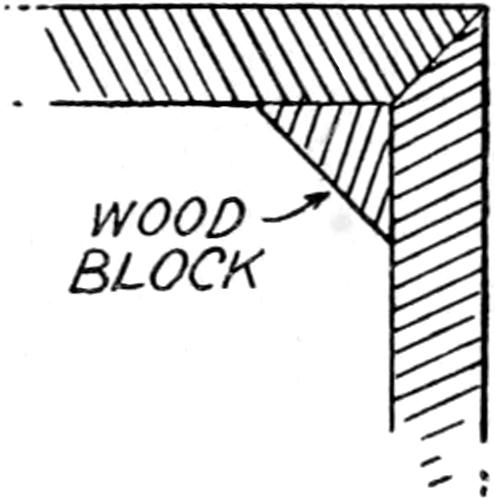
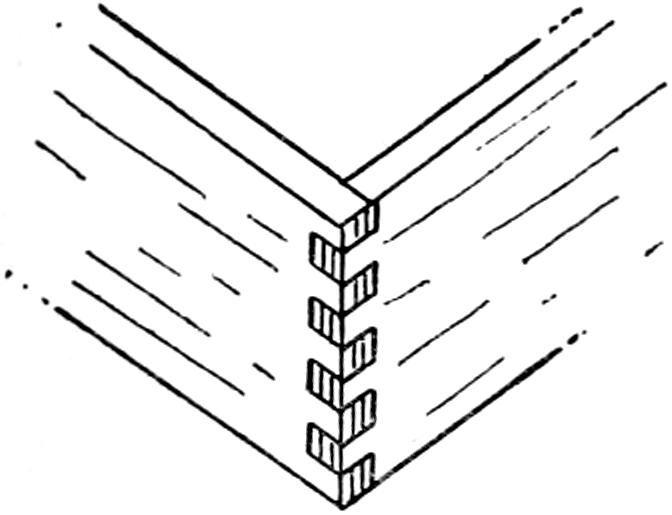
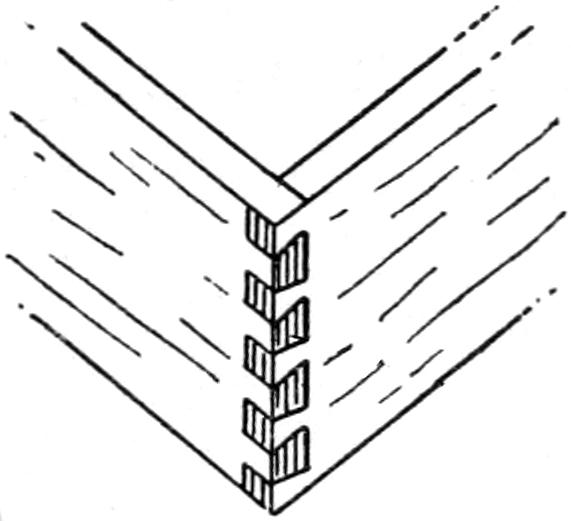
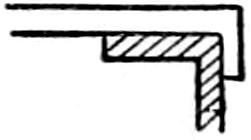
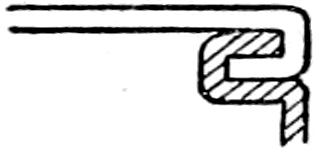
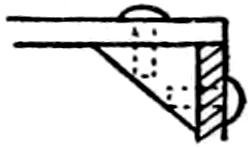
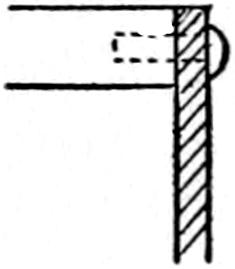
—There are five corner joints which
you should know about and these are (a) the butt, or
square joint; (b) the lap, or rebated joint; (c) the
mitered corner pieced joint; (d) the common dove-tail
box joint, and (e) the regular dove-tail joint, pictures
of all of which are shown in Fig. 4.
Now when you can saw a board off straight, plane
it true and make a good joint you will have small
trouble in making anything in wood that you want to
make.
A· THE BUTT OR SQUARE JOINT
B· THE REBATED JOINT
C· THE MITERED CORNER PIECE JOINT
D· THE SIMPLE BOX DOVETAIL
E· A BETTER FORM OF DOVETAIL
Fig. 4. how corner joints are made
—When most boys—to
say nothing of the majority of men—start to make
something they simply knit their eyebrows (not high-brows)
and think out how it will look in the concrete—that
is when it is all done and ready to use.
Then they go ahead and begin to saw up the lumber
and put the pieces together. The result is that when
the object is finished it looks very different from the
thing they so proudly pictured in their mind’s eye.
Now the right way to build what you want and have it
look as it ought to is to make a working drawing of it.
To do this draw a picture of it to a scale, of say 1
inch to the foot; that is, if it is to be 4 feet long
draw it 4 inches long. The drawings I have made of
the work-bench and the tool box which follow will
show you how to make simple working drawings and
the last part of Chapter III explains it all in detail, so
read it carefully.
—When you have your
workshop ready, your tools at hand, the foregoing
ideas of woods in your mind and know about simple
working drawings you can go ahead and make things
and your first job will probably be to make a bench.
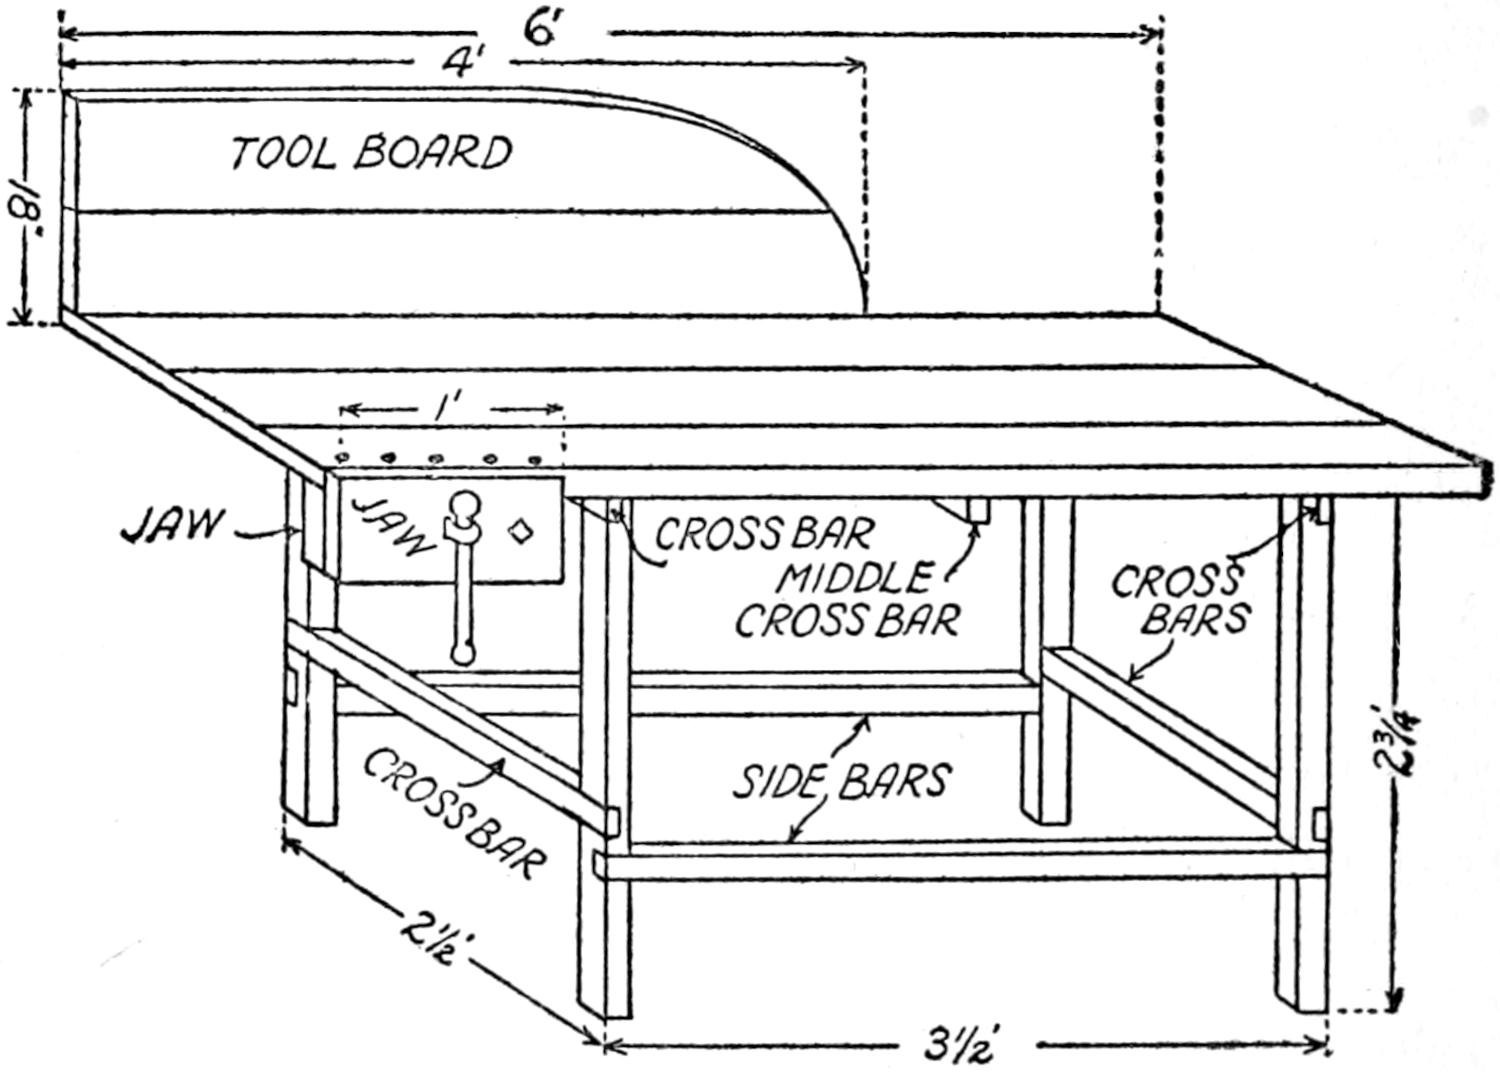
Fig. 5. an easily made work bench
—Go to a lumber
yard or a planing mill and get one 2 × 2 scantling 12
feet long for the legs, and two 2 × 2 scantlings for the
cross bars and the side bars; the middle cross bar can
be any kind of a thick piece of wood. If you can’t
get 2 × 2 scantlings get 2 × 4’s and have whichever
size you get planed smooth on all sides.
At the same time get three boards 1 or 2 inches
thick, 10 inches wide and 6 feet long for the top of
the bench and two boards 1 inch thick, 10 inches wide
and 4 feet long for the tool board. Saw the scantlings
up so that you will have four pieces for the legs 2 feet
9 inches long; four cross-bars 2 feet 6 inches long,
and two side bars 3 feet 6 inches long.
Build up the frame of the bench first as shown in
Fig. 5; then nail, or better, screw a cross-bar to the
middle of the 6 foot boards, lay them on top of the
frame and nail or screw them to the end cross bars.
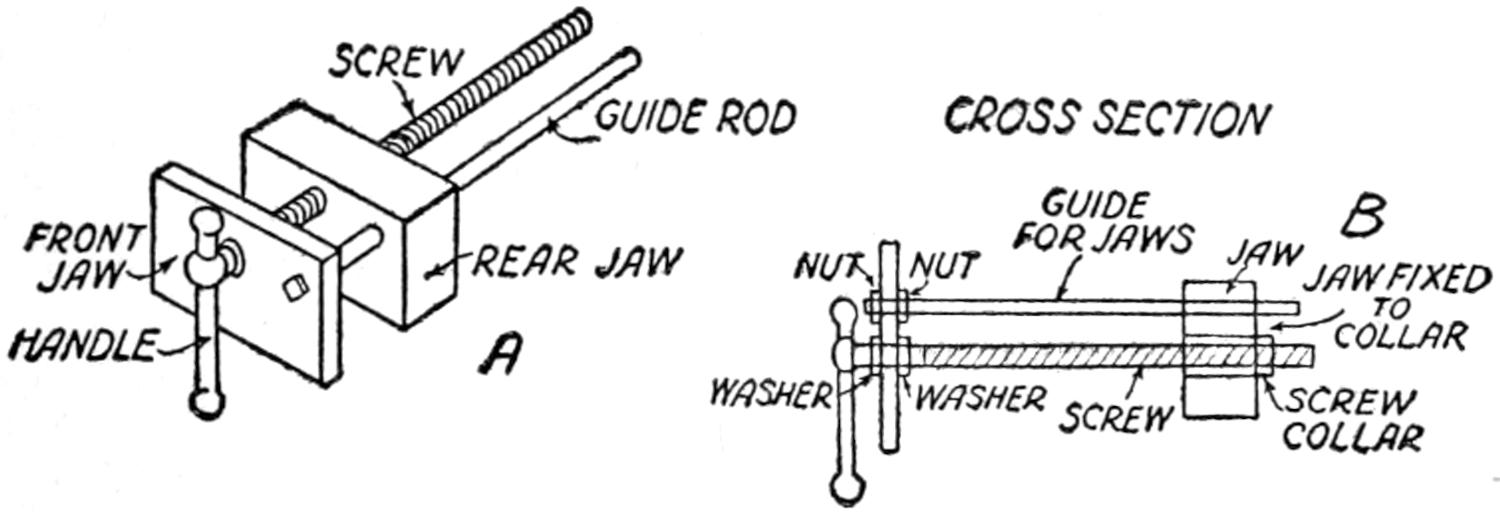
When you have the bench thus far along put on the
vise.
Fig. 6. a wood vise for your work bench
A wood-worker’s vise as shown at A and B in Fig.
6 can be bought for $3.50 on up to about $9.00. The
jaws are about 4 inches wide and 12 inches long and
they open nearly 12 inches. All you have to do to fix
it to your bench is to screw the rear jaw to the front
left hand edge of the top of the bench as shown in
Fig. 5.
The tool board is not an absolute necessity but it is
a great convenience. To make it saw off two boards
4 feet long, nail them together with a couple of strips
of wood—these are called cleats—and round off one
end as shown in Fig. 5. Screw the tool board to the
back of the bench and you are all ready to make things
in wood.
Fig. 7a. a carpenter’s tool chest
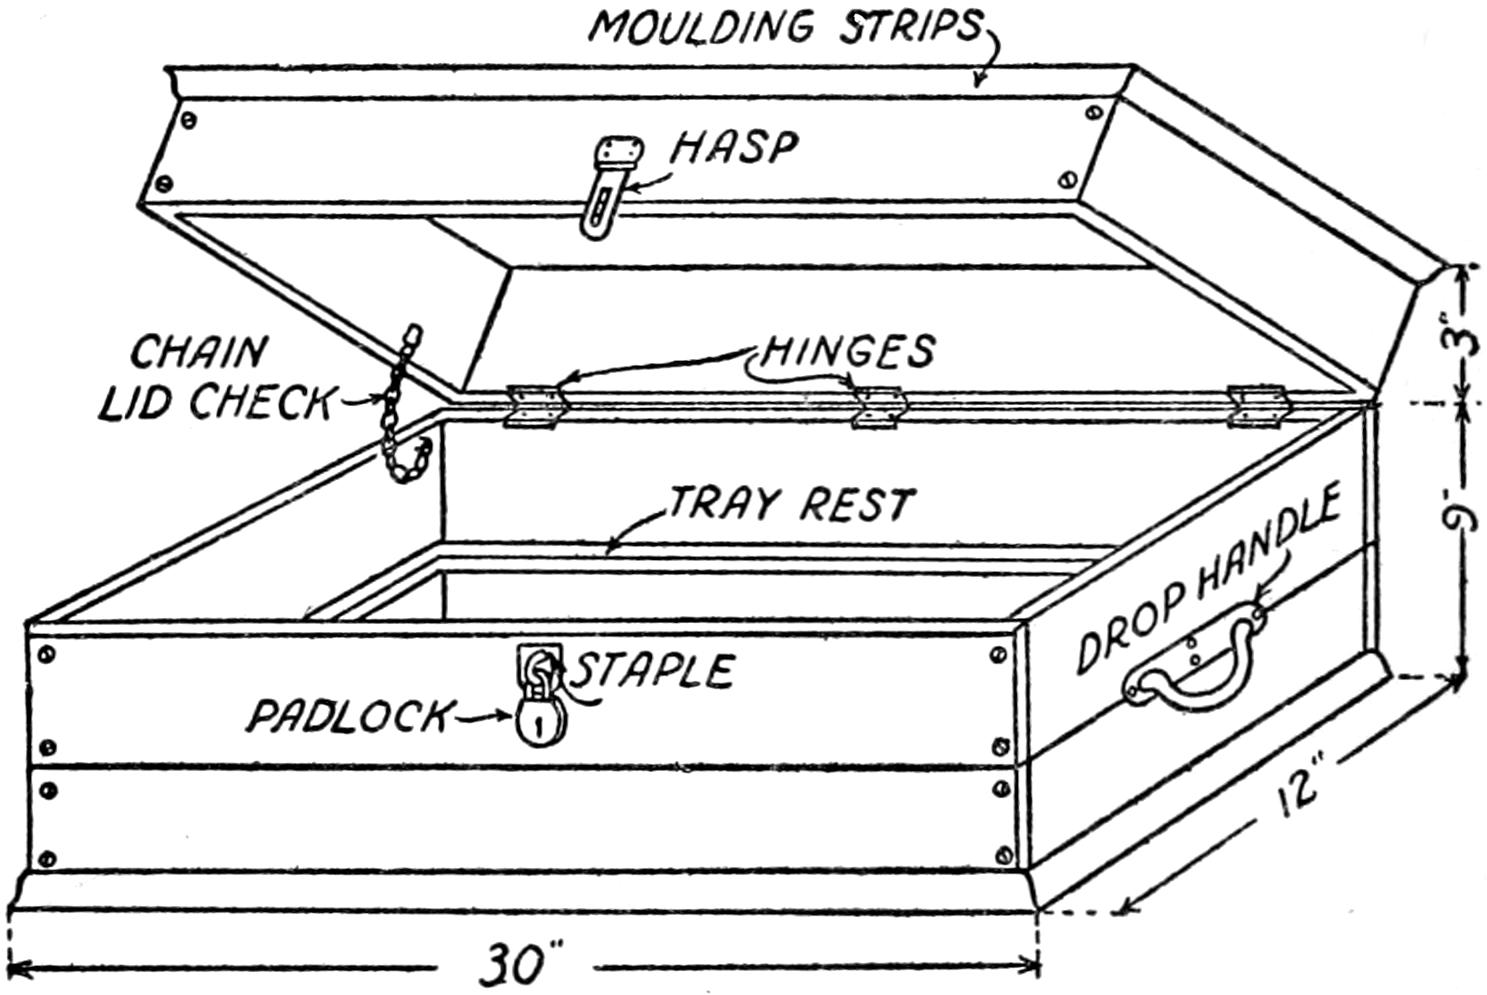
—Either birch or
chestnut are good woods to make your tool chest of.
Make the box, that is the lower part of the chest, and
the lid for it of ³⁄₄ inch thick stuff; have the box 9
inches high, 12 inches wide and 30 inches long and
have the lid 3 inches high, 12 inches wide and 30
inches long. Screw the boards together as nails will
not hold tight enough. See A Fig. 7.
Screw a strip of wood inside the chest for the tray
to rest on; put two or three hinges on the box and
lid and be particular how you do it or the lid will
not fit evenly on the chest. Fasten a staple on front
of the box in the middle near the top and a hasp on
the cover so that you can put on a padlock, or better
you can put on a regular chest lock which is handier
and makes a neater looking job. To keep the lid from
falling back when you open it, screw a piece of chain
about 8 inches long to it and the box and this will
serve as a check.
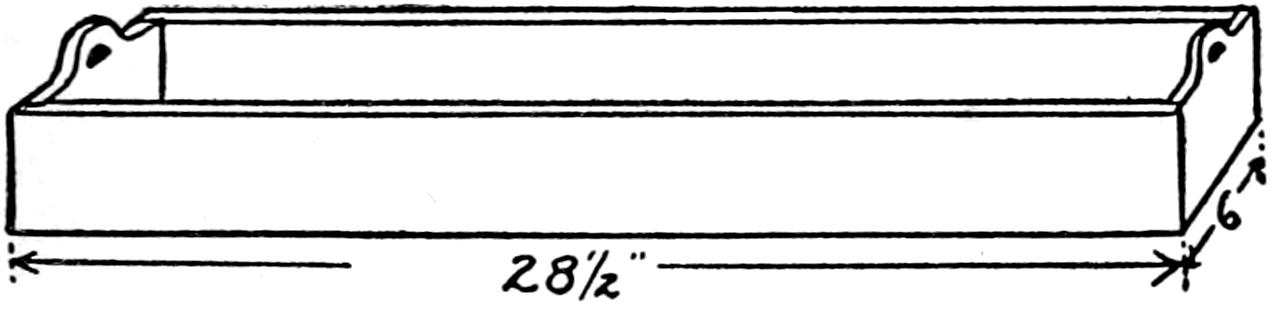
Fig. 7b. the tray for your tool chest
Finally make a tray of ¹⁄₂ or ⁵⁄₈ inch thick wood as
shown at B in Fig. 7. Make the ends 6 inches high
and 6 inches long and saw out the handle grips with
your keyhole saw. Make the sides and partitions 4¹⁄₂
inches high and 28¹⁄₂ inches long, screw them together
and put on the bottom. By making the tray narrower
than the chest you can slide it back and forth and so
get such tools out of the bottom as you may need without
lifting the tray each time you do so.
Note.—You can buy any tool I have described in
this chapter of any hardware dealer or tool supply
company in your town or if one is not at hand Hammacher,
Schlemmer and Company, corner of Fourth
Avenue and 13th Street, New York City, will supply
you with just what you want.
CHAPTER II SCROLL SAWING, WOOD TURNING, WOOD CARVING, ETC. — All About Scroll Sawing — Scroll Sawing Outfits. — A Cheap Scroll Sawing Outfit. — A Few Other Helpful Things. — How to Trace a Design on Wood. — Designs for Scroll Sawing. — Foot-Power Scroll Saws. — How a Foot-Power Scroll Saw Works. — How to Saw on a Foot-Power Scroll Saw. — TABLE OF SCROLL SAW WOODS — Fancy Woods for Scroll Saw Work. — Trimmings for Boxes, Etc. — Turning in Wood — Get a Lathe First. — The Cheapest Lathe You Can Buy. — Turning Tools for Wood. — How to Turn Wood. — The Art of Wood Carving — Your Set of Carving Tools. — The Best Woods for Carving. — Kinds of Wood Carving. — Pyrography, or Wood Burning — The Necessary Tools. — Coloring and Staining Wood.
As you may have observed, it takes a pretty good
sized room for a shop and quite a lot of tools to do
carpenter work and cabinet making.
Now if you find it hard to get these things don’t be
discouraged because there are other kinds of woodwork
that take neither a whole room nor a chest of
tools, and the chief ones of these are (1) scroll sawing;
(2) wood turning; (3) wood carving and (4)
pyrography.
Not only are the pursuits of these trades pleasant
but they are profitable because whether the art objects
you make are useful or not the work trains your
mind, your eyes and your hands at one and the same
time and when you get these three factors working
harmoniously together you have achieved something
that will be valuable to you as long as you live.
Scroll sawing, fret sawing and jig sawing all mean
precisely the same thing and that is sawing interlaced
and ornamental designs out of wood, or fretwork as it
is called.
With a scroll saw frame costing 50 cents and a few
thin boards you can saw out the most exquisite patterns
and make the most dainty articles imaginable.
There is more pleasure, of course, in using a regular
foot power scroll saw, but you can do just as good
work with a hand frame and though it takes a little
longer you’ll enjoy it immensely.
—A scroll saw is a very
simple piece of apparatus and it consists of a fine saw
fixed in a frame, or otherwise supported, so that it
can be moved up and down, and it is narrow enough
to turn sharp curves.
Now scroll saws, as I shall call them, are of three
kinds and these are (1) those worked by hand; (2)
those run by foot-power, and (3) those operated by
other kinds of power.
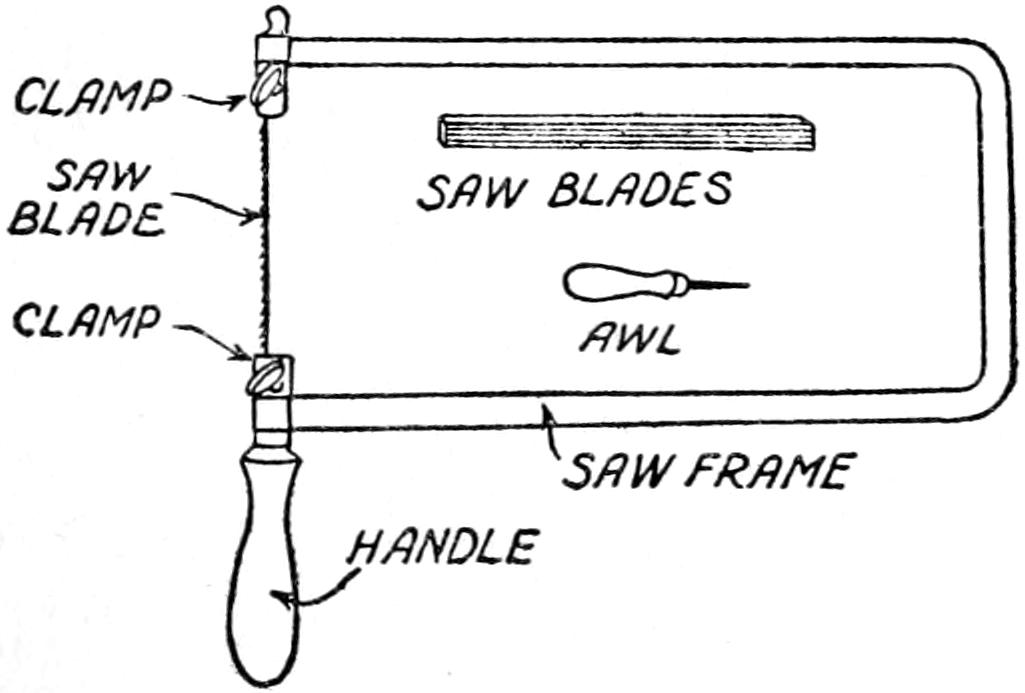
Fig. 8. a simple and cheap scroll sawing outfit
—The simplest
and cheapest scroll sawing outfit consists of (a) a
scroll saw frame; (b) a dozen saw blades, and (c) an
awl, all of which are shown in Fig. 8. If it is your
idea to saw out brackets and other fancy knickknacks
you ought to have a sheet of (d) impression paper,[9]
(e) some sheet designs,[10]
and (f) some fancy
wood.
[9] This is ordinary
carbon paper such as is used for typewriting.
The scroll saw frame is a bent iron or steel bar,
usually nickel-plated, which forms a frame about 5
inches wide and 12 inches long. A handle is fitted
to one end and a clamp to each end so that the saw
blade can be held tight in the frame.
How to Use the Scroll Saw.
—The first thing to do
is to put a saw blade in the frame and be sure to have
the points of the teeth down, that is toward the
handle.
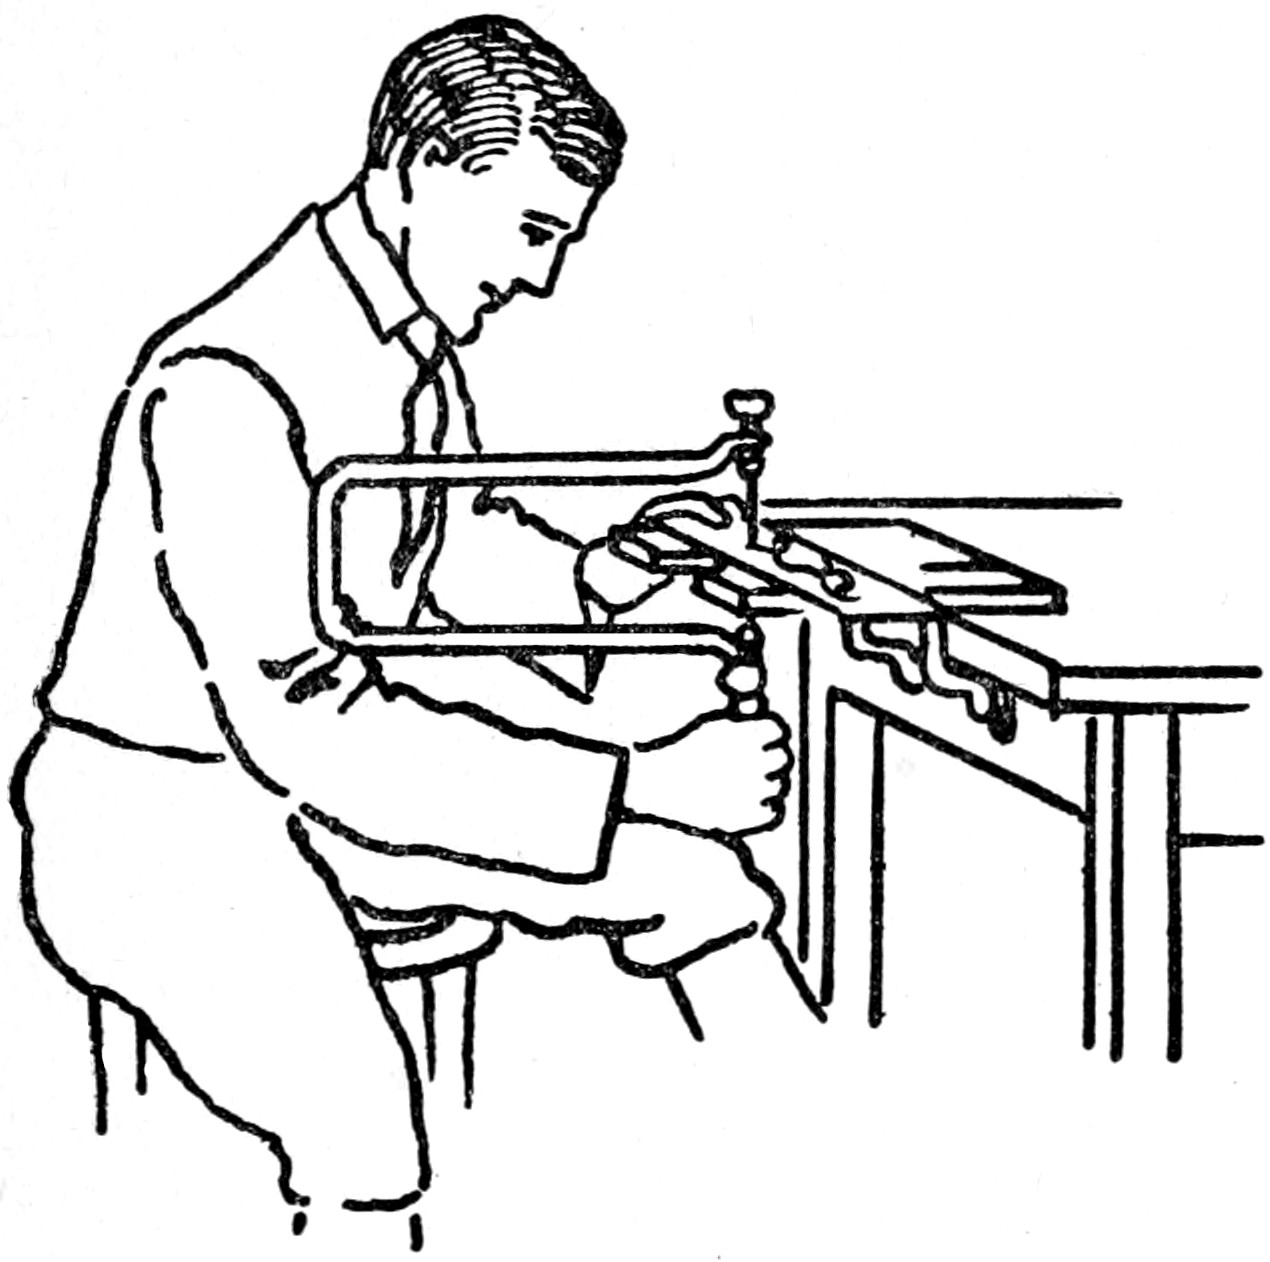
Next mark the design you intend to saw out on a
thin piece of wood[11] planed nice and smooth on
both sides, hold it flat on the edge of the table with
your left hand, grip the saw handle with your right
hand and hold it so that the saw blade is vertical as
shown in Fig. 9.
[11] Both can be bought of L. H. Wild, 171 Avenue A, New
York City.
You are ready now to begin to saw out the design;
set the sawblade on the line, jig the saw frame up
and down and be careful to give it even and smooth
strokes. You will be surprised to find how easily it
works. When you are sawing turn the wood and
not the saw frame—the latter can be turned a little
sometimes to advantage—and hold it so that the back
of the frame is always toward you and the blade
should move forward but very slightly.
Fig. 9. the right way to use a hand scroll saw
When you want to saw a piece out of the inside
of the board, take your awl and make a hole in it
by giving it a twisting motion to prevent it from
splitting the wood. Now unscrew one of the clamps
of your saw frame and put the free end of the saw
through the hole, clamp it in the frame and start to
saw again.
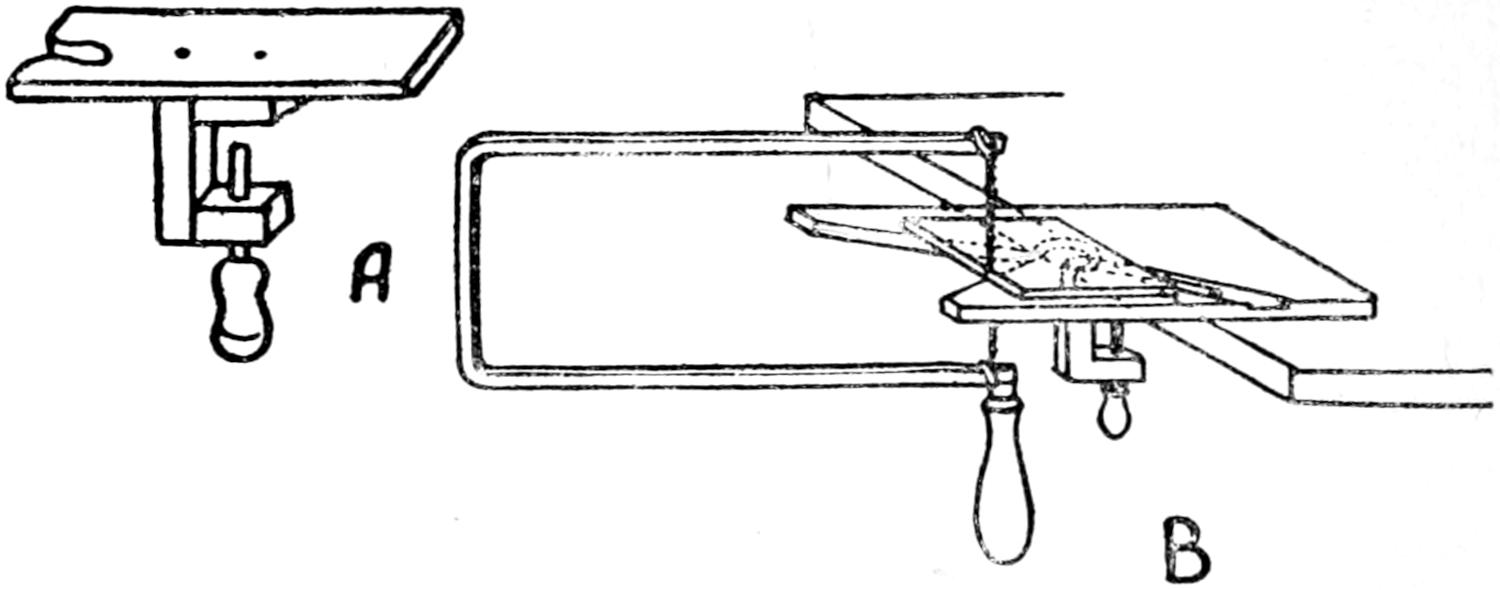
—A Hand Saw-Table.—You
can saw out your designs much more
easily and neatly if you use a hand saw table as shown
in Fig. 10. This is a board about 4 × 6 inches on the
sides with a V sawed out of one end and a clamp
screwed to the bottom of it.
Fig. 10. a hand scroll saw table
This makes the end of the board project out from
the table it is clamped to, raises the wood you are
sawing from the surface of it and gives you a firm
grip on it. You can easily make a saw table or you
can buy one for 50 cents.[12]
[12] The Millers Falls Company, Millers Falls, Mass., makes
them and nearly all tool companies sell them.
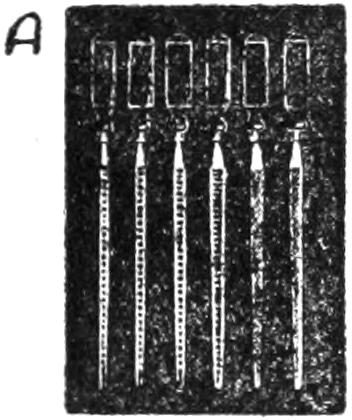
Files for Scroll Work.
—To do a really neat job
at scroll sawing you should have a set of scroll saw
files. These files are long and thin and are made
round, oval, knife edge, half round and three cornered
as shown at A in Fig. 11.
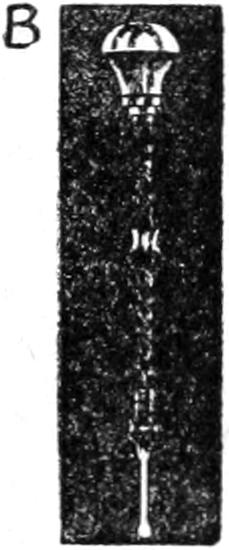
A Twist Drill Stock.
—A twist drill stock and a
drill, see B, Fig. 11, is far better for making holes
in wood than an awl and as they only cost 50 cents
you should have one. You can make a hole in a ¹⁄₈
inch thick board in the ¹⁄₁₀₀th part of a minute.
A Pair of Pliers.
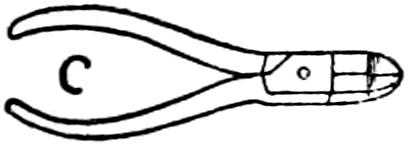
—A pair of flat-nose, side cutting
pliers is a very useful tool which will go a long way
toward making your scroll sawing efforts a success.
A pair is shown at C in Fig. 11.
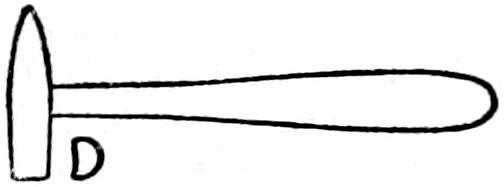
A Small Hammer.
—And finally get a small hammer
to drive brads with as pictured at D.
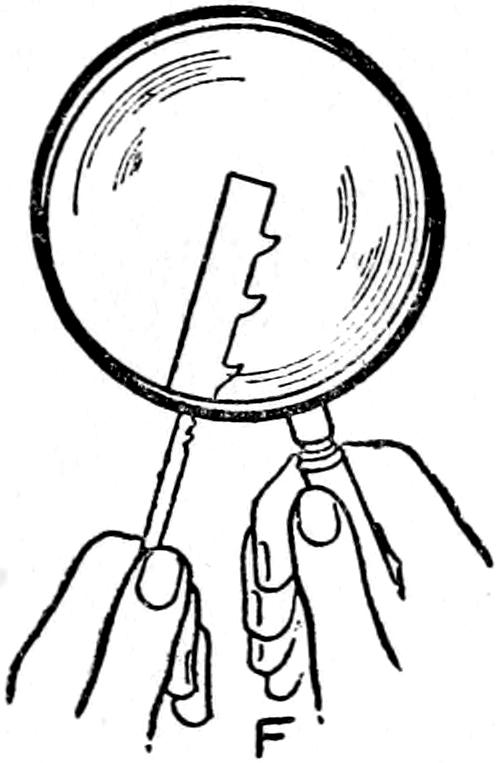
Scroll Saw Blades.
—There are two kinds made and
these are known as (1) Star saw blades and (2) German
saw blades.
A TWIST DRILL STOCK
SCROLL SAWYER’S FILES
SAW BLADES (HALF SIZE)
FLAT NOSE, SIDE CUTTING PLIERS
A SMALL HAMMER
THE TEETH OF A SAW ARE PLACED WIDE APART TO CUT CLEAN
Fig. 11. some necessary scroll sawing tools
As one is as good as the other by all means buy
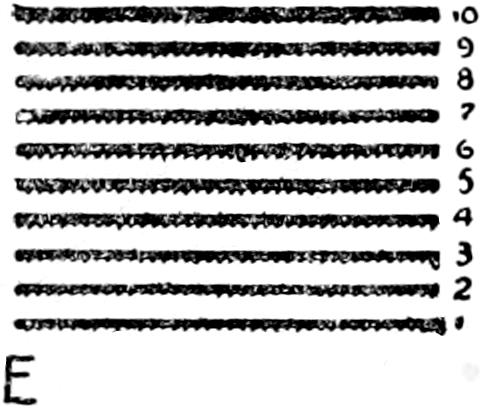
Star blades. The sizes from 1 to 10 are shown at
E in Fig. 11, but three smaller and two larger sizes
are made. The smaller sizes cost 10 cents a dozen
and the larger sizes 15 cents a dozen. The spacing
of the teeth on the blade is shown at F.
—You can
draw your own designs or buy them printed ready to
use. In either case you must transfer the design to
the surface of the wood you are going to saw.
To do this lay a sheet of carbon paper as typists
call it, or impression paper as jig sawyers call it, with
the prepared side next to the wood; lay the design
sheet on top of it; and fasten the corners of the sheets
to the wood with glue, or, better, with thumb
tacks.[13]
[13]
Thumb tacks are short, flat headed tacks used by draughtsmen.
Now take a sharp, hard lead pencil or a piece of
pointed bone and trace the outline of the design.
When you have it all done you will find that the design
is plainly marked in black lines on the wood—that
is except where you forgot to trace it.
—Designs in great
variety can be bought of H. L. Wild, Publisher, 171
Avenue A, New York City. Besides glove boxes,
handkerchief boxes, bird cages, clock cases, thread
and thimble stands, photo frames and a thousand and
one other pretty and useful articles you can get patterns
for doll furniture, alphabets and mechanical designs
like the horizontal engine shown at A in Fig.
12 and the fire engine shown at B.
—There are several
makes of foot-power scroll saws on the market and the
prices of these range from $4.50 to $25.
The Cricket Scroll Saw.
—This is the cheapest foot-power
scroll saw that you can buy and is the one that
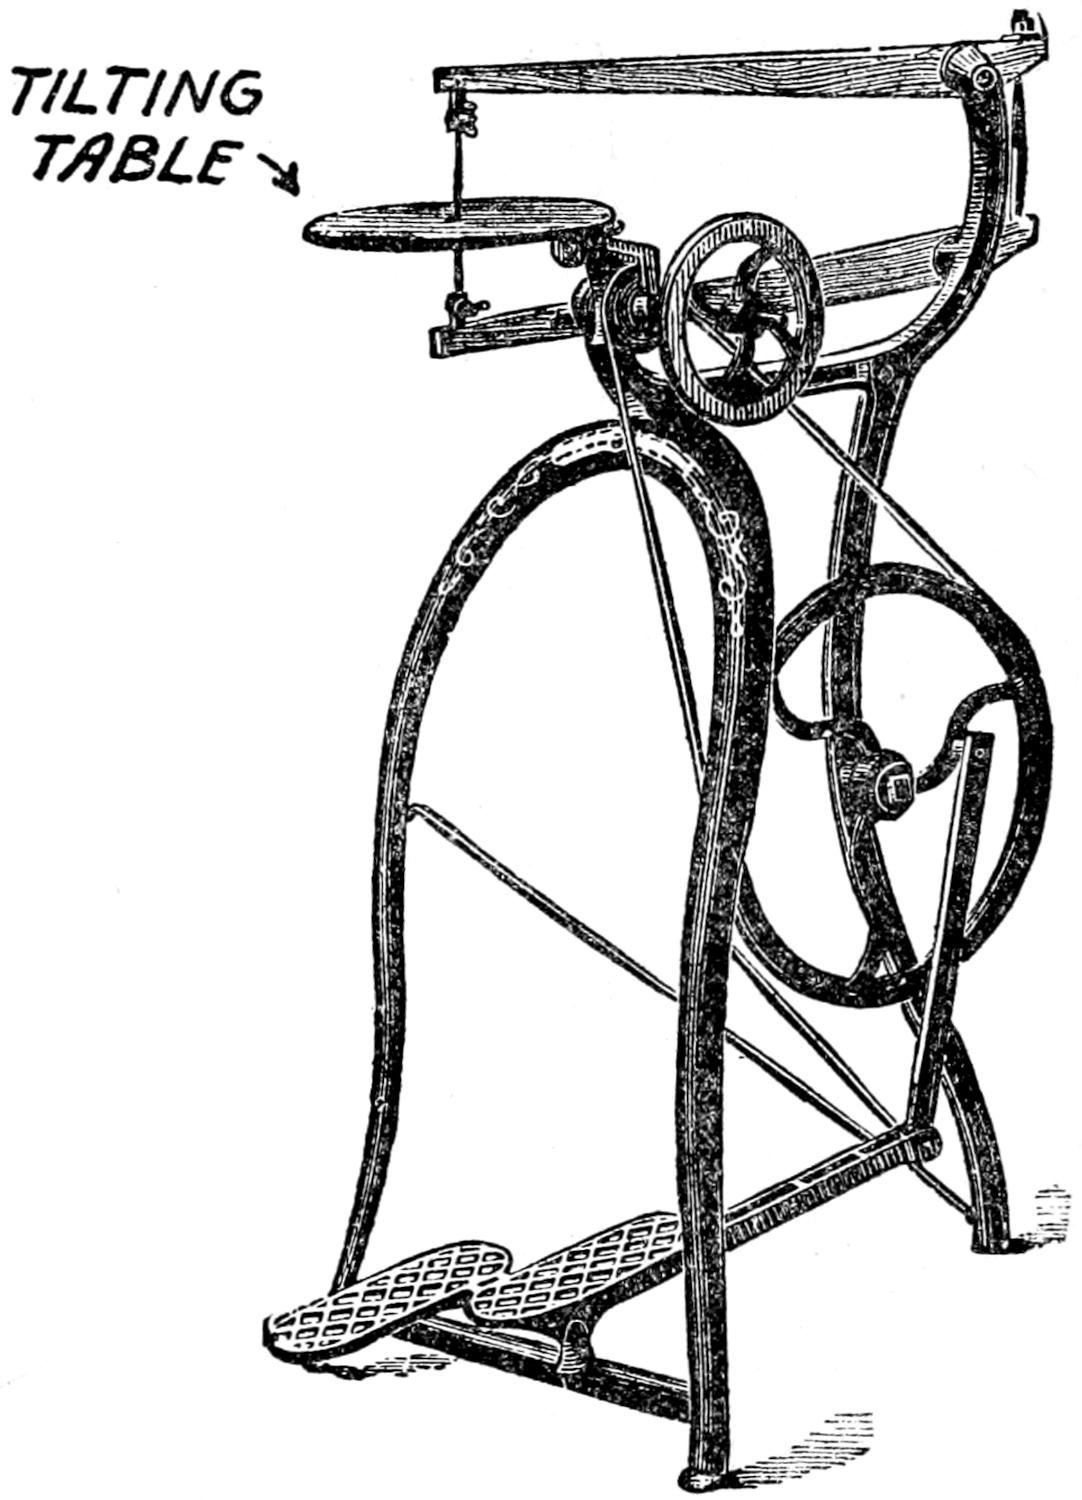
sells for $4.50. It has a table that tilts which permits
you to saw your work on a bevel—that is on a slant—so
that you can inlay it with some other kind of
wood or metal.
A—A HORIZONTAL STEAM ENGINE
B—A FIRE ENGINE
Fig. 12. mechanical masterpieces made with a scroll saw
This little machine weighs 17 pounds and is 33
inches high; it is made of lighter castings than the
machines which follow but it will do just about as
good work as the higher priced ones. Fig. 13 shows
what it looks like.
Fig. 13. the cheapest foot-power scroll saw made
The Lester Scroll Saw.
—This is a well made saw,
has a cast iron frame and the arms of the saw frame
and the pitman—that is, the rod which connects the
crank wheel with the frame—are of ash.
The Lester has several very handy attachments and
these are (a) an automatic dust blower, which blows
the sawdust away from the line you are sawing on;
(b) an adjustable lever saw clamp with a hinged jaw
which prevents the saw blades from breaking; and
(c) a drilling attachment.
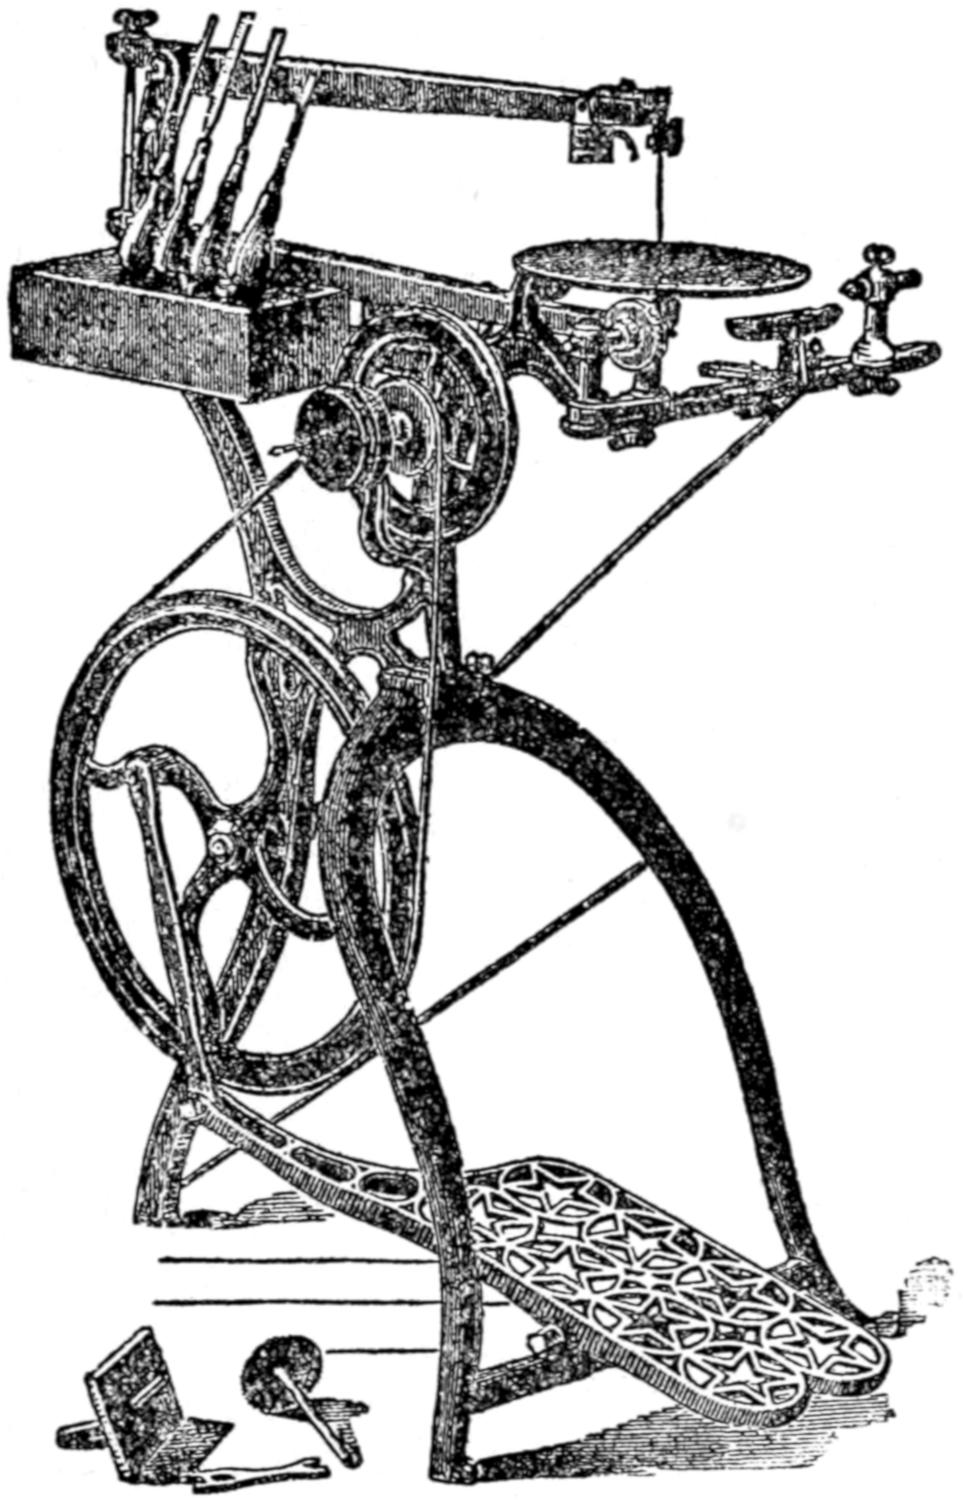
Fig. 14. the lester scroll saw with turning lathe
attachment
This saw, which is shown in Fig. 14, costs $10.00,
is 35 inches high and weighs in the neighborhood of
30 pounds. The lathe attachment costs $2.00 extra.
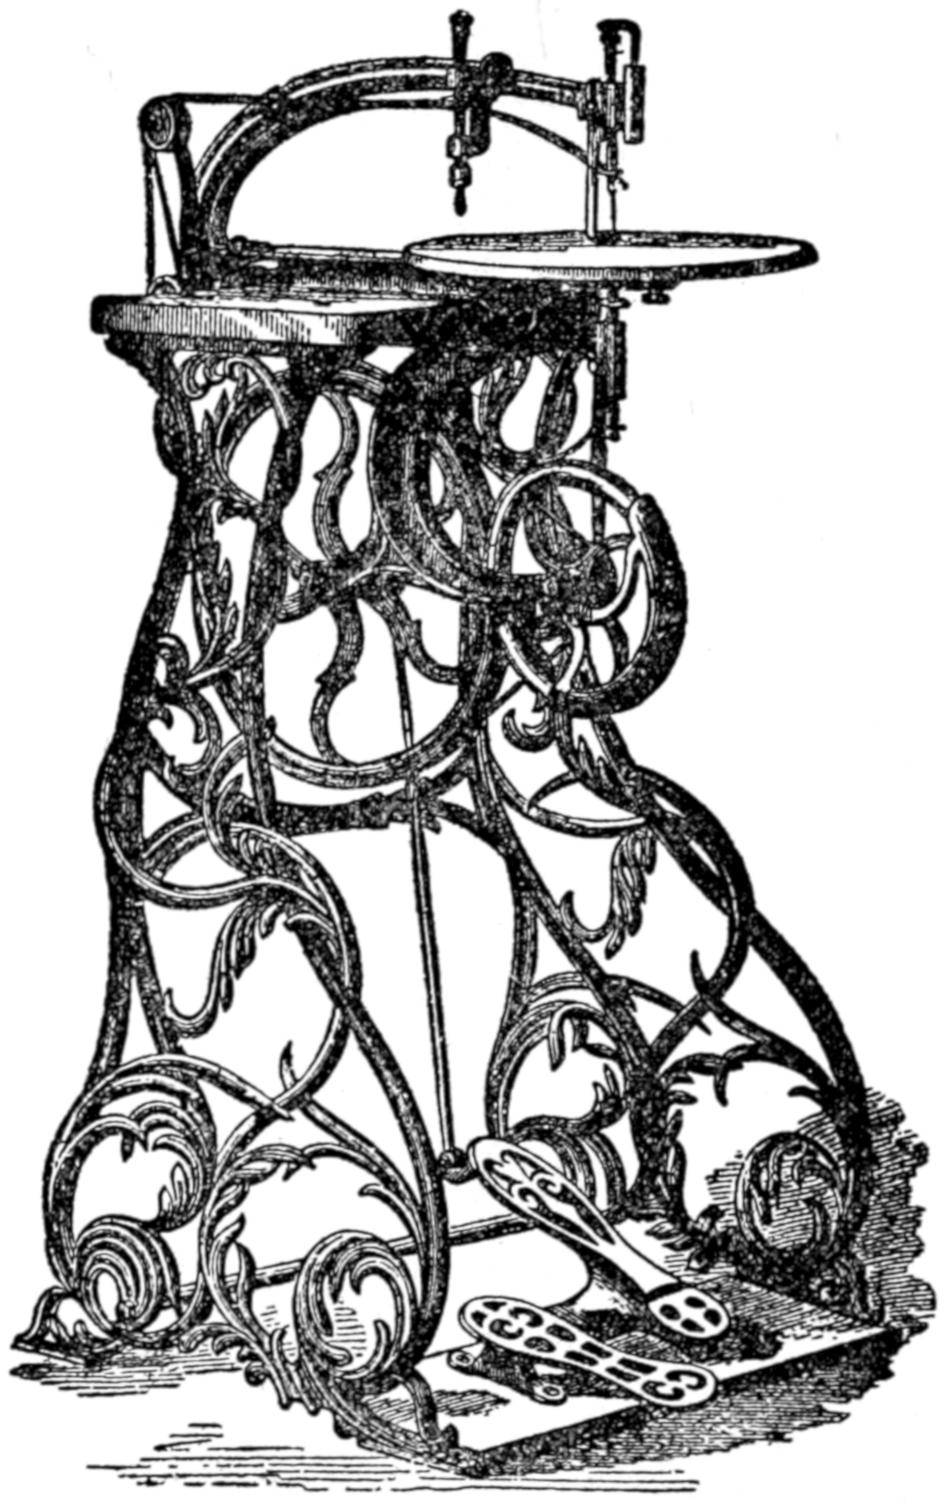
The Fleetwood Scroll Saw.
—This is the best and
consequently the most expensive foot power scroll
saw made. It has a swing of nearly 16 inches. It
is fitted with a tilting table, a vertical drill and a
blowing attachment. A scroll saw of this kind with
a plain stand can be bought for $21.00, or one with a
fancy stand, see Fig. 15, can be had for $25.00.
Fig. 15. the fleetwood scroll saw
—If you
will look again at Figs. 13 and 14 you will see that the
scroll saws shown have saw frames very like a hand
saw frame. The lower part of the frame is connected
with a crank on the end of a spindle, which has
a small grooved wheel fixed to it, by a pitman or rod
and the treadle is connected with the large drive
wheel by another pitman; finally the drive wheel is
belted to the small grooved wheel.
Now when you work the treadle with your foot it
produces a reciprocating motion and this is changed
by the pitman into rotary motion which it imparts to
the drive wheel. Since the grooved, or driven, wheel is
smaller than the drive wheel it revolves faster and this
gives the pitman connected with it a very rapid
rotary motion on one end but as it is pivoted to the
frame which in turn is pivoted at the rear end it is
changed into an up and down or reciprocating motion
exactly like the treadle but many times faster.
The Fleetwood works a little differently, in that instead
of a frame the pitman is connected with a metal
block that slides in a guide. The lower end of the
saw is fastened to the upper end of this sliding block
and the top of the saw blade is fixed to the end of a
long, curved spring whose elasticity tends to make it
fly up.
This action keeps the saw blade always taut and
pulls it up except when the pitman pulls the block down
and the saw with it. This is the principle on which
large power jig saws used in shops are worked.
—Lay
the board you are going to saw flat on the table of the
machine and put your finger tips of both hands on top
of the board; when possible keep one hand on one
side of the saw and the other hand on the opposite
side of it.
Press down hard enough on the work to keep it
on the table against the up strokes of the saw; as the
top of the table is polished it is easy to slide the work
around and keep the saw on the line. Run the saw at
an even speed and do not feed the wood against the
blade too fast.
Name
Price per foot planed to a thickness of
¹⁄₁₆ to ¹⁄₈ in.
³⁄₁₆ in.
¹⁄₄ in.
Poplar, or White Wood or Bass
$0.07
$0.08
$0.09
Spanish Cedar
.10
.12
.14
White Maple
.10
.12
.15
Sycamore
.11
.13
.15
Hazel Wood
.11
.13
.15
Oak or White Ash
.11
.13
.15
White Holly
.12
.14
.16
Black Walnut
.14
.16
.18
Bird’s Eye Maple
.14
.16
.18
Mahogany
.14
.16
.18
Cocobola
.20
.25
.30
Amaranth
.20
.25
.30
Rosewood
.25
.30
.40
Satin Wood
.30
.35
.40
Tulip
.50
.60
.75
Real Ebony
.50
.50
.50
These woods can be bought of H. L. Wild, 171 Avenue
A, New York City, or of J. Gabriel and Company, 672
Grand Street, Brooklyn, N. Y.
—Fancy
woods that are planed on both sides for scroll sawing
can be bought in thicknesses of ¹⁄₁₆, ¹⁄₈, ³⁄₁₆ and ¹⁄₄ inch.
Wood that is ¹⁄₈ inch thick is the best to use for all
ordinary work.
The foregoing list gives the name, thickness and
price of the chief common and fancy woods that are
good for scroll sawing.
—Brass hinges, knobs,
screws, drawer pulls, box hooks, French screws and
wire nails, that is brads, catches, metal legs, small
locks, escutcheons, turned moldings, etc., can be
bought of the above dealers who specialize in scroll
sawyer’s materials.
And now we come to another and highly fascinating
kind of wood-work and this is to spin a stick
of wood in a lathe and shape it with a chisel or gouge,
or wood turning as it is called.
While the outfit you need to turn wood with costs
more than for scroll sawing you will never forget the
pleasure of rounding up of a bit of wood into a shapely
form, no, not if you were to live a thousand years.
—It is far better to buy a lathe
than to try to make one, that is if you expect to turn
anything on it, for in the first place it is hard to get
the things to make one with and in the second you can
buy one for very little money.
How a Lathe is Made.
—A wood turning lathe consists
of four principal parts, and these are (1) the
headstock; (2) the rest; (3) the tailstock; (4) the
bed and (5) the stand, the first three parts of which
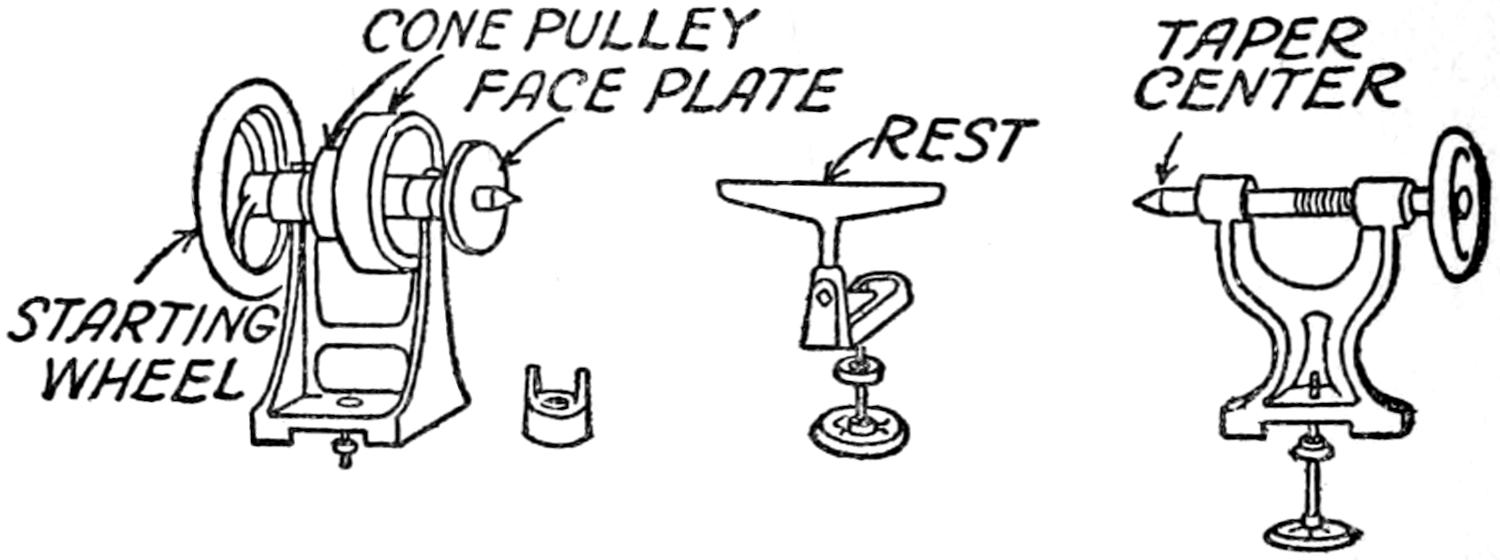
are shown in Fig. 16.
SPUR
HEAD STOCK
REST
TAIL STOCK
Fig. 16. the chief parts of a turning lathe
The head stock is fixed to the bed of the stand; it
is formed of a cone pulley mounted on a spindle in a
frame. A spur center is screwed to the spindle and
this holds the wood tightly in place while it is being
turned. The rest, which is adjustable, is used to lay
your turning tool on and so keep it in position. A
long and short rest usually go with the better lathes.
The tailstock has two adjustments, the first of which
allows it to be slipped back and forth on the bed and
clamped at any point which gives a rough adjustment,
and the second is a spindle which is threaded on one
end and has a taper center, that is a sharp point on
the other end. This allows the piece of wood which
is to be turned to be set between the spur center of
the headstock and the taper center of the tailstock.
These parts rest on the bed of the lathe and this in
turn is mounted on a stand. The stand is fitted with
a drive wheel and this is driven by a treadle with which
it is connected by a pitman exactly like a foot-power
scroll saw.
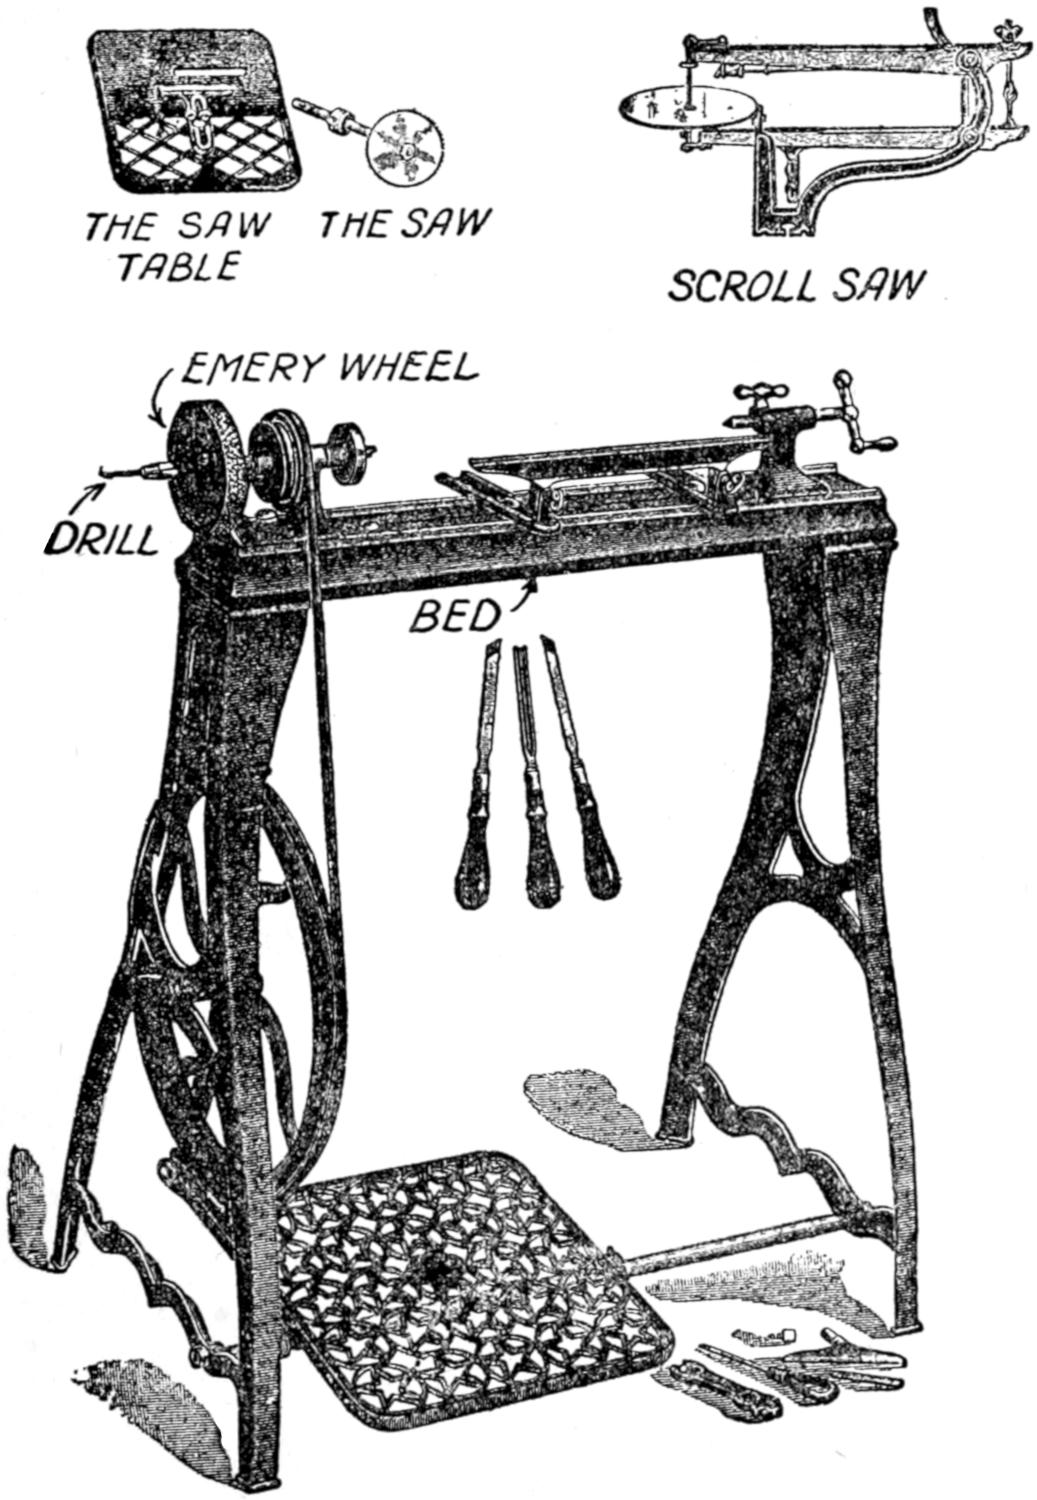
Fig. 17. the cheapest wood turning lathe made
—The cheapest
lathe you buy is called the Companion; it is made
by the Millers Falls Company, Millers Falls, N. Y.,
and it costs $10.50. It has a long and a short rest,
three turning tools and a 2 inch face plate and spur
center. When you get it uncrate it, set it up, oil it
well and you are ready to do some turning. The lathe
is shown complete in Fig. 17.
Attachments for the Companion Lathe.
—This lathe
is fitted with a 4 inch emery wheel without extra
charge. A very useful attachment is a circular saw
3 inches in diameter and a saw table 6 × 7 inches with
a straight edge guide; it costs $1.25 extra. A scroll
saw attachment that can be clamped on the lathe bed
may be bought for $3.00 extra. Both of these attachments
are shown in Fig. 17. Of course better
and larger lathes can be had for more money.
—The tools used for
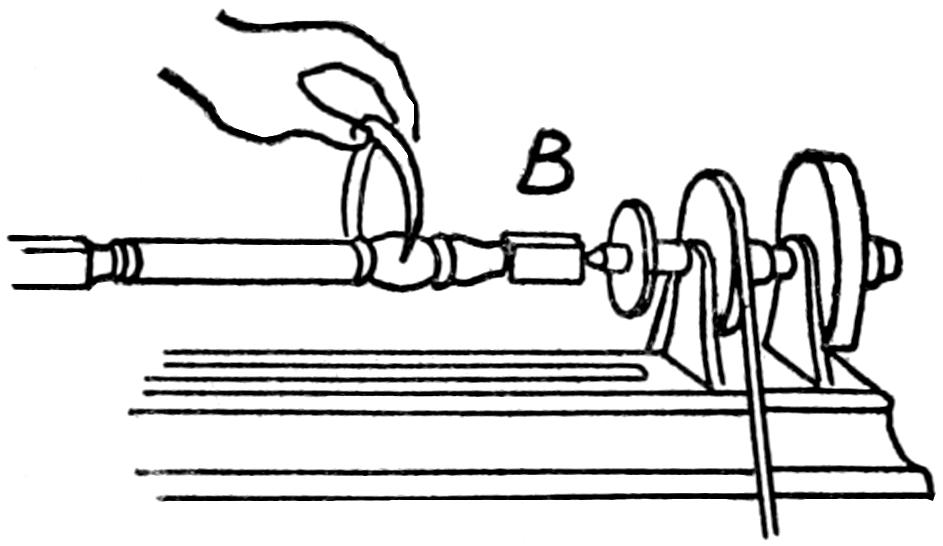
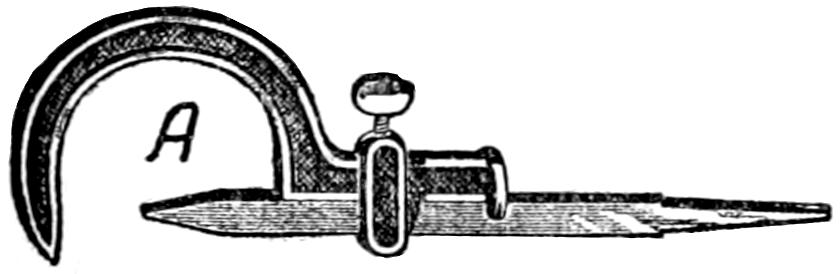
turning wood[14] are simply chisels and gouges. The
chisels are made with four kinds of points, namely,
(1) skew point; (2) round point; (3) square point,
and (4) spear point, and these are shown in Fig. 18.
These chisels can be bought in all sizes from ¹⁄₄ inch
to 1 inch wide.
[14] Buck Bros.’ turning tools for wood are counted best.
Gouges also come in sizes from ¹⁄₄ inch up to 1 inch,
and a parting tool, which is used to cut off a turned
piece and which is simply a V shaped chisel, can be had
in ¹⁄₂, ⁵⁄₈ and ³⁄₄ inch sizes. These turning tools are
also shown in Fig. 18. You can buy them fitted with
applewood handles and sharpened ready for use for
about 50 cents apiece. You can buy them of hardware
dealers or of Hammacher, Schlemmer and Co.,
Fourth Ave. and 13th Street, New York.
SKEW POINT
ROUND POINT
SQUARE POINT
SPEAR POINT
THE GOUGE
THE PARTING TOOL
Fig. 18. a set of wood turning tools
—Before you can turn out a
really good job on a lathe you must practice awhile.
A good thing to try your hand on is to make some tool
handles. The size of these will, of course, depend
on what you intend to use them for.
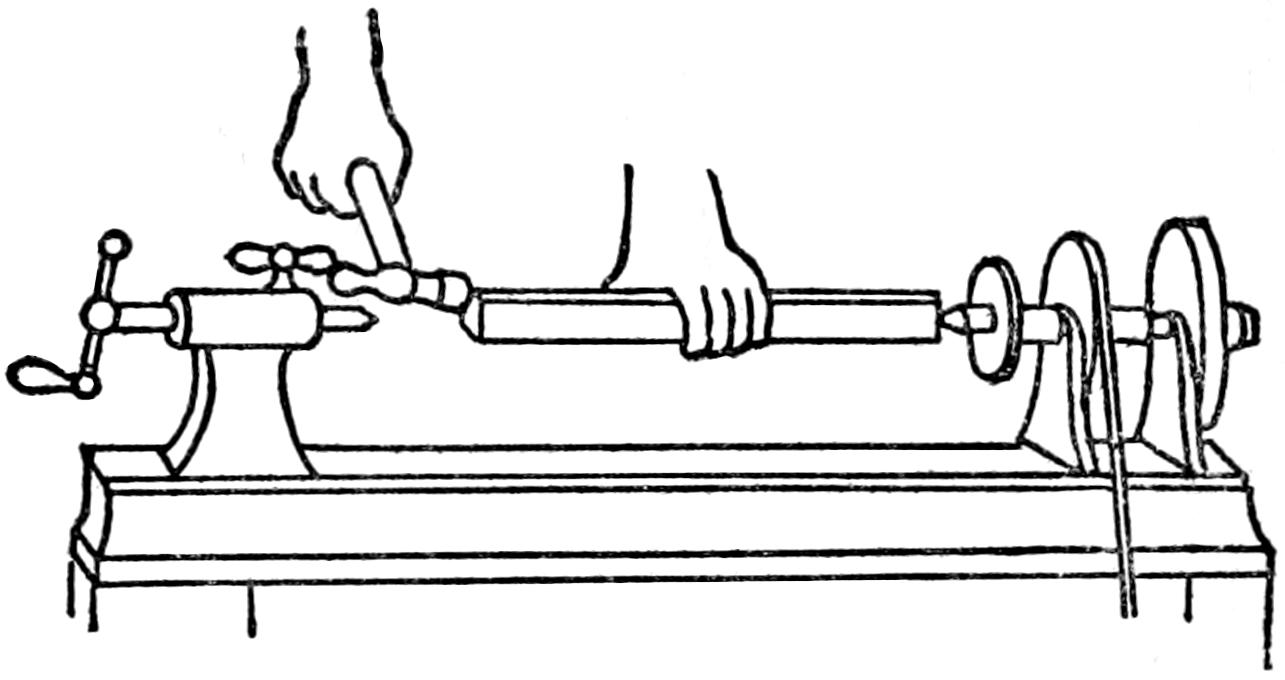
Take a stick of wood, round or square, it doesn’t
in the least matter, a couple of inches longer and a
trifle larger than the largest diameter that the handle
is to be and drive one end against the spurs of the
face plate as shown in Fig. 19.
This done screw up the feed of the tailstock until
the back-center is forced into the end of the wood
about ¹⁄₈ of an inch; clamp the rest so that it comes to
within ¹⁄₄ an inch of the wood you are going to turn
and you are ready for work.
Fig. 19. putting the rough wood in the lathe
Now put your foot on the treadle and work it up
and down; very soon the speed of the drive wheel will
carry it round smoothly and it will deliver considerable
power to the pulley of the headstock. If the drive
wheel is 5 times as large as the pulley and you treadle
the drive wheel 100 times every minute, the stick of
wood which you want to turn will revolve 500 times a
minute.
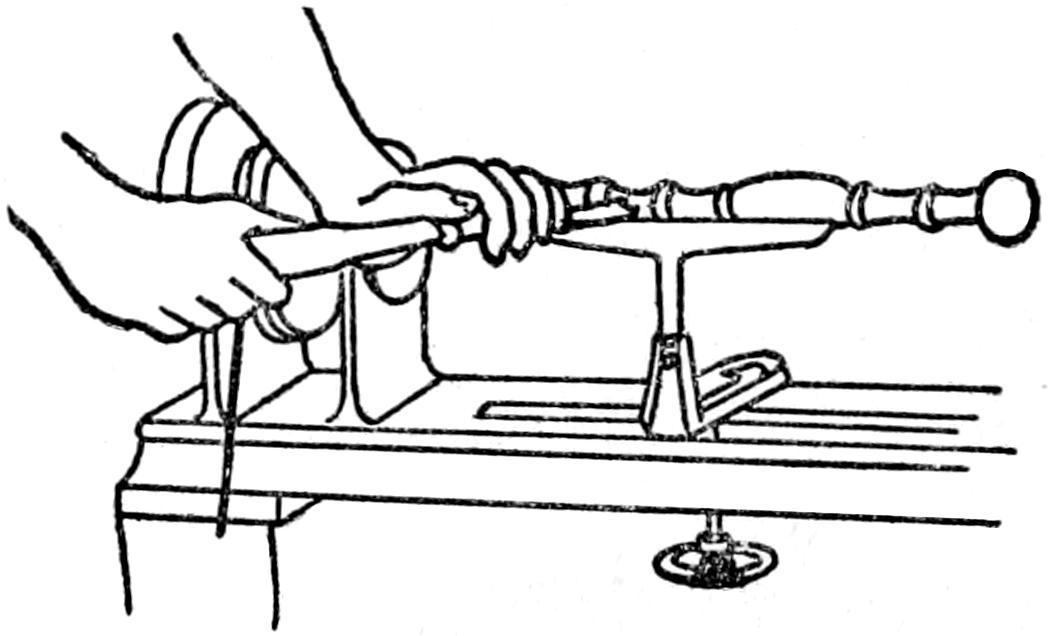
Fig. 20. the right way to hold a wood working tool
When you have the wood rotating at about this
speed grip the handle of it firmly with your right
hand, lay the back of the chisel on the rest and press
down on the blade with your left hand as shown in
Fig. 20. Of course the top edge of the wood is turning
toward you.
Whatever you do when you are roughing down a
stick of wood don’t try to take off too large a cut.
Go at it very gently with the point of your chisel and
as it begins to cut you can swing the tool around so
that the whole width of the blade is cutting.
Gouges are used in the same way as chisels and with
them you can turn out hollow parts. A parting tool
is used for cutting off the ends of the wood after you
have finished turning it.
SIZING WITH A PAIR
OF CALIPERS
A REGULAR
SIZING TOOL
Fig. 21. sizing the turned work
When you want to turn a piece of wood down to a
given size you can do so by testing it with a pair of calipers,
as shown in Fig. 21, or you can size it with a
regular sizing tool. To size the work measure off the
distance between the points of the calipers with a
rule for whatever thickness you want the turned part;
then as you turn the wood you can try it from time
to time until the wood will just slip through between
the points.
Carving is by all odds the hardest of all woodworking
processes to learn and yet there are some
simple forms of it that are at once easy to do and
pretty to look at. While carving is an art in itself
it can be used with fine effect in combination with
some kinds of scroll sawed and turned work.
—To begin with you
can get along very well with a set of six carving tools.
A set of this number is made up of a ³⁄₈ inch, a ¹⁄₄
inch, a ¹⁄₂ inch and a ⁵⁄₁₆ inch straight shank carving
tools and two of these are chisels and four are gouges,
so you see that they are just about the same as carpenters’
and turners’ chisels and gouges. Such a set
of tools costs about $3.00.
A better set contains a dozen carving tools and this
includes the above tools as well as a couple of bent
fluting gouges, with ¹⁄₈ and ¹⁄₄ inch sweeps, a couple
of front bent tools, a straight parting tool, and a veining
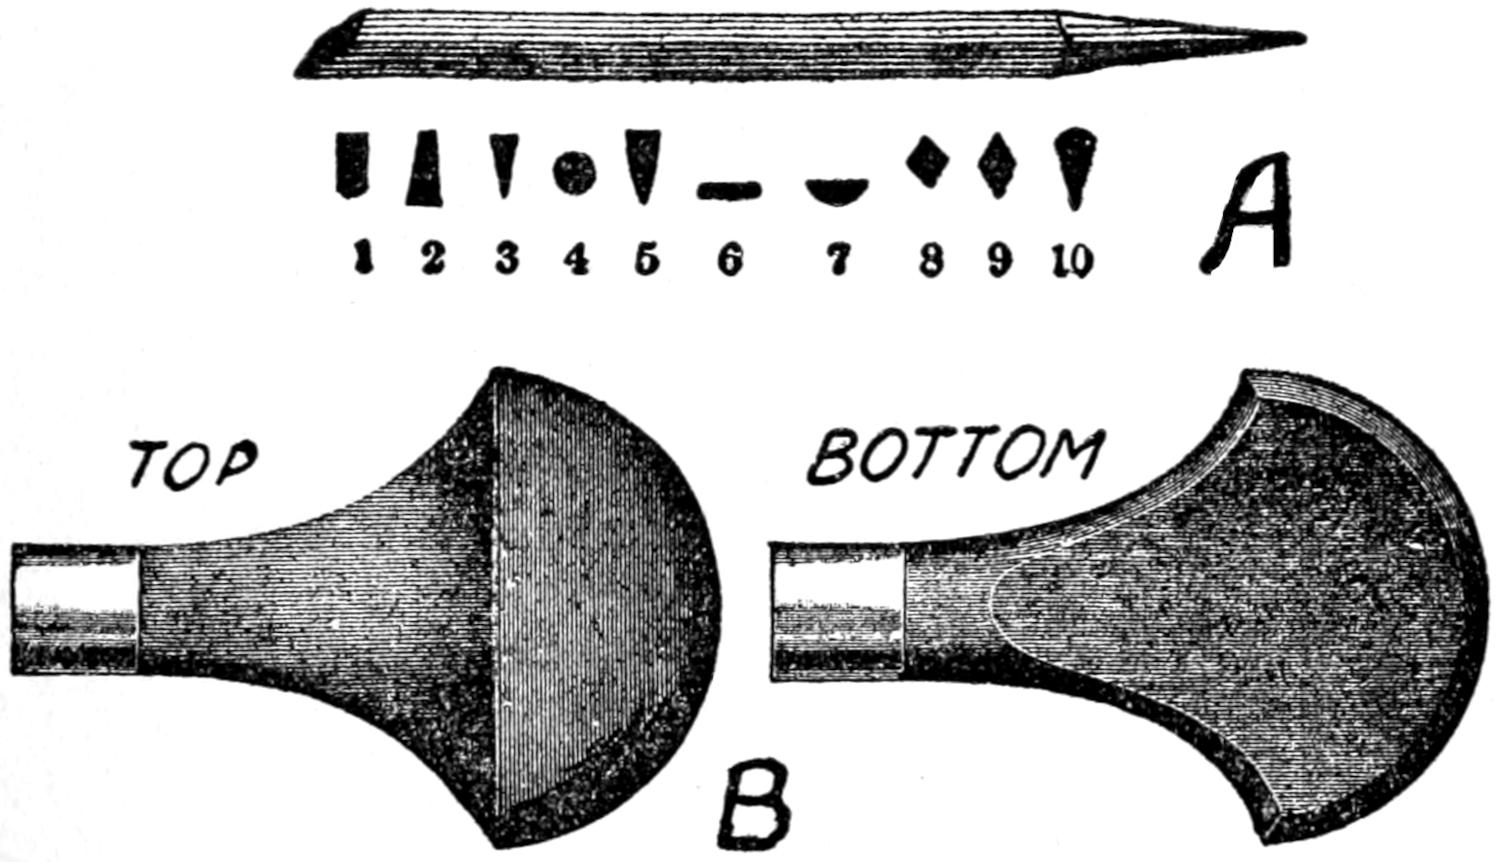
tool, all of which is shown at A in Fig. 22; the
sweeps, as the curved cutting edges are called, are
shown at B.
The tangs of these tools, that is the sharp ends
which fit into the handles, have shoulders on them
to prevent the handles from creeping and splitting.
The best carving tools on the market are those made
by S. J. Addis of London, and you can’t go wrong if
you buy them.
A
STRAIGHT CHISEL
SHORT BEND GOUGE
SKEW CHISEL
STRAIGHT PARTING TOOL
STRAIGHT GOUGE
LONG BEND GOUGE
FLUTING GOUGE
FRONT BEND GOUGE
VEINING TOOL
BENT FILE
B
C
SWEEPS OF WOOD CARVING TOOLS
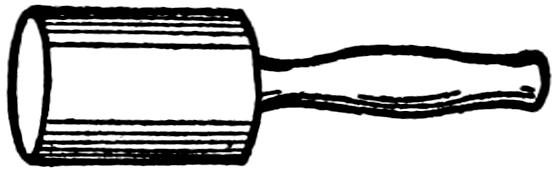
CARVER’S MALLET
Fig. 22. kinds and sweeps of carving tools
Carving tools as they come from the makers are
sharpened but not honed, that is the tools are ground
sharp, but the inside bevel of the tools must be rubbed
up with an oil stone slip and most wood carvers like
to do this themselves.
When you buy a set of carving tools you also want
to get a carver’s mallet made of lignum-vitæ[15] with a
face 2¹⁄₂ inches in diameter and, as you will see in Fig.
22, its shape is quite different from the ordinary kinds.
Also get a Washita oil stone, and an Arkansas carving
tool slip, which is a small wedge-shaped oil-stone.
[15]Lignum-vitæ is a greenish-brown wood and is very hard
and heavy. It grows in tropical America.
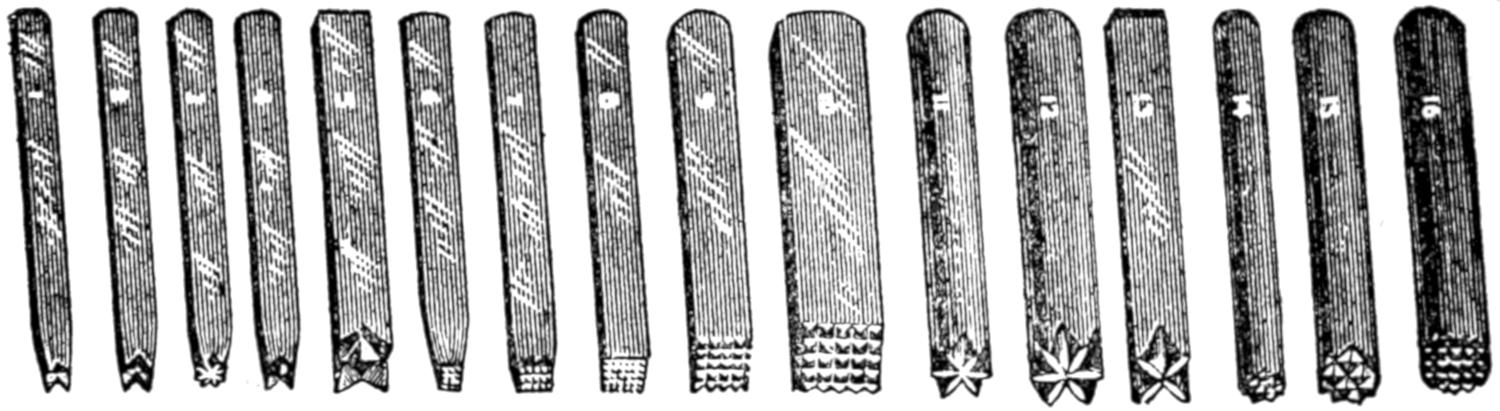
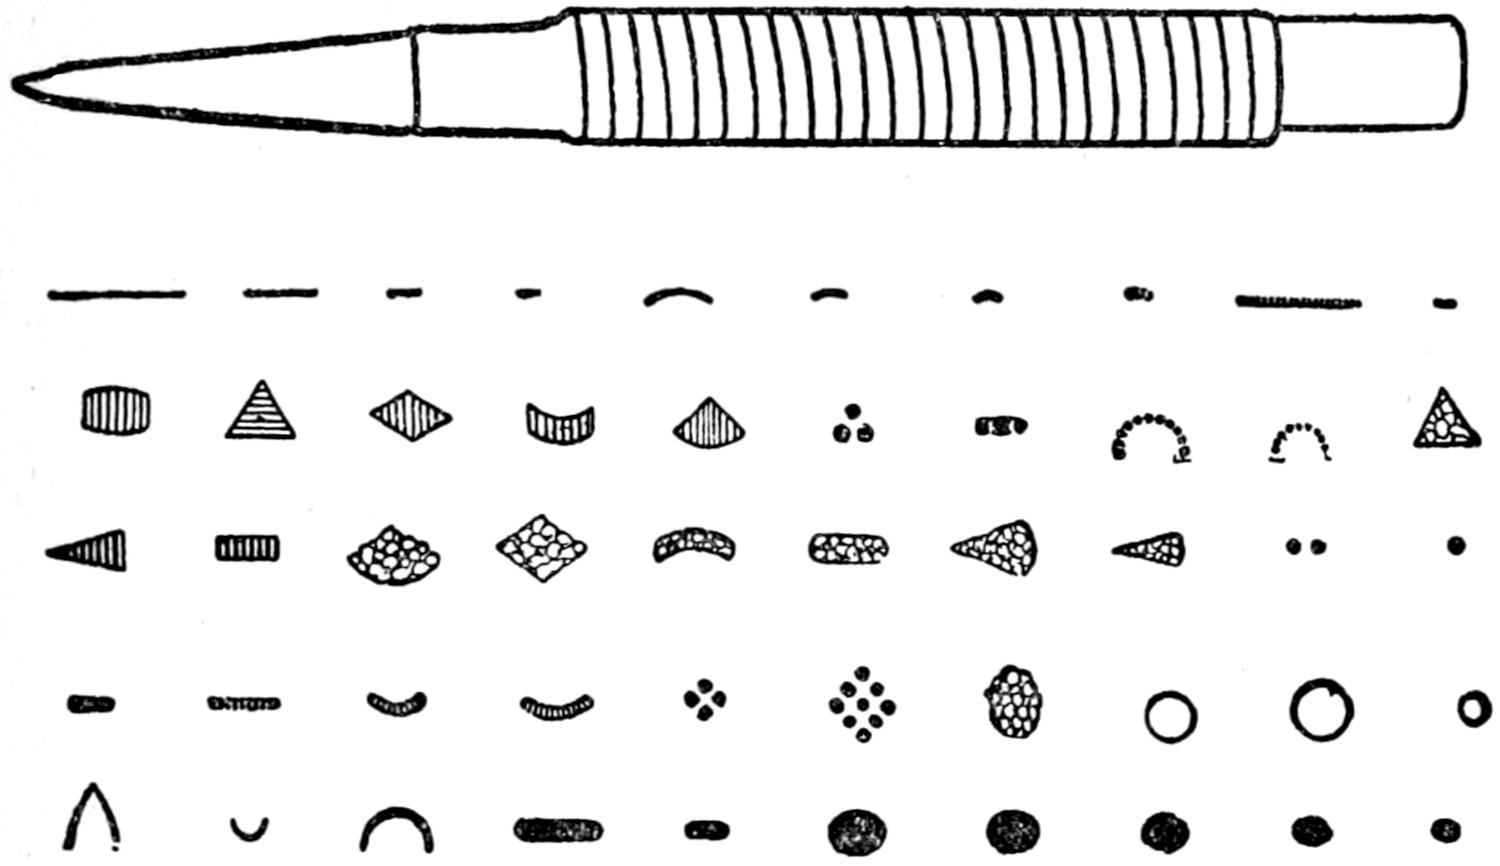
Fig. 23. markers for stamping in backgrounds
Two or more markers, which are stamps made of
tool steel, are very useful for stamping in background
work. A number of different designs are shown in
Fig. 23 and they cost about a quarter apiece.
A SNIB
A HAND CLAMP
A CARVER’S VISE
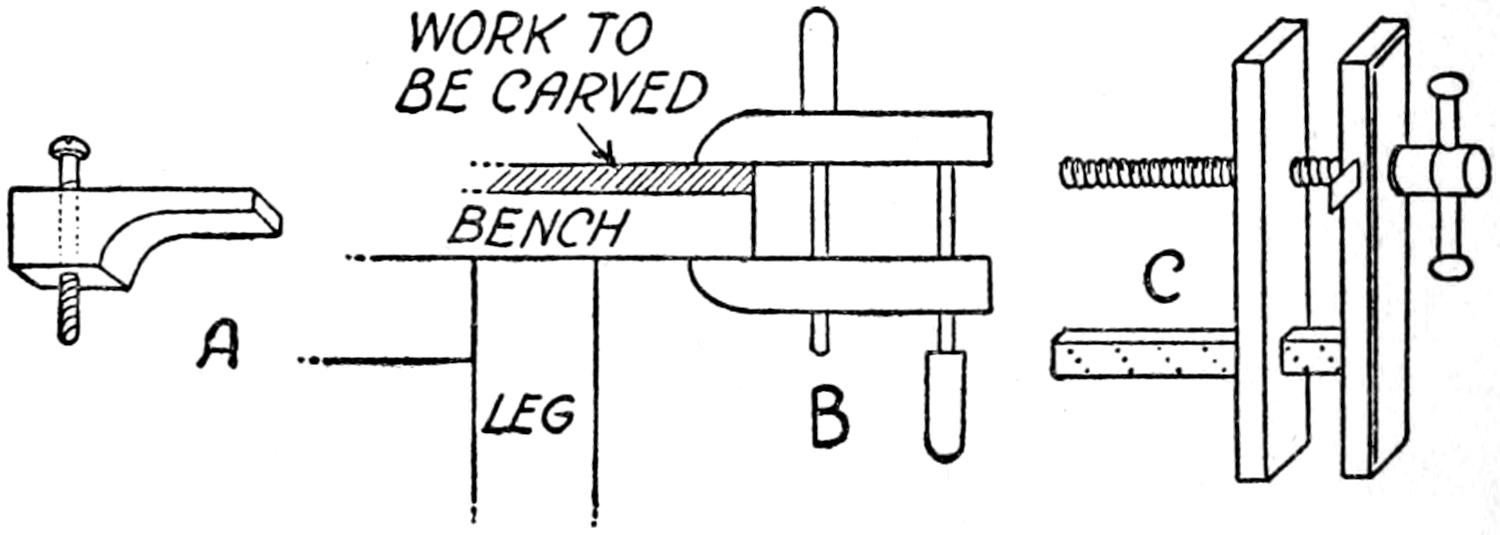
Fig. 24. schemes for holding work when carving
To hold the work while you are carving it you can
make two or more snibs as shown at A in Fig. 24.
These little clamps are sawed out pieces of wood with
an ordinary wood screw through the thick end, and
when you want to carve a flat piece of work clip it with
a couple of snibs and screw the latter to your bench.
A better scheme is to use a couple of hand screws as
shown at B. For carving in relief you will need a
wood-carver’s vise as shown at C.
—A wood that is
suitable for carving must be tough, even grained and
free from knots. For a beginner, and I guess you are
one, yellow pine is a good wood to practice on as it
is soft and easy to work but you must be careful not
to splinter it along the grain.
Oak is much tougher but it is a fine wood for carving
and you will not need to take the care to prevent
splintering as with pine. Black walnut and mahogany
are beautiful woods and are nice to carve, while for
finer work apple, pear, sycamore and California redwood
are largely used.
—There are three kinds
of wood carving in general and these are (1) chip, or
surface carving, (2) panel or relief carving, and (3)
figure carving, as shown in Fig. 25.
When you cut your initials in the top of your desk
at school you made a primitive attempt at what is
called chip carving. Most likely you got the birch
for it but it was only the savage instinct for decorative
art that was trying to find expression in you, and so
it’s not your fault. (But don’t do it again.) Any
kind of carving on a flat surface is called chip carving,
and some of it is very beautiful. It is shown
at A.
A—PLAIN PANEL
B—FANCY PANEL
C—FIGURE CARVING
Fig. 25. kinds of carving
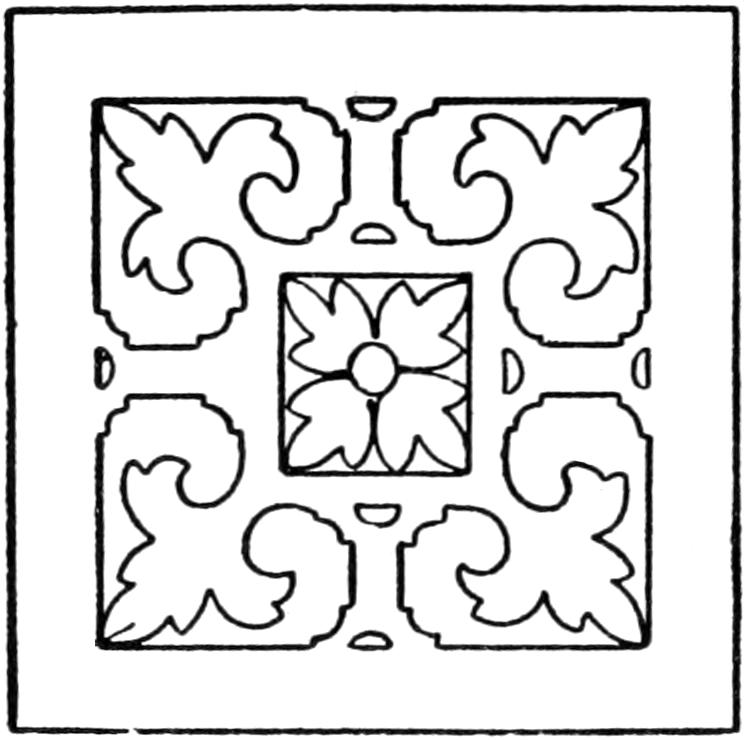
Panel carving is done on flat pieces of wood also
but the design is made by cutting out or sinking the
ground, as shown at B. Sometimes when it is desirable
to make some part stand out in relief above the
surface it is carved out of a separate piece of wood
and planted on, that is glued on.
To carve a lily of the valley or a deer’s head out of
a solid block of wood is not as easy as the other kinds
of carving, but if you have a natural aptitude for
using tools and an eye for art you can succeed as well
as the next one.
Fig. 25d. a carved watch case holder
Chip Carving.
—You will need only three tools for
chip carving and these are (1) a ¹⁄₄ inch chisel; (2)
a parting tool and (3) a veining tool.
The first thing is to get the design you want to
carve on the board. To do this you can either
draw the design directly on the board, or, better, lay
a sheet of impression paper on the board and then
the design you want to transfer on top of it and trace
it with a lead pencil.
Screw the board to your bench with two or more
snibs and you are ready for work. Carve out the
heavier lines with the parting tool and the lighter
lines with the veining tool. Use the chisel to cut
the corners sharp and make the lines clean and even.
In chip carving grounds are never put in.
Panel Carving.
—In this kind of carving leaves,
berries, scrolls and the like are carved out of the surface
of the board and as the ground is sunk these objects
stand out in relief.
Begin by drawing, or transferring, the pattern to
the board as before; then cut it out with gouges and
chisels as shown at A and finally use the veining tool
for the radiating lines. The head can be carved out
of a separate piece of wood glued to the ground, or
planted on as it is called. The work can be oiled
and polished but never varnish it. It is shown finished
at C.
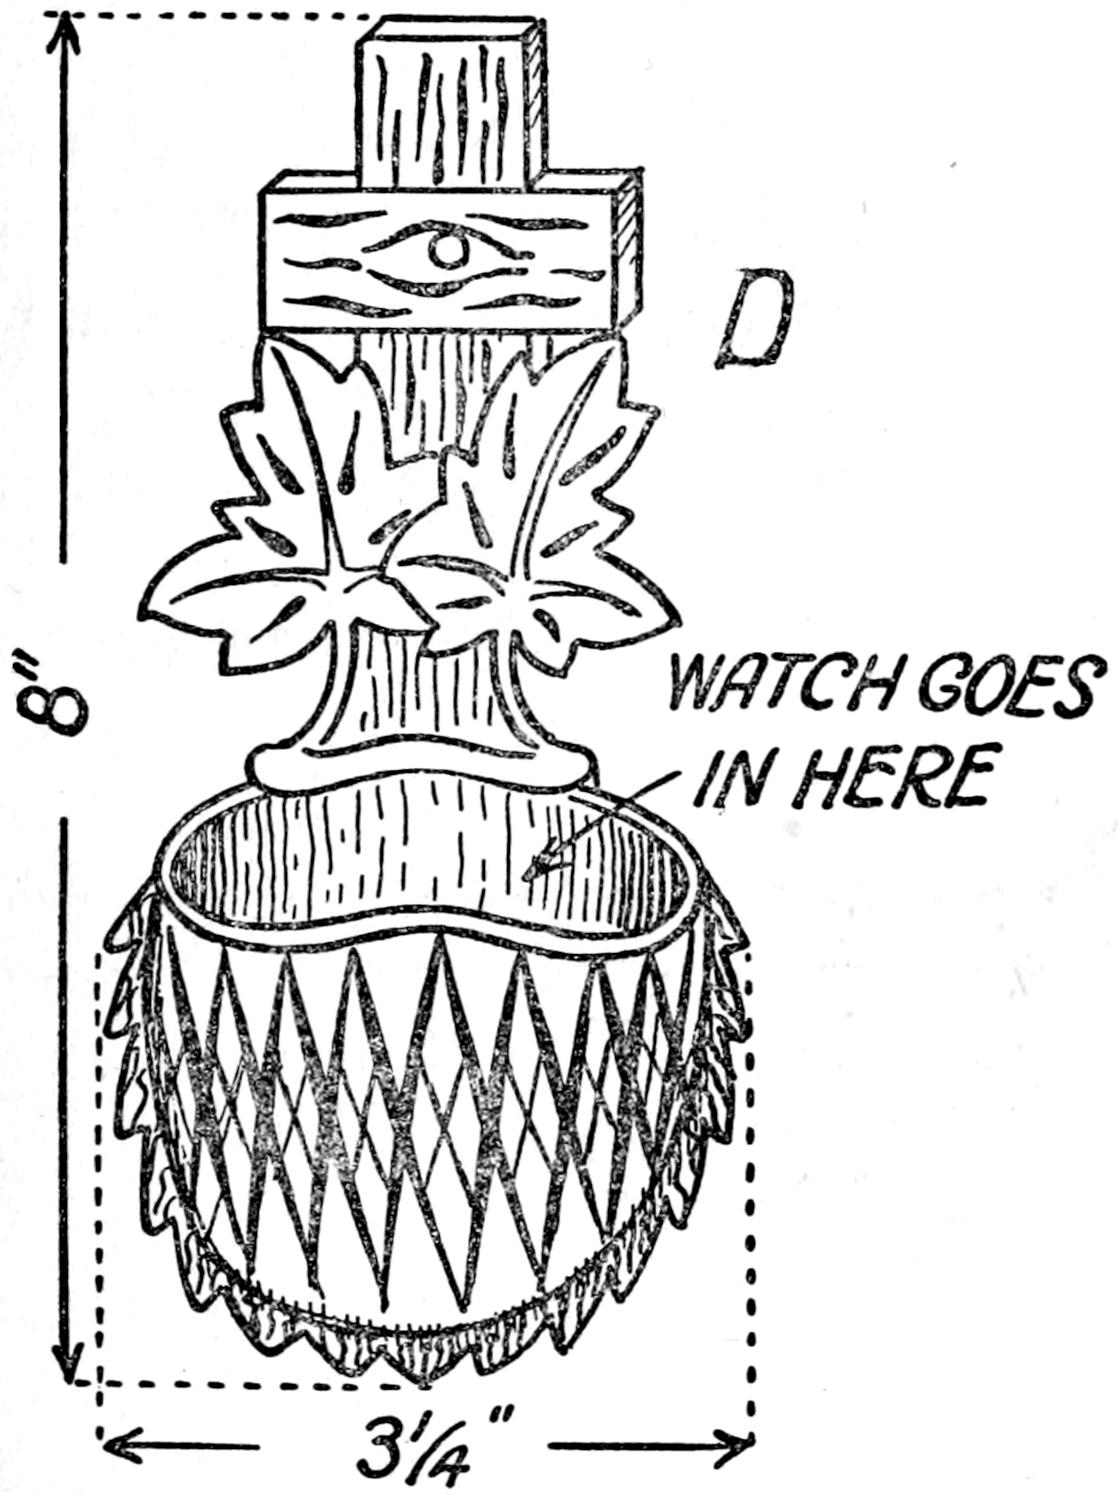
To make a watch case holder like the one shown
at D saw out a piece of walnut, or other wood, ¹⁄₄
inch thick and draw on the design.
Carve the cross and lower part of the case by
chipping it; carve the leaves in relief and put in the
veins with the veining tool. Now saw out another
piece for the pocket 1 inch thick and carve out the
front and the back to the shape shown at D so that it
is only ¹⁄₈ inch thick when finished and glue it to the
other part when you will have a watch case holder of
the vintage of 1875.
Carving in Solid Wood.
—This ranges all the way
from carving simple leaves as shown at D to the human
form divine.
To carve out leaves on a flat surface draw the design
as before and carve them out with your gouge to
look as much like real leaves as you can and to
give them the final touch of beauty cut the veins in
with your veining tool.
For carving out heads, as for example the one
shown at C, mark the shape of the object which you
intend to carve on the sides of the block as it would
look if you cut it down through the middle. Now
screw up the block in your vise and cut away the sides
with your chisels and gouges, using the mallet to do
it with. All you want to do at first is to get the rough
shape of the figure.
When you have done this you can go ahead and
finish up the work with your chisels and gouges. To
give the carving a life-like appearance do not use files
or sandpaper on it and do not varnish or polish it.
This is a simple and pleasing art and one that is
easy to practice. It gets its didactic name from the
Greek word pyro, which means fire, and graph, to
write, that is writing with fire, only in pyrography
you draw with fire instead.
—The chief tool you need
is called an etching tool. This is formed of a piece
of iron, copper or platinum with a curved point which
is heated in a flame until it is red or white hot.
When it is hot you press the curved point against the
wood upon which you have drawn the design and it
burns the lines into it.
A—THE ETCHING TOOL
B—COMPLETE WITH HANDLE
Fig. 26. the tool used for pyrography
How to Make an Etching Tool.
—Get a piece of
copper rod ¹⁄₄ inch in diameter and 3 inches long; file
one end down to a point to the shape shown at A and
B in Fig. 26 and put a file handle on the other end.
How to Make an Alcohol Lamp.
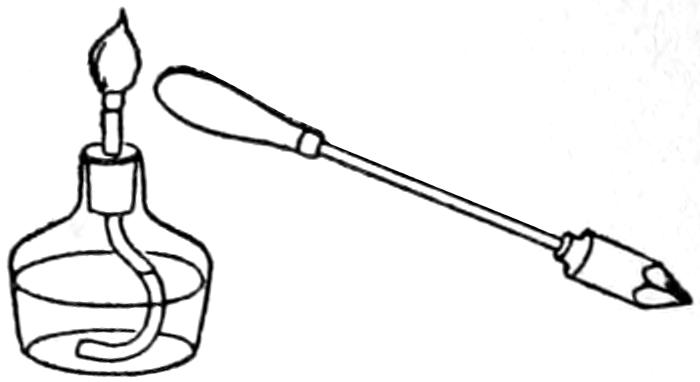
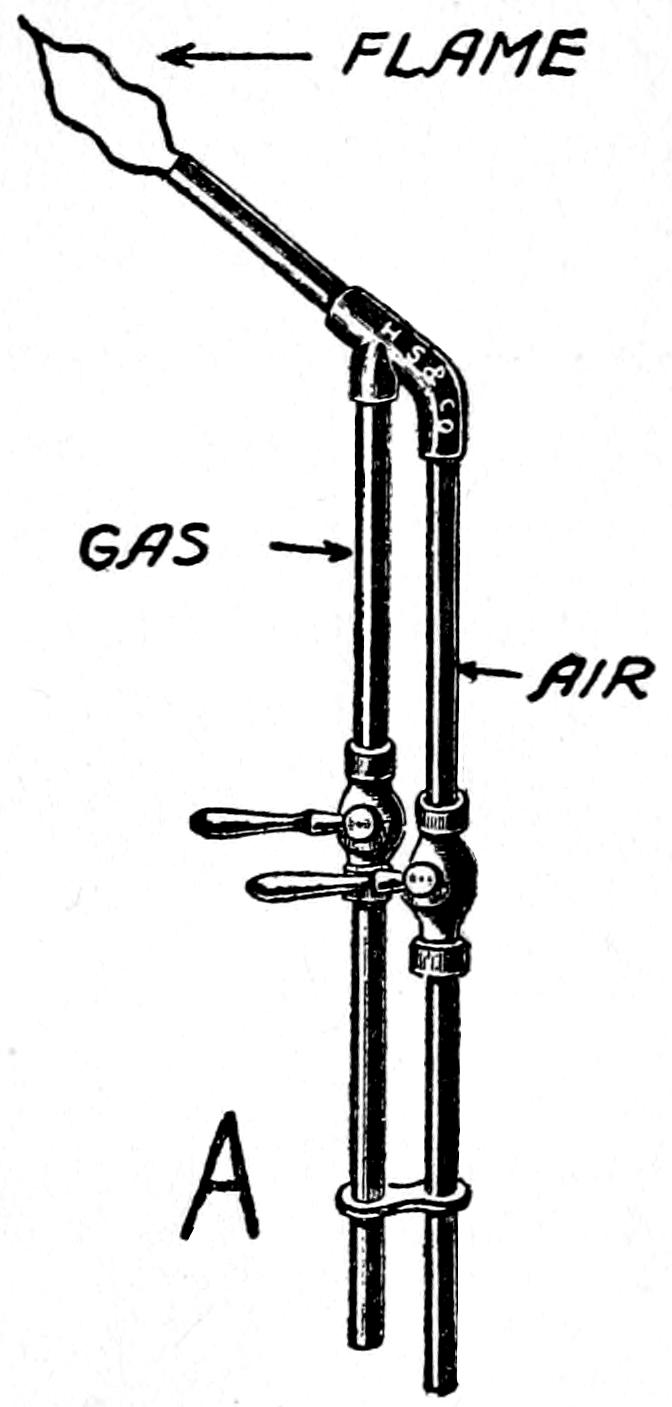
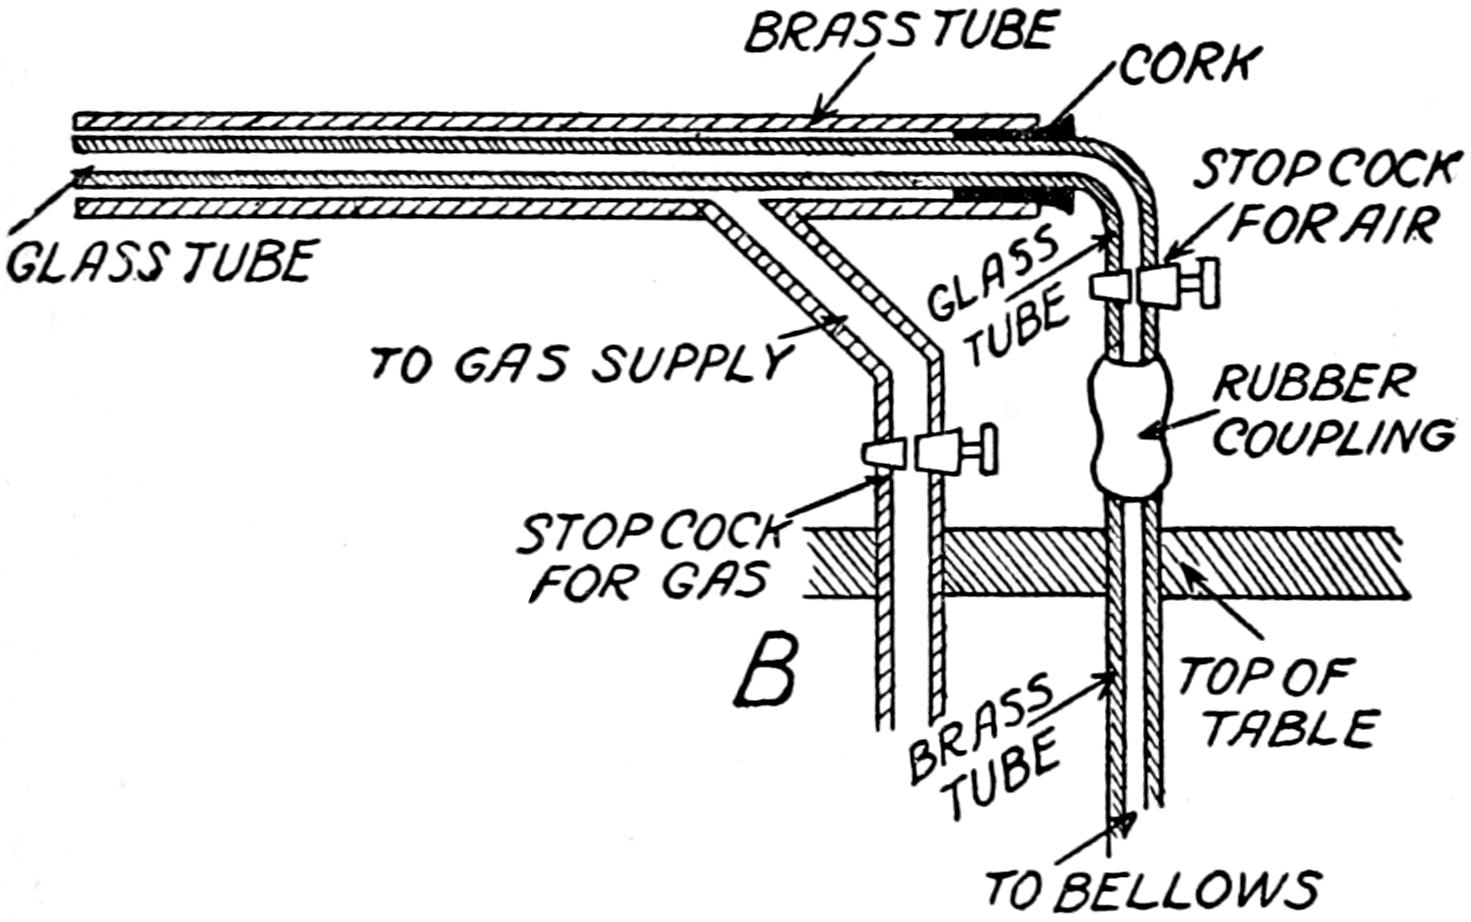
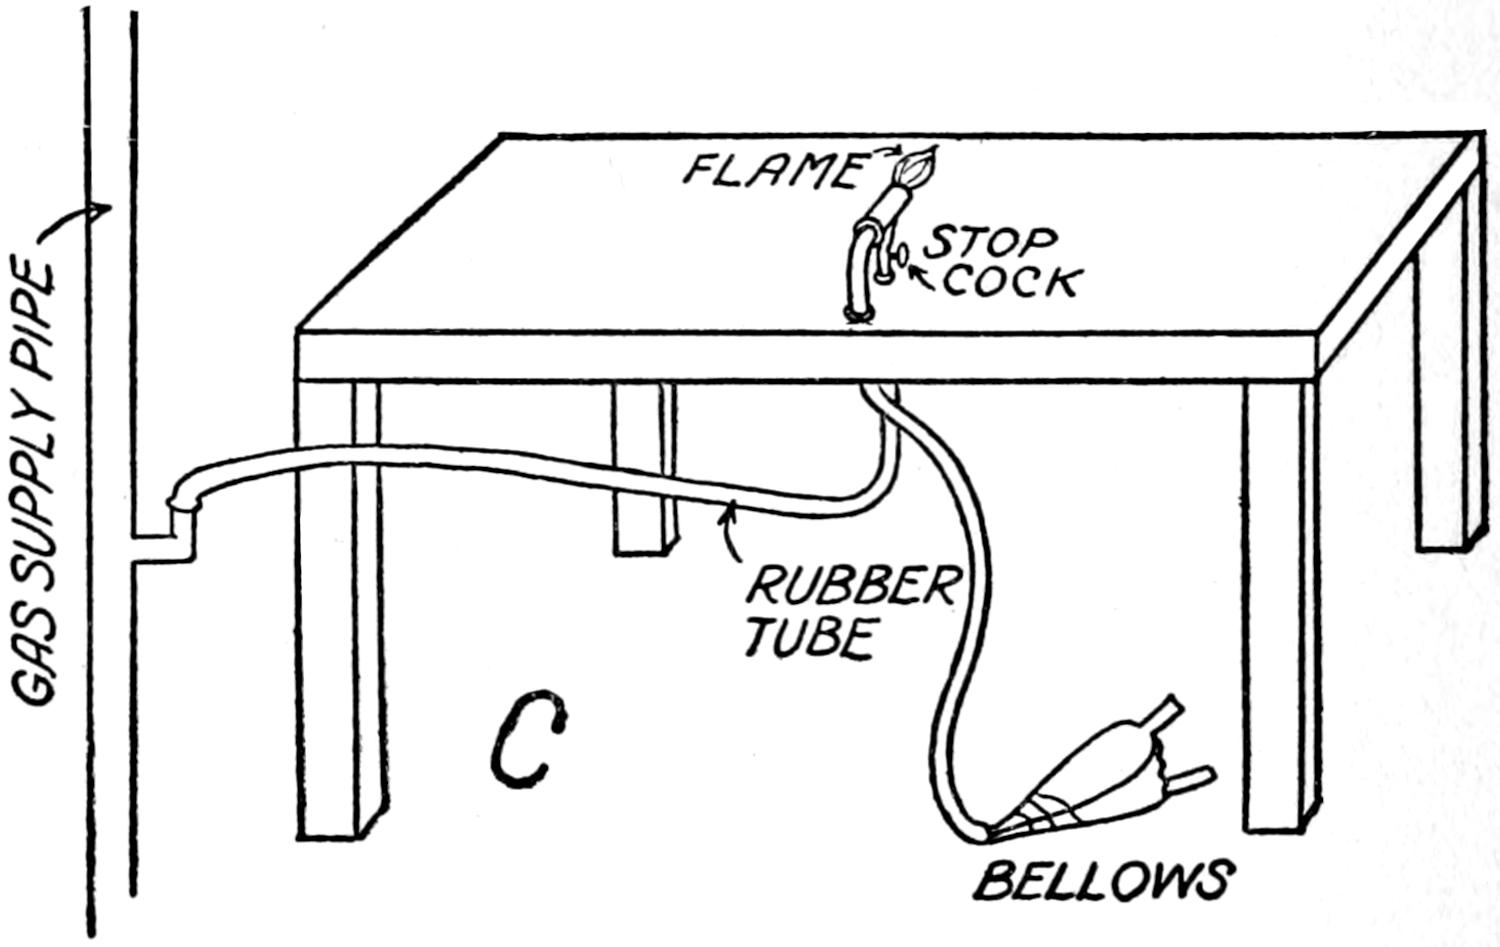
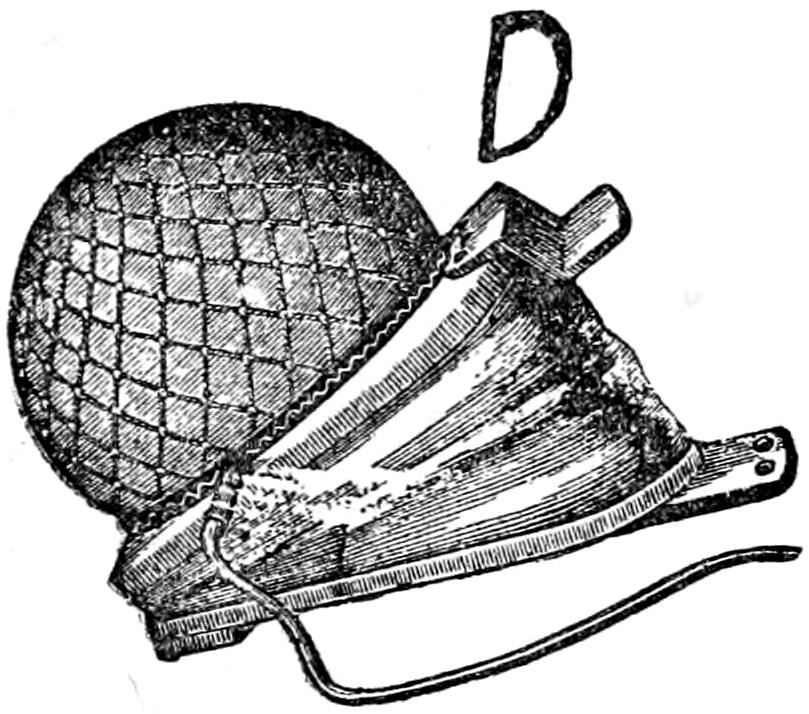
—The etching tool
must be heated in either an alcohol or a Bunsen flame.
You can make an alcohol lamp of an ink bottle that will
serve the purpose very well. Make a hole in the cork
about ¹⁄₄ inch in diameter and make a tin tube 1 inch
long that will fit it snugly. Braid a wick of string and
put it through the tin-tube; fill the bottle with alcohol
and your lamp is done. If you can get gas you
can use a Bunsen burner[16] which makes a hotter
flame and is less trouble.
[16] Can be bought of the L. E. Knott Apparatus Company,
Boston, Mass.
A Better Outfit.
—A good outfit which has a platinum
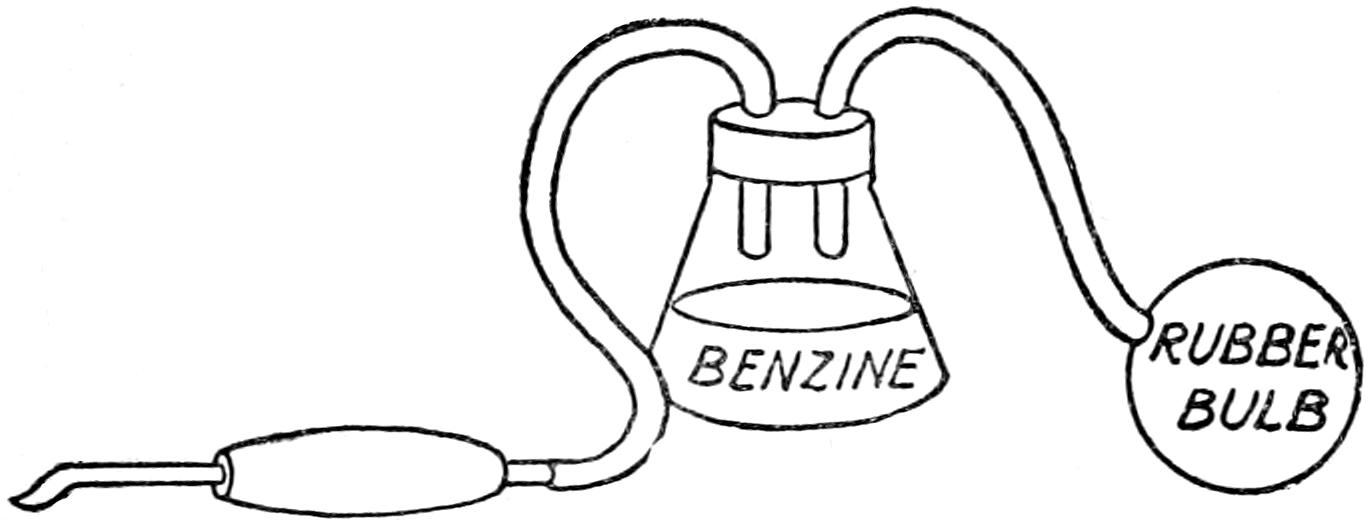
pointed tool and burns alcohol vapor, see C, can
be bought for $3.00 and more.[17] If you have gas in
your house you can buy a tool which uses it for 50
cents or less.
[17] Everything needed for pyrography can be had of the Frost
and Adams Co., Cornhill, Boston.
C—AN OUTFIT THAT BURNS
ALCOHOL VAPOR
Fig. 26c. an outfit that burns benzine vapor
About the Designs.
—If you are good at drawing
you can make your own designs, but if not you can buy
them ready to use. Draw your designs on soft white
pine or basswood with a soft lead pencil having a
blunt point. Photo frames, plaques, tie racks, collar
boxes and things which you can saw out on your
scroll saw are greatly improved by burning.
How to Burn in the Design.
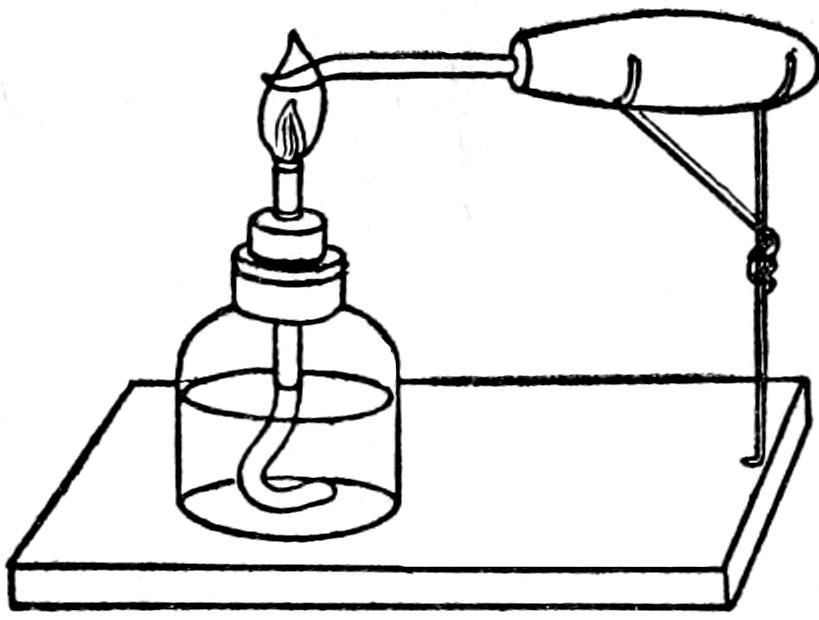
—Heat the tool until
it is red-hot, or if it is platinum until it is white hot
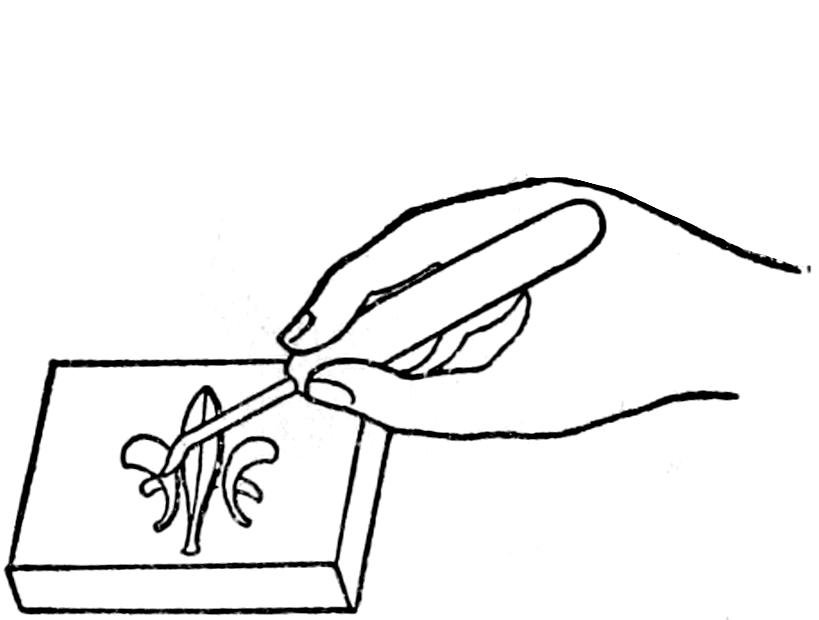
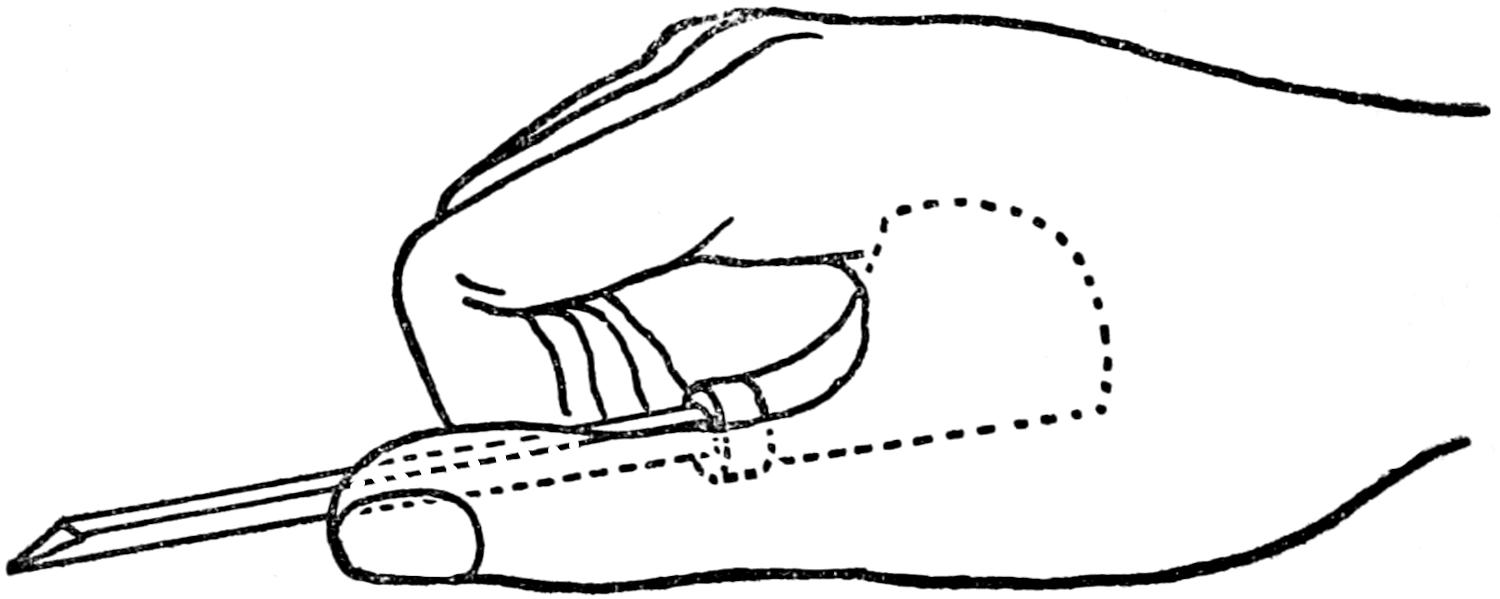
as shown at D. Hold the tool as shown at
E and
without using too much pressure draw and push the
point along the lines until they are burnt in evenly.
When you have burnt in the design burn in the
background by making a lot of closely spaced lines;
then burn in more parallel lines across the first set.
This produces a cross-hatched effect which at a distance
makes the design stand out in bold relief.
E
Fig. 26d. how the tool is heated
Fig. 26e. burning in the design
When you have become a little expert you can shade
the design but don’t try it until you can burn the lines
in evenly.
—Stains and dyes
of all colors can be bought of the Devoe and Reynolds
Company, 101 Fulton Street, New York.
Ebony Stain.
—Brush the wood with a saturated
solution of ferrous-sulphate and it will make it inky
black. When used on white holly, or any other close
grained wood, it gives it a real ebony look. Put the
solution on with a soft brush. After the ebony stain
has been used the wood should be polished with wax
to give it a dull finish.
Fumed Oak.
—Oak can be colored a beautiful brown
by putting it in a box with a tight fitting lid in which
is a saucer of ammonia; paste up the cracks around the
lid tight and leave it for a couple of days when it will
take on a brown color which is known by the trade
name of fumed oak.
CHAPTER III METALS AND METAL WORKING — Your Kit of Tools. — The Various Kinds of Tools. — Some Hints on Using the Tools. — About Sharpening Tools. — Metals and their Uses. — Iron. — Tin. — Zinc. — Lead. — Copper. — Aluminum. — A Few Useful Alloys. — Brass. — Type-metal. — Pewter. — How to Do Metal Work. — First Sketch Your Ideas. — Sheet Metal Work. — — Cutting and Sawing. — Making Seams and Joints. — How to Solder Metals. — Fluxes. — Solders. — Bolts and Rivets. — Bending Sheet Metal. — Finishing Up Metals. — Coloring Metals. — Bluing Steel. — Bluing Brass. — Giving Brass a Green Color. — Giving Brass a Dull Look. — Frosting Brass Articles. — Lacquering Brass and Copper. — How to Make the Lacquer.
There is something about working metals that
makes a tremendously strong appeal to a fellow and yet
it is just as easy to fashion these elements as it is to
shape wood, that is, if you have the right kind of tools
to do it with.
Then there is another good thing about working
metals and that is the tools you need don’t cost very
much and you can soon make enough useful things
to pay for them.
Metal working, like wood working, can be divided
into two classes and these are (1) the strictly practical,
and (2) the purely ornamental, but you can often
combine them in an object which possesses both utility
and artistic merit.
It is my intention to tell you in this chapter about
the tools that you need to do ordinary metal work,
such as sawing, drilling, bending, filing, etc. As in
working wood you ought to have a bench, or a good
strong table will do.
—To work metals you will need
certain tools according to the kind of work you intend
to do. If you get all of those I have listed below you
will have nearly all the hand tools you need to do any
kind of a job that may come up. The following list
is quite a full one and a kit which includes all of them
will cost in the neighborhood of fifteen dollars. You
don’t need to buy all of them at once, however, but
just get a tool at a time as you must have it until your
kit is complete.
—Metal working
tools are tempered harder than wood working tools
and are made of what is known as tool-steel.
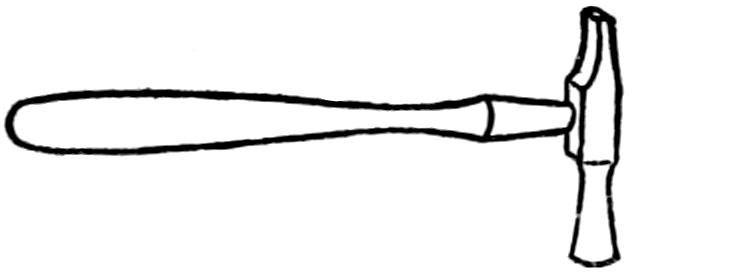
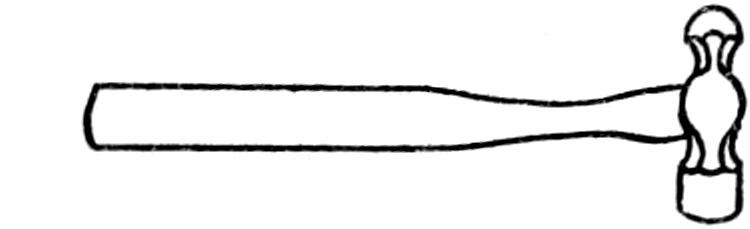
For your kit of machinists’ tools get (1) a ball pein
hammer which weighs about 8 ounces—this is a
regular machinists’ hammer; (2) a pair of 4 inch side
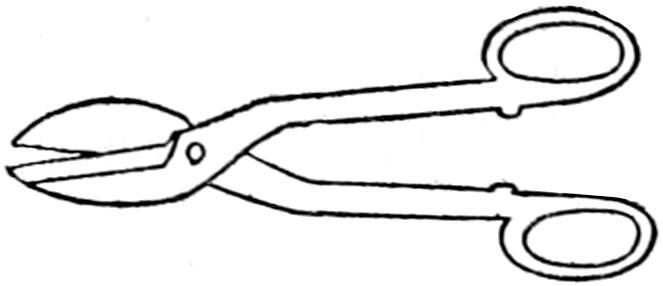
cutting pliers; (3) a pair of 8 inch tinners’ snips
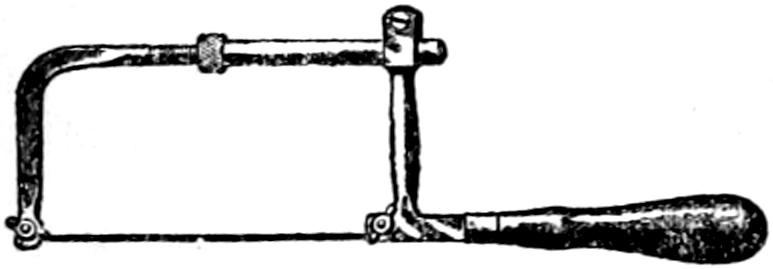
which makes a 2 inch cut; (4) a jeweler’s adjustable
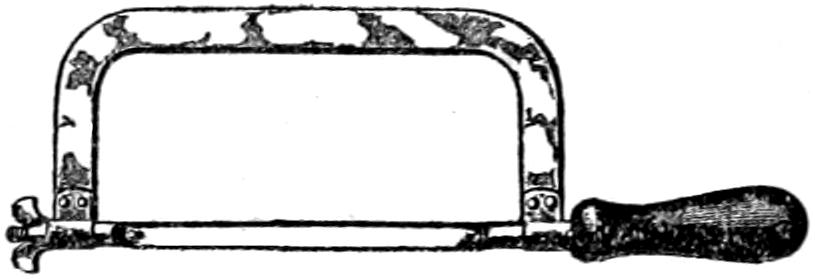
saw frame; (5) a hack saw frame to hold an 8 inch
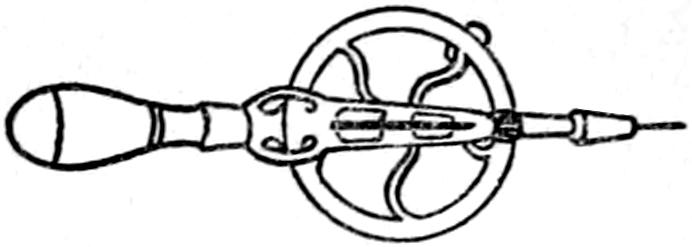
saw blade; (6) a hand drill stock with a chuck for
holding round shank drills from 0 to ³⁄₁₆ inch in diameter.
(7) Four Morse twist drills ¹⁄₁₆, ³⁄₃₂, ¹⁄₈ and ³⁄₁₆
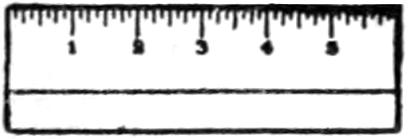
inch in diameter; (8) a 6 inch steel rule, graduated
into 8ths, 16ths, 32nds and 64ths of an inch; (9)
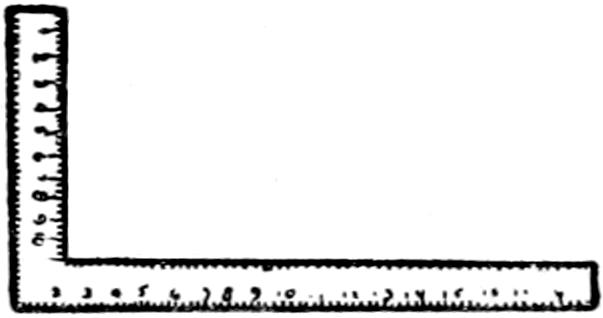
a machinist’s steel square with a 2¹⁄₂ inch blade; (10)
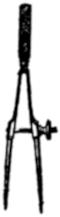
a pair of 3 inch spring dividers; (11) a pair of 3 inch
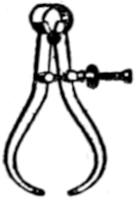
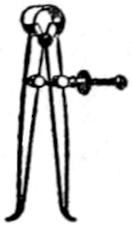
inside spring calipers; (12) a pair of 3 inch outside
calipers; (13) a center punch; (14) a No. 1 set of
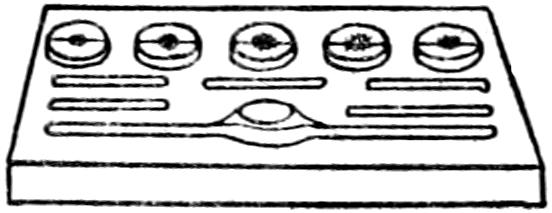
screw cutting taps and dies, this set contains a stock or
handle and five taps and five dies which cut ⁷⁄₆₄, ⁹⁄₆₄,
⁵⁄₃₂, ³⁄₁₆, and ⁷⁄₃₂ inch in diameter.
(15) A few files—flat, hand, round and half-round
in shape and the smooth and second cut will be
the most useful; (16) several screw drivers, small and
large; (17) a soldering copper that weighs about ¹⁄₂ a
pound; (18) a can of soldering paste, or you can make
a soldering fluid yourself, and (19) an alcohol lamp,
which I told you how to make in the last chapter, or
a Bunsen burner if you have a supply of gas, and (20)
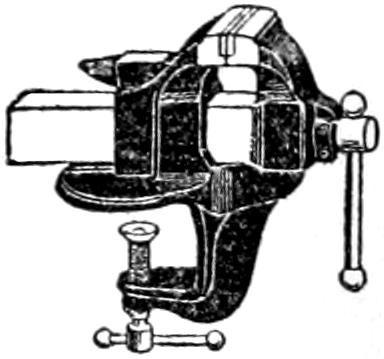
a machinist’s vise. All of these tools are shown in
Figs. 27 and 28.
TINNER’S SNIPS
SOLDERING COPPER AND ALCOHOL LAMP
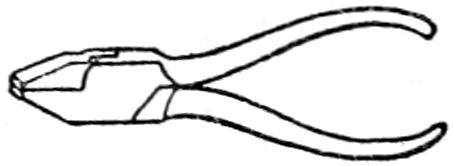
FLAT NOSE SIDE CUTTING PLIERS
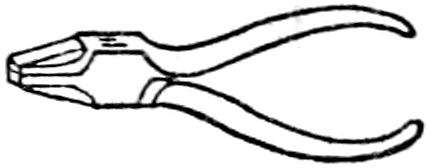
FLAT NOSE PLIERS
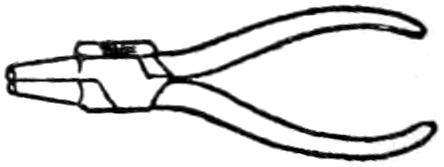
ROUND NOSE PLIERS
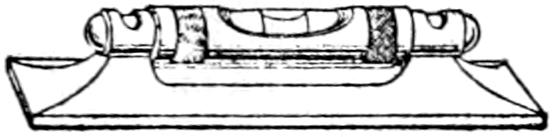
A BENCH LEVEL
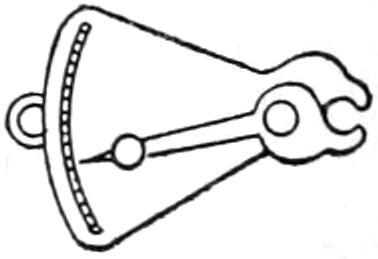
A WIRE GUAGE
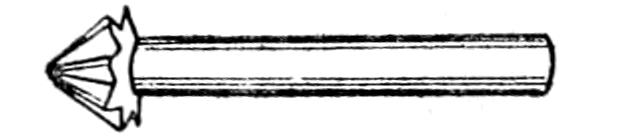
A ROSE COUNTERSINK
A TAPER REAMER
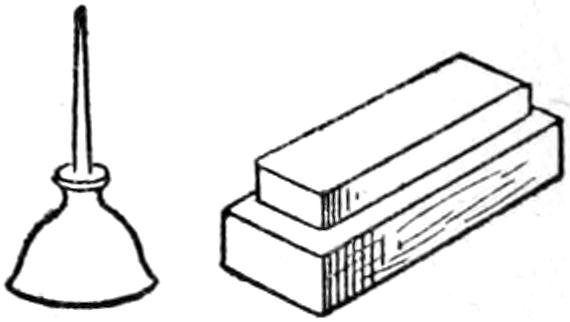
OIL CAN AND OIL STONE
SET OF SCREW CUTTING TAPS AND DIES
MACHINIST’S VISE
Fig. 27. the chief metal working tools
JEWELLER’S HAMMER
BALL PEIN HAMMER
HAND DRILL STOCK AND DRILL
SPRING DIVIDERS
SPRING CALIPERS OUTSIDE
SPRING CALIPERS INSIDE
JEWELLER’S ADJUSTABLE SAW FRAME
HACK SAW
6″ STEEL RULE
MACHINIST’S STEEL SQUARE
CENTER PUNCH
1—SHELL SQUARE TAPER
2—ROUND OR RAT TAIL
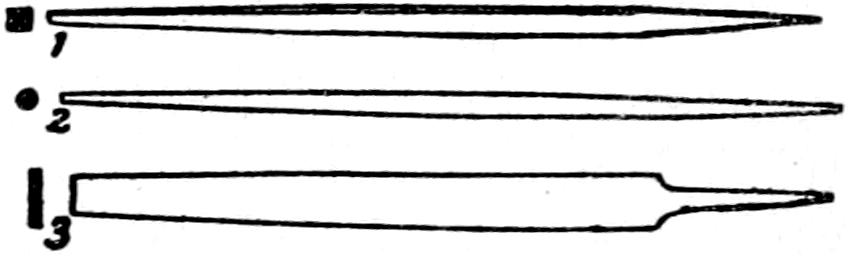
3—HAND OR FLAT KINDS OF FILES
COLD CHISEL
Fig. 28. some other metal working tools
—(1) When
you want to rivet something use the ball pein end of
the hammer to pound down the end of the rivet as this
will spread it out in every direction evenly and you
can make it nice and round. (2) Side cutting pliers
are useful to hold and bend bits of metal with and to
cut off pieces of wire as well. (3) Tinner’s snips are
simply large powerful shears and you can cut sheet
metal up to ³⁄₃₂ of an inch thick with an ordinary pair.
When you cut a sheet of heavy metal with them let
the lower blade and handle rest on your bench and you
can get a better leverage on it. Metals that are thicker
than ³⁄₃₂ inch must be sawed.
(4) While metals can be sawed by using a special
saw blade in a scroll saw frame you should use a
jeweler’s saw frame with jeweler’s saws for metal—I
prefer the Fish Brand for fine work. (5) For
heavier work use a machinist’s hack saw; put the piece
of metal in a vise and have the part you want to saw
close to the jaws of the vise so that it will not vibrate;
use a little pressure on the outward, or cutting stroke,
and let up on it as you draw the saw back or you will
dull the teeth.
(6) In using twist drills, and these are the only satisfactory
kind for metal work, be mighty careful not to
press too hard on the drill stock and don’t try to
crowd the drill into cutting faster than it will cut at
the speed with which it is turning. In drilling iron
keep plenty of oil on the drill point.
(7) You can measure much more accurately with
a steel rule than you can with a wood rule and whereas
measurements in cabinet work down to ¹⁄₁₆ inch are
close enough, for metal work it should not be more
than ¹⁄₃₂nd of an inch, and for machine work make
your measurements to ¹⁄₆₄th of an inch. (8) A small
steel square is better in every way for metal work
than a carpenters’ try square but you will find it quite
expensive.
(9) The advantage of spring dividers over the
ordinary kind is that you can set them very accurately
and they will stay where you set them. In scribing a
circle with a pair of dividers mark the center with
your center punch first as this will prevent your dividers
from slipping.
(10) Inside calipers are used for measuring the
inside diameters of cylinders and the like, and, conversely
(11), outside calipers are used for measuring
the outside of anything that is round. In either case
you measure the distance between the points of your
caliper with your rule to find the diameter of the
thing. (12) A center punch is always useful to make
a starting point in metal with, for it can’t be rubbed
off or lost sight of.
(13) A set of taps and dies to cut screw threads
with in metal of whatever kind is a joy forever. All
metal work becomes easy if you have a set of these
screw cutting tools and it is next to impossible to make
things if you haven’t got them.
When you are cutting threads in a piece of metal
with the tap, the hole in the metal must of course
be a trifle smaller than the diameter of the tap; the
tap is put into a handle called a stock and as you cut
the threads in the metal don’t turn the stock continuously
around but give it one complete turn forward
and then half-a-turn backward and you will be less
apt to break the tap.
The same method holds good when you are cutting
threads on a rod with a die; in this case the rod must
be a little larger than the hole in the die. In threading
iron use plenty of oil on the tap or die, but
for brass and the softer metals a lubricant is not
needed.
(14) In filing work press down on the outward
or cutting stroke and ease up on the file on the return
stroke for the teeth of a file are set like the
teeth of a saw, that is, so that the cut is made on the
out stroke.
A small file can be held in one hand and the work
you are filing in the other which can be rested on the
edge of the bench but heavier work must be put in a
vise and the file held firmly by the handle with one
hand and the end steadied and guided by the fingers
of your other hand.
(15) In putting in a screw always use the largest
size screw-driver whose blade will fit the slot in the
head of the screw; this will prevent the blade of the
screw-driver from twisting the edges of the slot out
of shape.
(16) Before a soldering copper can be used, if it
is a new one, it must be tinned, that is the point of
it must be coated with solder. To tin it get a pine
board about 1 inch thick, 4 inches wide and 6 inches
long, and put some brown resin and bits of solder
on it.
File off the copper until the point is sharp and it is
bright and smooth; heat the copper and then melt
the resin and solder on the board with it and rub the
copper in them on all sides until a film of solder is
formed on it.
(17) It is cheaper to buy a stick of soldering paste
than it is to make it but you can easily and cheaply
make a good soldering fluid by dissolving a teaspoonful
of zinc chloride in an ink bottle full of clean water.
In heating the soldering iron keep it near the tip
of the flame; if you use an alcohol lamp don’t have
the wick too high and if you use a Bunsen burner
adjust the openings in it until the flame is as nearly
invisible as you can get it.
—The only metal working
tools you will need to sharpen are the twist drills and
these can be sharpened on a carborundum oil stone.
Hold the beveled edge of the drill point on the stone
and move it to and fro, being very careful to keep the
drill perfectly straight up and down while you are
sharpening it.
—Like woods each metal
has its especial uses and it will depend largely on what
you are going to make as to the kind of metal you
should make it of.
There are five chief metals and a couple of alloys,
which are formed by melting and mixing two or more
metals together, which you will find the most useful
and I shall describe these for you in detail.
—This is the most useful metal we have.
When it is pure it has a silvery color, is very tenacious,
which means that it is tough; it is malleable, that is it
can be hammered without cracking, and it is ductile in
that it can be drawn out into wire without breaking.
It is hard to get pure iron for nearly all of it contains
a small percent of carbon, silica, phosphorus,
sulphur or other elements. These substances in iron
give it different properties. For instance cast-iron
has a large amount of carbon in it; this kind of iron
is good to cast into molds but it cannot be hammered
or drawn without danger of cracking or breaking.
Wrought iron has very little carbon or other substances
in it and this makes it easy to work because it
can be hammered or drawn. Steel contains more carbon
than wrought iron but it has less carbon than cast
iron; steel can be cast, forged, tempered and hardened
by heating it red hot and then suddenly cooling it.
—This is a white metal that looks very much
like silver, and it is so malleable that it can be hammered
out into very thin sheets and which you know
so well as tin-foil.
It is not found in very many places but the ancients
called Britain the Tin Islands because they got it chiefly
from there. What we ordinarily call tin is really
tin plate, that is thin sheet iron coated with tin, and
it is used as a covering for other metals because it
does not rust or oxidize in air.
Tin is largely used in making alloys such as soft
solder, type-metal, pewter, etc. It has a very low
melting point.
—This is a bluish white metal and though it
is sometimes found in a pure state it is usually found in
combination with other elements.
When it is heated to different temperatures it behaves
in various ways; for instance when it is cold it
is quite brittle, but at 100 to 150 degrees Fahrenheit,[18]
it can be easily rolled into sheets and rods; curiously
though when it is heated to 200 degrees or over it gets
brittle again.
[18] The Fahrenheit thermometer scale is the one generally used
in this country. Fahrenheit was a German scientist who lived
200 years ago, and he invented the mercurial thermometer.
Zinc is easy to cut and when mixed with copper it
forms the alloy we know as brass.
—This is the softest metal known and it has
a bluish-gray color. It is very heavy and melts at a
low temperature.
Lead was one of the earliest metals known and if
you will read the Book of Job you will find it mentioned
there. It has been used from time immemorial
in making water-pipes, utensils, etc., and the ancient
Romans made weights of it. Since it is so soft it
can be easily hammered into any shape or it can be
rolled or drawn.
It is also largely used in forming alloys with other
metals, thus solder is made of 50 parts of lead and 50
parts of tin; type-metal is made of 80 parts of lead
and 20 parts of antimony; and pewter is made of 25
parts of lead and 75 parts of tin.
—This metal is found in a pure state in
large quantities around Lake Superior in the United
States and in Chili, South America. It is a fairly
hard metal of a reddish color, has a high luster, is
malleable, and ductile.
Long before iron was known utensils and weapons
for the chase and war were made of copper and copper
tools have been found that were made by the ancients
and tempered even as steel is tempered now, but the
art was lost when iron came into use.
Copper is now largely used in the arts and trades as
for the sheathing and bolts of ships, the conducting
parts of electrical apparatus, in making alloys, such
as bronze of which tin is the other metal. Copper is
easily hammered and drawn but it is so tough that it
is hard to saw and drill.
It does not oxidize in dry air but in moist air it
gradually changes and takes on a layer of carbonate of
copper which gives it a very beautiful and artistic appearance
and makes it look as if it was a thousand
years old.
—This metal is found everywhere in
nature but as it is never found free it is only in the
last few years that it has been extracted in large quantities
and cheaply enough to bring it into use.
It has a bright bluish white color nearly like that
of tin and is the lightest common metal known.[19] It
does not tarnish either in dry or moist air; it is malleable
and ductile and as easy to work as brass but it is
very hard to solder but there are soldering compounds
on the market by which it can be soldered. Aluminum
can be bought[20] in sheets of any thickness, or in rods
or tubes of any size.
[19] Aluminum when mixed with magnesium makes an alloy
called magnaleum and this is lighter than aluminum alone.
[20] Sold by the Aluminum Co. of America, 120 Broadway, N. Y.
—When two or more metals
are melted together and mixed they form what is called
an alloy.
—This well known alloy is made by mixing
zinc with copper. There are twenty or more different
kinds of brass but common brass is made of 36
parts of zinc and 64 parts of copper.
Brass is harder than copper and while it can be
hammered and drawn it is not nearly as malleable or
as ductile as copper. It can be sawed, drilled, threaded
and machined easily and is about the best alloy you
can use for making small parts of machines.
—All kinds of metals shrink when they
cool after being run into a mold and so the edges of the
castings are never very sharp.
Now type metal which is an alloy made of 80 parts
of lead and 20 parts of antimony will expand and
this is the reason why type is so beautifully clear and
sharp. So if you want to cast little parts of machines
and engines and the like you can do a good job by
using type-metal. As it melts at a low temperature
you can melt it in an iron ladle over the kitchen
fire.
—This alloy, which is made of 75 parts of
tin and 25 parts of lead, in Colonial days was much
used for making all kinds of table-ware and household
utensils and it will come into vogue again
I hope. More will be said about this alloy and how
to work it in the next chapter.
—Now that you know
about tools and the properties of metals there are a
few other little things which, if you will bear them
in mind, will enable you to make nearly anything you
want to. The first has to do with drawing and the
others with working the metals themselves.
—To start out and try
to make an object which you have in mind without
sketching it on paper first so that you can see just
what size to cut and shape it, and how it will look
when you have finished it, is the first step toward being
a disappointed boy.
When you get an abstract idea for a design or a
machine that you want to put in concrete form take a
rule and compasses, pencil and paper and draw it out
to scale, that is, make a drawing of it and mark the
sizes, or dimensions, of each part just as it should be
when the thing is done.
By roughly sketching the object, or, better, by making
an accurate working drawing of it before you do
anything else you will save time, patience and materials.[21]
[21] How to
make working drawings is explained in Chapter V.
Fuller directions will be found in Inventing for Boys, by the
present author, published by Frederick A. Stokes Company, N. Y.
—After
having traced or otherwise marked out the design or
shape you want on the sheet of metal with the sharp
point of your center punch or an awl, or scribed it with
your dividers you can cut it out with your snips if the
sheet is thin enough. If it is too thick to be sheared
then saw it out with your jeweler’s or hack saw.
Should you want to make a hole or an open design
of any kind in thin sheet metal you can easily punch
it in with your center punch, or cut it out with a
stencil cutter’s chisel, which is simply a very sharp
cold chisel.[22] But should the metal be too thick to
punch or cut in this way drill a small hole in it
and you can then saw out the part with a jeweler’s
saw frame and blade just as you would saw out a
piece of wood with a scroll saw, though you may have
to hold the metal in a vise.
—The next thing to do
after having cut out the different pieces of metal is to
put them together. The way you do this will again
depend very largely on the thickness of the metals, but
in any event where the pieces meet, a seam or a joint
must be made.
A—LAP SEAM
B—GROOVED SEAM
C—LAP SEAM RIVETED
D—BUTT JOINT BOLTED
E—BOX LAP JOINT
F—BOX GROOVED SEAM
G—BUTT & PIECED JOINT
H—CORNER BUTT JOINT SCREWED
I—CIRCULAR LAP SEAM
J—CIRCULAR FOLDED SEAM
K—CIRCULAR OVERFOLD SEAM
Fig. 29. how metal seams and joints are made
If the metal is thin the pieces can be lapped and then
soldered or riveted together as shown at A in Fig. 29
or you can make a folded seam as shown at B. If,
however, the metal is thick you can make a lap seam
and either rivet or bolt it together with screws having
nuts on them as shown at C.
A strong butt seam can be made by hard soldering
or brazing the edges together but it takes a hot flame
and considerable skill to do a good job of this kind.
Another way to make a butt seam of two thick sheets
of metal is to lay them with their edges together and
then rivet a strip or plate on both sides of them as
shown at D.
In making corner joints one or both edges of the
sheet should be bent over as pictured at E when they
can be soldered, riveted or bolted together; or a
grooved seam can be made as shown at F if the metal
is thin enough.
If the pieces of metal are say ¹⁄₁₆ inch or more
thick you can put a three cornered piece of metal in
the corner and drill and thread it so that the pieces
which form the butt joint can be screwed to it as
shown at G, or if one of the pieces is thick enough
you can drill and thread it and screw the other piece
to it as shown at H.
When putting ends on tubes and cylinders you can
make a circular lap seam as shown at I, or a circular
folded seam as at J or a circular overfolded seam as
shown at K.
—The great secret in
soldering metals is to have them perfectly clean and
then if you use the right kind of flux and the proper
solder you will not have any trouble.
—After you have cleaned the surfaces to be
soldered you must use a flux to prevent the metal from
oxidizing and to make the solder stick. Different
metals require fluxes of different kinds.
When soldering bright new tinware use powdered
resin for the flux, but if the parts are old then scrape
and clean them well and use a flux of zinc chloride
solution. To make it dissolve 5 cents’ worth of zinc
chloride—which is muriate of zinc—in a small clean
inkbottle full of warm water; or you can make the
muriate of zinc by dissolving some zinc clippings in
muriatic acid and to make the soldering fluid add some
water to it.
This kind of a soldering fluid is a good flux for
tin, iron, steel, brass and copper. It is good for all
ordinary work but it must be washed off from iron or
steel as it will rust them very quickly. To solder copper
sal ammoniac can be used.
The only kind of a flux to solder zinc with is a
solution made of 10 per cent. of muriatic acid and 90
per cent. of water. For lead, pewter and any alloy
with lead in it use tallow, Gallipoli oil or Venice turpentine.
Resin can be used successfully for all metals
provided they are scraped bright and clean before they
are soldered.
—Just as certain metals require given
fluxes so also do these metals need special solders.
For soldering tinware a fine tinner’s solder made
of 1 part of tin and 1 part of lead flows best. For
soldering lead use a fine plumber’s solder which is
formed of 1 part of tin and 2 parts of lead. To solder
pewter which melts at a low temperature use a pewterer’s
solder which is composed of 3 parts of lead and
1 part of bismuth.
—Where two pieces of metal are
to be fixed together so that they can be taken apart
again, machine screws with nuts on them, or bolts,[23]
will be found useful.
[23] Machine screws and bolts for model work can be bought of
Luther H. Wightman, Boston, Mass.
A good kind of rivet for small work is known as
tinner’s rivets; they are made of iron and have a
length of ⁵⁄₃₂ of a inch. Now a rivet can either be
hammered down so that the point spreads out and
forms a burr, or a washer, which is called a burr, can
be slipped down over it and the end then peined down.
Copper-rivets as small as ¹⁄₄ inch in length can be
bought at most hardware stores.
—To bend a metal sheet put
it on a wood or metal form and pound it into shape
with a wooden mallet.
The edges of a piece of sheet metal can be bent
either by pounding it over the sharp corner of an iron
bar, or if a very small part is to be bent use a pair of
round or flat nose pliers. A thick piece of sheet metal
can be bent by putting it in your vise and pounding
over the edge with a hammer.
—Of course all the rough
parts must be smoothed up with a file; then use emery
paper or emery cloth to rub out the file marks and
finally finish off the surface by polishing it with
crocus[24]
put on with a cloth.
—Many things that you make of
metal can be greatly improved in appearance by coloring
them.
—First polish the articles and clean
them by immersing them in a hot solution of caustic
soda. Now put the screws, or whatever it is you
want to blue, in an iron pan half full of dry, clean
sand and heat them over a fire.
Keep moving the articles around with a pair of
tweezers until they are the color you want them and
then drop them into clean oil.
—Polished pieces of brass can be given
a fine color by putting them in a solution made as follows:
Stir 1¹⁄₂ drams of antimony sulphide,[25] 2 ounces of
calcined soda in ³⁄₄ of a pint of water; to this solution
add 2¹⁄₄ drams of kermes. Stir well, filter it and then
mix it with 2¹⁄₄ drams of tartar, 5¹⁄₂ drams of hyposulphite
of soda dissolved in ³⁄₄ pint of water when it is
ready to use.
[25] This and all other chemicals can be bought of Eimer and
Amend, Fourth Ave. and 18th Street, New York.
—Make a solution of
2 ounces of copper sulphate, ¹⁄₂ an ounce of sal ammoniac
and 25 ounces of water. Suspend the articles
to be greened in the solution and boil it until you get
the color you want.
—First clean the articles
thoroughly; then mix ¹⁄₄ ounce of iron rust and ¹⁄₄
ounce of white arsenic in 4 ounces of muriatic acid.
Use a brush and paint the articles with this solution
until it takes on the proper dull appearance. Then
wipe it off, oil, dry and lacquer it.
—Hang the brass articles
in a boiling solution of caustic potash, wash them
off in clean water and dip them in nitric acid until the
oxide is gone, wash them again and throw them in
sawdust to dry; heat them a little and lacquer while
they are warm.
—To lacquer a brass
or a copper article dip it in a weak solution of sulphuric
acid and water and then wash it in clean water.
Next put the article on a piece of sheet iron and heat
it over a gas jet or in an oven.
It must not be heated enough to color it but just so
that when you place your moistened finger to it it will
sizzle; now put on the lacquer and this can be done by
brushing the article over with a camel’s hair brush or
by dipping the article into the lacquer.
—Put 1 ounce of tumeric
powder, 2 drams of annatto and 2 drams of saffron
into 1 pint of alcohol.
Let it stand for a week or 10 days and shake it
often; pour the clear liquid into a bottle and put in
3 ounces of yellow shellac; let it stand for a couple
of weeks more; shake it often and pour off carefully.
Then you can put it on. Lacquers can be bought
ready made from Hanson and Van Winkle, Dealers in
Electroplating Supplies, Newark, N. J.
CHAPTER IV VENETIAN IRON, REPOUSSÉ, PIERCED BRASS AND PEWTER WORK — Venetian Bent Iron Work — The Tools You Must Have. — The Materials You Need. — What to Do First. — How to Make a Toaster. — How to Make an Egg Boiler. — How to Make a Venetian Plate Holder. — Doing Repoussé Work — Tools Needed for Repoussé Work. — How to Prepare the Work. — Tracing the Design. — Bossing the Work. — How to Make a Flat Candlestick. — How to Make a Photo Frame. — Pierced Metal Work — The Outfit to Do It With. — How to Do the Work. — Casting and Working Pewter — Something About Pewter. — How to Make Pewter. — About Working Pewter. — How to Cast Pewter. — The Patterns Necessary. — Making the Mold. — Finishing the Ware. — Engraving on Metal — The Tools That Are Used. — How to Engrave on Metal.
A very pretty and most useful kind of ornamental
iron work came into vogue in Venice, Italy, a long
time ago, and as it is easy to do and you need only
a few tools and inexpensive materials to do it with,
you ought to try your hand at it.
Venetian iron work consists of bending thin, narrow
strips of wrought iron into scrolls and other shapes
and then fixing them together with little iron clamps
called binders.
In this way objects such as egg boilers, candlestick
sconces, lanterns and brackets to hang them on, photograph
frames and helpful and artistic creations without
end can be made.
—You will need very
few tools for making Venetian iron work and these are
(1) a pair of flat nose 5 inch pliers;[26] (2) a pair of
round nose 5 inch pliers; (3) a box-wood four-fold,
2-foot rule; (4) a vise; (5) a pair of tinner’s snips
and (6) a small riveting hammer, all of which are
shown in Fig. 27.
[26] This means that the pliers are 5 inches long.
—The work is made of
¹⁄₃₂ inch thick soft iron strips and this can be bought[27]
in four different widths, namely ¹⁄₈, ³⁄₁₆, ¹⁄₄, and ³⁄₈ inch.
[27] Complete manual training outfits for Venetian bent iron
work can be bought of Hammacher, Schlemmer and Co., Fourth
Avenue and 13th St., New York.
In general it is the best practice to use the ³⁄₁₆ and ¹⁄₄
inch wide strips for all designs except the smallest and
largest. The strip iron comes in coils of 50 feet and
the prices range from 16 cents to 25 cents a coil.
BINDERS
COIL OF WROUGHT IRON STRIP
LEAD WIRE FOR MEASURING
Fig. 30. materials you need for venetian iron work
Then you will need a package of binders—these
are merely bits of strip iron cut off and bent as shown
in Fig. 30, they come in four widths and cost about
10 cents a hundred. Also get a couple of 3 foot pieces
of lead wire for with these you can quickly form the
scrolls and circles you intend to make of iron, then
straighten them out and accurately measure off the
length of iron you need. They cost 5 cents a
strip.
—Making a Simple Design.—The
first thing to do after you get your tools and
materials together is to draw on a sheet of paper the
object you are to make of bent iron.
—This is a good piece
of work to start with because it is formed chiefly of
straight lines. Draw a plan of it as shown in Fig.
31, full size and then measure the frame and the inside
strips—you will observe that there are two of
the latter—and find out exactly how long each strip
should be.
Now measure and cut off three strips of iron and
allow an extra inch for lapping the long strip that
forms the frame. This done mark off the points where
the strips are to be bent and use your flat nose pliers
to bend the sharp corners and your round nose pliers
to bend the curved parts of the frame.
Lap the ends of the strip forming the frame on the
side ¹⁄₂ an inch, fasten the joint by putting a binder on
it with your pliers and a light tap with your hammer
will tighten it up.
Now if you will look again at Fig. 31, you will see
that one end of the right inside strip projects up and
beyond the rest of it and this end sets in the handle of
the frame and strengthens it; put a binder on each
place where it is shown in the drawing including the
handle. Fix in the left inside bent strip with binders
and put the binders on so that the rough ends will be
inside, file down the rough places, rub the toaster all
over with a piece of fine emery cloth until it is nice
and smooth, rub it with some sweet oil, polish it off
with a soft cloth and then present it to Pietro or Hilda
or Wo Nang Fong or whoever it is that presides over
the kitchen.
Fig. 31. a useful bent iron toaster
—Having made the
toaster you are ready to try your hand at something
a little harder and a good design for your next piece
of work is an egg boiler.
The picture may look a little complicated but as a
matter of fact there is very little to it. There are only
three parts to the egg boiler and these are (a) the egg
holders; (b) the legs, and (c) the handle. Each of
the four egg holders is formed of a ring or strip of
iron just large enough so that an egg will slip through
it; lap the ends and put on a binder to hold the joint
tight.
Fig. 32. how make an egg boiler
Mark, cut off and bend the ends of two strips over
¹⁄₂ an inch, for the half ovals on which the egg rests
and then bend the strips to fit the shape of the egg.
This done, loop the ends of each half oval over the
ring and press them down hard with your pliers to
hold them in place. The way an egg holder is made
is shown at A in Fig. 32.
Each leg is a short strip bent over and pressed on
to the top of the ring. It is made rigid by putting a
binder on it and to one of the half ovals as shown
at B. To make the handle take a piece of lead wire
and bend it to fit the outline shown at C; then straighten
it out and cut off a strip of iron of the same length.
Bend the ends of it over ¹⁄₂ an inch and shape it up
with your round nose pliers.
Now join the four rings together with binders and
loop and press the ends of the handle on to the rings
that are furthest apart as shown at B. File, rub up and
polish the egg boiler and give it to the chef with your
compliments.
—To
make this plate holder you will have to add a hand
drill, a ¹⁄₈ inch twist drill, and a center punch—which
are described in Chapter III—to your list of
tools.
Fig. 33. an artistic venetian plate holder
The plate holder is of more simple construction than
the egg boiler but as you have emerged from the
kitchen into the dining room you will have to do a very
fine job. It consists of four legs as shown in Fig. 33,
riveted to a ring.
Draw the design on paper full size and this will
depend on the diameter of the plate it is to hold.
Find the length of the legs with your lead wire and
measure and cut off the strips of iron accordingly.
Likewise find the length of iron strips it will take for
the ring and allow 1 inch or over for the lap joint.
Fig. 34. a sconce for a candle
Now drill ¹⁄₈ inch holes in each strip you intend to
use for the legs, half way between the top and bottom
of it and drill four holes in the ring at equi-distant
points. Bend the strips into the artistic curves shown,
using, of course, your round nose pliers to do it with,
and bend the ring over a round form—a broomstick
will do, but a larger form will work better.
Finally rivet the legs to the ring and see to it that
you make a good job of it; slip the top of the legs
into place over the plate and you will have a piece of
Venetian iron work you can be proud of.
You can design and make pretty bent iron stands
for vases in a manner very like that used for the plate
holder; card racks, photograph frames, lamp shades,
etc., can be made in the same manner; and as you become
more adept at the work you can point and shape
up the iron by heating it in an alcohol lamp, or a Bunsen
burner and hammering it. When you can do this
you will be able to make a sconce, that is, an ornamental
mural[28] bracket for holding a candle as
shown in Fig. 34.
[28] Mural means anything that is supported by or has to do with
a wall.
Further you can twist and weave the iron strips
for the sides and doors of boxes and book-cases and
either line them with silk or put stained glass back of
them. In fact the most beautiful things imaginable
can be wrought from bent iron strips especially when
rivets are used to put the work together.
A Dead Black Finish for Iron Work.
—Get 25
cents’ worth of japan gold size and 10 cents’ worth of
pure drop black ground in turpentine and mix them
together.
If it is too thick thin it with turpentine and put it
on with a soft brush. When dry it will be dead
black and neither air nor moisture will spoil it.
Repoussé (pronounced re-poo′-say) is a French
word and means to form in relief, and repoussage (pronounced
re-poo′-sazh) is the word you want to use
when you mean the process of producing designs in
relief on sheet metal by hammering it on the back.
—Very few
tools are needed for this kind of work but it is important
to use the right kind.
The repoussé hammer is a jeweler’s hammer which
has one end, or face of it flat and the other rounded
like a peining hammer; it is shown in Fig. 35.
Fig. 35. how to hold a repoussé hammer
Then a number of blunt chisels and markers called
repoussé tools as shown at B, Fig. 35, are needed to
emboss the design in the sheet metal. These tools cost
about 30 cents apiece and a set of eight or ten tools
will serve you well. For the bolder parts of the work
boxwood punches can be used but steel punches are
always used for the finer work.
Fig. 35b. a punch and punch designs for repoussé work
—The kind of metal
that is easiest to work is cold-rolled sheet copper[29]
No. 32 Brown and Sharp gauge, but brass, aluminum
and pewter can also be hammered.
[29] Can be bought of Patterson Brothers, Park Row, New York,
or of the Frost and Adams Co., Cornhill, Boston, Mass.
Fig. 35c. how to hold a repoussé punch
To get the work ready fasten the piece of sheet
metal to a wooden block with a cement made as follows:
melt 1 pound of Burgundy pitch in an iron pan,
or skillet, and stir in 1 pound of dental plaster of
paris,[30] until they are thoroughly mixed. Then put
in a tablespoonful each of tallow and of resin which
will make the cement stick better.
[30]
This is very fine plaster and can be bought of any dentist.
Take a board 1 inch thick, 10 inches wide and 12
inches long and make a tray of it by nailing a strip
of wood around it so that it is ¹⁄₂ an inch higher
than the surface of the board. Pour the cement while
it is still hot on the board and press the sheet of metal
hard down on it; let it get cold when it will be firmly
cemented to it.
—After you have drawn the
design on the sheet of metal either with a pencil or
by means of transfer paper you can begin to trace
the design by punching it with the straight and curved
edge chisels.
To hold a chisel right, grip it between your thumb
and index finger, let your next, or medius, finger lie
gently on the shank of the tool and your third, or
annularis, finger rest on the sheet of metal as shown
at C in Fig. 35.
The handle of the hammer is long, thin and springy
and you hold it by the end with your index finger
laying on it as shown at A in Fig. 35. Do not strike
the tool hard or the punch may go clear through the
metal sheet but instead give it a succession of light,
gentle taps at the rate of about 100 a minute or so
and you will make the tracing nice and even.
—After you have traced the
outline of the design with the chisels hold the plate
over an alcohol or a Bunsen flame and when it is hot
enough you can take it off of the cement.
Then cement it to the block again, but this time put
the other side down. Now use your boxwood or steel
punches and hammer the copper, or other metal, into
bold relief or you can matt the ground with any one
of the numerous punches shown at B.
THE RING FOR THE CANDLE
THE CANDLESTICK WHEN DONE
THE DESIGN ON THE METAL
Fig. 36. a repoussé candlestick
—This is a
good piece of work for you to start with because it is
at once simple, artistic and more or less useful. To
make it, cut out a sheet of brass 6¹⁄₂ inches square and
draw a spider and his web and a poor little fly or two
making a bee-line for it as shown at A in Fig. 36.
Punch the outline with your chisels and raise the
bodies of the insects with your molding tools. The
ground can be left flat or you can put it in with a
marker. When you have the bossing done scallop
the edges with your snips and bend them up so that it
is 5 inches square.
For the handle cut a strip of brass ³⁄₄ inch wide and
4³⁄₄ inches long; raise the middle of it by hammering
it in a groove cut in a block of hard wood; bend it and
then rivet it to a corner of the brass sheet.
To make the ring which holds the candle cut out a
strip of brass 1 inch high and 3 inches long and cut
out three tongues as shown at B. Scribe a circle in a
corner of the sheet of brass, cut three slots on it, slip
the tongues through the slots and bend them over.
Rub the candlestick all over with some brass polish
and then cover the bottom with a piece of green billiard
cloth if you can get it, or any other kind you
may have at hand. It is shown complete at C.
—The front of this
frame can be made of brass, copper or German silver
and the back of it can be made of a sheet of tin or
brass.
You can make the frame round, oblong or square
and with a round or an oval opening in it to suit your
fancy. Suppose you make the outside of it 7 × 9
inches and the oval opening 3¹⁄₂ × 5 inches as shown at
A in Fig. 37. Draw or transfer the design to the
surface of the metal and work it into shape as I have
previously described.
Do not cut the opening or trim the metal sheet to
the size you want them until after you have hammered
it as this draws the metal out. After you have
finished the front make a back for it of sheet tin or
brass, 5 inches wide and 6 inches long, and bend over
the edge of one end and both of the side edges ³⁄₈ inch
as shown at B.
Solder the edges to the back of the frame and then
solder a stay, or stand on the back of it. This completes
the frame and the photograph can be slipped
in it between the front and the back.
THE HAMMERED
FRONT
THE BACK OF
THE FRAME
Fig. 37. a repoussé photo frame
Cleaning and Polishing Brass, Copper and German
Silver.
—To clean any of these metals mix some powdered
rotten stone with some machine oil and rub
them with a pad made of a soft flannel rag.
To polish wipe off the rotten stone and oil perfectly
clean and then rub the work with a chamois skin
dampened with alcohol and on which you have put
some red rouge.
Frosting, Coloring and Lacquering Metals.
—You
will find recipes for finishing articles in these styles
in Chapter III.
This is by all odds the simplest and easiest of all
art metal work and you won’t need any practice to
make a good job; then the tools and materials cost but
very little and the finished work is really pretty.
THE MALLET
A TRACING POINT
a MODELING TOOL
THUMB TACK
b MODELING TOOL
STIPPLING AWLS
Fig. 38a. the tools you need for pierced brass work
—The Tools.
—These
are very few indeed and include (1) a pear-shaped
mallet for stippling; (2) a tracing point; (3) a couple
of modeling tools; (4) an awl with a tempered point,
and (5) a metal folder, all of which are shown at A in
Fig. 38.
You will also need (a) a sheet of designs; (b) a
sheet of carbon, or impression paper; (c) a dozen or
more split shanks to fasten the edges of the work together;
(d) a drawing board about 12 × 18 inches on
the sides of which the sheet metal is tacked while
you are working it, and (e) some thumb tacks for
tacking the work to the board.
A CANDLE SHADE
THE FINISHED
CANDLE SHADE
Fig. 38b. a pierced brass candle shade
You will need too, of course, the sheet metal and
this can be of brass, copper or German silver and you
can buy sheets of these metals that are already cut out
for candle shades, lanterns, photo-frames and numerous
other articles with the designs marked on them
ready to use[31]
or you can buy the sheet metal and the
designs separately and then transfer and cut them
out yourself.
[31] All tools and materials for pierced metal work can be bought
of Frost and Adams, Boston, Mass.
An outfit for pierced brass work can be bought for
as little as 60 cents and you can buy any number of
brass or copper cutouts with the designs stamped on
them for 25 cents each, or of German silver for 50
cents each.
—The first thing to do is to
lay the sheet of metal with the design on it on your
drawing board and fasten it there with thumb
tacks.
Now with your stippling awl punch little holes
about ¹⁄₁₆ inch apart all along the outline of the design.
The background is then stippled with the awl,
that is, dotted all over but not punched through, and
the closer the dots are the prettier it will look.
Use a small modeling tool to put the veins in the
leaves and after you have done this use a larger
modeling tool and shape up the leaves or whatever the
design may be.
To do this grip the tool in your hand and press it
hard on the edge of the leaf and force it in toward
the vein and at the same time ease up on it. This is
all there is to the actual work of piercing brass.
After you have made the design take some brass
polish, put it on a little wad of cheese cloth and rub
off the remaining marks and then polish it with a clean
cloth.
Since the brass or other metal for pierced brass
work is very thin you will have to back it up with thin
wood, although candle shades and other small articles
can be used as they are. A design for a candle shade
is shown at B and the finished candlestick at C, while
one for a toast panel that can be hung on the wall with
a Venetian bent iron hanger which I described on page
76 is shown at D.
’Tis easy enough to be pleasant,
When life goes by with a song;
But the nan worth while,
is the man who will smile,
When everything else goes wrong.
Fig. 38d. a pierced brass toast sign
Since nearly all metals excepting tin and lead have
high melting points, it is hard to melt them unless you
have a regular furnace.
—But casting metals is
a fascinating process and you can do it by melting 25
parts of lead and 75 parts of tin together which forms
an alloy called pewter.
This alloy is as old as the hills and for ten or
eleven centuries before the golden age of invention—that
is to say the beginning of the 19th century—pewter
utensils were used in nearly every
home in every civilized country.
Then came the invention of cheap processes for making
pottery and glass and those good old hard alloys
known as britannia metal, which is formed of tin,
copper and antimony, and German silver, which is
German all right, for it was first made at Hildburghausen,
Germany, but it is not silver at all for it is
formed of nickel, zinc and copper, went entirely out
of use.
But there is a dignity and a beauty about pewter that
none of the other common metals have and it may be
revived one of these days for efforts are now being
made to produce it again in all its former glory.
—I do not know of any
place where you can buy pewter but you can easily
make the alloy yourself.
You can get the lead in your home town wherever
you live at any plumbing shop but you may not be
able to get the tin so easily. You can, however, get
it by sending to the Conley Tin Foil Company, 521
West 25th Street, New York, and at the present time
they are quoting pig tin in blocks at 75 cents a pound.
When you have the lead and the tin melt the lead in
an iron ladle, see Fig. 39, over the kitchen fire and
skim off the dross, that is, the impurities in it that
come to the surface, and then put in the tin. After
both are melted stir them well and then pour the alloy
thus formed, which is pewter, in a pan that is oiled
with sweet oil, to keep it from sticking and so make
sheets of it of whatever thickness you want.
Fig. 39. iron ladle for melting pewter
—Pewter can be worked
like any other malleable metal, only easier because it
is softer and more ductile, hence it can be hammered
into any shape.
It can be cast as you will presently see and it can be
soldered by using a flux of tallow, Gallipoli oil or
Venice turpentine and pewterer’s solder, which is made
of 1 part of lead, 1 part of tin and 2 parts of bismuth.[32]
This solder melts at 203 degrees Fahrenheit,
that is at a temperature of 9 degrees less than that at
which water boils.
—The way in which pewter
is usually cast is by making molds of iron and brass
and pouring the metal into them. But you can do
a very good job of casting pewter by making and using
plaster of Paris molds.
In making any kind of castings you need a flask,
that is a wooden frame made in halves, as shown in
Fig. 40; the top half of the flask is called the cope
and this must be fitted with pins that set in holes in
the bottom of the frame or drag, as it is called.
Fig. 40. how a pewter casting is made
When these pins set in the holes they keep the top
and bottom parts of the flask together so that after
the mold is made they can be taken apart and the
pattern removed and then when they are put together
again ready for the metal to be poured they will be
exactly even. Make the top and bottom halves of
the flask a couple of inches larger all round and a
couple of inches deeper than the size of the pattern
you are going to cast.
—You can saw or turn
or carve out of wood anything you want to cast in
pewter, provided it is not too intricate, and after sandpapering
it nice and smooth all over give it a couple
of coats of shellac varnish.[33]
[33] This can be bought already made at paint stores or you can
make it by dissolving some yellow shellac in alcohol.
If it is your idea to make table-ware of pewter you
can use ordinary china dishes for your patterns, provided
they are without handles, but before making a
mold with any kind of a pattern in plaster oil it well
all over with sweet oil, using a brush for the purpose,
so that it will not stick and then you can draw
it easily.
—Lay the drag, that is the
lower half of the flask, on a board or a table; mix
dental plaster of Paris with water until it is about as
thick as batter and fill the drag with it.
Just before the plaster begins to set, that is, harden,
take your pattern, whether it is one you have made or
a china dish, oil it and press it down into the plaster
until it is nearly even with the top edge of the pattern
and let it stay there until the plaster is hard, that
is, over night.
Then brush sweet oil over the top of both the pattern
and the hard plaster which must come about flush,
that is even, with the top of the drag. Now put on
the cope and fill it with plaster, smooth it off even with
the top edge and let the plaster get hard.
Your next move is to lift the cope from the drag
which you can do without trouble and then lift the
pattern from the drag, using the point of a knife if it
seems inclined to stick.
Drill a ¹⁄₄ inch hole through the plaster in the cope,
fit the cope to the drag again and then pour in the
pewter. When it is cold take the flask apart, take
the casting out gently and don’t spoil it even if you
have to break the mold.
Where cups, tankards or other hollow vessels are to
be cast make a mold for it just as though it was a
solid piece; now pour in the melted pewter and when
it has cooled enough to form a solid layer turn the
mold upside down and let the melted metal run out
which will leave it hollow. If handles are needed
cast them separately and solder them on to the body
of the vessel. Some finished pewter ware is shown
at C.
Fig. 40c. home made pewter ware
—Plates and the like can be
scraped with a steel scraper and when they are nice
and smooth rub them with a rag dipped in oil and
whiting, but do not polish them.
If you have a turning lathe of any kind you can
put your cups and other round objects in it and turn
it up with a bent inside turning tool, a flat tool and
a round point tool such as is used for turning brass,
ivory, etc., and which you can buy for a quarter
apiece,[34] and this will leave the pewter bright and
beautiful.
[34] These tools can be bought of Luther M. Wightman, Milk
Street, Boston, Mass.
Engraving on metal is a beautiful art. The method
is simple and the effect is striking but it requires a good
deal of patience and long practice to do really good
work.
Fig. 41. tools for engraving on metal
A. Shapes of gravers.
B. Handles for gravers.
—Engraving tools, or
gravers as they are called, are made in ten or a dozen
shapes but the knife, round and lozenge gravers will be
enough to do all ordinary work with. The different
shapes are shown at A in Fig. 41.
All of the gravers are about the same length, that
is 4¹⁄₂ or 5 inches, and they are fitted with knob shaped
handles a third of which has been cut away as shown
at B, so that the graver can be gripped in the palm of
the hand with the flat side against it which keeps the
tool in the right position. The way to hold a graver
is shown at C.
Fig. 41c. how to hold a graver
—If the object to be
engraved is very small it should be fixed to a block
of wood with the Burgundy pitch compound above
described, but if it is a large object it need not be
mounted.
In either case an engraving pad, that is, a round,
thick leather pad filled with sand, is a very great convenience
to rest the work on because it permits the
work to be easily turned in any direction and held at
any angle while it is being engraved.
Fig. 41d. an engraving on a sheet of copper
Rolled sheet copper is a good metal to practice on
and you can trace the design you want to engrave on
it by dabbing a thin film of engraver’s wax[35] on the
metal surface with your finger and then sketching the
outline with a bone stylus, that is a piece of bone having
a sharp point. An example of art engraving is
shown at D in Fig. 41.
[35] You can use beeswax but it is better to make a wax by melting
together 3 parts of beeswax, 3 parts of tallow, 1 part of
Canada balsam and 1 part of olive oil. Or you can buy a small
cake of Chinese white, wet your finger, rub it on the white and
then dab it on the metal surface.
CHAPTER V DRAWING SIMPLY EXPLAINED — Free-hand Drawing — Talent versus Practice. — Pictures for You to Draw. — Simple Line Sketches. — Sketching Simple Outline Figures. — The Proportions of the Human Figure. — How to Draw Faces. — Sketching Still Life Objects. — Drawing in Perspective. — How to Shade a Drawing. — Working Drawings — Drawing Tools You Should Have. — Simple Working Drawings. — Some Simple Aids to Drawing — How to Draw a Circle. — How to Draw a Spiral. — How to Draw an Ellipse. — How to Make and Use a Pantagraph. — How to Make a Reflecting Drawing Board. — How to Make Tracings. — To Make Lasting Impressions. — The Ancient and Honored Art of Cutting Silhouettes. — Transfer Pictures, or Decalcomania.
A picture made by the hand and eye and without
the aid of a rule and compass is called free-hand
drawing.
To be able to do free-hand drawing is one of the
nicest accomplishments you can have for then you
can sketch the things you see and want to remember;
and, further, sketches made with a pencil or pen and
ink are, to my way of thinking, just as interesting as
photographs provided they are well done.
—Some fellows have a
natural bent for sketching and are what you might
call born artists, while others seem to be entirely
minus this talent and the only way they can ever learn
to sketch is by following certain rules and then practicing.
Now the chances are you have a little talent but
whether you have or not if you will follow the simple
instructions I have written down in this chapter you
will be surprised to find what really clever pictures
you can draw.
—There are two kinds
of free-hand sketches for you to do and these are (1)
of life models and (2) of still life, that is, fruit, flowers,
furniture and inanimate objects of all kinds.
I shall tell you first how to make simple drawings of
living figures including man and beast and by beginning
where your savage ancestor left off you will be
able to at least represent anything your fancy dictates.
—As you will see by looking
at A and B in Fig. 42, the sketches of the man and
horse consist of merely straight lines but you will also
observe that A looks like a boxer because the action is
there.
Fig. 42. a simple line drawing of a man and a horse
This is because when I sketched it I was careful to
note the exact position of the boxer’s head, arms, legs
and body as they appeared at that given moment.
The keynote in sketching a figure in action is always
to draw it, not as you wish or believe it to look but
as it actually is.
The line sketches A and B only look as like a man
landing a right, and a horse coming down the home
stretch as they do because (a) all the lines are properly
proportioned, that is, of the right length when
compared with each other, and (b) they are set in the
correct positions. The way to become a good judge
of proportion is always to notice the relative sizes of
the things you draw.
—When you
can sketch straight line figures to show men and animals
in action you can then draw outlines around
them and so make them much more realistic as shown
at A and B in Fig. 43.
Fig. 43. simple outline drawing of a boxer and a race horse
To do this draw a straight line sketch first and
then draw the outline around it, when you can rub
out the straight lines if you want to. In these outline
sketches you will see that only the lines that are
actually needed to give the picture the contour, that is,
the shape of the figure, or body, are used.
—If you
will remember when you are drawing a picture of the
human form that the whole figure from neck to toe
should be 7 times as long as the head; that the body
proper, or torso as it is called, is 4 times as long as the
head; that the arms are as long as the body, and that
the legs should be 4 times the length of the head
measured to the inside of the crotch, as you will see
if you will look at A in Fig. 44, you will have it in proportion.
Fig. 44a. the proportions of the human body
—You can easily draw fairly
natural looking faces if you will rule off a number of
squares on a sheet of paper as shown at B and C in
Fig. 44.
The full view of the head of a human being is
shaped like an egg standing on its small end, and the
profile (pronounced pro´-feel) view, that is the side
view of the head, is more nearly square; if in the latter
case the square is divided into two triangles, the face
will be found to nearly fill one of them and the hair
the other.
Fig. 44b. a full view of the face
Both of these figures show the right sizes to make
the eyes, ears, nose and mouth, that the eyes are on
a line with the helix, or upper border of the ears and
that the top of the nose is on a line with the lobe, or
lower edge of the ear. It is mighty good practice to
sketch the faces of your friends in this fashion.
—It is always more
or less hard to sketch inanimate objects with anything
like a true portrayal of them from memory but it is
quite easy to do so if you have the object itself set up
before you to pattern after and then draw it as
you see it.
Fig. 44c. a profile view of the face
If you can do a creditable drawing in this manner
with your eye and hand alone it is art, but if you use
a rule or a pair of dividers to measure off the proportions
and then mark them on your paper, it degenerates
into a purely mechanical process; but you can take
your choice and do it whichever way you want to.
—The first thing to know
about drawing in perspective is what perspective
means. To do a drawing of an object or a view on
a sheet of paper as it appears to the eye you must draw
it in perspective.
As an illustration, when you look down a railroad
track you will see that the rails look very far apart
at your feet, but in the distance they seem to come
to a point and then vanish; this is quite natural for
nearby objects always look larger than when they
are at a distance.
So too, when you look at the top of a box the edge
a will seem longer than the edge b, which is farther
away from the eye, and the lines c and d which form
the other edges would meet if they were projected as
shown by the dotted lines at A in Fig. 45, and the
same thing is true for the front and the side of the
box.
Fig. 45a. the vanishing points of a perspective drawing
The Vanishing Point.
—So when you draw a box
or any other object in perspective the lines will meet
if you draw them out far enough and then vanish,
and hence this is called the vanishing point.
To find the vanishing point of the surface of an
object, such as the top of a box, hold a pencil out in
front of yourself at arm’s length and shut one eye,
as shown at B; then tilt the
pencil until it follows the
side line that you are going to draw; now open your
eye and you will see that the line of the box that
seemed at first to be straight is really slanting.
Draw a line on your paper at this slant, or angle
as it is called, and do the same with the other line and
draw it, when the two lines will meet and this is the
vanishing point. You can draw in now the front and
back lines of the top.
Fig. 45b. how to find the vanishing point
Houses and all other objects should be drawn with
vanishing points if they are to conform to the first
principles of art, but for certain kinds of mechanical
drawing art is sacrificed for the sake of showing the
sizes of the object and an abnormal picture results
which is called an isometric perspective.
But houses and all other large objects should be
drawn with vanishing points or they will not look real.
A barn drawn in this way is shown at C, and you
will see that the roof looks perfectly natural since
the lines forming it run to vanishing points.
Fig. 45c. the vanishing points put to use
—When you do a
drawing from an object you will see that the light
falling on certain parts of it seems white, or high
lights, as they are called, and on other parts where it
does not fall it is dark.
To shade your drawing so that it will show the
lights and shadows exactly as the object does, you
should study the latter, and put the shading, as it is
called, on the former just as nearly like it as you can.
But in shading a drawing there must be no sharp lines
to show where the light leaves off and the shadow
begins, but you must make them merge gradually one
into the other, as shown at A in Fig. 45.
And now we come to drawings of another kind and
these are not intended to please the eye but to work
from, hence they are called working drawings.
When most boys, and many men, want to make
anything of wood or metal they get busy with their
tools forthwith and whack it out willy-nilly and of
course a punk job results.
Now the right way to make an article—unless you
are going to crochet a sweater—is to (1) see it in
your mind’s eye, (2) then draw it out on paper to scale,
and (3) build it up from the plan as the picture is
called. By working this way you will be able to figure
out just how much material you will need for it; see
exactly how the various parts fit together, and know
that it will look just right when it is done.
—Drawing
instruments, or drawing tools as they are commonly
called, consist for the most part of (1) one or more
pairs of dividers; (2) one or more pairs of compasses
with pen and pencil points, and (3) one or more ruling
pens. One of each of the above tools will be
enough for you to begin with. A cheap set is shown
in Fig. 46.
Fig. 46. the drawing tools you need
Then you will need (4) a rule, or scale as it is
called; (5) a protractor; (6) a T square 20 inches
long; (7) a 30 degree triangle 5 inches long; (8)
some drawing paper[36] not less than 10 × 12 inches;
(9) a couple of medium hard (HHH) lead pencils,[37]
(10) a good rubber eraser;[38] (11) a bottle of Higgins’
India ink,[39] (12) a few thumb tacks, and (13) a
drawing board about 12 × 17 inches. And now let’s
see what these tools and other things are for and how
they are used.
[36] Get a 2-ply bristol board with a medium or smooth surface.
[39] This is a prepared India ink but you can make your own by
rubbing up stick India ink with water.
A pair of dividers is a tool having hinged legs, the
free ends of which are pointed; they are used to take,
mark off and subdivide distances.
The compasses are made like the dividers, but one
end has a needle point and the other is hollow so that
either a pencil or a drawing pen point can be slipped
into it; this tool is used to draw curves and circles,
either with a pencil or in ink.
A ruling pen is formed of two bowed steel blades
having a screw adjustment so that they can be forced
together or drawn apart and so make lines of varying
widths. Not only is a ruling pen different from a
writing pen but the ink that is used with it is thicker
than an ordinary writing ink. This pen is used to
make straight lines by running it along the edge of
a rule or T square.
A protractor is a semi-circle of brass or of German
silver and it is divided into 180 degrees—since it is
half of a circle and there are 360 degrees in a circle.
You can buy one for a quarter.
By placing the edge of your rule in the center of the
straight edge of the protractor and laying it on any
one of the lines—they are numbered from 0 to 180—you
will find the number of degrees the edge of the
rule is from the horizontal.
Fig. 47. the t square and triangle on the drawing board
The T square is laid with the head, that is the
short thick piece, against the left hand edge of the
drawing board which brings the blade, that is the long
thin piece flat on and across the board. The triangle is
placed against the straight edge. The triangle is laid
on the board with one of its edges against the blade
of the T square as shown in Fig. 47.
—There are two
kinds of working drawings that will be of use to you
and these are, (1) plan drawings, and (2) isometric
(pronounced i-so-met´-ric) drawings and you will find
both of these quite easy to do.
Making Plan Drawings.
—Suppose now you want to
draw the plans of a box which, let’s imagine, is to be
5 inches high, 6 inches wide and 8 inches long. The
first thing to do is to draw out a view of the bottom,
which also serves as the top since they are alike, and
you will have a rectangle like that shown at A in
Fig. 48, and mark the dimensions on it, that is, the
width and the length of the box. This you do by running
a couple of arrows in each direction and marking
in the size.
Fig. 48a. the plan drawings for a box
Next draw one of the sides as shown at B and this
will give you the height and the length of the box and
mark in the sizes, that is 5 and 8 inches accordingly.
Finally draw the end and you will have the height and
width of the box as shown at C and again you mark in
the dimensions.
It is easy to see now that if you have all three dimensions,
namely length, breadth and thickness, and
that if you make a box in wood or metal it will look
like the picture shown at D which is in isometric perspective.
Fig. 48d. the box drawn in isometric perspective
Isometric Perspective Drawings.
—The kind of perspective
drawings I told you how to do under the
caption of Drawing in Perspective is true perspective
but engineers do drawings which they call isometric
perspective, that is, while the object seems to stand
out in relief there are no vanishing points.
This kind of perspective is purely mechanical and
not in the least artistic but it is a great aid when you
intend to make anything, for you can still draw the
lines to scale and see exactly how the finished object
will look.
To make a drawing of this kind draw a line on a
sheet of paper near the bottom and two 30 degree
lines from the ends and a vertical line through them
where they meet as shown at A in Fig. 49.
Now there are four ways by which you can get the
30 degree lines on paper and these are (1) to buy
isometric ruled paper, that is paper on which the lines
are already ruled; you can buy this paper for 15 cents
a quire of any dealer in drawing materials or of
Keuffel and Esser, 127 Fulton Street, New York City.
This is the easiest and best way.
Fig. 49a. how the lines for isometric drawings are made
(2) Take a sheet of white paper exactly 5¹⁄₈ inches
wide and 10 inches long and draw two diagonal lines
from corner to corner so that they will cross each
other, then draw a vertical line through the middle and
a horizontal line near the bottom. The diagonal
and horizontal lines will be 30 degrees apart.
(3) By laying a 30 degree triangle on your T square
and drawing a line along the 30 degree side of it as
shown in Fig. 47; and (4) by laying off 30 degree
lines with a protractor.
To do this tack a sheet of paper on your drawing
board and draw a horizontal line near the bottom of
the paper with your T square; put your protractor on
the horizontal line near one end, lay the edge of the
rule on the center of the protractor and exactly on the
30 degree scale mark and then draw a line.
Fig. 49b. a sheet of isometric drawing paper
Slide the protractor on the opposite side of the
board, draw another 30 degree diagonal line so that
it will cross the first one and draw a vertical line down
through the middle of the paper.
Having, now, your sheet of isometric ruled paper
you are ready to do the drawing. Whatever the picture
is to be, all you need to do is to follow the 30
degree lines and the vertical lines and you simply
can’t help getting it in perspective.
In drawing isometric perspective circles, such as
wheels, disks and the like, they are always shown as
ellipses, that is, closed oblong curves. To draw an
isometric ellipse,[40] make it in the proportion of ⁵⁄₈ to 1,
that is, if it is ⁵⁄₈ inch wide, as we will call its minor
axis, then make it 1 inch long, as we will call its
major axis, as shown at C in Fig. 49, and you will
have one that is near enough the right shape for your
purpose; thus if you want to show a tube or a pipe,
draw it as pictured at C. Now with these few principles
well in mind you can make a working drawing
of nearly anything you please.
[40] A more complete description of isometric ellipses will be
found in Inventing for Boys by the present author and published
by Frederick A. Stokes Co., of New York.
Fig. 49c. the proportions of an isometric ellipse
—Should you ever want to
draw a circle and have no compasses at hand or should
you want to draw a larger circle than you can with
your compasses tie a bit of strong thread to a pin,
make a loop in the string at whatever length you want
the radius—that is half of the diameter of the circle—to
be.
This done, drive the pin in at the point where you
want the center of the circle, put the point of a
lead pencil in the loop and move it around the pin, as
shown at A in Fig. 50, keeping the thread taut and a
perfect circle, nearly, will result.
Fig. 50a. how to draw a circle with a thread
—Make a loop in one end
of a thread as before and tie the other end tightly to
a large pin; wind the thread around the pin until all of
it is on except the loop; push the pin through the
paper on which you want to draw the spiral and into
the drawing board as shown at B.
Next put the point of the pencil in the loop and
move it around the pin just as you did in making the
circle and you will find that you have drawn a very
pretty geometrical spiral which is known as the spiral
of Archimedes. It is so called because Archimedes
was the first to explain that it was caused by a point
moving with uniform angular speed and receding from
the center at a constant rate.
Fig. 50b. how to draw a spiral with a thread
—An ellipse can be
drawn in the same way as a circle, that is, by means
of a string; but instead of one pin you will need two
and each pin is driven in at the foci of the ellipse you
are to draw as shown at C. Simply make a loop of
the string, slip it over the pins, put the pencil point
in the loop and move it around the pins when an
ellipse will be formed.
—A pantagraph
is a simple mechanical linkage for enlarging,
copying or reducing the size of a picture. It is shown
in Fig. 51.
To make one of these instruments get four strips of
wood about ¹⁄₈ inch thick, ¹⁄₂ an inch wide, and 18 or
20 inches long. Now drill ¹⁄₁₆ inch holes ¹⁄₄ inch apart
in each stick the whole length of it. In the ends of
three of the sticks make a hole the size of a lead
pencil.
Fig. 50c. how to draw an ellipse with a thread
Fig. 51. how a pantagraph is made and used
Make two tin tubes each ¹⁄₂ an inch long and fit them
into the holes in the ends of the sticks and push a bit
of pencil through each tube; screw a block of wood
¹⁄₂ an inch thick to your drawing board and screw one
end of another stick to the block and the sticks together
with screw eyes.
Now tack a sheet of paper under the pencil in the
free end of the stick and a picture under the pencil
in the jointed ends of the sticks, then trace the picture
with the latter, and the other pencil will make an
enlargement of the picture. By changing the position
of the sticks a picture can be copied or reduced in the
same way. A pantagraph can be bought for as little
as 25 cents or for as much as $125.00.[41]
[41] A pantagraph can be bought of any dealer in art supplies or
drawing materials.
Fig. 52. how a reflecting drawing board is made and used
—This
is a very simple and easily made optical apparatus
for copying pictures and making drawings of flat objects.
Get a smooth board, or your drawing board
will do; make a wood frame and fit an 8 × 10 sheet of
clear glass in it and screw the frame to the middle
of the board as shown in Fig. 52.
Now all you have to do is to lay a picture or a flat
object, such as a leaf or a butterfly, on one side of
the glass and a sheet of paper on the other side and
look into the glass at a sharp slant, or acute angle
would be the better term, and you will see the picture
projected plainly on the paper so that you can easily
draw it in with a pencil.
—A very easy and effective
way to copy any picture already drawn, or
even a photograph, in line, is to use tracing paper.
This kind of paper, which you can buy of any
dealer in drawing materials, is quite transparent and
very tough. To make a tracing lay the drawing you
want to copy on your drawing board, then lay the
tracing paper on top of it, rough side up, and push a
thumb tack into each corner to hold them together.
Now trace the outline of the picture with a pencil
and then draw in the lines with India ink. If the
paper does not take the ink readily rub the surface of
it with a little powdered chalk on a soft rag. You
can make as many duplicate copies as you want by
using a printing frame and blue paper according to the
directions given in the next chapter.
—Here is an easy
way to make lasting impressions of your own and
your friends’ finger prints and hands.
Take a sheet of heavy glazed white paper, say 5 × 7
inches, and hold it over a kerosene lamp with the
chimney removed and the top of the burner thrown
back so that the flame will smoke like a locomotive.
Keep moving the paper about to make the soot, which
is simply particles of nearly pure carbon, cover the
surface of the paper as evenly as possible.
Fig. 53. a lasting carbon (soot) impression of your hand
Lay the smoked paper on a table and then press the
palm of your hand flat down on it; you must be careful
not to press your fingers down too hard or the
sharpness of the fine lines will be destroyed. To get
a clear impression of the lines in the hollow of your
hand press down on the back of it with the fingers of
your other hand.
After you have made the print, as the impression is
called, pour on some flint varnish, which is the kind
that photographers use to cover the films of glass
negatives. You can buy it at any photo supply house.
Pour a teaspoonful on one corner of the paper and
let it flow down and across until the whole surface
is evenly covered. As this is a genuine carbon process
the prints cannot fade and they will last as long as the
paper lasts. A print of this kind made by the author
18 years ago is shown in Fig. 53.
—Since
you are of the younger generation let
me tell you just what a silhouette is, and why.
It is a profile, or side view, of the head of a person
cut out of black paper and mounted on a white card,
or else cut out of white paper with a piece of black
silk back of it so that it looks like a shadow in miniature
of the sitter.
It was so called after M. de Silhouette, a French
Minister of Finance in 1759; his rigid economy in the
conduct of his office caused his name to be tacked on
to everything cheap and as photography had not yet
been discovered and painted portraits were costly, the
paper outlines filled in with black were the cheapest
substitute known and hence the name.
But as the years rolled by silhouettes became a dignified
and honored art and so when our great grandfather
and grandmother wanted to have their pictures
made—not taken—they went to a shears and paste
artist who cut out their silhouettes.
Fig. 54. silhouettes of your great-grand-pa and great-grand-ma
(when they were young)
While the art of cutting silhouettes is all but a lost
one because photography is so easy and shows all the
details, still you can make them with some black glazed
paper and a pair of sharp shears with a little practice.
Take a sheet of black glazed paper[42] about 2 inches
wide and 3 inches long and seat your sitter with the
side of his or her face turned toward you. Now with
a pair of sharp shears begin to cut the paper, starting
at the chin and going on up the face to the hair, then
around to the back of the head and finally cutting out
the collar and bust.
[42] Glazed paper can be bought at stationery stores or you can
get it from Dennison Mfg. Co., 5th Ave. and 26th St., N. Y. C.
All the time you are cutting you must keep your
artistic eye on the profile of your sitter and your mechanical
eye on your shears and paper and you will
be truly surprised to find how little knack it takes to
get a reasonably faithful likeness. A pair of silhouettes
are shown in Fig. 54.
—Of course
you know what transfer pictures are. There are very
few boys indeed who have not bought and used little
5 cent packages of jim-crow transfer pictures and you
will remember that usually only about half of the
picture transferred came off. But this was because
they were made for fun and not for real work.
Now transfer pictures, or decalcomania (pronounced
de-cal´-co-ma´-ni-a) or decalcomanie as the French call
it, from the Latin de which means down, plus calquer,
which is Latin for trace, plus mania which is Greek
for madness, are used by hundreds of thousands
by painters and decorators in every line of work.
These pictures are made with skill and care and when
used properly will not break or come off.
These transfer pictures can be bought in 10,000
different subjects and cost from 1¹⁄₂ cents to a couple
of dollars each. The pictures include every subject
imaginable from simple little flowers to birds with
wonderful plumage and from cupids in groups to
world’s fair buildings; then there are letters and monograms
and beautiful crests and coats-of-arms in gold
and brilliant colors.
When you get ready to do decalcomanie write to
Palm, Fechteler and Company, 67 Fifth Avenue, New
York, or to their western branch at 54 West Lake
Street, Chicago, Ills., for a price-list and this will give
you a description, the height and length of each picture,
the number of pictures on a sheet and the price
per sheet.
How to Transfer the Pictures.
—The regular pictures
can be transferred to wood, metal, painted surfaces,
etc., but instead of soaking them in water alone
as you used to with the toy pictures you give the face
of them a very thin coat of a good, quick drying, rubbing
varnish which you can get at a paint store, or
better, use a transfer varnish which you can buy of
the above company for 35 cents for a ¹⁄₂ pint can.
After you have applied the varnish to the face of
the picture let it dry until it is very tacky; now put
the face of the transfer down on the surface, wet it
with water on a sponge and roll it down hard with a
felt roller.
In a couple of minutes wet the paper again thoroughly
with water and peel it off; roll it down at once
with a wet felt roller and tap it off with a piece of
chamois skin. After the design or picture has dried
for 20 minutes or so, the varnish around it can be
removed by dampening it with dilute turpentine, ammonia
or, better, with a detergent made of equal
parts of turpentine and crude oil and immediately
rubbing it away lightly and quickly with a dry, soft
rag.
After the picture has been transferred as above, it
should be given one or more protecting coats of varnish
the next day.
CHAPTER VI SOME KINKS IN PHOTOGRAPHY — How to Make Blue Prints. — The Materials Required. — Another Kind of Contact Printing. — To Tone and Fix the Picture. — Recipe for a Combined Toning and Fixing Solution. — The Simplest Kind of a Camera. — How to Develop a Dry Plate. — How to Make the Developer. — How to Make a Fixing Bath. — A Good and Cheap Camera. — How to Make an Enlarging Apparatus. — How to Make an Enlargement. — A Developer for Bromide Paper. — How to Make a Reflectoscope. — To Use the Reflectoscope. — How to Make a Magic Lantern. — How to Work the Lantern. — How to Make Lantern Slides. — How to Make Radium Photographs. — Trick Photography — Spirit Photographs. — One Way to Catch Big Fish. — Taking Caricature Photographs.
Since the slogan you press the button and we’ll do
the rest has come to be so well known everybody makes
photographs. But there are a number of kinks in and
side issues of photography that are amusing, instructive
or useful and which if you do not already know
about will prove of service to you.
—This is the very simplest
and one of the most useful kinds of photography.
You need but very little material to make the pictures
with and the little you need will cost less than a dollar.
Fig. 55. a photo printing frame
—Buy, or you can make,
(1) a 5 × 7 printing frame as shown in Fig. 55 and
get a sheet of clear glass to fit it, and (2) a couple of
dozen sheets of 5 × 7 blue-paper[43] which you can buy
at any photographic supply house.
[43] You can make blue print paper by dissolving ammonium
ferric citrate in warm water and coating the surface of the paper
with it by floating it on top of the solution.
Now take one of the drawings you have made on
tracing paper or on tracing cloth with India ink as I
described in the last chapter and lay it with its inked
surface on the glass; lay on this a sheet of blue-paper
with its sensitized side on the tracing paper or cloth;
put the back of the printing frame on top of the blue-paper,
press the springs into place and set the frame
in the sunlight.
Every few minutes open a half of the hinged back
of the printing frame and take a look at the blue
paper to see if the printing is far enough along.
When the lines of the drawing show plainly on it
take the print out of the frame and wash it, as it is
called, by letting water run on it or by putting it
through several changes of water.
When it is well washed hang it up on a line by a
corner to dry and you will have a good, clear print
with white lines on a blue ground. In this way by
using a negative that you have made with a camera,
especially if it is a marine view, you can get some very
pretty and artistic pictures.
—If you like
nature you can use the above process of contact printing
to fine advantage. Instead of blue paper it is better
to use what is known as solio paper[44] or silver
paper.[45]
[44] Solio paper
is coated first with gelatin and then with silver.
[45] Silver paper is coated first with albumen and then with
silver.
To make a contact silver print first put a finely
veined leaf, the filmy wing of a butterfly, a piece of
delicate lace or any other thin, translucent object on
the glass in the printing frame, lay a sheet of solio,
or silver paper over it, then put the back in the frame
and fix the springs.
Set the frame so that the sunlight will fall full on
the glass side of it. From time to time open half of
the hinged back and see how the print is coming on;
make the print a couple of shades darker than you
want it when finished, but be careful not to overexpose
it for silver paper prints much quicker than blue paper.
—To tone a silver
print means to change its color and give it more
brilliancy and this is done by putting it in a chemical
solution made of chloride of gold, or toning bath as it
is called.
To fix a print means to treat it so that the light will
no longer act upon it and this is done with a solution
of hyposulphite of soda or just hypo as it is called
for short.
The easiest way to tone and fix your silver prints
is to buy a bottle of solio toning solution[46]
which is
a combined toning and fixing bath. Take the print
from the frame and do not wash it but put it into a
tray in which you have mixed 2 ounces of solio toning
solution and 4 ounces of cold water.
[46] It can be bought at any store where photographic materials
are sold or you can make it yourself from the formula given on
this page.
When the print takes on the proper color put it into
another tray containing a solution made of 1 ounce of
salt and 32 ounces of water; let it stay in this bath for
5 minutes to stop the toning. Now put the print into
another tray and wash it in 16 changes of water or in
running water for an hour. If you make a half or a
dozen prints at once you can tone and fix them at the
same time.
—To
make a combined toning and fixing bath
mix up two solutions, called stock solutions, as follows:
Stock Solution A.
—Dissolve in 20 ounces of cold
water 2 ounces of hypo, 1¹⁄₂ ounces of alum in crystals
and ¹⁄₂ an ounce of granulated sugar. Then dissolve
¹⁄₂ an ounce of borax in 2 ounces of hot water and
mix it with the hypo solution; let it stand over night
and then pour off the clear liquid.
Stock Solution B.
—Dissolve ³⁄₄ of a grain of pure
chloride of gold and 32 grains of acetate of lead in 4
ounces of water.
Now when you want to tone a picture or half a
dozen 4 × 5 prints, take 4 ounces of the stock solution
A and ¹⁄₂ an ounce of the stock solution B and pour
them into a tray and tone them as I have previously
described.
—When you can
buy a real camera for two or three dollars it seems of
little use to make one, so just consider the camera I
shall describe as a scientific curiosity rather than an
apparatus of utility.
Fig. 56. an easily made pin-hole camera
A. Cross section showing the notched strips.
B. The way the shutter works.
To make a pin-hole camera, so called because a pin
hole takes the place of a lens, form a box of pasteboard
or of thin wood 4 inches square and 8 inches long;
cut a hole ³⁄₈ of an inch in diameter in one end for
the pin hole. Fit a strip of wood ¹⁄₂ an inch thick
and 4 inches long, having notches cut into it to a
depth of ¹⁄₈ inch, to the sides of the box as shown
at A in Fig. 56. These notched strips are to hold a
sensitized dry plate.[47]
Next make a shutter, that is,
a little device to open and close the pin-hole; it is
simply a bit of sheet brass 2¹⁄₂ inches long, ¹⁄₄ inch
wide at one end and ¹⁄₂ an inch wide at the other end
as shown at B. Drill a hole ¹⁄₈ inch in diameter in the
center of the strip of brass and pivot this to the front
of the box so that it is on a horizontal line with the
center of the hole.
[47] A
dry plate is a sheet of glass coated on one side with gelatin
and bromide of silver which makes it sensitive to light.
Now to make the pin-hole, and certainly no pin-hole
was ever more important than this one. Glue a
thick piece of nice smooth tinfoil over the hole on the
inside of the box and with a fairly good-sized pin,
or better a needle, prick a smooth hole in the center
of it.
You are ready now to take a picture and to do so
slip a sheet of ground glass[48] into the grooves in the
camera up close and then farther back until you can
see the picture plain. This done take the camera into
your dark-room,[49] and load a dry plate into it, put
the cover on the box and fasten a black cloth over it
with a rubber-band as shown at C in Fig. 56.
[49] A dark room must be used because a ray of any kind of
light except red will spoil a dry plate the instant it strikes it. A
red-lamp can be bought for a quarter or you can make one and
either use a sheet of red glass or red dark-room paper.
Go out and point your camera at the object you
want to photograph, be it a landscape, a seascape or a
scapegoat, press down on the lever for a second, let
go of it when it will drop back and cover the pin-hole
again and the exposure is made.
—Next take your
camera into your dark-room and develop the plate,
that is, immerse it in a chemical solution called a
developer to bring the picture out on it. To do this
you must get a tray and put the exposed dry-plate in
it, film side up, and pour the developer over it.
Fig. 56c. the pin-hole camera complete with cloth and
rubber band
Rock the tray after you have poured the developer
over the plate to keep the solution flowing forth and
back evenly over it all the time. When you see the
image very plainly take the plate out of the developer,
wash it in clean water and then lay it with the film
side up in a tray containing the fixing bath.
Let the negative—when the plate is exposed and
developed it is called a negative—remain in the fixing
bath until all the white parts, that is, the free silver
which was not affected by the light, have disappeared
and then let a gentle stream of water run on it for an
hour or wash it in 16 changes of clean water. Stand
it in a negative rack over night to dry and then you
can make prints from it.
—You can make a
good, tried and true developer in two solutions as follows:
Pyro Solution, A.—Take 1 ounce of pyrogallic
acid, called pyro for short, dissolve it in 28 ounces
of water and then add 20 minims of sulphuric acid.
Soda Solution, B.—Dissolve 2 ounces of
desiccated[50]carbonate of soda and 3 ounces of sulphite of
soda in 28 ounces of water.
When you want to develop a plate mix ¹⁄₂ an ounce
of the pyro solution and ¹⁄₂ an ounce of the soda solution
with 4 ounces of water and to do this you need a
graduated glass.
—To make a good fixing
bath for dry plates dissolve 1 ounce of hypo, 60
grains of sulphite of soda in crystals and ¹⁄₄ ounce of
borax in 20 ounces of water. A developer can only
be used for one or two plates but you can fix 50 plates
in the same fixing bath.
—To take real pictures
you want a real camera. Now there are many
kinds of hand cameras but there is only one size that
I am going to try to interest you in and that is one
which will make pictures 3¹⁄₂ × 4¹⁄₂ inches.
With a camera of this size you can take nicely
proportioned little pictures to give to your friends, to
keep in your album, to make enlargements of and to
make lantern slides of by direct contact printing and
this will save you a lot of trouble.
Fig. 57. two cheap and good cameras
A. A Brownie box kodak.
B. A folding kodak.
The cheapest 3¹⁄₄ × 4¹⁄₄ camera you can buy is a No.
3 Brownie box kodak,[51]
see A Fig. 57, which costs
about $3.00. A folding No. 3 Brownie camera, shown
at B, will serve your needs much better and this one
will cost you in the neighborhood of $5.50, or you can
buy a Graflex camera[52] for $75.00 if father is rich
and mother doesn’t care.
[51] These cameras can be bought most anywhere or you can send
to the Eastman Kodak Company, Rochester, N. Y.
[52] With this kind of a camera you can see the object you are
photographing up to the very instant you snap the shutter.
Every good camera has what is called a rectilinear
lens, that is, a compound lens formed of two achromatic
lenses, which means that each acromatic lens is
made up again of two lenses one of which is of crown
glass and the other is of flint glass, and these two
latter lenses are cemented together with Canada
balsam.[53]
[53] This is a clear gum that is obtained from a tree called the
Canada balsam.
Now whereas a common convex lens will produce
all the colors of the rainbow around its edges when a
ray of light passes through it, an acromatic lens lets
through only the white light and while a single convex
lens makes the straight lines of a building curved in
the picture, an acromatic lens keeps all the lines
straight, or rectilinear, and hence its name.
These little cameras are filled with mechanical snap
shutters and they use roll films, that is the sensitive
silver and gelatine emulsion is spread on a thin celluloid
film instead of on glass plates. These roll films
come on spools in lengths of ¹⁄₂ and 1 dozen each and
they can be loaded into the camera in daylight. The
same kind of developing and fixing solutions are used
for films that are used for dry-plates.
—To
make an enlarged picture of a small negative take
out the back of your camera and get two perfectly
clear sheets of glass to fit the opening.
Make a box of ¹⁄₄ inch thick wood, 6 inches wide,
6 inches long and 7 inches high and have the top of it
separate so that it can be lifted off and put on the
box. In the middle of the top near one edge cut a
hole 1¹⁄₄ inches in diameter and put an electric light
socket—to which a cord and plug is fixed—in it
as far as it will go and then screw in a nitrogen 100
watt electric lamp[54] which gives about 75 candle
power, as shown at A in Fig. 58.
[54] The Delco Light Co., 52 Park Place, New York, sells these
lamps and all other electrical supplies.
Fig. 58a. a home-made enlarging apparatus
The lamp set in the top of the illuminating box.
Cut a hole out of the front board 3¹⁄₂ x 4¹⁄₂ inches
and fasten a sheet of ground glass[55] or, better, of
opal glass[56]
over the opening. Get a sheet of bright
tin 6 inches wide and 10 inches long, bend it into a
semi-circle and set it in the box so that it will reflect
the light from the lamp in front of it through the
ground glass screen as shown at B.
[55] Ground glass can be bought at a glazier’s or you can make it
as explained in Chapter IX.
Next make a stand for holding the bromide paper[57]
which is to be used for the enlargement. About the
easiest way to do this is to take a 1 inch thick board
6 inches wide and saw off a piece 12 inches long.
Fasten your drawing board to it with a couple of
angle blocks as shown at D, and you are ready to make
an enlargement.
[57] Bromide paper is a paper sensitized with a compound of silver
and bromine.
—When you have
the apparatus ready set the camera and the illuminator,
as the box with the light in it is called, on another
table. Put the negative between two plain sheets of
glass and then fasten them to the camera with a
couple of large rubber bands; set the illuminator with
the ground-glass screen close up against the negative
in the back of the camera, as shown at C.
Now set the drawing board stand about 4 feet away
from the lens of the camera to make an 8 × 10 enlargement.
Open the shutter, turn on the light and
focus the camera, that is, move the stand to and from
the camera until the enlarged picture is sharp. When
you get it so, close the shutter and cover up the cracks
where the light leaks through with a dark cloth.
Make the room perfectly dark except for your dark-room
light and then put a sheet of bromide paper on
the drawing board with thumb tacks. Open the shutter
of the lens and expose the paper to the light passing
through the negative and then close it again. The
bromide paper is developed and fixed just like a dry
plate when your enlargement is done.
Fig. 58b. a home-made enlarging apparatus
B. The illuminator showing the tin reflector in it.
C. The camera.
D. The stand for holding the bromide paper.
In handling bromide paper you must be almost as
careful as you are with dry plates or films. Before
making a picture it is a good scheme to test the length
of time to expose the paper. To do this take a sheet
of bromide paper and cut it into strips 1 inch wide and
10 inches long; fasten a strip at a time diagonally
across the board and expose the first one for say 5
minutes and then develop it, when you can usually
tell about how long the exposure should be.
—A good stock
solution developer for bromide paper, velox paper,
films and dry plates can be made by adding these
chemicals to 25 ounces of hot water in the order named
and stirring in each one until it is dissolved; elon ¹⁄₈
ounce; desiccated sulphite of soda 1⁷⁄₈ ounces; hydrochinon
¹⁄₂ ounce; desiccated carbonate of soda 5¹⁄₄
ounces; potassium bromide 30 grains and wood alcohol
3 ounces.
Fig. 58c. a home-made enlarging apparatus
E. Cross section top view of the enlarging apparatus.
This developer will keep for a long time if the
bottle containing it is kept full, otherwise the air will
act on it. To develop six 8 × 10 bromide prints use 1
ounce of the stock solution and 6 ounces of water.
To fix bromide prints keep them moving in a bath
made by dissolving 8 ounces of hypo in 2 quarts of
water and then adding ¹⁄₄ ounce of metabisulphite of
potassium and ¹⁄₄ ounce of powdered alum. Let the
prints remain in this bath for about 10 minutes and then
wash them thoroughly.
—A reflectoscope
is a kind of magic lantern but instead of using transparent
glass slides you can use any picture or opaque
object such as the works of a watch, your hand, etc,
and throw an image of it on the screen.
Fig. 59 a cheaply made reflectoscope
A. The projector.
B. The illuminator.
If you have a folding camera[58] you can convert it
into a dandy reflectoscope, so get busy with your
tools. Make a box—it is really two boxes fastened
together—of the peculiar shape shown in Fig. 59,
and it can be of wood or of metal as you wish.
[58] A box camera can not be used because its focus is fixed.
First make the larger box, which we will call the
projector, and this should be 4¹⁄₂ inches long, 5 inches
wide and 5 inches high[59]—and leave the front, back
and one side off. To the top and bottom fasten on
two wood cleats ¹⁄₂ an inch square and 5 inches long
to fix the projector to the camera with. This box
is shown at A in Fig. 59.
Fig. 59c. a cross section top view of the reflectoscope
This done, make another box for the illuminator 3
inches wide, 3 inches long on one side, and 4³⁄₄ inches
long on the other side, and 5 inches high. Bend a
piece of bright tin for the reflector and set this in the
back as shown at B.
Cut a 1¹⁄₄ inch hole through the top for an electric
lamp as described in the directions for making an enlarging
lantern; the top should be tight fitting but so
made that it can be taken off and put on at your
pleasure.
Now glue, screw, solder or otherwise fix the two
boxes together and the reflecting part of the apparatus
is done. To complete it fasten the back of your
camera to the cleats on the top and bottom of the
box with strong rubber bands as shown at C, which
is a top view of the reflectoscope.
Fig. 59d. the reflectoscope ready for use
—Tack a white sheet to
the wall and set the reflectoscope at a distance of about
10 feet from it with the lens pointing toward it, of
course.
Next turn on the light in the box and turn off all
the lights in the room and make it as dark as you can.
Hold a picture of any kind against the opening in the
back of the projector box and then focus the camera
until the picture on the screen is as sharp as you can
get it.
The way the reflectoscope works is like this: the
picture is projected upon the screen in virtue of the
fact that the direct light from the lamp, as well as
that portion of it which is reflected back by the tin, is
thrown against the surface of the picture or object
held in the opening; from this the light is reflected
through the lens which enlarges it and projects it on
the screen.
—To make a
magic lantern out of a camera is just as easy as it is
to make a reflectoscope but you will have to buy a
condensing lens[60] and this will cost 50 cents to $1.00,
according to size.
[60] The L. E. Knott Apparatus Co., Boston, Mass., sells a 2 inch
condensing lens for 50 cents; a 3 inch one for 75 cents, and a
4¹⁄₂ inch one for $1.10.
For this lantern you can use either a box or a bellows
camera, though the latter is better because the
picture can be focused. Whichever you use make a
base of a 1 inch thick board, 5¹⁄₂ inches wide and 14
inches long and nail or screw two strips of wood ¹⁄₂
an inch wide, ³⁄₄ inch high and 8 inches long along the
edges on one side as shown at A in Fig. 60.
If your camera is of the box kind set it in between
the strips on the base on the front end, but if it is of
the bellows type then you will have to make a shelf
for it as shown at B to hold the camera in place as
shown at C.
Next make an illuminator as described above in the
text How to Make an Enlarging Apparatus, but instead
of covering the front with ground glass make
a board to fit it and cut a hole in it the exact size of
the condensing lens. This lens is a plano or a double
convex lens as shown at D and while it should be 4¹⁄₂
inches in diameter to get all of the picture on the
screen you can use a lens as small as 2 inches though
all of the picture will not show.
THE BASE OF THE LANTERN
THE FRAME TO HOLD A POCKET FOLDING CAMERA
HOW THE CAMERA IS FIXED TO THE FRAME
PLANO CONVEX
DOUBLE CONVEX
ONE OF THE LANTERN SLIDE HOLDERS
FRONT BOARD ILLUMINATOR
CONDENSING LENSES
Fig. 60. the parts of a home-made magic lantern
Cut out six clips of sheet brass ³⁄₁₆ inch wide and
¹⁄₂ an inch long and punch a hole in the end of each
piece. Screw three of these clips to each side of the
board at equi-distant points around the hole so that the
end of each one projects over the edge of the hole ¹⁄₈
inch. Now put the lens in the hole and adjust the
ends of the clips so that they will hold the lens in place
as shown at E.
The next and last thing to do is to cut two strips of
tin or brass 1 inch wide and 3 inches long and bend
each one over the long way as shown at F; punch three
holes near the lower edge of each one and screw one
of them above and one below the condensing lens on
the board 3¹⁄₄ inches apart as shown at E. These
bent strips form the holder for the lantern slides. The
magic lantern complete is shown at G.
Fig. 60g. the magic lantern ready for use
—Tack a bed-sheet up
on the wall; turn on the light in the illuminator and
turn off all the lights in the room; slip a lantern slide
upside down in the holder and then push the rear end
of the camera—having first taken out the back—close
up to the lantern slide holder.
If you are using a box camera move the whole
lantern back until the picture is as large as you want
it and it is still bright enough. If it is a pocket folding
camera you can focus it and get a picture with
much better definition.
—A lantern slide is
a sheet of glass with a transparent picture on it. A
standard lantern slide is 3¹⁄₄ × 4¹⁄₄ inches and one of
this size can be used in any full sized magic lantern or
stereopticon.[61]
[61] A
stereopticon is really two magic lanterns, but the word is
now often used to mean a high-grade magic lantern.
To make lantern slides by direct contact printing is
not a hard thing to do at all, and all the equipment
you need to make them besides the chemicals is a
printing frame. Put a sheet of clean glass in it and
lay your negative on it with the film side up.
Now lay the lantern slide plate[62] with the film side
down on the negative just as though you were going
to make a print, but you must make it in your dark
room, using a white light to expose it of course, for it
is just as sensitive as a dry plate or a film. When
you expose it hold the printing frame about 12 inches
away from the light.
[62] Lantern slide plates can be bought at any photographic supply
house.
A lantern slide plate is developed, fixed and washed
exactly like a dry plate but to get the best results you
should use the kind of developer called for in the
directions that come with the plates.
When you have the lantern slide made, place a sheet
of clear glass of the same size—called the cover-glass—on
the film side of it and bind the edges with
passepartout binding, that is a strip of paper gummed
on one side. It is then ready for use.
—You can
make radium photographs, or skiagraphs as they are
called, with any one of a number of radioactive substances
and at a very small outlay.
The four most important radioactive substances, if
we except radium itself, are black uranium oxide,
pitchblende, thorium nitrate and uranium nitrate.
You can buy any one of these substances in a glass
stoppered bottle for $1.00 or the set of four for
$3.50.[63]
[63]
The L. E. Knott Apparatus Co., Boston, carries these radioactive
substances in stock.
While the radioactivity of these substances is low it
is sufficient to make a shadow-picture—and this is all
that an X-ray picture is—of a coin or other small
object if it is laid on top of a dry plate sealed in a
black paper envelope, which is opaque to the light.
Fig. 61. a photograph of a coin made with radium
That is, the coin is laid on the envelope containing
the dry plate, and the bottle with the radioactive substance
in it is laid on top of the coin. Let them remain
undisturbed in this way for a couple of days and
you will find on developing the plate a very good
radiograph, or shadow picture of the coin as shown
in Fig. 61.
—When photography was
young Sir John Herschel, the great astronomer, got
up what he called magic photographs and these have
been worked under the name of spirit photographs by
half of the mediums in the business.
The idea is to show the victim of superstition his
future wife or her future husband. To this end the
medium shows a piece of perfectly blank paper about
an inch square. She—sometimes it’s a he—then
dips the bit of paper into a saucer of what seems
to be ordinary, common every day water and with
much dignity and mysticism presses it to the forehead
of the aforesaid ninny who would fain know
what the partner of his, or her joys and sorrows will
look like. (What’s the use when they will know so
well afterward?)
Be that as it may, when the medium removes the bit
of paper from the simpleton’s forehead a photograph
has really and truly appeared on it and—there you
are! (Fifty cents, please.)
Now the trick is done like this and you can have
some fun repeating it. Print some photos postage-stamp
size of boys and girls on ordinary silver paper
and fix them in hypo dissolved in water but don’t tone
them; wash them well and then soak them in a
saturated solution[64]
of bichloride of mercury which
will bleach out the picture and leave the paper perfectly
white again; this done dry the paper and put it away
until you want to use it.
[64] A saturated solution of bichloride of mercury is one in which
all of the mercury has been dissolved in the water that it will
dissolve at its present temperature and pressure.
When you do, make a strong solution of hypo, soak
the picture in it for a minute or two, press it to your
subject’s forehead and the picture will appear.
—Of course you
know that when an object very near the camera is
photographed it will look proportionately larger than
when it is photographed a little way off from it. It
is simply a case of exaggerated perspective.
Hence the camera is an apparatus very well adapted
for camouflage as the French call faking. You can
easily try it out by having a friend lean back in a
chair and put his feet on the table. (If the table is
of highly polished mahogany request him kindly to
take off his spurs first.)
Stand your camera in front of him so that his feet
will be nearest the lens and then take his picture. The
result is that he will be about all boots and very little
head.
Another and deeper dyed trick is to photograph a
fellow—choose one who is noted for his whaling
yarns—with a fish dangling at the end of a pole and
line as shown at A in Fig. 62. This will make the
fish loom up as big as the cod in a Scott’s Emulsion
ad., and the boy will be the size of the lone fisherman
as shown at B. It will be some time before the
scales will drop from the eyes of the person who is
sizing up the picture.
You want to use a small stop in your lens when you
make a picture of this kind so that the definition will
be as sharp in the foreground as it is in the background.
Fig. 62. one way to catch a cod
A. How it is done.
B. How it looks when done.
—The word
caricature (pronounced care´-i-ca-ture) means a portrait
in which some part of it is distorted so that it
produces a comical effect.
Now there are a lot of ways to make photographic
caricatures but one of the best is to use what is called
a special foreground. This foreground is a sheet of
cardboard or a piece of muslin stretched on a frame
about 1¹⁄₂ feet wide and 2¹⁄₂ feet long.
Draw on the cardboard or muslin any kind of a
funny little body such as an anemic fellow in a bathing
suit, or a lank athlete rowing in a tub, or a gilded
youth riding a donkey; and finally cut out a place
around his collar for the neck of the sitter. Seat
your subject and have him hold the foreground as
shown at C in Fig. 62 so that his head comes just
above the collar of the picture and then take a photograph
of him.
Fig. 62c. how caricatures are made
If now the background—that is the ground back
of the sitter—and the foreground—namely the one
painted on the cardboard—are of the same shade
you can trim the print so that it will look exactly as
if your friend was in the Orient on his way to Mecca.
(If you will keep this picture for 20 years the fellow
who sat for it will gladly pay you a hundred dollars
for it.)
CHAPTER VII PRINTING AND ITS ALLIED ARTS — Kinds of Printing Presses. — The Parts of a Self-Inking Press. — How the Press Works. — Sizes and Prices of Presses. — The Outfit You Need. — Outfit for a 3 × 5 Press. — Outfit for a 5 × 8 Press. — Outfit for an 8 × 10 Press. — About Type and Setting Type. — — Relative Number of Type Letters. — Styles of Type. — The Parts of a Type. — The Sizes of Type. — Your Type Cases. — Setting the Type. — Making Ready. — Printing the Job. — How to Clean Type. — About Distributing Type. — The Ink and Rollers. — — The Ink. — The Rollers. — Printing in Colors. — Printing in Gold. — And Finally Your Stock Supply. — The Art of Paper Making — What Paper Is. — How to Make Paper. — Sizing and Finishing. — How to Bind Books — Making the Cover. — Sewing the Book. — Putting on the Title.
If there ever was a boy who did not want a printing
press I have yet to meet him. Ever since the day
when Gutenburg[65] invented movable types, and that
was some 500 years ago, every boy—and not a few
men—have wanted to set a few stickfuls of type and
run off some impressions on a press, and many thousands
of them have gratified that highly civilized ambition.
[65] Johanne Gutenburg was a German printer. He invented
movable types about the year of 1450.
But you fellows of to-day have all the best of it, for
you can buy a printing outfit complete for $1.50 on up
to anything you want to pay for it. After all is said
and done though, you can get more real enjoyment out
of a small self-inking press than you can out of a
larger one. Not only is there a lot of fun in printing
cards, etc., for yourself but there is money in it
too, if you go about it the right way, but that is
another story.[66]
[66] To make money out of job-printing on a small scale read
Money Making for Boys by the present author and published
by Dodd, Mead and Co., New York City.
—There are two kinds
of printing presses made and these are (1) hand inked
presses, and (2) self-inking presses.
You can make a printing press out of wood but to
do a good job you must have a press built of iron and
properly machined, that is finished up, for to do good
printing a good outfit is needed to begin with.
Small hand inked and self-inking presses are sold
in the toy departments of nearly all stores at prices
ranging from $1.50 to $5.00 and this will include a
font of type. Many of these little presses are made
which use type about half the length of regular type
and if you get a press of this kind you will never know
the real joy of printing.
—The Excelsior
is the name of a small self-inking printing press that
has been on the market for 50 years and it is a good
one. The description of it which follows will fit any
other model self-inking press just as well, for they
are all built on the same principle.
There are seven chief parts to this press and these
are (1) the body; (2) the type bed; (3) the platen;
(4) the ink-roller carriage; (5) the ink table; (6) the
chase, and (7) the handle, all of which are shown in
Fig. 63.
The body of the press serves to support all the
other parts. The bed, as you will see, is really a part
of the body casting and the feet of the type rest against
it. For this reason it must be perfectly smooth and
even, and it is planed off, that is machined, to make
it so.
The platen is pivoted to the middle of the body and
it swings up to and parallel with the bed and away
from and out at an angle to it. The card, or sheet
of paper to be printed is laid on the platen and is
brought up and into contact with the type which rests
on the bed. A pair of grippers are hinged to the
platen to hold the paper in place while it is being
printed but releases it when the platen moves back.
Fig. 63. a model self-inking printing press
The ink-roller carriage is connected by levers to the
platen and when the latter moves to and fro the
rollers run over the type to ink it; the rollers
get their ink from the ink table and this is a
disk which revolves and on which the ink is spread;
the ink table is made to revolve a little at a time so
that the rollers will pass over every part of it in every
direction and so distribute the ink evenly.
The type when set is locked in an iron frame called
a chase and this fits on the bed; and finally all the
movable parts are coupled to the handle and when this
is moved up and down it makes them perform their
various functions.
—Let’s suppose now, that
you have the type set in the chase and the chase is
fixed in the press; that you have put some ink on the
ink-table and a card or a sheet of paper on the platen.
Now when you press down on the handle it moves
the platen up, the grippers hold the card, or sheet of
paper to it, the arms pivoted to the platen pull the
ink rollers up and over the type and on to the ink
table which turns through a small arc, that is, part of
a circle, by a ratchet so that it keeps a fresh surface
exposed to the ink rollers all the time.
When the card, or paper makes contact with the
type you pull the handle up; this swings the platen
back; the grippers relax their pressure; the ink-rollers
move down over the face of the type; you take out
the printed card or sheet with your left hand and put
in a blank one with your right hand, when you are
ready to make another impression.
It may surprise you to know that any one can print
from 500 to 600 cards an hour and if you are expert
you can run off from 1,000 to 2,000 cards per hour.
—The Excelsior press
comes in three sizes and the price depends on the size
of the chase. (1) A press having a chase 3 × 5 inches
costs $5.00 and this is large enough to print cards,
labels, envelopes, etc.; (2) a 5 × 8 press costs $18.00
and this one will do nice jobs up to postal card size;
and (3) a 6 × 10 press costs $25.00 and is large
enough to print bill-heads, letter-heads and circulars,
or you can print a little newspaper on it.
—Your outfit will, of
course, depend largely on the size of press you have.
—A couple of dollars will
buy all the fixtures you need and these consist of (a)
a font of type, (b) some leads, (c) a type case, (d)
an assortment of furniture, and (e) a can of black
ink.
A font of type means enough of a kind having the
same face and body and the right amount of each
letter to set up an ordinary job. You will find more
about type under the next heading called Type and
Typesetting. Leads are thin strips of type metal less
than type-high which are used to separate the lines of
type; and a type case is a shallow wooden tray divided
into little compartments called boxes in which
the letters of a font of type are kept apart.
—The fixtures of a press of
this size include all of those named above and (a)
three fonts of type, (b) type cases for them; (c)
a set of gage pins, and (d) a pair of tweezers, or a
bodkin. The gage-pins are pinned into the paper backing
on the platen to keep the card or sheet from slipping
and to hold it in its proper place. The tweezers,
or bodkin, which is a large needle, is used for picking
out type from a form when you are correcting it.
—This outfit should have
all the fixtures of both of those described above and
you will need not less than four fonts of type, while a
composing stick, which is a little metal tray to hold the
type in as you set it, is a necessity. These fixtures are
shown in Fig. 64.
PAPER GUAGE
D—A BOUGHT GUAGE PIN
A—WOOD FURNITURE
B—A LEAD
A BODKIN
C—A COMMON PIN BENT FOR A GUAGE PIN
E—REGULAR PRINTER’S TWEEZERS WITH COARSE SERRATED FLAT POINTS
A COMPOSING STICK
Fig. 64. an outfit for a model press
—In looking over type catalogues
you will see that the fonts are listed as 4A, or 8A-10A,
etc. Now this means that in the 4A font there are
4 capital A letters and that all of the other letters are
in proportion to the A’s that are likely to be used,
thus:
A 4A FONT
A
B
C
D
E
F
G
H
I
J
K
L
M
N
O
P
Q
R
S
T
U
V
W
X
Y
Z
No. of letters to font
4
2
3
3
5
2
2
3
4
2
2
3
3
4
4
3
2
4
4
4
2
2
2
2
2
2
With an 8A-10a font there are of course twice as
many of each capital letter as in a 4A font while of
the lower case letters, which means the small ones,
there are 10 a’s and the number of the others are in
proportion to their use, thus:
AN 8A-10a FONT
a
b
c
d
e
f
g
h
i
j
k
l
m
n
o
p
q
r
s
t
u
v
w
x
y
z
No. of letters to font
10
4
6
8
18
4
4
8
10
2
3
8
6
10
10
6
3
10
10
10
6
4
4
2
4
2
—For card work you want a plain
block letter font like that shown at A, a script like B,
or an old English like that shown at C.
For envelopes, bill, letter head and other job work
three fonts of engraved plate style as shown at D, E
and F will give good results.
23A
$1.00
A
THEODORE ROOSEVELT
1234567890
8A 24a
$4.50
B
Miss Alice Verlet
123456789
11A 34a
$2.50
C
Lieut. John Hodder Stuart
123456789
22A
$1.00
D
ENGRAVED CARD STYLE IS PREFERRED
52468
16A
$1.05
E
HANDSOME ENGRAVED EFFECTS
123
A16
$1.25
F
ENGRAVED PLATE STYLE
140
For circulars you should have several fonts of different
styles of type as shown at G, H, I, J and K.
18A 36a
$2.90
G
CLEAR CUT Faces Popular
123
15A
$1.95
H
EXCELSIOR PRESSES
12345
A
$2.10
I
GRAINO
1
10A 15a
$5.35
J
GOOD for many places
3
11a 20a
$3.00
K
Good and Clear for poster and circular printing. A fine addition to any printing office.
12345678
And finally should you intend to print a cook-book,
a town directory or a newspaper you will need a half,
or a full font of 12 point plain pica Roman, as it is
called, and which is shown at L.
L
12 Point No. 1, 25 lbs. $12.00. (Half font, 12¹⁄₂ lbs., $6.50)
PLAIN Pica Roman, a FACE for many
uses. Books, circulars and jobbing.
Very clear and easy to read. Cast
from nickel metal and most durable
known.
£ $ L z 1234567890
—Before explaining how to
set type, make ready and print, there are a few little
things about letters and about type which are good to
know.
First let’s take, by way of illustration, the letter
HH. Now you will observe that the first H is plain
and the second one is embellished by fine lines at the
top and bottom and these embellishments are called
ser′-ifs.
As simple a bit of metal as a type has more parts
to it than you can shake a stick at, but you ought to
learn them by heart. Named, these parts are (a) the
body of the type; (b) the front; (c) the back; (d)
the face or letter; (e) the nicks; (f) the feet; (g) the
groove; (h) the shoulder; (i) the bevel, and (k) the
pin marks, and all of these are pointed out in Fig. 65.
Fig. 65. the parts of a type
It very often happens in italics and script type that
a part of a letter will stand out beyond the body and
this little extension is called the kern. The nick in
the type is to help the type-setter, or compositor as he
is called, to set the type the right way in the stick, that
is you always set the type with the nicks down and
toward you.
The pin-mark is made by a sharp instrument which
removes it from the mold. Finally a c e m n o r
s u v w x z are called short letters; j is a long
letter in that it takes up the full breadth of the face;
b d f h i l t are upstroke, or ascending letters, while
g p q are downstroke or descending letters.
—Type is made in standard
sizes and not so very long ago each size was known
by a name. Then a change was made and the point
system,[67] as it is called, came into general use. The
sizes under the old and the new systems are given
in the following table and it will enable you to know
type sizes both by name and by point.
[67] This is the standard system of sizes for type bodies. It is so
called because it is measured in decimal points or fractions of an
inch; that is, 1 point is .0138 inch, so that nonpareil, as it used to
be called, is now 6 point and bourgeois is 9 point, etc.
TABLE OF TYPE SIZES
OLD NAMES OF SIZES
NEW POINT SIZES
Pearl
5
point
Agate
5
¹⁄₂
“
Nonpareil
6
“
Minion
7
“
Brevier
8
“
Bourgeois
9
“
Long Primer
10
“
Small Pica
11
“
Pica
12
“
English
14
“
Great Primer
18
“
—There are two kinds of type
cases and these are made to hold (1) the capital, or
upper case letters, and (2) the small or lower case
letters.
The reason the capitals are called upper case letters
is because the case that holds them is set higher on
the composing stand than the case which holds the
small letters; this brings the small letters nearer to
the hand of the compositor and as they are used more
than the caps he can set the type faster. The arrangement
of the cases is shown at A in Fig. 66.
Fig. 66a. how the type cases are arranged
There are several schemes of type-cases but I shall
only describe three of them. The first is a small type
case 12¹⁄₂ inches square with 48 boxes in it and you
can buy one for 35 cents. It is good enough for any
one who doesn’t want to go to the bother of learning
the regular case. A plan view of the lay of a
regular upper and a lower case is shown at B and C.
You will see that the e box in the lower case is larger
than any other and this is because there are more e’s
used in setting up a job than any other one letter.
And you will also observe that the letters are distributed
and the boxes spaced in a very uneven way,
but this arrangement brings the letters that are used
the most into the easiest places to reach.
Fig. 66b. the upper case
Fig. 66c. the lower case
—Where you have more than one
line to set you should by all means use a composing
stick and a small one will cost you a dollar. It should
be held in the left hand as shown in Fig. 67, that is,
with the open side from you and the slide to the left.
Now read a few lines of your copy, pick the first letter
from its box and set it in the left hand corner of
the stick with the nick in the type toward your thumb.
Take the next letter from its box and let it slide into
the composing stick against the first letter and so on
from left to right until you have the first word set up.
Fig. 67. how to hold a composing stick
Now put in a medium sized space, which is made
just like a type but only shoulder high and without any
letter on it, and begin to set the next word. If when
you get to the end of the line there is a space left
but not enough to start another word, put a thin space
between the words to lengthen out the line, or justify
it as it is called.
When you have set the line put a lead, that is a
thin strip of typemetal which comes to the shoulder
of the type, against it and start a new line and so on
until you have the stick half full of type.
The type must now be taken out of the stick and
placed on a smooth surface, such as a piece of slate or
a stone called an imposing stone, and to do this without
dropping some or all of the type and making pi of it,
takes practice. To do it like a journeyman, put a lead
at the top and bottom of the type, set the stick on the
stone, grip the top and bottom with your fore fingers
and thumbs and the sides with your other fingers, hold
it tight and you can then easily lift it out and into the
chase as shown in Fig. 68.
Fig. 68. putting a stick of type in the chase
A good way for you to do it at first is to wet the
type after you have it set in the composing stick when
it will hold together without much trouble. When
you can manage half-a-stick full of type you can then
try a stick full.
—After you have the type, which
is to make up the form, set in the chase on the imposing
stone, or table, fill in the top and bottom spaces
with long pieces of wood furniture and the ends with
hollow metal furniture and then lock up the form,
that is screw or otherwise fix it in the chase.
Now there are two kinds of chases used with small
presses and these are (1) screw chases and (2) plain
chases. A screw chase has a couple of screws fitted
into the top of it so that after the type and furniture
are in the chase you only need to tighten up the screws
to hold the form in place.
Fig. 69. tools for locking up a chase
When a plain chase is used, quoins, that is wedges
made of wood, as shown in Fig. 69—you can get a
dozen hickory ones for a nickel—must be set in between
the furniture and the chase and these are forced
together with a mallet and a shooting stick, so that
the type is held firmly in place.
The next thing to do is to plane the form, that is,
you take a block of wood one side of which is covered
with a piece of felt. Lay this on the type and
tap it gently with the mallet to get all of the type
even on top. You can make a planer or buy one for a
quarter ready made.
This done, fit the chase in the press and put three
or four sheets of paper on the platen by means of the
pivoted bands on the edge of the latter. Ink the type
and run off a few impressions; but be careful that the
grippers are set so that they will just catch the edges
of the sheet but will not strike the type form.
If part of the impression does not come out plain,
paste a piece of paper on the paper backing on the
platen and, oppositely, if a part of the impression is
too heavy a bit of the under sheet of paper backing
must be cut away.
When the impression is even on the platen sheet
paste a piece of cardboard below and another to the
left hand side of it so that the card or the sheet of
paper will lay on the platen in exactly the right place
every time you feed it in.
Instead of cardboard you can use three bent pins to
gage the sheet, or, still better, use regular steel gage
pins (see Fig. 64), for these can be adjusted to a
nicety.
—All that remains for you to do
now is to put about as much ink as you can get on the
point of the blade of a penknife on the ink table and
then roll it out thin and even with a small hand roller.
Lay your stock on the table to the right of the
press and feed in a card or a sheet at a time with your
right hand and see to it that you get it in squarely
against the gage pins; take away your hand and
press the handle down with your left hand; raise it
up, take the printed sheet out with your left hand, feed
in another one and so on until the job is done.
—As soon as you have
printed a job take the chase from the press and before
you unlock the form rub the face of the type with a
rag dipped in benzine, or turpentine and when all the
ink and smut is gone wipe it with a clean rag.
If the type gets clogged up with ink wash it out
with a tooth-brush dipped in benzine and when the
ink on the table and the rollers gets dirty or does not
work well wash it off with benzine also. To do good
printing everything must be immaculately clean.
—After you have
cleaned the type, unlock the form and then take a line
o’ type at a time on a lead in your left hand; pick off
two or three letters at once and drop each one into its
respective box.
—While of
course you will buy your ink all ready to use you
may like to know how it is made. Here’s a recipe
for a printing ink that is as old as the hills and as
good as gold: Balsam of capivi 4¹⁄₂ ounces; lampblack
1¹⁄₂ ounces; indigo ⁵⁄₈ ounce; India red ³⁄₈ ounce,
and turpentine dry soap 1¹⁄₂ ounces; mix these ingredients
well in a mortar with a pestle; then mix the
mass with boiled linseed oil to the right thickness.
When buying ink for job printing get one that is
a quick drier and this costs from 50 cents to $1.50 a
pound according to quality. You can also buy colored
inks in red, white, blue, yellow, green, brown and
purple in 4 ounce cans for 60 cents a can.
—While it is cheaper and better to buy
ink rollers ready made, if you want to try your hand
at making them yourself get 1 pound Peter Cooper’s
best glue; 1 quart best sugar house syrup, and 1 pint
of glycerine.
Soak the glue in rain water until it is soft, drain off
all the excess water, put it in a glue pot and set it on
a slow fire until it is melted. Now put in the syrup,
boil it for half an hour, stirring it the while, and skim
off the scum that comes to the top.
About 5 minutes before you take it from the fire add
the other things and then pour the mixture into the
mold, which is simply a brass cylinder of the diameter
and length you want the roller. The stock, as the
spindle of the roller is called, is set exactly in the
middle of the mold and the composition is poured
into it.
—Printing in two or more
colors, or color printing, is not only interesting work
to do, but profitable, since you can easily get orders
for it. It is a little harder to do a good job with
colored inks than it is with black ink, but if you will
use plain type and good colored ink you will have
small trouble in doing a creditable job.
—When you want to print in
gilt instead of in black you can do it either by printing
in black ink first and then dusting bronze powder over
it with a tuft of cotton, or print the job with gold size
which makes the powder stick better. Dust the excess
powder off with a bit of cotton when the letters
will stand out in gold beautifully.
You can buy a 3 ounce can of gold size for a quarter
and bronze powder can be had in 1 ounce cans in gold,
silver, cardinal red and copper. All of the above
materials can be bought of the Kelsey Press Company,
Meriden, Conn., and you ought to send for one of
their catalogues.
—You will need
a supply of both visiting and business cards; paper for
labels, handbills and newspapers—that is, if you intend
to print one—and paper for bill-heads, statements,
letter-heads and envelopes to match them.
Cards come in all sizes and colors and in any
quantity however small; they are sold under the
name of thin white, thin colored, heavy china,
business bristol, fine bristol, extra fine bristol, satin
enameled and linen finished bristol. Then there are
cards with gold beveled and lace edges; fancy embossed,
with round edges, and for mourning.
Paper can be bought that is gummed on one side
for labels; linen and bond papers are used for correspondence;
the cheapest kind of white and colored
paper is good enough for handbills but you should use
a good white stock for newspaper work. Before ordering
stock of any kind the best way to do is to send
for a full set of samples and then you will know just
what you are buying.
Of course you know what paper looks like and how
it feels, but it is not so likely that you know what it is
and how it is made; but paper making is an art so
old, so wonderful and so useful, that you ought to
make enough to know all about it.
—Paper is made by chemical and
mechanical processes from rags, straw or wood into
thin sheets. These materials are formed of fibers
made up of what chemists call cellulose[68] and this
substance is in turn composed of C6H10O5, that is 6
atoms of carbon, 10 atoms of hydrogen and 5 atoms
of oxygen.
[68] Cellulose forms the ground-work of all vegetable tissues
whether they are the tender shoots of a fern or the hard wood of
trees.
—Whatever material you
use to make the paper of it must be converted into
a pulp first. Cotton or linen makes the best paper—this
is called rag paper—because these materials are
nearly pure cellulose to begin with.
Making the Pulp.
—To make a little paper take
about a pound of white cotton or linen rags and cut
them up into little bits; boil them in a solution of
caustic soda for a couple of hours, to get out all the
dirt and grease, and stir them often.
Next wash out the dirty water that has resulted
from boiling them and then the cotton or linen must
be broken up and beaten until the fibers are separated.
You can do this by putting the fabrics into a chopping
bowl, wetting it down with clean water and then using
a pair of chopping knives on them until the fibers are
cut fine, and you must change the water often. In
paper mills a rag engine, as it is called, is used to wash
and break up the rags.
Fig. 70. a frame for paper making
The Molds You Need.
—Make half-a-dozen frames
of wood ¹⁄₄ inch thick and ¹⁄₂ an inch wide, and about
5 × 8 inches on the sides; and cover these with brass
wire netting having about 20 wires to the inch as
shown in Fig. 70. School slate frames are good for
this purpose.
Laying the Paper.
—Now spread a thin layer of
pulp on the wire netting of each frame, or mold, and
set them to one side to dry. When you have all the
molds filled and the pulp is dry turn each frame upside
down on a sheet of blotting paper and lay another
sheet of blotting paper over the paper you are making.
In this way pile up the blotting paper and the paper
in the making and then put them under pressure; this
you can do by placing the pile between two smooth
1 inch thick boards and screwing them together with
a couple of wood clamps.[69] After an hour or so you
can take the clamps from the pile and separate the
sheets of paper from the blotting paper.
Next place the paper between sheets of oil
board,[70] make a pile of them and screw them up between
the wood clamps again good and tight and leave
them there over night; then hang up each sheet of
paper by a corner with a clip and let it dry.
[70] This is a heavy oiled paper and you can buy it at a painter’s
supply store, or of C. B. Hewitt and Bros., 48 Beekman St.,
New York City.
—When the sheets are dry
take them down and lay them carefully in a pile for
sizing. Make the sizing by dissolving gelatine in hot
water until it is about as thick as milk with the cream
in it.
Pour the sizing into a shallow dish or, better, a
photographic tray; lay each sheet, first one side and
then the other, on the sizing and be careful to wet it
evenly all over. Put the sized paper between the
sheets of oil board again, make a pile of them, screw
on the wood clamps, let them stay under pressure
for half a day and, finally when you take them out
let them dry slowly and you will have a hand made
paper that you have made with your own hands.
If you will look at this book carefully you will conclude
that it would be next to impossible to bind one
that would even faintly resemble it. But while I do
not want you to believe that you can do a job that
would anywhere nearly equal it, you can bind a book
good enough so that you will not feel ashamed to let
any one see it.
THE BOARDS
BOARDS GLUED TO CLOTH
WIDTH OF BOOK
Fig. 71. how to cut boards and cloth for book binding
—First mark out with a rule
and then cut out two pieces of pasteboard each of
which is just as wide as the book you are going to bind
and ¹⁄₄ inch longer as shown at A in Fig. 71.
Lay these boards on a piece of muslin or calico, or
you can buy regular book-binder’s cloth for the purpose[71]
and cut it 2 inches wider than the length of
the boards and three times as long as the width of one
of them as shown at B.
[71] For book binders’ materials of all kinds send to Thomas
Garner and Co., 181 William Street, New York. For book binders’
leather materials address Du Pont Febrikoid Co., Equitable
Bldg., New York.
Coat these boards on one side with a good glue laid
on thin and glue them to the cloth so that they will be
separated from each other by a space ¹⁄₂ an inch wider
than the thickness of the book you are binding as
shown at B and C; this done glue the edges of the
cloth over on to the other sides of the boards as
shown at D in Fig. 72.
Fig. 72. sewing on the muslin flap
While the back is drying take a piece of good muslin
and cut it 1¹⁄₂ inches shorter than the length of the book
and within 2 inches as wide as the width of the back
of the book when it is flat open. For instance suppose
the book is 5 inches wide and 1 inch thick which is
11 inches in all; then you would cut the muslin 9
inches long. The muslin on the book is shown at E.
—The next operation is to sew
this piece to the back of the book; for this work you
will need a thin sharp awl, a hammer, a large darning
needle and some strong linen thread—waxed thread
is the best.
Before doing so, however, take a sheet of good
white paper and make a couple of fly-leaves for the
front and back of the book; now punch a line of
holes ¹⁄₈ inch from the back, through the book as shown
at F, then put on the piece of muslin and sew it to
the book good and tight, and be sure the flaps are
even.
Fig. 73. the bound book complete
This done spread some glue on the pasteboard covers,
place the back of the book on the cloth binding
between the covers, turn it over on the front cover
and rub the muslin down smooth on it; then do the
same thing with the back. All that remains for you
to do now is to turn back one of the blank pages which
you sewed on to the book and glue it on the cover
which will conceal the muslin flap.
After you have bound the book lay it between a
couple of smooth boards and screw it up tight between
the jaws of a pair of wood clamps. Let it stay there
over night and in the morning when you take the
wood clamps off you will have one more book to add
to your five foot shelf.
—If you have a printing press
you can print the title of the book and the author’s
name—don’t forget the author’s name—on a slip
of heavy paper and gild it, or on a piece of cloth and
glue it to the front of the cover as shown in Fig. 73.
CHAPTER VIII RUBBER STAMPS, DIE SINKING, BURNING BRANDS AND STENCILS — Rubber Stamps — How to Make Rubber Stamps. — Making the Mold. — Vulcanizing the Rubber. — Mounting the Rubber. — How to Use a Rubber Stamp. — To Make Rubber Stamp Inks. — How to Make a Copygraph Pad. — How to Copy a Letter. — How to Make Hectograph Inks. — Die Sinking — How to Make Badges, etc. — How to Sink the Letters. — Finishing Up the Badge. — Burning Brands — How to Make a Burning Brand. — Stencils — How to Cut Stencils.
A rubber stamp is type matter molded in rubber
which is then mounted on a block with a handle as
shown in Fig. 77. When the stamp is inked and
then pressed on a smooth surface it leaves an impression
on it.
Rubber stamps are useful for marking tags, books,
boxes, bundles, etc., but it is very bad taste to use them
for letter-heads and envelopes.
—The Materials
Needed.
—To make rubber stamps you will need (1)
one or more fonts of type; (2) a composing stick if
you intend setting up more than one line; (3) a frame
called a chase, 4 × 5 inches on the sides made of a
strip of wood 1 inch wide and 1³⁄₁₆ inch high, which is
the height of type from its feet to its shoulder; (4)
another frame, called the matrix frame, made of a
strip of wood 1 inch wide, ³⁄₈ inch thick and 4 × 5
inches on the sides. These two frames are shown at
A and B in Fig. 74. (5) Two smooth boards 1 inch
thick, 6 inches wide and 7 inches long; (6) a tooth-brush;
(7) a couple of pounds of dental plaster of
Paris, and (8) a ¹⁄₄ pound of pure unvulcanized rubber.
Dental plaster is finer than the ordinary kind and
you can buy all you will need from your family dentist
for 5 or 10 cents a pound. Unvulcanized rubber for
rubber stamps comes in sheets about ³⁄₁₆ inch thick and
is sold under the name of signature stamp gum and
you can buy it for about $1.00 a pound.[72]
[72] You can buy signature stamp gum of The Goodyear Tire
and Rubber Company, 10 Central Park West, New York City.
In ordering of this firm ask for No. 4093, ³⁄₁₆ inch thick.
Fig. 74. the matrix frame, chase and boards for making
rubber stamps
Unvulcanized rubber is crude india-rubber mixed
with sulphur and when this is heated it gets very soft
and can be molded by putting it under pressure; when
it gets cold it is not only much stronger than before
but it is very elastic as well.
—Since you know how to make
pewter castings and how to set type, making a rubber
stamp will be as easy as rolling off a log.
When you have the type set up that you want to
make the rubber stamp of, put a lead[73] on each side
of it, oil it all over with sweet oil and tie a string
around it tight. Lay the thick, shoulder high wood
frame over the type matter you have set and see that
it is in the middle of it.
Next mix up a little more than enough plaster with
cold water in a bowl to fill the frame; stir it with a
tablespoon and make it about as thick as sorghum
molasses. Pour the plaster all around the type in
the frame and fill up the space between them as high
as the face of the type. Now let the plaster set,[74]
that is, get hard, which it will do in a very few minutes.
When it is hard enough to hold the type in
place and yet before it gets solid take the tooth-brush,
dip it in water and brush away the plaster until it is
exactly even with the frame, and hence, even with the
shoulders of the type as shown in Fig. 75.
[74]
When calcium sulphate is heated it loses its water of crystallization
and forms a powder, which we call plaster of Paris;
the plaster has the power of taking up water and forming a
solid substance, and this process is called setting.
When the plaster has set hard oil the face of the
type and the plaster with sweet oil; now lay the thin
frame over the thick frame; mix up some more plaster
with water and make it thin enough so that it will
flow easily into every little space of the type and fill
the frame up with it.
Let this frame stay on the lower frame over night
so that it will get very hard and you can then lift it
off, when a very sharp impression of the type faces
will be formed in it shoulder deep, that is as deep in
the plaster as the face of the type is high. This frame
with its plaster impression is called the matrix.
Fig. 75d. the type in the chase. e. plaster of paris
impression in the matrix frame
—Cut a piece of the unvulcanized
gum rubber ¹⁄₄ inch wider and longer all
round than the impression of the type; peel the strip of
muslin from the strip of rubber gum and lay it on the
matrix. Put one of the boards on top of the rubber
and the other on the bottom of the matrix and screw
them together tight with the iron clamps as shown
in Fig. 76.
Half fill a kettle with water; lay the mold on top
of the kettle—but not in the water—and put both of
them in a hot oven for 30 minutes. When the rubber
gum gets hot it softens and the pressure of the screws
forces it into the letters of the matrix and so makes
rubber type of them. The steam from the kettle will
keep the wood from charring and the rubber from
burning but has no other action on it.
Fig. 76. the matrix with the rubber gum in place ready to
vulcanize
The heat vulcanizes[75] the rubber gum and makes it
springy and stretchy, but if it gets too hot it will become
hard and you will have hard rubber instead. To
get just the right degree of heat a vulcanizer,[76] which
is simply a little boiler with a thermometer on top, is
used by rubber stamp makers.
[75] Vulcanizing is the process of heating raw India rubber with
sulphur; the sulphur combines with the rubber to form a new
compound. If a large amount of sulphur is used and great heat
is used hard rubber, or vulcanite, or ebonite is formed. If a
small amount of sulphur and a low heat are used the elastic
rubber that is so common is formed.
[76] The S. S. White Dental Mfg. Co., 5 Union Square, New
York, sells them, and unvulcanized rubber as well.
—All that you need to do
now is to trim off the edges of the rubber stamp with
a pair of shears and mount it on a smooth block of
wood having a handle as shown in Fig. 77.
Fig. 77. the rubber stamp ready to use
—A special kind of
ink is used for rubber stamps, as writing ink is too
thin and printing ink spoils the rubber.
To Make an Ink Pad.
—Cut out two blocks of pine
wood each of which is ¹⁄₄ inch thick, 2 inches wide
and 3 inches long; cut out four strips of woolen cloth
2 × 3 inches, lay two of the strips on each block and
then cover the latter by gluing a piece of muslin
over it.
Pour a dozen or 15 drops of rubber stamp ink on
each pad and rub the surfaces of both of them together
to distribute the ink evenly. When not in use
keep their inked surfaces together and in a box so
that the dust will not get on them.[77]
[77] You can buy a good rubber stamp pad for a quarter. Rubber
stamps, pads, and ink can be bought of the Everson and Reed
Co., 88 Chambers St., N. Y. C.
—A Black Ink.
—Mix
3 parts of lampblack with 7 parts of olive oil.
A Red Ink.
—Mix 2 parts of vermilion with 3 parts
of olive oil.
A Blue Ink.
—Mix 3 parts of aniline blue and 6
parts of oleic acid with 94 parts of castor oil.
A Green Ink.
—Mix 25 parts of aniline blue, 15
parts aniline lemon yellow, 50 parts oleic acid and
castor oil 950 parts.
—A copygraph
pad, or hectograph, as it is often called—from the
Greek hekaton which means 100, and graph to write,
hence to write a hundred—is a gelatine pad for
duplicating a letter or a drawing.
To use a copygraph pad you must write your original
letter with an aniline ink; then you lay it on the
pad and rub it down with your fingers. When you
remove the sheet an impression will be left on the face
of the pad and if now you lay a sheet of clean paper
on the pad, rub it and pull it off you will have a copy
almost as bright and clear as the original. In this
way as many as 50 or 100 copies of the original letter
can be made.
To make a copygraph pad put 1 ounce of the best
gelatine in enough water to cover it and let it stand for
24 hours. Put a tablespoonful of table salt into a cup
of water, pour it into the outside can of a water
jacketed pot. Put 6 ounces of glycerine in the inside
pot, set the pot on the stove and heat it good and hot,
or to be exact, to about 200 degrees Fahrenheit.
Drain off all the water from the gelatine and put
the latter in the glycerine while it is yet on the fire;
stir the mixture slowly every once in a while in order
to prevent bubbles from forming, and skim off the
froth that forms on top of it. When you have a nice
smooth mixture stir in a teaspoonful of oil of cloves
to keep it sweet.
Next make a pan of sheet zinc a little larger than
the letter you want to copy and ¹⁄₂ an inch high, or
you can use a tin pie pan if you merely want to try
it out. Set the pan on a level table, fill it with the
hot mixture, let it stand over night and it is ready
to use.
—You must write your
letter with a special aniline ink, called hectograph ink,
and use a new steel pen to do it with.
While the writing is getting dry take a small clean
sponge, wet it with cold water, squeeze it as dry as
you can, wash the face of the gelatine with it before
you try to make an impression or else you will spoil
the pad.
This done, lay the sheet of paper with the written
side down on the pad and gently rub your fingers over
every part of it. Let the paper stay on the pad for a
couple of minutes, then grip a corner of it and pull
it slowly and evenly from the pad as shown in Fig.
78. Now you are ready to make your copies.
To do this lay a clean sheet of paper on the pad,
rub it as you did the original, let it remain for a minute
and pull it off. Keep on making copies until you
have as many as you want or the impression gets too
faint.
Fig. 78. pulling an impression from the copygraph
When you get through pulling copies wash the face
of the pad with a moist sponge and let it dry thoroughly
before you make a new copy.
—Black Ink.
—Mix
10 parts of methyl violet; 20 parts of nigrosene;
30 parts of glycerine; 5 parts of gum arabic and 60
parts of alcohol. Heat it until the anilines are dissolved
and stir until all are thoroughly mixed.
Red Ink.
—Mix 10 parts of fuchsin, 10 parts of
alcohol; 10 parts of glycerine and 50 parts of water.
Heat and stir as before.
—It is fascinating work
to sink a name into a piece of sheet metal with steel
dies and yet it is very easy if you have the tools and
you can make some money out of it too, for every
boy wants a badge or a medal.
SHEET OF GERMAN SILVER OR BRASS
WITH SHIELD MARKED ON IT
THE SHIELD CUT OUT
Fig. 79a, b. first steps in making a badge
Badges can be made of any kind of sheet metal ¹⁄₆₄
inch thick or more but German silver[78] makes mighty
pretty ones for it takes a high polish and remains
bright a long time. To cut out a shield, a star or any
kind of a badge get a ¹⁄₄ and a ¹⁄₂ inch straight cold
chisel and a ¹⁄₄ and a ¹⁄₂ inch curved cold chisel,[79] also
a block of hard wood one side of which must be nice
and smooth.[80]
[78] You can buy German silver in any quantity and thickness of
Patterson Bros., Park Row, N. Y.
[79] The P. F. Smith Co., 325 West 42nd St., N. Y. C, make
these chisels.
[80] You can make it so by scraping it with a piece of glass.
Draw the outline of the badge you intend to make
on a sheet of metal; lay the latter on the block of wood
and then cut it out with your chisels and hammer as
shown at A and B in Fig. 79. When you have it cut
out, file off the rough edges.
—For this part of the
work you will need a set of ¹⁄₈ inch steel letters[81] as
shown in Fig. 80 and they will cost in the neighborhood
of $3.00.
[81] Can be had of Hammacher, Schlemmer and Co., Fourth
Ave. and 13th Street, New York.
Fig. 79c. the badge on a flat-iron in a vise. d. sinking in
the letters
Mark the lines on the badge on which the letters are
to be sunk with a very soft lead pencil, or, better, wax
the surface all over by tapping it with your finger on
which you have rubbed some white wax and then
mark the lines with a sharp pointed piece of bone.
Otherwise you will have trouble in getting the lines
out.
Now lay the badge on a perfectly smooth piece of
iron—a flat-iron screwed in a vise, see C, is good.
Then take the middle letter of the name you are going
to stamp and hold it with the notched side toward you
and with the serifs[82] on the lower edge of the letter
exactly on the middle of the line you have drawn as
shown at D.
Fig. 80. steel letters and figures for die sinking
Hold the steel letter perfectly straight and give it
a goodly blow with the hammer when the die will
sink into the metal and leave the impression of the
letter below the surface. Finish stamping the name
by working both ways from the middle letter, for this
is the way to get the name on the badge evenly.
With a set of steel letters and figures you can also
stamp key checks, jewelers’ checks, baggage checks and
name plates and also sink names on wood, metal,
leather, etc.
—The next thing to do
is to solder a pin on the back of the badge as shown
at E in Fig. 79. Scrape the back up and down the
middle bright and clean; put a small safety pin on
the badge and hold them together with a pair of
tweezers. Then put on a couple of drops of soldering
fluid.[83]
Hold the badge with the pin on top of it in the
flame of your alcohol lamp or Bunsen burner and when
the soldering fluid begins to sizzle touch the pin with
a piece of wire solder. When the solder runs let it
cool and the pin will be on securely enough for all
ordinary purposes.
Next polish up the badge by rubbing it with
powdered rottenstone mixed with a little machine oil
and then finish it off with some crocus. If you have a
lathe of any kind get a felt wheel[84] and use the rottenstone
and oil on it and then the crocus.
[84] F. W. Gesswein Co., Inc., 16 John St., sells engravers’, opticians’,
platers’ and polishers’ supplies.
Heat the stamped surface of the pin just a little and
put some black enamel, which you can get at the hardware
store, into the letters; rub off all that sticks to
the surface but leave all that is in the sunk letters.
Put it away and let the enamel dry thoroughly when
you will have a regular badge as shown at F.
A burning brand is useful to mark the handles of
tools, boxes or anything made of wood by burning
a name or a design into them.
—To make a
burning brand, say with your initials on it, make a
cardboard box ³⁄₄ inch wide, 1 inch high and 3 inches
long and without a top.
Mix up some plaster of Paris, fill the box with it
and let it set. When it is perfectly hard and dry tear
the cardboard box away from it, and on the narrow
side of it, that is the one that is ³⁄₄ inch wide, mark out
your initials, reversing the letters just as they are on
type.
Take a sharp pocket knife and cut away the plaster
from around the letters to a depth of ³⁄₈ inch, thus
leaving the letters standing out in relief like type letters
as shown at A in Fig. 81. Give it a couple of
coats of shellac varnish[85] which not only protects the
plaster to a certain extent but prevents it from sticking
to the mold.
[85] You can make this varnish by dissolving yellow gum shellac
in alcohol or you can buy it at a paint store.
A PLASTER OF PARIS
PATTERN FOR A
BURNING BRAND
THE BURNING
BRAND COMPLETE
Fig. 81. a burning brand of iron or copper
Now take this pattern to a brass foundry and have
a brass casting made of it. When you get it file it
up nice and smooth and be careful to keep the surface
of the letters perfectly flat. This done, drill a ³⁄₁₆
inch hole in the center of the back of the brand to a
depth of ¹⁄₂ an inch and thread it with a ³⁄₁₆ inch tap.
The next and last thing to do is to get an iron rod
¹⁄₄ inch in diameter, and 12 inches long, bend a ring
on one end, thread the other end with a ³⁄₁₆ inch die
and screw it into the brand, when it will look like B.
How to Use the Burning Brand.
—To use the burning
brand put it in a fire and when it is about red hot,
take it out and press it firmly on the wood you want
to mark and your initials will be left on the wood as
long as the wood lasts, nearly.
A stencil is a piece of heavy paper or thin sheet of
metal in which letters or a design are cut through with
broken lines, and it is used for marking the letters or
design on any smooth surface by daubing a color on
it through the open spaces with a brush or sponge.
There are two kinds of stencils, namely (1)
those used for practical work and (2) those used for
decorative purposes.
—You can cut your stencils
in either (a) oil board,[86]
or (b) in thin sheet brass or
copper. Paper stencils, as those cut in oil board are
called, are much easier to make than those cut in sheet
metal and as they are quite durable they will probably
serve your every need.
[86] Oil board can be bought of C. B. Hewitt and Bros., 48 Beekman
St., New York.
Cutting Paper Stencils.
—All you need to cut paper
stencils with is a sheet of oil board and a pen-knife
with a good, sharp-pointed blade. A stencil alphabet
is shown at A in Fig. 82 and by taking a look at it
you will see exactly where the lines must be broken
to hold the letters together.
First mark out with a pencil the size of the sheet
you want the stencil to be and then draw a line down
through the middle to divide it into equal parts. For
every line of letters you want draw a pair of lines
across the oil board and have the space between them
whatever you want the height of the letters to be.
When you mark in the name or word start with
the middle letter and draw it on the middle line of the
board and then draw in the rest of the letters to the
right and to the left; by lettering the oil board or
metal this way you will get the whole name or word
exactly in the middle of the sheet.
Fig. 82. stencil letters and stencils
A. How stencil letters are cut.
B. A stencil for marking boxes.
C. Decorative stencil for wall borders.
To cut the stencil lay it on a smooth board and hold
your knife just as you do a pen when you write but
with your fingers a little closer to the point. Start at
the top of each line if it is a vertical one, or on the
left hand side if it is horizontal; hold the knife at a
slight angle so that all the lines you cut will slant in
toward the center of the letter and so bevel the paper.
In cutting the stencil you can turn the sheet around
to bring the lines into the best position for cutting.
It does not take much pressure to cut through the
board but press down hard enough on the blade to
make the first cut go clear through and never cut over
the same line twice and also make the cuts run right
up sharp into the corners. It takes very small skill
to cut stencils but the chief part of the art lies in drawing
the letters or the designs on the paper or metal.
Cutting Brass Stencils.
—To cut sheet metal stencils
use annealed[87] sheet metal about No. 25 Brown and
Sharpe gauge;[88] mark out the letters or design as for
paper stencils and then cut them with stencil chisels.
When you have the stencil all cut file the burr off of
the edges of the letters or design with a fine file and
file them at an angle so that all the edges are sharp.
A practical stencil is shown at B.
[87] Patterson Bros., Park Row, New York, carry sheet brass and
copper in stock for stencils.
[88] The Brown and Sharpe Wire Gage is also used for measuring
the thickness of sheet metal.
How to Use Practical Stencils.
—A short, stubby
brush, called a stencil brush and made especially for
the purpose is the best kind to use to stencil with.
Dampen it a little and rub it on a cake of stencil ink;[89]
hold the stencil down tight to the surface you are to
mark and then dab—not paint—the spaces in it
with the brush.
[89] Nearly every stationery store carries stencil ink and brushes
in stock, or you can get them of Hammacher, Schlemmer and
Co., Cor. Fourth Ave. and 13th Street, N. Y. C.
How to Make Stencil Inks.
—Dissolve 4 ounces of
shellac and 1 part of borax in a little boiling water and
put in enough logwood to make it red if this is the
color you want it, or blue carmine if you want it to be
blue. Then add enough hot water to make it about
as thick as cream.
How to Use Decorative Stencils.
—Art stencils
can be used with good effect for certain kinds of decorative
work, but it is especially adapted for putting
borders on kalsomined walls. You can cut these
stencils, see C in Fig. 82, after your own design or
you can buy them already cut.[90]
[90] Write to the Frost and Adams Co., Cornhill, Boston, Mass.,
for a catalogue of their Art Cut Stencils. Also to Sears, Roebuck
and Co., Chicago, Ills., for a list of their decorative stencils.
Mixing Colors for Stenciling Borders.
—To make
the colors for decorative stencils stir a very little
moresco stenciling color[91] with some hot water; be
careful not to use too much color or the effect on the
kalsomined or frescoed wall will be too contrasting.
Beautiful colors in half-a-dozen tints can be had for
this work.
[91] Made by Benjamin H. Moore and Son’s Co., 180 William
St., N. Y., and sold by paint dealers generally.
CHAPTER IX THE ART OF WORKING GLASS — What Glass Is. — How to Cut Glass. — How to Use a Glass Cutter. — How to Finish Off Glass Edges. — How to Drill Holes in Glass. — A Couple of Ways to Cut Glass Tubing. — — The First Way. — The Second Way. — How to Cut Glass Disks. — How to Bend Glass Tubing. — What a Bunsen Burner Is. — Bending the Glass Tube. — How to Blow Glass — To Round the Ends of a Tube. — To Border the Ends of a Tube. — To Seal Off the End of a Tube. — To Make a Glass Nozzle. — To Make a Hole in a Tube. — To Join Two Tubes of the Same Size. — To Join One Tube to the Side of Another One. — To Blow a Bulb on the End of a Tube. — — How to Make a Blow-Pipe. — How to Blow a Bulb. — How to Etch Glass. — The Sand Blast Process. — How to Make Ground Glass. — The Acid Process. — How to Cement Glass. — A Simple Way to Frost Glass. — Substitutes for Glass. — Mica. — Gelatine. — How to Silver a Mirror.
One of the most fascinating of the mechanical arts
is working in glass. One reason for this is because it
is a substance so beautiful, so hard and so fragile that
it seems to the ordinary observer to be beyond the pale
of tools.
Au contraire, as the French say it, glass is easily
worked if you mix a little skill with the right kind of
tools and it gives me much pleasure to tell you how
to do it. Further, the tools you need are few and the
material is inexpensive.
—Before getting down to the processes
by which glass can be worked it is a good scheme
to know about the substance itself.
Hieroglyphic[92] inscriptions on the Egyptian monuments
show that the art of working glass was practiced
4,000 years ago or before the Hebrew exodus.[93]
Now glass is a chemical compound, the chief substance
of which is sand.
[92] The early Egyptians carved the history of their arts on stone
in a sign language called hieroglyphics from the Greek hieros
which means sacred, and glypho which means to carve.
[93] The departure of the Israelites from Egypt under the guidance
of Moses.
Common glass is made by melting sand, lime and
soda together. Sand is formed of a chemical element
called silica; lime is calcium carbonate and soda is
sodium carbonate and there you have three chemical
elements which when they are melted together make
common window glass.
Glass which contains lime is called crown glass and
it is this kind which is used in making one of a pair of
achromatic[94]
lenses. Flint glass which is the kind of
glass used in making the other one of a pair of achromatic
lenses contains lead instead of lime.
[94] An achromatic lens is one that is free from color.
Flint, or lead, glass melts more easily than crown,
or common, glass and this is a good pointer for you to
remember when you are getting glass for your glass
blowing experiments. Bohemian glass, which is
largely used for chemical apparatus, is made of sand,
lime and potash.
Colored glass is made by putting small quantities
of various substances into the melted glass. Thus
oxide of cobalt[95] gives a blue color; oxide of
chromium, or cupric oxide a green; one of the copper
oxides gives it a red color, uranium[96]
a yellow, etc.
[95] Cobalt is a metal and is usually found along with nickel.
—About the simplest and most
useful process for you to know is how to cut glass.
To cut window glass you need (1) a glass cutter;
(2) a drawing board and (3) a T square. There
are two kinds of glass cutters on the market and these
are (a) steel cutters and (b) diamond cutters.
The first kind has a little steel wheel in the end,
as shown at A in Fig. 83. You can buy one for a
quarter and it will serve all your needs very well. If
money is no object you can buy a glass cutter with
a diamond point such as glaziers use for about $4.00.
This kind of a glass cutter has a chip of genuine diamond
in a swivel end and it is a pleasure to cut glass
with one of them. It is shown at B.
Fig. 83. glass cutters
A. A steel wheel glass cutter.
B. A diamond point glass cutter.
—“There are tricks
in all trades but ours,” said the carpenter as he drove
in a screw with a hammer, and so if you will dip the
steel wheel cutter into some kerosene before each cut
is made you will be surprised to find how easily it
cuts.
To use a diamond cutter, hold it just as you would
hold a pencil and grip the three sided part with your
thumb, index and middle fingers, as shown at C.
Then place the cutter against the straight edge of your
T square, press it down firmly on the glass and draw
it along evenly.
To make the right kind of a cut hold the diamond at
a sharp angle, that is, very slanting, and raise it slowly
until a smooth, sound and clear cut is made. Don’t
hold it straight up and down or you will surely spoil
it, and never never cut twice over the same line.
Fig. 83c. the right way to hold a diamond point glass cutter
It takes more skill to use a diamond cutter the
right way than to use a steel cutter, but a little practice
will make you proficient.
Fig. 84. how to cut a pane of glass
When you want to cut a sheet of glass lay it on your
drawing board with the blade of the T square on it
and the head of it against the edge of the glass as
shown in Fig. 84; hold it tight and then make a good,
clean cut. You can then easily break the sheet of glass
along the cut if there is enough glass on each side of
the cut to get a firm hold on. If not put it into one
of the notches on the shank of the glass cutter and
you can then easily break it off.
—When you cut
a sheet of glass the edge left by the cutter will be
slightly rough. To smooth it up and round off the
corners rub it on a whetstone, that is any kind of a
coarse stone on which you have poured a little water.
A better way is to grind it on a grindstone if you
have one.
—To drill a hole
through a sheet of glass make a layer of putty ¹⁄₂ an
inch thick and as large as the sheet you are going to
drill and lay the glass on it.
The idea of using the bed of putty is to allow the
glass to bend a little should you press down on the
drill too hard. Take a Morse twist drill and, if you
know how, grind it on a grindstone to a sharper point
than it has when you get it; the next best thing to do
is to sharpen it on your oilstone.
The best kind of a drill stock to use is an archimedian,
or a reciprocating one, as shown at B in Fig. 11,
on page 29, for then the pressure on the glass is even
in every direction. Set the drill on the glass at the
point where the hole is to be made; hold it with the
fingers of your left hand to keep it from slipping and
lubricate it well with turpentine.
Work the drill at a fairly high speed and do not put
too much pressure on the drill stock or you will surely
break the glass.
You will find it quite hard to drill a hole less than
¹⁄₁₆ inch in diameter through ordinary glass because
the drills will break and when you drill a hole over ¹⁄₈
inch in diameter you will find it a slow job because of
its size, but you can drill a hole up to ¹⁄₄ inch in diameter
if you go slow and are careful.
—A simple way to cut, or rather break off
a piece of glass tube evenly is to make a cut all round
the tube with a three-cornered file[97] and you can
break it off at the line without trouble.
[97] The right name of a three cornered file is a three square
file.
Fig. 85. a cutter for glass tubes
—An easy and sure way to cut
glass tubing off smooth is to use a gauge glass
cutter;[98]
this is a V steel rod with a seat on one end and a steel
cutting wheel on the other. The arm of the rod holding
the wheel is marked off in fractions of an inch like
a rule and a stop with a set screw in it slides on this rod
as shown in Fig. 85.
[98] You can buy one of these tools of Hammacher, Schlemmer
and Co., Fourth Ave. and 13th St., New York.
To use the cutter set the stop on the rod at the length
you want to cut the tube; then put the rod with the
cutter on it in the tube and with the seat outside; press
the V rods together tight and turn it and the tube in
opposite directions when it will make a good cut and
you can break the tube in two easily.
—By sawing out a
round board, laying it flat on a sheet of glass and
running your glass cutter around the edge of the
pattern you can cut out an approximately round disk
of glass.
Fig. 86. a circular glass cutter
But to cut out a perfectly round disk you must have
a circular glass cutter[98a]
as shown in Fig. 86. It has
an adjustable cutter head mounted on a square rod so
that the head can be turned on it. The rod is mounted
on a hardwood base so that it can revolve around the
latter.
[98a] You can buy one of these tools of Hammacher, Schlemmer
and Co., Fourth Ave. and 13th St., New York.
After the cutter head is set on the rod for the size
of the circle you intend to cut hold it down on the
glass by the thumb-piece. The cutter head is then
moved round in a circle and a clean cut is made after
which the edge of the disk can be smoothed up.
This circular glass cutter, which is called the
Little Beauty, will cut a circle 20 inches in diameter
and costs about 50 cents. If you are making a frictional
electric machine this is the tool you need to cut
the glass plates with.
—It is useful to know
how to bend a piece of glass tubing, especially if you
are interested in chemistry and want to set up some
apparatus—in fact you should know how before you
ever start to experiment.
There are just two things you need to bend glass
tubes with and these are (1) a Bunsen burner[99] and
(2) the glass tubing, both of which you can buy of
Eimer and Amend, Fourth Avenue, Cor. 18th Street,
New York.
[99] Complete instructions for making a Bunsen burner will be
found in The Magic of Science by the present author and published
by Fleming H. Revell Co., New York.
—This is a burner in
which a jet of ordinary illuminating gas is mixed with
air, the amount being regulated by a ring which opens
and closes the air holes in the burner.
A Bunsen burner makes a very hot flame because the
gas in the tube moves faster than in an ordinary burner
and the oxygen in the air aids the gas to burn. A
plain Bunsen burner is shown at A, in Fig. 87. If
you have no gas in your house you can use an
alcohol lamp[100] which you can either buy or make for
yourself.
[100]
How to make an alcohol lamp out of an ink-bottle is explained
in The Magic of Science.
—To bend a piece of glass
tube you should have a fish tail jet set in the end of the
Bunsen burner to give a wide flame like an illuminating
burner as shown at B. Hold the tube over the
flame of the burner, or alcohol lamp until it is heated
red hot all along the place you want to bend it.
Fig. 87. kinds of bunsen burners
Now turn the tube in the flame with your fingers
until it is heated evenly all around and becomes soft;
take it from the flame and quickly but gently bend it
as you will which you can do very easily. With
very little practice you will be able to make a good
smooth bend just where you want it.
—When you cut a
tube either with a file or a glass cutter the edge of the
end will be sharp but not smooth. All you have to do
to round it is to heat it in the flame until it begins to
melt, when the glass will run and make a smooth
edge.
—To border a
tube means to spread the edge out a little all around
so that a cork can be put in easier or a liquid poured
out better.
Fig. 88. bordering the end of a tube
Take a piece of charcoal and shave it down with
your knife to form a cone the size you want the border
to be. Heat the end of the tube by turning it in the
flame until it is quite soft and then push in the charcoal
cone, as shown in Fig. 88.
—To close one
end of a tube, or seal it off as it is called, heat it in
a fish-tail burner just as I explained for bending
glass.
When the glass begins to get soft pull the two ends
of the tube apart until the walls of the tube are drawn
together as shown at A in Fig. 89. Cut a nick in the
thin solid part with a file and break it off. If you
want a closed end as shown at B heat the end of the
tube you have sealed off and press it down on a piece
of iron.
Fig. 89. sealing off the end of a tube
Fig. 90. how to make a hole in a tube
—In setting up chemical
apparatus it very often happens that a glass nozzle is
needed. To make a nozzle seal off a piece of glass
tube as described above and by nicking it with a file
you can have the hole in the end of the tube any size
you want it.
—To make a hole of
any size in a tube, or piercing it, as it is called, you
ought to have a sharp pointed flame and a blow-pipe,
which is described farther on.
Cork up one end of the tube, heat the point, see A
in Fig. 90, where you want the hole and then stick
the other end in your mouth and blow gentle puffs
in it until a little bulb is formed. When the bulb
is cold take a file and gently crack the thin glass
and trim it away; now heat the tube around the edge
of the hole again until the glass begins to run when a
round smooth hole will be produced as shown at B.
Fig. 91a. welding two tubes together.
b. making a T tube
—Put a
cork into one end of one of the tubes and hold the
other end in the flame as well as one end of the other
tube as shown at A in Fig. 91.
Let the ends of the tubes get hot enough to melt but
not thicken; now press the melted ends together hard
enough to make them stick together but not hard
enough to make them form a thick ring.
Fig. 92a. a regular blow-pipe
To make a good job you should now use a pointed
flame and heat the juncture all around red hot and
blow into the open end of the tube to spread the
glass a trifle. While you are blowing keep turning
the glass in the flame to make the joint nice and
smooth.
—First
make a hole in the side of the tube in the
manner already described and then cork up both ends;
heat the tube around the hole and one end of the other
tube as shown at B, in Fig. 91. When they are soft
press them together hard enough to make a good joint.
It is a good scheme to wrap cotton around the joint
while it is still hot to anneal the glass, which means to
make it less brittle by letting it get cold slowly.
Fig. 92b. cross section of a home made blow-pipe
—For blowing bulbs on tubes, for
flasks and the like, you need a regular glassblower’s
blow-pipe in order to get a hotter flame than a Bunsen
burner gives.
You can buy a blow-pipe as shown at A in Fig. 92
for $1.50,[101]
or you can easily make one as follows: get
a brass tube ³⁄₄ inch in diameter and 10 inches long
and drill a ¹⁄₂ inch hole in it 3 inches from one end;
fit another pipe of the same size and length at an angle
of about 30 degrees to the first one; put a stopcock in
the latter pipe and solder it to the first pipe over the
hole as shown at B in Fig. 92.
[101] Blowpipes and bellows can be bought of Hammacher,
Schlemmer and Co., Fourth Ave. and 13th St., New York.
Next take a glass tube ¹⁄₄ inch in diameter and 14
inches long and make a bend in it 3 inches from one
end. Make a hole through a cork and push it over the
glass tube; slip the tube into the brass pipe and force
the cork into the end of the latter tight enough to hold
the glass tube exactly in the middle of it.
Fig. 92c. the glass blowing arrangement ready to use
Connect the lower end of the glass tube with a rubber
tube about 3 inches long to a brass tube of the
same size and 8 inches long and fit a stopcock into this
pipe. This completes the burner but you want to set
the lower ends of the two tubes into and through the
top of your table so that the stopcocks are above it and
the lower ends of the tubes project below the table.
Next connect the large brass tube with a gas jet or
other source of illuminating gas and the small brass
tube with a foot blower or other source of compressed
air as shown at C. The blower can be an ordinary
molders’ bellows which you can buy for about $1.50,
or you can make a pair, or you can buy a regular blowpipe
bellows as shown at D, which are very much
better, for about $8.00.
Fig. 92d. a regular foot bellows
By adjusting the mouth of the glass tube—which
is the air tube—that is, drawing it in and out of the
mouth of the brass tube which is the gas tube, and by
regulating the amount of air and gas, a pointed flame
or a brush flame, that is, a flame of large size, can be
had at the mouth of the blowpipe according to the
work you are doing.
—Take a good piece of glass
tube about ³⁄₄ inch in diameter and 15 inches long;
draw one end out long and thin for about 3 inches as
shown at A in Fig. 93.
Fig. 93. first steps in blowing a glass bulb
A. Drawing out the tube.
B. Forming glass rings on the tube.
Then heat a small part of the tube in a large, or
brush flame, turn the glass in the flame all the time
until it is soft and then press on both ends to make
the glass thicker at this point. Do the same thing
above the ring thus formed, and so on until you have
several rings of glass as shown at B, which are thick
enough to make the sized bulb you want.
Fig. 93c. making a thick ring of glass
Next heat the narrower parts marked a a a a and
blow gently and press gradually on the ends to
make the thick rings melt and flow together into one
large ring of thick glass as shown at C; and in doing
so be mighty careful that the walls do not cave
in.
Now melt and seal off the tail and heat the
whole bulb in as large a flame as you can get and at
the same time turn the tube till the rings run together.
At this instant take it from the flame and, still turning
it, blow into it with a few little quick blasts until you
get the size and shape you want as shown at D.
Fig. 93d. last step in blowing a glass bulb
—There are two ways to etch
glass and these are (1) with a sand blast and (2) with
acid.
—The process which follows
is a simplified form of the regular sand-blast way
of doing it, and with it you can easily make a ground
glass surface or etch a stencilled name or a design on
a sheet of glass.
All you need is (1) a box with a tight fitting lid 5
inches wide, 5 inches high and 10 inches long as
shown at A in Fig. 94. Cut a hole in one end, say
4¹⁄₂ × 4¹⁄₂ inches, thus leaving a margin of wood ¹⁄₂ an
inch wide all around; (2) a pound of rather coarse
emery, and (3) a pound of shot.
Fig. 94a. parts of the apparatus for sand blast etching
Clean the surface of the glass you are going to
etch with warm water with a little soda in it, wash it
off and rub it dry. Next cut a stencil with your
name on it or you can make a geometrical design by
folding a sheet of paper and cutting it out with a
pair of shears. Coat the glass with a thin layer of
mucilage, lay the stencil on it and rub it down flat.
Rub the mucilage off clean in the cut out parts with a
slightly moist sponge and be sure to get it all off too.
Now cut out a piece of cloth the size of the end of
the box and cut a hole in it the exact size of the hole
in the box. Lay this on the end of the box with
the hole in it, lay the glass over it and fix them all
together tight with rubber bands as shown at B in Fig.
94, or tie it up with string. The cloth cut-out between
the box and glass will prevent the emery from sifting
through.
Fig. 94b. sand blast apparatus put together ready for etching
Put the shot and emery in the box, fasten the lid on
tight and then shake it hard up and down so that
the emery and shot will strike the surface of the glass
with as much force as possible. Keep this up for 15
minutes or half an hour when the glass will be etched
deep enough.
When you open the box you will find that the
particles of emery have been embedded in the lead
shot and each of the latter has become a cutting tool.
This process of etching can be used for metals as well
as for glass.
—To make ground
glass go about it as above described but in this case
no stencil is needed.
—Hydrofluoric acid is made by
treating fluor-spar[102]
with sulphuric acid. The acid
which is thus formed acts on glass by eating into it
and for this reason it must be kept in either rubber,
lead or platinum bottles upon which it has no effect.
In etching large surfaces the acid is not put on the
glass directly; because it eats so smoothly the effect
is not striking enough; instead the following process
is used which leaves a rough surface more nearly like
that of the sand blast.
[102]
Fluor-spar is calcium fluoride; you can buy it of Eimer and
Amend, 4th Ave. and 18th St., New York, or of the L. E. Knott
Apparatus Co., Boston, Mass.
Make a lead dish the size of the glass you want
to etch and with the sides an inch high. Put about
an ounce of powdered fluor-spar into the dish and
pour enough concentrated sulphuric acid on it to make
a thick paste.
Coat the surface of the glass with paraffin, or beeswax
and rosin, and then with a steel scriber, or other
pointed instrument scratch on your name or the design
you intend to etch, clear through to the glass.
Lay the glass with the waxed side down on the dish
containing the fluor-spar mixture, as shown at A in
Fig. 95, and let it stand over night. The vapor formed
by generating hydrofluoric acid in this way attacks the
silica, that is the sand, of the glass with which it has
a great tendency to unite, and thus the glass disintegrates
or is eaten away.
Fig. 95. etching glass with acid
A. Etching a sheet of glass with fluor-spar.
B. Etching a thermometer tube with hydrofluoric acid.
The next morning when you take off the glass,
scrape off the wax and you will find the name or design
etched on it.
To etch the graduations on thermometers, burettes,
etc., coat them with wax and scratch the lines and
figures on them just as described above—but in this
case you can put the hydrofluoric acid on direct as
shown at B, using a splinter of wood for the purpose.
—To cement glass clean
the edges or surfaces to be fixed together with hot
water in which you have put a little soda; dry well
with a clean cloth and then be careful not to let your
fingers touch the cleaned parts.
Brush over the edges or surfaces of the glass with
the cement made according to the directions which
follow and press and bind the parts together as tightly
as possible.
To make the cement dissolve 2 ounces of the best
gum arabic in some hot water and then add 1¹⁄₂ ounces
of pulverized starch and ¹⁄₂ ounce of sugar and stir
until they are dissolved. Heat the mixture in a pot or
a tin can which sets in a larger pot or tin of water—or
water bath as it is called.
When the starch gets clear take it from the fire, put
in a few drops of oil of cloves to keep the cement
sweet and let it get cold, when it should be about as
thick as cream.
—Make a saturated
solution of alum water, which means to dissolve as
much alum in hot water as possible.
Lay the glass on a perfectly level table and pour on
as much of the alum water as you can without its
running off and let it cool slowly, when the alum will
cover the glass with fine crystals. This is a good
substitute for ground glass.
A cheap frosting for windows can be made by dissolving
Epsom salts in hot water and then mixing it
with a clear solution of gum arabic.
—There are a number of
substances that can be used instead of glass. In some
cases a substitute is better than glass but generally they
are used because they are cheaper.
—This mineral, which is also but wrongly
called isinglass, is found in Farther India; it is a
silicate and can be split into thin sheets; in color it
ranges from colorless to a jet black and from the
transparent to the translucent. It is useful in many
ways because it is fireproof.
—Gelatine is obtained from the skins,
hoofs and horns of animals. Isinglass is a nearly
pure gelatine and is a white, tough, partly transparent
substance which is obtained chiefly from the air-bladders
of fish.
To make sheets of either gelatine, or isinglass, dissolve
some of the finest glue, or isinglass—the latter
is the best—in enough hot water so that it will
form a flexible solid sheet when it is cold.
While it is still hot strain it through a piece of
cheese cloth; this done, grease a clean sheet of glass
and build up the edges with some putty; warm the
glass and pour on the gelatine to a thickness of ¹⁄₈ inch.
Now lay another greased and hot sheet of glass on top
of the gelatine and let it stay there until it is cold.
The sheets of gelatine can be given any color by adding
a little aniline to the gelatine while it is hot.
—While it is much
cheaper to buy a mirror than it is to make one still
there are times when it is useful to know how to
make one.
As you know, a mirror is a sheet of clear glass
free from air bubbles and upon the back of which is a
film of silver. The silver bath is made by mixing a
weak solution of silver nitrate with ammonium
hydroxide until the solution is clear and then adding
a little caustic potash to it. This done, put in a few
more drops of ammonia and finally a very little
glycerine.
Now float the glass on this mixture when the surface
will soon be coated with silver. When the film
is thick enough take the glass from the bath, wash
the film of silver on the back of it with clean, cold
water, dry and varnish it and your mirror is done.
CHAPTER X TOYS FOR THE KIDDIES — How to Make a Policeman’s Puzzle. — How to Make an Automobile Truck. — How to Make a Swell Coaster. — How to Make a Nifty Wheelbarrow. — How to Make a High-Low Swing. — How to Make a Stick Horse. — How to Make a Pony and Cart. — How to Make a Life-like Goose. — How to Make a Dancing Sambo. — How to Make a Wireless Pup.
If there is as much pleasure in giving as there is in
receiving you can get twice as much pleasure out of
making toys with your own hands and giving them to
your little brothers and sisters—if you have any, and
if you haven’t, then I’m truly sorry for you.
Since you know how to use wood and metal working
tools it will be easy for you to make any and all
of these toys I have described in this chapter and some
of them are quite useful too. And when you are
making them let the little folks watch you for this
will please them greatly and make them doubly happy.
Now some grown-ups don’t know it but however
small a kiddie is he or she likes to play with things
that look like those the older folks work with. Of
course all toys cannot be of this kind for some of
them are made to be funny and others are made to be
lifelike, but these are the three chief kinds of toys.
—Get two
strips of wood ¹⁄₄ inch thick, ¹⁄₂ an inch wide and 11
inches long and cut handles on one end of each strip.
Saw with your scroll saw out of ¹⁄₈ inch thick wood,
two policemen 6 inches high and also one Baxter
Street clothier of Semitic persuasion, 3 inches high as
shown in Fig. 96.
Pivot the leg near the foot of each policeman to
the ends of both of the strips by driving a couple of
brads through and into them and then nail the Israelite
fast to the top strip with a couple of brads. Now
when you pull the strips apart one of the long arms
of the law will crack Ikey on the cranium and when
the strips are pushed together again the other minion
of authority will bounce his club on the place where
his brains ought to be. A little red and blue water
color will add to the realism of the toy.
Fig. 96. a policeman’s puzzle, or now will you be good
—This little
toy will bring a lot of unalloyed joy to any tiny, weentie
fellow and it’s easy to make, too.
Cut out a board for the bottom ³⁄₄ inch thick, 4¹⁄₂
inches wide and 14 inches long; trim down one end of it
so that it is 2 inches wide in front as shown at A
Fig. 97. Bore a ¹⁄₄ inch hole 2³⁄₄ inches from the
front end.
Saw off a block of wood 1 inch square and 2¹⁄₂
inches long—this is to brace the seat with—and glue
this block across the body 6¹⁄₂ inches from the back as
shown by the dotted line in Fig. 97. Make a seat of
a board ¹⁄₄ inch thick, 1¹⁄₂ inches wide and 3¹⁄₂ inches
long and glue or nail it to the block.
C—THE HOOD
B—SIDE VIEW
TOP VIEW
Fig. 97. plans for the automobile truck
To make the body or box, cut out two strips of
wood ¹⁄₄ inch thick and make one 2 inches wide and
the other 2¹⁄₂ inches wide and 4¹⁄₂ inches long for the
front and back, and two strips of wood 2 inches wide
and 6³⁄₄ inches long for the sides. Nail one of the
short strips on the bottom close up to the seat and the
blocks of wood it rests on and nail the side strips on
the bottom.
Next round off the lower edge of the short board
that is left; set it in between the ends of the sideboards
and drive a brad through each of the sideboards
and into the tail-board near the bottom; this
brings the tail-board so that it can be closed up or let
down as the side view at B shows.
Saw off two ³⁄₄ inch square blocks and have both of
them just a shade over 4¹⁄₂ inches long and these are
for the axles. Nail one fast near the rear of the bottom
2 inches from the back end, and nail the other
one fast to the front of the bottom 1 inch from the
end.
Fig. 97d. the automobile truck ready to run
Make a hood out of a block of wood 1³⁄₄ inches
wide and long and 2 inches high and bevel off the top
as shown at C; nail this to the bottom in front as
shown in the top and side views. For the steering
wheel saw out a wheel ¹⁄₄ inch thick and 1¹⁄₂ inches in
diameter.
The last thing to do is to saw out four wheels ¹⁄₄
inch thick and 2³⁄₄ inches in diameter; drill a ¹⁄₈ inch
hole in the exact center of each wheel and screw it on
the end of the axle with a 1 inch long, round head,
wood screw. Paint the automobile a bright red when
it will look like D and run like a fire engine.
—This is a practical
toy that every little tot will like immensely. It
is just as simple as the automobile but it must be made
very much stronger.
A—TOP VIEW
D—STEERING HANDLE
C—SIDE VIEW
B—AXLE SUPPORT
Fig. 98. plans for a swell coaster
Get a board, hardwood is the best, ⁷⁄₈ or 1 inch
thick, 5³⁄₄ inches wide and 14 inches long and saw it
out so that one end is 2¹⁄₂ inches wide as shown at
A in Fig. 98; bore a hole 1 inch in diameter in the
front end and ³⁄₁₆ inch holes across the back at the
places marked with circles.
Next make the rear axle support and for this saw
out of a 1 inch thick board a piece 4 inches wide and
7 inches long and saw out of one end of it a piece 2
inches square. Take your brace and bit and bore a
¹⁄₄ inch hole through the hangers as shown at B.
Screw this support to the seat across it 1¹⁄₂ inches
from the rear end. Brace the support by screwing an
angle brace, as shown in the side view C, to it and the
seat. This done make the steering handle, and for
it you want to use a stick of hardwood 1 inch
thick, 2 inches wide and 15 inches long; saw a piece
out of one end 1¹⁄₈ inches wide and 2¹⁄₂ inches deep
for the axle support for the front wheel; saw the other
end down until it is 1 inch wide and 6 inches deep.
Fig. 98e. the coaster ready to ride on
Round off this smaller end for the handle, as shown
at D, and bore a ¹⁄₂ inch hole close to the end for the
handle bar. Slip the rounded end through the hole
in the front part of the seat, drive a nail through it
just above the seat and glue in a piece of wood ¹⁄₂ an
inch in diameter and 6 inches long, for the handle
bar.
Saw out three wheels each of which is 4 inches in
diameter, bore a ¹⁄₄ inch hole in the center of each
one. Set one of the wheels between the hangers of
the steering handle, slip a bolt through them and screw
on a nut.
Push a bolt through each of the other wheels and
through a hanger of the axle support and screw on a
nut, when the coaster is ready to run, as shown at E.
A coat of bright paint will make it more attractive but
it won’t run any better.
—This is a
cute wheelbarrow and will tickle any little choptie
’most half to death and you can make it in no time.
Get two sticks of wood ³⁄₄ inch square and 24 inches
long and round off one end of each one about 3 inches
down for the handle. Next bore ¹⁄₂ inch holes half
way through in the other ends of the sticks 4 inches
back for the axle; bore two more ¹⁄₂ inch holes 6¹⁄₄
inches back of the first two, and finally 5³⁄₄ inches back
of the last ones bore two more ¹⁄₂ inch holes, as shown
at A in Fig. 99.
This done cut off four sticks ¹⁄₂ an inch in diameter—or
³⁄₄ inch square ones will do—and make one of
them 4¹⁄₂ inches long; the next one 6³⁄₈ inches long,
the third 8 inches long, and the last one 10¹⁄₂ inches
long.
Out of a board 1 inch thick saw a wheel 5 inches in
diameter and bore a hole in its center ¹⁄₂ an inch in
diameter. Smear some glue on the middle of the
shortest stick and slip the wheel on it so that it is
exactly in the middle.
Make the body, that is the box, of the barrow of
wood ¹⁄₄ inch thick and have it 4¹⁄₄ inches wide at one
end, 6¹⁄₄ inches wide at the other end, 5 inches high
and 7 inches long. Through the middle, but a little
toward the back and near the upper edge, bore two
holes a shade larger than ¹⁄₂ an inch in diameter and
slip the third longest stick through the holes in the
body; drive a brad through the stick on each side of
the body to keep the latter from slipping from side to
side, but it must swing easily on the stick.
A—TOP VIEW OF WHEELBARROW
B—SIDE VIEW
C—WHEELBARROW COMPLETE
Fig. 99. a, b. plans for the nifty wheelbarrow, c. the
barrow ready to wheel
You are now ready to assemble the wheelbarrow
and if you intend to paint it you must do so before you
put it together. To assemble it smear glue on the
ends of all the cross-sticks, except the one with the
wheel on it for this one must revolve, and drive on
the handles, being careful that the axle of the wheel
does not bind. A side view of the wheel barrow is
shown at B.
When it is done, see C, you will see that however
high or low the handle-bars are held the body always
sets level and if it is a good idea for a toy why
wouldn’t it be a good idea for a full grown wheelbarrow?
—Here is a
peace promoter and a queller of disturbances wherever
there are very little kiddies around. It is an indoor
swing that can be hung from the top of a door-case.
Further, though it may look a little complicated
in the drawing, it is simplicity itself.
First take the seat and for this, as for all of the
wood for the swing, use ¹⁄₂ inch thick stuff. Cut out
two side bars 1 inch wide and 13 inches long and drill
a ³⁄₈ inch hole in the end of each one. Across these
bars nail four cross bars 2 inches wide and 14 inches
long as shown at A in Fig. 100.
Next make the sides of the swing and from each of
these saw off two strips 1 inch wide and 13 inches
long as shown at B. Bore a hole in each end of both
sticks to match the holes in the side bars of the seat
and then bore two ¹⁄₂ inch holes in both sticks and
have each hole 2¹⁄₂ inches from the end.
Saw off two strips of wood ¹⁄₂ inch thick and 1 inch
wide for each side, cut down and round the ends,
smear glue on them and drive them into the cross-sticks.
The backs of the swing, as you will see at C,
are made exactly like the sides except that they are
14 inches long, and finally a single bar 1 inch thick
and wide and 14 inches long with a ¹⁄₂ inch hole in
each end goes across the front of the swing to keep
the little fellow from falling out.
A—THE SEAT
B—THE SIDES
C—FRONT BAR
Fig. 100. plans for the high-low swing
Now get two pieces of good ³⁄₈ inch thick manila
rope about 10 feet long; double each piece in the
middle and pass one end through the hole in the
front bar, thence through two holes in the side-strips
and finally through the hole in the cross-bar of the
seat and then knot it.
This done pass the other end through the holes in
the cross-strips of the back, then through the holes
in the cross-strips of the side and last of all through
the cross-bars of the seat. Fix the other piece of rope
the same way and swing is done, as shown at D.
Fig. 100d. the swing ready to swing low, swing high
All you have to do now is to loop the top of the
ropes over a couple of hooks screwed into the top
of the door-case, put the little tot in and give him or
her a swing.
—This is a great
improvement over riding a broomstick because it
doesn’t take so much imagination to change it into a
runaway horse.
Saw out of a board 5 inches square the head of
a fiery steed as shown at A in Fig. 101 and paint it
a dapple-gray, with a mane on its neck to look like a
real pony. Make a rein of webbing and then nail
the head on a stick ³⁄₄ or 1 inch square and 3 feet long
for the rider to straddle.
THE HEAD OF THE HORSE
THE STICK HORSE
COMPLETE
Fig. 101. ride a stick horse to banbury cross
Make an axle of a stick 1 inch square and 4 inches
long; whittle the ends down until they are ¹⁄₂ an inch
in diameter and nail the axle to the free end of the
long stick. Saw out a pair of wheels of ³⁄₄ inch thick
stuff, 4 inches in diameter and bore a ¹⁄₂ inch hole
through their centers.
Slip a wheel over each end of the axle and drive
a thin nail through each end to prevent the wheels
from coming off, and it will be fit and ready to ride
as shown at B.
—If this little
pony and cart are to be played with in the house you
can make it the size marked in Fig. 102 but if it is
to be used out-of-doors then you should make it twice
the size.
Get a nice smooth board ¹⁄₂ an inch thick, draw on it
a horse, at least as good as the one shown in the picture,
and then saw it out. Paint it any color but red
or green, for ponies, even in little picture books, are
never of these colors.
Make a frame 1⁵⁄₈ inches wide and 4 inches long
by nailing two strips of wood ¹⁄₂ an inch square with
a block of wood ¹⁄₂ an inch square and 1 inch long
between them. This leaves an opening ¹⁄₂ an inch
wide and 1³⁄₄ inches long as shown at A. Saw out
of a piece of ³⁄₈ inch thick wood a wheel 1 inch in
diameter and drill a ¹⁄₁₆ inch hole through its center.
Set the wheel in the opening and drive a wire nail
through the frame and the center of the wheel for it
to run on. This done nail, glue or screw the horse
to it as shown at B.
Make the cart next, see C, which is simply a box
made of ¹⁄₄ or ³⁄₈ inch stuff, 3 inches high, 4 inches
wide and 6 inches long. Nail a strip of wood ¹⁄₂ an
inch square and 4¹⁄₈ inches long on the bottom and in
the middle of it. Saw out a pair of wheels 2⁵⁄₈ inches
in diameter and screw them to the ends of the strip
of wood so that they can turn freely.
Next make the shafts; these are formed of two
strips of wood ¹⁄₄ inch thick and about 5¹⁄₂ inches long.
Nail the ends of these to the front end of the cart in
the middle and at a distance apart so that the horse
will just slip in between them.
COMPLETE
FRAME FOR THE WHEEL
PONY
CART
Fig. 102 a, b. plans for a pony and cart. c, d. the pony and
cart when done
Glue, or otherwise fasten the shafts to the horse,
as shown at D, and you can then show your little
brother how to play with it, but don’t break it before
you give him a chance to play with it too. The
finished pony and cart will then look like the picture.
—Nearly all
geese, including goslings, are lifelike unless they are
being made ready for the pot but this gray-goose is
lifelike in that her head moves out from and back
toward her body when she is drawn over the floor by a
string.
Fig. 103. how the life-like goose is made
A. The size of the board for the body.
B. The size of the board for the head and neck.
C. The crank shaft which makes the goose life-like.
Get two pieces of thin wood ¹⁄₄ inch thick, 3¹⁄₂ inches
wide and 6 inches long; draw the outline of a goose’s
body on one of them, as shown at A in Fig. 103, and
then fasten them together with a couple of brads.
Saw them out and drill a ¹⁄₁₆ inch hole through them
in the center of the circle which is the wheel; also
drill, or bore, three ¹⁄₄ inch holes at the points near
the edge of the body as shown by the larger circles.
On a board ¹⁄₄ inch thick, 2³⁄₈ inches wide and 5¹⁄₄
inches long draw out the head and the neck of a
goose, as shown at B, saw it out and drill a ¹⁄₁₆ inch
hole near the end of its neck. Now paint the bird’s
body and the anterior part of its anatomy—by which
I mean its head and neck. Saw out two wooden
wheels 2 inches in diameter and drill a ¹⁄₁₆ hole in
the center of each one.
Cut off a piece of iron wire ¹⁄₁₆ inch thick, slip it
through the hole in the goose’s neck and bend the
wire on both sides of it to form a crankshaft as shown
at C. The next move is to put each end of the
wire through the small hole in the body, then force a
wheel on each end of the wire tight and bend up what
is left of the latter.
Fig. 103c. goosie, goosie gander, where shall i wander
Make three pins of wood ¹⁄₄ inch in diameter and
⁷⁄₈ inch long; smear some glue on the ends and drive
them gently through the holes; these pins will keep
the boards which form the body the right distance
apart and the pins in front also act as a guide for the
goose’s head. When finished it will look like C.
Now when a string is tied to the front part of the
goose’s body and your little sister (or you) pulls it
over the floor, the goose will run its head to and fro
and forth and back in a most real and life-like fashion.
—Here is a
chance for you to get in your fine work with your
scroll saw and to do a bit of wood carving at the same
time if you want to.
Fig. 104a. the dancing sambo
Saw out, or carve out, or both, the head and body
of a black rascal named Sambo, and make them of
a single piece of wood; saw out a pair of arms and
legs but make each one of the latter in two parts and
joint them at the knees as shown at A in Fig. 104.
Fasten the arms and legs to the body with pins so
that they will swing freely. The figure should be
about 6 inches high and painted in 3 or 4 bright colors.
When you have it done fix the end of a wire ¹⁄₁₆ inch
in diameter and 5 inches long, firmly into the back of
Sambo’s body.
Make a box 3 inches wide, 3 inches high and 6
inches long; bore or cut a hole ³⁄₄ inch in diameter in
one end; turn it upside down and drill a ¹⁄₁₆ hole
through the middle of the top and drill a ¹⁄₁₆ inch
hole through both sides 2 inches back from the large
hole in it as shown at B.
Fig. 104b. the mechanism of the dancing sambo
Cut off a strip of wood ¹⁄₂ an inch square and as
long as the box is wide, drill a ¹⁄₁₆ inch hole through
it and glue it inside the box so that the hole in the
strip and the one in the top of the box will be in a
line.
Now cut off a strip of hardwood ¹⁄₄ inch thick and
3¹⁄₂ inches long for the lever and drill a ¹⁄₁₆ inch hole
through it 2 inches from one end; slip the lever
through the hole in the end of the box with its end
under the cross-bar; pivot the lever by running a wire
through the hole in it and the sides of the box as
shown at B.
Slip the wire which is fixed to Sambo through the
hole in the top of the box and on down through the
hole in the cross-bar so that its free end rests on the
end of the lever. This is all there is to the working
mechanism of Sambo.
By working the end of the lever with your fingers
as though you were sending a telegraph message, as
shown at A, the small time Ethiopian will execute all
sorts of fancy dance steps and cut up antics that will
keep the children, and the grown-ups too, in great
good humor for a long time.
By working the lever cleverly you can give the
darkey distinctive characteristics that not even a member
of his own race ever possessed.
Fig. 105a. the wireless pup. the slot in the floor of the
dog house
—This is a most
remarkable bull-pup for he will jump out of the kennel
when you or any one else calls him, when you clap your
hands or on any other occasion when a loud noise is
made.
Always make a dog-house for a pup before you
catch him so that when he gets home he’ll know he’s
there. Use smooth ¹⁄₂ inch thick pine boards for the
house and cut out a piece 7 inches wide and 8 inches
long for the floor. Cut a slot clear through the board
1³⁄₄ inches from one end and parallel with the edge of
the back and have it ¹⁄₂ an inch wide and 1¹⁄₄ inches
long; then on each end of the slot cut a groove ¹⁄₂ an
inch long and ¹⁄₄ inch deep as shown at A in Fig. 105.
Fig. 105b. the back end of the dog house
Cut out two pieces for the sides of the house 4
inches wide and 8 inches long and screw them to the
floor. Now bevel off the top edges of the sides with
a plane to allow for the slope of the roof but before
you put it on you must install the wireless apparatus
that makes the pup jump out of the dog-house. Make
a back out of a board 7 inches square as shown at B.
This apparatus consists of five chief parts and these
are (1) a spanker; (2) a solenoid; (3) a stiff piece of
clock-spring; (4) a telephone transmitter and (5) two
or three cells of dry battery.
Fig. 105c. the spanker with electric solenoid control
The spanker, so called because it spanks the pup out
of his kennel, is shown at C; it is simply a strip of
wood ¹⁄₈ inch thick, 1 inch wide and 3¹⁄₂ inches long.
Tack, or otherwise fix, a piece of tin to one side of it
to form an electrical contact; cut a ³⁄₈ inch hole in the
middle of it and then drive a brad in each edge near
one end. The spanker sets in the slot in the floor and
the brads rest in the grooves and serve as pivots.
A solenoid is merely an electromagnet with a loose
iron core in it. Make a cardboard spool 1¹⁄₄ inches
long and 1¹⁄₂ inches in diameter and have the hole in
it ⁷⁄₁₆ inch in diameter; wind it full of No. 20 or 22
double cotton covered magnet wire and your solenoid
is done. An iron bolt ³⁄₈ inch in diameter and 1¹⁄₄
inches long makes a good plunger, as the loose iron
core is called. Slip it through the hole in the spanker
and screw the solenoid to the inside of the back of the
house as shown in the cross section drawing at D.
Fig. 105d. cross section side view of the wireless pup ready
for action
Make a contact plate of a strip of tin or sheet brass
and screw this to the floor back of the spanker so that
when the plunger is drawn into the solenoid and the
spanker is back as far as it will go the plate will come
in contact with the tin on the spanker. Put a stop in
front of the spanker to prevent the latter from falling
too far forward.
Fig. 105e. the front end view of the wireless pup
house
Next get a strong, stiff piece of clock-spring, punch
two holes in one end and screw it to the back of the
house near the top, with the free end of the spring
pressing out the spanker. Fasten by means of hangers,
or otherwise, an ordinary telephone transmitter to
the roof of the house as shown at D. Now make
the front of the house and cut 4 × 5 opening in it
for the pup to get in and out, and a hole 1¹⁄₂ inches in
diameter, as shown at E, so that when you put the
front on, the hole will be directly over the mouthpiece
of the transmitter.
Before putting on the front connect up the apparatus
as shown at D, that is, connect one of the wires
of the transmitter to the contact plate; join the other
wire of the transmitter to the battery; lead one of the
wires of the solenoid to the tin on the spanker. When
these connections are made the circuit will be complete
if a battery is connected in and the spanker is
pushed back. Now put on the front of the house
and then make the pup.
Fig. 105f. when you call the wireless pup or clap your hands
he comes out of his dog house in a hurry
Saw the body of the pup and his legs out of separate
pieces of wood and glue them together. He should
be 2³⁄₄ inches high and 5 inches long when done and
he must slide easily on the floor. See F, Fig. 105.
The action of the wireless pup is like this: You
push the pup into the house and back against the
spanker as far as he will go; this presses the spring
back and at the same time makes connection with the
contact plate which closes the circuit.
The current from the battery then flows through the
solenoid and transmitter and this magnetizes the iron
plunger core and holds the spanker back against the
force of the spring.
If now you call loudly, or clap your hands, the
carbon granules in the transmitter will vibrate and
this will suddenly weaken the current, and, hence, the
magnetism of the solenoid. The instant the magnetic
pull of the solenoid is weaker than the spring the latter
will force the spanker against the posterior end of the
pup’s anatomy and boost him out of his kennel.
CHAPTER XI HOME MADE MUSICAL INSTRUMENTS — The Musical Coins. — — How to Make Them. — How to Play Them. — The Musical Tomato Cans. — — How to Make Them. — To Play the Tomato Cans. — The Musical Glasses. — — How to Make Them. — How to Play the Glasses. — The Tubular Harp. — — How to Make It. — How to Play the Harp. — The Musical Push Pipe. — — How to Make It. — To Play the Push Pipe. — The Curious Xylophone. — — How to Make It. — How to Play the Xylophone. — The Peculiar Tubaphone. — — How to Make It. — How to Play the Tubaphone. — The Cathedral Chimes. — — How to Make Them. — How to Play the Cathedral Chimes. — The Æolian Harp. — — How to Make It. — How the Wind Plays It. — An Egyptian Fiddle. — — How to Make It. — How to Make the Bow.
There is music in everything if you only know how
to get it out without cracking it. When a small boy
beats a pie-pan with a stick, or drums on a wooden
fence he is making music, only the neighbors won’t
believe it.
This is because he sets up the same note in succession
and after a while the constant repetition of this
single note gets on a grown-up’s nerves, especially if
he is writing a book; hence he thinks the sounds are
noise but it is really music of a
bombastic[103]order.
[103] The gong,
drum, bell, and cymbals all set up sound by concussion
and these are called bombastic instruments.
By this I mean that what we call noise is sound set
up by uneven air waves[104] in time and volume while
music is made by a tone, or tones, of even air waves.
Any musical instrument that produces sound by shock,
or concussion as it is called, is said to be bombastic.
[104] For the theory of air waves and sound see The Magic of
Science by the present author, published by Fleming H. Revell
and Co., New York.
When a bombastic instrument is played alone the
sounds set up by it are not very sweet or musical but if
you will use a set of eight of them, or octave as it is
called, and tune them so that the pitch—which is the
number of air waves that are produced and heard in
a second of time—of each one is a note higher than
the one before it and then make first one and the other
vibrate you will produce pleasing tones, and by combining
these tones properly you will have a resemblance
of what we call music.
—A
simple and very pleasing way to show that there is
music even in cold brass is to take a piece of sheet
brass, or, better, sheet steel, about ¹⁄₁₆ inch thick and
scribe on it with a pair of compasses eight circles
whose diameters range from 2 inches to 3 inches.
Fig. 106a. the musical coin
Saw them out and file them down so that each one
will ring out a whole number, as it is called in physics;
that is, if the largest and deepest toned coin, or disk,
makes 250 vibrations a second, the next one must make
500 vibrations a second, the next 750 and so on
until the smallest and highest pitched coin will make
2000 vibrations a second.
When each coin rings out its whole number, or
nearly so, you will have what is known as a harmonic
series. Now saw notches in the edges of each one
as shown at A in Fig. 106 and then file them until the
tone of each one is just right.
—To play a tune with the
musical coins spin them on the top of a table—a
marble top table is the best—and as each coin dies
down[105] and its edge strikes progressively against the
surface of the table it will ring out in a clear, loud
tone.
[105] If you will look closely at the spinning coin you will see
that when it spins fast at first the axis about which it rotates is
its diameter and that the coin stands upright. As the coin commences
to die down the axis about which it spins gradually begins
to shift from the diameter to the center of the coin until finally
at the finish the coin is spinning directly about its center. This
motion is the same as the processional motion of the earth.
Fig. 106b. how to hold the musical coin to spin it
The coins should be laid in a row on the table and
whatever note you want to ring out pick up the coin
which will produce it, hold it as shown at B, and give
it a little spin. You can soon learn to spin them with
either hand and keep two or more of them going at
the same time, when you will have that agreeable
combination of tones that is known in music as harmony.
The musical coins are easy to learn to play and at
a little distance off they look like real coins and are
a very pleasing novelty.
—The musical tomato cans make a bombastic
instrument—very bombastic I should say. Be that
as it may, get eight tomato cans, soak the labels off
carefully and keep them. Next melt off the tops of
the cans and paste the labels on them again. Set each
can on a piece of felt as shown in Fig. 107.
Fig. 107. the chopin tomato can
Now by pouring water in the cans you can tune
them so that each one will send forth a whole number
note and all of them together will give the notes in the
regular order of an octave. You do not need to put
any water in the first can but use this one for the fundamental
note, that is the note on which the chord is
formed.
Make a couple of mallets, as the sticks to beat the
cans with are called, of a pair of sticks about as thick
as a lead-pencil and twice as long and glue a wooden
ball ⁵⁄₈ inch in diameter on one end of each one.
—When you have tuned
the cans set them in a row on a piece of felt, or a
couple of thicknesses of thick woolen cloth will do,
and with a mallet in each hand tap them softly.
While some folks who have no ear for melody,
harmony and dissonance[106]
may say that both the instrument
and the performer ought to be canned still
the instrument is a great one to play Chopin’s[107]
funeral dirge[108] on. Undertakers are crazy about
the musical tomato cans.
[106]
These are the three chief factors that make up the various
combinations of tones which we call music.
[107]
Chopin (pronounced Sho′-pan) was a Polish musical composer.
[108]
A dirge is a tune expressing grief and mourning.
—Different
from the tomato cans, the musical glasses
make about the sweetest music ever heard. To make
a set get eight very thin glass goblets and mount them
on a board 12 inches wide and 2 feet long. An easy
way to do this is to fasten the foot of each goblet down
with a couple of thin strips of tin or brass placed
across it and screwing the ends of these to the board
as shown in Fig. 108.
To tune the glasses pour water in them until each
has exactly the right pitch and together they form an
octave. When you have learned to play simple tunes
on an octave of musical glasses you can build up the
set to 22 glasses or three octaves, which will give you
enough notes to play almost any of the popular airs.
Fig. 108. the musical glasses
—Before starting in to
play moisten the rims of the glasses and rub your
fingers with water in which you have put some vinegar,
or better, a little acetic acid,[109]
until they feel quite
rough.
[109]
This is the acid contained in vinegar that gives it its value.
Now when you lay the tips of your fingers flat on
the rim of a glass and rub them around it, the friction
between the skin of your roughened fingers and the
edge of the glass will set the latter into vibration and
a wonderfully sweet tone will be sent out. By varying
the pressure of your fingers on the glasses you can produce
a very beautiful tremolo effect.
It is a good scheme to put a few drops of acetic acid
into each goblet so that just as quickly as the volume
of sound begins to fall off you can dip your finger
tips into whatever glass they are nearest to and so increase
the friction between them and the glass.
If you can play a set of musical glasses well your
services will be in demand for all kinds of entertainments.
—This
easily made instrument gives out tones very much like
those of the musical glasses but they are much deeper
and louder.
Fig. 109 a, b. the harp of a thousand thrills
To make this harp you will need 12 feet of ¹⁄₂ inch
bell-metal[110] tube—brass tube will do but it is not as
good—and cut it into eight pieces; saw off the first
tube 2 feet long and cut off each of the other pieces
¹⁄₂ an inch shorter than the one before it. Cylindrical
sticks of wood can also be used for the tubes.
[110] Brass and bell metal tubing can be bought of the U. T.
Hungerford Brass & Copper Co., 89 Lafayette St., New York.
Get two strips of wood 1 inch square and 3 feet
long and screw them together as shown at A in Fig.
109 with a couple of thumb screws; this done bore
eight ¹⁄₂ inch holes in the sticks every 4 inches apart
and smooth them out with a half-round file.
Glue a strip of cloth on the side of each strip that
is bored out, set each tube with the middle in the
groove so that they grow shorter in steps and screw
the strips together tight with the thumb screws to
hold the tubes in securely as shown at B.
Fig. 109c. how to play the harp
To tune the tubes saw off and file off the end of
each tube until it gives forth the proper note. When
you have tuned them make a stand to hold the instrument
and this can be of either wood, or metal tubing
if you want the harp to look nice and you don’t care
about the expense. The harp is shown complete at C.
—When you have made the
stand get a pair of old gloves and cut off the fingers;
powder some rosin and rub it well into the palms of
the gloves.
This done, put on the gloves, grip the top of the
tube and draw your hand slowly down toward the
sounding board, as shown at C, and a beautiful tone
will be emitted. Not only does the tube vibrate to
make the sound but as it is hollow it acts as a resonator,
that is, the sound will set up sympathetic vibrations
in the tube which will reënforce the simple vibrations
of the tube both in strength and quality.
By waving your finger over the top of the tube
while you are playing it with the other hand a tremolo
effect can be produced that is very beautiful and if
you are versatile you can make it sound almost like a
human voice.
—This
musical instrument is an organ pipe but it is
played like a slide trombone, that is by pushing in and
pulling out a slide that fits inside of it.
Spruce is the best wood to make the organ pipe of
but you can use any other kind you have at hand.
Saw off four strips of wood ¹⁄₄ inch thick and 16 inches
long and have two of them 3 inches wide and the
other two 2¹⁄₂ inches wide, as shown in Fig. 110. Saw
off one of the 3 inch wide boards so that it will be
12¹⁄₄ inches long and plane down one end to a sharp
edge as shown at B.
Take another board ¹⁄₂ an inch thick and make it
2¹⁄₂ inches high and 3 inches wide as shown at D.
Cut out a board for the end ¹⁄₄ inch thick, 2¹⁄₂ inches
wide and 2¹⁄₂ inches long and bore a ¹⁄₂ inch hole in it
as shown at E.
THE PUSH THE PIPE BACK BOARD TOP FRONT BOARD LOWER FRONT BOARD LIP SIDE BOARDS END MOUTH PIECE
Fig. 110. parts of a musical push pipe
As you supply this pipe with air by blowing in it,
take a common thread spool and trim down one end
of it as shown at F so that you can get it into your
mouth; then glue the large end over the hole in the
bottom board. Next glue the sides together to form
a square tube and make and glue into the lower end a
three-cornered piece of wood 2 inches wide, 3 inches
high and 2¹⁄₈ inches thick as shown at G. This will
bring one of its sharp edges just under and very close
to the sharp edge of the short side of the pipe.
Glue the thick piece of wood shown at D to the
lower end of the pipe so that it leaves a ¹⁄₄ inch space
between its top edge and the sharp edge of the short
side of the pipe. Finally glue the mouthpiece in the
lower end of the tube and this part of the push pipe is
done.
If now you will place your hand over the open top
of the pipe and blow through the mouthpiece, a soft
note like that of a steamboat whistle will issue from
it. To play a tune on the pipe it must have a range
of an octave but if it will sound an octave and a half
you can play many of the popular airs on it.
To do this fit the organ pipe with a movable stop,
or push, which slides in and out of the pipe. Make
this push of two strips of ¹⁄₈ inch thick wood, 2¹⁄₂
inches wide and 12 inches long; screw one end of each
of these boards to a block of wood the size of the
top of the organ pipe and screw a knob—the head
of a clothespin will do—on it in the center for a
handle. The stop, or slide, will of course be open
on two sides and must slip snugly but easily in the
pipe.
—If now you will blow
through the mouthpiece and slide the stop in and out
various tones and semi-tones will be produced. It takes
very little practice to learn just where to stop the slide
to make a given note—that is if you are at all apt in
playing musical instruments. A push pipe[111] is just
the thing for a black-face musical act.
[111] A push pipe can be bought for $4.00 of the L. E. Knott
Apparatus Co., Boston, Mass.
Fig. 110j. how the push pipe is played
—This
instrument, which is pronounced zil-o-fon´, is
cheap to make or buy[112] and is easy to learn to play.
[112] Can be bought of any dealer in musical instruments or of
the L. E. Knott Co., Boston.
To make one cut off fifteen bars of a stick of maple
¹⁄₂ an inch thick, ⁷⁄₈ inch wide and make the longest one
5 inches. To get the right lengths of all the others
you will have to saw them off a little at a time and
try them out for tone, because any variation in thickness
will make a difference in the length of them.
Hence the above rule-of-thumb method for determining
the sizes of them.
Drill a ¹⁄₁₆ inch hole through both ends of each bar
and string them on a wire to keep them in place.
Make two rolls of straw ³⁄₄ inch in diameter and 20
inches long; fix the ends of these rolls on a board as
shown in Fig. 111 and lay the maple bars on them
when they are ready to be played on.
—The xylophone is
played with a pair of hammers. To make the latter
cut off two sticks ¹⁄₄ inch in diameter and 8 inches long;
get or turn two wooden balls 1 inch in diameter; bore
a ¹⁄₄ inch hole in each one and glue in one of the
sticks.
Fig. 111. a xylophone. the bars are made of wood
Take a hammer in each hand and hold it loosely;
stand over the xylophone so that the sticks of the
hammers are parallel with and about 6 inches above
the bars of the xylophone and with the ball ends in
the middle of the bar it is over. Now pound the bars
for dear life and the faster the tune the more musical
it will sound. For this reason pieces like the Circus
Life Gallop are especially adapted for the xylophone.
—By
using brass tubes, or better, tubes made of bell
metal, you can have a xylophone of another order.
Use tubing ³⁄₄ inch in diameter and have the first one
5 inches long for the fundamental.
Keep on sawing them off and filing them down until
you have them all done and all in tune. Make a
wooden frame of ¹⁄₂ inch stuff and have the bottom 2
inches wide at one end, 4 inches wide at the other end
and 17 inches long.
Fig. 112. a tubaphone. the bars are made of metal tubes
Saw off two strips of wood ¹⁄₂ an inch thick, 1 inch
wide and 17 inches long. Bore fifteen ³⁄₄ inch holes
1 inch apart measured from their centers in them;
glue a strip of felt or thick cloth to the wood in each
one and slip the tubes in the felt lined holes as shown
in Fig. 112.
—To play this peculiar
instrument use a couple of felt covered mallets; these
can be made by winding a little ball of string around
one end of each stick which should be about ¹⁄₄ inch
in diameter and 8 inches long, and then covering it
with felt. Beat the tubes with the felt mallets in
exactly the same way you do when you play the xylophone.
—This
is one of the easiest musical instruments to make
and the music produced by it is impressive in its tone
and depth.
To make it saw off a board, ³⁄₄ or ⁷⁄₈ inch thick,
about 12 inches wide and 22 inches long and screw
a block 1 inch square to each corner for it to rest on.
Get eight binding posts[113]
of the size shown at A in
Fig. 113; drill eight ¹⁄₈ inch holes in the board, 4 in a
row with the holes 5 inches apart and have the rows
also 5 inches apart, and then screw a binding post into
each hole.
[113] These can be bought of the Manhattan Electrical Supply
Co., Park Place, New York City.
Fig. 113. the cathedral chimes
A. A full sized binding post.
B. The chimes on the sounding board.
Make eight spirals of No. 14 spring brass, steel or,
better, phosphor-bronze[114]
wire; you can do this by
cutting off eight pieces of the wire each of which is
20 inches long. Draw a spiral on a sheet of paper as
described in Chapter V so that the inside turn of
wire is about ³⁄₄ inch in diameter, the outside turn
about 3¹⁄₂ inches in diameter and each turn of wire
will be separated from the other by a space of ¹⁄₄ inch
as shown at B.
[114] Get it of the U. T. Hungerford Brass and Copper Co.,
Hungerford Building, New York.
With your round nose pliers bend each length of
wire like the pattern you drew on the paper. When
you have made the spirals screw the inside end of
each wire in the binding post and your cathedral
chimes are done all except the tuning of them.
Let the first spiral of the upper left hand side give
the fundamental tone and tune the others to it by cutting
off the free ends of the wires until they are all
tuned in unison. Make a couple of wood mallets and
cover the ends with leather or rawhide.
—Strike the inside
turn of wire up close to the end that is fastened
to the binding post, and a tone will issue from the
spiral that is long, deep and loud, for the wire with
its free end forms a very perfect vibrating body.
—This
harp is of very ancient origin and it gets its name
from Æolus who, in classic mythology, was the father
of the winds, and very appropriately is it named, too,
for it is the wind that plays it.
Make a box of ¹⁄₂ inch thick wood, 2 inches deep,
5 inches wide and 3 feet long; use clear pine, or deal
will do, for the sides of it but the ends should be of
beech to hold the tuning pins and the hitch pins. Cut
a sound hole 3 inches in diameter near both ends of the
board which is to be used for the top; then glue the
box together and screw up the ends with your wood
clamps to hold it together tight while it is drying.
Fig. 114. the harp of aeolus
When it is thoroughly dry, drill a dozen ¹⁄₄ inch
peg holes ³⁄₄ inch deep in one end, six in a row as
shown at A in Fig. 114. Make a dozen pegs to fit
the holes and these should have wings on them as
shown at B like violin pegs. Each peg should be
about 1¹⁄₂ inches long and each one should have a ¹⁄₃₂
inch hole drilled near the top of the shank for the end
of the string to pass through. The hitch pins can be
brass brads driven into the other end of the box and in
a line with the holes, all of which is shown at A.
Make two bridges of hard wood ¹⁄₈ inch thick; have
each one 1 inch high and 5 inches wide and with 12
notches cut in one side. Now get a dozen catgut
strings of different thicknesses and put them on the
sounding board; to do this twist a loop on the end
of each one; thread the other end through the hole
in the peg and tighten it up a little.
When you have all of the strings in place set a
bridge under each end and then tune the strings in
unison, but don’t stretch the strings on very tight or
the wind won’t make them vibrate. This done, cut
out another ¹⁄₂ inch thick pine board and glue a block
¹⁄₂ inch square and 1¹⁄₂ inches long to each corner and
set it on top of the harp. The purpose of this cover
is to make the wind blow with as much force as possible
over the strings.
—To the end that old
Æolus may play the harp to the best of his ability set
it on the sill of an open window so that the wind
strikes the strings at a slant. Pull the window down
on the harp in order to make all of the wind pass between
the cover and the strings.
When the wind blows softly beautiful tones will be
emitted and when the wind blows hard discords will
be produced but as the wind subsides exquisite harmonies
will again prevail.
—The
early Egyptians invented the fiddle, or rebab as they
called it, but they did not play it with a bow. Later
in medieval times, that is in about the 9th century,
this fiddle came to be called a rebec and it was then
played with a bow. I’ll bet though that the fiddle I
shall tell you how to make and play sounds better
than any Egyptian rebab ever made—though it is
not exactly a Stradivarius.[115]
[115] The priceless fiddles made by the famous old violin maker
Antonio Stradivari of Cremona, Italy, in the early part of the
17th century.
To make a fiddle of this kind—it only has one
string and only one is needed by a master violinist—make
a sounding box of ¹⁄₈ or ³⁄₁₆ inch thick wood
except the ends which should be of ³⁄₈ inch thick stuff;
this box should be 4 inches high, 6 inches wide at one
end, 8 inches wide at the other end and 12 inches
long. Cut a hole 6 inches in diameter in the center
of the board which you are going to use for the sounding
board, and then glue all of the pieces together
using wood clamps to hold them tight.
For the neck take a stick of wood 1¹⁄₂ inches wide,
2¹⁄₂ inches thick and 15 inches long; cut it down until
one end is 1 inch thick and cut a piece out of this end
³⁄₄ inch wide and 1 inch deep; bore a conical hole
through this end and fit in a peg. Next saw out the
other end 2 inches deep for a length of 3 inches back
and glue and screw this end of the neck to the narrow
end of the box. The shape of the neck with the peg
in it and the way it is fixed to the sounding box is
clearly shown in the top view A and the side view B
in Fig. 115.
Cut out a bridge of a piece of hard wood ¹⁄₈ inch
thick, 1 inch high and 1¹⁄₂ inches long as shown at C;
and, finally, make a tail-piece of a bit of hard wood
¹⁄₈ inch thick ¹⁄₂ an inch wide at one end, 1 inch wide
at the other end and 2 inches long. Drill a hole in
each end and whittle or plane the large end to a sharp
edge.
In the middle of the large end of the sounding box
bore a ¹⁄₄ inch hole and glue in a hard wood peg for
a hitch-pin. Fasten the tail-piece to the hitch-pin with
a piece of catgut string. Slip the end of an A violin
string through the hole in the sharp end of the tail-piece;
knot it to keep it from pulling through, and
bring the other end up and thread it through the hole
in the peg in the neck. Finally put the bridge under
the string and tighten it up. Tune it to the treble, or
G clef, if you know enough about music to do it, or if
not tune it so that it gives a pleasing tone.
Fig. 115. plans for an egyptian fiddle
—The best kind of wood
to make a violin bow of is Brazilian lance-wood or of
snake-wood, but for this one stringed fiddle of yours
you can use a piece of beech.
Take a strip of wood ¹⁄₂ an inch thick, 1 inch wide
and 24 inches long and saw it out as shown at D; then
round up the stick and sandpaper it smooth. Cut out
two blocks to fit the ends, or frogs as they are called:
drill a hole in each one and screw it to the bow but
not very tight.
Fig. 115d. how the bow is made
Now comes the hard part and that is putting on the
hairs; get 50 or 60 white horsehairs about 2 feet long;
I do not advise pulling them out of Dobbin’s tail but
rather to buy a bunch of them from Sears, Roebuck,
and Co., Chicago, Ill., for 10 or 20 cents.
Having got them somehow put one end of each one
under one of the blocks and when you have them all
even and close together screw the block down tight;
this done fasten the other ends of the hairs under the
opposite block, and when you have them all drawn taut
screw down the block and put a little glue on the places
where they go under the blocks.
If you will look at a horsehair through a microscope
you will see that it seems very like the scroll saw
blade I told you about in the second chapter, that is,
it has a lot of fine teeth on it and all of them run the
same way. By rights then half of the hairs ought to
be put on the bow with the teeth running in one direction
and the other half with the teeth running in the
other direction so that the friction of the hairs is the
same on the string on the up and the down strokes.
Fig. 115e. how the fiddle is played
Do not use much rosin on the bow but rosin it often.
You can buy a piece of regular violin bow rosin for
5 cents but the kind that gives the best results is the
genuine Bernardel imported from France and which
costs about a quarter. It bites hard on the string
and makes a large volume of sound. The way the
fiddle is played is shown at E.
CHAPTER XII SOME EVENING ENTERTAINMENTS — Cartoons While You Wait. — Drawing the Cartoons. — Thirty Minutes of Chemistry. — The Mystic Glass of Milk. — The Cause. — The Chemical Action. — For the Fun of the Thing. — The Magic Fountain. — The Cause. — How to Make Hydrogen Chloride Gas. — The Vicious Soap Bubbles. — The Cause. — Caution. — The Uncanny Wheel. — The Cause. — How to Make Carbon Dioxide Gas. — Giving a Travelogue. — An Electrical Soirée. — Demonstrating Electricity Without Apparatus. — The Electrified Papers. — How to Electrify a Person. [133] — How Like Repels Like. — Making Experiments With Apparatus. — The Induction, or Spark Coil. — Demonstrating Wireless Telegraphy. — Reading Palms for Fun. — How to Read Palms. — A Talk on the Steam Engine. — Making the Model Engine. — How the Engine Works.
There is a feature of home life that the heads of
too many families overlook and that is getting together
and having an evening of entertainment which the
youngest as well as the oldest member can enjoy.
This is not at all a hard thing to do but as it takes
time to get the props together to give it with—which
neither your father or mother can well spare even if
they had the inclination—it is up to you as the boy
of the family to see that it is done.
It is a noble plan to give a divertisement, or
soirée[116] (pronounced swa´re) as the old time magicians
used to call it, once every month and you will
find after you have given the first one that all of your
folks will look forward to the coming of the next one
with interest and with pleasure.
[116] This is a French word and it means an evening social
gathering.
Moreover, you should let them know what the next
divertisement is to be a couple of weeks before it
comes off and then let all hands join in and talk about
it whenever the spirit moves them. Naturally since
you know all about it and they don’t know anything
about it, questions will be in order and you are the
one who will have to answer them; and don’t try to
make a secret of anything you have done or are going
to do unless it is magic or some allied subject of
mystery. After the divertisement is over it will furnish
food for conversation for a long time to come.
Now while I have used the words entertainment and
divertisement, both of which mean about the same
thing and that is amusement, and while you should
always strive to make your talks as light and recreational
as you can you do not need to stick to frothy
subjects altogether but instead you should alternate
them with scientific demonstrations. In this way you
will not only please and develop good fellowship in
the family, but you will instruct the members of it at
the same time.
Finally, don’t make your divertisements too long.
Better by all means make each one only 15 or 20 minutes
long and have everybody in high good humor
and saying that it was all too short, than to give them
an hour and have everybody gappy and bored half-to-death.
—This is a good feature
to start off your season’s divertisements with.
Make a substantial easel on which to set a large drawing
board as shown in Fig. 116, or you can fasten the
paper to a wall with thumb tacks if you live in a home
and not in a residence.
Get a dozen sheets of good white print paper—you
can buy a quire (24 sheets) 24 × 36 inches for 25
cents—and tack ¹⁄₂ a dozen sheets to your drawing
board or the wall. Also buy a stick of black marking
crayon,[117] which is better than chalk or charcoal for
it makes a heavy black line that will not smut, blur
or rub off.
[117] You can buy a marking crayon at a hardware or stationery
store.
Fig. 116. how an easel is made
—Start in with your crayon
in hand and explain that what you propose to do is to
show the principles upon which free-hand drawing is
based. Then make a simple line drawing of the boxer
reaching for the maxillary of his invisible opponent
as shown in Fig. 42, over in the chapter called Drawing
Simply Explained, and then draw the horse galloping
home on the three-quarter stretch.
Next draw around these simple line figures, which
are really the skeletons of the man and beast, the outlines
as shown in Fig. 43. If you are not expert in
free hand drawing you can trace these figures on the
paper in faint lines with a lead-pencil before you begin
your performance, and then all you have to do is
to mark over the lines with the crayon.
After you have made these drawings and explained
all about them tear off the sheet and on the clean one
draw the outline of a man as shown in Fig. 44 and
mark on the proportions of the human body. Have
your next sheet ruled off into squares with the lines
2 inches apart; draw in the face and at the same time
explain that this makes it easy for any one to get the
features in proportion.
Now comes the grand finale[118] (pronounced
fi-na´-le) and that is your
cartoons.[119] You should
practice drawing these and also have some patter[120]
about each one so that when you do them for the
family audience your tongue will be as clever as your
fingers. You can begin by explaining how the expressions
of one’s face—that is the way the features look
when the mind is at rest or is excited—can all be
represented by a few very simple lines.
[118]
The last part of an exhibition and it is generally the climax
of it.
[119]
A cartoon is usually a caricature of a person or thing done
in sketchy style. The word comes from the French carton,
which means pasteboard.
[120] Witty or amusing talk to help along the act.
Draw eight circles 5 or 6 inches in diameter in a
double row on the paper with your marking crayon
as shown at A in Fig. 117. Now you say first that
sleep can be represented by four straight horizontal
lines and you draw them as shown in the first circle.
Next draw four vertical lines in the second circle and
before you can say awake your little audience will see
it and laugh its approval.
FAST ASLEEP
WIDE AWAKE
SOME JOY
MORE SORROW
QUITE MODEST
MUCH DISDAIN
SOMEWHAT SURPRISED
A LITTLE ANGRY
A
Fig. 117a. first principles of cartooning
Joy is represented by four little arcs, or curved
lines with the ends of each pointing up, which you
draw in the third circle, while sorrow is, of course,
shown by four curved lines the ends of which point
down as in the fourth circle, since the emotion of sorrow
is the opposite to that of joy.
Show how modesty is depicted by drawing four little
angles in the fifth circle with the vertex, or point
of each one at the bottom, while disdain, which is the
reciprocal of modesty, can be illustrated in the sixth
circle by reversing the positions of the angles and having
their vertices at the top.
To portray surprise all you have to do is to draw
four little circles inside the seventh large circle and
you will have caught the expression. Finally in the
eighth circle draw two slanting lines for the eyes, a
vertical line for the nose and an angle with the ends of
the lines pointed down and you will have a very good
representation of anger, (or maybe it’s a Chinaman.)
BY DE LIGHT
OF DE SILVERY
MOON
PAT AND
HIS POIPE
HE HAS
JUST HEARD
A JOKE
B
C
D
Fig. 117 b, c, d. three simple cartoons that you can do
Now without my telling you how to draw the cartoons
shown at B C and D in Fig. 117, draw each one
of them half a dozen times on a sheet of paper with
your marking crayon and when you get before your
audience you will be able to do them like a lightning
crayon artist.
—Here are some
very pretty and easily made experiments in chemistry
and as you perform them you can give the explanation
I have written about each one which will serve as the
patter.
—The Effect.—You
show a glass of perfectly clean water and blow through
it with a glass tube, clay pipe or a straw when it becomes
to all intents, though not to all purposes, milk
of the cow variety. See Fig. 118.
BEFORE BLOWING
THROUGH STRAW
AFTER BLOWING
THROUGH STRAW
Fig. 118. the oracle of amor, or are you in love?
—To perform this chemical trick get 50
grams of good quicklime and powder it in a pint milk
bottle. Let it stand for 24 hours and shake it every
once in a while. Let it stand another 24 hours and
then pour off the clear solution, which is called lime
water[121] and this is the common name of mystic
milk.
[121] You can buy it in a drug store all ready to use.
—In the first place the lime
in the water is calcium hydroxide and when you blow
through the lime water the carbon dioxide in your
breath acts on the calcium hydroxide and forms a
white insoluble powder commonly known as limestone.
Since the calcium carbonate does not dissolve in the
water it remains suspended in the solution and this
gives it an opalescent hue that doth verily look like
the lactic fluid which is white but woe unto the milkman
who sells it as such.
—By pretending you can
tell which boys and which girls are in love hand around
several glasses of ordinary water and as many of clear
lime water. You must see to it, of course, that those
whom you want to make believe are in love are given
the lime water; then have everybody blow and it is a
sure sign that those who change the water into milk
are in love.
—The Effect.—You show
an empty bottle, or Florence flask, and then push a
cork with two holes in it into the mouth of the bottle.
Next push a glass tube having a nozzle on one end
through one of the holes in the cork until the nozzle
nearly touches the bottom of the bottle.
Through the other hole in the cork push a medicine
dropper, or fountain pen filler. The end of the long
tube projects down into a bowl containing water which
you have colored blue[122] either with indigo or with
copper sulphate or you can make a beautiful violet by
dissolving in it a little potassium permanganate. The
arrangement of the apparatus is shown at A in Fig.
119.
[122] Any kind of colored water will do for this experiment.
Fig. 119a. the mystic fountain
Now when you squeeze the bulb of the medicine
dropper the colored water rushes up the tube and
squirts out of the nozzle into a pretty fountain until
the flask is nearly full.
—Instead of the bottle being empty as
it looks to be, you have previously filled it with
hydrogen chloride gas of which 500 volumes will dissolve
in 1 volume of water.
The medicine dropper is filled with water and when
you squeezed it a few drops of water is forced into
the bottle and dissolves a large part of the gas that
is in it. This leaves a vacuum when, of course, the
atmospheric pressure on the colored water in the bowl
forces it up through the nozzle to fill the vacuum.
Fig. 119b. making hydrogen chloride gas
This water dissolves the rest of the gas in the flask
and more water is forced up until the bottle is nearly
full of it, all of which produces a very mysterious and
at the same time a mighty pretty effect.
—To make
this gas take another bottle and fit a two hole stopper
into it; in one hole put a funnel and in the other an
L tube as shown at B 119.
In the bottom of the bottle put ¹⁄₃ of a cup of common
table salt; put a straight tube down into the Florence
flask you want to fill and connect this tube and the
L tube with a piece of rubber tube as is also shown
at B.
The apparatus set up, pour sulphuric acid down the
funnel, a very little at a time until the salt is all gone
and then fit the cork with the long nozzle tube and the
medicine dropper in it, into the mouth of the bottle
filled with the hydrogen chloride gas.
—The Effect.—Show
a dish of soap-suds and then blow bubbles with the
apparatus described below.
When the bubbles take on a size of about 3 inches
in diameter shake them off and they will rise slowly
and gracefully in the air. Before they get out of
reach touch them with a long lighted taper and they
will explode viciously with a sharp report like that
made by a revolver.
—The bubbles are filled with a mixture
of hydrogen gas and oxygen gas and when these two
gases are simply mixed they form a very explosive
compound which is called detonating gas.
When the flame is brought close enough to the
bubble it fires the gases in it, and they explode and
combine chemically to form water. The apparatus
necessary to do this experiment with is shown in Fig.
120.
It consists of (1) a hydrogen gas generator and
(2) an oxygen gas generator.
The hydrogen bottle or flask is fitted with a two hole
stopper through which runs a glass funnel and
an L tube just as described in the fountain experiment
and shown at B in Fig. 119. Connected to the L tube
is a length of rubber tubing into the other end of which
another L tube is fitted.
The oxygen bottle or flask is fitted with a single
hole stopper which has an L tube running through it
as shown at B in Fig. 119. Connected to the L tube is
fixed another length of rubber tubing and in the free
end of this is fixed another and shorter L tube. Now
place the two short L tubes side by side and cement
them together with sealing wax. A long length of
rubber tube is forced on over the ends of the double
tube and, finally, a clay pipe is fitted into the free end
of the rubber tube, all of which is shown in Fig. 120.
Fig. 120. the vicious soap bubbles
Set the bottles or flasks as far apart as possible and
in the hydrogen bottle put a handful of granulated
zinc. Dilute hydrochloric acid[123] is poured down
the funnel on the zinc when hydrogen will be set free,
or generated as it is called.
[123]
If you want to buy dilute hydrochloric acid ask for normal
hydrochloric acid.
Put a small handful of a mixture of 2 parts of
potassium chlorate and 1 part of manganese dioxide,
finely powdered, in the oxygen bottle and then set a
Bunsen burner under it when it will give off oxygen.
When the two gases leave the short L tubes they mix
in the long rubber tube and by the time they reach the
clay pipe you will have detonating gas all right.
—Do not bring a flame anywhere near the
apparatus and as a further precaution wrap a thick
towel around the hydrogen flask.
The bubbles that are blown rise in the air because
both the hydrogen and the oxygen are lighter than the
air.
—The Effect.—A pitcher
is shown full of emptiness and then a cardboard wheel,
4 inches in diameter, with buckets, or cones 1 inch high
and ³⁄₄ inch across glued to the rim and which is
mounted on a wire so that it can be revolved, is passed
for examination.
Placing the wheel on the table you hold the empty
pitcher above it and pour out nothing on it when the
wheel will turn round just as though you were pouring
water on it. It is indeed uncanny. The idea is shown
at A in Fig. 121.
—But it is all canny enough when you
know how it is done. While the pitcher is apparently
empty you have, forsooth, previously filled it with a
gas called carbon dioxide. This gas is 1¹⁄₂ times as
heavy as air.
The cardboard wheel does not move in the air because
the latter pushes on all parts of it equally.
When, however, you pour the carbon dioxide gas on
it from the pitcher, since it (the gas) is heavier than
the air it fills the little buckets and makes them
heavier just as surely as if you poured water on them;
and hence the wheel revolves.
Fig. 121. the uncanny wheel
—Take a perfectly
dry bottle or flask of the kind shown in the
fountain experiment; fit it with a single hole stopper
and push a glass tube through it until it nearly touches
the bottom as pictured at B.
Set the bottle at a slant and put a mixture in it of
equal amounts of powdered copper oxide (that is
cupric oxide) and wood charcoal. Heat this mixture
over a Bunsen burner until it glows and for a few
minutes longer; the bottle will then be full of the
carbon dioxide gas.
Pour it into a glass pitcher and put a sheet of glass
over it to keep the air away from it until you are
ready to perform the uncanny experiment.
—A travelogue is simply a
talk on travel, or on a country, illustrated with pictures
of some kind.
To be able to give a travel talk does not mean necessarily
that you must have traveled or been in the
country you are going to tell about but if you have
done neither, it does mean that you must read up
on it.
To do this get several good books on whatever
country you intend to talk on, read them carefully,
and then outline a route just as though you had gone
over it yourself, but this must of course conform to
the pictures you can get.
Now there are four methods you can follow to
show a series of pictures and you can make your
choice according to the amount of money you want to
invest in it.
(1) The first and least expensive way is to cut a
dozen or twenty pictures out of magazines, arrange
them according to your route and build up your talk
around them. As you describe each place pass the
pictures, which should be mounted on cardboard, in
turn to each person present.
(2) A better way is to get a set of stereographs of
the trip or the country you are to talk on and a
stereoscope[124] and pass the picture showing the view
and the instrument to each person present.
[124] A stereoscope and the stereograms can be bought from
Underwood and Underwood, 417 Fifth Ave., New York, or Sears,
Roebuck and Co., Chicago, Ill.
Each stereograph, as the picture is called, is formed
of two pictures of the same scene made from slightly
different viewpoints and when the observer looks
through the lenses at them they blend into one image
when the scene stands out wonderfully clear and apparently
in three dimensions. The only drawback of
the stereoscope as an aid to a travel talk is that only
one person can look at a picture at a time.
(3) A far better plan than either of the above
schemes is to make a reflectoscope[125]
as described in
the chapter called Some Kinks in Photography. You
can show any kind of a picture in a reflectoscope if it is
not larger than 3×5 inches but picture postcards are
especially good to use for a travelogue or a talk of
any kind and they show up nicely when thrown on a
screen with a reflectoscope.
[125] You can buy one of the Bausch and Lomb Optical Company,
Rochester, New York, and you can get post-card views for it
of the Post-Card Store, 946 Broadway, New York.
(4) Finally either make, or better, if you can afford
it, buy, a magic lantern[126] that will take the regular
full size lantern slides, namely, 3¹⁄₄ × 4¹⁄₄ inches square.
Sets of lantern slides[127] for travelogues or talks on
any subject can be rented cheaply and in these days of
cheap electricity you can throw a picture on the screen
so big and bright and real that your offering is bound
to be a success.
[126] For magic lanterns and slides address the Charles Beseler
Co., 131 East 23rd Street, New York.
[127] Sets of lantern slides can be rented of the Charles Beseler
Co., 131 East 23rd Street, New York City.
—Experiments in electricity
are always interesting to all however young or old,
for of all the powers that have been harnessed by man
it is the least tangible and yet the effects produced by
it are the most spectacular.
Now there are some very extraordinary effects that
you can show with static electricity[128] which do not
require apparatus of any kind as you will presently
see, but if you will make or buy a ¹⁄₂ inch induction
coil[129] you can perform a series of classic experiments
that will create a profound and lasting impression
on all who see them.
[128] Many experiments with static electricity will be found in
The Book of Electricity by the present author and published by
D. Appleton and Co.
[129]
Complete instructions for making an induction coil will also
be found in The Book of Electricity.
—Did
you ever rub a cat in a dark room in the winter
and see the sparks fly? Well this is one way to make
electricity without apparatus though you need a cat[130]
to do it with.
[130]
A cat is not apparatus but only a kitten growed up.
—But you can make a lot
of electricity by simply rubbing a newspaper if you
know how to rub it and it is perfectly dry.[131]
[131]
Winter is the best time to do experiments in static electricity.
A—ELECTRIFYING A STRIP
OF NEWSPAPER
B—ELECTRIC ATTRACTION
Fig. 122. the electrified paper
Tear off a strip of newspaper, lay it flat on a table
and rub it with your finger nails as shown at A in Fig.
122. When you try to take the paper from the table
you will find that it sticks to it quite tenaciously. This
is because you have positively electrified the paper
when you rubbed it and the surface of the table under
it is negatively electrified by
induction.[132] Now since
positive and negative electricity attract each other, the
paper and the table are pulled together.
[132]
The theory of induction is simply explained in The Book of
Electricity by the present author.
—This is an experiment
that will make your gathering giggle just as
school girls giggle when they have their tintypes taken—that
is without any real reason except that the idea
strikes their mental funny bones.
[133]
Since the paper is positively electrified the person must be
negatively electrified.
To perform this experiment electrify a strip of newspaper
as above and then hold it close to some one’s
face; instantly there will be a mutual attraction between
them and the paper will be drawn to and stick
to his or her cheek. Put an electrified paper on the
cheek of each person present as shown at B and tell
them they belong to the same club. This will get a
laugh but it will not lessen their interest in the experiment
in the least.
—Electrify two strips of
newspaper this time and hold them together by the
ends. Instantly the free ends of the papers will fly
apart for like signs of electricity repel each other.
That is, since both strips of paper are positively
electrified and hence are of like signs, they repel each
other. If they were negatively electrified they would
repel each other just the same. In either case it shows
that there is a force acting across the space between
the two strips of paper.
—With a
dry battery of two or three cells, an electric bell, a
common steel magnet and an electromagnet, all of
which you can easily make or buy[134] for a dollar or
so, you can provide entertainment enough for ¹⁄₂ an
hour’s demonstration, and food for thought to last a
year.
[134] The L. E. Knott Apparatus Co., Boston, Mass., and The
Manhattan Electric Co., Park Row, New York, sell all these
things.
—An induction coil
is an apparatus for changing a direct low pressure,
but large quantity current from a battery into an
alternating high pressure but small quantity current,
which is called high tension, or high potential, electricity.
With an induction coil you can make any number
of wonderful experiments such as miniature streaks of
lightning, lighting up Geissler tubes, which produce
brilliant and beautiful colors showing the electric discharge
in gases, etc., etc. By fixing these tubes to a
small electric motor[135] so that they can be revolved
while the high tension current is passing through
them, the effects are further heightened.
[135]
A small electric motor can be bought for $1.00 of any dealer
in electrical supplies or of the Manhattan Electrical Supply Co.,
Park Row, New York.
—All you have
to do to make your induction coil into a wireless transmitter,
that is, the sending apparatus, is to put a couple
of brass balls on the points of the spark-gap, fasten a
wire to one of them and the other end to a nail in the
wall near the ceiling and then connect the other one
with a wire which ends in a small sheet of brass or
copper that rests on the floor as shown at A in Fig.
123.
To make a receiver that will tap out the signals you
send on your transmitter, you will need (a) a coherer,
(b) a relay, (c) an electric bell and (d) a dry cell.
You can make the coherer but the other three pieces
of the apparatus you had better buy.
Fig. 123. a simple wireless demonstration set
For the coherer cut off a piece of brass rod ¹⁄₈ inch
in diameter and 1¹⁄₄ inches long, file the ends off even
and slip them through the holes in the binding post.
Put a pinch of nickel and silver filings into a piece of
glass tubing about an inch long and push the ends of
the rod into the tube with the filings between them.
Screw the rods into a couple of binding posts set 2
inches apart on a block as shown at B and your coherer
is done.
Connect up the coherer, relay, tapper and dry cell
on a board as shown in the wiring diagram at C;
fasten a wire to one of the rods of the coherer and to
a nail near the ceiling; fix a wire to the other coherer
rod and to a small sheet of brass or copper which rests
on the floor.
Fig. 123b. cross section of the coherer showing its
construction
Now when you press the key or button of the sender,
which is on one side of the room, the bell of the receiver,
which is on the opposite side of the room, will
ring out a signal. The fact that there are no wires
connecting the sender with the receiver will create
much wonder.
The theory of wireless telegraphy is rather deep but
you will find it simply explained in my Book of Wireless
published by D. Appleton and Co., New York
City.
—Many years ago when
P. T. Barnum was exhibiting a sacred white elephant,
which was nothing more nor less than a small Indian
elephant covered with whitewash, and the good folks
were breaking their necks to pay their hard-earned
coin to see it, the great showman remarked that “the
American people love to be humbugged.” And they
do. Now palmistry is a kind of mild humbuggery on
a small scale and for an evening of fun and bunkum-squint
you can’t find anything to beat it.
Fig. 124a. the parts of the hand named according to
science
First of all there are three words that are constantly
used in the art which you must know how to
pronounce correctly or you will surely show your
ignorance. The first is palm, pronounced pom; the
second is palmist, pronounced pol´-mist, and the third
is palmistry, which is pronounced pol´-mis-try; now
be sure to say them right.
Fig. 124b. the parts of the hand named according to palmistry
While nearly every one believes in palmistry there
is nothing in it in-so-far as it is possible to read a person’s
character or to divine one’s future by means of
it; but there are some things you can tell from the
hand you are reading and these are if its owner is or
is not in good health and whether the brain that goes
with it is mechanically inclined or is of an artistic temperament.
Further you can gather—not from the hand but
from the face, stature, carriage, and mannerisms of the
boy or girl or the man or woman whose hand you are
supposed to be reading—a good deal about his or her
temper and temperament and also about her or his
foibles and peculiarities. In fact the palmistry of the
palmists is simply a study in deduction, very much a la
Sherlock Holmes, of the person as a whole, and it is by
no means limited to an investigation of the hand alone.
—There are two things which
you should learn before you begin to read palms and
these are (1) the names of the different parts of the
hand, and (2) the lines and mounts of the hand.
The names given and the corresponding parts of
the human hand are shown at A in Fig. 124; these are
the scientific names and you will add very greatly to
your stock of knowledge to get them down by heart.
The names, of the lines and the mounts of the hand
are given and shown at B and these are the terms that
are used by palmists. You will observe that the
eminences are called mounts and these are named after
the planets of the solar system, for the ancients supposed
that they were inter-related. To get by as a
palmist it goes without saying that you must have
these all down pat.
To find out what kind of health the subject is in,
grip the hypothenar eminence, which is the side of the
hand opposite the pollux, or thumb, between your
thumb and fingers and squeeze it a little; if it is perfectly
firm and the palm has a good healthy color you
are quite sure that its owner is in good health, but if
the flesh is soft and is not elastic and if the palm is
pale and bloodless you will be quite right in saying
that the subject’s health is not good, nay worse, it is
even bad, and you will not offend your subject by
so saying.
The length of the life line is supposed to determine
how long the subject who owns it will live but even if
you find one broken off short never tell the person that
he or she will live only a short time. Indeed to be a
successful palmist tell every one whose hand you read
that she or he will live to be anywhere from 80 to
108, and you’ll be on the safe side.
The line of the heart, according to palmistry, indicates
the affections and passions of a person. Always
tell a fellow that he is a great lover and that
he is constant, but you can say to a girl that she is
capricious, which means about the same thing as being
fickle, and both the man and the maid will be highly
pleased. The line of Saturn is the line of disposition
and you must always make the subject just as sweet
and angelic as possible unless you want her to break
up the séance[136]
then and there and hold a wake to
prove you’re right.
[136]
A sitting given by a medium or a palmist is called a séance
(pronounced say´ance).
Apollo, as the line of fortune is called, is a good one
to talk at length on; you can tell every subject that he
or she has had bad luck, but that fortune will follow;
that he or she will marry a pretty girl, or a handsome
man as the case may be, live in New York if already
living in the country and the other way about—for
everybody wants to live anywhere except the place
he is in—and don’t forget to say “you’ll live happily
ever after.”
Since folks will foolishly believe in palmistry don’t
try to convince them to the contrary, but while there is
nothing in it, when you play palmist tell them only
the nice, pleasant things and you will then be doing
them a real service.
Just two more pointers on the ignoble art of palmistry
and these are (1) read the palms of each one
present right out loud before the whole gathering, and
(2) be mighty careful that the single girls and married
ladies do not switch rings and so lead you into the trap
of thinking that the former are enjoying a state of
connubial felicity (whatever state[137] that may be) and
that the latter are living in a territory[138] of single
blessedness.
—For your final
evening entertainment give a thumb-nail lecture on
steam and the steam-engine.
You will find every one is interested in steam because
it is one of the great prime movers but there are
very few people indeed who have any idea of how a
steam engine works.
If you will do exactly as I tell you, you can talk on
and demonstrate the principles of a steam engine so
that, whatever the age of your listeners, they will
know, when you are through, exactly how and why a
steam engine runs and develops power.
—The engine I shall tell
you how to build is not a model that runs by steam,[139]
but one made almost entirely of wood and the purpose
of it is not actually to produce power but to show exactly
how it works.
[139] How to build model steam engines and all other kinds is
explained in my new book Engine Building for Boys, published
by Small, Maynard and Co., Boston, Mass.
To the end that this may be done the cylinder and
steam chest are split-down the middle lengthwise so
that the inside of them can be clearly seen and the
movements and functions of the piston and the slide
valve in these parts will be clear.
Make the cylinder first and the easiest way to do
it is to saw out two disks of wood for the cylinder
heads of ³⁄₄ inch thick stuff, 4¹⁄₂ inches in diameter and
bore a ⁹⁄₁₆ inch hole through the center of one of them
for the piston to slide through, as shown at A, C and
F in Fig. 125. Turn, or whittle out a piece of wood
for the stuffing box,[140]
1 inch in diameter and ¹⁄₂ inch
long, and bore a ⁹⁄₁₆ inch hole through the center of it
and glue it to the center of the cylinder head so that
the holes are exactly in a line as shown at A and F.
[140]
A stuffing box on a real steam engine is to keep the steam
in the cylinder and steam chest from leaking past the piston rod
and the slide valve rod.
Fig. 125a. working drawings for the demonstration steam
engine. cross section side view of the engine
Next saw out two rings of ¹⁄₄ inch thick wood, make
the outside 4¹⁄₂ inches in diameter and the inside 3
inches in diameter, see C, and glue one of the rings
to each end of the cylinder heads. Now cut out of a
sheet of thin cardboard, or better of tin, a piece 5³⁄₄
inches wide and 6 inches long; cut two holes ¹⁄₂ an inch
in diameter and have the center of each hole ¹⁄₂ an inch
from one of the long edges and ⁷⁄₈ inch from each of
the short edges as shown at D.
The next thing on the list is the piston and the
piston rod. For the piston, saw out a disk of wood
3 inches in diameter and bore a ¹⁄₂ inch hole through
it in the center. The piston rod is simply a piece of
wood ¹⁄₂ an inch in diameter and 12 inches long;
cut a slot in one end ¹⁄₈ inch wide and ¹⁄₂ an inch
deep and bore a ¹⁄₁₆ inch hole through it as shown at
C. Put the piston inside of the cylinder, slip the
piston rod through the hole in the cylinder head,
smear some glue on the end of it and fit it into the
hole in the piston.
The steam chest is next in order; for it use ³⁄₁₆ inch
thick wood and saw out four pieces 2 inches square;
two of these pieces are for the heads of the steam
chest, as shown at A and B, and in the center of
one of them drill a ³⁄₈ inch hole for the slide valve
rod to go through. Turn, or whittle out, a piece of
wood for the stuffing box ¹⁄₂ an inch in diameter and
¹⁄₂ inch long, bore a ³⁄₈ inch hole through the center of
it and glue it to the center of the steam chest head
that has the hole in it as shown at A, C and F.
Saw two holes 1¹⁄₂ inches square out of the other
two 2 inch square blocks and glue these to the steam
chest heads. Now make a trough of ¹⁄₄ inch thick
wood, or of cardboard or tin, 1¹⁄₂ inches square, outside
measurement, and 2³⁄₄ inches long; this is for the
sides of the steam chest; as shown at A and F.
Fig. 125b. end view of the engine. d. the crank shaft. e.
the rocker arm
Bore a ¹⁄₂ inch hole in the center of the top of the
trough; this hole is for the intake port, that is the opening
through which the steam flows from the boiler into
the steam chest. Bore three ¹⁄₂ inch holes in a line
in the middle of the bottom of the trough as is also
shown at A and F. The two holes nearest the ends
are the ports to let the steam into and out of the opposite
ends of the cylinder, and the central hole, or
port, is the exhaust port C.
Fig. 125c. top view of the engine
Next make the slide-valve; use ¹⁄₈ inch thick wood
and make it ³⁄₄ inch high, 1 inch wide, and 1¹⁄₂ inch
long on top and 2 inches long on the bottom; the
bottom, as you will observe at A and E, is cut out
so that it will cover one of the cylinder ports and
the exhaust port at the same time and you need put
only one side on it.
The slide valve rod is a piece of wood ¹⁄₄ inch in
diameter and 11¹⁄₂ inches long. Whittle or plane one
end flat and drill a ¹⁄₈ inch hole through it. This
done, set the slide valve in the steam chest; slip the
slide valve rod through the head and glue it to the
slide valve.
Now make four tubes or pipes of cardboard or tin ¹⁄₂
an inch in diameter, and have two of them 1¹⁄₄ inches
long and the other two 3 inches long; when you have
formed all of them cut a strip ¹⁄₂ inch wide out of each
one lengthwise; the purpose of which is to show that
they are hollow.
When you have the tubes done glue, or otherwise
fix, one of the short ones into the intake port of the
steam chest and the other short one into the middle,
or exhaust port in the bottom of the steam chest; then
glue, or fix the two long tubes into the end holes, or
ports, of the steam chest and the holes in the cylinders.
Saw out a guide block for the piston rod to slide
through, 2 inches wide, 3 inches high, 3 inches long on
top and 5 inches long on the bottom as shown at A
and C, and bore a ³⁄₈ inch hole through the middle of
the top of it lengthwise so that the center of the hole
will be exactly 2¹⁄₄ inches from the base line.
Likewise saw out a guide block for the slide valve
rod and make it 1 inch wide, 2 inches long and 3¹⁄₄
inches high and drill a ³⁄₈ inch hole through the middle
of the top of it lengthwise so that the center of
the hole will be exactly 2¹⁄₄ inches from the back board
to which it is fixed.
Next cut out a rocker arm of a ¹⁄₄ inch thick piece
of wood and have it ³⁄₈ inch wide at one end, ³⁄₄
inch wide at the other end and 7 inches long; drill a
¹⁄₈ inch hole in each end and a 1¹⁄₈ hole 1¹⁄₂ inches from
the large end; pivot the small end to the end of the
slide valve rod with a machine screw having a nut on
the end of it.
Cut out an eccentric rod ¹⁄₄ inch thick, ³⁄₈ inch wide
and 8¹⁄₂ inches long, and drill a ¹⁄₈ inch hole at each
end so that their centers will be exactly 8 inches apart:
pivot one end of this rod to the second hole in the
rocker arm with a machine screw as before. Saw
out a pivot block 1 inch square and drill a ¹⁄₈ inch hole
through the center of it and pivot the lower end of
the rocker arm to it with a screw.
Make a connecting rod, to couple the piston rod
to the crankshaft with, ³⁄₈ inch thick, ¹⁄₂ an inch wide
at one end, ³⁄₄ inch wide at the other end and 9 inches
long; whittle or plane down the small end so that it
will fit easily into the slot in the end of the piston rod
and drill a ¹⁄₈ inch hole in each end so that their
centers are precisely 8¹⁄₂ inches apart.
The crankshaft can be made of a piece of ¹⁄₈ inch
thick wire 13 inches long which must be bent to the
exact shape shown at D; before it is thus bent, however,
slip the wire through the hole in the end of the
eccentric rod and then bend the crank on it.
Saw out a flywheel of ¹⁄₂ inch thick wood, 8 inches
in diameter, drill a ¹⁄₈ inch hole through its center and
force it on over the wire forming the crankshaft; then
slip the end of the connecting rod on the other end of
the crankshaft wire and bend it to form a crank.
The front end of the crankshaft must be supported
by a pillow block just as it is in a real engine, but the
rear end is held in place by a board screwed to the
back of the base. This block is ¹⁄₂ an inch thick, 1
inch wide at the top, 2 inches wide at the bottom and
3 inches high; drill a ¹⁄₈ inch hole in the top of it
exactly 2¹⁄₄ inches from the base line and slip this
over the end of the crankshaft next to the connecting
rod.
The last thing to be done is to make a base to
mount the parts of the engine on; this is a sort of a
shelf and it is built up of a board ³⁄₄ inch thick, 6 inches
wide and 31 inches long for the base. Saw a slot in it
³⁄₄ inch wide and 9 inches long in one corner, 2 inches
from one end and ¹⁄₂ an inch from the side; this is for
the fly-wheel to set in.
Fig. 125f. the steam engine ready to demonstrate
Screw a back to it ¹⁄₂ an inch thick, 10 inches wide
and 3 inches long; this must be perfectly rigid and if
necessary you can brace it with angle blocks. Finally
glue four legs 1 inch square and 2¹⁄₂ inches long on
the corners of the base-board.
To put the engine together, or assemble it as it is
called, screw the cylinder to the base-board, then glue
or screw the piston rod guide block to the base; the
slide valve rod guide block to the back board, and the
pivot block for the rocker arm to the base-board.
Drill a ¹⁄₈ inch hole in the back board 2¹⁄₄ inches up
from the base-board exactly 16¹⁄₂ inches from the
front cylinder head; put one end of the crankshaft in
the hole and slip the other end of it into the pillow
block; see that all is in a line and that the flywheel
clears the sides of the slot in the base-board. Then
it is all done and will look like F.
—Now if you will turn
the flywheel around with your hand, or better, belt a
small electric motor to it, you will see exactly how the
slide valve opens first one port in the cylinder and then
the other and that when the port is open which gives
a clear path for the steam to flow from the steam
chest to the cylinder, the other port is connected to the
exhaust pipe, when the used steam passes into the
open air.
When you know all about it you are then ready to
give your last evening divertisement and for the time
being to say Good-by.
Depending on the hard- and software used and their settings not all
elements may display as intended. Indications of scale or
size in illustrations are not necessarily correct but will depend on
display size and zoom factor.
Unusual, archaic and inconsistent spelling and hyphenation have been
retained. The inconsistent numbering of illustrations has not been
standardised. The (minor) differences in wording between the Table of
Contents, List of Illustrations and Index compared to the text have
not been standardised, except as mentioned under Changes below
Page 20, ... the last part of Chapter III: Chapter III deals with
other subjects; possibly the reference should be to Chapter V.
Page 26, Footnote [10]: The section Designs for Scroll Sawing
may be found on page 30, the footnote anchor as printed in the
source document should probably have been printed after item (f).
The hyperlinks have been provided accordingly.
Page 53, Fig. 26C: Benzine and alcohol are as printed in the source
document.
Page 157 and Index, Johanne Gutenburg: as printed in the source
document.
Page 163, item F: A16 is possibly an error for 16A.
Page 164, item H: the number of As was illegible in the source
document; item J: 11a 20a is possibly an error for 11A 20a.
Page 180, Du Pont Febrikoid Co.: probably an error for Du Pont
Fabrikoid Co.
Page 207 and 208, footnotes [98] and [98a]: the source document has
two anchors for this footnote. For this text the second instance has
been renamed 98a, the footnote has been repeated.
Page 260, The harp is shown complete at C: Figure 109c does not show
the complete instrument, and there does not appear to be another
figure that does.
Page 276, Fig. 116: Presumably the dimensions provided are in feet
rather than inches.
Changes made
Illustrations, tables and footnotes have been moved out of text
paragraphs. The footnotes in the source document were not numbered
consistently, they have been renumbered for this text.
Several obvious minor errors in typography and punctuation have been
corrected silently.
Texts in dashed boxes under
illustrations have been transcribed from the illustration, and do not
occur as texts in the source document.
Page 3, illustration: items B and C interchanged.
Page 14: Removing Dust from Tools changed to Removing Rust from Tools.
Page 46: ... as you will see in Fig. 21 ... changed to ... as you
will see in Fig. 22 ....
Page 57: ... a ball pein hammer which weights ... changed to ... a
ball pein hammer which weighs ....
Page 84: repousage changed to repoussage.
Page 164, item L: reference letter L inserted cf. other references.
Page 179, Fig. 71: item B, PPASTEBOARD changed to PASTEBOARD; item C,
NNCH chamged to INCH (probably the number is missing).
Page 193: ... on a sheet of meal; ... changed to ... on a sheet of
metal; ....
Page 211: section heading How to blow glass inserted cf. Table
of Contents.
Page 222: fluorspar and flour-spar changed to fluor-spar as elsewhere.
Page 240, illustration: Fig. 109 changed to Fig. 102; caption: c. the
pony and cart when done changed to c, d. the pony and cart when done.
Page 246, Fig. 105C: reference letter D changed to B.
Page 277: ... the grand finalé ... changed to ... the grand finale
....
Page 281: ... already to use ... changed to ... all ready to use ....
Page 289: Busch and Lomb Optical Company changed to Bausch and Lomb
Optical Company.
Index: some words have been corrected to reflect the spelling used in
the main text.