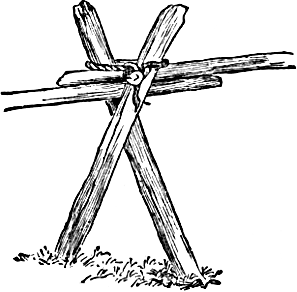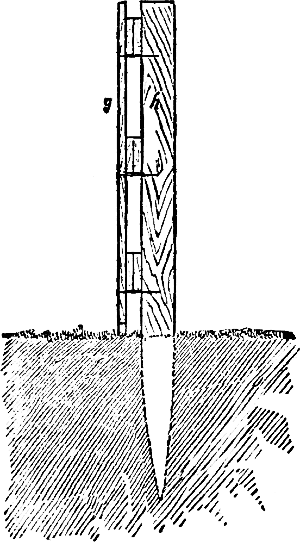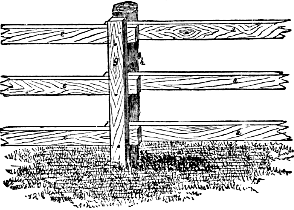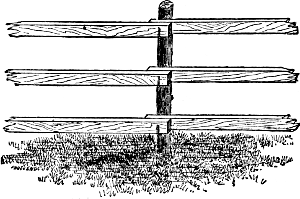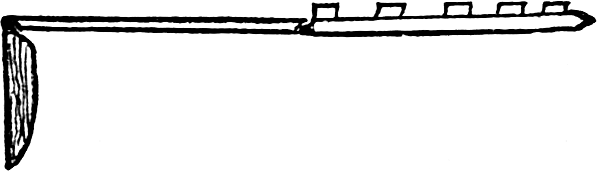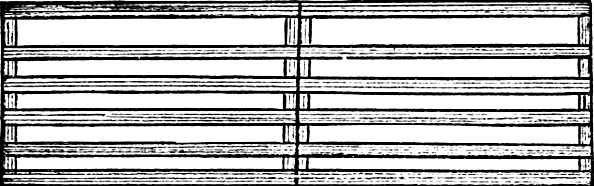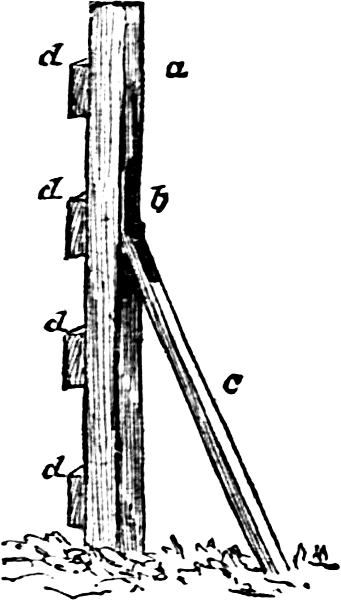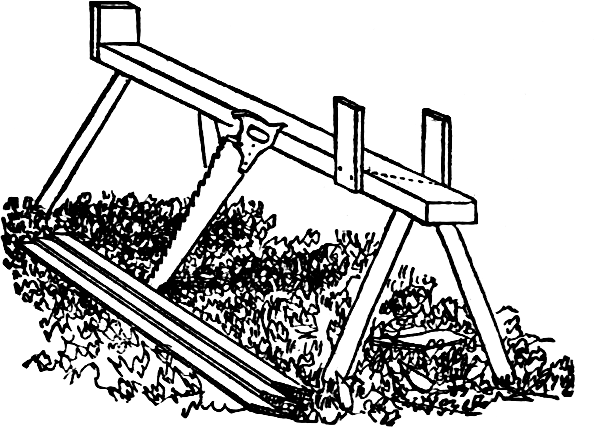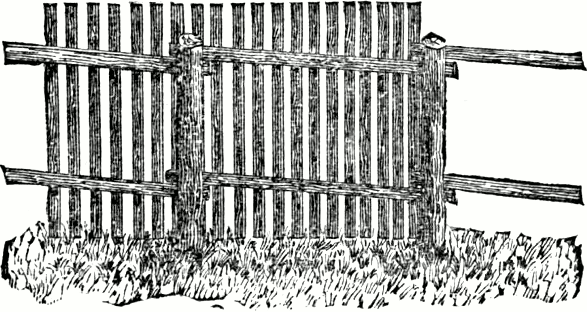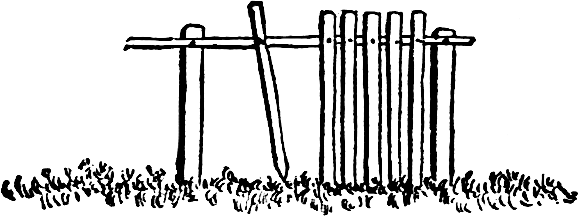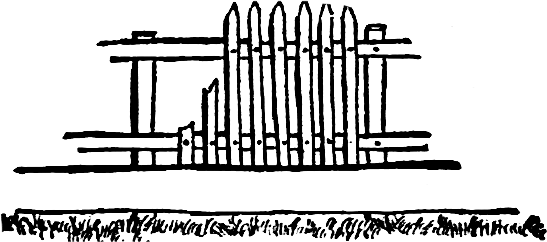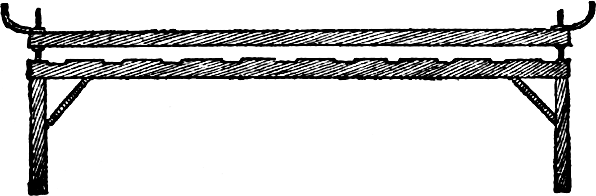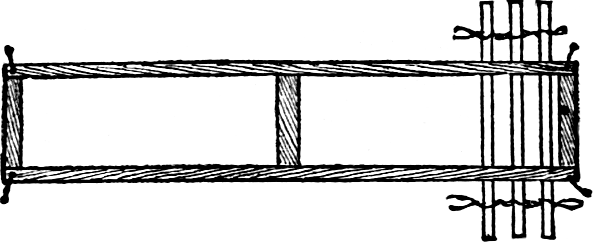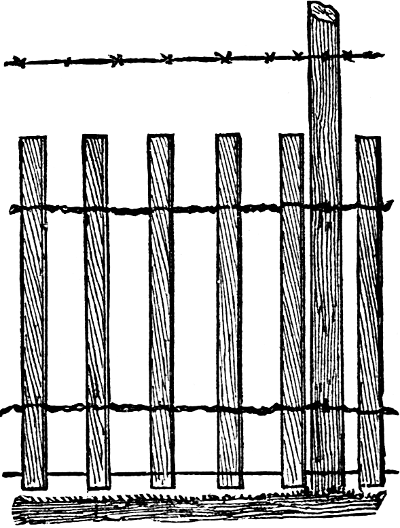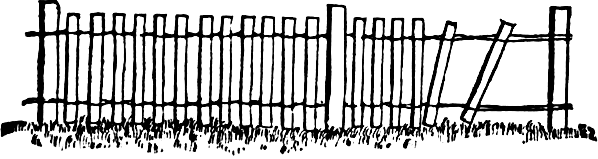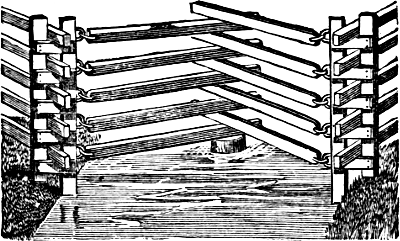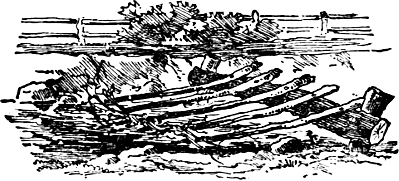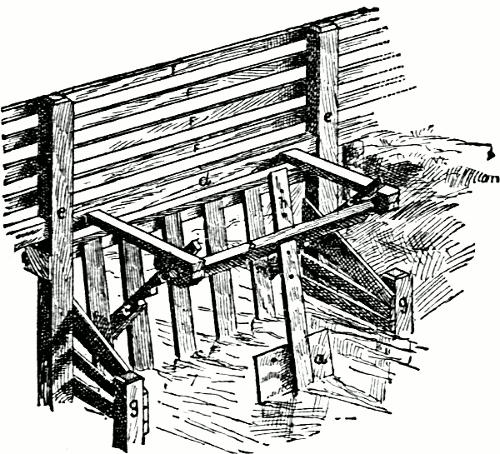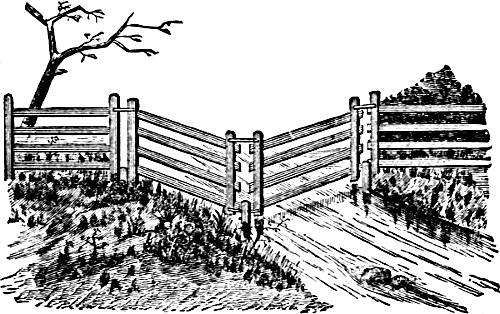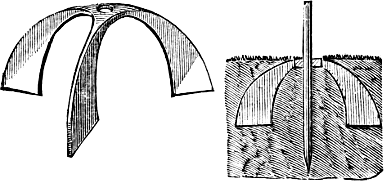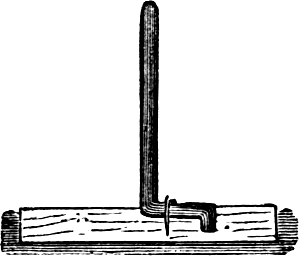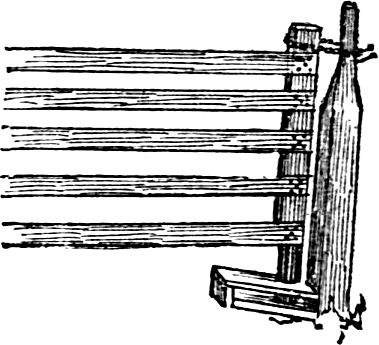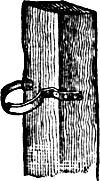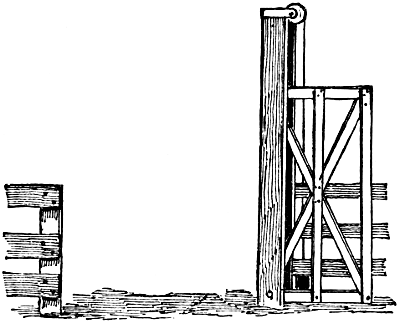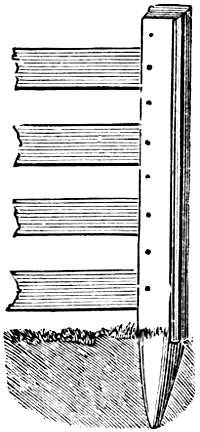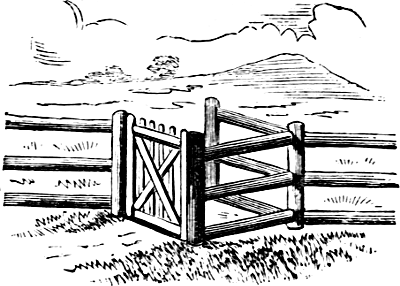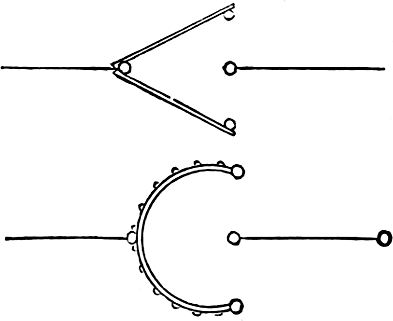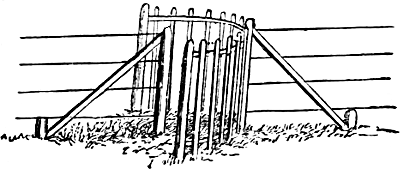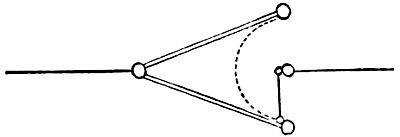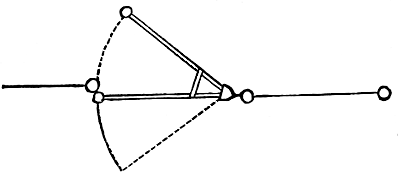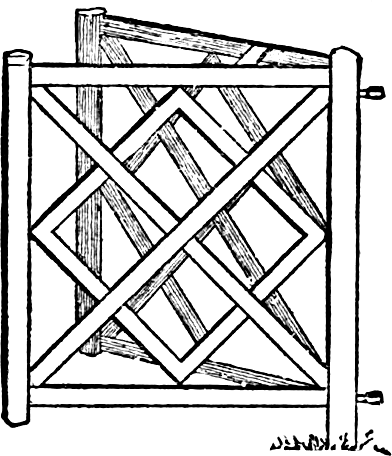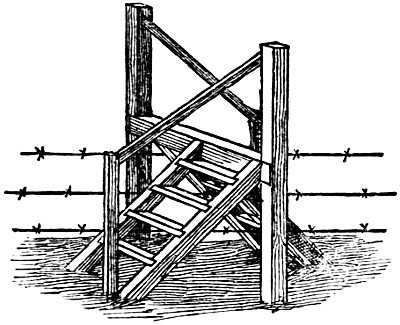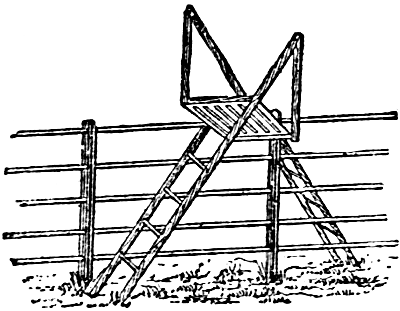
As board and picket fences have gradually replaced
rail and other primitive fences, useful but inconvenient
“bars” have begun to disappear, and tidy gates are seen.
The saving in time required to take down and put up
bars, rather than open and close gates, amounts to a
good deal. A good wooden gate will last a long time.
Gateways should be at least fourteen feet wide. All the
wood used in the construction of the gate should be well
seasoned. It is best to plane all the wood-work, though
this is not absolutely necessary. Cover each tenon with
thick paint before it is placed in its mortise. Fasten the
brace to the cross-piece with small bolts or wrought nails
well clinched. Mortise the ends of the boards into the
end-posts, and secure them in place with wooden pins
wedged at both ends, or iron bolts. The best are made
of pine fence-boards six inches wide; the ends should be
four by twenty-four inch scantling, although the one at
the latch may be lighter. Five cross-pieces are enough.
The lighter the gate in proportion to strength, the better
it is.
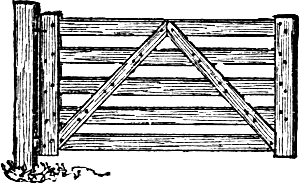
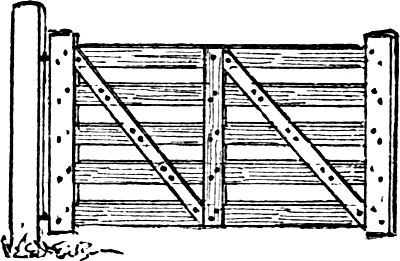
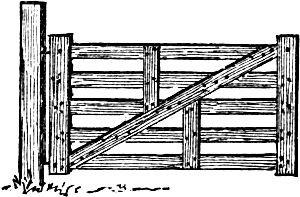
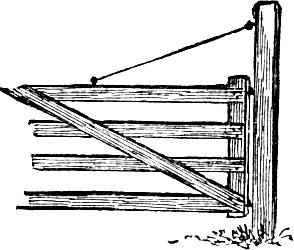
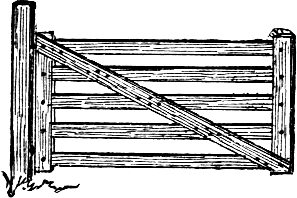
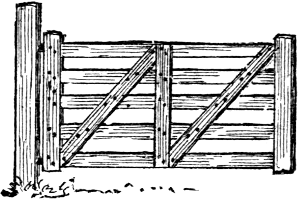
There is but one right way to brace a gate, and
many wrong ones. The object of bracing is to strengthen the gate, and
also to prevent its sagging. Gates sag in two ways; by the moving
to the one side of the posts upon which the gates are hung, and the
settling of the gates themselves. Unless braced the only thing to
hold the gate square is the perfect rigidity of the tenons in the
mortises; but the weight of the gate will loosen these, and allow
the end of the gate opposite the hinges to sag. It is plain that a
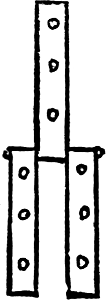
brace placed like that shown in figure 177 will
not prevent this settling down. The only opposition it can give is
the resistance of the nails, and these will draw loose in the holes as
readily as the tenons in the mortises. A brace set as shown at figure 178 is not much better, as the resistance
must depend upon the rigidity of the upright piece in the middle, and
the bolts or nails holding it will give way enough to allow the gate
to sag. The method shown in figure 179 is fully
as faulty, while the form shown in figure 180 is
even worse.
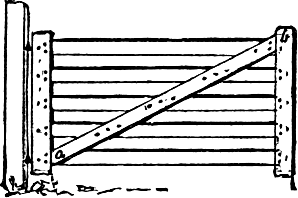
It seems strange that any one should brace a
gate in these ways, but it is quite frequently seen attempted. The
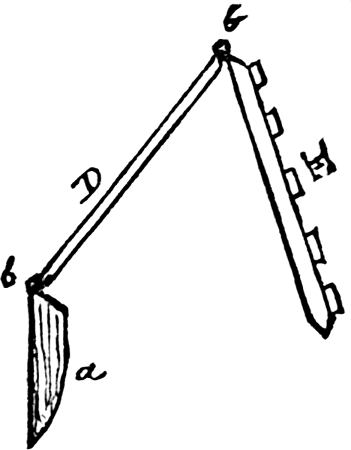
only right way to brace a gate is shown in figure
181. The gate may be further strengthened as shown in figure 182. Before the gate can sag, the brace
must be shortened; for as the gate settles, the points a and
b must come closer together, and this the brace effectually
prevents.
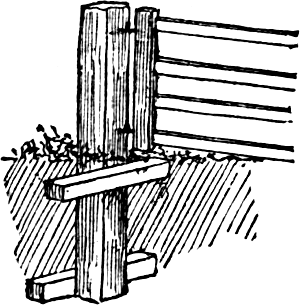
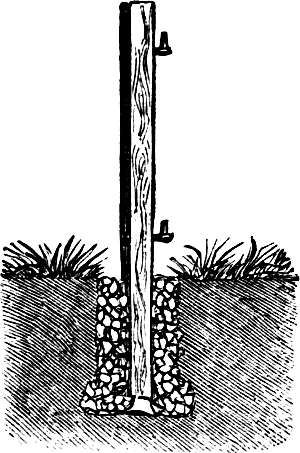
The posts should be set in such a way that they will not be pulled
to one side and allow the gate to sag. The post should be put below
the line of frost, or else it will be heaved out of position; three
feet in the ground is none too deep. Have a large post and make a big
hole for it. Be careful to set the post plumb and stamp the earth
firmly in the hole—it cannot be stamped too hard. While stamping,
keep walking around the post, so that the earth will be firmed on all
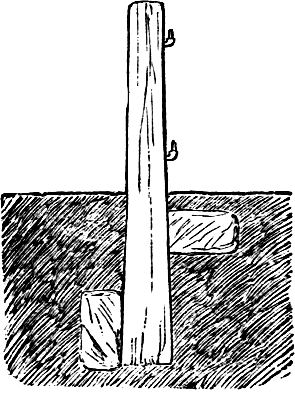
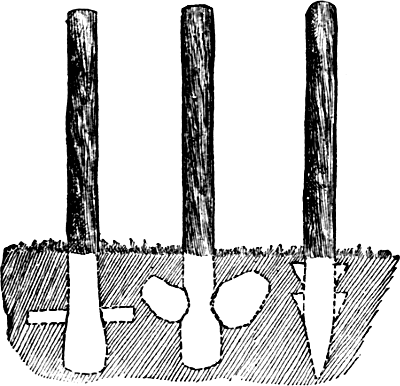
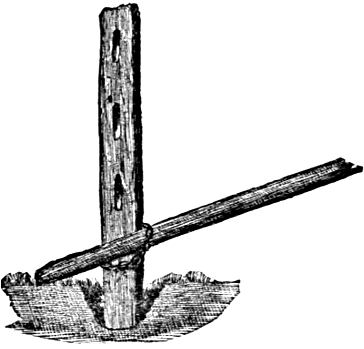
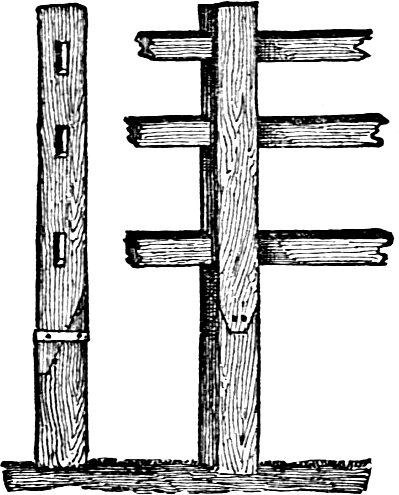
sides. Blocks may be arranged as shown in figure
183; but this is not really necessary, when the posts have been
rightly set, although it may be advisable to take this further
precaution.
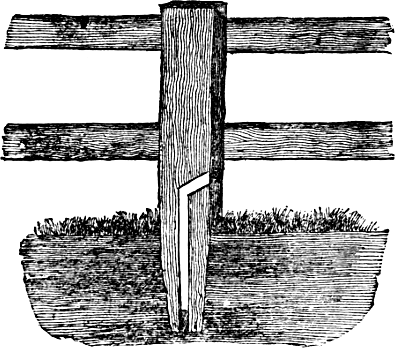
To remove the pulling weight of the gate when closed, the swinging
end may rest upon a block; or a pin inserted in the end-piece of the
gate may rest in a slot sawed in the post, or on a shoulder of the
post. Figure 184 shows one end of a combination
of two plans—the iron rod from near the top of the high post
holds the gate while the strain upon the post is lessened by the
opposite end of the closed gate being supported on the other post.
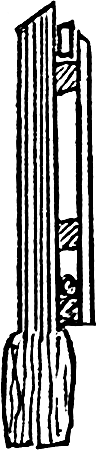
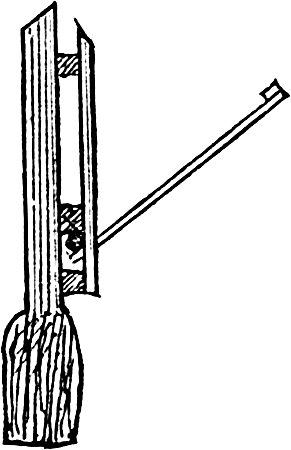
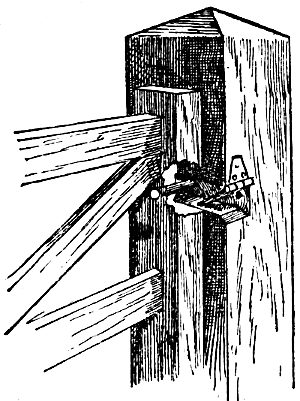
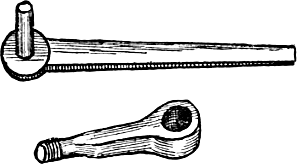
For hanging the gate the best hinges are doubtless those shown in figure 185. One part passes through the end-piece of
the gate, and is secured by a nut on the end. The other piece is heated
and driven into the post, following the path of a small augur-hole.
Next to this comes the strap hinge, which should be fastened with bolts
or screws. Three easy, cheap ways of supporting the gate are shown in
figures 186, 187, and 188. In figure 186, a stout
band of wood, or one of iron, may be used in place of the chain. And in
place of the stool for the reception of the lower end of the end-piece,
a block resting on the ground, or a shoulder on the post, may be
substituted. The mode shown in figure 187 is
common in the West. Its construction needs no explanation. By sliding
the gate back until it almost balances it may be carried around with
ease. In figure 188, the fastening, or latch,
must be so arranged as to hold the lower part of the gate in position.
The box of stone renders it easier to move the gate. A heavy block of
wood serves the same purpose.
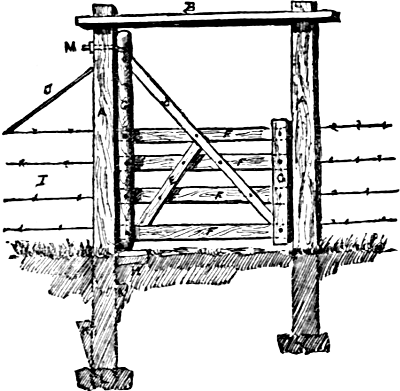
Fig. 189.—A Substantial Gate.


Figure 189 shows a gate which combines
great durability with much rustic beauty. The cedar posts, A
A, should be four feet in the ground, and at least ten feet
out of the ground. B represents a piece of 2 by 6 hard
pine, into which the posts are mortised. C is a 4 by
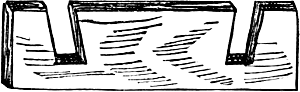
4 clear pine, turned at both ends and mortised as shown in figure 191. D E F are 1 by 4 pine strips.
G is a 1 by 6 pine strip, a sectional view being given in figure 190. It is best to use one piece each of
D and E, letting F come between them, as
it gives more stiffness to the gate. H is a block of cedar
with a hole bored or dug large enough to receive the post, C,
and to make it more lasting, a small hole should be bored through the
block, so as to let whatever water collects in it pass away; the block
should not be less than eighteen inches long—four inches above
ground. I shows wire fence connected. J is a strong
wire carried and secured to the bottom of the first fence-post. K
K are cleats attached to posts to keep them more firmly in the
ground. L are stones for posts, A A, to stand on.
M shows the hinge, made so as to take up the sag after the
gate settles, and as the wood wears out.
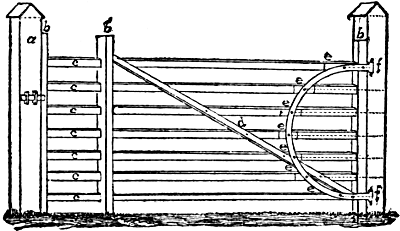
Fig. 192.—A Well-made Gate.
The posts, a, a, figure
192, of oak or other durable wood, are eight inches square,
and stand five and one-half feet above the ground. The posts,
b, b, three and one third inches thick, four and
three-quarter feet long, are mortised to receive the slats, c,
c, which are of inch stuff, three inches wide and ten
feet four and three-quarter inches long. They are let into posts,
b, b, at the distance marked in the engraving. The
slats, d, are three inches wide, and one inch thick, and are
placed opposite each other on front and back of the gate as braces;
e, e, are simply battens to make a straight surface
for the hinges, f, f; all except the upper and lower
ones are very short and carried back to the post. The hinges, made by
a blacksmith from an old wagon tire, are one and one-half inch wide,
three-sixteenth inch thick, and are fastened by light iron bolts
through the battens at e, and to the rear post.
The above describes a cheap, light, durable gate, which in over
twenty-three years’ use has never sagged, though standing in the
thoroughfare of three farms, and also, for years past, used for access
to a sawmill. It is made of the best pine. The hinge is an important
point. It is not only cheap and easily made, but acts as a brace for
the gate at every point, and thus permits the gate to be lightly made.
With this hinge sagging is impossible. A gate of this kind will rot
down first.
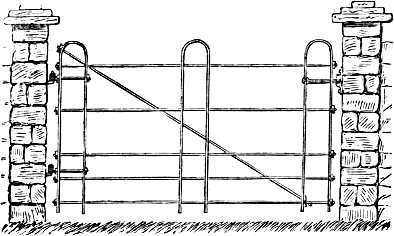
Fig. 193.—A Light Iron Gate.
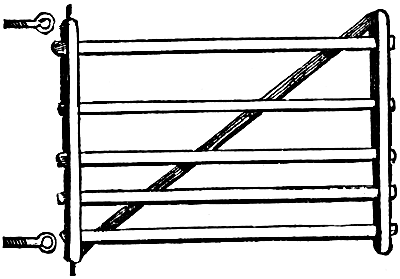
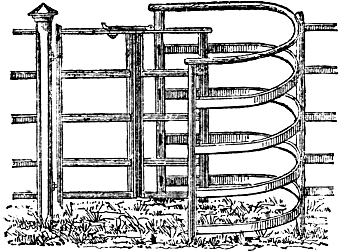
The gate shown in figure 193 may be made of
wrought iron an inch and a half wide and half an inch thick, or preferably
of iron gas-pipe of any diameter from half an inch to an inch. In the
vicinity of the oil-regions, pipe can be bought very cheaply, which is
in condition good enough for this purpose. For guarding against hogs,
it should be hung near the ground, and have one or two more horizontal
pipes near the bottom.
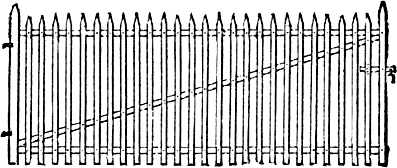
Fig. 194.—A Wrought Iron Gate.
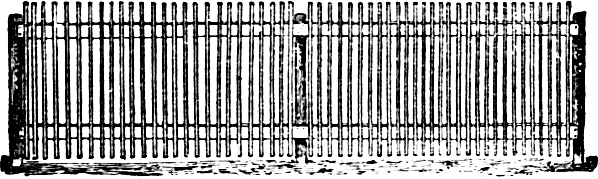
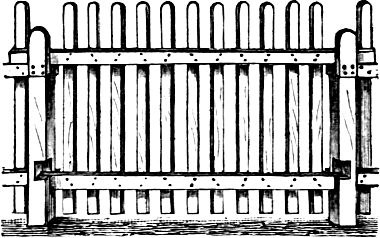
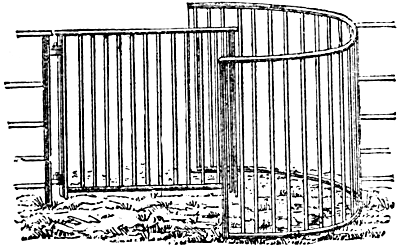
Figure 194 shows the construction of a gate
intended for situations much exposed to trespassers. It is made of
upright strips of flat iron, pointed at the top, and fastened by rivets
to a stout frame-work of iron. The “pickets” are placed
two to three inches apart, as desired, for the appearance of the gate,
or according to the size of the poultry or animals to be kept from
passing.
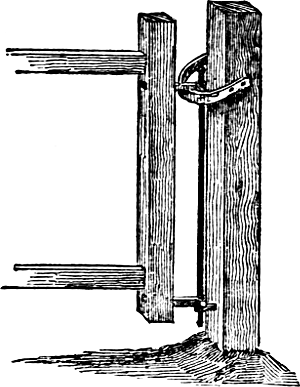
Fig. 195.—Hinge And Slide For Gate.
Every self-closing gate should be provided with a drop or spring
catch, a suitable bevel for it to strike against and notch to hold it.
Gates opening into the garden or out upon the street, should be so hung
that they will swing either way. Figure 195 shows
a hinge and slide for such a gate. In opening the gate from either
side, the arm of the upper hinge slides upon the iron bar, raising the
gate a little as it swings around. When loosed, it slides down without
help, and closes by its own weight. Figure 196
shows another form of the iron slide, suitable for a wide gate post,
and more ornamental than the plain slide in figure
195.
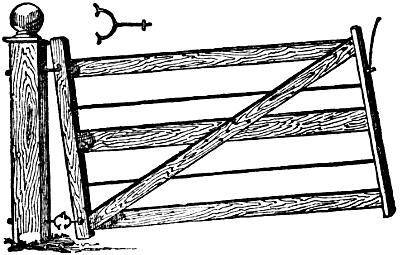
Figure 197 shows a very good and common
hanging. The upper hinge consists of a hook in the post and a
corresponding eye in the hinge-stile of the gate. The lower hinge
is made of two semi-circular pieces of iron, each with a shank,
one of which is shown above the gate in the engraving. They are made
to play one into the other. This style of hanging may be used on any
ordinary kind of gate, but is specially useful for a small street gate
opening into a door-yard.
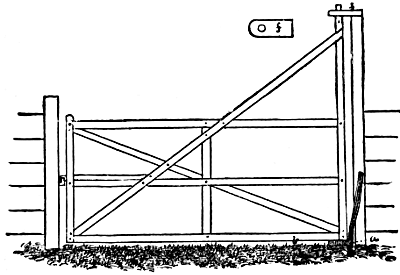
Fig. 198.—Self-closing Farm Gate.
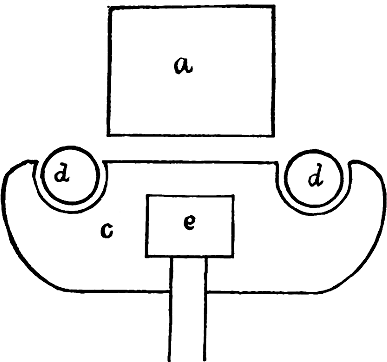
Fig. 199.—Lower Hinge Of Gate.
There is a style of gate for foot-paths, which is not uncommon, that
keeps itself always closed and latched, by means of a single upper and
double lower hinge, which are to be obtained at most hardware stores.
The lower hinge has two “thumbs,” which are embraced by two
open sockets. When the gate is opened, it swings upon one socket and
its thumb, and being thrown off the center, the weight of the gate draws it
back, and swinging too, it latches. A farm gate, entirely home-made,
may be constructed, of which figures 198 and 199 show the gate and the hinge. The gate is braced
and supported by a stay-strip, extending to the top of the upright,
which forms the upper hinge, f being attached to the top of
the gate-post, by an oak board with a smooth hole in it. The lower
hinge is separately shown at figure 199. It
consists of an oak board, c, an inch and a half thick, into
which the upright, e, is mortised. In this, two sockets are
cut, a foot from center to center. The sockets in this case are three
inches in diameter, and when the gate is in place and shut, they fit
against two stakes of hard wood (locust), two and a half inches in
diameter, d, which being curved, are nailed to the gate-post,
a. A smooth stone, laid across in front of these stakes, takes
the weight of the gate, and relieves in a measure the pressure on the
top of the post. The hinges must be kept well greased, and it is well
to black-lead them also, to prevent creaking.
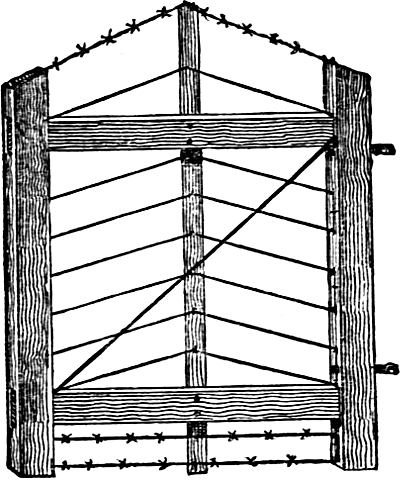
Fig. 200.—Convenient Gate.
Figure 200 shows a light, strong gate made of
wood and wire. The top wire is barbed to prevent stock from pressing
against it, and beaux and belles from hanging over it. The bottom wires
are also barbed to prevent cats, dogs, and fowls from creeping under.
This gate is cheap, may be easily constructed, and is suitable for
either front or back yard.
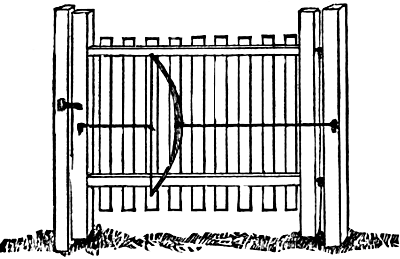
Fig. 201.—Chinese Door Or Gate Spring.
Figure 201 shows the manner in which the
Chinese use a bow as a spring for closing the light doors and gates.
The bow is fastened to the gate by a cord or chain. Another cord or
chain is attached to the middle of the bow-string by one end, and the
other end is made fast to the gate post, in such a manner that when
the
gate is opened, the bow will be drawn, and its elasticity will serve to
shut the gate when released. Our artist has shown the Chinese invention
attached to a gate of Yankee pattern.
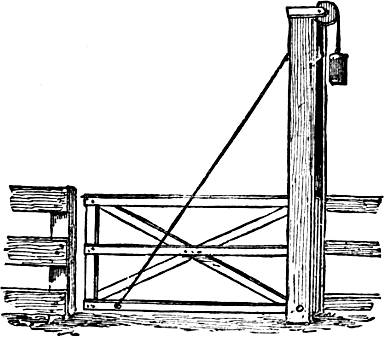
There are various forms of gates not hung on hinges at all, but
either suspended from above to lift, and provided with counterweights,
or made in the form of movable panels. Figure
202 represents a gate for general use, which is peculiarly well adapted
to a region visited by deep snows in winter. The post, firmly set,
extends a little higher than the length of the gate. In front of this
and firmly fastened to it at bottom and top, is a board at sufficient
distance from the post for the gate to move easily between them. An
iron bolt through the large post and the lower end of the tall, upright
gate bar, serves as a balance for the gate to turn on. A rope attached
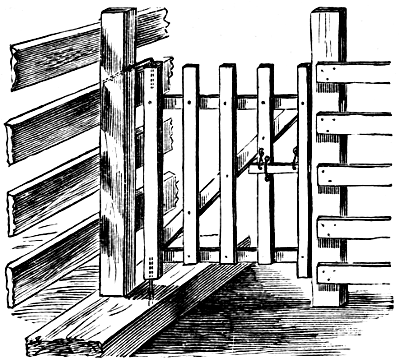
to the bottom of the gate runs over the pulley and has a weight of iron
or stone that nearly balances the gate. The opened gate is shown in figure 203.
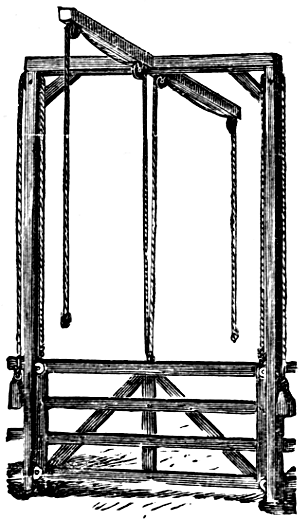
Fig. 204.—A “Self-opening” Gate.
Figure 204 shows a gate balanced in a similar
manner, and arranged so it can be opened by a person desiring to drive
through, without leaving the vehicle. It is suspended by ropes which
pass over pulleys near the top of long posts, and counterpoised by
weights upon the other ends of the ropes. Small wheels are placed
in the ends of the gate to move along the inside of the posts, and
thus reduce the friction. The gate is raised by means of ropes
attached to the center of the upper side of the gate, from which
they pass up to pulleys in the center of the archway, and then out
along horizontal arms at right angles to the bars which connect the
tops of the posts. By pulling on the rope, the gate, which is but
a trifle heavier than the balancing weights, is raised, and after
the vehicle has passed, the gate falls of itself. In passing in the
opposite direction, another rope is pulled, when the gate is raised as
before.
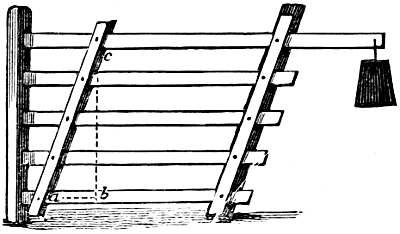
Fig. 207.—The Gate Closed.
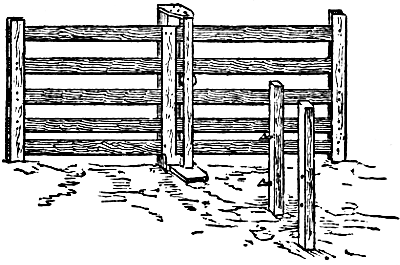
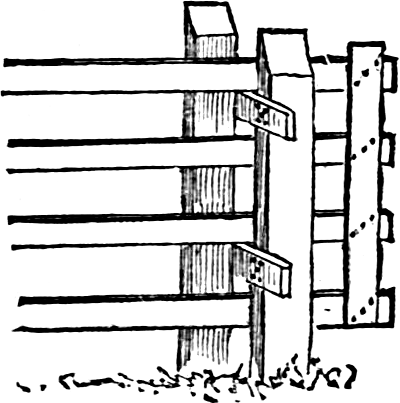
Figures 206 and 207
show a gate specially designed for snowy regions. The latch-post, figure 205, is fixed in the ground and connected
with the fence. It is an ordinary square fence-post, to the side of
which a strip of board is nailed, with a space of an inch between the
board and the post. At the opposite extremity of the gate a heel-post
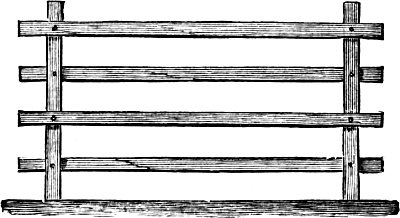
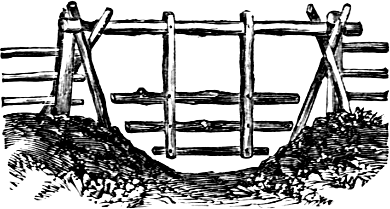
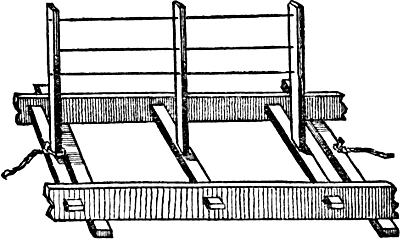
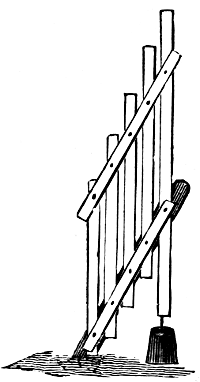
is set slanting, as shown in figures 206 and 207. The gate is made by laying the five horizontal
bars on a barn floor or other level place, with one of the sloping
cross-bars under them and the other above them. Half inch holes are
bored through the three thicknesses, carriage bolts inserted from
below, and the nuts screwed on. The gate, thus secured at one end, is
carried to the place where it is to remain and the other ends of the
horizontal bars secured to the heel-post by similar bolts. These should
work freely in the holes. The lower bar is four feet long and the upper
bar seven feet. To the heel of the upper bar is hung a weight nearly
heavy enough to balance the gate, so that it may easily be swung up, as
shown in figure 206, and the weight will keep it
raised.
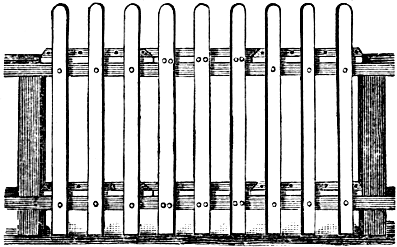
Fig. 208.—The Gate In Position.
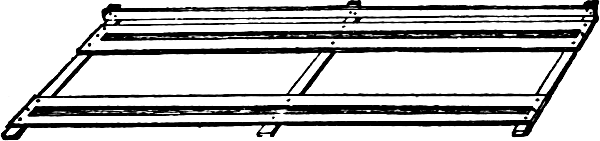
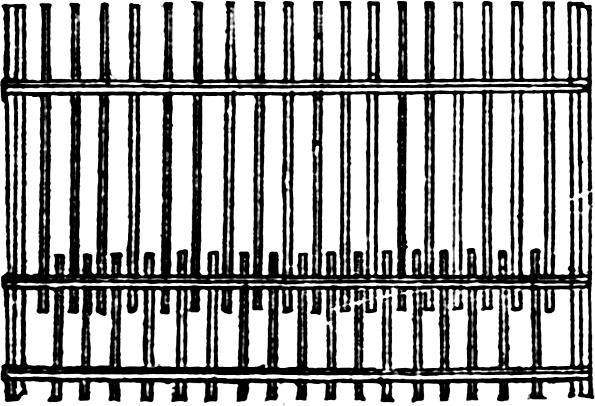
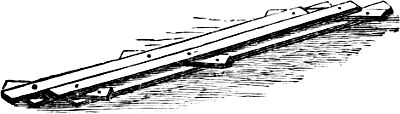
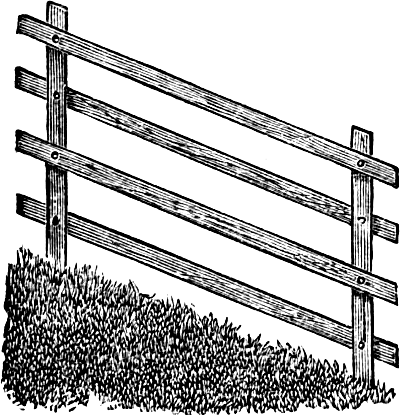
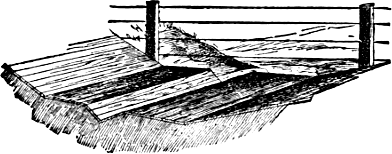
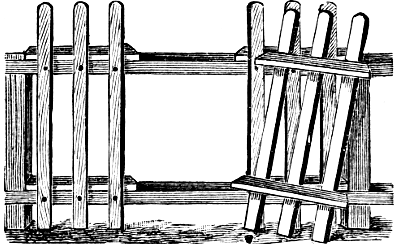
Figures 208 and 209
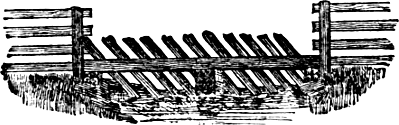
illustrate a very cheap way of making a hole through a picket fence in
a place where there is not sufficiently frequent occasion for passing,
to call for a more elaborate gate. Strips of inch board, as wide as
the rails of the fence, and five or six feet long, are nailed to the
upper side of the rails and three pickets are nailed to the strips. The
pieces are then sawed off, beveling, and the pickets detached from the
fence-bars by drawing or cutting the nails. The gate can be lifted up
and set at one side, but cannot be pushed in or pulled out. No rope or
other fastening is required, besides it is almost invisible, which is
many times an advantage. The gate, as lifted out of the fence and set
on one side, is shown in figure 209.
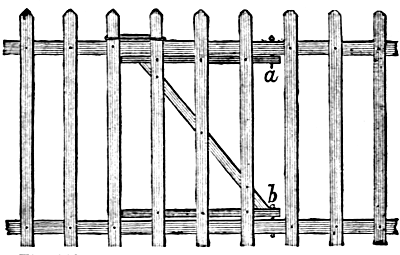
Fig. 210.—A Small Gate In A Picket Fence.
Figure 210 shows an improved form of this gate
without posts. In this case the small board strips are cut only as long
as the gate is to be made wide, and a diagonal cross-brace running
between them, as shown in the engraving. The hinges are fastened to
the horizontal bars of the fence by wooden pins shown at a
and b. A piece of rope or a short wire passing over the ends
of two of the pickets serves to keep the gate securely fastened. These
openings are not designed for a regular gate, and could not be used for
the passage of any vehicle, as the horizontal bars would be in the way.
For a back gate to the garden such an opening would frequently be found
convenient and save many steps.
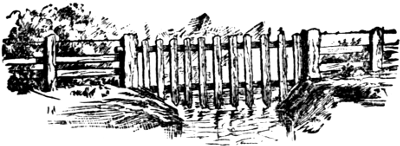
Figure 211 shows a lifting-gate, or rather, a
movable
panel, wide enough to permit the passage of a team and vehicle.
This might be useful in places where it was not desired to pass
frequently.
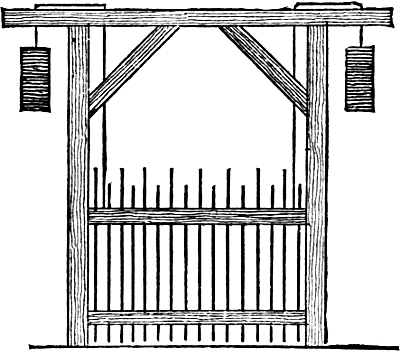
Fig. 212.—A Gate Not Clogged With Snow.
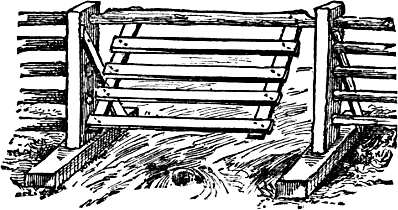
Figure 212 shows another very convenient form
of gate for use in a country where the snow is deep. It is fitted in
a strong frame, and is balanced by weights, so that it can be easily
raised. The engraving sufficiently explains how this very useful gate
is made and hung in the frame.
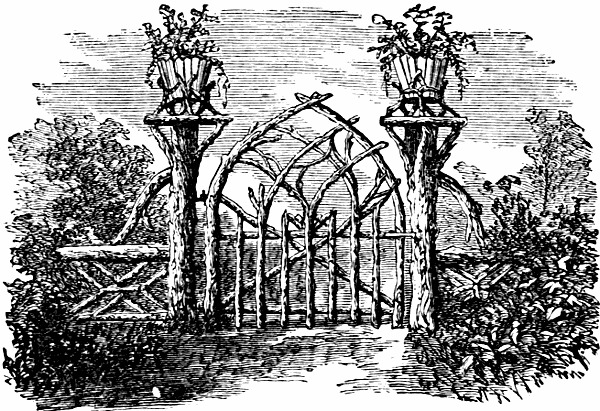
Fig. 213.—Ornamental Gate.
A picturesque rustic gate is shown in figure
213. The fence and posts are made to correspond. Its manner of
construction is clearly shown in the illustration. The vases on the
top of the posts may be omitted, unless time can be taken to keep them
properly watered.
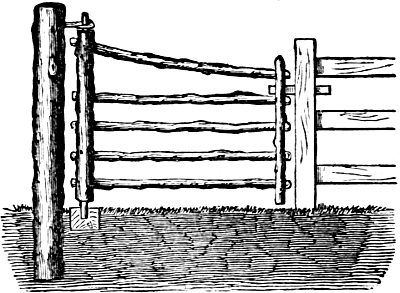
Fig. 214.—Light Rustic Gate.
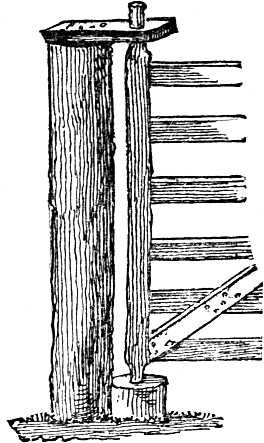
A very neat, cheap, and strong rustic gate is shown in figure 214. The large post and the two uprights
of the gate are of red cedar. The horizontal bars may be of the same
or other wood. The longer upright is five and a half feet long,
the shorter one four and a half feet. The ends of the former
are cut down to serve as hinges, as shown in the engraving. Five
holes are bored through each of the upright pieces, two inches in
diameter, into which the ends of the horizontal bars are inserted and
wedged securely. For the upper hinge a piece of plank is bored to
receive the gate, and the other end reduced and driven into a hole in
the post, or nailed securely to its top. A cedar block, into which
a two-inch hole has been bored, is partially sunk in the ground to
receive the lower end of the upright piece. A wooden latch is in better
keeping with the gate than an iron one.
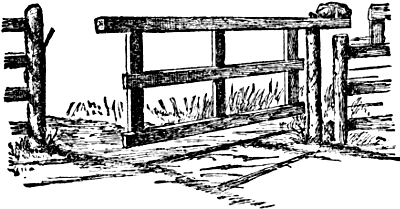
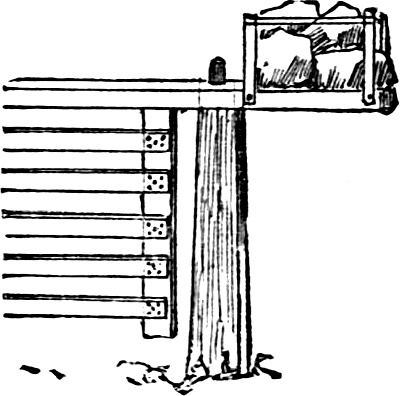
Figure 215 is a modernized form of a gate
which has for generations been popular in New England and the Middle
States. In the primitive method of construction, the top bar consisted
of the smoothly trimmed trunk of a straight young tree, with the butt
end projecting like a “heel” beyond the post upon which it
turned. Upon its extremity a heavy boulder, or box of smaller stones,
served as a counterweight. In the gate represented herewith the top
stick is of sawn timber, upon the heel of which the large stone is
held by an iron dowel. The other end of the top bar rests, when the
gate is closed, upon an iron pin, driven diagonally into the post, as
shown in the illustration. A smaller iron pin is pushed into the post
immediately above the end of the top bar, to secure the gate against
being opened by unruly animals, which may attempt to get in.
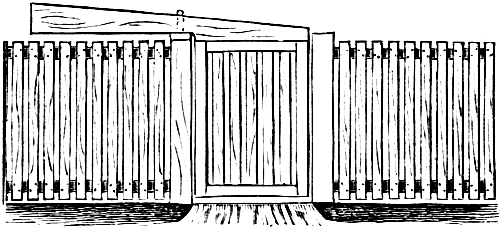
Fig. 216.—Carolina Balance Gate.
Figure 216 shows a balance gate which is used
in some parts of North Carolina. It is a picket gate framed into the
lower side of a long pole, which is hung near its middle to a pivot
driven into the top of the gate-post.
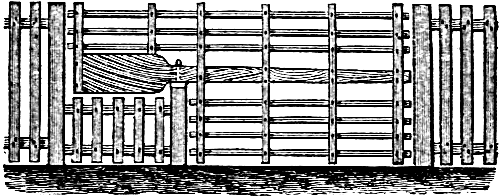
Fig. 217.—A Tidy Balance Gate.
Figure 217 shows a more elegant form, the
“heel” of the gate remaining on a level with the top line
of the fence.

Fig. 218.—Gate For Snowy Weather.
The gate shown in figure 218 is suitable for
all weather, but especially useful when there is a deep snow; for
it is easily lifted up above the snow, and kept in place by putting
a pin through holes in the hinge-bar, which is firmly fastened to
the gate post. The hinge-bar should be of good, tough wood, and made round
and smooth, so that the gate can swing and slide easily. Boards can be
used in place of pickets if preferable. The latch-post to the right,
has a long slot for the latch to work in, instead of a hasp, so that it
can be fastened when the gate is at any height.
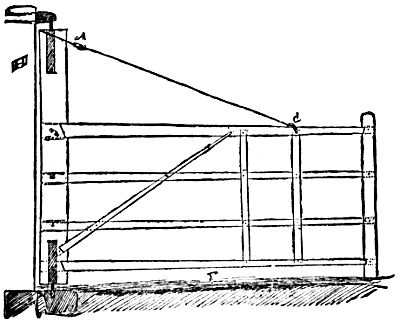
Fig. 219.—Wide Farm Gate.
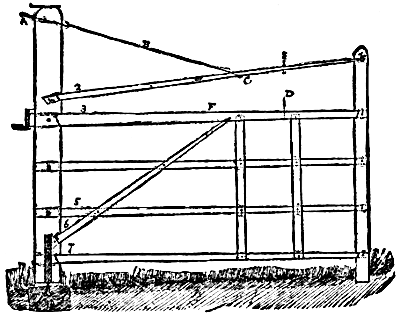
Fig. 220.—Another Wide Farm Gate.
The illustrations, figures 219 and 220, show two forms of gates used on the
island of Jamaica. These gates are twenty-one feet long, each, and
cannot possibly sag, even if any number of small boys swing on them.
In gate figure 220 the main post is nine by six
inches; the bars—marked 2, 3, 5 and 7—are let in the wood
three inches on the upper side and one and a half inches on the lower.
The tenons, indicated by the dotted lines, go entirely through the
posts, and are fastened with pins. Brace 6 is attached to the upper bar
eighteen inches beyond the center, F; D is a stout
fence wire fastened by a screw nut at E; the wire, B,
is held tightly by the screw hook, A; the iron band, 9, is
an inch thick and is bolted to the post. It works on a pivot one and
a quarter inches in diameter, and which turns on a flat piece of iron
at the bottom of a piece of a one and a half inch iron pipe, which is
soldered with molten lead in the stone, 10. Only hard wood is used
in the construction. In the gate shown in figure
219, the construction differs from the one just described in that
it has a light chain fastened in the shackle, C, and is
screwed firmly at A. It is attached to the post, H,
by a pivot, as seen in our illustration.
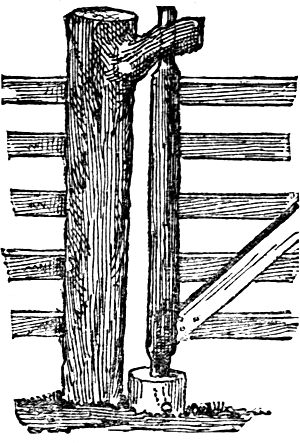
It is often convenient and economical, especially in newly settled
regions, where blacksmiths and hardware stores are not at hand, to
supply hinges for gates, to make them of wood. The simplest and most
primitive form is shown in figure 221. A post is
selected having a large limb standing out nearly at right angles. A
perpendicular hole in this secures the top of the rear gate standard.
The foot rests in a stout short post, set against the main post. A
small gimlet hole should extend outward and downward from the lowest
side or point in the hole in the short post, to act as a drain, or the
water collecting in it would be likely to soon rot both the standard
and the short post itself. Another form is to hold the top by a strong
wooden withe. A third form is illustrated in figure
222, in which the top of the standard passes through a short piece
of sawed or split plank, spiked or pinned upon the top of the post.
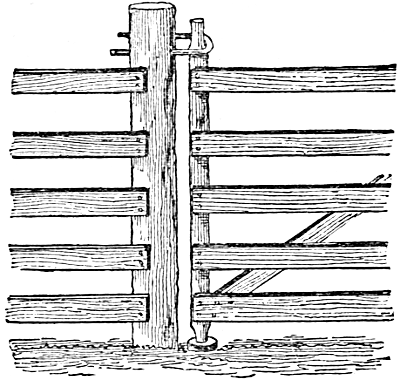
The form shown at figure 223 is made of a
stout lithe sapling or limb of beech, hickory or other tough hard wood
or, if it is attainable, a piece of iron rod.
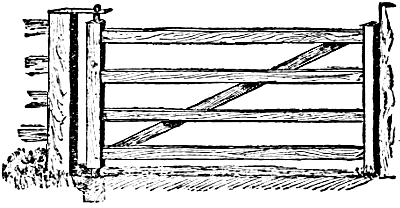
Fig. 224.—Gate Without Hinges.
A gate can be made without hinges by having the hanging stile
somewhat longer than the front stile, and making both ends rounded.
The lower one is to work in a hole in the end of a short post raised
so that the soil will not readily get in, and the upper one works in a
hole made in an oak piece attached to the top of the gate post. Gates
of this kind can be made and hung with but little more expense than
bars, and will be found far more convenient and saving of time than the
latter.
Figure 225 represents a small hand-gate
hung upon an iron pin driven into a hole bored in the bottom of the
hinge-post, and one of similar size and material bent to a sharp angle,
and fitted in the top. The lower pin rests in the sill and the upper
one extends through the post to which the gate is hung.
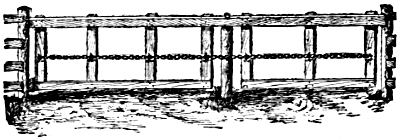
Fig. 227.—Double Balance Gate.
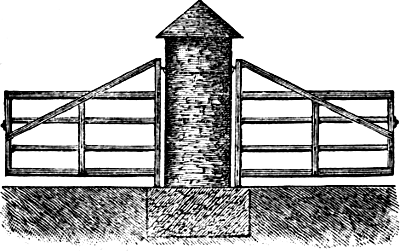
Figure 226 shows a substantial method of
hanging two gates to the same post. The post may be of masonry and the
hinge bolts pass through the post, thus preventing any sagging. It
is frequently convenient to have gates in the barnyard hung in this
manner, then yards may be shut off one way or the other by simply
swinging the gates.
Figure 227 represents a balanced gate for
a double driveway. The total length is thirty feet—sixteen
feet on one side of the supporting post and fourteen feet on the
other. The horizontal top-piece may be of sawn timber, or better
still, of a round pole cut from a straight young tree, the larger
end being on the short side, its additional thickness serving
to counterbalance the longer extremity of the gate. The vertical strips
of the original gate, from which the sketch was made, were lag-sticks
from an old tread horse-power, and the chain was a part of the remains
of a worn-out chain pump. It is held in place by staples driven into
the vertical pieces, as shown in the illustration. A pin pushed into
the post at either end of the large top bar fastens it securely when
closed.
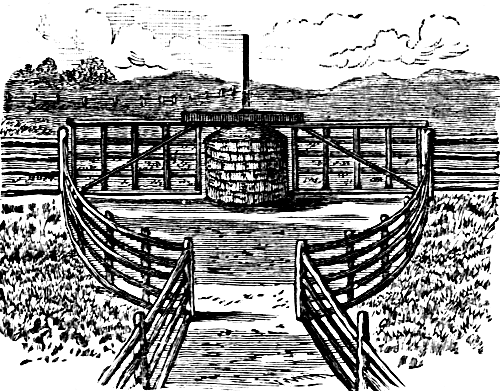
Fig. 228.—Double Balance Gate With Stone Post.
Figure 228 is a gate which combines some of
the features of the preceding two. The stone pillar is round, three
feet across and four and a half feet high. A post is placed in the
center, upon the end of which the bar rests, bearing the two gates. The
fence is arranged in a sweeping curve, so that only one passageway can
be open at once.
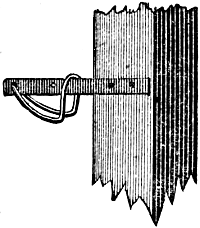
Fig. 229.—The Gate Latch.
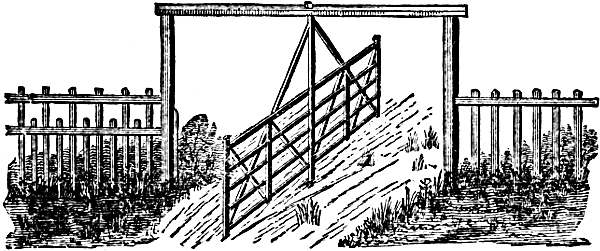
Fig. 230.—A Double Hingeless Gate.
Figure 230 shows a style of double gate,
which has been found very useful on large stock farms, where it is
necessary to drive herds of cattle through it. Two high posts are set
in the ground about twenty feet apart, and a scantling is put on, which
extends from the top of one post to that of the other. A two-inch hole
is bored in the center of this scantling, and a similar hole in a
block
of wood, planted firmly in the ground in the center of the gateway.
The middle post of the gate-frame is rounded at each end to fit these
holes, and this post is the pivot on which the gate turns. With this
gate one cow cannot block the passage, besides there is no sagging of
gate posts, as the weight of the gate is wholly upon the block in the
center. To make the latch, figure 229, a bar of
iron one and a half inch wide and eighteen inches long is bolted to one
of the end uprights of the gate, and a similar bar to one of the posts
of the gateway. For a catch, a rod of three-eighth inch iron passes
through a half-inch hole near the end of the bar upon the gateway. This
rod is bent in the form shown in the engraving, and welded. It will be
seen that the lifting of this bent rod will allow the two bars to come
together, and when dropped it will hold them firmly.
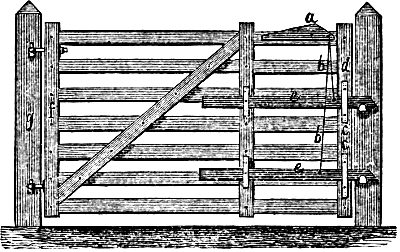
Fig. 231.—A Double-latched Farm Gate.
Figure 231 represents a substantial farm gate
with two latches. This is a very useful precaution against the wiles
of such cattle as have learned to unfasten ordinary gate-latches.
The latches work independently of each other, the wires, b,
b, being fastened to the hand lever a, and then to
the latches e, e. A roguish animal will sometimes
open a gate by raising the latch with its nose, but if one attempt it
with this, it can only raise one latch at a time, always the upper one,
while the lower one remains fastened. As soon as the animal lets go,
the latch springs back and catches again. A hog cannot get through, for
the lower latch prevents the gate from opening sufficiently to allow
it to pass. A cow will find it difficult to open the gate, because
she cannot raise the gate high enough to unlatch it. The latches
e, e, work up and down in the slides c,
c, and when the gate is fastened they are about half-way
between the top and bottom of the slides.
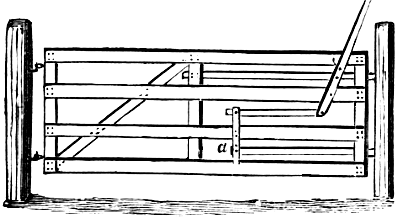
Fig. 232.—A Gate For All Livestock.
Figure 232 shows another form of double
latches, which are closed by absolute motion, instead of depending upon
their own weight. There are two latches fastened to a jointed lever, so
that when the upper end or handle is pushed backward or forward, the
latches both move in the same direction. The construction of the gate,
and the form and arrangement of the latches and lever, are plainly
shown.
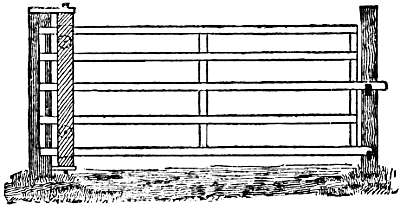
Fig. 234.—The Gate Complete.
The old style slide gate is an unwieldly contrivance, and
the only excuse for its use is its simplicity and cheapness.
Numerous devices have been invented and patented to make it slide easier
and swing easier, but their cost has prevented them from coming into
general use, and the old gate still requires the same amount of tugging
and heaving to open and close it.
Figure 233 shows the attachment. The blocks
at top and bottom are hard wood, one inch and a quarter thick. The two
boards should also be of hard wood. Between the boards are one or two
small iron or hard wood wheels, turning upon half inch bolts, which
pass through both boards. The bars of the gate run on these wheels. The
gate complete, with attachment, is shown in figure
234, the gate being closed. To open the gate, run it back nearly to
the middle bar, then swing open. As the attachment turns with the gate,
the lower pivot should be greased occasionally. It is well to fasten a
barbed wire along the upper edge of the top bar, to prevent stock from
reaching over and bearing down on the gate. Where hogs are enclosed, it
is advisable to fasten a barbed wire along the lower edge of the bottom
bar, as it keeps small pigs from passing under, and prevents large ones
from lifting the gate up, or trying to root under.
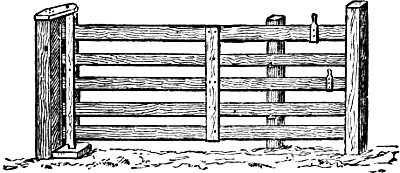
Fig. 236.—The Gate Closed.
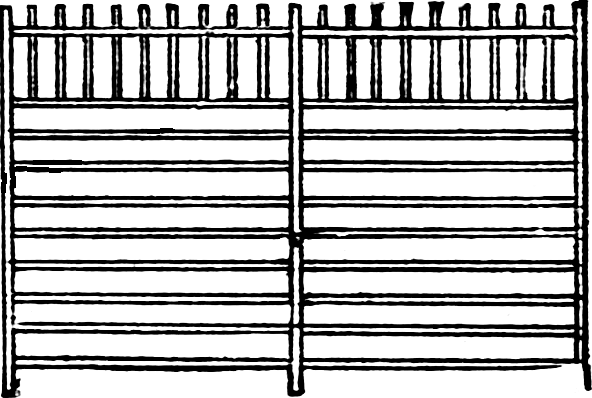
The illustrations, figures 235 and 236, show a gate very handy for barnyards.
It is fourteen feet wide for ordinary use, and has three short posts.
The middle one is movable. A box of two-inch boards made to fit the
post is planted in the ground; in this the post is set, and can be
removed at pleasure. This post is placed three feet from the outside
one. The hinge is made of hard wood, with a wheel six inches in
diameter, as shown in the engraving. It should be so constructed that
the gate will move freely, but not too loosely. It is supported at the
top by a cap, placed diagonally across, and at the bottom by a block
of locust or cedar under it. The middle uprights of the gate should
be placed a little to one side of the center, so that the gate can be
balanced under the roller. Wooden catches are placed in the middle
post, upon which the gate rests. To open the gate, push it back to
the middle post, elevate the gate slightly, and it will roll down to
the center, where it can be readily opened. Figure
235 shows the gate open, and in figure
236
it is seen closed. This gate has no latch. A barnyard gate is not
usually opened wide. A space large enough to admit a man or horse is
all that is necessary in most cases. It is more easily opened than
the ordinary gate, and it will stay where it is placed. By cutting a
notch in the third board, and elevating it to the upper catch on the
middle post, a passage is made for hogs and sheep, excluding larger
animals.
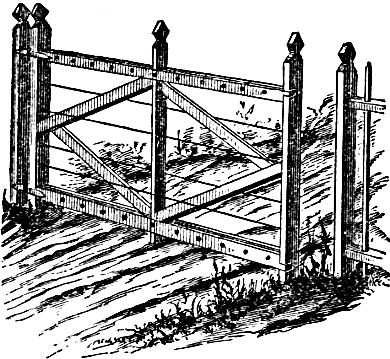
Fig. 237.—A Neat Gate Of Scantling And Wire.
One of the cheapest and most popular styles of farm gate is
made of plain or barbed wire, supported by wooden frames. Figure 237 shows a very neat form of combination
gate. To make it, obtain three uprights, three inches by one and a half
inches, five and a half feet long, and four strips, three inches by one
inch, eleven feet long. Cut shoulders in the ends of the strips, and
saw out corresponding notches in the uprights; make these one and a half
inch, or half the width of the strips. The bottom notch is two and a
half inches from the end of the upright, and the upper one nine and a
half inches from the top end. Fit the strips into the notches. There
is then a space of one inch between the strips, into which put inch
strips, so as to make all solid, and fasten together with carriage
bolts. Braces three by one and a half inches are inserted, and held in
place by bolts or wrought nails. Bore as many holes in the end-pieces
for one-quarter inch eye-bolts, as it is desired to have wires. Twist
the wire firmly into the bolts on one upright, and secure the other
end to the corresponding bolts on the upright at the opposite end. In
stretching the wires, pass them alternately on opposite sides of the
center piece, and fasten in place by staples. This will, in a measure,
prevent warping. By screwing down the bolts with a wrench, the wires
may be drawn as tightly as desired. The hinges are to be put on with
bolts, and any sort of fastening may be used that is most convenient.
Barbed or smooth wire may be used.
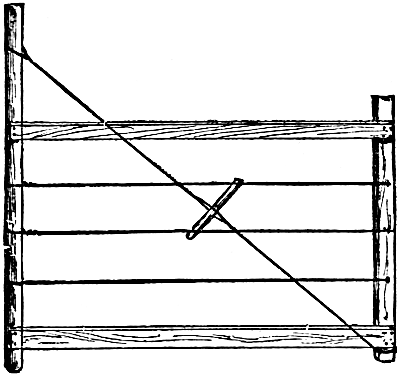
Fig. 238.—Good And Cheap Farm Gate.
Figure 238 shows a gate of common fence
boards and wire, which can be made by any farmer. The longer upright
piece, seven feet long, may be made of a round stick, flattened a
little on one side. The horizontal bars are of common fence boards
cut to the desired length, and the shorter, vertical piece may be
made of scantling, two by four inches. Three wires, either plain or
barbed, are stretched at equal intervals between the upper and lower
bar. A double length of wire is extended from the top of the long
upright to the opposite lower corner of the gate. A stout stick is inserted
between the two strands of this diagonal brace, by which it is twisted
until it is sufficiently taut. If the gate should at any time begin to
sag, a few turns brings it back.
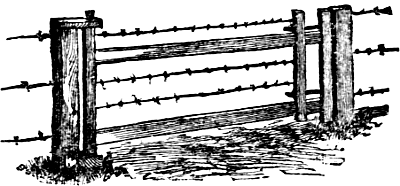
Fig. 239.—Improved Wire Gate.
Figure 239 shows an improved form of
wire farm gate, in which the wires can be made tight at pleasure.
Instead of attaching the wires to both of the end standards of
the gate, a sliding standard is put on near the end, to which the wires
are fastened. This is secured to the main standard by two long screw
bolts, leaving a space between the two of five or six inches. The wires
are tightened by turning up the nuts.
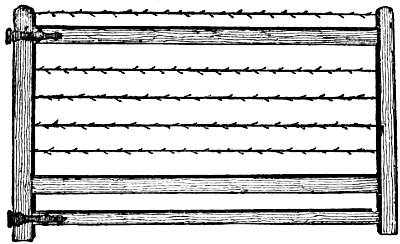
Fig. 240.—Gate Of Wood And Wire.
A plainer but very effective gate is shown in figure 240. The uprights are three and one-quarter
by two inches, the horizontals twelve or thirteen feet long, by three
and a half by two inches, all of pine. The horizontals are mortised
into the uprights, the bolts of the hinges strengthening the joints.
The barbed wires prevent animals from reaching over and through the
gate. To put in and tighten the wires, bore a three-eighth inch hole
in the upright, pass the wires through, one or two inches projecting,
plug up tightly with a wooden pin, and bend down the ends of the wire.
Measure the distance to the other upright, and cut the wire two inches
longer. Pass the wire through the whole and tighten with pincers. When
the wire is stretched, plug up with a wooden pin, and then bend down
the wire. If the wire stretches, it can be tightened very easily.
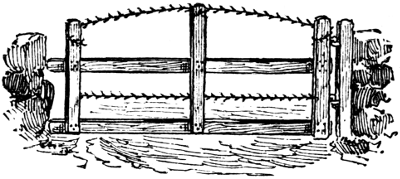
Fig. 241.—Barbed Wire In A Gate.
Figure 241 represents a light gate, that a
child can handle, which does not sag or get out of repair, and is
cattle proof. The materials are two boards, twelve or fourteen feet
long, three uprights, the end-piece three and one-half feet and the center
four and one-half feet, two strands of barbed wire, one between the
boards, and the other at the top of the uprights. It is hung the same
as the common form of gate.
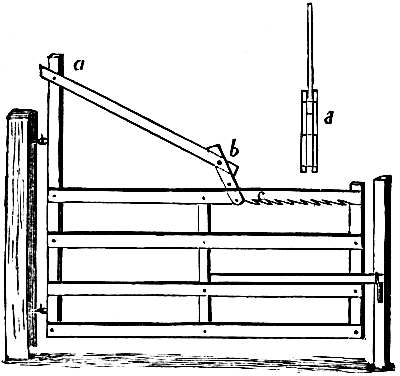
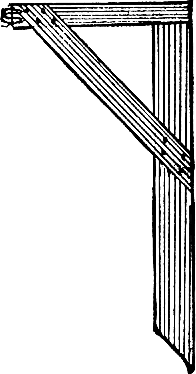
Fig. 242.—Remedy For A Sagging Gate.
Various means have been devised for overcoming the sagging
of gates. In figure 242 the hinge-post of
the gate-frame extends somewhat above the upper bar of the gate.
A board is fastened to the top of this post, a, which runs
downward to b, near the middle of the upper cross-bar, and
then connects with a short double band—one on each side of the
long board—which is provided with a bolt fitting into notches,
c, cut in the under side of the upper bar of the gate. The
form of the double-latch piece, with its bolts, and its attachment to
the board is shown at d.
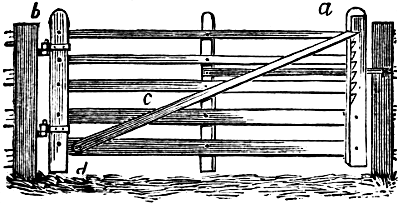
Fig. 243.—A Lift-bar For A Gate.
Figure 243 represents an arrangement which
not only provides for taking up the sag, but also for raising the
gate above encumbering snow. The gate is made of ordinary inch boards
put together with carriage bolts, upon which the joints play freely.
The end of the gate, a, is made of two boards, and the post,
b, is four by six inches. One board of the end, a, is
notched. The diagonal piece, c, is fastened at d, by
means of a bolt through it and the lower board. The end, a,
of the diagonal piece, is shaped to fit the notches, by means of which
the gate can be raised and lowered. It can also be used as a passage
for pigs between fields, by simply raising the gate sufficiently to let
them go through. A board, not shown in the engraving, is tacked to the
notched board, to prevent the diagonal piece from slipping out of its
place.
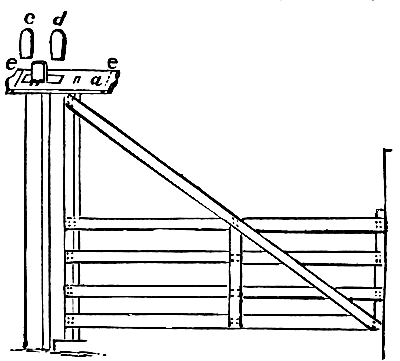
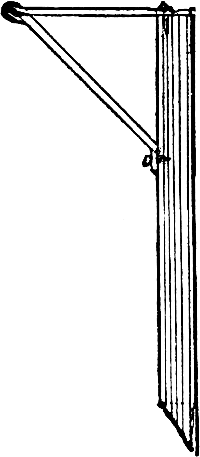
Fig. 244.—A Remedy For A Sagging Gate.
A much firmer gate is shown in figure 244.
The hinge-post is about twice the height of the gate, and has a
cap-piece, a, near the top. This cap is of 2 by 6 hard wood,
strengthened by two bolts, e, e, and held in place by
two wooden pins, driven just above it and through the tenon end of the
post. Wedges c and d are driven in the cap on each
side of the post. Should the gate sag, the wedge, d, may be
loosened, and c driven further down. The lower end of the gate
turns in a hole bored in a hard wood block placed in the ground near
the foot of the post.
Figure 245 shows a gate similarly
hung on pivots driven into the ends of the hinge-bar.
These play in eye-bolts which extend through the post
to which the gate is hung, and are fastened by nuts on the other side.
As the gate sags, the nut on the upper bolt is turned up, drawing the
upper end of the hinge-bar toward the post, and lifting the gate back
to a horizontal position.
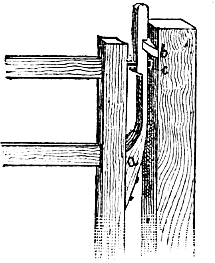
Fig. 247.—Spring Gate Catch.
Some cows become so expert, they can lift almost any gate latch.
To circumvent this troublesome habit, latches made as shown in figure 246 will fill this bill exactly. It is a
piece of iron bar, drawn down at one end, and cut with a thread to
screw into the gate post. A stirrup, or crooked staple, made as shown,
is fitted by a screw bolt and nut to the bar. A small bolt must be
driven in to keep the stirrup from being thrown over. A projecting slat
on the gate, when it is shut, lifts the stirrup and holds the gate.
This latch is too much for breechy cows, and they are never able to get
“the hang of it.”
A simple catch for a gate may easily be made from a piece of
seasoned hickory, or other elastic wood, cut in the shape as shown
at a in figure 247. This is fastened
strongly to the side of the gate, with the pin, c, working
through the top loosely, so that it will play easily. The catch,
b, is fastened to the wall or post, as the case may be. The
operation will be easily understood from the illustration, and it will
be found a serviceable, sure, and durable contrivance. The gate cannot
be swung to without catching, and it may swing both ways.
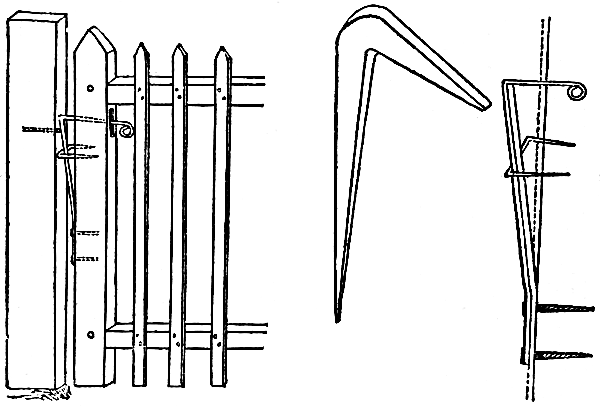
Fig. 248.—Latch In Position. Fig. 249.
Fig. 250.
A very simple and convenient style of fastening is illustrated
in figures 248 to 251.
It can be made of old buggy springs, or any flat steel, and should
be one inch broad by three six-tenth inch thick, and about eighteen
inches long, at the distance of four inches from the lower end.
The lever is slightly bent, and has two screw or bolt holes for
fastening, figure 249. Eight inches of the
top portion is rounded and bent at right angles. The upper part
passes through a narrow mortise in the head-post of the gate figure 248. A flat staple, large enough to go over
the spring holds it in place. An iron hook, figure
250, driven into the post, holds the latch. A wooden lever, bolted
to the top board of the gate, figure 251, enables
a person on horseback to open or close the gate. This latch can be
applied to any kind of a gate, and is especially desirable in yards or
gardens, when, by the addition of a chain and weight, one may always
feel that the gate is securely closed. The latch does not cost more
than fifty cents, and if properly made and put on will last as long as
the gate.

Fig. 251.—Latch With Top Lever.
In figure 252 is represented a
style of gate latch in use in some Southern States. It
possesses marked advantages, for certain purposes, over
others. It holds to an absolute certainty, under all circumstances,
and by allowing the latch pin to rest on the bottom of the slot in the
post, it relieves the hinges and post from all strain. The latch may
be formed by a common strap-hinge, made to work very easily, and the
pin should be either a strong oak one or an iron bolt or “lag
screw.”
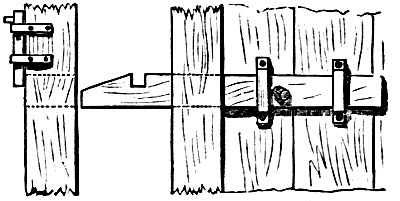
Figure 253 shows a latch which cannot
be opened by the most ingenious cow or other animal. The latch
of wood slides in two iron or wood bands screwed to the gate. It is
moved by a knob between the bands, which also prevents it from going
too far. The outer end is sloping and furnished with a notch. It slides
through a mortise in the gate post, indicated by dotted lines. When
the gate is closed, the latch is slid through the mortise, and the
drop-pin, which plays vertically in two iron bands, is lifted by the
slope on the latch, and drops into the notch. It can be opened only by
lifting the drop-pin, and sliding back the latch at the same time.
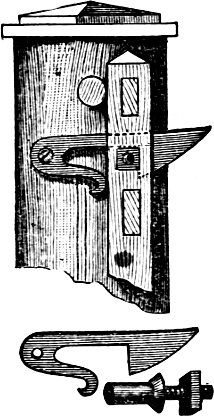
Figure 254 shows a very ingenious and reliable
form of latch. The curved tail must be thin enough and sufficiently
soft to admit of bending, either by a pair of large pincers or a
hammer, just so as to adapt it to the passage of the pin bolted through
the front stile of the gate. As the gate closes, the latch lifts out
and the tail-piece advances. The catch-pin cannot possibly move out,
unless the whole end of the gate moves up and forward.
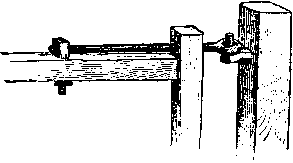
Fig. 255.—Top Hinge Of Farm Gate.
Continual use, more or less slamming, and the action of the
weather, make the gate settle somewhat, but the illustration,
figure 255, shows a hinge which obviates
this trouble. The upper hinge is made of a half-inch rod,
about sixteen inches long, with an eye on one end, and a long
screw-thread cut upon the other. This thread works in a nut, which
nut has a bolt shank and nut, whereby it is firmly attached to the top
bar of the gate. If the gate sags at all, it must be simply lifted off
the thumbs, and the hinge given a turn or two in the nut; and the same
is to be done in case of subsequent sagging. The hinge bolt must, of
course, have some opportunity to move in the stile, and must be set
long enough at first to allow the slack to be taken up whenever found
necessary.
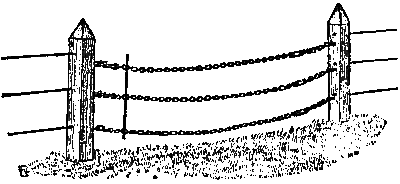
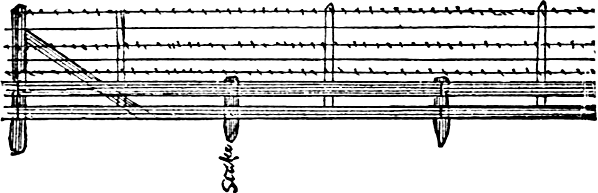
Fig. 256.—Gateway In A Wire Fence.
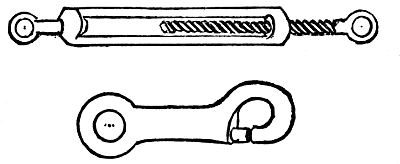
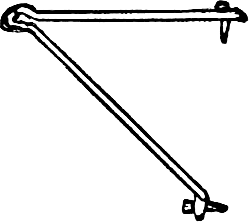
Figs. 257 and 258.—Buckle And Snap Hook For Chain Gate.
Regular posts and bars at a passageway through a wire fence are
inconvenient and unsightly. A good substitute for a gate is illustrated
in figure 256. Light galvanized iron chains have
a “swivel” near the end, by which they may be loosened or
tightened, so as to be of just the right length, and a snap-hook at the
other. These are both shown of larger size in figures
257 and 258. The chains are attached by
screw-eyes to the posts, and should correspond in number, as well as
in position, with the wires. Thus they appear to be a continuation
of the same, and as they are larger, they appear to the animals to
be stronger, and even more dangerous than barbed wire—hence
are avoided. A short rod of iron may be made to connect them at the
hook-ends, and so in opening and closing the way, they may all be moved
at once.
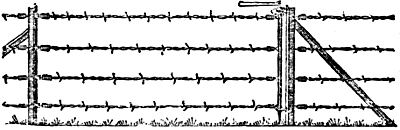
Fig. 259.—The Gate Closed.
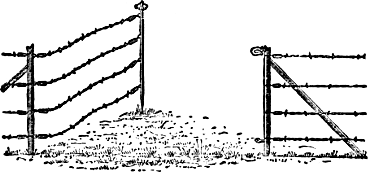
A cheaper and simpler form of wire gate is shown in figures 259 and 260. It
consists of the same number of strands as in the adjoining fence,
attached to a post in the ordinary way at one end, while the other
wire ends are secured to an iron rod. This rod is pointed at the lower
end, and when the gate is closed, as seen in figure
259, this end passes down through a loop, and the upper end is
secured to a hook. In opening the gate, the rod is loosened and swings
out, when the sharp end is thrust into the earth, or a hole in a
wooden block set in the ground at the proper place to receive it.
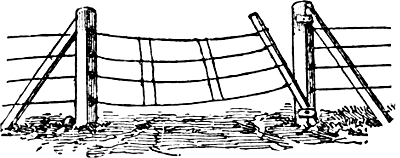
Figure 261 shows a somewhat similar
arrangement. The gate wires are fastened to one post with staples, and
attach the loose ends to a five-foot pole. To shut the gate, take this
pole or gate-head and put the lower end back of the lower pin, and
spring the upper end behind the one above. If the wires are all of the
right length, they will be taut and firm. Two slats fastened to the
gate wires will keep them from tangling. A short post set at one side
of the gateway may be found convenient to hold the gate when open.