The workshop and shed to hold farm implements
should look as neat and attractive as the larger buildings.
Farm implements are expensive. Farm machinery
is even more so. When such machinery is all properly
housed and kept in repair the depreciation is estimated
at ten per cent a year. When the machines are
left to rust and weather in the rain and wind the loss is
simply ruinous.
More machinery is required on farms than formerly
and it costs more. Still it is not a question whether a
farmer can afford a machine. If he has sufficient work
for it he knows he cannot afford to get along without
it and he must have a shed to protect it from the
weather when not in use.
In the first place the implement shed should be large
enough to accommodate all of the farm implements
and machinery without crowding and it should be well
built and tight enough to keep out the wind and small
animals, including chickens and sparrows.
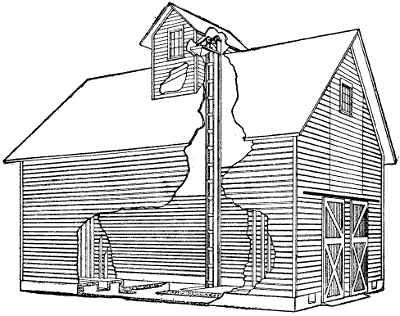
The perspective and plan shown herewith is twenty-four
feet in width and sixty feet in length.
[10]
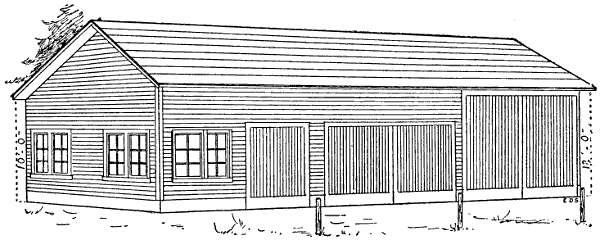
Figure 1.—Perspective View of the Farm Shop, Garage and Implement Shed. The doors to the
right are nearly 12 feet high to let in a grain separator over night, or during the winter, or a
load of hay in case of a sudden storm.
[11]
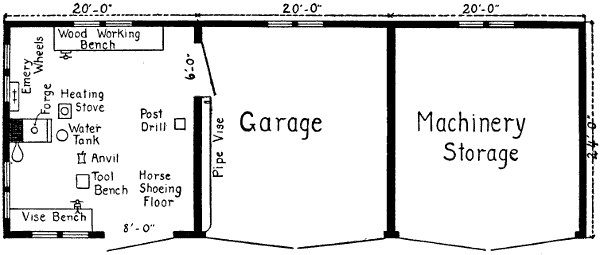
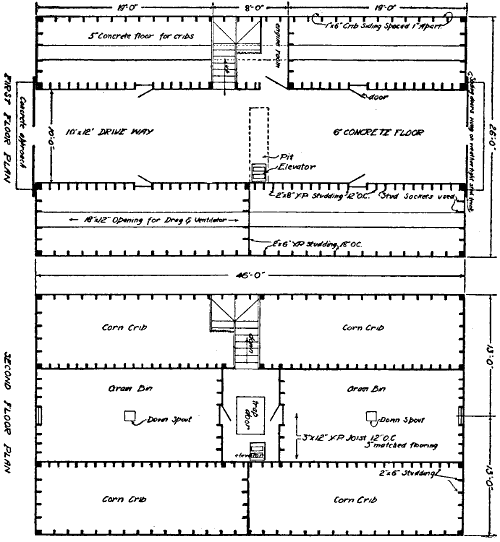
Figure 2.—Floor Plan of Shop, Garage and Storage. The building is 60 feet wide and 24 feet
from front to back. The doors of the garage and tool shed are made to open full width, but 8 feet
is wide enough for the shop door. All doors open out against posts and are fastened to prevent blowing
shut. The work shop is well lighted and the stationary tools are carefully placed for convenience
in doing repair work of all kinds. The pipe vise is at the doorway between the shop and garage
so the handles of the pipe tools may swing through the doorway and the pipe may lie full length along
the narrow pipe bench.
The doorways provide headroom sufficient for the
highest machines, and the width when the double
doors are opened and the center post removed is nearly
twenty feet, which is sufficient for a binder in field
condition or a two-horse spring-tooth rake.
One end of the building looking toward the house is
intended for a machine shop to be partitioned off by
enclosing the first bent. This gives a room twenty feet
wide by twenty-four feet deep for a blacksmith shop
and general repair work. The next twenty feet is the
garage. The machine shop part of the building will be
arranged according to the mechanical inclination of
the farmer.
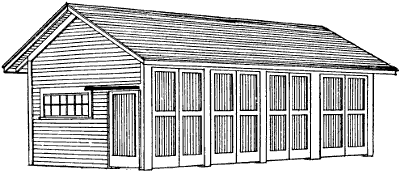
Figure 3.—Perspective View of Farm Implement Shed and Workshop.
A real farm repair shop is a rather elaborate mechanical
proposition. There is a good brick chimney
with a hood to carry off the smoke and gases from the
blacksmith fire and the chimney should have a separate
flue for a heating stove. Farm repair work is done
mostly during the winter months when a fire in the
shop is necessary for comfort and efficiency. A person
cannot work to advantage with cold fingers. Paint
requires moderate heat to work to advantage. Painting
farm implements is a very important part of repair
work.
A good shop arrangement is to have an iron workbench
across the shop window in the front or entrance
end of the building. In the far corner against the back
wall is a good place for a woodworking bench. It is
too mussy to have the blacksmith work and the carpenter
work mixed up.
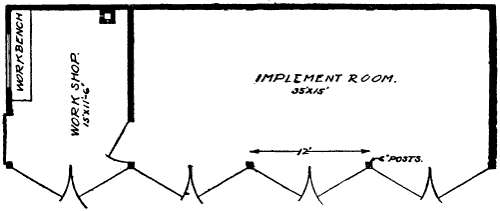
Figure 4.—Floor Plan of Farm Implement Shed, showing the
workshop in one end of the building, handy to the implement storage
room.
Sometimes it is necessary to bring in a pair of horses
for shoeing, or to pull the shoes off. For this reason,
a tie rail bolted to the studding on the side of the shop
near the entrance is an extra convenience.
In a hot climate a sliding door is preferable because
the wind will not slam it shut. In cold climates, hinge
doors are better with a good sill and threshold to shut
against to keep out the cold. Sometimes the large door
contains a small door big enough to step through, but
not large enough to admit much cold, when it is being
opened and shut. Likewise a ceiling is needed in a cold
country, while in warmer sections, a roof is sufficient.
Farm shops, like other farm buildings, should conform
to the climate, as well as convenience in doing
the work. A solid concrete floor is a great comfort.
And it is easily kept clean.
The perspective and floor plan show the arrangement
of the doors, windows and chimney and the placing
of the work benches, forge, anvil, toolbench and
drill press.
Figures 3 and 4 show the perspective and floor plan
of a farm shop and implement house 40 x 16 feet in size,
which is large enough for some farms.
Good tools are more important on a farm than in a
city workshop for the reason that a greater variety of
work is required.
Measuring Mechanical Work.—In using tools on the
farm the first rule should be accuracy. It is just as
easy to work to one-sixteenth of an inch as to carelessly
lay off a piece of work so that the pieces won’t go together
right.

Figure 5.—Caliper Rule. A handy slide caliper shop rule is made
with a slide marked in fractions of inches as shown in the drawing.
The diameter of a rivet, bolt or other round object may be taken
instantly. It is not so accurate as calipers for close measurements,
but it is a practical tool for farm use.
The handiest measuring tool ever invented is the old-fashioned
two-foot rule that folds up to six inches in
length to be carried in the pocket. Such rules to be
serviceable should be brass bound. The interior marking
should be notched to sixteenths. The outside marking
may be laid out in eighths. The finer marking on
the inside is protected by keeping the rule folded
together when not in use. The coarser marking outside
does not suffer so much from wear. Figure 5
shows a 12-inch rule with a slide caliper jaw.
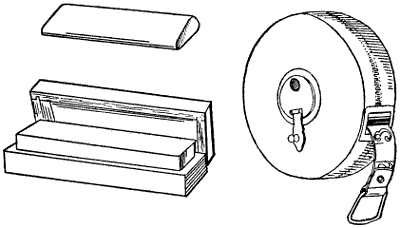
Figure 6.—Small Pocket Oilstone. Shop oilstone in a box. 100-foot
measuring tapeline marked in inches, feet and rods.
In using a two-foot rule to lay off work the forward
end should contain the small figures so that the workman
is counting back on the rule but forward on the
work, and he has the end of the rule to scribe from. In
laying off a 16-foot pole the stick is first marked with
a knife point, or sharp scratchawl, and try square to
square one end. The work is then laid off from left
to right, starting from the left hand edge of the
square mark or first mark. The two-foot rule is laid
flat on top of the piece of wood. At the front end of
the rule the wood is marked with a sharp scratchawl
or the point of a knife blade by pressing the point
against the end of the rule at the time of marking. In
moving the rule forward the left end is placed exactly
over the left edge of the mark, so the new measurement
begins at the exact point where the other left off, and
so on the whole length of the stick. The final mark is
then made exactly sixteen feet from the first mark.
In sawing the ends the saw kerf is cut from the waste
ends of the stick. The saw cuts to the mark but does
not cut it out.
In using a rule carelessly a workman may gain one-sixteenth
of an inch every time he moves the rule,
which would mean half of an inch in laying off a 16-foot
pole, which would ruin it for carpenter work. If
the pole is afterwards used for staking fence posts, he
would gain one-half inch at each post, or a foot for
every twenty-four posts, a distance to bother considerably
in estimating acres. It is just as easy to measure
exactly as it is to measure a little more or a little
less, and it marks the difference between right and
wrong.
In a farm workshop it is better to separate the woodworking
department as far as possible from the blacksmith
shop. Working wood accumulates a great deal
of litter, shavings, blocks, and kindling wood, which
are in the way in the blacksmith shop, and a spark from
the anvil might set the shavings afire.
A woodworking bench, Figure 7, carpenter’s bench,
it is usually called, needs a short leg vise with wide
jaws. The top of the vise should be flush with the top
of the bench, so the boards may be worked when lying
flat on the top of the bench. For the same reason the
bench dog should lower down flush when not needed
to hold the end of the board.
It is customary to make carpenter’s benches separate
from the shop, and large enough to stand alone, so they
may be moved out doors or into other buildings.
[17]
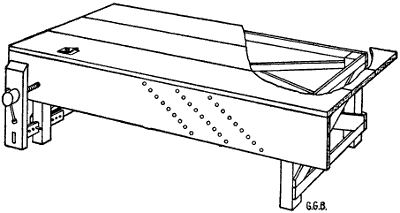
Figure 7.—Carpenter’s Bench. A woodworking bench is 16′ long,
3′ 6″ wide and 32″ high. The height, to be particular, should be
the length of the leg of the man who uses it. Lincoln, when joking
with Stanton, gave it as his opinion that “a man’s legs should be
just long enough to reach the ground.” But that rule is not sufficiently
definite to satisfy carpenters, so they adopted the inside leg
measurement. They claim that the average carpenter is 5′ 10″
tall and he wears a 32″ leg.
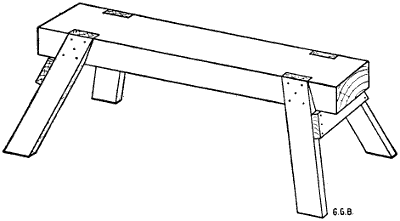
Figure 8.—Carpenter’s Trestle, or Saw-Bench. The top piece is
4 x 6 and the legs are 2 x 4. There is sufficient spread of leg to prevent
it from toppling over, but the legs are not greatly in the way. It is
heavy enough to stand still while you slide a board along. It is 2
feet high.
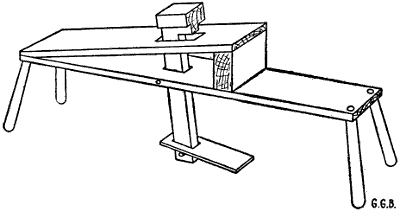
Figure 9.—Shave Horse. For shaping pieces of hardwood for
repair work. A good shave horse is about 8′ long and the seat end
is the height of a chair. The head is carved on a hardwood stick
with three projections to grip different sized pieces to be worked.
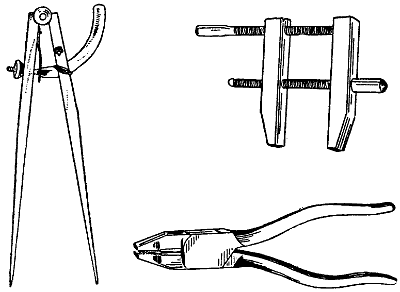
Figure 10.—Compasses, Wooden Clamp and Cutting Pliers.
Carpenter benches may be well made, or they may be
constructed in a hurry. So long as the top is true it
makes but little difference how the legs are attached,
so long as they are strong and enough of them. A carpenter
bench that is used for all kinds of work must be
solid enough to permit hammering, driving nails, etc.
Usually the top of the bench is straight, true and level
and it should be kept free from litter and extra tools.
Good carpenters prefer a tool rack separate from the
bench. It may stand on the floor or be attached to the
wall. Carpenter tools on a farm are not numerous,
but they should have a regular place, and laborers on
the farms should be encouraged to keep the tools where
they belong.
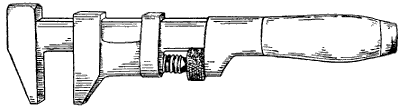
Figure 11.—Monkey-Wrenches are the handiest of all farm
wrenches, but they were never intended to hammer with. Two sizes
are needed—an eight-inch for small nuts and a much larger wrench,
to open two inches or more, to use when taking the disks off the
shafts of a disk harrow. A large pipe-wrench to hold the round
shaft makes a good companion tool for this work.
Every farmer has an axe or two, some sort of a
handsaw and a nail hammer. It is astonishing what
jobs of repair work a handy farmer will do with such
a dearth of tools. But it is not necessary to worry
along without a good repair kit. Tools are cheap
enough.
Such woodworking tools as coarse and fine toothed
hand saws, a good square, a splendid assortment of
hammers and the different kinds of wrenches, screw
clamps, boring tools—in fact a complete assortment of
handy woodworking tools is an absolute necessity on a
well-managed farm.
The farm kit should contain two sizes of nail hammers,
see Figure 15, one suitable to drive small nails,
say up to eight penny, and the other for large nails and
spikes; a long thin-bladed handsaw, having nine teeth
to the inch, for sawing boards and planks; a shorter
handsaw, having ten teeth to the inch, for small work
and for pruning trees. A pruning saw should cut a
fine, smooth kerf, so the wound will not collect and hold
moisture.
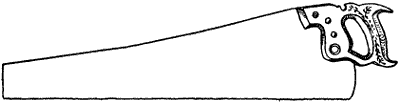
Figure 12.—Hand Saw. This pattern, both for cross cut and rip
saw, has been adopted by all makers of fine saws. Nine teeth to
the inch is fine enough for most jobs on the farm.
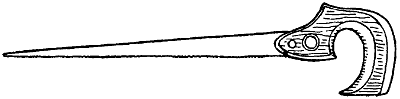
Figure 13.—Keyhole Saw with point slim enough to start the cut
from a half-inch auger hole.
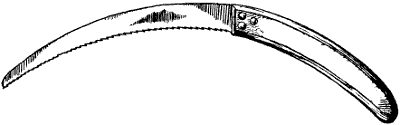
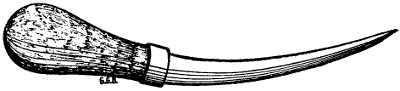
Figure 14.—Bramble Hook for trimming berry bushes and cleaning
out fence corners. It has a knife-edge with hooked sawteeth.
Farmers’ handsaws are required to do a great many
different kinds of work. For this reason, it is difficult
to keep them in good working condition, but if both
saws are jointed, set and filed by a good mechanic once
or twice a year, they may be kept in usable condition
the rest of the time by a handy farm workman, unless
extra building or special work is required.
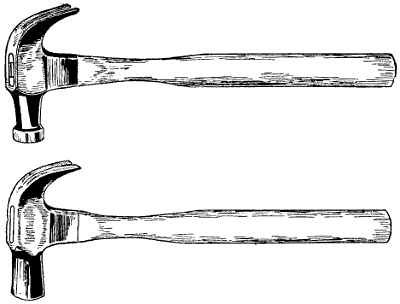
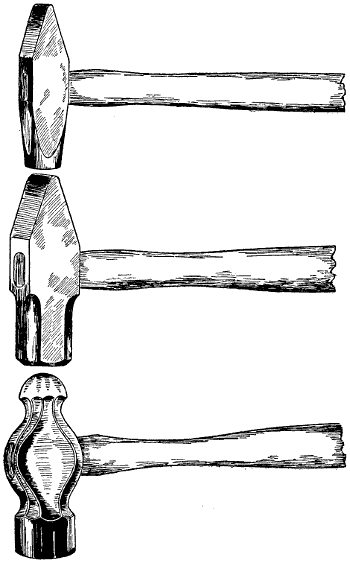
Figure 15.—Nail Hammers. Two styles.
The upper hammer is made with a ball peen
and a round face. It is tempered to drive
small nails without slipping and shaped to
avoid dinging the wood. This hammer
should weigh 18 or 19 ounces, including the
handle. The lower hammer is heavier, has
a flat face and is intended for heavy work
such as driving spikes and fence staples.
A long-bladed ripsaw is also very useful, and what
is commonly termed a keyhole saw finds more use on
the farm than in a carpenter’s shop in town. It is
necessary frequently to cut holes through partitions,
floors, etc., and at such times a keyhole saw works in
just right.
Handaxes are necessary for roughing certain pieces
of wood for repair jobs. Two sizes of handaxes for different
kinds of work are very useful, also a wide blade
draw shave, Figure 16, and shave horse, Figure 9. A
steel square having one 24-inch blade and one 18-inch
is the best size. Such squares usually are heavy enough
to remain square after falling off the bench forty or
fifty times. A good deal depends upon the quality of
the steel.
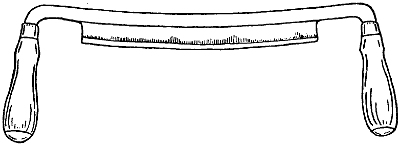
Figure 16.—Drawing-Knife with
wide blade for finishing straight
surfaces.
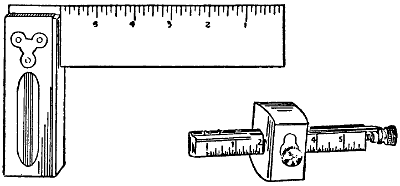
Figure 17.—Try-Square With Six-Inch Blade. Wood, brass and
steel are the proper materials for a try-square. A double marking
gauge for scribing mortises is also shown.
Steel squares differ in the measuring marks, but the
kind to buy has one side spaced to sixteenths and the
other side to tenths or twelfths. The sixteenth interest
farmers generally, so that special attention should
be given this side of the square. The lumber rule on
some squares is useful, but the brace rules and mitre
calculations are not likely to interest farmers.
Screw-drivers should be mostly strong and heavy for
farm work. Three sizes of handled screw-drivers of
different lengths and sizes, also two or three brace bit
screw-drivers are needed. One or two bits may be
broken or twisted so the assortment is sometimes
exhausted before the screw is started.
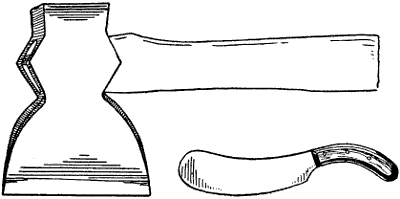
Figure 18.—Heavy Hand Axe for Use on the Shop Chopping Block.
A beet topping knife is shown also.

Figure 19.—Heavy Screwdriver. The strongest and cheapest
screwdriver is made from a single bar of steel. The wooden handle
is made in two parts and riveted as shown.
Pinch bars and claw bars are very useful in a farm
tool kit. Farm mechanical work consists principally
in repairing implements, machinery, fences and buildings.
Always a worn or broken part must be removed
before the repair can be made. A pinch bar twenty-four
inches long, Figure 21, with a cold chisel end, and
another bar eighteen inches long with a crooked claw
end, Figure 22, for pulling nails and spikes comes in
very handy. These two bars should be made of the best
octagon steel, seven-eighths of an inch in diameter.
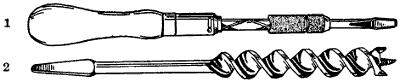
Figure 20.—(1) Ratchet Screwdriver. It does rapid work and
will last a generation if carefully used. (2) Auger-Bit of the Side
Cutter Type. A full set is needed. They are not for boring into old
wood. Running once against a nail ruins one of these bits.

Figure 21.—Handspike. A wooden handspike or pry is about seven
feet long by 3 inches thick at the prying end. In the North it is
usually made from a hickory or an ironwood or a dogwood sapling.
The bark is removed and the handle is worked round and smooth
on the shave horse. It is better to cut the poles in the winter when
the sap is in the roots. After the handspikes are finished they
should be covered deep with straw so they will season slowly to
prevent checking.
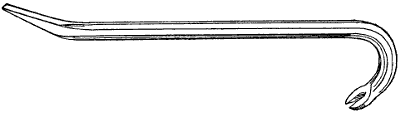
Figure 22.—Wrecking Bar for pulling nails and to pry broken parts
from other wreckage.

Figure 23.—Carpenter’s Level. For practical farm work the level
should be 24″ or 30″ long. Wood is the most satisfactory material.
The best levels are made up of different layers of wood glued together
to prevent warping or twisting. For this reason a good level
should be carefully laid away in a dry place immediately after using.
[25]
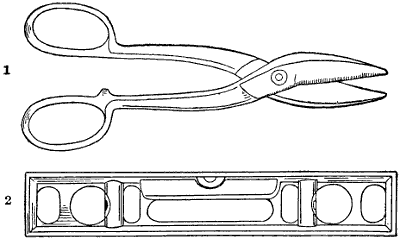
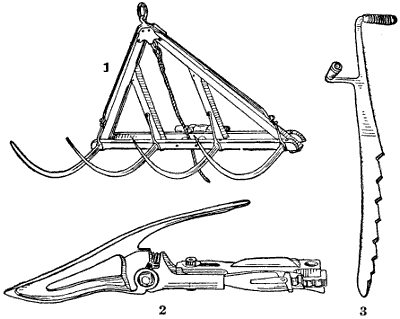
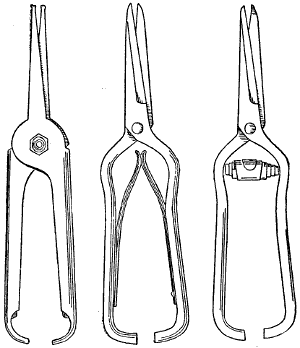
Figure 24.—(1) Snips for cutting sheet metal. (2) Carpenter’s
Level, iron stock.

Figure 25.—Wood-Boring Twist Drill Bit. Twist drills for wood
have longer points than drills for boring iron.
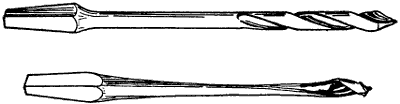
Figure 26.—Pod-Bit. The fastest boring gimlet bits are of this
pattern. They are made in sizes from to 1⁄8″ to 3⁄8″ and are intended
for boring softwood.

Figure 27.—Auger-Bits. For smooth boring the lip bits are best.
The side cutters project beyond the cutting lips to cut the circle
ahead of the chips. For boring green wood the single-worm clears
better than the double-worm bit.
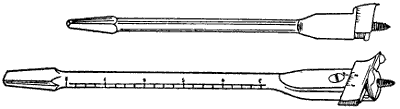
Figure 28.—Extension Boring Bits. The cutting lips may be set
to bore holes from 1⁄2″ to 3″ in diameter. They are used mostly in
softwood.

Figure 29.—Ship Auger. This shape auger is made with or without
a screw point. It will bore straighter in cross-grained wood
without a point.

Figure 30.—Long Ship Auger.

Figure 31.—Bridge Auger. The long handle permits the workman
to stand erect while boring. The home made handle is welded onto
the shank of a ship auger.
A wooden carpenter’s level, Figure 23, two feet
long, with a plumb glass near one end, is the most satisfactory
farm level, an instrument that is needed a
great many times during the year.
Good brace bits are scarce on farms. They are not
expensive, but farmers are careless about bits and
braces. Two sizes of braces are needed, a small brace
for small pod bits and twist drills, and a large ratchet
brace with a 6-inch crank radius for turning larger
bits.
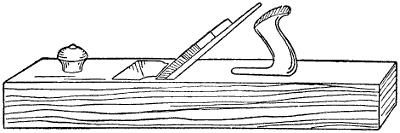
Figure 32.—Carpenter’s Jointer.
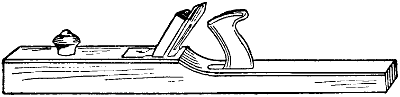
Figure 33.—Fore-Plane. This style plane is preferred to a regular
jointer for most farm work.
Twist drill bits will bore both wood and iron, and
they are not expensive up to three-eighths inch or one-half
inch. But for larger sizes from one-half inch to
one inch the finest lip wood boring bits will give the
best satisfaction. Extension bits are used for boring
holes larger than one inch. Two extension bits are better
than one bit with two lip cutters. They will bore
holes in soft wood in sizes from one inch to three inches.
Other cutting tools such as jack plane jointer and
smoothing plane, also an assortment of chisels, belong
to the farm equipment.
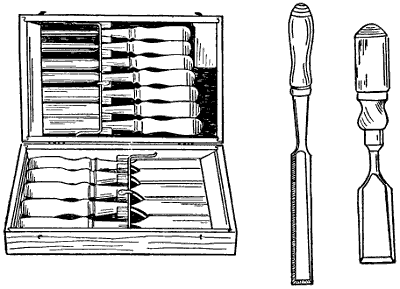
Figure 34.—Tool Box of Socket Chisels and Gouges. The chisels
are sized from 1⁄2″ to 2″ in width. The two chisels to the right
show different patterns.
All cutting tools should be of the best design and the
best steel. If they are properly used and taken care of,
the different jobs of repair work can be handled
quickly and to great advantage.
A grindstone may be gritty without being coarse so
it will bite the steel easily and cut it away quickly. A
good stone is a very satisfactory farm implement, but
a greasy stone is a perpetual nuisance.
There are grindstones with frames too light. The
competition to manufacture and sell a grindstone for
farm use at the cheapest possible price has resulted in
turning out thousands of grindstone frames that possess
very little stability.
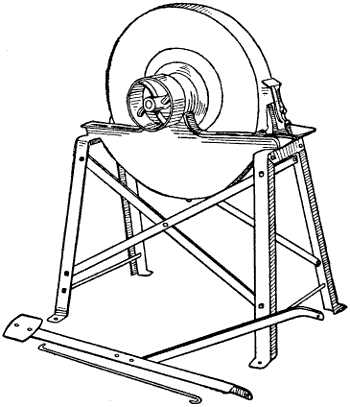
Figure 35.—Grindstone. The speed of a grindstone varies with
the diameter of the stone. It should turn just fast enough to keep
a flow of water on the upper face surface. If the stone turns too
slow the water will run down; if too fast, it will fly off.
Grindstones should be kept under cover; the best
stone will be injured by leaving it in the hot sun. The
sun draws the moisture out of the upper side and
leaves the lower side damp and soft so that in use the
stone soon becomes flat sided. The wet side freezes in
winter, which is a disintegrating process.
The best stones, with good care, will become uneven
in time. The remedy is to true them with a quarter-inch
soft iron round rod used like a lathe tool over an
iron rest placed close to the stone on a level with the
center of the stone. The rod is held against the stone in
such a way as to cut away the high bumps and make the
stone truly round. The stone cuts away best when it is
dry. A small rod is better than a large rod. It digs
into the stone better and takes out a deeper bite. Large
power stones in machine shops are trued up in this way
frequently. Farm stones often are neglected until
they wabble so badly that it is difficult to grind any
tool to an edge. If the grindstone is turned by a belt
from an engine the work of truing may be done in a
few minutes. If the stone is turned by hand the work
of making it round takes longer and requires some
muscle, but it pays.
The face of a grindstone should be rounded slightly,
and it should be kept so by grinding the tools first on
one side of edge of the stone, then on the other, with
the cutting edge of the tool crosswise to the face of the
stone.
For safety and to prevent a sloppy waste of water
the stone should turn away from the operator.
The best way to keep a stone moist is by a trickle of
water from an overhead supply. Troughs of water
suspended under the stone are unsatisfactory, because
the water soon gets thick and unfit for use. Such
troughs are forgotten when the job is done, so that one
side of the stone hangs in the water. An overhead supply
of water leaks away and no damage is done.
Grindstone frames are best made of wood 3″ x 4″
thoroughly mortised together and well braced with
wooden braces and tied across with plenty of iron rods.
A good grindstone frame could be made of angle iron,
but manufacturers generally fail in the attempt.
There are good ball-bearing grindstone hangers on
the market, both for hand crank stones and for belt
use.
The belt is less in the way if it is brought up from
below. This is not difficult to do. A grindstone turns
slower than any other farm machine so a speed reducing
jack may be bolted to the floor at the back of the
grindstone a little to one side to escape the drip. This
arrangement requires a short belt but it may have the
full face width of the pulley as the tight and loose pulleys
are on the jack shaft.
Emery Grinders.—There are small emery wheels
made for grinding disks that work quickly and cut an
even bevel all around. They are made in pairs and are
attached to the ends of a mandrel supported by a metal
stand which is bolted to a bench. The same rig is used
for sickle grinding and other farm jobs.
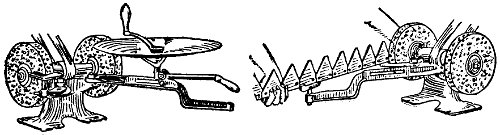
Figure 36.—Emery Grinder. The illustrations show two kinds of
grinding that double emery wheels are especially adapted to. To
grind a mowing-machine knife it is necessary to reverse. By placing
the rest opposite the center between the two wheels the bevel will
be the same on both sides, or edges, of the section.
The furniture in a blacksmith shop consists of forge,
anvil, half barrel, vise bench, drill press and tool rack.
A farm shop also has a heating stove, shave horse, a
woodworking bench, a good power driven grindstone
and a double emery grinder.
Forge.—The old-fashioned forge laid up with brick
in connection with an old-fashioned chimney is just as
popular as ever. The same old tuyer iron receives the
air blast from the same old style leather bellows, and
there is nothing more satisfactory. But there are modern
portable forges, Figure 37, made of iron, that are
less artistic, cheaper, take up less room and answer
the purpose just about as well. The portable iron forge
has a small blower attached to the frame which feeds
oxygen into the fire. There are a good many different
sizes of portable forges. Most of them work well up to
their advertised capacity.
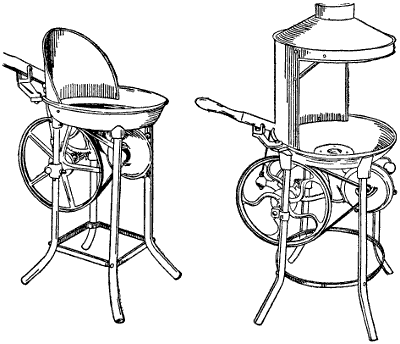
Figure 37.—Portable Forges. The smaller forge is for light work
such as heating rivets for iron bridge construction. The larger
forge to the right is meant for blacksmith work.
Generally, farm forges are not required to develop
a great amount of heat. Farmers do but little welding,
most of the forge work on the farm being confined
to repair work such as heating brace irons, so
they may be easily bent into the proper shape, or to
soften metal so that holes may be punched through it
easily.
Sharpening harrow teeth, drawing out plow points
and horseshoeing are about the heaviest forge jobs required
in a farm blacksmith shop, so that a medium size
forge will answer the purpose.
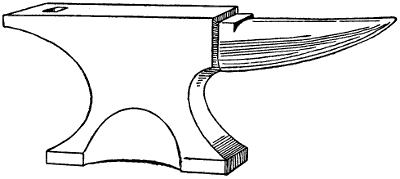
Figure 38.—Anvil. The only satisfactory anvil is forged out of
ingot steel with a power trip-hammer. It should weigh 140 pounds.
Anvil.—An anvil should weigh at least 120 pounds;
140 is better. It should be set six feet from the center
of the fire to the center of the anvil. It should be
placed on a timber the size of the base of the anvil set
three feet in the ground. The top of the anvil should
be about thirty inches high. Holmstrom’s rule is:
“Close the fist, stand erect with the arm hanging
down. The knuckles should just clear the face of the
anvil.”
Bench and Vise.—The vise bench should be made
solid and it should face a good light. The bench window
should look to the east or north if possible. It
should be about four feet high and eight feet long,
with the window sill about six inches above the bench.
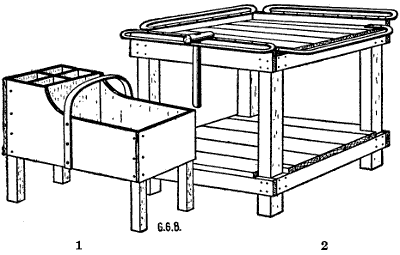
Figure 39.—(1) Shoeing Tool Box. The four small compartments
are for horseshoe nails of different sizes. There may be a leather
loop for the paring knife. The low box end is for the shoeing hammer,
rasp, nippers and hoof knife. (2) Blacksmith Tool Rack.
Tongs, handled punches and cutters are hung on the iron rails.
Hammers are thrown on top. The lower platform is the shop
catch-all.
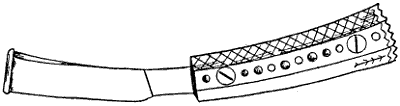
Figure 40.—Shoeing Knife. Good temper is the main qualification.
All shoeing knives are practically the same shape, although
they may vary in size.
Two and one-half feet is the usual height for a
workbench above the floor. The best workbench tops
are made by bolting together 2 x 4s with the edges up.
Hardwood makes the best bench, but good pine will
last for years. The top surface should be planed true
and smooth after the nuts are drawn tight.
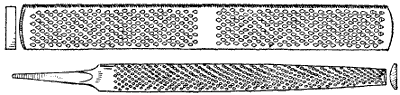
Figure 41.—Horseshoeing Rasp and Wood Rasp. These are necessary
tools in the farm shop.
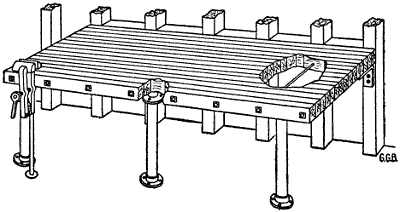
Figure 42.—Iron Work Bench. Solid is the first specification for
an iron shop bench. It should be three feet wide, not less than
eight feet long and about 32 inches high. The top is made of 2 x 4s
placed on edge and bolted together. The supports are 2 x 6 bolted
to the shop studding and braced back to the studding at the sill.
The front part of the bench is supported by iron legs made of gas-pipe
with threaded flanges at top and bottom. Heavy right angle
wrought iron lugs are used to fasten the top of the bench to the
studding. The foot of the vise leg is let into the floor of the shop
or into a solid wooden block sunk in the ground.
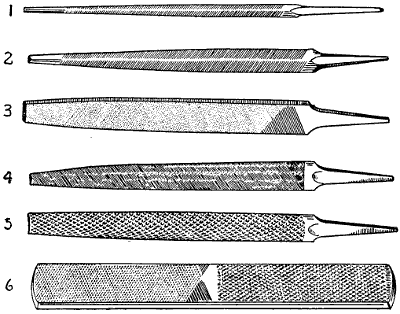
Figure 43.—Assortment of Files and Rasps needed in a farm shop.
(1) Slim three-cornered handsaw-file. (2) Common three-cornered
file suitable for filing a buck-saw. (3) Double-cut, or bastard, 10-inch
flat file. (4) Single-cut, or mill file, either 10 or 12 inches.
(5) Half-round 10-inch wood rasp. (6) Horseshoer’s rasp.
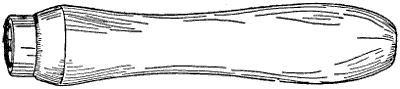
Figure 44.—File Handle. Basswood makes the most satisfactory
file handles. They are fitted by carefully turning them onto the
file shank to take the right taper. There should be a handle for
each file. The handle should be the right size and fitted straight
with the file so the file will take the same angle to the work when
turned over.

Figure 45.—Nail Set. On all wooden surfaces to be painted nails
should be carefully driven with a round peen nail hammer and the
heads sunk about one-eighth of an inch deep with a nail set. The
holes may then be filled with putty and covered smoothly with paint.

Figure 46.—Cold-Chisel. There are more flat cold-chisels than
all other shapes. They are easily made in the farm shop and it is
good practice. They are usually made from octagon steel. Different
sizes are needed according to the work in hand. A piece of 5⁄8″
steel 6″ long makes a handy cold-chisel for repair work.

Figure 47.—Cape Cold-Chisel. It may be tapered both ways or one
way to a cutting edge, or one edge may be rounded.
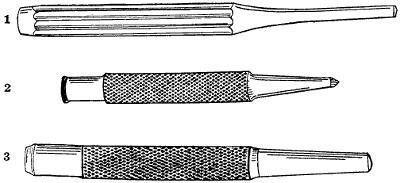
Figure 48.—(1) Tinner’s Punch. Made of octagon steel in sizes
to fit the rivets. The cutting end is flat and has sharp edges made
by roll filing. It should be about 7″ long and from 3⁄8″ to 1⁄2″ in
diameter, according to the size of rivet and thickness of sheet metal
to be punched. (2) Prick Punch. Usually made rather short and
stocky. It may be 1⁄2″ or 5⁄8″ diameter and 41⁄2″ to 5″ long. (3)
Hot-iron Punch. Made in many sizes and lengths. The taper
should be the same as the drawing.
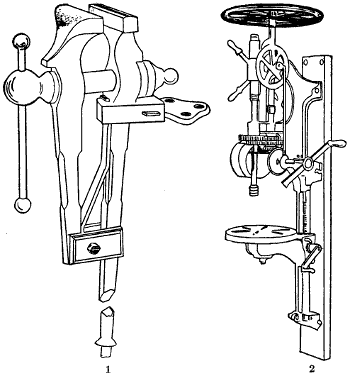
Figure 49.—(1) Blacksmith Vise. The old-fashioned leg vise is
the most satisfactory for the blacksmith shop. It should have 5″
jaws. (2) Power Post Drill. Belt power is practical for the post
drill in a farm shop. The hand crank may be easily attached when
needed.
The bench vise should be heavy. A vise is used for
bending iron hot from the forge. Unless the jaws are
large, the hot iron is likely to heat the vise sufficiently
to draw the temper. Heavy jaws are solid enough to
support the iron when it is being hammered. Often
heavy hammers are used for this purpose. A heavy
vise holds the work solid, because it may be screwed
so much tighter than a light vise. A heavy vise will
hold light work, but a light vise will not hold heavy
work. Heavy vises cost more, but they are cheaper in
the end and more satisfactory at all times. A leg vise
with five-inch jaws weighs about sixty pounds; five and
one-half-inch jaws, eighty pounds. A machinist’s vise
is made to bolt on top of the bench. It will answer for
blacksmith work on the farm, but is not as good as the
old-fashioned leg vise. A machinist’s vise is very useful
in the garage, but it would hardly be necessary to
have two heavy vises. The pipe vise belongs on a
separate bench, which may be a plank bracketed
against the side of the room.
Drill-Press.—The most satisfactory drill-press for
use on a farm is the upright drill that bolts to a post.
There is usually a self feed which may be regulated
according to the work. The heavy flywheel keeps the
motion steady, and because there is no bench in the
way, wagon tires may be suspended from the drill
block, so they will hang free and true for drilling.
Often long pieces of straight iron are drilled with
holes spaced certain distances apart. It is easier to
pass them along when they lie flat side down on the
drill block. To use a drill properly and safely, the
chuck must run true. It is easy to break a drill when
it wabbles.
Most drills are made on the twist pattern, and it is
something of a trick to grind a twist drill, but anyone
can do it if he tackles the job with a determination to
do it right. In grinding a twist drill, use a new drill
for pattern. Grind the angles the same as the new
drill, and be careful to have the point in the center. A
little practice will make perfect.
Mechanics will say that no one except an expert
should attempt to grind a twist drill, but farmers who
are mechanically inclined are the best experts within
reach. It is up to a farmer to grind his own drills or
use them dull.
In drilling wrought iron either water or oil is required
to cool the drill, but cast iron and brass are
drilled dry. Light work such as hoop-iron may be
drilled dry, but the cutting edge of the drill will last
longer even in light work if the drill is fed with oil or
water.
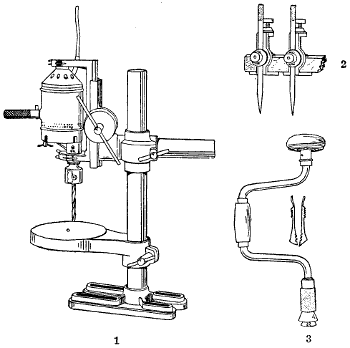
Figure 50.—(1) Electric Drill-Press. A small electric motor is
attached to the drill spindle. (2) Tram Points. Two steel points
are fitted with thumbscrew clamps to fasten them to a long wooden
bar. They are used to scribe circles too large for the compasses.
(3) Ratchet-Brace. Two braces, or bitstocks, are needed. A large
brace with a 6″ radius for large bits and a small brace with a 3″
or 31⁄2″ radius for small bits.
In using drill-presses, some extra attachments come
in very handy, such as a screw clamp to hold short
pieces of metal. Before starting the drill, a center
punch is used to mark the center of the hole to be bored
and to start the drill in the right spot.
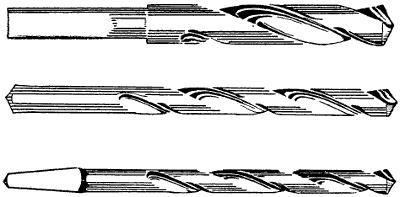
Figure 51.—Twist-Drills. Round shank for the post drill and
square taper shank for brace work. Brace drills are small, 1⁄4″ or
less.

Figure 52.—Taper Reamer. Used to enlarge, or true, or taper a hole
that has been drilled or punched.

Figure 53.—Another style of Reamer.

Figure 54.—Countersink. This is the old style, blacksmith-made,
flat countersink. It will do quick work but not so smooth as the
fluted kind.
In doing particular work, the drill may be re-centered
when it starts wrong. This is done with a
small round-nosed cold chisel. If the work is not very
particular, the drill may be turned a little to one side
by slanting the piece to be drilled. This plan is only
a makeshift, however, the proper way being to block
the work level, so that the drill will meet it perpendicularly.
However, by starting carefully, the hole may be
bored exactly as required.
Iron Working Tools.—Forge tools for a farm shop
need not be numerous. Several pairs of tongs, one
blacksmith hammer, one sledge, one hardy, one
wooden-handled cold chisel, one pair pincers, one paring
knife, one shoeing rasp, and one shoeing hammer
will do to begin with.
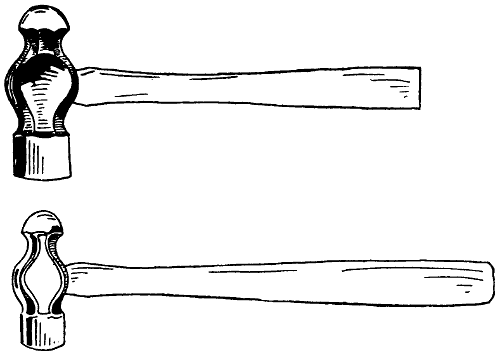
Figure 55.—Machinist’s Hammers. A medium
weight should be selected for farm
repair work. It should be hung so the end
of the handle clears half an inch when the
face rests flat on the bench.
Monkey-wrenches come first in the wrench department.
The farmer needs three sizes, one may be quite
small, say six inches in length, one ten inches, and the
other large enough to span a two-inch nut. And there
should be an ironclad rule, never use a monkey-wrench
for a hammer. For work around plows, cultivators,
harvesters, and other farm machines, a case of S
wrenches will be greatly appreciated. Manufacturers
include wrenches with almost all farm machines, but
such wrenches are too cheap to be of much use.
[43]
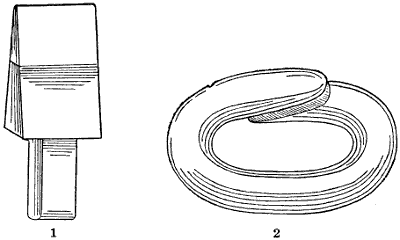
Figure 56.—(1) Hardy. The anvil hardy is used more than any
other anvil tool except the blacksmith’s hammer and tongs. (2) A
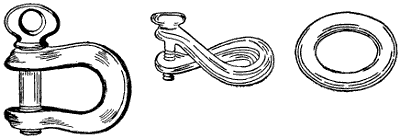
Cold-Shut Link that may be welded, riveted or simply pounded shut.
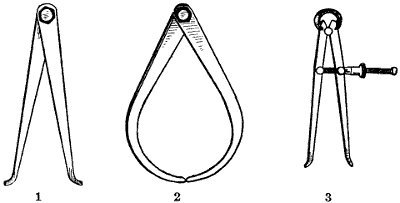
Figure 57.—Calipers: (1) A pair of tight-joint inside calipers.
(2) Its mate for taking outside dimensions. (3) A pair of spring-jointed,
screw-adjustment inside calipers for machinists’ use.

Figure 58.—Blacksmith Tongs. Straight tongs made to hold 3⁄8″
iron is the handiest size. Two or three pairs for larger sizes of iron
and one pair smaller come in handy.
[44]
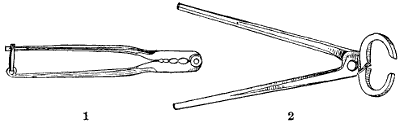
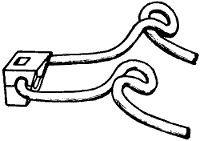
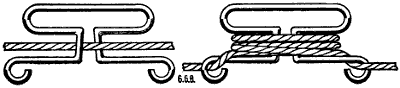
Figure 59.—(1) Wire Splicer. The oval openings in the tool are
of different sizes. They are made to hold two wires, close together,
with ends projecting in opposite directions. Each end is wound
around the other wire. The ends are then notched with a three-cornered
file and broken off short and filed smooth. The splicing
tool should be thin, about 1⁄8″ or 3⁄16″, to bring the two twists close
together. This is especially necessary in making hoops for wooden
pails. (2) Blacksmith Shoeing Pincers, used to pull horseshoes.
They should close together to catch a nail by the head.
For heavier work pipe-wrenches are absolutely
necessary. The reason for having so many wrenches is
to save time when in the field. It often happens that
men and horses stand idle waiting for what should be
a quick repair job.
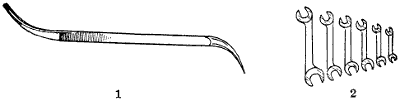
Figure 60.—(1) Cotter Pin Tool. Handy for inserting or removing
all sorts of cotter keys. (2) Nest of S Wrenches of different
sizes. Farmers have never appreciated the value of light, handy
wrenches to fit all sorts of nuts and bolt heads closely.
For bench work a riveting hammer and a ball peen
machinist’s hammer are needed. A nest of S wrenches,
two rivet sets, cold chisels, round punches and several
files also are required.
The same twist drills up to three-eighths-inch will
do for iron as well as wood. However, if much drilling
is done, then round shank twist drills to fit the drill
chuck will work better. Farmers seldom drill holes in
iron larger than one-half inch. For particular work,
to get the exact size, reamers are used to finish the
holes after drilling. Screw holes in iron are countersunk
in the drill-press.
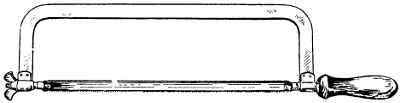
Figure 61.—Hack Saw. One handle and a dozen blades. The
frame should be stiff enough either to push or pull the saw without
binding. The teeth may point either way to suit the work in hand.
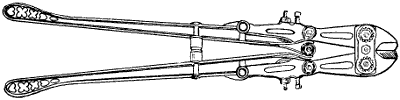
Figure 62.—Powerful Bolt Cutter. It is intended for factory use.
For small work, twist drills with square shanks for
brace use should range in sizes from one thirty-second
of an inch up to one-quarter inch, then every one-sixteenth
inch up to one-half inch.
For boring screw holes in wood the quickest work is
done with pod bits. Not many sizes are needed, but
they are cheap, so that a half dozen, ranging from one-sixteenth
to one-quarter inch or thereabouts, will be
found very useful. Pod bits belong to the wood department,
but on account of being used principally for
screw sinking, they are just as useful in the iron working
department as in the carpenter shop.
Sheet metal snips for cutting sheet metal properly
belong with the iron working tools. Snips are from
ten to fourteen inches in length. A medium size is
best for miscellaneous work. If kept in good working
order twelve-inch snips will cut 18-gauge galvanized
or black iron. But a man would not care to do a great
deal of such heavy cutting.
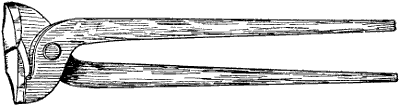
Figure 63.—Cutting Nippers. For cutting the points from horseshoe
nails after they are driven through the hoof to hold the shoe
in place. These nippers are hard tempered and should not be used
for any other purpose.
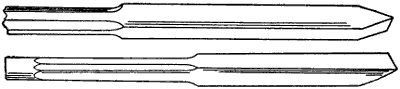
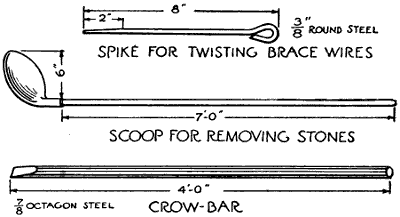
Figure 64.—Two Shapes of Steel Crowbars.
Pipe-Fitting Tools.—Recent farm improvements require
a few tools that rightfully belong to plumbers.
Every farm has some kind of water supply for domestic
use and for live-stock. A great many farm machines
require pipe tools for repair work. Every year
more plumbing reaches the farm.
Plumbing work is no more difficult than other mechanical
work, if the tools are at hand to meet the different
requirements. One job of plumbing that used
to stand out as an impossibility was the soldering together
of lead pipes, technically termed “wiping a
joint.” This operation has been discontinued. Every
possible connection required in farm plumbing is now
provided for in standardized fittings. Every pipe-fitting
or connection that conducts supply water or waste
water nowadays screws together. Sizes are all made to
certain standards and the couplings are almost perfect,
so that work formerly shrouded in mystery or
hidden under trade secrets is now open to every
schoolboy who has learned to read.
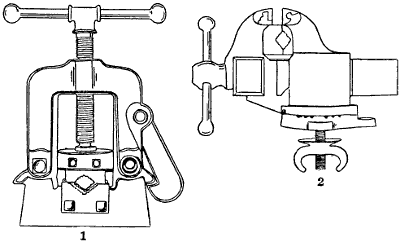
Figure 65.—(1) Pipe Vise. Hinged to open for long pipes. (2)
Machinist’s Vise. Made with a turntable to take any horizontal
angle. The pipe jaws are removable.
The necessary outfit to handle all the piping and
plumbing on the farm is not very expensive, probably
$25.00 will include every tool and all other appliances
necessary to put in all the piping needed to carry water
to the watering troughs and to supply hot and cold
water to the kitchen and the bathroom, together with
the waste pipes, ventilators and the sewer to the septic
tank. The same outfit of tools will answer for repair
work for a lifetime.
Farm water pipes usually are small. There may be
a two-inch suction pipe to the force pump, and the discharge
may be one and a half inch. But these pipes are
not likely to make trouble.
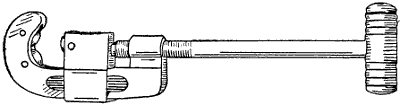
Figure 66.—Pipe Cutter. The most satisfactory pipe cutter has
three knife-edge roller cutters which follow each other around the
pipe. Some of these cutters have two flat face rollers and one cutter
roller to prevent raising a burr on the end of the pipe. The flat face
rollers iron out the burr and leave the freshly cut pipe the same size
clear to the end.
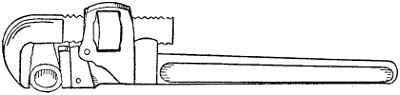
Figure 67.—Pipe-Wrench. This type of wrench is valuable for
working with the heavier farm implements. It is intended more for
holding than for turning. It is rather rough on nuts. Damaged
nuts show signs of careless work.
There should be a good pipe vise that will hold any
size pipe up to three inches. At least two pipe wrenches
are needed and they should be adjustable from one-quarter-inch
up to two-inch pipe.
We must remember that water pipe sizes mean inside
measurements. One-inch pipe is about one and
one-quarter inches outside diameter. Three-quarter-inch
pipe is about one inch outside. Two-inch pipe will
carry four times as much water as one-inch pipe, under
the rule “doubling the diameter increases the capacity
four times.”
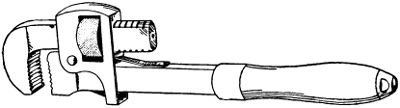
Figure 68.—A smaller sized wrench with wooden handle.
The three-wheel pipe cutter works quickly and is
satisfactory for most jobs. Sometimes two of the knife
wheels are removed and rollers substituted to prevent
raising a burr on the end of the pipe.
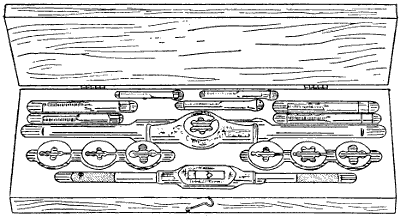
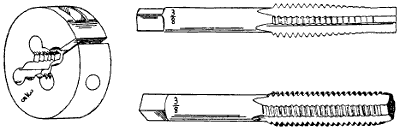
Threading dies are made in standard sizes. A good
farm set consists of stock and dies to thread all the
different sizes of pipe from one-quarter inch to one
inch, inclusive. Not many pipes larger than inch are
threaded on the farm. They are cut to the proper
lengths in the farm shop and the threads are cut in
town.
[50]