CHAPTER IV. SHOP ORGANIZATION — 1. Location of Shops. — 2. Division or Allotment of Time. — 3. Informational and Related Matter Pertaining to Woodwork and Mechanical Drawing. — 4. Woodfinishing. — 5. Structural and Decorative Design. — 6. Shop Excursions. — 7. Stock Bills. — 8. Estimating Cost of Material. — 9. Lumber and Material Bill for High School. — 10. Standardizing Materials and Tools. — 11. Records, Forms of Reports, Grading Work. — 12. Shop Conduct. — 13. The Lesson. — 14. Maintenance.
Shops for high school pupils will be
located in or near the high school building. A special effort should be
made to have both wood shop and drawing room placed in suitable
environment. Where manual training has been introduced into high
schools with buildings planned for academic work only, it has been the
custom to place manual training in the basement and drawing in the
attic, these being the only places available for subjects that had yet to
prove their worth. Even today, when it is a well established fact that
handwork as a part of our educational course has not only proven its
worth but is prophesied a greater place in our educational scheme in
the form of industrial training, some school authorities not only place
shops in basements of old buildings but plan new buildings with basement
shops. This is an economy with nothing to justify it but tradition.
In many cities the custom of building basements high out of the
ground serves to mitigate some of the evils, by giving a fair degree of
light and ventilation. Any basement, however, that is formed with a
cement floor directly on the ground will be damp in the spring and fall
when the heating apparatus ceases to force warm air thru the rooms.
The result upon tools, upon wood, and upon the health of those who
must spend their time in such surroundings is not a matter of speculation.
Any subject to be taught to the best advantage must not only be a
subject that will win the respect of the pupils but it must be given
surroundings that will not tend to degrade it in the eyes of the immature
student. Excellent work has been done in basement rooms and excellent
discipline maintained under very adverse conditions but it has been in
spite of these conditions and not because they do not influence the student
unfavorably. In spite of the instructor’s best efforts to create a feeling
of respect toward the basement shopwork similar to that entertained
toward the academic work, pupils in going from the comfortably furnished
rooms above, in which the decorator’s art has helped to make
everything agreeable to the eye, unconsciously assume an attitude in their
first conduct and deportment that places the shop instructor at a disadvantage.
Fig. 1.
ARRANGEMENT OF HIGH SCHOOL SHOP WITH REFERENCE
TO MAIN BUILDING.
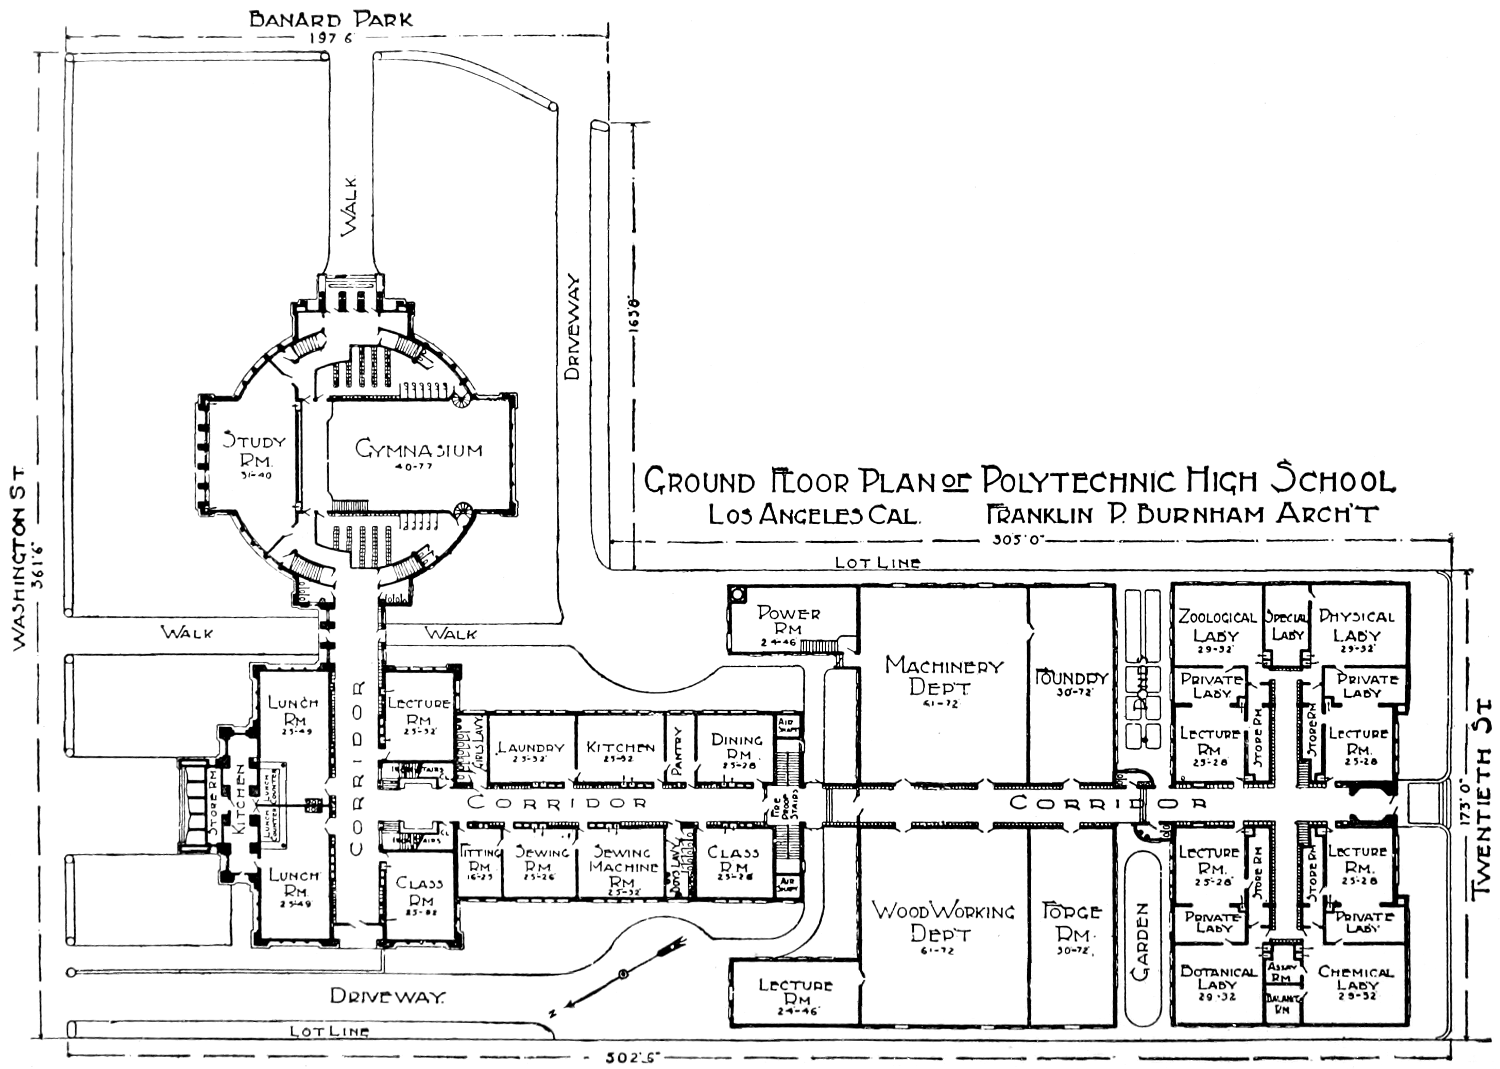
From the June, 1908 Manual Training Magazine
Ground Floor Plan of
Polytechnic High School
Los Angeles Cal. Franklin P. Burnham
Arch’t
The chief objection, aside from cost, to placing shops above ground
is the noise. This objection has been met, and can easily be met by any
competent architect. The accompanying floor plans are indicative. Fig. 1.
In some high schools, the shops are entirely separated from the main
or academic classrooms. This is unsatisfactory, as any one familiar with
high school organization knows. The frequent change of classes after
short periods makes the going from one building to another a matter of
serious moment, especially in our northern winter climate.
Shopwork has won its place fairly in our school courses and it is
encouraging to note an increasing tendency on the part of progressive
communities to place shop and drafting-room in environment calculated
to create a feeling of respect, to give dignity equal to that of other school
subjects, and to provide favorable conditions for the best working of
materials.
In the grammar schools the problem is but slightly different. In a
city of any size, shopwork will need to be given in centers. The
alternative of a shop in each school with an instructor going from shop
to shop on different days of the week is hardly practicable. The equipment
of a shop is a matter of too great cost to have it lying idle part of
the school time. There is added disadvantage in that a peripatetic shop
instructor cannot “keep up” his several shops with divided interest as
well as he can keep up one in which he works constantly.
The best plan is to have a center or shop located favorably for several
neighboring schools and install an instructor in this center. The pupils
are to be sent to him from a sufficient number of schools to occupy his
entire time at this shop.
Here again the basement makes its appeal to school authorities first,
the basement of some one of the grammar schools being utilized for a
shop center. Since almost all of the pupils come from other schools,
there is no excuse, other than economy, in placing grammar school
manual training shops in basements of schools already established. If
the high school shopwork suffers a disadvantage by being placed in basement
rooms, grammar school shopwork suffers more, and with less
excuse.
Since domestic science cannot well be taught in basements, and is
objectionable on main floors because of noise and odors, and since there
is no reason for having the laboratories directly connected with any
grammar school building, the best plan is to erect a special building to
house both manual training and domestic science. The cost need not be
great and the building may be erected upon grounds of some one of the
grammar schools. Evanston, Illinois, public schools offer a good illustration.
Figs. 2 and 3.
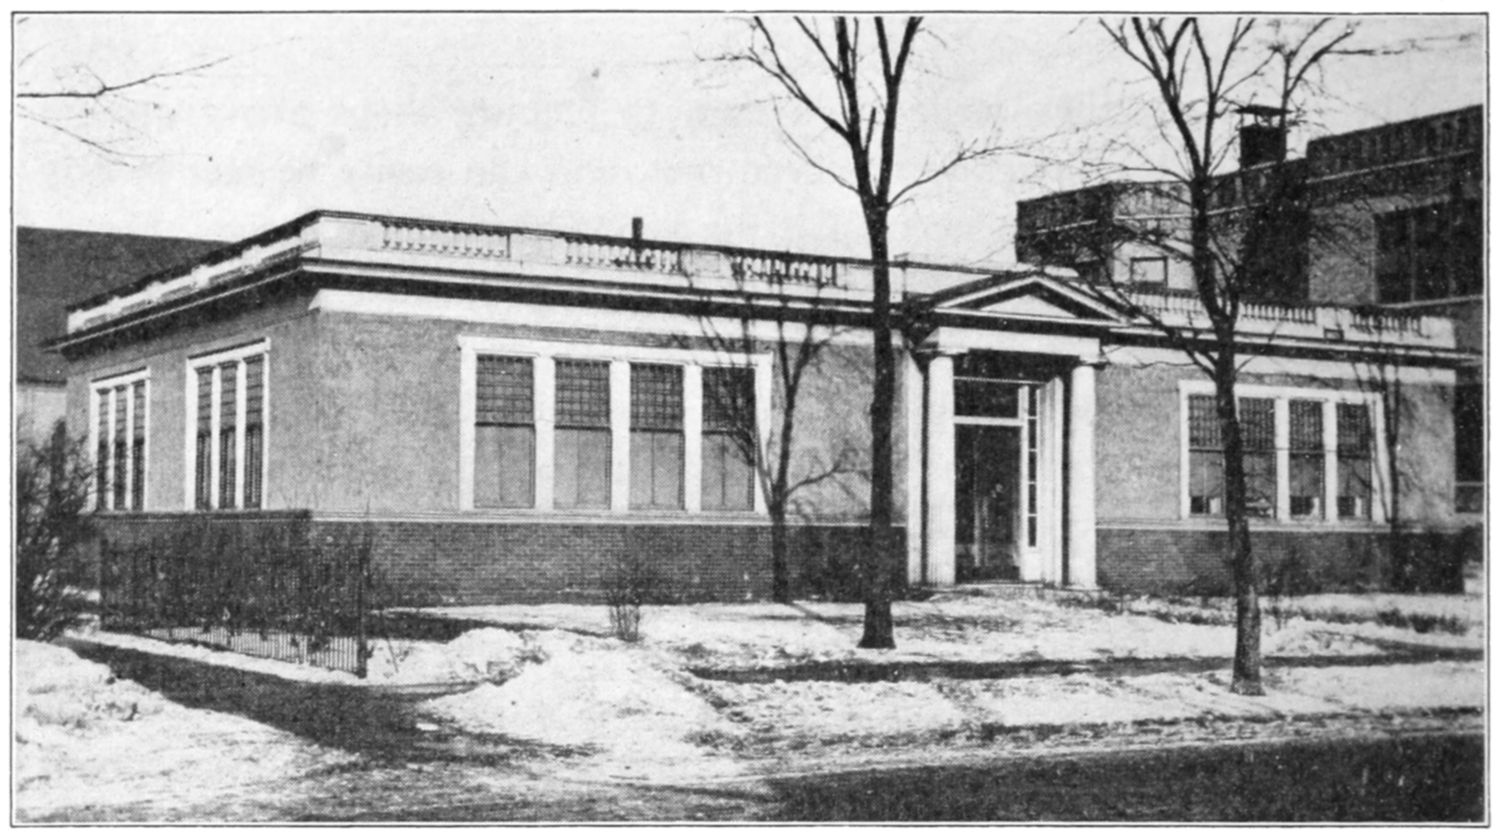
FIG. 2. EXTERIOR GRAMMAR SCHOOL BUILDING FOR MANUAL TRAINING AND DOMESTIC
SCIENCE, EVANSTON, ILLINOIS.
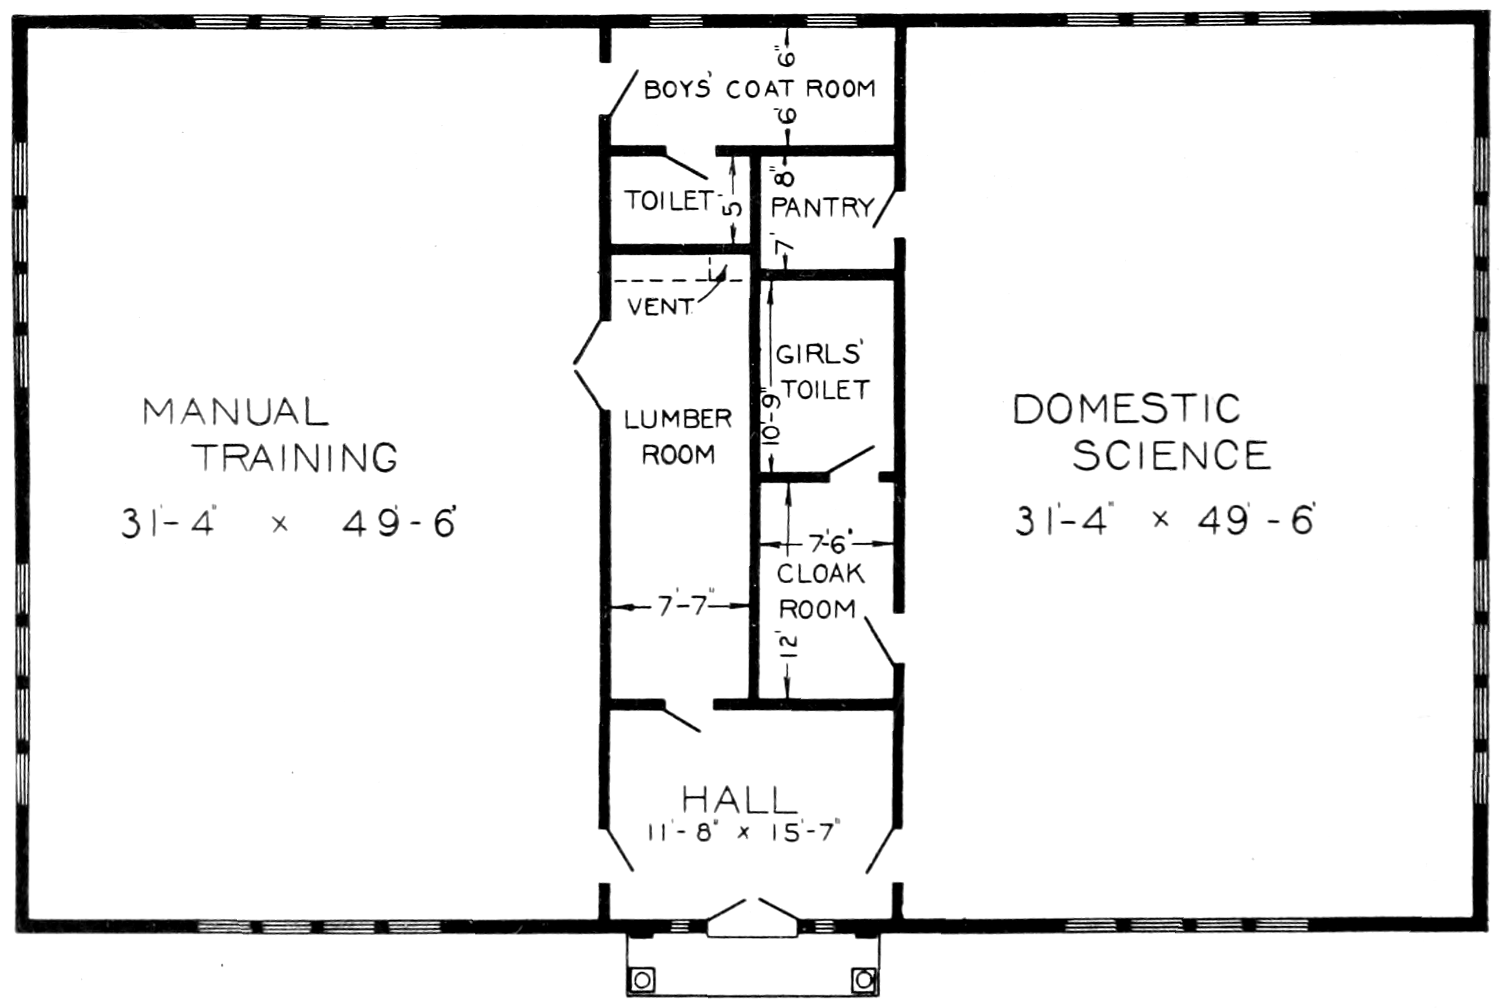
FIG. 3. FLOOR PLANS OF BUILDING, EVANSTON, ILLINOIS.
The proper placing of centers in a community will depend upon the
number of pupils to be cared for, the distance they must travel to get to
the center, and the site available.
Two divisions of time
are common in grammar school shopwork, the one-fourth and the one-half
day period once a week. In some cities manual training is given in
sixth, seventh and eighth grades of the grammar schools. In others it
is given in seventh and eighth grades only. In the former case, to the
best of the author’s information, the period never exceeds one-fourth day
each week. In the latter it very frequently occupies one-half day a
week. The outline for drawing and manual training as given in this
book presupposes the one-half day period. In favor of this period of
time are the following: The pupils go and come to manual training on
time out of school hours. This is a very decided gain and permits the
placing of centers so as to accommodate schools of widely differing
locations. Second, more and better work is accomplished in a one-half
day period of one year than in a one-fourth day period for two years.
In the one-fourth day period the pupil hardly gets his tools set and
adjusted when the bell signals him to begin to “clean up,” resulting in
much unprofitable effort. Our college administrators, who are responsible
for originating the short and infrequent period spread over a
long period of months or years, have long since found that better work
and more of it is obtained where the study is given a more intensive
view, the total number of hours for the course remaining the same but
being condensed into less calendar time.
The chief objection offered against the one-half day period is that the
pupil becomes tired, exhausted, and therefore disinterested and troublesome
before the close of the period. Where the full two hours and a half
are devoted entirely to shopwork, especially if the shopwork is of such a
nature as to make little appeal to the interest of the pupil, this argument
is valid. If, however, each period has its recitation on assigned study
and its demonstration on the new work to be presented there remains
but two hours of work requiring the student to be on his feet and, if
the interest is what it should be, very few boys will complain of fatigue.
The writer makes it a custom to give, in the place of the conventional
recess, a short five minute rest period. Boys are permitted to talk and
move about the shop but he has found that as many boys prefer to
continue their woodwork as prefer to rest.
If the one-fourth day period is to be used, it will be necessary to give
recitations and demonstrations on alternate days, and will necessitate
introducing the work lower than the seventh grade. It is hardly
profitable to begin serious, systematic work lower than the seventh grade,
and when it is begun in seventh grade it is hardly possible to make it
serious with a time allotment of less than one-half day each week.
There is not the same need for recess in shopwork as in academic
work. A five minute rest period is sufficient to permit pupils to make
known to each other their wishes or information. In this way it is
possible to dismiss the pupils ten minutes earlier than they otherwise
would be, thus allowing the morning class extra time for reaching home.
In the high school the time allotment is generally permitted to be
governed by the periods arranged for the academic subjects. The
common arrangement is to give two consecutive periods equal to two of
the recitation periods of the academic subjects for shopwork and another
for drawing each day thruout the week. If the periods are one hour
each, which is unusual in high schools tho common in colleges, but one
period is given to the shop.
Where manual training has been given serious consideration in the
seventh and eighth grades of the grammar schools under competent instructors
it ought to be possible to cover the necessary benchwork in
wood in the first half of the freshman year of the high school. This will
leave the second half for turning or for benchwork in metal, preferably
the latter.
To mechanical drawing the first half of the freshman year of one
period each day should be devoted, followed in the second half by freehand
drawing, perspective and design.
The mechanical drawing of the grammar schools, it will be noted in
the lesson outlines, takes the first twelve weeks or lessons of each year.
Mechanical drawing in grammar schools is usually presented in one of
three ways. First, by having the pupil make his drawing then immediately
make the object drawn in wood, carrying on woodwork and
drawing side by side thruout the year. Second, by having the pupil
make the object in wood first, followed by the drawing. Third, by
taking the first ten or twelve weeks of the year for making up all the
drawings of that year, following this with a continuous application in
wood.
After experimenting thru a number of years the writer finds the third
practice possesses many marked advantages. Among other things that
make it more satisfactory are the following: It permits concentration
of the pupil’s attention upon one thing at a time. Where woodwork
and drawing are carried on side by side or even where they alternate
the pupil’s attention and interest are divided. So much more interesting
do the pupils find the woodwork with its freer activity that the drawing
suffers immeasurably, it being almost impossible to get anything like the
proper attitude toward the technique of drawing when the young pupil
is allowed to see the immediate application in wood all around him.
The instructor’s struggles for neatness and accuracy in the drawings are
no match for the barbarous haste of the beginner in his desire to get
thru with the drawing and get at the woodwork. It is impossible to
get concentration on drawing in a woodshop with tools all about and
the knowledge on the part of the pupil that only the drawing separates
him from the tools.
The ideal way would be to have a separate drawing-room and equipment
as in high school. This, however, is impracticable in most grammar
schools. The woodworking teacher being the drawing teacher makes it
impossible to utilize both shop and separate drawing-room to advantage.
The fitting up and heating of rooms that are to be used only part of
the school time makes a separate drawing-room an unwarranted expense
in grade schools. A satisfactory substitute is to utilize the woodshop
benches for drawing benches but to remove all tools, having it distinctly
understood that ten or twelve weeks are for drawing, and that, no matter
how many drawings are produced by a pupil, he will begin no woodwork
until the time allotted to drawing is up. It becomes possible to secure
the right attitude toward the drawing. By this concentration of attention
both drawing and woodwork are the gainers.
Second, it enables the shop instructor to tell what supplies are going
to be needed for the woodwork and to get them delivered in time without
returning from his summer’s vacation several weeks before school begins.
In the twelve weeks of drawing the woodworking tools and equipment
can be looked over and put in order in plenty of time without breaking
into the summer months that belong to the instructor. Where the
woodwork begins at the beginning of school in September the instructor
must either take the fore part of his vacation at the close of school to
put his tools in shape or, if he has them simply cleaned and vaselined
by the pupils and stores them for the summer, he must come back several
weeks before school. This is true whether he does his own sharpening
or has it done, and the advantage in having woodwork begin some weeks
later than school is very manifest.
Third, this latter arrangement gives the pupil an intelligent preview
of the whole year’s work in wood thru the drawings he makes in the
first ten or twelve weeks.
Mechanical drawing, even in the grades, has a right to a clean,
quiet, well lighted room without unnecessary distractions either to the
eye or ear. This, with a definite understanding on the pupil’s part that
drawing technique is the major and the utility of the drawing the minor
consideration, should put the pupil in the right attitude toward his
drawing work and make it possible to secure the best drawings he is
capable of producing. No one, not even a finished draftsman, could
produce good drawings surrounded by the noise and dust of neighboring
woodworkers. Under the alternating system there are always slow
pupils who, if they finish their drawings before they make the application,
must do it while the others are working in wood. Add to the noise and
dust this pupil’s feeling that he too ought to be at his woodwork and
the limit of unfavorable conditions for producing a drawing are reached.
Making the year’s drawings the first twelve weeks of the year enables
one to avoid these unfavorable conditions.
Fourth, this arrangement makes possible a graduated transition from
the quietness and restrictedness of the academic class room to the noise
and greater freedom of the woodshop.
When beginning pupils come to the grammar school manual training
shop for the first time at the beginning of school in September, it is with
an overplus of energy and noise. To reduce these sufficiently to permit
of getting anything like satisfactory results in shopwork, the instructor
is placed at once squarely before a large problem in discipline. This
problem is very greatly simplified by introducing the pupil to ten or
twelve weeks or lessons in mechanical drawing before beginning the
woodwork.
Conditions surrounding a pupil in mechanical drawing classes are
very similar to those he finds in his regular academic classes and he can
readily be brought to understand that quietness, and orderliness with
seriousness of purpose are as necessary a part of his manual training as
of his academic work. After this attitude has been fixed in the pupil’s
mind in connection with his manual training thru the mechanical
drawing when the transition to woodwork is made, where more freedom
must be allowed, the pupil will be better able to distinguish between
legitimate noise and noise that is entirely unnecessary, and between
freedom and license.
Closely related to any
subject is a vast fund of informational matter. If the student is to have
an intelligent understanding of the subject matter, he must be given
opportunity to become acquainted with at least the most important of
this related information.
In the seventh grade the necessary study of tools and processes occupies
the pupil’s time fully. In the eighth grade opportunity offers itself for
introducing such subjects as wood structure, tree growth, lumbering,
and milling. In high school, the pupil should be made familiar with the
most common woods, their classification, characteristics, and uses.
High school pupils should be assigned outside readings on forestry.
They should secure and classify specimens of the more common woods
and should be able to recognize the tree by leaf, fruit, bark, wood and
tree form. See Figs. 4, 5, and 6.
In the grammar grades, mounted specimens should be prepared illustrative
of tree structure, shrinkage, defects, etc. As in the high school,
pupils should be encouraged to seek and prepare specimens illustrative of
the subjects under consideration.
It is now possible to rent or purchase very excellent lantern slides on
forestry, lumbering, milling, etc. Add the use of these to that of the
mounted specimens if at all possible.
The detailed lesson outlines indicate definitely where these subjects
are to be given attention in the course. The pages of the text are also
indicated. The high school library should be provided with the very
excellent bulletins of the United States Department of Agriculture,
Division of Forestry, most of which are for free distribution.
The subject of woodfinishing is treated in
a manner quite similar to that of woodworking. No pieces of woodwork
that should have a finish are ever sent from the shop until they have
been treated to a finish calculated to make them fit for immediate placing
in their future surroundings.
While the general outline of the course in woodwork makes no mention
of woodfinishing, the lesson outline indicates the gradual introduction
of the subject, beginning with the simplest finishes first and
terminating in high school in the rubbed copal varnishes.
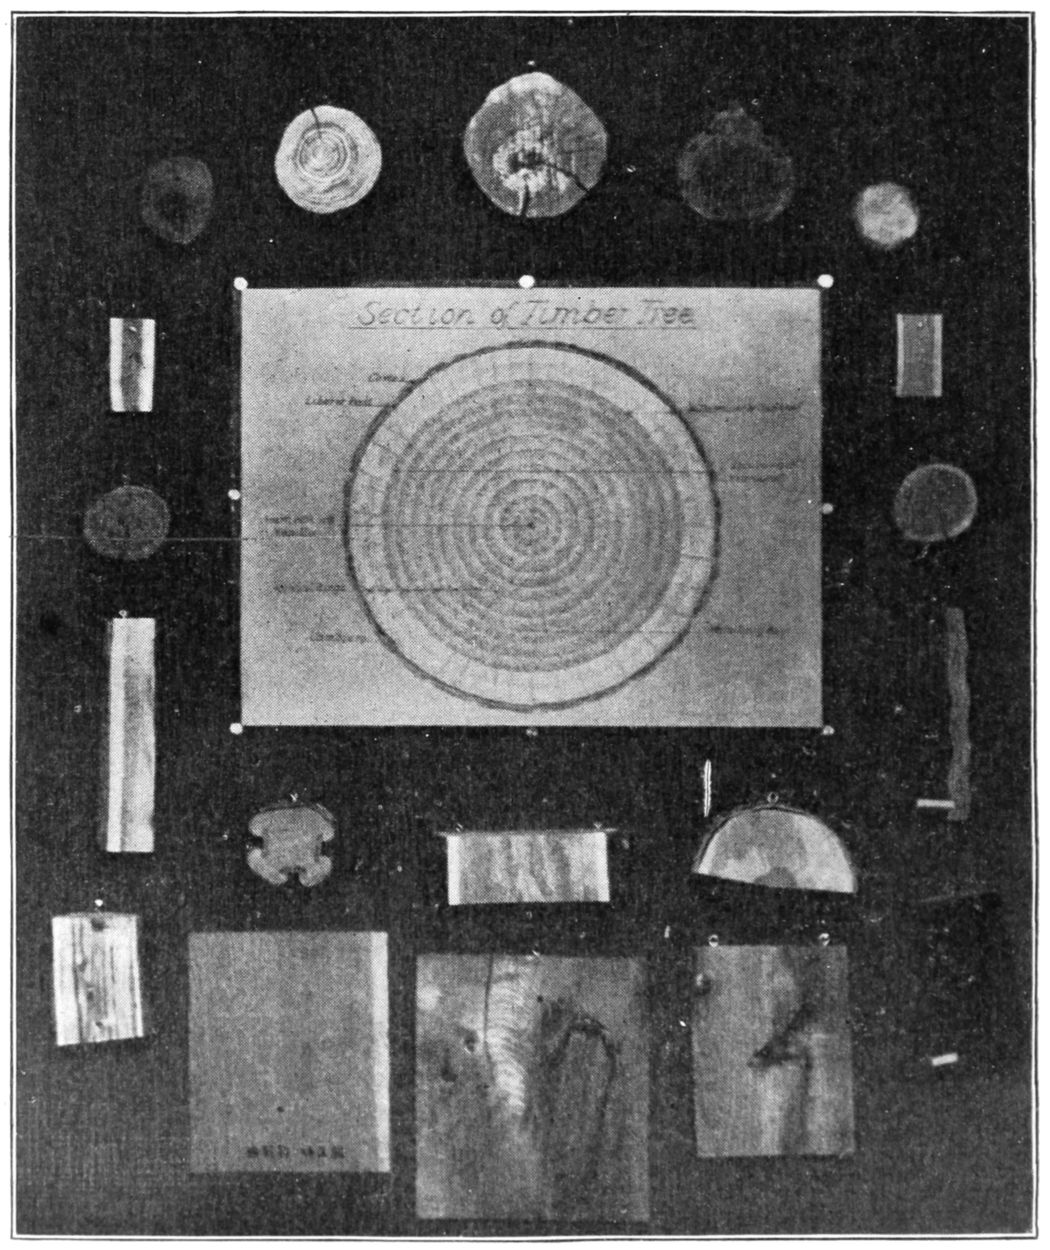
FIG. 4. CHART ILLUSTRATING WOOD STRUCTURE.
By T. B. Kidner, October, 1908 Manual Training Magazine
In woodfinishing, as in woodworking, the aim has been to have the
pupil treat the subject in a serious and workmanlike manner. In
seventh grade little woodfinishing is done. The woodworking processes
need the centering of the pupil’s attention, in the first place. Second,
the simple pieces which the beginner is able to make require no finish
as a rule. In one group stain and wax is used. This is the group
in which decorative design is emphasized. In the eighth grade the
woodfinishing problem becomes important. Almost all of the pieces
require a finish.
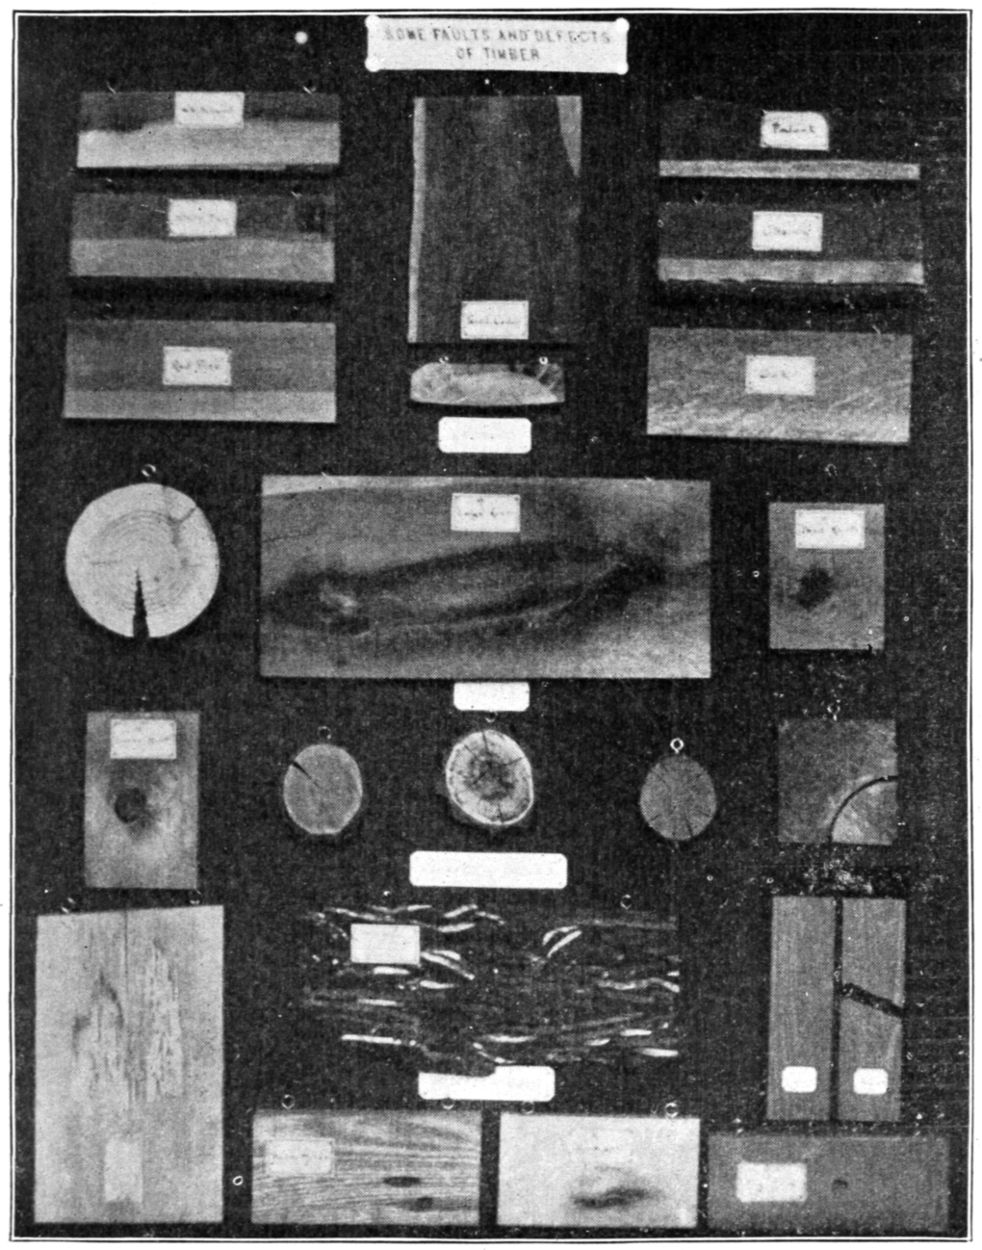
FIG. 5. CHART ILLUSTRATING TIMBER DEFECTS.
By T. B. Kidner, October, 1908 Manual Training Magazine
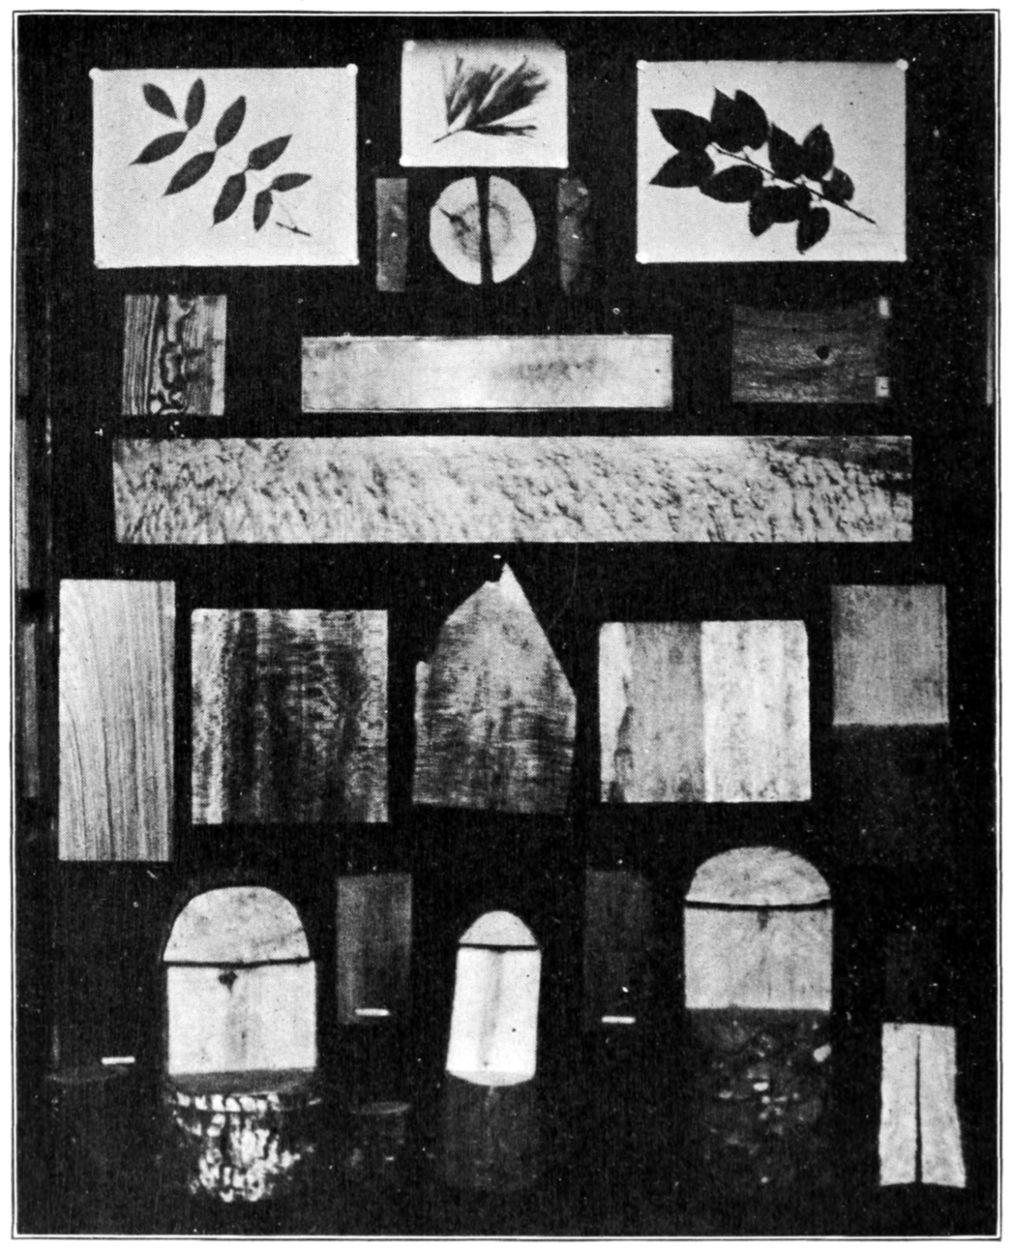
FIG. 6. CHART ILLUSTRATING PROPERTIES OF TREES.
By T. B. Kidner, October, 1908 Manual Training Magazine
The greatest obstacle to proper woodfinishing lies in the desire of the
pupil to take his piece home as soon as the woodwork is completed.
Unless a definite understanding is had with the class beforehand, proper
woodfinishing is difficult to obtain. Most boys are subject to reason, so
that it is not at all necessary to have woodfinishing slighted or to resort
to makeshifts. The writer makes it a practice to take plenty of time
when the subject of woodfinishing comes up for its first discussion to
explain in detail the commercial methods of finishing fine furniture, a
piano for illustration, counting the different operations and coatings it
will receive and the labor and time expended upon the finish. A comparison
is then made between a finely rubbed finish and the cheap, sticky,
unrubbed finishes of cheap furniture.
Having established in the minds of the pupils the fact that woodfinishing
is an art second to none and that it requires time to do it well,
there is not that impatience that breeds sullen looks when the woodfinishing
is to be begun after the woodwork has been completed. The
pupil will take the woodfinishing as a matter of course and goes about it
in a cheerful and manly spirit.
In grammar schools, woodfinishing has been made as simple as is
consistent with good work. Coming as the boys do but once a week and
each finishing application requiring over night for drying or hardening,
the total time is quite long even with the simple finish of filler, shellac,
and wax. If the pupil wishes a very dark finish, a stain which requires
one or more periods must precede his filler.
In high school, pupils come every day thus permitting the application
of rubbed varnish finishes, either shellac or copal, without unnecessary
loss of time. Here special finishing rooms are necessary.
Among other requirements
for a course in woodwork and drawing as stated in the foreword
is this: “At least a few problems should be given which involve
invention or design or both, thereby stimulating individual initiative on
the part of the pupils.” The present outlines in woodwork and drawing
have been planned with this in mind. In the seventh grade the pupil is
given little opportunity to exercise his initiative in either woodwork or
drawing. The reason for this, as has been previously stated, is a firm
belief that initiative in any subject to be of value must be based upon a
fair knowledge of the subject matter dealt with, its limitations and its
possibilities. In other words, that appreciation must precede invention
or initiative.
With the limited time allowed manual training, at most one-half
day each week in the general educational scheme, a seventh grade beginner
has about all he can well manage in becoming familiar with his
subject matter, with learning to handle his tools and work his material.
But one group in the seventh grade will admit of decorative design.
These problems, Group VI, have purposely been made simple as to
woodwork that the pupil may give most of his attention to the design.
In eighth grade, modifications of outline and dimensions of any project
are permitted where a fair degree of merit is shown. Modifications of
joints or fastenings are not to be made, however, unless a pupil wishes to
transfer a project from some other group into the group in which the
class is working.
In high school the pupil is expected to “work up” in his drawing class
projects original in so far as his ability will permit, subject to limitations
mentioned hereafter.
Eighth grade boys are expected to make at least one application of
decorative design to the pieces of woodwork made. The projects made
by the high school boys are, as a rule, not so well calculated to take
decorative design. Their efforts at decorative design will come later in
connection with the metalwork of the first year.
In high school the design is to be taught by special drawing teachers
who have informed themselves of the limitations of the shop methods
when it comes to applying these designs. It is for the shop instructor to
specify the kind of joint or joints that are to be used and the material,
also the limitations as to decoration. Present methods of organization
in high schools hardly permit of the teaching of shopwork and design
and by the same instructor, which is the ideal way providing, of course,
that the instructor is expert in both. This is a combination difficult to
find. It is gratifying, however, to know that some schools are insisting
that their shop men become informed in design as well as shopwork.
While these drawings are being worked up in the drafting room the
pupil’s shop periods are given over to the making of the exercise joints
and mastering the principles involved in their making. By the time
these exercises are completed, the working drawing will be completed
ready for use in the shop.
The proper correlation of design and shopwork is not a problem
beyond solution, because of the direct relation of the two departments,
providing there is a strong administrative head able to secure proper
esprit de corps. In the grammar schools, however, the problem becomes
less satisfactory of solution by correlation.
The first objection lies in the fact that the regular grade teacher has
both boys and girls to teach and the problems must therefore be the same
for the whole room. The second objection lies in the fact that the
problem in design has to pass thru too many hands before it reaches the
boy. If design is to be taught to the best advantage, it must have the
interest of the teacher and she must have an intelligent understanding
not only of the subject of design but of the particular problem that is
to be presented. The difficulties in the way are not insurmountable
where the drawing supervisor herself presents the problem to the pupils.
Even here, however, one frequently finds the drawing supervisor so
much more interested in the freehand drawing that her dislike for the
design makes her unfitted for such correlation work.
When, however, as is the case in cities, the drawing supervisor must
reach the pupils thru the regular teacher, correlation becomes in most
every instance a farce. The teaching of design is another imposition on
an already overburdened grade teacher. Very seldom does she understand
the problem and it becomes a distasteful subject to be got over in
the easiest way possible. Department teaching in the upper grammar
grades would do much to aid in the correlation of drawing and shop.
Until this is made possible, we can hope for little in the way of results
from grammar school correlation, unless it be in a small system where
the supervisor teaches the children directly.
The whole subject of design as it relates to woodworking is a constant
source of discussion among manual training shop men. Many good
teachers insist that design has no place at all in a course in woodworking.
Others admit that it ought to have a place but feel that the results
obtained do not justify the time spent upon it. Still others approach the
whole field of woodworking from the side of design, tool processes and
organized woodworking subject matter being mere incidents to the
problem in design.
Like every extreme position each of these points of view has good in
it, but there is sufficient error accompanying each to impair the validity
of the conclusions and to make the resulting applications unhappy as
related to ordinary public school conditions.
The whole subject of design as it relates to the manual training shop
is one that has demanded thought on the part of the author. It is one
of those places where teaching theory failed to bring efficiency either in
the results obtained in design or in the reaction upon the boy. He has
been forced to the opinion, from his own experience and from his
observation of the efforts of others to teach design to grammar school
pupils, that the cause for dissatisfaction and discouragement is due to
our insistence upon one and only one method of presentation—the inductive
or synthetic.
In judging results we must consider the results obtained from every
member of a class and the good each boy has got out of his experience.
This efficiency test most effectively excludes the exhibition of a few
“accidentals” as evidence that our method is the correct one. There is
no reason why design should seek justification on any ground other
than that offered by other subjects.
Inductive or synthetic teaching of design has its place; so also has the
deductive or analytic. Happily those educators who insist on the use
of one method or the other only are becoming few. In other subjects
we are finding that the teaching results which demand the respect and
approval of educators of safe and sane judgment are obtained by the use
of both methods interchangeably. There is no formal notice when one
is to be used or the other—whichever method fits the occasion is used
without apology. This is right; to do otherwise is to sacrifice the boy
or girl for the sake of the method. We are all agreed that the child is
the more important consideration. In fact, some psychologists tell us
that induction and deduction are one and the same process, the difference
being merely a matter of emphasis. It is this difference in placing the
emphasis that we seek to discuss.
Our methods in the high school have made much of the inductive.
This is right. Pupils of high school and college age are ready for this
method, tho our high school pupils often would profit by having a little
less of this with more of the deductive.
However, when it comes to grammar school teaching, the maximum
of use has to be made of the deductive or analytic method. This is
acknowledged in the academic subjects. Woodworking when taught
so as to meet the efficiency test that is applied to academic teaching also
makes use of this method mostly. Our design, however, has always been
taught by the inductive or synthetic method, no one seeming to have the
temerity to make use of any other. As a result we find the views of
design in the grammar school as stated above. Those who advocate it
urge the “accidentals” as sufficient justification. Those who reject it
base their argument on the fact that results based on a few accidentals
will not satisfy the same efficiency test that is applied to other subjects.
Experience has shown, at least to the author’s satisfaction, that the
deductive or analytic method when given maximum emphasis with beginners
in design is all that is needed to bring the results up to a standard
equal to that of other subjects. It is the rational method of presenting
any subject to beginners.
The terms deductive and inductive have such wide application that it
may be well to specify more particularly just what we mean. A concrete
illustration will suffice to show the distinction we seek to make between
what we choose to designate the deductive or analytic and the inductive
or synthetic methods.
Suppose we wish to have a class, with little or no information about
the subject, design a booklet to meet certain specified conditions. Three
distinct stages of progress manifest themselves in what we shall call the
complete method. First, the pupils must be given information bearing
upon the problem. Second, they must be given experience in handling
problems of that type. Third, they will utilize this information and
experience in designing the booklet to meet given conditions.
The first step will be the taking of a type form and analyzing it.
Either the instructor will demonstrate or, better, each pupil may be given
a booklet of type form and required to take it apart and put it together
again. Any way to give the pupil the information in a form that will
cause it “to stick.” In woodwork, it would be done by means of the
traditional shop demonstration—a wise practice, since psychology teaches
us that sight percepts are among the strongest.
Second, the pupils must acquire experience. Let them make a booklet
according to definite specifications provided them by the instructor.
The process thus far is mainly deductive or analytic. So far there has
been no invention or design, but the pupils are now prepared for it.
Using the information and experience now available, let them design a
booklet to meet certain conditions. This latter part we would call the
inductive or synthetic process.
We should have two aims in our teaching of design: (1) Appreciation,
(2) Development of the creative faculty. Since all must be able
to appreciate good line and good form when they get out into life while
only a few will ever become designers in a creative sense, it is essential,
as it is also rational, that attention should be paid first to appreciation.
Past efforts show how hopeless is the problem when we strive to give
to the pupils appreciation of and feeling for line and form by demanding
original forms in the very beginning. The beginner’s efforts at creation
are abortive and the appreciation that he derives is nil. By our insistence
on this method we have given to our pupils the idea that design means
making something out of nothing. He is not far wrong if we demand
of him original designs before we have given him anything tangible upon
which to work. We say tangible as distinguished from academic principles
or rules of design. If nothing tangible is given the pupil he must
get it outside of his school experience. This explains the superabundance
of “wienerwurst” forms, bouquets tied with ribbons, circles, etc., etc.
It is possible to create unknown out of what is seemingly unknown.
When we stop to analyze the process, however, we find that we have
made use of information, appreciation, and feeling that are known.
Sometimes we make ourselves believe that our pupils are creating unknown
out of unknown without these requisites. Analysis will show
that our continued suggestions to him, drawn from our own fund of
known are the causes, and not the pupil’s faculty. This method of
teaching is the kind we have been used to in design. It works pretty
well with small classes and individual instruction. Try it on large
classes of beginners and it is not possible to bring results that stand for
class efficiency.
And why should this particular method be insisted upon exclusively
with beginners? Why should not design, like mechanical drawing and
woodwork and other subjects be developed upon a substructure consisting
of information and appreciation secured by allowing or even insisting
that the boy handle good design until he becomes saturated with a feeling
for good line and good form? Of course, if any pupil comes to a
beginning class with this information and feeling, due allowance should
and can readily be made. It is highly probable that there would be
less inclination on the part of our pupils to insist that designers are born
not made were more use made of the deductive method. When the boys
no longer see their efforts result in crudities and are enabled to acquire
the necessary feeling and information as their work proceeds, then you
find a happy and interested class that as a whole takes design as a matter
of course and not as something intended only for the few.
Whatever the method of teaching design in the regular classroom,
lack of time demands the most direct treatment of shop design. A
grammar school boy is not inclined to listen very patiently to anything
that smacks of the academic. (1) Give the boy something definite with
which to work and (2) keep him working, or “playing,” as one has
fittingly designated it, until he has made a conscientious effort to “make
it a part of himself,” that is, until he succeeds in changing the form until
it no longer resembles the original but still possesses the pleasing appearance
of the original.
If he succeeds in doing this, he is well on the way to creative effort.
Not all boys are of equal ability in other lines of endeavor, neither are
they in this. By this method of attack, however, even the stupidest—usually
stupid only in the matter of design—is not without compensation
for his effort. He has learned somewhat of the principles that govern
good design by hearing them explained and seeing them illustrated in a
piece of good design. He will have developed some feeling for line and
form thru having played with good line and form. He can at the very
least fit the form given him to an outline made by himself after suggestions
of good line placed upon the board. To this extent, at least,
you have benefited him, whereas, by the usual method he—and there are
many like him—would have simply sat idle in discouragement—if he
were not more mischievously occupied.
If our old art schools were to be criticised because they made too much
use of the imitative method when they strove to give to their students
information and appreciation and feeling for form and line thru copying
historic ornament, it would seem, from results obtained, both tangible
and in the effect upon the pupils, that our modern schools are open to
criticism when they seek to force originality upon immature minds before
they have given these minds any information or feeling.
Of course grammar school boys are not interested in historic ornament,
at least not in America. This is the weakness of the imitative method
and helped to bring in the movement which now seems to have swung
to the opposite extreme—it lacks vitality for young pupils. Instead of
giving the boy historic fragments, give him a form that is vitally interesting
to him because he sees its immediate application in the thing
that is to be made in wood. Let him play with this form combining
imitation and modification and creation just as far as he is able.
Make the problem concrete, stating the principles you have to state
in a language the boy can understand. There will not be time to bring
out every principle that might be involved in design. There must be
time to bring out those involved in the particular problem under discussion.
Balance and symmetry, for illustration, are pretty well understood
by the boy in the simple form in which he will have occasion to use them.
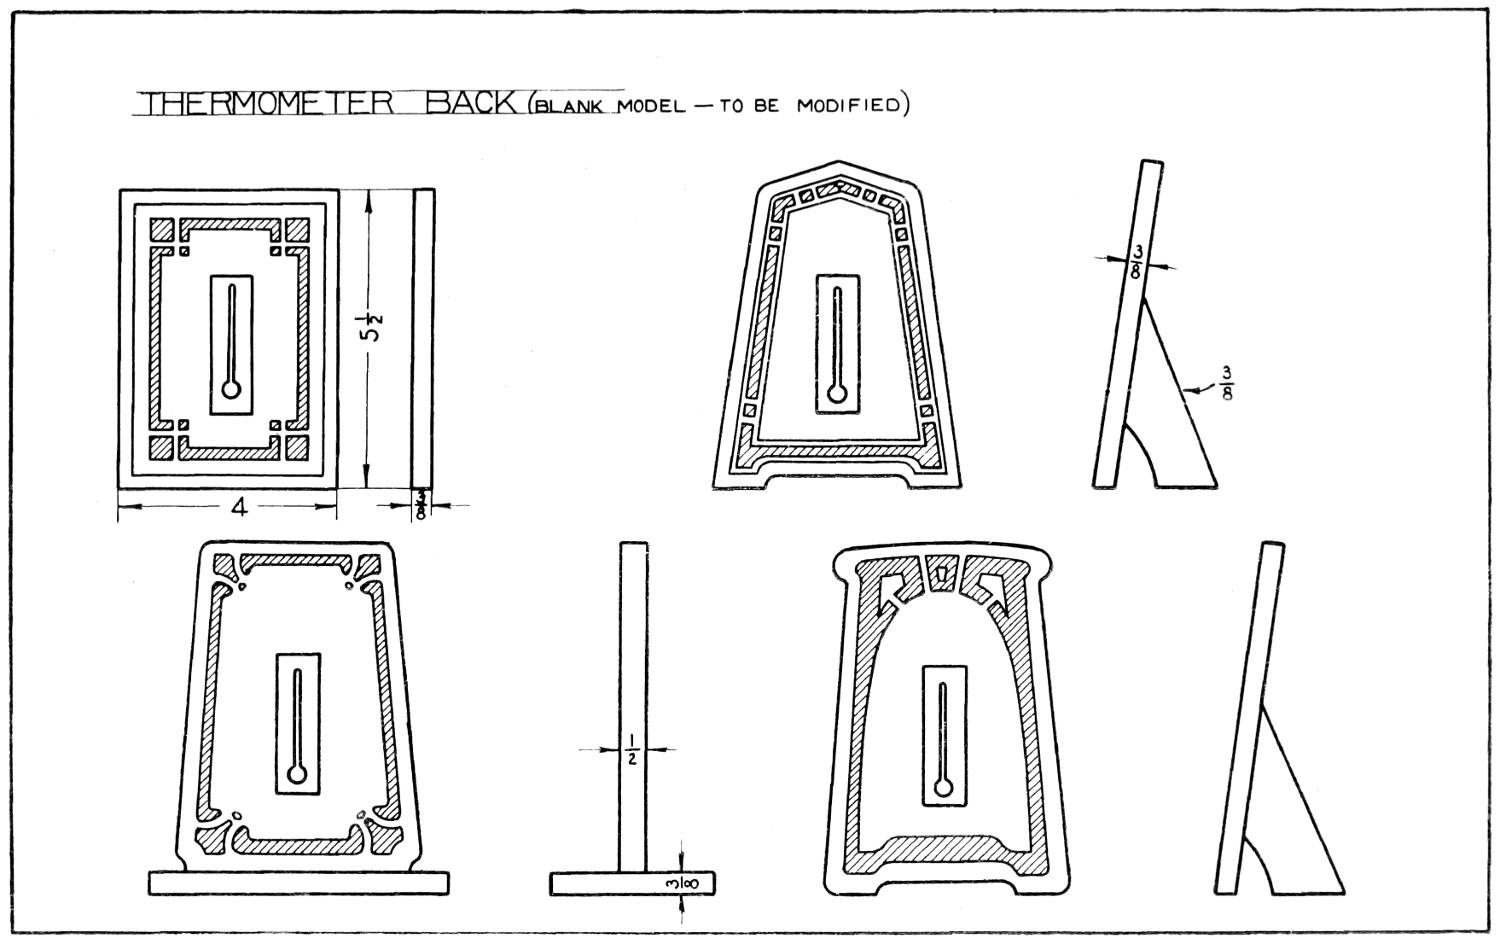
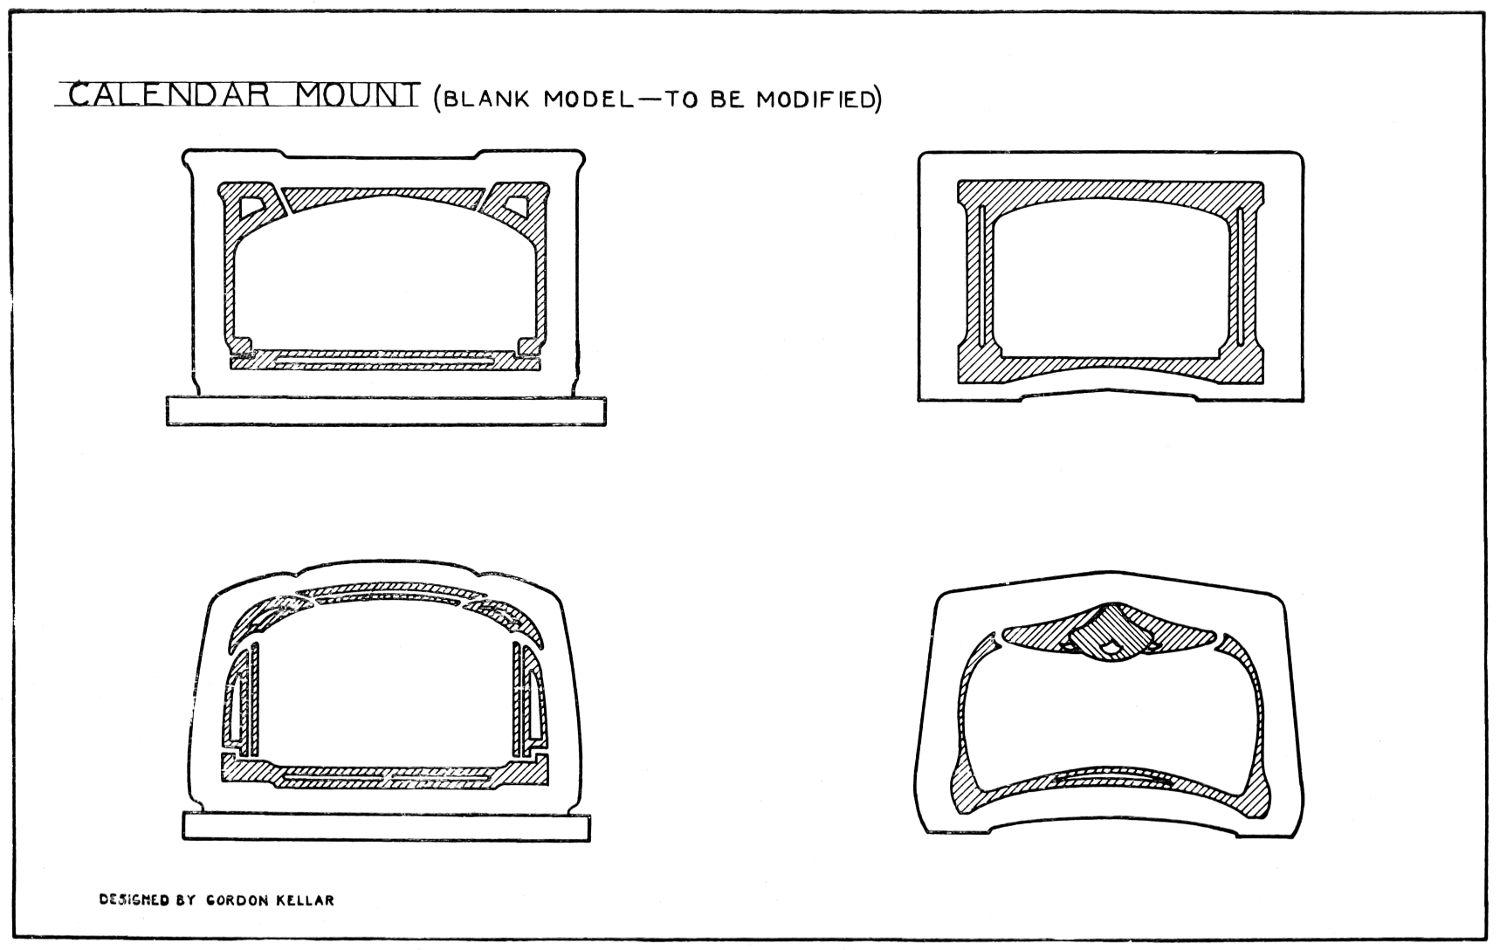
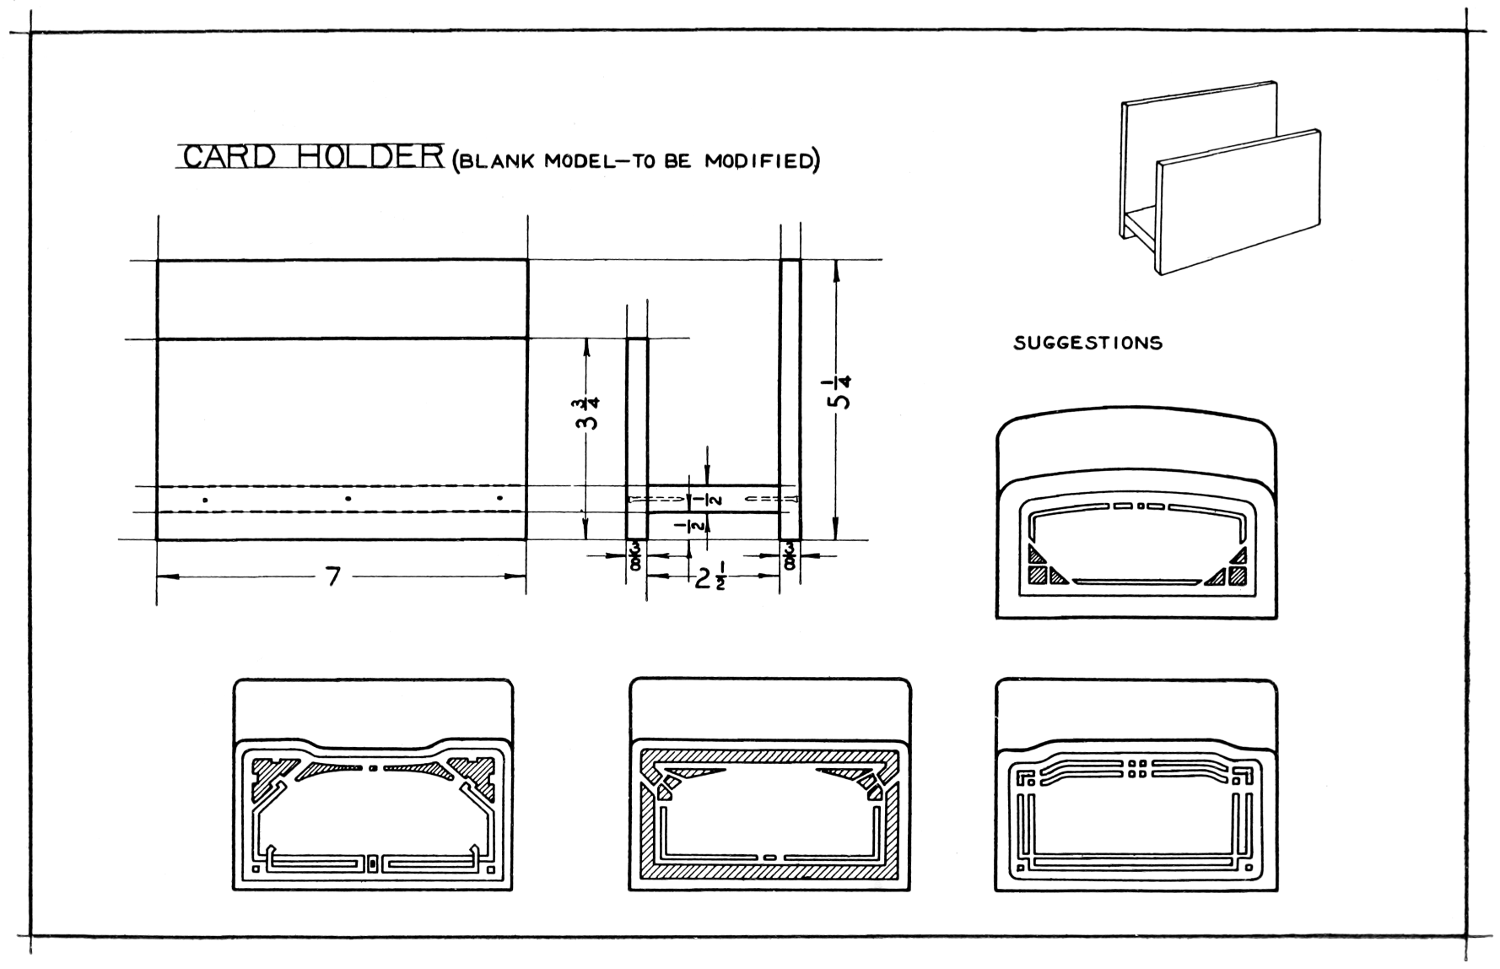
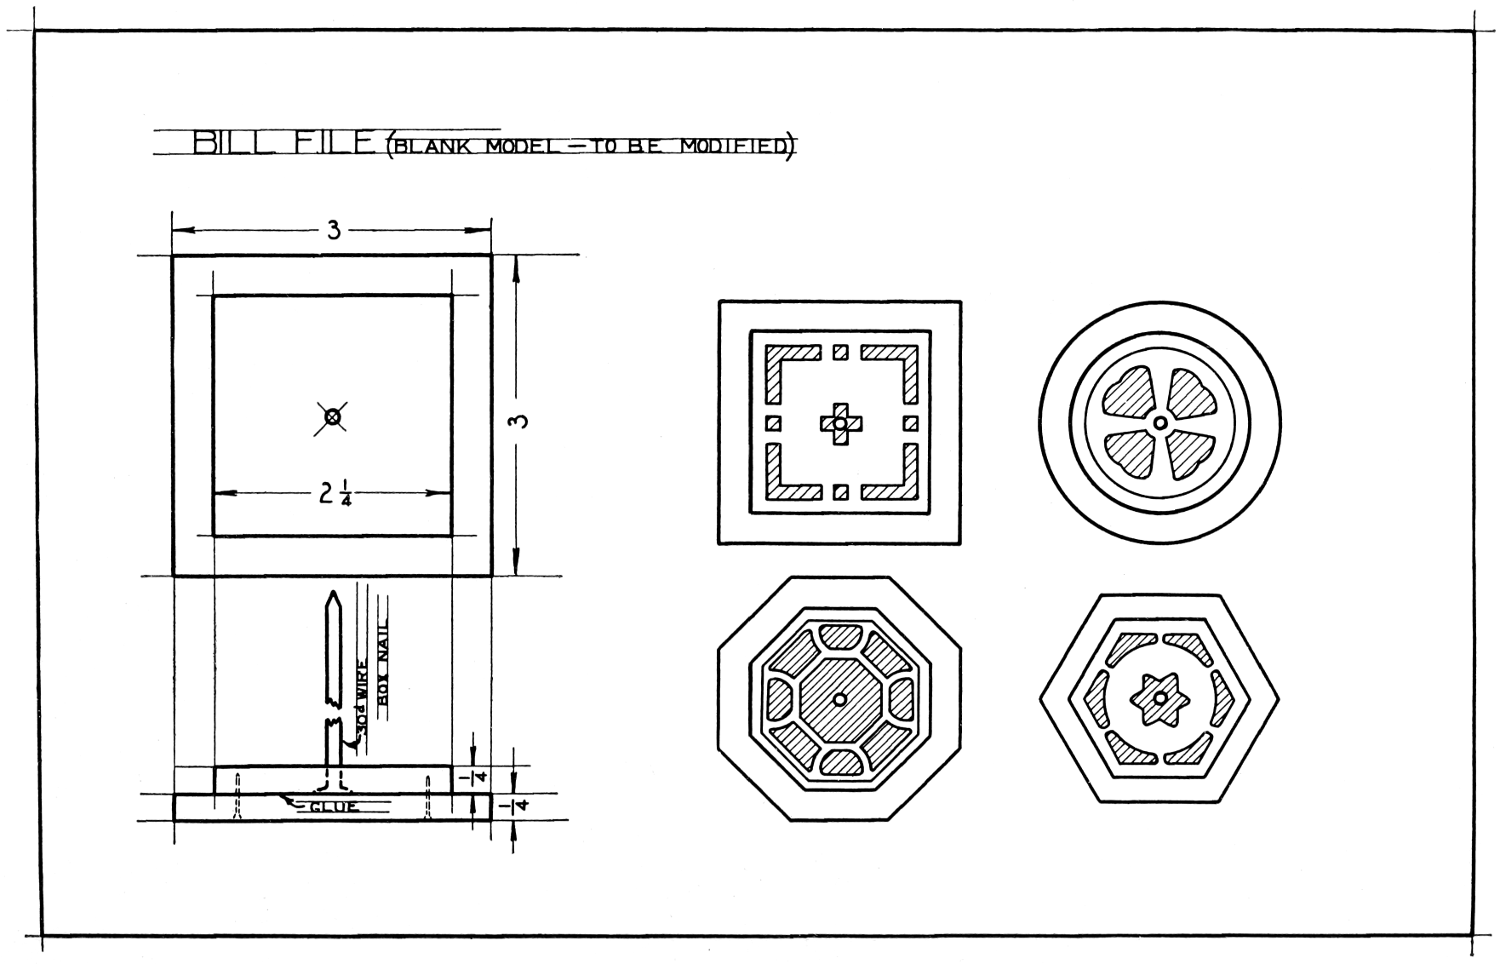
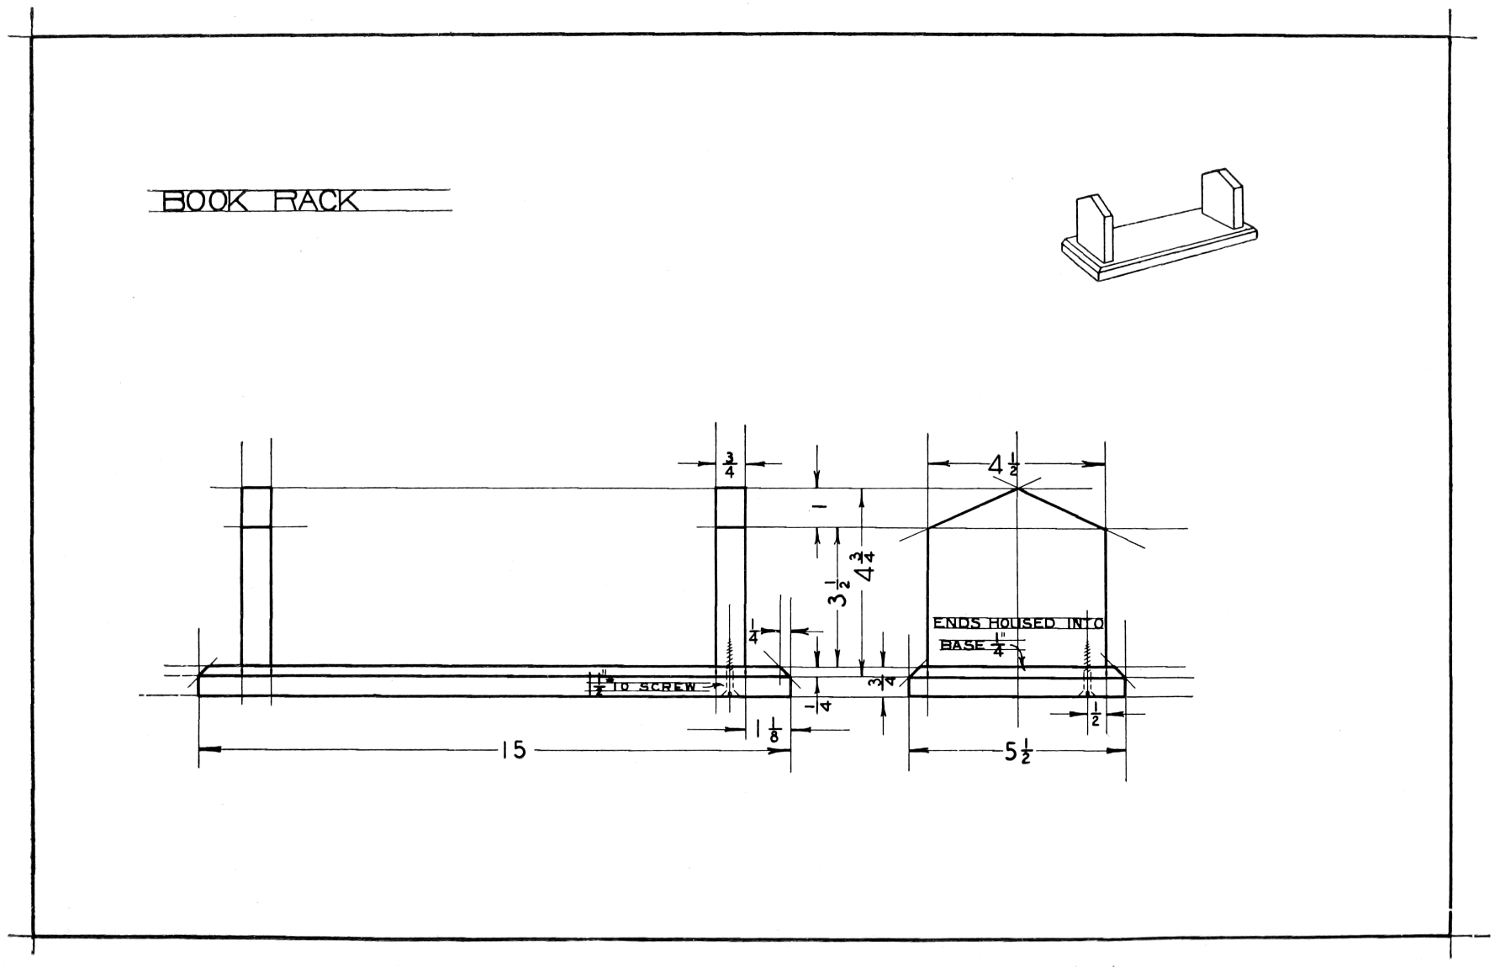
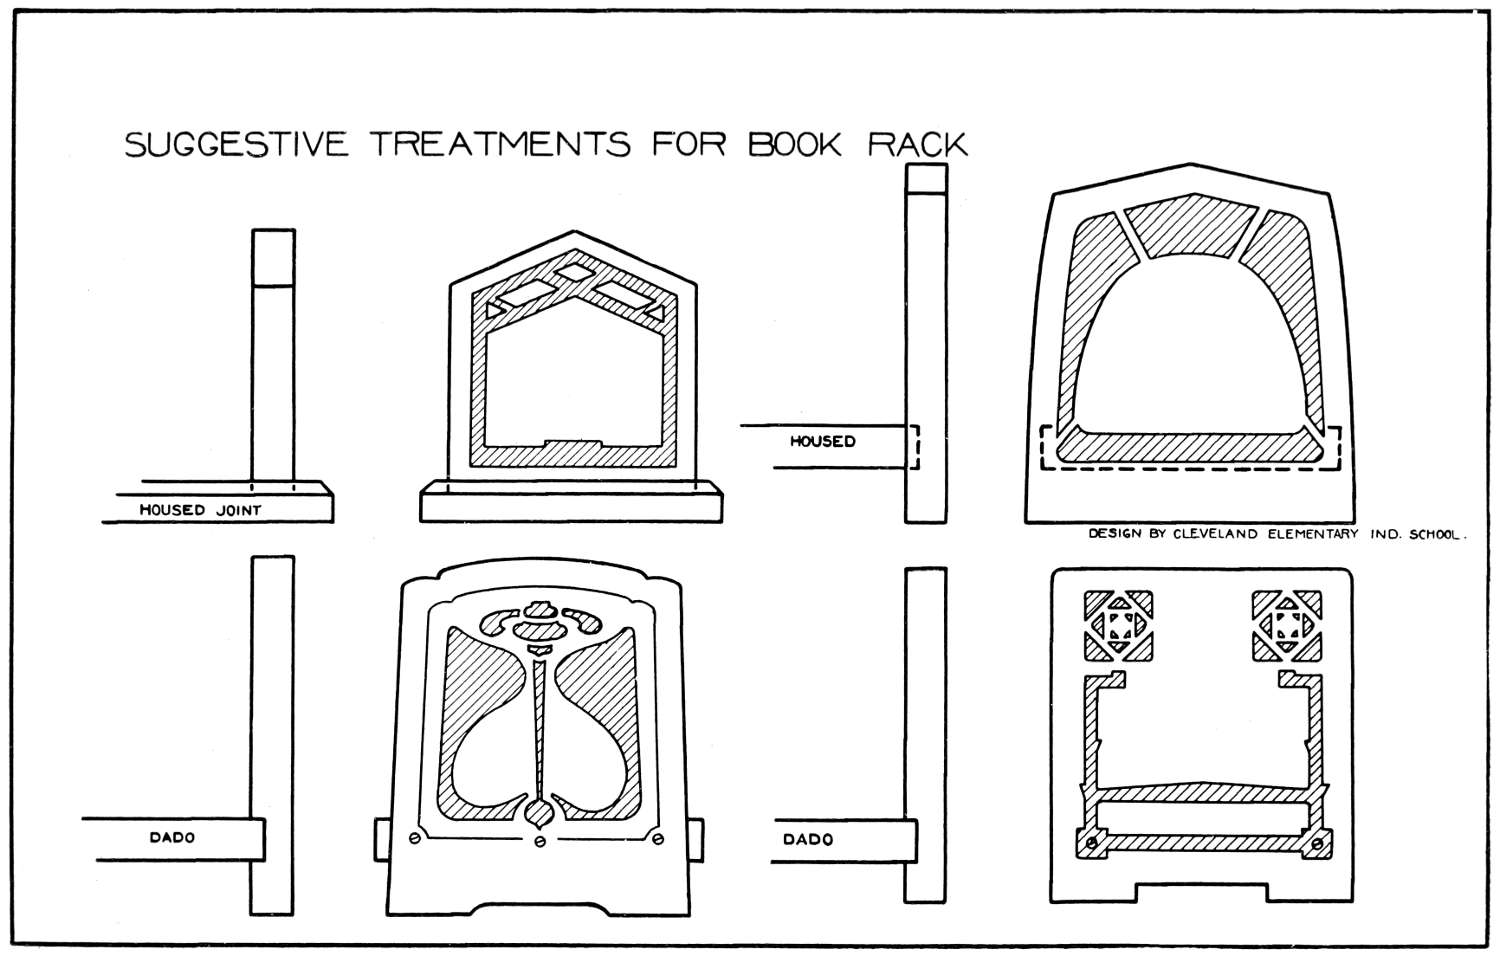
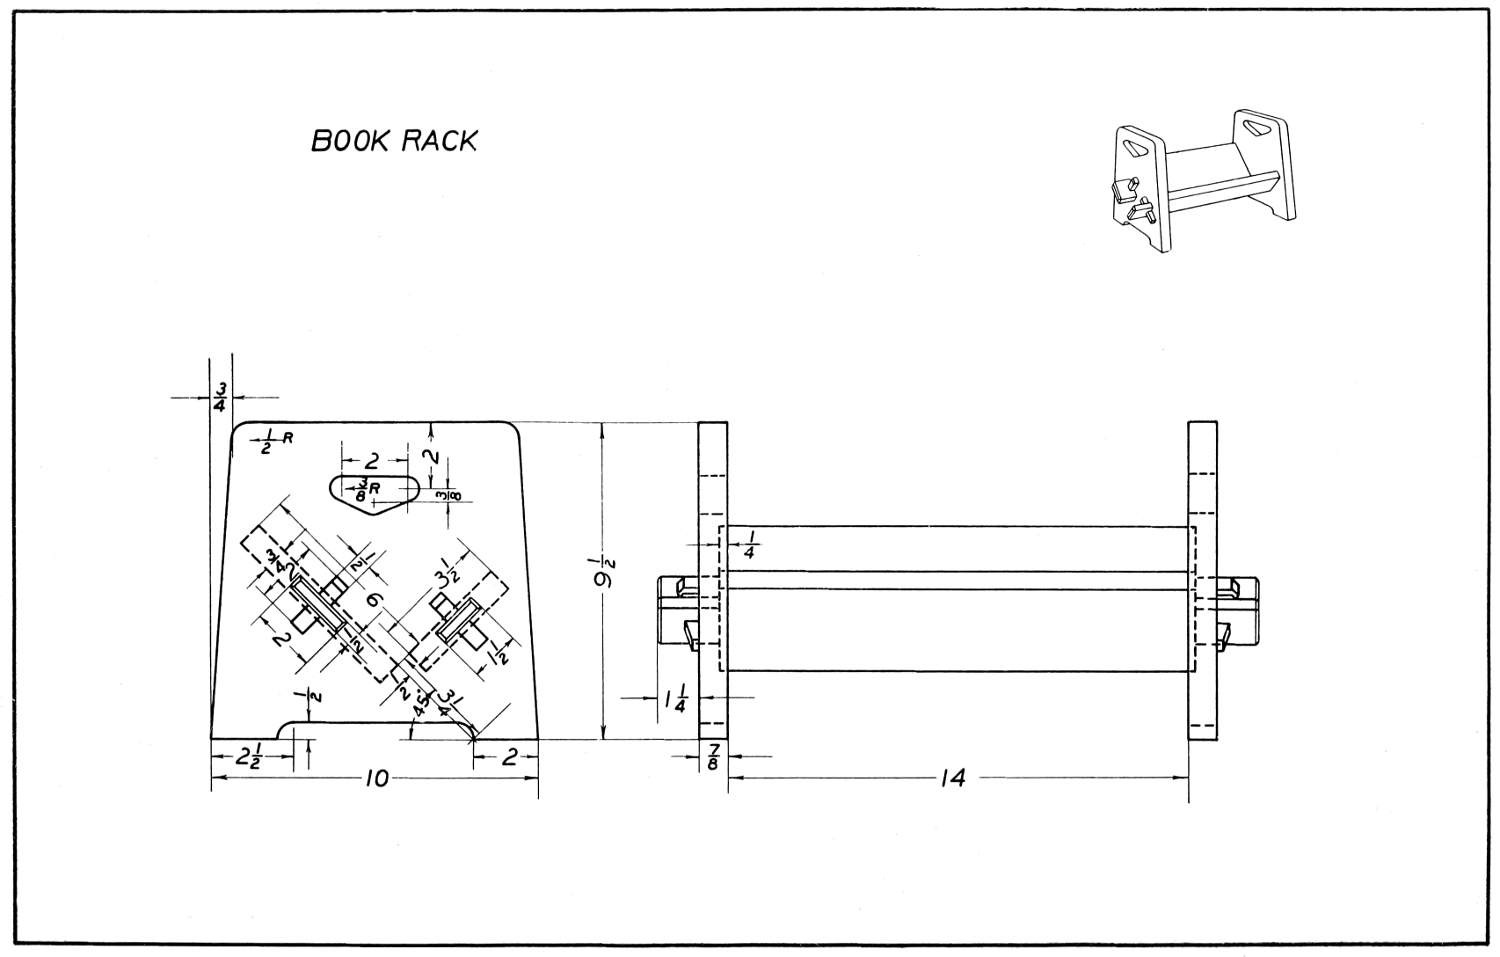
Take as an illustration the bookrack, Fig. 7. To present such a
problem we would place upon the blackboard the blank forms as shown,
also the decorative form as shown.
The lesson immediately divides itself into two parts for consideration:
(1) The Construction, (2) The Decoration. Under the subject of
Construction our normal school notes would suggest the following points
to be brought up: Use, Construction, Decoration; Requirements of
Utility; Limitations of Materials and Processes; Proportions of Parts
and Details; Harmony of Parts and Details; Points of Force; Construction
as Decoration. (According to Payne.) Under Decoration:
Supporting Outline; Center of Interest; Symmetry; Repetition; Radiation;
Rhythm; Contrast; Proportion in Curves; Proportion in Spaces;
Unity; Subordinate Centers of Interest; Balance.
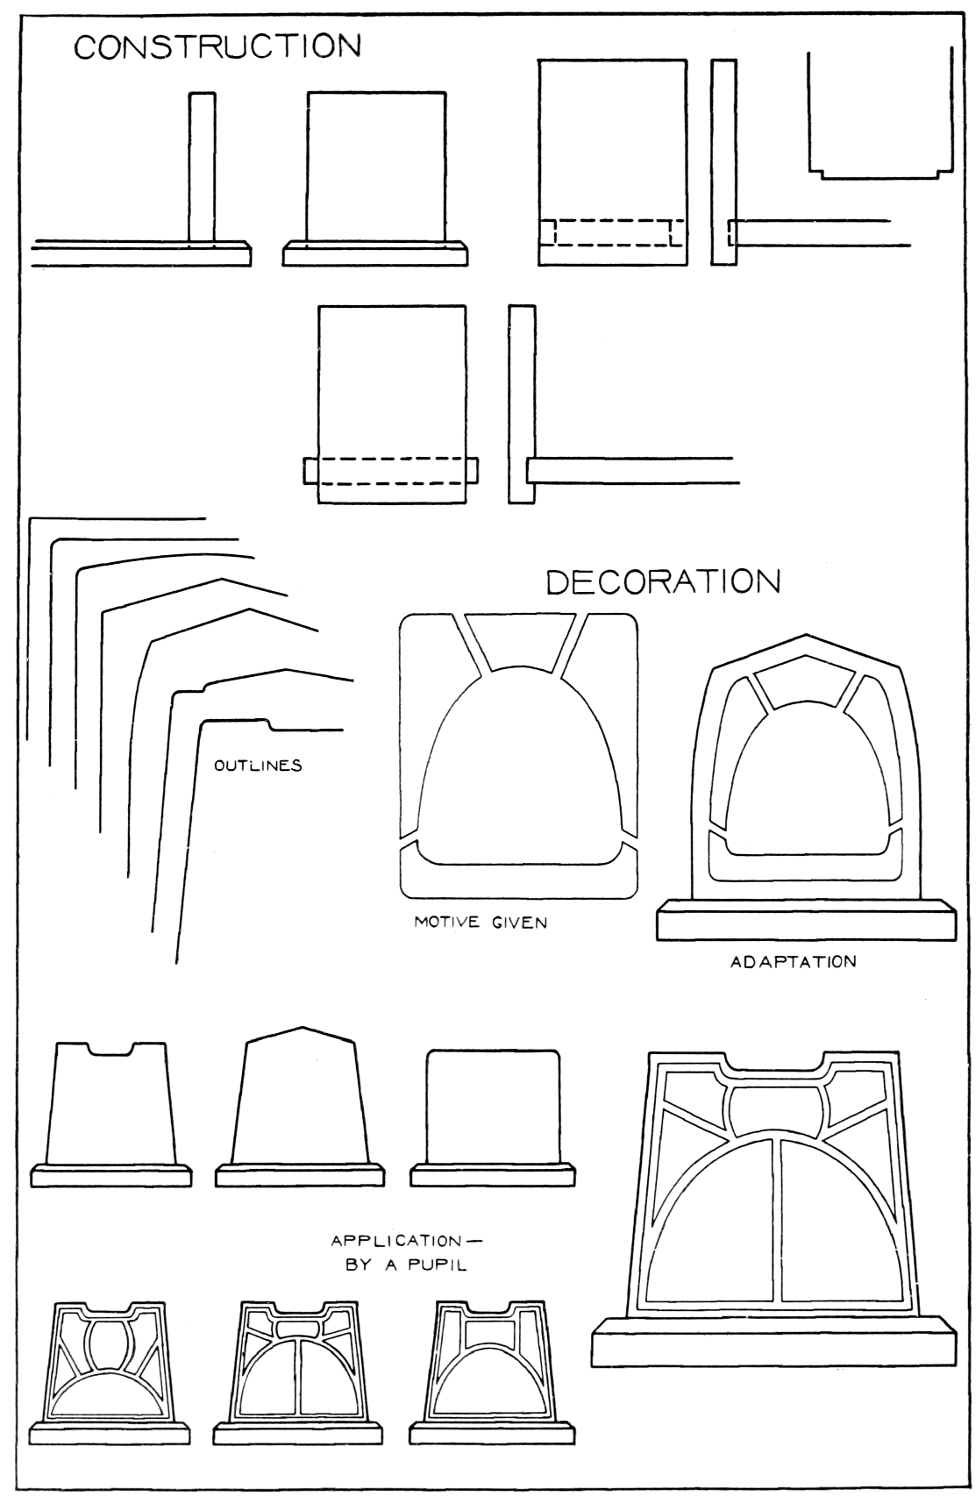
FIG. 7. TEACHING DESIGN IN THE PROBLEM OF THE BOOK-RACK.
| CONSTRUCTION |
| DECORATION |
| OUTLINES |
|
| |
MOTIVE GIVEN |
ADAPTATION |
APPLICATION—
BY A PUPIL |
|
Taking these in their natural order, but without making much ado
about the “framework,” the shop man who has made some study of the
principles involved can call the boys’ attention to the most important
points:
(1) The construction. Since the shopwork is to be carried on by
class instruction and not individually, it will be necessary to limit the
joint or joints used to those specified for the Group in which the project
is to be worked out. Joints of previous Groups may be used also. The
book rack will be made in Group VII. Some form of the groove joint
is to be used, none other.
Here we call attention to the difference between the designer and the
shop man in their handling of the problem. The discussion of construction
gives the designer an opportunity to display the possibilities
of his subject. He enumerates all the joints that may be used with
propriety in making such a piece as the bookrack, and the pupils are
encouraged to make use of as many varieties as possible. He is totally
oblivious of the fact that, while this is good teaching in design, it is
making the applications impossible except with individual instruction—a
method of instruction that may be used in small school systems but not
in cities.
(2) The manner of placing the members and the use to which the
rack is to be put will together determine the proportions of the members.
(3) For decoration, we might depend entirely upon the good form
of the outline and the stain and grain of the wood. With this particular
piece, however, we shall make use of a decorative form which will be
outlined or incised and colored with a dye.
(4) Since the design is to be made in wood and wood splits easily
along the grain, we must be careful in making an outline not to get
sharp points. Also, in making a decorative design we must avoid thin
parts that will bring incised lines close together. Also, we must take
into account in planning the members the facts of shrinkage or swelling
and the strength of the wood. The grain on the vertical members must
extend vertically and that of the horizontal member must extend from
vertical member to vertical member. This to be illustrated by referring
to some similar construction.
(5) In striving for pleasing outlines, or decorative forms either,
strive to avoid a sameness made by using many lines or forms of the same
size. “Large, medium and small” is a key that unlocks many a puzzle
as to what causes unpleasant feelings in both outline and decoration.
Long sweeping curves with short snappy ones, rather than a series made
with a compass. Make a special point of the fact, which almost every
boy overlooks, that the simple forms of outline are invariably the more
pleasing. To the beginner design means making something unlike anything
that was ever seen on the earth below or heaven above—hence the
freakish, fussy forms that are usually offered. Try telling the class you
are going to place an excellent form on the board then draw a well
proportioned oblong and watch the expressions on their faces. Yet a
well proportioned oblong with appropriate decorative form is one of the
most pleasing of forms. There will be no need to urge them to make
“unique” forms. Their inexperience and their zeal will produce a
sufficient number. Rather urge, or insist that they postpone search for
“unique” form until they have more information.
Illustrate with blackboard sketches as you go along each of these
points. Keep the boys “playing” with outline forms until you have
assured yourself they have done their best. With them, pick out three
of the best and place these in permanent form for keeping—put them
on another sheet of paper. Next, start them on the decoration. The
development of a decorative form will come much harder than the
outline. Here again the beginner will want to exhibit “unique” forms—unique
only in that they are founded upon his ignorance. Unless the
boy is not a beginner, it will be necessary in about twenty-four out of
every twenty-five cases to insist that he start with the form you have
placed upon the board for his use. If you were dealing with a few
pupils, you might take his “original” form and step by step get him to
work it into a good form. With large classes this is not possible, nor is
it necessary. Simply insist that he place the form given him in his
outline and in so doing he will acquire enough feeling for line and form
to enable him to proceed of his own accord.
(6) Have the boy put on a supporting outline, that is, tell him to
draw a line around his outline and parallel to it. Show the class on
the blackboard how this is to be done.
(7) Put in the main mass and break it up explaining as you do so
that you are seeking to get large, medium and small forms-proportion of
parts. Call attention to the efforts made to keep the lines in harmony.
(8) Call attention to the center of interest you have created. It is
unfortunate that lack of time forbids the boy’s placing colors on these
designs. Very frequently a touch of color is used to create a center of
interest, the form for this in black and white not giving the proper
significance at all. A design which in outline seems to be fussy because
of too many parts will, by a proper selection and placing of colors, be
made most pleasing. On the other hand, a design in outline that seems
agreeable may, when in color, not be agreeable because the colors make
certain parts stand out too prominently. A study of the color plate in
Projects in Beginning Woodwork and Mechanical Drawing will make
this clear.
(9) If the form proposed happens to illustrate repetition, radiation,
symmetry, or if some boy develops a form that does, take time to say a
word about them. While you will not have time to “teach design” in
the few lessons, a word here and there may serve to awaken further interest
on the part of some boy.
After all is said, we recognize that the time is short, that not much
can be done. On the other hand, what little can be done is worth doing
and doing well; its possible significance can not be overestimated.
In the grammar schools, and more especially
in the high schools, plans should be made for several excursions
to near by shops in which the pupils may get an insight into the workings
of related industries. The saw-mill, lumber yards, planing mills, furniture
factories, architectural or drafting-rooms and, in fact, anything
relating to the industrial employment of men and machinery may be
visited.
That the trip may be one of profit the instructor should see to it that
the pupils are prepared for the trip by previous talks on what is to be
seen and by after talks on the meaning of what they saw.
In every case it will be necessary, or at least advisable, to have a time
arranged with the superintendent of the factory to be visited. Pupils
should be given to understand that they are being privileged and must
act the part of gentlemen, refraining from asking needless questions of
the workmen or handling the equipment. In many factories no talking
to the men at all is desired. The questions of young pupils are often
impertinent and embarassing without their intending them so to be. The
better plan is, as has just been suggested, to have the pupils prepared by
preliminary talks then take them thru the shop with eyes and ears only
open, clinching the lessons of observation afterward.
Pupils should keep together in solid lines and, should any accident
occur, the instructor should see that any loss to the factory owner or
workmen is “made good.” Usually the class will voluntarily make
recompense. It is safer and less likely to cause embarassment if it is
understood beforehand that all members of the class who go will be
expected to help repay the instructor for any money so expended.
One might think the company well able to stand such loss. It is,
but it is not always the company’s loss. Even if it were, their courtesy
ought not to be abused. We have in mind a mold for an intricate piece
of casting representing a day’s labor for two men ruined by a student’s
accidentally brushing against it with his overcoat. As the men were on
“piece work” it meant no loss to the company, except delay in getting
out the finished article. It did mean a loss to the two men, who could
ill afford it. The instructor quietly settled for the damage or loss and
the pupils reimbursed him upon reaching school. This probably prevented
the factory from excluding succeeding classes as undesirables.
In woodworking shops there is little chance for such accidents. Nevertheless
workmen there do not wish their tools or work handled. Each
class should bear constantly in mind, while on the shop excursions, that
it is making succeeding classes welcome or unwelcome in that shop.
Every piece of woodwork made by a pupil consisting
of more than one member should have in addition to the working
drawing a carefully made stock bill. The reason is two-fold: It not
only prevents the pupil’s cutting out stock wrongly thru misreading the
drawing, but it saves time for the pupil. It is a practice that he will
have to master later in life if he follows any of the mechanical trades
and is just as essential a part of his shopwork as is the drawing or
woodwork. Where the drawings are made by referring to plates, experience
has shown that many a boy will be able to make a good drawing
without fully interpreting its meaning. The making of the stock
bill will show him his weakness, also it will show the instructor. No
boy can make out his stock bill without being able to read his drawing.
After the drawing has been made and then its stock bill, the boy will
have become so conversant with the plans of the thing he is to make
that few mistakes are made in working the wood, that is, mistakes due
to ignorance of the drawing.
STOCK BILL
(Form)
| Name |
________________________ |
Article |
________________________ |
| Grade |
________________________ |
Kind of Wood |
________________________ |
| |
|
|
|
|
|
|
|
|
|
|
|
|
|
| Finished Sizes |
Cutting Sizes |
| Pieces |
Thickness |
Width |
Length |
Pieces |
Thickness |
Width |
Length |
| 1 |
|
3⁄8 |
3 |
|
5 |
1⁄2 |
1 |
|
3⁄8 |
1 |
3⁄4 |
6 |
|
| 1 |
|
1⁄2 |
1 |
1⁄2 |
4 |
1⁄2 |
1 |
|
1⁄2 |
1 |
3⁄4 |
5 |
|
| 2 |
|
1⁄2 |
1 |
1⁄2 |
9 |
|
2 |
|
1⁄2 |
3 |
1⁄4 |
9 |
1⁄2 |
| 1 |
|
1⁄2 |
5 |
1⁄2 |
12 |
|
1 |
|
1⁄2 |
5 |
3⁄4 |
12 |
1⁄2 |
In the elementary schools the form of stock bill used should be as
simple and explicit as is possible. The appended form is one that has
proven satisfactory. That it may be in convenient form for student
use, it has been included with “Projects in Beginning Woodwork and
Mechanical Drawing,” as also is the Form for Price List and Estimate
of Cost.
The accompanying form
indicates clearly what is expected of the boys in figuring their cost of
material. Since these costs are figured before the articles are made in
wood, no account is taken of material wasted. With a carefully
planned course of projects and an instructor who knows the possibilities
of requiring a boy to reduce the size of his piece when one member has
been reduced under size there is very little use for extra stock. As a
rule what stock is so returned can be used for other smaller parts. If
a boy is unnecessarily wasteful, he should be required to figure extra
stock. This is to be done only in justice to the other boys, not as a
check to the wasteful boy. Such boys, as a rule rather glory in their
wastefulness. The best check for such a boy is to require him to use
his original stock, reducing the sizes of all affected pieces as may be
necessary.
As this is, in all probability, the first problem in which the boys
deal with approximate rather than mathematically exact results, the
instructor should not become discouraged with their first attempts. No
better opportunity exists for introducing the boys to problems such as
will confront them after they leave school. The instructor will do
well to check the boys’ results by means of his own previously figured
results after the boys are all thru their figuring. There is a difference
between figuring for an answer previously given and figuring as they
must after leaving school.
In order for the boy to figure his bills he must have a Price List.
A form for a price list such as is needed for the materials that are
to be used in “Projects in Beginning Woodwork and Mechanical
Drawing” is appended. The prices given are neither retail nor wholesale
but about midway between what the boy would have to pay for
his stock bought in the limited quantity he needs and the cost to the
school in quantity lots. Only the best of lumber is used. Money
might be saved by buying short lengths but none is saved by buying
“cull” stock with the expectation of cutting out the defects. The prices
are for Chicago, 1911-1912, and are inserted for comparison only. On
lumber, 15 to 25 per cent has been added for waste in cutting up.
Since all of the stock used in the grades is in board form, wood finish
is figured only for the two broad surfaces. The price will be found
sufficient to cover the material used on edges. The price will also
cover such waste as ordinarily comes thru the inexperienced handling
on the part of the boys—they will not “spread out” the materials to as
good advantage as will a mechanic, of course.
(Form, reverse side of a Stock Bill)
ESTIMATE OF COST OF MATERIAL
| 2 |
square feet of 3⁄4 inch stock @ 7c |
$ |
.14 |
| 3⁄10 |
square ft. of 3⁄8 inch stock @ 5c |
|
.02 |
| 4 |
1 inch, No. 10, flat head, bright screws @ 1⁄4c |
.01 |
| 5 |
square feet of finish @ 1c |
.05 |
| |
|
$ |
.22 |
PRICE LIST 1911-1912.
| LUMBER— |
| Chestnut, 1st grade, clear, kiln-dried: |
| S-2-S to |
3⁄8″, |
per square foot |
51⁄2c |
| S-2-S to |
3⁄4″, |
per square foot |
71⁄2c |
| S-2-S to |
1″, |
per square foot |
91⁄2c |
| Yellow Poplar or White Pine, clear, kiln-dried: |
| S-2-S to |
3⁄8″, |
per square foot |
5c |
| S-2-S to |
1⁄2″, |
per square foot |
6c |
| S-2-S to |
3⁄4″, |
per square foot |
7c |
| Rough, 1″, per square foot |
61⁄2c |
| HARDWARE— |
| Screws: |
| 1″ |
No. 10, flat head, bright, each |
1⁄4c |
| 11⁄4″ |
No. 10, flat head, bright, each |
1⁄4c |
| 11⁄2″ |
No. 10, flat head, bright, each |
1⁄4c |
| 21⁄2″ |
No. 10, flat head, bright, each |
1⁄2c |
| 3″ No. 10, flat head, bright, each |
1⁄2c |
| 5⁄8″ |
No. 10, round head, blued, each |
1⁄4c |
| 11⁄2″ |
No. 10, round head, blued, each |
1⁄4c |
| Nails: |
| 6d, common wire (used with, and price included in Mission nail) |
|
| 11⁄4″ |
No. 17 wire brads (used in Groups V and VI with 3⁄8″
stock) enough nails for nailing one box |
1c |
| 11⁄2″ |
No. 16 wire finishing nails (used in Groups VII and VIII) enough nails for nailing one project |
2c |
| No. 1617 and 1618 Mission nails, each |
1c |
| MISCELLANEOUS— |
| |
No. 81, 3⁄4″ brass shoulder hooks for key rack,
each |
1c |
| No. 81, 1″ brass shoulder hooks for plate rack, each |
1c |
| 21⁄2″ black Japanned wire coat hooks, each |
1c |
| Wire hook for coat hanger, each |
1c |
| No. 12141⁄2 brass screw-eye and No. 1614 hook
(calendar mount) per pair, |
1c |
| Fixtures for electric lights and hooks for hall mirror are to be purchased
by the individual—prices and tastes vary so greatly. |
|
| Wood Finish: |
| Stain, filler, shellac, wax or filler, shellac, wax or stain and wax, per
square foot of surface |
1c |
In the
grammar schools the lumber is figured by surface measure per square
foot and the form of bill is made as simple as is possible. A high
school boy should be able to handle a problem somewhat more in
keeping with commercial practice. In addition to the material cost he
should keep account of the time expended in making his piece of woodwork
so that he may figure the labor cost as well. The small size of
the stock used does not admit of the full commercial practice. This,
however, ought to be explained to the class at this time. The following
form is for High School use:
PRICE LIST, 19—— 19——
| LUMBER—Quality, 1st, clear, and kiln-dried. |
| Kind of Wood |
Per 1000 feet when surfaced on two sides |
| Thickness in the Rough |
5⁄8″ |
3⁄4″ |
1″ |
11⁄4″ |
11⁄2″ |
2″ |
| Yellow Poplar |
|
|
|
|
|
|
| White Pine |
|
|
|
|
|
|
| 1⁄4 Sawed White Oak |
|
|
|
|
|
|
| Mahogany |
|
|
|
|
|
|
| 1⁄4 Sawed Red Sycamore |
|
|
|
|
|
|
| Black Walnut |
|
|
|
|
|
|
| Plain Sawed Red Oak |
|
|
|
|
|
|
HARDWARE—
For prices on hardware consult Hardware Catalog provided for you.
Figure retail price, that is, figure screws at price per dozen, not price per
gross.
WOODFINISH—
Per square foot of surface covered.
LABOR—
Per hour.
(Form for high school use)
BILL OF MATERIAL
| Name________________________ |
|
Date Begun________________ |
| Class________________________ |
Date Finished______________ |
| Article_______________________ |
Extra Hours_______________ |
| Pieces |
Size |
Description |
Price |
Feet |
Cost |
| 2 |
|
1⁄2 |
× |
3 |
1⁄4 |
× |
12 |
1⁄2 |
Walnut |
Slats |
S-2-S to |
|
3⁄8 |
in. |
|
|
.10 |
|
5⁄10 |
|
.05 |
|
|
| 1 |
1 |
|
× |
8 |
1⁄4 |
× |
14 |
1⁄2 |
“ |
Stretcher |
“ |
7⁄8 |
in. |
|
- |
|
.10 |
03 |
9⁄10 |
.39 |
| 6 |
1 |
|
× |
3 |
1⁄4 |
× |
12 |
1⁄2 |
“ |
Rails |
“ |
“ |
| 1 |
1 |
|
× |
14 |
1⁄4 |
× |
14 |
1⁄2 |
“ |
Top |
“ |
“ |
| 4 |
1 |
1⁄2 |
× |
1 |
1⁄2 |
× |
24 |
1⁄2 |
“ |
Posts |
“ |
1 |
1⁄4 |
in. |
|
|
.11 |
02 |
|
.22 |
.66 |
| 8 |
2 inch No. 10 |
Flat Head Brt. Screws |
|
.001⁄2 |
|
.04 |
|
| 4 |
11⁄2 inch No. 10 |
Flat Head Brt. Screws |
|
.001⁄4 |
|
.01 |
.05 |
| |
13 sq. feet |
Wood Finish |
|
.01 |
|
|
.13 |
| |
|
Material Cost |
|
|
|
|
|
.84 |
| |
30 hrs. |
Labor |
|
.15 |
|
|
|
4 |
.50 |
| Total Cost |
$5 |
.34 |
INSTRUCTIONS
Under “pieces” put the number of parts that are alike.
Under “size” put the various dimensions of pieces. In finding the sizes of
the various pieces of lumber, examine the working drawings for finished dimensions,
making due additions for tenons, then add 1⁄4″ to the width and 1⁄2″ to
the length to allow for cutting out and squaring up. Tho you are to make use
of stock mill-planed to thickness, you are to specify the thicknesses from which
this mill-planed stock is got. Allow 1⁄8″ for mill-planing.
Remember that length always means along the grain.
Fractions of an inch in width and length are not considered. Neither are
fractions of a cent in the final results. If the fraction is 1⁄2 or over, take the
next higher whole number. If it is less than 1⁄2, drop it. Fractions of an inch
in thicknesses that are over 1″ and fractions of a cent in the price per foot are
to be figured as they are.
Lumber is measured by the superficial foot which is 1″ × 12″ × 12″. Boards
that are less than 1″ thick are sold by surface measure. In other words, boards
less than 1″ thick are figured for quantity as 1″ thick.
Standard sawed thicknesses are 1″, 11⁄4″, 11⁄2″,
2″, 21⁄2″, 3″, 31⁄2″, 4″. Thicknesses
less than 1″ necessitate re-sawing these sizes. In some communities the
price per square foot for re-sawed stock varies for each difference of 1⁄4″ in
thickness.
In figuring, multiply the length by the width by the thickness, by the number
of pieces. If any piece is less than 1″ thick figure it as 1″. Combine all results
that are the same in price per foot. Reduce to square feet by dividing by 144.
Reduce decimally and do not carry the result beyond tenths place. Dispose of
any fractional part beyond tenths as directed above. Write your result in
fractional form that the decimal point may not be overlooked and be the cause
of trouble.
The price list gives the price of lumber per 1,000 feet. The price per foot
is readily obtainable.
In figuring finish for these cabinet pieces, double the number of feet of stock
as given by the stock bill to get the number of feet of finish. This is only an
approximate method but is sufficiently accurate for such pieces as are to be made
in first year high school, as specified in “Advanced Projects in Woodwork,”
Group IX.
Standardization
in the manual training shop is just as desirable and as profitable as in
commercial shops. Not infrequently young teachers begin their work
with the idea that the greater variety of tools and materials they can
introduce into their course the richer is its content. To a certain
extent this is true but experience will soon prove that there is a
limit beyond which it is not profitable to go. In grammar schools,
with classes of twenty, it is inadvisable to have more than one plane
on a bench—or even in the general tool equipment, if the courses
outlined herewith are followed. By planning the joint work carefully
beforehand, or requiring the pupils to plan their joints according to
certain standards as to size, no more than two chisels need be placed
at the disposal of each boy and none in the general equipment. The
same may be said of bits, etc. Make use of certain screw sizes, as few
as can be used to advantage, and equip in auger bits accordingly. This
practice not only is less expensive but it enables the instructor to keep
the equipment well in hand both as to sharpening and accounting.
Except with individual oversight, in small classes, it is not advisable
to plan projects for grammar schools in which holes smaller than 3⁄16″
diameter are to be bored. The expense of maintaining or replacing
bits of smaller size that get broken is unwarranted.
Of course, it is not to be inferred from the foregoing that any
necessary tool is to be omitted, or that any tool is to be made to do a
work that will cause it to be injured thereby.
There is educational value in the way of imparting information in
providing pupils with a different kind of wood for each project. This
used to be specified in some of the very best courses some years ago.
Today the tendency is not only to standardize the kinds of wood but
to standardize the thickness. The economic problems arising from the
handling of many kinds and sizes of lumber more than offset the informational
value that pertains to the practice. A study of samples of
wood that are placed within easy reach of the pupils will compensate
somewhat for the loss occasioned by standardizing the kinds of stock.
After all, the presentation of three or four type woods is about all that
can be expected, as the work is now presented.
Wood finishes can be standardized in a manner similar to that of
lumber and hardware. There is undoubtedly educational value in a
boy’s making his own stains. Under ordinary school conditions, however,
it is not possible to have him do so. Nor is it advisable for the
instructor himself to mix his own finishing materials. Even the most
expert woodfinishers find it taxing their ability to mix a fresh lot of
stain that will exactly match that of a previous lot. There is nearly
always some boy, or boys, with pieces but partly covered when the stain
in any given lot is exhausted. The best way, everything considered, is
to make use of some standard color of finish in stain and filler. When
a given quantity is exhausted it is an easy matter to order more of the
same color with the assurance that the color of the new lot will match
that of the old. It is not possible to teach everything in the short time
allowed and there are excellent reasons for omitting these.
The price list and the list of equipment given herein show to what
extent the author has standardized his material and tools.
The
following forms have proven satisfactory.
(Form for front cover)
CLASS BOOK
Manual Training Center___________________
Instructor_____________________
(Form for pages)
The foregoing form is for use in grammar school centers. One book
for each center will suffice. On the cover, the instructor will fill in
the name of the school at which the center is located, also his own name.
There should be placed after “school” on the inner page the name of
the school from which any class of boys come. Their grade and the
name of their academic teacher is to be filled in.
In marking attendance in the class book, use a short straight line for
absence. If a boy is marked absent and later comes in, a straight
horizontal line thru the vertical line made to indicate absence will
indicate tardiness. By arranging these marks in the square in some
definite order the particular time of absence or tardiness can be told.
For example, if a class comes to manual training once a week, a mark
in the upper left hand corner may indicate absence or tardiness the first
week of that month; if in the upper right hand corner, for the second
week, etc.
In the column marked “Grade” will be recorded the teacher’s estimate
of the boy’s work. In some schools boys are required to pay for
material used. The column marked “Acct.” is to be used in keeping
record of money paid by the pupil.
The column marked for deportment is not to be filled unless a boy
insists in calling the instructor’s attention to himself because of his
misconduct. On such occasions a check is recorded after his name at
the time reproof is given.
These books will be taken up by the supervisor of manual training
at the close of the year and will be kept by him.
Boys who enter or leave at times other than the beginning or close
of the regular school period should have the fact and date indicated in
connection with their names.
Where money is collected from students, the supervisor should insist
that the instructor keep a separate purse for this purpose in addition to
keeping a record in his class book. The class book record will be of
service in checking the purse account and in aiding in settling any
dispute between instructor and boy and in giving the supervisor a check
in case any parent asks for information. It is not an unusual thing,
however, for the instructor to find his purse account in excess of his
book account. This is due to the fact that he has forgotten in the stress
of other shop duties to make a record. In such a case the purse account,
not the book account is to be turned in. Since the instructor is not a
purchasing agent there will never be occasion for his book account to
exceed his cash account.
The directions given for the grammar school class book apply equally
to this high school form, except that the week is the unit instead of the
month. If a class comes five days in the week, a mark in each of the
four corners of the square for Attendance and one in the center will
indicate that the boy was absent or tardy five times that week. Always
placing the marks in definite places for definite days will indicate what
day of the week a boy was absent or tardy.
(Form for High School)
(Outer cover)
CLASS BOOK
School_____________________________
Shop_______________________________
Instructor_________________________
(Form for pages)
At the end of each month there will need to be sent to the regular
grade teacher information suggested in the following form. This form,
when the teacher takes off the data contained thereon, is to be returned
to the manual training center. The information contained upon this
form is to be used by the regular teacher in making up her monthly
report for the boys whose names are recorded. Deportment and attendance
will be combined with similar marks in the regular work while
the manual training grade will be recorded in the space so indicated
on the regular monthly report.
As for the form of the monthly report for the high school, most high
schools have their marking systems so arranged that the different instructors
can transfer their markings directly from the class book to
the card. If a form is desired, the grammar school monthly report will
answer as well for the high school by changing the words “School” and
“Grade” to “Shop” and “Section.”
MONTHLY MANUAL TRAINING REPORT
To the Teacher—Deportment is satisfactory unless checked. A boy with two
or more checks needs a word of caution and advice.
Excuses for absence or tardiness are to be given the regular teacher except
where a boy is absent from manual training but is in attendance at the regular
school the same day. In such a case the excuse is to be given the shop instructor.
In addition to this the teacher will appoint a monitor who will telephone to
her the class attendance at the beginning of each manual training period. Unwarranted
absentees are to be attended to by her.
This record is to be returned at the very earliest opportunity to the manual
training shop. Otherwise, it may be the cause of delay in your getting your
class report from manual training the following month.
In grading work the tendency today is not to try to make fine
distinctions such as 83 per cent, etc. “Excellent” for work that is
equal to that of a mechanic, “Good” for work that is above average,
“Passed” for average work and “Poor” for work that is not acceptable
will be sufficiently exact. If the system of marking is by numbers, mark
by tens, as 90, 80, 70, and 60, seventy being “Passed.”
In conduct, a boy at the manual training
center should be governed by the same rules that obtain in the regular
school, with slight exception.
It is sometimes argued that shopwork provides an opportunity for
free and natural or unrestricted action on the part of the pupils. This
they argue is a distinct advantage of manual training over the restraint
of the academic classroom and results in greater development educationally.
Theoretically this seems reasonable. Practically, it soon becomes
evident that young pupils, such as our manual training boys, are
lacking sadly in judgment in the power to discriminate between liberty
and license in shop conduct. Allow them the privilege of talking to
one another about necessary matters without asking permission of the
instructor and you must be a strong teacher to prevent abuse of the
privilege. To allow unrestricted conversation, however, is decidedly
bad. Even with grown men and women working in shops, only restricted
conversation is allowed. The reason is evident. If with men
and women of supposed judgment there must be insistence on order and
system, how much more so with immature boys.
Have definite signals and insist upon their being heeded promptly.
The three bells used in the regular school work serve well to open the
school. One, the opening of the doors; two, the call to order; three,
the tardy bell.
Some instructors do not allow the pupils to enter the shop—do not
open the shop—until the second bell rings. Other instructors allow the
boys to enter the shop at the first bell and begin work as soon as they
like. The first method is used mainly in large cities where large classes
have to be cared for and where the boys are morally inacute. The
second is preferable in some ways. It allows the pupil to make the most
of his time. It has the disadvantage in that it requires the instructor’s
immediate supervision after the first bell, or else allows the pupil to
commit errors because of no supervision. As a rule it is the boy who
most needs the extra time who does not make use of the privilege.
Of course, where pupils are not admitted to the shop before the
second bell, provision must be made for taking care of them inside the
building in inclement weather.
To fully appreciate the merits of either practice it should be explained
that each boy is to be held responsible for the tools at his bench and the
class as a whole for all other tools. Each boy is expected to look over
his tools upon coming into the shop that he may report any tool that
is missing or damaged. Should he fail to make a report until late in
the period, or not at all he should be made to feel the responsibility.
Broken or lost tools should be paid for as the case merits.
At the close of the period, all tools are to be in their places ready for
the instructor’s inspection. It should be explained to the pupils that
this inspection is not to relieve them of responsibility but merely to
assist them in avoiding an oversight.
Unnecessary damage to the bench is to be reported and the responsibility
fixed as is that concerning tools.
At the ring of the tardy bell every boy should be in his place with
his material, ready for work. Since the recitation generally follows the
tardy bell, that should be the signal for quietness and attention such
as is demanded in the regular schoolroom. The instructor will have
marked his attendance by the time the pupils have got in order and the
recitation may begin at once.
Insist upon continued attention during the recitation and demonstration.
The author has made it a point to call upon any boy showing
signs of inattention to recite. No boy likes to be considered a dullard
and usually he will confess to inattention after which the proper note
can be made of it.
Where the full half-day is given to shopwork, a five minute rest
period is advisable. This allows the boys to relax and to make known
to one another their ideas. Where possible, they should be allowed to
move about and converse freely. Under no circumstances, however,
should there be allowed scuffling or loud talk, either at rest or before
the tardy bell. Aside from the damage that might be done themselves
and the equipment, there should be instilled a feeling of respect for the
shop environment.
The instructor should aim to have on each bench as many of the
tools as will be in great demand. The general tools will be kept in a
wall case. Permission should be given to boys to go after any such
tool whenever he needs it without asking for it. Likewise it is advisable
to allow boys standing permission to go to the drinking fountain,
if it be in the same room, or to the wash basin or the finishing tables.
It should be understood that there is to be no congregating at these
places. Permission to leave the room should be required.
At the close of the period a tap of the bell will be the signal for the
boys to put away their tools and work, get their wraps, brush off the
shavings from the bench top and from under the bench into the aisle.
When all are ready and the tools have been inspected, the teacher’s
signal to rise, and then to pass may be given. Have the rows instructed
to pass out in a definite order.
A few schools require the boys of the last class of the day to clean
up the entire shop. In many communities this is not advisable for there
is some justice in their complaints that they are not janitors. There
will be no objection by boys in any community, however, to brushing
out from under and around their own benches. This practice makes
the janitor’s work comparatively light and does not offend the boy’s
sense of justice or fitness. They do not object to the cleaning of the
room so much as to the idea of doing what another is paid for doing.
The discussion of ways and means of maintaining discipline is not
appropriate in a book of such brevity as this. Sufficient to say that a
manual training teacher to do his best work should be a teacher well
trained in methods of teaching and the psychological bases back of them.
He should at least understand the art if not the science of good teaching.
Where an instructor is engaged in teaching his entire time it is not
just that he should be required to attend to formal disciplining of pupils.
In most schools, therefore, an instructor, like the regular grade teacher,
conducts his shop as best he knows how. When a boy insists in being
unruly in spite of all the instructor can do, then that boy should be sent
to the principal of the building in which he belongs for further treatment.
The shop instructor will be expected to make use of the many little
devices for maintaining order that are required of other teachers.
Otherwise he will find himself wanting to send boys to the principals
more frequently than he should. His maintenance of order will be a
much easier task than is that of the regular teacher.
While these restrictions may occasionally work a hardship, they
effectually prevent such injustices as the boy who is inattentive during
the demonstration bothering the boy who was attentive, when it comes
to doing the work. Our American boy is not in much danger of being
injured by our school requirements of order and discipline. In fact,
he would be benefited by a little more strictness than is now the custom,
both at school and at home.
The high school shop bells will of necessity be those for other classes
with the exception of the double period. There will be no necessity
for a rest period, of course.
An examination of the Lesson Outlines of
Part II will make clear the component parts of the lesson. These parts
are: Recitation, Preparation for Demonstration, Demonstration, Work.
In making an analysis of the lesson, let us begin with “Preparation
for Demonstration.” The recitation really belongs to the preceding
lesson, and will be discussed last. The preparation for demonstration
consists in having a pupil read aloud sections of a text which bear
directly upon the demonstration which is to follow. The purpose of
this is primarily to assist in preparing the minds of the pupils for the
demonstration. Of course this preparation could be made orally by the
instructor. In centers where the classes repeat the work day after day
for the full week, the instructor finds himself enthusiastic in giving the
beginning classes their lessons but, in spite of good intentions, slighting
the lessons of the classes that come the latter part of the week. The
reading from the text insures every class equal attention. Of course,
the instructor will enliven the text by the addition of information
from his own experience. There are other uses for the text, such as
a reference book in case the worker finds as he works that he has
forgotten some point. Also it enables the instructor to formulate definite
questions on the work with some assurance that the student can answer
them the week following. The preparation must not be too elaborate.
This is a common fault of beginners in teaching. It is a means, not an
end.
Some instructors object to reading before the demonstration on the
ground that it detracts from the demonstration. When one thinks
only of the exercise of observation this seems reasonable. It must be
remembered, however, that young pupils are not skilled in making
observations as are grown people. It is wise therefore to give them
some aid in making their observations by giving them preliminary hints.
In fact, those instructors who object to the preliminary reading frequently
do precisely the same thing, that is prepare the boys for the
demonstration, when they talk during the demonstration—they usually
explain each step just before taking it. With the preliminary reading
of the text very little talking need interrupt the demonstration, which
may proceed rather rapidly.
Here one sees the necessity for a well organized course. Each lesson
must have its subject matter connected with previous knowledge of the
class.
A successful demonstration demands an equipment such that each boy
may see what is being done by the instructor. The closest of attention
should be demanded. The matter to be demonstrated should be unfolded
step by step. It is not necessary that all the steps be given.
Any steps that have been given in a previous demonstration may be
presupposed. Little time should be lost between the demonstration and
its application.
The remainder of the lesson, the recitation, is to be given at the
beginning of the next period or session. If shopwork has been lacking
in one thing more than another it has been in the failure of the instructor
to “clinch” his instruction. “The best test that a person has
understood a thing is, that he can reproduce it in his own way in his
own words.”
The woodshop instructor has a right and, in justice to the boys and
his work, should insist that they stand squarely upon both feet and express
the information asked for in good, plain, correct English. A boy
who says he “knows but cannot tell it” only half knows. Unless he
learns the lesson well enough to express it well, that lesson will soon
fade so that when the instructor attempts to build upon that knowledge
later, as he must, there will be trouble for both teacher and boy.
In written tests insist upon a definite form and neat papers. For
example, on one line have the date and name, one to the left side of the
paper and the other to the right. In the middle of the paper on the
line just below this, have the name of the subject. Insist upon marginal
spaces at either side of the paper. Do not have the questions copied
upon the boys’ papers, but insist that their answers shall be in the form
of complete statements, a subject and predicate—so complete that the
instructor need not refer to the question to mark the answers.
At all times use good English, never rough language if you expect
the boys to respect you and the surroundings. Quietly correct their
grammatical errors. These things cost little in effort and assist in
overcoming the slovenly tendencies so characteristic of boys at this age.
In the Lesson Outlines will be found questioning hints under Recitation.
Some fifteen or twenty years ago our text books in geography,
grammar, history, etc., had suggestive questions after each lesson. These
questions were very helpful but like many another good thing they
were abused. Weak teachers found it easier to conduct a recitation by
putting these questions to the students in routine order, instead of using
them merely as hints to enable them to present to the pupils all the
matter of the lesson. To conduct a recitation by asking routine questions
like conducting a recitation with a text open before the teacher
when pupils are required to recite without the text, is not the sign of
the highest type of teaching and is bound to result in more or less
formalism and lack of vital interest.
Of recent years, texts have gone to the other extreme and not a few
educators are wishing texts would give some hint as to the points of
importance in the lesson. This the present book aims to do in the
hints by questions under Recitation. These questions are purposely
put in an incomplete form so that the instructor must needs formulate
them before putting them to the pupil. They are intended, as are any
public speaker’s notes, merely to enable him to carry on the discussion
or recitation in a systematic and logical manner, missing none of the
important facts to be brought out.
The whole time taken in any one lesson for recitation, preparation
for demonstration and demonstration should not exceed, ordinarily,
twenty-five or thirty minutes.
It is a skilled teacher who can present a lesson to the best advantage.
The best possible presentation is a subject that manual training men
can investigate with profit. Asking questions and getting answers and
giving demonstrations may mean much or may mean little in the way
of developing the boys—nor can you tell always by the material results
obtained—it all depends upon how these things are done.
By maintenance we refer to the cost of keeping
a center running after it has once been fully equipped, exclusive
of teachers’ salaries. This will be found to have several variable factors
entering. A careless instructor can very quickly run the cost of maintenance
to a point almost prohibitive. The loss of tools by theft, waste
of lumber in getting out stock, etc., the careless planning of the work
so that articles are made, requiring much lumber and little work, quickly
makes inroads upon the appropriation for manual training purposes.
An allowance of ten per cent. for depreciation in equipment should
be sufficient under all ordinary conditions. An allowance of one dollar
per pupil per year should be ample where all material used is provided
free. In fact, observation covering a period of several years shows that
boys coming one-half day a week for the school year of ten months and
making models similar to those in “Projects in Beginning Woodwork
and Mechanical Drawing” cost the Board approximately seventy-six
cents per pupil for maintenance. This center had very close supervision,
however, and waste and breakage was reduced to a minimum.
The most prolific source of monetary outlay is caused by planning
projects—it makes no difference whether they are small or large, a boy
uses just as much lumber in a given amount of time,—that require
little effort in their construction. For illustration, a boy may make a
taboret with four solid sides and with butt joints where he should be
making a taboret with grooved joints. The former construction has
its place, but should not monopolize the whole scheme as it is so often
allowed to do. A course properly planned will show that the cost of
eighth grade work, such as taborets, etc., is no greater than that of the
seventh grade which is composed of much smaller but more numerous
projects.
Again, it is a mistake to plan many small projects consisting of small
parts in the hope of effecting economy. The awkwardness of the
average grammar school boy will make it necessary to discard much of
such stock. Where the parts are of some size, it is possible in most
every instance to give him a new but smaller set of dimensions and
require him to continue to work on the piece originally given.
A scrap box for holding small pieces that remain after cutting out
stock from the board, closely supervised so that the boys shall look over
the pieces it contains before cutting a full board, is another source of
economy. There should be comparatively little “kindling” for the
janitor, if due care is taken by the instructor. Above all things, it
should be understood and enforced that no boy is to discard a piece
once he has worked upon it without the instructor’s permission. This
he seldom needs to give for he can usually show the boy how to make
further use of the piece in question by reducing its size.
While most schools provide the materials free, some do not, but
require the pupils to pay the actual cost of the material used should
they care to take the article home. There is something to be said in
favor of each practice. The latter is not unjust as it provides the
necessary training. It tends to make class distinction, however, in
communities where pupils are not able to purchase their pieces. On
the other hand, it discourages the taking of things that are not really
wanted and permits a most economical administration—provided the
supervisor uses judgment in the selection of his projects. It tends to
make him resourceful in providing projects of interest, which is an
advantage provided the projects selected are in harmony with the
general plans of the course, which is supposed to provide for the orderly
introduction of processes.
High school pupils, according to the course outlined herein, will have
about the same amount of time in the half-year allotted to benchwork
in wood as do the grammar school boys in the full school year. The cost
of maintenance will therefore be approximately the same for the half
year as is that of the grades for the year.
In purchasing supplies it is possible, where the courses are organized
and the materials standardized as indicated herein, to save by ordering
in quantity lots. The lumber can be purchased by the 1,000 feet of the
various thicknesses wanted. Likewise the hardware can be got in
quantity lots, with the assurance that next year’s work will call for
any stock that may not be used the present year.
Short lengths in lumber are just as good as long for manual training
purposes and are cheaper.
Whatever is to be purchased by open quotations should be definitely
specified so that one and only one quality can be delivered.
The printed catalogs of the various dealers with their retail prices
are helpful, tho these prices are always “shaded” when quantity
quotations are asked.
CHAPTER V. EQUIPMENT. — 15. Equipment. — 16. Size of Classes. — 17. Lockers. — 18. Bench and Tool Equipment for Grade Center. — 19. Individual Tools. — 20. Equipment for Mechanical Drawing, Grade Center. — 21. High School Joinery Shop. — 22. High School Bench and Tool Equipment.
In the following discussion, effort is made to
suggest type forms of equipment rather than to offer a complete treatise.
The equipment offered may be added to or reduced as the exigencies
warrant. While it is complete enough to do the work planned in the
outline of the course in woodworking as given herein, and lists everything
necessary to do the work in a most approved manner, it does not
go to the extreme of listing every tool that might be used in a cabinet
shop. It lists every tool that must be used for the work outlined.
While it lists an equipment for grammar school and another for
high school, the grammar school equipment with slight additions can
be made to serve the purpose of high school work just as well in communities
where the same equipment must serve for both.
THE GRADE SHOP. The best arrangement of benches and other
equipment, so far as completeness and convenience is concerned is that
shown in Fig. 8. This is a floor plan of a grade school center. Montclair,
N. J. An extended teaching experience does not indicate any
way in which this arrangement could be improved.
We quote from a description of this shop which appeared in the
April, 1911, Manual Training Magazine.
The shop shown in the accompanying illustration is one of six in the town
of Montclair, N. J., and what is said of equipment holds true of the others. It
is unique in that it is housed in a structure especially built for the purpose.
This shop measures 29 by 54 feet, and, having windows on all sides, allows the
arrangement of equipment with but little reference to space or light. The
equipment consists of twenty-four single benches with the usual tools, and a few
essentials for simple metalwork. The benches are partially equipped with rapid-acting
vises, the old wooden ones being replaced as they wear out.
The demonstration theater was designed for a class of twenty, but larger
classes have made twenty-five seats necessary. The demonstration bench has both
woodworking and machinist’s vises. It is used also by students for such metalwork
as comes in connection with the shop projects. This bench is provided with
drawers for tools and compartments for sheet metals, etc.
The lumber rack was made by bolting five pieces of 4 × 4-inch chestnut to the
side wall, and inserting six 21-inch lengths of 13⁄4-inch gas pipe in each upright.
Such a rack is convenient, serviceable and inexpensive.
Bellevue Ave. Shop—Montclair, New Jersey
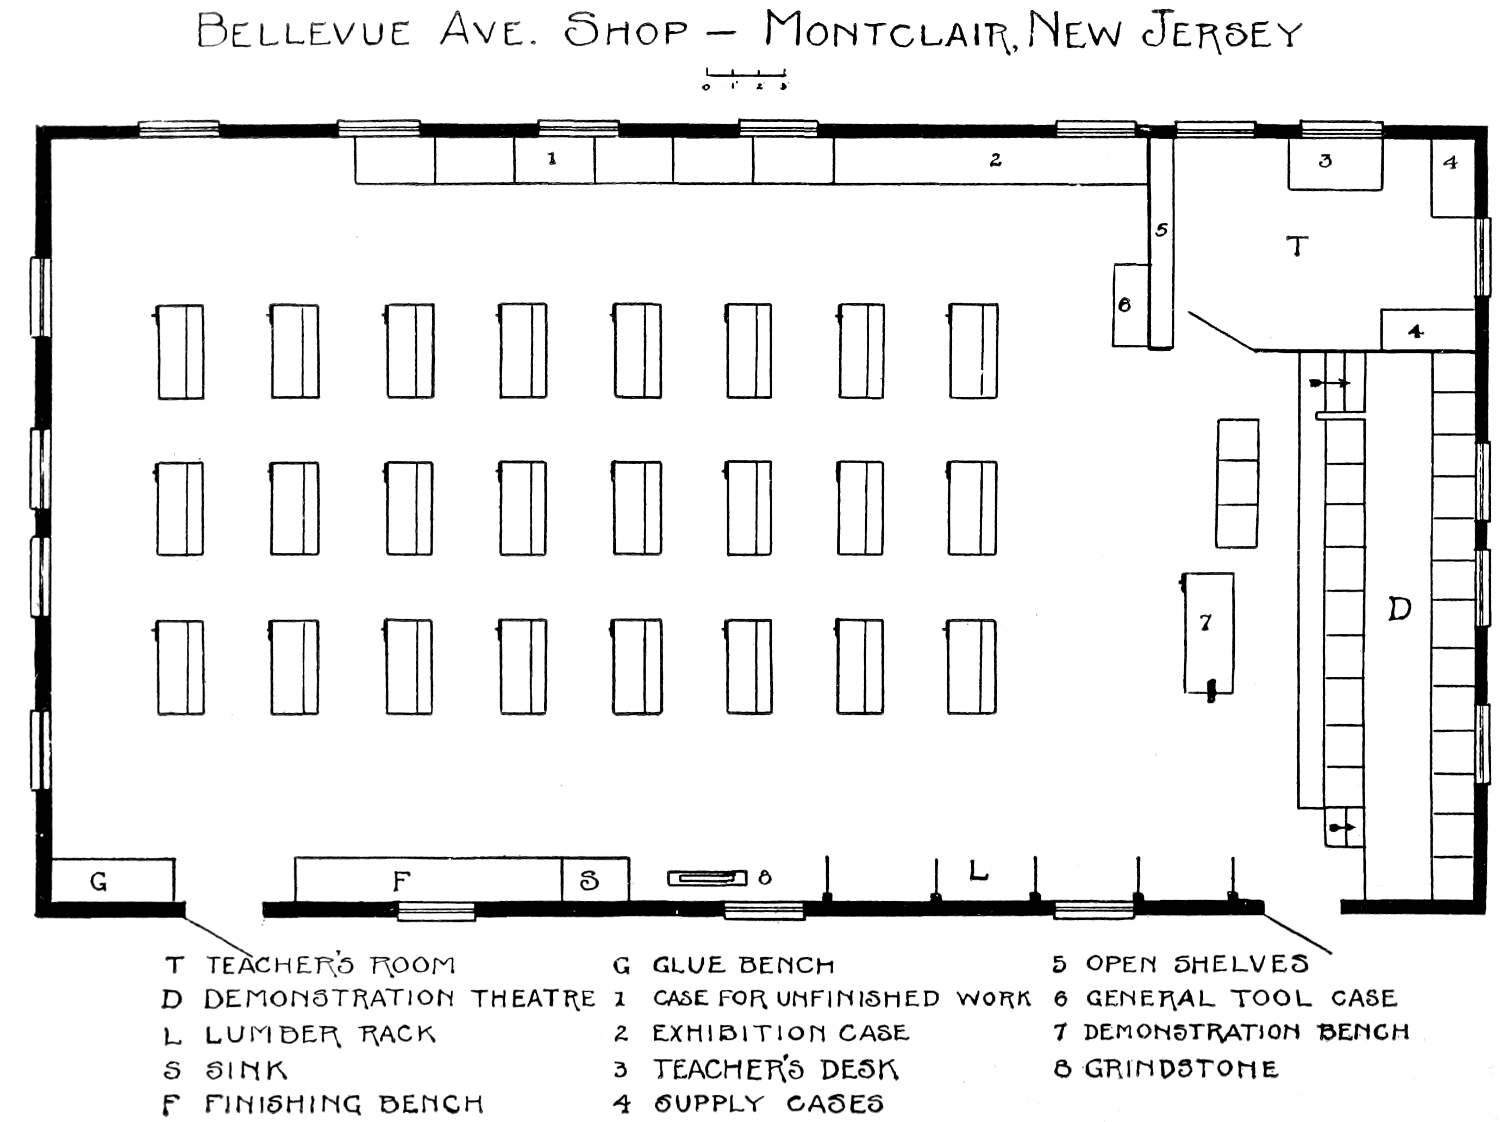
T TEACHER’S ROOM
D DEMONSTRATION THEATRE
L LUMBER RACK
S SINK
F FINISHING BENCH
|
G GLUE BENCH
1 CASE FOR UNFINISHED WORK
2 EXHIBITION CASE
3 TEACHER’S DESK
4 SUPPLY CASES
|
5 OPEN SHELVES
6 GENERAL TOOL CASE
7 DEMONSTRATION BENCH
8 GRINDSTONE
|
Fig. 8
The glue and finishing tables, not shown in the pictures, have zinc tops, and
are provided with drawers and compartments for keeping the materials used.
They provide the means for doing with cleanliness and order what sometimes is
a rather troublesome part of shopwork.
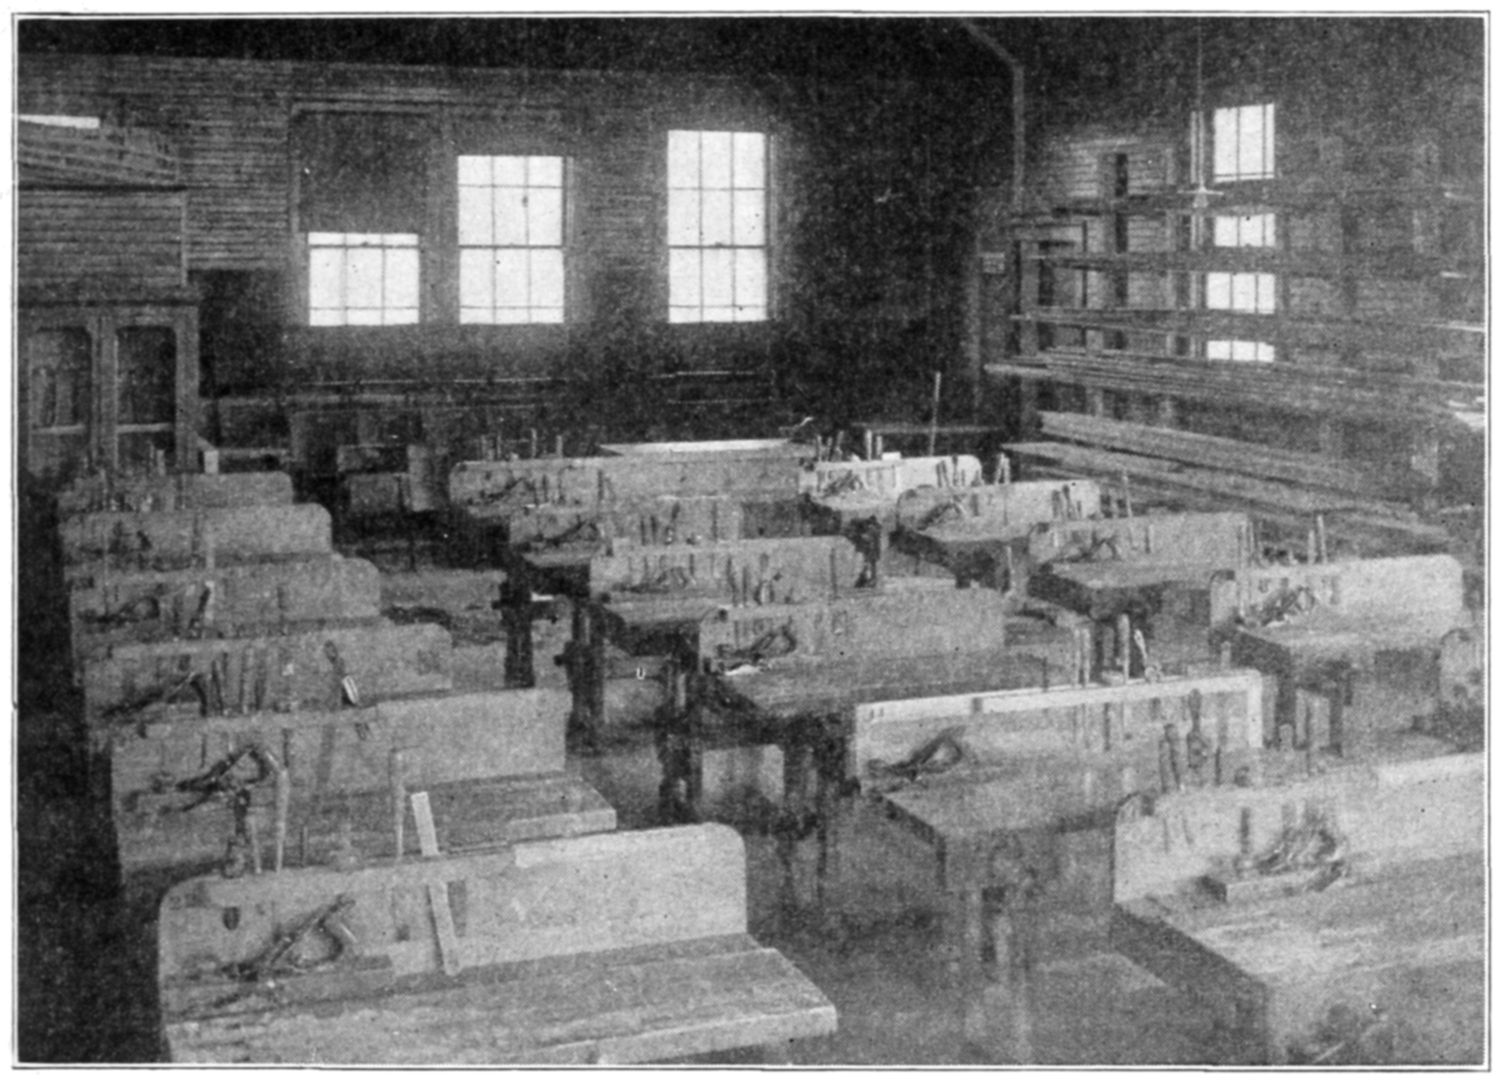
Fig. 9. INTERIOR OF GRAMMAR SCHOOL SHOP, MONTCLAIR, NEW JERSEY.
Fig. 10. LOCKERS FOR STORAGE OF UNFINISHED WORK, GRAMMAR SCHOOL
SHOP, MONTCLAIR, NEW JERSEY.
The permanent exhibit case measures 20 inches by 5 feet 6 inches by 12 feet.
It has adjustable shelves, glass doors, and is provided with the same style of
lock as are the general tool case, supply cases and demonstration bench.
The cabinets for pupils’ unfinished work have been planned to meet the
problem of providing a satisfactory place in which a pupil can keep his work
from lesson to lesson. The first requirement of the shop seemed a standard size
locker; secondly, it must be adjustable to provide for various sizes of projects;
and lastly, local conditions demanded a system which could be moved without
difficulty. The idea has developed into what is the most satisfactory system with
which the writer (Albert F. Siepert) has had experience, either as student or
teacher. A sectional case was designed which meets equally the needs of all
classes in the art and handwork department, whether they be bookbinding,
woodwork or sewing. Each section measures 20 in. by 24 in. by 36 in. The
open case in the illustration shows the maximum number of compartments, eight
pupils to the section, each pupil having a space 81⁄4
in. by 105⁄8 in. by 181⁄2 in.
for his work. By removing four or six of the upright partitions, the space may be
given to four or even to two pupils. Thus any piece of work up to 11 in. by
181⁄2 in. by 34 in. can be kept out of the way and under lock and key. Alternate
sections are assigned to a class to avoid congestion and confusion.
The cost of the building several years ago was $3,500. Local carpenters
built the demonstration theater, lumber rack, cabinets, etc. The demonstration
bench cost $27; the stain and glue tables approximately $4.50 per running foot;
and the cabinets for unfinished work $12 per section.
It should be noted that the building was
planned originally for twenty benches and that it now contains twenty-four.
Twenty benches ought to be the maximum number so far as the
giving of proper instruction is concerned. When more are given the
instructor the conditions for the most efficient work are not good. This
problem of accommodating twenty-four boys will have to be met, and
may as well be planned for just so long as school directors insist upon
crowding fifty pupils in the regular classroom when the teacher ought
to have but thirty-five or forty to do her best work. Then, too, it
frequently happens that a room contains more boys than girls. Some of
these boys might be sent to another and adjoining center. It is best to
plan to care for twenty-four boys, however, where the regular room
enrolment runs above average. In this case the dimensions of the
building as given in the preceding text should be changed. Enlarge
the width of the building by six feet. This will permit the placing of
the extra demonstration seats upon the platform and also allow sufficient
floor space near the lumber rack for cutting out stock, and about the
finishing table, etc.
In placing benches, plan to have the light enter over the back and
the left end of the bench. That is, when standing at his bench, the
light should strike the pupil in the front and left.
An amphitheater is very desirable both in the high school and the
grade school shop. In large classes it is a necessity. With small classes
it is possible to make use of desk stools arranged about a bench. Many
manual training centers, in fact, most manual training centers, do not
have the amphitheater. This is no argument against its desirability.
It simply means that the boys get but an imperfect understanding of
the demonstration and that their work must suffer accordingly.
The locker problem is one that has been a source
of trouble. The arrangement described in connection with the description
of the Montclair shop is by far the best solution of this problem
that has come to the author’s attention. The extreme length of pieces
that can be accommodated is 34″. A few pieces will be longer than
this. These can be accommodated outside the locker or the locker
sections may be planned large, say 40″ in the clear.
The grindstone is best suited for pupils’ use in sharpening edge tools.
Where a small motor is used for power, it is very desirable to have a
small dry emery grinder for the use of the instructor. Ten dollars will
cover its cost and it will pay for itself quickly. It can be placed near
the grindstone.
Unless the centers have frequent delivery of lumber supplies, or if
there is no central cutting-up station, it may be found advisable to add
to the building described a small room for the storage of quantity lumber
with, possibly, a power saw in it.
The individual bench is to be preferred to the two- and four-pupil
bench. Aside from the fact that the double benches are not conducive
to good order and system, it is next to impossible to get such benches
to remain rigid without going to an initial expense that would be
sufficient to purchase the individual bench. Unless they are rigid,
it is an injustice to ask a boy to return accurate work. The effect
that violent work at one side of a double bench will have upon fine or
accurate laying out by some boy on the other side of that bench is not
difficult to imagine. The only argument in favor of a double bench
is economy of space. If space must be economized, it is better to place
the individual benches back to back with just enough space between
them to keep them from touching and thus shaking each other.
The rapid-acting vise is desirable, if it is a good one. Some rapid-acting
vises now on the market are not as desirable as the old fashioned
continuous metal screw vise. A vise is in almost constant use and
should be most carefully investigated before being specified.
| |
Bench, open frame without drawer, glued up top 23 in. by 52 in. tool rack, rapid-acting
vise, approximate cost |
$ 10.00 |
| Jack-plane, Stanley or Bailey No. 5, each |
2.09 |
| Wooden mallet, Stanley No. 1 |
.13 |
| Rule, Stanley No. 34 |
.17 |
| Hammer, Maydole bell-faced claw, 13 oz. |
.50 |
| Wing Dividers, P. S. W., 6″ |
.23 |
| Chisels, socket firmer, Buck Bros., 3⁄8″ and
3⁄4″ both |
.83 |
| Marking-gage, Stanley No. 62 |
.12 |
| Try-square, Stanley No. 20, 6″ |
.21 |
| Saw, Bishop Handy Saw, 12″, No. 9 |
.75 |
| Swedish Sloyd Knife No. 7 |
.40 |
| Bench Brush, No. 2A, Orr & Lockett |
.30 |
| Bench-Hook |
.25 |
| Chisel-Board |
.00 |
| Total |
$ 5.89 |
| 6 |
Nailsets, cup pointed, assorted sizes, @ 10c. |
$ .60 |
| 6 |
Try-squares, Stanley No. 20, 12″, @ 36c. |
2.16 |
| 3 |
Turning-Saws and Frames, 18″, @ $1.00 |
3.00 |
| 6 |
Spokeshaves, Bradshaw and Field or Stanley No. 84, 21⁄2″, nut
adjusted @ 59c. |
3.54 |
| 3 |
Gouges, 1″, No. 8, outside bevel, Buck Bros., @ 43c. |
1.29 |
| 2 |
Ratchet Braces, Barber No. 33, 8″ sweep, @ $1.45 |
2.90 |
| 2 |
Plain Braces, Barber No. 13, 8″ sweep, @ $1.08 |
2.16 |
| 3 |
Crosscut-saws, Bishop No. 89, 22″, 10 pt., @ $1.55 |
4.65 |
| 3 |
Rip-saws, Bishop No. 89, 24″, 8 pt., @ $1.65 |
4.95 |
| 2 |
Planes, Jointer 22″, Bailey No. 7 or Stanley, @ $3.03 |
6.06 |
| 2 |
Rose head Countersinks, Buck Bros., @ 23c. |
.46 |
| 2 |
Screwdriver bits, Buck Bros., @ 17c. |
.34 |
| 4 |
Screwdrivers, 4″ blade, fluted handle, @ 25c. |
1.00 |
| 2 |
Auger-bits, 11⁄4″, R. J., @ 80c. |
1.60 |
| 4 |
Auger-bits, 1″, R. J., @ 60c. |
2.40 |
| 2 |
Auger-bits, 3⁄4″, R. J., @ 50c. |
1.00 |
| 4 |
Auger-bits, 1⁄2″, R. J., @ 35c. |
1.40 |
| 4 |
Dowel-bits, 3⁄8″, R. J., @ 27c. |
1.08 |
| 4 |
Dowel-bits, 1⁄4″, R. J., @ 27c. |
1.08 |
| 4 |
Dowel-bits, 3⁄16″, Morse, @ 12c. |
.48 |
| 1 |
T-bevel, Stanley No. 18, 8″, @ 44c. |
.44 |
| 1 |
Monkey Wrench, Coes, 8″, @ 50c. |
.50 |
| 1 |
Pair Combination Pliers, 6″, @ 40c. |
.40 |
| 2 |
Combination India Oilstones, 6″ × 2″ × 1″, in iron boxes, @ $1.00 |
2.20 |
| 1 |
Oil-can, 1⁄4 pt., @ 18c. |
.18 |
| 6 |
Handscrews, No. 812, @ 40c. |
2.40 |
| 2 |
Steel Bar Carpenter Clamps, 21⁄2 ft., @ $1.69 |
3.38 |
| 1 |
Set Steel Figures, 3⁄16″, @ $1.88 |
1.88 |
| 1 |
Shellac Can, 1-qt. |
.78 |
| 1 |
Kerosene Glue Heater, 2-pts. |
1.50 |
| 1 |
Steel Framing-Square |
1.00 |
| 200 |
Individual plane-irons, @ 25c. |
50.00 |
| 6 |
Coping-saws with Blades, @ 25c. |
1.50 |
| 2 |
Brad-awls, @ 15c. |
.30 |
| 2 |
Scribe-awls, @ 15c. |
.30 |
| List price |
$108.83 |
| 24 |
Benches, @ $10.00 |
$240.00 |
| 1 |
Demonstration Bench |
27.00 |
| 25 |
Sets of Tools, @ $5.89 |
147.25 |
| General Tools |
108.83 |
| List price |
$523.08 |
| Less 10% |
$470.68 |
This estimate does not include lockers, shelving, machinery, etc. The
cost of lockers, shelving, etc., can be roughly estimated by noting the
price per foot as given in the description of the Montclair shop. A
grindstone with motor power can be purchased for $30.00 for stone
and $60.00 for motor.
Where the instructor must do much grinding, a No. 101 Cortland
Corundum Wheel Co. Grinder, cost with tool rest and two grinding
wheels complete ready to belt $10.00, will be found an extremely satisfactory
investment.
Where power is not obtainable a Pyko Peerless Dry Emery Grinder,
cost $6.00 with tool rest attachment, will give excellent service. It
cuts much more rapidly than a grindstone and is therefore not so tiring
on the one who turns it.
In justice to other makers of tools it must be explained that the
mentioning of the firm names is due to the fact that indefinite specifications
are worthless. There are other tools as good as those named,
some of which are preferred by some manual training men to those
mentioned. Those mentioned are first class in every respect and will
serve to give the dealer an idea of the class of goods you want. It will
be for the purchaser to see that he gets equal quality. By all means,
avoid the poor grade tool whatever its price. Were it not for limited
space the author would like to list other makers of first class tools. If
one is not conversant with the different brands let him consult some of
his mechanic friends.
The prices given are list price for 1911-12, Chicago. A discount of
at least 10 per cent. will be allowed for quantity purchase.
The individual plane-iron is not absolutely
necessary. It is very desirable since the plane is in constant
use. To make use of the same irons class after class is unjust to the
good worker. He will spend a good part of the period getting his iron
in condition only to find when he comes again the next week that it
all has to be done over again. It puts a premium on slovenliness. True,
the same argument holds for the chisels, and it would be well if individual
chisels could be provided. The chisel is not used nearly so
much as the plane-iron and can, therefore, be used in common much
better than the plane-iron.
No machinery for cutting up stock, is included in the estimate. In
most cities the high school machinery can be used for this purpose. According
to the course outlined, there will be little stock cutting by
machinery required. What little there is might well be done as “busy
work” by the more rapid workers thruout the year. Such stock could
be stored away until needed.
Since the teacher of woodworking must also be the teacher of mechanical
drawing in the grade center, no special room for drawing is advisable.
With the first twelve weeks devoted to drawing, the woodworking
benches can be used as drawing tables, the woodworking tools not
being placed until all the drawing work is completed. When the
shop is properly cleaned during the summer vacation there is no
reason for its not being kept as clean as any special drawing room during
the drawing period of twelve weeks. The benches should be scraped
clean and shellaced.
A blackboard is needed for both drawing and woodwork and may as
well be placed in the woodworking shop.
For the most efficient presentation of drawing there will need to be
plenty of blueprints or plates from which the student may work. These
must be so well executed, as to technique, that the pupil will have
before him only the best as models. No one would think of placing
before the writing class other than the best models of style and execution
in penmanship, yet it is not infrequent to find mechanical drawing
students copying from blueprints that are far below standard as to
excellence.
In presenting the problems, models will be found of very great help
to the student in his efforts to interpret the conditions. Too much
dependence should not be placed upon models in the work of older pupils.
| Drawing-boards, 16″ × 22″, basswood, each |
$ .70 |
| T-squares, 22″, plain blade, fixed head, each |
.20 |
| 45° Triangle, 8″ each |
.16 |
| 30°-60° Triangle, 10″, each |
.15 |
| Desk Stool, 24″, rubber tipped, each |
1.25 |
| Total |
$ 2.46 |
| Total for 25 sets, less 10% |
$55.45 |
There will be needed in addition to the above a knife, scale, compass,
and sandpaper block. The knife and rule used in the woodwork will
serve equally well in the drawing. The sandpaper blocks or pencil
sharpening blocks can be made in the shop.
In connection with these blocks, it will be found expedient to have
them so fastened to the bench that pupils cannot get them on top of the
bench in sandpapering a point on the pencil. This can be done by
fastening the block to the bench with a screw in such a way that it can
be revolved from under the top of the bench when wanted. Otherwise
beginners will have the bench top and then drawings covered with the
fine lead of the pencil.
In getting equipment avoid “baby” sets. A taboret drawing, to be
well made, must be on a scale of 1⁄4″. This, with marginal lines will
mean a paper of 12″ by 18″.
PERSONAL EQUIPMENT.
Excelsior or Eagle Pencil Compass.
Pencil, Dixon Manual Training, 2H.
Eraser, Ruby Pencil.
Envelope for holding drawings.
Thumbtacks, two.
The personal equipment to be uniform should be purchased by the
school and sold to the pupils.
While this personal equipment may be kept in the woodworking
lockers, some instructors prefer to have a special case of drawers to
hold the drawing envelopes, and blocks of wood with suitable holes for
holding the pencils, erasers, and tacks, monitors being appointed to
look after them.
The paper used need not be as expensive as that of the high school
where problems are to be inked. A manilla paper such as is used in
the regular or freehand drawing classes will answer admirably and can
then be provided by the school. Such paper is usually purchased in
sizes 12″ by 18″ and 9″ by 12″. The former is the desired size for
the eighth grade work and the latter for the seventh grade. A 6″ by 9″
size will be found suitable for stock bills, where printed blanks are not
to be provided.
In the matter of paper, it is possible to practice economy without
detracting from the drawing. All that are not wanted at the close of
the year should be kept and the reverse sides made use of where experimental
penciling is required.
Drawing equipment will be stored when woodwork is begun.
The general plan of the
wood shop for the high school will depend so greatly upon its relation
to other shops in which wood is worked that the most that can be
hoped by discussing it is that the plan offered may offer a starting point
from which to work. In some communities the one shop will be all
that is needed both for cabinet work, first year joinery, and pattern-making
with, possibly, wood-turning. In other communities the number
of students taking the work may warrant separate shops with full
machine equipment for each. In still others it may be advisable to
have adjoining shops but still necessary to make use of the same
machinery. Some schools plan to have all the classes in one big room,
sometimes having as many as seventy boys with three instructors. If
this latter plan is followed, tho it is not advised, there should certainly
be provided an adjoining demonstration room where the instructors
may talk to the boys without the competing noises of other classes.
Fig. 11 is a suggestive sketch. It provides for lockers similar in
make-up to those discussed in connection with the grammar school.
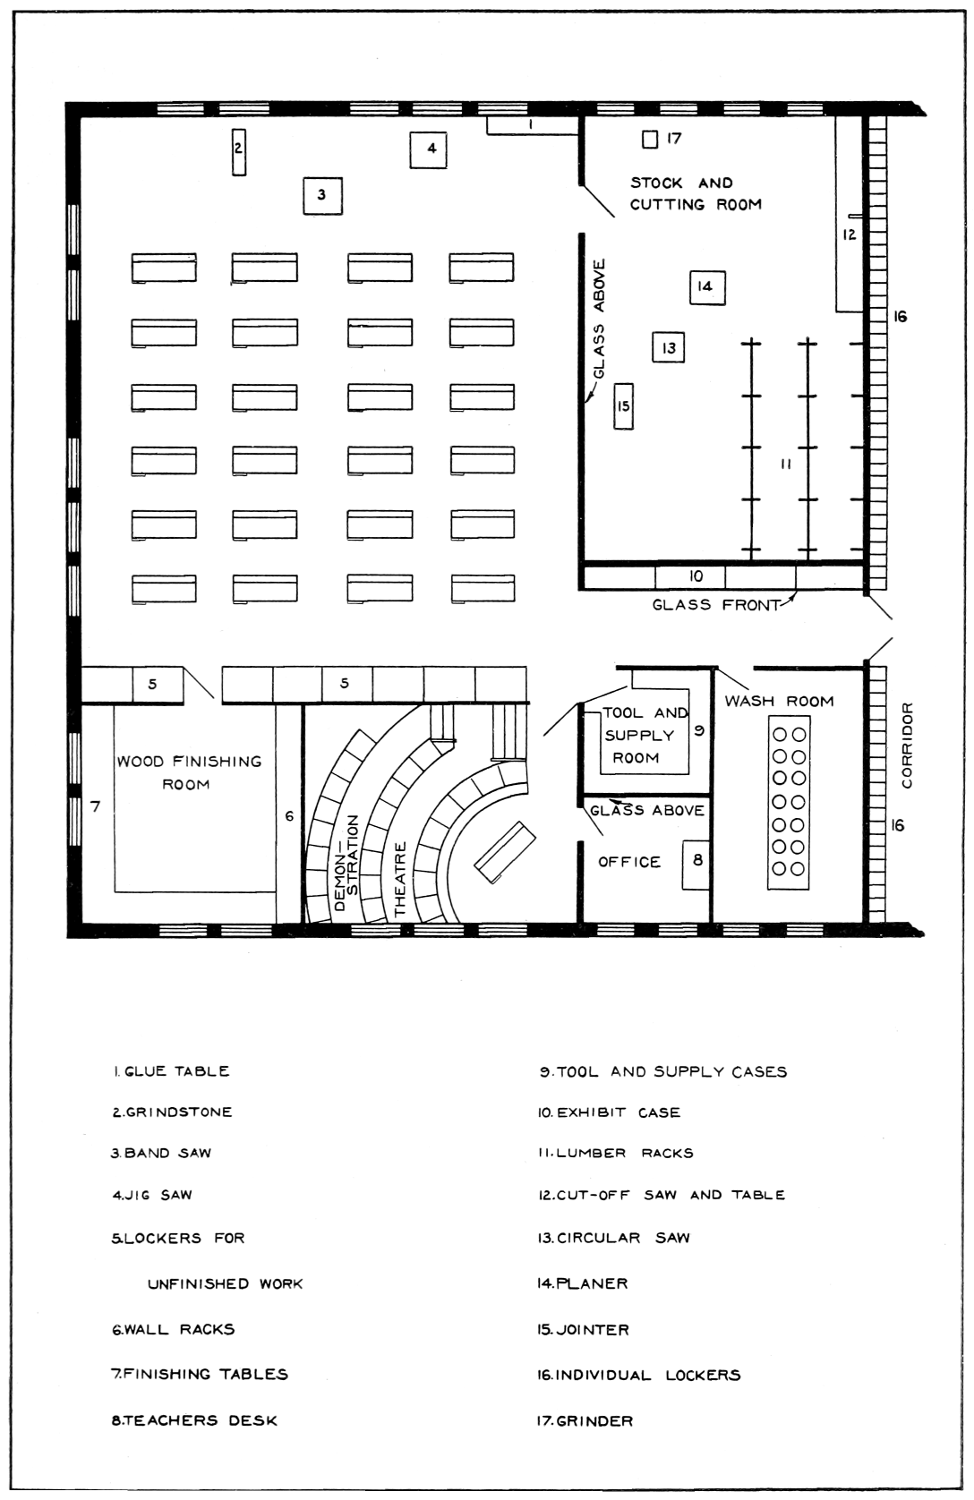
1. GLUE TABLE
2. GRINDSTONE
3. BAND SAW
4. JIG SAW
5. LOCKERS FOR UNFINISHED WORK
6. WALL RACKS
7. FINISHING TABLES
8. TEACHER’S DESK
|
9. TOOL AND SUPPLY CASES
10. EXHIBIT CASE
11. LUMBER RACKS
12. CUT-OFF SAW AND TABLE
13. CIRCULAR SAW
14. PLANER
15. JOINTER
16. INDIVIDUAL LOCKERS
17. GRINDER |
Fig. 11. SUGGESTED FLOOR PLAN FOR HIGH SCHOOL
SHOP.
General tools are to be kept in a tool room which may be placed
in charge of a student assistant. Each boy is then to be provided with
metal checks. When a tool is asked for the assistant will hang the
student’s check in the place of the tool taken out. Upon the return of
the tool the check will be returned.
First year students may be safely taught to use the band-saw and
jig-saw, with proper safe guards about the former. Other machines are
best kept in a separate room.
Since high school pupils ought to be taught how to apply more
difficult finishes, such as rubbed varnish, than those taught in the grammar
schools, a special room will be necessary in order to avoid the
shop dust. This room should be made fire proof, if possible, and should
have racks about the walls upon which to place work being finished.
The benches for the use of high school pupils are best when of the
cabinet type having drawers below in which each student may keep his
individual edged tools. Such a bench with drawers enough to accommodate
all the boys that will be able to make use of the bench during
the day, with a hinged or revolving board upon which may be fastened
the general tools that belong to that bench will cost approximately
thirty dollars. This includes a first class rapid-acting vise. The individual
bench in the high school is as desirable as it is in the grades.
Where a high standard of technique is to be demanded of the pupils,
the following tools should be added to those specified for the grammar
school bench equipment:
| Smooth-Plane, 13⁄4″ cutter, 8″ long, Stanley |
$1.66 |
| Jointer-Plane, 23⁄8″ cutter, 22″ long, Stanley |
3.03 |
| Screwdriver, 6″, Stanley |
.35 |
| T-Bevel, 6″, Stanley |
.40 |
| Combination India Oilstone, 1″ × 2″ × 6″ |
1.10 |
| Oil-Can |
.18 |
| Crosscut-saw, 20″, 10 pt., Bishop No. 89 |
1.40 |
| Rip-saw, 22″, 8 pt., Bishop No. 89 |
1.55 |
| Spokeshave, 21⁄2″ blade, Bradshaw and Field |
.57 |
| In place of the Bishop Handy Saw specified in the grammar school list,
substitute Bishop No. 8 Backsaw, 10″, cost 94c. |
| Provide for each drawer, that is, provide each boy with the following: |
| Chisel, 1″, bevel edged, firmer socket, Buck Bros. |
$ .57 |
| Chisel, 1⁄4″, bevel edged, firmer socket, Buck Bros. |
.41 |
| Chisel, 3⁄8″, socket mortise, Buck
Bros. |
.40 |
| Plane-iron for Jointer |
.29 |
| Plane-iron for Jack-plane |
.25 |
| Plane-iron for Smooth-plane |
.23 |
| Spokeshave-iron |
.15 |
| Sloyd knife, 25⁄8″ |
.40 |
This list presupposes that the mortising of the first year will be done
by chisel alone, no boring. If mortises are to be bored first, it will be
advisable to equip each bench with a Barber’s 8″ ball bearing brace,
cost $1.45.
In addition to the general tools specified for the grammar school,
make the following changes and additions:
GENERAL TOOLS.
Omit the rip- and crosscut-saws.
Omit the plain braces in case the bench is so equipped.
Omit handscrews and clamps, and glue heater.
Add 1 doz. Handscrews, No. 812, cost each 40c.
Add 2 doz. Carpenters’ Clamps, wood bar, 2-ft., @ 85c.
Add 1 doz. Carpenters’ Clamps, wood bar, 4-ft., @ 95c.
Add 1 Set Steel Letters, 3⁄16″, @ $1.88.
Add 1 Steam Glue Heater, O. & L. No. 9, @ $9.50.
Add 2 Draw-Knives, 8″, L. & I. J. White, @ 65c.
Add 1⁄2 doz. Steel Cabinet Scrapers, @ 10c.
Add 1 Set Auger-Bits in box, R. J. @ $4.00.
MACHINERY.
For the highest type of work the following machines should be placed
at the disposal of the first year high school classes:
Grindstone.
Scroll or Jig-saw.
Band-Saw.
These machines should have proper safety devices and should be
placed where they will be under the immediate observation of the instructor.
Machines for woodworking vary so greatly in price and
desirability that it is not thought wise to specify any particular make.
Only the experienced man will be called upon to equip with machinery
and such an one will have the information necessary to make the purchase.
For the second year, or optional cabinet work, there should be placed
at the disposal of the students, and they should be taught their use, the
following machines in addition to those specified for the first year work:
Circular-Saw.
Machine Jointer.
Planer.
Boring Machine and Mortiser.
Trimmer.
It is possible so to arrange these machines that the circular-saw and
planer may be used in getting out stock for other classes. The floor
plan given contemplates such use.
EQUIPMENT FOR HIGH SCHOOL MECHANICAL DRAWING.
A special room should be provided for the teaching of high school
mechanical drawing.
A north light is best and the tables should be so placed that the
light may come upon the board from in front and the left. If artificial
light must be used, employ the inverted system.
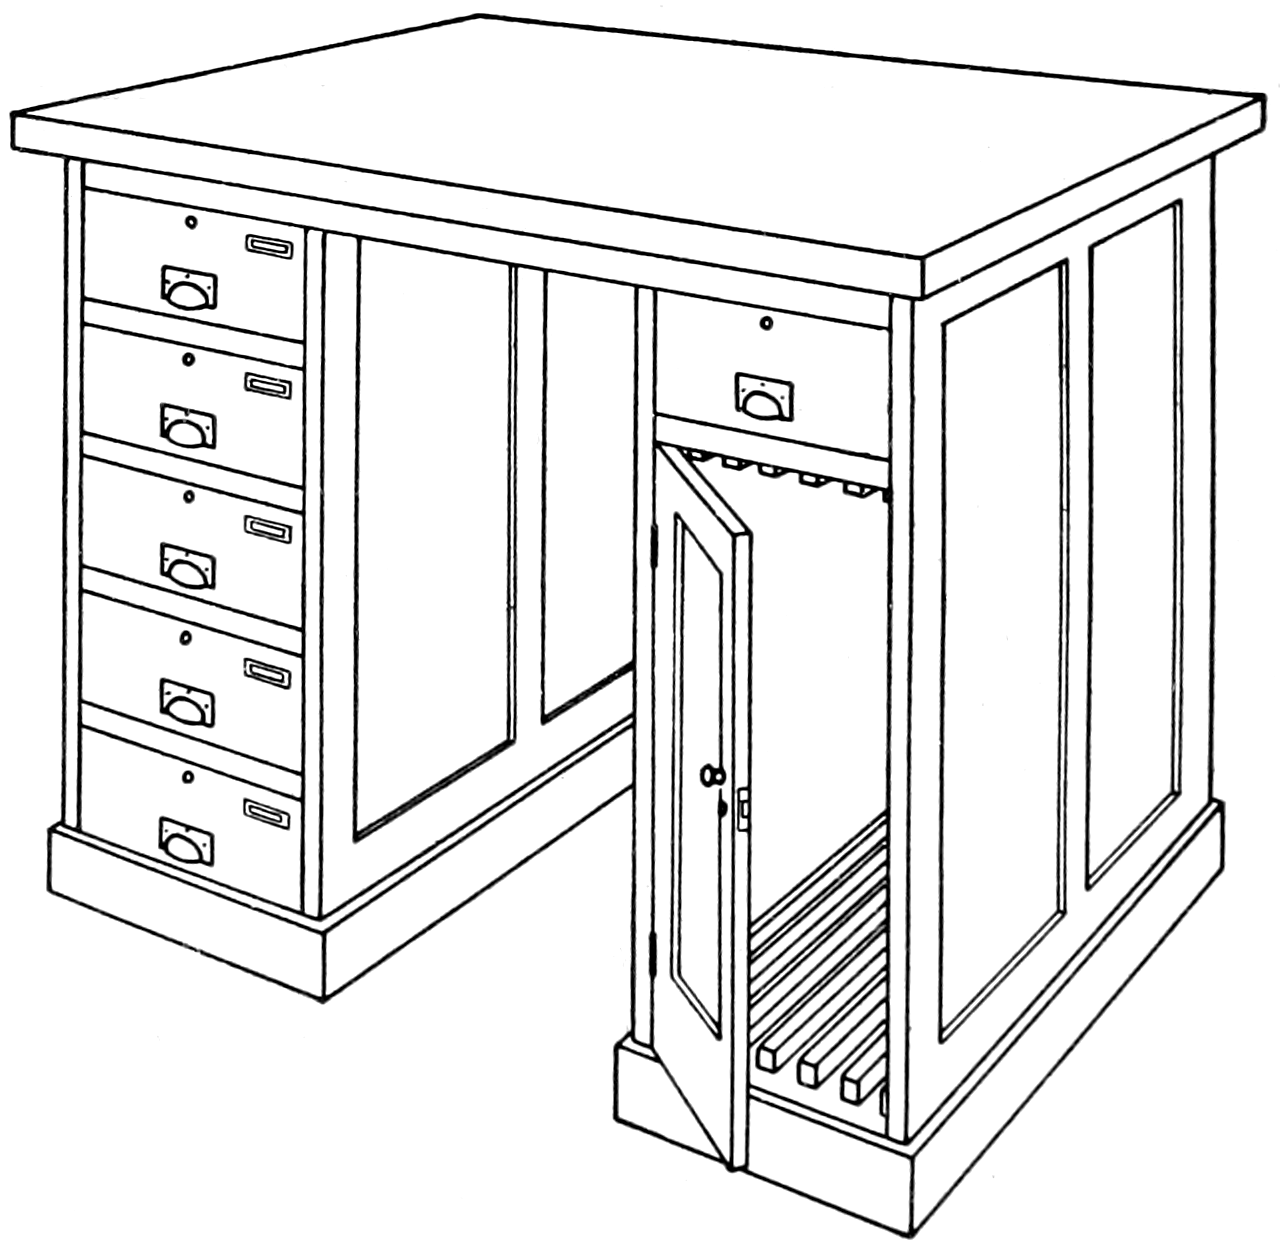
Fig. 12. TABLE FOR MECHANICAL DRAWING.
Tables have much to commend them over the pedestal. They are
easily swept around and keep a room looking orderly. Fig. 12 shows
a type of table that is commendable. On the left are drawers for
keeping the students’ instruments. On the right is a drawer for keeping
general equipment that is used by the boys in common. Below this
drawer is the cabinet for holding the drawing-boards. These boards
are so locked that only the board belonging to the boy with the key
can be released. Such a table with a top 24″ by 48″ and 41″ high will
cost $30, list price. Estimate for individual equipment will be as
follows:
| 1 |
Table |
$30.00 |
| 1 |
Stool |
3.50 |
| 5 |
Boards, of size to fit cabinet, @ $1.50 |
7.50 |
| 5 |
Sets Instruments, German Silver, @ $5.00 |
25.00 |
| 1 |
Scale, @ 38c |
.38 |
| 1 |
T-square, 24″, celluloid lined |
1.50 |
| 1 |
45° Triangle, 8″, celluloid |
.48 |
| 1 |
30°-60° Triangle, 10″, celluloid |
.48 |
| 1 |
French Curve, |
.20 |
| 1 |
Bottle Ink |
.25 |
| Total |
$69.29 |
| |
Sheets Paper. |
| Heavy Manilla Envelope for holding drawings. |
| Thumbtacks. |
| Eraser. |
| Pencil, hard, 4H. |
| Pencil, soft, H. |
| 1 |
Roll Blueprint Paper, (not to be purchased until ready to be used). |
| 1 |
Blueprinting Frame, 18″ by 24″. |
| 1 |
Roll Tracing Cloth. |
| |
Blackboard Triangles, Straight-edge, Compass. |
There will also need to be cases in which to file the envelopes in
which the students keep their completed drawings. If much blueprinting
is to be done, there should be a suitable room with sink and running
water. Where models are used, there should be a case for storing
them when not in use.
Practice varies greatly as to the amount of material provided by the
school. Some schools require the pupils to furnish their own instruments,
as well as paper and other supplies. The advisability of
requiring much or little will have to be determined by the social conditions
of the community it is intended to serve.
CHAPTER VII. LESSON OUTLINES FOR GRADE VIII. — GRADE VIII. (Mechanical Drawing) — GRADE VIII. (Mechanical Drawing) — GRADE VIII. (Mechanical Drawing) — GRADE VIII. (Mechanical Drawing) — GRADE VIII. (Mechanical Drawing) — GRADE VIII. (Mechanical Drawing) — GRADE VIII. (Mechanical Drawing) — GRADE VIII. (Mechanical Drawing) — GRADE VIII. (Mechanical Drawing) — GRADE VIII. (Mechanical Drawing) — GRADE VIII. (Mechanical Drawing) — GRADE VIII. (Mechanical Drawing) — GRADE VIII. (Woodworking Group VII.) — GRADE VIII. (Woodworking Group VII.) — GRADE VIII. (Woodworking Group VII.) — GRADE VIII. (Woodworking Group VII.) — GRADE VIII. (Woodworking Group VII.) — GRADE VIII. (Woodworking Group VII.) — GRADE VIII. (Woodworking Group VII.) — GRADE VIII. (Woodworking Group VII.) — GRADE VIII. (Woodworking Group VII.) — GRADE VIII. (Woodworking Group VII.) — GRADE VIII. (Woodworking Group VII.) — GRADE VIII. (Woodworking Group VIII.) — GRADE VIII. (Woodworking Group VIII.) — GRADE VIII. (Woodworking Group VIII.) — GRADE VIII. (Woodworking Group VIII.) — GRADE VIII. (Woodworking Group VIII.) — GRADE VIII. (Woodworking Group VIII.) — GRADE VIII. (Woodworking Group VIII.) — GRADE VIII. (Woodworking Group VIII.) — GRADE VIII. (Woodworking Group VIII.) — GRADE VIII. (Woodworking Group VIII.) — GRADE VIII. (Woodworking Group VIII.) — GRADE VIII. (Woodworking Group VIII.)
Lesson 1.
Introductory Talk—
The plan of the year’s work.
(Mechanical Drawing 12 weeks—Group 1, Straight Lines;
2, Circles; 3, Tangents; 4, Planes of Projections; 5, Review; 6,
First choice Dado Group of Woodwork—Working Drawing;
7, First choice Cross-lap Group of Woodwork—Working
Drawing; 8, Second choice Cross-lap or Dado Group of Woodwork—Working
Drawing; 9, Completion of any unfinished
drawings and Making stock bills; 10, Figuring stock bills; 11,
Structural Design; 12, Decorative Design. (Woodwork the
rest of the year—Two Groups, exercises and applications using
drawings just made.) (Along with this, information concerning
lumbering, etc.)
Preparation for Demonstration; Assignment for Lesson 2—
Essentials of Woodworking, Appendix III, Sections 3, 4, and 6.
Demonstration—
The essential points in making Drawings I. (Group I, Problems in
Mechanical Drawing.)
(Copies of the different problems of Group I—One each—should
be in the hands of the pupils that they may refer to them as
the demonstration is being given.)
Border and cutting lines, spacing the views, blocking-out, dimensions,
letters, final lines. Projection and relation of views. Visible
and invisible edges.
Work—
Each pupil solve his problem, freehand carefully on scratch paper
first, putting on dimensions. Then carefully to full scale with
border and cutting lines but no lettering or dimensions, only
sheet number and pupil’s name.
Rapid workers exchange problems and solve as time allows.
Lesson 2.
Recitation—
The names and relative positions of the three views most used in
mechanical drawing?
Send a pupil to the blackboard to make three views of a rectangular
block having chamfered edges on one side.
Develop the four principles of projection and relation of views.
Letters and figures, how proportioned? Test pupils at the blackboard.
How does a freehand working drawing differ from a mechanical
drawing?
Give fully the order of procedure in making a mechanical drawing.
How do you go about determining the placing and spacing of your
drawing?
Preparation for Demonstration; Assignment for Lesson 3—
Essentials, Appendix III, Sections 2 and 5.
Demonstration—
The essential points in making Drawing II. (Group II, Problems
in Mechanical Drawing.)
Center-lines; circles; cross-sections and cross-hatching; dimensioning
circles.
Work—
Solution of problems in Group II.
Complete any unfinished problems in I.
Rapids workers exchange problems in Group II and solve as time
allows.
Lesson 3.
Recitation—
The conventions—Scale drawings, why? Figures on the drawing
vs. the size of the object?
Seven kinds of lines—their meanings and how made?
When figures cannot be placed between the arrows, what?
What part of a mechanical drawing is to be made freehand?
A broken view? Why used?
Section drawing? Cross-hatching?
Hexagon, octagon, ellipse; how made?
Assignment for Lesson 4—
Essentials, Review Sections 34 and 36.
Demonstration—
The essential points in making Drawing III. (Group III,
Problems in Mechanical Drawing.)
Tangents—Locating centers of arcs and points of tangency.
Work—
Solution of problems in Group III.
Complete any unfinished problems in previous groups.
Rapid workers exchange problems in Group III.
Lesson 4.
Recitation—
The steps in squaring rough stock to dimensions?
The steps when the stock is mill-planed on two surfaces?
A true surface? Selection of first surface? When several parts
are to be fitted?
Preliminary tests before beginning to plane?
Planing—Many or few shavings? Roughened grain? Planes used?
Protecting the cutting edge?
Position of the body? Long or short strokes? Starting and stopping
the stroke? Feathering the shaving?
Testing broad surfaces with a straightedge?
Testing narrow surfaces with winding-sticks?
Explain precisely how to proceed in removing wind.
Assignment for Lesson 5—
Essentials, Review Sections 27, 28, 29, 30, 31, 32.
Demonstration—
The essential points in making Drawing IV. (Group IV, Problems
in Mechanical Drawing.)
Planes of projection. Number and prove the solutions.
Work—
Solution of problems in Group IV.
Complete any unfinished problems in previous groups.
Rapid workers exchange problems in Group IV.
Lesson 5.
Recitation—
Face side, face edge? Why? How marked?
Planing first edge? Choice? Two preliminary tests?
How place plane to remove high arris? Planes used? Tests?
Finishing second edge? What determines amount to be removed?
Tests?
Finishing second side? Gaging? Testing?
Planing first end? Tests? Caution about length?
Finishing second end? What limits amount to be planed? Tests?
Assignment for Lesson 6—
Essentials, Sections 46, 47.
Demonstration—
Numbering and lettering the points in the two views of the test
problems preparatory to their solution.
Work—
Complete unfinished “Problems.”
Solve test Problems.
Rapid workers may begin drawings for Woodwork Group VII.
Lesson 6.
Recitation—
Two classes of chisels? Their uses?
Four parts to each class?
Three parts to a mallet? The rule in selecting a pounding tool?
The size of a chisel indicated how?
Caution about holding chisel?
Explain fully the cutting action of a chisel. How it wedges, how
this is overcome?
Explain fully horizontal paring.
Assignment for Lesson 7—
Essentials, Sections 48, 49, 50, 51.
The essential points in making the working drawings for Woodwork
Group VII.
Work—
Make a drawing from Woodwork Group VII.
Rapid workers make drawing of second choice Woodwork Group VII.
Lesson 7.
Recitation—
Vertical paring? How? Position of hands? Amount to be cut
at each stroke? Position of worker relative to the line to be
cut?
Oblique and curved line paring? Direction of the cut with
reference to the grain?
Paring chamfers? Paring along the grain? Across the grain?
Firmer gouge? Bevel inside or outside? How is its size determined?
Position of the hands in roughing out? In finishing stroke? How
produce shearing cut?
Assignment for Lesson 8—
Essentials, Review Sections 52, 53, 54, 55, 56, 57.
Demonstration—
The essential points in making working drawings for Woodwork
Group VIII.
Work—
Complete unfinished drawings of Group VII.
Make a drawing from Woodwork Group VIII.
Rapid workers make another selection from Group VIII.
Lesson 8.
Recitation—
Why grind tools?
How much angle? How determined?
Why move the tool across the stone?
The effect of frequent change of angle?
In which directions should the stone turn with reference to the
tool? Why?
Why use water on a stone?
Two kinds of oilstone?
Advantages of coarse and of fine?
Advantages of manufactured stones?
Why use oil on stones?
How avoid wearing stone uneven? How level an uneven stone?
Explain fully steps in whetting plane-iron or chisel.
Holding tool? Angle in whetting as compared to angle in grinding?
How get tool at correct angle? The movement? Wire edge?
How removed? If a still keener edge is desired?
How is a gouge whetted?
Explain fully how to tell when a tool is sharp.
Preparation for Demonstration; Assignment for Lesson 9—
Essentials, Read Sections 62, 63.
Demonstration—
Work—
Complete any unfinished drawings.
Make other selections in either Groups VII or VIII.
Lesson 9.
Recitation—
Order of procedure in laying out duplicate parts?
Advantages of this method over that of laying out each part singly?
Illustrate?
Why use a scraper? Common mistake of beginners about mill-planed
stock?
Position of the hands in scraping?
The steps in sharpening a scraper?
Assignment for Lesson 10—
Essentials, Sections 76, 77.
Demonstration—
The essential points in making stock bills.
Work—
Finish any unfinished drawings and make out stock bills for working
drawings made.
Lesson 10.
Recitation—
Joinery? What is meant by the term?
Illustrate how direction of grain affects the planning of the relation
of the parts.
Why join faces together rather than other surfaces?
What about consecutive measurements? Gaging, lining, etc.?
What is meant by superposition?
In fitting parts together how tell where the different parts belong?
What is visualizing? How may one make it easier to visualize?
Knife vs. pencil in laying out?
Sawing joints in hard wood? In soft wood?
Assignment for Lesson 11—
Essentials, Review Sections 14, 64.
Demonstration—
The essential points in figuring costs from stock bills made in last
lesson.
Work—
Finish any unfinished stock bills and figure costs.
Lesson 11.
Recitation—
Back-saw? Purpose? Crosscut-saw or rip-saw? Set?
Explain fully how to hold, start, cut, stop cutting across the grain.
Explain fully when cutting along the grain. (Cutting tenons.)
Accurate sawing to a line? Explain?
How saw when paring is to be done?
Sandpapering, when? Why?
Sandpaper block? Its purpose? Size as compared to paper?
Sanding arrises? When? How?
Sanding curved surfaces?
Sanding parts that go to make up joints? Why not?
Numbers on the back of sandpaper sheet?
Assignment for Lesson 12—
Essentials, Sections 58, 61.
Demonstration—
The essential points in structural and decorative design of some
project involving groove or cross-lap joint or both, elected by
the class, (book-rack, etc.) or assigned by instructor.
Work—
Each boy make at least three modifications in outline and decoration
of project elected by class, or assigned by instructor.
Rapid workers will finish any unfinished work.
Lesson 12.
Recitation—
Explain fully the manner of laying out and working a cylinder.
How does a carpenter lay out a cylinder with the steel square?
What is meant by modeling in woodwork?
State the steps in laying out and working a hammer-handle.
Assignment for Lesson 13—
Essentials, Review Sections 71, 72.
Demonstration—
Work—
Finish any unfinished work.
Rapid workers make a full sized pattern of designed part and fill in
decorative design.
Make a dimensioned working drawing of the project designed last
lesson.
Make out stock bill for the same and figure estimate of cost on the
reverse side.
Lesson 13.
Recitation—
Screws—How made and sold?
How is the size designated?
How are blued screws made? What are the two kinds of screws?
How are the wood parts prepared for wood-screws? In soft wood?
In hard wood?
Preparation for Demonstration; Assignment for Lesson 14—
Essentials, Read Sections 78, 79.
Demonstration—
The essential points in making Dado Exercise.
Work—
All pupils square up exercise piece and begin making the joints.
Note:—No definite size is required for exercise piece but it must be
square and true.
Lesson 14.
Recitation—
Dado? What is this joint used for? Grooves?
Develop fully the steps taken in making the dado.
Develop fully the steps taken in making the stub tenon and mortise.
Assignment for Lesson 15—
Essentials, Sections 73, 74, 75.
Demonstration—
Talk on getting out stock. Look over small pieces first.
Use narrowest boards that will do; 12″ boards are scarce; keep
them for taboret tops, never use them for legs.
Use try-square and straight-edge and saw to the lines carefully ripping
first then crosscutting to the ripped part only. Leave on
the board all but just what you need. Use your stock bill. If
others are waiting for stock, saw only one piece and work on
that while they are getting a piece. Watch your thicknesses.
Never discard a piece that has been partly worked, without permission.
Bevels or chamfers are made after joints. Mill-marks
must come off before parts to joints are fitted; why?
Work—
Finish the exercise pieces, leave them on instructor’s desk to be
graded and begin on Group VII—first choice.
Instructor will want to see the pieces after the various steps.
Lesson 15.
Recitation—
Glue? Of what and how made?
Glue-pots? Describe. Why two pots?
How prepare glue for use? Why soak it?
How apply the glue? Thick or thin? Why warm the wood?
Cold glues? Advantages and disadvantages? Why do they thicken
and how thinned? In cold weather?
Clamps? Why used? Two kinds?
Names of four parts to hand clamp? How adjust?
How could a good substitute be made for cabinet clamp?
Why glue size end grain? What is glue size?
Rubbed glue joint is how made?
Assignment for Lesson 16—
Essentials, Sections 147, 148.
Demonstration—
Work—
Continue with Group VII Woodwork.
Lesson 16.
Recitation—
Two reasons for putting finish on wood?
Six kinds of materials used?
Brushes? Of what made?
Dusters? The edges of tracing brushes?
Cleaning shellac brushes? Varnish brushes?
Care of brushes from day to day?
The best alcohol or shellac cans? Cans for delicate woods?
Cleaning wire?
Preparation for Demonstration; Assignment for Lesson 17—
Demonstration—
The essential points in using brush. Section 149.
(That no point may be omitted have one boy with open book
enumerate the steps, Section 149.)
Work—
Continue Group VII, Woodwork.
Lesson 17.
Recitation—
State the seven steps in using a brush.
Feathering strokes? What? How taken?
Edges or surfaces first? Working out over edges?
Picking up surplus liquid?
What is the order in working finish on internal corner, panels,
stiles, rails?
Horizontal or vertical position preferred?
Tracing? What?
Preparation for Demonstration; Assignment for Lesson 18—
Essentials, Sections 150, 151.
Demonstration—
The essential points in applying filler.
Work—
Continue Group VII, Woodwork.
Lesson 18.
Recitation—
Fillers? Two kinds and their uses?
Are fillers absolutely necessary? Explain.
Liquid filler? How applied and where used mostly?
Why is shellac used on close grained woods in fine cabinet work for
first coat instead of filler or varnish?
Paste filler? Of what made? The cause of contrasts in the grain
of filled wood?
Four steps in filling a coarse grained surface?
How long ought filler to stand before applying other coatings?
Caution about excelsior and rags used in filling?
Assignment for Lesson 19—
Essentials, Review Sections 152, 153.
Demonstration—
Work—
Continue Group VII, Woodwork applying finish as needed.
Lesson 19.
Recitation—
Three kinds of stains?
Advantages and disadvantages of water stain?
Advantages and disadvantages of oil stain?
Advantages and disadvantages of spirit stain?
How is water stain applied? How thinned?
How is oil stain applied? How thinned?
How is spirit stain applied? How thinned?
Fumed oak? What is it and how obtained?
Is waxing an old or new finish? How made by our ancestors?
Advantages and disadvantages of wax finishes?
State five steps in applying a waxed finish.
Preparation for Demonstration; Assignment for Lesson 20—
Essentials, Sections 154, 155, 156.
Demonstration—
The essential points in shellacing preparatory to waxing.
The order in producing a waxed finish with and without shellac;
with and without water stain.
Work—
Lesson 20.
Recitation—
The two kinds of varnish?
Why do varnishes vary in price?
What are rubbing varnishes?
Necessary conditions for good varnishing? Why these conditions?
Shellac? Where found? What is it? How prepared?
Two kinds of shellac?
White shellac, how made and where used especially?
Orange shellac, advantages and disadvantages?
Caution about applying shellac?
Why is shellac sometimes used before varnish and wax?
Describe method of producing egg-shell gloss shellac finish.
Assignment for Lesson 21—
Essentials, Section 113. Instructor explain the mounted specimens
of wood illustrating tree structure.
Demonstration—
Work—
Lesson 21.
Recitation—
Tree structure? A tree is cut in three directions for study, what
are they? How does each section lie?
If a young sprout should be cut across what three layers of tissue?
If tissue is magnified how would it appear to be composed?
If the end of a log is examined how will it have changed from that
of the sprout?
Name six divisions of tissue of the log beginning at the center.
What makes the rings and why are some light and some dark?
Is a year’s growth composed of the dark or the light rings or both?
Why are the centers of the rings sometimes out of the log’s center?
General divisions of tissue are Pith, Wood, Bark.
How is heart-wood formed? Its purpose?
How is sap-wood formed? Its purpose?
Where does the actual growing take place?
What layers of tissue are on either side of the cambium?
What is the inner side of the bark called?
What is cortex?
Medullary rays? Of what composed? Purpose?
What makes grain in sawed lumber?
Knots?
Assignment for Lesson 22—
Demonstration—
Work—
Lesson 22.
Recitation—
What is the life blood of a tree called?
Beginning with the tree in early spring, explain the movement or
lack of movement of the sap.
The effect upon the tree of the sap’s movement in the spring?
What part do the leaves perform in the digestive process?
Chlorophyll? Assimilation?
The sap circulation from mid-summer to the end of summer?
Effect upon the leaves?
What becomes of the descending sap?
Does the upward movement of the sap and the downward movement
of the changed sap take place at the same time?
Do the leaves drop because the sap descends or does the sap descend
because the leaves drop off?
Assignment for Lesson 23—
Essentials, Sections 115, 116, 117. Instructor explain mounted
specimens illustrating shrinkage.
Demonstration—
Work—
Continue Group VII.
Pupils, finishing projects in Group VII now, may get out stock and
begin squaring it up for Group VIII.
Lesson 23.
Recitation—
Respiration is another name for breathing. How does it apply to
plants?
Animals breath in oxygen and breath out carbonic acid gas.
How about plants?
Carbonic acid gas is poisonous. Is it harmful to have plants in
the house? Explain.
How do trees breathe?
Transpiration? What is it and where and why does it take place?
What per cent. of living cell is water? Where is the water contained?
Which has more water sap-wood or heart-wood?
Which is stronger green or seasoned wood?
Shrinkage? What makes a plank cut from a tree shrink?
Could a plank shrink without having water in the interior of the
cells?
Explain why a plank shrinks across the grain but not along as the
eye can see.
Two reasons a log shrinks more along the rings than along the
radii.
The effect of this greater shrinkage along the rings?
Which shrinks more, sap-wood or heart-wood? Effect on a plain
sawed board? (On a quarter-sawed board?)
Which shrinks more soft or hard wood?
Assignment for Lesson 24—
Essentials, Sections 118, 119, 120. Instructor explain mounted
specimens illustrating grain formations—straight, curled, bird’s
eye.
Demonstration—
Work—
Continue Group VII.
Pupils, finishing projects in Group VII now, may get out stock
and begin squaring it up for Group VIII.
Lesson 24.
Recitation—
What is the weight or specific gravity of wood? Oak or pine?
Why does wood float then?
Upon what two things does the weight of any given piece of wood
depend? Does it ever vary? Why?
Why are some kinds of wood heavier than others similarly seasoned?
Is a heavy piece stronger than a light piece of the same size?
What is meant by strength, elasticity, hardness, toughness, cleavability?
What is meant by straight grain? Cross-grained? Twisted?
Causes?
What makes bird’s eyes in some woods?
Preparation for Demonstration; Assignment for Lesson 25—
Essentials, Sections 80, 81, 82.
Demonstration—
Recall steps in squaring up rough stock, use of winding sticks and
other tests.
The essential points in laying out and working cross-lap joint by
first method.
Work—
All pupils lay aside present work and square up stock for, and make,
cross-lap exercise piece.
When joint is completed finish any unfinished work of Group VII,
then begin Group VIII.
Lesson 25.
Recitation—
Cross-lap joint? Why plane stock for the two parts in one piece?
What about the face marks in case this is done? Why?
The difference in the two methods given?
State the ten steps in making the joint by the first method.
In the second method how are the grooves and their widths determined?
What about the location of the grooves with reference to the faces?
What about the faces in gaging for depth of groove? Why?
Assignment for Lesson 26—
Essentials, Sections 121, 122 to the bottom of page 130.
Demonstration—
Work—
Finish exercise piece and continue as in lesson 24.
Lesson 26.
Recitation—
Lumbering? Two kinds and their differences?
The camp; selecting trees; felling; trimming; cutting to length?
Skidding?
Transportation of logs to mill?
By cars, splash dam, rafts, river driving.
Milling? Location; log-booms; soaking logs in mill-pond?
Three kinds of saws? Advantages and disadvantages of each?
Timbers, planks, and boards?
Assignment for Lesson 27—
Essentials, Sections 122 continued, 123, 124.
Demonstration—
Work—
Lesson 27.
Recitation—
Lumbering? At the mill? The log-slide, inspection, measuring,
kicking logs out of slip on log-deck.
Sawing process in detail? 1. Log placed on carriage and dogged
and slab with a few boards taken off. 2. A half turn and
slab and few boards taken. 3. A quarter turn and nearly all
sawed up. 4. Half turn and all sawed up.
The live rolls? Edgers? Trimmers or jump saws? Butting saws?
Slasher? It is used on slabs. What becomes of slabs?
Quarter-sawing? Why and how?
Why do quarter-sawed boards not warp like plain sawed?
Uses for waste wood? Burners?
Assignment for Lesson 28—
Essentials, Sections 125, 126, 127.
Demonstration—
Work—
Lesson 28.
Recitation—
How is sawed lumber transported?
Two methods of seasoning? Why and how stick lumber?
Air seasoning? Time required? Depends upon what?
Kiln drying? Why? Temperature of kiln?
How do soft and hard woods differ as to methods of seasoning?
Time required for each?
Checks in hard wood? Why? How prevented?
Case hardening? Why? How prevented?
Clear lumber? Dressed lumber? Abbreviation for dressed lumber?
How is lumber computed and sold? Shingles, lath, and moldings?
How would you specify lumber in an order?
Assignment for Lesson 29—
Essentials, Review Appendix III, Sections 2, 3, 4, 5, 6, and Sections
26, 27, 28, 29, 30, 31, 32, 34.
Demonstration—
Work—
Lesson 29.
Review—
Instructor will place six questions on the blackboard, selected from
Assignment for this Lesson.
Pupils will write the answers to five of these, making complete
statements in each case so that the instructor will know what
is being discussed without referring to the question list. Instructor
will insist upon full sentences—subject and predicate—that
the pupil may not form bad habits in his English. Have
uniform headings. Insist on neatness.
Assignment for Lesson 30—
Essentials, Review Sections 46, 47, 48, 49, 50, 51, 52, 53, 54, 55,
56, 57, 62, 63.
Demonstration—
Work—
Lesson 30.
Review—
Instructor will place six questions on the blackboard, selected from
Assignment for this Lesson.
Assignment for Lesson 31—
Essentials, Review Sections 76, 77, 14, 64, 58, 61, 71, 72.
Demonstration—
Work—
Lesson 31.
Review—
Instructor will place six questions on the blackboard, selected from
Assignment for this Lesson.
Assignment for Lesson 32—
Essentials, Review Sections 78, 79, 73, 74, 75, 147, 148, 149.
Demonstration—
Work—
Lesson 32.
Review—
Instructor will give each pupil one question, for oral answer,
selected from Assignment for this Lesson.
Assignment for Lesson 33—
Essentials, Review Sections 150, 151, 152, 153, 154, 155, 156, 113.
Demonstration—
Work—
Lesson 33.
Review—
Instructor will give each pupil one question for oral answer,
selected from Assignment for this Lesson.
Assignment for Lesson 34—
Essentials, Review Sections 113, 114, 115, 116, 117, 118, 119, 120,
80, 81, 82.
Demonstration—
Work—
Lesson 34.
Review—
Oral test from Assignment for this Lesson.
Assignment for Lesson 35—
Essentials, Review Sections 121, 122, 123, 124, 125, 126, 127.
Demonstration—
Work—
Lesson 35.
Review—
Oral test from Assignment for this Lesson.
Assignment for Lesson 36—
This closes the text work for the year.
Demonstration—
Work—
Those finishing projects will assist slower pupils or do any necessary
work about the shop such as making bench-hooks, scraping
bench tops, etc. All pupils are to be kept busy at some work
until the last day. The last week, each class will polish tools.