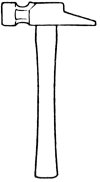
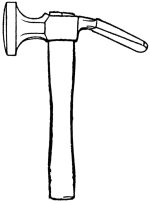
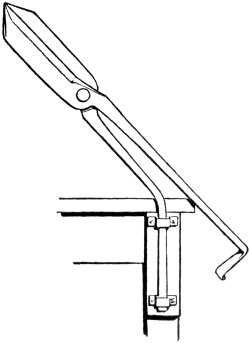
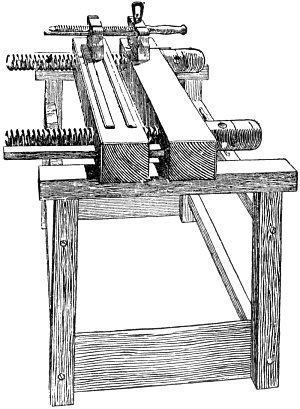
Decoration—Tools—Finishing—Tooling on
Vellum—Inlaying on Leather
DECORATION OF BINDING—TOOLS
The most usual, and perhaps the most
characteristic, way of decorating book
covers is by “tooling.” Tooling is the
impression of heated (finishing) tools.
Finishing tools are stamps of metal that
have a device cut on the face, and are
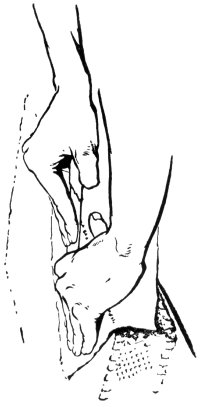
held in wooden handles (fig. 79).

Fig. 79.
Tooling may either be blind tooling,
that is, a simple impression of the hot tools,
or gold tooling, in which the impression
of the tool is left in gold on the leather.
Tools for blind tooling are best “die-sunk,”
that is, cut like a seal. The
“sunk” part of the face of the tool,
which may be more or less modelled,
forms the pattern, and the higher part
depresses the leather to form a ground.
In tools for gold tooling, the surface of
the tool gives the pattern.
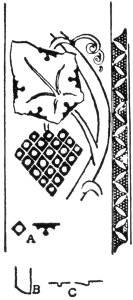
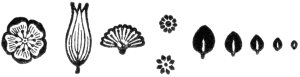
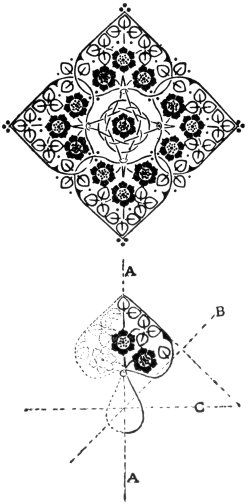
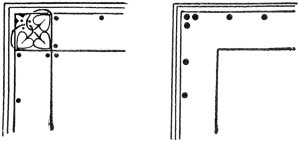
Tools may be either complex or simple
in design, that is to say, each tool may
form a complete
design with enclosing
border, as
the lower ones on
page 323, or it may
be only one element
of a design, as at
fig. 100. Lines may
be run with a fillet
(see fig. 88), or
made with gouges
or pallets.
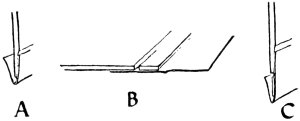
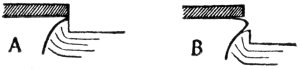
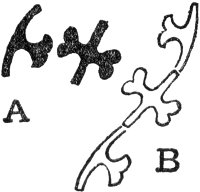
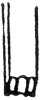
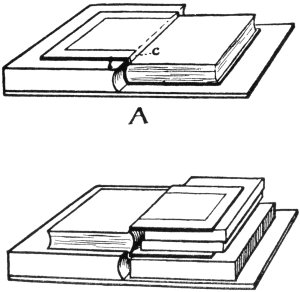
Gouges are
curved line tools.
They are made in
sets of arcs of concentric
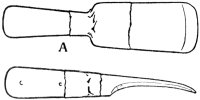
circles (see fig. 80, A). The portion
of the curves cut off by the dotted line C
will make a second set with flatter curves.
Gouges are used for tooling curved lines.
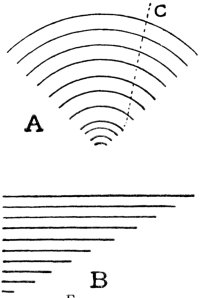
Fig. 80.
A “pallet” may be described as a segment
of a roll or fillet set in a handle, and
used chiefly for putting lines or other ornaments
across the backs of books (see fig.
81). A set of one-line pallets is shown at
fig. 80, B.
Fillets are cut with two or more lines
on the edge. Although the use of double-line
fillets saves time, I have found that a
few single-line fillets with edges of different
gauges are sufficient for running all straight
lines, and that the advantage
of being able to alter the distances
between any parallel
lines is ample compensation
for the extra trouble involved
by their use. In addition to
the rigid stamps, an endless
pattern for either blind or
gold tooling may be engraved
on the circumference of a roll,
and impressed on the leather
by wheeling.
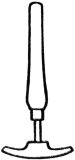
Fig. 81.
The use of a roll in finishing dates from
the end of the fifteenth century, and some
satisfactory bindings were decorated with
its aid. The ease with which it can be
used has led in modern times to its abuse,
and I hardly know of a single instance of
a modern binding on which rolls have been
used for the decoration with satisfactory
results. The gain in time and trouble is
at the expense of freedom and life in the
design; and for extra binding it is better
to build up a pattern out of small tools of
simple design, which can be arranged in
endless variety, than to use rolls.
Tools for hand-tooling must not be too
large, or it will be impossible to obtain
clear impressions. One inch square for
blind tools, or three-quarters of an inch
for gold tools, is about the maximum size
for use with any certainty and comfort.
Tools much larger than this have to be
worked with the aid of a press, and are
called blocks.
FINISHING
The first thing the finisher does to a
book is to go over the back with a
polisher and smooth out any irregularities.
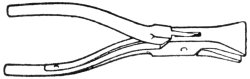
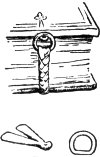
Two forms of polisher are shown at
fig. 82. The lower one is suitable for
polishing backs and inside margins, and
the upper for sides. Polishers must be
used warm, but not too hot, or the
leather may be scorched, and they must
be kept moving on the leather. Before
using they should be rubbed bright on
a piece of the finest emery paper, and
polished on a piece of leather. New
polishers often have sharp edges that
would mark the leather. These must
be rubbed down with files and emery-paper.
Leathers with a prominent grained surface,
such as morocco, seal or pig skin,
may either have the grain rough or
crushed flat. If there is to be much
finishing, the grain had better be crushed,
but for large books that are to have only
a small amount of finishing, the grain is
best left unflattened.
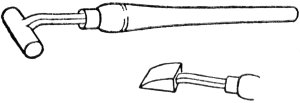
Fig. 82.
If the grain of the leather is to be
“crushed,” it may be done at this stage.
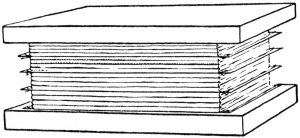
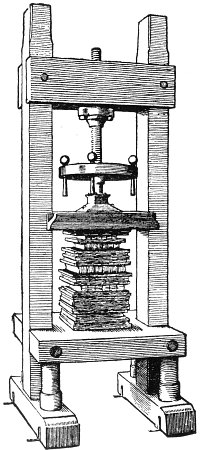
To do this, one board at a time is damped
with a sponge and put in the standing-press,
with a pressing plate on the grained
side, and a pad of blotting-paper, or some
such yielding substance, on the other
(see fig. 83). The press is then screwed
up tight, and the board left for a short
time. For some leathers this operation is
best done after the binding has been
finished and varnished, in which case, of
course, the boards cannot be damped
before pressing. No flexibly sewn book
should be subject to great pressure after
it has been covered, or
the leather on the back
may crinkle up and
become detached.
The next thing will
be to decide what
lettering and what
decoration, if any, is
to be put on the volume.
The lettering
should be made out first (see page 215).
If the book is to be at all elaborately decorated,
paper patterns must be made out,
as described in Chapter XVI.
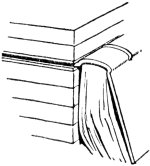
Fig. 83.
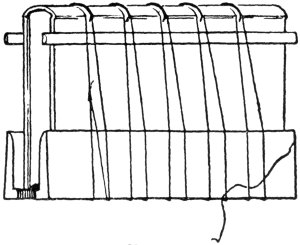
For tooling the back, the book is held
in the finishing press between a pair of
backing boards lined with leather (see
fig. 84), and the paper pattern put across
the back, with the ends either slightly
pasted to the backing boards, or caught
between them and the book.
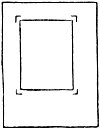
For the sides, the pattern is very slightly
pasted on to the leather at the four
corners. The book is then put in the
finishing press, with the board to be tooled
open and flat on the cheek of the press,
unless the book is a large one, when it is
easier to tool the sides out of the press.
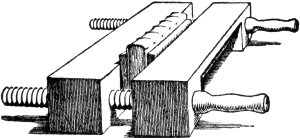
Fig. 84.
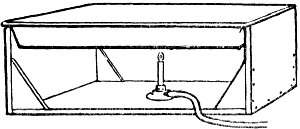
The selected tools, which should be
ready on the stove (see fig. 85), are one
at a time cooled on a wet pad, and then
pressed in their former impressions upon
the paper. The degree of heat required
varies a good deal with the leather used,
and will only be learned by experience.
It is better to have the tool too cool than
too hot, as it is easy to deepen impressions
after the paper is removed; but if they are
already too deep, or are burnt, it will be
impossible to finish clearly. Generally
speaking, tools should hiss very slightly
when put on the cooling pad. In cooling,
care must be taken to put the shank of
the tools on to the wet pad, as, if the end
only is cooled, the heat is apt to run
down again, and the tool will still be too
hot.
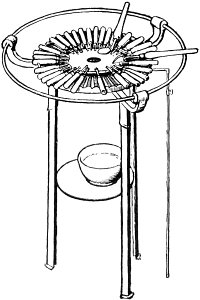
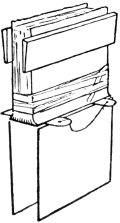
Fig. 85.—Finishing Stove
Before removing the paper, one corner
at a time should be lifted up, and the
leather examined to see that no part of
the pattern has been missed.
In some patterns where the design is
close, or in which the background is
dotted in, it will not be necessary to blind
in every leaf and dot through the paper.
If the lines with perhaps the terminal
leaves are blinded in, the rest can be better
worked directly through the gold. This
method implies the “glairing in” of the
whole surface. It is not suitable for open
patterns, where the glaire might show on
the surface of the leather.
If the book is only to have lines, or
some simple straight line pattern, it is
often easier to mark it up without the
paper, with a straight-edge and folder. In
panelling a back, the side lines of all the
panels should be marked in at the same
time with a folder, working against the
straight-edge, held firmly at the side of
the back. If the panels are worked separately,
it is difficult to get the side lines
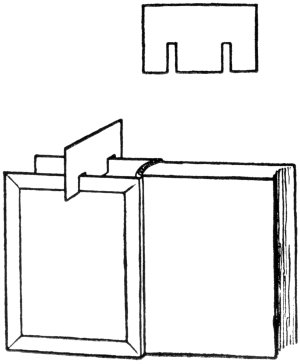
squarely above each other. The lines at
the top and bottom of the panel may be
marked in with a folder, guided by a
piece of stiff vellum held squarely across
the back. If there are lines to be run
round the board, they can be marked in
with a pair of dividers guided by the edge
of the board, except those at the back.
These must be measured from the fore-edge
of the board and run in with straight-edge
and folder.
When straight lines occur in patterns
that are blinded through the paper, it will
be enough if the ends only are marked
through with a small piece of straight line,
and the lines completed with straight-edge
and folder, after the paper has been removed.
Unless the finisher has had considerable
experience, it is best to deepen all folder
lines by going over them in blind with a
fillet or piece of straight line.
When the pattern has been worked in
blind, either through a paper pattern or
directly on to the leather with the tools,
and any inlays stuck on (see page 213), the
cover should be well washed with clean
water. Some finishers prefer to use
common vinegar or diluted acetic acid for
washing up books. If vinegar is used it
must be of the best quality, and must not
contain any sulphuric acid. Cheap, crude
vinegar is certain to be injurious to the
leather. Porous leather, such as calf or
sheep skin, will need to be washed over
with paste-water, and then sized.
Paste-water is paste and water well
beaten up to form a milky liquid, and is
applied to the leather as evenly as possible
with a sponge. When the paste-water is
dry, the leather should be washed with size.
Size can be made by boiling down vellum
cuttings, or by dissolving gelatine or isinglass
in warm water.
For the less porous leathers, such as
morocco, seal, or pig skin, no paste-water
or size is necessary, unless the skin happens
to be a specially open one, or the cover
has been cut from the flank or belly.
Then it is best to put a little paste in the
vinegar or water used for washing up.
When the leather is nearly, but not quite,
dry the impressions of the tools must be
painted with glaire. Finishers’ glaire may
be made from the white of eggs well beaten
up, diluted with about half as much vinegar,
and allowed to settle. Some finishers
prefer to use old, evil-smelling glaire, but
provided it is a day old, and has been well
beaten up, fresh glaire will work quite
well.
The impressions of any heavy or solid
tools should be given a second coat of
glaire when the first has ceased to be
“tacky,” and if the leather is at all
porous, all impressions had better have a
second coat.
As glaire is apt to show and disfigure
the leather when dry, it is best to use it as
sparingly as possible, and, excepting where
the pattern is very close, to confine it to
the impressions of the tools. It is not at
all an uncommon thing to see the effect
of an otherwise admirably tooled binding
spoilt by a dark margin round the tools,
caused by the careless use of glaire. Glaire
should not be used unless it is quite liquid
and clean. Directly it begins to get thick
it should be strained or thrown away.
The finisher should not glaire in more
than he can tool the same day. When the
glaire has ceased to be “tacky,” the gold
is laid on.
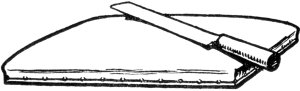
Fig. 86.
At first it will be found difficult to
manage gold leaf. The essential conditions
are, that there should be no draught,
and that the cushion and knife should be
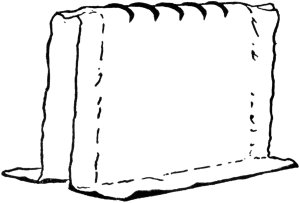
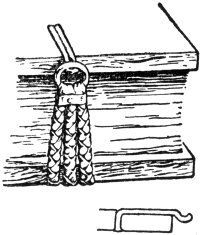
quite free from grease. The gold cushion
and knife are shown at fig. 86. A little
powdered bath-brick rubbed into the
cushion will make it easier to cut the
gold cleanly. The blade of the gold knife
should never be touched with the hand,
and before using it, both sides should be
rubbed on the cushion. A book of gold
is laid open on the cushion, and a leaf of
gold is lifted up on the gold knife, which
is slipped under it, and turned over on to
the cushion. A light breath exactly in
the centre of the sheet should make it lie
flat, when it may be cut into pieces of any
size with a slightly sawing motion of the
knife. The book with the pattern ready
prepared, and the glaire sufficiently dry
(not sticky), is rubbed lightly with a small
piece of cotton-wool greased with a little
cocoanut oil. The back of the hand is
greased in the same way, and a pad of
clean cotton-wool is held in the right hand,
and having been made as flat as possible by
being pressed on the table, is drawn over
the back of the hand. This should make
it just greasy enough to pick up the gold,
but not too greasy to part with it readily
when pressed on the book. As little grease
as possible should be used on the book, as
an excess is apt to stain the leather and to
make the gold dull. After experiment it
has been found that cocoanut oil stains the
leather less than any other grease in common
use by bookbinders, and is more
readily washed out by benzine.
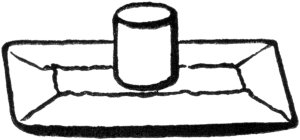
Fig. 87.
If the gold cracks, or is not solid when
pressed on the book, a second thickness
should be used. This will stay down if
the under piece is lightly breathed upon.
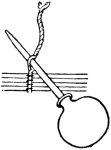
For narrow strips of gold for lines, a
little pad covered with soft leather may
be made, as in fig. 87.
It will be found of advantage to first
use the bottom leaf of gold in the book
and then to begin at the top and work
through, or else the bottom leaf will
almost certainly be found to be damaged
by the time it is reached. The gold used
should be as nearly pure as it can be got.
The gold-beaters say that they are unable
to beat pure gold as thin as is usual for
gold leaf; but the quite pure gold is a
better colour than when alloyed, and the
additional thickness, although costly, results
in a more solid impression of the
tools.
The cost of a book of twenty-four leaves
three and a half inches square of English gold
leaf of good ordinary quality is from 1s. 3d.
to 1s. 6d., whereas the cost of a book of
double thick pure gold leaf is 3s. to 3s. 6d.
For tooled work it is worth paying the increased
price for the sake of the advantages
in colour and solidity; but for lines and
edges, which use up an immense amount
of gold, the thinner and cheaper gold may
quite well be used.
Besides pure gold leaf, gold alloyed with
various metals to change its colour can be
had. None of the alloys keep their colour
as well as pure gold, and some of them,
such as those alloyed with copper for red
gold, and with silver for pale gold, tarnish
very quickly. These last are not to be
recommended.
For silver tooling aluminium leaf may
be used, as silver leaf tarnishes very quickly.
When the gold is pressed into the impressions
of the tools with the pad of
cotton-wool, they should be plainly visible
through it.
The pattern must now be worked
through the gold with the hot tools.
The tools are taken from the stove, and
if too hot cooled on a pad as for blinding-in.
The heat required to leave the gold
tooling solid and bright and the impressions
clear will vary for different leathers,
and even for different skins of the same
leather. For trial a tool may be laid on
the pad until it ceases to hiss, and one or
two impressions worked with it. If the
gold fails to stick, the heat may be slightly
increased.
If the leather is slightly damp from the
preparation the tools will usually work
better, and less heat is required than if it
has been prepared for some time and has
got dry.
Before using, the faces of all tools must
be rubbed bright on the flesh side of a
piece of leather. It is impossible to tool
brightly with dirty tools. A tool should
be held in the right hand, with the thumb
on the top of the handle, and steadied with
the thumb or first finger of the left hand.
The shoulder should be brought well
over the tool, and the upper part of the
body used as a press. If the weight of
the body is used in finishing, the tools
can be worked with far greater firmness
and certainty, and with less fatigue, than if
the whole work is done with the muscles
of the arms.
Large and solid tools will require all
the weight that can be put on them, and
even then the gold will often fail to stick
with one impression. Tools with small
surfaces, such as gouges and dots, must
not be worked too heavily, or the surface
of the leather may be cut.
To strike a large or solid tool, it should
first be put down flat, and then slightly
rocked from side to side and from top to
bottom, but must not be twisted on the
gold.
A tool may be struck from whichever
side the best “sight” can be got, and press
and book turned round to the most convenient
position.
It is difficult to impress some tools,
such as circular flower tools, twice in
exactly the same place. Such tools should
have a mark on one side as a guide. This
should always be kept in the same position
when blinding-in and tooling, and so make
it possible to impress a second time without
“doubling.” An impression is said
to be “doubled” when the tool has been
twisted in striking, or one impression does
not fall exactly over the other.
The hot tool should not be held hovering
over the impression long, or the preparation
will be dried up before the tool
is struck. Tooling will generally be
brighter if the tools are struck fairly
sharply, and at once removed from the
leather, than if they are kept down a long
time.
To “strike” dots, the book should be
turned with the head to the worker, and
the tool held with the handle inclining
slightly towards him. This will make
them appear bright when the book is held
the right way up.
Gouges must be “sighted” from the
inside of the curve, and struck evenly,
or the points may cut into the leather.
Short straight lines may be put in with
pieces of line, and longer ones with a fillet.
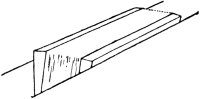
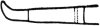
A one line fillet is shown at fig. 88;
the space filed out of the circumference
is to enable lines to be joined neatly at the
corners. That the lines may be clearly
visible through the gold, the book should
be placed so that the light comes from the
left hand of the worker and across the
line. It is well to have a basin of water
in which to cool fillets, as there is so
much metal in them, that the damp sponge
or cotton used for cooling tools would
very rapidly be dried up. When the fillet
has been cooled, the edge should be rubbed
on the cleaning pad, and the point exactly
adjusted to the corner of the line to be
run (see fig. 88). The fillet is then run
along the line with even pressure.
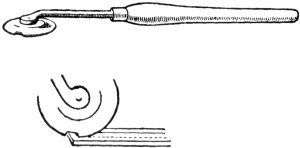
Fig. 88.
For slightly curved lines, a very small
fillet may be used.
When all the prepared part of a pattern
has been tooled, it is well rubbed to remove
the loose gold with a slightly greasy
rag, or with a piece of bottle indiarubber
which has been softened in paraffin. After
a time the rubber or rag may be sold to
the gold-beater, who recovers the gold.
To prepare indiarubber for cleaning off
gold, a piece of bottle rubber is cut into
small pieces and soaked in paraffin for some
hours. This should cause the pieces to
reunite into a soft lump. This can be used
until it is yellow with gold throughout.
When all free gold is rubbed off,
the finisher can see where the tooling is
imperfect. Impressions which are not
“solid” must be reglaired, have fresh gold
laid on, and be retooled. But if, as will
sometimes happen with the best finishers,
the gold has failed to stick properly anywhere,
it is best to wash the whole with
water or vinegar, and prepare afresh.
As an excess of grease is apt to dull
the gold and soil the leather, it is better
to use it very sparingly when laying on
fresh gold for mending. For patching,
benzine may be used instead of grease.
When the gold is picked up on the
cotton-wool pad, rapidly go over the
leather with wool soaked in benzine, and
at once lay down the gold. Benzine will
not hold the gold long enough for much
tooling, but it will answer for about half-an-hour,
and give plenty of time for
patching.
Imperfect tooling arises from a variety
of causes. If an impression is clear, but
the gold not solid, it is probably because
the tool was not hot enough, or was not put
down firmly. If only one side of an impression
fails to stick, it is usually because the
tool was unevenly impressed. If an impression
is blurred, and the gold has a
frosted look, it is because the leather has
been burned, either because the tool was
too hot, or kept down too long, or the
preparation was too fresh.
To mend double or burnt impressions
the leather should be wetted and left to
soak a short time, and the gold can be
picked out with a wooden point. When
nearly dry the impressions should be put
in again with a cool tool, reglaired and
retooled.
It is very difficult to mend neatly if the
leather is badly burnt. Sometimes it may
be advisable to paste a piece of new leather
over a burnt impression before retooling.
If a tool is put down in the wrong
place by mistake, it is difficult to get the
impression out entirely. The best thing
to do is to damp the leather thoroughly,
leave it to soak for a little while, and
pick up the impression with the point of a
pin. It is best not to use an iron point for
this, as iron is apt to blacken the leather.
Leather is difficult to tool if it has not
a firm surface, or if it is too thin to give
a little when the tool is struck.
When the tooling is finished, and the
loose gold removed with the rubber, the
leather should be washed with benzine, to remove
any grease and any fragments of gold
that may be adhering by the grease only.
The inside margins of the boards are
next polished and varnished, and the end
papers pasted down. Or if there is a
leather joint, the panel left on the board
may be filled in (see Chapter XVII).
When the end papers are dry, the sides
and back may be polished and varnished.
It is important that the varnish should
be of good quality, and not too thick, or
it will in time turn brown and cause the
gold to look dirty. Some of the light
French spirit varnishes prepared for bookbinders
answer well. Varnish must be
used sparingly, and is best applied with a
pad of cotton-wool. A little varnish is
poured on to the pad, which is rubbed on
a piece of paper until it is seen that the
varnish comes out thinly and evenly. It
is then rubbed on the book with a spiral
motion. The quicker the surface is gone
over, provided every part is covered, the
better. Varnish will not work well if it
is very cold, and in cold weather both the
book and varnish bottle should be slightly
warmed before use. Should an excess of
varnish be put on in error, or should it be
necessary to retool part of the book after
it has been varnished, the varnish can be
removed with spirits of wine. Varnish
acts as a preservative to the leather, but
has the disadvantage, if used in excess, of
making it rather brittle on the surface.
It must, therefore, be used very sparingly
at the joints. It is to be hoped that a
perfectly elastic varnish, that will not tarnish
the gold, will soon be discovered.
As soon as the varnish is dry the boards
may be pressed, one at a time, to give the
leather a smooth surface (see fig. 83), leaving
each board in the press for some hours.
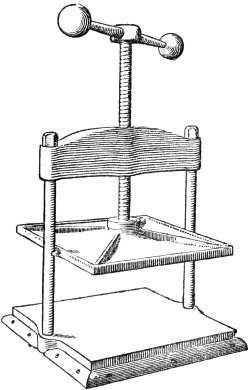
Fig. 89.
After each board has been pressed separately
the book should be shut, and pressed
again with pressing plates on each side of
it, and with tins covered with paper placed
inside each board. Light pressure should
be given to books with tight backs, or the
leather may become detached.
If, on removing from the press, the
boards will not keep shut, the book should
be pressed again with a folded sheet of
blotting-paper in each end. The blotting-paper
should have the folded edge turned
up, and be placed so that this turned-up
edge will be in the joint behind the back
edge of the board when the book is shut.
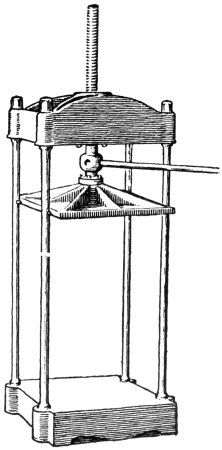
A small nipping-press suitable for giving
comparatively light pressure, is shown
at fig. 89.
TOOLING ON VELLUM
Most covering vellum has a sticky
surface, that marks if it is handled. This
should be washed off with clean water
before tooling. The pattern is blinded in
through the paper as for leather, excepting
that the paper must not be pasted directly
to the vellum, but may be held with a
band going right round the board or book.
It is best to glaire twice, and to lay on
a small portion of gold at a time with
benzine. As vellum burns very readily,
the tools must not be too hot, and some
skill is needed to prevent them from slipping
on the hard surface.
Vellum must not be polished or varnished.
INLAYING ON LEATHER
Inlaying or onlaying is adding a different
leather from that of the cover, as
decoration. Thus on a red book, a panel
or a border, or other portion, may be
covered with thin green leather, or only
flowers or leaves may be inlaid, while a
jewel-like effect may be obtained by dots,
leaves, and flowers, tooled over inlays of
various colours. Leather for inlaying
should be pared very thin. To do this
the leather is cut into strips, wetted, and
pared on a stone with a knife shaped
somewhat as at fig. 60, B. When the
thin leather is dry the inlays of the leaves
and flowers, &c., may be stamped out with
steel punches cut to the shape of the
tools; or if only a few inlays are needed,
the tools may be impressed on the thin
leather, and the inlays cut out with a
sharp knife. The edges of the larger
inlays should be pared round carefully.
For inlaying a panel or other large surface,
the leather is pared very thin and
evenly with a French knife, and a piece
of paper pasted on to the grained side
and left to dry. When dry, the shape
of the panel, or other space to be inlaid,
is marked on it through the paper pattern,
and leather and paper cut through to the
shape required. The edges must then be
carefully pared, and the piece attached
with paste, and nipped in the press to
make it stick. When the paste is dry,
the paper may be damped and washed
off. The object of the paper is to prevent
the thin leather from stretching
when it is pasted.
For white inlays it is better to use
Japanese paper than leather, as white
leather, when pared very thin, will show
the colours of the under leather through,
and look dirty. If paper is used, it should
be sized with vellum size before tooling.
When many dots or leaves are to be
inlaid, the pieces of leather, cut out with
the punch, may be laid face downwards
on a paring stone, and a piece of paper,
thickly covered with paste, laid on it.
This, on being taken up, will carry with
it the “inlays,” and they can be picked
up one at a time on the point of a fine
folder, and stuck on the book.
“Inlays” of tools are attached after
the pattern has been “blinded” in, and
must be again worked over with the
tool, in blind, when the paste is nearly
dry.
On vellum an effect, similar to that of
inlays on leather, can be obtained by the
use of stains.