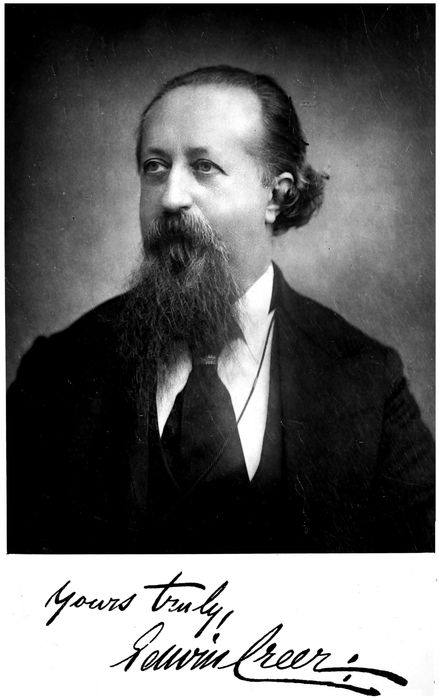
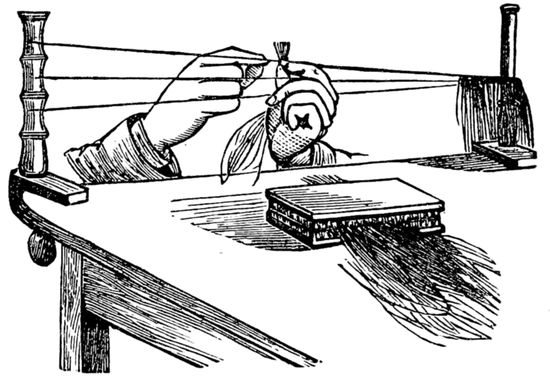
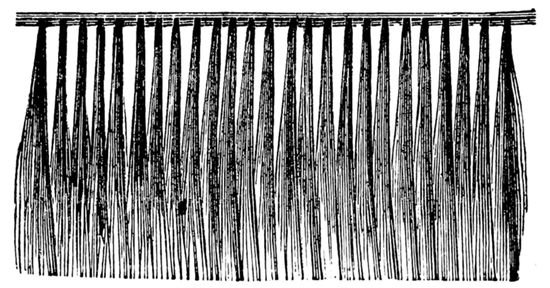
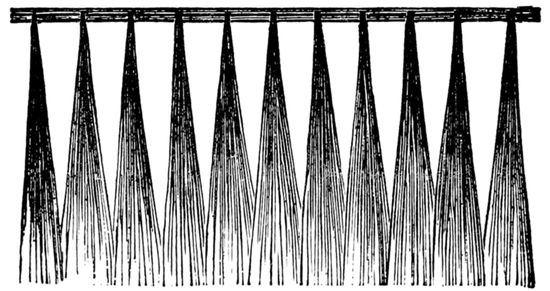
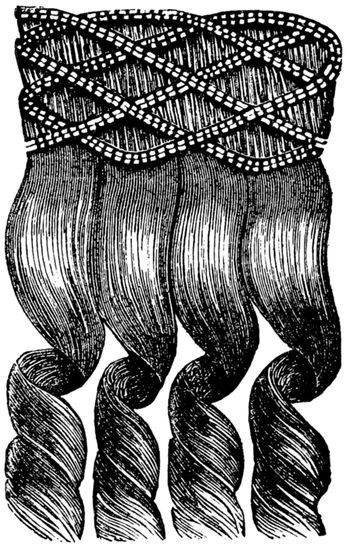
BOARD-WORK; OR THE ART OF WIG-MAKING, ETC. DESIGNED FOR THE USE OF HAIRDRESSERS AND ESPECIALLY OF YOUNG MEN IN THE TRADE. TO WHICH IS ADDED REMARKS UPON RAZORS, RAZOR-SHARPENING, RAZOR STROPS, & MISCELLANEOUS RECIPES, SPECIALLY SELECTED.
Transcriber’s Note:
The cover image was created by the transcriber and is placed in the public domain.
By EDWIN CREER,
EDITOR OF “THE HAIRDRESSERS’ CHRONICLE,” AUTHOR OF “A POPULAR TREATISE ON THE HUMAN HAIR,” “LESSONS IN HAIRDRESSING,” ETC.
WITH PORTRAIT AND NUMEROUS ILLUSTRATIONS.
LONDON:
R. HOVENDEN & SONS,
31 & 32, BERNERS STREET, W., AND
91, 93, & 95, CITY ROAD, E.C.
1887.
LONDON:
PRINTED BY WERTHEIMER, LEA AND CO.,
CIRCUS PLACE, LONDON WALL.
PREFACE.
iii
The following work, which is the result of much
anxious study and labour, is designed to meet a
long-felt want. It is intended chiefly for the use
of apprentices, improvers, and others in the trade
whose knowledge of board-work is deficient. The
Author trusts that the efforts he has thus made to
disseminate sound and useful information will be
appreciated by those for whom the book is intended.
The greater portion of the matter has
been already published in The Hairdressers’ Chronicle,
but for the purposes of this work it has
been carefully collated, revised, and additions
made, so that the subject might be presented to
the trade in a complete form. Nothing of importance
to learners has been omitted, and the
Author has dwelt, with repeated emphasis, upon
items which might be considered by some, as
minor details; but every skilled workman knows
how necessary it is for pupils to be well grounded
in the rudiments of their art.
It may be taken for granted that he who
habitually pays attention to small matters in
connection with his business, will be the one
most depended upon by his employer. But the
advantage to be derived from such a course of
action does not end here, for should he embark
in trade, the careful and painstaking man is
more likely to meet with a lasting success.
“Anything worth doing, is worth doing well,”
cannot be too deeply impressed upon the mind,
ivand those who studiously regard the maxim will
take a pride in all they undertake. Undue haste
in production must needs make careless workmen,
and, perhaps, excessively keen competition
lies at the bottom of all. The Author has reason
to know that a fair percentage of the public does
not object to giving a reasonable price for a
good article, and it is worth while to cultivate
such a class of customers. The tradesman, however,
must first acquire ability in his special
walk in life; no effort should be spared to
secure the confidence of his patrons by upright
dealing: thus it is that reputations are made
and sustained. The public experiences no difficulty
in procuring cheap articles; those which
are good in quality and reasonable in price may
not be so easily obtainable. All through this
work, the Author has strenuously urged the reader
to produce superior work as a tradesman, and to
practise fair dealing as a man, and if these
principles be acted upon, the student, for whose
benefit this treatise is designed, cannot fail to
profit by this endeavour to serve him.
When the present phases of business, and the
keenness of competition are borne in mind, the
importance of every person acquiring knowledge
in his craft will at once be appreciated. In no
sense more forcibly than this does the truth of
the adage apply, that “Knowledge is power.”
August, 1887.
CONTENTS.
v
CHAPTER I.
PAGE
Introduction—A Scientific Description of Hair—Chinese and Japanese Hair—Chiffonier Hair—Waste Hair—Turned Hair—Combings—Best Quality Hair—The Hair Market in Brittany—Dr. Lindemann’s Gregarine—The “Chignon Fungus”—Cuttings
The Implements Used in Preparing Hair—The Preparation of Hair Described—Washing the Hair—Drying the Hair—Drawing the Hair—Nitting the Hair—Carding the Hair—Curling the Hair—Boiling and Baking the Hair
The Preparation of Hair (continued)—Crop Hair—A Remarkable Trial—Craping and Crimping the Hair—Inserted Stems—Boiling and Baking Crêped Hair—Combings and Turned Hair alluded to again
viDyeing the Hair—Of Hair-dyes generally—Powder Dyes—Liquid Dyes—Iron Dyes—Lead Dyes—Various opinions concerning the use of Lead Dyes—Silver Dyes—Dyeing False and Faded Hair—Bleaching and Blanching Hair
The First Lesson in Wig-making, Weaving the Hair—“Once In,” Close or Ringlet Weft—“Twice In,” or Front Weft—“Thrice In,” Crop, or Wig Weft—“Fly” Weft, for Top Rows—Making Ringlet Bunches—Tufts—Curls on Combs—Alexandra Curls
Making Twists, “Tails,” or Switches—Back and Side Plaits—Chignon Universel—The Zephyr Coiffure—Semi-waved Curled Chignon—A Novel Chignon—Of Chignons in general
The Changeability of Fashion—Bandeaux, Fronts, and Fillets—Plain Bandeaux—Waved Bandeaux, with Fringe—To Wave the Hair of Bandeaux—French (woven) Fronts—French (woven) Fronts with Parting—Diamond-shaped and Wing Fronts—Temple-mounted Fronts—Fillets or Cauls
viiGeneral Observations on the Manufacture of Partings and Crowns—Non-transparent Partings; Silk and Skin—Transparent Partings; Net, Gauze, Yak, and Human Hair Foundations—“The Genealogy of Implantation”—Knotting, and some remarks thereon—Single Knotting—Double Knotting
Of Wigs in General, and some Historical remarks thereon—On Taking an Order for a Wig or Scalp—Means adopted for securing them to the Head—Directions for Measurement—On Mounting and Making a Scalp—“Pen-knife” and Metallic Springs—A Scalp described with Parting and Crown—Scalps with Gauze, Net, and Human Hair Foundations
Of Gentlemen’s Wigs, and a few additional observations thereon—To make a strong and durable Wig with woven Hair throughout—Mounting a Wig—The Metallic Spring again—Various kinds of Net used—Caution against using too much Hair—Sewing on the Weft—The Crown made with Weft—The Parting formed with Weft—Pressing the Work—Of Elastic Springs—The Wig completed
Of Gentlemen’s Wigs (continued)—Difference between Woven and Knotted Wigs considered—Instructions for Making a Knotted Wig—Of the Parting and Crown—Of the Crown only—Pressing, Dressing, etc.—A Superior kind of Wig Described, and Making the same—The Transparent Parting and Crown—Sundry Important Details
viiiOf Ladies’ Wigs, and important remarks thereon—Of Mounting and Making Ladies’ Wigs—A well-balanced Wig essential—A Wig with Parting and Straight Hair throughout—All Weft to be concealed—Alterations—Of Wigs with Transparent Partings—Mounting and Making the same—Shape of Head to be noted, together with any Elevations or Depressions—The Wig-block should be a correct Model of the Head
The Use of Leather Rollers in Curling Hair—Papering and Pinching Hair with the same object in view—Plaiting Hair (for Coiffures)—Of Razors, Razor Setting, and Razor Strops—Miscellaneous Recipes
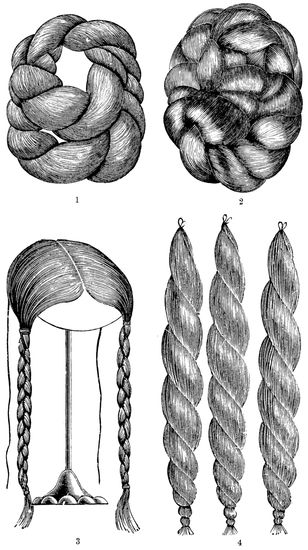
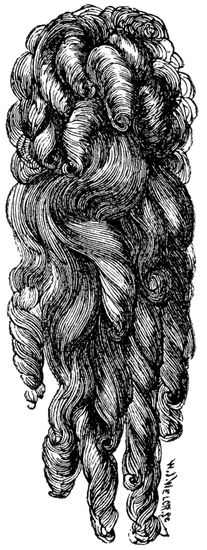
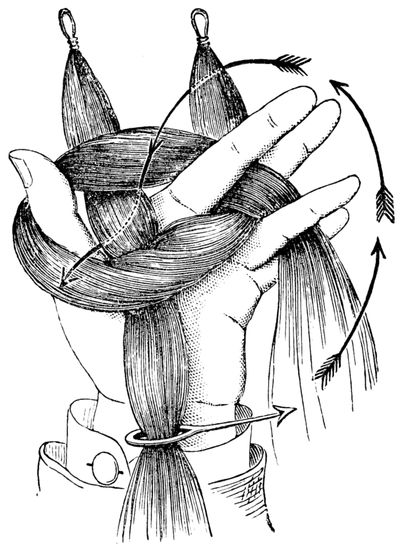
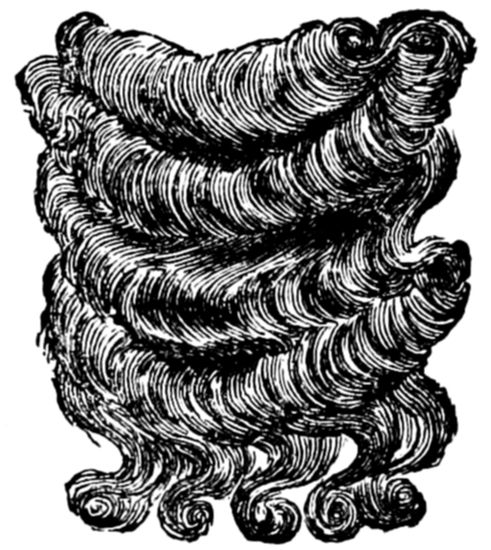
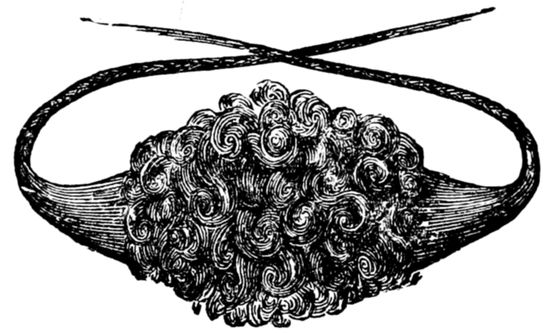
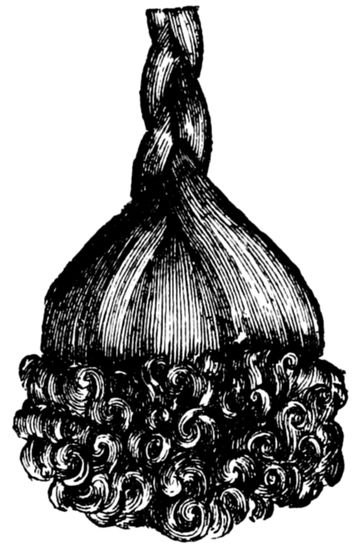
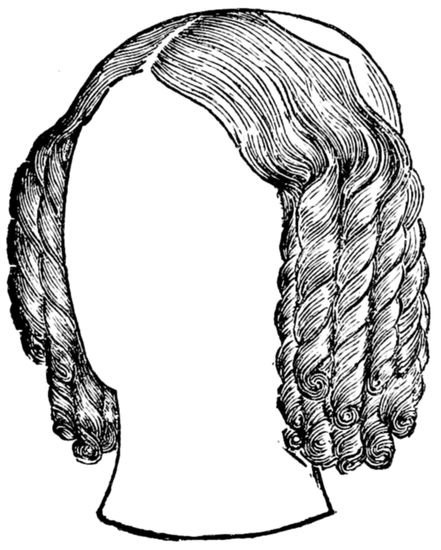
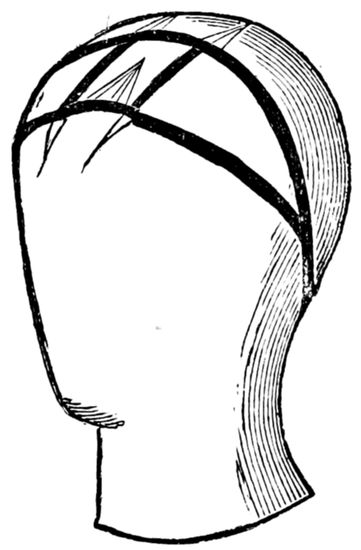
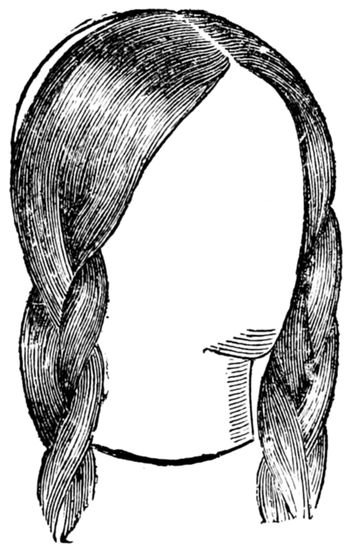
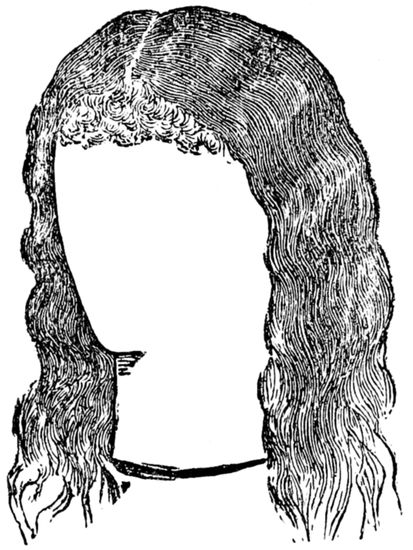
The four pages of illustrations are supplied for the
purpose of giving the learner some designs to work from,
and, as fashions repeatedly change, the ability to make
up sundry pieces of work is necessary and unquestionably
useful.
A brief description of the illustrations will be found
at the foot of each page.
BOARD-WORK, OR THE ART OF WIG-MAKING, Etc.
CHAPTER I.
1
Introduction—A Scientific Description of Hair—Chinese
and Japanese Hair—Chiffonier Hair—Waste Hair—Turned
Hair—Combings—Best Quality Hair—The
Hair Market in Brittany—Dr. Lindemann’s Gregarine—The
“Chignon Fungus”—Cuttings.
“Board-work,” in the fullest extent of its
signification, means all that which is done
by clever hairdressers and wig-makers in
the workshop and at the work-table. It comprises
the cleaning and preparing of hair for
the articles intended to be made; weaving;
sewing and knotting; the making of fronts,
bands, chignons, curls and twists of various
descriptions; scalp-making; ladies’ and gentlemen’s
wig-making; and numerous other matters
of detail in connection with the subject. That a
treatise on this subject is required there cannot be
a doubt, for while haircutters and shavers continue
to increase, the clever worker at the board, to a
certain extent at least, is gradually disappearing.
2This may be considered a bold assertion, but it
is true nevertheless. Let me give an illustration
in support of this statement, and experienced
men, doubtless, will coincide with my opinion.
It not unfrequently happens that when a youth
has acquired a knowledge of men’s haircutting
and shaving, he thinks himself tolerably clever
and able to get his living. If he be well proportioned
and possess a kindly disposition, such
a youth is sure to obtain the favourable consideration
of customers, and come to believe,
perhaps, that he is on the road to competency,
if not to fortune. By the time he arrives at nineteen
or twenty years of age he most likely desires
a change, and seeks another place, and as he
doubtless will get “a rise,” some encouragement
is given to his views by indiscreet acquaintances.
Numerous advertisements constantly
appear for “a good haircutter and shaver, with
a knowledge of board-work,” and the young
man forthwith applies for the situation, and
obtains it—the “knowledge of board-work” required
being, not unfrequently, of a trivial and
elementary character. And thus he goes on till
opportunity offers for further advancement, or
going into business, when he discovers the want
of “technical instruction.” Unfortunately, apprenticeship
is thought to be “old-fashioned,” and
a lad now-a-days thinks he can acquire as much
trade knowledge in four years as his master did
in seven. But such an idea is, unmistakably, “a
3delusion and a snare,” and thus it comes to pass
that many men seek to acquire at thirty what they
should have learnt ten or a dozen years before. The
foregoing remarks would apply equally as well to
other trades, and thoughtful men regard this aspect
of affairs with some degree of anxiety and apprehension,
hence the desire for “technical instruction,”
promoted as it is by some of the City Guilds.
I have reason to know that the book entitled
“Lessons in Hairdressing” is highly appreciated
by many, both employers and employed, and I
trust that “Board-work,” which I shall endeavour
to make as complete as possible, will be equally
as acceptable to the trade. The letterpress descriptions
will be given in a comprehensive manner,
and where the intricacies are somewhat complicated
or obscure, well-drawn illustrations will accompany
the text. To those who wish to take
advantage of my labours, I will briefly say that
no work, however well written and carefully put
together, will impart ability without practice.
Practice must be diligently pursued, and thoughtfully
brought to bear on the instruction given, and
a satisfactory result is sure to follow. As well
might a person, after reading sundry works on
music, and becoming acquainted with the significations
contained therein, expect proficiency on a
musical instrument, as for any one to think of
making a wig after reading “how it’s done.”
Proficiency in any art or trade can only be acquired
by application and hard work. The information
4it will be my pleasure to afford, coupled
with the industry and perseverance of the student,
must produce one result, that being of an eminently
satisfactory character.
Hair is the substance with which my readers
have to deal, and the subject I have to write
about. Hair—the theme of poets’ song, and the
ambition of all true artists to well depict on canvas.
The crowning glory of woman is a fine
head of hair, and baldness only becomes age.
Were a person to ask, “What is hair?” probably
nineteen people out of every twenty would consider
him an ignoramus, but only let the querist
press for a logical reply, and he, in turn, might
regard others in a similar light. Those employed
in manufacturing trades ought surely to know
some particulars concerning the chief material
used in the business in which they are engaged.
Unless this knowledge be imparted to the apprentice
or journeyman, technical instruction in any
trade cannot be complete. Physicians and surgeons
undergo a long and anxious training before
they are qualified to deal with the numerous ills
“that flesh is heir to.” Dentists, aurists, ophthalmists,
chemists, lawyers, and many others have
to master the details of their respective occupations,
before they are regarded as competent men.
It is somewhat surprising to witness the intelligence
and knowledge brought to bear upon sundry
manufactures, and a few visits to some of our
workshops and hives of industry in London and
5the provinces, would prove a source of pleasure
and instruction. I maintain that a scientific as
well as practical knowledge of the materials used
in any occupation, is essential to the welfare of
the clever workman; therefore, before proceeding
farther with the object I have in view, I consider
it necessary to answer the question—What is
Hair?
Hair is distributed over all parts of the body,
with the exception of the palms of the hands,
soles of the feet, and the lips. It grows abundantly
upon the head and face, and sparingly
upon the trunk and limbs, and according to its
location, differences are observed in shape, size,
colour, and structure. With reference to the
structure, I may observe that a hair has three
different modifications of tissue, viz., its centre,
which constitutes the medulla, or pith, and is a
loose cellulated tissue; that which encloses it
forming a greater portion of a human hair called
a fibrous tissue; and the outer sheath, cuticle or
external surface, which is of a horny description.
Hairs are somewhat cylindrical in shape, but not
exactly round, and curly or waved hair is rather
flat. Sometimes a hair is described as being
hollow, but this is incorrect, for it not only has
a cortical (or external) structure, but a medullary
(or internal) substance. The first is similar to that
which may be described as the bark of a tree,
and the second to the pith of vegetable substances,
the internal portions of feathers, or to the marrow
6in bones. But it is right to observe that when
a hair is viewed under a microscope with a low
power it appears dark at the sides and bright
in the middle, and that appearance would convey
the idea of hollowness. This impression prevailed
for a length of time, and justified the
humble barber in stating that “the ’air of the
’ed was a ’ollow tube.” He simply reiterated a
statement which other, and probably wiser, heads
had given currency to. When the cortical
structure of the human hair is examined it is
found to be jagged like the teeth of a saw, and
it is owing to this imbricated arrangement that
hair feels rough to the touch when the hand is
passed from point to root. The serrated appearance
of hair is produced through the outer
layer, or cuticle, being composed of flattened
cells, or scales, which overlap each other like
the scales of fishes, only they are not so
regularly placed. The medulla, also, consists of
a number of cells, which can be seen in hair
that has been steeped for a time in soda or
potash. These ceils are found to be angular or
rounded, and if the immersion has not been too
prolonged, will exhibit a nucleus, and one or
more globules, or granules of fat. The medulla
forms a dark line passing along the centre of
the hair, and occupies about a fourth or a fifth
of its thickness. The medullary line is absent
in infants’ hair, and in very fine light hair;
it is present in strong hair, and is not difficult
7to trace in white or grey hair. Dr. Beigel
observes, that “we may drive out the air contained
in the central tube—as the medullary has
likewise been called—and see it re-enter again
under the microscope. Turpentine penetrates all
parts of the hair which are filled by air, but its
action is slow and requires some time. If we
put, therefore, a hair into turpentine, and allow
it to remain therein about twenty-four hours,
and view it by the microscope, we find the
central tube, which was black before being acted
upon by turpentine, light,—perfectly transparent.
But if we expose the hair again to a high
temperature, the turpentine evaporates, and is
replaced by air, consequently the central tube
assumes its dark appearance again.” It is said
that “nature abhors a vacuum,” and, it will
perhaps be thought that the barber’s description
of a hair was not so very far removed from the
truth after all.
This description of hair is extracted from a
lecture which I delivered to the members of the
British Hairdressers’ Academy and their friends,
at the Rooms, New Bond Street, a few years
ago, and the importance of a correct knowledge
of this branch of the subject will be apparent
before my book is ended.
Every hairdresser knows that if his work is
to be good, he must use only hair of the best
quality in his business; Chinese hair, Japanese
hair, “Chiffonier” hair, “Waste” hair, “Combings,”
8“Root and Point” hair, or “Turned” hair,
however cleverly it may be treated to produce
fineness (being afterwards dyed perhaps to impart
the desired shade or colour), can only bring
forth one result, and that of an unsatisfactory
character. Competition, and the desire for cheapness,
fostered as it is by the encroachments of
other trades, all tend to the manufacture of goods
“to sell,” regardless of any other consideration;
and the introduction of inferior material and
workmanship, might thus be accounted for.
The study of hair, and the condition it should
be in when made up and offered for sale, is of
such importance that I consider some further
remarks on the subject necessary. “If a thing
is worth doing at all it is worth doing well;”
therefore I address myself to those who take an
interest in the business and desire to improve
it, more than I do to persons who vend almost
anything “for a consideration.” Allusion has
been made to various qualities of human hair,
and I refer to them again for the purpose of
pointing out what should be avoided by respectable
and reputable tradesmen. “Chinese”
and “Japanese” hair is coarse, strong and abundant,
and unsuited to the English people; but
it can be treated so as to make it passable
amongst persons of “economic” proclivities. One
thing is certain, and that is, Chinese hair finds
its way into the market, for in 1872 no less
than 100,000 lbs. of human hair was received at
9Marseilles, the principal portion of which came
from the Celestial Empire.
“Paris owns,” says Mr. P. L. Simmonds, in
his excellent book on “Waste Products and Undeveloped
Substances,” “among its street curiosities,
a race as distinct from the elements of
social life as the roving gipsies who have clung
together and run over Europe for centuries.
Consequently, its manners widely differ from
those of the common run of mankind. These
heteroclites are a species of night-birds of the
human race; everything about them reminds you
of dark shades and fantastic silhouettes; they
sleep at daytime, and spring out of the earth
when twilight sets; no one could say whence
they come and whither they go.... They
move about the deserted streets like a horde of
phantoms; the lanterns they hold shine dimly
and fluctuate to and fro in essentially supernatural
zigzags. The chiffonier has a basket
strapped to his shoulders; he creeps along the
asphalte like a wolf in a sheepfold; whoever
ignores his attributions would think him bent
on grievous mischief; he holds an iron hook,
and stops at every heap of rubbish. Parisians
are still in the habit of accumulating their refuse
before their doors. The iron hook goes to work
busily in the cabbage-leaf, rag, and broken-glass
hillocks, while the light of the lantern shows the
basket-owner what is worth taking, and then the
hook transfers the rubbish to the basket over the
10man’s shoulder.” Among the hundred and one
things which these people find is “waste,” or
“chiffonier” hair: and regarding this I will make
a quotation from another reliable source.
M. Alphonse Bouchard, writing on the subject
in The Hairdressers’ Chronicle, in the year 1873,
and at a time when hair was scarce in consequence
of the then prevailing fashion, says:—
“The hair that has fallen off is carefully collected
by men who make this work their special
business. They despise that which their brethren
of the rag eagerly search for. Bones, rags of
every description, fragments of crystal, broken
glass, old iron, old newspapers, all these are
neglected and despised by these specials. See
them bent over a pile of rubbish, which often
contains little else but cabbage refuse and a few
broken corks. They bend over it and kneel over
it as intently as if they were looking for the
philosopher’s stone, when suddenly we see them
draw from the midst the little balls of hair which
nearly every woman makes of the hair-combings....
“But let us follow M. Denizet, the author
of a remarkable work on ‘Waste Hair,’ in these
developments,” continues M. Bouchard. “This
writer tells us that the plaits or small chignons,
and which are consequently cheap, weigh from
60 to 80 grammes, and that in every one of them
there is contained hair from more than two hundred
persons. The following is their origin and
11manufacture. In the issues of the toilet of these
two hundred women of all ages and stations, the
hair of the middle-class woman is first observed.
These women are in the habit of rolling the
combings over their fingers, then putting them
into a small piece of paper, so that they do not fly
away, and this hair is found in the sweepings of
the house.... In the state in which the hair
leaves the bag of the collector it seems good for
nothing. People in general would not like to
touch it, and yet of this refuse the cheap postiches
are made which adorn the heads of persons who
will not pay the price of hair cut off from the
head.”
In speaking of the several operations which
this hair has to go through, my esteemed Parisian
correspondent quotes M. Denizet almost verbatim.
“The waste, seemingly without value, is sold
at six francs a kilogramme to wholesale dealers,
who sell it again, just as it was purchased, at
nine francs, to small manufacturers, who work it,
and then it is sold to certain hair-merchants, who
in their turn send it to small hairdressers, both
at home and abroad. The work of the small
manufacturer consists in five principal operations,
which are:—1. The Cleansing.—The hair is rolled
and twisted about in sawdust to free it from dirt,
dust, and grease. It is then opened by hand. 2.
The Combing.—The hair having been well disentangled,
stretched, cleaned, and freed from grease,
by means of black soap or certain chemical substances,
12is dried, and then combed in large cards
with iron points, the same as are used for mattress-wool;
this operation is done very carefully, to
prevent the hair from being broken. 3. Turning.[1]—Starting
upon the principle that the hair is a
conical tube, which tapers off from the root to the
point, a piece of hair of the thickness of a finger
is rolled forwards and backwards between the
hands. The piece elongates, the hair going in
different directions, according as the root or point
is situated. They are then easily separated, and
put once again root to root and point to point, and
this is the reason why it is called ‘turned hair.’
4. Classing.—There are only three lengths made
of this hair, that which is used for plaits, for
chignons of all kinds, and for men’s wigs. The
refuse from these four operations is about half of
the whole quantity in weight, and is good for
nothing. 5. Picking the Colour.—This work
requires the most patience, and is generally performed
by women. It consists in dividing the
hair according to colours. As there are seven
principal colours and three lengths, each packet is
divided into twenty-one portions. The shades are
white, grey, black, brown, chestnut, blonde, and
red. The lengths vary from twenty centimetres
to seventy centimetres. Having passed through
these different operations, the hair is ready for use
in postiches.”
From about this time, then, “root and point”
13hair, “turned” hair, and so forth came into requisition,
and English “combings” followed as a
matter of course. Nowadays ladies save the
“waste” hair which has been removed by the
action of comb and brush, and when the mass has
assumed somewhat large proportions it is taken to
a hairdresser’s to be made up, and emanates therefrom
in the shape of a plait, twist, &c. To show
that I am not alone in regarding the use of this
inferior hair with aversion, I will quote the following
from the American Hairdresser and Perfumer:—
“This fact alone, namely, the general and
almost universal use of the filthy and unwieldy
substitutes for first quality cut hair, known as
‘Italian,’ ‘refined China,’ ‘unrefined China,’
‘Georgia’ (refined China under another name),
and all the grades of ‘second’ and lower qualities,
all this has done more towards disgusting our
better class of people (those who have the means
at command) with wearing false hair than any
prevailing style or notion could have done.”
There is much truth in this, and I commend the
further consideration of the subject to the serious
attention of all who desire to advance and benefit
the trade.
Having given a description of hair, and spoken
disapprovingly of the commoner sorts, I purpose
considering the better qualities before dealing
with more practical details. If the maker of an
article wishes his work to be of a superior description
14he must necessarily confine himself to the
use of good materials, and the fine quality of the
hair used is of the greatest importance. I will
observe that hair should always be cut from the
head, for then it is in good condition and very
different to the “dead” hair which is thrown off
daily by most people, and is now well known
under the common appellation of “combings.”
Hair of the best description is obtained from
France and Italy, whence come sundry shades of
black and brown. The first-named country, as
well as Germany and Sweden, supplies the
market with brown, light, flaxen, and red hair,
while grey pieces are to be found in most parcels,
consequently its source may be described as
universal. There are regular “hair-harvests,”
and agents or collectors travel from place to place
at certain times, for the purpose of obtaining the
hair of peasant-girls in exchange for money,
trinkets, or other articles of personal adornment.
Mr. Francis Trollope, in his “Summer in Brittany,”
gives an amusing as well as interesting account of
what he observed at a fair in Collenée, and its
relation here will be appropriate. He says:—“What
surprised me more than all, by the singularity
and novelty of the thing, were the operations
of the dealers in hair. In various parts of the
motley crowd there were three or four purchasers
of this commodity, who travel the country for the
purpose of attending the fairs and buying the
tresses of the peasant-girls. They have particularly
15fine hair, and frequently in the greatest abundance.
I should have thought that female vanity would
have effectually prevented such a traffic as this
being carried to any extent; but there seemed to
be no difficulty in finding beautiful heads of hair
perfectly willing to sell. We saw several girls
sheared, one after the other, like sheep, and as
many more standing ready for the shears, with
their caps in their hands, and their long hair
combed out and hanging down to their waists.
Some of the operators were men, and some women.
By the side of the dealer was placed a large
basket, into which every successive crop of hair,
tied up into a wisp, was thrown. No doubt the
reason of their indifference to their tresses on the
part of the fair Bretonnes is to be found in the
invariable mode which covers every head, from
childhood upwards, with close caps, which entirely
prevent any part of the hair from being seen,
and, of course, as totally conceal the want of it.
The money given for the hair is about twenty
sous, or else a gaudy cotton handkerchief; they
net immense profits by their trips through the
country.” This hair is, as I am informed, the
finest and most silken black hair that can be
procured.
Preparing hair requires careful manipulation,
for unless it be properly cleaned and drawn off
into the required lengths, the particular work in
hand stands a chance of being spoiled. Only
fancy making a silk or skin parting with hair that
16has been imperfectly cleaned; the result can easily
be imagined; or a sensitive lady’s surprise and
disgust should she discover a “nit” upon her
torsade or plait.
While mentioning this, I cannot help calling to
mind the exaggerated and untruthful statements
which were made some years ago in reference to
Dr. Lindemann’s alleged discovery of “gregarines”
upon false hair, and their rapid procreation. The
effect produced was most prejudicial to hairdressers,
until, after a few weeks had elapsed, it came to
be regarded as “one of those things which no
fella could understand.” Let me here observe
that I have not seen a gregarine, neither have I
been able to procure one from the source indicated
by the learned Russian professor, nor could I ever
meet with a scientific gentleman who had a
specimen of the kind in his possession. Indeed, I
might go a little farther, and say that I have been
unable to discover any one who has even seen a
gregarine, although the “Micrographic Dictionary”
informs me that they are to be obtained from about
eighty different sources. Such, then, is their
insignificant character and appearance when
viewed under a powerful glass. This scare was
soon followed by the so-called “chignon fungus,”
which brought forth a most interesting disquisition
upon the subject by Dr. Tilbury Fox, at one
of the learned societies; but the fungoid growth
that was found upon a particular piece of hair had
nothing whatever to do with a chignon, as an
17examination of a portion of the same hair now
in my possession would readily prove.
The good condition of hair is taken into
consideration by professional hair merchants, for
their very success in business depends on the
unmistakably clean and glossy appearance of the
article in which they deal. I would urge, therefore,
all hairdressers who carry on a respectable
trade, and are desirous of improving it, to purchase
hair of first-rate quality only, and only to buy it
of those who study to well prepare it for their use.
They should avoid, if possible, having anything to
do with the common rubbish which now and again
finds its way into the market, and will thus be able
to give a good article for a fair and remunerative
price. It may be said, however, that all in the hairdressing
profession are not able to go or send to
some depôt in the vicinity for every little requirement;
neither is it convenient for them to keep
in stock hair of every shade or length. Besides,
they may have a quantity of “cuttings”
(not “combings,” mark you!) which should be
utilised and, after careful treatment, made up for
sale. It is, then, to such tradesmen that I desire
to speak, and hope my remarks will be found
useful in the course of their business career.
CHAPTER II.
18
The Implements Used in Preparing Hair—The Preparation
of Hair Described—Washing the Hair—Drying
the Hair—Drawing the Hair—Nitting the Hair—Carding
the Hair—Curling the Hair—Boiling and Baking
the Hair.
I will assume that the larger portion of
my readers are well acquainted with the
various implements and tools used in the
trade, but as this book will, no doubt, be brought
prominently under the notice of apprentices and
improvers, a brief description of such things is
not altogether unnecessary.
A “card” is made with a thick wooden base,
into which a large number of steel prongs or
spikes, about two or three inches deep, have been
firmly set, and it is used for carding or smoothing
hair. The possession of a pair of good drawing-brushes
is also most important. They should be
large and heavy, and well filled with the best
bristles. These brushes are made of various sizes,
but as they are so necessary and useful, I would
recommend the purchase of a good article, and of
fair proportions.[2] A “nitting machine” reminds
19one of a small-tooth comb, for its purpose is
similar. It is made of brass, fitted with screws
to be turned with the thumb and finger, and these
hold together or open at will a closely-set number
of steel teeth. This compact little instrument is
intended to be fixed, when in use, to the front of
the “card,” so that the whole length of hair may
be passed through it several times. A “jigger”
is wanted when piping or curling hair. It is a
piece of hard wood, about seven or eight inches
long, three inches wide, and half-an-inch in thickness.
There are to be three holes, in the form of
a triangle, towards the upper end, through which
ordinary screws are passed to fix it securely to
the work-table or bench. About three inches of
this piece of wood or “jigger” must be allowed
to project, and through the projecting part two
holes are to be made in a line with each other.
A piece of strong string is to be passed through
these two holes, tied in a knot, and extend to
within a couple of inches of the floor. The
“pipes,” for curling hair, are about three-and-a-half
inches in length, and the thickness of a lead
pencil. Formerly they were made of earthenware
clay, but common tobacco-pipe, pieces of cane, or,
better still, willow, with the bark stripped off,
answer every purpose. In addition to the foregoing,
a dozen or more pieces of wood, about
twelve or fifteen inches long and one inch square,
will be required, together with vessels for boiling
hair, tins or dishes for baking hair, plenty of
20string, a dressing comb or two, scissors, etc., and
an old razor-blade, well-set in a handle, allowing
two inches of the blade to appear, will all be
useful. Soft soap, and some of the best Scotch
soda, together with hot and cold water, must also
be provided.
Let me suppose that the reader has a small stock
of hair by him, which he is desirous of bringing
into use. It may have been accumulating for
some time, and is, probably, of divers lengths
and colours. It should be collected together,
and the first thing to do is to get the hair
thoroughly clean, so as to prepare it for after
manipulation. Separate the different qualities
first, should there be any variation in that
respect, and put all the coarse hair into one
lot, and all the fine into another. In the event
of a piece of hair being rather more bulky than
the rest, divide it, so as to have each piece
about the same size and not any thicker than
can be washed and dried in an easy, as well
as effectual manner. Tie every piece with string
moderately tight and securely fastened, but loose
enough for the tie to slide up and down a little
when the hair is being washed, otherwise, some
portion of the hair will be clean, and where
tied, dirty. Before washing, it is better to give
each piece a rough “carding,” so as to prevent
its matting together, and probably breaking the
longer hair in its disentanglement.
The foregoing instructions having been attended
21to, provide two pails or basins of hot water—as
hot as the hand can bear—and into each one put
a tolerable quantity of soft-soap and soda—the
best Scotch soda if it can be obtained. Place
a few pieces of the hair into one vessel to
soak, so that the dirt and grease upon it may
be more easily removed. Take up one of the
pieces, and holding it as a boy would a stick,
between the thumb and fingers, commence rubbing
it in washerwoman style, and, at the same
time, working it gradually from one end to the
other. Do not forget to slip the tie occasionally,
and if this process be carefully performed, a great
deal of the grease and dirt will have been removed.
This imperfectly cleaned piece can then
be passed into the second vessel. Proceed in
the same way throughout, changing the water
frequently, or as soon as it becomes foul and
unfit for use. When all the hair has been
washed twice in the manner described, clean the
pails or basins, and fill them with fresh water—hot
in one, and tepid in the other. This is
for rinsing purposes, and the last water must not
be soapy, for so long as that is the case other
water must be procured. It is of the utmost importance
to remove all grease, soap, or dirt from
the hair, and the greatest particularity should
be exercised in this preliminary operation.
The hair can be dried either in the sun, in a
warm room, or before a fire. If in the sun,
and, of course, in the open air, each piece should
22be fastened separately to a line, and left to blow
about in the wind for a few hours, or, in other
words, till it is quite dry. If the drying process
be carried on in a warm room, let the hair hang
near to the ceiling, and avoid making a dust:
but should an oven, or drying before the fire, be
more convenient, turn the hair frequently, and
mind it does not get scorched or burnt. Both
these operations having been duly attended to,
see that the “card” and “drawing-brushes” are
perfectly clean, for the next process is that of
drawing the hair.
I must now imagine that the various shades have
been selected and placed in different lots, such
as natural blacks here, dark browns there, light
browns, reds, greys, and other shades or particular
colours in separate and convenient places.
Commence with the natural black hair. Take a
piece and cut the string which binds it together,
hold the hair by the roots firmly in the right
hand, and make smooth by passing it gently
through the “card” several times. It may be
necessary to reverse it, but in that case hold it
as near to the roots as possible, so as to avoid
wasting the short and finer hair, which is to be
found in every tress. Having done the carding,
remove the top “drawing brush,” and place the
piece of hair upon the underneath one, the roots
upon the brush, the points being free and inclined
towards you. Repeat this with a second, third,
or fourth piece of hair, until you have collected
23all of that particular shade together, or until the
brush is conveniently full. Then place the other
brush on the top, press down moderately tight,
and put a rather heavy weight upon it. The
brushes being before you, the length of them
extending from left to right, the hair which is
free being of varying lengths (say) from twenty
inches up to the very short within the brushes,
it is now ready to be “drawn.” The workbench
or table should be bound with hoop-iron,
rising a quarter of an inch above the level, to
form a “stop,” so that the brushes, hair, and
weights may not be pulled off. But if the table
is not so made it will be necessary to provide
a “stop” by means of nails or screws. I have
previously alluded to a dozen or more pieces of
wood (the length of the brushes), twelve or fifteen
inches long, and one inch square, and now I will describe
their use. Assuming the longest hair in the
brushes to be twenty inches, four inches or more
of which being securely held between them, it follows
that fifteen or sixteen inches must be free. It
is requisite to have the points of the hair projecting
a little, and only a little, over the edge of the
table. The “stop” being at or near the edge cannot
act as a check, but by placing a sufficient number
of these pieces of wood between the “stop” and
the brushes, they, i.e., the brushes, can be made
secure at any distance required. Take the old
razor blade already spoken of (which for convenience
I will call a knife), and commence “drawing”
24the hair in small portions of, say, one or two
hundred hairs. Continue this, holding the hair
firmly in the left hand, while the knife is in the
right, until a large quantity has been drawn off.
As the length of the hair diminishes, so it will be
necessary to remove one or more pieces of wood
in order to keep the ends projecting, as I have
said before, a little over the table’s edge. Assuming
that the brushes were tolerably well supplied
with hair at the outset, the hand is likely to
get filled three or four times, but each of these
pieces of hair can be loosely tied for the present
and put aside. It is to be noted that the fastening
will in this case be at the points instead of at the
roots, but that, I need hardly say, is simply for temporary
convenience. The drawing-brushes being again
clear, the same pieces are to have the tie
cut and placed in regular order on the underneath
brush—the longest hair being on the right, the
shortest on the left, and the different lengths
graduating between. Now put the other brush
over all, with weights upon the top to hold the
hair secure. Let a sufficient number of slips of
wood fill up the vacancy between the “stop”
and the brushes, while the ends of the longest
hair project a little over the edge of the table.
Remember that the roots of the hair are now
before you, and commence. Keep the roots even
and clubbed, but drawing until there is about a
quarter of an ounce in the hand, when it should be
neatly and securely tied. This is to be repeated
25until the whole of the hair placed in the brushes
is finished. Of course, as the hair diminishes, one
piece of wood after the other must be taken away,
and tresses of certain definite lengths will be the
result. These tresses can all be classified by putting
the various lengths together, thus—seven
and eight-inch hair (calling it eight), nine and ten-inch
hair (calling it ten), eleven and twelve-inch
hair (calling it twelve), and so on. The shortest
and, in all probability, the finest hair in the
brushes must also be drawn and firmly tied, but
I purpose dealing with that, under the designation
of “crop” hair, in due course. This process of
drawing must be pursued, until the entire quantity
is disposed of.
Having got the hair well washed, and in regular
order, you must now make a careful examination
to see whether there are any nits. This is important,
for the most clever piece of work is spoiled
in the estimation of people in general, should they
discover anything of the kind upon even one of
the hairs. To imagine that a mixed quantity of
raw hair can be perfectly free from parasitic indications
is a mistake which no respectable hairdresser
would allow to occur. True, some hair
goods are to be found in a condition the reverse
of what they ought to be, but these are generally
offered for sale, by not over-scrupulous tradesmen,
and purchased by customers of strong economical
tendencies. Be that as it may, it is requisite to
examine the hair, and any unsatisfactory or suspected
26pieces should be picked out. Now, I will
suppose that nits are observed upon half-a-dozen
of these pieces, and with them I purpose dealing.
Fix the “nitting machine” to the front of the
“card” in a secure manner, and, to prevent accidents,
it is most important this should be strictly
attended to. Cut the tie: firmly grasp the tress
of hair, and “card” it, taking good care that each
time it is made to pass through the machine also.
This is to be repeated until the nits are removed;
the hair being reversed occasionally to “nit” the
other end.
It is worthy of remark that the eggs or nits
of the common louse are observable to the naked
eye; they are of sugar-loaf form, and generally
deposited upon the hair with the narrow end
pointing to the scalp. Hence it follows that by
“carding” the hair the reverse way the nits are
much more easily removed by this useful little
machine, which no hair-preparer should be without.
The teeth of the machine can be rendered
fine or coarse (as may be required) by means of
thumb-screws attached, and this process being
effectually performed, the hair is now ready for
further manipulation.
Curled hair of ten, twelve, fourteen, and sixteen
inches long, is most in request, but longer or
shorter can be curled, if required. I have already
described a piece of hard wood called a “jigger”
projecting from the work-table, and some of the
other requirements for “piping” or curling hair.
27These I will suppose have been provided, and sundry
locks of hair selected. Take one of the pieces,
say, for the sake of illustration, weighing about
a quarter of an ounce, and see that it is well and
securely tied. Moisten the right hand, and rub
the roots together to cause the hair to “felt,” and
prevent the tie slipping. Place the tied part on
the “jigger,” hold it by means of the string which
passes through, and press tight with the foot.
By this means the hair is, as it were, held in a
vice. Comb it out and divide in two portions.
Take one of the pieces of willow, cane, or whatever
may be employed for the purpose, technically
called a “pipe,” and a piece of rather stiff paper
about 3 inches by 2. Put the “pipe” upon the hair,
and the paper underneath, holding both in their
places by means of the thumb and fingers and pressing
gently the while. Draw the two downwards till
you get to the points, and then commence to curl.
By a movement of the hands, spread the hair a
little, holding it firm and tight until it is all rolled
up. Take about a yard of string and tie the hair
and “pipe” together, by passing the string round
one and then the other in such a way as to hold it
firmly in its place without slipping, and fasten off
securely. There is some art in doing this adroitly,
which is difficult to explain in writing, but the
reader should bear in mind that I am addressing
those in the trade, and probably an opportunity
will now and then offer for a practical illustration
by some experienced hand. I have generally
28found it convenient to use all the straight hair in
plaits, twists, etc., in the course of my business,
and to purchase the curled hair ready prepared for
use. This cannot always be done, especially by
those who reside in distant parts, but a little
practice will soon enable an intelligent workman
to overcome any difficulty that presents itself.
After the hair is rolled or curled up on “pipes,”
it has to be boiled and baked, so as to “fix the
curl.” The hair should be boiled for an hour or
more, and afterwards allowed a brief period to
drain. While still warm it is to be put into trays
or dishes and baked for several hours; there are
suitable ovens constructed for the purpose now-a-days,
but formerly the hair used to be embedded
in dried sand and baked in a moderately cool
baker’s oven. The whole lot of hair is to be
strung together like ropes of onions afterwards,
and hung in a warm dry place for days or months
till wanted. In unrolling (there being two curls
to each tress) one curl should be turned to the
right and the other to the left, and if this work
be properly performed, the hair will present a
bright, glossy appearance, with a natural-looking
and durable ringlet curl.
CHAPTER III.
29
The Preparation of Hair (continued)—Crop Hair—A
Remarkable Trial—Craping and Crimping the Hair—Inserted
Stems—Boiling and Baking Crêped Hair—Combings
and Turned Hair alluded to again.
The shortest and finest hair is employed for
gentlemen’s wigs, fringes, “Sevigny” curls,
and similar purposes. There is frequently
a natural inclination to curl in hair of this description,
but when coarse and strong, it is best
not to attempt to force it. To make the curl take
one of the pieces of fine hair, and thoroughly wet
it. Rub the roots with the palm of the hand as
before, so as to cause it to “felt” together. Have
ready a smooth brass tool, five or six inches long,
and in shape resembling the end of a steel used
for sharpening knives. With this (and the thumb)
press the hair between, giving the hair, at the
same time, two or three turns round the tool;
draw away the instrument; hold the curl between
the thumb and finger, and place it on an iron tray
made for the purpose. Each curl is to be held in
position by means of a small weight placed upon
it, and there must be a “stop” in the centre of the
tray to prevent the curl unwinding. The succeeding
curl acts as a “stop” to its predecessor, and
30when the tray is full, it looks not unlike a dish
of snails that has been prepared for some uncommon
and remarkable feast. It is not possible
to boil this hair, like that which is rolled upon
“pipes” and securely fastened by means of pieces
of string, therefore it must be steamed before it is
baked. The steaming process can be done effectually
in a small way with ordinary domestic
utensils. Hair manufacturers would proceed somewhat
differently, and necessarily so, because their
work is extensive; but I am addressing myself
to hairdressers whose requirements are on a
greatly reduced scale. Take a sufficiently large
saucepan, and put therein one of those three-legged
iron rings upon which meat is placed when
sent to the oven. Every good housewife will know
what I mean. On this stand put the tray containing
the crop hair, and surround the whole with
water, taking care, however, that none enters the
tray. Put the lid on the saucepan; boil for at
least a quarter of an hour, and by this simple
arrangement the hair will be sufficiently well prepared
for the baking process. Take the tray containing
the hair carefully out, and after allowing
the steam to blow off, a certain amount of dryness
will follow, when it can be baked in a cool oven,
or in front of a good fire—the oven of course being
preferable. When quite cold the weights are to
be removed, each curled lock of hair put into a
box or drawer till wanted, and, above all, it must
be kept in a warm, dry apartment.
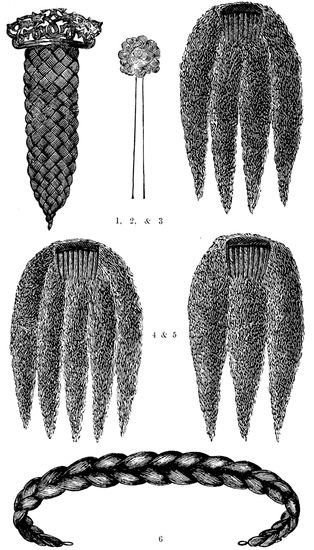
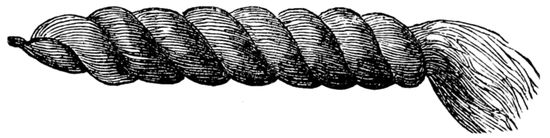
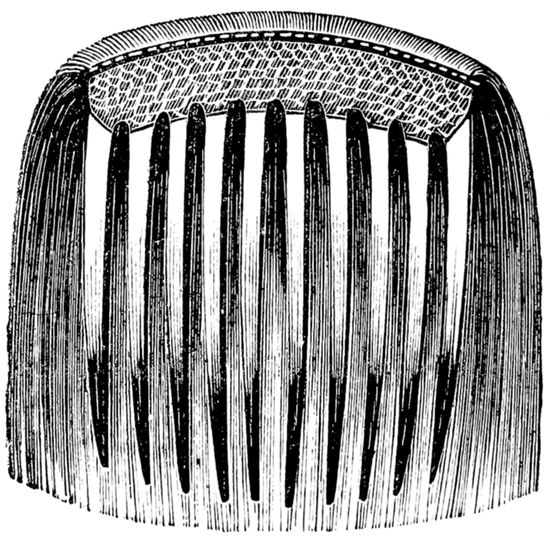
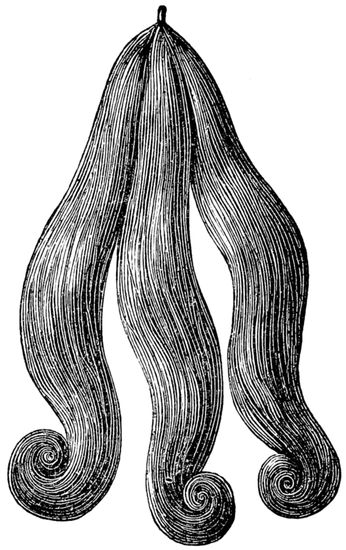
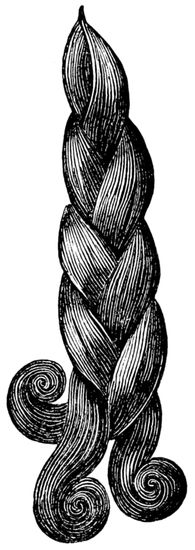
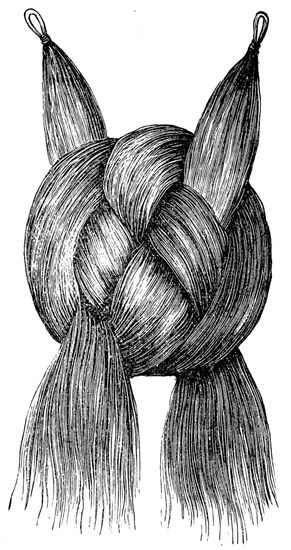
1. Seven Strand Plait, with Fancy Comb attached. 2. Pin Curl. These curls are generally made upon hair-pins, for which a small quantity of short frizzed, or curled hair, suffices. 3, 4, & 5. Human Hair Frizzetts, for plaited Chignons, Plicaturas, &c. 6. Long Plait, for a coiled Chignon when made upon the head.
31When frizzets were used in the elaboration of a
lady’s coiffure, as was the practice a few years ago,
several pieces of craped hair were all-important.
The trade done in both large and small
frizzets, pads, stems for plicaturas, twists, and
plaits was something enormous, and quantities of
a dyed material resembling hair were brought into
requisition. And this was absolutely necessary,
for the stock of human hair suitable for the purpose
became exhausted. A brief allusion to the
important case of Donisthorpe v. Jowett will not
be out of place here, as it is largely connected
with the subject. This action was tried in the
Court of Exchequer, and lasted six or seven days,
a full report of which appeared at the time.[3] It
was an action brought for the infringement of a
patent process which related to crimping hair, but
more particularly applied to a dyed material
largely used as a substitute. “I am afraid to
mention to you,” said Mr. Matthews, Q.C., in his
opening address, “the figures that have been laid
before me as to the extent of the trade. It is not
pounds; it is not hundredweights; it is not tons
nor hundreds of tons, but it is hundreds of thousands
of tons in which this crimped hair is sold in
the English market.” But I need not stay to enter
into the details of this remarkable suit; it is sufficient
for my purpose to show the enormous business
that was done in these goods at one time. I
will turn, therefore, to the appliances which every
32hairdresser possesses, or can easily obtain, and
deal with the crimping of human hair on a small
scale. The method generally adopted for craping
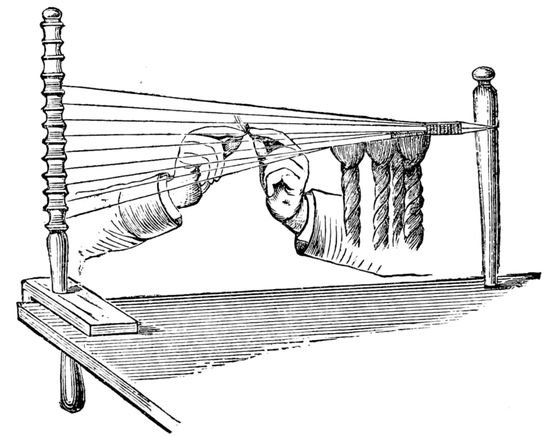
or crimping hair is as follows: Take the screws
and pegs used in weaving (a description of which
it is unnecessary to give, for the weaving-frame
must be known to nearly every hairdresser or
barber in the kingdom), and instead of silk, wind
string around the peg made for the purpose. The
string need not be thick, but it ought to be strong,
and if a little stouter than ordinary shop-string, so
much the better. When the frame is set up, two
strings instead of three (the number usually
employed in weaving), are required. Put the hair
to be used in the brushes in the usual way, with
sufficient weight thereon, and commence by drawing
out a moderately thick piece of hair technically
called “a weft.” I will take it for
granted that the reader knows what coarse weft
is, in connection with weaving generally, and
the “wefts” used in crimping hair are to be
decidedly coarse. In this operation, then, the
roots of the hair will be near the hand of the
workman, while the length of the hair (whatever
length it may be) lies smoothly between the two
brushes. From the hair so placed draw out a
weft, push the root-end close up to the knot
(previously tied in the strings by way of a starting-point),
and hold it firmly with the thumb and
finger of the left hand. Commence then to intertwine
the free ends of the hair, no matter how long
33it may be, in and out in a regular, firm, and secure
manner. Let me suppose that you are going to
crape some six or eight-inch hair, and that the
root-end is being held between the strings as before
described. I will assume that the free hair inclines
towards the right hand, and is hanging down.
Pass the root-end under the bottom string, draw
it through between; turn it over the top one;
draw the roots towards you again, and, by a kind
of twist, change the position of the hair, holding
the root-end (with the beginning of the crêpé) in
the left hand, while the full length of the hair is
free. This is to be intertwined in a regular
manner with the string till the ends are reached.
Push up close towards the commencement or root,
and use a “jockey” to keep it, as well as the end,
in place. What is a “jockey”? It is generally
a piece of wood, cardboard, or any other rather
hard substance, used in weaving, and found
necessary when the hair is coarse and strong. It
is dexterously slipped between or upon the “silks,”
to keep the roots from springing up when each
“weft” is placed in position. In this instance, I
would suggest two pieces of firewood, about an
inch and a half or two inches long, a quarter of
an inch wide, and flat, tied securely together at the
top, somewhat expanding at the bottom, and
when made, to look like a miniature clothes-peg.
With this little contrivance the end of the hair
intertwined around the strings can be held in its
place until the next “weft” is put in position,
34when it is to be removed, and proceed with the
work as before described. This process should go
on until all the hair is used, and there may be a
yard, or any quantity of craped hair made ready
for the next operation.
Hair of ten or twelve inches long is most suitable
for making “inserted stems.” Tie up two
strings as before described, and knot them together
at the commencement, which is the starting-point
in intertwining the hair. The hair itself should be
placed within the drawing brushes as before; pull
out thick “wefts,” and work them upon the strings
as previously described, but with this difference,
they are only to be crimped or crêped half way.
Here is the mode of procedure—draw out a weft,
and hold one half of the length in your left hand,
while with the right you turn it over, and under,
and between the strings in a methodical way, as I
have previously mentioned. Push up each piece
as it is worked, close and tight. Thus one half of
the hair will be left hanging loose, while the other
half when the operation is completed will be crêpé
or crimped.
Assuming that the work is properly performed,
the next important part is the boiling and baking
of it. Having craped all that is to be done, cut
down the strings, and tie the free ends securely
together. Have ready a clean saucepan (it is best
to keep one for the purpose) fill it with either hot
or cold water, put the hair and string into it and
boil for about a quarter of an hour. Then take
it out, let the steam evaporate, and put it in a
rather warm oven or before a good fire. It should
be well baked, for the crimp is wanted to be
durable; therefore, if kept in the oven for a day
and night so much the better. It can then be
allowed to remain on the strings till wanted.
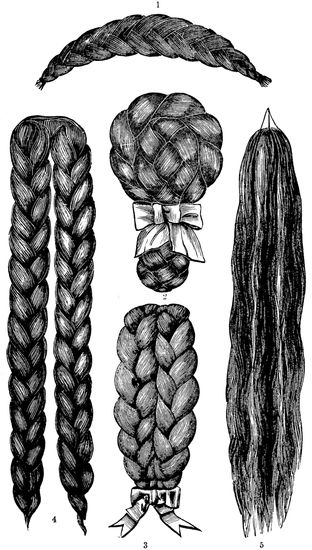
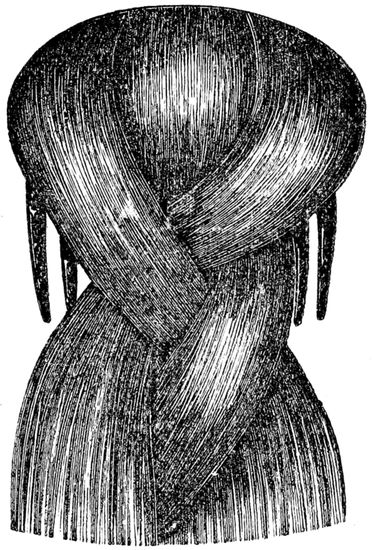
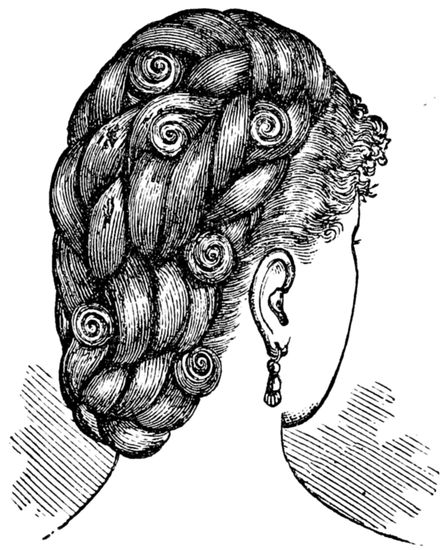
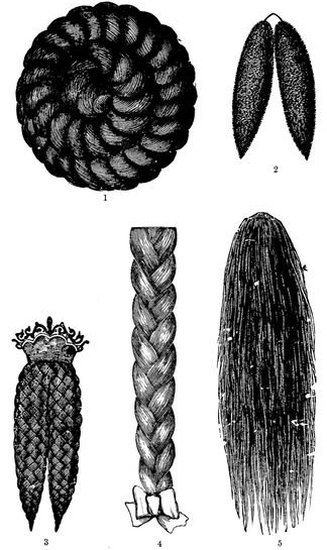
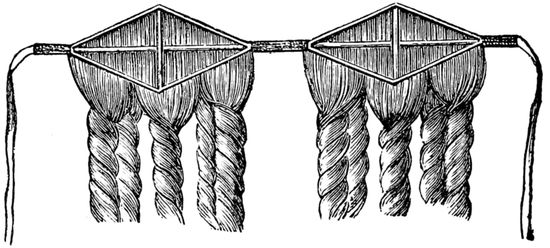
1. A Coronet Plait. 2. “Catogan” Chignon; being a twist and four-strand plait, with ribbon bow. 3. The “Dolly Varden” headdress. 4. Marguerite Plaits; which can be made in any length of hair, and are easily formed into Coils, &c. 5. Semi-covered Stems, otherwise “inserted stems,” for plaited Coils, Coronets, &c.
35When the crimped hair is required for use—and
I allude to the making of ordinary frizzets first—cut
the strings at convenient places and pull them
out. Have a “card” and “drawing brushes”
handy, and as each piece is carded, spread it upon
one of the brushes by means of a dressing comb,
and when conveniently filled put the other brush
on the top, with a sufficiently heavy weight to
keep it in its place. I need hardly say that the
points are to be within the brushes, while the
root-ends must be left projecting out a little way,
as that will be found necessary and convenient.
With reference to the longer hair which has been
prepared for making the inserted stems, a similar
course is to be pursued. The plain or straight
ends are to be within the brushes, while the roots
as in the previous case, are to be left free, say, to
the extent of half an inch. Having arrived at this
point, the next step is to weave the hair, and the
method of doing so will be described in due course.
I will remark here, however, that in weaving hair
for frizzettes inserted stems, &c., all the wefts
must not be set one way, as in the case when hair
is woven for wigs, fronts, and curls, but each weft
must be set in a contrary direction, i.e., one up and
36the other down. I shall be better able to describe
this under the head of “Weaving,” of which it
will be necessary to give an illustration.[4]
There was a time, and not many years ago
either, when such an announcement as “Combings
made up, and the Hair turned” would have
greatly astonished the trade and the public as
well; but now that kind of work is done in
nearly every hairdresser’s establishment, be it
large or small. I have before alluded to the use
of “waste” hair or “combings” in the manufacture
of postiche, as it is termed by Parisian
coiffeurs, and “false hair” by the generality of
people here, and expressed my aversion to its
employment. Hair that is cast off by a law of
nature, after illness, accouchements, and a variety
of other causes, cannot by any possibility be made
equal in appearance and quality to the hair which
is cut off from healthy heads. Then there is the
customary loss of hair about the autumn season,
which may be regarded in a similar light to
quadrupeds changing their coats, and to birds
moulting. Hair of this description is generally
withered and dry, through a want of sufficient
nutrition, which is the primary cause of its decay.
There is an old saying that “the value of a thing
is just as much as it will bring”; and to ascertain
the value of “combings” from a commercial point
of view, let any one go to different shops and try
37to sell a paper-bagful. The experiment is not
likely to be repeated. Like a true artist, I object
to the use of inferior materials, for however good
the workmanship may be, bad stuff will spoil the
lot. I have another objection to make, for I
consider that through the introduction of “combings”
the sale of hair—good, clean, glossy hair—has
fallen off, and the hairdresser’s profits
diminished in like proportion. Nevertheless, this
inferior quality of hair is used, and how to treat
it in the most satisfactory way, is what I have
here to deal with.
In preparing this hair, which generally comes
to hand in a matted and tangled state, the first
thing to do is to “card” it, and this should be
done with small pieces at a time. After which,
these pieces must be laid together until the
whole is finished. Tie it in bunches of a convenient
thickness, and wash thoroughly as previously
instructed. It is then to be dried and
drawn off in the usual way. Mostly it is made
up into the required article without “turning,”
but it is not suitable for curls unless it is
“turned.”
The process of turning hair is attended with
some little trouble, and various tradesmen have
different ways of doing it. Of course the hair
can be worked better when it is turned, but, as
cheapness is the order of the day, I suppose that
where one piece of hair is “turned,” nineteen
other pieces do not undergo such careful manipulation.
38In order to deal with this part of the
business properly, let me briefly recapitulate.
In describing the formation of hair, and speaking
of the cuticle, or outer sheath, I have said
that it is of a horny description; that hairs are
somewhat cylindrical in shape (excepting curly
or wavy hair, which is rather flat); that the
cortical structure of human hair is jagged like the
teeth of a saw, and that this serrated appearance
is produced through the outer layer, or sheath,
being composed of flattened cells or scales, which
overlap each other like the scales of fishes. This
can be seen by means of a good microscope, and
felt in passing hair quickly from point to root
through the fingers. By reversing the hair and
drawing it through the fingers from root to point,
the difference can more readily be detected in consequence
of its smoothness. The knowledge of
this structural arrangement is important as it
bears largely upon the “turning” operation.
The combings are to be picked out and
“carded,” being at the same time held rather
loosely in the hand. By so doing, the matted
hair becomes disentangled, and is deposited in or
upon the “card.” It is then to be drawn out,
piece by piece, and laid aside. When the whole
has been “carded” in this way, it can be loosely
tied in the middle, washed, and dried. I will
now assume that the cleaned hair is before you,
and that it is to be “turned.” Place it in the
brushes; draw off a convenient portion, taking
39care that the part held in the hand is clubbed,
and proceed in either of the following ways:—Hold
the piece of hair in the left hand, have a
cup of warm water near, into which the fingers
of the right hand are to be dipped as occasion
requires. The hair is to be worked between the
thumb and finger, and the peculiar formation
of the hair gradually forces the roots upwards.
These roots may be seen plainly with an ordinary
magnifying glass; they can be easily discerned
by those whose eyesight is good, and are to be
discovered by the touch. They generally present
a whitish appearance, and are bulbous in form.
It should be borne in mind that I am speaking
here of the roots in a business sense only,
without any regard to the more minute scientific
considerations. As the roots present themselves,
the hairs to which they are attached are to be
pulled out and “turned,” i.e., they are to be put
at the bottom of the piece of hair in hand. As
each portion is done, it is to be laid aside, until
the whole is completed, the roots being at one
end, the points at the other. To finish the turning
process, the hair should then be drawn off
and tied as previously described.
Several other ways of turning hair are adopted,
but the principle is the same. Some use the
“card” with the “nitting machine” attached.
The teeth of the machine are allowed to be open
or close, depending upon the coarse or fine quality
of the hair, proceeding upon the principle that
40these “knobs,” or roots, will offer a slight
resistance and be intercepted in their course.
Others, again, employ a row of needles, closely
set together, with the same object in view, and
producing a like result.
I observe that in a recent American work on
the Hair, by C. Henri Leonard, M.D., the subject
of hair “turning” has not escaped his notice.
He says, speaking of the epidermal coat or cellular
layer, that “the flat, quadrilateraloid cells forming
it overlap each other, just as the tiles or
shingles do each other on our houses,” and that
“this peculiarity of arrangement of the scales can
be detected by the touch; thus, drawing the hair
briskly through the fingers, from the tip to the
root, it will then seem to be rough and uneven.
Often, when quite firm pressure is used, a humming
sound may be produced by this manœuvre.
You can by this means always tell which is the
root-end and which the tip end of the hair, as the
overlapping layers lie from the roots. Now if you
turn the hair, end for end, and draw it from the
root to the tip, it will be felt to be smooth and
even. Advantage has been taken of this fact by
hair dealers and dressers, in arranging their stock.
Where the hair has become disarranged, that is, a
part with the roots one way and the remainder
with the tips in the same direction, the whole is
thrown upon a smooth, hard surface, and rolled
briskly back and forth with the palm of the hand,
or pulp of the fingers, when those with the roots
41in the same direction will begin to ‘back out’
from the mass, and then can be easily sorted out
and arranged in a proper manner. Were this
precaution not taken (to have the points all one
way) the hair would never lie evenly and smoothly
upon the head. This same ‘rolling’ process, in
a minor degree, takes place at each twist of the
head on the pillow, and hence explains why our
ladies’ hairs are less snarled and tangled than
they would otherwise be after a night’s repose.”
CHAPTER IV.
42
Dyeing the Hair—Of Hair-dyes generally—Powder Dyes—Liquid
Dyes—Iron Dyes—Lead Dyes—Various opinions
concerning the use of Lead Dyes—Silver Dyes—Dyeing
False and Faded Hair—Bleaching and Blanching Hair.
Dyeing the hair upon, as well as off, the
head, is a very important subject, and
should be dealt with in as complete a
manner as possible. A selected number of recipes
will prove, doubtless, interesting as well as
useful.
In the days of my apprenticeship—(it is not
necessary to say how many years ago)—there
were packets of “Pompeian Hair Dye” in the
shop window of my master, which bore the
name of the famous chemist Orfila, and the
recipe for making this dye was found, at least
so the label stated, “among the ruins of Herculaneum.”
“What a wonderful discovery,” I
used to think; and “how I should like to know
the secret of its manufacture.” It was a powder
dye, and had to be mixed with water, to the
consistency of paste, before application, the hair
being thoroughly washed and dried first. It
was generally applied at night time, and the
head had to be well covered with oiled-silk, a
43bladder, or some other non-porous substance, for
hours, to confine the “mixture” to the hair.
When the “bandages” were removed in the
morning the head appeared as though it had
been dipped in a flour-barrel; and, oh! what a
task it was to get it clean. These powder-dyes
are seldom used now; but, nevertheless, it is as
well to give two or three recipes for making
them. (1) Orfila’s hair dye: Take three parts
of litharge (oxide of lead) and two of quicklime,
both in an impalpable powder, and mix them
carefully. When used, a portion of the powder
is mixed with hot water or milk, and applied
to the hair, the part being afterwards enveloped
in oil-skin or a cabbage-leaf for four or five
hours. (2) Litharge two parts, slaked lime one
part, chalk two parts, all finely powdered and
accurately mixed. When required for use mix
the powder with warm water, dip a brush
into the mixture, and rub the hair well with it.
After two hours let the hair be washed. (3)
Litharge 4½ ozs., quicklime ¾ oz.; reduce to an
impalpable powder, and pass it through a sieve.
Keep it in a dry, close bottle. Wash the hair
first with soap and water, then with tepid
water; wipe it dry, and comb with a clean
comb. Mix the dye in a saucer with hot water
to the consistence of cream, and apply to the
hair, beginning at the roots. Place over it four
folds of brown paper, saturated with hot water,
and drained till cool, and over this an oil-skin
44cap and a nightcap. Let it remain from four
to eight hours, according to the shade required.
When removed, oil the hair, but do not wet it
for three or four days. There always was an
objection to these powder-dyes through the time
consumed in the operation, but the following act
more quickly. (4) Take of lime (slaked by
exposure to damp air) two parts; carbonate of
lead (pure white lead) one part. Mix thoroughly,
pass the mixture through a gauze sieve, and at
once bottle it and keep the air from getting to
it. Used as the preceding, but acts in one-third
or one-fourth the time. The shade depends
chiefly on the length of its application. (5)
Chevallier: Take of fresh slaked lime 5 drachms;
water, 1½ oz. Mix, strain through gauze, and
pour the milky solution into a 4–oz. bottle.
Next take of sugar of lead 5 drachms, water
3 ozs.; dissolve. Add to this solution dry slaked
lime 1 drachm, and agitate them well together
for a few minutes. Wash the resulting precipitate
with a little distilled or soft water, drain,
and add it to the “milk of lime” in the 4–oz.
bottle. Lastly, shake the whole well together,
and again before use, if it be not at once applied.
It must be kept well corked, as the last, but
acts more quickly.
I can imagine the reader expressing surprise
after reading the foregoing; and to young men
in the trade it would appear marvellous that
people should submit to such an ordeal. That
45writers should condemn the use of “lead dyes”
(if the last recipe given be the kind alluded to),
I can very well understand; but liquid (lead)
preparations I do not consider open to such disapprobation.
One reason can be given why lead
solutions are preferable, that is, they do not
darken the skin; and, indeed, with liquid dyes
in the hands of a careful manipulator, there is
little occasion to touch the skin; but when
such an accident occurs, it ought to be wiped
off directly.
Liquid dyes are easily applied, more certain
in their effect, and, undoubtedly, less unpleasant
to those who have occasion to use them. Liquid
dyes may be divided into two classes, namely,
those which gradually darken the hair, and those
which produce an instantaneous change. Before
proceeding farther, it is advisable to note the
chemical constituents of hair, because a successful
result depends, to a certain extent, at least,
upon this being taken into consideration and
acted upon accordingly. It is known to scientific
men that the chemical constituents of hair,
according to the analysis of Vauquelin, are—animal
matter in considerable proportion; a
greenish black oil; a white concrete oil, in small
quantity; phosphate of lime; carbonate of lime,
a trace; oxide of manganese; iron, sulphur, and
silex. Red hair contains a reddish oil, a large
proportion of sulphur, and a small quantity of
iron. White hair exhibits a white oil, with
46phosphate of magnesia. The white hair of old
persons contains a maximum proportion of phosphate
of lime. In preparing a dye for the hair,
where the required element is absent it has to
be supplied by art. For illustration, in red hair
sulphur largely predominates, and as a consequence
the hair readily darkens; in white hair—the
white hair of aged persons—it is not to
be found; hence the necessity of supplying a
mordant to produce the desired effect.
To gradually darken the hair, then (assuming
that sulphur is still developed in the course of
its formation), a wash composed of a weak
solution of the salts of iron, such as the sulphate,
acetate, lactate, or protoiodide will be
sufficient. A very small quantity of glycerine
can be added at pleasure, but to the latter it
is necessary. Here are two or three recipes:—(6)
Sulphate of iron (green; crushed), 1 drachm;
rectified spirit, 1 fluid oz.; oil of rosemary, 10
or 12 drops; pure soft water, ½ pint; agitate
them together until solution and mixture are
complete. Many persons substitute the strongest
old ale for the “water” in the above. Another
formula is, (7) take of rust of iron, 1 drachm;
old ale (strongest), 1 pint; oil of rosemary, 12
or fifteen drops; put them into a bottle, very
loosely corked, agitate daily for ten or twelve
days, and then, after repose, decant the clear
portion for use. The following is said to be
a favourite among fashionable Parisians. (8)
47“Parisian.” Take of sulphate of iron (green),
15 to 20 grains; distilled verdigris, 5 or 6
grains; white wine (good), ¼ pint; eau de
Cologne (to scent), q.s.; mix. It should be
mentioned that all these washes will “iron-mould”
linen if they are brought in contact. Should
the foregoing not answer satisfactorily, the cause
will probably arise through the absence of the
normal sulphur of the hair, and in that case,
water containing a little sulphuret of potassium,
or hydrosulphuret of ammonia should be used
once or twice a week.
Much has been said concerning lead dyes,
and the injurious effects produced upon individuals
who have used them for any length of
time. Dr. Benjamin Godfrey, a gentleman with
whom I had the honour of being acquainted,
devoted considerable attention to this question,
and in his treatise on “Diseases of Hair,” published
in 1872, says: “The common hair cosmetics
of the present day contain lead. The
following is a rough analysis of the more
noted:—
“Mrs. S. A. Allen’s World’s Hair Restorer,
acetate of lead, sulphur and glycerine.
“Rossetter’s Hair Restorer, ditto.
“Simeon’s American Hair Restorer, ditto.
“Hall’s Vegetable Sicilian Hair Renewer, ditto.
“Aqua Amarella, ditto.
“Helmsley’s Celebrated Hair Restorer, ditto.
“Melmoth’s Oxford Hair Restorer, ditto.
48“Alex. Ross’s Great Hair Restorer, oxide of
lead, carbonate of lead, and potash.
“The quantity of lead in any of these could
not possibly do harm. The strongest contained
but ninety grains to the half-pint of water, the
weakest but three grains to a like bulk. Water
was the chief ingredient of them all. Sulphur,
sometimes in the form of milk of sulphur, was
used; in another, the common flower of sulphur;
sometimes acetate of lead, at other times oxide
of that metal. In all the chemical change is the
same, namely, the solution of the metal entering
into the filament by absorption, there unites with
sulphur, forming a sulphuret of the material
used. Hair is porous; sulphur exists in hair of
all colours, but is in excess in red and blonde
hair. This is why these hues become blackened
by the chemicals used more perfectly than any
other shades.
“Now, the question has been asked oftentimes,
whether the use of lead solutions as hair-dyes be
prejudicial to health or no?
“As this is a question of much importance, we
will look carefully into the matter.
“The absorbent power of the skin is not great
without we remove its outer covering. If we
desire to get remedies absorbed into the system,
we first blister the surface, remove the outer
covering, then sprinkle our drugs upon the derma,
and the material then goes into the body. In
the endermic method of giving medicines, we
49must perforate the skin to produce any effect.
The cuticle is the protecting agent—one of Dame
Nature’s waterproof coverings to keep out external
poisons.”
And again—“Now, the skin of the head is
additionally protected by an oily solution—the
sebaceous secretion—which forbids entirely the
absorption of any watery hair-dye. So, protected
with nature’s waterproof cape and oiled epidermis,
it is impossible for an aqueous solution to enter
the body and destroy life. I have carefully
analysed the cases recorded in which lead cosmetics
are said to have caused death. Almost
all the cases occurred in France, and lead, in an
ointment, had been used. Now, an unguent could
easily be absorbed by an oily skin; therefore
these accidents are at least probable. The watery
solutions of lead for the last ten years have been
used largely by thousands and tens of thousands
of beings in our land, yet not one single case has
been recorded of poisoning from their use....
I have seen patients who have used lead dyes
for twenty years, but not a single sign of lead
poisoning has been revealed.... In the
strongest hair-dye that I have examined there
has been but one quarter of an ounce in a half-pint
bottle of water, which would last the patient
at least a month. Putting all these things together,
one can state that the hair-dyes, as used
in England at the present day, cannot prove injurious
to the users.”
50Another writer, Dr. Southwood Smith, in his
“Philosophy of Health,” stated that, “Over the
external surface of the body, or the skin, there is
spread a thin layer of solid, inorganic, insensible
matter, like a varnish of india-rubber. The obvious
effect of such a barrier placed between the
external surface of the body and external objects
is to moderate the entrance of substances from
without. Hence the impunity with which the
most deadly poisons may remain in contact with
the skin, with which prussic acid, arsenic, corrosive
sublimate, may be touched and handled.”
And Sir Erasmus Wilson, F.R.S., writes: “The
epidermis acts as an impediment to absorption,
and as such is an important safeguard against the
admission of injurious and poisonous substances
into the blood. Thus we find that it is only after
long soaking, or by continued friction, that we
are enabled to overcome this natural defence, and
then only to a very partial extent.”
Of lead dyes the following recipes may be
found acceptable—(9) Brown hair dye: Acetate
of lead, 2 drachms; hyposulphite of soda, 1
drachm; rose-water, 14 ozs.; glycerine, 2 ozs.;
dissolve the acetate of lead and hyposulphite
in separate portions of the rose-water; filter
separately, mix the solutions, and add the
glycerine. The two following are from Dr. C. H.
Leonard’s work on “The Hair”: (10) Sugar of
lead, 40 grains; distilled water, 2 ozs.; apply
this to the hair thoroughly, and when about dry
51apply a solution of the sulphide of ammonium,
about one-fourth the strength of the British
Pharmacopœia solution. The objection to this is
its unpleasant odour. It gives, though, an
excellent brown or black colour to the hair,
according to the strength of the solutions employed,
and does not stain the scalp. (11) Brown
hair-dye: Acetate of lead, ½ drachm; flowers of
sulphur, 1 drachm; water, 4 ozs.; shake well
and apply night and morning for a week or so,
then decrease the frequency of the application,
gradually, to once a week, or once in two weeks.
This is a slow dye, yet one that answers fairly
when there is not much greyness in the hair. It
also is a very mild preparation. The deposit left
upon the skin can be easily brushed off when it
becomes dry. Like all of the lead dyes, it acts
best upon hair of a reddish tinge, though grey
hair is turned to a brownish colour by it. Its
effect upon light hair is to give more of a dark
brown tint to it.
I now offer some remarks on silver dyes, for
probably they are more in use than any of the
other kinds. One reason is, they are quicker in
their action, and, with careful manipulation, more
decided in effect. Before application, however
(indeed, before any dye can be effective), it is
important to thoroughly wash the hair with soda
or soap and water, which must be well rinsed out
with plenty of tepid or cold water, and the hair
dried. It is then ready for the dye. It should
52be borne in mind that silver dyes will stain
linen, the skin, and finger nails, and almost any
thing the dye is brought in contact with. Under
these circumstances, then, carefulness must be
observed. Sunlight, and the open air will produce
a permanent change in a few minutes; with
diffused daylight it takes much longer, perhaps
two or three hours. But science has stepped in,
and, with the employment of a good mordant, the
desired alteration of colour is effected almost instantaneously.
Should the skin, however, be
wetted with any of the dye, wipe it off directly,
for if left untouched, a dark mark will be the
result. A cloth damped with a solution of
hydrosulphuret of ammonia, or sulphuret of potassium,
and rubbed on the spots, will remove
recent marks. So will a solution of iodide or
cyanide of potassium, but these, on account of
their poisonous qualities, are best avoided.
Proper caution in using the dye, a pair of old
gloves to cover the hands, and some little
practical experience will prevent any unpleasant
results. (12) One solution, crystallised nitrate
of silver, 1 drachm; gum arabic, 1 drachm;
distilled water, 2 ozs.; mix. (13) Another: one
solution, nitrate of silver, 192 grains; distilled
water, 8 ozs. Dissolve and add gradually sufficient
of the strongest solution of ammonia to
precipitate the silver. Then, afterwards, just as
much as is necessary to redissolve the precipitate.
53The following dyes require two solutions, and
produce a rapid change: (14) No. 1. Hydrosulphate
of ammonia, 1 oz.; solution of potash, 3
drachms; distilled water, 1 oz.; mix. Apply
this with a tooth-brush, and in about a quarter
of an hour use.—No. 2. Nitrate of silver, 1
drachm; distilled water, 2 ozs. In all cases
when two liquids are employed, the vessels into
which they are poured, the brushes used for
applying them, combs, etc., must be kept separate,
otherwise the action of the dye upon the hair will
be destroyed. Generally, the mordant is used
first and the dye afterwards, but this order is
reversed in the following “Instantaneous Hair
Dye,” the recipe for making which is taken from
the work by Mr. A. J. Cooley. (15) The white
liquid, or “dye,” is a solution of nitrate of silver
(1 to 8, 12 to 16). This is applied first. It is
followed by the “mordant” (diluted). The latter
is usually a mixture of hydrosulphuret of ammonia
and distilled water, in nearly equal proportions.
The colour of the hair, unaltered by the silver
solution, instantly turns “brown” or “black,”
according to the strength of the dye, when
moistened with the hydrosulphuret. Then there
are “vegetable dyes,” “vegeto-mineral dyes,”
“animal dyes,” “pommade dyes,” and washes
for producing red, auburn, golden, golden brown,
and other shades of colour in the hair, but to go
fully into this subject at the present moment,
would be a little beside the object I have in view.
54I might dismiss the subject of dyeing “false
hair,” as it is called, with a few brief remarks,
seeing that hairdressers rarely think it worth their
while to perform the experiment; but, as it
sometimes happens, new hair has to be added to
that which is old and faded, to meet the requirements
of economical customers, then “how to
restore it” becomes a question. Of course, if
the hair be impoverished, and assumes a “foxy”
hue, it cannot be restored; but—what answers the
purpose just as well—it can be dyed. There is
only one other reason to be adduced, so far as I
can tell, for dyeing “false hair,” and that is,
when a tradesman has a quantity of red hair
by him which is unsaleable, and, consequently,
thinks proper to make it a more common colour.
Whether red-haired people have generally “good
crops,” or whether they darken their hair by the
use of suitable preparations, I will not pretend to
say; but certainly red hair is not very often in
request. White, grey, auburn, flaxen, and several
choice pale colours are too valuable to be interfered
with, and ordinary colours are sufficiently
plentiful without resorting to the use of dye.
To dye “false hair,” then, one of the lead and
sulphur dyes mentioned in the preceding pages will
answer every purpose, and its action may, in
some instances, be promoted by boiling. Or any of
the methods used in dyeing wool may be employed
with good effect, for, in this connection, there is
not much dissimilarity in hair and wool, and what
55will dye one will dye the other. In dyeing blacks,
and dark colours, logwood forms one of the principal
ingredients, and in conjunction with gallnuts
it imparts a lustrous appearance. It should
be used either hot or boiling, according to the
depth of colour required. The accompanying
formula is very effective. (16) Logwood, ¼ lb.;
copperas (sulphate of iron), 1 oz.; nut galls, 1 oz.;
and about 2 quarts of water. Boil for an hour,
or longer according to the shade required. It
is necessary to observe that the hair should be
taken out of the dye-bath several times, and
freely exposed to the air. This is called “airing,”
and is done to allow the oxygen of the atmosphere
to act upon the ingredients of the dye, and
especially on the iron; as without this action of
the air a good colour cannot be produced.
To possess a head of hair of the “golden”
blonde, flaxen, or auburn hue, has been the desire
of many ladies from time immemorial, and various
expedients have been resorted to to produce the
desired effect. At the present moment I do not
intend to dilate upon this subject, but of all substances
used for the purpose of bleaching or
blanching hair, whether it be upon or off the
head, nothing surpasses peroxide of hydrogen,
respecting which Mr. Alfred H. Mason says:—“The
best known application for peroxide of
hydrogen is probably in its employment as an
auricome for bleaching dark coloured hair, producing
the yellow tint: for this purpose a 10-volume
56solution is used, the hair is saturated
with it, and then exposed for two or three days,
when the oxygen is liberated and the hair partly
decolourised; if wanted in a shorter time, after
immersion the hair is dried in a water-bath for a
few hours, but the ultimate result is not so
satisfactory. A London hairdresser produces
white hair, and it is conjectured that he employs
a 20–volume solution, with the addition of strong
solution of ammonia, and so completely decolourises
and bleaches the hair, at the same
time rendering it practically destroyed excepting
so long as it holds together.”
I think enough has been said upon dyeing, to
enable the intelligent reader to overcome many of
the difficulties that are sure to arise in the course
of his business pursuits. The operation, whether
it be performed upon the growing hair, or upon
that which is faded and dead, must be carried out
with carefulness and patience to ensure a satisfactory
result. Men in all branches of science,
have to perform one experiment after another
before they can achieve success, and hairdressers,
if they wish to be clever in their profession, must
be content to do the same.
CHAPTER V.
57
The First Lesson in Wig-making, Weaving the Hair—“Once
In,” Close or Ringlet Weft—“Twice In,” or
Front Weft—“Thrice In,” Crop, or Wig Weft—“Fly”
Weft, for Top rows—Making Ringlet Bunches—Tufts—Curls
on Combs—Alexandra Curls.
I now approach the second and, perhaps,
most important part of my work, viz.,
the art of Wig-making, and under that
heading I intend dealing with the manufacture of
Ringlets; “Tails,” Twists, or Switches; Plaits;
Bandeaux; Fronts; Chignons; Scalpettes;
Fillets; Scalps; Wigs; and, in short, everything
which appertains to this branch of the
business. Weaving is one of the first lessons
which a boy has to learn in a hairdresser’s shop
where “a knowledge of board-work is required.”
No matter whether he is employed in a first-class
establishment where superior work has to be
done, or in a shop of less pretension, good weaving
should be aimed at, and demands primary
consideration. In some of the principal houses,
professional weavers are engaged, who take the
hair home with them, and bring it back when
completed, receiving so much per yard for their
labour, the price being regulated by the kind of
58weft made. This practice is generally pursued,
for assistants have not much time or inclination
to weave, their services being more valuable, so
this operation is confided to other and less skilful
hands; but whoever does it, or wherever it is
done, excellence should always be aimed at.
Every hairdresser is more or less acquainted
with the weaving-frame, therefore I need not
give particular instructions in reference thereto.
Besides, the accompanying illustration indicates
nearly all that I would say about it.
Fig. 1.
From the above it will be seen that the hair to
be woven is placed in the brushes which lie upon
the table; the roots allowed to project a little,
and convenient to the workman’s hand. The
three “strings” as they are sometimes called, are
in reality silk, one skein of weaving-silk being
wound round each groove of the weaving-peg.
The silk can be had either fine, medium, or coarse,
according to the taste or requirement of the user.
59A tack is generally driven into the other peg
(to which the “silks,” by means of a loop, are
attached) and around it the weft is wound as it
increases in quantity, or occasion may demand.
When the “frame” is in position, all the silks
ought to be of an equal degree of tension—neither
too tight nor yet too slack; and a “jockey” should
be provided in the event of its being wanted. Do
not bear heavily upon the silks in a clumsy manner;
avoid weaving too much in one place, and as
the weft lengthens, work higher up, towards the
weaving peg. By observing these rules you may
escape the annoyance of the silks breaking—a
vexatious mishap, which sometimes necessitates
undoing that which is done, and re-weaving it.
Should a silk break, however, you must tie it
close to the last weft, but there is a particular
way of fastening which can easily be shown but
is awkward to describe.
60
Fig. 2.
“Once In” weft, which has several designations,
and is also indicated by the letter N, is
chiefly used when a moderate quantity of hair is
required to be put together in a small compass.
It is employed for “top-rows,” “bunches” or
“tufts,” “twists” or “tails,” plaits, chignons, etc.
To enable the reader more easily to comprehend
the modus operandi, I will for the sake of convenience
number the silks 1, 2, 3, beginning at
the bottom. On the next page an illustration of
the weft is given, to do which proceed as follows.
Draw out a weft and hold it firmly between the
thumb and finger of the left hand. Also, gather
the silks together as indicated in Fig. 1, and with
the index finger of the right hand push the roots
between 1 and 2, and draw them towards you between
2 and 3. Turn the root over the top silk;
draw it between 3 and 2; pass it under 1 and 2,
drawing it through 3 and 2 again. Finally, turn
the roots over the top and draw them between the
two lower silks. Then hold the longest portion
of the hair with the thumb and finger of the left
hand, firmly hold the roots in a similar manner
with the right, and draw them up as close, i.e., as
short as possible to the silks, at the same time
sliding the weft down to its destination, as shown
in the first engraving. Push up close with the
thumb and finger of the right hand, and, should
the hair be stubborn, it will be necessary to use
the “jockey,” of which I spoke before. This
procedure appears somewhat difficult to the uninitiated,
no doubt; but I think that persons in
the trade will find it tolerably easy. If properly
61executed, the work will be regular and smooth—not
“gouty,” as it sometimes appears when done
by a careless person, but firm and compact. This
kind of weft, or, indeed, any kind of weft, can be
made coarse or fine, according to the purpose for
which it is intended; but however thick or thin it
may be, the work must be uniform and evenly set.
Fig. 3.
“Twice In,” or Front Weft (Fig. 3), somewhat
resembles, when the silks are open, the letter M,
and to do this properly the weaving has to be increased
so as to keep the wefts farther apart, and
withal, firm. Should the weft be loosely done, it
will be unpleasant to sew up, and the job when
completed is not likely to be durable or satisfactory.
Follow the directions previously given, until
you come to “drawing it through 3 and 2 again.”
Having done this, continue as follows:—Pass it
under 1 and 2, draw it through 3 and 2, turn it
over the top, and end as before by bringing the
roots through (or between) the lower silks.
62This kind of weft can be executed by an expert
both rapidly and well, but perhaps a yard an hour
would be considered satisfactory, especially if it
were found perfect when completed.
“Thrice In,” Crop, or Wig Weft, should be
very finely made, taking about six or eight hairs
at a time to make a weft, depending of course
on the quality of the hair used. Each weft
should be tolerably wide apart, and firmly woven,
if durability in a wig be required. When it is
remembered that twenty or thirty yards are
wanted in the manufacture of a gentleman’s wig,
my reason for saying that the wefts should be
fine and well-set must be apparent, for were it
otherwise, the article would be heavy and uncomfortable
to the wearer. Lightness ought
never to be lost sight of in matters of this
description, neither should strength and durability
be forgotten. Bearing these instructions in mind
then, proceed as though you were going to make
“Front weft” but giving the hair a turn or two
more, and end by drawing the roots through
between the lower silks. Nimble fingers can
do this kind of weft in a very expeditious
manner, and I have heard of regular weavers
making about three yards of wig weft in an
hour—so much for constant practice.
“Fly” weft, for top rows, lies very close
and compact; the roots fly apart or separate
from the other portion of the hair, and they are
either to be removed by the scissors, or else
63pressed downwards with hot pinching-irons previous
to cutting down the weft. Indeed, it
would be advantageous to “pinch” all pieces
of close weft, where flatness and neatness are
desired. “Fly” weft covers work very nicely;
it should always be finely done and pushed up
close. It is made the same way as “once in,”
but with this exception, namely,—instead of
drawing the roots “between the two lower silks”
at the last movement, draw them again through
the top ones. The roots will stand out or “fly”
in an upward direction, and it may be necessary
to use a “jockey.” By preference, press the
roots with hot irons instead of cutting them off,
for a weft or two might come out in wear,
and then, to say the least, it would look unsightly,
and jeopardise the rest.
I shall have occasion to refer again to weaving,
but enough has been said for the present.
“Ringlet bunches” applies chiefly to side curls
made of ringlet hair, irrespective of the length of
hair, or quantity. They can be sewn up close,
showing a back as well as front; with all the
weft concealed except that upon the top, or in
diamond shaped-openings, as shown in Fig. 4.
64
Fig. 4.
The illustration represents one of a pair of
“bunches” made with three-quarters of an ounce
of fourteen-inch ringlet hair. To begin then:
separate the hair, putting the curls which turn
one way together, and do the same with the
others. All curls which come from the hair-merchant
turn both right and left—two ringlets
to one lock of hair. In making up either,
always remember that the curls should be so
arranged as to “turn to the face,” for if you
do not attend to this at the beginning, the curl
is not likely to form or droop properly, and
there will most likely be a “cramp” necessitating
its being rolled up again and heat applied.
With new work this is best avoided, and by
attention to the instructions the curls will be
made “right and left” as they always ought to
be. Next weigh the hair, putting an equal
quantity into each scale. Tie up each lot;
card it properly, and it will assume almost of
itself, or with a very little help, a curl. Now
65you have two curls, tied at the roots, and inclining
one to the right and the other to the left.
Take one of them, place it in the brushes, and
weave (see Fig. 2); when woven, comb it out
carefully while on the frame, and form several
ringlets all turning the same way. Cut the middle
silk six or eight inches from the weft, tie it to the
others, and fasten off securely. Now weave the
other tress, making the weft to correspond, so as
to resemble the first piece as much as possible, in
every respect; the curls of course being all turned
in a reverse direction. Fasten off and cut down as
before. You have now the weft for a pair of curls,
and it has to be sewn up. Take one of the pieces,
and double it, pressing the fold with your thumb
and finger so as to temporarily mark it. This will
give the centre of the piece. Fold one of these
halves into three (so as to get at the width to
make them) and then let the top one go loose.
You are now holding between the thumb and
finger of the left hand two rows of weft. Sew the
end to the adjoining row with silk specially made
for trade use, and the stitches are all to be in one
spot. Then sew at a proper distance again and
again in the same manner, and this will complete
the two lower rows of weft. Take up another
row, so arranging as to bring the stitches exactly
in the centre of the “diamond” until you get to
the end of that row. Do the same with any other
rows until completed. Pull into form with the
thumb and finger; slightly damp the weft, and
66press into shape with warm pinching-irons. The
other bunch, of course, is to be made to match. If
intended for stock they had better be attached
with the needle and silk, so as to keep the
“bunches” together, otherwise they will get
mixed and cause confusion.
I must here observe that the experienced eye
will notice a slight difference between the letterpress
description and the illustration. I did not
perceive the error until too late, but for the sake
of accuracy I think it necessary to draw attention
to it. The weft as shown in the engraving passes
from bottom to top and vice versâ, whereas in the
description it is in rows—one above the other. The
artist has in the main given the design correctly
enough, but the modus operandi by which it is produced
is not so clearly indicated as I would desire.
Sometimes the weft is sewn up close, and that
is more particularly the case when space is taken
into consideration. If the work has to cover a
rather large surface, it is best to sew it up in
diamond shapes, but if it is to be condensed, then
the wefts should be fine, close, and made up
in as compact a manner as possible. Take, for
instance, another lot of hair, the same in weight
and length as the preceding. Observe the instructions
given concerning its division, and weave as
before. Measure off as previously described, and
supposing that you allow for six rows of weft,
proceed as follows:—Fold back one over and
above the other, and securely stitch the end by
67way of a commencement. Push the needle towards
you through the centre of the lower row of weft,
and from you through the upper row of weft.
Avoid sewing “over and over.” Keep all the
stitches small, and the sewing-silk is not to be
doubled. Having worked in this way from end to
end, take another row of weft, and put in position
over the lower row. Sew it as before described,
and so on until the whole is completed. The weft
will be seen at the back, occupying, when made
up, about half the depth required in Fig. 4. The
worker must be particular in keeping the rows of
weft straight and flat, which he can easily do with
attention and the proper use of his thumb and
finger. I say “finger,” because curled hair should
never be held in the hand, for the warmth of the
hand is likely to cramp or weaken the curl. Comb
out, press, and dress as before described. Another
way, so as to hide the weft altogether, excepting
the top row, can be done when required. Take
a similar lot of hair, and weave it. Commence
sewing up as before, and when the two rows are
done, instead of turning the weft backwards and
forwards so as to show the work, turn it round and
round in order to conceal it, still sewing-up flat
as previously described.
Tufts of hair are side pieces or curls, and the
weft is wound round a side comb instead of being
sewn upon it, as will presently be mentioned.
The word “tuft” may be applied to almost any
small piece of postiche hair, whether it be upon a
68comb or a hair-pin, as “pin-curls” are made. I
have seldom heard the designation of “tuft”
applied to any piece of hair in a London shop,
though I have known it to be common in some
parts of the country, therefore it may be taken to
be a provincial more than a common term used in
the trade. Tufts, then, can be made of any length
and thickness, depending entirely upon the use for
which they are intended. Two tufts, i.e., two
bunches of lightly-formed ringlet curls, might be
employed in a lady’s coiffure with considerable
advantage. They could be placed behind the
ears, or so arranged near the tie (or knot) as to
form a pretty cache-peigne, while “pin-curls”
could be put wherever fancy might direct. To
make the tufts, take fine weft, and side combs
with rather open teeth. Arrange both hair and
combs for the right and left sides. Fasten the
weft to that part of the comb which is intended
to go nearest the forehead, and let the hair hang
towards the face. Having secured the weft with
needle and silk, cut the silk off, leaving only the
weft upon the comb. Then commence winding up
the weft around the back of the comb, keeping it
firm, and allowing one row of weft to go between
each tooth. Each layer of weft conceals that
which precedes it, and the weft should all be used
up before reaching the top. About two-thirds of
the back of the comb might be covered, and when
this is reached finish off with the needle. The
hair will be found in a rather rough condition, but
69that does not much signify to a patient workman.
It will be necessary to get some one to hold it
(which must be done with both hands, to prevent
any undue strain upon the comb) while you disentangle
the hair, turning the curl over the work on
the back of the comb. Put it on a block, press
the work with warm irons, and dress out in the
form required. “Pin-curls” are simply pieces of
weft of short curled hair, and made up after the
manner just described.
Fig. 5.
Curls on combs, when nicely made, are very
effective, being intended to wear at the sides.
Tortoise-shell combs should be used, rather open
teeth, and “grailed,” of a pliable quality, and
those known in the trade as “rights” and “lefts”
I have always found to be the best for this kind
of work. Divide, and prepare the hair as in the
previous instances. Weave one row of “fly weft”
out of each piece, and this should be as long as
the fine teeth of the comb extend. Begin and
finish this weft in a secure manner, and let each
piece be distinct from the other. Pinch, and cut
down. Weave the other two pieces in the
ordinary way, beginning and finishing off each
one separately. Comb out, pinch, and cut down.
You have now four distinct pieces of weft,
a long and a short, fine piece for each comb.
Take the longest piece of weft and fold it into
two, three, or four lengths (as the case may be),
each length being at least a quarter of an inch
shorter than the fine-toothed part of the comb.
70Sew it up close, because, in this instance, the
work has to be “condensed.” You cannot make
the weft too flat, and, of course, the weft is to lie
upon the comb. Comb out and pinch. Take up
the comb, say, for the right side, and the “fly”
weft for that side also. Hold the curls drooping
in your left hand, and the comb (the concave
part uppermost) in your right. Pass the teeth
of the comb through the hair nearest the weft,
and then pull it gently into its place. Take your
needle and silk and, as needle-women say, “fasten
on.” This part of the job is to be done carefully,
taking one stitch to each tooth (the weft being
down towards the points), the reason for this is
to avoid breaking the teeth. Bear in mind to
make the stitches loose, otherwise the weft will
not fit into its right position close to the top of
the comb; but if they are too slack the work
will not keep in its place at all. This important
point, like many others, can only be gained
by observation and practice. The “fly” weft,
remember, is in the concave or hollow part of the
comb, while the “twice in” weft is to be on
the convex, or upper part. Take this part, then
and put it into its place. Incline it towards
the points to allow the needle to pass through
easily. Fasten on, and make a stitch to every
tooth as before. Push it up close to the “top”
row, and with two or three small stitches taken
at random connect the whole together. Pursue
the same plan with respect to the one intended
71for the opposite side, when, of course, they will
form a pair. Comb out, press with curling irons,
and arrange. I may say, inter alia, that while the
hair is in a rough, dishevelled
state, a little—only a little—of
the very best olive oil, nicely perfumed,
should be applied. It
facilitates the action of the comb,
renders the hair easier to dress,
and adds a gloss to it which, if
not overdone, heightens the effect.
Pomade of any kind should not
be used to curled, or, indeed, to
any kind of “false” hair. My
reason for saying so is, that it
tends to “clog” the hair, does
not impart such a fine gloss,
and causes it sooner to become
sticky.
“Alexandra curls” form a very
pretty addition to the coiffure.
The curl or curls are occasionally
made with a portion of the back
hair set apart for the purpose, but
it sometimes happens that there
is not sufficient in quantity or
length, or that it will not retain
the curl, and then the necessity
arises for artificial aid. The long
ringlet curls here represented, were named after
Her Royal Highness the Princess of Wales, and
72for a great length of time remained in fashion.
Sometimes two or more are worn, and in that case,
they would be so disposed as to fall in front and
behind the shoulder. They add a charm to the coiffure,
and impart a nice finish to the whole. They
are made as follows:—Take three-quarters of an
ounce of eighteen-inch hair, or an ounce of twenty-inch
hair, and so on in proportion according to the
length. The hair must be specially prepared for
the purpose, otherwise the curl will be too heavy,
and “break” towards the top. To prepare the
hair for Alexandra curls take, say, half an ounce
of twenty-inch, and a like quantity of twelve-inch
hair, curled. Card and mix the two lengths
together, which, if properly done, will form a
long curl, and light at the bottom as it should
be. But Messrs. R. Hovenden and Sons, as
well as other hair merchants, keep “taper curled
hair for Alexandra curls” in stock, of divers
lengths and shades of colour, and it is much better
to obtain the hair already manipulated, than to do
it oneself. The mode of making these curls is
similar to that adopted for making hair-twists,
and fully described in the next chapter. Having
been sewn up, the hair must be carefully combed
out, pinched at the top where the work is, and
dressed. A long stick, termed a “curl-stick,” is
generally used for the latter purpose; the hair
being adroitly put round it (commencing at the
top, not at the bottom) and brushed; the stick
is then withdrawn and the curls remain as shown
on the previous page.
1. Spanish Coil Chignon. 2. Beatrice Chignon. 3. Straight Hair Bandeau. 4. Cable Twists, for making the Spanish Coil Chignon, &c.
CHAPTER VI.
73
Making Twists, “Tails,” or Switches—Back and Side
Plaits—Chignon Universel—The Zephyr Coiffure—Semi-waved
Curled Chignon—A Novel Chignon—Of
Chignons in general.
Twists, “Tails” or Switches are made
first into sections or stems, and two, three,
four, or five, are required to form a complete
twist, or “tail.” The word “tail” is used
more as a trade term than anything else, although
I have seen it written upon tickets attached to
long pieces of hair, exposed for sale in hairdressers’
shop-windows. It is not by any means an
elegant way to indicate the article, and “torsade”
or “twist,” is, to my thinking, preferable. The
number of stems employed is, generally, three,
and they may be long or short, according to
the length of hair; the purpose for which the
article is designed; and last, but not least, the
price. And here, again, the price, as well as the
style of manufacture, admits of great variety. A
twist can be made to sell for pounds, or shillings,
according to the colour, length, thickness, quality,
and workmanship. These are matters with which
persons engaged in the trade are well acquainted,
and I need not further refer to them.
74
Fig. 6.
Here is the method of making a twist. Take
two ounces of twenty-inch straight hair, and divide
into three parts, but one part is to be thicker than
either of the other two, so as to allow for a top
row, in addition, being made from it. Having
done this, tie each lot, temporarily, so as to keep
it intact. Fix the weaving frame, and three
silks, as on previous occasions. Put the thickest
portion into the brushes, and weave a very fine
top row of “once-in” weft, about three and a-half
inches in length. This is not to be cut down, but
go on weaving the remaining portion of the tress
of hair; the only difference being that it is to be
coarser. The weaving should be graduated, as it
were, so as to avoid an abrupt thickness of the
weft, for it would, doubtless, spoil the appearance
of the work. Plait up in three, and twist the
weft round the weaving peg. Leave a space of
about four or five inches, and then resume.
Commence with a very fine weft, and weave it in
the usual manner, taking care to secure it firmly
to the silks by a little extra-close weaving. There
is a special way of doing this which an expert can
easily show, but it is difficult here to describe.
Another way of proceeding is to press the first
portion with warm irons, cut down, and then
begin again, of course without making another
top row. Weave the third and remaining tress in
the same way, and the work then is ready for
sewing up.
Fig. 7.
To sew up, take a rather short but plain
75weaving peg, and bore a hole in it about five or
six inches from the top. Through this hole pass
a stout wire, bend it down to keep it in its place,
and form a hook at the bottom; turn the other
part of the wire in a corresponding direction, but
leaving a piece standing out to form a handle. If
this is designed properly, it can easily be turned
round and round without becoming detached from
its position. Take a piece of black tape, Russian
cord, or some other suitable material, about the
length of the weft; tie a knot at top and fix it to
the wire hook. Commence about an inch from the
bottom, by sewing the thick end of the weft to
the lower part, and having done so, break off the
silk. Begin, then, turning the handle of the wire
above described; this will cause the tape or cord
to twist, and when sufficiently twisted, it will be
proper to roll the weft upon it. Having done so
for a little distance, turn the wire again, so as to
keep it firm; continue this till the end of the
weft is reached, and then fasten off. (See the
accompanying illustration of one of the stems,
Fig 6.)
It will be necessary to observe that each row of
weft should lie close to and above the preceding
row, and when there is much weft to be rolled or
twisted up it ought to be stitched in several
places. Now, having completely made two of the
stems, make the third one, i.e., the one with the
top row attached. Sew this up as before
instructed until you come to the top row, when
76stop. Take the other two stems, and place the
free ends of the tape, cord, or whatever may be
the material used, with that which you are now
working, and stitch them all together. Having
done so, begin sewing the top row, neatly, and
well, but having started it, take sufficient Russian
cord to make a loop, put it in its place, cover all
with the top row, and finish off securely. Each
stem is to be pinched separately, and pinched
again when completed. (Fig. 7.)
These twists are exceedingly useful, and if well-made,
with hair of good quality and length, they
can be applied to a number of purposes in connection
77with the coiffure. They may be twisted up
with the back hair, made into a plait or plaits,
used as a solid twist or a light torsade for a coronet,
or back hair dressing. Speaking of a torsade,
the following instructions, taken from “Lessons in
Hairdressing,” will doubtless prove acceptable.
That which I am about to describe is known by
the names of Torsade Dondel, Torsade Repoussée,
Torsade Gouffrée. It is made “with a long thin
strand of hair, and is hollow when completed;
consequently, where lightness is required, two or
three of these may be introduced with charming
effect. Proceed to make it in the following
manner:—Take a piece of hair from twenty-four
to thirty inches long, and separate a thin strand,
which afterwards serves as a ‘draw.’ This put
on one side till wanted. Divide the hair into two
equal parts, and friz well upon the inner side, at
the same time spreading out the hair so as to make
it wide and flat. It may then be compared (for
further illustrating my instructions) to a long and
somewhat wide strip of cardboard. Hold the end
in your left hand, and turn upon the thumb of the
right hand, which, for the purpose, should be
placed near to the top, or roots. Having given it
a bend, it then forms a ‘hollow,’ which is to be so
twisted upon itself, and in a spiral direction to the
end. Then either pin down temporarily or get
the lady to hold it. Proceed in the same manner
with the second portion. Having done so, take
one end in each hand and twist both together,
78being particular to pass that held by the left hand
over that held by the right. Take then the little
strand of hair, and pass it round the torsade in such
a manner that it falls into every second space.
Hold the end firmly, and push up the frizzed twist;
fasten off, and place in position.”
Fig. 8.
It will be seen that when neatly done the whole
forms a hollow and “puffed up” twist, light in
construction, full in appearance, and very suitable
for a coronet or as an embellishment to the
chignon.
In the hairdressing business there are innumerable
changes of fashion, while the various
requirements of different individuals continually
make demands upon the practical knowledge of
those who carry on the trade. Some articles that
I have spoken of, and others to which I shall
have occasion to refer, are “not in fashion,” but
there is an occasional demand for something or
another that would puzzle many who profess to
know how to make almost everything. It is the
duty of a hairdresser to assist nature in matters
appertaining to the chevelure, for thin locks have
to be supplemented by artificial aid, and bald
heads not unfrequently require to be covered. It
79is not at all times pride and vanity that causes
people to resort to the use of “false hair,” as it is
termed, any more than it is pride and vanity
which compels some folk to use spectacles, wear
false teeth, or have recourse to surgical mechanicians
for their especial aid and comfort. I could
laugh at the remarks occasionally given expression
to, for “goody-goody” people seem inclined to
condemn in others that which they can dispense
with themselves.
To resume. A back plait with a flat top can be
made from any quantity or length of hair. It may
be wide or narrow as circumstances require, and
although the twist before described is in general
requisition, yet there are occasions when a flat
top is most convenient and suitable. Take half-an-ounce
of twenty-inch hair, and two ounces of
eighteen. Close, or “once in” weft, throughout.
Weave the long hair moderately fine for the top
row, or rows, and the eighteen-inch hair should be
woven rather coarse, but uniform from beginning
to end. There should not be a “break,” for all the
weft must be in one piece. Pinch, temporarily
plait in “threes,” and cut down. Decide upon the
width the plait is to be made, and sew up firm
and regular.
Side Plaits are made with sixteen or eighteen
inch hair, after the manner of closely-sewn ringlet
bunches; two or three loops are attached to each
bunch through which a piece of wide galloon or
ribbon is passed. This serves to fasten them to
80the head, and as they are made to slide, the
width apart can be adjusted according to the discretion
of the wearer. I have also made side
plaits on combs, after the method adopted for
making curls on combs, leaving the ends of the
plaits to be fixed by the wearer, or by “tacking”
them to the combs after being plaited.
The ends of these side plaits should be securely
fastened by means of black thread, and the whole
neatly covered with a piece of ribbon.
Concerning the plaiting of hair, the reader is
referred to “Lessons in Hairdressing,” wherein
copious instructions are given.
Fig. 9.
The “Chignon Universel,” as it is called, is a
clever arrangement for making good a deficiency
in the back hair; it is most convenient, and unmistakably
“defies detection.” To be made with
81smooth hair on the top, with the underneath hair
either créolé, or plain. If fulness be desired the
former plan is most expedient, or else long frizzettes
should be introduced. But much depends upon
the length and thickness of the hair and the way
it is going to be arranged. To manufacture the
Chignon Universel proceed as follows:—Take half
an ounce of twenty-two inch hair, and having previously
selected a comb, weave sufficient “fly”
weft to make a top row, pinch, securely fasten off,
and cut down. Then take two ounces of twenty-inch
hair, which is to be woven rather coarse, and
I need scarcely add, close, or “once in” weft;
the object being to get as much hair as possible
into the smallest compass. Sew up as though you
were going to make an ordinary back plait according
to the instructions previously given. Pinch, and
make it as flat as you can. Cover the top of the
comb with a piece of strong net, such as is used in
wig-making, and do all the sewing on the front part
of it, so that when finished it shall present a neat
appearance, as shown in the illustration.[5] Securely
stitch the piece made with the twenty-inch hair to
the net, at the top part of the comb, and in such
a way that it lies flat. Then take the piece of
“fly” weft, and (putting the roots underneath)
sew it on the top, so as to cover all. Press, and
comb out the hair. When completed, the work
ought to look as compact and pretty as it does in
the wood-cut annexed.
82Ability comes with practice, and as I am writing
for the benefit of those who desire to improve, I
would just hint that they need not be afraid of
doing their work too well. At the outset inferior
productions might reasonably be expected, but, as
the apprentice or improver advances, better work
should be forthcoming. There is an old saying
that “practice makes perfect,” and that is exemplified
in numberless instances every day.
Fig. 10.
Some few years ago several of the leading hairdressers
met together, by arrangement, and discussed
the necessity which then existed for the
introduction of a new style of coiffure. The once-fashionable
83chignon, with its accompanying
plaits and twists had disappeared, and the
coiffeur’s art began to decline in consequence.
Besides, ladies complained of the meagre fashion
which succeeded the more elaborate style of
hairdressing, and a change, for more reasons
than one, was considered necessary. I need not
pause here to discuss the importance of the
coiffure, or the pleasing effect which is produced
when the hair is arranged in harmony with the
features. All ladies’ coiffeurs are well aware of
it, and at the meeting in question it was decided
to introduce something new and of almost universal
application in reference to ladies’ hairdressing.
But the time was not sufficiently ripe for a
change—the little knot and the fringed brow
had taken too great a hold of the popular fancy.
However the innovation was of a tasteful and
serviceable character, and in expert hands could be
made to assume a number of charming designs.
It was called “The Zephyr Coiffure,” and is
made as follows:—Take some tapered curled hair
from sixteen to twenty inches in length, and about
an ounce and a quarter in weight. Weaken the
curl to within six inches of the points, and sew up
on three separate pieces of galloon or net, about a
quarter of an inch wide, keeping it flat and soft.
The stems may be four or five inches in length, or
longer, according to circumstances, while another
description is made of a lesser quantity of hair,
shorter in proportion, and sewn up in the usual
84way of making twists or “tails.” (See accompanying
illustrations.)
The first pieces described can be arranged in
puffs, undulations, rouleaux, knots, or twists, but
those made upon the last-named principle are
more suited for plaits, but leaving the ends
curled.
Fig. 11.
The experienced coiffeur will see at a glance
what can be done when these additions are introduced.
With the lady’s own chevelure, and the use
of two or more of these pieces of hair, a dressing
can be devised at once light and elegant, high on
the head as with a long coronet, by inserting the
85stems one into the other and concealing the loops,
or low on the neck with tight or fluffy curls.
Again, the stems can be incorporated with the
back hair, and the curled ends arranged over and
upon the forehead. Should the head of hair be of
a poor description, through its being short and
thin, then three, or at most four, of these tresses
will probably be required. The following headdress
has been executed to give the reader some
idea of the adaptability of these pretty additions to
almost any style of hairdressing, while the advantages
to be derived from the curled ends may
readily be discerned.
Fig. 12.
86In presenting this description of the Zephyr
Coiffure, I would remark that not one, but at least
twenty different styles can be executed with the
help of these necessary adjuncts, and, further, the
chignon can be made large or small according to
the taste or requirements of the wearer, as can
easily be imagined.
Fig. 13.
While speaking of taper-curled hair, I am reminded
of a semi-waved curled chignon which
is light in construction and produces a very
pretty effect. Of course it can be made either
large or small, thick or thin, with longer or
shorter hair, and a practised hand will see at
a glance its general utility. This cache-peigne
can be worn with a comb, or embellished with
87flowers, and, moreover, it presents a most natural
appearance. (See Fig. 14.)
Fig. 14.
To make the chignon, take about 3½ ozs. of
taper ringlet hair, a part of which is to be
twelve inches, another part fourteen, and so on
up to the longest, which should be about twenty
inches. Instead of weaving upon three silks in
the usual manner, fine wire is to be substituted for
the centre one. Let the weft be very good, and
88sew up into a diamond-shaped foundation. (Reference
to Chapter V. will show what is meant.)
With this quantity of hair the mount should be,
when completed, about four inches wide and
seven inches long. The weft required is about
three yards, and must be so arranged that the
shorter hair is kept at the top, while the longest
comes to the bottom. To make the wavings,
undo the curl a little here and there and friz
underneath, or it can be weakened by means of
a warm iron. Another cache-peigne I have made
on a similar principle, but very much lighter, and,
with proper dressing, it appears to be nearly as
full. Take ¾ oz. or 1 oz. of taper ringlet hair,
twelve, sixteen and twenty inches long. Weave
and sew up as before directed. In dressing, each
curl should be very carefully frizzed in the inside,
and disposed without the aid of the curl-stick,
if possible. By adopting this method, the curls
will be very thin and light, and obtain, through
frizzing, all the fulness required.
A novel chignon was designed, some time ago,
by Mr. Joseph Kubelka (Vienna), which consists of
the ingenious combination of two ordinary “tails”
or “twists,” and is worthy of reproduction here.
Its formation will be seen at a glance,[6] and the
method of arrangement is first made upon the
hand (the tops being held by some person, or else
temporarily fixed to a table), and a “bodkin”
must be employed in working the design. This
89bodkin can be made of tortoise-shell, ivory, or
bone, but it must have an opening sufficiently
large to encircle the free ends of the hair. (The
illustration given below indicates very clearly how
the plait is to be made.)
Fig. 15.
By means of this contrivance the hair is drawn
through spaces easily made by the fingers, and, as
can readily be discerned, the plaited chignon well
holds itself together. The final disposition of the
ends must be completed upon the head, when they
(as well as the natural hair) should be made into
90rouleaux, etc., as may be found most convenient
and tasteful. Where lightness has to be considered,
perhaps two well-covered inserted stems
might take the place of a quantity of hair—a
hint which is not likely to be overlooked by
clever hairdressers.
Fig. 16.
91Probably, at this juncture, some remarks on
chignons in general will not be thought out of
place. Chignons may be considered as “old as
the hills,” for the word simply means as I interpret
it—a back hair dressing without reference to
any particular shape. Were I to designate the mere
“knot” at the back of the head a chignon, perhaps
my meaning would not be clearly understood,
but it is in reality as much a chignon as the
most elaborate one could be. In the ordinary
acceptation of the word, however, a fanciful style
of dressing the back hair is meant, and “Board-work”
would not be complete without special
allusion being made to chignons, seeing that their
manufacture a few years ago gave employment to
thousands of people of both sexes.
M. Alphonse Bouchard, writing in The Hairdresser’s
Chronicle on the subject of “False
Hair,” says that “the compilers of the General
Catalogue of the Universal Exhibition, 1867,
have given us figures, which it would be very
difficult to check; but they, no doubt, used the
same sources which I have had recourse to, and
to prove the exactness and authority of this essay,
I shall quote a few data.
“This official document reports as follows:—The
manufacture of hair is to-day of very great
importance. Paris is the place where the hair is
well prepared, and where the headdresses arrive
at the highest degree of perfection. The price of
raw hair, says this catalogue, is about 50 francs
92on an average per kilo. It was 65 francs in
1865; and it is said to have been sold even at
100 francs. The price of prepared hair is 140
francs the kilo. The price of postiches is about
40 francs apiece; the prices of the fashionable
coiffures, called chignons, range from 15 francs
to 200 francs, and even as far as 500 francs
apiece. In France about 70,000 kilos. of cut
hair are sold. Of this quantity 40,000 kilos.
are French, and 20,000 kilos. are imported from
Italy, Belgium, Germany and other countries.
8,000 kilos. are collected in the workshops and
other places; this is called ‘waste.’ America,
England and Prussia buy 30,000 kilos. of hair
of us; 25,000 kilos. are used in France in the
manufacture of postiches; and about 13,000 kilos.
are exported to different countries. Marseilles
is next to Paris in importance for the hair
trade. M. Joseph Mathieu has given us some
curious details on the hair trade in Marseilles.
He tells us, that the statutes of the wig-makers
of Marseilles date from 1696. Their number
was for a long time limited to twenty. In
1760, the master-wigmakers of Marseilles, seeing
that a large number of ladies’ hairdressers established
themselves in that city, commenced
an action against them. But a decree of the
20th June, 1761, rejected these pretensions, and
gave full and entire freedom to the ladies’ hairdressers
to exercise their calling.
“In 1789, the number of hairdressers and
93ladies’ hairdressers of Marseilles was considerable.
It is well known how complicated the
headdresses of that period were, and according to
the records of that time, Marseilles was one of
the first cities in France for elegance and good
taste.
“After the Revolution the number of hairdressers
increased gradually, but it is more
especially during the last ten years that this
increase has been mostly noticed, and to-day we
have at Marseilles 397 coiffeurs.
“Four houses, employing about forty workmen,
hold the monopoly of the hair trade. The
trade has increased fourfold during the last thirty
years. The houses in the trade receive together
annually 6,000 kilos. of hair, from the Tyrol,
Bohemia, Dalmatia and Italy. Having been
worked, 3,000 kilos. of this quantity is sent to
the provinces and to foreign countries, and 3,000
kilos. remain for town consumption.
“It is estimated that of these, 500 kilos. are
used for men’s wigs, and 2,500 kilos. for postiches
for women. The postiches, chignons, cache-folies
and false plaits are employed to such an extent,
that there are at Marseilles actually 75,000
women, or the whole grown-up female population,
who wear false hair. This observation applies
equally to Paris and to some large towns abroad.
All coiffeurs at Marseilles trade in chignons
more or less, and their annual production of this
article amounts to 55,000. Of these, 30,000 are
94sent to the provinces, and 25,000 are sold in the
city and its suburbs.
1. Coiled Chignon, measuring thirty-six inches, or more, when undone. 2. Pair of side Frizzetts. 3. Seven Strand Double Plait. 4. Marguerite Plait: This can be plaited in 4, 5, 6, or 7 strands, as may be decided upon. 5. Bertha Frizzett (set of three), for Plaited Chignon: The stems are made with straight hair inserted, of medium thickness, and seventeen inches in length.
“Corresponding with the advance of education
in France, the difficulty to find young countrywomen
who are ready to part with their chevelure
increases. Nowadays it requires a sum of money
to induce a girl to undergo the ordeal of the
cutter’s scissors; consequently we have been
obliged to go elsewhere in search of this article,
principally to Germany, Austria, Italy, and more
particularly to Sicily, the Neapolitan provinces,
and the former Papal states. The large religious
communities of women furnish also great quantities
of hair. In certain Catholic countries the
hair of the novice who enters a religious order
is sold for the benefit of the convent where
the vow is taken, and those beautiful tresses,
sacrificed at the foot of the altar by virgins
who renounce the world, return to it again other
heads to adorn. The Italian hair is imported
into France viâ Marseilles, and the figure of
this importation reached in 1865 17,367 kilos.
95“In 1830, the value of raw and manufactured
hair exported from France amounted to 104,488
francs; in 1865 it had increased to 1,206,605
francs. Numbers of people at Paris, at Marseilles,
and in other large towns, have realised
fortunes in the hair trade. Let us mention
one house in the Palais Royal quarter which, in
1868, did business to the amount of 1,552,000
francs. We may safely say that the French
hairdressers sell annually 68,000 kilos. of hair,
which, made into plaits, curls, crape, etc., represents
a sum of 80,000,000 francs. Let us further
mention that another house sold, within sixteen
months, in 1871 and 1872, 16,000 chignons, at
prices varying from 12 to 70 francs each, but
of course there are much more expensive ones
sold, chignons of a natural red or golden tinted
hair, which is principally imported from Scotland,
being the most expensive.”[7]
From the foregoing, the reader can learn what
the trade was a few years ago; but what it is
now, his every-day experience can answer.
Undoubtedly the manufacture of chignons was
a thriving trade so long as it lasted, and we
96have it on record that of a certain dyed material
termed “hair” (which it greatly resembled) “hundreds
of thousands of tons” were used in the
making of frizzettes, pads, etc.[8]
It would be useless now to enter upon the
method of constructing chignons, for their patterns
are almost endless; but with inserted stems,
or pads, and suitable hair, an ingenious hairdresser
ought to be able, after what I have already said,
to make several of neat and pretty designs.
CHAPTER VII.
97
Scalpettes and Fringes; general remarks thereon—Curled
and Waved Fringes—“Water Waves”—Mounting and
Making Scalpettes.
Baldness is not by any means confined
to the male sex, for females, through illness,
accouchements, neuralgic pains in the
head, constitutional weakness, frequent head-aches,
tying the hair improperly, overmuch crimping, and
other causes—frequently experience a loss of hair.
True, this can easily be concealed by means of
headdresses, bows, ribbons, flowers, lace, and so
forth, but young and middle-aged ladies do not
find it convenient to have recourse to such artifices
at all times. Formerly, bandeaux and “fronts”
were employed to conceal this defective condition
of the hair, and they are still in request by elderly
people and those whose means are limited. But
now, thanks to the ingenuity of ladies’ hairdressers,
the “scalpette” has been invented, and
it may truly be regarded as a veritable work of
art. What is a scalpette? As this is comparatively
a new word, it will be advisable to dwell
for a moment upon its meaning. I therefore consider
it to signify an artificial covering for concealing
a deficiency of hair, or to cover a bald place
upon the female head—but not a wig. Just the
98same as a “scalp” is an artificial covering for
the bald head of a man—but it is not a wig.
Assuming, then, that my definition is correct,
those of my readers who have much to do with
board-work will readily perceive the variable
nature of the invention. A scalpette can be made
to cover a small space, or the entire top of the
head; it can be formed with or without a “fringe;”
with or without a parting or partings. It can be
manufactured with long straight hair, or short
curly hair, or both. It can be “knotted” upon
gauze or a “human hair foundation,” and made,
figuratively speaking, “as light as a feather,” or
it can be woven, and mounted with net and
galloon, which is, doubtless, more durable and less
expensive. In short, a scalpette can be adapted to
any possible requirement, and that there is a demand
for such manufactures at good prices in
certain localities, both in town and country, will
not, probably, be contradicted.
Speaking of sundry ingenious contrivances for
concealing bald patches, and helping thin partings
to an improved appearance, the Queen newspaper
observes that the modes of covering thin partings
are various. “First, if the head is very bald at
the top, a scalpette of straight hair is added; this
comes to a point in front, so that any hairs that
may remain on the forehead are seen; the partings
of this scalpette are made of hair, and are quite
invisible; secondly a scalpette of small curls is
laid over the parting; it rests quite flat on the
99head, and is dressy and becoming; and thirdly, a
scalpette of short straight hair, which forms a
fringe in front, and mingles with the wearer’s own
hair at the sides. The mode of concealing a
thinness of the hair at the sides is to insert a piece
of long hair, mounted on the most invisible of hair
partings. This thinness at the sides is generally
accompanied by the same at the top of the head;
the addition is then made to conceal all together.
The wearer’s own hair is parted at the side, the
addition added and kept in its place by a few
hairs brought over, and then the whole dressed
together, the added piece being quite imperceptible.
Another mode is the scalpette which
curls at the top, and has straight hair coming
from it on either side. When an entire covering
is necessary, there is the invisible topee. These
cover the parting with short hair, and are on the
principle of a front without either springs or
strings.”
It will appear, as my work advances, how
scalpettes can be manufactured, but a knowledge
of mounting and knotting must first be acquired,
and the other will follow in due course.
Fringes are of a less difficult character, at least
the majority of them, but some of the more
elaborate ones must, for the reasons given above,
stand over for the present.
100
Fig. 17.
Here is one[9], however, of simple construction,
which is made on a wire foundation. Take half
an ounce of six-inch hair in tight Sevigny curls.
Adjust the weaving-frame, with a wire (instead
of silk) in the centre, as has been before described.
Make about fifteen inches of close or “once-in”
weft. Comb out the hair carefully, curl up, and
securely finish off the weft. Cut down. Fold
the weft in three equal portions, and neatly, yet
firmly, sew the ends together. Take a piece of
watch-spring, one-and-a-half or two inches long,
and adapt it to fit the bend of the head. Round
off the ends, which is to be done with a small, fine
file, or by rubbing the corners on a stone. Protect
the ends with a piece of waxed kid, thin leather,
or parchment, and then cover the spring with
galloon. The galloon should be as narrow as
possible, with the ends carefully turned in and
stitched; it must also be sewn “over and over”
at the sides. Gently hammer to make it as flat
as possible; and I need scarcely observe that the
stitches in this, and all other work should be
small and almost invisible. Having thus prepared
the spring, put it in position, namely, in the centre
of the mount, the lower end being inside the weft,
to which it is to be sewn. Sew the top row to
101the top of the spring, while the centre row of weft
is, of course, to be attached to the middle of the
spring. Tack the “fringe” on to a block, and
dress in a number of small curls, as shown in the
illustration.
Another way is to take three-quarters of an
ounce of short, tight curled hair, and make twenty
inches of weft or more. Sew up into four rows
and put two springs, each one to be full an inch
from the ends. In this case, the springs must not
be quite so long as the previous one. Dress out
as before.
Fig. 18.
Waved Fringes[10] are made of curled hair, perhaps
twelve or fourteen inches in length, or more, as
occasion may require. The hair is closely woven
upon silks, and sewn up in diamond fashion; the
width and depth of the same being left to the
maker’s judgment. This scalpette is very light
and lies flat upon the front of the head and forehead.
The curl is “broken” by means of damping
and a warm iron, and sometimes by a “touch,”
but only experts can do it properly. Of course,
102fringes can be made of all sizes and shapes; that
matter is generally regulated by the parties concerned,
and the price which is to be paid for the
article. Some cover the whole front—in that case
they would be nine or ten inches long, or even
longer, while others are somewhat narrow, extending
from front to back; others again have long
hair at the sides (only a small portion it is true);
but “circumstances alter cases,” and the requirements
of customers have to be considered.
But the most elegant, vapoury, and artistic
“fringes” are, par excellence, those which come
under the designation of “water waves,” so-called,
I presume, because water plays an important part
in their manufacture. M. Eugene Ménard delivered
a very instructive lecture on this subject
at the Académie Internationale de Coiffure,
in 1884, and perhaps I cannot do better than
quote a portion of it. He said, “Any quality
of hair, curled or straight, fine or coarse, can be
made into water waves, with more or less trouble;
but it is certain that fine natural curly hair is the
best for that purpose. In default of this hair,
which is now very scarce, I should suggest what
we call, in French, ‘Croquignoles.’ This will be
found a capital substitute. The next after this,
is what is termed in this country, ‘tight curl,’ and
so on, but taking coarse and straight hair for the
last, as they never will keep waved. In every
instance the hair to be used for water waves, must
be well tapered, and as much as possible of a
103pliable nature. As to blocks, those of porcelain
or cardboard, covered with prepared calf’s skin or
vellum, will be found the most handy and useful
for the purpose. Some, I am aware, make use of
plain sheet-iron or glass, and yet, after having
spent much time over it, they are disappointed at
not getting a better result. Why? Because it
stands to reason that water waves made in that
way, when placed on the head, will not fit any
better than the sheet-glass itself, the waves being
bound to take the exact shape of that upon which
they are made. Therefore, this method will never
do, and the idea must be rejected. Others make
use of wooden blocks; certainly, when these are
new they are quite as good as porcelain, but after
they have been put into the oven two or three
times—for water waves require to be thoroughly
well dried—these blocks become rough and
cracked, and consequently, quite useless for that
kind of work. Some might, perhaps, object to
have the water waves dried in the oven, and
would prefer the front of the fire only; if so, my
answer would be this: The wood block merely
put to the front of the fire might bear the heat
once or twice more before being spoilt, but the
water waves dried in like manner, would assuredly
never last half the time they would if dried in the
oven. Experience shows that the oven is the
only recipient in which damp hair can be
thoroughly well dried, i.e., that the water waves
will last with a natural waving appearance.
104“Taking for granted that porcelain and cardboard
blocks never crack nor become rough by
a temperate heat, I will now demonstrate the
second great advantage of these two blocks.
“Firstly, I shall deal with the porcelain block,
which will be found very suitable for making
smooth and perfect water waves, any kind of
mounted postiche, such as fringes, partings, fronts,
scalpettes, etc. Here, I dare say, an apparent
difficulty will be found, as neither pins nor points
can be driven into porcelain. Therefore, in order
to avoid it, I should advise that the block be perforated
in four or six different parts, according to
the shape of the mounted postiche to be dressed, and
then to fill the holes with a piece of best quality
cork, into which to drive pins and to fix therewith
any piece of mounted postiche. By so doing
the apparent difficulty will be very easily and
simply overcome. For instance, place first on the
block the scalpette, front, parting, or fringe, in the
same way as it is to be placed on the lady’s head
by whom it is to be worn, and fix it with four or
six pins; next, wet the hair right through, and
then when thoroughly saturated with water or
spirits of wine, brush or comb it down quite flat
on the block, and proceed thus: Maintain the
mounting or the last wave made, with the medium
finger, lift up gently the hair with the thumb of
the same hand, and with the comb in the other
hand, wet again to the utmost and make the wave,
between the two said fingers, according to your
105wish of the way required. When two or more
waves are made, keep the annular finger on the
penultimate made wave and support the mounting
with the little finger, till you get to the end.
Then wet with moderation in upholding the waves,
and lift them up again. If necessary, cover the
dressed piece of postiche with fine muslin or net, so
as to see whether the waves are in or out of order;
put it into the oven, which must be as hot as the
hair can bear without being injured; take it off
when thoroughly dried; let it get quite cold;
pass the comb through the waves, flatten them
with the hand, and then you will get waves as
smooth and as natural as can be imagined. I dare
say these water waves would cause many an experienced
eye to be perplexed in the event of
being called upon to make a distinction between
them and natural ones. Never divide the hair
when the divided parts are intended to make but
one wave; at least, do not let it dry in that state,
or else the hair will never join together, and the
waves—if not entirely disfigured—will be, at least,
awry or crooked. On the contrary, wave the
whole of the hair at once, even if it is a scalpette—I
mean if it is only one wave all round, it is
not more difficult, and the waves will be regular.
When the hair, however, is over ten or twelve
inches long, the first two or three rows of waves
might be made separately, but then they must
be joined together before proceeding any farther.
Another thing to be observed in making water
106waves is, that they be perfect before drying.
When the porcelain block becomes dirty, wash
it with soap or soda.
“I shall now proceed with covered cardboard
blocks. Vellum or prepared calf’s skin, as suggested,
is, for the subject I am treating, best
adapted to cover cardboard blocks with. These
blocks will be found useful for almost any kind
of postiche to be dressed in fantaisie water waves,
more especially for light pieces, such as curls on
pins, marteaux for crown chignons, flat twists, false
nuques relevées, transformations, loose or unmounted
hair, as used by M. Auguste Petit, of Paris, for
his well-known “Universal Postiche,” etc. The
way of proceeding for this kind of water waves
is quite different to the former. It will take
more time to get the waves made, as it necessitates
two distinct preparations. On the first one—although
it is very easy to make—will depend
the success of the second; and on this second
preparation, which requires some little taste to
make properly, will depend the success of the
waves, whose beauty is to get them methodically
hollow. To proceed: Take the marteau or any
other mounted or unmounted piece of hair—if
mounted, the mounting must be straight and not
exceeding two inches wide, so as to get the waves
perfect from beginning to end—saturate it well,
and pin it on the block, then comb it straight,
hold it flat between the index and the medium
fingers of both hands, and start, either side, by
107making a kind of zigzag in the same way as you
would make waves with curls, varying from one
to two inches and a-half wide, according to thickness
and size of waves wanted. These zigzags
must be very regularly made, and great care taken
in order to always have the hair perfectly straight,
or in other words, to prevent the underneath hair
coming over, and vice versâ. Starting from the
right side, pull the whole of the piece of hair with
the two above-mentioned fingers of the hand;
keep the piece of hair loose, and close to the block,
between the two same fingers of the left hand,
just in the middle of the zigzag; leave off, first,
the medium finger of the right hand, elevate it a
little, weigh gently on the hair with the index,
take this finger off, fix the part made of the
zigzag with a pin; proceed in the same manner
with the left hand, and go on alternately till you
get at the end of the piece of hair to be waved.
Curl the extreme point of the hair if thought
necessary. Then put it into the oven and let it
well dry. Here ends the first preparation.
“Now for the second. When the zigzag piece
of hair is quite cold, take off the pins that served
to fix it on the block, pass the comb through, friz
it underneath, if necessary, place and fix it again
on the block, but dry this time, tap slightly over
it, fix another pin at each extremity of the
intended waves, attach a thin thread or cotton to
the first pin, pass that cotton or thread pretty
tightly over the zigzag—which will now soon be
108a wave,—widen this in forming the hollow by the
help of the fine teeth of a dressing comb, tighten
the thread, stop it at the pin opposite the one from
which the thread comes, and so on till the last wave
is made. Then damp the dressed piece of postiche,
put it once more into the oven; let it thoroughly
well dry; and when quite cold, take off pins and
filament, and you will get some splendid water
waves ready to wear. When pins driven into the
skin-covering of the block leave a kind of rough
bump caused by the heat, pass over it the pressing
iron, and it will become flat and smooth again.
Now, concerning the liquid to be used—I am of
opinion that warm water, previously boiled with
a very little soda in it, is the very best component
to wet the hair with for water waves; boiling
water and soda, or potash if preferred, having both
the property of softening the hair; but, of course,
this is only recommended for dark colours. For
light ones, suppress the soda, and for grey or
white hair, let the boiling water get quite cold,
and add to it a very little of Reckitt’s blue, so as
to prevent the hair from turning of a yellowish
tint. To dry this hair it will be also very prudent
to cover it with light blue tissue paper. Spirits
of wine is also a very good liquid to make use of
for water waves; it does not soften the hair so
much as the above-stated, but on the other hand,
it causes the waves made with it to last much
longer. To make use of it, like water, a great
quantity is required, more especially when waves
109are to be made on a porcelain block; therefore,
unless a great number of waves are made with it,
it would cost very often more than the piece of
postiche itself. It is more adapted for hair
merchants or coiffeurs posticheurs. Great care
must be taken in using spirits of wine, chiefly
when postiche dressed with it is drying at the front
of the fire. The slightest spark would be enough
to spoil it.
Scalpettes and fringes, as I have before
indicated, admit of great variety. Indeed, both
in make and style of dressing, there is ample
scope for the coiffeur to exhibit his skill, and
those scalpettes of a fanciful and gossamer-like
character are remarkable for taste and ingenuity.
Fig. 19.
To make one as indicated above, with which
long straight hair is associated, take ten, twelve
or more inches of galloon (according to the size
decided upon), double it together, and sew firmly
at the ends, leaving, say, a quarter of an inch free.
Find the centre of the galloon, tack it by means
of “points” to the forehead portion of a clean
110wig-block, and affix the ends in a similar way;
your object being to make a “mount” about
three inches deep in the centre, four, five, or
six inches long, and tapering off at the sides.
The galloon ends, of which I spoke just now,
must be at the top, so that when taken off the
block only a fine seam is noticeable. Having
attended to this, the mount has to be “basted”
and formed. The one I am describing is of a
diamond shape, and the basting stitches are to
be at the bottom, top, and sides. Drive a
point into the centre of the block an inch and
a half below where you purpose the lower part
of the mount to be. Use stout cotton, single,
tie a knot at the end of it, and attach to the
“point”; take a firm stitch through the galloon
and draw it gently down into position. Twist
the cotton round and round the “point,” finishing
with a loop made with the finger; then take
one or more similar stitches upon each side
terminating in a like way. Give the “point” a
tap or two with the hammer, bend it down,
and knock the head of it into the block. Proceed
with the top in a like fashion, and then
the ends, or sides. You have now made a step
towards “mounting,” and that which I have
described is not by any means difficult of
execution.
It must be borne in mind that I am not
addressing myself to novices, but to young
men who, at all events, have some knowledge
111of the trade, and I presume they will not
experience much trouble in getting a practical
illustration from a friend should they require it.
To proceed; take the block in your lap, and
commence sewing on the net. Begin on the
right-hand side of the inside edge of the bottom
galloon, the stitches being moderately close
together. Having reached the left-hand corner,
turn the block round, and commence sewing in
the same manner to the inside edge of the top
piece of galloon. While all this is being done
pull the net tight, keep it smooth and avoid
“puckering,” cut away the superfluous net, but—and
this is important—the edge of the net
which is stitched to the mount ought to well
cover two-thirds of the galloon. Now you have
both galloon and net upon the block, and the
work ought to be strong and secure. A spring,
rubbed or filed down, and covered as before
described, is to be placed in the centre; but it
must not overlap the mount, either at top or
bottom.
About half an ounce of short, curled hair (or
less, according to the size of the mount) and an
equal quantity of sixteen or eighteen inch straight
hair will, perhaps, be sufficient; but more can
be added if desired. The hair has to be made
up into rather fine front-weft or “twice-in.” The
straight hair weft should also be fine, and equally
divided; but the curled hair can be left all in
one piece. Sew the straight hair on to the
112sides first; begin at the point (or end of the
mount), and let the rows of weft be firm,
regular, and at equal distances from each other.
I need scarcely say that the straight hair has to
be incorporated with the wearer’s own hair when
it is dressed, and then two or three hair-pins will
keep the “fringe” in place. That portion of the
mount to be covered with straight hair will
depend upon circumstances, of which you must
be the judge. The curled hair has now to be
sewn to the mount. “Fasten on securely,” as
seamstresses would say, and sew along the
bottom of the galloon, from right to left, taking
about one stitch to every weft. Turn the block,
and sew another row along the upper part of the
galloon, being careful to cover the free edge of
the net, which thus becomes stitched a second
time by this operation. The rows of weft are
sewn in a like manner until the mount is
covered. When turning the weft see that it
is done neatly where it joins the straight hair,
so that no irregularity or ugly spaces are visible.
The weft has now to be pressed (for which
a special tool called a “pressing-iron” is used),
and the hair properly arranged. Cut the basting
stitches, pull them out from the mount, and
examine your work. If the stitches are very
small, the weft even, the mount a good shape,
and the work unmistakably firm and secure, I
should pronounce it to be satisfactory; but if
there be imperfections in any of these respects,
113then follow the best advice it is possible to give,
and, “Try, try, try again.”
Fig. 20.
This design shows a scalpette, intended to cover
the top of the head, and, when it is worn, the
straight hair should be tied, or twisted in with
the natural hair at the back. A covering of
this description is very useful when a bald
place exists, or there is a thinness of the natural
growth of the hair.
In making it, the following instructions should
be observed: Upon a clean block, mark with a
black lead pencil (in its proper position) the form
and size of the mount wanted. Take a piece of
galloon and commence by driving a point or two
through it, somewhere about the temple. Keep it
firm by means of points, as you proceed along the
pencilled lines, until both ends of the galloon meet.
Cut off, but leave sufficient length to take hold of
114with the thumb and finger. Pinch together, and
with needle and silk sew tight and close, leaving
short ends as before. I will suppose that you intend
to put on a mount four inches deep, and five inches
wide, in shape nearly square, the front (or lower
galloon) being drawn down a little. You will
have to put basting stitches at the four corners,
and also in the centre to make it the desired form.
Sew on a piece of galloon extending from left to
right, an inch and a-half from the top, one spring
in the middle, and others if necessary to keep the
corners out. Cover with net, and the mount is
complete. You now have an inch and a-half
space for the back hair and two and a-half inches
space for the front, the joinings taking place upon
the piece of galloon affixed for the purpose.
Sew on the straight hair first, and then the
curled, observing the directions before given.
About half an ounce of short curled hair will
be sufficient for the one part, and three-quarters
of an ounce of sixteen or eighteen-inch hair for
the other. Fine weft; press, finish off, and a
reference to the illustration[11] will show its arrangement.
A great many articles of this description are
“knotted” instead of being woven, and it is
simply mentioned here to enable me to say that
I shall deal with that part of the subject
by-and-bye.
CHAPTER VIII.
115
The Changeability of Fashion—Bandeaux, Fronts, and
Fillets—Plain Bandeaux—Waved Bandeaux, with
Fringe—To Wave the Hair of Bandeaux—French
(woven) Fronts—French (woven) Fronts, with Parting—Diamond-shaped
and Wing Fronts—Temple-mounted
Fronts—Fillets or Cauls.
Fashion is ever changing, and the fickle
goddess does not seem to know her own
mind for very long together. And this
remark is as applicable to hairdressing as it is to
dress, or, indeed, anything else with which the
leaders of ton have to do. To coiffeurs nothing
perhaps is more interesting than a perusal of old
illustrated books, and to note the various styles of
coiffure. Fifty years ago, when Felix displayed
his talent in hairdressing, the front was distinguished
by a cluster of curls, made with properly
cut and tapered hair of about seven or eight
inches in length, and these curls were designated
“frizzed,” or “French curls.” Old hairdressers
can remember the “French Fronts,” to which I
shall merely allude. They were made upon wires,
with full and round curls (though done with a
thin layer of hair), and the roots as well as the
points were woven in together. There would
probably be five, six, or seven of these curls
upon each side; but for an illustration of them
I can only refer the reader to the fashions of bye-gone
116days. At the period to which I am referring
(and long after), it was no uncommon thing to
find in hairdressers’ shops a large stock of fronts
and bands, and though they may never come into
general use again, still, those who wish to be
proficient in board-work, should learn how to make
them. To be well-grounded in the rudiments of
any trade is of the greatest importance, for all
must have a beginning, and the more skilful work
of the clever tradesman will surely follow after.
There used to be a good demand for French
(woven) Ringlet Fronts, and being so light and
pretty, the ingenious way of making them, I think,
ought to be preserved.
Fig. 21.
The weaving frame, then, resembles that which
was before shown, but has more silks upon it. The
peg is specially made for this kind of work, and
117there are a number of grooves for the silks, but
one with twelve spaces will perhaps answer every
purpose. Wind the silks upon it in the usual
way, and tie up in groups of three according to
the customary mode. Let each knot (which
forms a stop to the weft) be in a line, thus—⋮
and have nine of the silks placed in position
as shown in the illustration.[12] Take first a piece
of straight hair of the same colour as the curls,
and about twelve inches long, and draw out
what is best described as a coarse weft. This
has to be plaited, as it were, upon all the silks
employed in making the “front.” Hold the root
end between the thumb and finger of the left
hand, having the long hair uppermost. Commence
by placing it at the back of the lower
silk, and draw it through. Then over two, under
(or behind) three, over two and behind the top
one. Continue in the same fashion downwards,
but reversing the movement until the whole of
the hair is worked up. Plait tight; but it can
be made close and firm by pulling the hair as
frequently as possible to get it into shape. (See
the ends and centre of the next engraving.)
Having thus worked the hair, finish off at the
lower three silks by drawing the ends towards
you, and leave it so for the present. Take three-quarters
of an ounce, or an ounce of twelve-inch
ringlet hair, and divide into two equal parts,
bearing in mind that the curls have to be separated
118and classed together, and also that curls
should always turn to the face, as I have repeatedly
stated. Place the proper portion into
the drawing brushes, and weave five inches of
moderately fine close weft upon the three lower
silks. Next make four inches and three-quarters
of the same description of weft upon
the three middle silks, leaving a quarter of
an inch space between the end of the plait and
the weft; the reason for doing so will presently
appear. Now weave five inches of the same kind
of weft upon the three top silks, and the end of each
row must be regular. Draw off another coarse
strand of the straight hair, and plait all the silks
together as before. Three rows of weft are
now to be done exactly the same, leaving the
quarter of an inch space at the corresponding
end; then take a third strand of straight hair and
make a finishing plait as at the beginning. The
whole length of the “front” should be eleven
inches, including the plaited ends, and centre
piece. The above illustration is so plain that
no mistake can possibly arise if proper attention
119be given to the subject. Comb out the
hair as each row is completed, and form into curls.
Now warm a pair of pinching irons, press each
section of the weft, and carefully remove with
the scissors all superfluous ends and hairs. Cut
the centre silk of each group of three, finish off
securely and then cut down. I said just now
that the reason for leaving the space at the ends
of the middle row of weft would shortly appear,
and you are now to take hold of those three
silks and pull them. Do so at each end, the
result will be to shorten the centre row; thus
enabling you, with the help of springs, to form
the mount as designed.[13] Make two springs, file
down the ends, cover with kid or parchment,
and sew them up in narrow galloon. Stitch the
sides nicely, and fix them to each row of weft
by means of a needle and silk. The springs
120may be about two inches long, and, of course,
must be put on carefully. Strings of galloon
are to be affixed, and so far as the making is
concerned, the job is finished.
Fig. 22.
Fig. 23.
It is now to be placed upon a block, pressed
and dressed as indicated in the wood-cut (p. 119).
The number of curls is immaterial, for the hair
may be arranged in three upon each side, or
there might be as many as a dozen.
In addition to the kind just described, there
is another way of proceeding so as to introduce
a patent silk, or skin parting. These fronts
can be made very light, and seeing that there
is no net and but little galloon, ventilation does
not suffer impediment. Proceed as follows:—Set
up the weaving frame as shown in Fig. 21,
but instead of nine silks there are now to be
twelve. Tie them in threes as before, and intertwine
a piece of straight, twelve-inch hair according
to the following directions:—Hold the
root end, pointing downwards, firmly between the
thumb and finger of the left hand, and also the
lower silk. Push the long hair through, pass two
silks, and bring the hair to the front again.
Then pass three, push the hair through, and pass
three more, draw it forward, pass two, and over
the top one. The hair plait (for plait it is) is
now to be continued downwards, but the movements
are to be reversed. I will describe this in
another way. Say that you are holding the hair
in the manner set forth above, together with the
121first lowest silk—now—over one, under two, over
three, under three, over two, under one, and over
the top, reversing the order of plaiting up and
down till the length of hair is all used. You
must “manœuvre” or work it a little, so as to
get it tight, firm, and regular, and fasten off as
previously instructed. Take three-quarters of an
ounce, or an ounce, of ringlet hair of the required
length, say ten or twelve inches. Separate
the curls, putting all those which turn one
way together, and do the same with the other
lot. Bear in mind that curls should always
turn to the face. Weigh the two portions,
so that you may have an equal quantity of
hair to work with. Make four inches and three-quarters
of weft on the lower silks; four-and-a-half
inches of weft on the next group; a like
quantity on the group above, and five-and-a-quarter
inches of weft upon the top. There is
to be a vacancy of a quarter of an inch (near the
plait) in the second and third rows, and this will
explain why they differ from the lower one. As
there is to be a patent parting, a space of an
inch and a-half (but this depends upon the width
of the parting) must be left in the centre to
which you have now arrived; the top row forming
an exception, and that is to be woven right along,
without any break whatever.
Commence weaving in the order just described
upon the other side, leaving the quarter-inch
spaces at the ends of the second and third rows
122as before. Complete the weaving of the top
row; see that the weft joins properly in the
middle, because all should be uniform and regular.
Make a corresponding plait to that which you
did at the beginning; pinch the weft with warm
irons; fasten off securely, and cut down.
Fig. 24.
It has now to be mounted. Take a clean
wig-block—there are two kinds, let me observe,
“mounting” blocks and “combing” blocks—but
it is to the former that I am alluding.
Partings vary in depth, but the front here
pourtrayed is four inches deep, and I will
assume that you are going to make a similar
one. Have some ribbon the full width of the
parting (after the edges of the latter are tacked),
and cut off five inches. Turn up the lower edge
of the ribbon and lay the smooth surface upon
the block, exactly in the centre, and just where
the front should be worn when upon the head.
Drive two points into the block, at short but
123equal distances from each other; take a needle
and cotton, single, tie a knot, and “fasten on” to
a point: pass the needle through one corner of the
ribbon, and secure the cotton to the point below.
Proceed in the same way with the other corner.
Turn the block round, bend up the end of the
ribbon as before, and secure the corners by
means of basting stitches in a like manner.
Remember, that in weaving I directed quarter-inch
spaces to be left at both ends of the two
inner rows of weft. Now draw the silks out a
quarter of an inch so as to bring the weft close to
the plait, for by this movement you will be enabled
to spread out the top and bottom rows to the
ends of the springs, while the centre rows are
tightened and nearly straight, as they should be.
Next sew the strings on to the plaited ends;
make two springs, each a full quarter of an inch
deeper than the parting; cover as previously
instructed, and fix in their appointed places.
(Fig. 24 clearly pourtrays all that is here
described.) The two middle rows of weft need
not be sewn to them yet. Now place all upon
the block, get the mounted ribbon exactly in
the middle, take hold of the strings, pull tight
and drive a point through them at the back, in
the place where they should be tied by the
wearer. Arrange so as to keep the top row of
hair out of the way; let the lower silks be a
quarter of an inch above the place where the
parting touches the forehead, and fix all in their
124respective positions by means of a needle and
silk. Secure the two middle rows of weft to the
springs in the same way. Now to affix the
parting. Turn in the edges of the silk or skin
upon which the parting is worked, and “tack”
them in such a manner that the lowest portion
(being the most important) is turned up last.
The parting is now to be sewn neatly to the
ribbon, commencing at the bottom; both should
exactly fit, and, what is most important, only the
parting is to be seen where it touches the brow.
Fig. 25.
The pressing iron can now be used, the curls—be
they many or few—arranged, a pair of side-combs
placed in position if desired, and the front
is finished, as above shown.
There are other fronts with ringlet curls beside
those just described. For instance, there is a
mounted front of a diamond shape, which is made
to slide, technically called a “diamond” front. It
125is made as follows: cut off two pieces of galloon
about eight or nine inches in length each. Sew
the ends (through and through, not over and over)
neat and firm; these are for the two sides. Place
one of them upon a block, in the position it is
intended to be worn. The ends of the galloon
(where it has been sewn) must be uppermost at
any place except a corner. Open the ends and
hammer slightly, so as to make them lie as flat
as possible. Take four points, and spread out the
galloon in a diamond shape, so that it will be
about two inches deep, and perhaps four inches
long. Now take your needle and cotton, points,
&c., and baste out in the required form; the
upper and lower bastings (where the springs go)
to be somewhat pointed; the ends are to be
square, equal to the width of the galloon forming
the strings. Make another mounting on the
corresponding side of the block, and both must
be alike in every particular. Upon the block
(between the right and left sides of the mountings)
a space of two inches or more should be
left, because the wearer’s own hair must be seen
when the curls are worn. Bear in mind this
is to be a sliding front, and the lady will be
able to adjust the curls to her own wishes or
taste. Now, the two sides being in their proper
positions, and firmly secured by means of the
basting stitches, sew a piece of galloon on one
side only from one end to the other; the reason
for doing so will presently be given. Cut off
126sufficient galloon for the strings, and this must be
long enough to encircle the head, leaving plenty
to tie in a double bow as well. Find the centre of
the galloon, and temporarily fasten it with a point
between the mounts. One of these strings is to
be continued along the mount, corresponding with
that upon which a piece of galloon has been
sewn, the remainder being fastened by means
of a point in the neck. The other half is to
be abruptly turned back over the crown, and
temporarily secured to keep it out of the way.
Measure off two springs, grind the ends, cover
with narrow galloon as previously instructed, and
fix in their respective places. Put on the net;
sew it to the inner edges of the mount only, and
to both sides of the centre galloons and springs.
The mountings are now ready for the hair.
Take sufficient hair, say one ounce of twelve-inch
ringlet, and divide it equally. Weave a top
row first, and ordinary front weft with the remainder.
Do the same with the second lot of
hair. Remember what I have said before—“All
curls should turn to the face.” Sew on the weft,
beginning at the bottom of the lower galloon,
turn the corners neatly; let the weft appear in
regular rows, and, lastly, sew on the top row.
Comb out the hair and curl it over the fingers in
proper form before doing the other side, which,
when done, is to be treated in a similar manner.
Warm your pressing iron, divide the weft in conveniently
small portions, and press carefully.
127Take the mountings off the block, and now I
will give my reason for sewing on the first piece
of galloon, namely, because this is the mounting
intended to slide. Cut off another piece of galloon
an inch longer than appears to be necessary.
Turn in about half an inch at one end, and sew
the corners securely to one of the ends of the
mount. Neatly stitch the edge of this piece of
galloon to the edge of that which is attached to
the mount, but before fastening off, turn in the
free end as you did at the beginning. Sew along
the other edge of the galloon as before, and secure
the stitches. Now there is a hollow space for the
string to travel through, and a bodkin is the
necessary instrument for leading it in the first
instance. Replace the front upon the block,
dress and arrange the curls as required.
Wing Fronts are made in a similar way, but
instead of being of a diamond form they are
shaped like birds’ wings; the narrow end, of
course, towards the upper part of the head, and
the broad part near the ears. Mounts of this
shape are very pretty, the curls lie nicely together,
and, furthermore, they are easy to wear.
Bandeaux, or as they are more generally termed,
“bands,” embrace a variety of designs to suit
different requirements. Some are made plain
with a patent parting of silk or skin; others
have net, gauze, or human hair foundations, and
latterly a material called “Yak-hair” has been
used, which answers the same purpose, and is
128less expensive. Then, again, there are bandeaux
with waved hair or waved hair and “fringes,”
while others have long hair attached for combing
in with the natural hair at the back. Indeed,
this branch of the business offers a wide field for
the display of taste, judgment, and ability. The
hair used to be “banded” and then secured at
or near the end of the mount, and dressing
“bands” and “fronts” in the days of my apprenticeship
was a continual source of employment
and profit. The hair, at the time I speak of, was
generally worn smooth, oils and pomades were in
request, and rough hairdressing, it was thought,
showed want of skill on the part of the hairdresser.
But styles are ever-changing, and what
is approved to-day will, perhaps, be condemned
to-morrow. From smooth hairdressing we come
to that which is dry, wavy, frizzy and crisp, and
I am disposed to think that ladies sometimes
imagine a coiffure should present a rough appearance
to obtain approval. This loose method of
arranging the hair is to the advantage of bandeaux,
and coverings for bald places, because the false
piece can be more easily arranged by the wearer.
129
Fig. 26.
To make a plain bandeau, take a yard and a-half
of galloon, measure ten inches from one of the
ends but do not cut it off. Turn it back and give
it two or three raps with the hammer so as to
make a mark. Keep the galloon even and smooth,
and turn back another ten inches at the other end;
both of which are to be brought together. The
ends are to be turned in, and stitched over and
over. Double these sewn pieces exactly in the
centre, and tap with the hammer again. Open
out, and you will find that a mount of between
nine and ten inches is begun. Now take a mounting
block, which should be clean and smooth, and
place the galloon thereon. The centre of the
mount has already been found, and after opening
it (say) two inches, temporarily fix by means of
points in the centre of the block. There is no
difficulty about this because a fine line marks the
place, and I need scarcely say the mount should
be on the block exactly as it is intended to be
worn on the head. With the block in your lap
(the face being turned inwards) take the galloon
in each hand, pull tight, double one piece over the
other, and drive a point through both at the back of
the neck. Hammer it down firmly, and then fix the
remainder of the galloon, which I need hardly say
130is intended for the strings, as you think proper,
so long as they are out of your way. I will now
suppose that you are going to make a three-inch
silk or skin patent parting band, therefore you
must commence with basting the lower galloon
first, and then the top one, drawing it back at the
same time, so as to give the necessary depth.
Indeed, if you make it a rule to give a quarter of
an inch more depth than the parting, it will be, I
think, all the better. Next draw back the lower
centre, and form a pretty curve, the object being
to keep the galloon out of the way lest it be seen
in the most critical part of your work, and, further,
that the parting should lie upon the forehead both
flat and close. Having done basting, the next
thing is to put on the springs. Break two pieces
of watch spring the proper length; the ends of
which are to be rounded off and covered with kid
or parchment, afterwards neatly enclosing the
springs in galloon. They should have just
sufficient bend to easily fit the head, and assist in
holding the parting in position. A reference to
the engraving will illustrate all that I have
endeavoured to explain.[14]
Having well secured the mount which, let me
say, should always be tight and firm upon the
block, take a piece of ribbon, exactly the width of
the centre between the springs, and sew thereon,
the object of this being to give a neat appearance
to the band when off the block, and, also, to conceal
131the work in the parting which otherwise
could be seen. The net should next be attached,
as directed in previous instructions, and then the
mount will be completed.
Fig. 27.
In addition to the parting, take an ounce of the
best hair (say) sixteen inches long (the hair in the
parting being of the same length), and weave a
top row. Weave the remainder of the hair in
rather fine front weft, and then divide, marking
the division, however, by merely tying a piece of
string in the place. The parting should next be
dealt with; turn in the edges as previously
directed, “tacking” as you proceed, and finishing
with the lower portion. Sew the parting in its
proper position, beginning with the two corners in
front; it will then be as well to sew it at the top,
and afterwards the sides. The parting should
be straight, and exactly in the centre; perfectly
132smooth, and not stretched or puckered in any direction.
The weft must be sewn on next, but should
there be a rather wide space between the parting
and the top edge of the galloon, put in two or three
rows of weft first. Sew the weft along the bottom
and top edge of the galloon and then at regular intervals
until one side is completed. Do the same
with the other side, and, finally, put on the top row.
The number of rows will, of course, depend upon
the quantity of weft, of which you must be the
judge, and calculate accordingly. Press, tie the
hair of each side together or loosely plait in three,
leaving the wearer to arrange it when upon the
head.
What I have already said is sufficient to show
the learner how to make a “band” with a parting
of either silk or skin, or any other similar substance.
Indeed, when a “band” has to be produced for a
very low price, it can be made without a patent
parting at all, as the parting can be made to
consist of weft only. To do this, the springs need
not be so wide apart, and the intervening space is
to be filled up with weft, sewn close, one row after
the other, beginning at the bottom. If the weft
is well done and fine, it will lie flat, then, with the
comb, a parting should be made, and pressed into
shape. True, the wearer cannot show the parting,
but such work is designed for elderly ladies, and the
cap border, or other head-gear hides it completely.
Partings are generally used, however, and I merely
allude to this very plain way of making a “band”
133to suit humble and, necessarily, economical
customers.
For making a Waved Bandeau, with fringe, turn
to the instructions for mounting already given,
and notice the mount upon the block. A mount
of a similar description is to be made, but without
the arched piece of galloon in the centre,
for the parting being of a transparent material,
the skin of the head should be seen through
it. Besides, a dark line of galloon just in the
most conspicuous spot would be sadly out of
order.
Proceed as follows: Take a clean block, and
mark with a pencil the exact dimensions of the
mount, in its proper place. Be very particular
about this, because the pencilled lines you should
strictly adhere to. These lines, then, having been
made, commence by driving a point through the
end of the galloon near the crown, and on your
right side as the tracing faces you. Continue the
galloon down to the angle upon the forehead
where the spring goes, and fix with a point. Keep
the galloon flat, and turn it towards the ear where
it is also to be secured. Pass the galloon along the
top, and when in the centre of the block (being
mindful of the depth of the parting) drive in
another point. For the other side continue the
galloon as before, and end on the top of the block
in a corresponding position to that where it begins.
The mount should then resemble the illustration
to which your attention is directed (Fig. 26), but
134with this difference—the centre arched portion of
the galloon is absent.
The galloon is now to be “basted,” and preceding
instructions observed. The mount being tight
and firm, the strings are to be neatly sewn on,
fixed in the neck, and the long ends put out of the
way as before. It is now seen that there is a gap
in the centre, and unless some kind of stay is put
at the lower part, the parting will, in all probability,
soon get torn. To obviate this, it is usual
to employ a material called “silk-worm gut,”
which is securely fastened across the bottom, or
nearly at the bottom, for the parting should be so
arranged as to lie flat on the forehead—the closer
it lies the better. Sometimes a white horse hair
is used for the purpose, and occasionally white
silk, but whatever the material, it should be strong
and durable. It is usual, also, to put additional
“stays” about an inch apart, right along the parting,
for they are not seen upon the head, and
much greater strength is given to the article.
Indeed, when the parting is more than three
inches deep it is absolutely necessary to do so.
Put on the springs as before, let them be narrow,
and in this instance they may be covered with
black tape, as the galloon upon which they will be
sewn conceals them from view when off the block.
Now attach the net, and the mounting is completed.
A mount, let me observe, should be accurately
designed, and measurements taken from any convenient
place upon the block must correspond, one
135side with the other. Indeed, where much board-work
is done, it is a strong recommendation to be
a good “mounter,” and a correct eye is not among
the least of such a man’s qualifications. It matters
not how well done the knotting, weaving, or sewing
may be; should the mount be inexact, the
work is faulty from the very commencement, and
might result in the article being returned. This
is best avoided. Therefore, make it a rule to
“start fair” with your work, and, if slow, be
sure, remembering at all times that “practice
makes perfect,” and how important it is that
strict attention should be paid to minute details.
The mount having been finished, the next thing
is to put in a transparent parting, with a “fringe.”
This “fringe” should be of short, curled hair,
which can be arranged when the job is finished.
In transparent partings generally there are no
edges to turn up, like those made of silk or skin,
and alluded to before. Commence by sewing the
parting to the corner of the mount on your right
hand first, finish off, and then attach it to the
corresponding corner on the left side, keeping
the line of parting exactly in the middle. It
will then be proper to sew the top; see that it
is firm, straight, and smooth, and conclude by
stitching the sides. About the same length and
quantity of hair will be required for this as was
used in the previous one; therefore, weave a top
row, divide the weft, and proceed according to the
instructions already given. Sew the weft on in
136rows, beginning at the bottom; neatly and securely
turn the corners; and, lastly, affix the top row.
Press, and dress as required; take it off the block,
draw out the basting stitches, and the work is done,
unless you wish to give a waviness to the hair.
Fig. 28.
Of course the hair can be left straight if desired,
but if waved (it need not be very strong), the
effect is much more natural. Put the band on the
block again, and the hair can be waved in either
of the following ways:—(1) By plaiting. Slightly
damp the hair, and make two or more three-plaits
upon each side. Plait rather tight, and pinch with
moderately warm irons, but only sufficient to
remove the moisture, if any, and to fix the wave.
This, perhaps, is the most simple and natural way
of doing it. (2) With hair-pins. Divide the
side-hair in two or three equal portions, so as to
make the wave regular and uniform. Take a long
137hair-pin, and with the left hand hold it close to
the roots of one of the pieces, keeping the prongs
rather wide apart. Then, with the right hand,
entwine the piece of hair in and out, as though
forming with it any number of figures 8. Having
come to the ends (or done as much as you consider
necessary), push up close to the head of the pin,
turning back one of the points to keep the hair
well in place. Do the same with all; pinch with
warm irons, and allow it to be quite cold before
drawing out the pins. (3) Curling-irons are used
also for waving the hair, but, although permissible
when dressing a lady’s hair, I do not advise their
use for work of this description. There are other
methods of waving hair, as with string, card, wire,
etc., but what I have described, if carefully done,
will answer nearly all requirements.
Fig. 29.
Temple-Mounted Fronts.—Measure off twenty-three
inches of galloon, double it, and stitch at
138the ends through and through. Shift the ends a
little, so that they will come anywhere but where
basting stitches are likely to be put. Now double
the galloon again, tap it with the hammer, open it,
and you will find that you have made two creases.
Put these creases upon the line which marks the
centre of the block, and fix them with points to
about the depth of the parting. Take other points
and bring the mount into shape. You will now require
a rule, or tape measure, a pair of compasses,
and a large double-threaded needle, to enable you
to make correct measurements. You can measure
from any convenient spot, but when the strings are
on, they should be so adjusted that, when off the
block and tightened, the mount will incline inwards
both at top and bottom, thus proving that it will
bind, or fit well to the head. The shape is well
defined in the illustration,[15] and the places where
basting stitches are to be put distinctly shown.
Springs are made and fixed on the top about the
width of the parting, the intervening space being
filled up with a piece of ribbon. A spring is also
placed on each side near the ear, so as to keep the
mount well in shape, and the strings, as will be
seen, are made to cross over from the bottom
galloon to the top. The trained eye will perceive
at a glance how comfortable this shaped mount
is likely to be to the wearer.
Having sewn on the net, commencing, as usual,
upon the inner edge of the lower galloon, the next
139thing is to put in the parting, which should be
either skin or silk—but if transparent a deviation
will have to be made as already explained. The
same remark applies as to whether the hair should
be knotted or woven. These matters must always
be decided upon at first, when the mount is commenced.
Take (say) 1¼ oz. of twelve-inch ringlet
hair, and put the curls in two lots as usual.
Weigh one parcel against the other, and balance
evenly. Remember what I have said about the
curls inclining to the face. Make a thin top row,
comb out, and cut down. Weave the hair in fine
front weft, and contrive to make it of a similar
length for both sides. Commence sewing on at or
near the string, and proceed as before instructed.
In stitching on the weft be careful to well secure
the net, and the spaces must be according to the
length of the weft used—certainly they should
not be so much as a quarter of an inch apart. Let
both sides be uniform and alike in every respect.
Press and dress as required, and retain the hair in
position by means of side-combs. If, at the outset,
it is decided to “knot” the hair, then the mount
should be prepared accordingly, respecting which I
have given instructions in another place.[16]
Fillets (or Cauls).—A fillet signifies a little
band intended to tie about the hair; and a caul
(probably a modification of cowl) intimates, in
trade parlance, a net or some such covering for
the head. But that which I am going to describe
140is probably unknown to many, although it was
formerly adopted by elderly women instead of a
wig. This can be accounted for in two or three
ways. (1) Because at the time I speak of “fronts”
were generally worn; (2) ladies’ wigs were heavy
and expensive, and (3) a fillet or caul, being much
cheaper, well answered the purpose. Indeed,
where the necessity exists for wearing a head
covering, through loss of hair, or other causes,
perhaps a fillet would be most acceptable to many
in want of some such assistance. Proceed as follows:
Measure the head, and use a mounting-block
about one inch larger in size. Put on any
shaped mount you please so long as it is adapted
to the purpose, and suits the requirement of the
lady for whom it is intended. In place of strings
use a piece of wide galloon which is neatly attached
to the mount, and fits comfortably round the head.
The galloon may be half an inch or more in
width, or a mount can be made in the neck
(extending from ear to ear) resembling that
portion of a lady’s wig. Having the mount,
springs, and wide galloon in position, you have
next to obtain a silk net, and put it on to the
block, covering the entire mount and neck-piece
as well.[17] The meshes of the net should not be
too open, because the weft has to be sewn upon
141a part of it. I need hardly observe that no portion
of the net must be allowed to project over
the lower edges of the galloon and mount. The
hair is now to be divided as before; a top-row
woven, and good front, or “twice-in” weft made.
Bear in mind that instead of sewing it along the
lower galloon, and turning at the parting and
strings, it is now to be sewn from bottom to top;
in other words—begin sewing on the weft where
the wide galloon joins; let the hair incline or fall
over the ear, and, as I said just now, sew the weft
from bottom to top, turning each row upon the
lower and upper galloon. The reason is, that as
the meshes are much more open than in the
ordinary description of net, the rows of weft ought
to be shortened so as to give additional strength.
Having finished the front part, attention must now
be directed to the back, or rather that portion
which fits in the neck and extends from ear to ear.
Have ready (say) half an ounce of “Sevigny,” or
“doll” hair. This is tight curled hair of about
four or five inches in length—the same in fact as
that used in making “fringes.” Weave very fine,
and sew on to the wide galloon, turning at each
end of it. The long and short hair will thus
meet near the front of the ear, where the joining
must be neat.
If the hair is to be worn either plain or wavy
142and banded, of course hair (say) of sixteen inches
in length should be used, but if in curls, probably
ten or twelve-inch hair will be sufficient. Dress
as required. The short-curled hair (after the work
is pressed) can be arranged in small ring curls, or
in the manner of a close fringe.
Remember, I said that a block somewhat larger
than the head was to be used, and the reason is
plain. The fillet is sure to be large enough, and
this will allow for shrinking; besides, there is to
be an elastic spring put in the neck which must be
done so as to grip or bind the head properly. If
these details are carefully attended to, the fillet will
fit “like a glove,” be a source of comfort to the
wearer, and a credit to the maker. How an elastic
spring is to be placed and held in position will
appear in due course.
CHAPTER IX.
143
General Observations on the Manufacture of Partings
and Crowns—Non-transparent Partings; Silk and
Skin—Transparent Partings; Net, Gauze, Yak, and
Human Hair Foundations—“The Genealogy of Implantation”—Knotting,
and some remarks thereon—Single
Knotting—Double Knotting.
Partings, no matter for what use they may
be intended, are either transparent or opaque.
The foundation of transparent partings is invariably
net, gauze, yak hair, or human (white)
hair, the two latter substances being specially
adapted to the purpose. Indeed, anything that
will enable the worker to imitate nature so closely
as to defy detection, might be employed, if it be
durable and impervious to the effects of perspiration—two
points never to be overlooked. The
great art of parting-making is to cause the joining
(where it comes in contact with the forehead) to
be so exquisitely well done, that it passes unnoticed
even by a keen-sighted and critical observer.
Now is a chance for some ingenious young man
to make himself famous, as perfection is not yet
reached, I venture to think in this respect. True,
the “fringe” goes far to produce a natural appearance
in those who are still young, but a “fringe”
is out of place altogether upon the brow of a matronly
dame, or attached to the parting of a gentleman’s
wig; therefore I repeat there yet remains
144something to be done in the matter of partings,
and probably a fortune awaits the lucky inventor.
But there are professed patent parting makers,
and, as a rule, it is most advisable to purchase
this portion of the work ready made, or have it
done to order. When convenient, especially if a
hairdresser resides at a distance from London or
certain provincial towns, it is expedient to keep a
small stock of such goods in the house, for occasionally
it happens that an order is wanted in a
hurry. Most in request are partings of three,
three and a-half and four inches deep, made with
hair sixteen or eighteen inches long, and, I may
add, common colours. Here then is a little
“stock-in-trade” which is sure to come in useful.
Should the reader, however, wish to make
the parting himself, I will merely say that “foundations”
of the usual length and width can be
obtained through the usual trade channels, but I
may hazard an opinion, which is, that very few
hairdressers execute this kind of work themselves.
Non-transparent partings are made upon silk or
skin, the latter consisting of a very thin skin upon
white or pale-pink silk. I have known other substances
used (more by way of an experiment than
anything else) but the foundations named are, so
far as I am aware, universally employed. Silk
partings are the cheapest, skin partings and net
partings come next, and so on, the price per inch
being regulated according to width, foundation,
length and quality of the hair, workmanship, &c.
145It is worthy of observation that fronts, in
years gone by, were almost universally worn by
married women. “The first grey hair” gave the
signal, and a visit to the hairdresser followed
shortly after. His aid was invoked, and, if holding
a good position in the trade, his design was to
produce a front natural in appearance, and sufficiently
open in the parting, to suit the expression
of the features. But since the introduction of silk
and skin partings (which occasionally show a
division little more than a straight line) the aim
seems to be different, and a parting is produced
thicker and closer than would be seen on a young
girl’s head. The result of this is to impart a
heavy aspect to the countenance, which is at all
times undesirable, and will account in some degree
for their discontinuance. These unnatural-looking
partings are sometimes demanded by persons who
make no pretension to good taste, and they will
not be advised by the tradesman, who knows full
well what is likely to suit them best. Partings
which require the most skill in their manufacture,
if the aim be to produce a good article, are silk and
skin partings, and to make the first of these proceed
as follows:—In proportion to the length of parting
required prepare a stout wire frame—say six inches
long, and four inches wide, and that you are going
to work a three and a-half inch parting. With the
help of a needle and stout cotton, stretch the silk
firm and secure in the centre of the frame, so that
it is immovable and longer than required. Weave
146the hair in “close,” or “once in” weft, keeping
it free from grease or dirt lest the foundation be
soiled. Attach the weft to the back of the silk,
and draw a few hairs through at a time by means
of a small hook made for the purpose. Work
regularly and methodically, bearing in mind the
width and length required. The centre portion
must be done very fine, while the sides may be
coarser, a somewhat larger hook being used.
Having drawn all the hair through to what is now
the top, take a comb and “make a parting” the
same as you would upon a lady’s head. Comb
the hair smoothly on each side, warm the pressing-iron,
and press into shape. Cut down, and the
parting is made.
It is not reasonable to expect first attempts to
afford much satisfaction, but procure a well-made
parting and strive to imitate it by all the means in
your power. With a good pattern, you may
observe what can be done, and if you desire to
enter the foremost ranks, you must endeavour to
equal, if not excel others.
Skin partings are made the same way, but, as
I have before said, a thin skin (sold for the
purpose) is laid upon the silk before working.
Transparent partings are to be made upon
a net, gauze, Yak-hair, or human-hair foundation.
Professed patent-parting makers no doubt
use a frame, but a hairdresser would, in all probability,
make the parting upon a block, and in
its proper place. Of course, it is best to do the
147parting as a separate portion, because it can be
easier pressed into shape, and the piece of thin
skin (previously sewn underneath) for preventing
the effects of perspiration, will escape being
punctured by the knotting needle. However, this
is a matter for consideration by the worker, who
must necessarily be somewhat experienced before
venturing to knot partings. The kind of net used
for partings can be purchased at a hair merchant’s;
it is made of cotton, and should be fine, smooth,
and as regular as possible consistent with durability.
Gauze is much finer and closer than net,
being manufactured expressly for the purpose.
It is largely used for scalpettes, gentlemen’s
scalps, and fine knotted work generally. TulleYak,
or Yak-hair foundations, are made abroad,
and well suit the purpose for which they are intended.
Like other work of this description, the meshes
vary in size, and can be had either open or very
close. But the best foundations are made of
white human hair, with a square, round, diamond,
or diamond-barred mesh; the foundations for
crowns, and crowns and partings, being specially
prepared. Speaking of the Yak-hair manufacture,
a recent writer says, “there is a large quantity of
good lace made in the mountain villages of Saxony
and Bohemia, and thousands of hands are thus
constantly employed. This industry has of late
received an addition in the manufacture of a
peculiar lace or tulle made of white hair. It was
148introduced into this district a few years ago by a
Normandy lady, and has since then extended to
such a degree that now in one town (Rothenkerchen)
alone several hundred persons live
by it. The lace is made of white human hair
procured from all countries of Europe, but principally
from Italy. The price paid for it ranges
from one penny to two shillings per gramme,
according to quality, and the fine lace made out of
it is used as a foundation for wigs.”
To give completeness to my work, a short
account of “The Genealogy of Implantations,”
from the Moniteur de la Coiffure, will, no doubt,
interest the reader, for it has a direct bearing on
the subject.
The journal named had the following under the
heading of “Croisat and the 101 Coiffeurs.”
“In 1805, Leguet, hairdresser at Lyons, invented
the flesh-coloured hair-net. Postiches had
hitherto been so coarsely made that this improvement
in the manufacture of wigs caused quite a
sensation. The fame of the inventor soon reached
Paris, and M. Tellier, hairdresser at the Palais
Royal, tried to buy Leguet’s patent. In 1810,
Leguet, who had found that his wigs did not
keep the desired firmness (the hair being badly
knotted), easily agreed to cede his patent to
Tellier. An English firm having heard of
Leguet’s invention, procured one of his wigs,
which they imitated and improved. This came
to the knowledge of Tellier, who went to London
149to study the improvements. Meanwhile,
Carron, another coiffeur at the Palais Royal,
bought from a Lyons silk weaver the process for
the implantation on silk of a different kind,
which, though less suitable for men’s wigs than
that of Leguet’s, gave much neater partings for
women’s work. Tellier, on his return to Paris,
intending to considerably extend his novel industry,
associated himself with a stocking-weaver
of the Cevennes. Hence arose a law suit between
Carron and Tellier. But, contrary to the ordinary
rule, this law suit, instead of ruining the parties
more immediately concerned, helped to make their
fortune. All the papers were full of this suit,
and every baldhead—feminine or masculine—in
the kingdom was eager to see and perchance try
to rejuvenate itself by the novel inventions.
The poor Lyons weaver, who had parted with
his patent, being unable to witness others amassing
fortunes by its means, while he remained
in misery, put an end to his days. In the law
suit M. Tellier, having produced the patent
bought of Leguet, got the best of it.
“Michalon, a weaver, invented the silk parting,
produced with a long piece of silk without head,
which he put on his shuttle. Dufaur invented
the knotted hair foundation, knotting the hair by
means of a gauze needle. Then a workman
established himself in the Faubourg St. Denis,
who made partings in the way Carron made
them. He was the first to make partings in
150heart shape. The brothers Lavacquerie perfected
the work of the latter. Valon, one of
Dufaur’s workmen, further perfected the wigs
by giving a tighter and better fit.
“In 1822, Souchard took out a patent at
Bordeaux for implantations made with an embroidery
needle, and having in the course of time
perfected his invention, he tried to implant hair
on a pig’s bladder, which, being lined with gros de
Naples, made an excellent bald-wig for theatrical
performances, and produced a very good effect.
“In 1823 Souchard went to England, to study
the manner in which the English made their silk
net wigs. He found the English silk net infinitely
superior to the French, and be adopted
the former for his wigs.
“This genealogy of M. Souchard’s was written
in 1836, and since then implantation has made
immense progress.”
Enough, perhaps, has been said about the manufacture
of partings to acquaint the reader with the
manner in which this kind of work is done; but I
regard parting-making as a separate branch, and
only those who have constant practice can expect
to become proficient.
Knotting, however, lies more within the hairdresser’s
domain, and to be a clever knotter the
worker must be patient, careful, have good eyesight,
and bring to bear sound judgment in the
arrangement and execution of his work. In parts
not seen, or rather where knots are concealed
151through being covered with the hair above, they
may be somewhat coarsely done, but in conspicuous
places, such as partings or crowns,
the greatest skill must be exhibited, and Nature
copied as exactly as possible. I have had occasion
to refer at different times to knotting,
and it will be well, perhaps, to speak of it in
general terms before dwelling upon any class of
work in particular.
In preparing a mount for knotting (no matter
whether it be for a bandeau, front, scalp, scalpette,
or what not) you have to decide first whether
there is to be weft upon the edges of the net, and
likewise upon the galloon. If so, the net need
only be cut off as before mentioned; but when
the mount is to be knotted all over, the edges of
the net must be allowed to extend the eighth of
an inch or more beyond the whole of the galloon.
Here is the reason: in order to knot over the
galloon and close to the edges of it, that portion
of the net which projects must be turned under
and in upon the galloon, to which it should be
neatly and securely sewn. Indeed, the net must
be sewn to the galloon wherever edges occur, for
it not only holds the net firm and tight, but when
taken off the block there are no ugly openings
visible. Bear in mind the net is to be put on
firm and tight, the meshes well open, and no
“bagginess” in any part. There are different
kinds of net, and you will have to select particular
sorts for special work, about which experience—if
152no other instructor can be approached—must
be your guide.
Fig. 30.
Knotting needles are, as the accompanying
illustration shows, small hooks set in wooden
handles, and can be purchased where the trimmings
for wig-making, etc., are procurable. These
needles are fine, medium, and coarse, each one
being employed according to the kind of work
required to be done. For instance, in knotting
over galloon or ribbon, where the knots cannot be
seen when the mount is examined, they might be
coarsely done, especially if thickness of hair be
required. Upon net, perhaps the medium-sized
needle had better be used, but a needle sufficiently
fine to carry only a single hair will have to be
employed in partings and crowns if you attempt
to “defy detection.” Care is necessary in the
selection of a needle, the point of which should
turn, as it were, into the neck of it, otherwise, in
drawing back, the hook is likely to catch the net,
and your handiwork stands a chance then of being
spoiled before it is completed. Let me here give
one word of advice. When you have obtained
needles to your liking, take the greatest care of
them, for if you are proud of good workmanship
they might come to be regarded as “little
treasures.”
153The first thing a learner should do is to make
a “single knot,” and I would recommend that a
mount be put on the block, say similar to that
here shown, merely for the sake of practising.
Fig. 31.
Take some straight hair about six inches long;[18]
put it between the drawing brushes, and place a
weight thereon as though you were going to do
weaving. Draw out a weft and double it over at the
roots, leaving them (the roots) rather long. You
have now made a loop, which is to be held firmly
between the thumb and finger of the left hand.
Take the knotting needle and hold it with the
thumb and finger of the right hand; insert the
hook in one opening of the net and allow it to pass
out at the next. By this movement you have
154taken up a thread (or line) upon which you are
going to knot the hair. Now bring the looped
portion of the hair forward and hook it with the
needle; Fig. 31 clearly indicates the position.
Turn the open part of the hook downwards,
but keeping firm hold of the hair (by a little
dexterity you may avoid catching hold of the
net) and draw the needle back again. Let the
open part of the hook now face the weft, and by
a slight movement of the needle the loop will slip
back a little towards the handle while you catch
hold of or hook the weft again. This is well
shown in the following illustration.
Fig. 32.
You have now to give it a turn (which to a
certain extent secures the hair), draw the hook
(with the hair) through the loop; let go the hair
from the left hand at the same moment, and pull
rather tight. The knot will then be upon the net,
and if the roots are long fairly secure. Of course
there is a difficulty in describing these technicalities,
but I think with a little practice there need
155not be any trouble in mastering the details, at
least so far as I have gone.
With regard to single knotting, I would observe
that it is not so secure as double knotting, but the
knots can and should be made much finer. In single
knotting, the roots ought always to be long, much
longer in fact than when the knots are double, and
ought only to be done with a hair or two at a time,
such very fine work being necessary in the middle of
partings, the centres of crowns, etc. When single
knots are coarsely made, they are liable to be
caught by the comb when arranging the hair, and,
as a consequence, the weft pulled out; but if
finely worked this is not so liable to occur.
Single knotting can be done rapidly with short
hair, as in gentlemen’s wigs, but it is somewhat
insecure, and, therefore, best avoided. Better be
“slow and sure” at your work, than spoil it
altogether merely to be quick. Strive at all times
to execute good work, so that your employer may
depend upon what you do, and all that emanates
from the shop will, in consequence, bear the
stamp of excellence.
With regard to double knotting, I wish you to
turn to the instructions given on page 153, and,
to avoid recapitulation, begin with the words,
“Take some straight hair,” etc., and follow
on till you come to “draw the hook (with the
hair) through the loop,” then stop for a
moment and take up here. I repeat—“draw
the hook (with the hair) through the loop;” let
156that slide back a little as it did before, take hold
of (or hook) the weft again, giving the needle at
the same moment a turn; draw through the loop
once more, and pull tight down upon the net. In
other words, proceed as though you were going to
make a single knot, but instead of drawing it
through at once, make another knot upon the
hair itself, and then draw through. Thus you
have made or tied a double knot, and there need
not be any fear of its coming away, for it is too
well secured. These double knots should be made
where they are best concealed, but ought not to be
coarsely done, otherwise they will appear unsightly
when the workmanship is examined. Practice,
with attention to details, will soon enable you to
become expert. When the job is completed, (if
it be a front, or a band, or anything of that description),
have ready a top row of weft, and sew
it on as before instructed, press, and finish off in
the usual way.
CHAPTER X.
157
Of Wigs in General, and some Historical remarks thereon—On
Taking an Order for a Wig or Scalp—Means
adopted for securing them to the Head—Directions for
Measurement—On Mounting and Making a Scalp—“Pen-knife”
and Metallic Springs—A Scalp described
with Parting and Crown—Scalps with Gauze, Net, and
Human Hair Foundations.
Of wigs in general how much could be
written! They are almost “as old as the
hills,” and perhaps amongst the ancient
Egyptians might be found the earliest makers of
the periwig, or peruke. Indeed, in the British
Museum can be seen a wig from the Temple of
Isis that was made two or three thousand years
ago; the curl and material of which it is made
being well preserved. Probably the custom of
shaving the heads of the people (for all had to
submit to it), led to the introduction of wigs, and,
as Wilkinson says, “it may appear singular that
so warm a covering to the head should have been
adopted in the climate of Egypt; but we must
remember the reticulated nature of the ground-work,
on which the hair was fastened, allowed the
heat of the head to escape, while the hair effectually
protected it from the sun: it is evident that
no better covering could have been devised, and
that it far surpassed, in comfort and coolness, the
modern turban.” According to Stow, the periwig
158was first brought into England about the time of
the massacre of St. Bartholomew (1572), but the
peruke is mentioned in a wardrobe account in the
time of Edward VI. About 1595, wigs “had
become so much the fashion that it was dangerous
for children to wander out of sight of
their parents or attendants, as it was a common
practice to entice them into some private place
and deprive them of their hair for the manufacture
of such articles.”—Planche. During the reign of
Charles II. the large wigs (such as are shown in
Kneller’s portrait of the Duke of Marlborough)
were introduced, and continued to increase in size
till the middle of last century. Concerning prices,
the following is interesting:—“Perukes,” says
Malcolm, “were an highly important article in
1734. Those of right gray human hair were four
guineas each; light grizzle ties, three guineas;
and other colours in proportion, to twenty-five
shillings. Right gray human hair perukes, from
two guineas to fifteen shillings each, which was
the price for dark ones; and right gray bob
perukes, two guineas and a-half to fifteen shillings,
the price of dark bobs. Those mixed with horsehair
were much lower. It will be observed, from
the gradations in price, that real gray hair was
most in fashion, and dark of no estimation.”
The names of wigs, as may be judged from the
foregoing, possess deep interest for the trade, and
it is therefore worth while to allude to them. In
the reign of Queen Anne, in addition to very long
159and formally curled perukes, are mentioned “black
riding wigs,” “bag wigs,” and “nightcap wigs.”
The famous battle of Ramilies, in the same reign
introduced the “Ramilie wig,” with a long
gradually diminishing plaited tail, called the
“Ramilie tail,” which was tied with a great bow
at the top and a smaller one at the bottom. In
the reign of George II., the “tye-wig” and the
“pigtail-wig” have to be added to the catalogue,
and at the same time the revival of the
“bob-wig,” first heard of in 1684, or one that
is called after it, is also spoken of. The “bob-wig”
is thus described:—“I cut off my hair
and procured a brown bob periwig of Wilding of
the same colour, with a single row of curls just
round the bottom, which I wore very nicely combed
and without powder.” Indeed, “the nomenclature
of wigs is very ample,” says an authority on the
subject, “a complete system of classification might
be adopted, and genus and species discriminated
with the greatest nicety: there were Wigs Military,
Legal, Ecclesiastical, and Infantile,” room
being found only for a few varieties, viz.:—
Perruque à bonnet.
Perruque à trois marteaux.
Perruque à nœuds.
Perruque ronde.
Perruque pointue.
Perruque naissante.
Perruque à deux queues.
Perruque à tonsure.
Perruque à la brigadière.
Perruque de l’Abbé.
Perruque à boudin.
Perruque à papillons.
Perruque à deux marteaux.
Perruque à bourse.
Wigs were first worn by barristers about 1670,
to which opposition was made by the judges, and
160some of the leaders were not allowed to plead in
their new head-gear. In the time of James II.
wigs increased in size, becoming still larger in the
following reign (William III.), when wigs were
adopted by all classes, but among those of humble
station they were moderate in size and price.
Gentlemen’s wigs, however, were large and full,
requiring much hair in their manufacture. It is
recorded that in 1700 a sum of £60 was given for
a country girl’s hair, and that the grey hair of an
old woman deceased sold for nearly as much—the
ordinary price of a first-class wig being at that
time forty pounds. Full-bottomed wigs were
invented, it is said, by Duviller, for the purpose of
hiding some natural defect in the shoulders of the
Dauphin. Children wore wigs, or the natural hair
was curled to look like them. Archbishop Tillotson
was the first of our prelates who wore a wig.
Steele’s wig cost as much as forty guineas. Dean
Swift had a fine wig for state occasions, and
“Colley Cibber’s wig, in which he played a favourite
character, was of such noble proportions
that it was brought upon the stage in a sedan
by two chairmen.” The tie-wig (the long-curled
wig abridged) was not considered court dress.
“How to wear a wig,” says the author of
“Trichocosmos,” “was part of the education of
a man of the world, not to be learned from books.
Those who know what witchcraft there is in
handling a fan, what dexterity in the ‘nice conduct
of a clouded cane,’ will imagine the wits and
161gentlemen of old did not suffer the wig to overshadow
their temples with perpetual gloom, like
the wreath of smoke which overhangs our Modern
Babylon. And many a country squire must have
tried in vain to catch the right toss of the head;
to sport a playful humour in those crisp curls; or
to acquire the lofty carriage of the foretop, or the
significant trifling with some obtrusive lock; and
felt as awkward in his new wig as a tailor on
horseback, or a fat alderman with a dress sword
dangling between his legs.”
Natural coloured wigs were worn till about
1714, when it became fashionable to adopt
bleached hair, which soon faded, then wigs were
powdered. It is said that wigs of peculiar excellence
cost as much as £140 each, and it is on
record that “a petition from the master peruke-makers
of London and Westminster, presented to
the king (George III.) in 1763, points out the
great decline of their use to have taken place at
that time.” In this memorial they complain of
the public wearing their own hair, and say, “That
this mode, pernicious enough in itself to their
trade, is rendered excessively more so, by swarms
of French hairdressers already established in those
cities, and daily increasing.”
Theatrical wigs will supply many capital illustrations
of those that were worn by notable
personages in former years, and a ramble through
the National Gallery, Hampton Court Palace, and
other public as well as private picture galleries
162will be found highly instructive to wig-makers of
the present day. The chief art now consists in
making wigs so closely to imitate Nature as to
defy detection, and those who succeed in doing so
may well be classed among the most talented men
in the profession. Wigs and scalps will always
be worn, and probably there is a good trade to be
done in such manufactures now, but great attention
to every detail is necessary so as to withstand
the keen glance of scrutiny.
I will now apply myself to the task before me,
but consider that a few general observations are
necessary and important before entering into the
technicalities of the art.
When taking an order for a lady’s or gentleman’s
wig, observe the shape of the head, cast of
countenance, and age of the person who intends
wearing it. Note whether the head is long, broad,
or high, as a correct shape ought to be maintained
by the wig-maker, who, in this and other respects,
should be an artist. Observe also whether the
face is long, round, or oval, because the arrangement
of the hair on the forehead and sides of the
head has much to do in presenting a good appearance.
If this passes observation and comment, the
result may be considered satisfactory; but should
there be “a something” objectionable which
causes remark, find out what it is, or where the
fault lies, and either remove or alter it if possible.
Again, notice the countenance; do not put in
contrast to an aged face hair that is only suitable
163to youth. Let the hair be consistent both in
colour and quantity with the age of the wearer,
and, above all, endeavour to avoid anything extravagant
or out of place. A gentleman’s wig
must be cut and trimmed after it is made, to adapt
it to the style and taste of the wearer; it ought to
fit easily in every part; and where springs are, no
undue pressure should be allowed to exist. While
the general appearance has to be well considered,
the comfort of the wearer must always be kept
in view.
The reader is, doubtless, fully aware that baldness
is not confined to age, for some men lose their
hair early in life. You may, without much trouble,
find a bald-headed man at thirty, and it is perhaps
as easy to discover a man at sixty with a fairly
good head of hair. All classes are likely to be
more or less troubled with baldness, for it makes
its mark in a variety of ways. Sometimes the
hair recedes from the brow, giving the appearance
of a very high forehead, at other times it only
attacks the crown. Then, again, the whole of
the top part of the head is left bare, which not
unfrequently extends to the occiput behind. A
partial baldness requires merely a scalp which
may, according to the circumstances of the case,
be either large or small, but when the baldness is
extensive, a wig will be found the most convenient
and suitable head-covering. Scalps are consequently
made in a variety of shapes and sizes; the
mountings are equally variable, and the method
164adopted for holding them firmly in position
admits of great ingenuity. Some scalps are
mounted with galloon, net, and springs; others
have a metallic-spring attachment, which sensibly,
though not uncomfortably, grips the head, while
another mode of fastening is by means of “penknife
springs” or clasps.[19] (These open as the
name indicates, and being closed, a small portion of
the growing hair is shut in or clasped at the same
time.) Some scalps, when made for the top of
the head and crown have, in addition, a strip of
galloon, which, being covered with hair, easily
adapts itself to the lower part of the back of the
head. By an arrangement of this character a
scalp cannot possibly go forward on to the forehead
of the wearer. Scalps when made very
light and delicate, and intended for a small-sized
patch upon the upper portion of the head, and
sometimes the crown, are fixed only with gum,
a gummy substance sold for the purpose, or
diachylon. This gossamer-like scalp admits of
very superior work (knotted), while the mounting,
if required, should be of the lightest possible
description. Where strength and durability are
concerned, probably nothing can be better than
a well-sewn, woven scalp or wig; but when art
steps in to closely imitate nature, and attempts to
defy the keen glance of scrutiny, then both single
and double knotting are brought into requisition.
This presents a more natural appearance, of
165course, and though the cost is increased, the work
is not so lasting. In wig and scalp making there
is plenty of scope for ability, ingenuity, and taste,
for to insure success very much is left to the
judgment of the maker, and to the carefulness and
discretion of the wearer, so as to prevent his
“secret” being discovered. I will give some
working directions, with suitable illustrations, as
I proceed, but for the present I am chiefly concerned
in impressing certain leading points or
features upon the mind of the learner, as success
will greatly depend upon strict attention to minute
details.
Of course, careful measurement is all important,
for no matter how well the work may be done, if
it proves to be a misfit, disappointment and annoyance,
to say the least, will surely be felt by the
parties concerned. Besides, a mistake of this kind
is likely to prejudice the mind of the customer,
and another article (however well-made) might
not, perhaps, be received with favour; therefore,
be exact. I wish now to direct attention to the
illustration which appears on the next page and
to the following directions for measurement.
No. 1.—With a tape measure ascertain the circumference
of the head.
No. 2.—Measure from the centre of the forehead
(where the hair should be) to the nape of the
neck.
No. 3.—Ascertain the distance from ear to
ear across the forehead (see the lower dotted line).
166No. 4.—Measure from ear to ear over the top
(or highest) part of the head.
No. 5.—Note how many inches it is from temple
to temple, round the back of the head.
Fig. 33.
These directions are simple enough and only
require careful attention; be very exact in writing
down the figures, and observe the formation of
the head. Of course, all these measurements are
not wanted for a scalp (some scalps at all events),
but the different kinds of work are so intimately
associated that it is difficult to make any very
marked distinction here upon the subject. Besides
using a tape measure, it will be as well to cut out
a paper pattern for a scalp. An expert might say
there is no necessity for doing both, but I am not
addressing myself to the advanced men in the trade,
who do not stand in need of assistance from me.
I direct my remarks more particularly to apprentices,
167improvers, and to beginners in general. To
them I say—you cannot be too particular, therefore
do not spare yourself a little extra trouble, as
you may probably reap advantage from it before
the job is finished. A paper pattern for a scalp
comes in very useful at times, more especially
when there are some intricacies to be noted. It
need not be exactly a pattern, but still it should
unmistakably show the outline of the patch which
is to be covered. Having taken the dimensions,
then, the next thing is to cut off a piece of hair
for the colour. Your customer should be advised
to wear his hair a convenient length for the purpose
in view, (say) from two and a-half to three
and a-half inches long. Fashion, of course, has
much to do with the length of men’s hair, but you
cannot make a wig or scalp with hair so preposterously
short as is worn by many at the present
time—that is out of the question. The real hair as
well as the “false” should be sufficiently long to
allow of one combining with the other. There
ought not to be any division, and the length of the
hair must, as a consequence, be taken into consideration.
Whether a crown is to be put in, or a
crown and parting, should next engage attention;
also, whether the parting is to be in the centre, on
the right, or left side; if it is to be skin or transparent;
and what kind of foundation. These
preliminaries being arranged, I will proceed with
the making of a scalp.
The scalp you are to make is without a patent
168parting, but with a crown either of silk or skin.
If any parting is to be made on this scalp, it
should not be clearly defined, but whether it be
formed with weft or “knotted,” the hair ought to
be set closer than it is elsewhere. This, however,
will be alluded to later on. Should a rather narrow
scalp be all that is required, and the wearer’s
hair thick enough, a parting could well be made
upon the head, some of the natural hair being
trained to comb over and allowed to mingle with
the hair of the scalp. Nothing could be better
than an arrangement of this kind, where it is possible
to adopt it. Attention must also be paid to
the “set” of the hair upon the brow; if allowed
to remain in slight disorder perhaps that would
be the better way to wear it. At all events, a
“wiggy” and cloudy aspect should be avoided.
Fig. 34.
The mount represented above is, as I before
169stated, for a scalp with a crown, but without a
patent parting. In reference to mounting, detailed
instructions have frequently been given, which I
need not here repeat. Take a clean, smooth,
mounting block, and with a blacklead pencil carefully
mark the size and form of the work taken in
hand. Having done this, commence at the back
by tacking on the galloon (which should be a little
wider than that ordinarily used for fronts, bands,
&c.), and with it follow the line marked until the
ends meet. Arrange this so as to have half an
inch or more to spare at both of the ends. Of
course, in following the pencil marks with the
galloon, you have found it necessary to use points
so as to keep the shape, drawing the galloon at the
same time moderately tight. You are now to hold
the free ends between the thumb and finger of the
left hand close down upon the block, while you
stitch them through and through, so that when
done they may be close and firm. Open the ends,
gently hammer the sewn part, and take a few
stitches to keep the ends in place. You are now
to baste where it has just been sewn, observing to
maintain an even roundness so as to fit nicely at
the back of the head. Come now to the front and
form the peak upon the forehead, but it should be
more rounded and less pointed than is indicated in
the engraving.[20] The sides are to be basted out as
shown, and to impart a graceful curve, points are
to be driven into the centre of the block and the
170galloon drawn inward as required. I will now
assume that the outline of the scalp is formed; the
galloon moderately tight and firmly held in place—and
that it is ready for other matters to be proceeded
with. Sew a piece of galloon from temple
to temple; affix another piece at the sides (across
the top) and then connect the front and back
together. A glance at the illustration shows
clearly what is to be done.[21] Springs are now to
be attached, and for this purpose take a piece of
watch-spring sufficiently long to reach from the
forehead nearly to the crown, or quite to the edge
of the crown if considered necessary. Two other
springs are to be prepared extending from the
side angles to join the centre one. At this point
they are not to overlap, but must fit evenly and
flat. Here, again, a reference to the engraving
will indicate my meaning. It may be necessary
to put two springs at the back also, especially if
the scalp be rather large, otherwise, the patent
crown might be found sufficient. The springs are
to be somewhat flattened, so as to fit the mount
exactly, for unless this be attended to, the scalp
will not lie upon the head as it should do. They
must now be filed or ground off at the ends, and
tipped with kid, thin leather, or parchment,
the whole neatly covered with galloon, and then
sewn in their proper places. The next thing is to
put on some silk net, carefully sewing it all round
the inner margin of the scalp. Cut off, leaving an
171edge which must not extend beyond the outer
line of the galloon. Fix this in place by means of
the “herring-bone” stitch, and sew the net to all
the other edges of the galloon and springs. I may
observe that it is intended to cover this mount
with weft, but were it to be “knotted,” the edges
of the net should be left rather long, then turned
in, and firmly sewn to the outer line as previously
instructed.
“Pen-knife” springs should now be attached.
Fig. 35.
They are, as before stated, made to open, and
upon being closed, a small portion of the natural
hair is shut in with what might be termed the
blade. Here is the representation of a “penknife”
spring (open), and it is drawn the exact size.
The scalp now in course of manufacture would
require three or four of these fastenings, namely,
one on each side towards the front, and one or two
at the back in convenient situations.
Observe that these springs are intended to lie
as flat as possible, being made with a slight concavity,
which should go next the head. They
must, consequently, be arranged as “rights” and
172“lefts.” Take a piece of galloon the width of the
spring (that which is used for the mount will
probably answer the purpose), turn in the
ends, and sew over and over right round, except
where the blade shuts in. In order that you may
properly secure the covering, notice three small
holes in the spring, through which stitches should
be made. These details having been attended to,
the springs are to be attached to the mount, and,
I need scarcely say, they ought to be secure.
The hair is now to be put on, and the weft I presume
is ready. Correct judgment, together with
the requirements of the work, should, to a certain
extent at least, guide you. As the rows of weft
are arranged, so the hair will “set,” and this
should always be borne in mind. A properly
made and well-dressed gentleman’s wig is a
“study,” from which much is to be learnt, and
young men in the trade should never allow such
ingenious productions to pass unnoticed. Of the
“cutting and dressing a gentleman’s wig” I shall
speak presently, and merely allude to it here for
the purpose of showing the importance which
attaches to a proper arrangement of hair in the
first instance, whether it be woven or “knotted.”
Remember, as a rule, that in gentlemen’s wig-making
the hair should always be dressed to the
face, but this effect cannot be produced without
careful attention to the rows of weft, or “knots.”
However, in this instance suppose you adopt the
following plan. Commence sewing on the weft at
173the back, at the lower edge of the galloon, and
continue it all round; go round again, sewing the
weft moderately close to the first row. It is
important that these should be well and neatly
put on. Continue sewing till you come to one of
the angular places which is to be filled up, bearing
in mind the preceding observations. Then pass
on (without cutting the weft) to another and
another, till all the corners are disposed of. If
this be judiciously executed, you will then have a
“clear field” to work upon, and may go on sewing
the weft round and round until you approach the
crown, when the rows must be a little closer
together. While there is yet plenty of room,
take the crown (silk or skin I am supposing it
to be), sew the edges, as is done when putting in
a patent parting, and fix neatly, yet firmly, in its
proper position. Then go on with the weft, and
finish off upon the crown, close to the hair.
Having done with the needle, the work is now
to be pressed (and some of these observations
apply to wig-making in general), about which
you must needs be careful. The hair employed
in this description of manufacture (short crop hair)
is specially curled for the purpose, and in making
gentlemen’s wigs, hair of two, three, and sometimes
four different lengths is used, so as to avoid
cutting, if possible. It stands to reason that the
hair put at the top of a wig or scalp should
be longer than that in the neck, while at the
sides the hair required is probably of a length
174something between the two. Therefore, when
purchasing the hair, calculate the length before-hand,
or, should it be in stock, cut it off at
the roots before weaving or “knotting,” if it is
found necessary to do so. In pressing and dressing
this scalp, I will assume that merely the points
of the lower hair are to be removed, therefore push
back with a comb the same as though you were
about cutting a lady’s hair, and remove the ends
with a sharp razor. Even this must be done in
a particular manner, and is to be produced by
a kind of sliding motion. Let me tell you the
object which is to be attained, that you may the
more readily understand what and how to do it.
The natural ends of hair are finer and more
pointed than they would be if cut. They curl
and combine more readily if left in their normal
condition, with which ordinary cutting is likely
to interfere: therefore the employment of a razor
is to make the points resemble the original as
near as possible.
Pressing, you can now perceive, is equally
important, and should be done first. You must
press the work, but not the hair—that is, the
curl; for if you do that, the job will be spoilt
before it leaves your hands, that’s all! Therefore,
press carefully; incline each section of the hair
as it leaves your fingers to take up its proper
position; do not injure the curl in the least, and
endeavour to impart to it a natural and becoming
appearance.
175Another way of fixing the scalp is by means
of a metallic spring (see Fig. 36), and it can
easily be adapted to the purpose. The galloon
which passes across the top could either be dispensed
with, or arranged so that the spring, when
covered, passes along unseen. The front of it
could easily be made to come forward, while the
corner springs (either front or back) must be reduced,
or otherwise designed so as to keep the
scalp well in shape.
Fig. 36.
These springs, I may observe, are made to go
across the top of the head, while others are constructed
to go at the back, just below the bind
of the hat. It is of the former description that
I now speak. For making either a scalp or wig
with a metallic spring it is best to keep some of
these springs in stock, and when taking an order
try them on, so as to get one that will be easy
and comfortable. Heads vary in size, so do the
springs; therefore, this mode of fitting a spring
is essential. That part which extends from front
to back is movable, and can be readily adjusted,
while the behind part may be broken off at
176pleasure, the end, of course, being filed and
covered in the usual way. With these preliminaries
arranged, take a long piece of galloon,
fasten on to a given point (say the front), and
wrap round to the end, firm, smooth, and regular,
holding the spring at the same time in the left
hand; the upper edge of the galloon which is on
the spring being covered with the lower edge of
that which is free. Continue this from one end to
the other and sew firmly. Now do the side-spring
in the same way; cover neatly the centre at the
top of the head, and sew wherever necessary. Of
course, the spring will by this arrangement project
at the sides, and extend down towards the
ears. All this part, then, must be covered with
weft, the hair well “set,” pressed forward, and
made to combine with the natural side hair of
the wearer.
The mounting already shown is capable of
numerous modifications, but the general directions
remain the same. The form may be enlarged or
diminished, it can be oval-shaped or round (or
three-cornered if needs be), nevertheless, all the
details must be carefully attended to if good workmanship
be desired.
Baldness is not particular to age, neither does it
assume any definite form; it varies upon different
individuals. As a consequence the size and shape
of scalps vary considerably, and the class of work
is regulated not unfrequently by the purse. These
deviations from any fixed rule, therefore, afford
177ample scope for the display of ingenuity and taste
on the part of the boardsman; and to be a good
wig-maker is a strong recommendation to first-class
situations. Clever workmen, as I have
stated before, do not stand in need of instruction,
and were I to offer it some offence might reasonably
be taken; but with apprentices and improvers,
as well as those in business whose experience in
the wig-maker’s art is limited, the case is altered,
and if I can be the means of helping them my
task will not have been undertaken in vain.
To manufacture a scalp of a like description but
with a silk or skin parting and crown inserted,
proceed as follows:—Mark the outline of the
mount upon a clean block and put on the galloon
as before. Note the width and length of the
parting, which should always be placed on the
left side except when ordered otherwise, and arrange
so that the centre of the crown will fall
into its proper place. Having basted the galloon
which marks the shape or outline of the scalp,
you can then attach the piece which extends from
front to back, and a cross piece right in front,
if necessary (see illustration).[22] Notice the width
of the parting, and in regard to this portion of
the work, deal with the mount as instructed in
mounting a front, paying great attention to the
edge where it joins the forehead. About this
you cannot be too particular. Now take the
galloon and drive a point in the end of it, near
178to one of the basting-stitches, and conduct it
upwards towards the crown; form the outline
of the crown with it, and return to the fellow
basting-stitch where it is to be cut off. I will
now assume that you have the exact form of the
parting and crown, the galloon being held in
position by means of points driven into it at intervals.
Sew the ends in their places, and baste the
galloon, making a neat circle at the crown. Here
the galloon will become puckered; the puckers
are to be pinched together, sewn through and
through, and made to lie as flat as possible.
Having done all this, what, let me ask (in order
that I may be clearly understood), is the object in
view? It is to impart neatness to the work, and
to conceal the margins of the parting and crown;
it renders the scalp more durable, and when off
the block the edges of the parting, &c., are neatly
concealed.
The net and springs are to be put on, then
the hair, and all finished off in a proper manner.
Scalps of this description can be held in their
places by means of a cement made and sold for
the purpose (to which I shall presently allude),
but I cannot help thinking that, after all, springs
are preferable.
A better class of work is done upon gauze, and
the best of all is made upon human hair foundations.
Other materials for the purpose, of an inferior
description, are used, to which I need not
here refer, as the two kinds named are sufficient
179for my purpose. The gauze is very fine in texture,
and can be mounted with galloon or not,
just as it may be considered necessary. Of course,
galloon affords additional strength to the article,
and if lightness be not the chief requisition, I
should say that gauze scalps were more durable
when mounted. Here is an outline of one:—
Fig. 37.
It will be seen that there is galloon all round,
and to the parting and crown also. A mount of
this character can be designed by omitting the
latter altogether; it can be made with a crown
only, or, with a parting in addition, as shown in
the diagram,[23] but in that case, the piece of galloon
which now marks a separation between the crown
and parting should be omitted. This, of course,
could easily be managed by putting on the galloon
in the way just previously mentioned. A scalp of
this kind can be mounted with white, drab, or other
180coloured galloon; it might be knotted either on
gauze or net, with a human hair foundation parting
and crown inserted. Indeed, the variations made
in this description of manufacture are of a
multifarious character, as may readily be perceived.
The mode of attaching these scalps to the head
of the wearer is by means of diachylon, or, what
is better, the Pomade Toulouse, an adhesive substance
easily softened by heat, or else “wafers,”
which are made sticky by a little moisture, and
used as desired by the wearer.
Scalps with entire Human Hair Foundations cannot
be excelled for lightness and a natural appearance.
They are made of any size and pattern, with
perfectly secured edges, so that no galloon or
springs are necessary. They only require to be
well and properly attached to the block by means
of basting-stitches, and carefully—I might say
artistically—knotted all over, the crown, or crown
and parting, being done as the work progresses.
Some exquisite pieces of workmanship are executed
in this line by expert hands, their productions
being well qualified to receive the name of
“zephyr” which has been given to them by certain
manufacturers. The mode of attachment is the
same as that mentioned above, by means of
cement or gum.
CHAPTER XI.
181
Of Gentlemen’s Wigs, and a few additional observations
thereon—To make a strong and durable Wig with
woven Hair throughout—Mounting a Wig—The Metallic
Spring again—Various kinds of Net used—Caution
against using too much Hair—Sewing on the Weft—The
Crown made with Weft—The Parting formed with
Weft—Pressing the Work—Of Elastic Springs—The
Wig completed.
It is now my intention to treat of Gentlemen’s
Wigs, and I think that, so far as general
remarks are concerned, there is but little to
add to my former observations on the subject.
The approved method to be adopted for measuring
the head, together with other necessary instructions,
have been already given, to which the reader
is referred. Like every thing else, gentlemen’s wigs
admit of considerable variation, and can be made
to suit the pockets of all classes. Some customers
are strictly economical; they do not so much care
for appearances, their desire being to have a wig
that shall be strong, durable, and low in price.
Such men will wear a wig until it “goes foxy” (to
use a trade phrase which fully explains my meaning).
Some people, as they advance in years, have
an aversion to putting on new things; preferring
that to which they have become accustomed before
a fresh, and, it may be, more elaborate article.
182This applies to clothing, boots and shoes, hats,
&c., and why not to wigs? Therefore, in executing
an order for a person who habitually wears one,
notice every detail associated with that which
he is wearing, and deviate as little as possible
therefrom. Younger men, who lose their hair
early in life, require to be much more particular;
they wish to defy the scrutinizing glances of
friends and acquaintances, and, as a consequence,
seek to obtain that which is lighter, and of a more
natural appearance. Price, it may be, is of the
last consideration, for nothing, perhaps, would
cause them greater uneasiness than to be told by
some indiscreet associate, “Why, Jack, you’ve
got a wig on.” Men sometimes show their ignorance
by making such foolish remarks; and I
allude to it here to impress upon the reader how
important it is to acquire taste, good judgment,
and proficiency in business. I said just now that
“gentlemen’s wigs admit of considerable variation,”
and it is my intention to describe the manufacture
of two kinds, namely, those which are intended to
be worn for an indefinite period, and others that
have to be renewed more frequently. That is to
say, the buyer of a wig at thirty-five shillings
would desire it to last for a longer time than he
who purchases a more artistically made article at
treble the price, and renews it every year.
I propose making a wig (in the first instance)
of a strong and durable character, and with woven
hair throughout. This description, either with
183or without patent crowns, or patent partings and
crowns (of which more hereafter), I prefer making
with weft, because I think them less likely to
shrink than if they were knotted. Knotted work
for lightness, weft for durability; at least, this is
my opinion of the matter. It will be for the
workman to decide which he considers preferable,
and, as I shall give instructions how to proceed
in either case, an opportunity will thus be afforded
him to judge of the correctness of my assertion.
Fig. 38.
Take a clean mounting-block, and having your
measurements properly written out according to
previous instructions, pencil the outline of the
mount thereon. Be very particular in marking
details, because the galloon should follow every
line. Having done this accurately, commence at
the back of the block (in the neck) by driving a
184point or two through the galloon on the left side of
the central line. Keep the galloon fairly tight with
the left hand, following the pencilled markings,
and hammer in points wherever it is necessary to
do so. I will now assume that you have carefully
made the proper curves at the ear and temple, and
that you have reached the cut line on the block
which is in the centre of the forehead. You have
now to continue the galloon along the pencil
markings on the opposite side of the block until
the place from which you started is reached:
drive in another point or two and cut off the
galloon, leaving at least half an inch to spare
upon the block. In foregoing instructions these
“free ends” have also been alluded to; you are to
pinch them well together, and, with a needle
and silk, sew them through and through. The
mount is now ready for “basting,” but where
you should begin is optional, and depends in a
great measure on the style of mount. In this
instance, I should begin in front; next the
temples; then, round about the ears. The engravings
which accompany these descriptions very
clearly indicate details.[24] Having completed this
part of the work, you will find that in various
places the galloon is puckered; these you must
pinch together, sew through and through, lay
them down quite flat, and a stitch or two will
hold them in their places.
185
Fig. 39.
The first important step in making a wig is
now accomplished. To be quite sure, go over
your measurements again (I presume that you
have done so before), and satisfy yourself of their
exactness. Now, take the galloon and put a portion
of it across the top from front to back;
drive points through as before; cut off and sew
neatly. A similar piece is to extend from ear to
ear across the crown, which must be treated in a
similar way. Having done this, take the galloon
again, and, passing it under these cross-pieces,
bring the ends to the front, pull it moderately
tight, and sew down upon the galloon. This piece
forms, as it were, a fillet round the head. Make
a circle with the galloon, about two and a-half
inches from the outer edges, to form the crown;
in this instance I intend it to be made of weft,
which will presently demand no little cleverness
on the part of the wig-maker. This circle will
186have many puckers, and they are to be sewn down
as before.
I have already alluded to metallic springs, and
given an illustration of one.[25] The instructions
then presented to the reader, must be borne in
mind when an order is given for a wig, and also
while the mount is progressing. Indeed, the
spring ought to be placed in its appointed position
when the mount is designed upon the block, and
it should not reach (in any instance) to the lower
edges of the galloon. The spring is to be
covered as before, put on the block, and sewn
in its place. With regard to other springs, which
are used to keep the wig in shape, and thereby add
to the comfort of the wearer, the engravings,
together with previous instructions, will no doubt
be found sufficient.
With the foregoing particulars, and the illustrations
which accompany them, the learner can proceed
to mount and make a wig. There is, in
this class of work, much scope for ingenuity and
thoughtfulness, and a well-made wig is not only
creditable to the maker, but displays an amount of
skilfulness which, to many, is surprising.
There are various descriptions of net used in
wig-making to meet all requirements. For patterns
and prices I cannot do better than refer the
reader to either of Messrs. R. Hovenden & Sons’
warehouses. To suit my own purposes, I find it
sufficient to divide the net into two classes, viz.,
187silk and cotton, of which, I need scarcely add,
the latter is the cheapest; but for strength and
durability, as well as neatness, the former is much
to be preferred. The form and size of the mesh
is not of any particular moment if woven hair
has to be used; but when the hair is knotted
the case is different, and, as the learner becomes
proficient in his business, he will understand why
some particularity in the choice of net should
be exhibited by the worker, more especially
when he takes delight in the excellence of his
productions. I have said before that in manufacturing
wigs, the “set” of the hair is all-important,
and in knotting, the formation of the mesh
is, doubtless, considered to have a great deal to do
with it.
The mount being divided into sections by means
of the galloon which passes from front to back,
side to side, etc., enables the maker to sew on the
net in parts, in preference to one entire whole. It
is better to do this portion of the work in sections,
not only because it is economical, but it is
much more convenient. Commence (say) at the
neck, by sewing the net to the innermost edge of the
galloon, and you may arrange to cover one or both
of the back divisions. Having sewn it along the
edge securely, draw the net fairly tight, and stitch
it to the nearest edge of the galloon which divides
the front from the back. Cut off, but leave a
sufficient margin to “herring-bone” afterwards.
The front part of the wig may be covered in a
188similar manner. All edges of the galloon must be
sewn to the net. I will now assume that the mount
is covered except the points near the ears, the
front peak, and, it may be, the nape of the neck.
The angular, or odd pieces of net, will do exceedingly
well for these. All being sewn to every
available spot, the net tight and firm (not “baggy”—by
all means guard against that), and free edges
neatly “herring-boned” to the galloon, the mount
is complete.
Of course, the hair selected for the top of the
head, about the front and crown should be longer
than it is at the sides and in the neck, therefore,
two or three lengths of hair must be employed.
A calculation ought to be made first, and the
appearance, age of wearer, and so forth taken into
consideration. As a rule, the makers of wigs put
too much hair in their manufactures. The lighter
they are, the better. Still, sufficient hair must be
used to cover them, and much depends upon the
fineness of the weft. Weaving some thirty yards
of weft is, no doubt, considered a task by many,
but unless it is fine throughout, more hair than
necessary is likely to be consumed. An ordinary
weaver should do at least a yard of wig-weft an
hour, but professed weavers would do much more
than that. The lengths of hair, then, having been
decided upon, and their apportionment made, the
weft should be completed without delay, before this
monotonous part of the job becomes tedious. I said
just now that too much hair is generally used, for
189I have known instances where three ounces or more
of crop have been employed, in place of half, or two-thirds
of that quantity, which would have suited
the job much better. Here, then, is another cause
of the “wiggy” appearance of which some people
complain. Besides a general improvement in
the article which adds considerably to the ease and
comfort of the wearer, something is saved in the
cost of material, which must not be lost sight of.
True, the weight of hair depends in a great
measure upon its length, but for ordinary purposes
it should not be allowed to exceed two
ounces, if possible.
The weft being completed, begin sewing on
behind the ears and in the neck; for this use the
shortest hair. The first row, or, I might say, rows,
of weft should, as a matter of course, be very
carefully put on; indeed, all the margins or edges
ought to receive the greatest attention, for if the
hair be raised up and the work critically examined,
a show of galloon would stamp it as bad at the
very outset. Two, if not three rows of weft can
be first sewn on before filling in the angles, and
when that is attempted, both sides must be done
uniformly. The angles (or points) behind the ears
having been thus treated, the weft can be continued
in lines until the neck part is all filled in.
The sides should now be attended to, and, if the
hair be sufficiently long, the front peak also.
Commence sewing on the weft close to that which
is already on the block, and this will be somewhere
190behind the ear. Stitch close to the edge of
the galloon, and, as before, make two or three
rows; then fill in the two sides. Bear in mind
what I have previously said, which in this connection
is worth repeating. It is this—remember, as
a rule, that in gentlemen’s wig-making, the hair
should always be dressed to the face, but this effect
cannot be produced without careful attention to
the rows of weft, or “knots.” Therefore, arrange
the weft in such a way as to ensure this desirable
result, and the pressing iron will do the rest. I now
assume that all the angular places have been filled
up, and that hair covers the wig up to the galloon
which goes around the head like a band or fillet.
You now require to use the second length of hair,
and, probably it will do for both back and front;
if so, go on sewing several rows of weft round
and round at equal distances from each other.
Not too close, otherwise the wig is likely to be
heavy, and not very wide apart, or else the work
will be flimsy and unsubstantial. Should you
decide upon using longer hair for the top and sides
than you do at the back, then the work must be
done accordingly, by sewing half-way—backwards
and forwards. The other half will have to be
filled up in like manner; but, when the wig is
taken off the block, the rows should appear as
though they were sewn on in the way just before
mentioned. I will now imagine that you are
approaching the part marked out for the crown,
and if you make any further difference in the
191lengths of hair to be employed, here you may
begin with the longest, and continue up to the
circle reserved for the crown. The hair used in
this place may be of one length only, and can be
sewn round and round until the lower margin of
the crown galloon is covered with one or two rows
of weft.
Fig. 40.
I previously stated that “I propose making a
wig (in the first instance) of a strong and durable
character, and with woven hair throughout;” but
I have another object in view besides strength
and durability. In all that I have written about
“Board-work,” I have addressed myself chiefly to
apprentices and improvers, and in this particular
instance I wished the young wig-maker to possess
himself of a good specimen of his abilities. Indeed,
192I am now about setting a task which will
try his ingenuity, and if successful in doing it
well, he may justly feel proud of his work. It is
to make a crown according to the illustration
given on the preceding page.
A reference to Fig. 39 shows a wig mount, with
the circular space left for the crown, which is,
moreover, divided into four parts. In each of
these divisions the weft (carefully and finely made
for the purpose) is to be sewn according to the
diagram Fig. 40. It will be seen from the covered
half that each row of hair overlaps the
other, and the greatest nicety should be exercised
in working the exact centre, so as to conceal, if
possible, every sign of weft. This is to be done
by adroit workmanship, assisted by a warm iron
and careful pressing.
To make a parting with the weft take a needleful
of white cotton, mark the place for the parting,
and the width it is intended to be. Simply make
two straight lines from the crown to the temple,
about an inch apart, and on the side the parting is
worn. Having done this, remember that when
sewing on the weft, it is to be turned back for an
inch, and then returned again, so as to follow on
in its proper course; these turnings and re-turnings
being necessary (1) to bring the rows closer
together, and (2) to make a division without
showing the net foundation. Of course, a clear
and distinct parting must not be attempted in this
case, but just such a division as a hairdresser
193should be able to make on a gentleman’s head
with a brush only.
All being so far completed, the next thing to
do is to press the work, but not the hair, otherwise
the curl will disappear. Take a smooth, warm,
pressing iron and begin, say, upon the left side,
nearest the face. This will be at one of the
angles, or points. Separate three or four rows of
weft at a time, and of a convenient width, so as
to hold the slip of hair firmly between the two
fore-fingers of the left hand. Damp the weft only,
with a small sponge, or the finger, at the same
time inclining the curled ends to the face; press,
lay the curl flat and leave it undisturbed. In
like manner the whole of the work has to be
treated, and when finishing off at the crown, see
that its peculiar circular turn or inclination is
well preserved. Having allowed a little time to
elapse for all to get cold and “set,” cut the
basting stitches, and carefully take the wig off
the block. Pull out all loose threads, examine
your work, and see that everything is as it
ought to be.
I have said that the block for this kind of
work should exceed the circumference of the
head by half an inch or more; this allowance
is necessary, as it insures an easy fit, and
provides to a certain extent for shrinking.
Besides, should it prove to be a fault, it is one
easily got over by means of an elastic spring,
or springs. These springs are made of different
194lengths; but for a gentleman’s wig, one would
probably be two-and-a-half inches long, and it has
to go at the back of the neck. Take the wig, turn
the back part inside out, so as to get at the lower
galloon easily. Cut a piece of galloon the same
width, and full an inch longer than the spring.
Mark the centre, and sew neatly (both edges) to
the lower galloon, so as to form a casing for the
spring. The stitching should not be continued to
the ends. Now take a needle with doubled silk and
fix it to one end of the spring; put the head of
the needle foremost, and pass it through as
though it were a bodkin. Draw the spring into
position, and firmly sow first one end to the wig,
and (having previously attached a second needle
and silk to the other end) then the other. The
degree of tightness required must be your guide,
both as to the length of spring and amount of
elasticity. Turn in the free ends of the galloon
and sew neatly as before, until all is perfectly
covered. Should a second spring be required, it
is to be placed above, in exactly the same way,
upon the fillet or band which goes around the
head.
The wig is again to be put on the block, the
hair cut with a razor, by a kind of gliding motion
(to taper off the ends as much as possible),
brushed and dressed. It is now ready for the
wearer, and any other alterations in regard to
trimming, etc., can be done upon the head, so as
to adapt it to the features.
CHAPTER XII.
195
Of Gentlemen’s Wigs (continued)—Difference between
Woven and Knotted Wigs considered—Instructions for
Making a Knotted Wig—Of the Parting and Crown—Of
the Crown only—Pressing, Dressing, etc.—A
Superior kind of Wig Described, and Making the
same—The Transparent Parting and Crown—Sundry
Important Details.
“Do you not think,” said a gentleman to me
one day, “that a wig made with weft
is rather old-fashioned?” The question
can only be answered in the affirmative, because
knotted work has very generally superseded it,
but, I maintain, for a man to be clever in any
trade or profession (and wig-making forms no
exception to the rule), he must be acquainted with
all the rudimentary parts. To be well grounded
in the first principles of an art is, other qualifications
being equal, a sure precursor of success.
Careful instructors are well aware of this, and as
a consequence, cause their pupils to undergo much
preliminary training before entrusting them with
more difficult tasks. The medical and legal professions,
painting, sculpture and music, chemistry,
photography, and many others might be enumerated
to show the amount of technical instruction
196which must, as it were, be drilled into a man
before he is sufficiently clever to take a foremost
place in his profession. The art of hairdressing
furnishes another instance of what I am asserting,
and the talented coiffeurs, who give expositions of
their skill at the different concours in Paris and
London, afford examples of untiring energy, and
great attention to the most trifling details. The
fact is, he who desires to be clever must go plodding,
plodding on, regarding nothing as too trivial
for him to do, and nothing (within reason) too
difficult for him to attempt. Weft of one kind or
the other will always be in requisition; it is the
key-stone of the hair-work trade, affords employment
to the less skilful, imparts durability to
false hair manufactures, and is contributory to
cheapness.
My inquiring friend could have put a similar
question to me respecting the metallic spring; but,
let me ask, if a customer did not wish it, and it
was not considered necessary by the wig-maker,
why introduce it at all? The spring can be left
out, and other lesser springs substituted, as it is
very much a matter of taste or convenience. Some
persons cannot bear the pressure of a metallic
spring, which, perhaps, is attributable more to the
spring not fitting the head properly than to the
oversensitiveness of the wearer.[26] Yet I am under
an impression that, for ordinary wear, a wig with a
well-fitting metallic spring across the top, or at
197the back of the head (the latter especially) is both
secure and comfortable; the wig retains its shape
better, and, with weft, is much more durable. In
matters of this description a great deal depends
upon circumstances, and the arrangements made
between buyer and seller. My desire is to give
completeness to the work which I have undertaken;
to have, as it were, a “word in season”
for every emergency; to lead the pupil far on the
road towards proficiency, and, having arrived
there, he can well be left to look after himself, for
he is no longer a learner, but a good boardsman.
To make a knotted wig, I will direct the reader’s
attention to Figs. 38 and 39, and request him
to mount a wig in accordance with the instructions
given therewith. He can mount it with, or without,
the metallic spring, but in either case, care
must be taken to affix springs of the requisite
lengths, and in suitable places to keep the
angles or points well in position. All the springs
must be neatly covered, and put on before the net;
in fact, as the wig is to be knotted, all galloon
work should be done first, and the net affixed last.
Silk net is to be used. In sewing, first stitch the
net to the edge of the galloon in the usual way, and
allow it to overlap the other edge before cutting
off. Now that portion which overlaps is to be
turned under and sewn, of course, to the second
edge, and thus all the galloon becomes firmly
covered with net. The same applies to the springs
and with even greater force to the edges of the
198mount itself; and here it is necessary to be
extremely careful, for when the job is completed
and comes under the scrutinizing glance of the
master, all wefts should be as regular and well-set
as plants in a garden. There must not be
inequalities, gaps, or other irregularities, all should
be neat and trim. In this instance I do not propose
inserting either a parting or crown. I rather
prefer leaving the student to “try his ’prentice
hand” in making them himself, at least, so far as
he is able. My last wig was not intended for a
clearly defined parting; neither is this one. The
mount is now ready for the hair, instructions concerning
which have already been given.
The course to be pursued when knotting the
hair, is similar to that which was adopted with
the weft—the object being the same. I would
observe that, instead of turning in the net as before
directed, the maker can (if he chooses) sew upon
the galloon two or three rows of very fine wig-weft;
one or two of them, however, must cover
the edge of the net as well. Additional firmness
being thus secured, the knotting can then be proceeded
with. In knotting over or on the galloon
and springs, coarser work, if considered desirable,
may very well be done, but when it is executed on
the net, the knots should be moderately fine and
regular. The angles, or points of the wig, are to
be well and properly filled in, and of course, all the
hair should be drawn in the direction in which it is
intended to lie. How close, or how far apart, the
199knots are to be placed is difficult to say. All net
is not made alike; some meshes being large while
others are small, and, of course, a fixed rule would
not apply. Besides, all workmen are not painstaking
or patient, therefore the knotter must
observe closely the aspect of his work, and be the
judge. Perhaps, with a moderately close mesh, it
might be sufficient to knot hair in every other
space; if this appears to make it too thick, reduce
the number of hairs. This is a tolerably safe rule
to follow, and a little practical experience will do
the rest. The shorter hair is to be used for the
neck and sides, the longer for the top; but in these
matters such copious instructions are already given
that the student cannot well make a mistake if he
reads them attentively. He has merely to substitute
“knots” for “weft,” and the whole will
apply to the job he has now undertaken.
As to the parting and crown, some of the
details which have appeared are applicable here.
As a clearly defined parting is not intended, it is
merely necessary to implant, or knot the hair closer
and finer on the side where the parting should be,
than in any other portions of the wig. What
division there is should be made with the brush (not
with the comb), care being taken that the foundation
is well covered with hair, and, of course,
concealed from view. The crown is to be done
last of all, and, if knotted upon the wig net, the
design given for making a woven crown, Fig. 40,
should be carried out as far as possible. The four
200sections are to be knotted in such a way that the
hair of one falls over the other, while the knotting
immediately in the centre should be finely and
closely arranged.
Except it be for practice or an economical
customer, I do not expect that such a crown will
generally be made, because a silk, skin, net, gauze,
or other crown can be obtained from the hair merchant,
or patent parting maker, which, of course,
imparts a better finish to the wig, and presents a
more natural appearance. The illustration, Fig. 39,
gives a circle adapted for either of the crowns just
mentioned, and if a silk or skin one be employed
no alteration in this part of the wig is required;
but, should a transparent one be inserted, the cross-pieces
of galloon must be omitted when mounting,
or else cut away afterwards—the reason is
obvious. If a transparent crown be inserted, it
is optional whether a piece of thin skin (or other
light material) be put on first, so as to prevent, to
a certain extent, the effect of perspiration, but if a
human hair foundation be employed, no such precaution
is necessary. Whether a protecting substance
be used or not, that part of the crown in
which hair is implanted should be brought close to
the inner edge of the galloon, and the free portion,
i.e., that upon which no hair appears, should lie
flat on the galloon, to which it must be neatly
sewn. Should any of the material on which the
crown is worked overlap the galloon, of course it
must be cut away. The vacant space (which will
201be just the width of the galloon) can then be filled
in with weft, unless the net is properly arranged
for knotting. But, should a non-transparent parting
be employed, the galloon can remain as shown,
and the whole be covered with the net used for the
wig. In this case the edges of the crown are to
be turned in very neatly before it is sewn in position,
and, if possible, they ought to be concealed
by means of the galloon, the intervening space is
either to be filled in with weft, or else the hair
can be knotted.
It will thus be seen that various methods of
finishing off what might be termed the crowning
point of a common wig can very well be adopted.
For Pressing, Dressing, Elastic Springs, &c.,
see remarks which have from time to time been
made.
I have given such copious directions for making
gentlemen’s wigs, and dwelt at such length upon
the various points essential to a good fit and the
comfort of the wearer, that, perhaps, but little
more need be said upon the subject. My instructions
have been chiefly associated with productions
that are strong and durable, for it may be accepted
as a truth that when a man can execute the
commoner work well, only a short time will elapse
before he attempts, or is called upon, to do something
better. Besides, as I have so frequently
remarked, my instructions are more intended for
learners than for skilled men. These do not stand
in need of instruction; indeed, it would be impertinent
202to offer it to them; but with apprentices,
improvers, and others whose opportunities for
learning are few, the case is widely different.
Though I have dwelt at some length on the
manufacture of gentlemen’s wigs—wigs that will
endure a fair amount of every-day wear—yet a few
particulars concerning the better-class article will
certainly not be out of place, and might prove to
be exceedingly useful.
Fig. 41.
I must, therefore, again direct the reader to
observe Figs. 38 and 39, and attentively read the
instructions with which they are accompanied.
Having done this, the above illustration is to
be studiously regarded, and a marked difference
will easily be perceived. The outline, as a matter
of course, is to be preserved, and if the student feels
so inclined, he can take a tracing and fill in the
203markings shown upon the others. There is no
necessity for doing so, except that it impresses the
mounting of a wig upon his memory in a more effectual
manner. This wig is intended for a transparent
parting and crown, the foundation of which
may be either human hair, gauze, net, or such material
as is generally used for the purpose. Before
putting on the mount, it is best to provide the
parting and crown, as well as the hair to be used
for the other parts of the wig. Instructions as
to length and quantity have already been given.
My reason for saying that the parting and crown
should be obtained before putting on the mount is,
because exactness can be better observed. The
edges of the parting work lie on the galloon to
which it is sewn; the inner edges of the galloon
must come close up to the margin of the implanted
hair; “gaps” or vacancies should not be observable,
but when the wig is removed from the block and
examined, the parting and crown, being surrounded
with the galloon, ought to look like a piece of
artistic work well set in a frame. Of course, a silk
or skin parting and crown may be employed instead
of a transparent one, but then there is no occasion
to leave the opening in front, as shown in the
engraving.[27] In that case the galloon can pass
round the head, be continued across, and the whole
covered with net; this will impart strength to the
wig—a transparent effect not being required.
To mount a wig for the transparent parting
204and crown, commence tacking on the galloon at
the neck, the free portion lying towards the left
hand. Proceed, keeping the galloon fairly tight
till you reach the lower part of the ear; use
more points, and continue till the top of the ear is
approached; carefully curve the galloon and make
a decided point in front of the ear. Then incline
the galloon as shown on the temple, and up to
where one corner of the parting is intended to be
attached. Turn the galloon and trace the outline
for parting and crown, returning to the angle near
the centre of the forehead. Incline the galloon
sufficiently low (but not lower than is absolutely
required) and continue round the other side of the
block till the starting-place is reached. Cut off,
but see that there is at least half-an-inch of free
galloon upon each side, which will presently have
to be sewn together. You have now the outline
galloon upon the block, which, after careful
measurements, must be securely basted. (The
“points” and basting stitches sufficiently well
indicate this.) Afterwards, it will be found that
the galloon is puckered in various places; pinch
some of these together, sew through and through
close to the block, and fix so as to obliterate all
such indications. The inner galloon or “fillet”
is next to be put on. This passes round the
back of the head (at the neck) and is fastened
upon the galloon at each side of the parting. A
piece of galloon is then placed at the back, extending
from the crown to the lower part of the neck;
205pieces of galloon being put at the sides, reaching
from the top of the ears to the crown. Another
piece of galloon is attached to the point upon the
forehead, and joins the parting galloon in a straight
line with the piece at the back. Springs are
placed as shown in the engraving, or in such other
positions as may be required. No metallic spring
across the top can be used, and one at the back
is best avoided, for with correct measurements,
and perhaps one or two elastic springs in the
neck, a close-fitting wig may well be assured. A
reference to the illustrations will suggest other
minor details, and, after all that has been said,
the learner will know how to deal with them.
The mount having been completed, the springs
being neatly covered and placed in position, it now
remains to put on the net. Given a transparent
parting and crown, the other portions of the wig
should be knotted. Indeed, all the better class of
work ought to be so treated, though, in some
instances, a little weft may be employed with
advantage, especially if strength be required.
However, in this instance, I have designed a
knotted wig, the openness or closeness of the net
being left to your own selection; regard always
being paid to the kind of work you are going to
do. When this part of the wig is completed the
net ought to “fit like a glove,” and wherever
there is galloon, the net must be sewn to the
edges of the same.
The knotting or insertion of the hair ought to
206be done with neatness and great regularity, and
should be continued until nearly the whole of the
wig is covered, with the exception of the parting
and crown. Having dwelt at length on this part
of the subject in other places, I cannot do better
than ask the student to refer back for more
complete details.
With regard to the transparent parting and
crown, the reader is invited to look at Fig. 41, and
he will perceive that the side galloons (on which
the edges of the parting and crown are intended
to be sewn) are securely held in position by some
large stitches placed in a zigzag direction. These
stitches can be increased or diminished at pleasure,
or taken away altogether if such a step be desired,
but I do not recommend it. They are intended to
impart additional strength to the zephyr-like
parting; to keep it from tearing, and to prevent
its widening or stretching, as it most likely will
do, unless something effectual be done to stop it.
Most certainly there ought to be a “stitch” or
“stay” within half an inch of the front of the
parting, another should be placed where the parting
ends and the crown begins, while a third might
well be put mid-way between the two. There is
a substance specially employed for making these
stitches, called “Silkworm Gut,” which can be
obtained at Messrs. Hovenden & Sons’ warehouses,
and, as its name implies, is a kind of gut, white in
appearance, and impervious to perspiration. The
best white silk cord (about the thickness of coarse
207thread) is sometimes preferred; it can be renewed
when thought desirable, and is, further, soft to the
head. This arrangement, then, being completed,
a piece of skin, used for the purpose, can be
attached to the side galloons, but is not required
when the foundation is made of human hair. The
skin should not be allowed to reach the front of
the parting, and must be turned upwards and
inwards, so as to present a neat and even
appearance at the edge when the wig is taken off
the block. These preliminaries having been duly
attended to, the parting and crown may now be
put in position and sewn carefully, so as to avoid
any wrinkles or puckering; it must lie flat, be
perfectly smooth, and resemble the natural parting
of hair as much as possible. Herein lies the art
of the wig-maker—to imitate nature so skilfully
that detection is almost impossible—a feat that is
accomplished not unfrequently by some of the
most skilful wig-makers of the day.
The larger portion of the mount being now
covered with hair, and the parting and crown fixed,
it remains for the intervening spaces to be filled
in, which having been done the work is ready to
be pressed. Instructions and remarks on this
branch of the subject have already been given.
If possible, it is at all times desirable to try on
a wig before giving it up to the wearer, and this
remark has special reference to gentlemen’s wigs.
Elastic springs (in the neck) may or may not be
put in before the fitting process takes place, and
208the finishing touches should, if required, be
completed upon the head. The hair ought to be
well combed and dressed to the face, and anything
striking or likely to draw attention to the wearer
(so far as the wig is concerned) must be studiously
avoided.
CHAPTER XIII.
209
Of Ladies’ Wigs, and important remarks thereon—Of
Mounting and Making Ladies’ Wigs—A well-balanced
Wig essential—A Wig with Parting and Straight Hair
throughout—All Weft to be concealed—Alterations—Of
Wigs with transparent Partings—Mounting and
Making the same—Shape of Head to be noted, together
with any elevations or depressions—The Wig-block
should be a correct Model of the Head.
It is now my intention to treat of ladies’ wigs,
but before doing so, I desire to make a few
general remarks concerning them. If possible,
I think it best to avoid making an entire
wig for ladies’ wear, if the customary plaited knot
is intended to be worn behind, and my reason
for expressing such an opinion will presently
appear. Partial baldness among the female sex
is not uncommon, but this defect can well be
concealed by coverings specially made for the
purpose. These pieces of ingenious workmanship,
be they frontlets, scalpettes, fringes, partings,
twists, chignons, curls, plaits, or what not,
are easily and securely attached to the natural
hair-growth, while a ribbon-bow, feather, flower,
lace, cap, or other decoration lends a charm, and
completes the coiffure. But when a wig is required,
through the head being very considerably
210deprived of its natural covering, a difficulty
immediately arises as to holding it securely in
position, and this difficulty is increased by the
smoothness of the scalp, caused, perhaps, through
the nature of the ailment, or in consequence of
the head being shaved. Besides, to promote the
growth of hair, the shaving process should be
frequently repeated, and, as a consequence, the
smoothness remains until the hair has acquired
sufficient strength and thickness to be permitted
to grow. Then, as the hair increases in growth,
the wig becomes more troublesome, and it is a
welcome moment when the wearer can discontinue
its use, and appear in a “short crop” which is, at
the present time, so generally adopted for fashion’s
sake. But some cases of alopecia are known to
have defied all attempts to restore the hair, while
others, again, only lose it for a time, from no
assignable reason. Instances like this necessarily
require coverings for the head, which, in the case
of gentlemen, are comparatively easy to deal with,
but in long-haired wigs for ladies it is a different
matter altogether.
Copious instructions have been given respecting
board work in general, and the various manufactures
therewith connected; and the ingenious tradesman
will find but little difficulty, I am inclined to think,
in devising a wig for ladies’ wear, whether it be
curled all over as a “friz,” with or without parting,
or frizzed in front only, with the hair short and
partially straight behind. In either case the
211wearer would be at liberty to exercise discretion
in the use of additional postiches, which may be
employed with advantage, either as regards
appearance, comfort, and what is perhaps no less
important—additional security. In making wigs
let it be a golden rule (1) that they bind well to
the head, and (2) that the front and back parts be
equally-well balanced, or, as nearly so as possible.
I said just now that I thought “it best to avoid
making an entire wig for ladies’ wear, especially
if the customary plaited knot is intended to be
worn behind,” and here is my reason for saying
so: It too frequently happens that wigs of this
description are over-weighted at the back. Consequently
they slide away from the face, leaving
the forehead bare. This, of course, is a fearful
source of anxiety and annoyance to the wearer,
and complaint is forthwith made to the tradesman
who executed the order. The article is then
returned perhaps as a misfit, or else to undergo
certain alterations. These are carried out by
additional depth being given to the front;
necessitating, perhaps, the insertion of a new
parting; the hair at the back probably will be
reduced in quantity (and it may be shortened),
the result proving, doubtless, satisfactory. Why?
Because the wig is now more evenly balanced, and
consequently sits upon the head a great deal better.
Here, then, is the secret of making a wig feel
comfortable—let it be well proportioned, and use
no more hair than is necessary. I cannot conceive
212anything so distressing to a wearer as the
feeling of anxiety and discomfort which a wig
causes through evincing a strong tendency to slip
down behind. This should be overcome, and a
clever wig-maker can, if permitted to use his
own judgment, prevent, under ordinary circumstances,
such a contretemps taking place.
Fig. 42.
Respecting the mounting of a lady’s wig, I wish,
in the first place, to direct the learner’s attention
to what I have said upon the subject in preceding
chapters, so as to avoid unnecessary repetitions.
True the matter there refers to those worn by
gentlemen, but the modus operandi is almost
identical, and will apply, to a very great extent,
in both instances. The clean block and pencilled
outline, the putting on of the galloon, and attention
to curves, the ears, temples, etc., must be equally
213well attended to—the principal difference being in
the shape of the front part, to which it is requisite
more particularly to allude.
In comparing Fig. 38 (mount for gentleman’s
wig) with the mount for a lady’s wig,[28] the
variation becomes apparent. A gentleman wears
the parting at the side, but as a lady usually parts
her hair in the centre, the front has necessarily to
be somewhat differently designed. Let us suppose
that a wig has to be made according to the design
given on the preceding page, with a patent skin
parting in front and long hair behind. The
parting, I should say, ought to be five or six
inches in length if straight hair is to be employed,
and, perhaps, still longer should “a friz,” or short
curls be desired. Why? To preserve the balance
as much as possible, of which I have already
spoken. There might be (say, for example) two
ounces of 14 and 16–inch hair in front, and two
and a-half ounces of 18 and 20–inch at the back;
and if the mount be made well forward there need
not be any apprehension of the wig slipping off.
But should the wearer wish to have a fringe on
the forehead, with curls at the sides (either long
or short), equality of weight must, nevertheless,
be maintained, and the other portion treated accordingly.
A well-balanced wig is, at all times,
essential to success.
To make a wig, then, for straight hair only,
mount it as previously instructed. Having fixed
214the galloon according to pencilled outlines, baste
it carefully and put another piece of galloon across
the top, which must extend from ear to ear. Next
attach galloon to where the mount rises above the
temples, pass it round the back like a fillet, and
fasten on to the corresponding side. Prepare and
cover the springs, and place in position as
indicated. In the neck, just behind the ears, two
other springs are to be attached, similar to those
marked in Fig. 39. Galloon is also to pass from
the top of the parting to the nape of the neck; a
piece of broad ribbon on the top, between the two
springs,[29] and the net being put on finishes the
mount. Whether the hair shall be woven or
knotted is optional, and in reference to both
methods of affixing hair, instructions have been
freely given in other places. If the former be
decided upon it may be advisable to refer to page
139, i.e., in so far as the front is concerned, but a
somewhat different way must be adopted with the
back. After filling up the neck and angular parts
with the longest or most suitable length of hair,
it will be found that there remains a more or less
circular place at the back to be covered, and in
order to do this properly the sewing should be commenced
in the middle, and continued round and round
(like making rings upon paper without removing
the pencil), until the whole is filled in. The weft
ought to be very fine and well spread, and in the
centre part especially the rows need not be anything
215like close together. Indeed, rather than leave an
unseemly opening, I have found it necessary at
times to fill up the middle portion with short, fine
hair, which, being concealed by the longer hair
is no defect whatever. By such an arrangement,
lightness is maintained, while the rows of weft
are continuous and regular. The weft being
measured, and a calculation made as to the space
to be covered, the worker must then act accordingly.
There are two principal points now to be
mentioned. First, the cross-parting from ear to
ear, which in the present instance I have designed
should be formed with the weft. It requires some
little ability to do this nicely, for the hair must be
so placed as to conceal the weft, though still making
a separation or parting. Some do it by adroitly
covering with the hair all the weft except the last
row, which, being closely woven and very fine
withal, is sewn on the wig the wrong way, but,
the hair being pressed into proper position, covers
the weft, and effectually conceals it from view.
There are other modes of attaining this object,
but much depends on a man’s ingenuity, for here
is a difficulty which a clever workman must seek
to overcome. Secondly, it is natural for some
fine, short, more or less fluffy hair to grow in the
neck; and here is the next trial of skill on the
part of the wig-maker. No weft, of course, should
be seen in such a noticeable place, therefore attention
must be given at the outset to hide the lower
row or rows, partly by skilful manipulation in
216sewing on, and also by means of the short hair to
which I have just alluded. In effecting the concealment
of the weft, attention should be given to
the different kinds employed in the manufacture
of postiches, etc.[30]
Referring to the illustration last given, I wish
to observe that the mount there shown can be
adapted to a transparent, instead of a skin parting,
with very little trouble. An order might be taken
for one of the latter description, and perhaps
countermanded when the mount is completed
in favour of one of a lighter manufacture. All
that is necessary under such circumstances would
be to cut away the lower-central piece of galloon;
adapt the basting threads to the altered conditions,
and connect with zigzag stitches.[31] Besides,
alterations are not unfrequently required in wigs
after they have been worn; and a wearer may
wish for increased ventilation in it, through its
causing the head to feel hot and uncomfortable;
or other changes might be wanted which necessitate
the insertion of a new parting. The requirements
of people are various, but the ingenious
workman seldom acknowledges a difficulty that
(within reasonable limits) cannot be overcome.
To make a lady’s wig with transparent
partings, pencil the outlines upon a clean block,
but, if possible, get the partings done before-hand;
my reason for this I have already given.
Exactness is essential, for, with the mount being
217made in one place and the partings (front and
cross-partings) in another, a discrepancy might
occur which is best avoided. I will suppose
that the hair, partings, galloon, net, etc., are
all ready to hand; the measurements carefully
observed, and, perhaps, some other necessary
details noted. Commence by tacking on the
galloon at the neck, bring it towards the left
ear, and then, over the temple to the side of
the parting; turn, and continue the galloon as
far back towards the crown as the front parting is
intended to go. Turn again, and fasten off at the
top of the ear, taking care to follow the line
marked for the parting. A portion of one side of
the mount is thus formed which can be traced by
referring to Fig. 42. The right side should be
done in the same way, and I need hardly observe
that both sides must correspond exactly. Next
place the galloon so as to extend from one temple
to the other, and across the back of the neck after
the manner of a fillet, but it must overlap (just
behind the ear) that which was first put on.
Another piece of galloon is next to be fixed in
position across the top of the head, extending
from one ear to the other. With an obvious
exception at the top, there will now be two
galloons exactly the width and length of the cross
parting, and two galloons in front also, exactly
the width and length of the front parting. The
professed wig-maker may raise an objection to the
galloon remaining at the ends of the side partings;
218but in such places it will scarcely be seen, and by
allowing it to remain much additional strength is
given to the wig—no unimportant consideration
with those of an economical turn of mind. But, as
I have repeatedly stated, these lessons are not
designedly for the very skilful, and it is a question
whether the man who attempts to make a wig
such as I am describing need refer to this at all.
I imagine not, but there are learners, and to them
instruction will always be acceptable. The springs
(made of fine watch-spring) are to be neatly
covered and placed in their respective positions.
It is advisable to affix one on each side of the
front parting, and the others where necessary to
maintain the proper shape of the mount. The net
should be put on next and sewn according to
instructions frequently given before. Whether the
hair is to be knotted or woven, the maker must
decide, but perhaps the former is best adapted for
a wig of this kind. Whether the partings should
be attached before or after a greater portion of
the hair is knotted or sewn on, is optional, so long
as their proper adaptation is secured. Should
they be of gauze or net, it may be thought
desirable, first of all, to attach some thin skin, to
counteract as much as possible the effects of
perspiration and grease; but if the foundation be
made of human hair, no such precaution is
necessary.
I have before alluded to the different kinds of
net used in wig-making, and there is also variety
219in galloons, some being white and some flesh-colour,
as well as the ordinary brown. Bear in
mind my remarks about ladies’ wigs being well-balanced,
and when measuring the head, carefully
observe the shape. If smooth and round, two
elastic springs in the neck will be absolutely
necessary; but should the head incline to fulness
(either back or front) these more or less prominent
organs, speaking phrenologically, will perhaps
give a “stay” to the wig, and the elastics may be
considered unnecessary. A word or two concerning
natural elevations and depressions may probably
be useful. It has been previously stated that in
mounting a wig the block must be at least half an
inch larger round than the actual measurement;
this is to allow for shrinking. Should there be
any protuberances or “bumps” apparent, a similar
elevation must be made upon the block, and, of
course, exactly in the same position. This may be
done with thin sheet lead, such as tea-chests are
lined with; but should there be a depression, then
the place upon the block must be filed or scraped
away if necessary. The block is, as it were, the
model; and with a good model to work upon, a
perfect fit can almost be ensured.
I need not dilate upon any other styles of ladies’
wigs, believing that I have said quite enough to
enable a man to make almost anything that might
be required.
CHAPTER XIV.
220
The use of Leather Rollers in Curling Hair—Papering
and Pinching Hair with the same object in view—Plaiting
Hair (for Coiffures)—Of Razors, Razor Setting,
and Razor Strops—Miscellaneous Recipes.
Besides the preparation of hair for making
it into twists, curls, bandeaux, scalps, wigs,
etc., there are many other things to be
done with care and attention, and “Board-work”
will not be complete without some allusion being
made to them. For instance, there is the curling
of hair with leathern rollers. These rollers are
smooth, soft, round, and well adapted to the purpose.
They make a nice curl if properly manipulated,
do not break the hair, and only the application
of a little warmth is necessary. For ringlet
hair nothing can be better, no matter whether it
be real or false. Next to the employment of
rollers, is the process of papering and pinching
the hair. A dexterous workman experiences no
difficulty whatever in rolling up a thin strip of
hair (no matter whether it be long or short) with
his thumb and finger, and wrapping the usual
three-cornered curl paper around it. But a curling-peg
is more generally employed. This is a round
221piece of hard wood about six inches long, perfectly
smooth, with one end much thinner than
the other. The reason is—should the hair be
short, or a tight curl required, the small end must
be used, but if the hair be long, and a full, round,
curl wanted, then the thicker portion has to be
employed. The curl is made by rolling it round
and round the “peg” (beginning at the points
and ending at the roots), and keeping it as flat as
possible all the time. Then hold the curled portion
securely between the thumb and fingers of the left
hand, withdraw the “peg,” and place the curl
within the three-cornered paper aforesaid, screwing
up the ends to make all secure. When this is
done, the curl should feel perfectly round within
the paper, the centre being equally as well formed
but hollow. Bear in mind what I have so frequently
said before, that all curls should turn to
the face. Only a medium quantity of hair is to
be taken for each curl, and all ought to be about
the same size. The curls are next to be “pinched,”
and, for this purpose, pinching irons are brought
into requisition. If the hair be somewhat new,
and of good quality, the less heat that is applied
the better, but should it be otherwise much
warmth and pressure is necessary. Old hairdressers
can recollect when the fronts and curls
which came to be re-dressed had to be baked
(they were so numerous), and how trouble was
caused sometimes, through their being “overdone.”
222The papering should be done in regular order,
and all quite cold before the papers are removed.
For dressing, a little oil (not pomade) should be
used, and the curls—if long or short ringlets—formed
with the aid of a curl-stick or cold curling
irons. True, they can be formed with the
fingers, but the other method I consider best.
Short, round curls, of course must be made with
the fingers after a little frizzing, but these operations
are difficult to explain in writing—they
want practical illustration, which, now that we
have societies and schools, is easily obtainable.
Concerning the beautiful art of plaiting hair for
ladies’ coiffures, the reader is informed that copious
instructions are already given in my “Lessons in
Hairdressing,” and to that work he is respectfully
referred.
Of razors and razor-sharpening much might be
said, both as regards the instrument itself, as well
as the proper mode of keeping it in order. Every
hairdresser and barber knows when he is in
possession of a good razor, and undoubtedly takes
proper care of it. He is to be commended for
this, as he simply follows the course adopted by
those in other walks in life. Whether the old-fashioned
description of razor is better or worse
than the more modern “hollow-ground” I will
not discuss, believing that a great deal depends
upon the shaver, the nature of the beard, and the
conditions under which the shaving operation is
performed. Good practice in a barber’s shop is
223the best school in the world for imparting a knowledge
of easy shaving; while ordinary intelligence
combined with shrewd observation, will go far
towards making one a master of his art.
“It appears,” observes a writer[32] on the subject,
“that the choice of a razor may quite as well be
left to the makers, as determined by the purchaser;
however, it sometimes happens, that, exclusive
of its goodness, the weight, the poise, &c.,
of a razor, are circumstances which seem to claim
acquaintance with particular hands; and, with
regard to these, every one will do well to suit
himself.
“I have lately ventured, notwithstanding the
long-established notion that weight is a very
requisite property in a razor, to recommend those
which were deficient in this respect; and I will
embrace this opportunity to offer the reasons which
influenced my judgment on the subject.
“It does not appear, upon considering by what
means a razor acts, that its ponderosity can assist
in the operation; the performance depending upon
the condition of the edge, abstractedly from its
weight; momentum can assist only where force is
requisite; thus, in dividing a tough piece of wood,
we find that the edge of a knife, however keen,
cannot make its way; it becomes necessary, therefore,
to use some instrument of more weight,
which, being applied by an accelerated action of
224the arm, becomes equal to the task. The weight
of all cutting instruments should be adapted
according to the nature of their acting; and if the
beard required to be hewn, or chopped off, doubtless,
a hatchet, with a sharp edge, would answer
the purpose better than a razor; on the contrary,
if the beard can be erased by an unforced incision,
which is certainly the case, an instrument of no
considerable weight, with a proper edge, will
always deserve the preference; for the hand,
having nothing to overcome in point of weight,
performs with more exactness and ease, than it
possibly can, when feeling the oppression of
weight in the instrument it has to manage.”
As regards hollow-ground razors much can be
said in their favour, and many in the trade consider
them to be the best, but of this each man
must judge for himself. I think that much depends
on fancy, and what we are accustomed to, as well
as to the mode of treatment. Sometimes it is
requisite to put a long-used razor by for a time so
as to restore its edge, and the following observations
anent “Tired Razors” are à propos of the
subject:—Barbers often assert that razors get
“tired” of shaving, and that they will work
satisfactorily if permitted to rest for a time. It
has been found by microscopic examination that
the “tired” razor, from long stropping by the
same hand, and in the same direction, has the
ultimate fibres of its surface or edge all arranged
in one direction, like the edge of a piece of cut
225velvet; but after a month’s rest the fibres rearrange
themselves heterogeneously, crossing each
other, and presenting a saw-like edge, each fibre
supporting its fellow, and hence cutting the beard
instead of being forced down flat without cutting.
Razor-setting cannot well be taught—it must,
(like tuning a violin)—be acquired. Some persons
are unable to set a razor with any degree of certainty,
while others become recognised as clever in
that branch of the business. The quality of the
hone is an important consideration in razor-setting;
it should neither be too hard nor too soft. The
razor has to be rubbed from heel to point in the
usual way, and always turned on the back. The
edge should be tried from time to time upon the
thumb or finger-nail, until it feels quite smooth
and keen, it is then to be fixed or “set.” This
is effected by passing the razor to and fro, as
lightly as possible and with single strokes upon
the hone. Do this for a short time until the edge
“bites” the nail as it were, when the setting is
completed. Should it not do so, the assumption is
that the setting has not gone far enough; the
other extreme being when the edge is wiry, and
then the setting is overdone. In either case the
job is not satisfactory, as the razor is “not in
tune,” and will quickly require to be set again.
Stropping assists greatly in fixing the edge of a
razor, and perhaps I cannot do better than quote
what Mr. Savigny says upon the subject:—
“In strapping a razor, it is necessary to observe,
226that the thick or hind part bears upon the leather
at the same time the edge does: for if the back is
raised, the hand loses its only guide; in which
case it could not fail of receiving some injury;
but if the razor is applied flat, and the strap a
proper one, ten or twelve strokes, on each side the
blade, will be sufficient to give the edge its necessary
refreshment.
“I have always given directions to draw the
razor downwards, from the termination of the
edge to the point; having experienced that this is
the most steady manner the hand can act in; and
it is an observation pretty well established, that
any thing may be drawn to a much greater degree
of exactness, than it can be shoved; and in the
present case, were a razor to be pushed upwards
along the strap, that is, from the point to the
termination of the edge, there would be some
danger of its turning on the rivet, and cutting
both the leather and the fingers; to be as secure
as possible in this respect, it will be well to place
the hold just above the rivet, grasping at the same
time the handle, and that part of the blade which
issues from it.
“The manner in which a proper strap acts upon a
razor must necessarily form an edge most suitable
for the purpose, as it neither wears it so fast as
the hone, nor confines its effects entirely to a flat;
by the gentle manner in which it operates, and
being in some measure yielding to pressure, it
cannot leave that roughness upon the edge, which
227the hone, on account of its quickness, and the
solidity of its surface, is commonly found to produce.”
There cannot be two opinions regarding the
importance of a good strop, and its being kept
in proper condition, if the edge of a razor is to
be considered.
For ordinary use, I give the preference to buff
leather mounted upon wood in the old style, but
there should always be a layer or two of common
leather or other suitable substance between;
otherwise there will be a hardness which, to say
the least, is not agreeable. Softness and pliability
should always be aimed at, and, doubtless, this is
why many prefer a long piece of buff securely
fastened to the wall. In preparing the leather for
shop use, after having cleaned and thoroughly
dried it, saturate it with olive oil, and then let
it be well dressed with suitable razor paste. (If
the leather is intended to be affixed to wood, it
must be glued on first and time allowed for the
glue to harden.)
Canvas strops are generally recommended for
hollow-ground razors, but they are specially prepared
in Germany, with the aid of suitable machinery.
When unprepared, the canvas is exceedingly
hard, and to adapt it for use, it should be filled
with soft soap, the ends secured, and boiled for
some length of time in a sufficient quantity of
water. It is then to be pressed flat, scraped, and
well rubbed with a smooth, round instrument until
it becomes soft and pliable.
MISCELLANEOUS RECIPES. — Razor Pastes. — Shaving Pastes. — Essence of Soap, Shaving Essence, or Shaving Fluid. — Rosemary Hair Wash. — American Shampoo Liquid. — A Wash for Moist, Lax Hair. — Washes for Dry, Stubborn Hair. — Egg Julep. — Bay Rhum. — Another. — To Allay Irritation of the Skin after Shaving. — Brilliantine. — Marrow Oil. — Hair Oil.
228
(1.) From jeweller’s rouge, plumbago, and
suet, equal parts, melted together and stirred
until cold.
(2.) From prepared putty powder (levigated
oxide of tin), 3 parts; lard, 2 parts; crocus martis,
1 part; triturate together.
(3.) Prepared putty powder, 1 oz.; powdered
oxalic acid, ¼ oz.; powdered gum, 20 grains;
make a stiff paste with water, q.s., and evenly and
thinly spread it over the strop, the other side of
which should be covered with any of the common
greasy mixtures. With very little friction this
paste gives a fine edge to the razor, and its action
is still further increased by slightly moistening it,
or even breathing on it. Immediately after its use,
the razor should receive a few turns on the other
side of the strop.
(4.) Mechi’s.—Emery, reduced to an impalpable
powder, 4 parts; deer suet, 1 part; well
mixed together.
229(5.) Pradier’s.—From powdered Turkey stone,
4 ozs.; jeweller’s rouge and prepared putty powder,
of each, 1 oz.; hard suet, 2 ozs.
Obs.—The above (generally made up into square
cakes) are rubbed over the razor strop, and the
surface being smoothed off with the flat part of a
knife, or a phial bottle, the strop is set aside for a
few hours to harden before being used.
(1.) Naples soap (genuine), 4 ozs.; powdered
Castile soap, 2 ozs.; honey, 1 oz.; essence of
ambergris, and oils of cassia and nutmegs, of each
5 or 6 drops.
(2.) White wax, spermaceti, and almond oil, of
each ¼ oz.; melt, and, while warm, beat in two
squares of (white) Windsor soap, previously reduced
to a paste with a little rose water.
(3.) White, soft soap, 4 ozs.; spermaceti and
salad oil, of each ½ oz.; melt them together, and
stir until cold. It may be scented at will. When
properly prepared, these pastes produce a good
lather with either hot or cold water, which does
not dry on the face. The proper method of using
them is to smear a minute quantity over the
beard, and then to apply the wetted shaving-brush,
and not to pour water on them, as is the common
practice.
230
White hard soap[33] (in shavings), ¼ lb.; rectified
spirit, 1 pint; water, ¼ pint; perfume (at will),
q.s. Put them into a strong bottle of glass or tin,
cork it close, set it in warm water for a short
time, and occasionally agitate it briskly until
solution be complete. After repose, pour off the
clear portion from the dregs (if any) into clean
bottles for use, and at once closely cork them. If
the solution be not sufficiently transparent, a little
rectified spirit should be added to it before decantation.
A little spirit (fully proof) may be added
if it be desired to render it thinner. If much
essential oil be used to perfume it, the transparency
of the product will be lessened.
Chiefly used for shaving, by travellers and
others, to avoid the trouble of carrying or keeping
a soap-box. By simply rubbing two or three
drops on the skin, and applying the shaving
brush, previously slightly dipped in water, a good
lather is produced. The choice of perfume is a
mere matter of taste, as with toilet soaps, 15 to
23120 drops of essence of musk or ambergris, 1 fluid
drachm of any of the ordinary fragrant essences
or esprits, or 12 or 15 drops of essential oils (simple
or mixed), per pint, are sufficient for the purpose,
a corresponding name being given to the preparation;
as “Essence,” or “Esprit de Savon à la
Rose,” “Essence Royale pour la Barbe,” &c.—Cooley.
Cold (boiled) water, ½ gallon; spirit of rosemary,
10 ozs.; eau de Cologne, 10 ozs.; glycerine, 2 ozs.;
salts of tartar, 1 oz.; liquor ammonia, ½ oz. Colour
with burnt sugar.
Take of sesquicarbonate of ammonia, and carbonate
of potash, of each, 2 drachms; soft water,
1 pint; dissolve, and add the solution to a mixture
of tincture of cantharides, 1½ fluid ounces; rectified
spirit, ¼ pint; and good rum, 1½ pints; and agitate
the whole well together, adding a little scent or
not, at will. A commoner kind, in which the
“rectified spirit” and one-third of the “rum” is
replaced by water, forms the “shampoo liquid”
often used by hairdressers, after cutting the hair.
Take of essential oil of almonds, 1 fluid drachm;
oil of cassia, and essence of musk, of each,
232½ fluid drachm; rectified spirit, 2½ ounces;
mix, and add gradually, with brisk agitation,
16 ounces of distilled water, in which 1 ounce of
finest gum arabic has been dissolved. The hair
and scalp should be slightly moistened with the
liquid, and the hair at once arranged, without
wiping, whilst still moist.
The best and most effective of these consists of
glycerine dissolved in any fragrant distilled water,
as that of roses, or orange or elder flowers, in the
proportion of 1 to 1½ ounces of the former, to 1
pint of the latter. Some of them also contain 15
to 20 grains of salt of tartar per pint.
Egg julep, or saponaceous wash, is made as
follows:—Rectified spirit, 1 pint; rose-water, 1
gallon; extract of rondeletia, ½ pint, transparent
soap, ½ oz.; hay saffron, ½ drachm; shave up the
soap very fine; boil it and the saffron in a quart of
the rose-water; when dissolved add the remainder
of the water, then the spirit, finally the rondeletia,
which is used by way of perfume. After standing
for two or three days it is fit for bottling. By
transmitted light it is transparent; but by reflected
light the liquid has a pearly and singularly wavy
appearance when shaken.—Piesse.
233
Tincture of bay leaves, 5 ozs.; otto of bay, 1
drachm; bicarbonate of ammonia, 1 oz.; biborate
of soda (borax), 1 oz.; rose water, 1 quart. Mix
and filter. Piesse says: “This is a very good
hair-wash. It was first introduced in New
York by those go-ahead scissors that ‘abbreviate’
the ‘crown of glory.’”
Bay leaf otto, ½ oz.; magnesium carbonate,
½ oz.; Jamaica rum, 2 pints; alcohol, 3 pints;
water, 3 pints. Triturate the ottos with the
magnesium carbonate, gradually adding the other
ingredients, previously mixed, and filter.—Snively.
Powder, either plain or scented, is the best
counter-irritant after shaving, but as some persons
give the preference to bay rhum, the following
formula may be adopted:—Bay rhum (of the
ordinary strength), 8 ozs.; rose water, 8 ozs.;
glycerine, 2 ozs. Mix, and let it stand for a few
days, then filter. Should this be found too
powerful for general use, add more rose water.
A solution of castor oil in eau de Cologne, 1
part in 4. Another: Glycerine and eau de
234Cologne, of each 1 part; honey, 2 parts; rectified
spirit, 4 parts. Another formula is as follows:—Castor
oil, 1 oz.; esprit de rose, 1 oz.; spirits of
wine, 2 ozs. A few drops of tincture of saffron
to colour.
Prepared (benzoated) lard, 3 lbs.; clarified beef
suet, 1½ lbs.; palm oil, ½ lb.; yellow wax, 4 ozs.;
castor oil, 1 lb.; olive oil, 1½ lbs.; ess. oils of
bergamot, lemon, and cloves, of each, ½ oz.
Finest olive oil, 3 lbs.; castor oil, ½ lb.; ess.
lemon 1½ ozs. To colour, steep 1 oz. of alkanet
root (bruised, and tied in muslin) to every 20 ozs.
Apply heat by means of a water bath, and filter.
2. For the convenience of those who desire the information,
I may state that Messrs. R. Hovenden & Sons
keep all the necessary implements in stock, and supply
them to the trade.
3. Vide The Hairdressers’ Chronicle, 15th July, 1876.
7. Concerning French weights, measures, and money,
the following information will, doubtless, be useful:—The
unit in weights is the gramme. 28 of which go to the
English ounce; 1,000 grammes are called a kilogramme,
or, shortened, a kilo., equal in weight to 2 lb. 3 oz. 4 drs.
English avoirdupois. The unit in measures is the metre,
equal in length to 39⅓ inches English. The metre is
divided into 1,000 parts, each of which is called a millimetre;
10 millimetres are called a centimetre. The
length of a centimetre is rather more than one-third of
an inch English, the figure in decimals being 0·39371.
One foot English is equal to 304 millimetres, and an inch
equals rather more than 25 millimetres. The unit in
money is the franc, equal to ninepence-halfpenny English.
The franc is divided into one hundred parts, each of which
is called a centime; five centimes are called a sou; and a
sou is rather less in value than a half-penny.
8. Donisthorpe v. Jowett, 1876; vide Law Report in
The Hairdressers’ Chronicle.
17. There are (or used to be) silk nets made for the
purpose, very strong and durable, and could be procured
where the “trimmings” are usually sold. The crown of
this net is left rather loose and threaded on a silk cord.
The cord is held up, which gathers the loose meshes
together, when it should all be fastened, and thus a
caul net well fitting the head is formed.
18. I mention six inches because hair of that length is
most convenient for a learner to practise with, but you
will have to knot hair of various lengths, from the
shortest for gentlemen’s perukes, to very long for ladies’
wigs.
32. A Treatise on the Use and Management of a Razor,
by Mr. Savigny.
33. Olive-oil (white Castile) soap, or almond oil soap is
here intended. It should be moderately dry when weighed,
next reduced to thin shavings, and then further desiccated
by exposure to warm, dry air, but no artificial heat should
be employed. By replacing a portion (say one-third) of
the above with an equal weight of dry, white tallow soap
(i.e., curd soap) the “lathering” quality of the essence
will be increased.
Wertheimer, Lea & Co., Printers, Circus Place, London Wall.
ADVERTISEMENTS.
R. HOVENDEN & SONS,
31 & 32, BERNERS ST., OXFORD ST., W.,
AND
91, 93, & 95, CITY ROAD, E.C., LONDON.
HAIR MERCHANTS & MANUFACTURERS
Wholesale Perfumers,
FANCY SOAP MAKERS AND GENERAL WAREHOUSEMEN for HAIRDRESSERS.
Importers of Essential Oils, Sponges, French Pomades & Oils, Fancy Combs, Etc.
THE LARGEST and MOST COMPLETE STOCKS IN LONDON OF
MANUFACTURED HAIR,
Trimmings, Partings, Ornamental Hair,
COMBS IN HORN, SHELL, & RUBBER,
HAIR, TOOTH, NAIL & CLOTH BRUSHES,
CUTLERY, MIRRORS, HAIRDRESSERS’ TOOLS, AND SHAMPOOING REQUISITES.
Proprietary Articles In Perfumery
Kept in Stock or procured at short notice.
☞ NO TRAVELLERS represent the Firm. Their enormous
expenses being avoided, R. H. & SONS can offer their
Goods from 10 to 20 per cent, below those Houses who
employ them.
ILLUSTRATED CATALOGUE POST FREE UPON RECEIPT OF BUSINESS CARD OR INVOICE HEADING.
ESTABLISHED 1846.
EDWIN CREER,
Hairdresser, Wig-Maker, & Manufacturing Perfumer,
MAKER OF CHIGNONS, TWISTS, SWITCHES, PLAITS, CURLS, AND ALL KINDS OF ORNAMENTAL HAIR.
589, COMMERCIAL ROAD EAST, LONDON, E.
589, COMMERCIAL ROAD EAST, LONDON, E.
Dealer in Combs, Brushes, Fancy Goods, and other Requisites for the Toilet.
POMADES, OILS, WASHES, PERFUMES, POWDERS, HAIR DYES AND RESTORERS, Etc.
ARTIST IN HAIR—ESTABLISHED 1846.
EDWIN CREER,
589, COMMERCIAL ROAD EAST, LONDON, E.,
MANUFACTURES ALL KINDS OF HAIR JEWELLERY FOR THE TRADE,
Rings, Brooches, Bracelets, Watch-Guards, &c.,—and Device-Work of every description.
⁂ Best work guaranteed, and at the lowest possible prices.
No. 1. Hair, Gold Top
2s. 3d.
No. 2. All Gold, with Hair Plait and Heart or Shield Top
6s. 6d.
No. 3. Albert Guard, with Gold Mountings
15s. 6d.
Letters of inquiry, as well as others requesting, price list and designs, should enclose a business card, and aSTAMPfor reply. Terms—Cash on or before delivery.