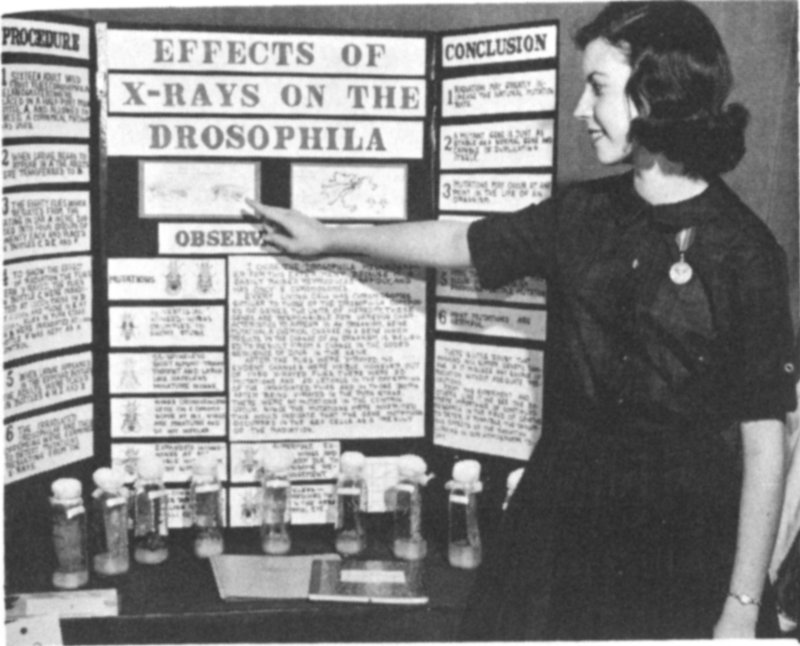
Try to organize your exhibit content so that it will be
meaningful to viewers who know less about it than you do.
The following outline may be followed, but is not the only
one possible. Don’t be afraid to let the unusual aspects of
your project influence the organization of its exhibit.
Title The same title you chose for your project report
may be an acceptable exhibit title. It should be brief and as
nontechnical as possible. A subtitle may explain or amplify
the main title.
The Summary Message (or Statement of the Problem)
Give the viewer a capsule explanation of the project and its
significance. You may use a simplified version of your
abstract, eliminating information and language which is not
meaningful to the average viewer. Keep it simple.
Hypotheses and Conclusions List these briefly in a manner
understandable to the average viewer. (Those interested
in details can find them in your notebook and project report.)
Method and Scope of Investigation Hit only the high
points, but emphasize instances where you feel you displayed
unusual imagination, ingenuity, or resourcefulness.
12
Observations and Data Both are important, but in an
exhibit too many data can be dull. Select only those which
are essential to the capsule story of your project.
Photographs and Illustrations Review the foregoing elements
to see where pictures will tell your story as well as
(or better than) words. List all photographs you have already
taken of your project, ones you can still obtain, and
drawings which will illustrate or help narrate your story.
Don’t be selective yet. Later, when you are designing your
exhibit layout, space limitations will force you to choose.
Equipment and Specimens These also help narrate your
story. Select objects and apparatus which will provide
viewers a good grasp of your project work. Have you hit
upon a low-cost substitute for expensive laboratory equipment?
Do some of your specimens present clearly visible
evidence of points you want to make? Are any of the experimental
results or specimens particularly unusual, spectacular,
or beautiful? List them for possible use.
Handout Brochure An important but frequently overlooked
exhibit component is the “handout brochure” to be
distributed to interested viewers. Even a single mimeographed
page can supply more written information than
should be displayed in the limited space of the exhibit. It
can provide serious viewers a condensed version of the
project report. The brochure provides all viewers a reference
when they discuss the science fair and your exhibit
with others. Consider the handout brochure while planning
your exhibit’s contents because it can contain data and
graphs which might otherwise clutter and confuse your
exhibit proper.
Rules for the judging of exhibits vary, but most science
fairs stick fairly closely to the criteria and point values
used by the National Science Fair-International, which are:
I. Creative Ability Total 30 points
How much of the work appears to show originality of approach
or handling? Judge that which appears to you to be
original regardless of the expense of purchased or borrowed
13
equipment. Give weight to ingenious uses of materials, if
present. Consider collections creative if they seem to serve a
purpose.
II. Scientific Thought Total 30 points
Does the exhibit disclose organized procedures? Is there a
planned system, classification, accurate observation, or controlled
experiment? Does exhibit show a verification of laws,
or a cause and effect, or present by models or other methods
a better understanding of scientific facts or theories? Give
weight to probable amount of real study and effort which is
represented in the exhibit. Guard against discounting for what
might have been added, included, or improved.
III. Thoroughness Total 10 points
Score here for how completely the story is told. It is not essential
that step-by-step elucidation of construction details be
given in working models.
IV. Skill Total 10 points
Is the workmanship good? Under normal working conditions,
is the exhibit likely to demand frequent repairs? In collections,
how skilled is the handling, preparation, mounting or
other treatment?
V. Clarity Total 10 points
In your opinion, will the average person understand what is
being displayed? Are guide marks, labels, and descriptions
spelled correctly, and neatly yet briefly presented? Is there
sensible progression of the attention of the spectator across or
through the exhibit?
VI. Dramatic Value Total 10 points
Is this exhibit more attractive than others in the same field?
Do not be influenced by “cute” things, lights, buttons, switches,
cranks, or other gadgets which contribute nothing to the exhibit.
Such rules leave much to the individual discretion of the
judges, particularly regarding the distinction between the
science project itself and the exhibit. Be sure to study your
local rules and judging criteria carefully. Since usually 60
points pertain to creativity and sound scientific thought, a
large part of your score depends on the original excellence
of your science project. The remaining 40 points apply to
the manner in which you develop your exhibit of that project.
14
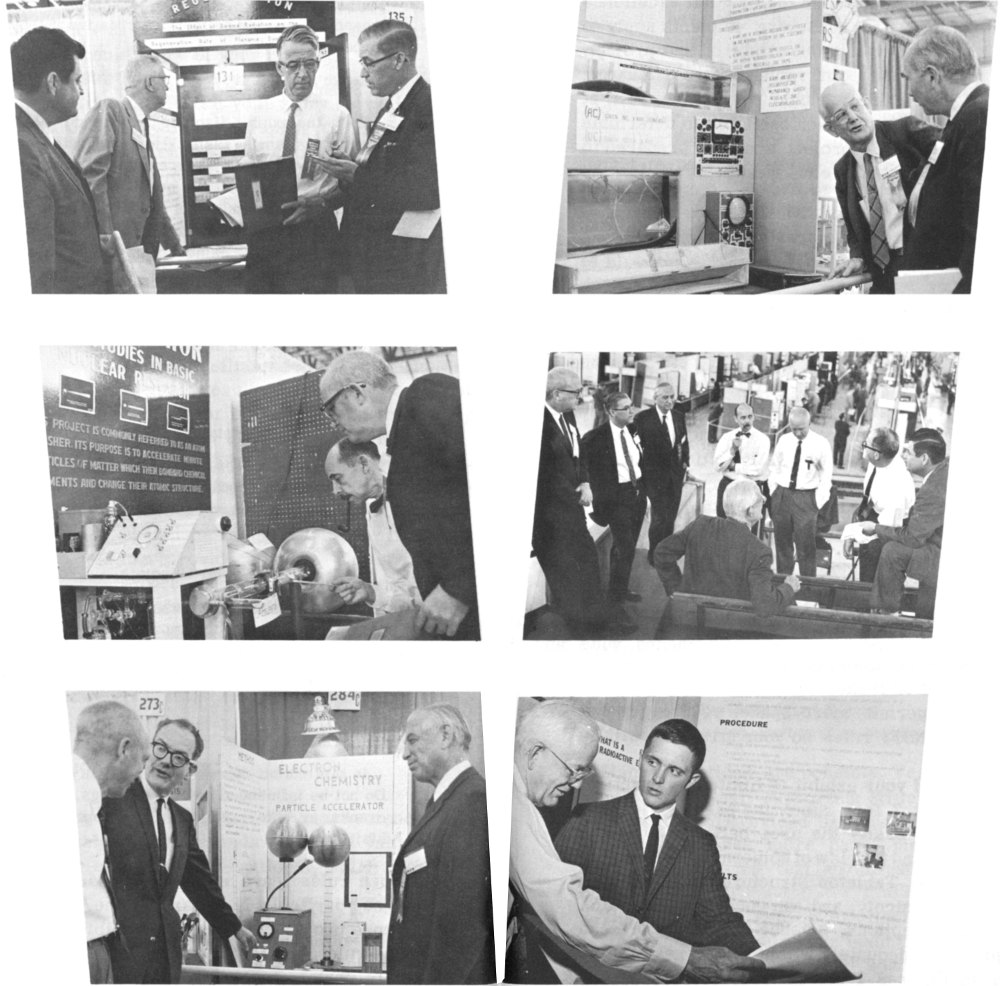
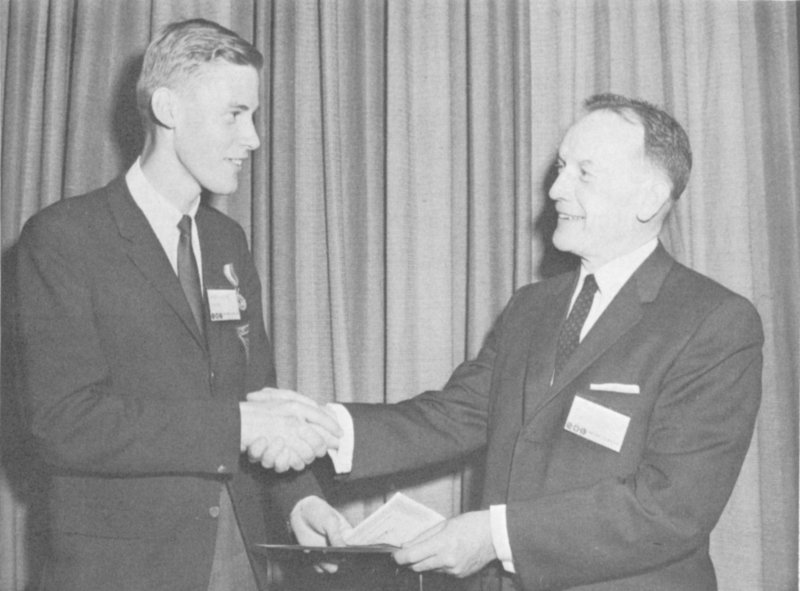
AEC Special Award competition
is judged by a “blue-ribbon”
panel composed of people who
head research and development
programs at AEC
offices and laboratories
throughout the United
States. At the 14th NSFI
at Albuquerque, these
judges spent the morning identifying
eligible exhibits, “huddled”
late in the afternoon to
select semifinal choices, and
then in the evening talked
with each semifinalist before
making the final
choice of winners and
alternates.
16
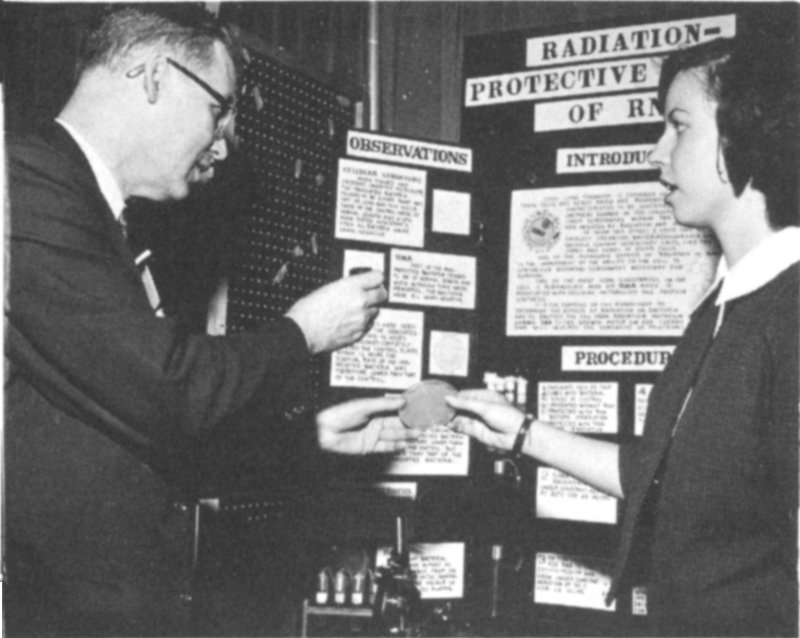
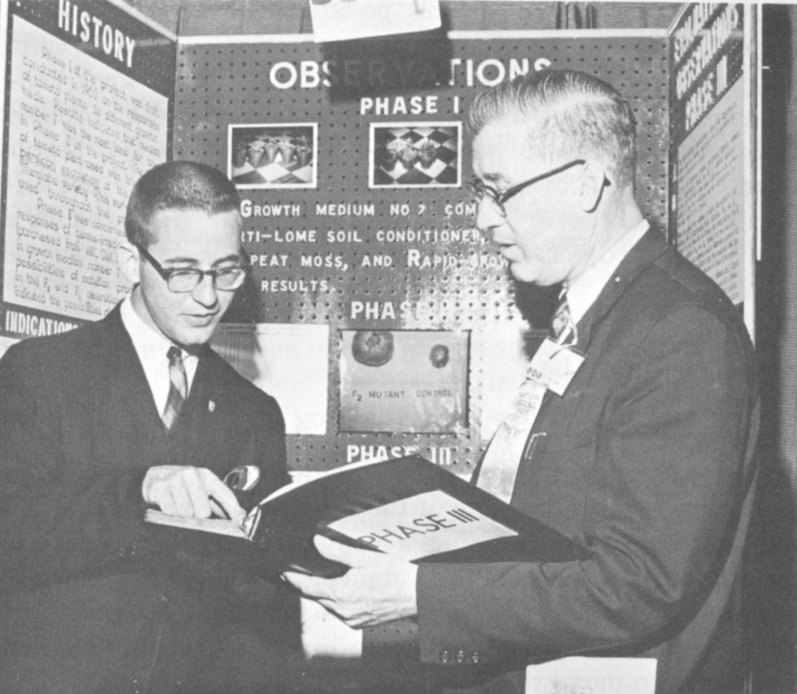
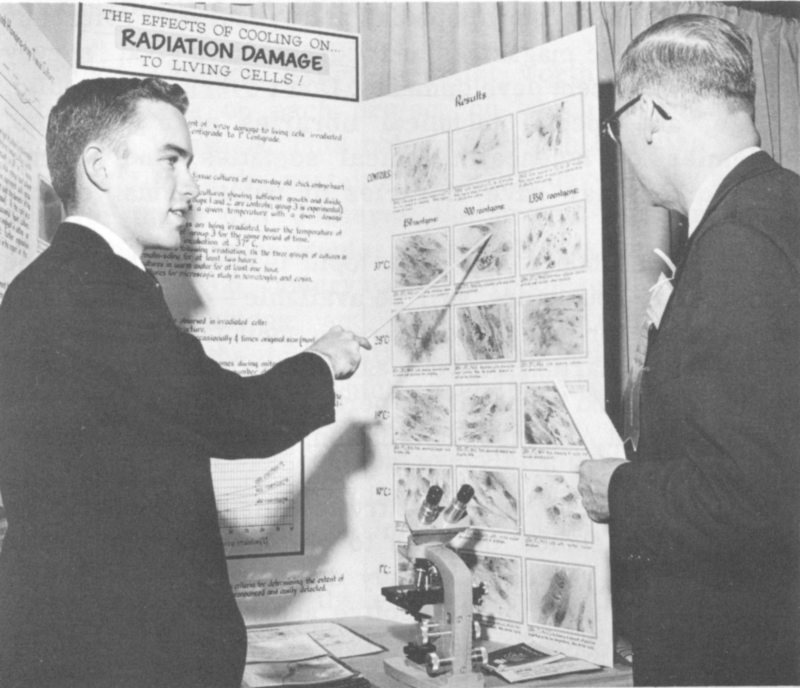
Judges study criteria and point values before evaluating
exhibits. Although your exhibit should speak for itself, at
many fairs the judges chat with each exhibitor to determine
how well he understands his project area. Be prepared to
present details concisely and clearly, but avoid lengthy
explanations unless asked.
After you have finished your project, documented your
work in a project report, planned and listed what must go
into the exhibit, and familiarized yourself with the ground
rules under which you will compete, you are ready to design
your exhibit. The sections which follow suggest guidelines
and construction hints on exhibit structure; ways of
presenting information (text, photographs, transparencies,
line drawings, captions, models, specimens, laboratory
equipment, etc.); layout and location of exhibit items, exhibit
materials, color, and lighting.
Size. National Science Fair-International rules limit
exhibit size to 48 inches wide and 30 inches deep. The
structure may rest on the floor, on its own supports, or on
a table (normally about 30 inches high) supplied by the fair.
Even if local rules permit more space, you may find it
desirable to build to NSFI rules so your structure will be
eligible at all fairs.
The overall height of your exhibit is limited by practical
considerations to about 7 feet, since the passing viewer’s
eye encompasses most easily the area between 30 and 90
inches above the floor and the view of someone standing near
is even more limited. Tabletop structures 48 inches or
less in height work out nicely, and can conserve materials.
Shape. With few exceptions, science fair exhibitors can
explain their projects adequately within structures similar
to those shown in Figures 1 and 2. Such tabletop “booth”
17
exhibits have these common features: (a) a large back wall
which can be used for the introductory message, for
featured illustrations or specimens, or for important
conclusions; (b) two smaller side walls, angled outward
for easier viewing, which can contain supplementary text
and illustrations; and (c) horizontal display space at table
height to hold specimens, apparatus, project notebook and
project report, handout brochures, etc. Some exhibitors fit
this space with a slanted- or stepped-shelf unit. If the back
and side walls are fastened to such a base the structure
is stronger.
These two basic structures are designed for simplicity, flexibility,
economy of materials, and repeated use in successive years of
science fair competition. Both meet NSFI rules on maximum dimensions.
The structure shown in Figure 1 is easiest to build. The
one in Figure 2 is a modified Figure 1 designed to accommodate an
outsize object which must rest on the floor.
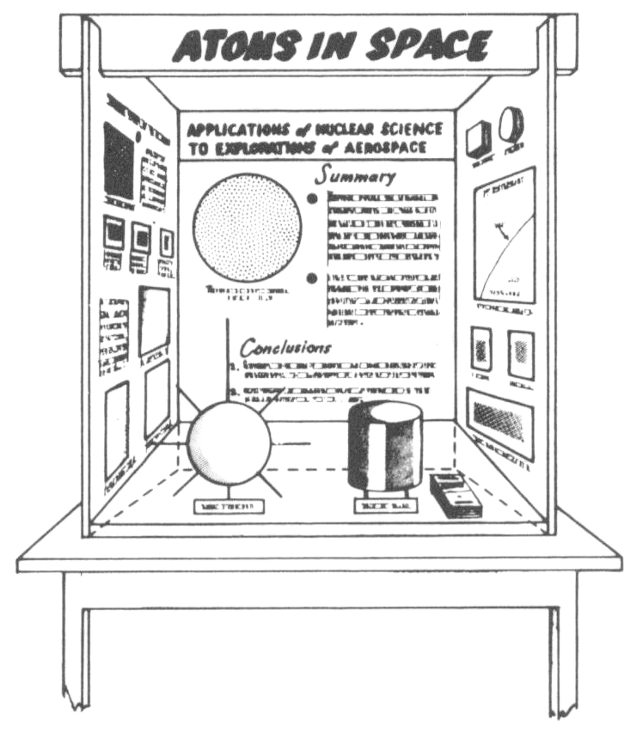
Figure 1
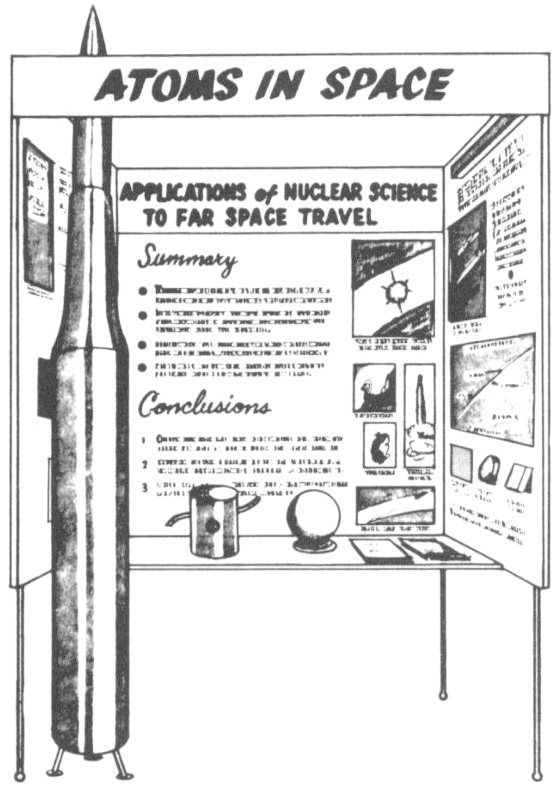
Figure 2
Many variations are possible. Very tall objects might be
handled by the self-supporting structure shown in Figure 2.
Some exhibitors extend back and side walls to the floor,
but this requires more panel material and tempts the
exhibitor to mount text and illustrations below the level
of easy viewing.
The title board can be functional as well as attractive,
as in Figure 1. It puts your main title where it can be seen
easily and it conserves wall space. It can brace the side
walls and serve to shield lights.
18
Materials. Attractive exhibit structures can be built
from artboard and similar paper products, so for one-time-only
elementary school exhibits you may not wish to
invest in more permanent materials. But if you look forward
to other projects, exhibits, and fairs, you will be wise to
consider materials which will hold up in repeated use.
Even though most fairs do not permit you to compete in
successive years with the same exhibit material, seldom
do they require you to build a new structure each year to
hold your changing displays.
“Masonite” and similar wood-fiber particle boards are
relatively inexpensive, take paint and adhesives well, are
fairly light, and in thicknesses of more than ⅛ inch and
lengths of less than 48 inches are sufficiently rigid when
supported by adjoining panels. They are available with
rows of holes pre-drilled to accommodate a multiplicity
of “pegboard” hanger devices. If you hope to use your
basic structure for other exhibits, pegboard allows you
flexibility in rearranging three-dimensional exhibit items.
Also, the holes facilitate wiring down display items that
might be dislodged by careless viewers or filched by
thoughtless souvenir hunters.
One standard 4-by-8 foot sheet of hardboard or plywood
will suffice for the typical tabletop structure if you divide
it as shown in Figure 3.
Plywood and untempered hardboard should be sealed
with a primer coat before finish painting. If you seal the
reverse side of the panels also, they warp less. For
finish coats, the enamel now available in aerosol spray
cans will save you some brush work. Always apply spray
paints in several light coats while the surface is horizontal,
to avoid unsightly “runs”.
For bracing, framing, and other woodwork, white pine is
strong, light, easy to work, and unlikely to warp if seasoned
properly.
Hinges, washers, bolts, nails, or screws which will be
painted may be of uncoated steel. Otherwise, you may find
brass, stainless steel, aluminum, or chrome-plated steel
better.
If your exhibit proves to be a winner, you may need to
erect and dismantle it at several fairs. A little ingenuity
and foresight in the selection of removable-pin hinges,
wing-nut bolt assemblies, and the like, may save a lot of
time later and help keep your exhibit structure in good
condition.
19
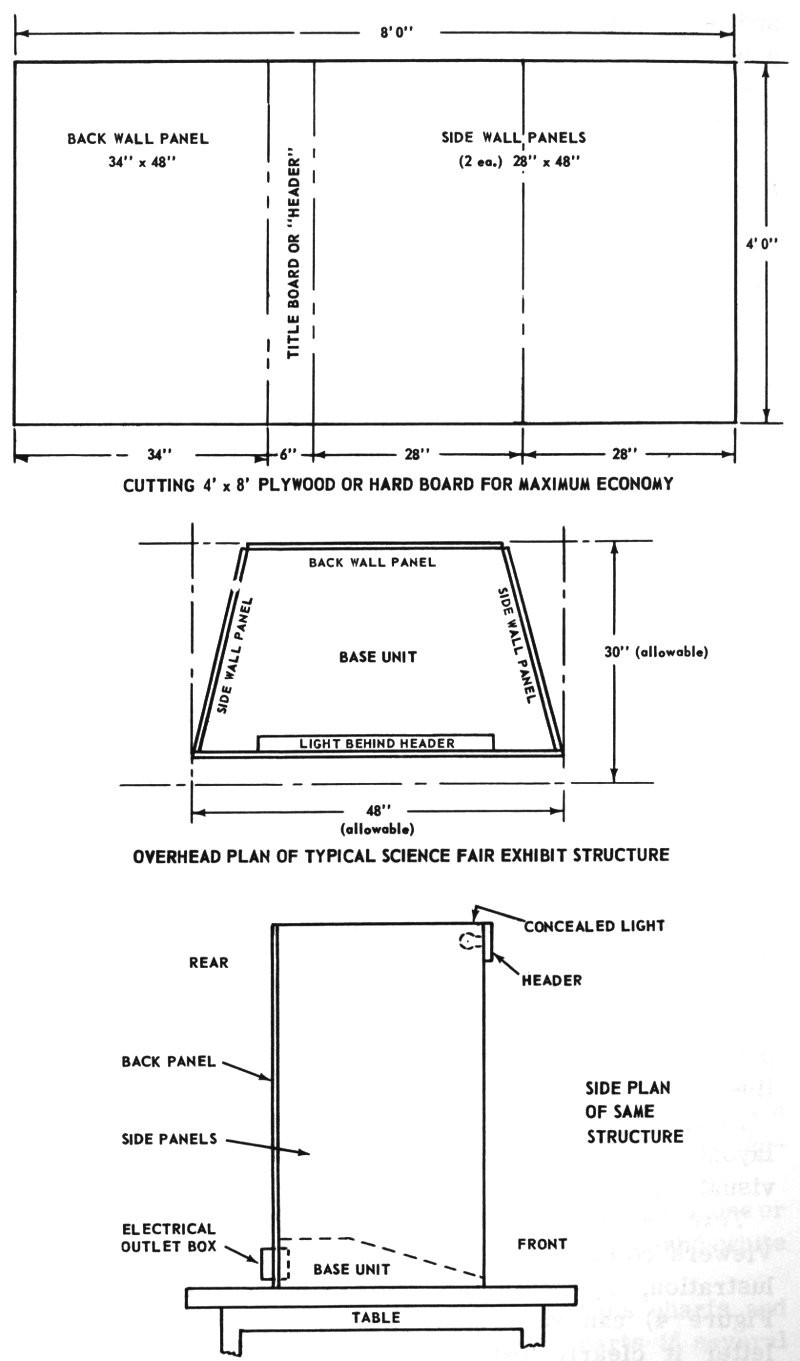
Figure 3
- CUTTING 4′ × 8′ PLYWOOD OR HARD BOARD FOR MAXIMUM ECONOMY
- BACK WALL PANEL 34″ × 48″
- TITLE BOARD OR “HEADER”
- 6″
- SIDE WALL PANELS (2 ea.) 28″ × 48″
- OVERHEAD PLAN OF TYPICAL SCIENCE FAIR EXHIBIT STRUCTURE
- BACK WALL PANEL
- SIDE WALL PANEL
- SIDE WALL PANEL
- BASE UNIT
- 30″ (allowable)
- LIGHT BEHIND HEADER
- 48″ (allowable)
- SIDE PLAN OF SAME STRUCTURE
- CONCEALED LIGHT
- HEADER
- BACK PANEL
- SIDE PANELS
- ELECTRICAL OUTLET BOX
- BASE UNIT
- TABLE
20
Lighting and Wiring. Fluorescent lighting is bulky and
hard to conceal in the average science fair exhibit. Incandescent
showcase lamps work well, take up less space, and
are less expensive. If you need shielded light, consider
inexpensive clip-on bed lamps.
Most fairs have rigid rules on electrical wiring and you
should study them and those of the National Science Fair-International.
If you will install a fused entry-outlet box
on your back wall or base unit, as shown in Figure 3, you
can run all fixture cords to that one location. Most fairs
provide power cords reaching to the exhibitor’s electrical
inlet, but don’t depend on it. Procure 25 to 50 feet of heavy-duty
extension cord and keep it handy, just in case.
After determining the shape and size of your structure,
you can decide how best to present the information needed
to explain your project. Some exhibitors prefer to build
their structure first, so that they may try out different
arrangements of illustrations and three-dimensional items
on the finished display space. Or, you can measure off your
back wall, side walls, and interior base areas, and then
“try out” the size and placement of your display items on
matching-size sheets of tracing paper.
There are many good ways to present the same information.
Exhibit design is an art with some established
principles but with few fixed rules. Here are some guidelines
which may help you.
Preliminary Sketches. Make sketches of all possible
layout ideas and study each for clarity of content and
visual effect.
Text. Keep all text to a minimum number of words.
Viewers come to see an exhibit, not to read it! A good illustration,
specimen, or a graphic representation (see
Figure 4) can save many words. Where text is needed,
letter it clearly and large enough for easy reading. But
21
avoid unnecessarily large or garish lettering—titles and
text should only explain your exhibit, never dominate it!
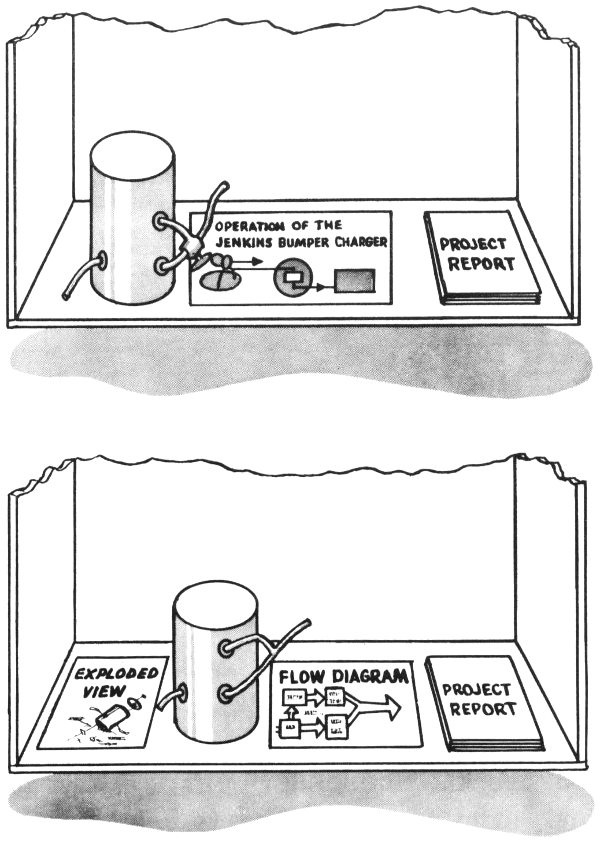
Figure 4
Text Placement. Some exhibitors place captions uniformly
over or under all illustrations, but text blocks
placed at the side may communicate as clearly, and help
prevent visual monotony (see Figure 5).
Points of Emphasis. If you use a series of illustrations
or specimens to tell a running story, consider enlarging or
featuring one of the most significant items so it can serve
as the focal point of the series, as in Figure 5.
Large Photos. Unless your photographs can be viewed in
detail without stooping and squinting, either have them enlarged
or discard them.
Color Photos. Color photos are expensive, but just one or
two will add interest to a large group of black-and-white
prints.
Charts and Graphs. If your exhibit contains charts and
graphs, keep them simple. Avoid line charts if several
22
curves must cross and recross. Logarithmic charts, scatter
diagrams, and similar ratio charts are confusing to the
average viewer. Caption and explain charts and graphs
adequately. Simple pie, bar, and representational charts, as
shown in Figure 6, can be particularly meaningful. Often
the use of colors will make the various factors more
discernible.
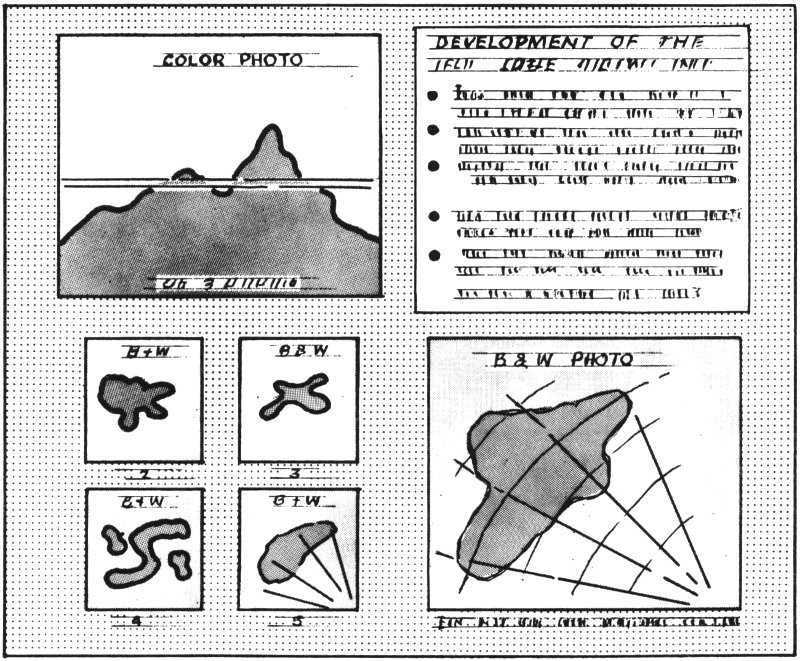
Figure 5
White Space. Next to content, the exhibitor’s most valuable
tool is “white space”—those unoccupied areas of his
display panels. Crowded, busy panels on which materials
and text fill every inch of space are a hallmark of the
amateur. Worse, they defeat their purpose, for viewers
usually take one hurried glance, decide that understanding
so cluttered an exhibit would be a chore, and move on to
simpler displays. (As a rule of thumb, approximately 40%
of your available display space should be occupied by
absolutely nothing!)
Organization. Just as you organize words into sentences
and paragraphs, your exhibit elements (textual and visual)
should be organized into groups and subgroups. (See Figures
1 and 2.) Here again the “feature” technique may be employed.
For example, if you are displaying several similar
specimens you may emphasize the most unusual one by
placing it on a raised or differently-colored background as
shown in Figure 7.
23
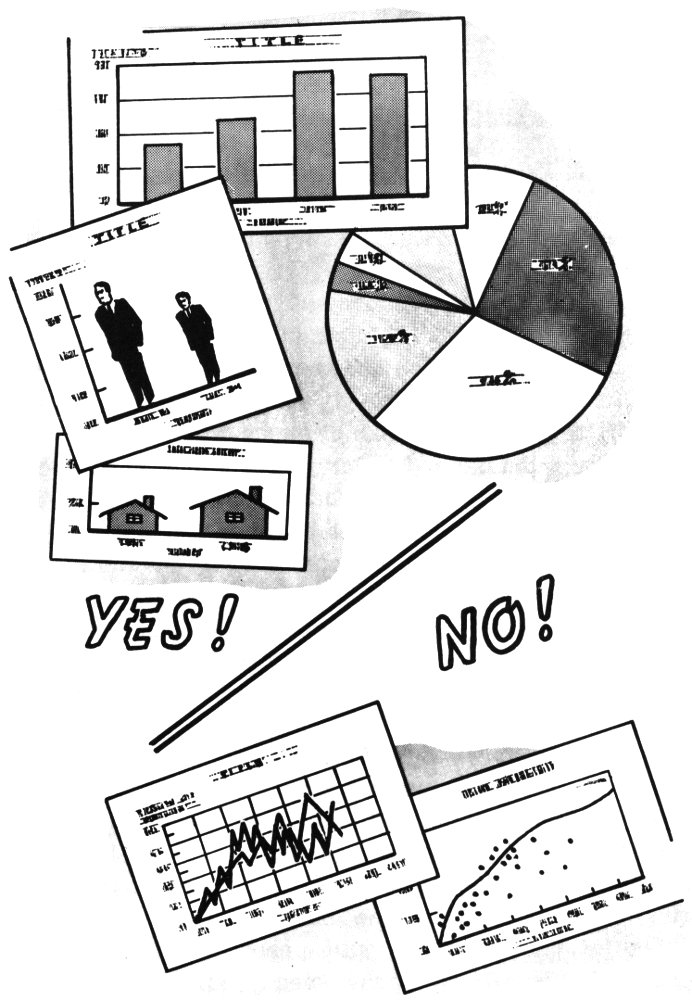
Figure 6
24
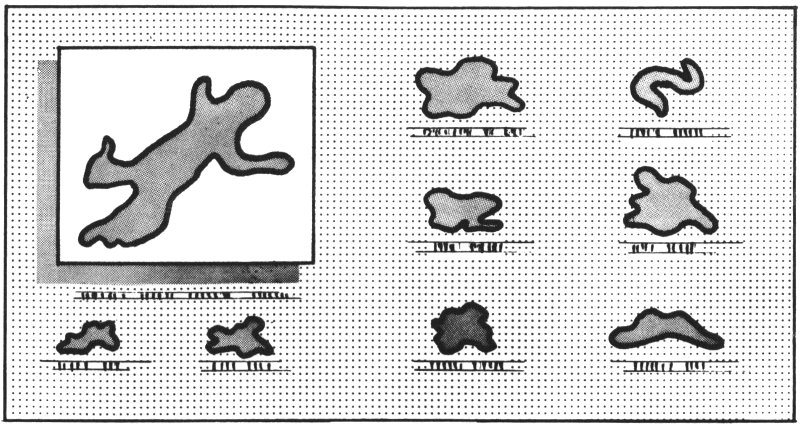
Figure 7
Apparatus. Amateur exhibitors sometimes get carried
away with enthusiasm for large arrays of mechanical apparatus
which are both unnecessary and confusing. If your
project involved development of a unique piece of equipment,
consider whether you can display it alone, without
the entire assembly into which it fits. Sometimes this can
be done by displaying the featured part alongside a drawing
or photograph of the complete assembly, as in Figure 4.
Again, keep details to a minimum; leave them in the project
report.
Mechanical movement. Usually motion in a science fair
exhibit is called for only when there is a clear need for it.
Thus it is logical to use a turntable to revolve different
fluorescing mineral specimens under “black light”, or to
present successive radioactive ore specimens to a Geiger-counter
probe. But to use such a turntable to present a
series of photographs would probably be unnecessarily
contrived. Usually you may spend your efforts better on
sound content, clean design, and clear text than on mechanical
gimmicks.
Pushbuttons and Such. Few audience-participation devices
in science fair exhibits merit the effort, money, and
space expended on them. But if you do display equipment
for viewers to operate, make certain it can be operated
safely and dependably even when you are absent (as during
25
the judging). Nothing frustrates an exhibit viewer more
than a pushbutton that doesn’t work!
Demonstrations. These can be informative and interesting,
and you may want to include one. But since you cannot
be on hand to demonstrate at all times, design your
exhibit to “stand alone” without the demonstration. And
when you are absent, you may avoid unsatisfied viewer
curiosity either by removing the idle demonstration equipment,
or by posting a “Next demonstration at ____ o’clock”
sign.
Living Things. Plants or animals which have been employed
in the science project can often be displayed to lend
interest and meaning to the exhibit. But since the science
fair follows the project, interim growth and aging may alter
living specimens so that at fair time they are considerably
less meaningful or attractive than at the peak of your
project. Also, if you compete in several fairs, you may find
transportation and special care of your living specimens
difficult and onerous. If you do plan to exhibit living specimens,
familiarize yourself with local and national fair regulations
governing their use, make sure that animals can
be housed attractively and comfortably, and protect both
animals and plants from inquisitive fingers. Then be selective
and employ the minimum needed to make your point
in the exhibit.
Properly employed, color is functional as well as aesthetically
pleasing. You may find the following suggestions
helpful in deciding which colors to employ in your exhibit,
and where.
In a space as small as your science fair exhibit, one or
two basic colors, plus black and white, should suffice. Use
your color in a few large blocks, not in many small patches.
Different basic colors can be used to define different main
areas of emphasis; then different shades of the basic colors
can be used to define subareas.
Life-science project exhibits can rely most safely on
pastel shades running heavily to greens and yellows, while
physical-science projects are portrayed frequently against
more intense colors. In either case, avoid violent contrasts
and “paintpot” variety. Your exhibit should convey an air of
handsome restraint, not flippant prettiness or carnival
gaudiness. Your colors should attract and enhance, not
shock or confuse!
26
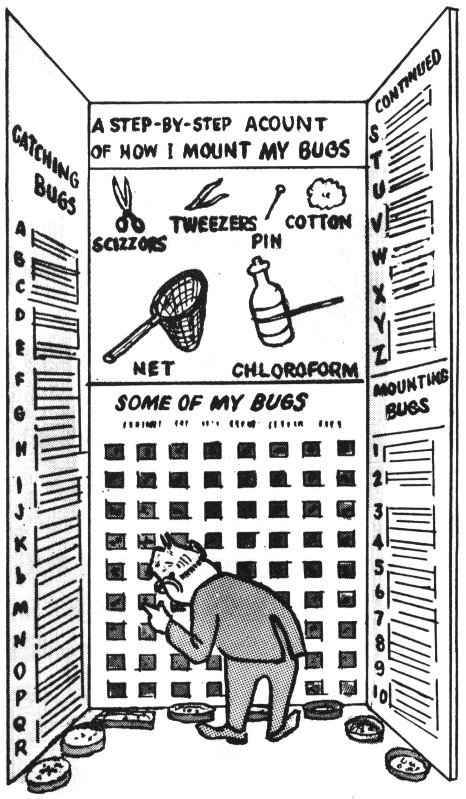
Figure 8
Far too frequently science fair judges are asked to evaluate very
poor exhibits of what may have been very worthwhile science projects.
Some of the more common mistakes they encounter have been
included by our artist in the sketch above. Now that you have read
our advice on designing science fair exhibits, how many shortcomings
can you identify? (Answers below.)
Answers: Structure extends too high and too low for easy viewing,
and width exceeds dimensions usually allowed. The main title is too
long. Two words are misspelled. The best display space is wasted
on ordinary objects which contribute little new understanding to
topic exhibited. There are too many photographs which are too
small and poorly positioned for viewing. Specimen boxes positioned
on the floor as an afterthought where few viewers will attempt to
inspect them. Endless text provides details of little or no interest
to the average viewer. More text on introductory topic (“Catching
Bugs”) than on the exhibit topic. No logical progression from the
original problem and hypothesis through experimentation and observation
to conclusions. There is no project notebook, report, or
handout brochure. No thought has been given to lighting. No points
of emphasis in either text or illustrations. White space has not
been exploited.
- A STEP-BY-STEP ACOUNT OF HOW I MOUNT MY BUGS
- CATCHING BUGS
- MOUNTING BUGS
- SCIZZORS
- TWEEZERS
- PIN
- COTTON
- NET
- CHLOROFORM
- SOME OF MY BUGS
27
Where desired, visibility and impact of illustrations and
specimens can be increased by mounting them against contrasting
background colors. Avoid the amateurish impulse
to always tape or paint a border around illustrations,
specimens, and blocks of type. Placed properly against a
contrasting background, these provide their own best border.
The final test of color is how it looks in actual use, so
experiment with your color schemes before making a final
choice. And if you have any doubts, invite the reactions of
your family and friends and also the advice of your art
teacher.
Before mounting your exhibit elements on the structure
permanently, lay them out temporarily. (You will probably
want to move them around several times to get the best
position.) You can then pencil in your title, text, and caption
blocks in actual size. Use separate sheets of paper for each,
and try out various locations around the materials they
explain.
Use of too many letter styles will detract from the attractiveness
of your exhibit. Headings can be all in capital
letters, and subheads in smaller “caps”, or in initial caps
and “lower case” letters. Statements and other text should
use caps and lower case. Do not use all caps for a paragraph
of descriptive material—a mass of capitals is harder to
read.
Before completing the lettering, you should try out your
layout and text on classmates, family, and perhaps your
English teacher. Science fair exhibits should be understandable
to intelligent laymen as well as to trained specialists.
Technical jargon, pompous adjectives, and stilted
sentence structure are not scientific. In scientific writing,
as in any good writing, the simple, direct approach is usually
28
best. Try to use short sentences, familiar words, and a
minimum of technical terms and formulae.
Are your present photographs too small? You can experiment
with desirable sizes of photos by clipping from old
magazines any illustrations that appear about the right size,
and trying them on your layout. You can then have your
photos enlarged to the ideal sizes that you find most pleasing.
Matte-finish photo prints are preferable since glossy
prints produce “glare”. Before mounting photographs, trim
off the white border, which detracts from the impact of
your pictures and the simple unity of your exhibit.
When fully satisfied with your layout, begin the final
lettering of your text. For hand-lettering, sketch with a soft
pencil first, using a ruler and eraser freely. A lettering
guide, borrowed from your school’s graphic arts department,
will prove very helpful. Unless you are experienced
you can save yourself trouble by not lettering directly upon
the background. Instead, letter each copy block on a separate
piece of art paper which can be glued into position later.
Have a friend or teacher double-check your lettering for
typographical errors.
With illustrations and copy blocks complete and trimmed
to size, you are ready to start mounting. For paper products
use “rubber cement”, obtainable at stationery stores. Coat
both surfaces completely, but do not press them together
until each is dry. To avoid air bubbles, first separate the
coated surfaces with a “slip sheet” of waxed paper or aluminum
foil, which can be slipped out when the materials
are positioned exactly. Then press into place with a soft
cloth or rubber roller. (Excess cement will rub off when
dry, without damage.) Also consider using double-coated
adhesive tape for mounting. It is obtainable at art-supply
stores.
Assemble your structure, mount your lighting fixtures,
and plug them in. Install whatever equipment needs to be
displayed. Put your project notebook, project report, and
handout brochure in place. Your science fair exhibit is
finished and you are ready to compete!
29
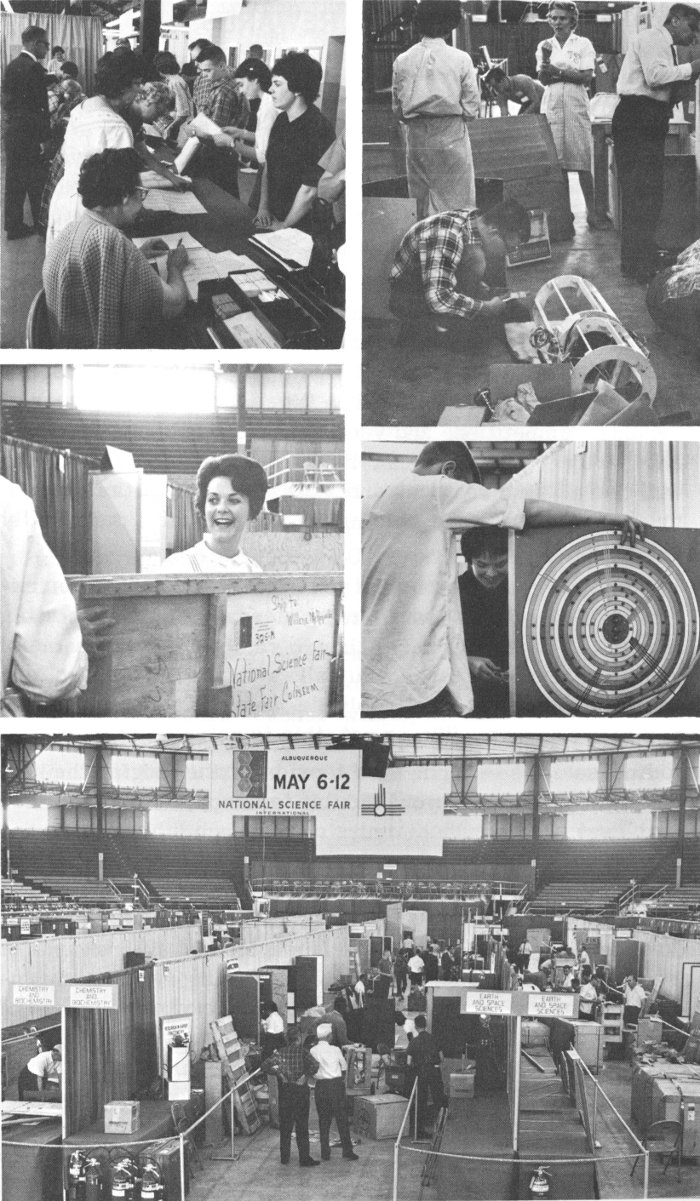
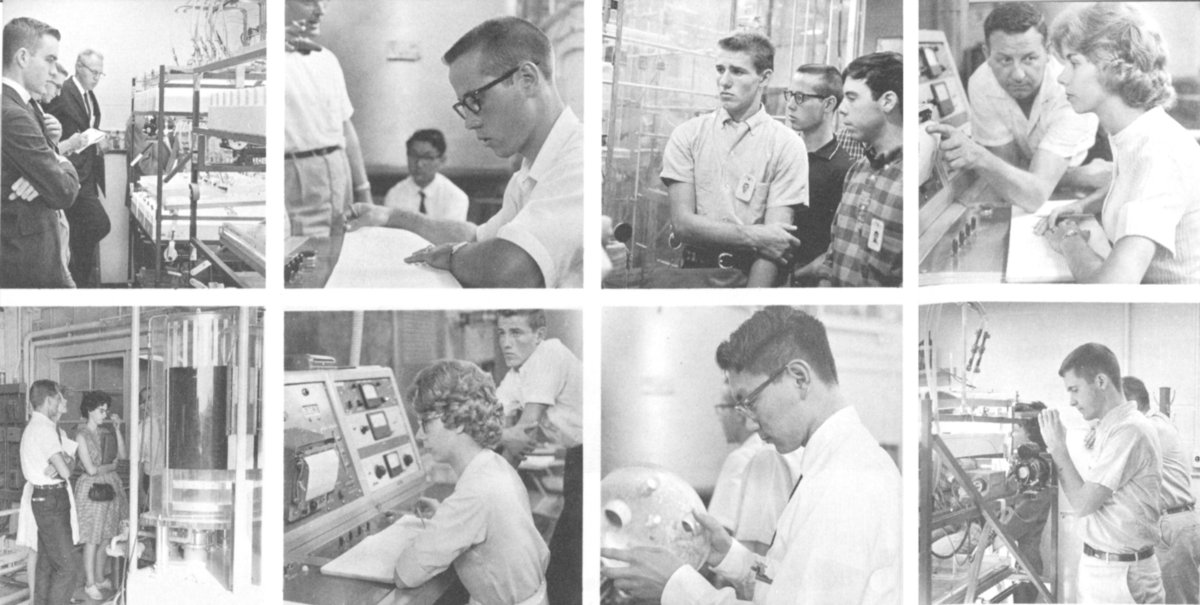
Typical arrival day activities at the 14th National Science
Fair-International, Albuquerque, New Mexico,
1963.
30