ANCIENT EGYPTIAN, ASSYRIAN,
AND PERSIAN COSTUMES AND
DECORATIONS.
By Mary G. Houston and Florence S. Hornblower.
Containing 25 full-page illustrations, sixteen of them
in colour, and 60 line diagrams in the text.
Small crown quarto.
In this volume the history of Costume is traced
from the earliest ages. The illustrations (which are
taken chiefly from the British Museum) are given in
facsimile from the drawings of the artists of the period,
and, where the drawing is too primitive to be easily
understood, a garment is also shown drawn in modern
style; in addition, every type of garment illustrated
is accompanied by a flat pattern showing the cut.
Information of this special character on Ancient
Costume is usually very difficult to obtain, and it is
anticipated that the volume will be of first-rate
importance to dress designers, to theatrical designers,
and also to the schools in which historical costume
and the history of the progress of the human race
are subjects for study.
Published by A. & C. BLACK, Ltd., 4, 5 & 6, Soho
Square, London, W. 1.
AGENTS
America
The Macmillan Company
64 & 66 Fifth Avenue, New York
Australasia
Oxford University Press
205, Flinders Lane, Melbourne
Canada
The Macmillan Company of Canada, Ltd.
St. Martin’s House, 70 Bond Street, Toronto
CONTAINING SIXTEEN FULL-PAGE ILLUSTRATIONS
—EIGHT OF THEM IN COLOUR—AND EIGHTY-
SEVEN LINE ILLUSTRATIONS IN THE TEXT
A. & C. BLACK, LTD. 4, 5 & 6, SOHO SQUARE, LONDON, W. 1. 1920
“Go, little booke; God send thee good passage”
TO
MY MOTHER
NOTE
The Author’s thanks are due to the owners of the
pieces of embroidery illustrated in this book who kindly
lent them to her for reproduction:—Miss Beatrice Brooks,
Miss Marion Boyd, Miss Janetta S. Gillespie, Miss Mary A.
Gill, Miss Martha Stevenson, Miss Elspeth Stewart, Miss
Jessie Gibson (students of the Glasgow School of Art);
also to Miss Kay, Parkhurst, Cedars, Derby, for the
loan of three pieces worked by her pupils.
FOREWORD
Now that many of our busy working people have
better regulations as regards the hours of the day’s
work, there is great need to provide occupation for the
day’s leisure; and needlework, as a leisure craft, is one of
the most refreshing and pleasant and profitable sources
of entertainment—provided always, that those who undertake
it realise that, with right thought and consideration
on the part of every worker, each should become,
as it were, a law unto herself, so that she should realise
also that she need, under no circumstance, be the
slave of old traditions, if she can give fitting reasons
for making a change which is to the purpose of her
work.
To be in a healthy and living state, our art should
be constantly changing its fashion; if it stands still,
it is retrograde, and for some few generations we may
say this of British embroidery. What changes it has
undergone are due almost entirely to the commercial
enterprise of manufacturers of printed patterns—usually
foreign ones. The importation became very considerable
with the introduction of so-called Berlin woolwork, and
since that period the British needlewoman has set aside
her own ingenious arrangements and follows blindly
where the merchant leads, and British design for needlework,
as an expression of its people, is almost a dead
thing.
Most people have a superstition that in knowledge of
a multitude of stitches lies the whole mystery of needlework.
This is emphatically not the case. There really
is no mystery about stitches; they are but the letters of
the needleworker’s alphabet, and the words of her language—to
be used according to her own ideas. One may
embroider poems; another may embroider prayers and
praises for her church; another may beautify a fair
woman’s garment or sing a little song in stitches for a
baby’s robe; yet another may be like a treatise on surgery,
repairing and restoring that which has been
damaged. But needlework does not exist for the stitches.
It is the stitches which—as they are well or ill-used—express
the worker, and, if she is a wise worker, she can
find out for herself most of the stitches she needs. Nor
is it necessary to be at great expense in needlework,
indeed, for those who take it up as a recreative craft
half the interest may lie in the fact that no material is
too common or too homely to be made into something
fitting and, therefore, beautiful—since the truest art is
to make a thing pleasing to the eye and yet entirely suited
to the purpose.
The commonest failing of the designers of this country
is that they think that beauty lies in the elaboration of
ornament, and this is why the fashions of British dressmakers
fall short of those abroad. It is the little simple
contrivances, that are almost no more than a sort of
loving finish to the actual construction of a piece of
work, that give the highest standard of style in garments:
and the best training a needlewoman can have is to make
her seams, hems, openings and fastenings of garments
or household fitments things of beauty, while, at the
same time, she considers the uses and purpose of her
work. It is as a piece of engineering we should consider
the construction of our household hangings and covers
of our garments—planning that decoration should be
coarse or fine, as fits the material, and taking thought
also for the washing and wearing of it.
The fashions of to-day show a very marked tendency
to decorative construction, due in great measure to a
change in the needlework for school children introduced
a few years ago. The tendency shows most interesting
results, especially in the fact that the shaping of clothing
has become very simple and that garments depend almost
entirely on stitchery for their decoration, rather than on
manufactured braids and trimmings; and the styles and
shapes are infinitely less stereotyped, so that clothing
for women tends to express more nearly the personality
of the wearer than it has done for many generations.
The work of the hand—as apart from that of the
machine—is more and more in demand, and decorative
needlework, even in our shops, is becoming more to
be desired, for unique and personal characteristics and
expression, than it has been for a very long period. This
being the case, let our needlewoman take courage and
realise that in each mind there are possibilities of new
ideas and new inventions—that all materials open up
new opportunities, and that with little labour she may
greatly enhance and beautify the things she works and
find appreciative opening for her skill. Never was there
such universal demand for handwork of every kind, and
for such household fittings, which tend towards economy
and labour saving in particular, the need is almost
unlimited. Some of the most interesting embroideries
done during the last few years have been planned and
carried out in some of our Scottish schools by untrained
workers—designs so simple that the workers do not
realise that they are designing at all—since they draw
largely with needle and thread alone, and have little
assistance from chalk and other markings. And it is
this type of work, usually sewn in coarse yarns and on
rough canvas, flannel or homespun, that is perhaps the
most happy and most stimulating for a designer of needlework
to begin on. The work is so quickly achieved—so
gallant and bright in colour—so utilitarian in purpose and
of so little cost in outlay, that it is above all others to be
recommended. It needs no experience in stitchery to
work in bright wools, if the material is firm and strong,
and the writer has pleasant experience of maid-servants
and village wives in the north country making admirable
rugs, garments, and other embroideries, which command
good prices at the Artificers’ Guilds and other places
where a high artistic standard of design is required.
It is only by means of such counter attractions in stimulating
leisure crafts, which pay their way as well as give
pleasure to the workers, that we can contend with the
spirit of restless excitement and craving for mere pleasure-giving
that is so marked a sign of the early days of
peace, and reconstruction can only come by countering
this mischievous tendency in young people by giving
them something that gives stimulus to their longing for
brightness and yet does not unduly tax those whose
days may be occupied in strenuous employment.
How desirable it is that such gatherings of women
and girls as church sewing meetings, guilds and clubs,
should take up such new ideas in needlework and apply
for a competent instructor. How almost more desirable
is it that men might realise the pleasure a needle can give
if applied to bold construction and original work.
It is by no means universal over the world that needlework
is a women’s craft; in many countries it is done
quite as much, if not more, by the men, and it is probable
that if our men took up this craft, it would show a very
marked tendency to individual and original expression.
The power of invention is so great and serious a factor,
that it is almost too big a thing to touch upon here. We
do not exaggerate its importance when we say that this
faculty in human beings is what we can justly call the
Holy Ghost, for it is that in us which comes, not of ourselves,
but from direct inspiration, and the first principle
of education ought to be to open our minds to it,
in howsoever small and humble a fashion it comes, and
to make clear the way for its development and growth
towards greater things.
“Give her of the fruit of her hands; and let her own works
praise her in the gates.”
Needlework, as an artistic and practical craft, is
highly interesting from a decorative point of view, and
well within the scope of any intelligent worker. It
has distinct advantages over most crafts—it neither
requires great initial outlay for apparatus or materials,
nor does it demand a special workshop; thus, as a
domestic art, it commends itself to many of us on account
of its adaptability to the conditions of life, as well as for
its decorative value—as a means of adding grace and
beauty to our daily surroundings.
During the thirteenth and fourteenth centuries
England was famed for the beauty and magnificence of
its ecclesiastical embroideries. These wonderful works
found their way into many countries and were eagerly
sought after by patrons of the beautiful; many pieces
still exist, preserved in our museums, churches, or in
private collections, to show us what extraordinary
ability and invention these ancient embroiderers must
have had. After the Reformation, when there was no
longer the great demand for ecclesiastical work—embroiderers
turned their attention to the decoration of
garments to be worn by the wealthier classes. In the
“Golden Days of Good Queen Bess,” and for some time
later, all the ingenuity and skill formerly applied solely
to church work was bestowed on the decoration and
beautifying of personal clothing—dresses, cloaks, coats,
waistcoats, caps, gloves, etc.; neither time, labour, nor
expense was spared, the worker’s ideal evidently being
to obtain the highest result of which he or she was
capable. Some of the quaint pattern books of those
days still exist, and they consist mostly of elements—dainty
flower sprays, sprigs, fruits, birds, animals, fishes,
border patterns and geometrical forms—all intended to
assist the workers in the composition and building up
of their designs and patterns.
In the busy world of nowadays, we cannot hope ever
to attain to such perfection, nor to regain for embroidery
the high position it once held in this country; but we still
have many clever needlewomen who could produce
beautiful work provided they had a better knowledge of
how to set about it.
This book has been planned with the hope that it may
be of use to many, and that it may create in both girls
and women the desire to construct and decorate for
themselves those simple articles of daily use which cost
so much to buy and which can be made and embroidered,
in simple patterns, with a little knowledge of construction
and stitchery, at a moderate expenditure of time and
money.
Perhaps the reason why so many workers buy their
materials already stamped with a design, which often
proves unsuitable to the purpose for which it is intended,
and which gives small satisfaction when embroidered, is
because of a certain distrust of themselves, a want of
knowledge of their own powers of invention and ingenuity;
or it may be a lack of energy and initiative, a
reluctance to plan and create for themselves, due to the
fact that they have never been taught to express their
own ideas, but rather to depend on those of others.
Nevertheless, the sense of beauty is, in a greater or less
degree, common to us all. Why, therefore, should a
needleworker not develop her own ideas rather than
those of other workers? The designer, for example,
who may have as little knowledge of stitchery as the
needlewoman has of design, and who, therefore, cannot
realise the labour involved in its execution, may lose
much of his effect and may waste the time of the embroiderer.
It is generally agreed that no two people
have the same ideas; it is surely, then, of considerable
importance that each one should at least make some
attempt to express his or her own. If scope is given to
the creative and inventive powers they, like other
faculties, will grow in a most inspiriting manner; new
ideas, inherent instincts, perhaps dormant hitherto, will
spring up like flowers to encourage the beginner on the
upward path, and as interest becomes keener and confidence
grows, difficulties which at first appeared insurmountable
will quietly disappear as the worker plans
and thinks out a piece of embroidery from the foundation.
How interesting and attractive it will be to execute such
a piece of work, which will express the personality of the
worker in all parts, design, colour and stitchery. Greater
technical excellence, as well as charm, must accrue; the
embroideress will work with more judgment and understanding,
and because it has gained so much in interest
to her, she will be able to express herself more freely, and
her work will convey and suggest more to others.
CHAPTER II
THE ART AND CRAFT OF EMBROIDERY—THE SIX POINTS
“Chaires, Stooles and Screen, the same, all of Satten Stitch
done in Worsteads.”
We shall now consider the six important points of
design.
Art and Craft.—Many women have an inherent
instinct for needlework—that is, the craft of the needle—for
the knowledge of how to use a needle and thread is
generally easily acquired; but it is quite otherwise when
the design, the artistic or imaginative part, has to be
carried out, as it ought to be, by the worker. Then all
sorts of difficulties arise, mostly imaginary, as those who
make an attempt may find.
Let us here consider the design as a necessary part of
the workmanship. We shall be ambitious enough to
study embroidery from an artistic point, for the art and
the craft ought surely to go hand in hand.
The Habit of Design.—A special knowledge of
drawing is not essential for pattern making—a child will
make delightful patterns—nor for simple designs composed
of straight lines and geometrical forms, such as
might be happily applied to borders for articles of daily
household use or for personal wear. A ruler, a compass
and a sheet of squared paper are sufficient for initial
efforts: and once the habit of simple designing is acquired
it can become a wonderfully absorbing pastime, for eyes
that are opened to see will find designs on every side.
Good Taste and Common Sense.—To carry out
a piece of work successfully, however, the embroideress
must possess good taste and common sense; these are
indeed important qualities, the possession of which will
help the beginner enormously: add to these an eye for
colour and form, a practical knowledge of the stitches
commonly in use, some acquaintance with materials,
their utility and adaptability, and the worker will find
herself fairly well equipped to start her design.
The Six Points.—There are about six points to be
considered in connection with a piece of embroidery:—
The Object and its Use.—We must decide this, bearing
in mind the position the work will occupy when finished;
choosing a material suitable for the purpose, and with
due regard to the restrictions of economy.
The Colour Scheme.—Consider the environment, and
let the scheme be in harmony with or in contrast to the
background and surroundings.
The Construction.—Plan carefully and arrange for the
decoration, which should never interfere with the usefulness
of the finished work.
The Building up of the Pattern.—This should always
be done with a view to the limitations of the material.
The Stitchery.—This must also be adapted to the
material—with bold, effective types for the coarser
woven stuffs, and daintier, closer stitchery for the firmly
woven textiles.
Finishing Touches.—A beginner rarely realises the
importance of these, yet it is well worth while bestowing
thought on them; interest may be considerably
heightened by such additions or an otherwise good
piece of work rendered less attractive by lack of care
and thought at the final stages.
It will now be seen that the design—the least mention
of which strikes terror to the soul of the uninitiated—does
not consist in the drawing or the making up of the
pattern alone, and that there are important preliminary
stages to be gone through. Indeed the design is well on
its way by the time the worker reaches the fourth point,
i.e., the building up of the pattern.
The First Point: On the Choosing of
Materials, Threads, Tools, Etc.
Materials.—Materials, threads, and needles are important
items, and should be chosen carefully; to spend
time and labour on embroidery on a poor foundation is
an extravagance rather than an economy—the tendency
being to make up for the poorness of the quality by the
profuseness of the decoration. Materials need not be
costly, but they should be good of their kind.
Homely Materials.—Charming things can be made
out of homely cloths, remnants and oddments. Texture,
tone and colour should be considered, both from a
practical and an artistic point of view; a background
that is pleasant to work upon is always an advantage.
Linens, of varying quality and texture, can be relied upon
for domestic purposes—they make for good stitchery,
they wash well, and are very durable. (Plate VII.)
Some unbleached materials are extremely economical.
Greenhouse Shading.—A soft creamy netting used
for greenhouse shading, which may be obtained from any
of the large seed merchants, is made in different widths
from 54 inches to 72 inches. It has an open mesh and
lends itself to all types of darning and needle-weaving—the
narrow widths make excellent semi-transparent sash
curtains, which may be brightened by applied bands of
coloured linen or chintz, and finished with rows of simple
running or tacking stitch in wools or in some of the
coarser makes of embroidery cottons. (Plate VIII.)
The thicker quality has a closer mesh and is admirable
for coverlets and hangings. These, when edged and
decorated with lines of bright-coloured washing braids,
and wide borders of coloured cretonnes—which again
may be connected with bars of needle-weaving or darning,
or any simple stitchery—make charming and economical
articles, such as any housewife might well be proud to
possess. (Plates V. and VI.) Covers and runners to
match might complete the set. This would be a pleasant
and instructive work for a girl’s leisure hours; she
might make just such a set for her bedroom, with the
addition of chair covers and cushions, adorning them
beautifully with some simple design and a colour scheme
of her own choosing.
Damask and Huckaback.—Damask linens, with
simple-patterned backgrounds, twilled sheetings, of
various makes, and huckabacks, can be used most
effectively for runners, mats, and luncheon sets; the soft,
warm, creamy tone of the unbleached material blends
harmoniously with bright-coloured threads and wools.
Titian Canvas.—Many coarser and more loosely
woven textures make most charming and desirable
backgrounds for bands of needle-weaving. (Plate VI.)
Coarse canvas in various colourings, woollen hopsacks,
floor-cloths, etc., are adaptable for many household
articles.
Russian Crash.—A common roller towelling, or
Russian crash, as it is also called, is a delightful material
(Plate III.), and may be had in narrow widths, varying
from 12 inches to 24 inches; it is woven by the Russian
peasantry in small handlooms and varies considerably
in texture and quality—but in all cases it is a most
durable and suitable linen for domestic purposes.
The Scottish Blanket.—Another pleasing material
for wool decoration is the well-washed, worn-out Scottish
blanket; with the smaller pieces one can make hassocks
and cushions which look wonderfully well in strong
colours in any flat stitch; the larger single blanket can be
used for coverlets or hangings—with applied decoration
where the material is too frail for general hard wear.
Decorated with edgings of woollen braids, etc., these will
look almost new, and certainly will give immense satisfaction
to the worker.
Threads are to be had in great variety and in different
makes, many of which are excellent for embroidery.
Cottons and flaxes in various sizes and thicknesses in a
large range of colours can be combined most successfully.
Embroidery Wools.—Wools and yarns, particularly
the types known as fingering, in three, four, and five-ply,
are reliable both in colour and quality. It is
always advisable to shrink wools before using them for
embroidery if they are to be applied to articles which
require frequent washing. Crewel and tapestry wools,
to be had in hanks, “white heather” mending in balls,
are very convenient for needle-weaving and canvas
work, and they may be had in beautiful colours.
Silks.—Silks of different makes, embroidery or
knitting, filosel, filo-floss and a soft, thick variety known
as “Tyrian,” are all good for various purposes. The
latter is particularly useful for couching lines; filo-floss—a
bright, glossy silk with no twist in it—requires some
skill in the manipulating of it, therefore filosel or mallard
floss, each of which has a slight twist on it, is better for
the less-skilled worker. Carpet chenilles in colours, both
cotton and woollen, applied to coarse canvas or sacking,
are used for the making of mats and rugs. Woollen
and mohair, cotton and brush braids of the common
skirt type, carpet and binding braids, cords and French
tapes, coloured and washing gimps, all may be used with
advantage for embroidery. It is better to shrink some
of the loosely woven skirt and carpet braids before
applying them to the material, or they are apt to pucker
the material after washing.
Good needles should always be used, with well-drilled,
good-sized eyes. Care should be taken to choose them
so that they may be exactly suited to the thread and to
the material; the eye should be large enough to hold the
thread easily, in which case it will make a hole in the
foundation of a sufficient size to allow the thread being
pulled through without roughening it. Scientific sharps
are very pleasant to use—numbers four, five and six, are
suitable for cotton and flaxes, crewel and chenille, and
long-eyed sharps for general embroidery and needle-weaving.
For openwork backgrounds such as are shown
in Plate XI, H, I, J, K, L, where no threads are withdrawn
from the material, a special needle with a large
thick stem and a small eye is used; it separates the
threads of the material and makes them easier to gather
into groups by means of the tightened thread.
In working on loosely woven materials—such as
canvases—and for weaving patterns, tapestry, chenille,
or rug needles with blunt points are the most comfortable
to use; if these are not to hand, work with the eye of
the needle foremost.
A well-fitting thimble, preferably vulcanite or silver
lined with steel, is necessary. It should be deeply pitted
to catch the eye of the needle and well finished, so as not
to roughen the thread. Scissors of different sizes are
required: a large pair with one sharp and one rounded
point—these for the cutting and preparing of the material;
a small sharply pointed pair for the snipping of threads;
a special pair with a little square knob on the one blade
and a sharp point on the other for cutting out threads
and sections between embroidered and openworked
parts; these are a safeguard and prevent the snipping
of the work.
Frames are not necessary for the simpler types of
work, but for wide borders in needle-weaving, particularly
for the novice, a frame will fix the warp threads
by keeping them taut, and prevent puckering of the
material—little tambour frames which consist of a
couple of rings, the one fitting into the other, will serve
the purpose.
Finally, a small emery cushion, for polishing the
needle should it get sticky or rusty, a piece of beeswax
is useful for flax threads, a stiletto for piercing eyelet
holes, a yard measure, a bodkin, and some small pins,
are all necessary items, which should always be at hand
when wanted.
The Second Point: The Colour Scheme.
Colour lends an inexpressible charm to our daily life—it
is in nature that it exists in greatest beauty. The
wonderful robe of colour which she displays for us
throughout all seasons and in all countries, through
the flowers and fruits, trees and foliage, sea and sky,
the birds, animal and insect life, all under different
aspects and ever-varying circumstances, increase our
admiration and pleasure. We reflect and gratify our
need for colour in our intimate surroundings—dress,
hangings, furniture, carpets, pottery and pictures. The
embroideress who has a fine instinct for colour will arrange
a scheme wherein beautiful combinations of hues, tints,
and shades will mingle and produce a harmonious whole.
It is for those less favoured that the following hints are
given. A knowledge of the principles of colour will
serve as a guide, while the use of a chromatic circle,
i.e., a colour circle, will be invaluable to the beginner.
This convenient arrangement wherein successive strips
of all the colours are placed concentrically in their due
proportions—as in the prismatic spectrum—will enable
her to study the varieties, the relations and the peculiarities
of colour and help her to arrange and select
those hues, tints and shades which will combine well
together; it will aid her to obtain happy effects with
some appreciation of its harmonies and contrasts.
The three primary colours, green, red and blue—green
being now generally accepted as a primary instead of
yellow—offer the greatest contrast to each other. They
are the strongest and most powerful and exercise a
greater influence on the mind than any of the others;
add to these, orange, yellow, violet, white and black—the
sum of these six colours constitutes white, and the
absence of all, black—and we have the eight from which
all the other colours and their modifications can be made,
easily and systematically.
Red (Complementary Colour, Bluish-Green).—Red,
the strongest and most powerful, excites and
stimulates the eye. It was the first colour to be used
for decorative purposes by primitive man, and the first
to receive a name: it is the most predominant of the
warm colours, and on account of its fresh, bright, cheerful
character, is much used by beginners; but this very
assertive quality makes it rather difficult to combine
with other hues, therefore it is well to use it in small
quantities for general purposes. Red, in different hues,
has always been the symbol of power and distinction.
Scarlet has been used for regal robes and state ceremonials,
as well as for military purposes—it indicates
bloodshed and war, fierceness and courage. Red of a
rosy hue signifies divine love. It has been a favourite
colour with the poets from the days of Homer to our
own time. The complementary of red is bluish-green.
Blue (Complementary Colour, Yellow).—Blue
followed red—it is of a quiet retiring nature, soft and
soothing in effect, imparting the same quality to all the
hues in which it predominates. It is one of the cool
colours and is symbolically emblematical of heaven,
piety, and intelligence. The complementary of blue is
yellow.
Green (Complementary Colour, Purple).—Green,
the most prevalent colour in nature, and the least stimulating,
has a remarkably distinct and striking effect on
the eye. It is highly refreshing as well as soothing, and
is the necessary restful colour, the opposite of red. Yet
the nervous power of the eye is sooner exhausted by
strong greens than by any other hue; thus, a piece of
work with a preponderance of green is not so pleasing
to look at constantly as the piece where blue predominates.
Symbolically, green is the emblem of
bountifulness, youth, happiness and prosperity. The
complementary of green is purple (violet-red).
Yellow (Complementary Colour, Blue).—Yellow
approaches white, and is therefore a brilliant and
advancing colour. It possesses the greatest power of
reflecting light; is rather difficult to combine unless
modified. Bright yellow has been used emblematically,
to express charity, joyousness, plenteousness and old
age—greenish-yellow is the symbol of jealousy and envy.
Its complementary is blue.
Orange (Complementary Colour, Greenish-blue).—Orange,
coming between red and yellow, partakes of the
nature of both—it expresses warmth, fruitfulness and
wealth. The complementary colour is blue with a tinge
of green.
Purple (Complementary Colour, Green).—Purple
is the quietest of the rich colours, being composed of red
and blue. It varies in tone according to the amount of its
constituents. When blue is predominant it is symbolical
of mourning, expressive of sorrow, sadness, and is called
violet; when inclining to red it becomes warmer and
richer. It expresses dignity, pomp, and regal power.
Its complementary colour is green.
These six bright colours, when used in conjunction
with black and white, with each other, or with their
complementaries, will strengthen, intensify and enrich
each other without altering their true value—when such
vivid effects and sharp contrasts offend the taste of the
worker, when they appear too crude, too conspicuous
and too obtrusive—which they are apt to do—they may
be harmonised quite simply, either by modifying the
complementaries or by using a tint or a shade, that is, a
lighter or a darker tone of the same colour. The strength
and potency of these startling contrasts are in this way
tempered; they become less glaring, less assertive,
pleasanter and simpler to arrange, and lose the jarring
effect they might have if used in their full brilliancy.
For simple household articles with little decoration
these bright colours may be used with charming effect.
It is well to remember, in choosing the tints and shades
of a colour, that the foundation material will have a
considerable influence on them. On a white ground they
will appear stronger and brighter, their tone being
heightened by the white or light background, while on a
black ground they appear more distinct and brilliant,
particularly light ones, the contrast being greater. Dull
hues gain in brightness when used with black and lose
accordingly when combined with white.
Juxtaposition of Colour.—Colours, then, when
associated, influence each other simultaneously in various
ways, darkening and lightening, adding to or detracting
from, as the case may be—thus, by placing a light and
dark one in contact, for example, black and white, the
former looks blacker, intenser, while the latter looks
more startlingly white on account of its dark neighbour.
It is advisable, also, in arranging the colour scheme—after
taking materials and positions into consideration—to
determine at the very outset what the leading features
are to be, and to have one colour in the scheme more
predominant than the others, either in intensity or in
area. There should be some central point or points of
interest which will attract the eye to certain parts of the
construction.
A Dominant Colour.—A liberal use of a dominant
colour, by conveying a definite impression, will give
decision of character as well as beauty of tone to the work,
while a vague, uncertain, or too equally distributed
arrangement will leave an unsatisfied and indefinite
impression on the mind.
There are abundant suggestions to be had from fields,
hedgerows, flowers, plumage of birds, etc., for the
embroideress who can adapt them to her purpose, but a
simpler plan for the beginner is to choose her colour
scheme from a good picture, a coloured illustration, a
piece of chintz, cretonne or good brocade, or, when
possible, to study the various pieces of old embroidery
preserved in our museums, as a record of the time
when we could compete with other countries, when
embroidery was almost the sole occupation of women
of rank, as it was of the occupants of the convents.
Green.—If we were to use one of the primaries as a
dominating colour, say green, a bluish-green, we might
have as a background a deep pomegranate red, the
design could be worked out in bluish-greens, grey-greens,
soft blues and purples, with touches of pale chamois
yellow here and there; all the colours should have a
tinge of bluish-green, the combining colour.
Blue.—Or we might choose blue, the pleasantest,
simplest and most harmonious combining colour, and
select as a background a warm white or cream. The
decoration could be carried out in various tones of blue,
deep rich blue, turquoise, deep and pale orange, and a
blue grey—much would depend on the tones used in
combination and the manner in which they were
employed. Always avoid a spotty effect, and do not
contrast colours too suddenly in an endeavour to
emphasise special points.
Red.—Red, when used as the predominant or combining
colour, looks best on a dark blue or a cream background.
With a dark blue ground, white or cream,
bright greens and a touch of dull orange will work in well
with the reds, the former combining to make the latter
less assertive. With a white ground and the same
colours, the work becomes suggestive of some of the
beautiful Bokhara embroideries in which reds, greens,
blues and yellows—the latter used sparingly—are combined
so gaily and instinctively.
CHAPTER III
CONSTRUCTION AND DESIGN
“A cunning workman, an embroiderer in blue and in purple
and in fine linen.”
We shall now discuss the decorative points.
The construction and the building up of the pattern
may be taken together.
A Simple Pattern in Needle-weaving.—The simplest
design for an initial effort should be one which could
be executed in needle-weaving such as is illustrated in
Plate I. Here the spaces for the decoration are marked
off on the material, there being no necessity to put any
design on to paper—the weaving may be done in any
simple primitive pattern, or from some of the more
interesting darning pattern samplers, or it may follow
some idea or fanciful invention of the worker. It should
be more or less symmetrical in colour and form, and
provided that sufficient thought is taken in arranging
the colour scheme and that the technique is good,
the result should be both pleasing and decorative.
(See Chapter V. on needle-weaving.) Supposing the
material and the colour scheme to have been already
decided, and that a loosely woven texture—which
demands a simple conventional pattern with bold
stitchery and bright colour effects—has been chosen
(let it be a runner, table cover or any article suitable for
household use). It would be best, as simplicity must be
the keynote, to have a marginal or border design, built
up entirely on straight lines and geometrical forms.
First plan out the material and arrange for the decoration;
decide whether the pattern is to be placed on to a
wide hem, or inside a narrow one, or whether it is to be
applied as wide bars at the ends and edges of the runner.
The limited space at the disposal of the designer will
often aid and suggest the pattern.
The decoration should, when possible, strengthen the
construction. Be careful at all times to place it where
it will not interfere with the usefulness of the object. A
cushion, for example, ornamented with raised embroidery
or with large beads, conveys the idea of discomfort
rather than of comfort, which is, after all, the
raison d’être of a cushion, the addition to a room,
by means of colour and decoration, being a secondary
point.
In the early days, when decoration was so freely
applied by primitive peoples to seams, hems, shoulder-straps,
indeed to all objects, it was their aim to increase
the usefulness of the article rather than to decorate it.
A Border Pattern.—When the above-mentioned
points have been decided, take squared paper, ruler, and
pencil, and draw a few nicely spaced lines; duplicate
the outer ones to give weight to the edges. All these lines
crossing at the corners will form the framework of the
design. Regularity and order are as essential in needlework
as in most crafts, therefore the care and precision
taken in the earlier stages will aid in the working of the
later.
The Construction.—Plan carefully and arrange for
the decoration, which should never interfere with the
usefulness of the finished work.
The Corners.—The treatment of the corners presents
the greatest difficulty. In a frame they are structurally
the weakest parts; for this reason the ornamentation
is placed at these parts to bind and strengthen, as well
as to decorate them. In a piece of needlework with a
simple border design they are again the most important.
One expects to find unity, enrichment and massiveness
there where the lines cross; we add, therefore, a few
extra lines or chequers to the corners. By this means
we enlarge them, and by so doing append dignity and
importance. Still greater emphasis and the necessary
note of interest will be given by the colour and the
stitchery—the treatment of which should always be in
the foreground of the mind of the designer.
Principle of Repetition.—Do not aim at great
variety of form; repetition is one of the first principles
of design. The beginner will save herself much worry
and labour if she keeps this principle before her, instead
of striving—as she invariably does—after variety.
She should make her form—a square, an oblong, or
whatever simple element she may have chosen—recur
at regular intervals, and all corners should be
alike.
Masses connected by Lines.—Masses should be
joined by connecting lines and the spacing so arranged
as to give value to the rest of the work.
Value of Spaces.—A form or element should never
be cramped into a space nor stretched out unduly in
order to fill one; it should be planned and balanced to
look as if it just belonged to it. A design is well balanced
when the elements are so adjusted that they are neither
too monotonous by over repetition nor confused by too
much variation.
Diagonal Lines.—It is safer at the earlier stages to
avoid diagonal lines, or forms made up of such lines, for
several reasons: they give a restless effect which should
be avoided if possible, they present to the embroideress
considerable difficulty of manipulation—coming, as they
must, on the bias of the material, which may easily be
tightened, puckered or pulled out of shape in the working
by the inexperienced hand.
The Game of Design.—There is really no limit to
the possible patterns which may be built up on straight
lines and geometrical forms. The needlewoman has only
to try with a ruler, pencil and squared paper in order to
discover that she may, after some little practice, make
most elaborate designs with interesting results. There
are, of course, certain fundamental principles which will
help her, but they are not many, and with the suggestions
already given she should be able to arrange many simple
designs suitable for her own use. It might be quite a
pleasant occupation for the younger members of a household,
on a winter’s evening, to start and play at design.
A time limit, perhaps a quarter of an hour for the first
effort, and a longer period as the patterns became more
elaborate, might be given; afterwards all the designs
could be exchanged, compared, criticised, and then
judged by an older member. In this way a “habit”
of pattern making might be cultivated. Many of the
designs should prove valuable to the craft worker as
well as interesting to the youngsters.
Circles.—From the making of patterns with straight
lines we go on to circular forms, with radiating lines.
This opens up a wide field to the embroideress, allowing
her to extend and vary her simple designs
indefinitely.
With this new element, the circle, she can formulate
some of the more definite floral shapes, and arranging
them in an orderly manner, symmetrically, can make a
geometrical pattern suitable to her purpose; she can
make use of compasses, or if these instruments are not
at hand, any circular form, such as a plate or a coin, will
suit admirably. Should these prove too small, there is
always the simple device of the fixed pin encircled
by a thread, with the pencil at the opposite end,
which, when the pin is held firmly in the centre of
the space—as the thread must remain taut—will form
a circle, the size being fixed by the length of the
thread.
Circles at once suggest natural forms and growth,
but to begin with the young designer must keep to
the geometrical side of Nature; natural floral forms will
come later. If she examines carefully a number of the
flowers of the field or hedgerow she will find that many
of these beautiful forms are built up on a geometrical
basis—she will note the radiating lines of the flowers,
the sepals, petals and stamens, the venation of leaves,
the manner in which the mid-rib gives off, gradually, the
beautiful curving lines which flow into the outer edges,
and the wonderful orderliness of the little seeds clinging
to the sides or centre of the seed vessel, and thus she
will realise that all curving lines are but segments, or
parts of circles of various sizes.
To aid the designer in her first efforts let her turn to
an elementary text-book on botany—she will probably
find there a number of diagrams of horizontal sections
of the commoner wild flowers. These give the plan of
each flower typical of the family to which it belongs—all
the parts are arranged symmetrically in circles or
whorls, and show how the flower is built up. The
embroideress should find these sections full of suggestions;
she might take the simpler forms to begin with and
elaborate them, adding fresh details where necessary
for the development of her design. By comparing the
sections of one flower with another—of the wild rose
with the poppy, the purple loosestrife with the forget-me-not,
the primrose with the daffodil—she will be able
to obtain variety with simplicity and balance; then she
will connect and join all the masses with straight or
curved lines, and thus give completeness to her design.
With increased knowledge of the structure of flowers
the embroideress will gain a keener sense of observation
which will be of great value when she studies the natural
forms.
Setting forth once more on the high adventure of
making her own design, she will bring to her aid the
principles already learnt in the making of straight
lines while she was building up her patterns and
designs.
The Fifth Point: The Stitchery.
We express ourselves and our ideas in embroidery by
means of stitches and colour.
To have pleasure in the craft, the needlewoman must
have a fairly accurate knowledge of the technique.
Stitchery should at all times be as simple as possible,
and carefully adapted to the material and the design.
Simpler Types of Stitchery.—The commoner types,
those which by experience and long use have been proved
to be the most beautiful or the most practical, are the
best. All the more complicated forms are merely
modifications or combinations of these simple types,
many of which are used in “plain” needlework. There
are, in fact, few stitches which a careful worker cannot
master in a very short time.
Stitchery not the Most Important.—It is wise
to remember that stitchery is not the most important
factor, but only one of the many which go to the making
of good and artistic work. Beauty, in needlework,
consists, not in the variation and elaboration of stitch,
but in the harmony of material and technique, as well
as of form and colour.
Unity of Stitch.—Where coloured threads are used it
will often be found advantageous to adopt one stitch
only. Many of the charming pieces of embroidery stored
up in our museums give us an idea of what can be done
in this way, and though we lack, perhaps, both time
and patience nowadays, there is no reason why we
should not, by cultivation of our tastes, raise the level
of the art considerably above its present standard and
prove that we can still produce embroidery—of the
modest, reticent type—adapted to our own conditions
of life, which will reveal both refinement and artistic
delight.
To execute a piece of work in one stitch would be
excellent practice for the young embroideress, whereby
she would learn to know and use a stitch in all its
varied aspects. She need not fear monotony—the
coloured threads will give sufficient variety. Let her
take the simplest of all stitches to begin with—the tacking
or basting stitch—and keeping it and its many varieties
in her mind when planning out the pattern, she will find
that she has many delightful ways of executing it.
Tacking or basting stitch, worked in rows, becomes
simple darning, a background stitch with which she may
make charming patterns and fillings, ad libitum. (Plates
II. and XII.) Worked closer, it is a running stitch,
wherewith braids may be tacked in place (Plate IV.),
frills gathered up, seams of frocks connected, or smocking
prepared. Finally, when worked with the same quantity
of thread on the under and upper surfaces of the material,
it attains a new dignity, and becomes satin stitch—the
stitch beloved of the young modern needlewoman, who
is generally inspired and stimulated by the wonderful
skill and precision of the Eastern needleworkers.
White Backgrounds.—White backgrounds, when
embroidered in white or with only a little colour, may
have much greater variation in stitchery; it is a relief
to the worker and an improvement to the work—indeed,
should the embroideress feel so disposed, she has here the
opportunity of displaying her knowledge of stitchery
to a considerable extent, always keeping, of course,
within the limits of good taste.
She should endeavour to suit the stitchery to the
work, to produce the desired effect without too much
labour—not that work should ever be done in a hasty
or untidy manner—but, as said before, she should
adapt it to its purpose. It is well to remember that
large pieces of embroidery, generally seen from a
distance, demand bold, effective treatment; detail is
lost, so can be omitted; smaller pieces, seen at
closer range, should bear inspection, therefore more
delicate treatment may be applied; detail and finer
stitches can be seen to advantage. (See Chapter XII.
for stitches and the method of working.)
The Sixth Point: The Finishings.
The aim of the embroideress is to make her work
beautiful, as well as suitable for her purpose. If she has
the gift of originality she will also make it distinctive,
possibly unconsciously, by adding here and there those
little touches of individuality which will mark the work
as characteristic of herself.
It is in the finishings that she has most scope for these
dainty devices; for by their means she may add interest
and artistic detail to the simple garment or article of
domestic use and render them charming things to look
at. She may attain this end, not by obtaining expensive
fitments, rich cords and silk tassels, such as are sometimes
applied, most unsuitably, to embroidered cushions,
table squares, and other objects that require frequent
washing, but by the use of braids (Plate VI.), and bindings
(Plate VIII.), and bands (Plate IV.), hand-made
cords and tassels, linings, edges, fringes, beads and
buttons, raffia and plaited straw.
Thus, the amateur will find it well worth while
giving some thought to the making-up and finishing
off of her embroidery. She will soon realise, too,
the possibilities of making many of these ingenious
devices herself wherewith to adorn her work, and she
will feel well repaid in the end when she has contrived
some simple embellishment at little extra cost.
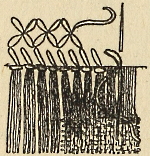
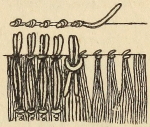
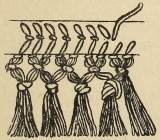
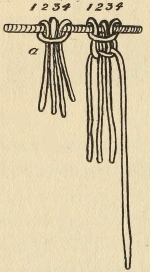
Hand-made cords and tassels (Figs. 38A and 41), fringes
and edgings (Figs. 34 and 42), may soon be made by
skilful fingers; bright-coloured skirt braids and carpet
bindings and hand-made cords of dyed string or wool give
a decorative effect to hems and borders—a wide hem looks
well with a heading of brush braid or a piping of coloured
galoon or narrow Russian braid oversewn with wool, or
a narrow band of needle-weaving. Material and edges
may be joined, chair backs and runners may be
brightened, dress fitments may be completed simply,
artistically and economically, by means of these braids,
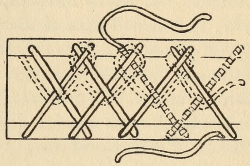
connected with dainty joining stitches (Figs. 26 and 29).
Wools of various qualities may be brought into service
to make fringes and cords for cushions, etc.; seams may
be decorated and joined with insertion stitches, worked
by hand (Fig. 25), or by the crochet needle (Fig. 63);
fastenings may be secured by latchets of wool, thread, or
silk, or cord, all of which are easy of manipulation and
much prettier than machine-made articles.
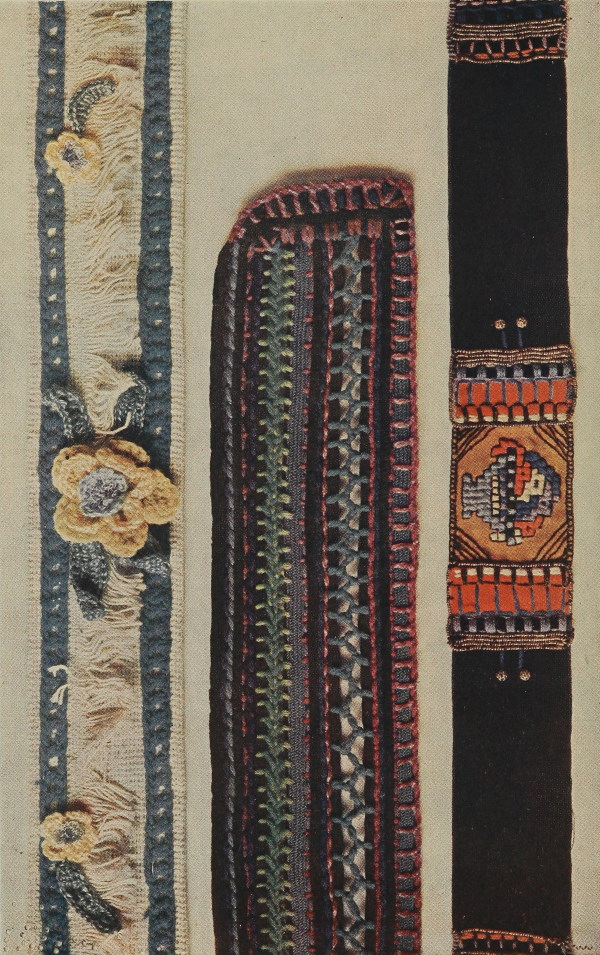
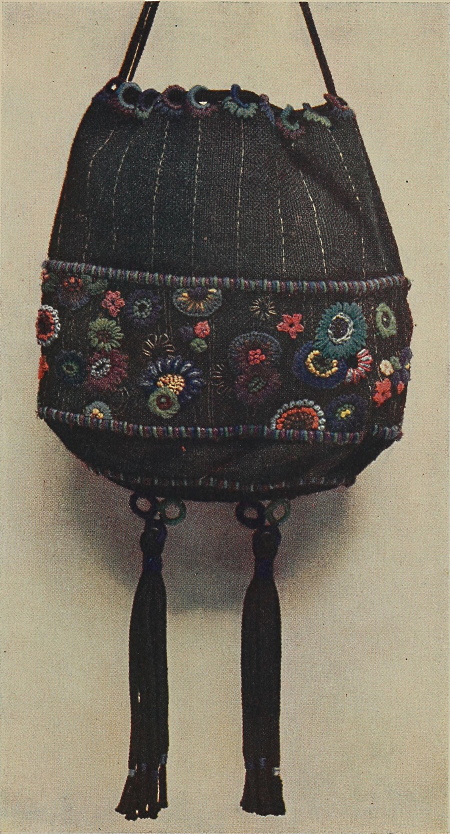
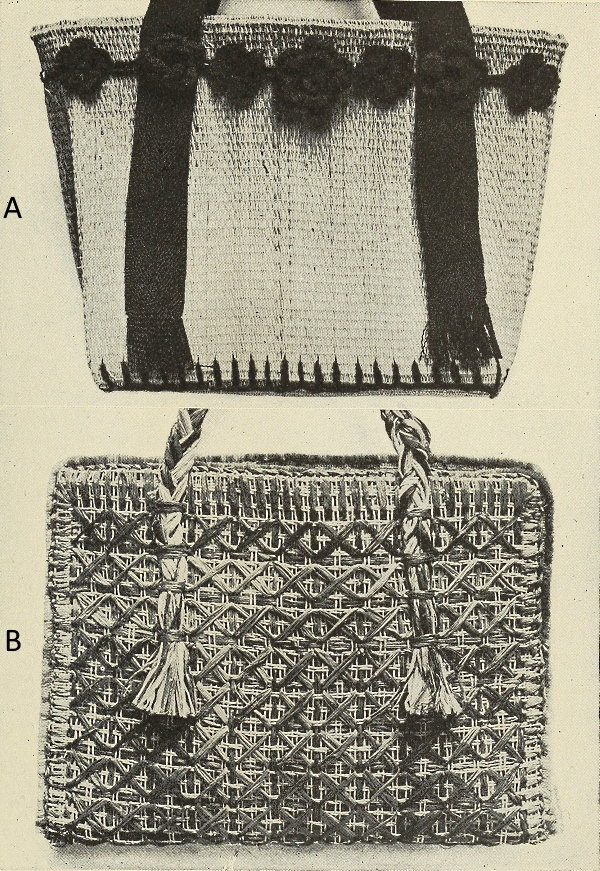
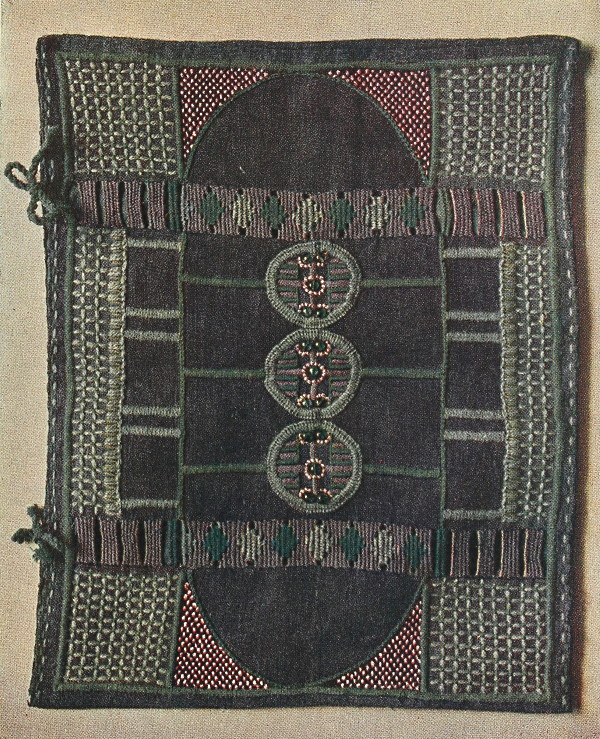
By referring to Plate XIII., it may be seen that much
may be achieved by means of braid in the decoration of
a useful bag; for description, see page 153.
Charming hand-made braids which may be used for
many purposes, such as waist cords, latchets, ties, belts,
hat bands (Fig. 40), may be made by means of an
embroidery frame, a lace cushion or a small hand loom.
For the handles and joinings of bags, see chapter on
needle-weaving.
Beads and buttons are useful for ornamentation—they
give richness and weight wherever they may be placed;
and as an addition to fringes (Fig. 35), tassels and ties,
they are most effective. Flat beads and buttons may be
applied to embroidery provided they do not interfere
with the use of the object; this they would do if it
were in such constant use as to require frequent
washing.
Small beads may often take the place of French knots,
giving much the same appearance to a border or hem.
Washing galoons and gimps, bindings and trimmings,
may be effectively applied to dainty little tea and
luncheon sets, as well as to children’s dresses and
overalls, they may be further embellished with narrow
borders of needle-weaving worked in coloured cottons
or in flax threads.
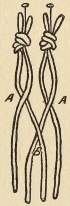
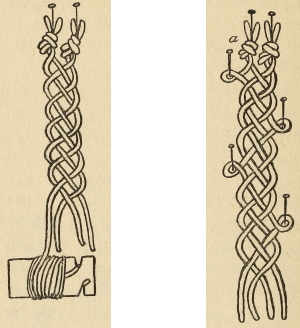
For method of making fringes, tassels and braids, etc.,
see Chapter XI.
CHAPTER IV
DARNING STITCHES—BACKGROUNDS AND FILLINGS
“The needle’s work pleased her, and she graced it.”
There is an infinite variety of pattern to be made with
darning stitches, and fortunately many needlewomen
have sufficient originality to invent little variations to
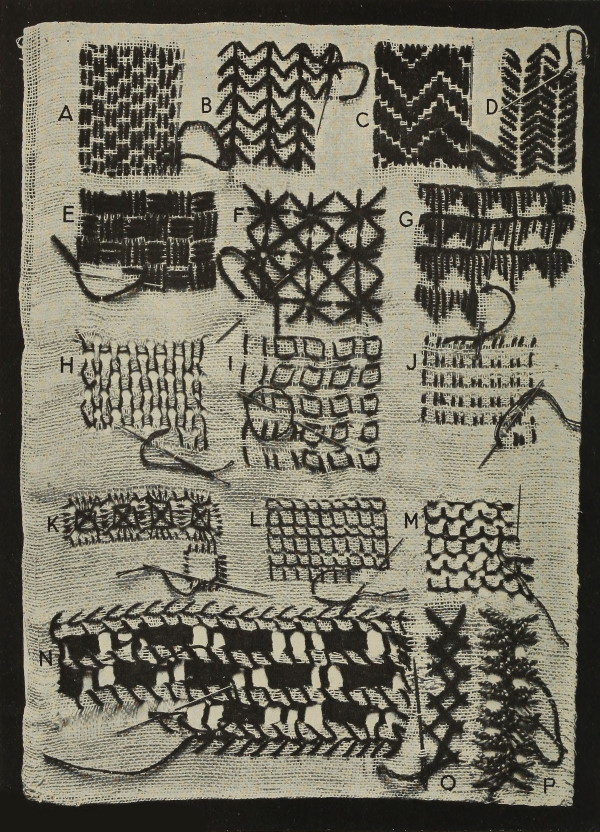
suit their work and material. Most of the patterns on
Plate II. are intended to be worked on a loosely woven
foundation where the threads are easily counted, such
as some of the coarser linens, single thread canvases,
greenhouse shading, and tammy cloth for finer work.
These darning patterns are better worked with a blunt
needle and a long thread, as it is rather awkward, at times,
to join new threads in the middle of a pattern, especially
an openwork one (see Fig. H). Simple fillings like
these may greatly enhance the effect of a piece of embroidery.
It will be seen by referring to Plate II. that
they might be worked so as to form quite a number of
patterns in straight lines (Fig. A), in waves or chevron
pattern (Fig. C), in clusters or stars (Fig. F), in lines of
slanting stitches (Fig. D), in groups of squares or chequers
(Fig. E), in vandykes (Fig. G), or in any of the openwork
stitches as Figs. J and L.
A Simple Openwork Filling.—Fig. J is a pretty
little pattern suitable for a border, for the foot of a
child’s frock, for a jumper, for table mats, or for any
article where a dainty openwork appearance is wanted.
It consists of straight lines in a vertical overcast stitch,
worked in rows, from left to right and from right to left.
These upright stitches are in groups of two, worked
over four threads of the material; each row is separated
from the other by two strands of the material.
To Work Fig. J.—Unfortunately the Fig. J does
not show this filling to advantage. When the pattern
is worked it will be seen that the intervening strands,
in conjunction with the open spaces, form tiny little
crosses, which add transparency to the work.
A filling more tedious to work, but with a more open
appearance, is got by overcasting every stitch on the
advancing row, and on the return row working the upper
part of each stitch into the lower space of the row above,
thus leaving no strands between the stitches or rows.
Vandyke Border, Fig. G.—This pointed pattern,
worked in a single row, makes a good finish for a border
or hem.
To work as Fig. G, each group requires seven stitches
to form it, the shortest covering four threads and the
longest twelve; the last stitch of each group forms the
first of the next one.
Pyramid Filling.—The size of the groups may vary;
large and small vandykes may alternate. Another
filling somewhat similar may be made by taking the
stitches horizontally instead of vertically; in this way
groups of little pyramids are formed. Each row should
be worked with alternating pyramids. The simplest
method is to begin at the top with a short stitch over
two threads, work five more horizontal stitches, increasing
in width, right and left, by one thread, so that
the sixth stitch covers twelve threads of the material.
Work in oblique rows.
Strips of vandyke pattern may be worked over large
backgrounds with good effect. Make five horizontal
stitches over five strands of canvas, each stitch being
below the other, but one thread to the right of the last;
then work four stitches beneath these, each stitch being
this time one thread to the left of the one above it;
continue for length required. Start the second row on
a level with the first and six or seven strands to the right
of it.
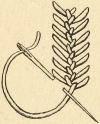
Fig. B, Arrow-head Filling.—This is a useful
stitch for covering the ground quickly. The three
stitches are here formed over six vertical and ten horizontal
threads, but, of course, the number must always
depend upon the quality of the material. The vertical
stitch is worked first, then the left slanting stitch, followed
by the right. In working with loosely woven cloth, it
is necessary to carry the working thread up behind the
material to the top to start each stitch. This uses
rather more thread, but the stitches lie better and the
work is not puckered.
Fig. F, Star Filling.—Here, a number of stars
are worked in successive rows. To make them quite
regular, each one should be begun at the same point.
In the Fig. F they are worked over sixteen strands:
start at the top left corner with a double stitch, then
make the horizontal stitch below, and so on till complete.
By tightening the working thread a little a hole is formed
at each corner, and in the centre of each star, which
makes the pattern an open one, provided the working
thread is not too thick, in which case it would fill up the
hole.
An equally good background for a firmer material is
to work stars in two rows, diagonally, one up, one down,
leaving always an equal number of strands between each
star. In this way the material itself is formed into little
diamond-shaped panels or lozenges.
Fig. C, Wave Pattern.—This is one of the more
elaborate darning patterns. It makes a more solid
filling and takes rather longer to work than some of the
others. Many pleasing variations may be formed with
darning stitches, where the background weft or warp
threads are utilised to form the pattern.
Damask Darning.—Materials may be repaired by a
linen, twill, or damask darn, in which case the weft
threads have to be put in first by the worker before the
pattern can be woven.
Work Fig. C by lifting two weft threads in descending
rows and passing over seven; after working six
rows the pattern is changed by the two weft threads
being lifted in ascending rows, the last of the descending
counting as the first of the ascending row.
In a twill darn, the pattern of weft threads descends
all the time in regular diagonal lines.
It is quite worth while copying some of these damask
patterns from table napery, and reproducing them on a
larger scale in bright colours—in order to see what
effective designs they are; they might well be utilised
as fillings for squares, stools, or cushions.
Fig. A, Single Darning.—A simple grounding
pattern, such as that of Fig. A, is useful; it is quickly
worked, too, a number of threads being lifted by the
needle at each stitch. Start at the left corner; pass over
four and lift two weft threads alternately for the first
two rows; for the next two rows, lift the two weft
threads in a line with the centre of the long stitch, and
so on.
Basket Pattern.—A basket or brick pattern may be
got by working four rows with the lifted threads in a line,
instead of two, as Fig. A, before changing the stitch.
This pattern looks very well when the chequers are worked
with contrasting colours. Work four vertical stitches
first, in lines, and in one colour, over eight strands; then
take the contrasting colour and fill in all the horizontal
stitches. If one colour only is used these squares may
be worked in rows, the vertical and horizontal sections
alternately.
Fig. H.—This type of work makes a rather more
open background than some of the others; it is very
suitable for filling in small spaces, for handkerchief
sachets, nightdress bags or borders for collars or handkerchiefs.
It should be worked with a fine coloured or white lace
thread, sufficiently strong to draw the strands firmly
together, yet fine enough to leave the spaces as clear as
possible. As a filling it is easily and quickly worked, as
no threads are drawn out, which is a recommendation.
The pattern is worked over six threads both ways—with
the exception of the first stitch—and in two horizontal
lines. It will be noted that the stitches are not
quite vertical, being inclined towards each other in
twos.
A Good Filling.—To form the first stitches, bring
the needle out at the top left corner; count down over six
strands and three to the right; insert the needle and take
a horizontal stitch under six strands to the right. The
slanting stitch is now formed by inserting the needle into
the hole on the upper line made by the first stitch, and
taking a horizontal stitch under six strands to the right
on that line—the upper one; proceed in this way to the
end of the space. The next row is worked from right to
left. The thread should be tightened after each stitch
to increase the open space.
Fig. D, Diagonal Filling.—This grounding pattern
consists of rows of slanting stitches, worked downwards
over six strands of material; the working thread is
taken across from corner to corner of a square, each
successive stitch being taken three strands below the
upper one; a strand of the material forms a mid-rib
between the inverted rows. If preferred, these rows
might be separated by a line of backstitching, in which
case two threads should divide each row of slanting
stitches; this gives a clear line for the backstitching.
These backgrounds and darning stitches described
above are well suited for working on coarse materials
with thick threads—as well as with finer ones; although
the patterns for the majority of workers are too laborious
for very fine stuffs, they may be used for small spaces in
linen embroidery such as fillings for flowers, or initials.
Charming open groundings may be worked without
removing the threads of the foundation material, but by
drawing them in clusters tightly together, by means of
stitches. Compare Plate II., where the fillings, Figs.
H, I, B, K, L, and M, are worked in this way.
These patterns can be only shown properly on a
loosely woven cloth, such as canvas, linen, or cambric.
For fine material a fine lace thread is required.
Fig. I.—This pattern consists of little squares and
crosses. In Fig. I it has been worked with a thick
thread and the strands have not been pulled together—in
order to show the method of working; but as already
explained, it requires a fine thread and tightened strands
to show to advantage.
A Filling in Squares.—Begin the pattern with
vertical stitches, in horizontal rows over six strands,
exactly as in Fig. 10, until the required space is filled,
drawing each group of threads tightly together; then
work the horizontal stitches over five strands to complete
the squares, tightening them also, but not to such
an extent as to pucker the material. The squares may
be made smaller and the open spaces larger if each stitch
is worked over twice with a very fine thread.
Fig. K, Squares and Stars.—Here, each square
takes up sixteen strands of linen, and each one is completed
before going on to the next. Work by overcasting
all round the outside of the square over four
strands, and make an inner square, as Fig. I, with a
cross stitch in the centre, taking care to finish with the
needle in a position to begin the next square.
Fig. L, Square Stitch and Rhodian Embroidery.—This
pattern is made up of rows of square
stitches separated by vertical ones. It is usually
worked without removing any threads from the
material, although with a very firm cloth it is rather an
advantage to do so when an insertion is wanted; in
the latter case the vertical threads connecting the rows
of square stitch are left out.
This is a stitch one frequently finds in old linen
embroideries, particularly of old German and Italian
work—where it is used either as a border or insertion,
or as a separating line between squared or diamond-shaped
forms; there is a similarity in the working
of it to the stitches used by the people of the
Island of Rhodes—latterly known as Rhodes embroidery
or punch work—the only difference being
that it covers the entire background in Rhodian embroideries
and the threads are more closely drawn
together. In these Rhodian embroideries the rose is
frequently to be met with. It is the symbol which
invariably accompanies the head of Helios on its coins,
and to which the classic isle owes its name. Square
stitch can be worked in straight or in slanting lines, see
Fig. M—the former is the simpler, as each square is
completed in one row, while the latter requires two rows
to complete it.
To work on horizontal lines, Fig. L, begin at the
right-hand side and make an upright stitch over six
threads; take a slanting stitch at the back and bring the
needle out six threads to the left at the base. Take a
horizontal stitch to the right, inserting the needle at the
foot of the vertical stitch; take an upwards slanting
stitch at the back to the left and insert the needle into
the top of the first stitch. This forms three sides of the
square. Now bring the needle out in position to start
as for the first upright stitch. If properly worked, the
reverse side forms a series of crosses. Fig. L has a
row of these square stitches with an alternate row of
upright stitches worked from left to right between them.
This is a pretty and unusual combination of stitches,
and it makes a charming border worked in colour on a
loosely textured material for a collar or other small
article. Another variation of the same type, and still
more open, is to have double rows of square stitch
between each row of vertical stitches, the lower row of
little squares coming between those of the upper row.
Fig. I, Square Stitch in Slanting Lines.—To
work this stitch in slanting lines is rather a slower
process. The first row forms a series of zig-zags or little
steps on the right side, while on the wrong side it forms
two single lines on the bias of the material. Begin at
the right-hand side of the work; take a horizontal stitch
from left to right over six threads; a slanting stitch at
the back to the left brings the needle out six threads
below the starting-point. Take an upright stitch and
put the needle into this point—two sides of the square
are now formed. Take a slanting stitch at the back and
bring the needle out six threads to the left of the base of
the upright stitch and continue for the distance required.
This slanting line of square stitch is easily acquired if
the worker remembers the appearance of the stitch, on
the “wrong” side as well as the right.
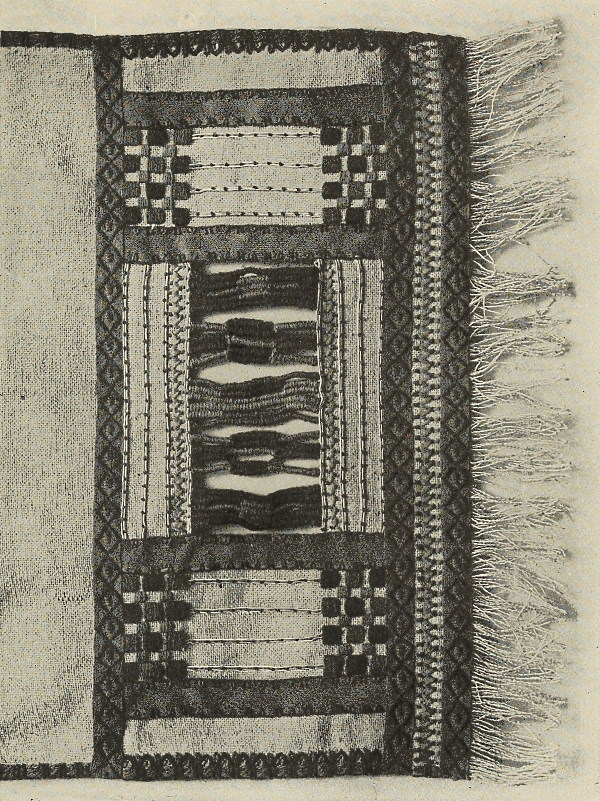
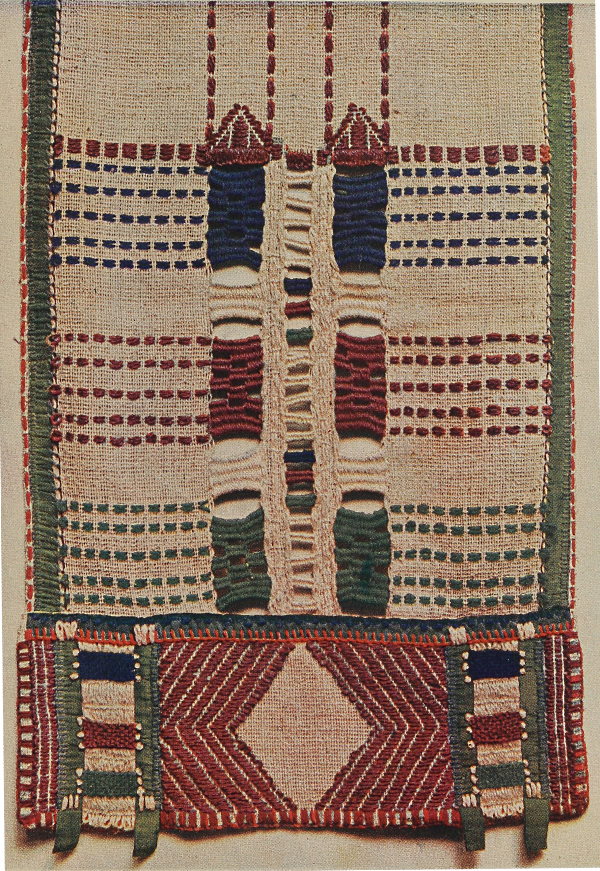
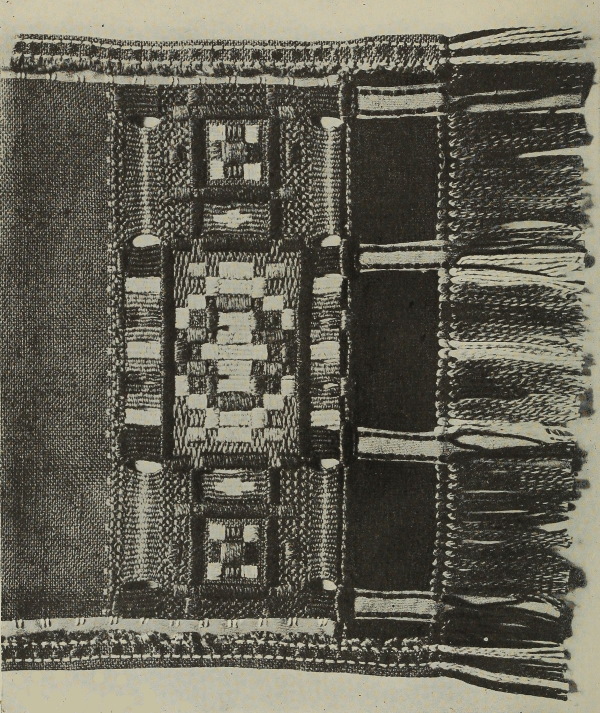
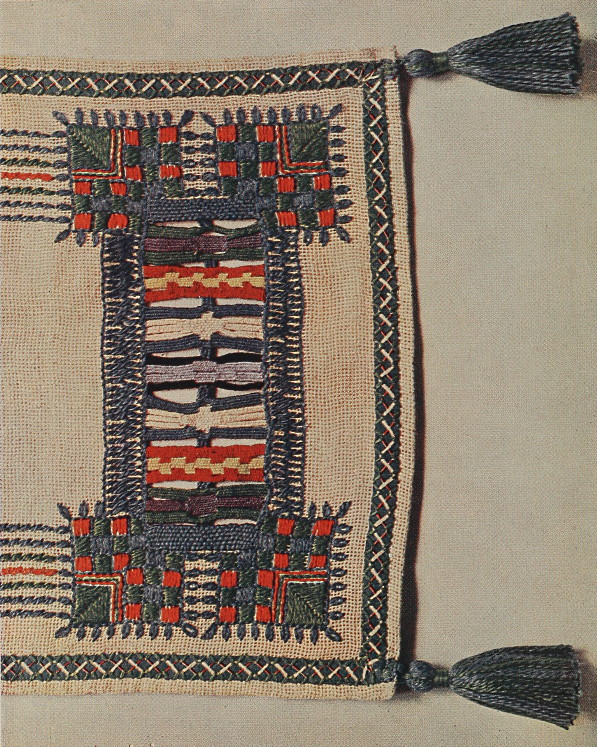
A Table Scarf in Russian Crash.—This design is
another of the direct type in which the needle-woven
border forms the principal subject. The material is very
pleasant to work—it is of a soft greyish-cream colour, which
combines well with the wools and braids, and the texture
is sufficiently open to allow of the threads being easily
removed, which is a recommendation when preparing
for the needle-weaving and the fringe. The stitchery is
all done in wools, and the colours are dark heliotrope
with two lighter tints, blues (two tones), greens, a dark
and light emerald, and deep orange. The broad braid
is of soft blue, the narrow of straw colour. The design
forms a deep border divided into panels by bands of
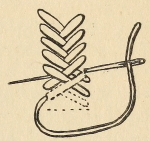
braid; the bands are tacked into place by short button-hole
stitches in the darker shade of emerald green,
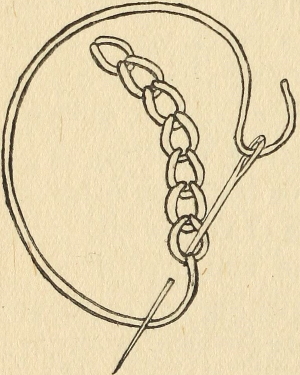
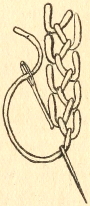
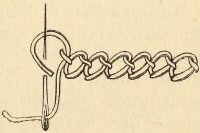
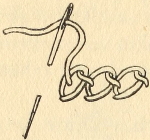
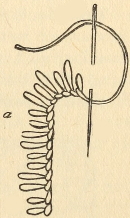
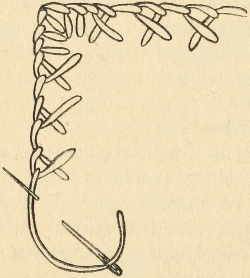
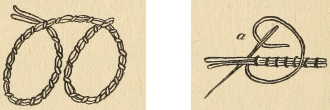
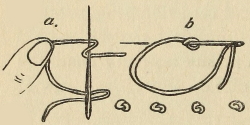
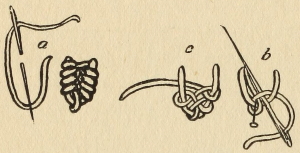
between which are tiny little loop stitches (Fig. 3), in
orange. The centre panel has a wide band of needle-weaving,
about three inches deep, which is divided up
into five groups; the groups are worked from the outside,
inwards, as in Plate I., and the various colours are introduced
into them. The most prominent colour in the
scheme is blue, accentuated in this case by the blue braid,
the blue edging, and the second and fourth groups of
weaving, which are worked in two shades of blue. The
first and fifth groups are woven in heliotrope with orange
in the centre; the middle group has light heliotrope on
the outer parts and pale green on the inner. This same
green is worked in oriental stitch on each side of the
central 3-inch bar, while the stitchery between the rows
of wide blue braid is in the lightest tint of heliotrope,
tacked down with tiny stitches of the darkest shade.
The two side panels are worked in satin stitch in two
tones of heliotrope, each row of chequers being connected
by small chequers in light green—they also are
worked in satin stitch. The lines of straw-coloured
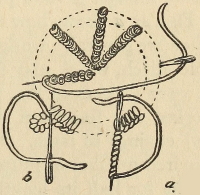
braid are sewn down with French knots in heliotrope
(Figs. 22A, 22B). The pattern of the stitching on the
bands of braid which border the design is worked in the
same way as loop or oriental stitch; the needle is brought
out on one side of the braid and inserted on the other
side, just opposite, then brought out again in the centre
to the right, where the wool is tacked down with a tiny
stitch; the needle is again brought out on the edge of
the braid, about half an inch further on, inserted on the
lower edge and brought out in the middle again in order
to tack the wool down. These two stitches reversed give
the diamond shape of the insertion; three satin stitches
in orange give a bright little note to the edging. These
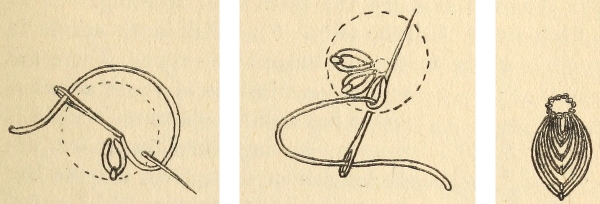
looped or petal stitches worked in different ways can be
used to form many pretty headings. The narrow edging
on the selvedges between the lines of blue braid is
charming; it consists of two loops of heliotrope in two
shades—the one worked within the other—with a closed
looped stitch in orange between each pair. When all
the embroidery is finished, the weft threads are withdrawn
from the remaining ends of the material, which
have been left for the fringe. Sometimes a fringe of a
closer texture or of a different type is worked, or the
material may be too short to allow of one—in all of which
cases a strip of cloth could be inserted under the braid
and sewn down with the pattern, then fringed.
It is generally advisable when working with narrow
braids to take the ends through the material where they
can be stitched firmly in place; wider ones are often tied at
the ends to prevent spreading, then turned in and stitched.
CHAPTER V
NEEDLE-WEAVING—RUSSIAN OPEN-WORK— LINKED
STITCHES
“A web made fair in the weaving.”
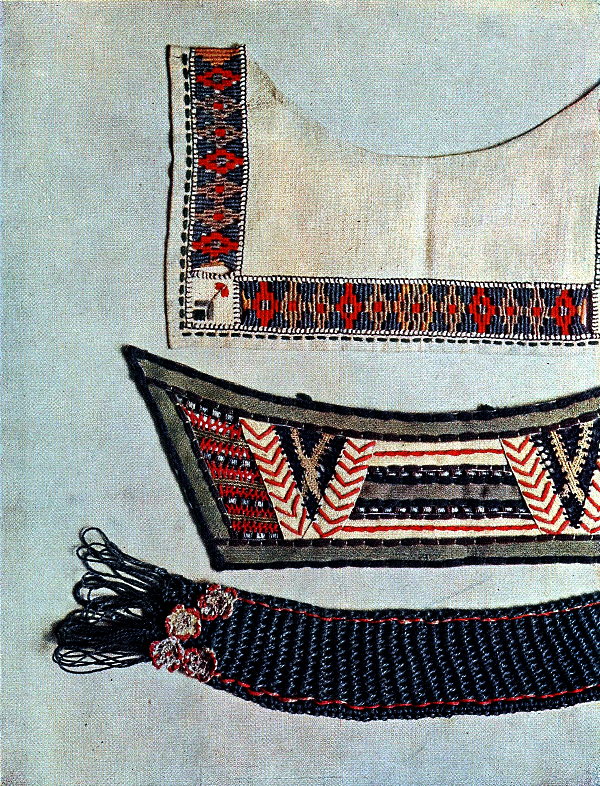
Needle-weaving is a form of decoration common to
all countries; it was practised by primitive peoples and
must have preceded embroidery. It was a means of
adding richness and colour much in favour with the
early Egyptians, who decorated their garments with
fringes and bands of needle-weaving. Mummy cloths
treated in this way are to be seen in the British Museum;
also specimens of early Coptic work, preserved in the
Victoria and Albert Museum, show that they were in
the habit of weaving little panels and borders with the
needle, with which to decorate their garments. This
desire to enrich and decorate with the needle, by means
of colour and pattern, the more important parts of their
apparel followed on the discovery of how to weave
cloth, and so we find that these early workers frequently
left out the weft threads and wove in beautiful patterns,
rich in colour, with the needle into these spaces. Later,
little panels, bars and medallions were worked in this
way and inserted into their garments. This needle-weaving,
which is practically tapestry with the needle,
seems to have reached a great degree of perfection in the
fifth century. There is very little to distinguish needle-weaving
from tapestry, except that the latter is done
with the shuttle instead of the needle.
This weaving of patterns directly on to the material
is fascinating work. It is so effective, so rich in result,
and so charmingly appropriate to the material; there
must always be a certain stiffness and rigidity in the
pattern, caused by the upright warp threads, which
demand simplicity of treatment. Weaving, whether
done with needle, bobbins or shuttle, is just a method of
interweaving the warp threads with the weft; these weft-threads
may consist of wools, silks, cottons, or—decoratively,
of raffia, or even gold and silver threads.
This type of work may be applied to all kinds of useful
household articles—table linen, bed linen, cushions, bags,
chair backs, footstools, book covers; also bands and
insertions for garments. There is room for such simple
pattern, combined in some cases with other stitchery,
on these and many other articles, where a marginal
decoration is appropriate.
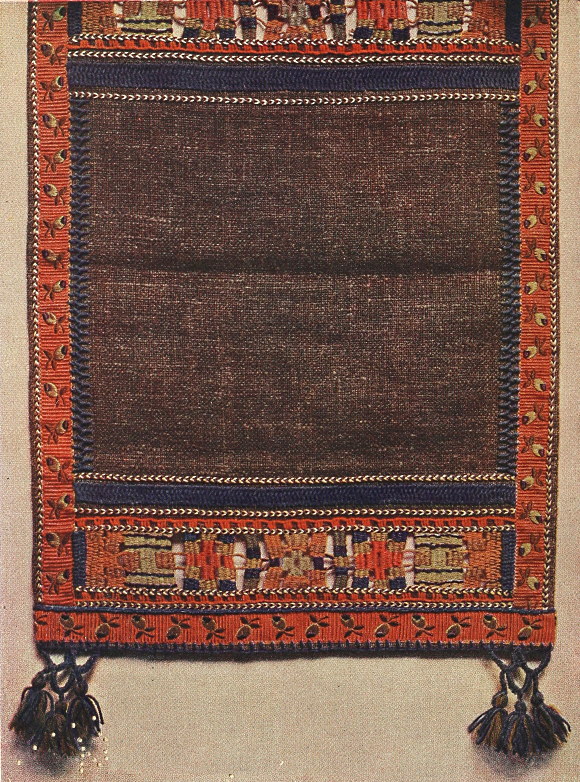
Description of Frontispiece.—Plate I. shows a
table square worked on “Titian” canvas of a soft
brown tint. The original was 36 inches by 18 inches.
The edges of the canvas should be turned up and the
spaces arranged for the needle-weaving and coloured
bands before the weft threads are removed. Allow
about 3 inches for the open-work. Cut the weft threads
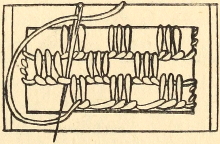
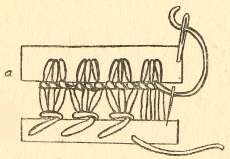
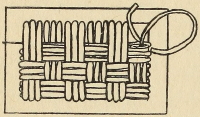
and pull them out. Fig. 31 shows method of working;
begin at the right-hand corner and weave the pattern over
six groups, three strands in each group—these are
worked in gold and yellow; repeat the same pattern on
the opposite side—it simplifies the work and saves time
and trouble if the weaving is done from the ends, working
inwards; thus two similar patterns are woven, one after
the other. If the band of weaving is carefully examined,
it will be seen that the gold-coloured threads form a
definite pattern on the background; if these are woven
in first, it will aid the worker and act as a guide for the
interlacing of the other colours. The next group, in
lemon and purple, is worked on nine groups of threads:
throughout all these patterns a group consists of three
strands. The purple lines are sewn in with a back
stitch. The third group is formed of a large cross in
orange surrounded with gold-coloured squares, which
in turn are completed with blue squares at the corners.
The fourth, or central group, has two narrow bars on
each side, worked in soft green, blue, purple and gold.
The inner cross of lemon wool with purple and gold can
be easily followed from the plate.
The broad band of needle-weaving is edged by rows
of variegated chain stitch in brown and cream (for the
working of which, see Fig. 1, p. 46), and followed by
rows of button-hole in orange (Fig. 11).
The wide braid-like line in oriental stitch, along the
top, is worked very closely; along the sides the same
stitch is seen with wider spacing. This stitch is of the
herring-bone type—the needle is inserted vertically,
instead of horizontally, as in the case of the commoner
and better-known stitch. It is effective and economical,
as the bulk of the thread is on the surface.
The tassels are of soft brown and bright blue wool
hung on to button-holed loops, for the making of which,
see Fig. 57, Chapter XIII.; and for the tassels, Fig. 41.
The ribbon border is worked in gold and purple silk.
A sideboard runner worked similarly, but with two
wide bands of needle-weaving at each end and rather
wider lines of stitchery at the sides, was made to match
this table runner; the light colours of the border gave a
very gay touch to an otherwise sombre room.
Plate II., Fig. N, illustrates another type of open-work
which is practised by the peasantry of Russia. It
is interesting and quite different in appearance from
some of the other peasant work. One distinguishing
feature is that two rows are worked in conjunction, and
another is the number of rows and the manner in which
they are worked. This form of open-work deserves to
be better known in this country. The pattern is formed
by means of blocks of stitches, which are not worked in
the ordinary darning or weaving stitch but by the overcasting
of laid threads; indeed, with the exception of
the first and final rows—which are hemstitched—the
entire work consists of the overcasting of threads; bars,
strands or groups, all are worked from right to left. The
Russian peasantry work most elaborate borders on
handsome linen of an open texture; these borders vary
in width from 2 inches to 18 inches, and are applied to
all kinds of articles for household and personal use. This
form of open-work is more durable than the type usually
done in this country; indeed, the material is strengthened
by the stitchery rather than weakened, as is frequently
the case with the usual method of treating drawn-thread
work.
To work a border similar to Plate II., Fig. N,
begin by removing two threads; work a row of single
hemstitch into the space, over four threads, dividing the
material into clusters with six warp threads in each—the
hemstitching is done from left to right in the usual
way. To prepare for the next two rows, leave a narrow
bar of five weft threads and draw out six threads—the
number of threads to be removed will, of course, vary
according to the quality of the material, but the horizontal
intervening bars are always narrower than the
open spaces. Begin at the right hand; make the
number of upright stitches necessary to carry the thread
to the left of the group, which is to be worked into a
solid block; lay the thread across this group, and returning,
bring the needle out between the first and second
cluster of threads, on the right of the cluster; now put
the needle over the laid thread and bring it out under
the laid thread at the next group. Put the needle over
the thread again and bring it out at the left of the entire
group; in other words, overcast the laid thread from
right to left of the group—always pass the needle behind
a cluster of threads between each overcasting stitch;
continue to lay the thread and overcast back until the
space is filled, then work one straight stitch over the
upper horizontal bar; overcast one vertical cluster; slip
the carrying thread up behind; work another upright
stitch; overcast the second vertical cluster; again slip
the thread up through the back of the stitchery; then
work the upright stitches and repeat the laying and
overcasting to make the solid pattern again. Once the
method is acquired, it will be a simple matter to arrange
these solid masses in such a way as to form a pattern.
It is better to prepare and cut the threads of each row
just before working it; there is, in this way, less risk of
making mistakes by cutting the wrong threads. Another
reason for preparing the rows step by step is that the
material is easier to hold before the removal of the weft
threads than it would be after they have been withdrawn.
Linked Stitches.
Chain and Tambour Work (Fig. 1).—Chain stitch,
which is said to have come to us from China, has been
for a long time little used in this country. Tambour
stitch—in high favour and greatly used by our grandmothers—was
produced later by the machine in such
quantities and in so mechanical and inartistic a manner
that it fell into disfavour, and unfortunately chain
stitch—which is practically the same, except that it is
worked with the needle instead of with a crochet hook—fell
with it. Nevertheless, it is a stitch which is most
useful and charming in its even and somewhat monotonous
regularity, especially where a great variety of
colour is used and a broad effect is wanted. A particularly
adaptable stitch, it lends itself, on account of
its linked nature, to the following of curves and spirals,
outlines and the filling of circular and oval forms. It
can be worked singly—as a powdering—or in a zig-zag
pattern—with two colours at once—which produces an
interesting result (Plate I.), or with a twist. Worked
openly with the needle inserted first to the left then to
the right to give a broader line, it is known as ladder
stitch, while twisted chain, worked closely, is known as rope
stitch. Linked chain and cable chain (Fig. 8) are more
elaborate forms of the same stitch. Much of the beautiful
Persian quilting done on linens is worked in chain
stitch on the wrong side, which gives the “quilting,” or
back stitch, on the right side.
The Working of Tambour Stitch.—Tambour
stitch, though of little use for small work, might still be
employed very effectively as a quilting stitch, and for
large pieces of work, such as table covers or hangings;
it is worked on a frame, and one can quickly acquire
facility with the hook and accuracy in the working of it.
Method:—The material is put in a frame; the thread
is kept underneath, where the left hand guides it; a
sharp-pointed hook is kept in the right hand and passed
through the material from the surface; it catches the
thread from the under side and bring it up in a loop;
the hook is inserted again and
the thread is again brought up
in a loop through the preceding
loop.
Fig. 1.
To Work Chain Stitch
(Fig. 1).—To work chain
stitch, bring the thread out
at the beginning of the line;
hold it down with the left
thumb; place the needle into
the hole, which the thread
already occupies, and take up
a small piece of the material—this
will vary from one-sixteenth to one-eighth of an inch
according to the thread and material; draw the thread
through, and the first link of the chain is complete;
insert the needle again at the spot where the thread
comes out and proceed as before. A cord-like effect
may be got by overcasting each link of the chain with
another colour: the eye of the needle should be used,
as the overcast stitch is taken over the links only.
Chain Stitch in Two Colours.—A variation to a
border may be given by working alternate links of
different colour.
Method:—Take two threads in the needle, a black and
a white, or a blue and a green, or any two contrasting
colours; bring the needle out at the starting point; hold
the black thread, which should be to the left, under the
thumb—the white thread is placed aside out of the way;
insert the needle, as for chain stitch, beside the held
thread and draw through—a chain stitch of black has
been formed. Next, hold the white thread under the
thumb, and form the white link, the black thread being
placed aside to the right this time. Work in this way
alternate black and white links; a little manipulation is
sometimes required to keep the thread not in use out of
sight (Plate I.).
Split Stitch.—Split stitch may be used for very fine
work, or for fixing down laid stitches, for which it is
particularly suitable; it has the appearance of a fine
chain stitch, but is in reality a single stitch which is
split, in the process of working, by the needle. Up to
the fourteenth century, it was generally used in figure
embroidery to express form, folds of drapery, and
features, and was a stitch well adapted for the purpose;
but as figure embroidery is quite beyond the scope of
this book and the simpler pieces of embroidery it
advocates, it is sufficient perhaps to explain the method
of working, rather than go into the particulars of its
history. It is worked from left to right.
Method:—Bring the thread to the surface at the left;
take a stitch, one-sixteenth of an inch, to the right with
the point of the needle towards the left; pierce the thread
which covers this space and draw the needle through it,
splitting the thread and forming a link-like stitch.
Fig. 2.
Coral Stitch (Fig. 2).—Coral stitch is a good
decorative line stitch, easily and quickly executed. It
is known under several names, such as snail-trail and
knotted stitch, etc. It is composed
of single knots, worked
with the connecting thread on the
surface; sometimes the knots are
worked so closely together as to
have the appearance of beads, or
they may be worked half an inch
apart, and in rows, when they
make good lines for filling large
spaces or borders.
Method of working:—Bring the
thread through to the front; place
the left thumb on it, beyond the point where the
knot is to be made; take a stitch under the held thread
and at right angles to it; draw the needle through, still
holding the thread under the thumb, and tighten. This
stitch is suitable for working with wools on fine material.
PLATE IV.
A PORTIÈRE.
Petal or Loop Stitch (Fig. 3).—Another useful
stitch is shown in Fig. 3. It is invaluable for the making
of small flowers and borders, for picking out edges, and
for emphasising lines (Plates IV., XIII.). The working
of a small flower is shown in Figs. 3 and 3A.
Fig. 3.Fig. 3a.Fig. 3b.
Method:—Bring the needle out in the centre of the
space; insert it again at the same point; bring it out
near the tip of the petal, as in Fig. 3A, and tack it
down with a small stitch.
Larger flowers can be quite artistically worked by
beginning with a small stitch at the foot of the petal,
and increasing by successive stitches until the outline is
reached (Fig. 3B). The outer stitch can be worked in a
different colour or tone with pleasing effect. One of
the large conventional flowers in Plate XI.
has an outline of these stitches, while another
has the inner circle worked in the same
way (Plate IV.).
Fig. 4.
Feather Stitch (Fig. 4).—One of the
feather stitches, all of which are composed
of button-hole stitches, is illustrated in
Fig. 4. It is worked vertically, a stitch
being made alternately from left to right.
The width of the stitch may vary, but it
must be regularly worked and uniform in size, to look
well, when it presents a braid-like appearance which is
most ornamental for underlinen and other purposes.
The diagram explains the method of working.
Fish-bone Stitch (Fig. 5).—Fish-bone stitch is
another of the feather or button-hole type. There are
so many variations of those stitches,
which are well known to most needle-women—having
been used for the
decoration of underlinen for the last
generation or two—that only a few
need be mentioned here.
Fig. 5.
Quite a pretty and uncommon
variety (Fig. 5) is useful for the filling
of leaf forms, as well as for borders.
The stitch appears to be made up
of two long outer and two short inner ones, but as will
be seen by looking carefully at the diagram, there are
only two movements. It is worked just as in Fig. 4,
from left to right. It is very easily worked on loosely-woven
material, but where the texture is close, it is
simpler and safer to mark four lines on the material for
guidance, two outer and two inner, the latter closer
together.
To work Fig. 5.—Begin to work from one of the
central lines—the one to the right; insert the needle on
the left outer line and bring it out on the left inner line,
keeping the working thread under the needle; continue
in this way, working vertically and keeping the stitches
regular and equally spaced. The outside stitches may
be made still longer and closer than those in the diagram
with good effects, particularly when used for a filling for
petals and leaves.
Cretan Stitch.—A still more pleasing variety, known
as Cretan stitch and frequently seen on Cretan or
Eastern embroideries, is worked similarly in horizontal
lines, but the outer and longer stitches are small, straight
and closely worked together, so that it makes an excellent
solid border stitch, which looks very handsome when
worked in metal threads.
To work Cretan or Oriental Stitch.—Draw four
lines on the material; start as in Fig. 5, on the right
inner line; insert the needle on the left outer line, and
bring it out on the left inner one with the thread under
the needle; take a stitch on the right outer line; bring it
out on the left inner line with the thread under the needle;
continue alternately from left to right, taking care to
keep the stitches exactly below each other. The
appearance of the line can be slightly varied by
increasing or decreasing the outer stitches. The inner
plaiting is regulated by the size of the stitches taken
on the outer edges. See
Plate I., where the solid
blue line enclosed within the
chequered chain-stitched
lines is worked in this way.
The lines on either side of
the runner show the stitch
worked more openly.
Fig. 6.
Link Stitch (Fig. 6).—This is rather an unusual
stitch, being formed of links connected by short stitches.
To be effective, it should be worked with thick twisted
thread. It is easily done on a ground where the warp
and weft threads are sufficiently open to guide the
worker, otherwise two lines parallel should be marked
from a quarter to half an inch apart.
Fig. 6a.
To work Link Stitch (Fig. 6a).—Begin
with the smaller stitches
(Fig. 6A); bring the needle out in
the middle of the space to be
covered; insert on the upper edge
to the left, and bring out still further
to the left on the lower edge. Pass
the eye of the needle down through
the small stitch and insert again on the lower edge
slightly to the left of the previous one; take a vertical
stitch upwards and a little beyond the centre, having
the thread under the needle as in Fig. 6; pull the needle
through. These three movements complete the stitch,
the thread being now in position to
make the first small stitch again.
This stitch is called linked, or knotted
chain.
Fig. 7.Fig. 7a.
To work Tête de Bœuf (Fig. 7).—Another
variation of the loop or petal
stitch is called Tête de Bœuf. Work
a loop stitch as Fig. 7A, then take a
stitch across from left to right; bring the needle out
above the stretched thread. Make another loop
stitch, which fixes this in place. This stitch is often
used as a powdering. It makes a good border stitch.
To work Cable Chain (Fig. 8).—Cable chain can
be worked in two ways. Two guiding lines will be of
assistance. Bring the needle out at the starting point
in the middle of the space; form a small loop by throwing
the thread round as Fig. 8; insert the needle in the
centre of this loop, which will vary
in size according to the thickness of
the thread and the size of the cable
wanted; bring it out about a quarter
of an inch lower down, taking care
to keep the thread under the point of
the needle; tighten the small loop to
the proper size with the right hand,
then, placing the thumb on the stitch,
pull the thread through. This forms both the small
and large link and the thread is in position to start
again. When worked in a firmly twisted thread,
such as Knox’s linen “cord” floss thread, it
makes a pretty border or line stitch. A row of
couching makes a good edging and emphasises the line
if required.
Fig. 8.
By the second method, the small stitch is made first,
and the needle brought out to the surface about a
quarter of an inch lower down; put the needle through
the small stitch from left to right and place the thumb
on it; put the needle through
the large loop in process of making
from right to left and tighten the
thread sufficiently. The small
stitch has now to be made.
Fig. 9.
Braid Stitch (Fig. 9).—When
a fairly heavy line is necessary,
Fig. 9 can be used. It has a
braid-like appearance, and for that reason is generally
known as braid stitch. Work from right to left and
start on the lower edge. Bring the
thread out and place the thumb on
it, and twist the needle round the
held thread, so forming a loose
twist on it (Fig. 9A). Then insert
the needle in the upper line, a
little to the left of the starting
point; bring it out on the lower
line, exactly beneath; place the thread under the
needle, and draw through, keeping the thumb on the
stitch till tightened sufficiently to form the link.
Fig. 9a.
CHAPTER VI
BUTTON-HOLE AND BORDER STITCHES—HEMSTITCHING
AND OPEN FILLINGS
“And she that is wise, her time will pris.”
Part of a Curtain.—This illustration (Plate IV.)
gives a part of a curtain, which is a fine piece of work.
The design has been well considered. The simple masses
are admirably juxtaposed; they have been skilfully
arranged in a manner singularly appropriate to the
work. As a piece of embroidery that would generally
be looked at from some distance there has been no time
spent on minute detail which would involve unnecessary
labour. The bold, yet dainty treatment of the needlework
is first-rate, and the whole arrangement of the
design, colour and stitchery show that the purpose for
which the embroidery was meant must have been continually
in the mind of the worker.
The circular massed forms in rich reddish-orange are
set, most successfully, the one against the other; the
green masses, so simple in shape and satisfactory in
colour, are clearly silhouetted against the dark background;
the white oblongs with the little orange circles,
the applied hem and bands in vivid blue, the interesting
variation in stitchery, all go to make a charmingly
harmonious piece of simple decoration. Work of this
type can be made from materials which are quite inexpensive,
and its value on that account is increased
tenfold. In the illustration, the various parts of the
design, colour and stitchery are so clearly brought out
that a detailed description is not required. The background
is of linen of a firm quality; the applied forms
may be of linen or of any firm material in wool or cotton;
the embroidery is in wools, cottons and silks. For the
method of working the button-hole filling, see
Fig. 11.
The large circular forms are fixed to the foundation with
a row of chain stitch; the little orange circles on the
white ground are in the same stitch (Fig. 1). The blue
bands are applied with darning or tacking stitch outlined
with coral stitch (Fig. 2), the hem with button-hole
stitch. The effective little groups of white on the green
ground are in petal stitch (Fig. 3). All the little square
blocks are in satin stitch. How interesting this constructional
design can become to the needlewoman who
uses her powers of mind and brain, and who applies her
ideas to decorate all manner of things. She would no
longer be content to work detached sprays of flowers and
leaves, strewn promiscuously over her work, once she
discovered what good patterns she could make with
simple shapes and with the aid of small pieces of bright-coloured
patches and short lengths of material, which
she might adapt and use for many purposes.
Various Button-hole Stitches.—Button-hole stitch
is one of the most useful of stitches, owing to its
construction and adaptability, and the decision with
which it marks a line. It can be used equally well
for plain needlework, embroidery, or needle-point lace;
for borders or fillings, either open or solid, for the
covering of raw edges, the outlining of appliqué forms,
or the working of flowers or leaves. The direction,
spacing and grouping of the stitch may be arranged
to suit the work and curved lines may be followed with
the utmost facility.
Indeed, the interesting variations and combinations
which may be obtained by an ingenious worker are
endless.
Fig. 10a.
There are two ways of working the stitch, single
button-hole (Fig. 10A), and double or
tailor’s button-hole; the former, when
worked with rather a wide space
between each stitch, is generally
known as blanket stitch. Fig. 10A
gives a corner for a border, which
will also make a suitable finish or
heading to the neck of a dress or
blouse; it may be spaced in various
ways, worked in slanting lines, or
with stitches of equal lengths, worked
over threads or narrow braids of a
different colour or tone. When the
heading forms a close line, it is usually considered as a
button-hole stitch. Plate I. shows two lines of button-holing
worked in groups of three, in orange wool,
between two rows of chequered chain stitch, where
they serve to connect the broad bands of orange which
surround the border of the runner.
For the making of an actual button-hole, or where a
firmer and more decorative heading is wanted, it is
better to use the variety known as tailor’s button-hole,
which has an extra knot added to it; it is this knot
which gives greater firmness as well as beauty to the
stitch.
To work Blanket Stitch (Fig. 10a).—Blanket, or
single button-hole stitch, is so well known that it is
hardly necessary to describe it. Bring the needle out at
the left end of the line or border; place the thread under
the left thumb and insert the needle as shown in Fig. 10A;
draw it through, still keeping the thumb on the thread—the
needle is thus brought out over it.
Tailor’s Button Stitch.—Tailor’s button-hole—the
method of working:—Put the needle into the same
position, with the thread under it, as for the single
stitch, then take the thread, near the eye of the needle,
in the right hand and pass it from right to left again
under the needle; draw the
needle through both loops
and the stitch is complete.
Fig. 10.
Crossed Button-hole
(Fig. 10).—Fig. 10 shows
another variety of the
stitch. The threads are
crossed by sloping the
needle to the right for the
one, and to the left for the
other. When worked on a
loosely-woven material they
can easily be kept exact.
The knotted edge may be
further strengthened by a row of chain stitch, which
always improves the line. As may be seen from the
figure, either the under or upper stitches may be the
longer, but they should not be varied on the same
border, otherwise the regularity of the work will be
impaired.
Flowers in Button-hole Stitch (Plate XIII.).—Fig.
11 may be used for a solid or open groundstitch;
it makes a charming filling when worked over the material
for the petals of large flowers, each petal being outlined
with chain stitch, couching, or back stitching (Plate XI.).
When working over a foundation, the first row and the
last only are fixed to the material; the intervening rows
are worked into the headings or loops of the preceding
rows. When the spaces to be filled with stitchery of this
type are not of such a form as to allow of working continuously,
each row of stitchery must be attached to the
material at the sides, to keep it in position; the rows
are then worked to and fro from right to left, or vice
versâ.
“A Portière” (Plate IV.).—In this piece of work
an excellent example of this method of filling is seen; the
groups of five stitches worked in lemon wool, on a black
linen background, make a bright chequered effect, which
adds both interest and distinction to the design.
Fig. 11.
Button-hole Filling of a
Space (Fig. 11).—Fig. 11
shows clearly the method of
filling an open space in this
way. The edges must be
button-holed in the manner
described for white work,
unless a braid is used, when
the firm edge which it gives is sufficient without extra
stitching. Begin at the right upper corner; make three
small overcast stitches to carry the thread into position
for working the first row, which consists of groups of
three button-hole stitches worked loosely into the edges
of the braid or material; at the end of the row fasten the
thread to the braid; again overcast three stitches; work
the second row of button-hole into the loops or spaces of
the previous row; continue in this way until the space
is filled; the last row should be worked into the braid,
in order to keep the others in position.
Plate X. has the central portion enriched by a filling
worked in button-hole in blue flax thread. It is commenced
from the centre; the lines of the pattern are then
followed towards the outer edges (see description on
p. 112). Plate XI. shows a similar filling, in the flower
at the corner, which is also
worked in colour and finished
on the inner row of button-holing
by a line of back
stitch.
Fig. 12a.
A Diapered Border
(Fig. 12a).—Quite an interesting
solid diapered
background may be obtained
by working these
stitches in rows, in groups of three or five. The
clusters are worked closely at the top; the second row
has the apex of each cluster fitting into the base
of the preceding one. A very pleasing border in
contrasting colours may be obtained in this way; the
two firm lines of button-holing will, of course, form
the outer edges.
Fig. 12b.
Double Button-hole (Fig. 12b).—Double button-holing
has two rows of button
stitch (Fig. 12B). The first
must have the stitches spaced
so as to allow of the second
row of stitches dovetailing into
those of the first. This variety
can be applied very successfully to braid or galoons, in
which cases the stitches need not reach to the opposite
side as in Fig. 12B.
Leaves in Button-hole Stitch.—A very good method
of filling leaves is to work them in two rows of button-holing,
back to back, the firm central line forming the
mid-rib of the leaf and the rather broken outer line
suggesting the serration of the edges. Small flowers,
flower centres and berries are frequently worked in this
way (Plate XIII.). The heading of the stitch forms the
outline. An old-fashioned, but quaint variety of ground-filling
to be seen on some of the earlier samples consisted
of successive rows of these little eyelet
stitches. The material was first pierced by a
stiletto at regular intervals; each hole was
then button-holed or overcast round. The
insertion of the needle into a common centre
formed an opening which gave a lighter effect
to the background.
Fig. 13.
Decorative Back Stitch (Fig. 13).—This
figure is simply back stitch. To be effective
and to make room for the interlacing thread,
it should be worked rather larger than usual, and with
a thicker thread, from one-eighth to a quarter of an
inch in length. A thread of a contrasting tone is then
laced through, eye of the needle foremost, the loops of
each stitch being regulated before passing on to the next.
Back stitch was greatly in use in the seventeenth and
early eighteenth centuries, for the adornment of all sorts
of articles. Quilts, hangings, and personal clothing
were ornamented in this way with bands and patterns.
These were sometimes produced by chain stitch worked
on the wrong side of the material, which, as an
embroideress knows, forms a row of back stitching on
the reverse side—the right side in this case.
Reversible Back Stitch.—Sometimes these patterns
were worked in reversible back stitch, in order to make
both sides of the stitching alike, for in those days needleworkers
did not grudge either the time or the patience
spent on their embroideries.
Reversible back stitch, so-called, is a running or
darning stitch. All should be regular and equal in
length, or the appearance of the work, when finished, will
not resemble back stitch. The “back” stitch is formed
by going over the line a second time with a running
stitch, which fills up the spaces
on both sides of the material
and renders it reversible.
Fig. 14.
Honeycomb Filling (Fig.
14).—This pattern has an
advantage over some of the
more elaborate background
stitches; it is easily and
quickly worked, and most of the thread is on the
surface. It is known to some needlewomen as honeycomb
stitch, to others as Mexican stitch.
To work Honeycomb or Mexican Stitch.—To
obtain the best result work the small foundation stitches
in one tone and the interlacing in another. If worked on
a material where the warp and weft threads are distinct
the small stitches may be kept quite regular without
difficulty, otherwise it is better to mark their position
by means of a ruler and pencil. The spacing will vary
according to the material and the thread used; about
half an inch should be left between each small stitch for
bold effective work, and the second row should alternate
with the first. When all are in position, a long thread is
taken for the interlacing, which is done in rows. Fasten
the thread at the right top corner, and, eye of needle
foremost, pass through the first stitch in the top row,
down to the second, up to the top row again, and so on,
as shown in Fig. 14. As the edges are undefined, this
stitch requires a good firm outline round it.
Table Runner (Plate V.) of cream cotton canvas,
or netting, is of a very open texture; it is treated in a
simple direct manner, which is both pleasing to the eye
and interesting to the worker.
It may be made of half-a-yard of material, 54 inches
by 18 inches. The pattern is worked in wools and thick
cottons, in stitchery eminently suited to the loosely-woven
texture.
Method of working:—Turn over on to the front surface
a single fold of about 1 inch on each side and tack in
place to prevent fraying; later on these raw edges will
be covered with galoon or braid. Allow about 12 inches
at each end for the wide hem, and from there about
14 inches for the needle-weaving. Get the centre line
by means of a measuring tape; cut ten warp threads at
each end of the bar, which in this material is about three-quarters
of an inch. Great care must be taken in cutting
the top threads to see that they correspond exactly with
those already cut. It is a good plan to draw the two
outer threads a little, the tightening of which will
indicate the exact place to cut the upper ones. This
bar should be worked before the adjacent bars are cut.
Leave a strip of material about half an inch wide on
either side, then proceed to cut the weft threads, as
before, for the broader bands—each is about one-and-three-quarter
inches wide, so that twenty-four threads
are withdrawn.
PLATE V.
A BUREAU SCARF.
In weaving these wide strips, a frame is of assistance
on account of the very soft nature of the material: the
pattern should be easily followed from the illustration,
but perhaps a few suggestions might help the beginner.
Fig. 31 gives the method of weaving. Start with cream
cotton or flax; run a few stitches on the under side; bring
the needle to the point and weave, by passing over three
of the double warp threads and under three, backwards
and forwards, until these upright threads are completely
covered—it is necessary during this process to press
down the threads closely from time to time, and care
must be taken not to tighten the groups too much or the
material will get puckered. Repeat these woven bars
in different groups of colour to the end of the strip, which
gives five groups in cream flax and three in colour, jade
green, reddish-purple, royal blue. Cover the half-inch
bands of material with a herring-bone or oriental stitch,
worked in cream linen floss embroidery thread. Take
up the strands in groups of three on either side—this
separates the threads into groups and simplifies the
weaving of the next strip. Proceed now with the more
elaborate weaving. It will be noticed that the weaving
moves in a step-like manner, and that the pattern
changes three times in each ascending or descending line,
so that each line from edge to edge is divided into threads.
Begin with the green group and pass under and over four
groups of thread (in Plate V. the group worked in purple
is the most distinct). Each group, as before, consists of
three double warp strands; weave one-third of the space,
then leave out the fourth group; continue to weave on
three groups for another third of the space; leave out the
third group; finish with two groups. Overcast one stitch
into the canvas and weave over two fresh groups downwards
for one-third of the distance, then over the next
two groups of the second third; then take up the two next
groups and weave to the edge of the threads—thus
weaving diagonally in groups of two from the bottom of
the bar, this last row produces a series of steps. Repeat
the same in ascending groups; finish exactly in the
same manner as before, with the exception that the
weaving over four groups is this time at the top of the
bar—these masses of weaving are separated by plain
bars of cream, woven over four groups. The cut threads
at the top are button-holed to keep them secure. Lines
of darning stitches connect the edges with the woven
bars. The bands of galoon are now laid over the turned-over
folds, hemstitched on the one side and button-holed
on the other, with dull blue; a line of tacking
stitch in cerise gives a touch of bright colour to the outer
edge.
Turn up about 6 inches at each end to give weight to
the hems; fill the central parts with darning stitches
worked in rows—it is best to mark off the central unworked
space with lines before beginning this darning;
this serves as a guide and prevents the stitching from
encroaching on the space.
The galoon on either side is attached with button-holing
and French knots—the spaces being filled with
laid threads in cream, couched in the same colour.
Latchet darns give emphasis and connect the green bars.
Finally, the band of green is placed over the hem to
finish it. The edges of the galoon are button-holed with
blue to correspond with the rest of the runner.
Latchet darns are bands of weaving; the upright
threads are laid, not too closely, to represent the warp
threads, then the weft threads are woven in backwards
and forwards; the edges are kept free exactly as in the
other woven bars. These latchet darns make an
excellent finish either to a bag, where they serve to hold
the drawing-up cords, or to a dress, where they ornament
or keep the belt in position.
All strands withdrawn, when of a useful length, should
be carefully kept. They can be used in many different
ways to make cords, tassels, or fringes.
CHAPTER VII
LAID WORK—BASKET AND LINE STITCHES
“And thou shalt embroider the coat of fine linen, and thou
shalt make the girdle of needlework.”
A Sideboard Cloth.—Plate VI. gives an example of
a very handsome sideboard cloth. The canvas is of the
tough hard-wearing type, generally used to cover basket
hampers, but under the skilful fingers of the embroideress
it became a beautiful piece of work, with which one might
well adorn a good piece of furniture. The illustration
shows the design, which is of the simple straight-line
type. The canvas, of rather a heavy weight, is of a rich
warm brown; the threads of floss embroidery linen are
in rich blue, tussore colour, emerald green, grey-green, a
pale blue-green and brown. The design is placed at the
ends, where it forms bars and blocks of rich colouring.
It occupies about 8 or 9 inches, 6½ inches for the embroidery,
and 2½ inches for the wide band of braid. The
stitchery is made up of bars of needle-weaving with bars
and blocks of solid embroidery. The wide bands at the
top and foot, enclosing the central portion, are of needle-weaving
in a perfectly simple pattern. Each band is
about 1 inch wide; they are worked in blue-brown and
three shades of green. The bar in the central panel is
woven in tussore and light green, surrounded by a border
in satin stitch of emerald green. The upright bars or
straps on either side are woven in bright blue with blue-green
crosses in the centre; the chequered squares in
tussore and blue are enclosed by emerald green bands in
satin stitch. The background of the central panel is
worked in chequers of blue tussore and light bluish-green;
the little crosses, hardly visible in the illustration, are
all in emerald, while the darning stitch, which forms the
background, is in bright blue.
Square Stitch.—The remainder of the background
is worked in square stitch (see Figs. L and M). A fold of
the canvas turned over on to the right side has a frayed
edge; three or four threads are withdrawn—this gives a
pretty soft effect; the fold is tacked down over a creamy-fawn
skirt braid, with lines of couching in tussore.
These lines have the appearance of back stitching, but
are in reality couched down; they are sewn in that
interesting method of bygone days, when embroiderers
worked much in gold threads.
“Point rentré et retiré.”—The surface thread is
pulled through and caught underneath by means of
another thread which never appears upon the surface at
all; this method has been applied to backgrounds worked
in silk, as well as in gold (p. 81). It is economical in use
and very durable. One can well understand the reason
of its use, but not the cause of its falling out of use.
Probably this was due to the gradual decadence of embroidery
in this country towards the end of the fourteenth
century, or perhaps the then new method of couching—in
use at the present day—involved less time and
labour.
PLATE VI.
A SIDEBOARD CLOTH
The wide dark bar at the end of the work is of dark
brown braid, about 2½ inches wide, with straps of the
lighter braid couched down in brown thread; these
straps are carried down over the fringe which has been
added in the various colours with a crochet hook (p. 115).
The sideboard cloth is 54 inches by 22 inches wide. The
fringe is about 4 inches deep.
Laid Work.—Laid work is particularly effective for
the filling of large surfaces, where a bold definite mass of
colour is required. It is a method of applying threads
which gives a rich appearance almost similar to that
achieved by the appliqué of some rich silk material.
The stitches are on the surface only and are generally
very long; they have to be crossed and recrossed by
other strands, which in their turn are tied down by little
stitches. When worked in floss silk, a favourite medium
with Eastern embroiderers, it is a stitch par excellence
for showing off the beauty and lustrous sheen of the
thread, but it is not a very durable type of work, and is
therefore only suitable for such articles as are not
exposed to hard wear, unless worked in wools or thick
cottons. All the threads on the surface are “laid,” as
the term is, in parallel lines either vertical or in whatever
direction is best, in order to allow the couching lines to
accentuate the form or pattern; it adds to the durability
of the work if these threads are laid rather widely
apart to begin with, as it allows the needle to get a firmer
hold of the material; the spaces are then filled up by
working over the surface a second time. Compare
Fig. 15 and note first layer of stitches. For example, let
us suppose the vertical threads are laid—the horizontal
ones, of another colour perhaps, could be placed over
them, about three-quarters of an inch apart; small
upright stitches, about half an inch apart, could couch,
or fasten these down, one row alternating with the other.
This is a most decorative method of filling in large
flowers or leaves. Single petals can be laid diagonally,
crossed and tied down, or a complete flower may have
laid lines radiating from the centre, with the second
layer of threads in concentric circles couched down with
small stitches of a contrasting
colour.
Fig. 15.
Chequered or Basket
Pattern (Fig. 15).—Fig. 15
gives a plaited or basket
pattern; after the vertical
threads are laid or placed in
position in such a way as to lie easily—just filling the
form—the weaving in of the cross threads is a simple
matter.
To work a Chequered Pattern.—Begin at the right-hand
corner and pass the needle over and under three
strands for three rows, then reverse the chequer by lifting
the stitches previously passed over. This work looks
much better if the darning is all done from right to left.
It is not so economical in thread, but much more practical
on account of its greater durability, as the threads all lie
the same way; they are carried back behind the material
instead of being worked to and fro as in ordinary darning.
The Italian, Spanish and Japanese embroiderers make
great use of these laid stitches which, like most other
stitches, probably originated in the East, as they are to
be met with in most oriental embroideries.
Fig. 16.
Basket or Stroke Stitch (Fig. 16).—This figure
gives another good line in rather high relief stitchery.
It is sometimes called plaited stitch,
sometimes fishbone, but it is really
a stroke stitch; it is most effective
and useful for a solid line, whether
worked on coarse material with a
thick twisted thread, or on fine
material with a correspondingly fine
twisted silk thread. It has a strong
resemblance to some of the plaited Slav or Algerian
stitches. It may be easily worked on most materials,
especially if a couple of guiding lines are traced before
setting to work. Quite a broad border may be attempted
which will look well if worked in a coarse thread.
To work Basket Stitch.—Bring out the needle at
the top of the line on the left; make a slanting stitch
downwards to the right line; pass the needle under the
material and bring it out on the left opposite; take a
slanting stitch upwards over the first stitch to the right
and insert the needle a little lower than the level of the
first stitch; then pass under the material to the left
side again and bring it out just under the first stitch;
take a slanting stitch downwards
again and continue by
taking a cross and a slanting
stitch alternately.
Fig. 17.
Net stitch can also be used
as a surface stitch or as a
filling for an open space. It
is a method of interlacing
which one frequently finds on the seats of small chairs,
in the construction of baskets and other wicker articles.
It may be worked with the lines set further apart than
those in the figure. The horizontal lines are stretched
first, not too tightly; these are followed by oblique lines
which start from the left lower corner. The final row,
also in oblique lines, starts at the right; each row is interlaced
with two others. It is useful and most effective
when used as a surface stitch, as a filling for geometrical
forms; when used as a lace stitch worked in a linen
thread the lines may be duplicated. This net is generally
the foundation on which the design is made.
Openwork Hems (Fig. 12).—Openworked hems
may usually be applied to all types of woven materials,
to drawn thread work, and to household linen. They
are more decorative than the ordinary hem.
Method:—Draw out the number of threads required—this
will always depend on the quality of the material,
and varies from two to six; lay the folds for the hem
and tack them just above the open space; fasten the
thread on the left and insert the needle from right to left
under four, five, or six threads; pull through the needle
and re-insert, taking a vertical stitch under three or four
threads of the folded material. Plate V. shows a border
of green galoon fixed with hemstitching on the inner
side; as the material is very loosely woven, no threads
have been withdrawn. The same stitch is used for a
heading for a fringe (Fig. 34); it prevents the material
from fraying and collects the strands into groups.
Ladder Hemstitch.—A more open appearance may
be given by withdrawing a few more threads and hemstitching
the lower edges also; this makes a narrow
insertion, for by grouping the same threads together, as
in the upper row, little perpendicular strips are formed
which gives wider spacing—the bars suggest the rungs of
a ladder, and on this account it is generally known as
ladder hemstitching.
Vandyke Insertion.—A vandyke form is also effective;
it is worked by grouping the stitches of the second
or lower row, after hemstitching the upper row, in the
following method:—Take up half the threads of the
first cluster and half of the second on the needle, then
proceed as in upper row; by dividing the groups of the
upper row in this way a series of slanting stitches is
formed when the lower row is complete.
Antique Hemstitch.—There are several other ways
of hemstitching which only vary slightly; perhaps the
most decorative form is that usually seen on old embroideries,
where the thread is carried round a narrow
rolled hem, not a folded one.
Method:—Work from right to left, beginning at the
right corner; pass the needle over and under a cluster of
four threads; draw it out at the place inserted; pass it
over the edge of the rolled hem
and bring it out on the left of
the cluster, ready to take the
next stitch, over and under the
second group of four strands.
Fig. 18.
Roumanian Stitch (Fig.
18).—Cretan, oriental, or Roumanian
are the various names
applied to this well-known stitch.
It is frequently to be met with in the early English
embroideries, particularly those of the seventeenth
century. It is one of those adaptable stitches which
are so helpful for the decoration of borders, fillings,
leaves, flowers; it has therefore always been much
used by embroiderers.
To work Fig. 18.—This figure hardly needs description,
being merely a long stitch tacked down. Begin
on the left of the space to be filled; insert the needle on
the right edge and bring it up in the centre; take a small
stitch over the stretched thread to fix it down and bring
the needle out at the left edge again, just below the first
stitch. If the thread is stretched loosely across as in
the V-shaped portion of the braid collar, Plate IX., a
broad and effective means of filling narrow spaces or
tacking a braid in position can be obtained with economy
of time and material.
Fig. 19.
To work Fern or Fish-bone Stitch (Fig. 19).—This
stitch, somewhat similar in form, also makes a good
border line or even a filling, if worked in rows, see Fig. D,
Plate XI., where a centre line of material gives the rib.
In Fig. 19 the stitches meet in the
centre and have a definite central rib.
A central line should be marked on the
material before starting to work it.
Bring the thread out at the left; take a
slanting stitch towards the centre and
insert the needle just beyond the line;
bring it out at the opposite edge; take
another slanting stitch and insert just
beyond the line again. This slight overlapping
of the stitches in the middle gives the solid
effect to the stitch.
Chequered Fern Stitch.—A pleasing variation may
be introduced into a quiet border by working this stitch
in two colours; two or three stitches worked in each colour
will give a chequered effect, and help to relieve monotony
if necessary. Work with two threads, bringing each to
the surface as required. This stitch makes a good filling
for leaves, the mid line being suggestive of the mid-rib.
Fig. 20.
Loop-stitch Border (Fig. 20).—This border is of
the familiar loop or petal stitch. It has been already
described (Figs. 3A and 3B). It makes
a very pretty border between broad
bars of needle-weaving. The method
of working is quite the same, the only
difference being in the length of the
tying stitch, which in this border forms
the stem, while in the flowers it ties
the edges of the petals; the loops are
thus reversed in the working. The
border may easily be followed from
Fig. 20. Plate VIII. shows this stitch
applied to the edges of the squares at the corners,
where it serves to accentuate them as well as to
soften their outline.
Table Mat of White Linen.—Plate VII. gives a
table mat embroidered in blue; it is the central mat of
an afternoon tea set. The design is of a very simple
nature, composed by the loops and curves of the French
tape. The main curves are formed of four short lengths
which meet at the ends and sides. Each piece of tape
takes a curve at the centre and begins and ends with a
spiral; the outer sides can be put in with one length of
braid—eight short pieces will do equally well; little
remainders may be economically disposed of in this way.
The inner parts of the curves give the opportunity for
openwork detail which enriches, while it lightens the
background. The design should be drawn out on paper.
All lines which represent the braid must be parallel and
spaced as nearly as possible to correspond to the width
of it; it is important to remember that braid spreads
when curving and therefore the centres of loops or
circles become smaller when placed on the material;
this must be allowed for in the drawing out of the
design. Care and accuracy are necessary both in forming
the curves and in tacking on the braid; the beauty
of the work would be marred by uncertain lines and
unequal curves.
PLATE VII.
A TABLE CENTRE IN WHITE AND BLUE
Plate VII. has not much variety of stitch; the
relief given by the blue stitches prevents any feeling of
monotony.
Method:—Tack on the braid round the outer edges;
overseam the inner edges of the parts which take the
curves; prepare for the more open spaces by snipping
the linen, the way of the warp and the weft, quite close
to the braid; then turn the edges in under the braid
and button-hole with blue thread, not too closely, the
needle should enter easily into the head of the stitches
for the making of the lace stitch—“Point de Réprise.”
These openings may be backed by small pieces of
toile cirée; a little medallion of button-holed linen
should be placed in the centre and tacked firmly in
place. The connecting threads for the weaving of the
little bars or bridges are laid in two or four strands,
according to the fineness of the thread. Begin at the
outer edge; carry the thread to the inner medallion, and
slip the needle, eye first, through a loop of button-hole
stitch; overcast the next one, and carry the thread from
there back to the outer edge; then weave over and under
these two strands till the centre is reached. Oversew one
or two button-hole loops and lay the threads for the next
bridge; this, when woven, will finish at the outer edge
again. Oversew the stitches until the position for the
next bar is reached, and continue till the circle is filled
in. The corners are worked similarly with a few added
bridges here and there to fill in spaces, which would
otherwise be rather empty. These oval openings and ends
might be worked in what is known as Richelieu work, instead
of in the manner described. It is rather a quicker
method, but not quite so firm, nor are the bars so flat.
Method:—Button-hole the inner edge of the space,
also round the edge of the little inside medallion; then
lay three strands of thread as the foundation of the
bridges (see Fig. 24); button-hole these to the edge and
oversew the button-hole stitches of the outer edge until
the thread is in position for the next strap.
When the work is finished, the linen under the bars is
carefully cut away with a very sharp pair of embroidery
scissors.
Run round the outer edges of the spaces which are
to be filled in with a filet or net pattern with two
rows of tacking stitch to strengthen, and button-hole
over this.
To prepare the mesh background, turn on the wrong
side, then cut six and pass six horizontal threads alternately;
remove the cut threads; turn the work half round
and prepare the threads, previously the vertical ones, in
the same way, that is, cut and withdraw six, pass six.
Turn the work to the right side again and oversew the
strands, one stitch into each little space, taking care to
let the stitches slant in the same direction on the return
row. This groundwork is also described in connection
with Plate XV. The braid has a row of French knots in
blue to finish the inner edge. For the finishing of the
edges of the mat, a firmer edge will be made by cutting
the linen a quarter of an inch beyond the braid and
turning it back under the braid, then button-hole this
double edge and the braid together in blue. The little
lace edge may be worked with the needle or with the
crochet hook; in Plate VII. the latter was used. The
lower loops are worked in white, the edging in blue
with picots is worked into it. For description, see
Chapter XIII. on crochet edgings.
CHAPTER VIII
COUCHING—FRENCH KNOTS AND BULLION
STITCH
“When she rode in coach abroad, was always knotting thread.”
Couching is a pleasant and most useful method of
applying threads, cords or braids to materials of various
kinds. For filling in forms, circles, or squares it is equal
to chain stitch, and should be worked similarly—all
forms, whether squares or curves, are better to be commenced
from the outer edge and worked inwards, in
order to preserve the shape. Special care is required
for the outlining of squares or angular forms where the
tendency is to tighten the applied material, whether
threads or braids, in turning the corners. At these
points the threads or braids should lie easily and they
should be firmly sewn down with closer stitchery.
Couching is one of the simplest means of decorating
velvet, a material always difficult of manipulation, and
particularly so for the beginner, on account of the pile,
which is apt to cause irregularity in the stitchery.
Fig. 21.Fig. 21a.
Couching (Figs. 21, 21a).—This stitch is often
worked in a frame—it is easier to keep the material
stretched; when working diagonal lines or circles,
where much of the stitchery comes on the cross of the
material, it is advisable to do so. By means of couching,
the embroideress may sharply define an outline, fill
in various forms, geometric or otherwise, repair a worn
surface, work diaper patterns, or attach metal threads
and braids to her embroidery (Plate XVI.).
It is a name applied to a method of attaching
threads singly or in groups to a foundation by means
of another thread, usually a single one. Under all
circumstances this should be finer than the thread or
cord sewn down. It is most economical in use as the
threads lie on the surface—a point well worth consideration
(Plate III.).
Probably it was originally used for the sewing on of
gold threads, which were too precious to be wasted,
being made of pure metal—naturally the difficulty of
drawing these metal threads through the material would
lead to the simplest means of attachment. At any rate,
this method of sewing on gold threads was in general use
all over Europe as early as the twelfth century.
Couching is particularly useful as an outline to stitching,
especially where a weak line requires defining. An
irregularly sewn form, whether floral or geometrical, may
be much improved, and the colour may also be enhanced,
by a firmly couched outline. It is most convenient for
sewing down applied work. Primarily it covers the join,
and is of considerable importance in aiding the colour
scheme (Plate IV.). Where simple treatment shows to
advantage, couched threads, outlined with metal cord,
give the necessary means of expressing taste and choice
of colour, and with a little extra stitching to indicate
veinings or whatever detail there may be, couching can
again be applied with good results, instead of resorting
to another stitch. It is worked from right to left; the
small tying down stitches may be straight or slanted,
but they ought not to be placed too far apart—for
simple decorative work, from a sixteenth to a quarter
of an inch, the latter for the attaching of wools or yarns
and narrow braids, the former for finer work. One of
the commonest mistakes of a beginner is to couch with
a thick thread, each stitch varying from a half to one-and-a-half
inches apart. This entirely destroys the
character and effect of the applied threads. When couching
a straight line with cord or braid it should be held
rather tightly, while with wool or silk a pretty bead-like
appearance can be got by holding the thread rather
loosely (Plate XVI.).
The fashion of sewing on a cord invisibly—as in
upholstery—by untwisting the cord slightly between
each stitch should never be resorted to for embroidery.
Ancient method of Couching, “Point rentré et
retiré.”—A most interesting method of couching, which
unfortunately fell out of use, was practised up till the
middle of the fourteenth century. The couching thread
was on the reverse side, and was generally of strong
waxed linen thread, which did not appear on the surface
at all. The ground material was formed of two layers
of linen, and the gold or silk thread was kept on the
surface, only penetrating the layers of linen at intervals
where the linen couching thread had drawn it through.
Some of the beautiful specimens of early English
work, the famous Syon Cope and the Jesse Cope, to
be seen in the Victoria and Albert Museum, the backgrounds
of which are covered with couching done
in this quaint and durable fashion, are well worth
studying. The linen background of the Syon Cope is
couched in coloured silk, that of the Jesse Cope in fine
gold.
The two lines on the outer edges of the sideboard
runner, which has almost the appearance of back
stitching, are worked in this way (Plate VI.).
Fig. 22a.Fig. 22b.
French Knots (Figs. 22a, 22b).—French knots can
be applied with artistic effect in many ways, not as an
outline, but as an adjunct
to some of the line stitches,
such as chain stitch, couching,
back stitch, etc.
(Plate XIV.). They may
be used to add touches of
colour to a pattern, to
modify or enrich it (Plate
XIII.); to powder backgrounds, either single or in
clusters, qualifying both texture and colour; to outline
or fill in flower centres, to form stamens (Plate XI.);
to fill in lattice patterns or any form that requires
some contrast of stitch or colour.
Method:—To work a French knot, bring out the
needle at the point where the knot is to be; place the
thumb of the left hand over the thread (Fig. 22A); twist
the needle once round this tightened thread; turn the
point to the right—thumb still holding the thread—and
insert it just behind the point where it came out, and draw
the thread through to the back, or when some experience
has been gained, the needle may be drawn through on
the right side in position for the next knot.
The Chinese, who are adepts, frequently work entire
pieces of embroidery in knots with such care and precision
that they are almost mechanical in appearance.
They have a method of knotting their thread first, then
sewing each knot down. This method was also common
in England about the seventeenth century. At that time
ladies used to work up hanks of thread, and, by means of
a small cushion and a netting needle, work a succession
of knots on the entire length; these hanks were wound
up into balls ready for applying to the work in hand.
It is better in making French knots to use a thick
thread, or if a large knot is required, two or more threads
in the needle are more satisfactory than twisting one
several times round the needle. Plate V. shows knots
applied to the edges of the galoon, which serve to fix it
down, as well as to give a finish
to the latchet darns.
Fig. 23.
Bullion Knots (Fig. 23).—Bullion
knots are frequently
used in white embroidery where
variety of stitch is made use of
in order to relieve the monotony.
They consist of little
tight coils of thread and can be
used most successfully to form
the centres of large flowers, either in a mass or in pattern.
Squares or lozenge-shaped forms with a French knot in
each space make rather interesting fillings.
Fig. 23 shows how bullion knots might be applied in
lines radiating from the centre to form small flowers.
Flower Centre in Bullion Stitch.—Method of
working:—Bring the thread up on the surface at the
centre; insert the needle at the outer edge of the circle,
and draw it out for half its length at the centre, beside
the thread, which now take hold of with the right hand,
and twist firmly, but not too tightly, round the needle
six or eight times according to the size of knot required.
Then place the thumb of the left hand on the coil and
draw the thread carefully through till it is tight. It is
always advisable to keep the thumb over the coil during
the whole process if possible.
A Good Flower Centre.—Make a number of bullion
knots to fit the circle, then surround the outer circle with
one or two rows of close regularly-sized French knots.
Bullion stitch may be used for small flowers—each petal
being made of two knots, meeting at the tip—for leaves,
inside fillings, ground powderings and sprigs.
Fig. 23 a shows how to make picots in bullion stitch.
They are generally worked into a bar or loop of button-hole
stitch, which may form an edging, as in Fig. 37, or
an open loop, as in Fig. 23 b. Picots of this type when
worked in a fine linen thread are used for the outlines
and edgings of laces. To work as Fig. 23 a, make the
required number of button-hole stitches, then insert the
needle for half its length through the head of the last
one; twist the thread round the needle from left to
right six, eight, or ten times, according to the thickness
of the thread and the size of the picot required; place
the thumb of the left hand over the coil and draw the
needle and thread gently through; keeping the thumb
still on the coil, tighten the thread until the stitch has
been drawn up into a small semi-circle; then continue
the button-hole stitch till the next picot is reached.
Note Fig. 23 b—the thread is placed under the needle
before it is drawn through.
If a larger picot is required, it may be made in button-hole
stitch instead of bullion stitch. Button-hole the
bar or loop to the left of the required picot, and lay the
foundation or padding threads for the picot by carrying
a thread to and fro three times from the left to the right;
pass the needle each time through the edges of the button-hole;
when the third thread is laid the needle is at the
right side of the picot; button-hole the loop closely till
it is covered, then continue on to the next point. Open-looped
button-hole edging looks very well with three
bullion stitch picots, but the worker requires to be of a
patient temperament, as each loop takes some time to
work.
Bullion knots are used very frequently in Mount-mellick
work. This type of needlework originated in
Ireland; it is of a very elaborate nature, generally done
in coarse white threads on a strong white linen or jean
foundation. Here monotony in tone allows for a great
variety of stitching. Openwork is not combined with
it, as the patterns in which it is worked are mostly of a
bold conventional floral type; most of the stitches used
are those which give a raised effect, such as the different
linked stitches, chain, cable, raised-stem stitches, French
and bullion knots, and padded satin stitch. The flowers
are filled in with a great variety of lace stitches.
Button-hole bars are useful for connecting two edges
such as the two sides of a lined bag, the seams of a
child’s frock, or for adding a false hem to any dainty
article. They are in common use for modern openwork
embroidery, where they form connecting links between
the various parts of the design.
Fig. 24.
Button-hole Bars (Fig. 24).—Fig. 24 shows the
method of working connecting bars. The objects to be
joined together may be of any
shape, provided the lines are more
or less parallel with each other.
Begin by button-holing one part
of the work, which will give a
basis or line into which the bars
may be worked, then button-hole
the part to be joined to it a
few stitches, until the place where the bar is to be is
reached; lay each of the threads into a different loop
of the button-holing—this gives a greater strength and
wider surface to work upon; when finished, button-hole
along the edge as before, until the next point where a
bar is to be worked is reached. These bars are worked
over three threads, and should, when worked in lines,
be made before the material is cut, otherwise it is
better to have the two parts to be joined tacked down
on to a piece of stiff linen, glazed calico, or brown paper.
A Luncheon Set.—This illustration gives a table
centre in cream canvas embroidered in bright blue,
green, red, cream, yellow, heliotrope and black. The
design is simple; it is more or less governed by the mesh
of the material and the method of working it, which
renders the construction so simple and gives a quaintness
and rigidity admirable in effect. By examining the
illustration it will be seen that the central portion of the
design is occupied by a broad band of needle-weaving,
about two inches wide, worked on the weft threads,
the warp or vertical threads having been withdrawn
to the required depth. The weaving forms seven
separate groups, each of which is composed of two
colours. The whole mass, rich in effect, is finished on
either side with two bars of latchet darning; these are
worked similarly to repairing darns, but are left free at
the sides. They are edged with an oriental stitch in
blue which may be worked much closer and more
regularly (see Plate I., where, as a heading to the
band of needle-weaving, it has almost the effect of a
braid). The corners, which balance the wide needle-woven
bar, are worked in chequers of red, green, and
blue; the larger squares are in green, worked in a simple
stitch similar to Fig. 18. A row of equally distributed
petal or loop stitches (Fig. 3, p. 49) breaks the severity
of the line; seven lines of couching—sewn in self-colours—connect
the two ends. The edges of the cloth
are turned over on the surface and finished with a
row of blue galoon—Prussian binding; this is tacked in
place on each side with little triangular stitches in green
embroidery cotton. Through these stitches a thread of
bright red is interlaced; this is followed by a second
one in cream colour. Large tassels (Fig. 41, p. 120) in
blue make a finish to the corners. Six little mats, 12
inches by 9 inches, when finished, were made to match,
each having a border and couched lines similar to those
of the scarf. Little blue tassels of appropriate size
completed this useful little set.
One yard of material, 54 inches wide, is required to
make the complete set, that is the table scarf, 54 inches
wide by 24 inches, and six little mats, 14 inches by 10
inches; this allows for folds at ends and sides. If braid
is used for finishing the hems, after calculating the
quantity an extra yard should be allowed, as with so
many corners to turn one is apt to be too short in the
end, and these braids are often difficult to match.
Wools and thick cotton threads may be used and a
large-eyed blunt-pointed needle for the weaving and
darning.
CHAPTER IX
BRAIDS AND DESIGN—FAGGOTING—VEINING—ANTIQUE
SEAMS—KNOT INSERTION AND EDGING
“There’s nothing neere at hand, or fartherest sought,
But with the needle may be shap’d and wrought.”
Braids.—Braids in different widths are invaluable
to the embroideress who wishes to execute rapidly a
piece of work suitable for daily household use, which
may possibly be exposed to the smoky and foggy city
atmosphere, and on which she does not wish to expend
much time, labour, or money.
Braids of various kinds and qualities—mohair, alpaca,
woollen, cotton or silk—can be utilised in many ways,
and for different objects, as well as for the finishing
and decoration of hems and borders (Plates IX. and
XII.).
Those which have an unbroken edge are the best for
ornamental purposes. They may form the basis of
simple geometrical patterns (Fig. 45); lines may be
arranged to go in different ways, running vertically from
end to end of a table scarf (Plate VI.), horizontally, as
Plate III., or diagonally—the direction is immaterial; all
are simple to arrange, with the exception of diagonal lines,
which always require care in the placing and stitching, on
account of the different stretching qualities of the braid
and of the material. Sometimes the bands of braid are
placed singly, sometimes in pairs, one braid—usually in
a contrasting colour—being superimposed on the other.
They may cross each other at right angles, they may
entwine or interlace (Plate X.), or they may be formed
into circles or spirals (Figs. 45, 51).
The manner in which braids themselves are made,
with the twistings and interlacings of strands and groups
of threads, is interesting; this renders them peculiarly
suitable for the designing of interlacing patterns, both
simple and intricate (Figs. 49, 50).
The word “braid” is taken from the verb of the old
Anglo-Saxon “bregdan,” or “bredan,” signifying to
weave, to entwine, to braid; the latter word bearing, in
those days, the meaning “to plait,” a word which came
into use at a later date.
The use of braid for decorative purposes has come
down to us from very early times—it has always been
used by Eastern peoples much more than by those of
the Western countries. Some of the elaborately worked
pieces of Indian and Persian work, where tinsel braids
are freely employed, are things to marvel at.
The peasant costumes of many countries—particularly
those for gala days—are made gorgeous by the addition
of bands of brilliantly coloured braids, enriched in many
cases by embroidery. Braids are used on uniforms, in
an official sense, where they are considered as symbols of
honour—the higher the grade, the more elaborate the
decoration.
Care must be taken with the arrangement of these
patterns—all curves must be exact, interlacing designs
must be correct, the series of bands always passing
alternately the one under the other.
The possibilities for the treatment of braids and bands,
for the decoration and enrichment of them, open up an
interesting field to the young designer. By comparing
some of the plates it will be seen that much has been
done in a simple way by the use of these braids and
tapes.
Many of the old illuminated manuscripts show wonderful
interlacing designs, many of which were copied or
adapted by embroiderers of the period.
An old Venetian pattern book, published in 1562, gives
beautiful examples of the letters of the alphabet worked
first with an outline in narrow braid, an elaborate twisted
design being then woven in and out of the double lines
with a narrow braid, with the help of a tapestry needle;
the delicate points and finishings of the letters being
finished in satin stitch.
Perhaps the best way to go about a design in which
bands of braid are to form the foundation of the design
would be to take one form and try how it might be
adapted to suit the conditions of space and material. A
border for a circular form is simpler in construction than
one for a square—the corners of the latter always
requiring special attention—but after a few preliminary
trials it will be readily seen what the possibilities are.
Interlacing Knots.—Interlacings of knots and bands
are always interesting, and the working out of these
designs should be a profitable exercise for a beginner.
There is such variety in their construction, such simple
or intricate patterns to be made out of these continuous
and interlacing lines, that all craft workers have found
in them a ready means of ornamentation. Knot designs
of a simple kind may be applied in the form of braids and
cords to many useful articles of domestic use; the most
direct way to work out some elementary designs would
be to take a length of soft cord and some pins, and using
the back of a cushion as a foundation, or a covered table,
pin out a geometrical design—a square would be suitable
for the first attempt—and develop it. The first square
might have the braids twisted into small loops at the
corners, the second might have the sides indented or
looped, and so on. Make a series of these with every
possible variation; then all could be drawn in a note-book,
in squared paper—for the sake of ease and
accuracy. The ends of the cords or braids should
be pinned together in order to form a continuous
band.
The next step would be to interweave a second length
of cord into those already formed. Care is necessary to
interlace the bands, so that each passes over and under
the other in regular rotation. This second band might
take the form of another square, set the reverse way,
or a circular form might be introduced. When all possibilities
have been worked out, they also should be noted.
By degrees more complicated and intricate knots may
be attempted.
Sometimes an elaborate form may be worked out on
paper to begin with, then interlaced and pinned out in
cord. The embroideress will find a note-book and a
square of canvas very useful for reference, also as
aids to memory: in the former, she can make notes of
designs and suitable detail, of colour schemes taken from
pictures, materials and embroideries, suggestions for
finishing and fastenings of garments, little notes and
quotations suitable for embroidery—all sorts of interesting
matter which the eye is quick to see but which the
memory cannot always recall at the right moment. In
the square of canvas or coarse linen, divided into sections,
might be worked some of the more interesting or unusual
stitches, or groups of stitches; or pleasing combinations
of stitches and colour might be preserved as the opportunity
occurred. These might serve to suggest or recall
methods and varieties suitable to some work in hand.
Faggoting.—Faggoting is a stitch which is used to
connect two edges, particularly such edges as require a
dainty finish, or to fill in an open space, or to serve as a
foundation for some interlacing stitch. It is much used
for joining ribbons, braids, or thin materials, such as
ninon, chiffon, or crêpe.
Method:—Prepare the material for faggoting by
tacking it on to a piece of stiff toile cirée, glazed calico,
or if that is not at hand, stiff brown paper will answer the
purpose. This is done in order to keep the edges at an
equal distance. The width of the space may vary from
one-quarter to three-quarters of an inch; the joining
thread should vary in thickness—the wider the space, the
thicker the thread. Draw two parallel lines on the
foundation as a guide, if necessary, and tack the material
to these lines. If a braid or ribbon or any material
with a finished edge is used, there is no need for turnings,
but with a raw edge it is necessary to turn in three-eighths
of an inch and to press them with an iron before starting.
To work the stitch, begin at the upper end of the left-hand
corner with a small stitch; cross to the opposite
side; take a stitch, keeping the thread under the needle;
work alternately from side to side, always inserting the
needle from the outside. Keep the stitch regular, the
same size and the intervals of equal distance.
Faggoting is practically a herring-bone stitch, but the
needle is inserted vertically. See Plate I. and compare
the stitchery in blue which forms a line up either side.
It forms the foundation for many interlacing stitches of
which there are quite
a variety adaptable
to various purposes.
Fig. 25.
By interlacing
threads as in Fig. 25,
where the dotted line
represents the interwoven
thread, the
whole of the foundation
stitches can be covered. It must be done in
rows, one after the other. The first row is drawn much
tighter than the one in Fig. 25, each successive
row being placed on the outside of the previous row, till
eventually the faggoting foundation has almost disappeared.
A very good line of raised stitchery can be worked on
to a foundation of herring-bone stitching. The threads
are laced in, one row at a time, as shown in Fig. 25. See
Plate XIV., where it is worked round the outer edge, also
in the nightdress case (Plate XI.), where it forms the
narrow inner border.
“Point d’Alencon.”—Faggot or Russian is one of
the stitches used in the making of point lace or Honiton
point. As a lace stitch, it goes under the name of “Point
d’Alencon.” It is used to join the braids; it also makes
one of the principal filling stitches for leaves or oval
spaces.
Fig. 26.
Veining (Fig. 26).—Fig. 26 shows a well-known
joining stitch, which looks well if done in a twisted silk,
wool, or linen. It makes a pretty
insertion, and adds much to the
appearance of a seam. It is a
narrow line stitch, therefore the
two edges of the material should
not be too widely spaced. Prepare
the edges in the same
manner as for faggoting and tack
them on to a stiff foundation.
Method:—Fasten the thread to the edge of the
material; carry the needle across to the opposite edge;
insert it under and bring it through the material; twist
the thread twice round the needle and insert it on the
opposite side from underneath, as shown in the diagram;
oversew a few stitches along the edge to carry the thread
into position for the next stitch. This insertion is useful
for joining braids, for dress fitments and other purposes;
it is much in vogue for the joining of thin materials, such
as chiffon and ninon or crêpe; these require to have a
fold laid and pressed before being tacked on to the paper.
A very pretty addition to a border, whether for a
piece of ornamental work, for the edging of a collar, the
joining up of a bag, or for the foot of a jumper, is made
by inserting between the material a line of gold tinsel or
velvet ribbon, braid, or even material of a contrasting
colour. This must be tacked on firmly to a foundation
of stiff calico or brown paper, then attached by an
insertion to the edges of the material.
Fig. 27.
This stitch, whether used as an insertion or as a filling,
must also in this case be carefully arranged and regularly
worked, otherwise the appearance of the work is spoiled.
The threads should in all cases be tightened sufficiently
to give the necessary firm twist to the line. To obtain
the technique of many of these insertion stitches it is
only needful to practise them for a few minutes on a
piece of material as a preliminary to the actual working
of them. This enables the worker to see what size of
thread to use, and it gives her the opportunity of trying
and comparing various colours
without the irksome task of
unpicking.
Fig. 27 is worked much the
same as Russian stitch (Fig.
25), except that it is worked
closer and the thread picked
up by the point of the needle
before it is inserted on the
opposite side—this twisted
faggot stitch is really a combination of the veining and
faggot insertion and is used for the same purposes.
Antique Seam (Fig. 28).—In earlier times, when the
linens were woven in narrower widths, the seams were
always connected in a more interesting method than at
the present day, when, if a flat seam is wanted, the
selvedges are invariably oversewn. One of the older
methods is shown in Fig. 28. It makes a firm, flat and
decorative row of stitching. For the joining
of selvedges of bed-linen a narrow slanting
stitch sewn in white was used; for more
decorative purposes a coloured and a larger
straight stitch was used, as Fig. 29. To
work, lay the two selvedges parallel to
each other and tack or pin them quite flat.
Begin on the left side and insert the needle
from below on the right and left sides alternately;
in this way the threads cross each other between
the selvedges. In connecting a very thin material in
this way it makes a good finish.
Fig. 29.Fig. 29a.
Fig. 29 gives an effective stitch for a decorative joining
of two edges. It may be applied to bands, cushion covers
and household embroideries generally.
To work:—Prepare the seams by placing the two
selvedges flat on to a stiff foundation, say quarter of an
inch apart; secure the thread on the left upper edge;
insert the needle at the lower edge a little to the right;
pull through with the thread to the right of the needle;
make a little stitch, as Fig. 29; pull through with the
thread under the needle. This makes a good firm
insertion; a thick twisted thread is the most suitable.
Fig. 29 shows the insertion rather widely spaced. Plate
XII. shows this stitch worked in wool, where it is applied
to the edges of braids, which form the foundation for a
useful collar.
Fig. 30.
A Useful Edging.—Fig. 30 gives a knotted loop
stitch which is again borrowed from the many useful lace
stitches. It is an edging
which may be worked in
silks, flax, cotton, threads,
or wools. In Plate XII.
it forms the finish to the
braid collar, where it is
worked in thick cotton
thread. This loop stitch makes a charming insertion if
worked on to the edges of any suitable material—narrow
ribbon or hat straws. The working of the
stitch is clearly shown in Fig. 30. The two edges are
joined with an interlacing stitch of a contrasting colour,
with raffia, cord, or narrow ribbon. Bands of hat
straw could be joined in this way and made up
into delightful light and economical summer hats.
The shape could be then placed over a foundation of
wire and the brim stiffened with wire, button-holed on
to the straw with a silk, flax, or raffia thread.
A Collar of Braid.—Plate XII. illustrates an interesting
piece of work, built up of oddments of skirt braid,
silver tinsel, braid, silks and wools.
Very charming dress and coat fitments may be made
in this way, and all sorts of scraps and remainders of
trimmings and braids, silk patches and patterns may be
utilised. The construction is very simple. The best
way to set about the making of these braid collars, cuffs,
or bands is to cut out the desired shape—the exact size
wanted. The pattern is then placed on to a piece of
glazed calico and the outline traced firmly upon it. A
still more direct method is to cut out the pattern in stiff
brown paper and utilise it as the foundation on which to
tack the braids. Care must be taken to have the shape
correct before starting to work with the materials. This
being assured, arrange a braid or cross-bar of material
round the outer part; tack it at the outer edge with bright-coloured
wool on to the paper foundation, then adjust
the bars and panels, allowing the ends of the braids to
slip under the outer braid. Circles or squares of ribbon,
velvet, or tinsel, placed in the most important parts and
tied to the outer edges with lines of braid or ribbon,
which, in turn, might be connected with open stitchery,
fork-pin insertion (Fig. 73), or some small beads, are very
pretty. All give scope for individual taste and ingenuity
in colour and material. If the collar is on the round,
the outer bands must be flexible, in order to take the
curve nicely.
The collar in the illustration has for the outer row
a skirt braid of a soft dove grey. It is tacked in
place with a line of couching in royal blue wool, sewn
on with a silk thread—reel twist is very good—of
the same colour; the stripes of cream-coloured braid
are ornamented with coral-coloured wool in long stitches,
tacked down the centre to form a point. The smaller
panels have been placed in position previously; they
consist of chequered silk ribbon in grey and heliotrope.
All the short lines are connected with Russian stitch
worked in coral wool, the bands of cream braid being
laid on over them and then sewn down; finally the
inner edge of the border is couched down. The edges
are now all tucked out of sight, the brown paper is cut
away from the back, all ends, edges and tags are secured
and made neat with tiny overcasting stitches, and the
collar may either be lined or sewn on in place without
lining, as the case may be.
It is often necessary to confine the cut edges of the
broad braid, in order to prevent them from spreading,
by winding a thread round and tying it just above the
part to be cut—this often saves time and trouble in the
long run.
INSERTIONS IN NEEDLE-WEAVING—POINT DE RÉPRISE— INTERLACING
AND OPENWORK BACKGROUND
“There she weaves, by night and day,
A magic web with colours gay.”
A Chequered Pattern (Fig. 31).—Chequered patterns
look well in needle-weaving. A number of colours
may be introduced if the spacing permits.
Fig. 31.
Fig. 31 shows a diagram of needle-weaving which
gives the method of working a chequered pattern on the
upright or warp threads. Prepare the bar or band by
removing the weaker
(weft) threads; a little
decorative line of
stitchery may then be
added by hemstitching,
button-holing, or
herring-boning the
edges; this adds a
finish and groups the
warp threads into
clusters which is an advantage—it saves trouble when the
actual weaving begins by keeping the weft threads in
place; cross stitch and oversewing are useful stitches for
the same purpose. The worker should be careful to
group the strands equally by dividing them into clusters
of three, four, or six threads. In Fig. 31 the upper
row is hemstitched loosely, to show the method (see
also Fig. 34, p. 114, for hemstitching). The lower
edge of the diagram is not hemstitched; if the threads
are woven in closely it is not always necessary to do so,
although a line of stitchery is an improvement—it
softens the edge and adds to the appearance of the
weaving (see Chapter V.).
Method of working Fig. 31:—Withdraw the threads of
the material for three-quarters of an inch wide, and of
the desired length; cut the weft threads at one end and
the corresponding threads at the opposite end. If the
bar is long, correctness of line may be ensured by pulling
and tightening a single thread on the upper and lower
edges—these will indicate the exact spot for cutting them
without risk of mistake. Take a fairly long thread of
wool and a blunt-pointed tapestry needle; a loose but
regularly-woven canvas is the best material to work on
to begin with, and wool or flax threads give the best
results. The threads are easily seen and counted, and
there is not the same chance of their being dragged or
over-tightened. Secure the thread by running a few
stitches on the under side; bring the needle up between
two groups of threads; pass it alternately over one group
and under the other until a piece the size of the chequer
wanted has been filled in. As the needle passes to and fro
it should press down each row of weaving closely together;
this has the same effect as the “comb” which the weaver
uses to press down the weft threads of his fabric. The
first block being finished, pass to the next two groups by
carrying the needle over and under as before, and
pressing down each row with the needle; the second
compact mass will then be woven as in the diagram. To
reach the next block, slip the needle down the back of
the second chequer; this will bring it into position to
work the lower block. Continue in this way to the end
of the row, always passing the needle—at the back—through
the group of woven threads to get into position
for the next block.
Reversible Needle-weaving.—These chequers may
be worked in slanting rows, or they may form a vandyke
pattern, ascending and descending in a series of little
steps; the V-shaped spaces between at top and bottom
of the line may be filled in with another pattern or with
rows of chequers in a contrasting colour. Both sides of
the patterns are alike, and when the beginnings and
finishings of threads are neatly done it may be reversible.
This is one difference between needle-weaving and
tapestry-weaving; in the latter the work is done with the
wrong side or back of the pattern uppermost; it shows
the starting and fastening off of threads, as well as the
passing of threads from one part to another, all of which
makes the one side unpresentable.
Another Pattern.—Some simple insertions may be
worked by varying, slightly, the arrangement of the
groups. Begin as in Fig. 31, but weave over three
groups of threads instead of two; having arrived at the
centre, carry on weaving over two more groups to the
right and include the last group of the block just darned,
to form the beginning of the new block. By repeating
these groups of three alternately at the top and at the
foot, always using the last of the previously darned block
as the first of the next, a pretty little pattern is formed—a
central cluster of threads is left between each block,
which may afterwards be oversewn with a contrasting
colour, or left with the warp threads of the material
exposed. A very open and particularly effective insertion
for a hem is made by working over two groups of
four threads each—three or six strands of thread in each
cluster if preferred. Begin exactly as in Fig. 31, at the
left lower corner, and weave to the centre; then take in
one more cluster and weave in with it the last one of the
previous block; work to the top; slip the thread down to
the centre; weave over two clusters, adding one of those
previously woven with another group; continue in this
way to the end. By adding a new cluster to the one
already in use the threads are pulled further apart, and
a wider opening between the groups is the result. With
these few suggestions, the worker will find that she can
arrange and vary these insertions to suit her material
and her own taste.
Filet Background.—Small squares, ovals, circles, or
indeed any shaped space may be filled in with a net or
filet background, then darned in with a simple pattern.
The usual way of opening a square or oval (Plate X.) is
to button-hole the form round the outside, then turn the
work on to the wrong side and cut the horizontal threads
at the edge—near the button-holing; draw and cut again
at the opposite side these same threads. The whole
of the space is cut and divided up; a bar of threads
is left between each of the open spaces, always leaving
the same number of threads between each three or four,
and cut and draw the next three or four. When the
horizontal threads are cut and drawn, cut the vertical
ones in the same way; when these are finished, begin to
oversew each line, with one stitch into each hole backwards
and forwards, until each line, horizontal and
vertical, is oversewn. Care must be taken to make all
oversewn stitches lie the same way. Note—the preparation
of the background is done on the wrong side. Little
geometrical shapes and patterns may now be darned in.
As said above, the number of threads left in between
these open spaces may vary; the fewer there are, the
more open the squares will be. The result of this cutting
and pulling of threads is a net background which can be
worked in many different ways. The usual method is
to oversew all the horizontal lines first, taking care to let
the stitches lie the same way in each row; turn the work
half round to oversew the remaining lines in the same
way.
There is another way of making an open background
which might commend itself to those who are averse to
removing the threads, that is, by cutting the material
which forms the background into narrow strips and oversewing
the bars. It should be marked off in double
horizontal lines rather less than an eighth of an inch
apart; place these double lines at regular intervals about
half an inch apart; rule them in chalk or pencil, then
mark off the half-inch spaces into vertical lines an
eighth of an inch apart; these vertical lines are then
cut two or three at a time with a sharp pair of scissors
and oversewn one by one in rows, overseaming the
upper and lower horizontal bars by the way.
Very charming needle-woven bands can be arranged
for different purposes by button-holing squares or oblongs,
cutting and withdrawing four threads each way and
leaving eight between. When a square is button-holed—with
twenty-eight vertical and horizontal threads in
the enclosure—there will be four solid squares connecting
nine open ones, that is, one open square in the centre
with the four solid squares at each corner, and the open
ones surrounding them. Each solid square has eight
single threads surrounding it; divide these into two groups
by interweaving four threads under two and over two.
When finished, there will be two woven bars connecting
each side of the small squares with each other and with
the outer button-holed square. These woven bars
could occur at regular intervals among the more solid
needle-woven portions.
Many very charming things may be made in this way
with woven threads. These primitive patterns can be
worked with ease in such varied forms, alone or as
adjuncts to embroidery (Plate VI.), that an inventive
needle-woman can ornament in rich colours, or without
the aid of colour, many interesting pieces of work, provided
she takes care to weave regularly and keeps her
design simple and suited to the material.
Fig. 32.
“Point de Réprise” or Darning Stitch.—Fig. 32
shows an insertion worked on a foundation or trellis.
This stitch, which may be used as a filling for open spaces
or for the decoration and joining of two edges, is an
interesting one, and most effective when worked. In
cottons, wools, or silks it could be applied to many
different purposes quite suitably; worked on linen with
silk or flax threads, it might provide a dainty insertion
for some article of personal wear; worked in wool, it
could decorate simply collars, cuffs and bands for a
dress or jumper suit. Fig. 32 gives merely one form with
the method of weaving, but there are many others to
which the woven pyramid is applied. It is much
quicker and simpler in execution than the button-hole
pyramid, which is firmer but much more tedious to
work—the former, too, looks well in wools and thick
threads, while the latter requires lace thread. Woven
pyramids are frequently used by point lace workers; this
is called by them “point de réprise,” and applied to the
fillings of circles and leaf shapes where the little cone-like
forms work in very appropriately. The foundation of
Fig. 32 is a double line of faggoting in Russian stitch; a
single line is worked first; the stitches are taken widely
apart, then a second row is worked between the spaces
of the other, so that a series of little diamond-shaped
spaces are formed as in Fig. 25. Begin at the edge of
the braid and weave the pyramid from the base so that
the points may meet at the centre; be careful to weave
an equal number of threads into each cone-like shape,
or they will vary in size.
Pyramid Insertion.—An insertion of alternate pyramids,
with the bases at the centre, is more open and does
not take so long to work. Make a foundation of faggot
stitch, a single row this time, then carry the thread to
the point of one of those stitches and weave over two
threads to the centre. As these little cones should always
be worked from the point, carry the thread to the top
of the braid by overcasting the faggot thread; weave
again towards the centre; when finished, the bases of the
pyramids will form a central line.
An equally simple insertion and quite as effective is to
work the pyramids in button-hole stitch on to each
faggot thread. After forming the foundation stitches—the
trellis—begin at the point as before, and work two
button-hole stitches on each side before crossing over to
the other side; otherwise it is worked exactly as the
former pattern detailed above. Two rows of faggot
stitch may be used for the foundation of quite a number
of different woven patterns. Little rosettes or wheels are
formed by five threads; at the junction of the stitches—at
the centre of the space—are four threads; add another
by carrying a central thread to the first group; work the
rosettes over the five threads in a similar manner to
Fig. 54, weaving the threads in and out; when finished,
slip the needle under the finished rosette to the next
intersection of the stitches and work the second rosette
and so on. Descriptions are always tedious to follow—the
best way is for one to work with needle and thread
while another reads the directions aloud.
Interlacing Stitch (Fig. P, Plate II.).—This interesting
insertion stitch is one which will well repay the worker
for her trouble in mastering it. Although not a complicated
stitch, there are little points to be noted in the
laying of the foundation threads which, if omitted, prevent
the interlacing threads from working in properly.
Fig. 33.
Fig. 33 shows a diagram with the method of laying the
foundation stitches:—One row is worked over the other;
this lattice work supports
the interlacing threads,
which also require two
rows to work them. Fig. P
shows the insertion completed.
At a casual
glance, Fig. 33 appears to
consist of two rows of
herring-bone stitch, the
one superimposed upon the other; but if a short line of
herring-boning is worked and compared with the diagram
the difference will be noted at once. In working the
foundation, let the threads lie loosely on the surface to
allow for the interlacing threads.
Method:—Secure the thread at the left lower line;
take a short horizontal stitch, three-quarters of an inch
to the right on the upper line. Note—place the thread
under the needle when drawing the stitch through; this
keeps the working thread under the diagonal stitch just
formed. Cross to the lower line, and three-quarters of an
inch further on take a horizontal stitch, but this time
the thread is not kept under the needle, as it comes out
on top and lies over the last diagonal. Proceed in this
way until the end of the row is finished, then compare
carefully with the diagram. Make sure before starting
the second row that all the diagonal stitches beginning
at the left of the upper row pass under those crossing
from right to left; this is achieved, as said above, by
keeping the thread under the needle on the upper row.
The first row of the lattice being finished, start at the
left of the upper line and work in the same way as before;
cross to the lower line, and take the horizontal stitch
exactly beneath that of the previous row; then slip the
eye of the needle under the thread of the diagonal stitch
and take the horizontal stitch on the upper line with the
thread under the needle. Working in this way, little
diamond-shaped spaces are formed. With the completion
of the second row, it will be seen that the stitches
are all interlaced over and under each other with the
utmost regularity. For the inter-threading of the
pattern, take a long thread and a blunt-pointed needle;
the thread only enters the material at the starting and
finishing of the work. Secure the thread at the left in
the middle of the space between the upper and the lower
lines; if an open insertion, it must be secured at the top.
In Fig. 33, the thin dotted line represents the interlacing
thread, which passes over and under the little crosses on
the upper line and down to the crossing at the centre;
thus the first row of interlacing threads are all worked
on the upper half of the foundation stitches. When the
end of the line is reached, turn the thread round the last
central cross and return, interlacing the threads on the
lower half of the herring-bone foundation. Note, in
passing to the centre of the line, that the threads interlace
regularly with those of the upper row, as they must
pass to the upper side of the central crosses. By this
time it will be seen how beautifully these threads fit into
one another, but should any little mistake have occurred
in the foundation stitches—the supporting lattice work—the
equal and regular inter-threading will be found
impossible. The thread must be chosen to suit the size
of stitch—the foundation threads are practically covered.
In Fig. P they are shown rather too clearly at the
edges; also in Fig. 33 the interlacing thread is not in
proportion to the size of the lattice work, but a little
practice will soon show the worker the size of thread
suitable for a border; a half-inch border requires a good
stout thread to fill the space—too thin a thread will make
the insertion rather poor in appearance, while too thick
a thread will make the interlacing difficult to manipulate.
This insertion looks well with all types of threads, therefore
it can be used for many purposes. For making
decorative hems for household linen it is most useful,
and gives one quite a pleasant change from the usual
hemstitch; it is also more practical, because much more
durable. No threads are withdrawn; a single fold of the
material turned over to the front surface is the preliminary;
this is firmly secured by the two lines of
herring-bone stitch. Large decorative initials could be
worked with the same stitch; placed in the centre just
below the hem, they would look very well—it would be
better to draw these out on squared paper for the first
trial, one or four squares to each cross, according to the
size of the initial wanted. The insertion could be used
for many purposes. In some of the old German linen
work of the fourteenth century this stitch is applied to
household linen—in geometrical patterns to borders,
insertions and corners, where it looks very appropriate;
they are worked with white thread on white linen, but
there is no reason why they should not be embroidered
on a coloured linen—blue would look very effective
worked in white threads or vice versâ. At a later date,
some of the Eastern countries adapted this stitch to
their own type of work and design, conventional flowers
being carried out with admirable effect in coloured silks.
The worker would find this adaptation rather difficult
unless she had done a fair amount of line work.
Cosy Cover.—Plate X. illustrates a piece of work
suitable for everyday use. It is a washable cosy slip
worked in white linen with a pattern in braid. In this
example the braid is flexible enough to take the curves
of the design easily; it is tacked on, as previously
described in the nightdress case (Plate XI.), on the outer
edges, and gathered up with tiny oversewn stitches on
the inner, to make the curves lie nicely. The design is
very simple; it is made up with French braid in
varying lengths formed into curves at the corners; the
ground is of white linen. The braid is sewn on in blue
cotton with a small button-hole stitch; the little daisies
of loop stitch and the surface filling of the centre are also
in colour. The open web in the centre is a simple lace
stitch worked in button-holing.
Method:—Cut away the linen (see description, Plate
X.); work round the opening a row of button-hole stitch
not too closely set, then work ten loose loops similar to
Fig. 54. Catch the last loop of the circle into the first
to join; then on the last-formed loop work six button-hole
stitches; pass the next loop; work six button-hole
stitches again into the following loop—the third;
proceed in this way to the end of the row. Work on in
continuous rows until the centre is reached; each group
of pyramids must have one stitch less in each row as
the circle becomes smaller. Finally, at the apex, the
thread is twisted once round each loop; carry the thread
to the edge of the material by overseaming the edge of the
first pyramid; finish it off on the back of the linen. The
square mesh for the open-work is prepared as described on
p. 127. The open-work clusters of the background may
be grouped differently from those in the illustration,
where they are oversewn horizontally and vertically.
Quite a pretty variety would be to work them in diagonal
lines securing each cluster with a knot stitch.
Method:—Start the thread at a part on the left where
a definite oblique line may be laid. Work a stitch with
the thread under the needle, through the stitch and
tighten the knot; carry the thread obliquely to the next
cluster and repeat the knot. Another method is, after
preparing the background, to fill up the spaces with four
open loops of button-hole stitch; work each loop into
half the cluster of surrounding threads—the other half is
used in working the adjacent square; in other words, the
open square is filled in with four little loops, the needle
being passed through the first loop to join it with the
last before passing on to the next square, and the
clusters of loose warp and weft threads are divided and
pulled apart by the loops, leaving a little oval-shaped
opening. The edges of the cosy are worked round with
loops (see Fig. 57). These finish the sides and serve as a
means of lacing the two halves together. This manner of
finishing makes for simplicity in the washing and ironing.
CHAPTER XI
FRINGES AND TASSELS—HAND-MADE BRAIDS— KNOTS
AND PICOTS
“And bid them that they make them fringes in the borders of
their garments.”
Fringes are used to form an ornamental border for
various articles; they seem to be the most natural finish
to many of the loosely-woven textures. They can be
knotted in different ways into simple or elaborate
patterns, or they can be enriched with groups and bands
of coloured threads or beads. The most simple are those
produced by the unravelling of the horizontal or weft
threads. In planning out a piece of work to be finished
off with a fringe, allow 6 or 7 inches for it—or whatever
depth is wanted; finish it after the rest of the work has
been completed, as the frayed edges
are apt to get soiled and untidy if
unravelled before.
Fig. 34.
To prepare a Fringe.—Withdraw
a few threads at the head of
the space and work a row of single
hemstitching, or overcast it with
large stitches. There is only a
single ply of material, but this stitching, while giving
firmness, adds a decorative value and prevents the
loosening of the weft threads. Fig. 34 explains the
method of hemstitching; if the strands or warp threads
look rather poor and thin, additional weight may be
given to the whole by darning in either some of the
weft threads, which have been removed, or by adding
various coloured ones.
Fig. 35.
Fig. 35 shows one way of adding threads. These
are fixed into place most easily by means of a crochet
hook.
Method:—Wind the thread round a piece of cardboard
sufficiently wide—that is,
almost twice the depth of the
required fringe; cut the threads
along one edge of the cardboard,
and the strands are ready for use.
Put the hook into the material near
the edge from behind; lay the loop
of the doubled length of thread on the hook and draw
it through, then slip the two ends through this loop and
tighten (Fig. 35).
Many pretty variations may be made by adding beads
or narrow ribbons, tassels or knots (Plate VI.). Those
tasteful finishing touches add greatly
to the appearance of the work.
Fig. 36.
Knotted Fringe.—Fig. 36 has
the strands in groups knotted together,
then divided and knotted
again. These knots take up a fair
quantity of thread, thus the length
allowed for the fringe must depend
on the number of rows of knots, as well as on the coarseness
or fineness of the thread used. The thicker and
firmer the texture of the strands, the greater the length
of thread required for the knots. The method of making
the knots being shown in the figure, it needs little explanation.
After the first row of knots is formed, the
second row is made up of the groups of threads hanging
from these knots—they are divided, and half a group
is taken from the right and left respectively. Three or
four rows may be added in this way, each succeeding
row of knots coming between those of the row above.
Fig. 37.
A Flat Knot.—Fig. 37 gives a flat knot used in fringe-making
by macramé workers. At one
time (in the sixteenth century), priests’
vestments were frequently trimmed
with this handsome type of fringe,
consisting chiefly of knots grouped into
various patterns. It was then known
under the name of “punto a gruppo”;
later it was called macramé, from an
Arabic word meaning ornamental
fringe or trimming. The Genoese used
it for the trimming of bridal dresses.
These knots can be added directly to
a hem, or worked over a cord.
Fig. 38.
Method:—Arrange the thread in groups of two double
strands, as in Fig. 37 a; take the two outside strands, and
passing the left one under the middle strands, and the
right-hand one over them—these middle strands meanwhile
being held taut between the second and third
fingers—bring the left-hand strand out, as Fig. 37, and
the right-hand strand under so that their positions are
reversed. Complete the knot by crossing the reverse
way again and tighten to finish. Quite a pretty fringe
can be made by working a row of four of these flat knots
in succession over four strands, one knot below the other;
the second row has the knots made on four strands—two
strands taken from each of the groups immediately
above—this brings the knots of the second row alternating
with those of the upper row, as in Fig. 36.
Twisting and Crossing.—Fig. 39 gives a little hand-made
braid, very useful for many purposes, for small
headings, or for finishings, edges, or seams. It is a simple
plait made with four strands of any firm
thread or narrow braid—the latter is the
more suitable for embroidery. Lace plaits
similar to this require bobbins and a pillow,
as well as a suitable lace or linen thread;
but the gimps for embroidery can be made
quite nicely by fixing the knots to some firm
foundation and winding the cord, string, or
braid on to a piece of cardboard. The plait is
done by means of twisting and crossing.
These terms are used in the making of pillow
lace. “Twisting” always means passing the
right-hand strand over the left (Fig. 38 A), and “crossing”
means the passing of the inner left-hand strand
over the inner right-hand strand (Fig. 38 B).
Fig. 39.Fig. 39a.
Hand-made Gimp.—Fig. 39 shows the braid in
process. Each pair of threads is twisted once, then the
inner threads are crossed; this is repeated to the end,
care being taken to keep all threads as equal as possible.
Fig. 39A is the same braid with picot edgings. These
picots may be placed at every second loop instead of
every fourth as in the figure. They are made with the
help of pins fixed into the foundation; the outside thread
is passed round the pin before twisting with the next
strand.
Fig. 40.
To make a Lace Pillow-Cushion.—Fig. 40 is a still
more elaborate braid, consisting of five double strands.
It could be more easily worked on a cushion—a large pin-cushion
tilted against a table would do, or the worker
could make a pillow-cushion for herself, such as some
lace-makers use, in the following way: Cut a piece of
firm cotton or linen about 20 or 22 inches wide and 22
to 24 inches long; join up the length by the machine;
hem the two ends and run a drawing string through them
to close the ends. Cut two circles of cardboard 4 or 5
inches in diameter; draw up one end of the pillow and
place a circle of cardboard in against the closed end; fill
the cushion with bran or cork—such as is used for packing
grapes—horsehair, or sawdust; stuff tightly; then
place the other circle of cardboard on top and tighten
up the second end by means of a
strong cord run through the edges.
This little cushion can be placed
into a wooden box or basket,
which is better to be weighted a
little to keep it steady. Some
pillows are made like a cylinder
and fitted into a box, which is
higher at the back than at the
front; others are made with an
axis which is fitted into grooves cut
in the side of the box; this enables
the worker to turn the pillow and
also allows the lace as it is worked
off to fall behind into the box.
Braid.—To work Fig. 40, fix on
to the cushion in a straight line five lengths of braid,
knotted as in Fig. 38.
Method:—Twist the first and second pair once; cross;
twist the second and third pair once; cross; twist the
third and fourth pair once; cross; twist the fourth and
fifth pair once; cross; place a pin at the right-hand edge;
twist the fourth pair once; twist the fifth pair once;
cross; twist the third and fourth pair once; cross;
twist the second and third pair once; cross; twist the
first and second pair once; cross; place a pin at the left-hand
edge; twist the first pair twice; twist the second
pair once; cross, and repeat from: twist the second and
third pair once; cross, and so on for length required.
This braid when worked with bobbins and a stout linen
thread will be excellent for teaching the method of
making grounds for some of the simpler pillow laces.
Simple Tassels.—Fig. 41 gives a small tassel.
Fig. 41.Fig. 41a.Fig. 41b.
Method:—Take a piece of cardboard, rather wider
than the length of the finished tassel, and wind some
wool rather slackly round it, twelve to twenty times,
according to the size and thickness of the tassel to be
made. Take a long large-eyed needle with a doubled
thread; slip it through the wool close to the cardboard;
pass the ends through the loop and pull firmly to tighten.
Cut the wool at the opposite edge of the cardboard.
Pass the thread through the centre of the bunch of wool
and knot it two or three times to form a padding for the
head. Sometimes a wooden bead helps to fill out the
head, the needle being passed through it to keep it in
place; after which the thread is knotted. Figs. 41 and
41B give the making of the neck of the tassel. Take a
needle with a double thread and wind it round the neck
two or three times; pass the needle through the loop, then
up the centre of the head and out at the top—here
another bead adds to the appearance of the finished
tassel—the ends serving to attach it to the embroidery.
A much more elaborate finish may be made by button-holing
the head of the tassel, beginning at the neck and
working in rows towards the top. If the tassel is large
enough to admit of it, a crochet-covered top, beginning
with a chain and working upwards, is very quickly made;
long chains ending with beads may finish the lower part
effectively. Plate VIII. shows simple tassels made in
this way—those on Plate I. are rather more elaborate.
Fig. 42.
Needle-made Picots (Fig. 42).—This edging requires
a good stout thread, linen, twisted silk, wool, or
fine string, according to the purpose for which it is
required. It may be worked on a braid, a cord, or the
edge of the material. There
is no great difficulty in the
working of these picots, but
absolute regularity of the
loops and knots is essential—in
order to secure this, a
mesh, or if that is not to
hand, a pencil may be used
to keep the loops uniform in size. After some practice,
the worker will probably dispense with a mesh and use a
pin to keep the loops in place while making the knot.
Fig. 42 shows the method of working. Fasten the
thread securely and take the first stitch, which is of the
button-hole type, with the thread under the needle;
then slip the thread round the mesh, passing it behind
and bringing it out over the front of it; put the needle
behind the loop (see Fig. 42) and twist the thread round
the needle, over and under it; pull through and tighten
the knot. If a pin is used, pass the needle behind the
first little loop, then put the pin
into position—a quarter or half
an inch below the edge; pass the
thread round the head of it;
make a loop round the point of
the needle and tighten.
Fig. 43.
Fig. 43 shows the same edging
with an additional row worked
over a narrow braid—several threads could be substituted
for the braid.
Button-holed Rings.—Button-holed rings are useful.
They are generally made over a foundation of soft
threads, which serves the double purpose of padding and
strengthening them.
Fig. 44.
Laces, Edgings, Central Fillings.—Danish needle-workers
use these rings a great deal as foundations for
making both laces, and edgings, also
central fillings. The former they apply
to their beautifully worked embroideries
as insertions or finishings; the latter
have some arrangement of grouped
stitches worked round a button-holed
ring, then sewn on to the parts prepared
for them. They use a ring stick, which is graduated in
such a way as to enable them to make rings in several
sizes, also to make any number in the one particular size
desired. Rings are quite simply made. The thread is
wound round the stick six to ten times, according to the
size of the ring, and a stitch or two of button-holing is
worked before removing it; then work round the threads
until it is complete and finish by passing the needle
through the head of the first stitch and slipping it inside—and
along the line of strengthening threads; cut off neatly.
Rings may have pyramids worked round them, in which
case a definite number of button-hole stitches should be
made. If a ring is covered with twenty-eight button-hole
stitches, four pyramids of six stitches each could be
made, with one stitch between each pyramid; with
thirty stitches, six smaller pyramids, with one stitch
between each, could be worked in.
Rings could be made over a metal or bone foundation
when they are used to support any weight, as for the
draw strings of a bag, or to attach a splasher to a wall;
for lacing or connecting the front or shoulders of a
jumper or child’s frock they can be either made on
threads or metal rings.
Note the interesting method of applying rings in
Plate XIII.; see also Fig. 23 b, which shows method of
working rings with picots of bullion stitch.
Very useful indestructible buttons can be made of
very thickly padded small rings in which the stitches
practically fill up the centre; twisted bars, crossed,
should be worked at the back for the purpose of attaching
these buttons to the garments which they are to adorn.
Ornamental Knot (Fig. 45).—Knot work, like
embroidery and lace, seems to have originated in the
East.
All of the following knots may be worked more simply
from the diagram than from the description.
Fig. 45.
Fig. 45 is commenced at the top or foot, where the X
is marked. The braid is joined
there under the curve; it is formed
of one piece of braid, and can make
a very good centre for a cushion,
applied in a coloured braid, if sufficiently
enlarged. It could have a
decoration within the curves of conventional
flowers, or, on the other
hand, it might be enclosed by a narrow geometrical border.
It could also be worked in chain, couching, or oriental
stitches instead of braid.
Fig. 46.
Weaver’s Knot (Fig. 46).—The weaver’s knot, used
by all weavers for the joining of warp threads—weft
threads are worked with the weaving—is
a well-known knot. It is
illustrated in Fig. 46 and consists
of two loops interlaced; when
finished, one loop has the ends
crossed while the other has the two
lines lying parallel. It can be easily followed from
the figure. A simple method of tying it is to take
the end of the new joining thread and form it into a
loop with the threads crossed; note that the short end
is under and pointing to the left, and the long upper
end is pointing to the right. Place this loop between
the finger and the thumb of the left hand and hold it
upright; take the end of the working thread in the
right hand, and putting it from behind up through
the loop, pass it round between the thumb and the
first finger, under the short end of the new thread and
over the long one, down into the upright loop again.
Tighten the ends of both threads.
Fig. 47.
The Carrick Bend (Fig. 47).—This knot is simple
and ornamental. It could be used
quite successfully for embroidery and
braiding. It is used by sailors for
tying hawsers. To arrange the
knot take one piece of narrow braid
or cord and form it into a loop on
the table; cross the ends—the under and shorter one
points towards the worker; take the second cord in the
right hand and pass it under the complete curve of the
loop in a diagonal direction (see Fig. 47); passing then
over the long and under the short end, enter into the
loop and pass it under the diagonal line and out over
the loop. This knot looks well—tighter or looser
according to the width—when placed at intervals on a
border and connected by lines of stitches.
Fig. 48.
The Reef Knot.—This knot varies slightly from
Fig. 46. It forms a rather neater
one than the weaver’s knot and is
also more ornamental.
Method:—Make a loop as before
at the end of the new thread. Hold
it upright between the thumb and
the first finger of the left hand, but do not cross the ends;
take the end of the working thread and pass it up through
the loop from behind: put it round between the thumb
and the finger, under the two ends of the held thread,
then down through the loop again; draw up both pairs
of threads. The reef knot, as its name indicates, is used
by sailors for tying the reef points of a sail.
Fig. 49.
Fig. 49 shows a knot which may be made of braid or
of two rows of cord, on a larger scale, or it may be
worked in chain stitch as a
smaller knot. When made in
narrow braid or cord the second
cord is laced through after the
knot has been formed by the first
cord. This knot could be used
for a border, placed at regular
intervals with lines of cords connecting the one knot
with the next; to fill up a corner the central loop could
be made larger. It looks well when worked in chain
stitch or in couched lines.
Fig. 50.
The Chinese Knot (Fig. 50).—This knot, used for
the ornamentation of a sailor’s collar, is made of one
cord. One loop is made long
enough to pass round the neck,
under the collar. Used as a
part of the border design the
end loops may be made as long
as required to fill the space.
The Chinese knot makes an
ornamental fastening for anything that might require
it. To make it, start at the X; from there it can be
easily followed from Fig. 50. It takes the form of two
hearts reversed and interlaced; the outer loops are
formed in the process.
Fig. 51.
Fig. 51 is made up of two pieces of braid. The crosses
show where the ends disappear under the curves. This
knot could be used similarly to Figs. 45 and 49.
Knots are not generally used in embroidery for the
starting or finishing of threads, but sometimes a new
thread has to be
joined directly on
to the old one, in
which case a firm,
non-slipping knot is
necessary. Figs. 46,
47, 48 are all useful
for joining threads.
Nightdress Case in Blue and White.—Plate XIV.
shows a charming and useful nightdress case in white
linen, embroidered in white and blue flax. The simple
interlacing design is laid on in white French tape, which
develops into leaves at the centre and corners, and gives
scope for a pleasant change in stitchery. The braid is
fixed in place on the outer edge by a button-hole stitch
worked in flax thread over three strands of blue. The
material is cut and turned in and button-holed—this
gives a little raised edge and accentuates the outer line;
the inner edge is marked out by a line of back stitching
(Fig. 13), and French knots worked in blue (Fig. 22).
The spaces between the interlacing braids are worked in a
filet or net pattern—which is simply worked but rather
tedious on account of the necessary preparation.
Method:—Remove four vertical threads and leave
four of the linen; repeat this within the space; then
remove four horizontal threads and leave four; repeat.
These little groups of threads are kept closely together
by means of overcasting stitches—which should be done
with a very fine thread—worked in rows over the warp
threads, then over the weft. The linen in the centre
of the leaf forms at the centre and corners should be cut,
turned under the braid and button-holed, as described in
Plate XIV. The outer ones are filled in with button-holed
bars, which may be worked as described in Fig. 24, or they
may be inserted after the button-hole edge is finished, by
laying two or three strands, button-holing them, and overcasting
three or four stitches along the edge to carry the
needle into position for the next bar. The opening in the
centre is worked in pyramids and bars, alternately (see
description of Plate XIV.). It will be seen that the two
outer leaves of the centre group are worked in a weaving
stitch which gives the appearance of mid-rib and veins.
Method:—After the inner edge is button-holed, carry
six threads to and fro from point to base to form the
foundation; then weave by passing the thread over
three and under three strands until the point for the
first vein is reached. Press the threads closely together
with the needle to make the line solid; then carry the
working thread across to the edge to and fro and back
to the edge; weave into and out of these three strands
until the mid-rib is reached again; weave a couple of
threads into the centre rib, then form the vein on the
opposite side in the same way, and proceed in this way
until the base is reached. The stitch must be very
evenly worked and well pressed up by the needle continuously
to get the right effect. The inner leaves are
worked with a row of open button-holing, after which
button-holed loops (Fig. 59) and pyramids are arranged
to fill up the space. The braid-like appearance of the
inner border is obtained by working a row of herring-bone
stitch to form a foundation; a long flax thread is
then interlaced as shown in Fig. 25. See also border
to Plate XIV. This interlacing thread is worked in,
row after row, until the desired thickness has been got.
In Plate XI. the foundation stitch is in blue and the
interlacing in white flax thread—the little blue points
of the herring-bone stitch peeping out on either side
give a pretty effect. Two rows of fine chain stitch
(Fig. 1) finish the dainty border.
The outer edges following the curves of the braid are
worked in open button-holed loops (Fig. 59) which in
Plate XI. are done with the needle; but this edging
may be done more simply, if desired, with a crochet hook,
by forming a row of chain loops, then covering them with
double crochet stitch (see p. 157 for description).
The edging of needle-made loops is, of course, preferable
to any other, but in these days, when most of the
household linen must go to the laundry, these little
crochet edgings might quite suitably be worked directly
on to little mats, table-napkins, and many other articles.
They are quickly worked and wear excellently.
Hat Bands.—The illustration shows two hat bands,
both of which might be made in a colour to go with a
hat or suit.
A Flowered Hat Band (Plate XIIa.).—Plate XIIA.
consists of a piece of cotton—celtic canvas—about
5 inches wide; the length will vary and must depend on
the shape and size of the hat. To make a similar band,
prepare a fringe about half an inch deep on one side
only; turn the fringed edge over the plain one and tack
into position; crochet two lines of insertion (Fig. 65) in
wool or in any material preferred. Make the flowers
as in Figs. 66 and 67; those in the centre of the illustration
are made up of three separately worked flowers,
the smallest one is in silver tinsel. The large flower
groups are placed on the band alternately with the
smaller sprigs. For the making of the leaves see Fig. 68,
p. 160. This band may be made in a very short time;
it is a very suitable hat decoration for rough weather,
as rain does not destroy either the foundation or the
crochet flowers.
A Velvet Hat Band with Cross Stitch (Plate XIIc.).—Cross
stitch, so little used nowadays in this country,
except for the marking of household linen, seems to
have been well known from a very early date by all
needle-workers. It, and many other varieties of a
similar nature, was worked on canvas or linen in
patterns where the threads were counted. At one time
these embroideries were so characteristic of the various
countries that their origin was generally recognised by
the pattern and the colour in which they were worked.
The Italian cross stitch, embroidered on a very fine
linen, was mostly done in a reddish-purple, and frequently
worked in a two-sided stitch. Red, blue and yellow
were the predominating colours of the Slav, Hungarian
and Swedish peasantry. Very large pieces, destined
for wall hangings, were worked in tent stitch or cross
stitch, in designs suggestive of those used for tapestry
weaving. These have even been called tapestries on that
account. The famous Bayeux tapestry represents an
interesting series of events of English history from
the accession of Edward the Confessor to the death
of Harold at Hastings; it is worked in coloured wools
on linen canvas: this is, of course, not really tapestry;
a true tapestry is formed by the interlacing or weaving
of warp and weft threads by means of a needle or a
shuttle (see chapter on needle-weaving).
Plate XIIc. shows a dainty band made on velvet
ribbon; the quaint little basket of flowers in cross stitch
on a gold-coloured foundation may be worked quite
simply on to any material, but in order to keep the
rigidity which is characteristic of the stitch it is necessary
to have a piece of fine canvas as a foundation.
The ribbon is tacked on over it, and the design is worked
over the two materials. In the case of velvet this method
is reversed, as the pile is always an obstacle in the way
of accurate sewing. The canvas is laid on top of the
velvet; the cross stitch is then easily worked and the
threads of the canvas are removed, one by one, when the
work is finished. The centre piece of Fig. C is of gold-coloured
velvet worked in this way. It is caught down
on the outer edges by gold tinsel threads, couched closely
to keep them in position; the strips of orange-coloured
velvet applied on either side and peeping through the
stitchery give a gay little touch to the panel, which is
finished off by lines of gold thread and two little gold
beads. The strips of decoration at equal intervals are
somewhat similar, but not so elaborate. No cross
stitch is used except in the front.
Much may be done with canvas stitches, provided
they are applied to designs which are treated in a
conventional manner. The form of the stitch, occupying
a square space, would enable the worker to make
out patterns on squared paper; chair seats and cushions
could be worked very satisfactorily in geometrical
designs.
Baskets and bags, worked on canvas in wools, cottons
and raffia, can be very useful; the canvas should always
be worked with a thread which fills the mesh. For fine
embroidery it is often better to work it in a frame, particularly
for fine cross stitch or petit point, or when
worked over two plies of cloth—the frame prevents the
under cloth from puckering.
Some of the darning stitches, too (Plate II.), could be
applied successfully to bags; if small, they could be
worked in silk on a fine-meshed canvas. Cross stitch
requires no description, except that it is worked in two
rows; this allows the threads of the second row—on the
return journey—to cross over those of the first. A quick
method of filling a line is to work a half-stitch over a
stretched thread.
Tent Stitch or Petit Point.—the finest of the canvas
stitches—is, like the first half of the cross stitch, worked
over a single thread of canvas.
Goblin stitch is worked over one vertical and two
horizontal strands. A close herring-bone stitch looks
well alternating with rows of an upright stitch for a
canvas-made basket in various colours.
There are many other canvas stitches, but varieties
will be easily constructed by the worker. Canvas may
be bought with a single or double thread, of a coarse or
fine quality. A wide-meshed canvas of a stiff quality,
used for rugs, is very satisfactory for the making up of
work bags or baskets with raffia.
A Braid Hat Band (Plate XIIb.).—A hat band or
collar made from remainders of braids is illustrated on
Plate XIIb. The original was made as a collar to wear
with a suit, but it looked so fascinating as a hat band
that it was worn as such. It is a perfectly straight band
and the illustration shows very clearly some of the
insertion stitches already mentioned (see Figs. 25 and 29).
Prepare it in the manner already described for the braid
collar (Plate IX.). Cut a piece of brown paper to the
size wanted and tack the braids upon it. In the illustration
three rows of black skirt braid, with a row of
black chenille in the centre, go to form the foundation.
The upper and central rows have a line of blue braid
laid over them, just close to the chenille. Join the
braids with faggot stitch on the one side (Fig. 25) and
a knot stitch (Fig. 29) on the other. The knot stitch
is in turquoise blue wool, the faggot in jade green with
a stronger green interlaced. The lines of bright blue
braid are connected at one side and the edging (Fig. 30)
is worked over the other. This edging has a thread
intertwined with it so that the loops are connected,
instead of being detached as in Fig. 30. When all the
braids are connected the paper is cut away from the back.
CHAPTER XII
DRAWN-THREAD AND WHITE WORK—RHODIAN,
RICHELIEU AND HEDEBO
“Be rich in patience if thou in goods be poor.”
Many of the pretty delicate lace stitches which look
so complicated when worked in fine lace threads, on a
net or cambric foundation, can be used with admirable
effect for the filling in of spaces and the covering of
surfaces of some of the coarser stuffs; worked in wools
and thick threads they lose their filmy and lace-like
appearance, and can be adapted quite nicely to the more
utilitarian articles. The arrangement of the stitches
may be chosen to suit all kinds of materials; they may
be very open or only partly so, but as a rule, the simpler
these surface stitches are, the better they look. The
main idea being to bring the background into tone with
the rest of the work, the worker should choose a stitch
which will have just the amount of colour to give the
right tint or shade to the material. Diapers are also
commonly used to tone in the background; single spots
or groups of spots, which may be represented by French
knots or bullion knots, flower or leaf sprigs worked in
loop stitch, and all simple types of darning may be
requisitioned for the purpose. Interlacing patterns can
frequently be made up of two or more stitches combined,
and may often be invented on the spur of the moment
by the interested needlewoman. There are endless
varieties to be made out of button-hole stitch, which is
the foundation stitch of most needle-point laces (Figs. 53
and 11). Weaving stitch—interweaving of threads—is
another upon which many laces, needle-point and
pillow, are built up (Figs. 32, 62, 17 and 40). These two
are often combined (Figs. 54 and 55); add to them
darning stitch, both simple and patterned, and we have
got one step towards lace-making. But lace-making is
not for the busy woman or householder, who has her day
fully occupied, but rather for the few who possess skill,
good patience, and many unoccupied hours—these must
belong to the woman who would excel in the art of producing
the delicate fabric. It is most interesting to
trace the development of lace; how needle-weaving of
the more simple, primitive type later became drawn-thread
work or openwork, in which finer threads and
materials were used; under the skilful fingers of the
inhabitants of the convents works of exquisite skill
were produced, vestments and hangings, all destined to
ornament the church. In England in the sixteenth and
seventeenth centuries lace came into general use, and
was worn in great profusion by Queen Elizabeth and her
Court. Fine steel needles were made in England during
this reign. Naturally this must have had some effect
on embroidery, but the change does not appear to have
been noticeable. Linen was embroidered in silk in
various colours, and further ornamented with drawn
work. This drawn work was followed by cut work,
and from these we have the origin of lace. These first
laces were of two kinds: Lacis and Cut Work. They were
heavy in texture and suited to the costumes of the period.
Lacis.—In lacis the background consisted of a network
of squared meshes upon linen on which a pattern
was darned in linen thread, coloured silks, or gold
threads; it was worked usually in large pieces, for
coverlets and bed hangings, curtain borders, and altar
cloths.
Cut Work.—Cut work had the background at certain
parts drawn, other parts were cut away and the edges
button-holed. Probably this stitch was invented for the
purpose of protecting these cut edges. This darned
netting and cut work, point coupe, were often combined
on the one piece.
Reticella.—The next step, of course, was to work
without a linen foundation. The threads were arranged
in a frame, on a foundation which was only there to hold
the threads in position while they were worked into
various patterns, and filled with button-hole stitches.
All the laces of this period were geometric in design—squares
and circles combined with cut work, drawn
work and embroidery. It was not until about the end
of the seventeenth century that these gave place to
flowing lines and more elaborate and complicated workmanship
with a net background.
Some of the earlier peasant embroideries are singularly
interesting. There is a personality and a quaintness of
thought combined with those spontaneous designs, a
brightness of colour so instinctive, and an inventiveness
of method so freely displayed that one has only to see
the embroideries to realise their charm.
The art and craft has passed from generation to generation.
Some nations are distinguished by the exquisite
skill with which the work is executed, others by the multiplicity
of colours; the patterns predominating are
mostly of the geometrical type. Some of the sixteenth
and seventeenth-century Italian drawn work (punto
tirato), in which the weft or warp threads were removed;
punto tagliato (cut work), in which both the weft and
warp threads were cut away, leaving only connecting
bars of the linen, are inspiring to the needlewoman of
leisure.
From these embroidered and cut-linen works reticella
and needle-point laces arose.
Hedebo Embroidery.—The embroidery done by
the peasantry of Denmark is worked almost entirely in
button-hole stitch, on a firm linen ground, and with a
coarse linen thread. (The Danish women always wear a
little shield of metal when they are working on the
second joint of the little finger to protect it—the constant
friction would be apt to cut the finger otherwise.)
It is an exceedingly durable type of embroidery or
lace—for it partakes of the nature of both—and is simple
to work. The designs are mostly of the geometrical
type, consisting of squares, circles, ovals, etc., worked
in button-hole stitch, arranged to form borders, corners,
or centres for table and bed linen. By combining other
embroidery stitches with the button-hole stitch many
charming pieces of work might be produced without
much difficulty. Many of the Danish peasantry earn
their livelihood by means of this beautiful work.
Plate XIV. illustrates the corner for a panel for a
pram or cot coverlet in process. The centres of the
forms are all worked in the typical hedebo work, while
the outer parts are filled in with a variety of stitches.
To prepare the simple design, make a series of squares
and circles in paper and connect them with double lines;
arrange and space them symmetrically. Leave sufficient
space between each circle to allow for the surrounding
stitchery (see chapter on design). Then, when finished,
draw directly on to the linen with compasses or any small
round shape; leave sufficient material for a hem or
border. The linen should be of a good firm quality. Use
a sewing needle—No. 6 scientific sharp—and a lace
thread—Taylor’s Mecklenberg, No. 6, or Knox’s two-cord
linen lace thread, No. 25 or 30, are suitable.
Method:—To prepare a circle, outline it with two
rows of tacking stitch, keeping most of the thread on the
surface by lifting a tiny stitch of linen. Tack the piece
to be worked over toile cirée or over a stiff piece of brown
paper; with sharp pointed scissors snip a small piece
out of the centre of the circle, and by the warp and weft
threads, cut up almost to the edge to allow the material
to be turned back quite close to the edges of the double
row of tacking, about six cuts to the half-circle. Begin
to work in the following way:—Secure the thread at the
edge nearest the worker by running it along the outline
for a short distance—knots are never used—and bring
it out on the surface; hold the material so as to be able
to work towards the centre of the circle—that is, away
from the worker; make the first stitch by inserting the
needle from underneath; draw up the thread until there
is only a small loop left; put the needle through the loop
from underneath and tighten with a jerk of the thread.
Repeat these stitches, but not too closely, round the circle,
turning the material under as the work proceeds; finish
with the last stitch into the first loop. The button-hole
stitches should not be worked either too closely or too
tightly—about six or seven stitches to a quarter of an
inch. The inner row is worked in open button-hole
loops (see Fig. 52), one loop into the head of every fourth
stitch; this can be strengthened by working back along
the top, one stitch into each loop. A close row of
button-holing, or, if preferred, another row of open
button-holing, should be sufficient to fill the circle. Carry
the thread down over the first button-hole loop, which is
a single thread, and secure it at the back of the linen.
The centre filling, composed of groups of three loops
and pyramids, is worked as in Fig. 59. The working
of continuous pyramids is described in connection with
the cosy slip. Isolated pyramids are worked in a slightly
different manner. Starting from the left, work seven
button-hole stitches into the heads of the seven stitches
surrounding the open space; overseam back to the left;
work six button-hole stitches into the previous row;
overseam back; work five button-hole stitches and overseam
back, when there is only one stitch left; overseam
down the right side of the pyramid; this brings the
needle into position to work the next group of loops.
When all pyramids and loops are finished, pick up a
pyramid and a loop alternately with a button-hole
stitch into each; overseam one stitch into each loop,
then down the side of the last-made pyramid; fasten
off at the edge.
The flowers in Plate XIV. are worked down the outer
edges in blue and white linen embroidery thread. The
stitchery used can be fairly well seen from the illustration.
The largest flower in the corner has a row of
eyelet holes, made at equal distances to finish the hedebo
centre; the space is further ornamented with open
button-holing (Fig. 53, Plate X.) in blue. This stitching
should be commenced at the centre; the final row is
worked into the linen and headed by a line of back
stitch in white; a line of chain stitch in blue finishes the
flower. The flower on the left has a waved line of
closely set French knots, filling up the space, followed
by a row of chain stitch in white. The little outer
spaces between the curves are filled in with oriental
stitch (Fig. 18); these alternate with French knots
worked in blue. The flower on the right is filled in with
loop or petal stitch, and finished with a double row of
blue knots.
Rhodes embroidery is rather different from the other
peasant embroideries. It is less varied, and so it is more
monotonous and less interesting to work than many of
the openwork or drawn-thread varieties. It seems to
be of very ancient origin, and though it has been brought
into prominence lately, under different names, it is only
a revival of the old form of needlework done by the
people of the Isle of Rhodes and adapted to modern
methods. The old work was done on hand-made linen;
the background was worked in red and the design left
in the linen, with an outline stitch to define it; it was
thrown strongly into relief by the colour of the worked
background.
“Punch Work.”—In America this embroidery is
known under the name of “Punch work.” It is much
used as dress trimmings and for bed linen and table
wear; as the fabric is not weakened by the withdrawal
of the threads, it stands wonderfully well for articles of
daily household use.
The linen should be loosely-woven so that the warp
and weft threads can be gathered easily together without
puckering the work—if hand-made, so much the better;
a linen working thread, strong but fine, and a thick
needle are required so as to separate the strands of the
material. Special needles may be had from needlework
depots at 1d. each. The strong fine thread draws the
clusters together and yet does not fill up the open spaces
which are a feature of the background. Fig. M, Plate II.,
gives an idea of how the stitch is worked, but in the
figure the working thread is cotton, and each group of
five threads is gone over twice, so that the open spaces
are rather smaller than they would be if a linen thread
had been used. When the material has been chosen
and the design traced on, fix the work on to a drawing-board,
and with a ruler mark off the dots in rows one-eighth
of an inch apart; note particularly in starting
the first row of dots, that they are in a perfectly straight
line—with the warp or weft of the linen; this is very
important, as the work will not look well unless care is
taken in marking these dots. If the warp and weft lines
of the material are easily followed without strain to the
eyes, these dots need not be marked, but in many cases
it is better to have a guide of some sort, particularly
when fine linen or muslin is used. Another method of
marking in the pattern of dots is to use an open canvas
as a guide; this can be placed over the linen and fixed
with drawing-pins at the top; the dots can be marked
with a knitting needle or traced at regular intervals
through the threads of the canvas with a sharp-pointed
pencil. The only difficulty in using the canvas is that
the lines of warp and weft of the linen are hidden, so
care must be taken to make both materials correspond,
otherwise the dots will be off the straight line and the
work will prove most unsatisfactory when finished.
Some workers prefer to do the outlining of the design
first and the background afterwards, others reverse the
process—much depends on the worker herself; the
background can be kept free from puckering by placing
the work in a frame.
To work Fig. M.—Tie the thread to begin with;
bring the needle out at the first dot of the top left-hand
corner; put it down through the dot to the right; pull
the three or four strands together and repeat this
horizontal stitch to tighten; pass the needle diagonally
under to the second left-hand dot—exactly under the
first; make an upward stitch into the first dot; pull
strands together; repeat stitch and tighten—this brings
the needle to the surface again with one horizontal and
one vertical stitch completed. Repeat these two stitches
to the end of the row. These stitches should form three
sides of a square, the fourth side being added with the
second row.
When the edge of the space is reached, turn the work
round so as to be able to work from the top down, as
at starting. Make a little stitch to keep the thread firm,
on the wrong side, then bring the needle out at the dot
to the left; put it down through the previous hole—horizontal
stitch; repeat; take a vertical stitch, putting
the needle down into the previous hole, and, completing
the square (Fig. M), repeat; pass the needle diagonally
under the material to the next dot, and so on. When
a very fine material is used the groups of threads may
be held together by a single stitch instead of a double
one. This background may be worked in a different
way, all the horizontal stitches being worked first, and
then the whole turned half round and the vertical
stitches, which are now horizontal, worked next. This
may commend itself to some, being rather a simpler
method; it is done entirely in horizontal stitches and
needs no description after studying the first method.
After the background is finished the design may be
worked in with satin stitch, chain stitch, outline stitch
or button-hole stitch. This should be done in the hand.
Richelieu Embroidery.—Richelieu embroidery—another
of the embroideries worked in button-hole
stitch—is even simpler in execution than Danish work,
as the material is not cut away until the button-holed
bars—which connect the pattern—are finished. It is
worked in the hand, generally over a piece of toile cirée—American
cloth specially made for embroidery. The
entire design is outlined in small tacking stitches with
embroidery cotton; the bars are then worked in—they
always have picots, which is characteristic of Richelieu
work. For the working of bars see Fig. 24, and of
picots, Fig. 57. Care must be taken to secure the ends
of the bars, by passing the needle through the linen to
the back and making a stitch, before running the stitches
along the outline to the point for the making of the next
bar. The design is then button-holed all over in equal-sized
stitches; the flower centres are worked in, and
finally the linen is cut away very close to the button-holed
design with a sharp pair of embroidery scissors.
Fig. 52.
Edging: Point de Bruxelles (Fig. 52).—This
Fig. 52, which consists of a piece of Honiton braid with
an edging, shows the working of one of the most elementary
of the lace stitches. It will be seen at a glance
that it is the familiar button-hole stitch worked in loose
loops; to lace-makers it is known
as point de Bruxelles. It is a
stitch constantly in use with them
as it forms a good foundation net,
and charming patterns may be
made with it when worked in rows,
backwards and forwards. Point de Bruxelles is frequently
found in laces of different types as it may be worked
closely or openly to suit various styles and designs. The
stitches are worked into the loops of the previous row;
sometimes a strengthening thread is stretched from right to
left, in which case the button-hole loops are worked from
left to right over this thread, as well as into the loops of
the upper row. There are many beautiful varieties of
patterns for covering spaces or openwork fillings to be
made from this simple foundation stitch, by varying
the grouping of some and duplicating others (Fig. 53).
What is known as double-net stitch has two button-hole
stitches worked into each of the loops of the previous
row. When used as a surface stitch worked in coarse
threads the loops may be fairly loose, provided care is
taken to keep them regular in shape and size. For
those who are not expert a frame is helpful or a piece
of stiff glazed calico or brown paper—either might be
utilised to keep the material stretched.
As a filling for an open space they should be worked
much smaller and closer in a linen thread, the size mainly
depending upon the opening to be filled in.
Fig. 53.
Point de Sorrento.—In this (Fig. 53) there is a
pleasing variety of the same stitch. It also has a special
name among laceworkers—point
de Sorrento, although only
varying slightly in the arrangement
of the loops from point de
Bruxelles. It is used principally
for the filling of open spaces and
is comparatively quickly worked.
Good results, too, can be had by
filling in large spaces with
woollen threads of the twisted type. In the first row
the stitches are taken rather closely together but equally
distributed in the second row; one stitch is worked
into the last loop of the first row; one loop is missed;
one stitch into each of the two following loops, and
so on across the space. The pattern starts on the left
side and is worked to and fro, the third row, therefore,
starts from the left again with one stitch into the
smaller loop and three into the wider loop.
Fig. 54.Fig. 54a.
Fig. 54 is rather a favourite pattern, but the making
of the small wheels or roses is just a little tedious. The
foundation is a row of looped button-hole stitches,
similar to Fig. 52, worked into a circle of braid or a row
of not too closely worked button-holed material as
described on p. 138. If the circle is small, another row
added to this and drawn up by overcasting the inner
circle will often be sufficient. The little wheels take
up quite a large space themselves, but where such
elaborate stitching is wanted they look very effective.
Method:—After the row of open loops has been made,
overcast a single stitch into each loop and draw up the
thread to tighten the circle; the first row of open
button-holing should be nicely spaced to leave room for
the forming of the little wheels. The little wheel-like
forms are woven in and out of the connecting stitches
as is clearly shown in Fig. 54A. Another method of
filling in a circle is as follows:—Make a row of open
button-holing as Fig. 52, spaced widely, so that there
may be eight or ten loops in the round. This done,
draw them up by overcasting one stitch into each loop;
then carry the thread back to the edge of the braid at
the starting point of the first button-hole loop—this is
necessary to complete the first loop, the last half of
which, so far, has only got one strand. Add two more
threads to this half-loop by carrying the needle to the
centre and back again; this acts as a strengthening or
padding thread to the half-loop, which has now to be
button-holed from the outer edge to the inner circle.
Each loop is worked in the same way, always adding the
padding threads and starting the button-holing from the
braid, and from there working towards the centre.
When each loop has been worked, button-hole round
the inner circle with the heading towards the outer
ring; slip the thread up through the first bar and finish
off neatly.
Fig. 55.
Fig. 55 gives a simple method of filling in a square
opening with a circular form. It is not so complicated
as one might suppose. Start at
the lower left-hand corner and
lay the threads for the square;
then the first diagonal line is
stretched across to the top right-hand
corner; overcast it back—in
the method shown in the
diagram—as far as the centre
only. From this point—the
centre—each thread is laid in succession to the edge—vertical,
diagonal, horizontal, each one in turn—and
overcast back to the centre; when the circle is complete,
overcast the second part of the first diagonal back to the
edge. The loose button-hole loops are then worked,
two into each side of the side and the thread, passing
round the first incomplete loop, is interlaced round the
inner circle to strengthen and tighten it (compare
Fig. 55). Now complete the first button-hole loop; make
the final outside circle and finish off the thread. If the
filling looks rather thin when finished it may be solidified
by working a row of close button-holing round the inner
circle.
This stitch is an interesting one and rather less used
than the common point de Bruxelles, on account of the
initial difficulty of keeping it quite regular; a little
practice very quickly gives facility to a careful
worker.
Fig. 56.
A Netting Knot (Fig. 56).—The knot is similar to
that used for netting. In working an open space as
in Fig. 56, it will be found of
considerable aid—towards the
equalising of the loops—if horizontal
lines are drawn on the
foundation material. The loop
may be fixed with a pin into
position, and the needle being
inserted behind the loop of the
upper row and the stretched
thread, the working thread is
then twisted over and under the needle before the thread
is drawn up. This stitch can also be worked without the
strengthening horizontal lines, either in diagonal or
straight lines. To work it diagonally, make the first
loop in the left top corner of the square; overcast a few
stitches along the top to reach the position for starting
the second row; each loop is secured with the knot as
in Fig. 56, their regularity and equal length being
ensured by the pin which is stuck into the foundation.
In netting, a knitting needle or small mesh is used
instead of a pin.
Edgings.—A very dainty and durable little edging
may be made by working this knot on to a coloured or a
lace braid. In Fig. 30 the knot comes at the edge of the
material, while with this point Turc knot the edge of the
loop is knotted. If the loop in the edging in Fig. 30 is
worked rather tighter, it also makes a very durable finish.
Fig. 57.
Picots (Fig. 57).—The little pin picot is occasionally
used as a finish to a button-hole edging. It is rather
ineffective, having only a single thread, which is apt
to disappear after a little
wear. Fig. 23 gives a much
more substantial picot in
bullion stitch.
To work Fig. 57, button-hole
a few stitches along the
edge or bar as the case may be; fix a pin into the material
or bar and pass the thread under it; take a stitch into
the material; bring the needle out at the back; slip it
under the three threads from left to right (see Fig. 57)
and draw through. Make a firm knot close to the edge
of the material, then continue the button-holing till the
next point is reached.
Venetian Picot.—A more substantial picot is used in
Venetian lace and embroidery as follows:—Make a
connecting bar by stretching three threads across from
one edge of the opening to the other, as in Fig. 26.
Button-hole half-way across, then insert a pin as Fig. 57,
but pass the thread under the pin and over the bar
twice; then begin to button-hole the picot at the point
where the pin is inserted and work five or six button-hole
stitches till the bar is reached; the point must be closely
covered, then continue the button-holing of the bar.
Fig. 58.
Fig. 58, a, b, c, show how a solid little picot may be
worked as an edging; it should have some decorative
stitch to join up the
picots, such as large
overcasting, button-hole,
chain or couching
stitch. It is generally
easier to work the picots
with the edge held
away from the worker.
Make a loop as at a;
fasten it with a pin; then take the thread to the top of
the loop and pass it round as b. Then interlace backwards
and forwards, passing the needle under the thread
before going over to the opposite side, c. Repeat four
or five times until the loop is filled. A twisted thread
of a fairly thick make is most suitable for these picots.
Fig. 59.
A Button-hole Edging.—Fig. 59 shows how to
work an edging which
is particularly suitable
for household linen,
table mats, towels, etc.;
being both strong and
durable, it will stand the
hard wear which household
articles in daily
use are subjected to.
Figs. 60 and 61 are
very good surface stitches, both of which make bold
and most effective headings to a border or band of
needle-weaving. Both depend considerably on the care
with which the foundation stitches are worked; if these
are not equally distributed and the interlacing thread
carefully adjusted to form the circles or links of the
pattern the decorative value
of the line or filling is spoilt.
Fig. 60.
A Border Stitch (Fig.
60).—To work as Fig. 60
three rows are required to
complete the stitch. First
make a row of horizontal stitches on a level with each
other; then take a long thread and pass the needle, eye
foremost, up under the first small stitch, down through
the second, and so on, till the first row is finished—the
second row of interlacing
completes the link.
Fig. 61.
An Interlacing Border
or Filling (Fig. 61).—The
stitch may also be used as
a background or filling, in
which case the ground must
first be patterned over with alternating rows of horizontal
and vertical stitches, equally spaced. The vertical
stitches hold the lower and upper edges of the links
together—one such stitch is seen on the left of Fig. 60.
Fig. 61 looks well if the foundation stitches are worked
in one colour and the interlacing threads in another.
By looking at the figure it will be seen that four small
horizontal stitches are required to support the interlacing
threads, in groups of two. These must be equally
spaced so that the rings may be equal in size. After
the foundation stitches are worked proceed exactly as in
Fig. 60. Take a long thread for the interlacing of the
first row; pass the eye of the needle foremost through
the small stitches to prevent splitting of the threads;
follow by a second row, which completes the ring.
Fig. 13 gives a row of large back stitching with an
interlacing thread which is worked in a similar way, and
which makes a good firm
line or heading to a border
or hem.
Fig. 62
Two Leaf Fillings
(Fig. 62).—This filling for
a leaf or oval form is quickly
worked; it may be used
equally well for a surface
stitch. Fig. 62 represents a
leaf with a lace braid for the outline. The central
thread which forms the mid-rib is stretched first, the
loosely worked loops are then threaded over this. This
very simple arrangement looks remarkably well, and can
be still further enriched by spacing the loops much
wider apart, stretching horizontal lines across the spaces
and forming little woven wheels, or rosettes, over them,
down the mid-rib. This is, of course, a much more
elaborate type of leaf, and would be used to fill quite a
large space.
There are many simpler methods of filling leaf forms
or oval spaces—a row of button-holing, point de Bruxelles
(Fig. 52) worked round the inner edge, followed by
one or two rows of looped button-hole stitch (Fig. 53),
and closed down the centre by a line of faggot, or Russian
stitch, finally overcasting a few stitches to the edge in
order to finish off the thread neatly.
Similarly, Fig. 62 b, may also be worked either as a
surface filling or as an open one. The horizontal lines
are stretched first, then overcasting from left to right of
the straight lines fixes these transverse threads; otherwise
they would be apt to get out of place, as they are
only threaded over the one line and under the other.
Point de Venise (Fig. 62a).—This can be worked on
to baby garments, or to any article where a dainty
finish is required. It looks even better if the heading is
of some of the lace braids. The thread is secured at the
edge and a looped stitch is taken as a foundation thread
into which are worked four button-hole stitches—to
form a scallop. This charming edging is much used in
point de Venise. The same stitch also makes a beautiful
filling pattern.
A Useful Bag.—Plate XIII. illustrates what
may be done with such simple materials as canvas,
braid and wool. The foundation of canvas has the design
traced on to the material; it consists of a series of little
circles and half-circles, which overlap here and there,
and which are eventually turned into gay little conventional
flowers by means of bright-coloured wools.
These flowers are mostly worked in petal stitch (Fig. 3A),
and French knots (Fig. 22A). The band is enclosed by
two rows of braid, oversewn with green, blue and purple
wool. The foot of the bag is made up of an oval of
braid worked in rows from the centre outwards; the
tassels, also of braid, are brightened by rings and tags
of wool; little thin lines of tinsel threads are darned
into the canvas—these serve to connect the embroidered
band with the upper decoration. The embroidered rings
which hold the draw strings are extremely pretty. This
note of originality, and indeed, the whole bag, conveys
to one’s mind the impression of the bright personality
of the worker who thus gives outward expression of the
joy it gives her to work with her needle.
CHAPTER XIII
DECORATIVE FLOWERS AND LEAVES—EDGING
AND INSERTION
“Take the gifts, too, to serve as monuments of my hand
labour.”
These little flowers are a dainty trimming for hat
bands (Plates IX. and XII.), collars, ribbon, ties and
jumpers, for dress decoration, or as an addition to
almost any article of daily wear: further, they are so
simple to work that a very few directions will enable
any one to make and apply them to whatever object may
be chosen for decoration.
Crochet.—All crochet consists of a series of little
loops made by a needle or hook, these being worked or
drawn together in various ways to form patterns or
designs suitable for edgings, insertions, motifs, etc., for
domestic use, and innumerable articles of personal wear.
The foundation stitch is a chain, and all patterns
commence with it—two or three or more, according to
the article to be formed. Most crochet patterns are
worked in rows, backwards and forwards, or all from one
end; in the former case, the work must be turned at
the end of the row, after making two or three stitches
to allow for turning; therefore, the second, fourth, and
sixth row, etc., will be worked on the opposite side from
the first, third, and fifth, etc. When the rows are all
started from the same end, the wool must be cut off at
the end of each row, and commenced again at the
beginning of the next. Crochet is
worked, as in ordinary needlework,
from right to left.
Fig. 63.
Chain Slip-knot (Fig. 63).—We
will start then with a slip-knot,
which forms the first loop for the
chain (Fig. 63). Wind the wool once round the first two
fingers of the left hand and pull the long end of the wool
through the circle thus made in a such a way as to form
a loop; insert the hook; pull both ends of the wool and
tighten the knot sufficiently to leave
an easy passage for the hook through
it. The next stitch is made by taking
up the long end of the wool with the
hook and drawing it through the loop. Repeat this
process until the length of chain required has been
obtained (Fig. 64). A little practice will soon give the
regularity of stitch necessary.
Fig. 64.
Single Stitch.—To practise single crochet, make a
chain about 12 inches long; put the hook into the upper
half-loop of the second chain; throw the wool over the
point and draw it through this half-loop and through
the loop which is already on the hook. Proceed in this
way to the end of the chain; work one chain; turn and
work back again, taking care to put the hook into the
upper half of the stitch of the previous row. Thus the
first stitch of each succeeding row is always worked into
the back of the last stitch of the preceding row.
Double Stitch.—Double stitch is not very different
from single stitch. Put the hook into the upper half of
the third chain from the hook, as in single stitch; pass
the wool over the hook and draw it through. There are
now two loops on the hook. Pass the wool over again and
draw it through these two loops; continue to the end of
the chain and turn as in single stitch.
Treble Stitch.—This stitch uses up much more wool
than the two preceding ones. Begin by passing the
wool over the hook, then insert it in the upper half of
the chain already made; draw the wool through and
there will be three loops on the hook. Put the wool over
the hook and draw it through two loops; put it over a
third time and draw through the two remaining stitches.
That completes a treble stitch. It will now be noticed
that for a single stitch the wool passes over the hook
once, for a double stitch it passes over twice, and for a
treble stitch it passes over three times.
Long Treble Stitch.—Long trebles are made by
passing the wool twice over the hook to begin with, then
working it by drawing the needle through two by two,
always remembering to pass the wool over the hook, just
as in treble stitch. When working trebles to and fro,
four or five chain stitches must always be made at the
end of each row before turning. When the work is
turned, these chain stitches form, or rather replace, the
first treble, which is skipped. This keeps the edges more
regular.
Fig. 65.
Ladder Insertion (Fig 65).—Fig. 65 forms a useful
little insertion or ladder on which to place the crochet
flowers. It connects the groups and prevents the
spotty appearance which would be rather a disadvantage
if the flowers were scattered in arrangement (Plate XII.).
It is very simply worked. Make a chain the required
length, then add three or four stitches for turning, to
allow for the depth of the
treble; insert the hook
into the fifth half-loop,
counting backwards, and
make a treble stitch as described
(p. 157); crochet
one or two chain between
each treble stitch to correspond
with the number of
chain stitches passed over.
Hooks.—In making the flowers, it is better for a
novice to work with a bone crochet hook and wool;
steel hooks are used for fine threads, flax, silk, or cotton,
and are not quite so easy to manipulate as bone or
wooden ones. The point of the hook ought to be quite
free from roughness, as the wool
or thread of any kind is so easily
ruffled.
Fig. 66.
Flowers (Fig. 66).—To make
the simplest flower, work five
chain and join (Fig. 66 a). This
figure is worked very loosely in
order to show the method. Then
make seven chain and one double
crochet into the ring; five chain
and one double crochet into the
ring. Work in this way until
seven little petals have been formed, then join into
the third chain; finish off by cutting the wool and
pulling it through. Thread a needle with the cut end,
and slip it down the chain to fasten off. This forms
a tiny flower, which may be duplicated in various
tones of the same colour and sewn on to the foundation
with cross stitch or French knots. The sizes of the
flowers will vary considerably according to the thickness
of the hook and thread used, as well as to the
method of working, but it is always better to crochet
flowers firmly to keep them in shape.
Fig. 67.
A more elaborate Flower (Fig. 67).—Fig. 67 gives
a slightly more elaborate
flower.
Method:—Work six or
seven chain and join by
pulling the loop through
the first stitch. To make
the petals, work four chain;
three treble stitches into
the ring; four chain and
one single or double stitch
into the ring—this completes
a petal. Notice that the four chain at the
beginning and end form the sides of the petal. Be
careful not to split the wool while working, as this spoils
the appearance of the flower. Make five, six, or seven
petals and join at the ring as before.
If a larger flower is wanted, make a small flower as
Fig. 66 for the centre, and work the petals into the
openings instead of into the ring; the petals may be
made fuller also by adding more treble stitches to each
one.
Figs. 66 and 67, if worked in silk, cotton, or flax, make
quite a pretty decoration; the flowers may be folded into
various shapes and an interesting touch of colour or a
stitch here or there, or an outline of button-holing will
add richness and variety to the work (Plate XV.).
Fig. 68.
Leaves (Fig. 68).—Leaves are quite simple to make,
and, of course, will vary in size and form, just as the
flowers do, according to the size of
the hook and the thickness of wool
used. A chain forms the mid-rib of the
leaf, and into this double, treble and
long treble stitches are worked up one
side of the chain and down the other,
the long trebles coming at the widest
part and decreasing towards the tip.
Method:—Make nineteen chain as
a foundation; work one single stitch
into the second chain from the hook, one double crochet
into each of the next two chain, one treble stitch into
each of the next two chain, one long treble into each
of the next eight chain, one treble into each of the next
two chain, one double crochet into the next chain, three
double crochet into the last chain. These three stitches
form the tip of the leaf. Continue with one double
crochet into the next chain; on the other side of the
chain a treble stitch into each of the next two chain,
and so on—repeating the stitches as on the ascending
side—to the end of the chain (Plate XII.). This leaf
may be enlarged by working a row of double stitch all
round, while a smaller one may be made by starting
with thirteen or fifteen chain and putting in fewer
long trebles.
Fig. 69.
Wired Leaves (Fig. 69).—Another type of leaf
(Fig. 69) is made with two lengths
of covered green millinery wire—any
wire will do so long as it is
covered—which are tied together in
the centre with green silk and then
bent into the form of a leaf and
fastened at the foot with silk or
wool. The wire is then interlaced
with wool, flax, or silk, or chenille, in
green, blue, or any colour desired.
As the weaving proceeds in and out,
take care to push the rows closely together until the tip is
reached; pass the needle and thread twice round the
tip and slip the needle down the centre to the stem,
where the thread is wound round and round until it is
firm and a sufficient length of stem is covered.
Wired Flowers.—Flowers may
be made in the same way, each petal
being treated as a leaf; five or six
are then tied together to form the
stem, and French or bullion knots
added in another colour—to give
stamens and pistil for the centre.
Fig. 70.
A Useful Cord (Fig. 70).—Fig.
70 makes a very good finish
for various purposes; it is a chain
made with double stitch. Begin
with two chain; put the hook into the first chain; pass
the thread over and draw it through in a loop; pass
the thread over again and draw it through the two loops
on the hook; put the hook into the left side of the
stitch just made; pass the thread over the hook and
draw it through; pass the thread again over the hook
and draw it through both stitches; continue in this
way till length required has been worked. This little
cord will be useful for bags, edgings for coats and
jumpers and many other articles.
Tricot (Fig. 71).—Fig.
71 represents another type
of crochet, sometimes called
Victorian or Tunisian crochet
or simply crochet tricot. It
makes a firm, close, yet
elastic piece of work, and
is specially suited to the
making of children’s slippers,
scarves, bonnets, reins, braces, collars, hat bands, etc.
It is always worked in rows—never in rounds—and
a long straight hook with a knob at the end is necessary
as all the stitches on the advancing row are kept on
the hook and worked off on the return row—these two
rows complete the stitch, which is worked on the right
side backwards and forwards.
Fig. 71.
Tricot crochet is commenced with a chain the exact
length and finished off with single stitch.
A Tricot Collar (Plate IX.).—The collar in Plate
IX. is worked in Knox’s linen “cord” floss thread.
Make sixteen chain and work three rows of double
stitch to keep the ends from curling up as they would
do if the tricot stitch was started right away. For the
tricot, the loop row is worked thus:—Put the hook
through the first stitch; pass the thread over and draw
it through in a loop; put the hook through the second
stitch and pass the thread over; draw through in a loop;
continue in this way to the end of the row, when there
should be sixteen loops on the hook. Put the thread
over the hook and draw it through one loop; pass the
thread over and draw it through two loops; keep on
repeating this, passing the thread over and drawing
through two loops until there is only one stitch left on
the hook. These two rows complete the stitch. In the
next row, the loop row, put the hook through the hole
between the first and second stitches; pass the thread
over and draw it through; pass the thread over the
hook again and draw it through the first of the two loops
on the hook; repeat to end of row, always putting the
hook into the hole between the stitches; count the
stitches at the end of the rows, as it is quite a common
mistake for a beginner to increase or decrease by missing
or making stitches.
The collar is finished with a row of single stitch right
round, a deep picot fringe to the ends with flowers
worked in Knox’s linen “cord” floss thread in delicate
tints edged with silver thread and placed in groups to
give weight, interest and finish to the whole.
Picots.—Picots (Fig. 72) make a dainty finish for an
edging of crochet, needlework, or lace. Collars, table
mats and many small articles may be improved by these
light points of various shapes; the one objection to them
is that they lose in appearance after washings and so are
not suitable for rough wear unless substantially made.
Plain Crochet Picots.—Crochet picots are quickly
and easily worked. For a plain triangular point, make
six chain, then work one treble stitch into the first
chain made, that is the stitch furthest from the hook.
Repeat six chain and one treble into the first chain
for the length required—the six chain form the little
triangular points or picots, the treble stitch forms the
heading.
Dropping Picots.—These dropping picots are a
little more solid in appearance than the plain picots.
Make five chain; withdraw the hook from the loop and
insert it in the second of the five chain stitches just made;
take up the loop dropped; pass the thread over the needle
and draw it through the two loops; repeat with five
chain; drop the last loop; insert in second chain; take up
the dropped loop; put the thread over the hook and draw
through both loops. Continue in this way for the length
required.
Crochet Lace Picots (Fig. 73).—Lace picots, as the
name suggests, are generally worked in fine threads;
nevertheless, they can make very effective trimmings if
worked in wool or stout thread over a mesh, and will
wear wonderfully well.
Two-chain Picots.—Commence with two chain;
put the hook into the first chain; pass the wool over and
draw it through the stitch—there are now two loops on
the hook; work two chain, then slip the loop nearest
the end of the hook off on to a thin wire or mesh and
repeat. Put the hook into the first of the two chain;
pass the wool over and draw it through the stitch; work
two chain and slip off the last loop. It is sometimes
easier to withdraw the needle from the two loops instead
of slipping the last loop off the end of the hook and to
replace it into the front loop.
This edging may be sewn to a piece of work.
Fig. 72.
Picots (Fig. 72).—The following picot is worked
directly on to the edge
of the finished piece of
crochet, or it may be
worked into a length of
chain and overcast to
the edge of any article
suitable. Put the hook
into the first stitch;
pass the wool over and
draw through; work one double crochet (see p. 157)
into the next chain; draw out the loop to the desired
length for the picot and slip it on to a mesh or pencil;
insert the hook into the horizontal stitch at the foot of
the loop; pass the wool over the hook and draw a loop
through; make a double crochet stitch into the next
chain; draw out the loop and slip on to the mesh;
repeat to the end of the work.
Two-pronged Fork.—A very quickly worked insertion,
fringe, or edging may be made by means of a two-pronged
fork. The little implement can be manufactured
quite easily at home. For a fringe, a wooden
fork is necessary, with one wide and one narrow prong.
The usual fork is of thick steel wire and varies in size,
but as steel wire is too hard for the unskilled worker to
manipulate, a softer metal would be more satisfactory.
A length of copper wire about one-eighth of an inch in
diameter and 15 inches long, could be beaten into the
form of a hairpin (Fig. 73) by means of a hammer; if the
metal is too hard to take the curve it can be softened
by annealing it. The width between the prongs may
vary in different forks according to the width of the
insertion to be made, from half an inch to 3 inches apart
is the usual spacing. The
stitch is made with a crochet
needle, which will also vary
in size according to the
material used; for working
in fingering wool, three or
four ply, a No. 1 steel crochet
needle does very well. Cotton,
flax, wool, raffia, string and
metal threads, all may be
worked up to form various
useful articles for decorative
purposes. An effective fringe
could be made by threading
beads into the wool; the beads could be kept at the
edge of the wide prong.
Fig. 73.
An Insertion or Fringe.—Method of working:—This
insertion may be worked in two ways. By looking
at Fig. 73 it will be seen that the stitch is a very simple
one. Make a slip-knot as Fig. 63, and one chain; withdraw
the hook. Place the fork with the prongs upwards
in the left hand, between the thumb and the middle
finger; slip the chain stitch on to the left prong with the
thread towards the worker. Insert the hook from below
into it, then carry the thread round the right prong and
pass it over the point of the hook; pull it through the
loop; make one chain; put the thread round the left
prong and turn the fork to the right—slipping the hook
over the right prong at the same time so that it remains
in the same position between the prongs with the handle
to the worker; insert the hook into the stitch on the
left prong from below; catch the thread and pull through;
there are now two loops on the hook; close these by
putting the thread over and drawing it through both.
Repeat with the thread round the left prong as before.
Raffia.—A simple braid is done in three movements,
the fork being turned between each three. When
the fork is filled, closely covered, slip off the loops and
reinsert the two prongs into the last five or six loops,
then continue for the required length. Two or three
braids may be joined together by slipping one loop over
another, or a contrasting thread may be taken and two
loops on the one side may be joined together by a double
stitch; then make three chain; two loops on the other
side, joined again, then three chain; working in this
way, the joining forms a little row of vandykes in chain
stitch. The outer edges are then strengthened by one
double stitch into two loops; two chain; one double
stitch into the next two loops; two chain, and so on.
Carpet and skirt braids may be joined together by
means of an insertion made in twine or raffia—the latter
being the more decorative. After making a row of gimp
on a wide-pronged fork, connect it to the carpet braid
by working two double crochet stitches into each loop
and two into the braid—if a sufficient number of rows
are joined together a strong and useful shopping bag
may be made, finished with handles of plaited raffia and
braid.
A pretty crochet edging suitable for finishing off many
articles of personal wear or for domestic use, which wears
and washes well, may be worked directly on to the
material. Work a row of button-hole stitch into the
edges of the material; space the stitches rather widely so
as to allow of an easy entrance for the crochet hook—this
makes a daintier edging than inserting the needle directly
into the material. It is worked in three rows—a linen
thread gives the best effect. To work the first row, begin
with one double stitch into a button-hole loop, then two
chain, and one double crochet into every second button-hole
loop; on approaching the corners, work into every
loop so as to allow the next row to lie easily round them—nothing
spoils good work so much as to see the stitching
tightened and strained round the edges and corners.
When the first row is finished join the stitches with a
single stitch and commence the second row. Make eight
or ten chain according to the thread used and size of loop
wanted, then work double crochet into every third or
fourth loop of the previous row—give ease to the corners
by working three double crochet into each loop at the
finish of the row; join as in second row. For the third
row work ten or twelve double crochet stitches over the
chain loops, as these stitches should cover the chain loops
closely, when they look similar to button-hole stitching.
The appearance of this edging will naturally vary considerably
according to the size of the needle and thread
used. A very serviceable edging, not too minute, is
made with a No. 4 steel crochet hook and linen “L.C.”
crochet thread, No. 14.
PLATE XVI.
A CUSHION COVER.
Another Edging (Plate VII.).—A very effective
edging is worked into a row of needle button-hole
stitch. Like the one above, it wears and washes
well. First row: work one double crochet into one
of the button-hole headings; make ten chain; pass
six button-hole loops and work one double crochet into
sixth loop; continue making ten chain and one double
crochet until the row is complete. Break off the thread.
Start the second row with one double crochet in the centre
of the chain loop; make ten chain and work one double
crochet into the centre of the next loop, and so on to the
end of the row; then join and break off the thread. The
third row is worked in a coloured thread. Take a blue
linen or cotton thread and start this row by working into
the first loop. Two double crochet, four chain, four
double crochet, four chain and two double crochet. Work
the same number of stitches in each loop. The chain
stitches form little picots; this makes a dainty little
finish to a table centre. Compare Plate VII.
Plate XVb. gives an example of a work bag made
from rug canvas. It is worked in cross stitch in two
shades of blue, light green and a reddish-purple raffia.
The edges are turned in and finished off with a border of
soft blue brush braid; the handles are of raffia, plaited,
in the different colours; the basket is lined with a printed
silk which matches the various colours.
Plate XV. gives a Japanese basket woven in grass,
trimmed with cherry-coloured braid and crocheted
flowers—the flowers are sewn on with dark blue; the
lining consists of two shades of blue. The handles are
of cherry-coloured carpet braid. These baskets are so
very useful for the holding of odds and ends, mending,
or embroidery. Some of the simplest woven Japanese
baskets look very well when trimmed with braids in gay
colourings and little crochet flowers. The busy woman
might well have one of these useful little baskets with
work ready to her hand, or suitable in their contents to
her various rooms.
A Cushion Case (Plate XVI.).—The original is a
charming piece of work. The background, of a soft blue
tone, is worked in blues, bright greens, heliotrope and
cream. The design, in straight lines and circles, has two
bars of needle-weaving, the definite pattern of which is
shown to advantage by the plain woven bars on either
side. The bars are worked similarly to the latchet darns
which are frequently used instead of rings to support the
draw strings of bags.
The design is so simple that it might be drawn directly
on to the material—this should not be a difficult matter
if the threads of the canvas are regularly woven. Put
in the main lines first—in the illustration these lines are
worked in satin stitch; use a ruler and a chalk pencil—the
latter is easily rubbed out if a mistake is made—then
run in the design in wool or thread. Measure off the
bars for needle-weaving, but do not cut and draw the
threads until ready to work them. Great care must be
taken in planning out the various parts of the design
to have all lines running accurately with the warp and
weft of the material, otherwise, when the woven bars are
put in, they will accentuate any mistake made. The
corners are in “laid” stitch, that is, the threads are
stretched loosely across from one side of the square to
the other, horizontally, then vertically—or vice versâ;
they are then sewn down at the junctions with tiny
cross stitches, which requires some care if the squares
are not to be displaced. The rows of running or tacking
stitches accentuate the oval in the centre. Cut and
draw the threads for the needle-weaving after the outer
band of satin stitch has been worked. The plain bars
should be worked in first, as they are simpler in construction.
When these plain bars are finished, divide up
the strands into groups of seven for the pattern, and one
group of eight—the latter forms the start and finish of
the pattern which should have four groups in each.
Weave in all the purple blocks to begin with; these, as
may be seen from the illustration, are widest at the base.
Weave over seven groups for one-eighth of the space;
leave out a group of threads on either side and weave
over five; then over three, and then over one group;
each step is fully one-eighth in height. This process is
then reversed, and the weaving finishes at the opposite
side over seven groups. The start and finish over four
groups can be followed from the illustration. The
central figures alternating in green and blue will then be
woven in without difficulty.
The circles in the centre are worked in rows of satin
stitch; the flat green beads are surrounded by French
knots in cream, and each circle is surrounded on the
outer edge by button-holing in blue of a lighter tint than
the canvas.
Useful Hints.—As a preliminary to the embroidery
of a piece of work comes the putting on of the pattern.
This may be done in different ways, but whichever way
is chosen, it is well to realise from the outset that
accuracy is essential. All possible care should be taken
with the drawing on or tracing of the pattern or design;
all straight lines should follow the warp and the weft
of the material, when they are visible—the slightest
unevenness causes unnecessary trouble in the after-working.
Transferring the Design.—As previously mentioned,
in a design for coarse canvas a geometric pattern may
be put on with a ruler and a chalk pencil, but as chalk
gives a thickish blunt line and is also very easily rubbed
off, it is necessary to fix the design, either by running it
round with a needle and thread, or by taking a fine
brush and going over the chalk lines with Chinese white
or oil paint thinned with turpentine. Another method
is to lay a sheet of tracing paper over the design and
trace it through clearly and accurately; then, following
the plan of the little ones in the kindergarten with their
embroidery cards, lay the traced design, face up, on a
pad of felt, or on two or three folds of woollen material,
and prick little holes very closely together, along the
lines of the design.
Pouncing.—A needle or a fine glass-headed steel pen
will serve as a pricker. Lay the pricked design face
downwards on to the material—which has previously
been pinned on to a drawing board; fix the tracing, and
with a soft pad dipped in powdered chalk and charcoal
rub lightly across the holes from left to right—keep
always rubbing in the same direction; on removing the
tracing, the pattern should be perfectly clear. Take a
fine brush and go over the design with Chinese white or
red oil paint thinned with turpentine; this is called
pouncing. The superfluous chalk or charcoal will blow
off.
Carbon Paper.—A simpler method is to use carbon
paper, which may be had in yellow, blue and red. Fix
the material on a board and place the design carefully
and evenly on to it. Secure with drawing-pins at the
top line—leave the lower part free; raise the design—like
a flap—and place the carbon paper, colour downwards,
on to the material, then pin down the lower edges of the
design. Do not put the pins through the carbon paper
as they leave an ugly mark wherever pressure is applied;
thus rings and bracelets should be removed before tracing.
The upper pins keep the design in position, and progress
may be noted by removing the lower pins and lifting the
tracing and the carbon paper without disturbing the
position of the design.
Yet another way is to trace the design through on to
a piece of tarlatan—an open-meshed muslin; this being
done, place the tarlatan over the material, take a drawing
pen, and with Indian ink run over the lines already there.
If this is quickly done, a clear line should show on the
material.
Stretching.—Embroidery sometimes gets rather
puckered while working. It can be much improved, not
by ironing, which is apt to flatten too much, but by
stretching. Simple needle-weaving with flat stitchery
may be laid on to two or three folds of blanket and
pressed without harm. For most other kinds of work
it is better to lay it face downwards on a board which
has already been covered with a napkin or a fine towel;
fix it at regular intervals with drawing-pins, and while
doing so stretch the material into its right shape, if
possible; be careful not to stretch it out of shape, which
would be worse than ever; then lay a damp cloth over
the work, leave it over-night to dry, and the puckering
should have disappeared by the time it is dry.
There is really no need to pucker work if it is held
properly. Some stitches are more inclined to tighten
than others, but it is generally when working across the
material that they tighten it. The work should always
be held in a convex position over the fingers, and when
working in wools—which are sometimes very elastic—the
needle-worker should see that the threads lie easily
over the surface. If the background appears rounded
at the worked part on the under-side, the wools are too
tightly strained. When mistakes are made it is always
wiser to cut them out than to unpick—it does not harm
the material in the same way, and it is not extravagant,
as threads are generally too much roughened for use
after unpicking.
Knots, as a rule, should be avoided; threads should
always be cut, not broken off. The best way to commence
a new thread is to run a few stitches on the right side on
a part which will be covered afterwards by embroidery.
This keeps the wrong side tidier, and the threads more
secure. A long thread does not make for good work,
as a rule; it gets roughened before it is finished and
takes longer to pull through.
Braids and thick threads can be taken through to the
wrong side by making a hole with a stiletto, or by using
a needle and thread. Bring the needle through the hole
and pass it round the braid, then pass it back through
the same hole and pull the braid through the hole with
it; in the case of a coarse thread, the needle will make a
large enough hole. In working with flax, note the
direction of the fibre by drawing it through the fingers.
The needle should be threaded at the smooth end, so that
when the thread is drawn through the material it is not
roughened. In working with double wool, cotton, or
silk, pass two separate threads through the eye—both
threads are then running the same way. Always keep
the finished part of the embroidery covered up while
working, if possible; it keeps it fresher and the threads
do not get rubbed. Hot hands discolour the threads,
roughened fingers ruffle them. Washing in warm water
with the free use of pumice stone will help in both cases.
Washing Woollen Embroideries.—The soap should be
of a good quality and free from alkali, which injures the
colours. Flake the soap and dissolve it in boiling water;
whip it into a lather; add cold water until it is of a comfortable
heat for the hands, and put the embroidery in.
Squeeze and work it gently—but on no account rub it—until
it is clean, then rinse in warm water, and again in
cooler water; squeeze the water out; hang up immediately—in
the open air, if possible; dry quickly and pin out
on a board, and iron damp on the wrong side on a folded
blanket. White work may be washed in a lather of Lux—any
soap which does not contain alkali may be used.
Proceed as for coloured work, squeezing the dirt out, not
rubbing; rinse and stretch over a towel or put in the open
air till almost dry. It is then laid face downwards on
several folds of blanket, a damp cloth placed over it, and
a hot iron passed backwards and forwards until it is
quite dry—the cloth prevents the iron from soiling the
material on the back and equalises the moisture. Velvet
should be held while being pressed, or the iron should
be fixed face up and the velvet passed over it. All wools
should be shrunk before being worked on to articles such
as sash curtains and coverlets, which require washing.
Steep them in a bath of hot water for some hours; hang
them up—in the hank—to drip; when dry, they will be
as soft as when new.
Braids should be subjected to the same treatment—they
may probably lose a very little colour if they are
not reliable of their kind.
Practical Hints about Materials.—There is sometimes
difficulty in obtaining threads and materials of a
coarse make and weave suitable for carrying out articles
similar to those illustrated throughout the book. A
short list of the names of firms where such may be bought
is given below for the benefit of readers.
Canvases and crashes particularly suited to needle-weaving
may be obtained from Messrs. Brown and
Beveridge, Ltd., 194, Bath Street, Glasgow. These
are of good quality, in great variety and excellent
colouring.
Titian canvas, one of the heaviest makes, is very
suitable for runners, table covers and large objects
generally; it may be had in three widths, 27 inches,
50 inches and 72 inches, in mole, blue and soft brown.
Art canvas and antique canvas, both of a regular weave
in quiet colours, are lighter in make.
In vandyke canvases the warp and weft threads, which
are of different colours, blend very harmoniously. Art
linens and bloom linens are charming; the latter are
woven in two colours. Celtic canvas in cream, fawn, red,
green, and a beautiful rich blue, are guaranteed fast dyed.
Cotton repps and Sundour unfadeable materials are also
suitable and useful for household decoration.
Messrs. Brown and Beveridge, Ltd., also supply
tapestry and crewel wools and a soft thick silk thread
known as Tyrian embroidery silk.
Linens of different makes and colours can be obtained
so easily that it is not necessary to mention any special
firm. Heavy unbleached linen sheetings and towellings
can be procured from some of the Irish linen
manufacturers.
Messrs. Murphy and Orr, Donegal Street, Belfast,
make a heavy twill unbleached linen to be recommended
for coverlets.
Messrs. J. and J. Baldwin and Partners, Ltd., supply,
through their various agents, wools and yarns of a soft
quality and in excellent ranges of colour. “White
Heather,” three-ply, and a thicker “Rainbow” embroidery
wool, sold in balls, are both good.
Fingering wools, three, four and five-ply, in light
colours, may be had from any of the numerous Scotch
wool shops—Messrs. Fleming and Reid, Greenock.
Messrs. W. and J. Knox, Ltd., Kilbirnie, manufacture
linen and lace crochet threads in cream, ecru and Paris
white, also linen floss embroidery threads in a wide
range of beautiful colours. L.C. linen lace thread
in various thicknesses, numbering from 8 to 70. The
medium sizes from 35 to 50 are suitable for the background
of Rhodian embroidery.
“Cord” floss, a thick twisted thread, is suitable for
knitting; hats, collars, short jumpers, bags, etc., may
be made from it.
Messrs. Kirkby, Beard & Co., Redditch, supply
needles of a reliable quality.
Blunt-pointed tapestry needles, No. 18, suitable for
needle-weaving, crewel and chenille needles, and the
excellent “Scientific Sharps” may be had from most
of the needlework depots, or through any of their agents.
Simple wooden looms for the making of braids, hat
bands, ties, girdles, etc., with instructions and with a
piece of work started, may be had from the Dryad Works,
42, Nicholas Street, Leicester. The same firm supplies
raffia in brilliant colours and raffia needles.