The following hands are illustrative of the principles discussed in
the previous chapters, and while, to the experienced players, some
of the points will appear simple, the hands all show interesting
situations which merit careful study from those who wish to improve
their Bridge play.
All the hands have been taken from actual play and show by no means
unusual situations. The writer has endeavoured to eliminate freakish
distributions of cards and unsound play.
Play each illustration as though but one hand were exposed, without
previous reference to the notes.
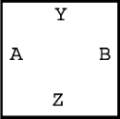
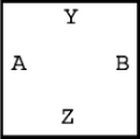
In each case Z is the dealer and A the leader.
Transcriber’s Note:
In each of the TRICK tables, the underlined card
indicates the card which won the trick.
ILLUSTRATIVE HAND NO. 1
Many players would be tempted to declare “no-trumps” with this hand,
but the declaration of hearts is sound. No risks should be taken with
a strong heart make when one weak suit is held.
Trick 1.—There are two lines of play
that could be adopted by the dealer in this hand, one to exhaust the
trumps and try for the spade suit, the other to try to establish a
ruff in the weaker hand. The former course is preferable. As Z holds
but one trump, the adversaries would probably prevent the ruff. To
make the spade suit an entry card may be necessary. Y takes the lead,
in order to save Z’s entry card.
Trick 8.—This position will be
appreciated by all students of the game. Z has three good spades
and the commanding diamond, Y the losing trump and the ace of
clubs. Should Y now lead a diamond and take Z’s re-entry card, the
adversaries’ trump would stop the suit. Leading the losing trump is a clever play.
SAVING AN ENTRY CARD.
LEADING THE LOSING TRUMP.
It is the first game, score sixteen to nothing, in favor of the
dealer. Z deals and passes the make. Y declares hearts.
No. 1
| | ♠ 9 |
| | ♣ A 6 5 3 |
| | ♦ A 4 2 |
| | ♥ A K Q 7 5 |
| ♠ J 6 5 |
 |
♠ K 10 8 |
| ♣ 7 4 2 | ♣ K Q J 10 |
| ♦ Q 10 8 6 | ♦ J 9 |
| ♥ 9 3 2 | ♥ J 10 8 4 |
| | ♠ A Q 7 4 3 2 |
| | ♣ 9 8 |
| | ♦ K 7 5 3 |
| | ♥ 6 |
| TRICK | A | Y |
B | Z |
| 1 | 6♦ | A♦ |
9♦ | 3♦ |
| 2 | 2♥ | K♥ |
4♥ | 6♥ |
| 3 | 3♥ | Q♥ |
8♥ | 5♦ |
| 4 | 9♥ | A♥ |
10♥ | 8♣ |
| 5 | 5♠ | 9♠ |
10♠ | Q♠ |
| 6 | 6♠ | 2♦ |
8♠ | A♠ |
| 7 | J♠ | 5♥ |
K♠ | 2♠ |
| 8 | 2♣ | 7♥ |
J♥ | 7♦ |
| 9 | 4♣ | A♣ |
K♣ | 9♣ |
| 10 | 8♦ | 4♦ |
J♦ | K♦ |
| 11 | 7♣ | 3♣ |
10♣ | 7♠ |
| 12 | 10♦ | 5♣ |
J♣ | 4♠ |
| 13 | Q♦ | 6♣ |
Q♣ | 3♠ |
The dealer makes a small slam.
ILLUSTRATIVE HAND NO. 2
Trick 2.—This situation demands careful attention. If the
diamond is led from Y’s hand for Z to trump, the adversaries must
obtain the lead at the next trick, and would promptly lead trumps to
prevent any further ruffing. Z can estimate that he has but five sure
tricks in the two hands, three trump tricks, the diamond trick, the
ruff, and the possibility of making a trick with the king of clubs.
This, however, would give the adversaries the game and the rubber. To
win the game, two ruffs must be obtained and Z cannot afford to make
the situation clear to his opponents. He leads the seven of clubs
from Y’s hand in order to establish the cross-ruff.
It is this form of strategy that wins games and rubbers for the
clever player. Z takes the one chance to win the game.
Trick 3.—B’s best play is unquestionably
the trump. He has both the spade and the club suit protected, his
partner is marked with strength in diamonds, and he can lead trumps
with safety, but not knowing that the weak hand can ruff, he returns
his partner’s original lead.
Trick 7.—A can stop the cross-ruff by
trumping with the king of hearts, but this play would not afford him
any advantage, as Y would discard a losing spade, and Z may not have
another trump.
Trick 8.—There is no reason for B to trump.
To discard is his best play.
NOT SHOWING ADVERSARIES THAT
THE WEAK HAND CAN “RUFF.”
It is the rubber game, score twenty-four all. Z deals and passes the
make. Y declares hearts.
No. 2
| | ♠ 9 6 5 |
| | ♣ 7 |
| | ♦ A 5 3 2 |
| | ♥ Q J 10 5 4 |
| ♠ K Q |
|
♠ A 10 8 7 |
| ♣ 10 8 6 | ♣ A Q 5 2 |
| ♦ K Q J 9 6 | ♦ 10 8 7 |
| ♥ A K 3 | ♥ 7 2 |
| | ♠ J 4 3 2 |
| | ♣ K J 9 4 3 |
| | ♦ 4 |
| | ♥ 9 8 6 |
| TRICK | A | Y |
B | Z |
| 1 | K♦ | A♦ |
7♦ | 4♦ |
| 2 | 6♣ | 7♣ |
A♣ | 3♣ |
| 3 | 6♦ | 2♦ |
10♦ | 6♥ |
| 4 | 8♣ | 5♠ |
2♣ | K♣ |
| 5 | 10♣ | 4♥ |
5♣ | 4♣ |
| 6 | 9♦ | 3♦ |
8♦ | 9♥ |
| 7 | Q♦ | 5♥ |
Q♣ | 9♣ |
| 8 | J♦ | 5♦ |
7♠ | 8♥ |
| 9 | Q♠ | 6♠ |
2♥ | J♣ |
| 10 | K♥ | 10♥ |
7♥ | 2♠ |
| 11 | K♠ | 9♠ |
8♠ | 3♠ |
| 12 | A♥ | J♥ |
10♠ | 4♠ |
| 13 | 3♥ | Q♥ |
A♠ | J♠ |
The dealer wins two odd tricks.
ILLUSTRATIVE HAND NO. 3
Trick 4.—When the commanding trump
is against you, the best play is usually to force your adversary to
“ruff” with it, but if you hold an established suit in one hand, it
often pays to take out the winning trump. Your long suit can then be
continued without interruption.
LEADING THE LOSING TRUMP
It is the first game, score love all. Z deals and makes it hearts.
No. 3
| | ♠ 5 4 2 |
| | ♣ A Q J 8 6 3 |
| | ♦ 7 5 |
| | ♥ 9 5 |
| ♠ A K Q 8 7 6 3 |
|
♠ J 10 9 |
| ♣ 10 5 4 | ♣ 9 7 |
| ♦ K | ♦ Q J 10 9 8 |
| ♥ J 3 | ♥ Q 8 2 |
| | ♠ —— |
| | ♣ K 2 |
| | ♦ A 6 4 3 2 |
| | ♥ A K 10 7 6 4 |
| TRICK | A | Y |
B | Z |
| 1 | K♠ | 2♠ |
9♠ | 4♥ |
| 2 | 3♥ | 5♥ |
2♥ | A♥ |
| 3 | J♥ | 9♥ |
8♥ | K♥ |
| 4 | 3♠ | 4♠ |
Q♥ | 6♥ |
| 5 | K♦ | 5♦ |
Q♦ | A♦ |
| 6 | 4♣ | 3♣ |
7♣ | K♣ |
| 7 | 5♣ | A♣ |
9♣ | 2♣ |
| 8 | 10♣ | Q♣ |
10♠ | 2♦ |
| 9 | 6♠ | J♣ |
J♠ | 3♦ |
| 10 | 7♠ | 8♣ |
8♦ | 4♦ |
| 11 | 8♠ | 6♣ |
9♦ | 6♦ |
| 12 | Q♠ | 7♦ |
10♦ | 7♥ |
| 13 | A♠ | 5♠ |
J♦ | 10♥ |
The dealer makes a small slam.
ILLUSTRATIVE HAND NO. 4
Trick 1.—To win the game the king
of hearts must be in B’s hand and the lead must be arranged so that Y
can lead the jack of hearts toward the ace queen. To make an entry
card in Y’s hand, Z throws his king of diamonds on the ace.
Trick 2.—A would like to change the
suit, but, undoubtedly, the diamond is his best lead.
ARRANGING THE LEAD
It is the rubber game, score eight to twenty-four against the
dealer. Z, the dealer, declares Hearts.
No. 4
| | ♠ 9 8 6 4 |
| | ♣ 9 8 6 4 |
| | ♦ Q 4 |
| | ♥ J 5 4 |
| ♠ K 5 |
|
♠ A Q J 10 7 |
| ♣ 10 3 2 | ♣ A 7 |
| ♦ A 9 8 7 6 3 | ♦ J 10 5 |
| ♥ 8 6 | ♥ K 9 2 |
| | ♠ 3 2 |
| | ♣ K Q J 5 |
| | ♦ K 2 |
| | ♥ A Q 10 7 3 |
| TRICK | A | Y |
B | Z |
| 1 | A♦ | 4♦ |
5♦ | K♦ |
| 2 | 3♦ | Q♦ |
10♦ | 2♦ |
| 3 | 6♥ | J♥ |
2♥ | 3♥ |
| 4 | 8♥ | 5♥ |
9♥ | 10♥ |
| 5 | 6♦ | 4♥ |
K♥ | A♥ |
| 6 | 2♣ | 4♣ |
A♣ | K♣ |
| 7 | 7♦ | 4♠ |
J♦ | 7♥ |
| 8 | 8♦ | 6♠ |
7♠ | Q♥ |
| 9 | 3♣ | 6♣ |
7♣ | Q♣ |
| 10 | 10♣ | 8♣ |
10♠ | J♣ |
| 11 | 9♦ | 9♣ |
J♠ | 5♣ |
| 12 | 5♠ | 9♠ |
A♠ | 2♠ |
| 13 | K♠ | 8♠ |
Q♠ | 3♠ |
The dealer wins three odd tricks.
ILLUSTRATIVE HAND NO. 5
Trick 2.—To many players a trump
lead at this trick would seem imperative, but if trumps are led, the
adversaries obtain the lead and must make three tricks in the club
suit. The clubs must be discarded before the adversaries obtain the
lead. The king of spades should be led, otherwise the spade suit
would be blocked.
Trick 4.—It seems like tempting fate
for Z to lead his high cards, but nothing can possibly be lost. The
discards which Y takes on these high cards offset any trump that the
adversary might make. There is everything to gain and nothing to lose.
NOT LEADING TRUMPS UNTIL LOSING
CARDS HAVE BEEN DISCARDED
It is the rubber game, score eighteen to nothing in favour of the
dealer. Z deals and passes the make. Y declares hearts.
No. 5
| | ♠ K 3 |
| | ♣ 9 8 7 |
| | ♦ A |
| | ♥ K Q J 9 6 4 2 |
| ♠ 5 4 2 |
|
♠ J 10 9 7 |
| ♣ 6 3 2 | ♣ A K Q J |
| ♦ J 9 7 5 2 | ♦ 10 8 4 |
| ♥ 5 3 | ♥ A 10 |
| | ♠ A Q 8 6 |
| | ♣ 10 5 4 |
| | ♦ K Q 6 3 |
| | ♥ 8 7 |
| TRICK | A | Y |
B | Z |
| 1 | 5♦ | A♦ |
4♦ | 3♦ |
| 2 | 2♠ | K♠ |
7♠ | 6♠ |
| 3 | 4♠ | 3♠ |
9♠ | A♠ |
| 4 | 2♦ | 7♣ |
8♦ | K♦ |
| 5 | 7♦ | 8♣ |
10♦ | Q♦ |
| 6 | 5♠ | 9♣ |
10♠ | Q♠ |
| 7 | 3♥ | J♥ |
A♥ | 8♥ |
| 8 | 2♣ | 2♥ |
K♣ | 4♣ |
| 9 | 5♥ | K♥ |
10♥ | 7♥ |
| 10 | 3♣ | Q♥ |
J♠ | 5♣ |
| 11 | 6♣ | 9♥ |
J♣ | 10♣ |
| 12 | 9♦ | 6♥ |
Q♣ | 6♦ |
| 13 | J♦ | 4♥ |
A♣ | 8♠ |
The dealer makes a small slam.
ILLUSTRATIVE HAND NO. 6
Trick 2.—Should B lead another round of
hearts the weak hand would “ruff” and the strong hand would discard.
Trick 4.—The dealer requires every trick
to win the game. To accomplish this both finesses must be successful.
The trumps held in the two hands are in sequence from the six to the
queen, and should B have the king of trumps three times protected,
the lead must be kept in Y’s hand. Many a hand has been ruined by the
incorrect play of this position.
Trick 10.—Z has the opportunity to make
a brilliant coup. To catch the ten of spades he must lead through A’s
hand, and, therefore, trumps Y’s winning club in order to obtain the lead.
LEADING THROUGH
It is the first game, score love all. Z deals and makes it diamonds.
No. 6
| | ♠ A J 9 7 5 |
| | ♣ K Q J 7 |
| | ♦ Q 8 6 |
| | ♥ J |
| ♠ K 10 6 4 |
|
♠ —— |
| ♣ 8 6 4 2 | ♣ A 5 |
| ♦ 3 | ♦ K 5 4 2 |
| ♥ K 10 9 7 | ♥ A 8 6 5 4 3 2 |
| | ♠ Q 8 3 2 |
| | ♣ 10 9 3 |
| | ♦ A J 10 9 7 |
| | ♥ Q |
| TRICK | A | Y |
B | Z |
| 1 | 7♥ | J♥ |
A♥ | Q♥ |
| 2 | 2♣ | 7♣ |
A♣ | 3♣ |
| 3 | 4♣ | J♣ |
5♣ | 9♣ |
| 4 | 3♦ | Q♦ |
2♦ | 9♦ |
| 5 | 6♣ | 8♦ |
4♦ | 7♦ |
| 6 | 8♣ | 6♦ |
5♦ | 10♦ |
| 7 | 9♥ | 5♠ |
K♦ | A♦ |
| 8 | K♠ | A♠ |
2♥ | Q♠ |
| 9 | 10♥ | K♣ |
3♥ | 10♣ |
| 10 | K♥ | Q♣ |
4♥ | J♦ |
| 11 | 4♠ | 7♠ |
5♥ | 8♠ |
| 12 | 6♠ | 9♠ |
6♥ | 3♠ |
| 13 | 10♠ | J♠ |
8♥ | 2♠ |
The dealer wins five odd tricks.
ILLUSTRATIVE HAND NO. 7
Trick 1.—As there are but six trumps
in the two hands, Z knows that one adversary must hold at least four
trumps, and should the force be taken and the trumps led, the
adversaries would make the entire suit of diamonds. Z must wait
until Y is able to take the ruff, in this way keeping his own trump
strength intact.
Trick 3.—A is placed in a difficult position.
Trick 7.—With the best trump against him,
Z must force the commanding trump, for, no matter how the adversaries play,
the spade suit must be brought in.
REFUSING TO ACCEPT A FORCE
It is the first game, score eight all. Z deals and makes it hearts.
No. 7
| | ♠ Q 4 3 |
| | ♣ A 10 9 8 7 5 |
| | ♦ 7 5 |
| | ♥ 9 3 |
| ♠ 6 2 |
|
♠ 10 7 |
| ♣ K | ♣ Q J 6 |
| ♦ A K Q 8 3 2 | ♦ J 10 9 6 4 |
| ♥ J 10 8 2 | ♥ 7 5 4 |
| | ♠ A K J 9 8 5 |
| | ♣ 4 3 2 |
| | ♦ —— |
| | ♥ A K Q 6 |
| TRICK | A | Y |
B | Z |
| 1 | K♦ | 5♦ |
6♦ | 2♣ |
| 2 | Q♦ | 7♦ |
9♦ | 3♣ |
| 3 | K♣ | A♣ |
6♣ | 4♣ |
| 4 | 2♥ | 3♥ |
4♥ | A♥ |
| 5 | 8♥ | 9♥ |
5♥ | K♥ |
| 6 | 10♥ | 5♣ |
7♥ | Q♥ |
| 7 | 2♠ | Q♠ |
7♠ | 5♠ |
| 8 | 6♠ | 3♠ |
10♠ | A♠ |
| 9 | J♥ | 4♠ |
10♦ | K♠ |
| 10 | A♦ | 7♣ |
J♦ | 6♥ |
| 11 | 2♦ | 8♣ |
4♦ | J♠ |
| 12 | 3♦ | 9♣ |
J♣ | 9♠ |
| 13 | 8♦ | 10♣ |
Q♣ | 8♠ |
The dealer wins four odd tricks.
ILLUSTRATIVE HAND NO. 8
Many players might criticise the make of this hand without realising
its tremendous possibilities. A hand with five trumps and an
established suit is a difficult one for the adversaries to defeat.
As Z is short in two suits, there are not many tricks for the
adversaries outside of the trump suit. Z hopes to find an honour in
trumps with his partner which would enable him to exhaust the trumps
and make his suit.
Trick 2.—Many players would find it
difficult to resist the temptation of leading trumps up to the ace
and queen in Y’s hand, but the danger lies in having the finesse go
wrong, for this would enable the adversary to force the strong trump
hand and the trump suit would be blocked. To get the lead the dealer
would again have to force his own trump hand. If either adversary
held four trumps this would be ruinous.
NOT TAKING A FINESSE, WHICH IF UNSUCCESSFUL,
WOULD BLOCK THE TRUMP SUIT
It is the first game, score love all. Z deals and makes it hearts.
No. 8
| | ♠ 6 |
| | ♣ 8 7 6 3 2 |
| | ♦ A 5 4 3 2 |
| | ♥ A Q |
| ♠ 9 8 5 2 |
|
♠ 10 |
| ♣ K 10 4 | ♣ A Q J 9 5 |
| ♦ K Q J 9 | ♦ 10 8 7 |
| ♥ 7 2 | ♥ K 8 6 4 |
| | ♠ A K Q J 7 4 3 |
| | ♣ —— |
| | ♦ 6 |
| | ♥ J 10 9 5 3 |
| TRICK | A | Y |
B | Z |
| 1 | K♦ | A♦ |
7♦ | 6♦ |
| 2 | 2♥ | A♥ |
4♥ | 3♥ |
| 3 | 7♥ | Q♥ |
K♥ | 5♥ |
| 4 | 9♦ | 2♦ |
10♦ | 9♥ |
| 5 | J♦ | 6♠ |
6♥ | J♥ |
| 6 | 4♣ | 3♦ |
8♥ | 10♥ |
| 7 | 2♠ | 4♦ |
10♠ | A♠ |
| 8 | 5♠ | 5♦ |
5♣ | K♠ |
| 9 | 8♠ | 2♣ |
9♣ | Q♠ |
| 10 | 9♠ | 3♣ |
J♣ | J♠ |
| 11 | Q♦ | 6♣ |
8♦ | 7♠ |
| 12 | 10♣ | 7♣ |
Q♣ | 4♠ |
| 13 | K♣ | 8♣ |
A♣ | 3♠ |
The dealer makes a small slam.
ILLUSTRATIVE HAND NO. 9
Trick 1.—Z must save an entry card
for the spade suit.
Trick 2.—A refuses to part with the
control of the adversary’s suit.
Trick 3.—Should Z not overtake the
jack of spades, A would again refuse to part with the control, and
hence this entire suit would be blocked. This situation frequently
occurs and is often misplayed. When your cards are in sequence and
should you know that the adversary is holding up, always overtake to
obtain the lead so that you can continue to establish your suit.
Trick 4.—A cannot afford to lead
any other suit and continues with the diamonds.
SAVING AN ENTRY CARD. OVERTAKING
It is the first game, score love all. Z deals and passes the make.
Y makes it “no-trump.”
No. 9
| | ♠ Q J |
| | ♣ A Q J 2 |
| | ♦ A 5 3 |
| | ♥ A 8 7 4 |
| ♠ A 6 3 |
|
♠ 5 2 |
| ♣ K 8 7 | ♣ 9 5 4 |
| ♦ Q J 7 6 2 | ♦ 10 9 8 |
| ♥ K 10 | ♥ Q J 9 6 5 |
| | ♠ K 10 9 8 7 4 |
| | ♣ 10 6 3 |
| | ♦ K 4 |
| | ♥ 3 2 |
| TRICK | A | Y |
B | Z |
| 1 | 6♦ | A♦ |
8♦ | 4♦ |
| 2 | 8♠ | Q♠ |
2♠ | 4♠ |
| 3 | A♠ | J♠ |
5♠ | K♠ |
| 4 | Q♦ | 3♦ |
9♦ | K♦ |
| 5 | 6♠ | 4♥ |
5♥ | 10♠ |
| 6 | 2♦ | 7♥ |
6♥ | 9♠ |
| 7 | 7♦ | 8♥ |
4♣ | 8♠ |
| 8 | 10♥ | 5♦ |
5♣ | 7♠ |
| 9 | 7♣ | 2♣ |
9♣ | 10♣ |
| 10 | 8♣ | J♣ |
10♦ | 6♣ |
| 11 | K♣ | A♣ |
9♥ | 3♣ |
| 12 | K♥ | Q♣ |
J♥ | 2♥ |
| 13 | J♦ | A♥ |
Q♥ | 3♥ |
The dealer makes a small slam.
ILLUSTRATIVE HAND NO. 10
Trick 1.—Z false cards the king of
spades in order to deceive his adversaries.
Trick 2.—The lead of the club suit
must come from Y, but if a low heart is led, it will take out Y’s
only card of entry. With the purpose of making two cards of entry, Z
leads the high cards from his own hand.
Trick 4.—As all the hearts have
fallen, Z can safely overtake the jack, to lead the queen of clubs
toward the ace. Should Z continue with another round of hearts, Y
would have no way of obtaining the lead after the club suit was
established. The low heart must be saved as a card of entry.
DOUBLE ENTRY
It is the first game, score love all. Z deals and makes it “no-trump.”
No. 10
| | ♠ 4 2 |
| | ♣ Q J 10 6 3 |
| | ♦ 4 3 |
| | ♥ K 5 4 3 |
| ♠ A 9 8 7 6 |
|
♠ J 5 3 |
| ♣ 8 5 | ♣ K 7 4 |
| ♦ K 8 5 | ♦ Q J 10 9 6 |
| ♥ 10 7 6 | ♥ 9 8 |
| | ♠ K Q 10 |
| | ♣ A 9 2 |
| | ♦ A 7 2 |
| | ♥ A Q J 2 |
| TRICK | A | Y |
B | Z |
| 1 | 7♠ | 2♠ |
J♠ | K♠ |
| 2 | 6♥ | 3♥ |
8♥ | A♥ |
| 3 | 7♥ | 4♥ |
9♥ | Q♥ |
| 4 | 10♥ | K♥ |
6♦ | J♥ |
| 5 | 5♣ | Q♣ |
4♣ | 2♣ |
| 6 | 8♣ | 3♣ |
7♣ | 9♣ |
| 7 | 5♦ | 6♣ |
K♣ | A♣ |
| 8 | 6♠ | 5♥ |
3♠ | 2♥ |
| 9 | 8♠ | J♣ |
5♠ | 2♦ |
| 10 | 9♠ | 10♣ |
9♦ | 7♦ |
| 11 | A♠ | 4♠ |
10♦ | Q♠ |
| 12 | K♦ | 3♦ |
J♦ | A♦ |
| 13 | 8♦ | 4♦ |
Q♦ | 10♠ |
The dealer makes a small slam.
ILLUSTRATIVE HAND NO. 11
Trick 1.—As the club suit is blocked,
Y needs two entry cards, one to establish the suit and the other to
obtain the lead and make it. Z, therefore, overtakes the jack of
spades with the ace, to make it possible for Y to have two entry
cards.
Trick 5.—Without reference to the
position of the cards, A’s lead of the five of spades is bad. The
game is lost unless B holds the diamond suit, and his best play
is undoubtedly the ace and the jack of diamonds. As the cards are
placed, however, this would give the dealer an additional trick.
MAKING AN ENTRY CARD
It is the rubber game, score twenty-four to nothing against
the dealer. Z deals and makes it “no-trumps.”
No. 11
| | ♠ Q J |
| | ♣ Q J 10 9 7 3 2 |
| | ♦ 8 6 |
| | ♥ A 2 |
| ♠ 10 7 5 4 2 |
|
♠ 9 8 6 |
| ♣ K | ♣ 8 5 |
| ♦ A J | ♦ Q 10 9 5 |
| ♥ K J 10 | ♥ 9 8 7 3 |
| | ♠ A K 3 |
| | ♣ A |
| | ♦ K 7 4 3 2 |
| | ♥ Q 6 5 4 |
| TRICK | A | Y |
B | Z |
| 1 | 4♠ | J♠ |
6♠ | A♠ |
| 2 | 4♣ | 2♣ |
5♣ | A♣ |
| 3 | 2♠ | Q♠ |
8♠ | 3♠ |
| 4 | K♣ | Q♣ |
8♣ | 2♦ |
| 5 | 5♠ | 6♦ |
9♠ | K♠ |
| 6 | 10♥ | A♥ |
3♥ | 4♥ |
| 7 | 6♣ | J♣ |
5♦ | 3♦ |
| 8 | J♦ | 10♣ |
7♥ | 4♦ |
| 9 | J♥ | 9♣ |
8♥ | 5♥ |
| 10 | 7♠ | 7♣ |
9♥ | 6♥ |
| 11 | 10♠ | 3♣ |
9♦ | Q♥ |
| 12 | A♦ | 8♦ |
10♦ | K♦ |
| 13 | K♥ | 2♥ |
Q♦ | 7♦ |
The dealer wins four odd tricks.
ILLUSTRATIVE HAND NO. 12
Trick 5.—Z finds that the seven of
diamonds is a card of re-entry and plays to establish the club suit.
Trick 12.—Z can well afford to
chance the making of a small slam.
A CARD OF RE-ENTRY
It is the first game, score love all. Z, the dealer, makes it
“no-trumps.”
No. 12
| | ♠ 8 4 2 |
| | ♣ 8 7 5 4 3 |
| | ♦ 7 4 3 2 |
| | ♥ A |
| ♠ 10 9 7 3 |
|
♠ K J 5 |
| ♣ 9 6 | ♣ Q J 10 |
| ♦ 10 5 | ♦ J 9 8 |
| ♥ Q J 7 6 4 | ♥ 10 9 8 5 |
| | ♠ A Q 6 |
| | ♣ A K 2 |
| | ♦ A K Q 6 |
| | ♥ K 3 2 |
| TRICK | A | Y |
B | Z |
| 1 | 6♥ | A♥ |
8♥ | 2♥ |
| 2 | 5♦ | 2♦ |
8♦ | A♦ |
| 3 | 10♦ | 3♦ |
9♦ | K♦ |
| 4 | 6♣ | 4♦ |
J♦ | Q♦ |
| 5 | 9♣ | 3♣ |
10♣ | A♣ |
| 6 | 3♠ | 4♣ |
J♣ | K♣ |
| 7 | 7♠ | 5♣ |
Q♣ | 2♣ |
| 8 | 4♥ | 2♠ |
10♥ | K♥ |
| 9 | 9♠ | 7♦ |
5♥ | 6♦ |
| 10 | 7♥ | 8♣ |
9♥ | 6♠ |
| 11 | J♥ | 7♣ |
5♠ | 3♥ |
| 12 | 10♠ | 8♠ |
J♠ | Q♠ |
| 13 | Q♥ | 4♠ |
K♠ | A♠ |
The dealer makes a small slam.
ILLUSTRATIVE HAND NO. 13
Trick 1.—Z cannot afford to hold up
the ace of spades, as the entire diamond suit is against him. The
game can neither be saved nor won unless the king of clubs is in B’s
hand. Should this be the case, it may be necessary to lead twice from
Y’s hand.
Z proceeds to make these entry cards by leading the high hearts from
his own hand. The situation is one that is not only interesting but instructive.
DOUBLE ENTRY
It is the rubber game, score twenty-four to nothing against the dealer.
Z deals and makes it “no-trump.”
No. 13
| | ♠ 7 5 |
| | ♣ 9 8 6 |
| | ♦ 7 6 5 4 |
| | ♥ K 5 4 3 |
| ♠ K J 10 8 6 4 3 |
|
♠ Q 2 |
| ♣ 7 4 | ♣ K 10 3 |
| ♦ J | ♦ A K Q 10 3 2 |
| ♥ J 9 7 | ♥ 10 8 |
| | ♠ A 9 |
| | ♣ A Q J 5 2 |
| | ♦ 9 8 |
| | ♥ A Q 6 2 |
| TRICK | A | Y |
B | Z |
| 1 | 10♠ | 5♠ |
2♠ | A♠ |
| 2 | 7♥ | 3♥ |
8♥ | A♥ |
| 3 | 9♥ | 4♥ |
10♥ | Q♥ |
| 4 | J♥ | K♥ |
2♦ | 6♥ |
| 5 | 4♣ | 9♣ |
10♣ | J♣ |
| 6 | 3♠ | 5♥ |
3♦ | 2♥ |
| 7 | 7♣ | 8♣ |
3♣ | 2♣ |
| 8 | 4♠ | 6♣ |
K♣ | A♣ |
| 9 | 6♠ | 7♠ |
Q♠ | Q♣ |
| 10 | 8♠ | 4♦ |
10♦ | 5♣ |
| 11 | J♦ | 5♦ |
Q♦ | 8♦ |
| 12 | J♠ | 6♦ |
K♦ | 9♦ |
| 13 | K♠ | 7♦ |
A♦ | 9♠ |
The dealer wins four odd tricks.
ILLUSTRATIVE HAND NO. 14
Trick 1.—Z’s only hope to win the
game is to establish and make the diamond suit in Y’s hand. To do
this it may be necessary to have an entry card.
Trick 2.—B very properly refuses to
part with the commanding diamond and waits until the last diamond has
been played from the dealer’s hand.
Trick 5.—There is little excuse for
the dealer’s play of the ace of clubs at this point. He cannot lose
by playing a low card.
OVERTAKING TO MAKE AN ENTRY CARD
It is the first game, score love all. Z, the dealer, makes it
“no-trump.”
No. 14
| | ♠ 9 8 3 |
| | ♣ J 7 |
| | ♦ K J 7 6 3 2 |
| | ♥ K Q |
| ♠ K Q 5 |
|
♠ J 10 7 |
| ♠ K Q 5 | ♣ Q 10 9 5 |
| ♦ 10 | ♦ A 9 5 |
| ♥ J 9 6 5 3 2 | ♥ 10 8 7 |
| | ♠ A 6 4 2 |
| | ♣ A 4 3 2 |
| | ♦ Q 8 4 |
| | ♥ A 4 |
| TRICK | A | Y |
B | Z |
| 1 | 5♥ | Q♥ |
7♥ | A♥ |
| 2 | 10♦ | 2♦ |
5♦ | Q♦ |
| 3 | 2♥ | J♦ |
9♦ | 8♦ |
| 4 | 3♥ | 3♦ |
A♦ | 4♦ |
| 5 | 6♣ | 7♣ |
5♣ | A♣ |
| 6 | 6♥ | K♥ |
8♥ | 4♥ |
| 7 | 5♠ | K♦ |
10♥ | 2♣ |
| 8 | 8♣ | 7♦ |
9♣ | 3♣ |
| 9 | 9♥ | 6♦ |
7♠ | 4♣ |
| 10 | Q♠ | 9♠ |
10♠ | A♠ |
| 11 | K♠ | 3♠ |
J♠ | 2♠ |
| 12 | J♥ | J♣ |
10♣ | 4♠ |
| 13 | K♣ | 8♠ |
Q♣ | 6♠ |
The dealer wins three odd tricks.
ILLUSTRATIVE HAND NO. 15
Trick 1.—It is wrong to hold up an
ace when one entire suit is against you. You must take the lead and
make all that is possible in the other suits.
Trick 2.—The spade suit looks
tempting, but the club suit is longer and the dealer cannot afford
to run the risk of the adversaries’ obtaining the lead. Hasty and
careless play to the first lead of clubs would ruin the hand. Y must
begin to unblock.
Trick 8.—The game is saved and
cannot be won unless the finesse in the spade suit is successful.
NOT HOLDING UP AN ACE.
UNBLOCKING
It is the rubber game, score twenty-four to nothing against the
dealer. Z, the dealer, makes it “no-trumps.”
No. 15
| | ♠ A 10 9 6 5 |
| | ♣ 10 9 4 |
| | ♦ 5 4 2 |
| | ♥ 7 4 |
| ♠ K 8 2 |
|
♠ 4 3 |
| ♣ Q 5 | ♣ J 6 |
| ♦ J 10 3 | ♦ A K Q 9 7 6 |
| ♥ Q 10 9 8 3 | ♥ K J 5 |
| | ♠ Q J 7 |
| | ♣ A K 8 7 3 2 |
| | ♦ 8 |
| | ♥ A 6 2 |
| TRICK | A | Y |
B | Z |
| 1 | 8♥ | 4♥ |
K♥ | A♥ |
| 2 | 5♣ | 9♣ |
6♣ | A♣ |
| 3 | Q♣ | 10♣ |
J♣ | K♣ |
| 4 | 3♦ | 4♣ |
6♦ | 8♣ |
| 5 | 10♦ | 7♥ |
3♠ | 7♣ |
| 6 | 3♥ | 2♦ |
4♠ | 3♣ |
| 7 | J♦ | 4♦ |
7♦ | 2♣ |
| 8 | 2♠ | 5♠ |
9♦ | Q♠ |
| 9 | 8♠ | 6♠ |
Q♦ | J♠ |
| 10 | K♠ | A♠ |
5♥ | 7♠ |
| 11 | 9♥ | 10♠ |
J♥ | 2♥ |
| 12 | 10♥ | 9♠ |
K♦ | 6♥ |
| 13 | Q♥ | 5♦ |
A♦ | 8♦ |
The dealer makes a small slam.
ILLUSTRATIVE HAND NO. 16
Tricks 1 and 2.—Z refuses to part
with the ace of hearts, and waits until B’s last heart has been
played.
Trick 4.—B cannot afford to win the
queen of clubs with the king. The dealer may have another club to
lead. As the dummy holds no card of entry, B hopes to block this suit
by waiting until the last club has been played from the dealer’s hand.
Trick 5.—The dealer can, without
doubt, make an extra trick by playing the ace of clubs, but he
imagines that the king of clubs is with A.
HOLDING UP A KING
It is the first game. Score 8-0 against the dealer. Z, the dealer,
declares “no-trumps.” A leads for the first trick.
No. 16
| | ♠ 5 4 2 |
| | ♣ A J 10 8 7 3 |
| | ♦ 8 6 |
| | ♥ 4 2 |
| ♠ J 8 6 |
|
♠ A 10 3 |
| ♣ 9 4 | ♣ K 6 2 |
| ♦ 10 9 5 | ♦ K J 4 2 |
| ♥ K Q J 5 3 | ♥ 10 8 6 |
| | ♠ K Q 9 7 |
| | ♣ Q 5 |
| | ♦ A Q 7 3 |
| | ♥ A 9 7 |
| TRICK | A | Y |
B | Z |
| 1 | K♥ | 2♥ |
6♥ | 7♥ |
| 2 | Q♥ | 4♥ |
8♥ | 9♥ |
| 3 | 3♥ | 2♠ |
10♥ | A♥ |
| 4 | 4♣ | 3♣ |
2♣ | Q♣ |
| 5 | 9♣ | 10♣ |
K♣ | 5♣ |
| 6 | 5♦ | 6♦ |
2♦ | Q♦ |
| 7 | 6♠ | 4♠ |
A♠ | K♠ |
| 8 | 9♦ | 8♦ |
K♦ | A♦ |
| 9 | 8♠ | 5♠ |
3♠ | Q♠ |
| 10 | J♠ | 7♣ |
10♠ | 7♠ |
| 11 | J♥ | 8♣ |
6♣ | 9♠ |
| 12 | 5♥ | J♣ |
4♦ | 3♦ |
| 13 | 10♦ | A♣ |
J♦ | 7♦ |
The dealer loses two odd tricks.
ILLUSTRATIVE HAND NO. 17
Trick 1.—To win the game Z must
establish and make the club suit; as A holds both queen and jack of
clubs, he must make one trick.
Trick 2.—A plays very badly in
attempting to win this trick. This mistake, however, is often made.
Should A refuse to win this trick it would be impossible for the
clubs in Y’s hand to make.
Trick 9.—B’s only hope is to find
his partner strong in spades.
OVERTAKING, LOSING A TRICK,
IN ORDER TO MAKE A SUIT
It is the rubber game, score love all. Z, the dealer, makes
it “no-trumps.”
No. 17
| | ♠ 8 6 4 |
| | ♣ K 10 9 8 6 5 |
| | ♦ 10 6 |
| | ♥ 5 4 |
| ♠ K 10 5 |
|
♠ Q J 3 |
| ♣ Q J 7 2 | ♣ —— |
| ♦ 5 4 2 | ♦ A J 9 7 3 |
| ♥ 9 8 3 | ♥ K J 10 6 2 |
| | ♠ A 9 7 2 |
| | ♣ A 4 3 |
| | ♦ K Q 8 |
| | ♥ A Q 7 |
| TRICK | A | Y |
B | Z |
| 1 | 2♣ | 5♣ |
2♥ | A♣ |
| 2 | J♣ | 6♣ |
3♦ | 4♣ |
| 3 | 9♥ | 4♥ |
6♥ | Q♥ |
| 4 | 7♣ | 8♣ |
7♦ | 3♣ |
| 5 | Q♣ | K♣ |
9♦ | 2♠ |
| 6 | 2♦ | 10♣ |
10♥ | 7♠ |
| 7 | 4♦ | 9♣ |
J♦ | 9♠ |
| 8 | 5♦ | 10♦ |
A♦ | 8♦ |
| 9 | 5♠ | 4♠ |
Q♠ | A♠ |
| 10 | 3♥ | 6♦ |
3♠ | K♦ |
| 11 | 8♥ | 5♥ |
J♠ | Q♦ |
| 12 | 10♠ | 6♠ |
J♥ | A♥ |
| 13 | K♠ | 8♠ |
K♥ | 7♥ |
The dealer wins four odd tricks.
ILLUSTRATIVE HAND NO. 18
Trick 2.—Should Z finesse and lose,
Y’s suit would be blocked and the adversary would undoubtedly take
out Y’s only re-entry card. The suit must be cleared before this
re-entry card is gone and many games and rubbers are lost by hasty
play in positions of this kind.
NOT TAKING A FINESSE
The score is eighteen to nothing against the dealer. Z deals and
makes it “no-trumps.”
No. 18
| | ♠ 8 7 |
| | ♣ J 10 9 6 5 4 |
| | ♦ 7 3 2 |
| | ♥ A K |
| ♠ Q 4 |
|
♠ K J 10 9 |
| ♣ K 8 | ♣ 7 3 2 |
| ♦ Q 9 6 | ♦ 10 8 5 |
| ♥ Q J 8 7 6 2 | ♥ 10 9 5 |
| | ♠ A 6 5 3 2 |
| | ♣ A Q |
| | ♦ A K J 4 |
| | ♥ 4 3 |
| TRICK | A | Y |
B | Z |
| 1 | 7♥ | K♥ |
5♥ | 3♥ |
| 2 | 8♣ | 4♣ |
2♣ | A♣ |
| 3 | K♣ | 5♣ |
3♣ | Q♣ |
| 4 | 2♥ | A♥ |
9♥ | 4♥ |
| 5 | 6♥ | J♣ |
7♣ | 2♠ |
| 6 | 4♠ | 10♣ |
8♦ | 3♠ |
| 7 | 8♥ | 9♣ |
5♦ | 5♠ |
| 8 | J♥ | 6♣ |
9♠ | 6♠ |
| 9 | 6♦ | 2♦ |
10♦ | K♦ |
| 10 | 9♦ | 3♦ |
10♠ | A♦ |
| 11 | Q♠ | 7♠ |
J♠ | A♠ |
| 12 | Q♦ | 7♦ |
10♥ | 4♦ |
| 13 | Q♥ | 8♠ |
K♠ | J♦ |
The dealer wins four odd tricks.
ILLUSTRATIVE HAND NO. 19
Trick 1.—Should Z refuse to win the
first round of spades with the king, his hand may be led through
and the king captured. He cannot gain by holding up this high card
unless the original leader holds a six-card spade suit as well as
the ace of hearts. In other words, he will lose if A has a four-or a
five-card suit, and can only win if A holds a six-card suit and the
ace of hearts. In the play of any hand, the usual, not the unusual
distribution of the cards should be considered.
Trick 2.—Z must play the hand with
a certain goal in view—eight tricks. If he leads the diamonds,
he is compelled to guess, and a wrong guess would be disastrous.
As the ace of hearts must win, Z hopes, by allowing the spades to
make, to obtain information which will guide him to a successful
finesse.
Tricks 4, 5, and 6.—Why does B
protect both clubs and diamonds?
Trick 9.—A’s discard of the two
of diamonds is informative and as B is protecting the diamond suit
the dealer can safely infer the location of the queen.
FORCING DISCARDS TO LOCATE A FINESSE
It is the rubber game, score twelve to twenty-four against the
dealer. Z passes the make. Y declares “no-trumps.”
No. 19
| | ♠ 9 5 |
| | ♣ A 8 7 3 |
| | ♦ A 10 8 6 |
| | ♥ K Q 3 |
| ♠ A J 10 7 6 |
|
♠ Q 4 |
| ♣ K 10 6 | ♣ Q 5 4 |
| ♦ 9 4 2 | ♦ Q 5 3 |
| ♥ 8 2 | ♥ A 9 6 5 4 |
| | ♠ K 8 3 2 |
| | ♣ J 9 2 |
| | ♦ K J 7 |
| | ♥ J 10 7 4 |
| TRICK | A | Y |
B | Z |
| 1 | 7♠ | 5♠ |
Q♠ | K♠ |
| 2 | 2♥ | Q♥ |
A♥ | 7♥ |
| 3 | 10♠ | 9♠ |
4♠ | 2♠ |
| 4 | A♠ | 3♣ |
4♥ | 3♠ |
| 5 | J♠ | 7♣ |
5♥ | 8♠ |
| 6 | 6♠ | 8♣ |
6♥ | 2♣ |
| 7 | 6♣ | A♣ |
4♣ | 9♣ |
| 8 | 8♥ | 3♥ |
9♥ | J♥ |
| 9 | 2♦ | K♥ |
5♣ | 10♥ |
| 10 | 4♦ | 6♦ |
3♦ | J♦ |
| 11 | 9♦ | 8♦ |
5♦ | K♦ |
| 12 | 10♣ | A♦ |
Q♦ | 7♦ |
| 13 | K♣ | 10♦ |
Q♣ | J♣ |
The dealer wins two odd tricks.
ILLUSTRATIVE HAND NO. 20
Trick 2.—Z cannot afford to lead
diamonds from Y’s hand, as this would take out the only entry card.
Trick 3.—B waits until Z’s last
diamond has been played.
Trick 6.—Z endeavours to establish
an entry card for Y by sacrificing a high card from his own hand. B
again tries to block the dealer’s game.
Trick 7.—The ace of hearts is now
marked with B, and the Finesse Obligatory must be taken. Unless the
jack of hearts lies with A, Y can never make the diamond suit.
Trick 11.—It is very difficult
for A to mark the two of clubs.
DESCHAPELLES COUP. FINESSE OBLIGATORY
It is the rubber game, score love all. Z, the dealer, makes it
“no-trumps.”
No. 20
| | ♠ 9 8 5 4 |
| | ♣ 8 |
| | ♦ J 9 7 5 4 |
| | ♥ Q 10 6 |
| ♠ K 10 6 |
|
♠ Q J 7 |
| ♣ 10 7 6 5 3 | ♣ J 9 4 |
| ♦ 10 6 | ♦ K 8 3 |
| ♥ J 3 2 | ♥ A 9 5 4 |
| | ♠ A 3 2 |
| | ♣ A K Q 2 |
| | ♦ A Q 2 |
| | ♥ K 8 7 |
| TRICK | A | Y |
B | Z |
| 1 | 5♣ | 8♣ |
J♣ | A♣ |
| 2 | 6♦ | 4♦ |
3♦ | A♦ |
| 3 | 10♦ | 5♦ |
8♦ | Q♦ |
| 4 | 6♠ | 7♦ |
K♦ | 2♦ |
| 5 | 3♣ | 4♠ |
9♣ | K♣ |
| 6 | 2♥ | 6♥ |
4♥ | K♥ |
| 7 | 3♥ | 10♥ |
A♥ | 8♥ |
| 8 | 6♣ | 5♠ |
4♣ | Q♣ |
| 9 | J♥ | Q♥ |
5♥ | 7♥ |
| 10 | 7♣ | J♦ |
9♥ | 2♠ |
| 11 | 10♠ | 9♦ |
7♠ | 3♠ |
| 12 | K♠ | 9♠ |
J♠ | A♠ |
| 13 | 10♣ | 8♠ |
Q♠ | 2♣ |
The dealer wins four odd tricks.
ILLUSTRATIVE HAND NO. 21
Trick 2.—Z infers that the
adversaries will not continue with the spade suit as Y holds a tenace
over A’s cards. Every suit is protected, but it would be dangerous to
have clubs led through, for, should A obtain the lead, this entire
suit might be brought in. In all probability the adversaries will
make a trick in diamonds and Z prefers that the first be taken by B.
Trick 3.—B leads an irregular card in hearts
so that A can mark his suit. Z cannot afford to have A lead and so takes this trick.
NOT ALLOWING ADVERSARY TO LEAD
THROUGH A ONCE GUARDED KING
It is the rubber game, score eight to twenty against the dealer.
Z deals and makes it “no-trumps.”
No. 21
| | ♠ K J 7 |
| | ♣ K 7 |
| | ♦ K 8 3 |
| | ♥ 10 8 5 4 3 |
| ♠ Q 10 9 6 3 |
|
♠ 8 2 |
| ♣ 10 8 4 | ♣ A Q J 9 5 3 |
| ♦ Q 7 2 | ♦ J 9 |
| ♥ K J | ♥ Q 9 2 |
| | ♠ A 5 4 |
| | ♣ 6 2 |
| | ♦ A 10 6 5 4 |
| | ♥ A 7 6 |
| TRICK | A | Y |
B | Z |
| 1 | 6♠ | 7♠ |
8♠ | A♠ |
| 2 | 2♦ | 8♦ |
J♦ | 4♦ |
| 3 | J♥ | 3♥ |
9♥ | A♥ |
| 4 | 7♦ | K♦ |
9♦ | 5♦ |
| 5 | Q♦ | 3♦ |
2♠ | A♦ |
| 6 | 4♣ | 4♥ |
3♣ | 10♦ |
| 7 | 8♣ | 5♥ |
5♣ | 6♦ |
| 8 | 3♠ | J♠ |
9♣ | 5♠ |
| 9 | 9♠ | K♠ |
J♣ | 4♠ |
| 10 | K♥ | 10♥ |
2♥ | 6♥ |
| 11 | Q♠ | 8♥ |
Q♣ | 7♥ |
| 12 | 10♠ | 7♣ |
Q♥ | 2♣ |
| 13 | 10♣ | K♣ |
A♣ | 6♣ |
The dealer wins two odd tricks.
ILLUSTRATIVE HAND NO. 22
Trick 1.—Z hopes to exhaust the
hearts in B’s hand.
Trick 4.—To make two odd tricks
is simple. To win the game A must not get the lead. With an
established suit against you, you should not take a finesse, which
would allow the adversary with the established suit to obtain the
lead. To lead the queen of clubs from Y’s hands would be dangerous.
The possibilities lie in the diamond suit. Z, therefore, leads a
diamond and allows B to win the trick. The dealer must play the ace
of clubs, for, should the diamonds fall, the game is assured.
NOT ALLOWING AN ESTABLISHED
SUIT TO MAKE
It is the rubber game, score twenty-four to nothing against the
dealer. Z deals and makes it “no-trumps.”
No. 22
| | ♠ Q J 3 |
| | ♣ Q 9 |
| | ♦ A K 8 6 5 2 |
| | ♥ 7 6 |
| ♠ 9 7 5 |
|
♠ 8 6 2 |
| ♣ K 8 | ♣ 6 4 3 2 |
| ♦ Q 4 3 | ♦ J 10 9 |
| ♥ K Q J 10 5 | ♥ 9 4 2 |
| | ♠ A K 10 4 |
| | ♣ A J 10 7 5 |
| | ♦ 7 |
| | ♥ A 8 3 |
| TRICK | A | Y |
B | Z |
| 1 | K♥ | 6♥ |
2♥ | 3♥ |
| 2 | 10♥ | 7♥ |
4♥ | 8♥ |
| 3 | J♥ | 3♠ |
9♥ | A♥ |
| 4 | 3♦ | 2♦ |
9♦ | 7♦ |
| 5 | 8♣ | 9♣ |
2♣ | A♣ |
| 6 | 5♠ | J♠ |
2♠ | 4♠ |
| 7 | 4♦ | A♦ |
10♦ | 5♣ |
| 8 | Q♦ | K♦ |
J♦ | 7♣ |
| 9 | 7♠ | 8♦ |
6♠ | 10♣ |
| 10 | 9♠ | 6♦ |
8♠ | J♣ |
| 11 | 5♥ | 5♦ |
3♣ | 10♠ |
| 12 | Q♥ | Q♠ |
4♣ | K♠ |
| 13 | K♣ | Q♣ |
6♣ | A♠ |
The dealer wins four odd tricks.
ILLUSTRATIVE HAND NO. 23
Trick 3.—With four spades in B’s
hand, to make this suit Z must allow B to win the first trick.
Trick 10.—Z hopes to make the
king of diamonds by leading from the weak hand.
“DUCKING”
It is the first game, score love all. Z, the dealer, makes it
“no-trumps.”
No. 23
| | ♠ A K Q 10 7 5 4 |
| | ♣ 9 6 4 |
| | ♦ 10 7 |
| | ♥ 3 |
| ♠ —— |
|
♠ J 9 3 2 |
| ♣ Q 10 8 5 | ♣ K J |
| ♦ Q 6 3 2 | ♦ A J 9 4 |
| ♥ Q 10 7 6 4 | ♥ 9 8 5 |
| | ♠ 8 6 |
| | ♣ A 7 3 2 |
| | ♦ K 8 5 |
| | ♥ A K J 2 |
| TRICK | A | Y |
B | Z |
| 1 | 6♥ | 3♥ |
8♥ | J♥ |
| 2 | 2♦ | 4♠ |
9♠ | 8♠ |
| 3 | 4♥ | 4♣ |
9♥ | A♥ |
| 4 | 5♣ | Q♠ |
2♠ | 6♠ |
| 5 | 7♥ | A♠ |
3♠ | 2♣ |
| 6 | 8♣ | K♠ |
J♠ | 3♣ |
| 7 | 10♣ | 10♠ |
4♦ | 7♣ |
| 8 | Q♣ | 7♠ |
9♦ | 5♦ |
| 9 | 10♥ | 5♠ |
J♦ | 2♥ |
| 10 | 3♦ | 7♦ |
A♦ | 8♦ |
| 11 | Q♥ | 10♦ |
5♥ | K♥ |
| 12 | 6♦ | 6♣ |
J♣ | K♦ |
| 13 | Q♦ | 9♣ |
K♣ | A♣ |
The dealer wins five odd tricks.
ILLUSTRATIVE HAND NO. 24
Holding the ace, king, and jack of a suit, provided the queen is
not in dummy, it is often advisable to wait until your partner can
lead through the dealer’s hand. To lead through a king in dummy is
sound play, especially when you hold a sequence. Z cannot gain by
covering the honour led. He hopes that the ace will fall to the first
or second lead.
Trick 5.—B indicates his suit
before returning his partner’s original lead.
LEADING THROUGH DUMMY’S STRENGTH
It is the first game, score eight to nothing against the dealer.
Z, the dealer, passes the make. Y declares hearts.
No. 24
| | ♠ J 2 |
| | ♣ K 9 8 |
| | ♦ 6 4 3 |
| | ♥ A Q J 7 5 |
| ♠ 10 7 5 |
|
♠ A K 6 4 |
| ♣ Q J 10 | ♣ A 6 5 4 |
| ♦ A K J 5 | ♦ 9 8 2 |
| ♥ K 6 3 | ♥ 8 2 |
| | ♠ Q 9 8 3 |
| | ♣ 7 3 2 |
| | ♦ Q 10 7 |
| | ♥ 10 9 4 |
| TRICK | A | Y |
B | Z |
| 1 | K♦ | 3♦ |
2♦ | 7♦ |
| 2 | Q♣ | 8♣ |
4♣ | 2♣ |
| 3 | J♣ | 9♣ |
5♣ | 3♣ |
| 4 | 10♣ | K♣ |
A♣ | 7♣ |
| 5 | 5♠ | 2♠ |
K♠ | 3♠ |
| 6 | J♦ | 4♦ |
9♦ | 10♦ |
| 7 | A♦ | 6♦ |
8♦ | Q♦ |
| 8 | 7♠ | J♠ |
A♠ | 8♠ |
| 9 | 10♠ | 5♥ |
4♠ | 9♠ |
| 10 | 3♥ | A♥ |
2♥ | 4♥ |
| 11 | K♥ | 7♥ |
8♥ | 9♥ |
| 12 | 5♦ | J♥ |
6♣ | Q♠ |
| 13 | 6♥ | Q♥ |
6♠ | 10♥ |
The dealer loses three odd tricks.
ILLUSTRATIVE HAND NO. 25
Trick 1.—Many players would be
tempted to lead the supporting diamond rather than to open the
four-card suit.
Trick 2.—Should B lead the ace of
spades the ruff would be established in the weak hand. As B holds
protection in all of the suits, his best play is to lead trumps
through the strong hand.
Trick 3.—It would be bad play for
A to return his partner’s lead of trumps. He holds the king of trumps
protected and must wait until his partner can again lead through the
dealer’s hand. It would be wrong to continue his original lead of
spades, as the dealer could then stop the lead of trumps and give
dummy the ruff. A infers from his partner’s lead of trumps that
he holds strength in the other suits, and the ten of diamonds is
undoubtedly his best play.
Trick 4.—B again leads through
the strong trump hand, A makes his king and leads his losing trump to
draw two for one. No matter how the dealer may play he cannot prevent
his adversaries from making the remaining tricks in spades or in
diamonds, it being impossible to obtain the lead in dummy.
PREVENTING THE WEAK HAND
FROM RUFFING
It is the rubber game, score sixteen to eight in favour of the
dealer. Z, the dealer, makes it hearts and A leads for the first trick.
No. 25
| | ♠ 5 4 |
| | ♣ K Q 6 5 2 |
| | ♦ K J 4 |
| | ♥ 7 6 4 |
| ♠ Q 10 9 2 |
|
♠ A K 6 |
| ♣ 9 7 4 | ♣ J 10 8 3 |
| ♦ 10 9 5 | ♦ A Q 8 2 |
| ♥ K J 2 | ♥ 5 3 |
| | ♠ J 8 7 3 |
| | ♣ A |
| | ♦ 7 6 3 |
| | ♥ A Q 10 9 8 |
| TRICK | A | Y |
B | Z |
| 1 | 2♠ | 4♠ |
K♠ | 3♠ |
| 2 | J♥ | 4♥ |
5♥ | 8♥ |
| 3 | 10♦ | J♦ |
Q♦ | 3♦ |
| 4 | K♥ | 6♥ |
3♥ | 9♥ |
| 5 | 2♥ | 7♥ |
2♦ | 10♥ |
| 6 | 4♣ | 2♣ |
3♣ | A♣ |
| 7 | 5♦ | K♦ |
A♦ | 6♦ |
| 8 | 9♠ | 5♠ |
A♠ | 7♠ |
| 9 | 10♠ | 4♦ |
6♠ | 8♠ |
| 10 | Q♠ | 5♣ |
8♦ | J♠ |
| 11 | 9♦ | 6♣ |
8♣ | 7♦ |
| 12 | 7♣ | Q♣ |
10♣ | Q♥ |
| 13 | 9♣ | K♣ |
J♣ | A♥ |
The dealer loses three odd tricks.
ILLUSTRATIVE HAND NO. 26
Trick 1.—A is almost strong enough
to lead the trump originally, but holding the ace and king of a suit
his best play is to take a view of the dummy hand.
Trick 2.—The queen of spades falling
in the dealer’s hand indicates that the weak hand will ruff. A leads
trumps through the strong hand.
Trick 3.—B has no reason to wait for
the trumps to be led through again, as he does not hold a tenace over
dummy. He, therefore, leads the ace and then a low trump in order to
exhaust trumps from the weak hand.
PREVENTING THE WEAK HAND
FROM RUFFING
It is the first game, score love all. Z, the dealer, passes the
make. Y declares hearts. A leads for the first trick.
No. 26
| | ♠ 9 4 3 2 |
| | ♣ A K 6 |
| | ♦ 7 |
| | ♥ K J 9 5 3 |
| ♠ A K J 10 |
|
♠ 8 7 6 5 |
| ♣ Q J 8 3 | ♣ 10 2 |
| ♦ A Q 2 | ♦ K J 8 4 |
| ♥ 7 6 | ♥ A Q 8 |
| | ♠ Q |
| | ♣ 9 7 5 4 |
| | ♦ 10 9 6 5 3 |
| | ♥ 10 4 2 |
| TRICK | A | Y |
B | Z |
| 1 | K♠ | 2♠ |
5♠ | Q♠ |
| 2 | 7♥ | 3♥ |
Q♥ | 2♥ |
| 3 | 6♥ | 5♥ |
A♥ | 4♥ |
| 4 | 2♦ | 9♥ |
8♥ | 10♥ |
| 5 | 3♣ | K♣ |
2♣ | 4♣ |
| 6 | 8♣ | A♣ |
10♣ | 5♣ |
| 7 | J♣ | 6♣ |
6♠ | 7♣ |
| 8 | A♠ | 3♠ |
7♠ | 9♣ |
| 9 | J♠ | 4♠ |
8♠ | 3♦ |
| 10 | 10♠ | 9♠ |
4♦ | 5♦ |
| 11 | A♦ | 7♦ |
8♦ | 6♦ |
| 12 | Q♣ | J♥ |
J♦ | 9♦ |
| 13 | Q♦ | K♥ |
K♦ | 10♦ |
The dealer loses two odd tricks.
ILLUSTRATIVE HAND NO. 27
Trick 2.—The dealer after taking
the force leads trumps in order to bring in the established spade suit.
Trick 4.—This is the critical point
in the hand. A can continue to force the strong trump hand, but as
the trumps are evidently all established in the dealer’s hand, it
would enable the dealer to take out the remaining trumps and make the spades.
This situation is interesting and deserves careful study. It is too
late to force when the adversary holds an established suit against you.
You must make what you can in the other suits before giving up the lead.
Trick 5.—A overtakes the queen of
clubs in order to continue the lead.
Trick 7.—B discards his only spade.
Trick 8.—A gives B the
opportunity to make his losing trump.
NOT FORCING
It is the first game, score love all. Z, the dealer, makes it hearts.
No. 27
| | ♠ A K Q J 8 7 6 |
| | ♣ 10 8 |
| | ♦ 10 8 |
| | ♥ J 9 |
| ♠ 10 2 |
|
♠ 9 |
| ♣ K J 9 2 | ♣ A Q 6 |
| ♦ A K Q J 7 | ♦ 9 6 5 4 3 2 |
| ♥ A 5 | ♥ 7 4 2 |
| | ♠ 5 4 3 |
| | ♣ 7 5 4 3 |
| | ♦ —— |
| | ♥ K Q 10 8 6 3 |
| TRICK | A | Y |
B | Z |
| 1 | K♦ | 8♦ |
2♦ | 3♥ |
| 2 | 5♥ | J♥ |
2♥ | 6♥ |
| 3 | A♥ | 9♥ |
4♥ | K♥ |
| 4 | 2♣ | 8♣ |
A♣ | 3♣ |
| 5 | K♣ | 10♣ |
Q♣ | 4♣ |
| 6 | J♣ | 10♦ |
6♣ | 5♣ |
| 7 | 9♣ | 6♠ |
9♠ | 7♣ |
| 8 | 10♠ | J♠ |
7♥ | 3♠ |
| 9 | 7♦ | 7♠ |
3♦ | 8♥ |
| 10 | 2♠ | 8♠ |
4♦ | 4♠ |
| 11 | J♦ | Q♠ |
5♦ | 5♠ |
| 12 | Q♦ | K♠ |
6♦ | 10♥ |
| 13 | A♦ | A♠ |
9♦ | Q♥ |
The dealer wins the odd trick.
ILLUSTRATIVE HAND NO. 28
Trick 1.—Z false cards the ace of
hearts to tempt A to again lead the suit.
Trick 3.—The correct play of third
hand is high unless two or more honours are held in sequence, in
which case the lower honour is played. B’s play of the jack denies
the ten and the king. It would, therefore, be bad play for A to
continue his suit. He must wait until his partner can lead through
the dealer’s hand.
A’s best lead is through the strength of the dummy hand, and he leads
the highest card of his sequence.
Trick 4.—B must wait until his
partner can again lead through the king of diamonds, and so returns
his partner’s original lead.
INFERENCE
It is the rubber game, score twenty-four to nothing against
the dealer. Z, the dealer, makes it “no trumps.”
No. 28
| | ♠ 10 5 3 2 |
| | ♣ 9 7 4 |
| | ♦ K J 3 2 |
| | ♥ 8 2 |
| ♠ 7 6 4 |
|
♠ Q J 9 8 |
| ♣ A K | ♣ 6 2 |
| ♦ 10 9 5 | ♦ A Q 8 4 |
| ♥ Q 9 7 6 3 | ♥ J 5 4 |
| | ♠ A K |
| | ♣ Q J 10 8 5 3 |
| | ♦ 7 6 |
| | ♥ A K 10 |
| TRICK | A | Y |
B | Z |
| 1 | 6♥ | 2♥ |
J♥ | A♥ |
| 2 | K♣ | 4♣ |
2♣ | Q♣ |
| 3 | 10♦ | J♦ |
Q♦ | 6♦ |
| 4 | Q♥ | 8♥ |
5♥ | 10♥ |
| 5 | 9♥ | 2♠ |
4♥ | K♥ |
| 6 | A♣ | 7♣ |
6♣ | J♣ |
| 7 | 7♥ | 3♠ |
8♠ | 7♦ |
| 8 | 3♥ | 5♠ |
9♠ | 3♣ |
| 9 | 9♦ | 2♦ |
4♦ | 5♣ |
| 10 | 5♦ | 3♦ |
8♦ | 8♣ |
| 11 | 4♠ | K♦ |
A♦ | K♠ |
| 12 | 6♠ | 10♠ |
Q♠ | A♠ |
| 13 | 7♠ | 9♣ |
J♠ | 10♣ |
The dealer loses three odd tricks.
ILLUSTRATIVE HAND NO. 29
Trick 1.—With three cards of
re-entry in his hand A can afford to lead one of them in order to
gain information as to the position of the cards in his long suit.
Winning the first trick, A can clearly see the situation. The play of
the two of hearts by B indicates that he cannot hold four cards in
the heart suit. Should A continue leading hearts he must establish
one or more cards in the dealer’s hand.
Trick 3.—A cannot afford to lead
spades, as Y holds a double major tenace over his hand. As Z, the
dealer, has passed the make, A can mark strength in the diamond suit
with B. He, therefore, abandons his own suit and endeavours to help
his partner by leading the singleton diamond. B overtakes the jack of
diamonds and continues with the suit.
INFERENCE
It is the rubber game, score twenty to nothing against the dealer.
Z, the dealer, passes the make. Y declares “no-trump.”
No. 29
| | ♠ A Q 10 |
| | ♣ A Q J 8 4 2 |
| | ♦ A 2 |
| | ♥ 8 5 |
| ♠ K J 8 5 4 3 |
|
♠ 7 |
| ♣ 9 7 | ♣ K 6 |
| ♦ J | ♦ K Q 10 9 8 7 6 |
| ♥ A K Q 3 | ♥ 7 6 2 |
| | ♠ 9 6 2 |
| | ♣ 10 5 3 |
| | ♦ 5 4 3 |
| | ♥ J 10 9 4 |
| TRICK | A | Y |
B | Z |
| 1 | K♥ | 5♥ |
2♥ | 4♥ |
| 2 | Q♥ | 8♥ |
6♥ | J♥ |
| 3 | J♦ | 2♦ |
Q♦ | 3♦ |
| 4 | 3♠ | A♦ |
6♦ | 4♦ |
| 5 | 7♣ | A♣ |
6♣ | 3♣ |
| 6 | 9♣ | Q♣ |
K♣ | 5♣ |
| 7 | 4♠ | 10♠ |
K♦ | 5♦ |
| 8 | 5♠ | Q♠ |
10♦ | 2♠ |
| 9 | 8♠ | 2♣ |
9♦ | 6♠ |
| 10 | J♠ | 4♣ |
8♦ | 9♠ |
| 11 | K♠ | 8♣ |
7♦ | 10♣ |
| 12 | A♥ | J♣ |
7♥ | 10♥ |
| 13 | 3♥ | A♠ |
7♠ | 9♥ |
The dealer loses four odd tricks.
ILLUSTRATIVE HAND NO. 30
Trick 1.—B’s play of the queen
denies the jack, which A marks with the dealer.
Trick 2.—The dealer can lead his
high spades, but this lead might establish a trick in the suit for
his adversaries. His best play is to conceal the strength in this
suit, and to establish the club suit.
Trick 3.—A is placed in a difficult
position; if he continues with his diamonds the jack will make. He
must place the lead with B so that the dealer’s hand may be led
through. The heart suit is better than the spade suit, as dummy holds
an honour to lead through.
Trick 4.—B must wait until his
partner can again lead through the king of hearts, and so returns A’s
original lead.
Should A continue with the lead of diamonds at trick two the dealer
would win four odd tricks instead of losing that number.
INFERENCE
It is the rubber game, score sixteen to nothing against the dealer.
Z, the dealer, makes it “no-trump.”
No. 30
| | ♠ 9 8 7 5 |
| | ♣ 8 6 5 4 |
| | ♦ 8 3 |
| | ♥ K 8 7 |
| ♠ 4 3 2 |
|
♠ J 10 6 |
| ♣ A 3 | ♣ 10 2 |
| ♦ K 10 9 7 2 | ♦ Q 6 5 |
| ♥ 6 5 2 | ♥ A Q J 9 4 |
| | ♠ A K Q |
| | ♣ K Q J 9 7 |
| | ♦ A J 4 |
| | ♥ 10 3 |
| TRICK | A | Y |
B | Z |
| 1 | 7♦ | 3♦ |
Q♦ | A♦ |
| 2 | A♣ | 4♣ |
2♣ | K♣ |
| 3 | 6♥ | 7♥ |
J♥ | 3♥ |
| 4 | 9♦ | 8♦ |
6♦ | 4♦ |
| 5 | K♦ | 5♣ |
5♦ | J♦ |
| 6 | 10♦ | 6♣ |
10♣ | 10♥ |
| 7 | 2♦ | 8♣ |
6♠ | 7♣ |
| 8 | 5♥ | 8♥ |
Q♥ | 9♣ |
| 9 | 2♥ | K♥ |
A♥ | J♣ |
| 10 | 3♣ | 5♠ |
9♥ | Q♠ |
| 11 | 2♠ | 7♠ |
4♥ | K♠ |
| 12 | 3♠ | 8♠ |
10♠ | A♠ |
| 13 | 4♠ | 9♠ |
J♠ | Q♣ |
The dealer loses four odd tricks.
ILLUSTRATIVE HAND NO. 31
Trick 2.—B’s return of the three
of hearts shows the situation to A. It is the rule at “no-trump” to
return partner’s suit with your highest card. A can mark Z with two
cards in the suit higher than the three.
Trick 3.—It would be bad play for
A to lead his king of hearts, as this would establish the queen for
Z. A opens the low diamond, hoping that B can obtain the lead.
LEADING THROUGH
It is the rubber game, score love all. Z, the dealer, makes
it “no-trump.”
No. 31
| | ♠ K Q J 4 3 |
| | ♣ K Q J 7 |
| | ♦ J 5 2 |
| | ♥ 10 |
| ♠ 6 5 |
|
♠ 8 7 2 |
| ♣ 9 3 | ♣ 10 6 5 4 |
| ♦ Q 10 6 4 | ♦ A 7 3 |
| ♥ K J 8 7 6 | ♥ A 3 2 |
| | ♠ A 10 9 |
| | ♣ A 8 2 |
| | ♦ K 9 8 |
| | ♥ Q 9 5 4 |
| TRICK | A | Y |
B | Z |
| 1 | 7♥ | 10♥ |
A♥ | 4♥ |
| 2 | J♥ | 2♦ |
3♥ | 9♥ |
| 3 | 4♦ | 5♦ |
A♦ | 8♦ |
| 4 | 6♥ | J♦ |
2♥ | 5♥ |
| 5 | K♥ | 7♣ |
3♦ | Q♥ |
| 6 | 8♥ | 3♠ |
7♦ | 9♦ |
| 7 | Q♦ | 4♠ |
2♠ | K♦ |
| 8 | 5♠ | J♠ |
7♠ | A♠ |
| 9 | 6♠ | Q♠ |
8♠ | 10♠ |
| 10 | 3♣ | K♠ |
4♣ | 9♠ |
| 11 | 9♣ | K♣ |
5♣ | 2♣ |
| 12 | 6♦ | Q♣ |
6♣ | 8♣ |
| 13 | 10♦ | J♣ |
10♣ | A♣ |
The dealer wins the odd trick.
ILLUSTRATIVE HAND NO. 32
Trick 1.—B’s play of the jack denies
the ace, which must be with the dealer.
Trick 2.—Should A allow the queen of
hearts to win this trick, his re-entry card would be taken out before
his suit is cleared. He must overtake his partner’s card in order to
establish the suit.
Trick 4.—The dealer hopes that the
ace of clubs is with B, as this would shut out A’s heart suit.
OVERTAKING BY THE ADVERSARY
It is the second game, score twenty-four to nothing against
the dealer. Z, the dealer, makes it “no-trump.”
No. 32
| | ♠ Q 4 2 |
| | ♣ 10 9 6 |
| | ♦ A J 10 5 4 |
| | ♥ 5 3 |
| ♠ 9 8 3 |
|
♠ J 10 6 5 |
| ♣ A 7 | ♣ 5 4 3 |
| ♦ 8 3 | ♦ Q 9 7 2 |
| ♥ K 10 9 8 6 4 | ♥ Q J |
| | ♠ A K 7 |
| | ♣ K Q J 8 2 |
| | ♦ K 6 |
| | ♥ A 7 2 |
| TRICK | A | Y |
B | Z |
| 1 | 8♥ | 3♥ |
J♥ | 2♥ |
| 2 | K♥ | 5♥ |
Q♥ | 7♥ |
| 3 | 4♥ | 2♠ |
4♣ | A♥ |
| 4 | A♣ | 6♣ |
3♣ | K♣ |
| 5 | 10♥ | 4♦ |
5♣ | 7♠ |
| 6 | 9♥ | 5♦ |
2♦ | 2♣ |
| 7 | 6♥ | 10♦ |
5♠ | 8♣ |
| 8 | 8♦ | J♦ |
Q♦ | K♦ |
| 9 | 7♣ | 9♣ |
6♠ | Q♣ |
| 10 | 3♦ | 10♣ |
10♠ | J♣ |
| 11 | 3♠ | 4♠ |
J♠ | A♠ |
| 12 | 8♠ | Q♠ |
7♦ | K♠ |
| 13 | 9♠ | A♦ |
9♦ | 6♦ |
The dealer wins the odd trick.
ILLUSTRATIVE HAND NO. 33
Trick 2.—As A holds no card of
re-entry except the ace of diamonds, he cannot afford to win this
trick. He must trust B for a card of re-entry and a diamond to lead.
The play can only lose one trick, and it may save the game.
Trick 3.—Z must establish the spade suit.
REFUSING TO PLAY THE HIGH
CARD OF A LONG SUIT
It is the rubber game, score love all. Z, the dealer, makes
it “no-trumps.”
No. 33
| | ♠ 9 8 7 |
| | ♣ J 10 7 5 |
| | ♦ K 4 2 |
| | ♥ K Q 5 |
| ♠ 6 2 |
|
♠ A 5 3 |
| ♣ 9 6 2 | ♣ K 8 3 |
| ♦ A 10 7 6 5 | ♦ Q 9 3 |
| ♥ 6 4 3 | ♥ 10 9 8 7 |
| | ♠ K Q J 10 4 |
| | ♣ A Q 4 |
| | ♦ J 8 |
| | ♥ A J 2 |
| TRICK | A | Y |
B | Z |
| 1 | 6♦ | 2♦ |
Q♦ | 8♦ |
| 2 | 5♦ | 4♦ |
9♦ | J♦ |
| 3 | 2♠ | 7♠ |
A♠ | 4♠ |
| 4 | A♦ | K♦ |
3♦ | 4♣ |
| 5 | 10♦ | 8♠ |
3♠ | Q♣ |
| 6 | 7♦ | 9♠ |
5♠ | 2♥ |
| 7 | 9♣ | 5♣ |
3♣ | A♣ |
| 8 | 6♠ | 7♣ |
8♣ | K♠ |
| 9 | 2♣ | 10♣ |
7♥ | Q♠ |
| 10 | 6♣ | J♣ |
8♥ | J♠ |
| 11 | 3♥ | 5♥ |
9♥ | 10♠ |
| 12 | 4♥ | Q♥ |
10♥ | A♥ |
| 13 | 6♥ | K♥ |
K♣ | J♥ |
The dealer wins two by cards.
ILLUSTRATIVE HAND NO. 34
Trick 1.—B wins the first trick
with his lower honour in sequence.
Trick 2.—The usual rule at
“no-trump” is to return partner’s lead with your highest card. This
is done to prevent blocking and in order not to mislead. To arrange
the lead, B returns the low spade, knowing that he can neither
deceive nor block his partner’s suit. He arranges the lead so that
hearts may be led through the dealer’s hand.
ARRANGING THE LEAD
It is the first game, score love all. Z, the dealer, makes it “no-trump.”
No. 34
| | ♠ 2 |
| | ♣ J 6 4 3 |
| | ♦ 9 8 7 6 2 |
| | ♥ 5 3 2 |
| ♠ A J 9 7 6 |
|
♠ K Q 5 4 3 |
| ♣ 8 7 2 | ♣ 10 9 |
| ♦ 5 4 | ♦ J 10 |
| ♥ A 8 4 | ♥ Q J 10 7 |
| | ♠ 10 8 |
| | ♣ A K Q 5 |
| | ♦ A K Q 3 |
| | ♥ K 9 6 |
| TRICK | A | Y |
B | Z |
| 1 | 7♠ | 2♠ |
Q♠ | 8♠ |
| 2 | J♠ | 2♥ |
3♠ | 10♠ |
| 3 | A♠ | 3♥ |
4♠ | 3♦ |
| 4 | 9♠ | 5♥ |
5♠ | Q♣ |
| 5 | 6♠ | 3♣ |
K♠ | K♣ |
| 6 | 4♥ | 4♣ |
Q♥ | 6♥ |
| 7 | 8♥ | 2♦ |
J♥ | 9♥ |
| 8 | A♥ | 6♦ |
7♥ | K♥ |
| 9 | 8♣ | 6♣ |
9♣ | A♣ |
| 10 | 4♦ | 7♦ |
10♦ | A♦ |
| 11 | 5♦ | 8♦ |
J♦ | K♦ |
| 12 | 2♣ | 9♦ |
10♥ | Q♦ |
| 13 | 7♣ | J♣ |
10♣ | 5♣ |
The dealer loses two odd tricks.
ILLUSTRATIVE HAND NO. 35
Trick 1.—With the ace and a small
card, to your partner’s high card lead at “no-trumps,” the ace should
usually be played, but B cannot afford to overtake his partner’s
king, as it would eventually establish the ten of spades for Y.
Trick 3.—Unless A holds the king of
hearts, the game is lost, no matter what B may lead. To make a
possible re-entry for A, B sacrifices his queen of hearts. Z hopes
that B has but two hearts and so refuses to win this trick.
It makes but little difference what Y now leads. A’s spades must make.
NOT UNBLOCKING.
DESCHAPELLES COUP
It is the rubber game, score eighteen to twenty-four against the
dealer. Z, the dealer, passes the make. Y declares “no-trump.”
No. 35
| | ♠ 10 9 8 4 |
| | ♣ A K J |
| | ♦ A Q J 9 |
| | ♥ A J |
| ♠ K Q J 6 5 3 |
|
♠ A 7 |
| ♣ 8 3 | ♣ Q 5 4 2 |
| ♦ 6 5 | ♦ K 4 3 2 |
| ♥ K 8 6 | ♥ Q 5 4 |
| | ♠ 2 |
| | ♣ 10 9 7 6 |
| | ♦ 10 8 7 |
| | ♥ 10 9 7 3 2 |
| TRICK | A | Y |
B | Z |
| 1 | K♠ | 4♠ |
7♠ | 2♠ |
| 2 | 3♠ | 8♠ |
A♠ | 2♥ |
| 3 | 6♥ | J♥ |
Q♥ | 3♥ |
| 4 | 8♥ | A♥ |
5♥ | 7♥ |
| 5 | 5♦ | A♦ |
2♦ | 7♦ |
| 6 | 6♦ | Q♦ |
K♦ | 8♦ |
| 7 | K♥ | J♣ |
4♥ | 9♥ |
| 8 | Q♠ | 9♠ |
3♦ | 6♣ |
| 9 | J♠ | 10♠ |
4♦ | 7♣ |
| 10 | 6♠ | 9♦ |
2♣ | 9♣ |
| 11 | 5♠ | K♣ |
4♣ | 10♣ |
| 12 | 8♣ | A♣ |
5♣ | 10♥ |
| 13 | 3♣ | J♦ |
Q♣ | 10♦ |
ILLUSTRATIVE HAND NO. 36
Trick 2.—The dealer’s best play is
undoubtedly to establish the club suit. A has little reason to pass
this trick; taking the king with the ace may establish the jack in
B’s hand.
Trick 3.—Players will so often play
for their own suit, with little or no regard for their partner’s
hand. If the high cards in your suit are against you, and your card
of entry has been taken out, abandon the suit and endeavour to help
your partner. A infers that his partner’s suit is diamonds and leads
the supporting jack through the king.
ABANDONING A SUIT
It is the rubber game, score eighteen to nothing against the dealer.
Z, the dealer, declares “no-trump.”
No. 36
| | ♠ J 9 8 7 5 |
| | ♣ 5 4 |
| | ♦ K 3 2 |
| | ♥ K 8 7 |
| ♠ 6 4 2 |
|
♠ K 10 |
| ♣ A 9 2 | ♣ 10 7 3 |
| ♦ J 4 | ♦ A Q 10 9 7 5 |
| ♥ J 6 4 3 2 | ♥ 9 5 |
| | ♠ A Q 3 |
| | ♣ K Q J 8 6 |
| | ♦ 8 6 |
| | ♥ A Q 10 |
| TRICK | A | Y |
B | Z |
| 1 | 3♥ | 7♥ |
9♥ | 10♥ |
| 2 | A♣ | 4♣ |
3♣ | K♣ |
| 3 | J♦ | 2♦ |
5♦ | 6♦ |
| 4 | 4♦ | 3♦ |
9♦ | 8♦ |
| 5 | 2♠ | K♦ |
A♦ | 3♠ |
| 6 | 4♠ | 5♠ |
Q♦ | Q♠ |
| 7 | 2♥ | 7♠ |
10♦ | 6♣ |
| 8 | 2♣ | 8♠ |
7♦ | 8♣ |
| 9 | J♥ | K♥ |
5♥ | Q♥ |
| 10 | 9♣ | 5♣ |
7♣ | Q♣ |
| 11 | 6♠ | 9♠ |
10♣ | J♣ |
| 12 | 4♥ | J♠ |
10♠ | A♠ |
| 13 | 6♥ | 8♥ |
K♠ | A♥ |
The dealer loses the odd trick.
ILLUSTRATIVE HAND NO. 37
Trick 1.—The dealer’s first object
should be to win the game. By playing the ace of spades, Z is assured
of ten tricks—four in clubs, four in diamonds, one in spades,
and one in hearts—whereas the play of a low spade or the queen
might enable B to win the trick and establish the heart suit against
the dealer; in this case, should A hold the king of clubs the game
could not be won.
Trick 2.—In order to unblock the
diamond suit the ace and king in Y’s hand must be led.
Trick 3.—Whether or not B covers is
of minor importance, for the play of a low card does not alter the
result of the hand.
Trick 5.—Z finds that his club suit
is blocked by the two commanding cards in the dummy. The only
possible way to make the balance of this suit is to discard the jack
and ten of clubs on the two winning diamonds.
Trick 11.—Z takes out A’s king of
spades, retaining the ace of hearts for re-entry.
“DISCARDING COMMANDING CARDS”
It is the first game, score love all. Z deals and passes the make.
Y declares “no-trump.”
No. 37
| | ♠ A Q 5 3 2 |
| | ♣ Q J 10 |
| | ♦ A K |
| | ♥ A 3 2 |
| ♠ K J 9 7 |
|
♠ 10 8 |
| ♣ 4 3 2 | ♣ K 5 |
| ♦ 5 4 2 | ♦ 10 9 8 6 |
| ♥ K 8 4 | ♥ Q J 10 9 6 |
| | ♠ 6 4 |
| | ♣ A 9 8 7 6 |
| | ♦ Q J 7 3 |
| | ♥ 7 5 |
| TRICK | A | Y |
B | Z |
| 1 | 7♠ | A♠ |
8♠ | 4♠ |
| 2 | 2♦ | A♦ |
6♦ | 3♦ |
| 3 | 4♦ | K♦ |
8♦ | 7♦ |
| 4 | 2♣ | Q♣ |
K♣ | A♣ |
| 5 | 5♦ | 10♣ |
9♦ | Q♦ |
| 6 | 3♣ | J♣ |
10♦ | J♦ |
| 7 | 4♣ | 2♥ |
5♣ | 9♣ |
| 8 | 4♥ | 2♠ |
6♥ | 8♣ |
| 9 | 9♠ | 3♠ |
9♥ | 7♣ |
| 10 | J♠ | 3♥ |
10♠ | 6♣ |
| 11 | K♠ | 5♠ |
10♥ | 6♠ |
| 12 | 8♥ | A♥ |
J♥ | 5♥ |
| 13 | K♥ | Q♠ |
Q♥ | 7♥ |
The dealer makes a small slam.
ILLUSTRATIVE HAND NO. 38
Trick 1.—The jack of clubs must be
played to the first trick, for otherwise the club suit would be
blocked, and it is useless to lead through A’s hand. B’s best discard
is a spade. As A’s lead indicates a four-card suit, B can count Z
with six clubs.
Trick 2.—A cannot afford to win
this trick, for if Z has an entry card the clubs will be made. B
should not shorten his diamonds or hearts as Y has four cards of
each. He cannot lose by discarding an honour in spades. The queen
gives A information, and if necessary enables B to unblock.
Trick 4.—A’s lead may be from
four spades; B must keep the low spade.
Trick 6.—B can now count all the
cards in both A’s and Z’s hands. A has shown four spades, four clubs,
and is marked with the queen of diamonds alone; he must, therefore,
have three hearts. Z has three remaining clubs, two diamonds, one
spade, and two hearts. B unblocks the spade suit.
Trick 8.—A can now count both
B’s and Z’s hands; B must have four hearts and the ace of diamonds
alone; Z has the remaining clubs, a diamond and two hearts.
Trick 9.—It is immaterial what
Z now discards; if he discards a diamond, A leads the heart; if he
discards a heart, A leads the ace of clubs, and forces Z to lead a
diamond to B.
“COUNTING”
It is the rubber game, score eight to nothing against the dealer.
Z passes the make. Y declares “no-trump.”
No. 38
| | ♠ A K |
| | ♣ K J 5 |
| | ♦ K 7 5 3 |
| | ♥ K 7 5 2 |
| ♠ 7 5 3 2 |
|
♠ Q J 10 6 4 |
| ♣ A Q 3 2 | ♣ —— |
| ♦ Q J | ♦ A 10 9 8 |
| ♥ J 6 4 | ♥ Q 10 9 8 |
| | ♠ 9 8 |
| | ♣ 10 9 8 7 6 4 |
| | ♦ 6 4 2 |
| | ♥ A 3 |
| TRICK | A | Y |
B | Z |
| 1 | 2♣ | J♣ |
4♠ | 4♣ |
| 2 | 3♣ | K♣ |
Q♠ | 6♣ |
| 3 | Q♣ | 5♣ |
8♦ | 7♣ |
| 4 | 2♠ | K♠ |
10♠ | 8♠ |
| 5 | J♦ | 3♦ |
9♦ | 2♦ |
| 6 | 3♠ | A♠ |
J♠ | 9♠ |
| 7 | Q♦ | 5♦ |
10♦ | 4♦ |
| 8 | 7♠ | 2♥ |
6♠ | 8♣ |
| 9 | 5♠ | 5♥ |
8♥ | 6♦ |
| 10 | 4♥ | 7♥ |
Q♥ | A♥ |
| 11 | 6♥ | K♥ |
9♥ | 3♥ |
| 12 | A♣ | 7♦ |
A♦ | 9♣ |
| 13 | J♥ | K♦ |
10♥ | 10♣ |
The dealer loses the odd trick.
ILLUSTRATIVE HAND NO. 39
Trick 2.—A should not continue
the lead of diamonds; the weak hand would “ruff.”
Trick 3.—Z can exhaust the trumps
and make the club suit, but will then be left with two losing
diamonds. Before attempting to get the trumps out, he must allow Y to
trump these losing cards.
Trick 5.—Hasty play by the dealer
at this point would incur a loss of four or five tricks. If Y trumps
with the eight of hearts, the trump suit is blocked and Z has no way
of obtaining the lead. Ruffing with the ace enables the dealer to
unblock the trump suit and make the clubs.
ALLOWING THE WEAKER HAND
TO “RUFF”
It is the first game, score sixteen to nothing against the dealer.
Z deals and makes it hearts.
No. 39
| | ♠ 10 7 6 4 |
| | ♣ K Q J 8 3 |
| | ♦ 6 |
| | ♥ A 8 6 |
| ♠ Q J 9 8 5 |
|
♠ K |
| ♣ 9 | ♣ 10 7 6 2 |
| ♦ A K Q 10 8 | ♦ J 9 4 2 |
| ♥ 3 2 | ♥ 9 7 5 4 |
| | ♠ A 3 2 |
| | ♣ A 5 4 |
| | ♦ 7 5 3 |
| | ♥ K Q J 10 |
| TRICK | A | Y |
B | Z |
| 1 | K♦ | 6♦ |
2♦ | 3♦ |
| 2 | 9♣ | 3♣ |
2♣ | A♣ |
| 3 | 8♦ | 6♥ |
4♦ | 5♦ |
| 4 | 5♠ | 4♠ |
K♠ | A♠ |
| 5 | 10♦ | A♥ |
9♦ | 7♦ |
| 6 | 2♥ | 8♥ |
4♥ | K♥ |
| 7 | 3♥ | 6♠ |
5♥ | Q♥ |
| 8 | 8♠ | 7♠ |
7♥ | J♥ |
| 9 | 9♠ | 10♠ |
9♥ | 10♥ |
| 10 | Q♦ | K♣ |
6♣ | 5♣ |
| 11 | J♠ | Q♣ |
7♣ | 4♣ |
| 12 | A♦ | J♣ |
10♣ | 2♠ |
| 13 | Q♠ | 8♣ |
J♦ | 3♠ |
The dealer makes a small slam.
ILLUSTRATIVE HAND NO. 40
Trick 1.—It would be bad play to
hold up the ace of hearts.
The adversary can only make the queen and jack, the nine being three
times guarded in Z’s hand. The spade suit must be established at once.
Trick 5.—As A holds a possible card
of re-entry in diamonds, he continues his own suit.
Tricks 7 and 8.—Clever play to unblock
the club suit and to obtain the lead with the eight of spades.
Z discards his losing diamonds.
NOT HOLDING UP AN ACE
It is the rubber game, score love all.
Z, the dealer, makes it “no-trump.”
No. 40
| | ♠ 8 6 5 |
| | ♣ K Q 4 |
| | ♦ 7 6 5 4 2 |
| | ♥ A 10 |
| ♠ A 10 |
|
♠ 4 3 2 |
| ♣ 8 3 2 | ♣ J 10 9 7 6 5 |
| ♦ K 8 | ♦ J 10 9 |
| ♥ K Q J 5 3 2 | ♥ 7 |
| | ♠ K Q J 9 7 |
| | ♣ A |
| | ♦ A Q 3 |
| | ♥ 9 8 6 4 |
| TRICK | A | Y |
B | Z |
| 1 | K♥ | A♥ |
7♥ | 4♥ |
| 2 | A♠ | 5♠ |
2♠ | K♠ |
| 3 | Q♥ | 10♥ |
5♣ | 6♥ |
| 4 | J♥ | 2♦ |
3♠ | 8♥ |
| 5 | 2♥ | 4♦ |
4♠ | 9♥ |
| 6 | 10♠ | 6♠ |
6♣ | Q♠ |
| 7 | 2♣ | 4♣ |
7♣ | A♣ |
| 8 | 3♣ | 8♠ |
9♣ | 7♠ |
| 9 | 8♣ | K♣ |
10♣ | 3♦ |
| 10 | 3♥ | Q♣ |
J♣ | Q♦ |
| 11 | 8♦ | 5♦ |
9♦ | A♦ |
| 12 | 5♥ | 6♦ |
10♦ | J♠ |
| 13 | K♦ | 7♦ |
J♦ | 9♠ |
The dealer wins four odd tricks.